

Page 1

www.blaupunkt.com
Radio CD MP3 WMA
London MP37 7 647 553 310
Bedienungsanleitung
Operating instructions
Mode d’emploi
Istruzioni d’uso
Gebruiksaanwijzing
Bruksanvisning
Instrucciones de manejo
Instruções de serviço
Betjeningsvejledning
Instrukcja obsługi
Návod k obsluze
Návod na obsluhu
Page 2

3
1
2
46
5
11
1213
9
14
7810
2
Page 3

Controls
1 button to open the fl ip-release con-
trol panel.
2 On/Off button
Short press: Switches the device on. In
operation: Mutes the device.
Long press: Switches the device off.
3 SOURCE
button
Short press: Source selection between radio and CD and (if connected
or switched on) CD changer, AUX and
FRONT AUX.
Long press: Briefl y displaying time.
4 Volume control
5 Keys 1 - 5
6 FRONT AUX input
7 TRAF•RDS button
Short press: Switches traffi c information standby on/off.
Long press: Switches convenient RDS
function on/off.
8 Arrow keys
and
9 ESC•DIS button
Short press: Changes from a menu item
back to the main menu (also in Audio
menu).
Long press: Changes display contents.
: Arrow keys
and
; MENU•OK button
Short press: Calls up the menus for
basic settings and confi rms settings.
Ending the scan function.
Long press: Starts the Scan function.
< AUD button to call up the Audio menu:
Adjusting bass, treble, middle, subout,
balance and fader.
Switching X-BASS on/off and adjusting it.
Selects an equaliser presetting.
= BAND•TS button
Short press: Selects the FM memory
banks and the MW and LW wavebands.
Long press: Starts the Travelstore function.
button (Eject) for removing a CD
>
from the device.
ENGLISH
37
Page 4

Contents
About these instructions ..................40
Symbols used................................ 40
Use as directed ..............................40
Declaration of conformity ................40
For your safety ................................41
If you are installing device yourself .... 41
Cleaning notes...............................41
Disposal of old unit
(EU countries only) ........................ 42
Scope of delivery ............................. 42
Optional equipment
(not part of the scope of delivery) .... 42
Warranty .........................................43
Service ........................................ 43
Detachable control panel ................. 43
Theft protection.............................43
Detaching the control panel .............43
Attaching the control panel .............. 44
Switch-off time (OFF TIMER) ...........44
Switching on/off .............................. 45
Adjusting the volume .......................45
Setting the power-on volume ........... 45
Quickly reducing the volume (Mute) .. 46
Telephone Audio/Navigation Audio ... 46
Switching the confi rmation
beep on/off ................................... 47
Radio mode .....................................47
Adjusting the tuner......................... 47
Switching to radio mode ................. 48
Convenient RDS functions (AF, REG) ....48
Selecting the waveband/
memory bank ................................48
Tuning into a station ....................... 49
Setting the sensitivity of station seek
tuning .......................................... 49
Storing stations .............................50
Storing stations automatically
(Travelstore) ................................. 50
Listening to stored stations ............. 50
Scanning receivable stations (SCAN) ...50
Setting the scanning time ................ 50
Programme type (PTY) .................. 51
Optimising radio reception .............. 52
Traffi c information ...........................53
Switching traffi c information
priority on/off ............................... 53
Setting the volume for traffi c
announcements .............................53
CD mode ......................................... 54
Switching to CD mode .................... 54
Selecting tracks ............................. 54
Fast track selection ........................ 54
Fast searching (audible) .................. 55
Random track play (MIX) ................. 55
Scanning tracks (SCAN).................. 55
Repeating tracks (Repeat) ...............55
Interrupting playback (PAUSE) .........55
Confi guring the display ...................56
Displaying CD text ..........................56
Traffi c announcements in CD mode .. 56
Ejecting a CD................................. 56
MP3/WMA mode ............................. 57
Preparing an MP3 CD ..................... 57
Switching to MP3 mode .................. 58
Confi guring the display ...................58
Selecting a directory ...................... 59
Selecting tracks/fi les ...................... 59
Fast search ................................... 59
Random track play – MIX .................59
Scanning tracks – SCAN ................. 60
Repeated playback of individual
tracks or entire directories – REPEAT ...60
Interrupting playback (PAUSE) .........60
38
Page 5

Contents
CD-changer mode ............................61
Switching to CD-changer mode ........ 61
Selecting CDs ................................61
Selecting tracks ............................. 61
Fast searching (audible) .................. 61
Repeating individual tracks or whole
CDs (REPEAT) ............................... 61
Random track play (MIX) ................. 61
Scanning all tracks on all CDs (SCAN) ...62
Interrupting playback (PAUSE) .........62
Confi guring the display ...................62
Clock – Time.................................... 63
Displaying the time ........................ 63
Setting the time ............................. 63
Selecting 12/24-hour clock mode ....63
Displaying the time continuously
when the device is off and the
ignition is on ................................. 63
Sound ............................................. 64
Adjusting the bass ......................... 64
Adjusting the middle ...................... 64
Adjusting the treble ........................ 65
Setting the left/right volume
distribution (Balance) .................... 65
Adjusting the front/rear volume
distribution (Fader) ........................ 65
Preamplifi er output
(Preamp-Out/Sub-Out) ....................66
Adjusting the sub-out level .............. 66
Adjusting the sub-out cutoff
frequency ..................................... 66
X-BASS ...........................................67
Adjusting the X-BASS boost .............67
Equalizer presettings (Presets) ........ 67
Adjusting the display settings ...........68
Adjusting the display brightness ....... 68
Setting the display illumination
colour .......................................... 68
External audio sources ..................... 69
Switching the rear AUX input on/off .. 70
Technical data .................................70
ENGLISH
39
Page 6
About these instructions
About these instructions
These instructions contain important information to easily and safely install and operate the device.
Read these instructions carefully and
•
completely before using the device.
•
Keep the instructions at a location so
that they are always accessible to all
users.
•
Always pass on the device to third parties together with these instructions.
In addition, observe the instructions of the
devices used in conjunction with this device.
Symbols used
These instructions employ the following
symbols:
DANGER!
Warns about injuries
CAUTION!
Warns about laser beam
CAUTION!
Warns about damaging the CD
drive
Use as directed
This device is intended for installation and
operation in a vehicle with 12 V vehicle system voltage and must be installed in a DIN
slot. Observe the 'performance limits in the
technical data. Repairs and installation, if
necessary, should be performed by a specialist.
Declaration of conformity
The Blaupunkt GmbH declares that this
car sound system complies with the basic
requirements and the other relevant regulations of the directive 1999/5/EG.
The CE mark confi rms the compliance with EU directives.
Identifi es a sequencing step
쏅
Identifi es a listing
•
40
Page 7

For your safety
For your safety
The device was manufactured according to
the state of the art and established safety
guidelines. Even so, dangers may occur if
you do not observe the safety notes in these
instructions:
If you are installing device
yourself
You may only install the device yourself if
you are experienced in installing car sound
systems and are very familiar with the electrical system of the vehicle. For this purpose, observe the installation instructions
at the end of these instructions.
Observe the following!
DANGER!
Increased risk of injury from
connector
In case of an accident, the protruding connector in the FRONT-AUX-IN socket may
cause injuries. The use of straight plugs or
adapters can lead to an increased risk of injury.
ü
For this reason, we recommend using
angled jack plugs, e.g. the Blaupunkt
accessories cable (7 607 001 535).
CAUTION!
The device contains a Class 1 laser
that can cause injuries to your eyes.
Do not open the device and do not perform
any modifi cations.
In operation
Operate the device only if traffi c situa-
•
tion permits it! Stop at a suitable location to perform more extensive operations.
Remove or attach the control panel only
•
while the vehicle is standing an.
Always listen at a moderate volume
•
so that you can hear acoustic warning
signals (e.g. police sirens) and protect
your hearing. Do not increase the volume when selecting a different audio
source or while the CD changer changes the CD. The device is briefl y muted.
After operation
•
The device is worthless to a thief without the control panel. Always remove
the control panel whenever you leave
the vehicle.
•
Transport the control panel so that it is
protected against impacts and the contacts cannot become dirty.
Cleaning notes
Solvents, cleaning and scouring agents as
well as dashboard spray and plastics care
product may contain ingredients that will
damage the surface of the device.
Use only a dry or slightly moistened
•
cloth for cleaning the device.
If necessary, clean the contacts of the
•
control panel regularly using a soft
cloth moistened with cleaning alcohol.
ENGLISH
41
Page 8

For your safety Scope of delivery
Disposal of old unit
(EU countries only)
Do not dispose of your old unit in
the household trash!
Use the return and collection systems available to dispose of the old device.
Scope of delivery
The scope of delivery includes:
1 Car sound system
1 Case for the control panel
1 Support frame
2 Disassembly bar
1 Guide pin
1 Operating instructions
Optional equipment
(not part of the scope of delivery)
Use only accessories approved by
Blaupunkt.
Remote control
The steering wheel and/or handheld remote
control allows you to access the basic functions of your car sound system safely and
conveniently.
You cannot switch the device on/off using
the remote control!
You can fi nd out from your Blaupunkt dealer
or on the Internet at www.blaupunkt.com
which remote controls can be used with
your car sound system.
42
Amplifi er
You can use all Blaupunkt and Velocity amplifi ers.
CD changers
You can connect the following Blaupunkt
CD changers:
CDC A 03, CDC A 08 and IDC A 09.
Page 9
Warranty Detachable control panel
Warranty
We provide a manufacturer's warranty
for products bought within the European
Union. Devices purchased outside the
European Union are subject to the warranty
terms published by our respective regional
agency.
The warranty terms can be called up under
www.blaupunkt.com or requested directly
from:
Blaupunkt GmbH
Hotline
Robert-Bosch-Str. 200
D-31139 Hildesheim
Service
In some countries, Blaupunkt offers a repair
and pick-up service.
Information about the availability of this
service in your country can be found at
www.blaupunkt.com.
If you want to take advantage of this service, you may request a pick-up service for
your device via the Internet.
Detachable control panel
Theft protection
The device is equipped with a detachable
control panel (fl ip-release panel) as a way
of protecting your equipment against theft.
The device is worthless to a thief without
this control panel.
Protect your device against theft by taking
the control panel with you whenever you
leave your vehicle. Do not leave the control
panel inside your vehicle - not even in a hiding place.
Notes:
•
Never drop the control panel.
•
Never expose the control panel to direct sunlight or other heat sources.
•
Avoid direct skin contact with the
control panel’s electrical contacts. If
necessary, please clean the contacts
with a lint-free cloth moistened with
cleaning alcohol.
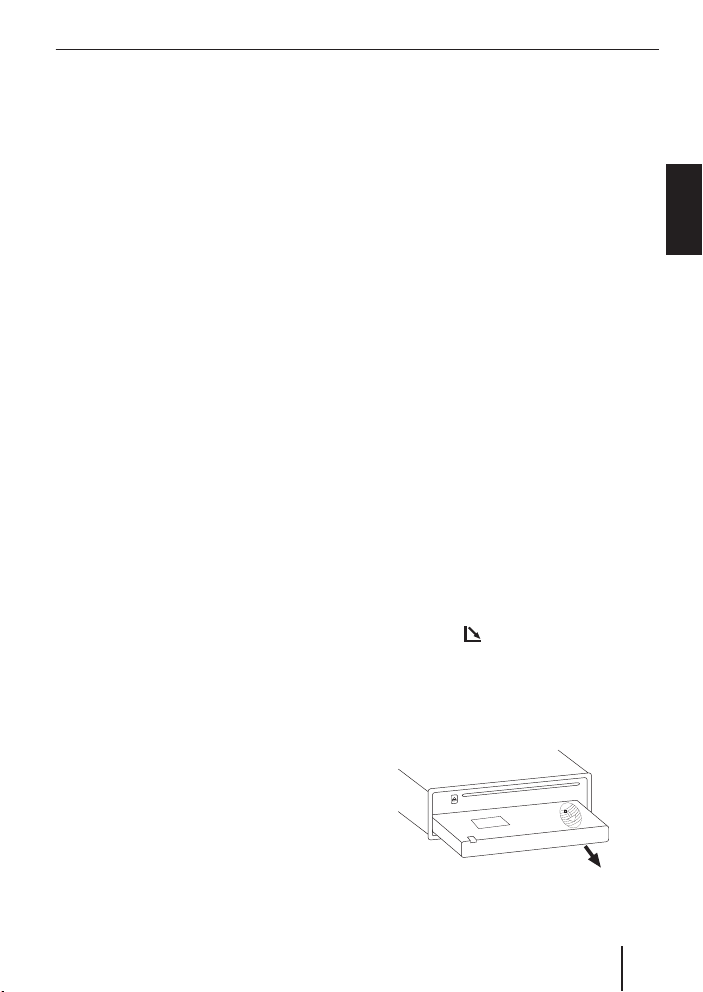
Detaching the control panel
Press the button 1.
쏅
The control panel opens out towards you.
쏅
Hold the control panel by its right side
and then pull the control panel straight
out of the bracket.
ENGLISH
43
Page 10
Detachable control panel
Notes:
The device is switched off after a
•
time preset by you. For instructions,
please read the section "Switch-off
time (OFF TIMER)" in this chapter.
•
All the current settings are saved.
Any CD already inserted in the device
•
remains there.
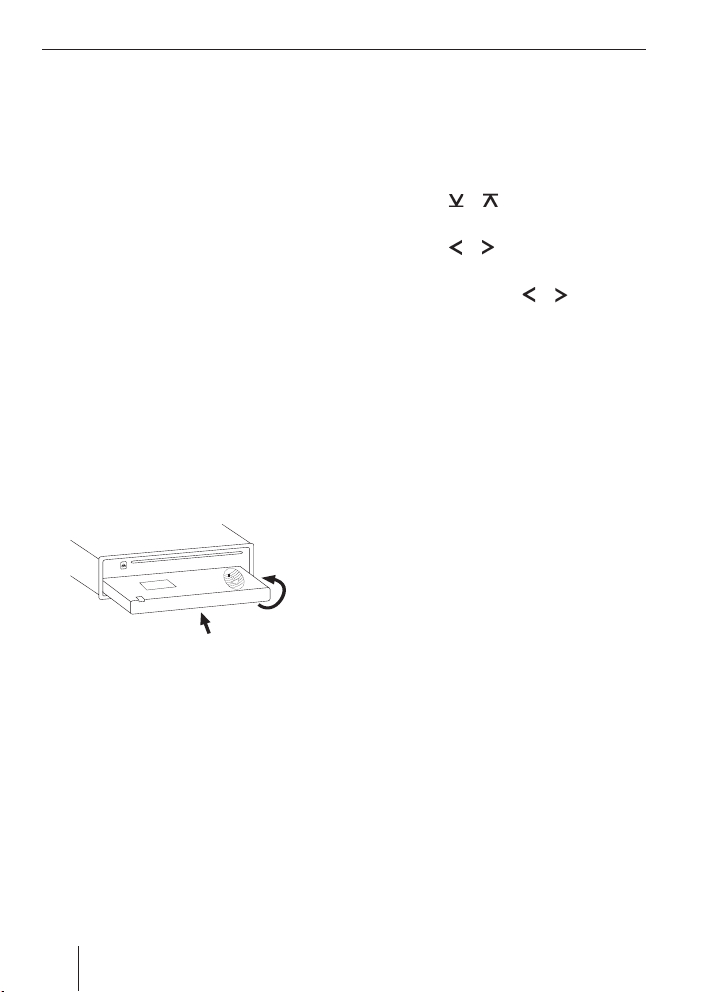
Attaching the control panel
Hold the control panel approximately at
쏅
a right angle to the device.
Slide the control panel into the de-
쏅
vice’s guides that are positioned on the
left and right at the lower edge of the
housing. Push the control panel carefully into the bracket until it clicks into
place.
쏅
Carefully fl ip up the control panel until
it clicks into place.
1.
Switch-off time (OFF TIMER)
After opening the control panel, the device
is switched off after an adjustable time. You
can set this time from 0 to 30 seconds.
Press the MENU button ;.
쏅
Press the
쏅
until the displays shows "OFF TIMER".
Press the
쏅
menu.
Set the time with the
쏅
When you have fi nished making your
changes,
press the MENU button twice ;.
쏅
Note:
If you set the switch-off time to 0 seconds, the device is switched off immediately after opening the control panel.
2.
or button : repeatedly
or button 8 to open the
or button 8.
If the device was still switched on when you
detached the control panel, it will automatically switch on with the last setting activated (radio, CD, CD changer or AUX) when
the panel is replaced.
44
Page 11

Switching on/off Volume
Switching on/off
There are various ways of switching the
device on/off:
Switching on/off using button 2
To switch on the device, press button
쏅
2.
The device switches on.
To switch off the device, press and
쏅
hold down button 2 for longer than
two seconds.
The device switches off.
Switching on/off using the vehicle
ignition
The device will switch on/off simultaneously with the ignition if the device is correctly connected to the vehicle’s ignition as
shown in the installation instructions and
you did not switch the device off by pressing button 2.
Switching the device on/off using the
detachable control panel
Detach the control panel.
쏅
The devices switches off after the time set
in the "OFF TIMER" menu.
Attach the control panel again.
쏅
The device switches on. The last setting
(radio, CD, CD changer or AUX) is reactivated.
Note:
To protect the vehicle battery, the device will switch off automatically after
one hour if the ignition is off.
Adjusting the volume
You can adjust the volume in increments
from 0 (off) to 66 (maximum).
To increase the volume,
turn the volume control 4 clockwise.
쏅
To decrease the volume,
turn the volume control 4 counter-
쏅
clockwise.
Setting the power-on volume
Note:
The device features a time-out function
(time window).
For example, if you press the MENU
button ; and select a menu item,
the device switches back after approx.
8 seconds after the last button activation. The settings performed are
saved.
You can set the power-on volume.
쏅
Press the MENU button ;.
쏅
Press the
edly until "ON VOLUME" appears on the
display.
Press the
쏅
menu.
Set the power-on volume with the
쏅
or
To help you adjust the setting more easily,
the device will increase or decrease the volume as you make your changes.
If you enable "LAST VOL", the volume which
was set the last time you switched off the
device is re-enabled.
or button : repeat-
or button 8 to open the
button 8.
ENGLISH
45
Page 12

Volume
Note:
To protect your hearing, the power-on
volume is limited to the value "38" for
the setting "LAST VOL". If the volume
was higher before switch-off, the value
is automatically set to "38" at switchon. This prevents an unintentionally
and unexpectedly high volume when
switching on the device.
When you have fi nished making your
changes,
쏅
press the MENU button twice ;.
Quickly reducing the volume
(Mute)
You can quickly reduce the volume to a
preset level (Mute).
쏅
Briefl y press button 2.
"MUTE" appears on the display.
Cancelling mute
To return to your previously set volume
level,
쏅
briefl y press button 2 again.
Adjusting the mute level
You can adjust the mute level.
쏅
Press the MENU button ;.
쏅
Press the
edly until "MUTE LVL" appears on the
display.
쏅
Press the
menu.
쏅
Set the mute level with the
button 8.
or button : repeat-
or button 8 to open the
or
When you have fi nished making your
changes,
쏅
press the MENU button twice ;.
Telephone Audio/Navigation
Audio
If your car sound system is connected to a
mobile telephone or a navigation system,
the sound system’s volume will be muted as
soon as you "pick up" the phone or as soon
as a navigation announcement is made. You
will then hear the caller or navigation announcement over the car sound system’s
loudspeakers. In order for this feature to
work, the mobile telephone or navigation
system must be connected to the car sound
system as described in the installation instructions.
You can fi nd out from your Blaupunkt dealer
which navigation systems can be used with
your car sound system.
If the sound system receives a traffi c announcement during a telephone call or
whilst a navigation announcement is being made, you will only be able to hear the
traffi c announcement after the call or navigation announcement is fi nished (in so far
as the traffi c announcement is still being
broadcast). The traffi c announcement is
not recorded!
You can adjust the volume with which you
switch on the telephone calls or the voice
output of the navigation.
쏅
Press the MENU button ;.
쏅
Press the
until "TEL VOL" appears on the display.
쏅
Press the
menu.
or button : repeatedly
or button 8 to open the
46
Page 13

Volume Radio mode
Set the desired volume with the or
쏅
button 8.
When you have fi nished making your
changes,
press the MENU button twice ;.
쏅
Note:
You can use the volume control 4 to
adjust the volume of telephone calls
and navigation announcements whilst
you are listening to them.
Switching the confi rmation beep
on/off
The system will output a confi rmation beep
for some functions if you keep a button
pressed down for longer than two seconds,
for instance, when assigning a radio station
to a station preset button. You can switch
the beep on or off.
쏅
Press the MENU button ;.
쏅
Press the
until "BEEP ON" or "BEEP OFF" appears
on the display.
Switch the BEEP ON or OFF with the
쏅
or button 8.
When you have fi nished making your
changes,
press the MENU button ;.
쏅
or button : repeatedly
Radio mode
This device is equipped with an RDS radio
receiver. Many of the receivable FM stations
broadcast a signal that not only carries the
programme but also additional information
such as the station name and programme
type (PTY).
The station name appears on the display as
soon as the tuner receives it.
Adjusting the tuner
To ensure proper functioning of the tuner,
the device must be set for the region in
which it is being operated. You can select
among Europe "EUROPE", America "USA",
South America "S-AMERICA", and Thailand
"THAI". The tuner is factory-set to the region in which it was sold. If you experience
problems with your radio reception, please
check this setting.
The radio functions described in these operating instructions refer to the tuner setting EUROPE.
쏅
Switch off the device by pressing button 2.
쏅
Hold the buttons 1 and 5 5 pressed at
the same time and switch on the device
again with the button 2.
"TUNER" is displayed.
쏅
Select your tuner region with the
button :.
To save the setting,
switch the device off and on again or
쏅
wait approx. 8 seconds. The radio
starts playing with the last setting selected (radio, CD, CD changer or AUX).
or
ENGLISH
47
Page 14

Radio mode
Switching to radio mode
If you are in CD, CD changer or AUX mode,
press the BAND•TS button =
쏅
or
press the SOURCE button 3 repeat-
쏅
edly until the memory bank, e.g. "FM1",
appears on the display.
Convenient RDS functions
(AF, REG)
The convenient RDS functions AF
(Alternative Frequency) and REGIONAL extend your radio’s range of functions.
•
AF: If the RDS function is activated, the
radio automatically tunes into the best
receivable frequency for the station
that is currently set.
•
REGIONAL: At certain times, some radio stations divide their programme
into regional programmes providing
different content. You can use the REG
function to prevent the car radio from
switching to alternative frequencies
that are transmitting different programme content.
Note:
REGIONAL must be activated/deactivated separately in the menu.
Switching REGIONAL on/off
쏅
Press the MENU button ;.
쏅
Press the
until "REG" appears on the display.
or button : repeatedly
"OFF" or "ON" is displayed alongside "REG".
To switch REGIONAL on/off,
press the
쏅
When you have fi nished making your
changes,
press the MENU button ;.
쏅
Switching the RDS function on/off
To switch the RDS functions AF and
REGIONAL on or off,
press and hold down the TRAF•RDS
쏅
button 7 for longer than two seconds.
If the RDS comfort function is active, RDS
appears on the display.
or button 8.
Selecting the waveband/
memory bank
This device can receive programmes broadcast over the FM frequency range as well as
the MW and LW (AM) wavebands. There are
three memory banks available for the FM
waveband (FM1, FM2 and FMT) and one
for each of the MW and LW wavebands.
Five stations can be stored in each memory
bank.
To switch between the FM memory banks
(FM1, FM2 and FMT) and the MW and LW
wavebands,
briefl y press the BAND•TS button =.
쏅
48
Page 15

Radio mode
Tuning into a station
There are various ways of tuning into a station.
Automatic station seek tuning
Press the
쏅
The radio tunes into the next receivable
station.
Note:
If the priority for traffi c information is
active (the display shows the traffi c
jam symbol), the next traffi c information station is set.
Tuning into stations manually
You can also tune into stations manually.
Note:
You can only tune into stations manually if the RDS function is deactivated.
To change the set frequency in small increments,
쏅
briefl y press the
To change the set frequency quickly,
press and hold down the
쏅
8 for a longer period of time.
Browsing through broadcasting
networks (FM only)
If a radio station provides several programmes, you have the option of browsing
through its so-called "broadcasting network".
or button :.
or button 8.
or button
Note:
The convenient RDS function must be
activated before you can use this feature.
Press the
쏅
to the next station on the broadcasting
network.
Note:
When using this feature, you will only
be able to switch to stations that you
have received once before already. To
receive the stations, use the Scan or
Travelstore function.
or button 8 to switch
Setting the sensitivity of station
seek tuning
You can choose whether the radio should
only tune into stations providing good reception or whether it can also tune into
those with a weak reception.
Press the MENU button ;.
쏅
Press the
쏅
until "SENS HI" or "SENS LO" appears
on the display.
The display shows the currently set sensitivity level. "SENS HI3" indicates the highest sensitivity, "SENS LO1" the lowest.
Set the desired sensitivity with the
쏅
or
When you have fi nished making your
changes,
press the MENU button ;.
쏅
Note:
The device stores the sensitivity value
set in the respective FM and AM waveband.
or button : repeatedly
button 8.
ENGLISH
49
Page 16

Radio mode
Storing stations
Storing stations manually
Select the desired memory bank (FM1,
쏅
FM2, FMT) or one of the wavebands
(MW or LW).
Tune into the desired station.
쏅
Press and hold down one of the station
쏅
buttons 1 - 5 5 for longer than two
seconds to assign the station to that
button.
Storing stations automatically
(Travelstore)
You can automatically store the fi ve stations offering the strongest reception in the
region (FM only). The stations are stored in
the FMT memory bank.
Note:
Any stations that were previously
stored in this memory bank are deleted
in the process.
Press and hold down the BAND•TS but-
쏅
ton = for longer than two seconds.
The storing procedure begins. "FM TSTORE"
appears on the display. After the process
has completed, the radio will play the station that is stored in memory location 1 of
the FMT memory bank.
Note:
If the priority for traffi c information is
active (the display shows the traffi c
jam symbol), only traffi c information
stations are stored.
50
Listening to stored stations
Select the memory bank or waveband.
쏅
Press one of the station buttons 1 - 5
쏅
5.
The stored station is played if it can be
received.
Scanning receivable stations
(SCAN)
You can use the scan function to play all
the receivable stations briefl y. You can set
the scanning time in the menu to between
5 and 30 seconds.
Starting SCAN
쏅
Press and hold down the MENU button
; for longer than two seconds.
The radio scans the next receivable station.
The current memory bank and "SCAN" appear briefl y on the display followed by a
fl ashing display of the current station name
or frequency.
Cancelling the SCAN and continuing to
listen to a station
쏅
Press the MENU button ;.
Scanning stops and the radio continues
playing the station that it tuned into last.
Setting the scanning time
Press the MENU button ;.
쏅
Press the
쏅
edly until "SCAN TIME" appears on the
display.
쏅
Press the
menu.
쏅
Set the desired scan time with the
or
or button : repeat-
or button 8 to open the
button 8.
Page 17

Radio mode
When you have fi nished making your
changes,
press the MENU button twice ;.
쏅
Note:
The defi ned scanning time is also applied by the system to scanning carried
out in CD and CD changer mode.
Programme type (PTY)
Besides transmitting the station name,
some FM stations also provide information on the type of programme that they are
broadcasting. Your car radio can receive
and display this information.
For example, the programme types can be:
CULTURE TRAVEL JAZZ
SPORT SERVICE POP
ROCK KNOWLEDGE KIDS
You can use the PTY function to select sta-
tions of a particular programme type.
PTY-EON
If you specify the programme type and start
seek tuning, the radio will switch from the
current station to a station of the selected
programme type.
Notes:
If the tuner does not fi nd a station
•
that corresponds to the selected programme type, you will hear a beep
and "NO PTY" appears briefl y in the
display. The radio will then retune to
the station that it received last.
If the tuned radio station or another
•
station on the broadcasting network
broadcasts your selected programme
type at a later point in time, the radio
will automatically switch from the currently tuned station or from CD mode
or CD-changer mode to the station
whose programme type matches the
one you selected.
•
If you want to deactivate this PTY
EON switching, you must disable
PTY in the menu with "PTY OFF". In
CD or CD changer mode, the menu
item "PTY ON/ OFF" is not available.
Instead, use the SOURCE button 3
or BAND•TS button = to change to
radio mode fi rst.
Switching PTY on/off
쏅
Press the MENU button ;.
쏅
Press the
or button : repeatedly
until "PTY" appears on the display with
the current setting.
쏅
Press the
or button 8 to switch
PTY ON or OFF.
When you have fi nished making your
changes,
press the MENU button ;.
쏅
Selecting the PTY language
You can select the language for the display
of the programme types. Options include
DEUTSCH, ENGLISH and FRANÇAIS.
쏅
Press the MENU button ;.
쏅
Press the
or button : repeat-
edly until "PTY LANG" appears on the
display.
쏅
Press the
or button 8 to open the
menu.
Set the desired language using the
쏅
buttons 8.
or
ENGLISH
51
Page 18

Radio mode
When you have fi nished making your
changes,
press the MENU button twice ;.
쏅
Selecting a programme type and
starting seek tuning
Press the
쏅
The current programme type appears on
the display.
If you want to select another pro-
쏅
gramme type, you can do so by pressing the
display is visible.
The selected programme type appears
briefl y on the display.
Press the
쏅
seek tuning.
The radio will then tune into the next station
that it fi nds that corresponds to your selected programme type.
or button 8.
or button 8 whilst this
or button : to start
Optimising radio reception
Treble reduction feature during
interference (High Cut)
The High Cut function results in an improved
reception in case of weak radio reception
(FM only). If reception interferences are
present, the interference level is automatically reduced.
쏅
Press the
High Cut on or off.
"HICUT 0" means no automatic reduction of
the interference level, "HICUT 1" means automatic reduction of the interference level.
When you have fi nished making your
changes,
press the MENU button ;.
쏅
or button 8 to switch
Switching High Cut on/off
Press the MENU button ;.
쏅
Press the
쏅
ly until "HICUT" appears on the display
with the current setting.
52
or button : repeated-
Page 19

Traffi c information
Traffi c information
Your device is equipped with an RDS-EON
receiver. EON (Enhanced Other Network)
ensures that whenever a traffi c announcement (TA) is broadcast, the system switches automatically from a station that does
not provide traffi c reports to the appropriate traffi c information station within the
broadcasting network that does.
Once the traffi c report has been played, the
system will switch back to the programme
that you were listening to before.
Switching traffi c information
priority on/off
Press the TRAF•RDS button 7.
쏅
The priority for traffi c announcements is activated if the display shows the traffi c jam
symbol.
Notes:
You will hear a warning beep:
If you leave the reception area of a
•
traffi c information station that you
are currently listening to.
If you leave the reception area of a
•
traffi c information station that the
system is tuned into while you are in
the CD or CD changer mode, and the
subsequent automatic seek tuning
cannot fi nd a new traffi c information
station.
If you retune the radio from a traffi c in-
•
formation station to a station that does
not broadcast traffi c information.
If you hear the warning beep, you can either switch off traffi c information priority
or tune into a station that broadcasts traffi c
information.
Setting the volume for traffi c
announcements
Press the MENU button ;.
쏅
Press the
쏅
edly until "TA VOLUME" appears on the
display.
Press the
쏅
menu.
Set the volume using the
쏅
8.
To help you adjust the setting more easily,
the device will increase or decrease the volume as you make your changes.
When you have fi nished making your
changes,
press the MENU button twice ;.
쏅
Notes:
Using the volume control 4, you can
•
also adjust the volume during a traffi c announcement for the duration of
that announcement.
You can adjust the sound settings
•
and volume distribution settings for
traffi c announcements. For further
information, please read the "Sound"
chapter.
or button : repeat-
or button 8 to open the
or button
53
ENGLISH
Page 20

CD mode
CD mode
You can use this device to play standard audio CDs, CD-Rs and CD-RWs with a diameter of 12 cm. To avoid problems when playing self-burned CDs, you should not burn
CDs at speeds greater than 16-speed.
Risk of severe damage to the
CD drive!
CD singles with a diameter of 8 cm and noncircular contoured CDs (shape CDs) must
not be used.
We accept no responsibility for any damage
to the CD drive that may occur as a result of
the use of unsuitable CDs.
To ensure proper functioning, use only CDs
with the Compact-Disc logo. Copy-protected CDs can cause playback problems.
Blaupunkt cannot guarantee the proper
functioning of copy-protected CDs!
Besides being able to play audio CDs on this
device, you can also play CDs containing
MP3/WMA music fi les. For further information, please read the chapter entitled "MP3/
WMA mode".
The drive draws in the CD automatically.
You must not hinder or assist the drive as it
draws in the CD.
Gently close the control panel whilst
쏅
exerting a little pressure until you feel
it click into place.
The CD playback starts and "CD" is shown
on the display.
Note:
If the vehicle ignition was switched
off prior to inserting the CD, you must
switch the device on fi rst with the button 2 to start the playback.
If a CD is already inserted in the drive,
쏅
press the SOURCE button 3 repeat-
edly until "CD" appears on the display.
Playback begins from the point at which it
was last interrupted.
Selecting tracks
Press an arrow button 8 or : to se-
쏅
lect the next or previous track.
If you press the
8 once, the player will play the current
track again from the beginning.
button : or button
Switching to CD mode
If there is no CD inserted in the drive,
press the
쏅
The control panel opens.
Gently insert the CD with its printed
쏅
side uppermost into the drive until you
feel some resistance.
54
button 1.
Fast track selection
To quickly select tracks backwards or forwards,
쏅
press and hold down the
: until fast track selection backwards /
forwards begins.
or button
Page 21

CD mode
Fast searching (audible)
To fast search backwards or forwards,
press and hold down the
쏅
8 until fast searching backwards/forwards begins.
or button
Random track play (MIX)
Press the 5 MIX button 5.
쏅
"MIX CD" appears briefl y on the display and
the MIX symbol is displayed. The next randomly selected track will then be played.
Cancelling MIX
Press the 5 MIX button 5 again.
쏅
"MIX OFF" appears briefl y on the display
and the MIX symbol disappears.
Scanning tracks (SCAN)
You can scan (briefl y play) all the tracks on
the CD.
Press the MENU button ; for longer
쏅
than two seconds.
The next track will then be scanned. The display briefl y shows "TRK SCAN". The fl ashing
track number is displayed next.
Note:
You can set the scanning time. For
further information, please read the
section entitled "Setting the scanning
time" in the "Radio mode" chapter.
Cancelling Scan and continuing listening
to a track
To end the scanning process,
쏅
press the MENU button ;.
The currently scanned track will then continue to be played normally.
Repeating tracks (Repeat)
If you want to repeat a track,
쏅
press the 4 RPT button 5.
"RPT TRCK" appears briefl y on the display
and the RPT symbol is displayed. The track
is repeated continuously until you deactivate Repeat.
Cancelling Repeat
If you want to cancel the repeat function,
쏅
press the 4 RPT button 5 again.
"RPT OFF" appears briefl y on the display
and the RPT symbol disappears. Normal
playback is then resumed.
Interrupting playback (PAUSE)
쏅
Press the button 3 5.
"PAUSE" appears on the display.
Cancelling pause
쏅
During the pause, press the button 3
5.
Playback is continued.
ENGLISH
55
Page 22

CD mode
Confi guring the display
You can choose from various display options in CD mode:
Track number and playing time
•
Track number and time
•
To switch between the display options,
쏅
press the ESC•DIS button 9 for long-
er than 2 seconds.
Displaying CD text
Some CDs include CD text. The CD text
might contain the names of the artist, album and tracks.
The CD text is shown as scrolling text on the
display with every track change.
Switching CD text on/off
쏅
Press the MENU button ;.
쏅
Press the
until "CD TEXT" appears on the display.
쏅
Press the
menu.
쏅
Select between the options "TEXT ON"
(show CD text) or "TEXT OFF" (hide CD
text) using the
When you have fi nished making your
changes,
쏅
press the MENU button twice ;.
or button : repeatedly
or button 8 to open the
or button 8.
Traffi c announcements in
CD mode
If you wish to receive traffi c announcements
in CD mode,
press the TRAF•RDS button 7.
쏅
The priority for traffi c announcements is activated if the display shows the traffi c jam
symbol. For further details, please read the
chapter entitled "Traffi c information".
Ejecting a CD
Press the button 1.
쏅
The control panel opens out towards you.
Press the button
쏅
compartment.
The CD is ejected.
Remove the CD and close the control
쏅
panel.
Notes:
If a CD is ejected, the drive will auto-
•
matically draw it back in again after
10 seconds.
You can also eject CDs whilst the de-
•
vice is switched off or whilst another
audio source is activated.
> next to the CD
56
Page 23

MP3/WMA mode
MP3/WMA mode
You can also use this car sound system to
play CD-Rs and CD-RWs that contain MP3
music fi les. You can also play WMA fi les.
The operation for playing MP3 and WMA
fi les is identical.
Notes:
WMA fi les with Digital Rights
•
Management (DRM) from online music shops cannot be played with this
device.
WMA fi les can only be played back safe-
•
ly if they were created with Windows
Media-Player version 8 or later.
Preparing an MP3 CD
The various combinations of CD burners,
CD burning software and CD blanks may
lead to problems arising with the device’s
ability to play certain CDs. If problems occur with your own burned CDs, you should
try another brand of CD blank or choose another colour of CD blank.
The format of the CD must be ISO 9660
Level 1/Level 2 or Joliet. Other formats cannot be played reliably.
You can create a maximum of 252 directories on a CD. You can use this device to access directories individually.
Regardless of the number of directories on
the CD, the device can handle up to 511
MP3 fi les on a single CD, with a maximum
of 255 fi les in one directory.
This device supports as many subdirectories as your burner software can create despite the fact that the maximum directory
depth defi ned by the ISO 9660 standard
is only 8.
D01
T001
T002
T003
T004
T005
T006
T007
T008
T009
T010
T011
A
B
D02
D03
T001
T002
T003
T004
T005
T001
T002
T003
T004
T005
T006
A Directories
B Tracks · Files
You can name each directory using a PC.
The device is capable of displaying the directory name. Name the directories and
tracks/fi les using your CD burner software.
The software’s instruction manual will provide details on how to do this.
Note:
When naming directories and tracks/
fi les you should avoid using accents
and special characters.
D04
ENGLISH
57
Page 24

MP3/WMA mode
If you like your fi les to be in the correct order, you should use burner software that
places fi les in alphanumerical order. If
your software does not provide this feature you also have the option of sorting the
fi les manually. For this purpose, you must
enter a number in front of each fi le name,
e.g. "001", "002", etc. The leading zeros
must also be entered.
MP3 tracks can contain additional information such as the artist, album and track
names (ID3 tags). This device can display
ID3 tags (version 1).
When creating (encoding) MP3 fi les from
audio fi les, you should use bit rates up to a
maximum of 256 Kbit/sec.
This device can only play MP3 fi les that
have the ".MP3" fi le extension.
Notes:
To ensure uninterrupted playback,
do not try changing the fi le extension
•
to ".MP3" of any fi les other than MP3
fi les and then attempt to play them!
The device will ignore these invalid
fi les during playback.
Do not use "mixed" CDs containing
•
both non-MP3 data and MP3 tracks
(the device only reads MP3 fi les during MP3 playback).
Do not use mix-mode CDs containing
•
both CD-audio tracks and MP3 tracks.
If you try playing a mix-mode CD, the
device will only play the CD-audio
tracks.
Switching to MP3 mode
MP3 mode is activated in the same way as
normal CD mode. For further information,
please read the section entitled "Switching
to CD mode" in the "CD mode" chapter.
Confi guring the display
Confi guring the default display
You can display various types of information on the current track:
Directory number and playing time
•
Track number and playing time
•
Track number and time
•
Directory number and track number
•
Directory number and time
•
To switch between the different display options,
press the ESC•DIS button 9 once or
쏅
several times for longer than 2 seconds
until the desired display is shown.
Confi guring the MP3 scrolling texts
One of the following scrolling texts is
shown once on the display with every track
change. Afterwards, the confi gured standard display is shown.
The available scrolling texts are:
Directory name ("DIR NAME")
•
Name of the track ("SONG NAME")
•
Name of the album ("ALBM NAME")
•
Name of the artist ("ARTIST")
•
File name ("FILE NAME")
•
58
Page 25

MP3/WMA mode
Note:
Artist, track and album name are a component of the MP3 ID tag of version 1
and can only be displayed if they were
stored with the MP3 fi les. For further details, please read the instructions of your
PC MP3 software or burner software.
To switch between the different display options,
쏅
press the MENU button ;.
쏅
Press the
edly until "MP3 DISP" appears on the
display.
Press the
쏅
menu.
Select the desired MP3 scrolling text
쏅
with the
When you have fi nished making your
changes,
press the MENU button twice ;.
쏅
Note:
The "MP3 DISP" menu item is available
only during the playback of a CD with
MP3/WMA fi les.
or button : repeat-
or button 8 to open the
or button 8.
Selecting a directory
To move up or down to another directory,
press the
쏅
several times.
Notes:
The device will automatically skip any
•
directories that do not contain MP3
fi les. The device will automatically
correct the number of directories for
the display. This number might there-
or button : once or
fore no longer be identical to the
number of directories that you actually created.
The device treats all directories and
•
subdirectories as if they were located
on one level. Repeatedly pressing the
or button : will also bring you
to all subdirectories.
Selecting tracks/fi les
To move up or down to another track/fi le in
the current directory,
press the
쏅
several times.
If you press the
current track will be played again from the
beginning.
or button 8 once or
button 8 once, the
Fast search
To fast search backwards or forwards,
press and hold down the
쏅
8 until fast searching backwards/forwards begins.
or button
Random track play – MIX
To play the tracks in the current directory in
random order,
briefl y press the 5 MIX button 5.
쏅
"MIX DIR" appears on the display and the
MIX symbol is displayed.
To play the tracks contained in all the directories on the inserted MP3 CD in random
order,
press the 5 MIX button 5 for longer
쏅
than two seconds.
"MIX CD" appears on the display and the
MIX symbol is displayed.
ENGLISH
59
Page 26

MP3/WMA mode
Cancelling MIX
To cancel MIX,
briefl y press the 5 MIX button 5.
쏅
"MIX OFF" appears on the display and the
MIX symbol disappears.
Scanning tracks – SCAN
You can scan (briefl y play) all the tracks on
the CD.
Press the MENU button ; for longer
쏅
than two seconds.
The next track will then be scanned.
"TRK SCAN" briefl y appears on the display. The directory number and the track
number are displayed next. The track
number fl ashes.
Note:
You can set the scanning time. For further information on setting the scanning time, please read the section entitled "Setting the scanning time" in the
"Radio mode" chapter.
Cancelling Scan and continuing listening
to a track
Briefl y press the MENU button ;.
쏅
The currently scanned track will then continue to be played normally.
Repeated playback of individual
tracks or entire directories
– REPEAT
To play the current track repeatedly,
briefl y press the 4 RPT button 5.
쏅
"RPT TRCK" appears briefl y on the display
and the RPT symbol is displayed.
To repeat the whole directory,
쏅
press the 4 RPT button 5 for longer
than two seconds.
"RPT DIR" appears briefl y on the display
and the RPT symbol is displayed.
Cancelling Repeat
To stop the current track or current directory from being repeated,
쏅
briefl y press the 4 RPT button 5.
"RPT OFF" appears briefl y on the display
and the RPT symbol disappears.
Interrupting playback (PAUSE)
Press the button 3 5.
쏅
"PAUSE" appears on the display.
Cancelling pause
During the pause, press the button 3
쏅
5.
Playback is continued.
60
Page 27

CD-changer mode
CD-changer mode
Note:
Information on handling CDs, inserting
CDs and operating the CD changer can
be found in the operating instructions
supplied with your CD changer.
Switching to CD-changer mode
Press the SOURCE button 3 re-
쏅
peatedly until "CHANGER" appears on
the display.
The device starts playing the fi rst CD that
the CD changer detects.
Selecting CDs
To move up or down to another CD,
press the
쏅
several times.
Note:
The device will ignore empty CD slots
in the changer and slots containing
invalid CDs.
Selecting tracks
To move up or down to another track on the
current CD,
press the
쏅
several times.
Fast searching (audible)
To fast search backwards or forwards,
press and hold down the
쏅
8 until fast searching backwards/forwards begins.
or button : once or
or button 8 once or
or button
Repeating individual tracks or
whole CDs (REPEAT)
To repeat the current track,
briefl y press the 4 RPT button 5.
쏅
"RPT TRCK" appears briefl y on the display
and the RPT symbol is displayed.
To repeat the current CD,
press and hold down the 4 RPT button
쏅
5 for longer than two seconds.
"RPT DISC" appears briefl y on the display
and the RPT symbol is displayed.
Cancelling Repeat
To stop the current track or current CD from
being repeated,
briefl y press the 4 RPT button 5.
쏅
"RPT OFF" appears briefl y on the display
and the RPT symbol disappears.
Random track play (MIX)
To play the tracks on the current CD in random order,
briefl y press the 5 MIX button 5.
쏅
"MIX CD" appears briefl y on the display and
the MIX symbol is displayed.
To play the tracks on all inserted CDs in random order,
press and hold down the 5 MIX button
쏅
5 for longer than two seconds.
"MIX ALL" appears briefl y on the display
and the MIX symbol is displayed.
ENGLISH
61
Page 28

CD-changer mode
Cancelling MIX
Briefl y press the 5 MIX button 5.
쏅
"MIX OFF" appears briefl y on the display
and the MIX symbol disappears.
Scanning all tracks on all CDs
(SCAN)
To scan (briefl y play) all the tracks on all the
inserted CDs in ascending order,
쏅
press the MENU button ; for longer
than two seconds.
The next track will then be scanned. The
display shows "TRK SCAN". The CD number
and the track number are displayed next.
The track number fl ashes.
Stopping Scan
To stop scanning,
쏅
briefl y press the MENU button ;.
The currently played track will then continue to be played normally.
Note:
You can set the scanning time. For
further information, please read the
section entitled "Setting the scanning
time" in the "Radio mode" chapter.
Confi guring the display
You can choose from various display options in CD changer mode:
CD number and track number
•
CD number and time
•
CD number and playing time
•
Track number and playing time
•
Track number and time
•
To switch between the display options,
쏅
press the ESC•DIS button 9 once or
several times for longer than 2 seconds.
Interrupting playback (PAUSE)
Press the button 3 5.
쏅
"PAUSE" appears on the display.
Cancelling pause
During the pause, press the button
쏅
5.
3
Playback is continued.
62
Page 29

Clock – Time
Clock – Time
Displaying the time
To briefl y display the time,
press the SOURCE
쏅
longer than two seconds.
The display changes and the time is shown
for approx. 2 seconds.
Setting the time
To set the time,
press the MENU button ;.
쏅
Press the
쏅
edly until "CLOCK SET" appears on the
display.
Press the
쏅
menu.
The time appears on the display. The hours
and minutes can be adjusted.
Set the time using the
쏅
:.
To switch between hours and minutes,
press the
쏅
When you have fi nished making your
changes,
press the MENU button twice ;.
쏅
or button : repeat-
or button 8 to open the
or button 8.
button 8 for
or button
When you have fi nished making your
changes,
쏅
press the MENU button ;.
Displaying the time continuously
when the device is off and the
ignition is on
To display the time when the device is off
and the vehicle ignition is on,
press the MENU button ;.
쏅
Press the
쏅
until "CLOCK OFF" or "CLOCK ON" appears on the display.
Press the
쏅
the display between CLOCK ON and
CLOCK OFF.
When you have fi nished making your
changes,
press the MENU button ;.
쏅
or button : repeatedly
or button 8 to switch
ENGLISH
Selecting 12/24-hour clock mode
Press the MENU button ;.
쏅
Press the
쏅
until "24 H MODE" or "12 H MODE" appears on the display.
Press the
쏅
between the modes.
or button : repeatedly
or button 8 to switch
63
Page 30

Sound
Sound
You can adjust the sound settings (bass,
middle and treble) separately for each
source (radio, CD, CD changer, AUX, traffi c announcement, telephone/navigation).
The volume distribution settings (balance
and fader) and X-BASS apply to all the audio sources except for traffi c announcements and telephone/navigation. You can
adjust the volume distribution settings
separately for traffi c announcements and
telephone/navigation.
Note:
The settings of the sound for traffi c announcements and telephone/navigation can only be made during a traffi c
announcement or during a telephone
call/voice output.
Adjusting the bass
You can select 1 of 4 middle frequencies
(60 Hz, 80 Hz, 100 Hz, 200 Hz). In addition, you can adjust the level between
-7 and +7 for the selected bass frequency.
Adjusting bass frequency and level
쏅
Press the AUD button <.
"BASS" appears on the display.
쏅
Press the
reach the BASS submenu.
쏅
Press the
until the desired bass frequency appears on the display.
쏅
Press the
the level between -7 and +7.
or button : once to
or button 8 repeatedly
or button : to adjust
Press the AUD < button twice to exit
쏅
the menu.
Note:
If an Equaliser preset (POP, ROCK,
CLASSIC) is selected, the manual increase of the bass level does not result
in an audible change starting at a certain setting. For further information,
please read the note in the section
entitled "Equaliser presets".
Adjusting the middle
You can select 1 of 4 centre frequencies
(500 Hz, 1 kHz, 2 kHz, 3 kHz). In addition,
you can adjust the level between -7 and +7
for the selected centre frequency.
Adjusting centre frequency and level
Press the AUD button <.
쏅
"BASS" appears on the display.
Press the
쏅
until "MIDDLE" appears on the display.
Press the
쏅
reach the MIDDLE submenu.
Press the
쏅
until the desired centre frequency appears on the display.
Press the
쏅
the level between -7 and +7.
Press the AUD < button twice to exit
쏅
the menu.
or button 8 repeatedly
or button : once to
or button 8 repeatedly
or button : to adjust
64
Page 31

Sound
Adjusting the treble
You can select 1 of 4 treble frequencies
(10 kHz, 12 kHz, 15 kHz, 17 kHz). In addition, you can adjust the level between
-7 and +7 for the selected treble frequency.
Adjusting treble frequency and level
Press the AUD button <.
쏅
"BASS" appears on the display.
Press the
쏅
until "TREBLE" appears on the display.
Press the
쏅
reach the TREBLE submenu.
Press the
쏅
until the desired treble frequency appears on the display.
Press the
쏅
the level between -7 and +7.
Press the AUD < button twice to exit
쏅
the menu.
Note:
If an Equaliser preset (POP, ROCK,
CLASSIC) is selected, the manual increase of the treble level does not result in an audible change starting at a
certain setting. For further information, please read the note in the section
entitled "Equaliser presets".
or button 8 repeatedly
or button : once to
or button 8 repeatedly
or button : to adjust
Setting the left/right volume
distribution (Balance)
To adjust the left/right volume distribution
(balance),
press the AUD button <.
쏅
"BASS" appears on the display.
Press the
쏅
until "BAL" appears on the display with
the current setting.
Press the
쏅
the balance (right/left).
Press the AUD < button to exit the
쏅
menu.
or button 8 repeatedly
or button : to adjust
Adjusting the front/rear volume
distribution (Fader)
To adjust the front/rear volume distribution
(fader),
press the AUD button <.
쏅
"BASS" appears on the display.
쏅
Press the
until "FADER" appears on the display
with the current setting.
Press the
쏅
the volume distribution front/rear.
Press the AUD < button to exit the
쏅
menu.
or button 8 repeatedly
or button : to adjust
ENGLISH
65
Page 32

Preamplifi er output
Preamplifi er output
(Preamp-Out/Sub-Out)
You can use the preamplifi er outputs
(Preamp-Out) of the car sound system to
connect external amplifi ers. In addition,
you can connect an amplifi er for operating
a subwoofer to the integrated dynamic lowpass fi lter of the device (level and cutoff frequency can be adjusted).
For this purpose, the amplifi ers must be
connected as described in the installation
instructions.
Adjusting the sub-out level
The sub-out level can be adjusted in 8 increments (0 to +7).
Press the AUD button <.
쏅
"BASS" appears on the display.
쏅
Press the
edly until "SUBOUT" appears on the
display.
Press the
쏅
reach the SUBOUT submenu.
Press the
쏅
value between 0 and +7.
When you have fi nished making your
changes,
press the AUD button < twice.
쏅
or button 8 repeat-
or button : once to
or button : to adjust a
Adjusting the sub-out cutoff
frequency
You can select 1 of 4 settings: 0 Hz, 80 Hz,
120 Hz and 160 Hz.
Press the AUD button <.
쏅
"BASS" appears on the display.
Press the
쏅
edly until "SUBOUT" appears on the
display.
Press the
쏅
reach the SUBOUT submenu.
Press the
쏅
until the desired frequency appears on
the display.
When you have fi nished making your
changes,
press the AUD button < twice.
쏅
or button 8 repeat-
or button : once to
or button 8 repeatedly
66
Page 33

X-Bass Equaliser presets
X-BASS
X-Bass allows you to increase the bass at
low volume.
The selected X-Bass setting is effective for
all audio sources (radio, CD, CD changer or
AUX).
The X-BASS increase can be set in increments of 1 to 3.
"XBASS OFF" means that the X-BASS function is switched off.
Adjusting the X-BASS boost
Press the AUD button <.
쏅
"BASS" appears on the display.
Press the
쏅
until "X-BASS" appears on the display.
Press the
쏅
reach the X-BASS submenu.
Press the
쏅
until the desired setting appears on the
display.
When you have fi nished making your
changes,
쏅
press the AUD button < twice.
or button 8 repeatedly
or button : once to
or button : repeatedly
Equalizer presettings
(Presets)
This device features an equaliser in which
the settings for the music genres "ROCK",
"POP" and "CLASSIC" are already programmed.
To select an equaliser setting,
press the AUD button <.
쏅
"BASS" appears on the display.
Press the
쏅
"POP", "ROCK", "CLASSIC" or "EQ OFF"
appears on the display.
Press the
쏅
one of the settings or select "EQ OFF"
to switch off the equalizer.
When you have fi nished making your
changes,
press the AUD button <.
쏅
Note:
Without Equaliser presets, you can adjust the bass and treble up to +7.
If you selected an Equaliser preset
(POP, ROCK, CLASSIC), the adjustment of bass and treble is only limited.
For example, the preset POP only allows for an audible treble adjustment
up to +3.
or 8 repeatedly until
or button : to select
ENGLISH
67
Page 34

Display
Adjusting the display
settings
Adjusting the display brightness
If your car sound system is installed as described in the installation instructions and
your vehicle features the corresponding
connection, the display brightness for day
and night is switched by switching on the
vehicle lighting. The display brightness can
be adjusted separately for day and night in
increments from 1 - 9.
쏅
Press the MENU button ;.
쏅
Press the
until "DIM DAY" or "DIM NIGHT" appears
on the display.
Press the
쏅
menu.
Press the
쏅
between the brightness levels.
When you have fi nished making your
changes,
press the MENU button twice ;.
쏅
or button : repeatedly
or button 8 to open the
or button 8 to switch
Setting the display illumination
colour
For the display illumination, you can mix a
colour from the RGB spectrum (red green
blue) or select a colour during a colour
seek.
Mixing a colour for the display
illumination
To customise the display illumination to suit
your tastes you can mix a colour yourself
using the three primary colours red, green
and blue.
Press the MENU button ;.
쏅
Press the
쏅
edly until "DISP COL" appears on the
display.
Press the
쏅
menu.
The menu for mixing your own colour is displayed. "R", "G", and "B" are displayed with
the current values. The setting for "R" is activated.
Press the
쏅
edly until the desired colour value is
displayed.
Press the
쏅
selection marker to the position after
the other colours.
Adjust the other colour components to
쏅
suit your preferences.
When you have fi nished making your
changes,
press the MENU button twice ;.
쏅
or button : repeat-
or button 8 to open the
or button : repeat-
or button 8 to move the
68
Page 35

Display External audio sources
Selecting a display illumination during a
colour scan
Press the MENU button ;.
쏅
Press the
쏅
edly until "COL SCAN" appears on the
display.
쏅
Press the
colour seek.
The device starts changing the display illumination colour.
To select the currently set colour,
쏅
press the MENU button ;.
To start the seek tuning again,
쏅
press the
If you found the desired colour,
쏅
press the MENU button twice ;.
or button : repeat-
or button 8 to start the
or button 8.
External audio sources
External audio sources, such as portable
CD players, MiniDisc players or MP3 players, can be connected to the device in two
ways:
1.
Via the rear AUX input (if no CD changer
is connected to the device).
Notes:
•
An adapter cable is needed to connect an external audio source via the
rear AUX input. You can obtain this cable (Blaupunkt no.: 7 607 897 093)
from your Blaupunkt dealer.
•
The rear AUX input must be activated
in the menu.
•
The rear AUX input can be selected
with the SOURCE
"AUX INPUT" then appears on the display.
2. Via the front AUX-IN socket.
Note:
As soon as an audio source is connected to the front AUX-IN socket,
it can be selected with the SOURCE
button 3. "FRONT AUX" then ap-
pears on the display.
button 3.
ENGLISH
69
Page 36

External audio sources Technical data
Switching the rear AUX input
on/off
Press the MENU button ;.
쏅
Press the
쏅
ly until "AUX OFF" or "AUX ON" appears
on the display.
쏅
Use the
between the options "AUX ON" and
"AUX OFF".
When you have fi nished making your
changes,
쏅
press the MENU button ;.
Note:
If no CD changer is connected to the
device, the AUX menu item cannot be
selected.
or button : repeated-
or button 8 to select
Technical data
Amplifi er
Output power: 4 x 18 watts sine at
14.4 V and
1% distortion factor
at 4 ohms.
4 x 26 watts sine
in accordance
with DIN 45324 at
14.4 V at 4 ohms.
4 x 50 watts
max. power
Tuner
Wavebands:
FM : 87.5 - 108 MHz
MW : 531 - 1 602 kHz
LW : 153 - 279 kHz
FM frequency response:
35 - 16,000 Hz
CD
Frequency response:
20 - 20,000 Hz
Pre-amp out
4 channels: 2 V
70
Input sensitivity
AUX input: 2 V / 6 kΩ
Tel./Navi input: 10 V / 1 kΩ
Weight 1.36 kg
Subject to changes
Page 37

Bitte den ausgefüllten Gerätepass sicher aufbewahren!
Please keep the fi lled-in radio pass in a safe place!
Prière de conserver soigneusement la carte d’autoradio remplie !
Tenete per favore il libretto di apparecchio, debitamente riempito, in un
posto sicuro!
Bewaar de ingevulde apparaatpas op een veilige plaats!
Vänligen förvara ifyllt apparatpass på säker plats!
¡Favor guardar el documento del aparato debidamente llenado en un lugar
seguro!
Por favor, guardar o cartão preenchido do aparelho num lugar seguro!
Det udfyldte apparatpas opbevares et sikkert sted!
Prosimy przechowywać metrykę radia w bezpiecznym miejscu!
Vyplněný dokument o přístroji prosím bezpečně uschovejte!
Vyplnený dokument o prístroji prosím bezpečne uschovajte!
423
Page 38

Country: Phone: Fax: WWW:
Germany (D) 0180-5000225 05121-49 4002 http://www.blaupunkt.com
Austria (A) 01-610 39 0 01-610 39 391
Belgium (B) 02-525 5444 02-525 5263
Denmark (DK) 44 898 360 44-898 644
Finland (FIN) 09-435 991 09-435 99236
France (F) 01-4010 7007 01-4010 7320
Great Britain (GB) 01-89583 8880 01-89583 8394
Greece (GR) 210 94 27 337 210 94 12 711
Ireland (IRL) 01-46 66 700 01-46 66 706
Italy (I) 02-369 62331 02-369 62464
Luxembourg (L) 40 4078 40 2085
Netherlands (NL) 00 31 24 35 91 338 00 31 24 35 91 336
Norway (N) +47 64 87 89 60 +47 64 87 89 02
Portugal (P) 2185 00144 2185 00165
Spain (E) 902 52 77 70 91 410 4078
Sweden (S) 08-7501850 08-7501810
Switzerland (CH) 01-8471644 01-8471650
Czech. Rep. (CZ) 02-6130 0446 02-6130 0514
Hungary (H) 76 511 803 76 511 809
Poland (PL) 0800-118922 022-8771260
Turkey (TR) 0212-335 06 71 0212-346 00 40
USA (USA) 800-950-2528 708-6817188
Brasil
(Mercosur) (BR) 0800 7045446 +55-19 3745 2773
Malaysia
(Asia Pacifi c) (MAL) +604-6382 474 +604-6413 640
Gerätepass
(dt, gb, fr, it, nl, sw, es, pt, dk, pl, cz, sk)
11/06 - CM-AS/SCS1
Name: .....................................................................
Typ: ....................................................................
London MP37
7 647 553 310
Serien-Nr: BP ................................................................
Blaupunkt GmbH, Robert-Bosch-Straße 200, D-31139 Hildesheim
424
8622405201
 Loading...