

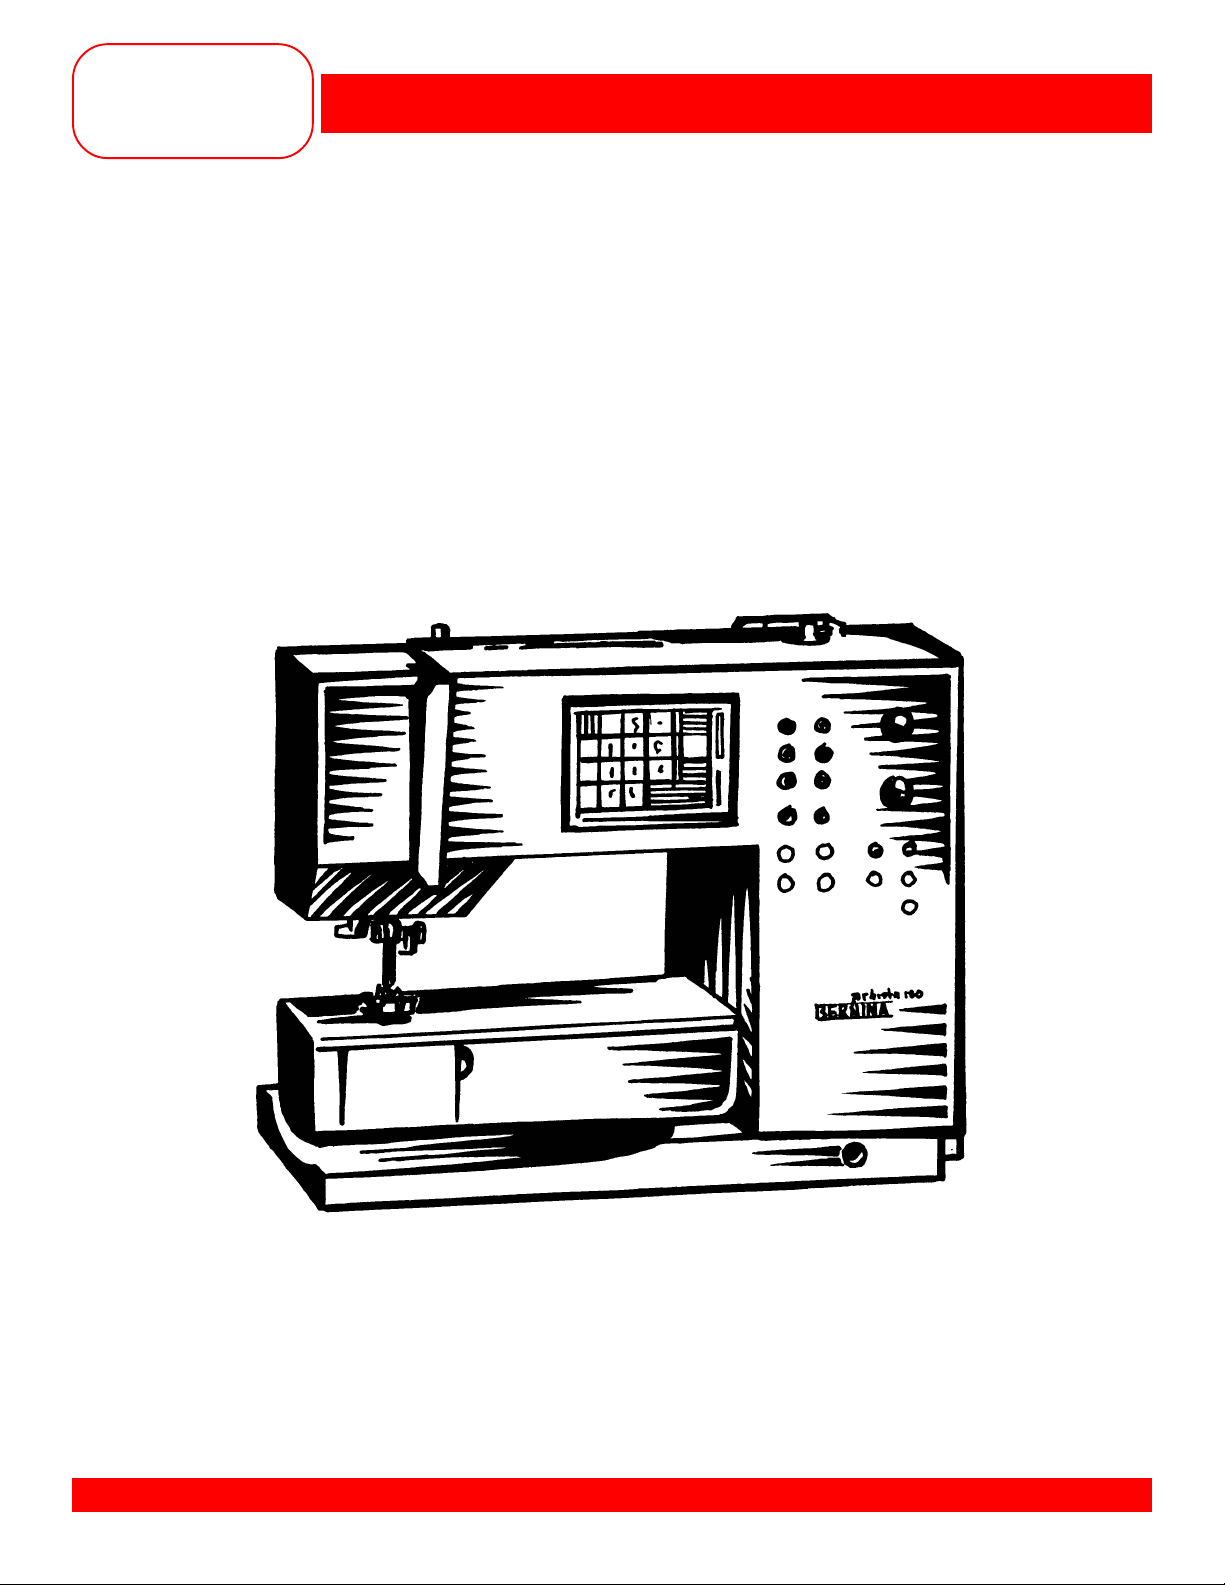
Bernina Artista 180 User Manual
MASTERING
YOUR
BERNINA
®
BERNINA® artista 170 QPE/180
MASTERING YOUR
BERNINA
artista 170 QPE/180
®
OWNER’S WORKBOOK
MASTERING YOUR BERNINA®1/10/02 artista 170 QPE/180/1

MASTERING
YOUR
BERNINA
®
BERNINA® artista 170 QPE/180
Table of Contents
SECTION A Pages 3-16
Care and Feeding of Your Machine
SECTION B Pages 17-36
Let’s Start WIth The Basics
SECTION C Pages 37-59
On The Edge
SECTION D Pages 60-74
Gather It Up and Tuck It Down
SECTION E Pages 75-91
Miscellaneous Magic
SECTION F Pages 92-99
Creative Sewing
SECTION G Pages 100-111
Programming Pizzazz
SECTION H Pages 112-121
Fabulous Features
SECTION G Pages 122-131
Decorative Directions (180 only)
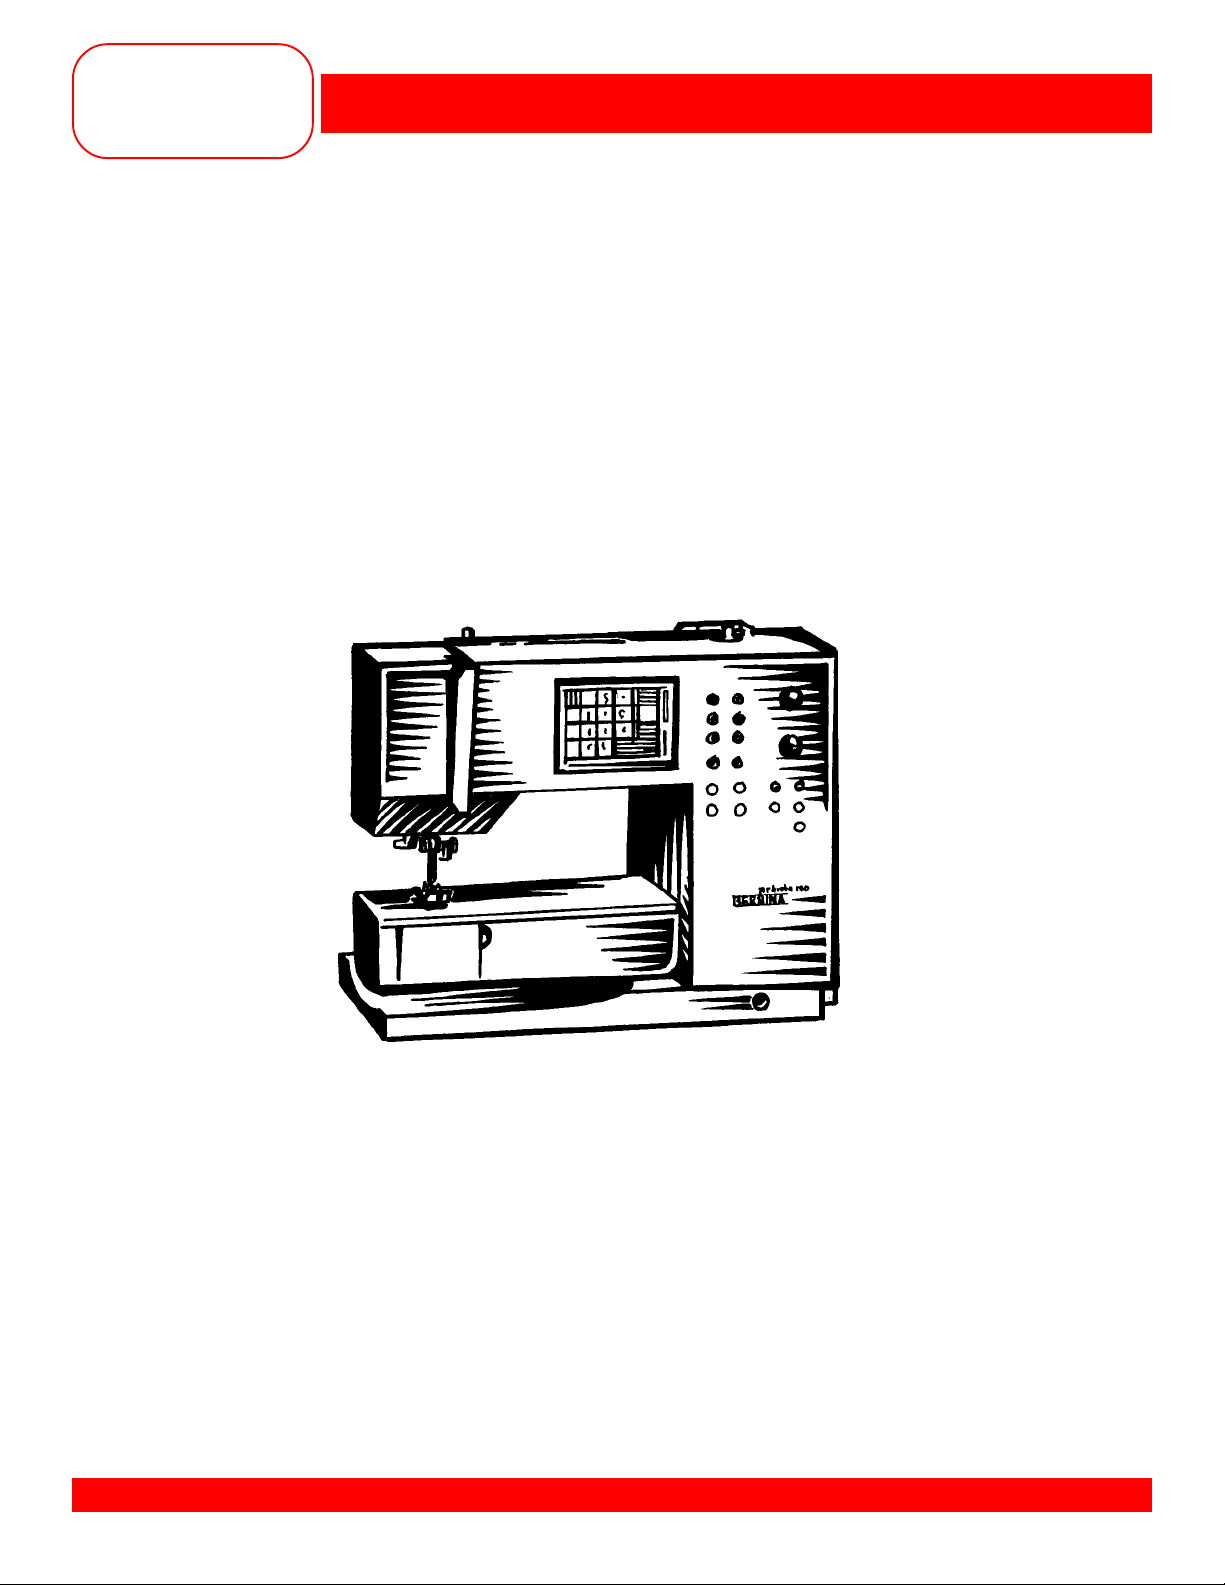
MASTERING YOUR BERNINA®1/10/02 artista 170 QPE/180/2
MASTERING
YOUR
BERNINA
MASTERING YOUR
®
BERNINA® artista 170 QPE/180
®
BERNINA
artista 170 QPE/180
OWNER’S WORKBOOK
Section A
Care and Feeding of Your Machine
MASTERING YOUR BERNINA®1/10/02 artista 170 QPE/180/3

MASTERING
YOUR
BERNINA
®
BERNINA® artista 170 QPE/180
Care and Feeding of Your Machine
Machine Set Up
Owner’s manual pg.____
• Cover/Storage of foot control, FHS bar, etc.
• Accessory storage – how box slides on & opens
• Attach foot control; note storage of cords
• Power switch – Owner’s manual pg____
• Light - on/off function (in setup) – Owner’s
manual pg____
• Extension table + sliding guide
• Presser foot lifter
- acts as a “third hand”
- extra 2mm of presser foot lift
- drops feed dog to give extra space between
presser foot and feed dog
- speeds sewing by 20%
- alternate size available for use with a sewing
machine cabinet
Presser Feet
Owner’s manual pgs.____
• Importance of using the correct foot
• On-screen indicator
• Overview of included presser feet
Feed Dog
Owner’s manual pg. ____
Threads
Owner’s manual pg. ____
• Types of thread
• Uses for each type of thread
Needles
Owner’s manual pg.____
Bobbins
Owner’s manual pg.____
• Removing the bobbin case
• Winding a bobbin
• Use bobbin thread cutter
• Quick start bobbin – use thread cutter located in
the bobbin area
• Clip the thread close to the case before
removing the bobbin
SECTION A
Threading the Upper Thread
Owner’s manual pg.____
• Spool pins and discs – Owner’s manual pg.____
- vertical spool pin for stacked and decorative
threads
- horizontal spool pin for crosswound threads
- use disc closest to diameter of the spool
• Optional supplementary thread guide
• Optional BERNINA
• Thread machine with the presser foot up until
ready to thread the needle
Threading the Needle
• Needle threader – Owner’s manual pg.____
• Side thread cutter – Owner’s manual pg.____
• After the needle is threaded, put the thread
under the presser foot
• Lower the presser foot
• Insert the thread into the cutter; it is cut to the
proper length to begin sewing
Needle Stop Adjustment
• With the foot control – Owner’s manual pg.___
• With the Needle Stop Up/Down function –
Owner’s manual pg.___
Needle Positions
Owner’s manual pg. ____
• Eleven positions
Practical/Decorative Stitches
Owner’s manual pgs.____
• Stitches programmed in the machine
• Stitches available from CPS software
• Uses for the stitches – Owner’s manual pgs.____
• How to select stitches – Owner’s manual pgs.____
- touch screen
- scroll arrows
- selection by stitch number
- external buttons for stitch groups
®
thread stand
MASTERING YOUR BERNINA®1/10/02 artista 170 QPE/180/4
MASTERING
YOUR
BERNINA
Straight Stitching
• Seam measuring – stitch plate marks – Owner’s
manual pg.____
- the following measurements are indicated on
the stitch plate: ¼”, 3/8”, ½”, 5/8”, ¾”, and 1”
- the line just behind the needle is 4mm
- the horizontal lines to the far back and the
line in front of the needle are
• Quilting/seam guide is included with the machine
• Left seam guide and seam guides with rulers are
available as optional accessories
• Straight stitch throat plate available
• 5.5mm throat plate available for 180
Basting
Owner’s manual pgs.____
• Loosening the top tension helps in the removal
of stitches.
• Using the maximum stitch length gives a 1”
stitch.
Topstitching/Edgestitching
Owner’s manual pgs.____
• Machine sews every second stitch when the
Long Stitch function is activated; stitch length is
10mm when using the maximum stitch length.
Securing Stitches
Owner’s manual pgs.____
• Options
• Stitch
• Functions
Satin Stitches
• Tension adjustments
- Function icon - must be placed on the
function bars (artista 180 only)
- TTC button (artista 180 only)
- Creative Consultant (artista 180 only)
- Setup function (artista 180 only)
- Thread bobbin case finger to adjust tension
(artista 170 QPE only)
• Can taper while sewing
• Stabilizer – important to the success of stitches
Altering Stitches
Owner’s manual pg.____
®
BERNINA® artista 170 QPE/180
5
/8” from needle
Restoring Basic Settings
Owner’s manual pg.____
Presser Foot Pressure
Owner’s manual pg.____
Speed Controls
• Three ways to control – Owner’s manual pg.___
- function box in Setup
- function box on the screen
- ½ stitch at a time by tapping the back of the
foot control
Changing the Light Bulb
Owner’s manual pg.____
• Use only 12V 5W. W 2.1 x 9.5d bulbs
Cleaning the Feed Dog
• Periodically remove thread fluff and fabric fuzz
which collects under the stitch plate. Refer to
manual for step-by-step instructions (pg.___).
Cleaning and Lubricating the Hook
• Low mass hook system does not require
lubrication
• See Owner’s manual page ____ for step-by-step
cleaning instructions
Cleaning the Screen
• Wipe only with a damp cloth
Cleaning the Outside of the Machine
• Wipe with damp cloth. If needed, use a solution
of water and a few drops of liquid soap.
IMPORTANT: Never use oil, alcohol, or
solvents of any kind on any part of the
external surface of the machine.
Here’s an idea...
Use your birthday month as a
reminder to have your BERNINA
machine serviced. Take it to an
authorized BERNINA® technician
during the month of your birthday
and you’ll never have to remember
when it was last serviced.
®
MASTERING YOUR BERNINA®1/10/02 artista 170 QPE/180/5

MASTERING
YOUR
BERNINA
®
BERNINA® artista 170 QPE/180
THREADS
Poor quality or the wrong type of thread can cause poor stitches on any machine. Thread passes through
the eye of the needle approximately 37 times in a “see-saw” action before it forms a single stitch. Poor
quality thread results in crooked and looped stitches, puckered seams, frayed thread, and/or needle
breakage. To achieve quality stitches, a sewing machine needs three things: correct thread, correct size
needle, and properly adjusted thread tensions.
Several factors such as the fiber, twist, ply, finish, and size of thread must be considered for use with today’s
fabrics for fine stitches.
Staple – refers to the length of fibers used to twist together to form a single ply. Domestic thread
fiber lengths are usually 1½” to 2½” long while European threads use 5½” to 6½” lengths.
Ply – the number of single strands twisted together to make a single thread.
Roll – the tendency of thread to roll to the right or left during stitching, causing the stitch to
appearslightly crooked. Poor quality threads are more likely to roll.
Twist – the crimping of fibers which causes them to interlock firmly into a single ply. Thread should
not untwist during stitching. This will cause skipped stitches, thread breakage, crooked stitches, and
weak spots in seams.
Right twist – most American threads are twisted to the right, causing some rolling.
This gives average stitch quality.
Left twist – Most commercial and imported threads are twisted to the left, giving better
than average stitch quality. Left twist resists rolling and makes a larger loop for the hook
point to enter, reducing skipped stitches.
Wearable art embellishment has necessitated the creation and marketing of many new thread types, such
as Sulky’s rayons and metallics. Made in West Germany, these are left twist threads; Mettler and Isacord
threads are also left twist. To test the twist of a thread: while holding the spool in the left hand, roll the strand
of thread towards you with one thumb. Left twist will tighten, right twist will loosen.
Fiber – refers to the typ eof material used to produce the thread. Some commonly used threads:
• Polyester 2 ply – such as Metrosene 100. Good for clothing construction on man-made,
natural or blended fabrics. Will tolerate heat up to 450° Fahrenheit. Also Isacord
embroidery thread – excellent for embroidery, very abrasion resistant.
• Polyester 3 ply cordonnet – topstitching or buttonhole twist – such as Mettler 30/3.
• Cotton 2 ply – such as Mettler 60/2 – excellent for French Machine Sewing, delicate
machine embroidery, and darning.
• Cotton 2 ply – such as Mettler 30/2 – loose twist for a soft, shiny look in machine
embroidery, applique, and buttonholes.
• Cotton 3 ply – such as Mettler 50/3 – excellent for clothing construction on natural fibers.
Tighter twist than embroidery cotton thread and less puckering on problem fabrics. Cotton
thread stretches less than polyester.
• Rayon – a lustrous embroidery thread. Weaker than cotton, it is used for decorative work only.
MASTERING YOUR BERNINA®1/10/02 artista 170 QPE/180/6
MASTERING
YOUR
BERNINA
®
BERNINA® artista 170 QPE/180
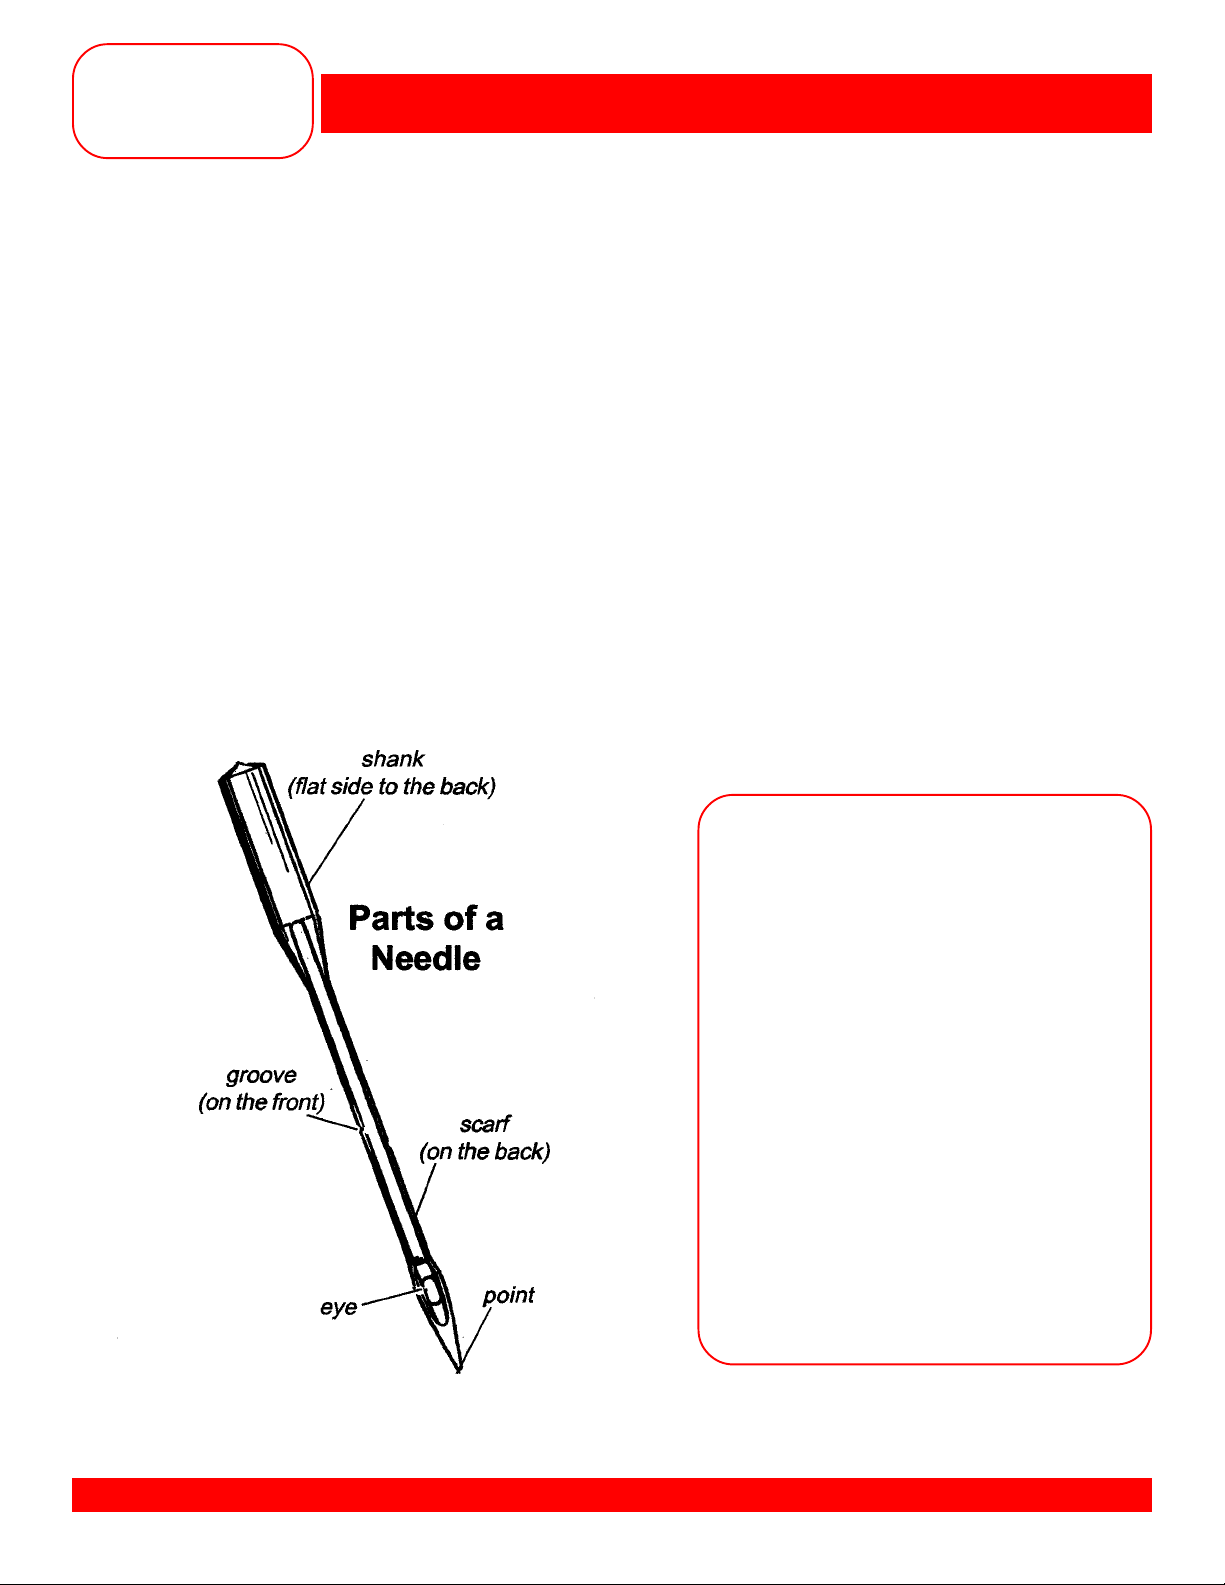
NEEDLES
Along with thread, needles are very important to stitch formation. Many “mechanical” problems and damage
to fabrics can be traced to a bent, damages, or incorrect size or type needle. Approximately 60% of all
needles made are discarded at some stage of production. When selecting the correct needle for any sewing
project, three things must be considered:
Needle system – 130/705H
Needle point – to assure stitch formation and avoid fabric damage
Needle size – small size for lightweight fabrics; larger needle for heavier fabrics
If the needle is:
Too small – the thread can’t stay in the groove to form a loop to be picked up by the hook point
Bent – thread loop forms too far away from hook point; hook can’t enter loop to form stitch
Blunt – needle won’t pierce fabric so no thread loop forms to make a stitch
Need To Know
• Needle should be changed every 4-6
hours of sewing. The needle is the most
inexpensive part in your sewing machine
but is one of the most crucial for getting
good results and keeping your machine
running well. Don’t let false economy
keep you from doing what is best for
your sewing projects and your machine.
• European needles are chrome-plated
to glide in and out of fabric easily.
• The selected thread should fit in the
groove on the front of the needle. If it
isn’t protected by the groove, a needle
with a larger groove should be used.
• Always make sure the needle is fully
inserted as high as possible when
installing a new one.
MASTERING YOUR BERNINA®1/10/02 artista 170 QPE/180/7
MASTERING
YOUR
BERNINA
Ball Point
Stretch
Stretch
Double
Universal
Double
Universal
Triple
(Drilling)
Jeans
Jeans
Double
70-90
70-90
2.5/75
4.0/75
60-110
1.6/70-
8.0/100
3.0/90
70-90
4.0/100
®
BERNINA® artista 170 QPE/180
SEWING MACHINE NEEDLES
Has a rounder point. 70 for
lingerie, nylon, jersey; 80 for
T-shirt; 90 for sweatshirt fleece.
A stretch needle has a more
rounded point and a blue anticling coating which helps to
prevent skipped stitches in knits
and elastic. Sometimes used on
Ultrasuede
Two ballpoint needles on one
shank; each needle has a large
scarf. Used for hemming and for
stitching on knit fabric.
A compromise between a sharp
and a ballpoint needle; can be
used on both wovens and knits.
60 – very fine batiste
70 – broadcloth
80 – trigger and gabardine
90 – denim and twill
100 & 1 10 – canvas
Two needles attached to one
shank. Used for pintucks, hems,
and decorative work. Note: The
170 QPE can use up to a 4.0mm
and a 180 can use up to an
8.0mm.
Three needles attached to one
shank. Used to create mock
smocking and other decorative
effects.
Has a sharp point and a shaft
that is less prone to flex. The
sharpness of the needles makes
it better for use on denim and
woven fabrics where a clean
stitch is desired.
Two Jeans needles attached to
one shank. For topstitching on
denim with heavy thread; can
also be used for decorative
®
, vinyl, and plastic.
Microtex
Sharp
(Schmetz)
Microfiber
(Lammertz)
Quilting
Topstitch
Embroidery
(Schmetz)
Metafil
(Lammertz)
Metafil
Double
Wing
Double
Wing
Leather
60-90
assort’d
(75 &
90)
80-100
75-90
3.0/75
100120
100
80-90
stitching with metallic thread.
A sharp point with a thin shaft.
60-90 corresponds to the weight
of the fabric; as the fabric gets
heavier, the number is higher.
The thin, tapers point of this
needle causes less damage to
fabric when seaming and cross
seaming.
A sharp point with a large eye
and deep groove. For use with
heavier fabrics – the large
groove cradles heavier threads.
Sharp needle with a large eye
and groove; also has a coating
and a larger scarf. For use with
embroidery thread – prevents
shredding of rayon or metallic
threads. Two threads may be
used through the eye of an 80
or 90 needle.
Two Metafil needles attached to
one shaft; for double needle
work with embroidery threads.
Sharp pointed needle with a noncutting wedge of metal on each
side. Needle makes a hole in the
fabric without cutting the threads
of the fabric. Used for decorative
and heirloom work, such as
hemstitching. Works best on
natural fibers or on the bias.
One regular needle and one wing
needle attached to a single shaft.
Use the same as a Wing; makes
one large and one regular hole.
Point is a sharp cutting wedge.
Used for sewing leather only. Not
for vinyl or simulated leathers.
MASTERING YOUR BERNINA®1/10/02 artista 170 QPE/180/8
MASTERING
YOUR
BERNINA
®
BERNINA® artista 170 QPE/180
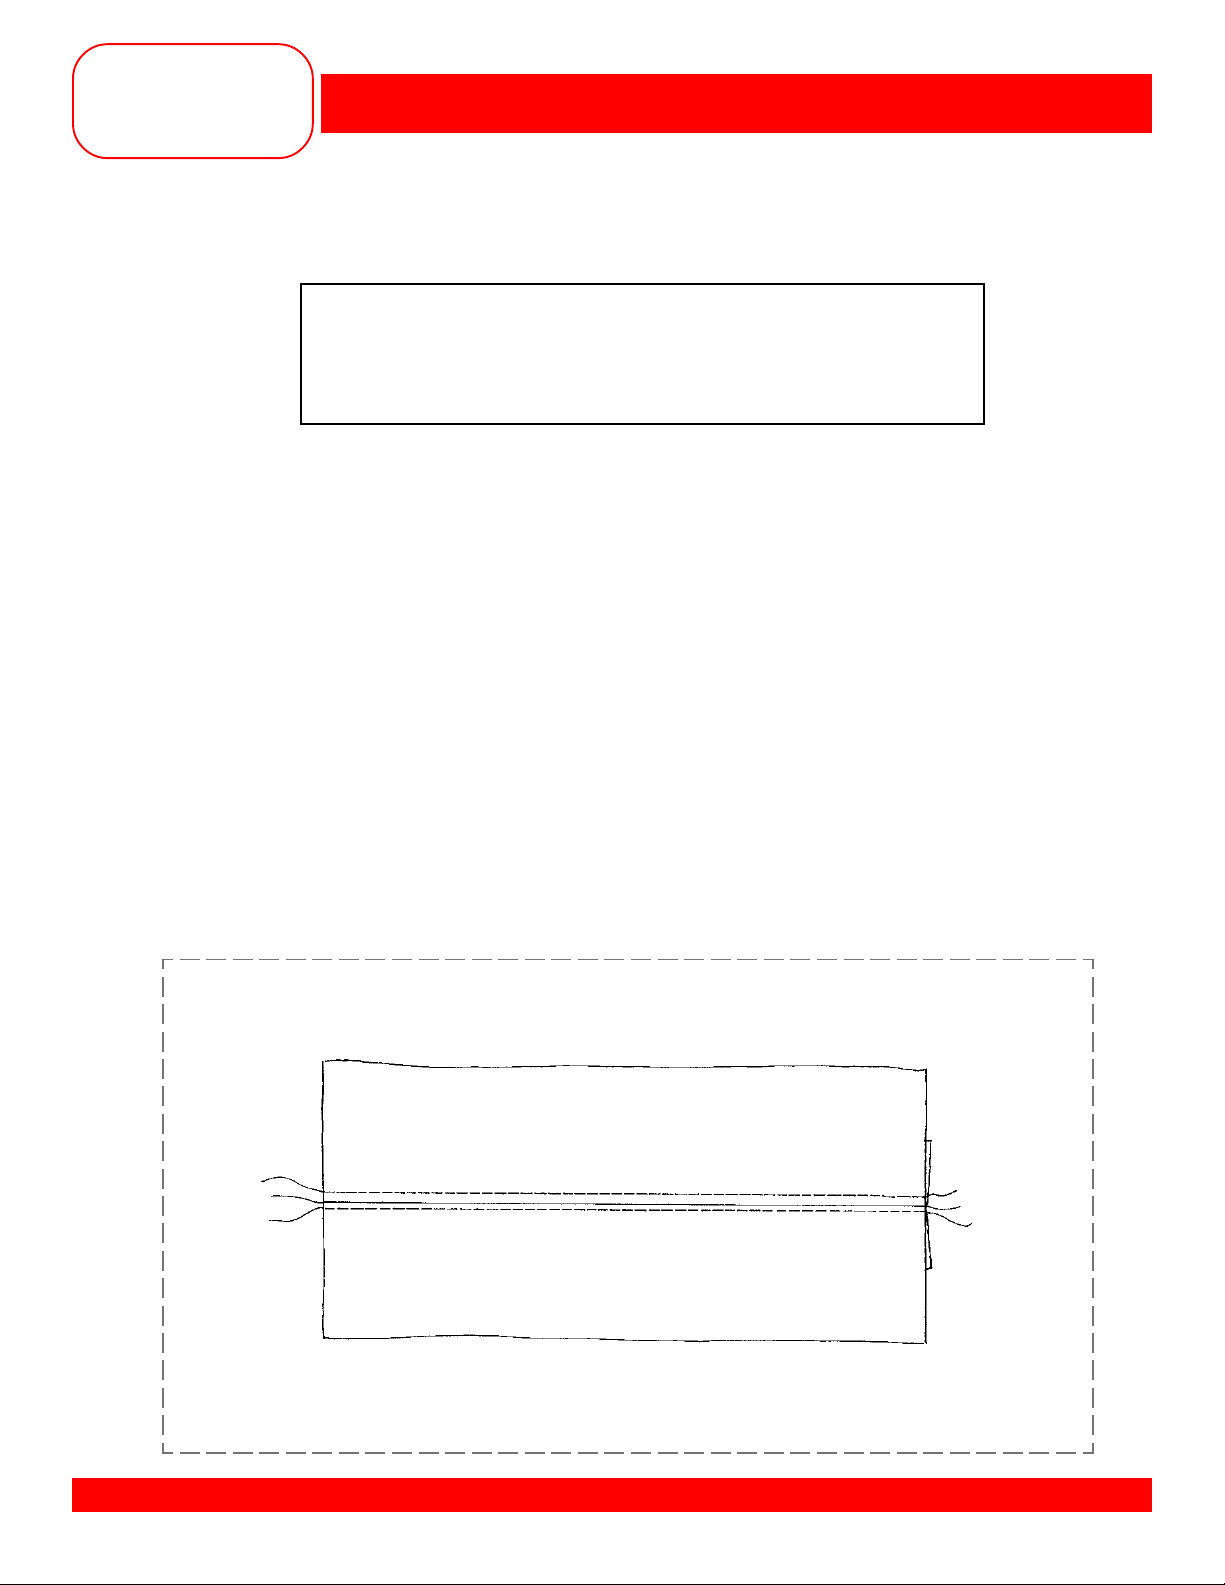
NEEDLE POSITIONS
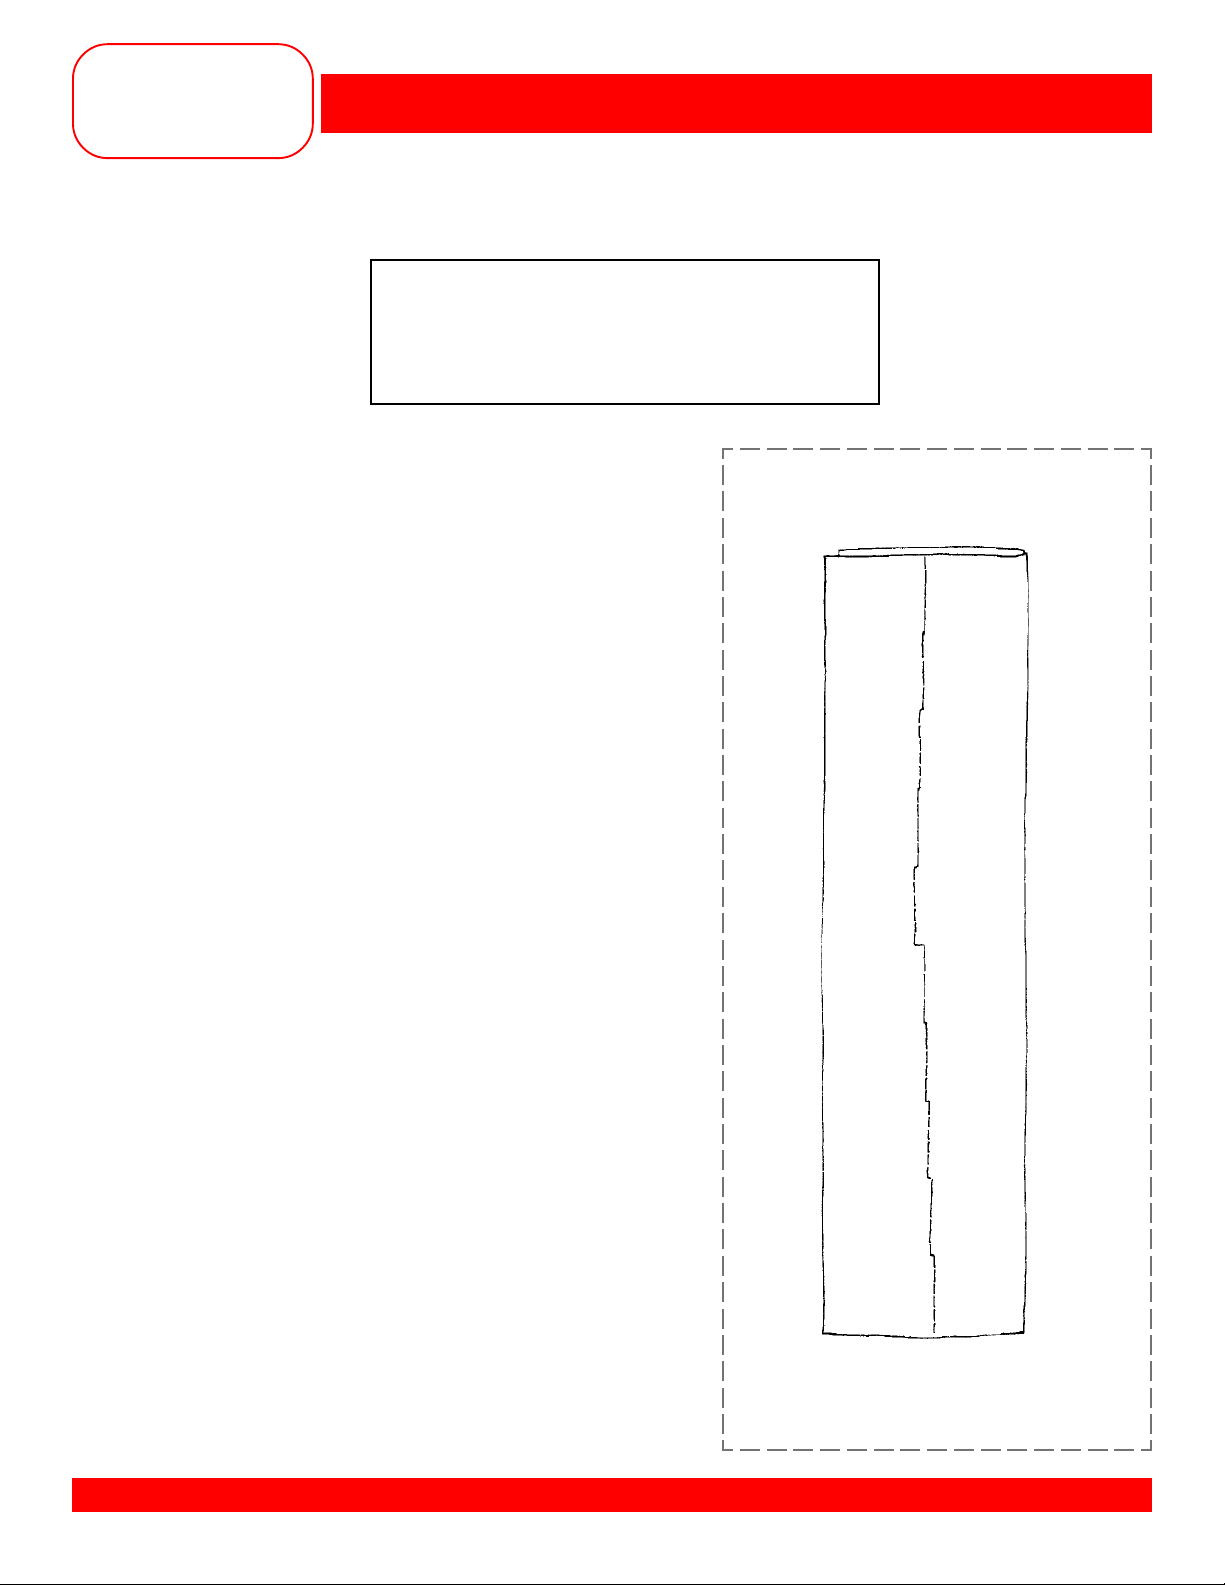
Fabric: Firmly woven fabric, 4” x 6”
Needle: 90/14 Embroidery
Thread: 30 wt. cotton embroidery
Contrasting color
Presser Foot: Reverse Pattern Foot #1/1C
Owner’s manual pg.____
• The 170 QPE/180 has 11 fixed needle positions.
• Fold fabric in half to 2” x 6”.
• Select Straight Stitch. The basic settings are displayed
on the screen. The needle position indicator is just
below the stitch width scale; the needle should be in
center position.
• Position the fold of the fabric on the 1” mark on the
right side of the stitch plate.
• Select Pattern End 3x; sew until the machine stops.
• Move the needle one position to the left.
• Sew until the machine stops.
• Repeat until all six positions have been sewn.
• Leaving the fabric under the foot – move the needle
position back to center.
• Sew until the machine stops.
• Move the needle one position to the right.
• Sew until the machine stops.
• Move the needle one more position to the right – sew
until the machine stops.
• Repeat until all six positions have been sewn.
MASTERING YOUR BERNINA®1/10/02 artista 170 QPE/180/9
MASTERING
YOUR
BERNINA
®
BERNINA® artista 170 QPE/180
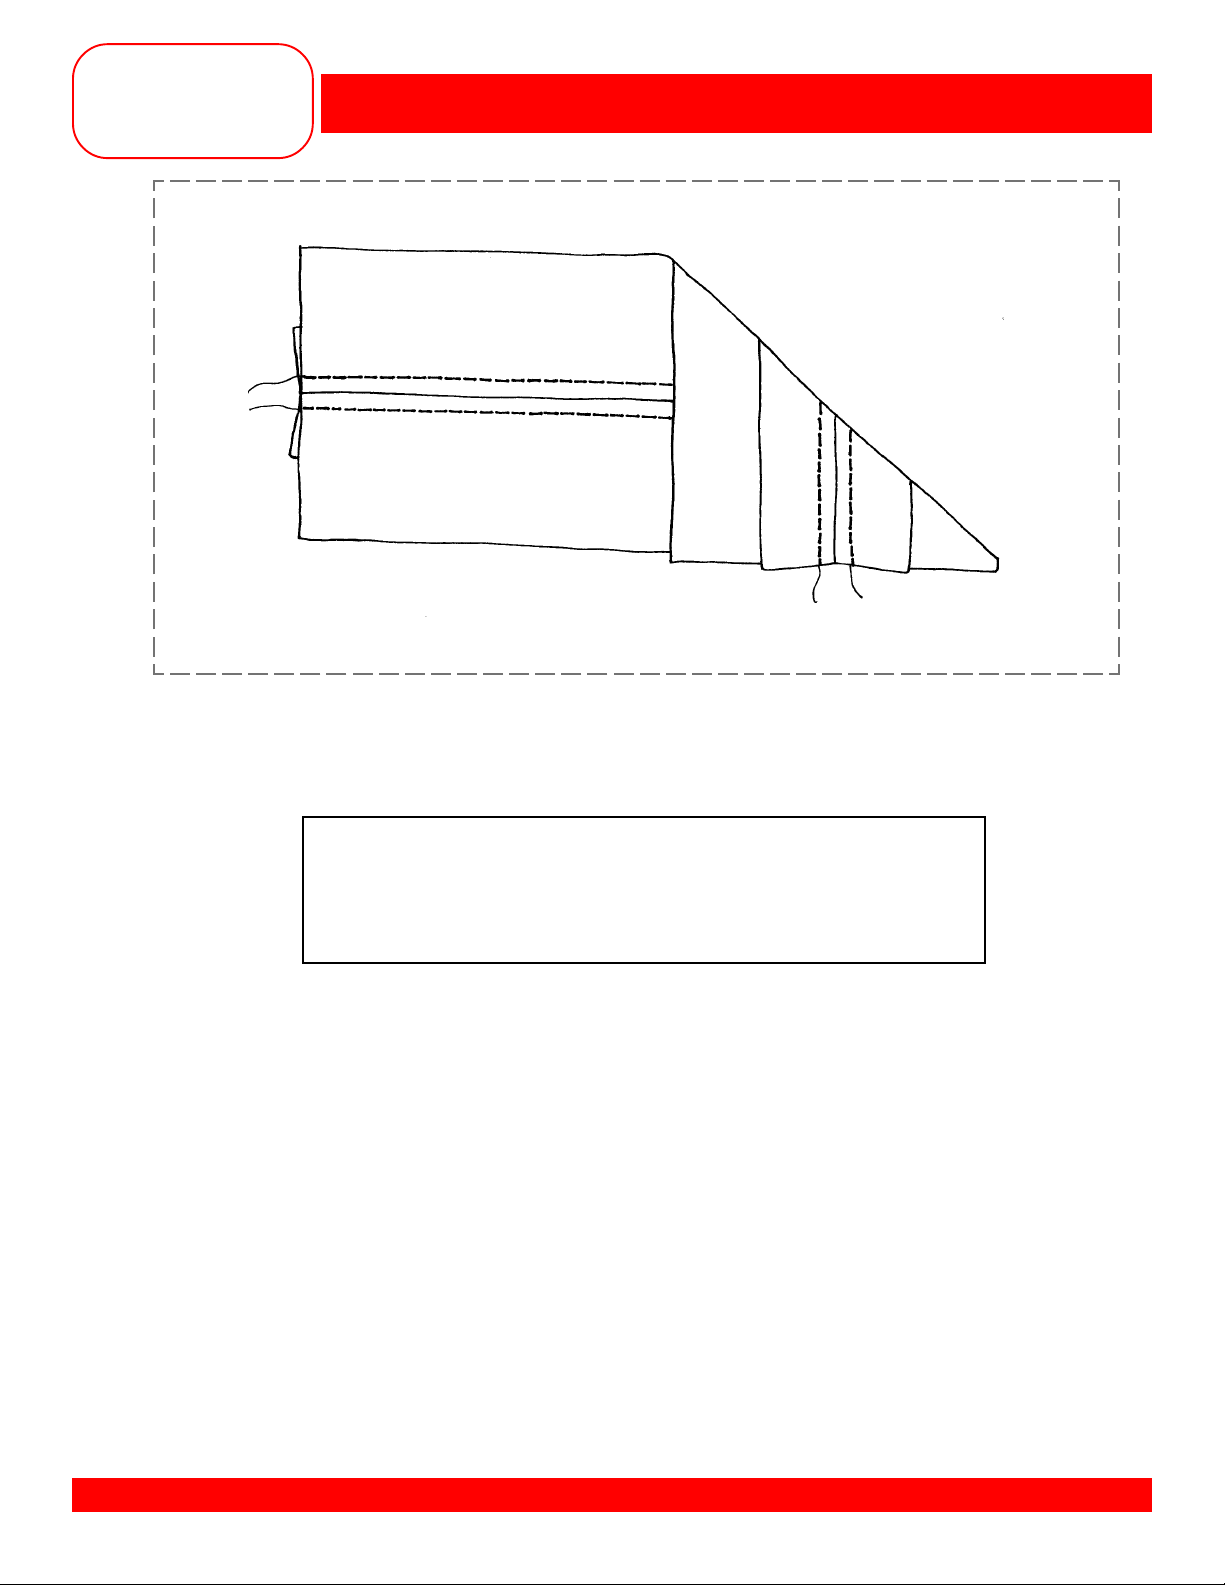
SEAMING
Fabric: Firm fabric – 2 pieces, 4” x 6” each
Needle: 90/14 Embroidery
Thread: 30 wt. cotton embroidery
Contrasting color
Presser Foot: Reverse Pattern Foot #1/1C
Owner’s manual pg.____
• Find the 5/8” guide line on the stitch plate.
• Place fabric pieces right sides together and
align them with the guide line.
• Sew a 5/8” seam on one 6” edge.
• Attach the Quilting/Seam Guide to the foot
and sew a 2” seam on the other side.
MASTERING YOUR BERNINA®1/10/02 artista 170 QPE/180/10
MASTERING
YOUR
BERNINA
®
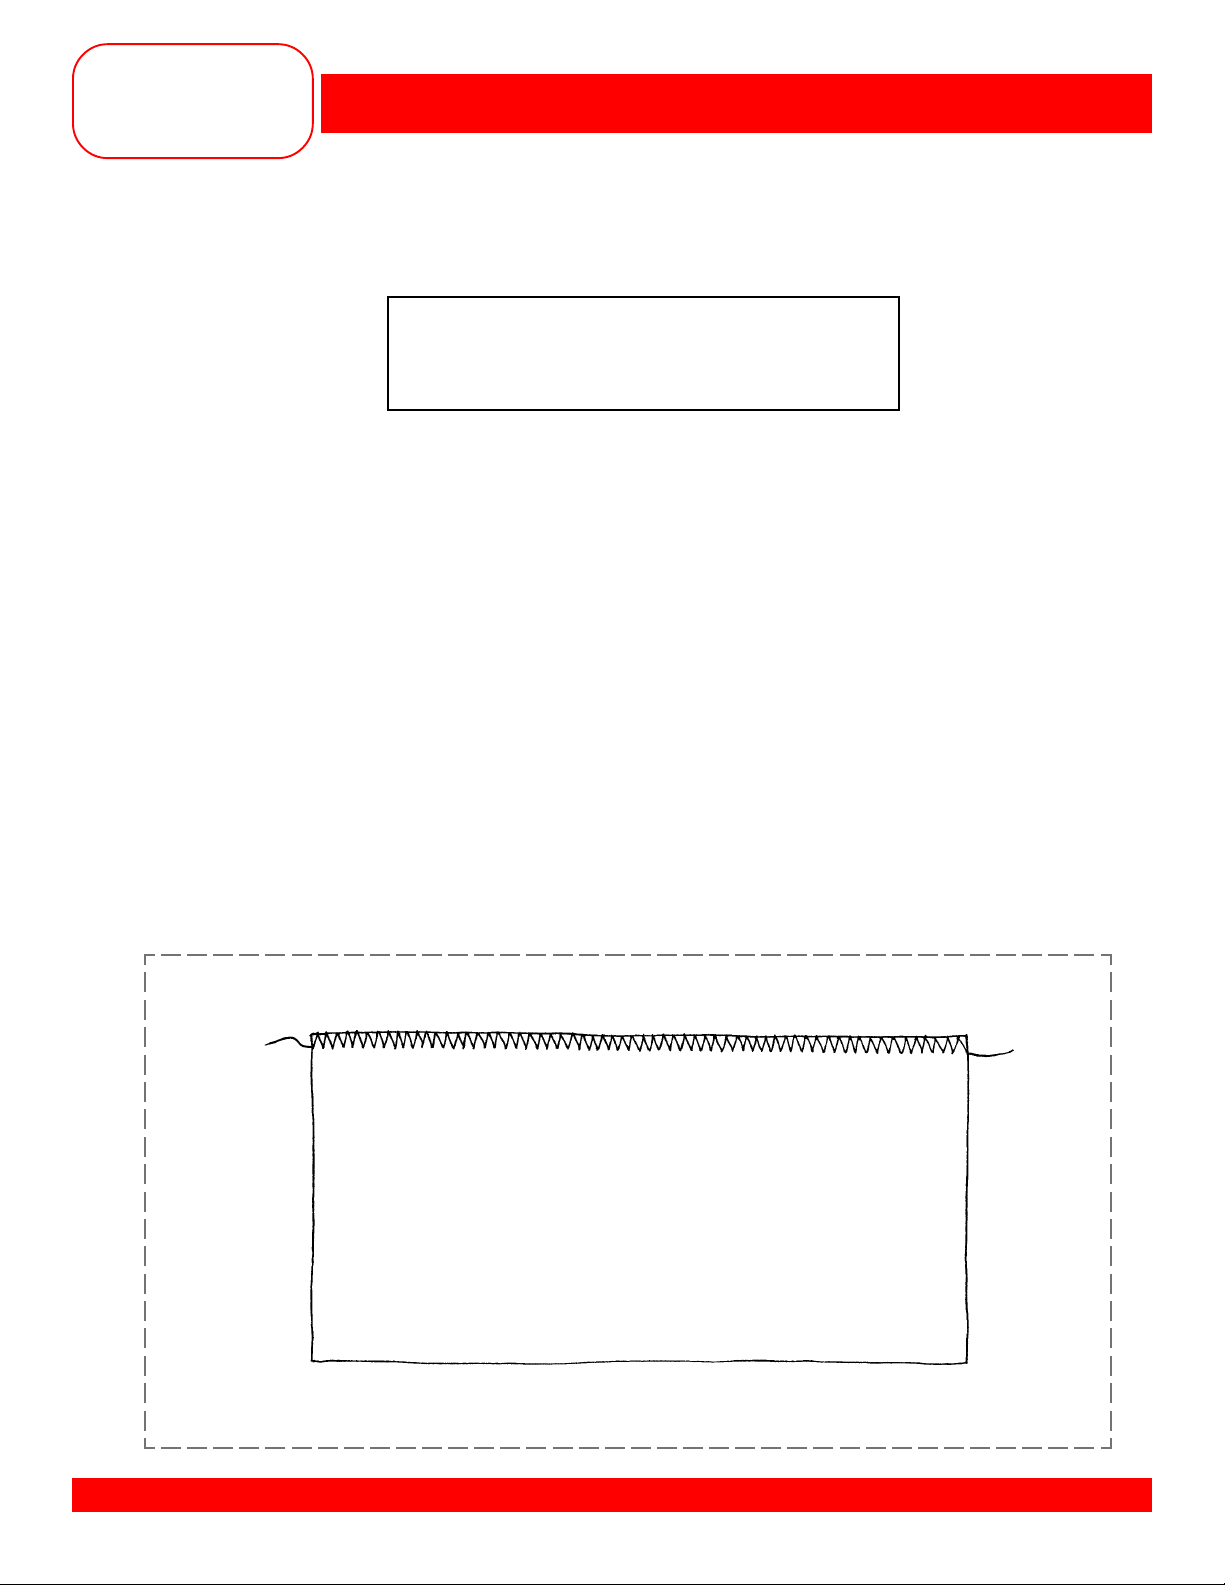
Basting Stitch #21
Preprogrammed settings
BERNINA® artista 170 QPE/180
Basting Stitch #21 - 5mm length
Long Stitch function engaged
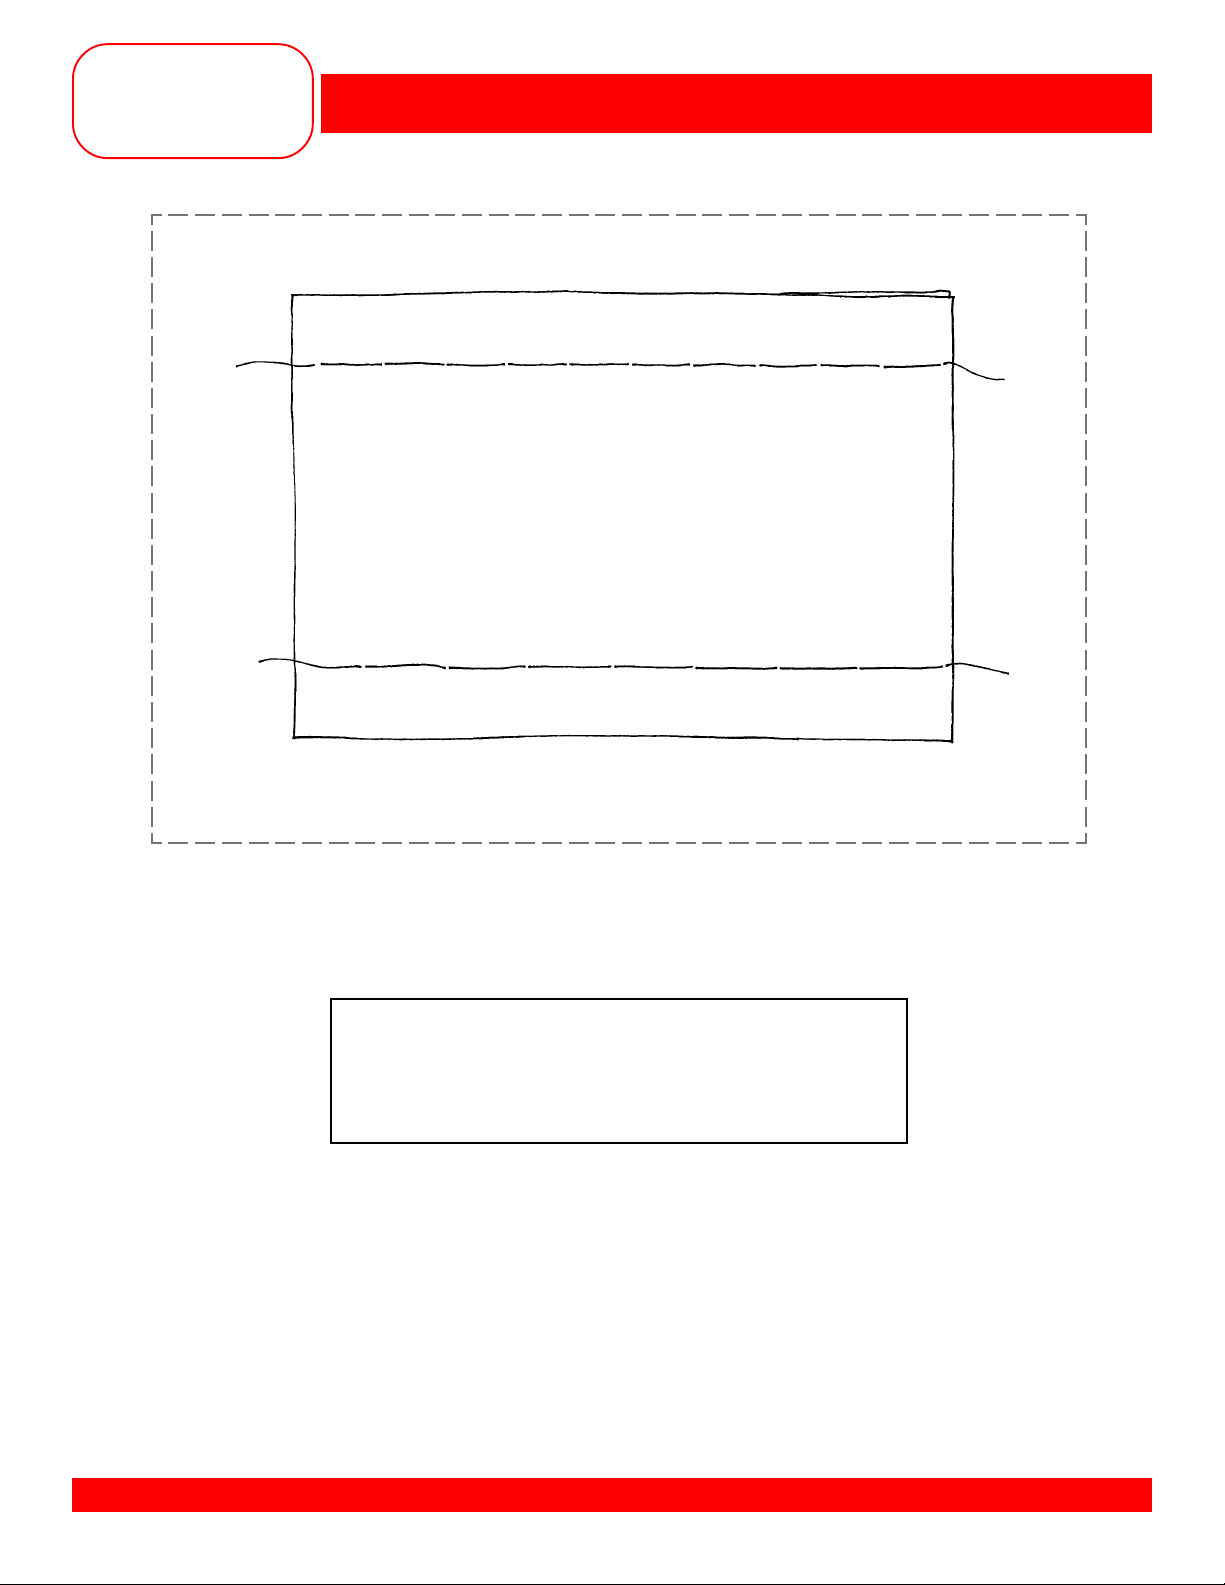
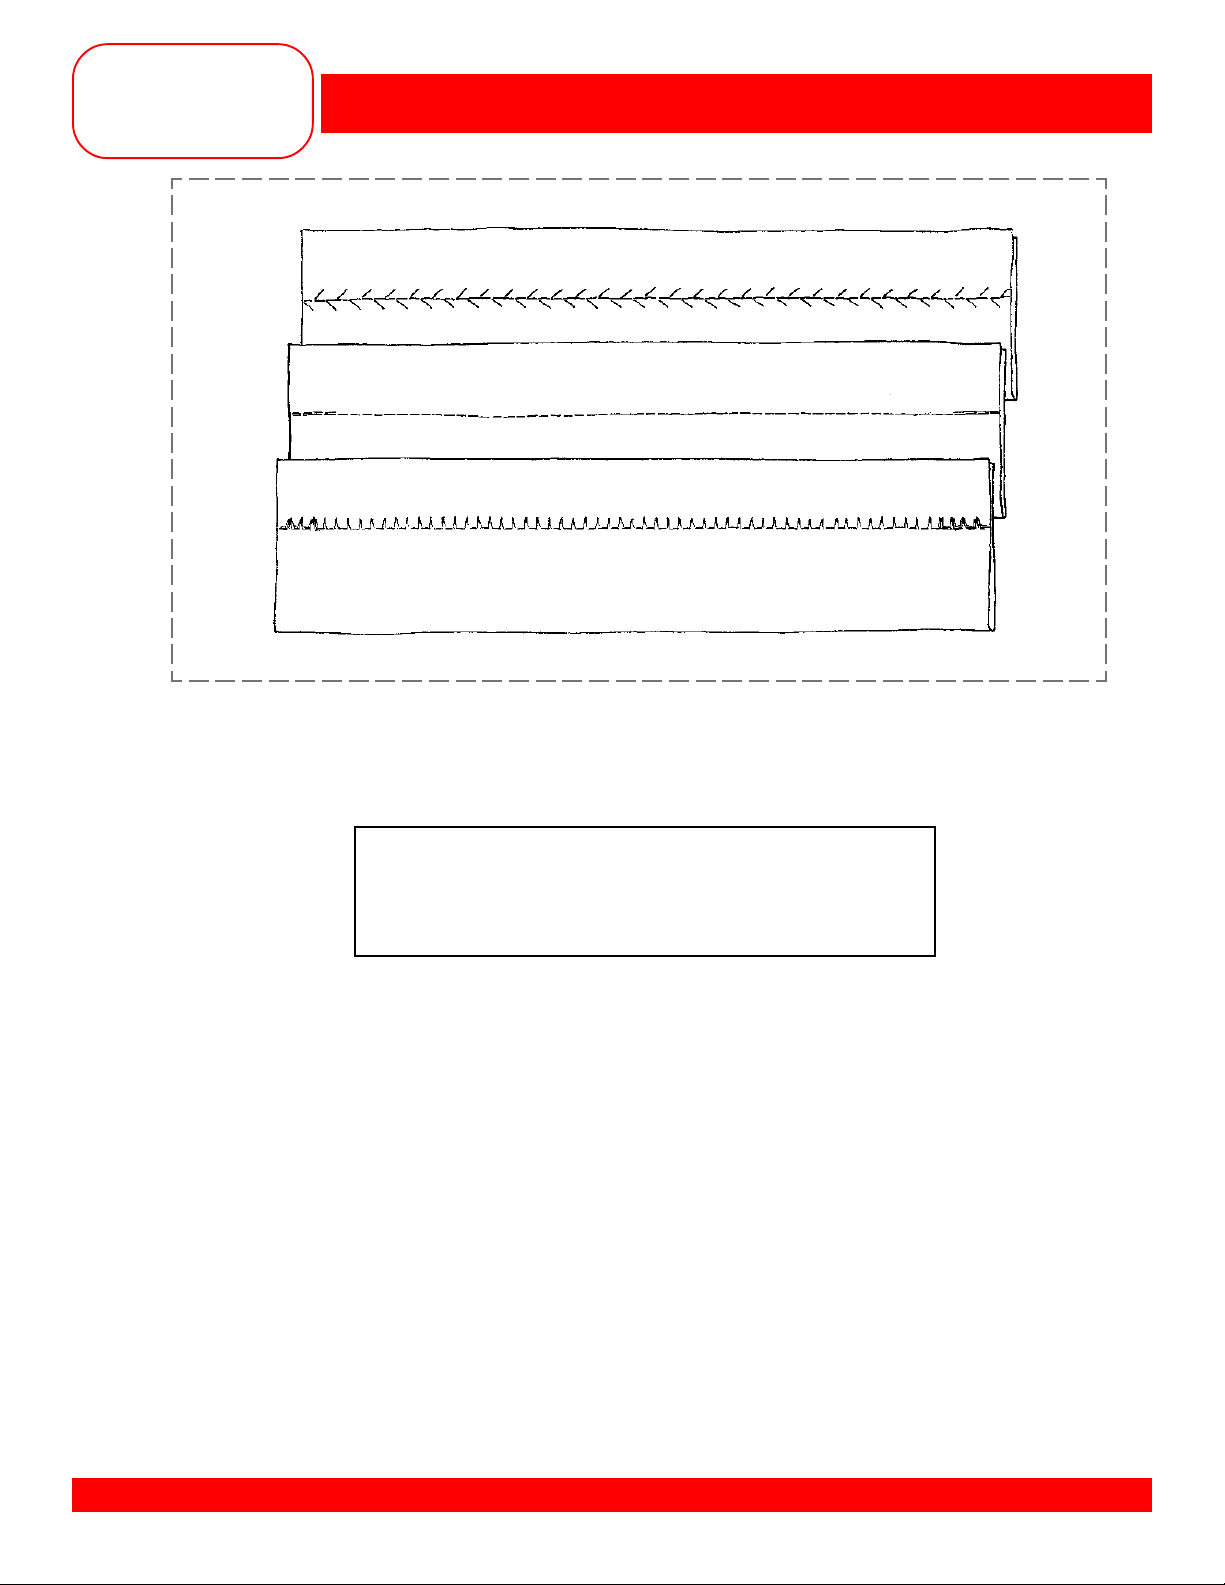
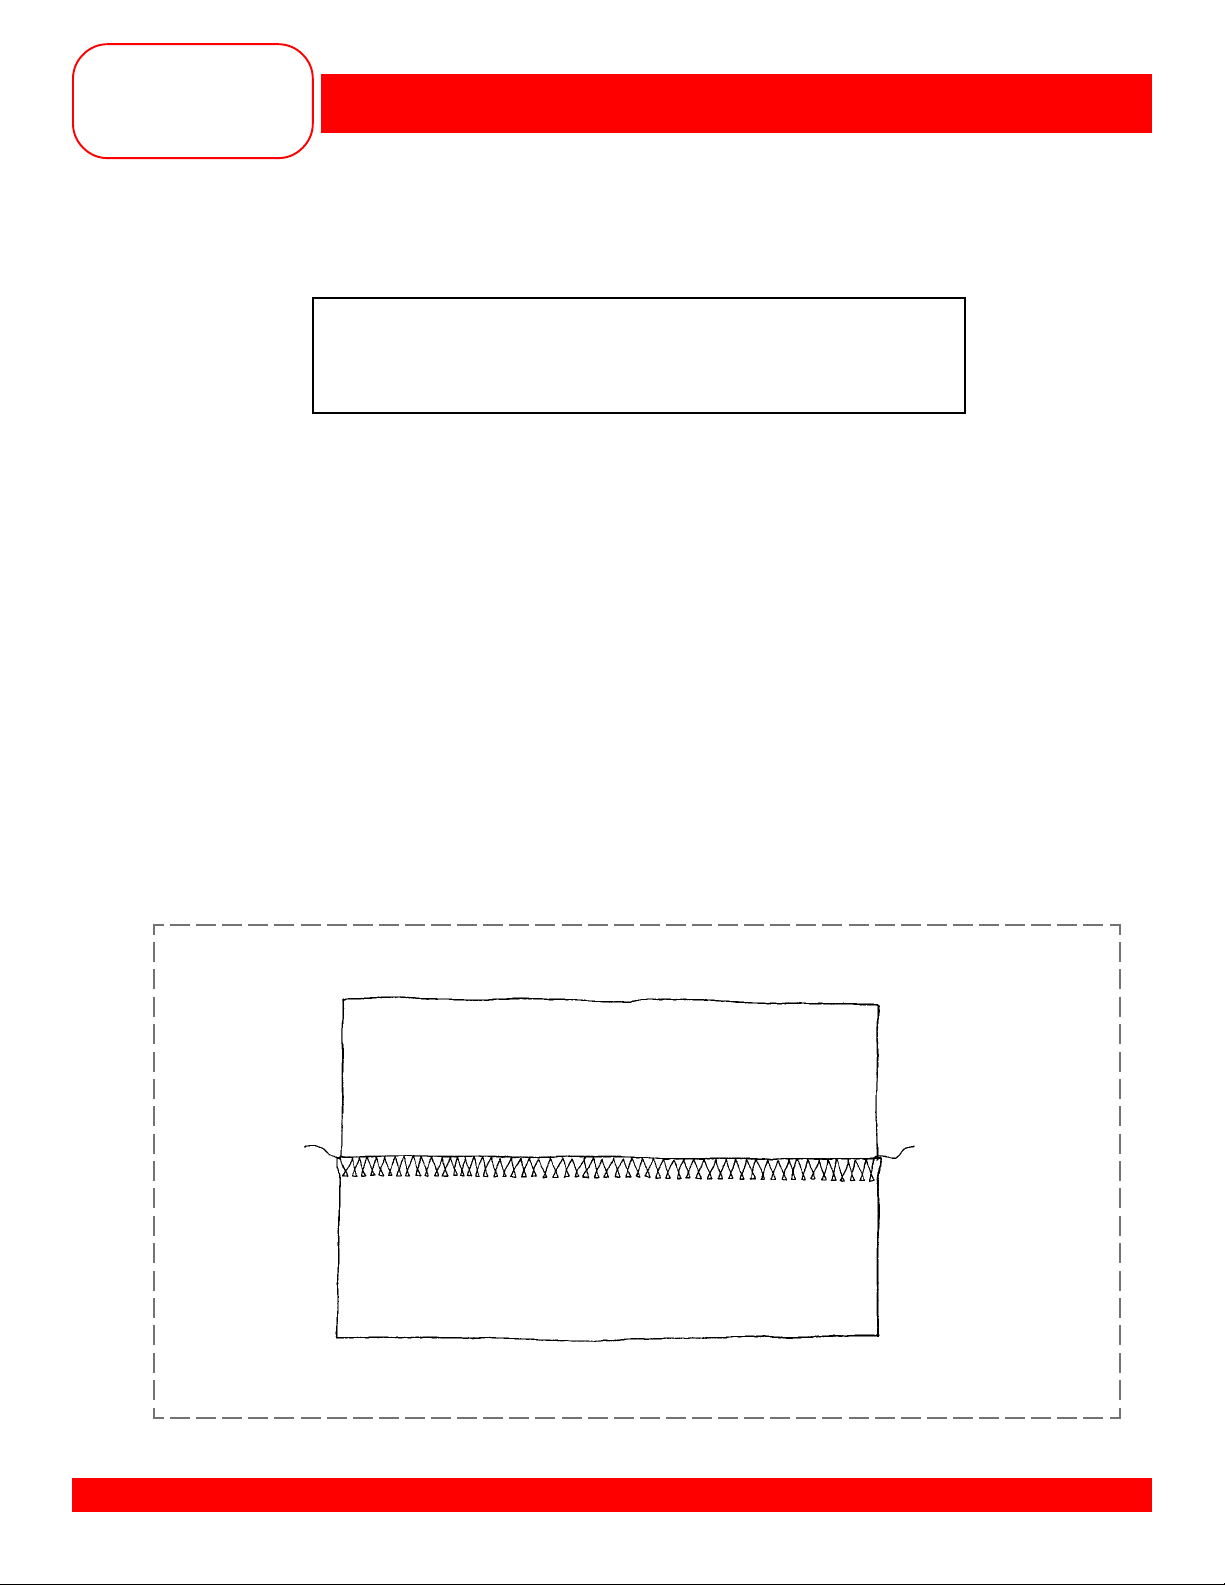
BASTING
Fabric: Firm fabric – 2 pieces, 4” x 6” each
Needle: 90/14 Embroidery
Thread: 30 wt. cotton embroidery
Contrasting color
Presser Foot: Reverse Pattern Foot #1/1C
Owner’s manual pg.____
• Place fabric pieces right sides together.
• Using Basting Stitch #21 with the preprogrammed length, baste a
• Using the same stitch with a 5.5mm stitch length, engage the Long Stitch function and baste another 5/8”
seam along the opposite edge.
MASTERING YOUR BERNINA®1/10/02 artista 170 QPE/180/11
5
/8” seam along one side of the fabric.
MASTERING
YOUR
BERNINA
®
BERNINA® artista 170 QPE/180
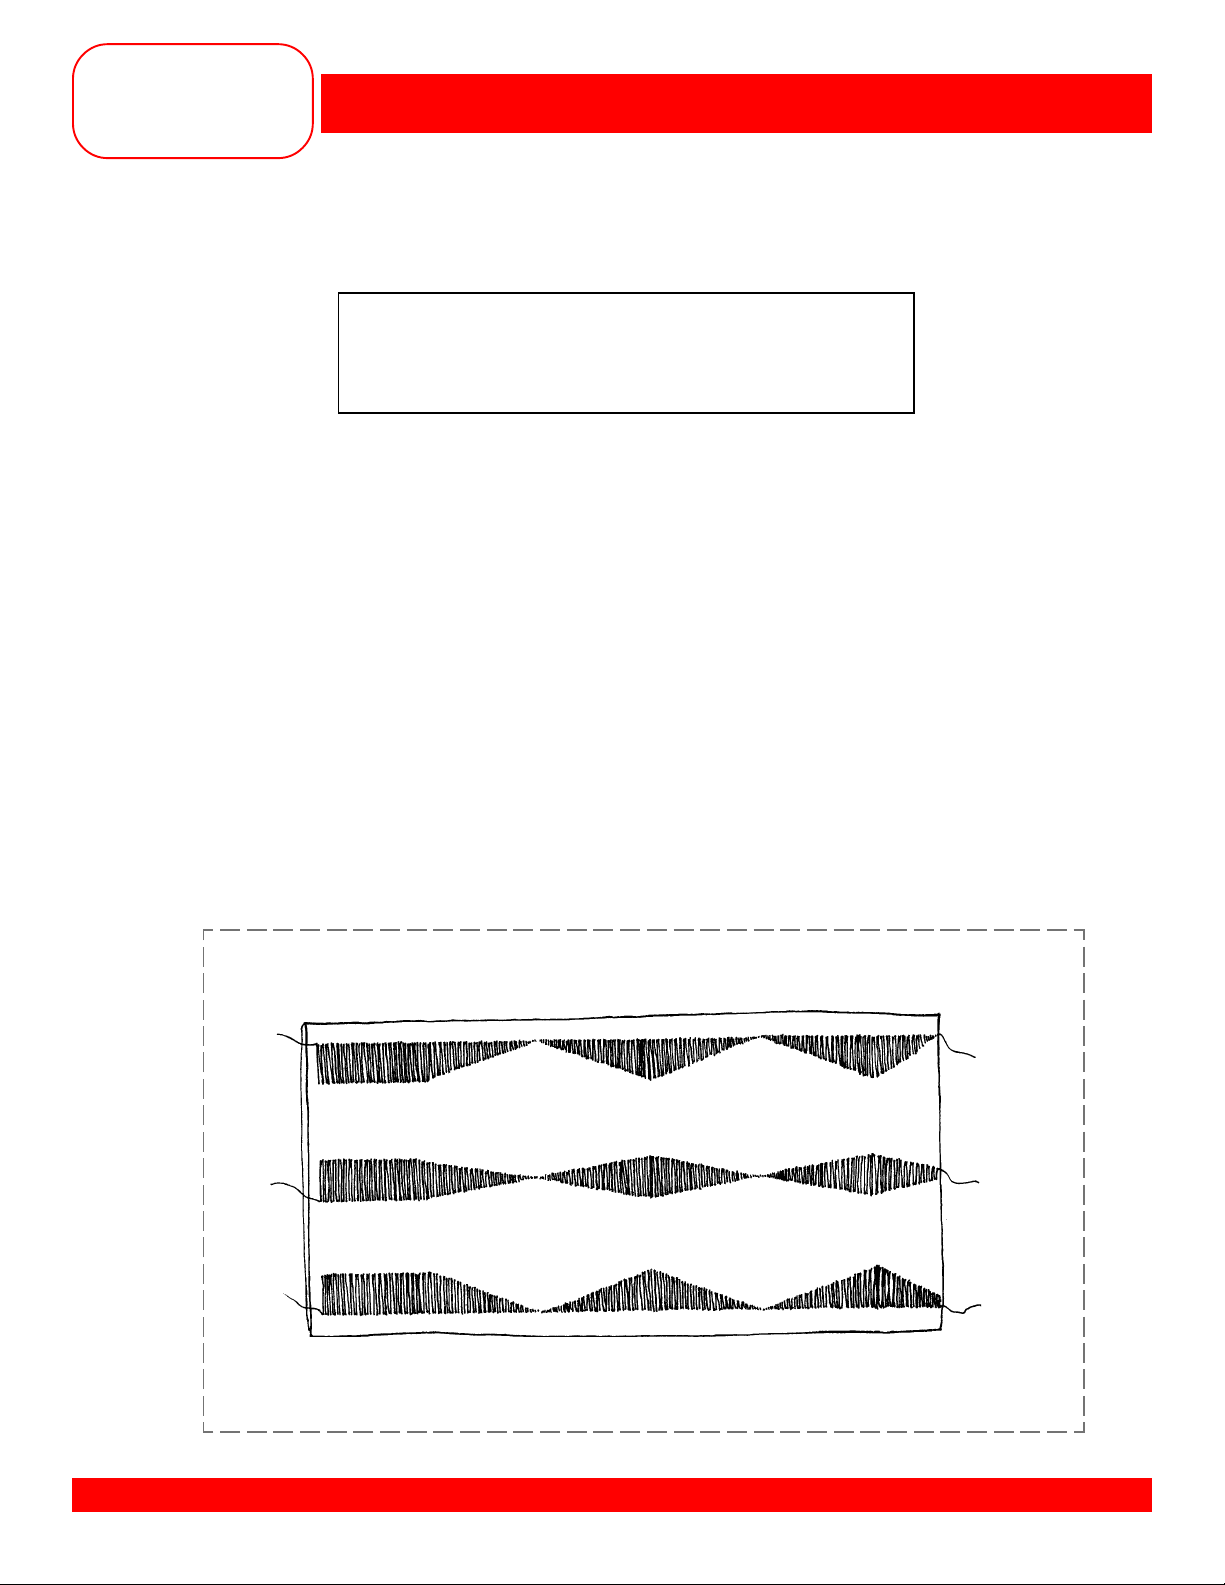
TOPSTITCHING/EDGESTITCHING
Fabric: Firm fabric – 4” x 6”
Needle: 90/14 Embroidery
Thread: 30 wt. cotton embroidery
Contrasting color
Presser Foot: Edgestitch Foot #10/10C (optional accessory)
Owner’s manual pg.____
• Cut fabric in half to create 2 pieces each 2” x 6”.
• Sew two pieces together with a
• Press the seam open.
• From the right side, position the blade of the foot in the ditch of the seam.
• Select Triple Straight Stitch #6.
• Move the needle position 3 places to the left.
• Sew the length of the seam.
• Select the Long Stitch function.
• Move the needle position 4 places to the right.
• Start at the top of the seam as before.
• Sew down the length of the seam again.
5
/8” seam on the 6” sides.
MASTERING YOUR BERNINA®1/10/02 artista 170 QPE/180/12
MASTERING
YOUR
BERNINA
®
BERNINA® artista 170 QPE/180
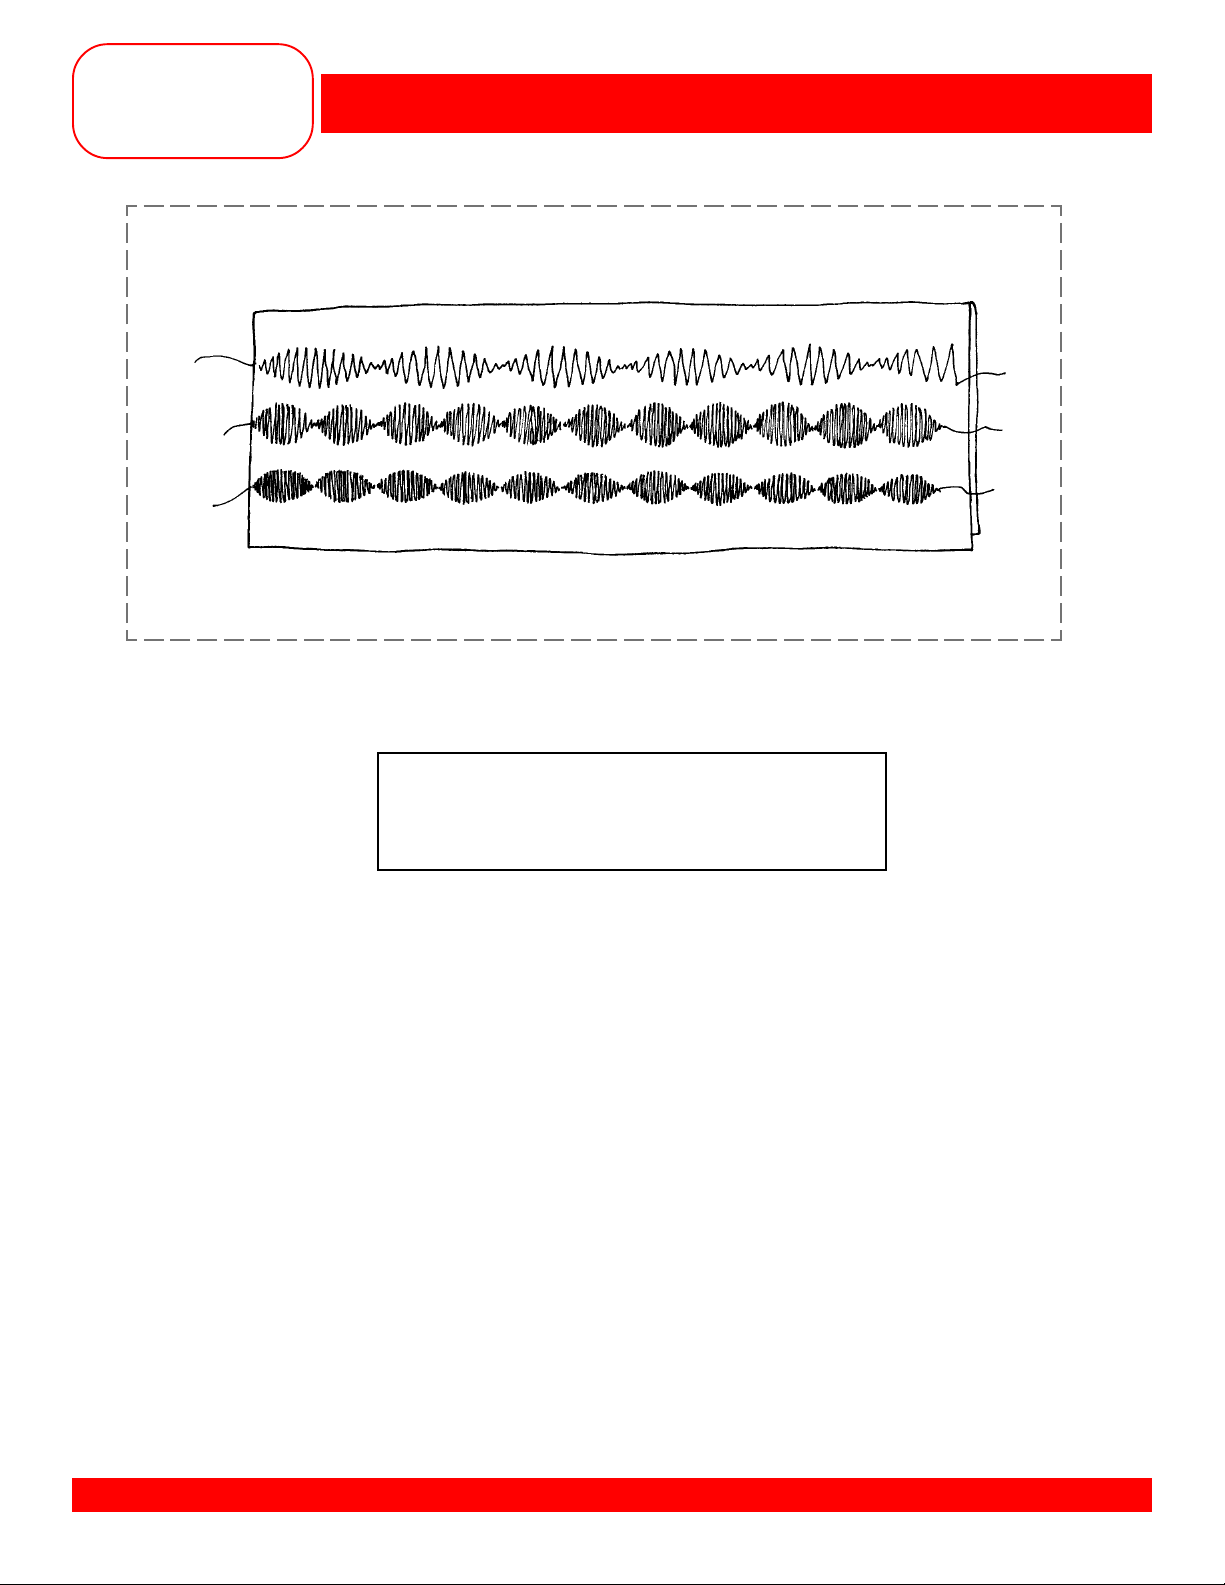
SECURING STITCHES
Fabric: Firm fabric – 3 pieces, 3” x 6” each
Needle: 90/14 Embroidery
Thread: 30 wt. cotton embroidery
Presser Foot: Reverse Pattern Foot #1/1C
Owner’s manual pg.____
• Fold each fabric piece in half to 1½” x 6”.
• Find the
• The BERNINA® 170 QPE/180 secures in three ways:
5
/8” seam line on the guide plate.
1 – Select stitch #3 and sew a few stitches. Press the Quick Reverse button located on the front
of the sewing machine and the machine will sew in reverse until the button is released. Continue
stitching the seam and secure the end in the same manner.
2 – Select stitch #5 and stitch. The machine will automatically reverse after five stitches, then
continue in a forward motion. Stitch to the end of the seam, then press and release the Quick
Reverse button. The machine will stitch backward five stitches, and then continue forward again
five stitches and stop.
3 – Select stitch #332. Engage the Securing function to put a securing stitch at the beginning and the
end of each pattern repeat. In regular sewing, turn the Securing function off after the first stitch and
back on again after the last stitch is taken.
MASTERING YOUR BERNINA®1/10/02 artista 170 QPE/180/13
MASTERING
YOUR
BERNINA
®
BERNINA® artista 170 QPE/180
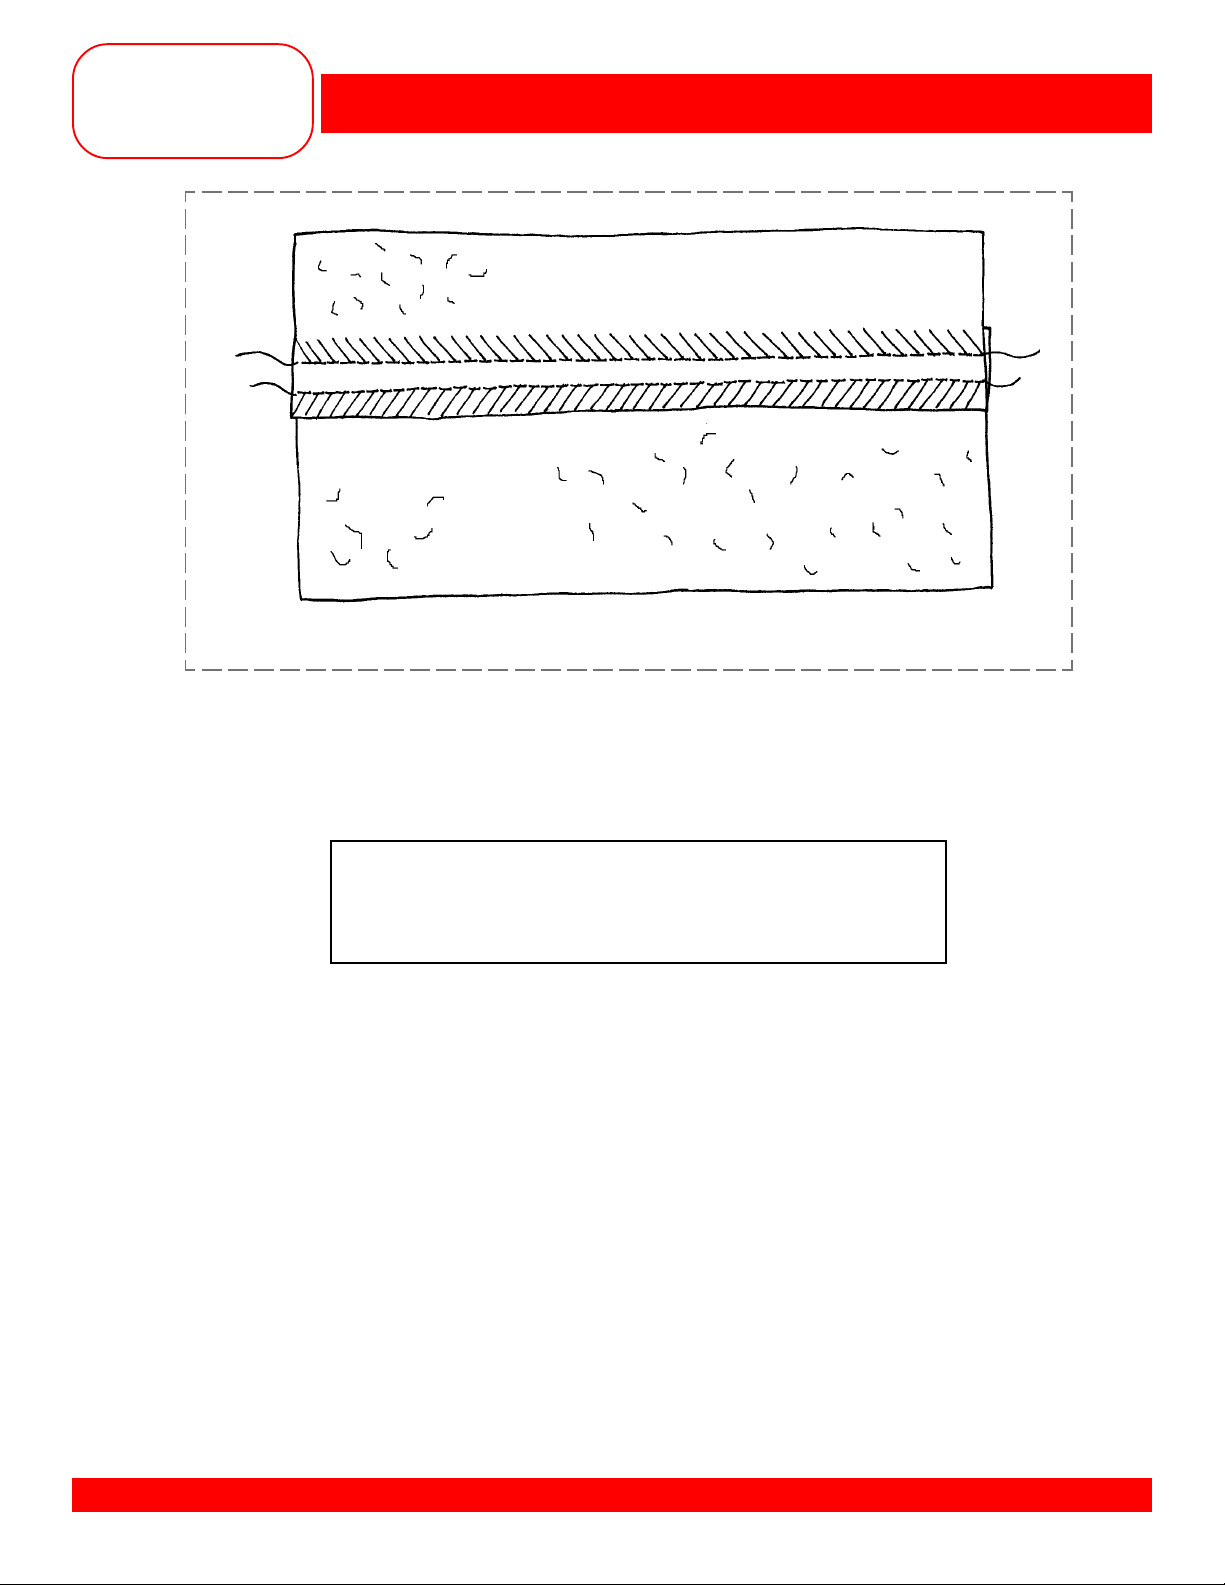
SATIN STITCH
Fabric: Firm fabric – 3 pieces, 3” x 6” each
Needle: 90/14 Embroidery
Thread: 30 wt. Cotton Embroidery
Presser Foot: Reverse Pattern Foot #1/1C
Owner’s manual pg.____
• Fold fabric in half to 3” x 6”. Use stabilizer as needed.
• Select Stitch #2. Change the stitch length to satin stitch and the stitch width to the maximum setting.
• Thread the bobbin thread through the hole in the finger of the bobbin case (170 QPE only).
• Move the needle position all the way to the left.
• Position the raw edge of the fabric on the 3/8” line (on the right side of the stitch plate).
• Sew down this edge about 1”. While continuing to sew, turn the stitch width knob to taper the stitch to
0mm. Then widen the stitch back to maximum. Repeat until the stitching reaches the end of the fabric.
• Position the fold of the fabric on the 3/8” line (on the left side of the stitch plate).
• Move the needle position all the way to the right and stitch along the right side of the fabric, tapering
and widening the stitching while sewing.
• Move the needle position to the center and stitch down the center of the fabric, tapering and widening
the satin stitch while sewing.
MASTERING YOUR BERNINA®1/10/02 artista 170 QPE/180/14
MASTERING
YOUR
BERNINA
®
BERNINA® artista 170 QPE/180
ALTERED MEMORY
Fabric: Firm fabric – 6” x 6”
Needle: 90/14 Embroidery
Thread: 30 wt. cotton embroidery
Presser Foot: Reverse Pattern Foot #1/1C
Owner’s manual pg.____
• Fold fabric to 3” x 6”.
• Select stitch #407.
• Sew a row of stitching as programmed down the center of the sample.
• Alter stitch length to 1mm and sew a 2nd row on one side of the first row.
• Touch CLR - this clears alterations made to the selected stitch only.
• Select stitch #2 - (the one used for satin stitching in the previous exercise).
Notice the computer remembered all the changes made to the stitch.
• Select stitch #407 again.
• Alter stitch width to 3.5mm (170 QPE) or stitch 6mm (180) and sew a 3rd row on
the other side of the first row.
• Touch CLR ALL- notice the alterations made are gone.
• Select stitch #2 again - notice the changes made to it are gone also. CLR ALL
returns
• The computer will remember any and all stitches you alter, as long as the clear
buttons are not used and as long as the machine is not turned off.
all stitch alterations back to default settings.
RETURNING TO BASIC SETTINGS
• Three options: 1. Press the external CLR button
2. Touch the CLR ALL function.
3. Manually set changes back to the basic mark
MASTERING YOUR BERNINA®1/10/02 artista 170 QPE/180/15

MASTERING
YOUR
BERNINA
Feet-ures
Edgestitch Foot #10/10C
Additional bobbin holders for accessory cabinet
Additional presser foot holders for accessory cabinet
Stabilizers – Sampler Pack or type __________
Thread – Assortment or size ____ and type ____
Needles – Assortment or size ____ and type ____
Needle Threader
Bobbins – Baker’s dozen
Spool Bobbin Holders
Magnetic Pin Cushion
Magnetic Bobbin Holder
Straight Stitch Plate
Seam Sealant
Extra Thread Stand
Scissors - 6” or 7” Dressmaker’s shears ____
Left guide (matches right guide included with machine)____
Seam Guide with Rulers (right and left) ____
Set of Magnifying Glasses
®
BERNINA® artista 170 QPE/180
WISH LIST
Care and Feeding of Your Machine
type __________
size ____ and type ____
size ____ and type ____
size ____ and type ____
size ____ and type ____
4” or 5” Trimming scissors ____
Thread nips ____
MASTERING YOUR BERNINA®1/10/02 artista 170 QPE/180/16
MASTERING
YOUR
BERNINA
MASTERING YOUR
®
BERNINA® artista 170 QPE/180
®
BERNINA
artista 170 QPE/180
OWNER’S WORKBOOK
Section B
Let’s Start With The Basics
MASTERING YOUR BERNINA®1/10/02 artista 170 QPE/180/17

MASTERING
YOUR
BERNINA
®
BERNINA® artista 170 QPE/180
Let’ s Start With The Basics
Seams
Triple Straight Stitch – SL 2-3mm
Owner’s manual pg.____
• Jeans Foot #8 prevents needle deflection
• Non-Stick Straight Stitch Foot #53
• This stitch sews strong seams on heavy
fabrics
Zigzag – SL1mm SW1.5mm
Owner’s manual pgs.____
Stretch – SL1mm SW2mm
Owner’s manual pg. ____
Super Stretch – as programmed
Owner’s manual pg. ____
• use to seam curved edges that receive a
lot of stress such as the crotch area of pants.
Vari-Overlock – SL1mm SW4mm NP right
Owner’s manual pg. ____
• Can be used with double needle for a
decorative hem on knits
• Overlock Foot #2 (optional for 170 QPE) or
#2A (included with 180) prevents the seam
from rolling as it is being sewn
• Engage the Needle Down function
SECTION B
Reinforced Overlock – SL2mm SW5mm
Owner’s manual pg. ____
• The artista has several seaming stitches
from which to choose, depending on the
type of fabric being used. With the Creative
Consultant, you can specify the type of fabric
you want to use, and the computer will
suggest the appropriate stitch.
Stitching Corners
• Utilize the FHS system to raise and lower
the presser foot when turning corners.
• Use the 5/8” markings on stitch plate
• Engage the Needle Down function
• Press heel on foot control to lower needle
Oversewing Edges
Blind Hem – Owner’s manual pg.____
• The Blind Hem Foot #5, along with the
blindstitch, produces a superior blind hem.
The zigzag part of the stitch is formed over
the guide on the foot, causing the stitch to
be slightly loose, so that the blind hem will
not pucker and does not form a tuck in the
fabric.
Hand Picked – Feet-ures, Unit B pg.____
Double Overlock – SL2mm SW5mm
Owner’s manual pg. ____
Knit Overlock – as programmed
Owner’s manual pg. ____
• Use Overlock Foot #2 (optional for 170 QPE)
or #2A (included with 180)
Stretch Overlock – SL2mm SW4mm
Owner’s manual pg. ____
Flat Joining – SL2mm SW4mm
Owner’s manual pg. ____
• Good for thick fabrics such as terry cloth
which would be stretched by a straight stitch
MASTERING YOUR BERNINA®1/10/02 artista 170 QPE/180/18
Triple Zigzag – Feet-ures, Unit A pg.____
• This stitch is used for strong, visible hems
on firm, coarse fabrics such as denim and
canvas.
Double Needle – Feet-ures, Units A and K, pgs__
Neckline Hem – Owner’s manual pg.____
Jeans – Feet-ures, Unit B pg.____
• Height Compensation Tool
MASTERING
YOUR
BERNINA
®
BERNINA® artista 170 QPE/180
TRIPLE STRAIGHT STITCH
Fabric: Denim, 4” x 6”
Needle: 90/14 Jeans
Thread: All-purpose
Presser Foot: Reverse Pattern Foot #1/1C
Edgestitch Foot #10/10C (optional accessory)
Owner’s manual pg.___
• Cut the fabric in half lengthwise forming two pieces, 2” x 6” each.
• Select the Triple Straight Stitch #6.
• Sew the two pieces together with a
• Press the seam open.
• Change to Edgestitch Foot #10/10C and adjust the needle position to stitch through the seam allowance.
• Adjust the stitch length to 3.5mm.
• With the guide of the foot in the ditch of the seam, topstitch the length of the seam on both sides.
5
/8” seam allowance using Reverse Pattern Foot #1/1C.
MASTERING YOUR BERNINA®1/10/02 artista 170 QPE/180/19

MASTERING
YOUR
BERNINA
®
BERNINA® artista 170 QPE/180
ZIGZAG SEAM
Fabric: Firm knit – 4” x 6”
Needle: 80/12 Universal
Thread: All-purpose
Presser Foot: Reverse Pattern Foot #1/1C
Owner’s manual pg.___
• Cut the fabric piece in half lengthwise, creating two pieces, 2” x 6” each.
• Select the Zigzag Stitch #2 – SW 1mm and SL 0.5mm.
• Position the fabric to produce a
• Stitch the seam.
• Clip one seam allowance in the middle.
• Press one part of the seam open and leave the other half closed, so the stitch is visible.
• Trim and mount the sample.
5
/8” seam down one side.
MASTERING YOUR BERNINA®1/10/02 artista 170 QPE/180/20

MASTERING
YOUR
BERNINA
Owner’s manual pg.___
• Cut fabric in half lengthwise creating two pieces, 2” x 6” each.
• Select stitch #11.
• Position the fabric to produce a
• Stitch the seam; lighten the presser foot presure if fabric stretches.
• Clip one seam allowance in the middle and press one part of the seam open.
• Trim and mount the sample.
®
BERNINA® artista 170 QPE/180
SUPER STRETCH SEAM
Fabric: Heavy Double Knit, 4” x 6”
Needle: 80/12 Universal
Thread: All-purpose
Presser Foot: Reverse Pattern Foot #1/1C
5
/8” seam down one side.
Note: This stitch is good for an open seam on all knit fabrics; works well for sportswear.
MASTERING YOUR BERNINA®1/10/02 artista 170 QPE/180/21
MASTERING
YOUR
BERNINA
®
BERNINA® artista 170 QPE/180
V ARI-OVERLOCK SEAM
Fabric: Cotton Interlock, 4” x 6”
Ribbing, 2” x 4”
Needle: 80/12 Univeral
Thread: All-purpose
Presser Foot: Overlock Foot #2 (optional accessory) /2A
Owner’s manual pg.___
• Cut an inside curve in one corner of the fabric to simulate a neckline.
• Select the Vari-Overlock Stitch #3.
• Engage the Needle Down function.
• Place folded ribbing along the curved edge of the fabric (ribbing and fabric, right sides together).
• Guide the raw edges of the fabric under the pin of the foot and stitch; stitch length and width can
be adjusted, if needed.
• Trim the sample and mount with the ribbing pressed to the finished position.
MASTERING YOUR BERNINA®1/10/02 artista 170 QPE/180/22
MASTERING
YOUR
BERNINA
Owner’s manual pg.___
• Cut the fabric in half lengthwise, creating two pieces, 2” x 6’ each.
• Select the Double Overlock Stitch #10.
• Guide the raw edge along the pin of the Overlock Foot.
• The right swing of the needle should go off the fabric edge.
• Trim the sample and mount.
®
BERNINA® artista 170 QPE/180
DOUBLE OVERLOCK SEAM
Fabric: Single Knit – 4” x 6”
Needle: 80/12 Universal
Thread: All-purpose
Presser Foot: Overlock Foot #2 (optional accessory) /2A
Note: This is a good overlock seam for loosely knit fabrics and for cross
seams in other knits and jerseys.
MASTERING YOUR BERNINA®1/10/02 artista 170 QPE/180/23
MASTERING
YOUR
BERNINA
Owner’s manual pg.___
• Cut the fabric in half lengthwise, creating 2 pieces 2” x 6” each.
• Select the Stretch Overlock stitch #20.
• Guide the fabric so the right swing of the needle goes off the edge of the
seam; lighten presser foot pressure if seam stretches.
• Trim and mount the sample.
®
BERNINA® artista 170 QPE/180
KNIT OVERLOCK SEAM
Fabric: Sweater knit fabric, 4”x 6”
Needle: 80/12 Universal
Thread: Regular sewing
Presser Foot: Overlock Foot #2 (optional accessory) /2A
MASTERING YOUR BERNINA®1/10/02 artista 170 QPE/180/24
MASTERING
YOUR
BERNINA
Owner’s manual pg.___
• Cut the fabric in half lengthwise, creating 2 pieces 2” x 6” each.
• Select the Stretch Overlock stitch #13.
• Guide the fabric so the right swing of the needle goes off the edge of the
seam; lighten presser foot pressure if seam stretches.
• Trim and mount the sample.
®
BERNINA® artista 170 QPE/180
STRETCH OVERLOCK SEAM
Fabric: Loosely knit fabric, 4”x 6”
Needle: 80/12 Universal
Thread: Regular sewing
Presser Foot: Reverse Pattern Foot #1/1C
MASTERING YOUR BERNINA®1/10/02 artista 170 QPE/180/25
MASTERING
YOUR
BERNINA
®
BERNINA® artista 170 QPE/180
FLAT JOINING SEAM
Fabric: Terry cloth - 2 pieces, 2” x 6” each
Needle: 90/14 Universal
Thread: Regular sewing thread to match fabric
Presser Foot: Reverse Pattern Foot #1/1C
Owner’s manual pg.___
• Select the Stretch Overlock stitch #13.
• Cut a 5/8” seam allowance off one piece of fabric along the long edge.
• Mark a line on the other piece of fabric, 5/8” from one long edge. This will be
the right-hand piece of fabric.
• Overlap the fabric edges left over right, aligning the left raw edge with the
drawn line on the right-hand piece.
• Stitch along the raw edge. Turn the fabric over and stitch along the remaining
raw edge.
NOTE: This is a great seam technique to use on bulky fabrics such as terry cloth.
MASTERING YOUR BERNINA®1/10/02 artista 170 QPE/180/26

MASTERING
YOUR
BERNINA
®
BERNINA® artista 170 QPE/180
REINFORCED OVERLOCK SEAM
Fabric: Bulky knit fabric, 4”x 6”
Needle: 80/12 Universal
Thread: Regular sewing
Presser Foot: Reverse Pattern Foot #1/1C
Owner’s manual pg.___
• Cut the fabric in half lengthwise, creating 2 pieces 2” x 6” each.
• Select the Reinforced Overlock stitch #19.
• Guide the fabric along the 15mm line for a
• Trim excess seam allowance and mount the sample.
5
/8” seam; lighten presser foot pressure if seam stretches.
MASTERING YOUR BERNINA®1/10/02 artista 170 QPE/180/27
MASTERING
YOUR
BERNINA
®
BERNINA® artista 170 QPE/180
STITCHING CORNERS
Fabric: Firm fabric – 2 pieces, 5” x 5” each
Needle: 80/12 Universal
Thread: All-purpose
Presser Foot: Reverse Pattern Foot #1/1C
Owner’s manual pg.___
• Select the Straight Stitch #1.
• Place fabric pieces right sides together.
• Place the fabric under the foot with the top edge even with the horizontal line behind the foot.
• The right edge should be even with the 5/8” seam line.
• Engage the Needle Down function.
• Sew until the bottom edge touches the horizontal line in front of the needle; stop.
• Pivot and continue sewing until you come to the next corner and do the same thing.
• Stitch only three sides of this sample.
MASTERING YOUR BERNINA®1/10/02 artista 170 QPE/180/28
MASTERING
YOUR
BERNINA
®
BERNINA® artista 170 QPE/180
OVERSEWING EDGES
Fabric: Heavy Flannel – 3” x 6”
Needle: 80/12 Universal
Thread: All-purpose
Presser Foot: Reverse Pattern Foot #1/1C
Owner’s manual pg.___
• Select the Zigzag Stitch #2.
• Finish one 6” edge using the following steps.
• Guide edge of fabric under the middle of the presser foot.
• The needle should go into the fabric on one stroke of the needle and over the edge on the next stroke.
• Do not use too long a stitch or too wide a stitch; the edge should lie flat, not roll.
• Match the weight of the thread to the weight of the fabric.
• Trim and mount the sample.
MASTERING YOUR BERNINA®1/10/02 artista 170 QPE/180/29
MASTERING
YOUR
BERNINA
®
BERNINA® artista 170 QPE/180
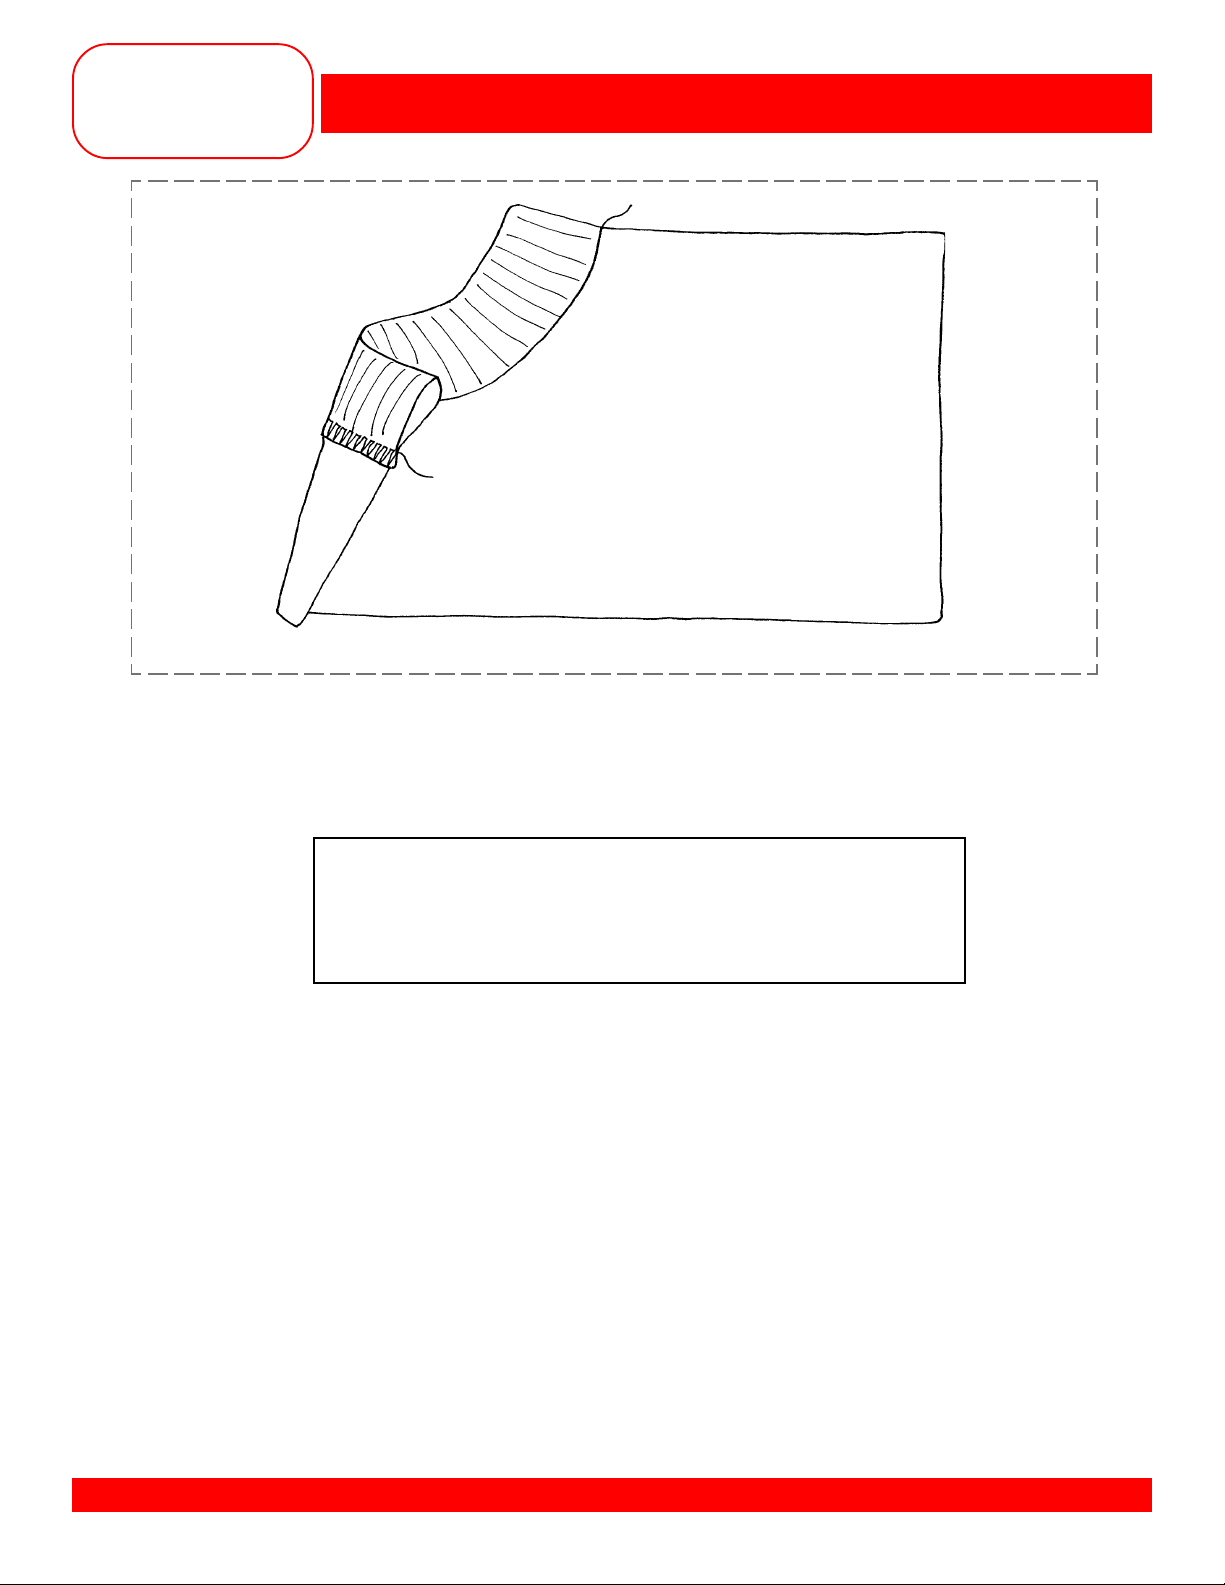
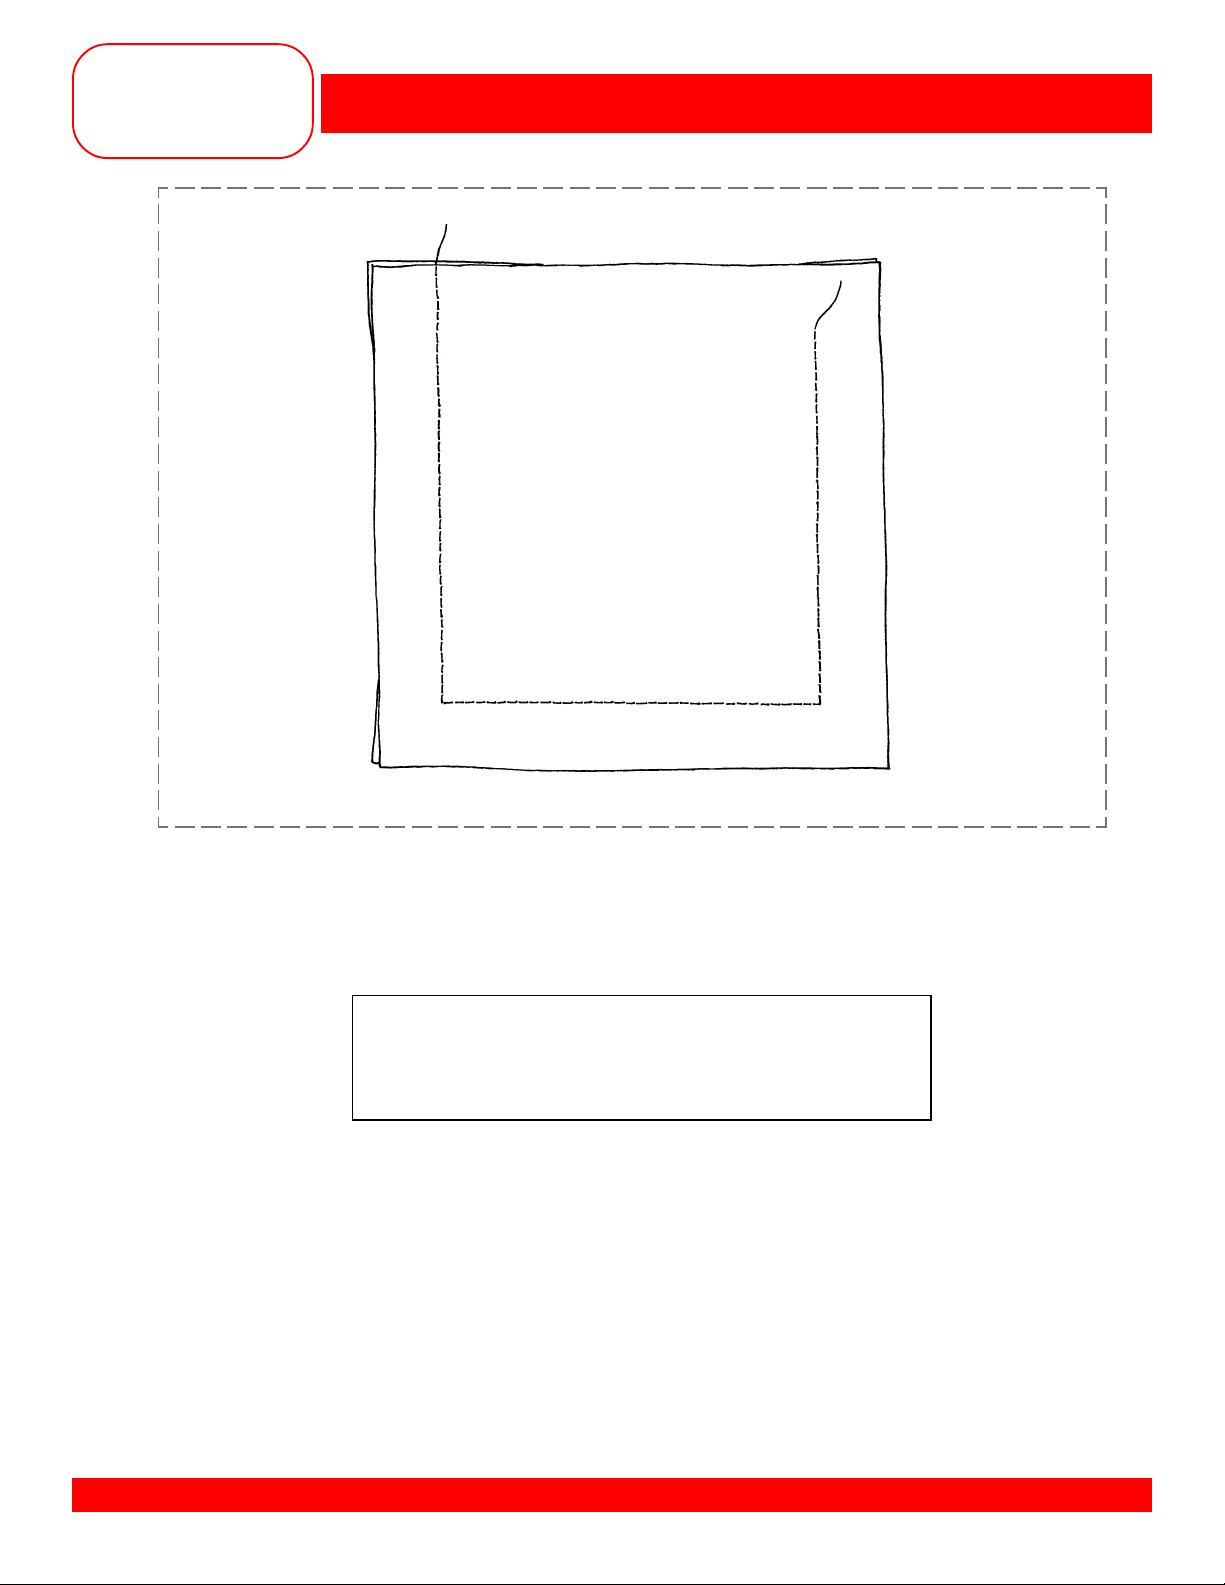
BLIND HEM
Fabric: Heavy Flannel – 6” x 7”
Needle: 80/12 Universal
Thread: All-purpose
Presser Foot: Reverse pattern Foot #1/1C and
Blind Hem Foot #5
Owner’s manual pg.___
• Finish one 6” edge of the fabric following the steps of the previous exercise.
• Fold a 2” hem to the wrong side of the fabric and press.
• Select Basting Stitch #21 and attach Reverse Pattern Foot #1/1C.
• Baste the hem in place, sewing about ¼” from the raw edge.
• Select the Blindstitch #9 and attach Blind Hem Foot #5.
• Fold hem back to the right side over the basting line.
• Sew on the extended hem allowance, keeping the folded edge next to the guide on the foot.
• Adjust the stitch width if needed so that the needle barely stitches into the fold.
• Mount the sample with the edges folded back as shown in the drawing.
MASTERING YOUR BERNINA®1/10/02 artista 170 QPE/180/30
 Loading...