

Page 1
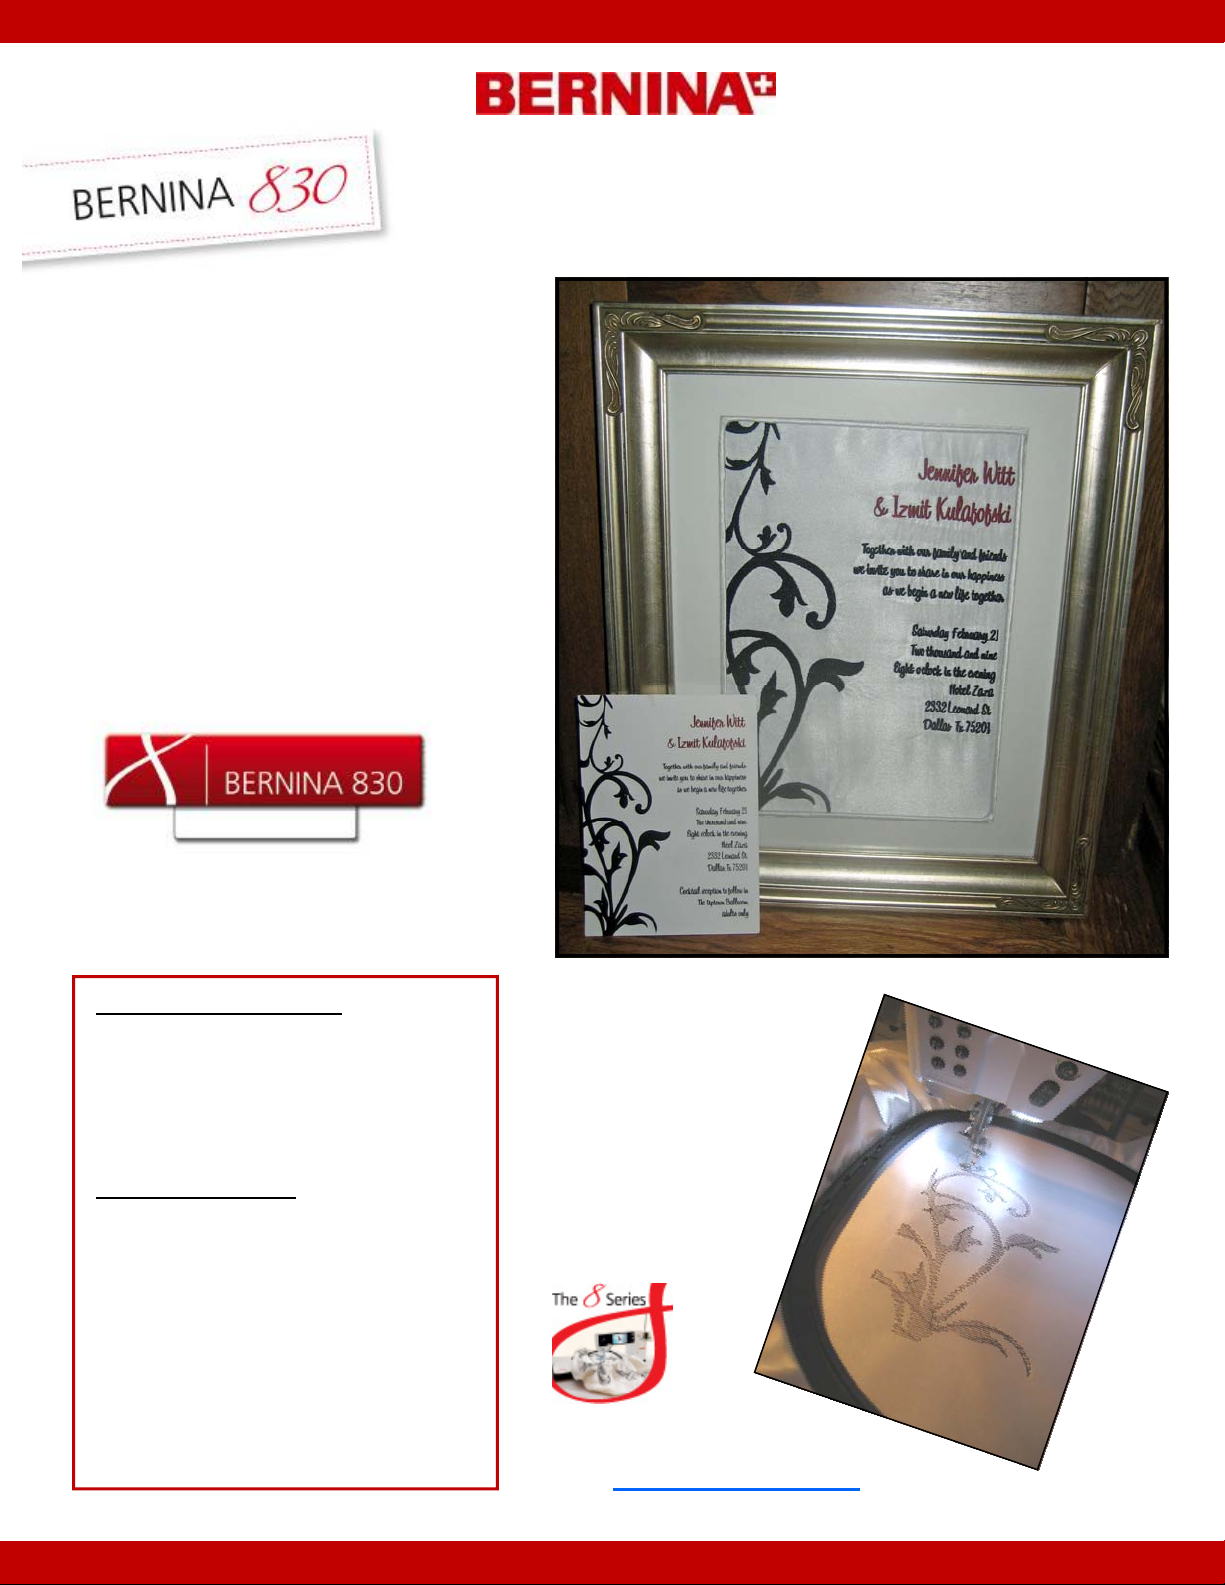
Wedding Invitation
Embroidery Keepsake
Created by Debbi Lashbrook
Pair the BERNINA 830 with the
BERNINA DesignerPlus Software
to create extra special keepsakes!
Using DesignerPlus Software, turn
wedding invitations, birth announcements and other special occasion
announcements into embroidered
designs with ease. These extra large
embroidery projects are a breeze to
stitch with the BERNINA 830!
Experience it. Now!
www.bernina.com/830
Supplies
Machine & Accessories
• BERNINA 830 Sewing & Embroidery
Machine
• Jumbo hoop and template
• BERNINA DesignerPlus Embroidery
Software
Fabric and Notions
• White Satin or fabric of choice
• Isacord Thread - Selection of colors
for Embroidery
• Bobbin Thread for Embroidery
• OESD MediumWeight Tear-away
Stabilizer
• 505 Temporary Spray Adhesive
• Organ Needles for Embroidery -
Size 80
• Picture Frame
The BERNINA 830
and the Jumbo Hoop
Embroider this
project in a snap with
the BERNINA 830 and
the Jumbo Hoop...no
repositioning necessary!
For additional
8-Series projects,
Visit www.berninausa.com
©2009 BERNINA of America, Inc. ceg Page 1 of 3
Page 2
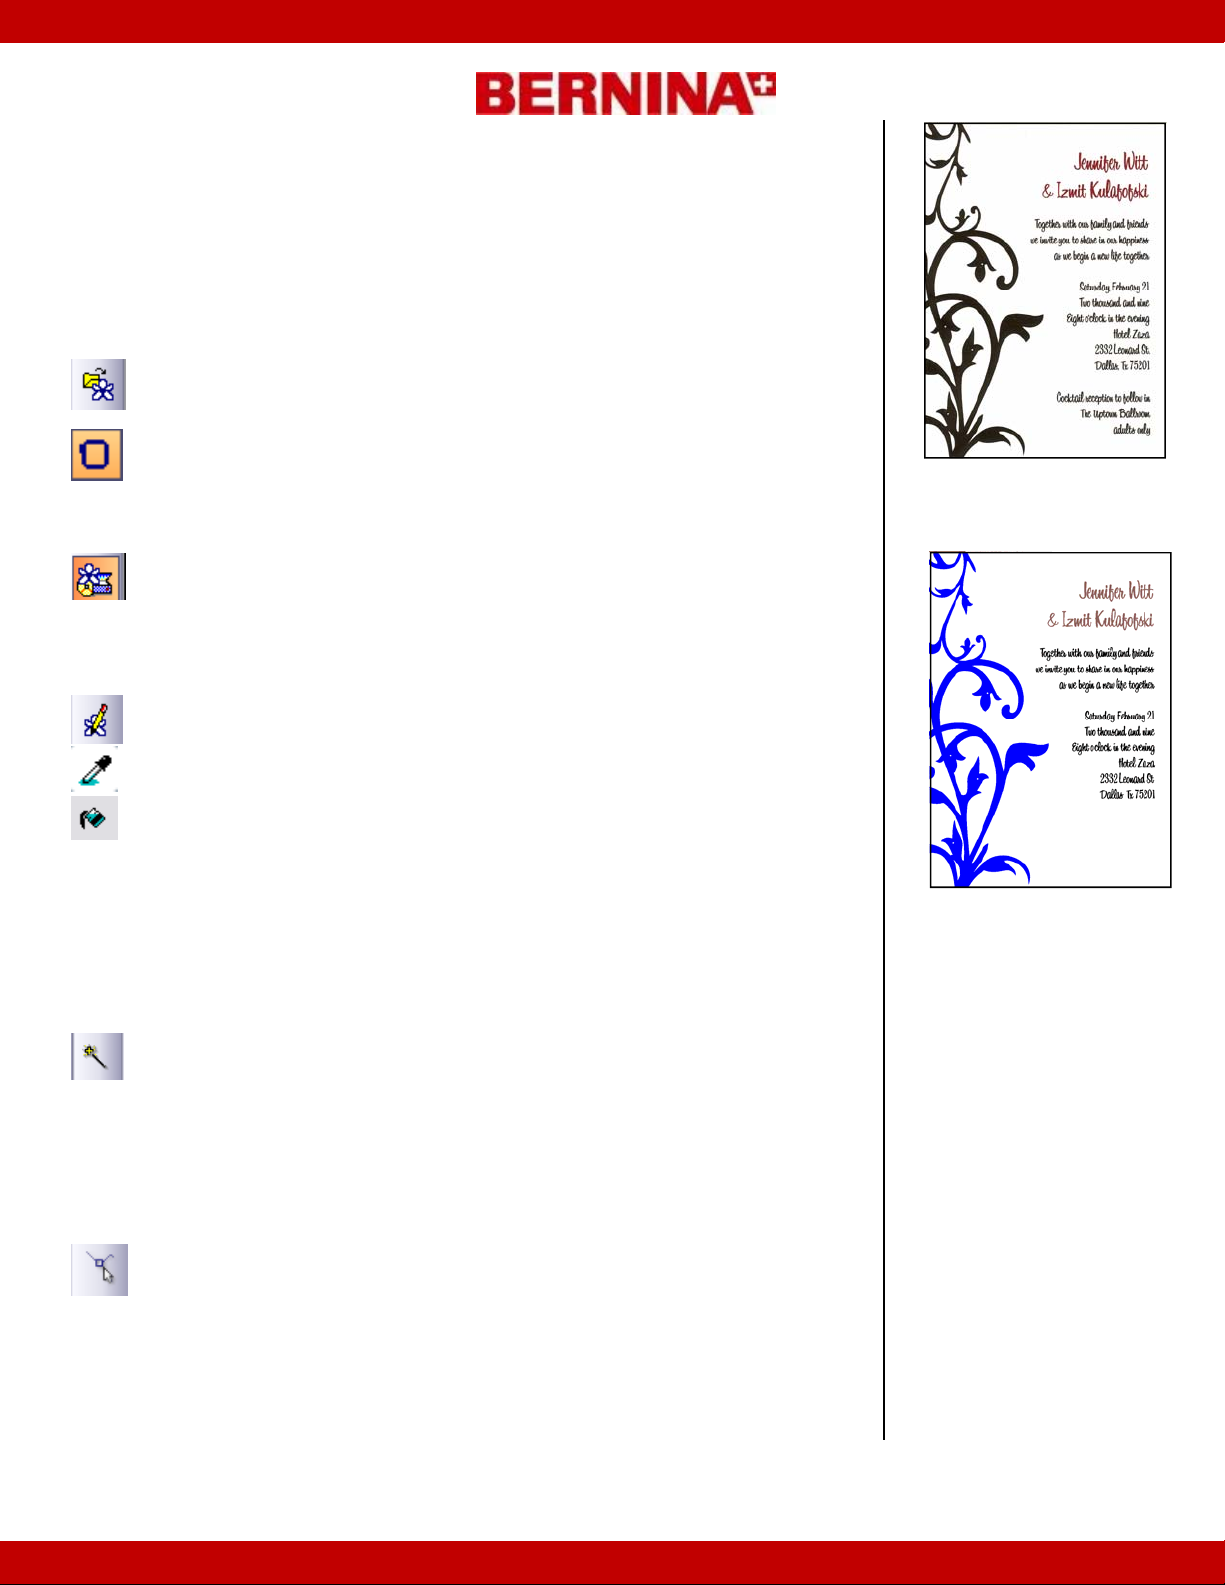
Wedding Invitation - Digitize the Design
Scan picture
• Scan in picture with scanning software and save the scan on your
computer.
• Open DesignerPlus software.
• Go to Picture View.
• Click on the Load Picture icon.
• Navigate to the scanned file, select the file, and load the picture.
• Right click on the Hoop icon and click on the drop down arrow and
select the Jumbo Hoop # 26.
• Make sure the picture is selected and increase the size of the invi-
tation until it fills the jumbo hoop by clicking on a corner square and
dragging until the picture fills the hoop.
• Process the picture with the Artwork Preparation tool. Reduce the
number of colors to the appropriate number for the wedding invita-
Picture Preparation
Auto Digitizing the Picture
tion. Click on OK.
• While the picture is selected, click on the Touch Up Picture icon.
• Select Paint from the program choices. Click OK.
• Select the eyedropper tool and select a color other than black from
the colors available at the bottom of the screen.
• Select Fill with Color icon and click on any sections of the invitation
that are black that shouldn’t be processed with a satin stitch.
• Select File/Exit and Return to Design when you have finished
touching up the picture.
• You must re-process the picture with the Artwork Preparation tool
after touching it up in the Paint program.
• Click on the Artwork Preparation tool once again. Then click on OK.
• Switch to Design View after reprocessing the picture .
• Click on the Magic Wand icon, then select the color and stitch type
that you wish to use from the Color & Stitch bar.
• Click on the object you wish to stitch first. An outline will appear
around the picture. Hit enter to activate the stitches. Continue to
select the colors to use, the stitches and appropriate stitch angle
and click on the other areas of the picture and hit enter to set the
stitches.
Remember that you can always use the Reshape icon to make
•
changes that might be necessary.
Remember to set the Pull compensation for auto digitized objects
•
to .4 mm. Select the objects that were automatically generated with
the Magic Wand and Open Object Properties.
• Select the Effects button and the Other Tab.
• Change the value of Pull compensation from .2 to .4. Click on OK.
The picture must be touched up
for final processing.
The software sees all black areas in the picture as a detail
and will process these areas
with a satin fill, a satin outline,
or a double run. By changing
the color in the picture, these
areas will be processed with a
fill stitch. Then, they can still be
stitched in black.
Note: For Vista, choose File/
Update Design then Exit & Return. If prompted, save the new
picture.
Use the Magic Wand tool for
digitizing the invitation as it
works better for lettering as you
can select the stitching order
with the Magic Wand, but not
with the Auto Digitizer. You can
also select your stitches and
your stitch angle prior to setting
the stitches.
©2009 BERNINA of America, Inc. ceg Page 2 of 3
Page 3

Option for Lettering: Magic Wand
• You will have choices for the lettering. One is to use the Magic
Wand to digitize the lettering. This works best with alphabet styles
that are small in size and for letters that are not connected, as they
are in a script alphabet.
• Set up the stitches prior to digitizing the letters:
∗ Open Object Properties.
∗ Select Fill Tab and Select the Satin Fill.
∗ Select the Stitch Angle Tab.
∗ Change the angle to 0 degrees.
∗ Click on Effects
∗ Place a check mark in front of “use automatic underlay set-
tings for new objects.” Click on Apply.
∗ Select the Edge Walk underlay from the drop down box.
A stitch angle of zero degrees
might not be appropriate for all
letters as the floats may be too
long. The best angle must be
tested.
Option for Lettering: Use a True Type Font
• You can search font websites for a true type font that is close to
that on the invitation.
• To import a font that you download from a website, first unzip the
font. Unzipped files are automatically placed in C/unzipped folder.
• Right click on the True Type Font and select copy from the drop
down menu.
• Navigate to C/Windows/Fonts.
• Right click within the folder and select paste.
• The font will be installed within your font folder and can be ac-
cessed through True Type Fonts within the Lettering program.
• Open Bernina Embroidery Software.
• Right click on the Lettering icon. Select the installed font from the
drop down menu.
• Type in the words in the first line of the invitation. Select Apply.
• Click on the screen to generate the lettering. Resize the lettering
as desired. Repeat for the rest of the invitation.
Option for Lettering: Choose a Font in the Software
• You can choose a lettering style within the software that is closest
to that on the invitation.
• Add lettering one line at a time for more control of placement and
spacing.
• Once the lettering is digitized, you can skew the lettering by select-
ing it and then click inside the boxes. The skew handles are the
middle outlined squares above and below the lettering.
• You can also change the size of the line for the lettering by select-
ing the lettering, then clicking on Reshape. Select the appropriate
resizing triangle and change the lettering as desired.
• You can also move individual letters closer together by clicking on
the pink diamond control points within each letter and moving the
letter.
Stitch the Design
• Layer the stabilizer and fabric together, using a temporary spray
adhesive to hold together. Hoop in the Jumbo Hoop.
• Attach the Jumbo Hoop to the BERNINA 830.
Stitch the design.
•
Remember that all True
Type Fonts do not work
perfectly for lettering. Avoid
fonts that have uneven lines
and serifs. Always test before using.
You may want to enter each
line of the lettering separately to give you more control when aligning and reshaping.
The last option will give you
the most professional digitized alphabet.
Remember to go to Help/ On
Screen Manual/Appendices
and click on the Alphabet
section.
You can scroll through the
different alphabets in the software to help select an appropriate one and to get sizing
parameter information.
Tip: Place each row of lettering not on, but above the line
of the picture; it makes it easier to adjust the stitches to the
picture.
Focus on getting close to the
look...remember that the picture will not be embroidered
behind the invitation!
Save the completed design
and send it the BERNINA 830
for the stitch out.
©2009 BERNINA of America, Inc. ceg Page 3 of 3
 Loading...