


Becker TrafficProHighSpeed7825, TrafficProHighSpeed7823, TrafficProHighSpeed7820, TrafficPro4733, TrafficPro4725 User Manual
...G,PSRUWDQW 6DIHW\ LQVWUXFWLRQV
8VH RI WKH QDYLJDWLRQ XQLW LV RQO\ SHUPLWWHG LI WKH WUDIILF FRQGLWLRQV DUH VXLWDEOH DQG \RX DUH DEVROXWHO\ VXUH WKDW QR ULVN REVWUXFWLRQ RU LQFRQYHQLHQFH ZLOO EH LQFXUUHG WR \RX \RXU SDVVHQJHUV RU RWKHU URDG XVHUV 7KH UHTXLUHPHQWV RI WKH 5RDG 7UDIILF 5HJXODWLRQV DSSO\ DW DOO WLPHV 7KH GHVWLQDWLRQ PXVW RQO\ EH HQWHUHG ZKHQ WKH YHKLFOH LV VWDWLRQDU\ 7KH QDYLJDWLRQ V\VWHP VHUYHV VROHO\ DV DQ DLG WR QDYLJDWLRQ ,W QHLWKHU UHOHDVHV WKH GULYHU IURP KLV GXW\ WR GULYH FDUHIXOO\ LQ URDG WUDIILF QRU GRHV LW WDNH WKH SODFH RI KLV RZQ DELOLW\ WR PDNH MXGJHPHQW ,W LV SRVVLEOH WKDW LQDFFXUDWH RU LQFRUUHFW LQVWUXFWLRQV DUH JLYHQ GXH WR FKDQJLQJ WUDIILF FRQGLWLRQV RU YDU \LQJ GDWD 7KH DFWXDO URDG VLJQV DQG WUDIILF UHJXODWLRQV PXVW WKHUHIRUH DOZD\V EH REVHUYHG ,Q SDUWLF XODU WKH QDYLJDWLRQ V\VWHP FDQQRW EH XVHG DV DQ DLG WR RULHQWDWLRQ ZKHQ YLVLELOLW\ LV SRRU 7KH XQLW PXVW RQO\ EH XVHG IRU LWV LQWHQGHG SXUSRVH 7KH YROXPH RI WKH FDU UDGLR QDYLJDWLRQ V\VWHP PXVW EH DGMXVWHG VR WKDW H[WHUQDO QRLVH LV VWLOO DXGLEOH 6ZLWFK RII WKH XQLW LPPHGLDWHO\ LI D IDXOW RFFXUV H J HPLVVLRQ RI VPRNH RU RGRXUV ,Q WKH LQWHUHVW RI VDIHW\ WKH XQLW PXVW RQO\ EH RSHQHG E\ D VSHFLDOLVW 3OHDVH UHIHU WR \RXU GHDOHU IRU UHSDLU
75

&RQWHQWV
|
&RQWHQWV |
|
|
$UUDQJHPHQW RI FRQWUROV |
|
|
$QWL WKHIW V\VWHP |
|
|
Entering the code number |
79 |
|
||
|
Removing the portable panel |
80 |
|
Inserting portable panel |
80 |
|
*HQHUDO RSHUDWLRQ |
|
|
Switch on / off |
81 |
|
Adjusting the volume |
81 |
|
Activating the tone menu |
81 |
|
Setting the bass |
81 |
|
Setting the treble |
81 |
|
Fader |
82 |
|
Setting the balance |
82 |
|
Linear setting |
82 |
|
Switching loudness on / off |
82 |
|
Setting the subwoofer or centre speaker volume |
82 |
|
1DYLJDWLRQ RSHUDWLRQ |
|
|
What is navigation? |
83 |
|
Safety instructions |
83 |
|
Digitised area |
83 |
|
General notes |
84 |
|
Selecting navigation |
85 |
|
Main navigation menu |
85 |
|
Entering destination |
86 |
|
Route menu |
92 |
|
Storing a specified destination in the |
|
|
destination memory |
94 |
Route guidance calculation |
95 |
Stopover |
96 |
Traffic jam function |
97 |
Cancelling route guidance |
98 |
Notes on route guidance |
99 |
Dynamic navigation with TMC |
101 |
Information during route guidance |
104 |
Destination memory |
107 |
Special destinations |
107 |
Points of interest (P.O.I.) CD |
110 |
System settings |
112 |
5DGLR PRGH |
|
Switching on radio mode |
118 |
Switching on radio menu mode |
118 |
Selecting the FM waveband |
118 |
Selecting the AM waveband |
118 |
Setting options for transmitter selection |
118 |
Dynamic autostore (FM DAS) |
119 |
FM DAS transmitter search |
119 |
Transmitter search MW, LW, SW |
119 |
Scan search |
120 |
Programme filtering for FM DAS |
120 |
Programme type selection (PTY) |
120 |
Switching PTY display on / off |
121 |
Requesting/storing FM transmitters |
121 |
Requesting/storing MW, LW, SW transmitters |
121 |
MW, LW autostore |
122 |
FM manual tuning |
122 |
MW, LW, SW manual tuning |
122 |
76

&RQWHQWV
Regionalisation
Switching regionalisation on/off Switching frequency display on / off Switching radio text display on / off Traffic Programme (TP) Activating/quitting the TP menu Switching TP on/off
Selecting automatic tracking
Selecting / deleting direct programming Switching mute on/off
Interrupting TP announcements TP announcement volume Switching TMC on/off Display for TMC stations Telephone mute function
&' RSHUDWLRQ
Compact Disc (CD) instructions Inserting / ejecting CDs
Track skip - forwards / backwards Scan search
Fast forward / rewind Random play Repeating a track
Number of tracks and total playing time Temperature protection circuit
&' FKDQJHU RSHUDWLRQ
Operational readiness of CD changer CD magazine - load / unload Playing CDs
123 |
Naming a CD |
133 |
|
123 |
CD filter function |
134 |
|
123 |
8VHU PHQX |
|
|
124 |
Requesting/quitting user menu |
135 |
|
124 |
GAL setting (Gal) |
135 |
|
125 |
Telephone mute characteristics (Tel) |
136 |
|
125 |
Display colour setting (Col) |
136 |
|
126 |
Display setting (Lcd) |
136 |
|
|
|||
126 |
Setting reception optimisation (M/S) |
137 |
|
126 |
LED setting (Led) |
137 |
|
127 |
Setting navigation announcements (Nav) |
137 |
|
127 |
AUX input (Aux) |
138 |
|
127 |
Compass display (Cmp) |
138 |
|
128 |
Signal tone volume (BeV) |
139 |
|
128 |
6HUYLFH PHQX |
|
|
|
|
||
Requesting /quitting the service menu |
140 |
|
|
129 |
Triggering reset |
140 |
|
129 |
&RQQHFWLRQ LQVWUXFWLRQV |
|
|
130 |
|
||
5HPRYDO LQVWDOODWLRQ JXLGH |
|
|
|
130 |
|
||
*HQHUDO LQVWUXFWLRQV |
|
|
|
130 |
|
||
RDS SYSTEM |
144 |
|
|
130 |
|
||
DAS Seek Qual. plane |
144 |
|
|
131 |
|
||
DAS Seek Name plane |
144 |
|
|
131 |
|
||
Stations RDS plane |
144 |
|
|
131 |
|
||
Stations Fix plane |
144 |
|
|
|
|
||
PTY (Programme Type) |
145 |
|
|
132 |
|
||
7HFKQLFDO GDWD |
|
|
|
132 |
|
||
|
|
|
|
132 |
127,&( |
|
|
77

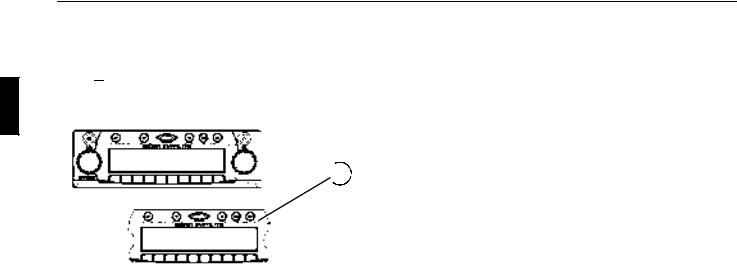
$UUDQJHPHQW RI FRQWUROV
2 |
3 |
4 |
|
5 |
6 |
7 |
8 |
|||||||||
|
|
|
|
|
|
|
|
|
|
|
|
|
|
|
|
|
|
|
|
|
|
|
|
|
|
|
|
|
|
|
|
|
|
|
|
|
|
|
|
|
|
|
|
|
|
|
|
|
|
|
|
|
|
|
|
|
|
|
|
|
|
|
|
|
|
|
|
|
|
|
|
|
|
|
|
|
|
|
|
|
|
|
|
|
|
|
|
|
|
|
|
|
|
|
|
|
|
|
|
|
|
|
|
|
|
|
|
|
|
|
|
|
|
|
|
|
|
|
1 |
9 |
11 |
10 |
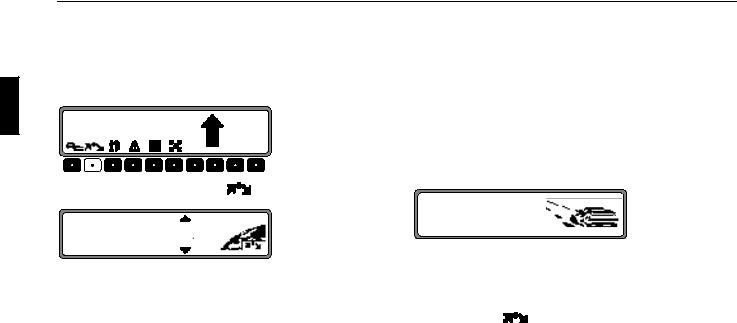
1Left rotary control  (Info)
2On / off switch ( 21 )
3Tone button (  )
)
4Traffic programme button ( 73 )
5Select CD mode ( &' )
6Select radio mode (5DG )
7Select navigation mode ( 1DY)
8CD eject button (  )
)
9Right rotary control  (Ok)
(Ok)
10Multifunction buttons
11Display
78

$QWL WKHIW V\VWHP
(QWHULQJ WKH FRGH QXPEHU
If the car radio is disconnected from the power supply, it is theft-protected upon reconnection. After switching on via the 21 button, the prompt 5;,9 6+, <4),9 is displayed.
+ 1 " / , ! " 2 * " /
The five-digit code must then be entered using the multifunction buttons " - ".
([DPSOH Code number 15372 (the code number can be found on the enclosed CODE CARD).
Enter code number using the multifunction buttons.
The unit automatically switches when the fifth digit is entered and all other digits have been entered correctly.
1RWH It is essential that the CODE CARD be kept in a safe place outside the vehicle. Thus, illegal use is not possible. The sticker provided should be attached to the inside of the vehicle windscreen/ window.
If an incorrect code number is entered, the prompt is displayed again. After entering an incorrect code three times $! is displayed and the unit is disabled for approx.
60minutes.
& 1
Three further incorrect entries block the unit for another 60 minutes.
$WWHQWLRQ 7KH GLVDEOLQJ SHULRG IXQFWLRQV RQO\ ZLWK WKH XQLW VZLWFKHG RQ
79
$QWL WKHIW V\VWHP
5HPRYLQJ WKH SRUWDEOH SDQHO
As an effective anti-theft device, the portable panel ($) can be removed from the unit.
Press  button briefly (storage medium remains in the unit). The display folds forwards.
The portable component can then be pulled out.
 $
$ 
The volume is limited to a maximum value after the display has been folded down. After 20 seconds an audible signal indicates that the control component is folded down. The unit
then switches off automatically.
1RWH For safety reasons, it is not permitted to leave the portable panel open when driving.
$WWHQWLRQ 3OHDVH LQVHUW WKH SRUWDEOH SDQHO LQ WKH DFFRP SDQ\LQJ SURWHFWLYH FRYHU DIWHU UHPRYDO 'R QRW WRXFK WKH PHWDO FRQWDFWV RQ WKH SRUWD EOH SDQHO RU RQ WKH UDGLR
,QVHUWLQJ SRUWDEOH SDQHO
Insert the portable panel in the lower left catch and then engage it in the lower right catch. Then fold up the portable panel and engage it in the upper catches.
Alternately, position portable panel directly over all four catches and press in firmly to engage.
For correct functioning, ensure that the portable panel is firmly engaged in all four catches.
If a new portable panel or one from another unit is utilised, the code number must be entered, as previously described, in order to activate the unit.
80
*HQHUDO RSHUDWLRQ
6ZLWFK RQ RII
button.
Additional options for switching on / off: Via ignition. In order to switch on via the ignition, the unit must have been switched off previously via the ignition. After switching off the ignition, the unit can be prevented from switching off by pressing the 21 button within 3 seconds.
1RWH With the ignition switched off, the unit can also be switched on via the 21 button. The unit switches off automatically after 1 hour.
$GMXVWLQJ WKH YROXPH
Turn the left rotary control  . The volume is increased or decreased.
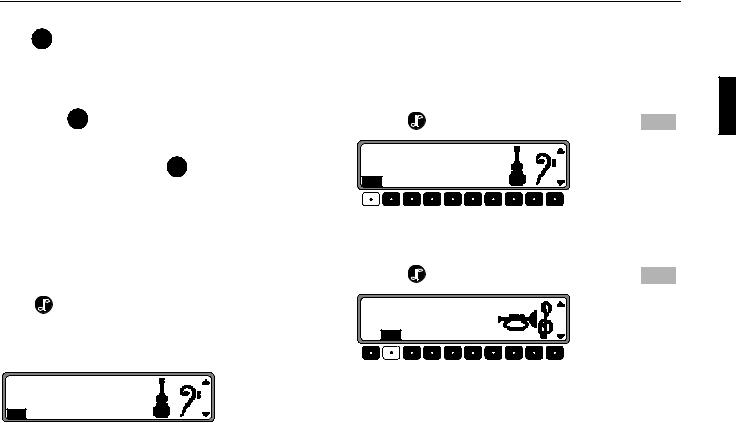
$FWLYDWLQJ WKH WRQH PHQX
Press |
button. The tone menu is activated. The following |
functions can be requested: (: (Bass), !9) (Treble), (+ (Fader), (3 (Balance), 3; (Linear setting) <) (Subwoofer) and +5 (Loudness).
0 0 V
(:!9) (+ (3 3; <) +5
Settings for the bass, treble, fader, balance and loudness are stored separately for wavebands MW, LW, SW, FM, for traffic announcements, navigation messages, telephone operation, CD and CDC/AUX operation.
6HWWLQJ WKH EDVV
Press the |
button and then the multifunction button (: . |
0 0 V
(:!9) (+ (3 3; <) +5
Set the desired bass level using the right rotary control  .
.
6HWWLQJ WKH WUHEOH
Press the |
button and then the multifunction button !9) . |
/ " ) " V
(:!9) (+ (3 3; <) +5
Set the desired treble level using the right rotary control  .
.
81
*HQHUDO RSHUDWLRQ
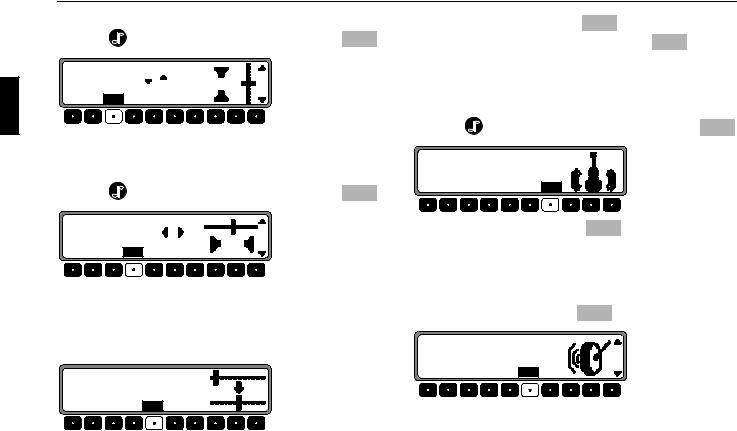
)DGHU
Press the |
button and then the multifunction button (+ . |
! " / V
(:!9) (+ (3 3; <) +5
Use the right rotary control  for the desired fader setting.
6HWWLQJ WKH EDODQFH
Press the |
button and then the multifunction button (3 . |
) + " V
(:!9) (+ (3 3; <) +5
Set the desired balance level using the right rotary control  .
.
/LQHDU VHWWLQJ
Briefly press the  button.
,+" #) 1?
(:!9) (+ (3 3; <) +5
Press the multifunction button 3; - !65, -3(; is displayed. By pressing the multifunction button 3; again the tone settings for the currently selected signal source (e.g. FM) are set to an average value.
6ZLWFKLQJ ORXGQHVV RQ RII
Press the |
button and then the multifunction button +5 . |
,2!+"00
(:!9) (+ (3 3; <) +5
Using the multifunction button +5 you can select either loudness on ( ) or loudness off ( ).
Loudness is switched off in MW, LW and SW wavebands.
6HWWLQJ WKH VXEZRRIHU RU FHQWUH VSHDNHU YROXPH
Press the multifunction button <) .
2 4,,#"/ V
(:!9) (+ (3 3; <) +5
Use the right rotary control  to set the desired subwoofer volume level.
82

1DYLJDWLRQ RSHUDWLRQ
:KDW LV QDYLJDWLRQ"
The term "navigation" (lat. navigare = to travel by sea) is generally understood to mean the location of a vehicle, the determination of the direction and distance from the desired destination and the required route. Stars, prominent landmarks, compasses and satellites etc. are used as navigation tools.
With the Becker TrafficPro, the location is determined via the GPS receiver (GPS = Global Positioning System). The direction and distance from the destination is determined using a digital street map, a navigation computer and sensors. A speedometer and reverse signal are additionally used to calculate the route.
For safety reasons, route guidance follows predominantly in spoken form supported by a direction indicator on the display.
6DIHW\ LQVWUXFWLRQV
•The requirements of the Road Traffic Regulations (RTR) apply.
•Observation of traffic signs and local traffic regulations always takes priority.
•Traffic guidance is restricted to passenger vehicles. Special driving recommendations and regulations for other vehicles (e.g. commercial vehicles) are not taken into account.
•The destination must only be entered when the vehicle is stationary.
'LJLWLVHG DUHD
The navigation CD provided contains a digitised street map. Motorways, federal and regional roads, as well as district roads are detailed in this street map. Larger cities and boroughs are completely covered. The regional and unclassified roads or access roads and the town centre for smaller towns and boroughs are included.
One way streets, pedestrian zones, turn bans and other traffic regulations are taken into account as far as possible. There may be discrepancies between the data on the navigation CD and the actual local situation, due to permanent changes to road systems and their traffic regulations.
83

1DYLJDWLRQ RSHUDWLRQ
*HQHUDO QRWHV
•During navigation mode, radio or CD can still be heard. The distance to the next announcement and, depending on the setting made in “Setting the time display” on page 117, the estimated time of arrival, the current time or the remaining travel time are displayed at the right of the display.
•The unit can be switched to radio mode when route guidance is in operation by pressing the 5DG button. Press the &' button to switch to CD mode.
The navigation menu is automatically displayed when navigation announcements are given.
•When entering the address, only those letters, digits and symbols which are relevant for the address are displayed. The entries are automatically completed.
Spaces (e.g. in Bad Abbach) must be entered using the underline symbol.
Letters, numbers and symbols can be selected via the multifunction buttons to . The individual sym-
bols can be selected by pressing the relevant multifunction buttons repeatedly.
Selection can also be made using the right rotary control  , as described later in this guide.
•1DY quits the current menu and displays the previous
menu.
•The route is recalculated by the system if deviation from the route is made.
•Press the left rotary control  to hear the current navigation announcement.
•During the navigation announcement, adjustment can be
made to the volume using the left rotary control  and to the tone by pressing the
  button (see page 81).
•By briefly pressing the left rotary control  additional information can be requested during route guidance or the current position when route guidance is not active See ”Information during route guidance” on page 104.
•The current navigation announcement is interrupted by pressing the left rotary control  .
.
•If the left rotary control  is pressed for longer than
2 seconds during a navigation announcement, the navigation announcement switches off and route guidance con-
tinues via display only.
By briefly pressing the left rotary control  the navigation announcements are switched on again.
• The scroll marks and indicate a selection list which can be scrolled through using the right rotary control  . Each entry in the list shown in capital letters can be selected by pressing the right rotary control
  .
.
84
1DYLJDWLRQ RSHUDWLRQ
6HOHFWLQJ QDYLJDWLRQ
Press 1DY multifunction button.
# ! ! # ! B
# !
The main navigation menu appears after this display.
1RWH The navigation CD must be loaded when starting navigation operation for the first time.
If the navigation system has not yet been calibrated, a calibration journey is prompted (see Installation Guide).
A navigation CD with the data for the destination country is required for navigation operation.
The navigation CD must be inserted to start the route calculation. During the calculation, the prompt flashes on the display. Once the calculation has been completed, the prompt extinguishes, the navigation CD can be removed and an audio CD can be inserted.
When entering destinations, driving off should be delayed until the prompt disappears.
0DLQ QDYLJDWLRQ PHQX
!Y &
Y Y
Selection from
! !,
!Y &, Y Y Y,
! ! ! ,
can be made by turning the right rotary control  , and confirmed by pressing the right rotary control
  .
.
•! !
accesses the entry menu for the destination. See ”Entering destination” on page 86.
•!Y &
contains destinations which have been stored previously. See ”Destination memory” on page 107.
•Y Y
Menu for the selection of special local and interregional destinations and special destinations nearby. Special destinations are e.g. petrol stations, airports or hospitals See ”Special destinations” on page 107.
85

1DYLJDWLRQ RSHUDWLRQ
•! ! !
A list of the last 50 destinations is displayed. The desired destination can be selected using the right rotary control  . Before confirming with the right rotary control
  , details of the destination can be requested by pressing the left rotary control
  . Stopovers are not stored as last destinations.
(QWHULQJ GHVWLQDWLRQ
Select ! ! in the main navigation menu using the right rotary control  and press to confirm.
6HOHFWLQJ WKH FRXQWU\
&
If your destination lies in another country, select &
using the right rotary control  and press to confirm.
! !
Select the country using the right rotary control  and press to confirm.
1RWH We recommend the selection of a stopover (page 96) at the half-way point to the destination.
86
1DYLJDWLRQ RSHUDWLRQ
(QWHULQJ WKH GHVWLQDWLRQ
! !
The last location entered is displayed.
If you want to enter a destination in the displayed location, you can select or ! immediately.
If your destination lies in another location, select the location using the right rotary control  and press to confirm.
! $ P
!"#$Y&'
YYYYYYYYYYYYYYYYYYYYYYY
Select the letters one after the other by turning the right rotary control  and press to confirm. The enlarged selected letter appears at the right of the display.
Using the multifunction button  the last confirmed letter is deleted.
The complete entry is deleted if the multifunction button  is pressed for more than 2 seconds.
! $ P
YYY YY YYYY YYYYYYYYYYYYYY
YYYYYYYYYYYYYYYYYYYYYYYY
Letters which are already entered are displayed inversely. For the purpose of support, the existing entry is displayed at the next place-name to be reached. The unit offers only the possible remaining letters for selection. If no other entries are available, the unit completes the place-name automatically.
To accept the entry, press and hold the right rotary control  for more than 2 seconds or select the small tick and briefly press the right rotary control
  .
.
If the complete place-name was previously entered or was automatically completed, the program switches to either placedistinguishing list or to road or centre entry.
If no roads and only the centre can be selected in the location entered, the program switches directly to route menu.
If an incomplete location entry was confirmed, the place selection list is displayed.
87
1DYLJDWLRQ RSHUDWLRQ
"
!
The place nearest to the entry appears in capital letters in the place selection list.
The scroll marks indicate that more places are available for selection in alphabetical order.
Select by turning and confirm by pressing the right rotary control  . (See ”General notes” on page 84.)
If the entry is unequivocal, the program switches to road or centre entry. If no roads and only the centre can be selected in the location entered, the program switches directly to route menu.
The place-distinguishing list is displayed if the selection is ambiguous.
"
!
Select the required place using the right rotary control  and press to confirm.
The program switches to road or centre entry.
If no roads and only the centre can be selected in the location entered, the program switches directly to route menu.
6HOHFWLQJ GHVWLQDWLRQ YLD SRVW FRGH
The destination can also be selected via the town’s post code.
!
! !
Select the destination’s ! by turning the right rotary control  and press to confirm the selection.
! P
Y Y !"Y$Y&'
YYYYYYYYYYY YYYYYYYYYY
Using the right rotary control  , enter the post code for the destination and press for more than 2 seconds to confirm the entry. To confirm, the small tick can also be selected and the right rotary control
  briefly pressed.
"
The display then shows either the destination corresponding to the post code or, if the post code is shared among several towns, a list containing these towns.
88
1DYLJDWLRQ RSHUDWLRQ
Select the required location using the right rotary control  and press to confirm.
If more than 20 locations share the same post code, the display will show the location input menu instead of the abovementioned list. In that case, the location name is to be entered as described in “Entering the destination” on page 87.
The program returns to road or centre entry. If there are no streets in the selected town or only the centre can be selected, the unit will switch directly to the route menu.
(QWHULQJ WKH GHVWLQDWLRQ URDG
!
Using the right rotary control  , select and press to confirm.
P
!"#$Y&'
YYYYYYYYYYY YYYYYYYYYY
Select the letters one after the other by turning the right rotary control  and press to confirm. The enlarged selected letter appears at the right of the display.
Using the multifunction button  the last confirmed letter is deleted.
The complete entry is deleted if the multifunction button  is pressed for more than 2 seconds.
P
YYY YYYYYYYYY YYYYYYYYYY
YYYYYYYYYYYYYYYYYYYYY
Letters which are already entered are displayed inversely. For the purpose of support, the existing entry is displayed at the next road to be reached. The unit offers only the possible remaining letters for selection.
If no other entries are available, the unit completes the roadname.
To accept the entry, press and hold the right rotary control  for more than 2 seconds or select the small tick and briefly press the right rotary control
  .
.
If the complete road-name was previously entered or was automatically completed, the program switches to either roaddistinguishing list or to route menu.
If an incomplete location entry was confirmed, the road selection list is displayed.
!
89
1DYLJDWLRQ RSHUDWLRQ
The road nearest to the entry appears in capital letters in the road selection list.
The scroll marks indicate that more roads are available for selection in alphabetical order.
Select the road by turning the right rotary control  and press to confirm.
If the entry is unequivocal, the program switches to route menu.
The road-distinguishing list is displayed if the selection is ambiguous.
M V
Select the required place using the right rotary control  and press to confirm.
The program switches to route menu.
(QWHULQJ WKH GHVWLQDWLRQ FHQWUH
Using the right rotary control  , select! and press to confirm.
If the place selected only has one centre, the program switches immediately to route menu.
If the number of centres is less than 10, the centre list is displayed.
!
Select the centre by turning the right rotary control  and press to confirm.
If the number of centres is greater than 9, the program switches to centre entry.
! P
Y Y !"#$YYY
YYYYYYYYYYYYYYYYYYYYY
Select the letters one after the other by turning the right rotary control  and press to confirm. The enlarged selected letter appears at the right of the display.
90
1DYLJDWLRQ RSHUDWLRQ
Using the multifunction button  the last confirmed letter is deleted.
The complete entry is deleted if the multifunction button  is pressed for more than 2 seconds.
! P
YYY YYYYYYY Y YYYYYYYYYYYY
If the complete centre-name was previously entered or was automatically completed, the program switches to route menu.
The program switches to the centre list if the selection is ambiguous.
YYYYYYYYYYYYYYYYYYYYY |
|
|
" |
Letters which are already entered are displayed inversely. For the purpose of support, the existing entry is displayed at the next centre to be reached. The unit offers only the possible remaining letters for selection. If no other entries are available, the unit completes the centre-name.
To accept the entry, press and hold the right rotary control  for more than 2 seconds or select the small tick and briefly press the right rotary control
  .
.
The centre nearest to the entry appears in capital letters in the centre list.
The scroll mark indicates that more centres are available for selection in alphabetical order.
Select the centre by turning the right rotary control  and press to confirm.
The program switches to the route menu.
1RWH A list of possible centres is displayed immediately by pressing the right rotary control  for more than 2 seconds without having selected any letters.
91
1DYLJDWLRQ RSHUDWLRQ
5RXWH PHQX
# ! !
D F
" "
Selection from
# ! !,
! !\ ! Y, ( ! !\ ! Y or ! !\ & Y Y)
" ",
"! !!
can be made by turning, and confirmed by pressing the right rotary control  .
.
•# ! !
accesses the entry menu for the destination memory (page 94).
•! !S ! Y, ! !S ! Y or ! !S & Y Y
Starts route guidance. Simultaneously, a prompt appears indicating the currently selected route option (S !
Y for a short route, S ! Y for a fast route and S & Y Y for a dynamic route).
•" "
The house number in the specified destination road can be entered here.
This function is only available if this information is stored on the navigation CD.
An intersecting road can be defined as the destination here.
This function is only available if this information is stored on the navigation CD.
•"! !!
Specifications such as quick route, short route, dynamic route, motorway, ferries and toll roads can be selected here.
(QWHULQJ WKH KRXVH QXPEHU IRU WKH GHVWLQDWLRQ URDG
Using the right rotary control  select " " in the route menu and press to confirm.
" " P G S H
YYYYYYYYYYYYYYYYYYYYYYYYYYY YYY YYYYYY
Using the right rotary control  , enter the house number for the destination road and press for more than 2 seconds to confirm the entry. To confirm, the small tick can also be selected and the right rotary control
  briefly pressed.
Due to the system characteristics, route guidance continues only in the area of the house number specified.
# ! !
D F
"! !!
Select ! !\ to start route guidance.
92
1DYLJDWLRQ RSHUDWLRQ
Select ory menu.
Select "! !! to access the possible route settings.
Select by turning the right rotary control  and press to confirm the selection.
6HOHFW WKH LQWHUVHFWLRQ IRU WKH GHVWLQDWLRQ URDG
Using the right rotary control  , select in the route menu and press to confirm.
$
Select the intersection for the destination road by turning the right rotary control  and press to confirm.
# ! !
D F
"! !!
Select ! !\ to start route guidance.
Select # |
! ! to jump to the destination mem- |
ory menu. |
|
Select "! |
!! to access the possible route set- |
tings. |
|
Select by turning the right rotary control |
and press to con- |
firm the selection. |
|
6HOHFWLQJ WKH URXWH VHWWLQJV
Using the right rotary control  , select "! !! in the route menu and press to confirm.
! "!
! "!
•! "!
If selected, the program calculates the shortest possible journey time.
•! "!
If selected, the program calculates the shortest possible distance.
1RWH The setting " ! "! " is often recommended for larger cities or conurbations.
•& "!
Dynamic route guidance is used to calculate the route, taking current traffic announcements into account.
1RWH Can only be selected if TMC has been switched on or is currently switched on. See ”Switching TMC on/off” on page 127.
If dynamic route guidance has been activated, the routes are calculated using the "fast route" setting.
93
1DYLJDWLRQ RSHUDWLRQ
Further information under “Dynamic navigation with TMC” on page 101.
•! !
Provides options for avoiding motorways, ferries or toll roads.
!$&$ |
$! |
F$! "! |
||
|
|
|
|
|
|
|
$! F |
$! "! |
|
|
|
|
|
|
! |
$! F $! "! |
|||
|
|
|
|
|
Selection can be made by turning the right rotary control  , and settings can be changed by pressing the right rotary control
  .
.
Press the control for more than 2 seconds to accept all settings and quit the menu.
1RWH Routes without motorways can only be calculated for short distances (up to 200 km).
6WRULQJ D VSHFLILHG GHVWLQDWLRQ LQ WKH GHVWLQDWLRQ PHPRU\
It is not absolutely necessary to store a destination in the destination memory for route guidance. It saves repeated manual entry, if the destination is required at a later date.
Select # ! ! in the route menu and press the right rotary control  to confirm.
P
!"#$%&'
NFGH Y
Any name of your choice consisting of up to 20 characters can be entered for the specified destination and then automatically stored in the destination memory after pressing the right rotary control  for more than 2 seconds. See ”Destination memory” on page 107.
To store, the small tick can also be selected and the right rotary control  briefly pressed.
If you do not wish to enter a name of your choice, press and hold the right rotary control  for more than 2 seconds to store the address as previously entered in the destination memory.
The last destination entered can be filed at any position by turning the right rotary control  . The memory position is confirmed by briefly pressing the right rotary control
  .
.
A total of 50 destinations can be stored.
94
1DYLJDWLRQ RSHUDWLRQ
$ !Y
D F
"! !!
For final storage in the destination memory, either route guidance must be started or the program must be switched to new destination entry by selection of $ !Y.
'HOHWLQJ VWRUHG GHVWLQDWLRQV
Select destination memory (see page 107).
H H
" !"!! !N !"!!
Select the destination to be deleted using the right rotary control  and press the multifunction button.
'HVWLQDWLRQ PHPRU\ IXOO
!Y & "
! J
J #
Occurs when the destination memory is full.
Select either ! (to jump to the destination memory in order to delete a destination) or (to cancel saving).
5RXWH JXLGDQFH FDOFXODWLRQ
The message "Calculating route" indicates that the distance is being calculated, which may take several seconds.
After the first route guidance announcement, the prompt flashes on the display until the route has been completely calculated. When entering a destination, driving off should be delayed until no longer flashes.
5HFDOFXODWLQJ WKH URXWH
If the current route is not followed due to road blocks, diversions, unintentional driving in the wrong direction or failing to observe the recommendations, the system immediately calculates a new route. During this recalculation, is displayed.
95
1DYLJDWLRQ RSHUDWLRQ
6WRSRYHU
This function enables a stopover to be entered when route guidance is active.
(QWHULQJ D VWRSRYHU
|
Q F V |
|
|
|
P |
Press the multifunction button  .
.
! !
F F
!Y &
Using the right rotary control  , make a selection and press to confirm.
•!Y &
(see page 107) Select the stopover from the destination memory.
•! !
(see page 86) allows entry of a stopover with the precise specification of the address.
•Y Y
(see page 107) enables the selection of special destinations as stopovers via , &
! ! and !$F " ! &, e.g. petrol stations
or airports.
6WDUWLQJ URXWH JXLGDQFH WR D VWRSRYHU
To start route guidance to the stopover, press the right rotary control  .
.
The route is calculated and route guidance begins.
1RWH |
The |
symbol is displayed inversely during |
|
route guidance to a stopover. |
|
96
 Loading...