


GRAND PRIX
Table of contents
 Loading...
Contents
Safety instructions 65
Information regarding
general road safety 66
Arrangement of controls 67
Anti-theft device 68
Entering the code number 68
Removing the portable panel 69
Attaching the portable panel 69
General Operation 70
Switching on/off 70
Setting the volume 70
Activating the tone menu 70
Setting the bass 70
Setting the treble 70
Fader 71
Setting the balance 71
Linear adjustment 71
Adjusting the volume of the
subwoofer or centre speaker 71
Switching loudness on / off 71
Radio mode 72
Switching on FM mode 72
Switching on FM menu mode 72
Selecting the FM waveband 72
Settings for station selection 72
Dynamic autostore (FM-DAS) 72
Station search FM-DAS 73
Scan search 73
Programme filtering for
FM-DAS 73
Programme type selection (PTY) 74
Turning PTY display on / off 74
Calling up / storing FM stations 74
Manual FM tuning 75
Regionalisation 75
Switching regionalisation on / off 76
Turning frequency display on / off 76
Switching radio text on / off 76
Traffic programme (TP) 77
Activating / quitting the TP menu 77
Switching TP on / off 77
Selecting automatic tracking 78
Selecting / cancelling direct
programming 78
Switching mute on/off 79
Interrupting TP announcements 79
TP announcement volume 79
Telephone muting 80
Switching on AM mode 80
Switching on AM menu mode 80
Selecting the AM waveband 80
Setting options for station selection 80
Station search MW, LW, SW 80
Scan search 81
Calling up/storing MW, LW, SW
stations 81
Autostore MW, LW 81
Manual MW, LW, SW tuning 82
CD mode 83
Notes on compact discs (CD) 83
Inserting / ejecting CDs 83
Forward / backward track
skipping 84
Scan search 84
Fast forward / reverse 84
Track repeat 84
Random play 85
CD settings menu 85
Displaying number of tracks 85
Switching between Track/
CD Text display 85
Temperature protection circuit 86
Notes on CD-R and CD-RWs 86
Notes on copy-protected CDs 86
MP3 mode 87
General notes on MP3 87
Creating an MP3/WMA storage
medium 87
Creating a playlist 88
Inserting /ejecting MP3 CDs 89
Switching between folder/
playlist 90
Forward / backward track skipping 90
Changing folder/playlist 90
Scan search 90
Fast forward / reverse 91
Random Play 91
Track repeat 91
63

Contents
MP3 settings menu 91
Number of folders/playlists/tracks 91
Displaying name of folder/playlist 92
Switching between track/
ID3 tag display 92
Audio playback via an optional
Apple™ iPod 92
CD changer mode 94
Operational readiness of
CD changer 94
Loading / ejecting the CD magazine 94
Selecting CD changer mode 94
Changing/selecting CDs 94
CDC settings menu 95
Displaying track information 95
Displaying number of tracks and
total playing time 95
Naming a CD 96
CD filter function 97
Telephone mode 98
Requesting telephone mode 99
Mobile phone already connected 99
Mobile phone has just been
connected 99
Mobile phone not yet connected 99
Connecting mobile phone 100
Connecting automatically 101
Dialling numbers 101
Number is busy 102
Call lists 102
Calling a number from a call list 103
Deleting call lists 103
Accepting a call 104
Rejecting a call 104
Terminating a call 104
User settings 105
Opening / quitting User
Settings menu 105
Setting the GAL (Gal) 105
Telephone mute function (Tel) 105
Display brightness (Lum) 106
LED setting 106
Setting reception optimisation
(M/S) 106
AUX input (Aux) 107
Signal tone volume (BeV) 107
Service menu 108
Calling up / exiting service
menu 108
CD Changer reset 108
Bluetooth module reset 108
Unit reset 108
Installation of the microphone 109
Connecting a microphone to
the Grand Prix 110
Explanation 114
RDS SYSTEM 114
DAS Seek Qual. level 114
DAS Seek Name level 114
RDS Stations level 114
Stations Fix level 114
PTY (programme type) 114
Technical terminology glossary 116
Index 118
Technical data 121
NOTICE 122
Correct disposal of this product
(waste for electrical and
electronic equipment) 123
64

G
Operation of the unit is permitted only if traffic conditions are suitable and you are absolutely sure that you, your passengers or other motorists are not endangered, obstructed or inconvenienced.
The country-specific regulations for telephone operation apply.
The unit may only be used for its intended purpose. The volume of the radio should be adjusted so that external noise is
still audible.
Do not activate the telephone near petrol stations, fuel depots, chemical plants or blasting areas.
In the case of a malfunction (i.e. smoke or other noticeable odours) the unit is to be turned off immediately.
For safety reasons, the unit may only be opened by a trained technician. Please refer to your dealer for repair.
Safety instructions
65

Information regarding general road safety
This car radio device is intended and approved for installation and operation in passenger cars, commercial vehicles and
buses (vehicle classes M, N and O) whose electric system has a rated voltage of 12V.
Installation and maintenance should only be carried out by specialists. Faulty installation or maintenance can result in
the malfunctioning of the motor vehicle’s electronic systems. The vehicle manufacturer’s safety instructions must be observed.
The vehicle’s electronics (e.g. speedometer signal) may only be worked on by an authorised service garage. We assume no
liability for any impairment of the vehicle’s electronics.
This device is only intended for installation in the area provided for this purpose by the vehicle manufacturer.
The method of attachment used must ensure that the device will remain properly attached, should the vehicle be involved
in a crash.
The power supply must be properly fused.
Using mobile phones without an external antenna in the proximity of the radio unit may cause interference.
Familiarise yourself with the device and how it works before embarking on your journey. Whilst on the move, only operate the device in appropriate traffic conditions. The volume of the device should be set at a level that enables external
noises (e.g. police sirens) to be easily heard.
66
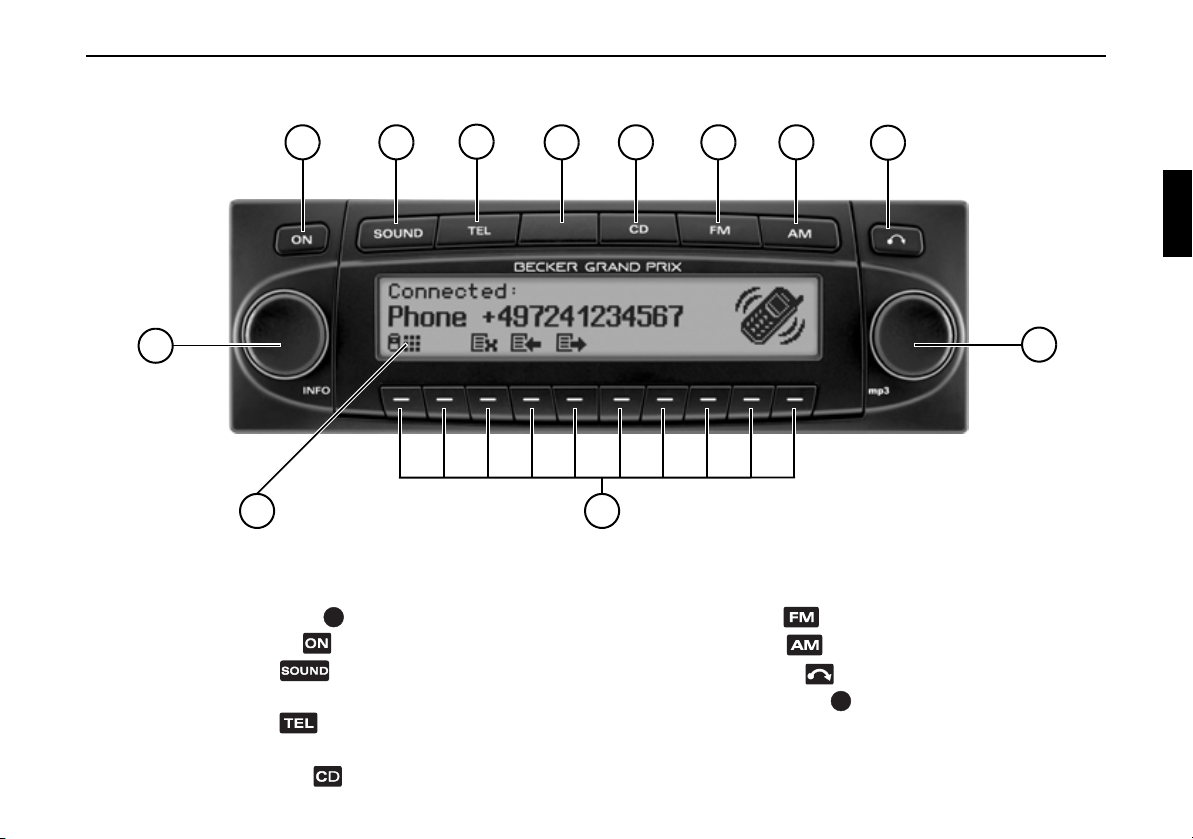
Arrangement of controls
2
3
1
12
Arrangement of controls
1 Left rotary control (INFO)
2 On / off switch ( )
3 Tone button ( )
4 Switching between telephone/traffic
programme ( )
5LED
6 Select CD mode ( )
4
5
6
7
8
9
10
11
7 FM selection ( )
8 AM selection ( )
9 CD eject button ( )
10 Right rotary control
11 Multifunction buttons
12 Display
67
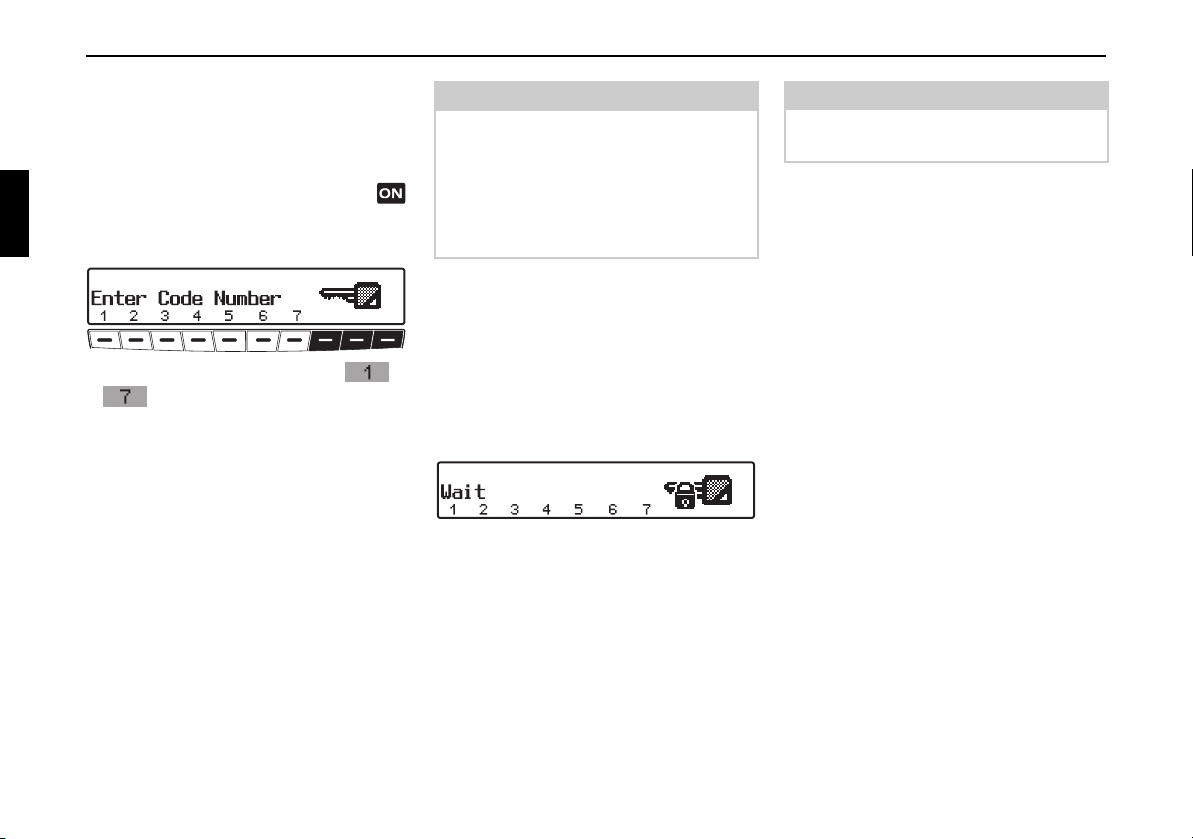
Anti-theft device
Anti-theft device
Entering the code number
If the car radio is disconnected from the
electrical supply source, the anti-theft
device prevents it from being reconnected. After turning on the unit via the
button, the prompt
Number
! Use the multifunction keys -
is displayed.
to enter the five-digit code
number.
Example:
Code number 15372 (the code number
can be found on the enclosed CODE
CARD).
The unit automatically switches on
when the fifth digit is entered and all
other digits were entered correctly.
Enter Code
Note
It is important to store the CODE
CARD in a safe place outside of the vehicle. This will prevent unauthorised
use. The window stickers provided
should be attached to the windscreen/
windows inside your vehicle.
In an incorrect code number is entered,
the prompt
Enter Code Number
will be displayed once again. If an incorrect code number is entered three times
in a row, the unit will display
Wait, and
it will be blocked for approximately 60
minutes.
Three further incorrect entries block the
unit for another 60 minutes.
Attention:
The waiting time elapses only when the
ignition and unit are switched on.
68
Anti-theft device
Removing the portable panel
As an effective anti-theft device, the
portable panel (A) may be removed from
the unit.
! Press button briefly (storage me-
dium remains in the unit).
The display folds forwards.
! Detach the portable panel.
A
The volume is limited to a maximum
level after the display has been folded
down. After 20 seconds, an audible signal indicates that the control component
is folded down. The unit then switches
itself off.
Warning
GG
Accident hazard
For safety reasons, the portable panel
may not be left open while driving.
Attention:
Please insert the portable panel in the
accompanying protective cover after removal.
Do not touch the metal contacts on the
portable panel or on the radio.
Attaching the portable panel
! Insert the portable panel into the lower
left catch and then engage it in the
lower right catch. Then fold up the
portable panel and engage it in the upper catches.
The portable panel can also be placed
flat against the unit and pushed into
place.
To ensure correct function, be sure that
the portable panel is completely seated
in all four catches.
69
General operation
General Operation
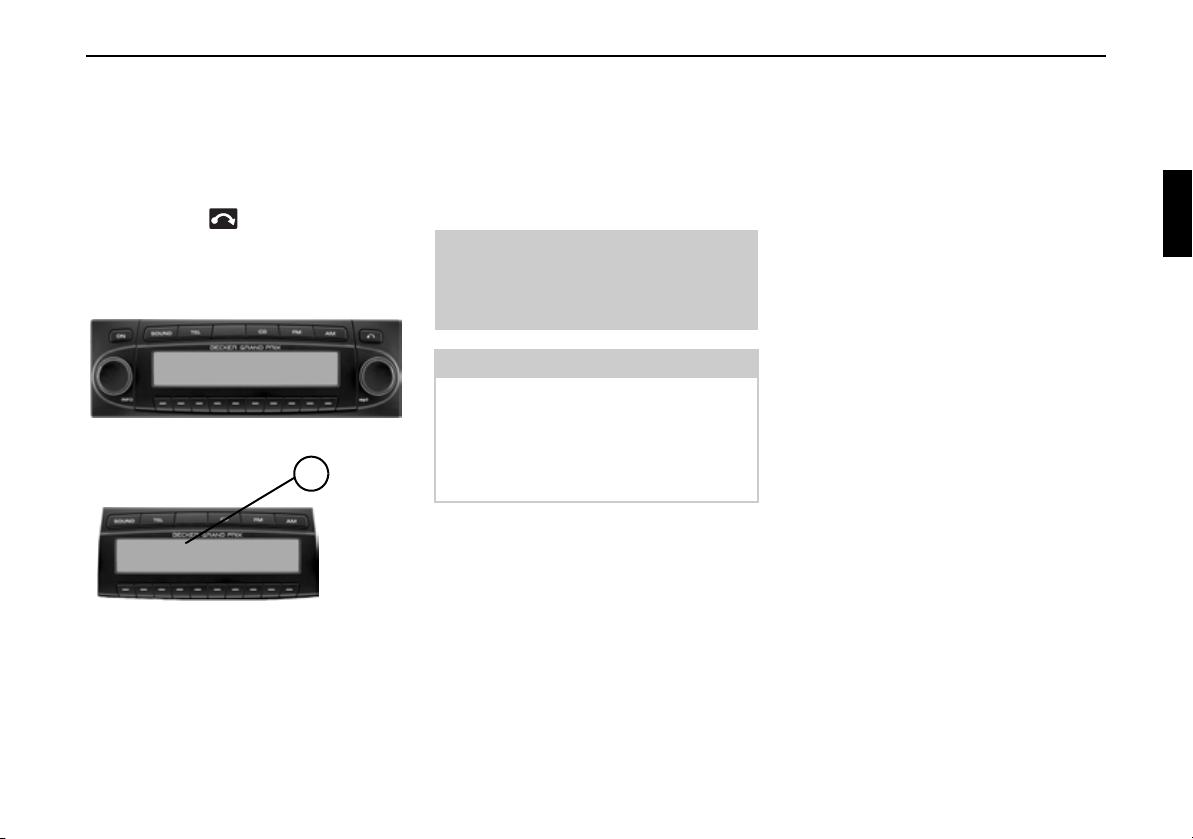
Switching on/off
! Press .
The unit can also be switched on/off via
the vehicle ignition.
To switch the unit on via the ignition, the
unit must have previously been turned
off via the ignition.
After switching off the ignition, the unit
can be prevented from switching off by
pressing the button within 3 seconds.
Note:
The unit can also be switched on with
the ignition switched off via the
button, but it will switch off automatically after 1 hour.
Setting the volume
Turn the left-hand rotary control .
The volume increases or decreases.
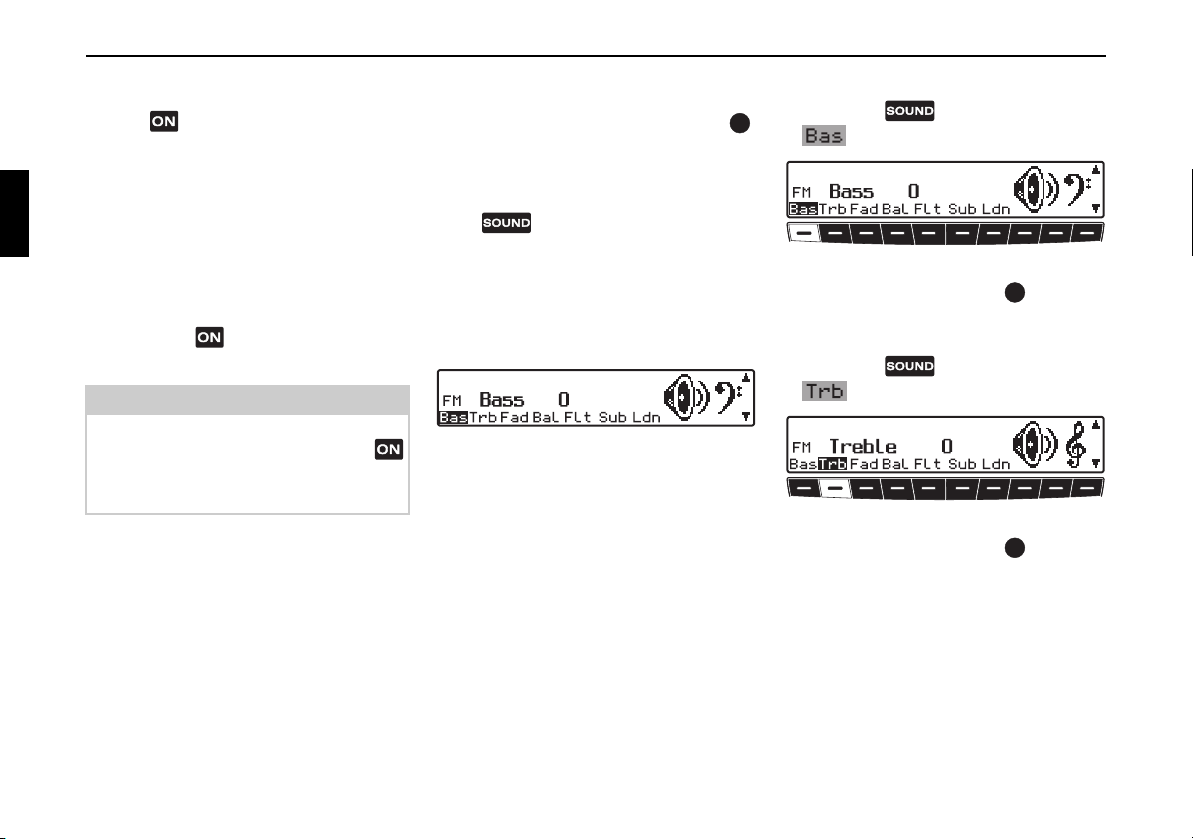
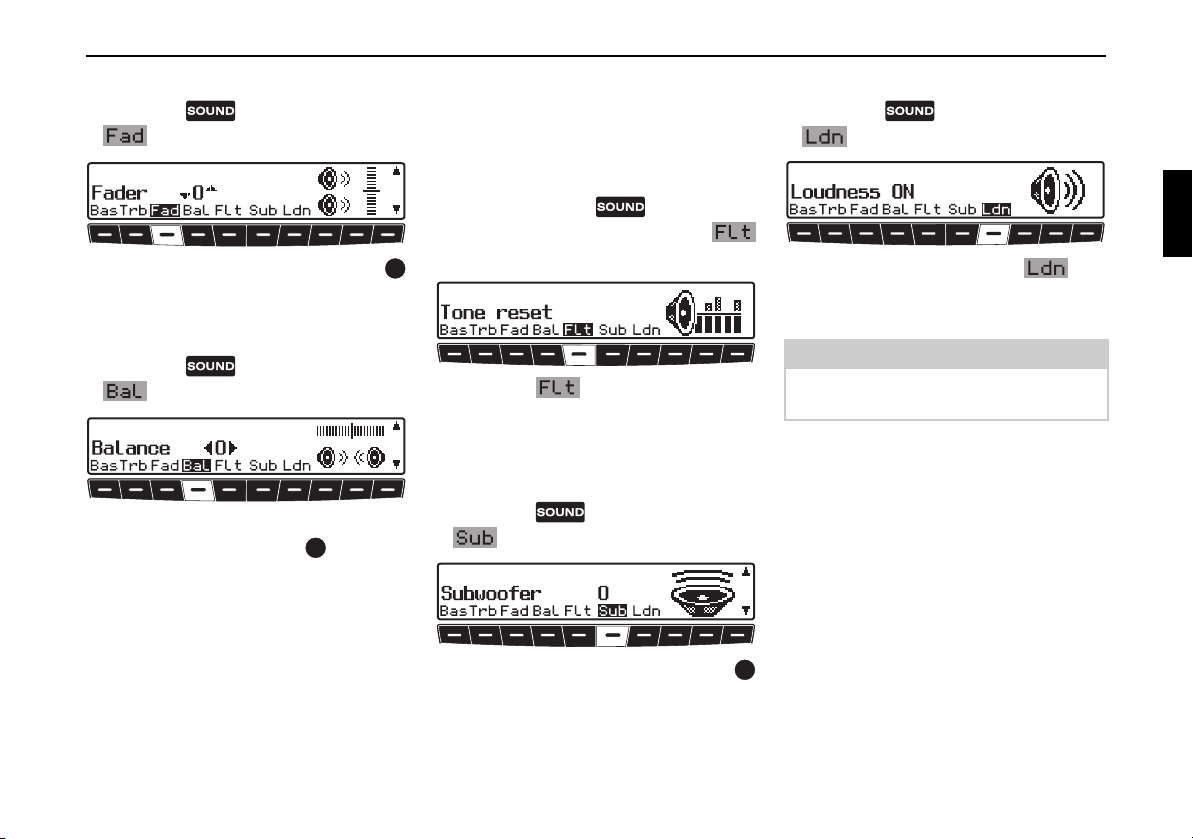
Activating the tone menu
Press . The tone menu is activated.
The following functions can be called
up:
Bas (Bass), Trb (Treble), Fad
(Fader), Bal (Balance), Flt (Linear
adjustment),
(Loudness).
Settings for bass and treble, for the FM,
AM (MW, LW, SW) wavebands, for
road traffic announcements, telephone
mode, CD, MP3/WMA and CDC/AUX
mode are stored separately.
Sub (Subwoofer) and Ldn
Setting the bass
! Press the button and then the
multifunction button.
! Set the desired bass level using the
right-hand rotary control .
Setting the treble
! Press the button and then the
multifunction button.
! Set the desired treble level using the
right-hand rotary control .
70
General operation
Fader
! Press the button and then the
multifunction button.
! Use the right-hand rotary control
to achieve the desired fader setting.
Setting the balance
! Press the button and then the
multifunction button.
! Set the desired balance level using the
right-hand rotary control .
Linear adjustment
The tone adjustments for the current signal source (i.e. FM) can be reset to a
mid-level.
! Briefly press the button. Then
press multifunction button
briefly -
! Press the multifunction button
Tone reset will appear.
again.
Adjusting the volume of the subwoofer or centre speaker
! Press the button and then the
multifunction button.
Switching loudness on / off
! Press the button and then the
multifunction button.
! With multifunction button you
can select either Loudness on (
Loudness off (
OFF).
Note:
Loudness is switched off in MW, LW
and SW wavebands.
ON) or
! Use the right-hand rotary control
to achieve the desired subwoofer volume setting.
71
Radio mode
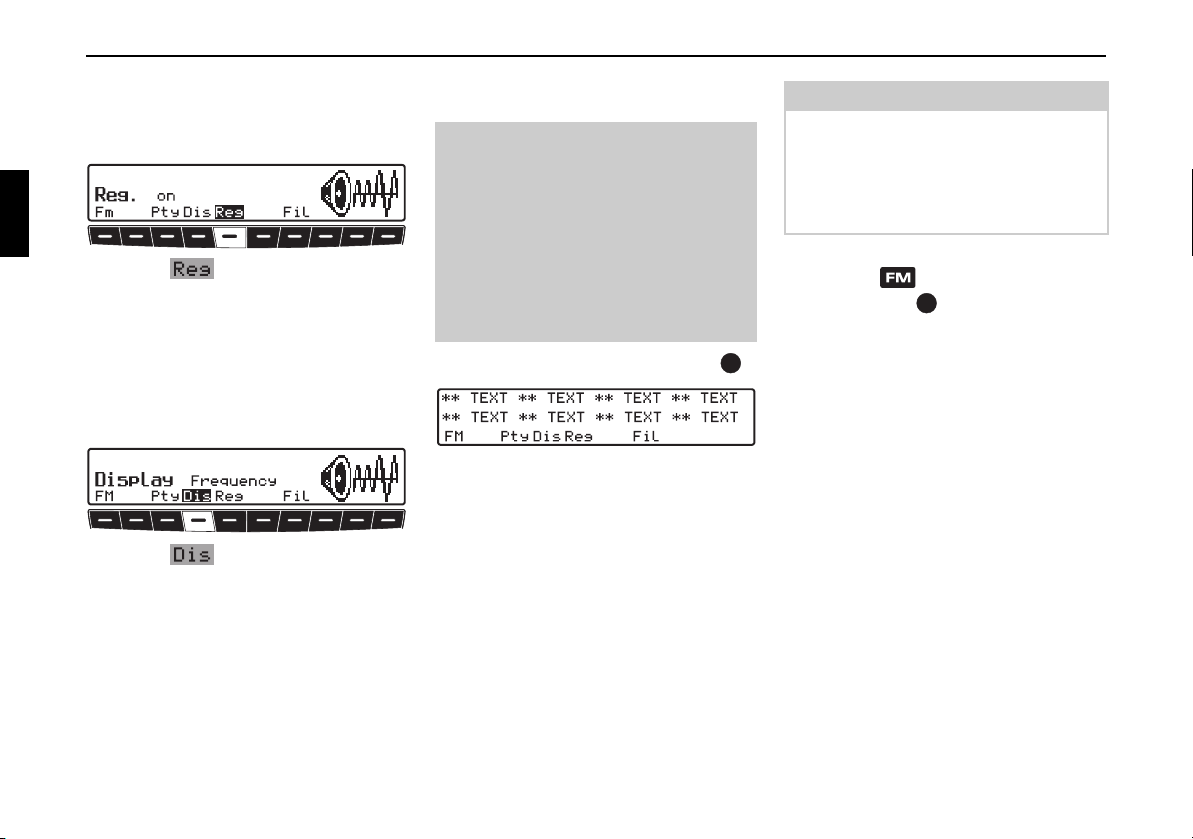
Radio mode
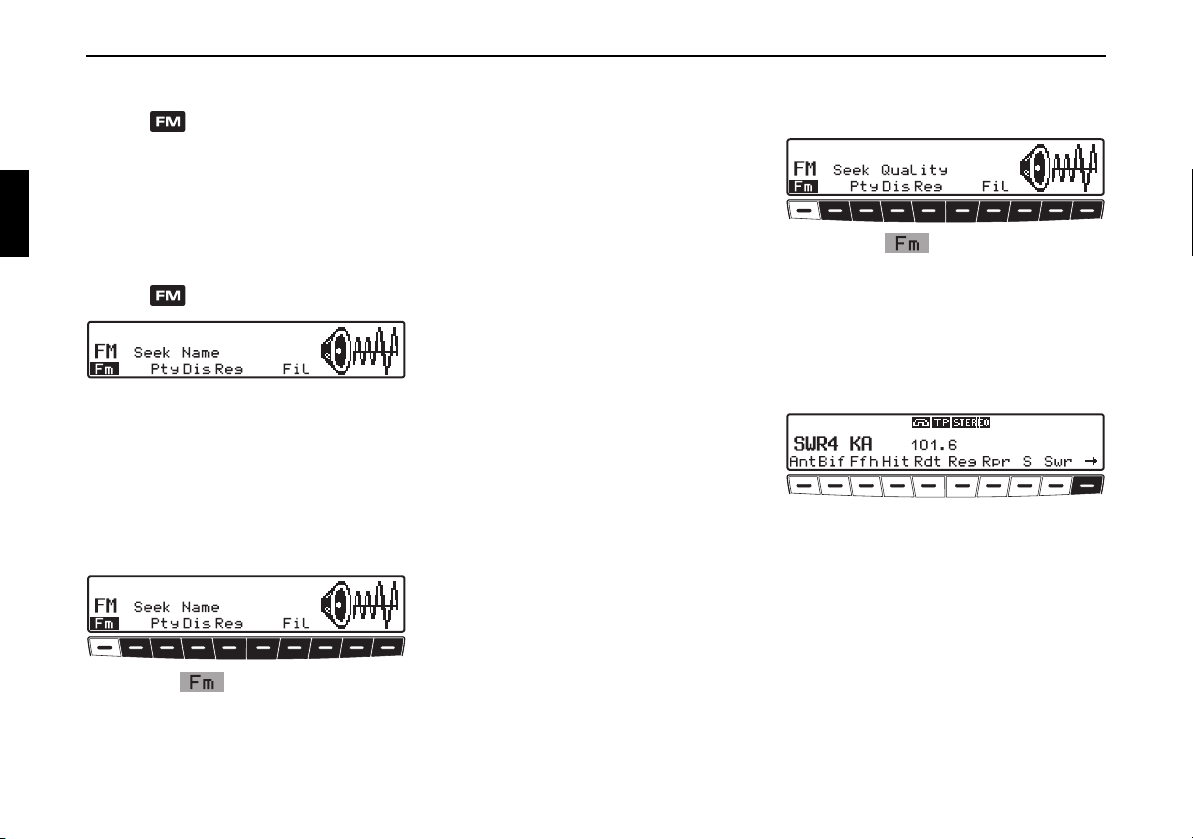
Switching on FM mode
! Press .
The last selected station and level are
displayed.
Dynamic autostore (FM-DAS)
! Request FM menu mode.
The FM waveband will start up with the
memory level and frequency that was
last selected.
Switching on FM menu mode
! Press in radio mode.
The radio menu mode is activated and
displayed. The unit switches back to
radio mode if no button is pressed within
the next 8 seconds.
Selecting the FM waveband
! Request radio menu mode.
! Press the multifunction button.
By pressing repeatedly, you can choose
between the levels
Seek Name, Stations RDS and
Stations Fix.
Seek Quality,
• Seek Quality (see also page 114)
•
Seek Name (see also page 114)
•
Stations RDS (see also page 114)
• Stations Fix (see also page 114)
Settings for station selection
The desired station can be selected via
dynamic autostore, station search, scan
search, manual tuning, and station buttons.
! Press the multifunction button
repeatedly until
Seek Name is displayed.
Seek Quality or
In the FM-DAS mode, the receivable
stations are displayed via the multifunction buttons depending on the settings.
Set the desired station by pressing the
button directly below the abbreviated
station designation. If the selected station broadcasts several programmes/regional programmes, a submenu is
automatically displayed to select the desired programme.
72

Radio mode
If a programme has previously been
selected that belongs to the particular
station programming chain, the last
stored programme entry will be
automatically selected.
Multifunction button indicates
that, by pushing this button, other
stations can be displayed and selected.
If station names are being misused to
send advertisements or messages, this
station is indicated with
L-1... L-Z (L =
Local) instead of the abbreviated station
name. This prevents the lower display
line from constantly changing. When a
station is selected, it is identified by a
star (i.e.
L*1).
The first time the unit is operated, or after the electrical supply has been interrupted, it may take the radio some time
to evaluate the station signals. The display will appear incrementally as the
evaluation progresses.
Station search FM-DAS
! Turn the right-hand rotary control
to the left or right.
The radio displays the receivable and
identified stations in descending/ascending order.
Scan search
! Press the right-hand rotary control .
appears on the display.
An automatic station search will be initiated. The first run is performed on an insensitive plane, all further runs on a
sensitive plane. Receivable stations will
remain audible for 8 seconds. If you
wish to store one, press the right-hand
rotary control .
Note
With
Seek Quality and Seek
, Scan Search is conducted in al-
Name
phabetical order.
Programme filtering for FMDAS
You have the option of filtering various
stations from the FM-DAS station list.
! Request FM menu mode.
! Press the multifunction button.
! The individual programmes can be se-
lected using the right-hand rotary
control . By pressing the right-hand
rotary control , you can choose between
Play (programme unfiltered)
and
Skip (programme filtered out).
Press the multifunction button repeatedly to turn the filter function on
(
Fil on) or off (No Fil).
73
Radio mode
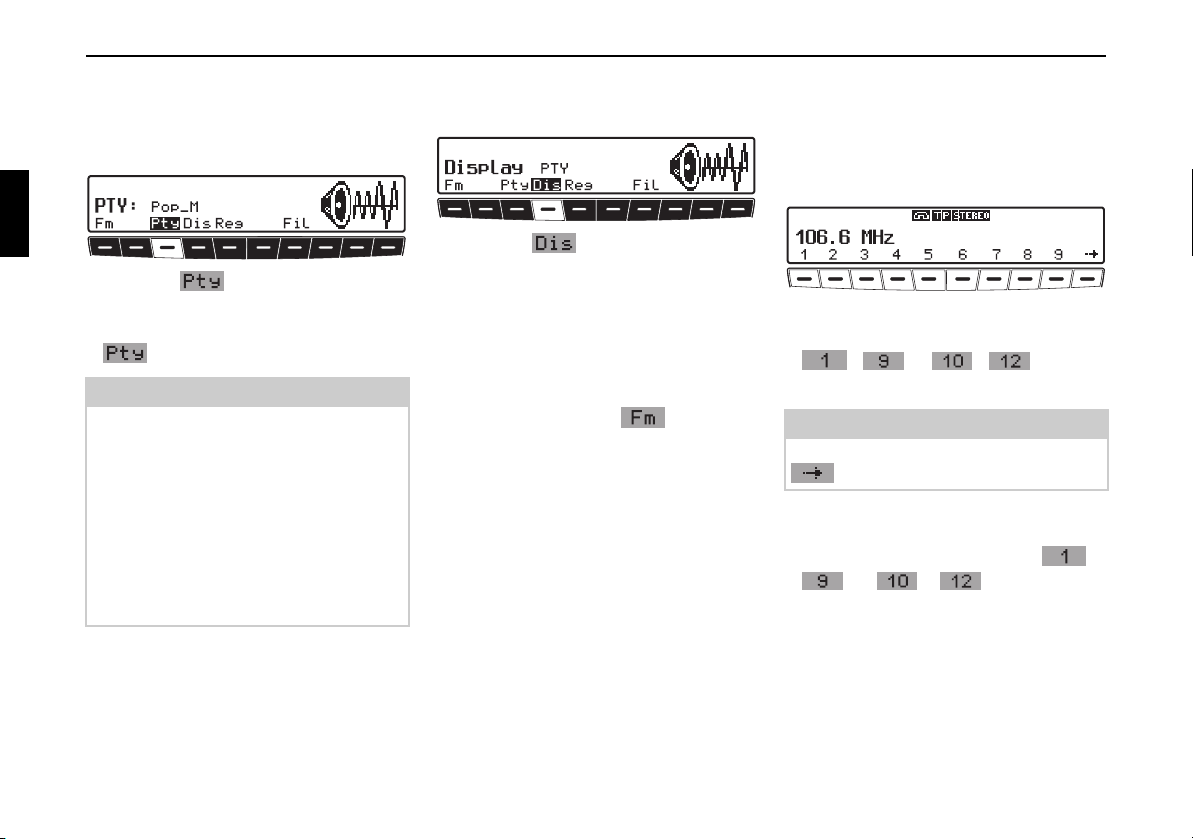
Programme type selection (PTY)
! Request FM menu mode.
! Press the multifunction button.
! Then select the desired PTY (see also
page 114) using multifunction button
.
Note
Only the currently available PTYs can
be selected.
Once a PTY has been selected, only
those stations can be selected in FMDAS mode that are provided with this
PTY.
By selecting
DAS mode, all stations will once again
be displayed.
NO PTY whilst in FM-
Turning PTY display on / off
! Select FM menu mode.
! With the multifunction button,
select either
Frequency (PTY display off).
PTY (PTY display on) or
Calling up / storing FM stations
! In the FM menu mode, select the
Stations RDS or Stations
level using the multifunc-
Fix
tion button.
•
Stations RDS (see also page 114)
• Stations Fix (see also page 114)
Storing:
12 frequencies or programmes can be
stored per waveband.
! Find desired station.
! To store the desired station or pro-
gramme, press multifunction button
- or - until you
hear a signal tone.
Note
To reach presets 10 – 12, press the
multifunction button.
Calling up a preset:
! Press multifunction button -
or - and the stored
station will be called up.
74
Radio mode
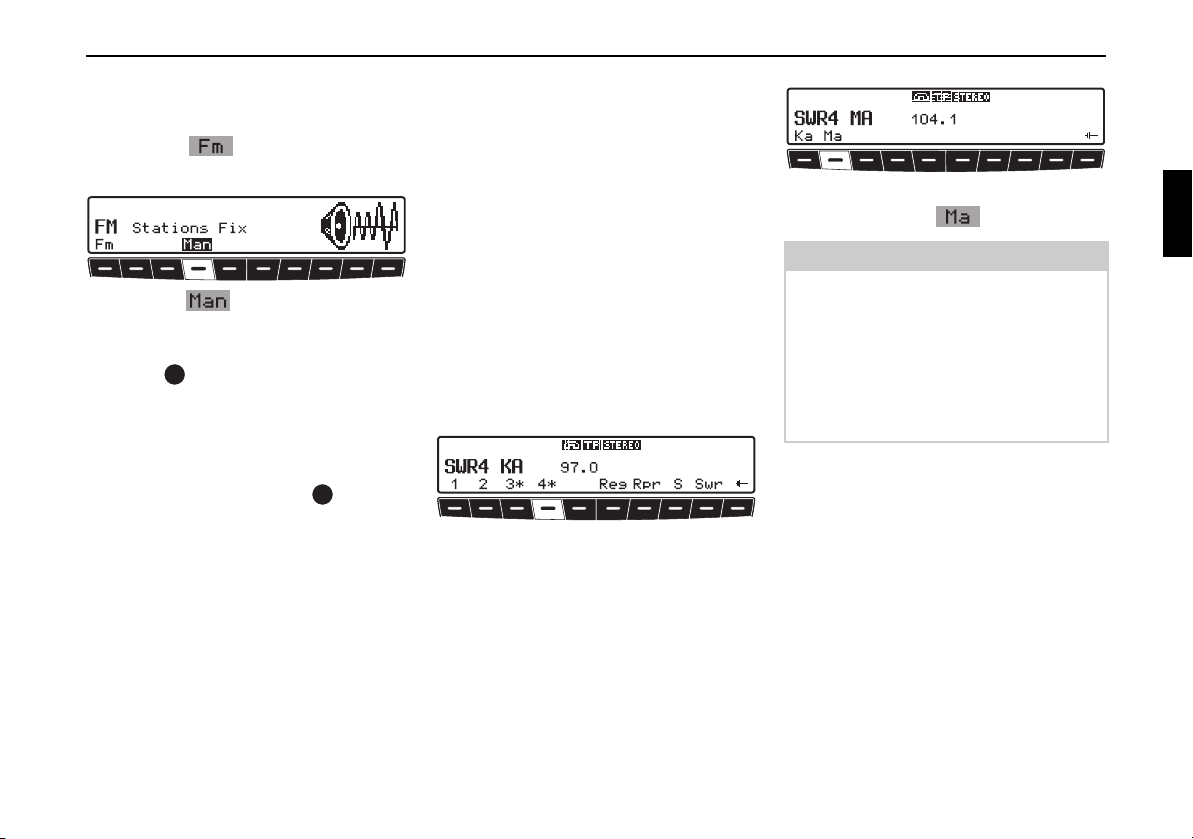
Manual FM tuning
! Select FM menu mode.
! Using the multifunction button
select the
! Press the multifunction button
twice.
! Next, turn the right-hand rotary
control .
100 kHz tuning steps are performed.
The display will show that manual tuning is currently active with
right-hand rotary control is not
turned after a short time,
pear from the display and manual tuning
is turned off.
Stations Fix level.
MAN. If the
MAN will disap-
Regionalisation
The RDS diversity function is independent of region. As a result, the RDS diversity function can lead to the radio
switching between various regional programmes which may vary in terms of
broadcasting content. In such a case, the
special regional programming must be
selected directly.
If several regional programmes are
transmitted by one station, this can only
be seen when the station is selected.
Stations with additional regional transmitters are indicated with a star (i.e.
Upon selection of one of these stations
4*), all receivable regional sub-
(e.g.
programmes for this station will be displayed.
4*).
! Then select the desired regional sub-
programme (i.e. ).
Note
If the signal quality of a regional alternative drifts despite the RDS diversity
function, it may mean that regional alternatives are only transmitted on a few
frequencies. Therefore, there are fewer
frequencies with strong signals available for the unit to switch to.
75
Radio mode
Switching regionalisation on / off
! Select FM menu mode.
! Use the multifunction button to
turn regionalisation on (
(
off).
on) or off
Turning frequency display on / off
! Select FM menu mode.
! Use the multifunction button to
select either
display on) or
off).
Frequency (frequency
PTY (frequency display
Switching radio text on / off
Warning
G
Accident hazard
Since information transmitted via radio
text is constantly changing, we recommend displaying the radio text only
when the vehicle is stationary to avoid
unnecessary distraction for the driver.
This is a necessary precaution for accident prevention.
! Press the left-hand rotary control .
The car radio filters data transmitted by
the radio station and displays it in the
form of radio text.
Note
Radio text cannot be displayed unless
the selected station transmits radio text.
Poor reception or interference may distort the radio text or completely prevent
it from being displayed.
! In order to quit the radio text level,
press the button or the left-hand
rotary control .
76
Radio mode
Traffic programme (TP)
If an RDS diversity station broadcasts
TP announcements, it is possible to interrupt CD, MP3/WMA, CDC/AUX,
MW, LW, SW mode or the mute mode
and switch the broadcast TP announcements through. Moreover, you can listen
to one FM station while receiving TP announcements transmitted by another FM
station.
There are two ways to select a TP station:
- Automatic tracking
- Direct programming
Automatic tracking transmits TP bulle-
tins over the FM station currently being
received. If the selected FM station has
poor signal quality or is not a TP station,
the unit applies specified criteria to
search for a new TP station.
Direct programming enables a TP station to be programmed that is not the FM
station being received. This means, for
example, that a particular FM station can
be listened to whilst TP announcements
are received from another one.
If the programmed TP station’s reception is poor, the unit switches to automatic tracking until the programmed TP
station can be restored.
If the unit detects a TP station, this is indicated on the display by
TP.
appears on the display to indicate
that the traffic programme is active.
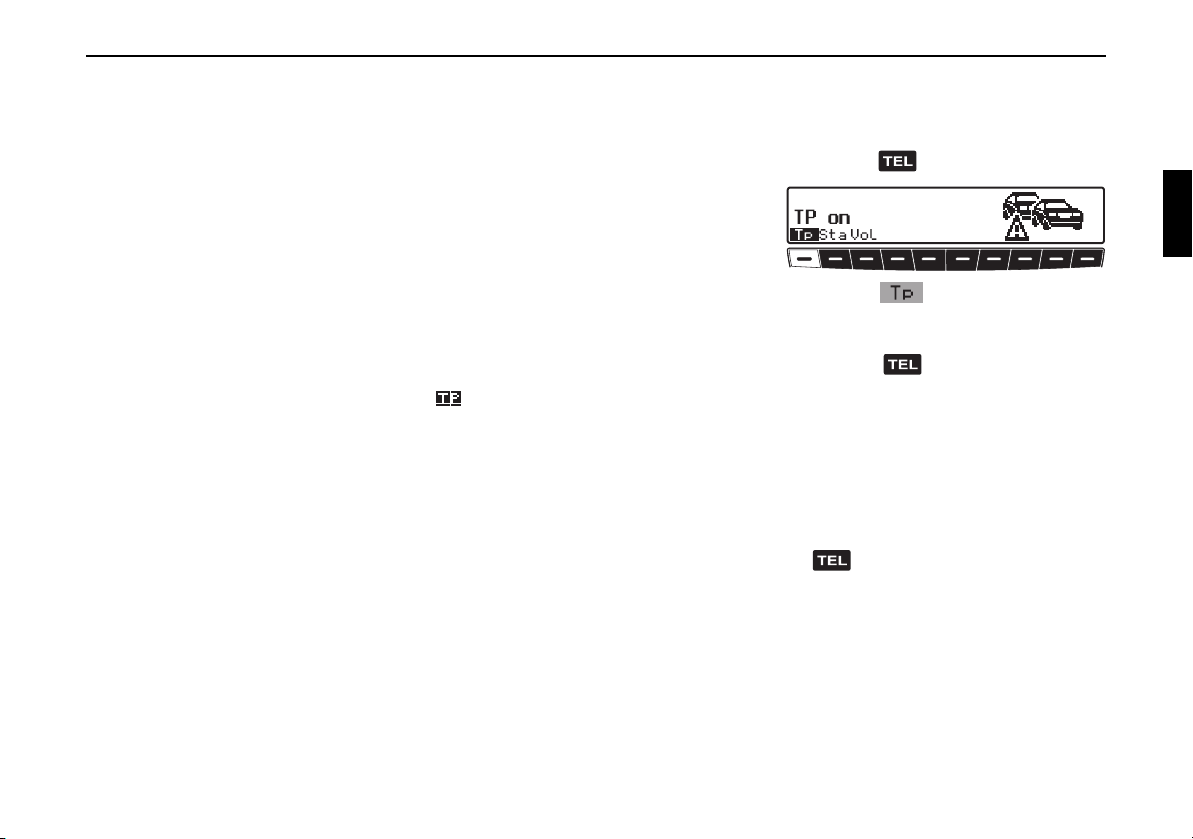
Activating / quitting the TP menu
Activating:
! Press the button twice.
! Press the multifunction button.
Quitting:
! Press the button; otherwise the
TP menu will automatically disappear
after 8 seconds if no further operations
are performed.
Switching TP on / off
In all modes and wavebands, TP can be
turned on or off by pressing and holding
the button for more than 2 seconds.
TP can also be switched on or off whilst
in the TP menu:
77
Radio mode
Switching on:
! Switch on TP menu.
! Press multifunction button re-
peatedly until
TP on appears.
Switching off:
! Switch on TP menu.
! Press multifunction button re-
peatedly until
TP off appears.
TP is switched off after returning to normal display.
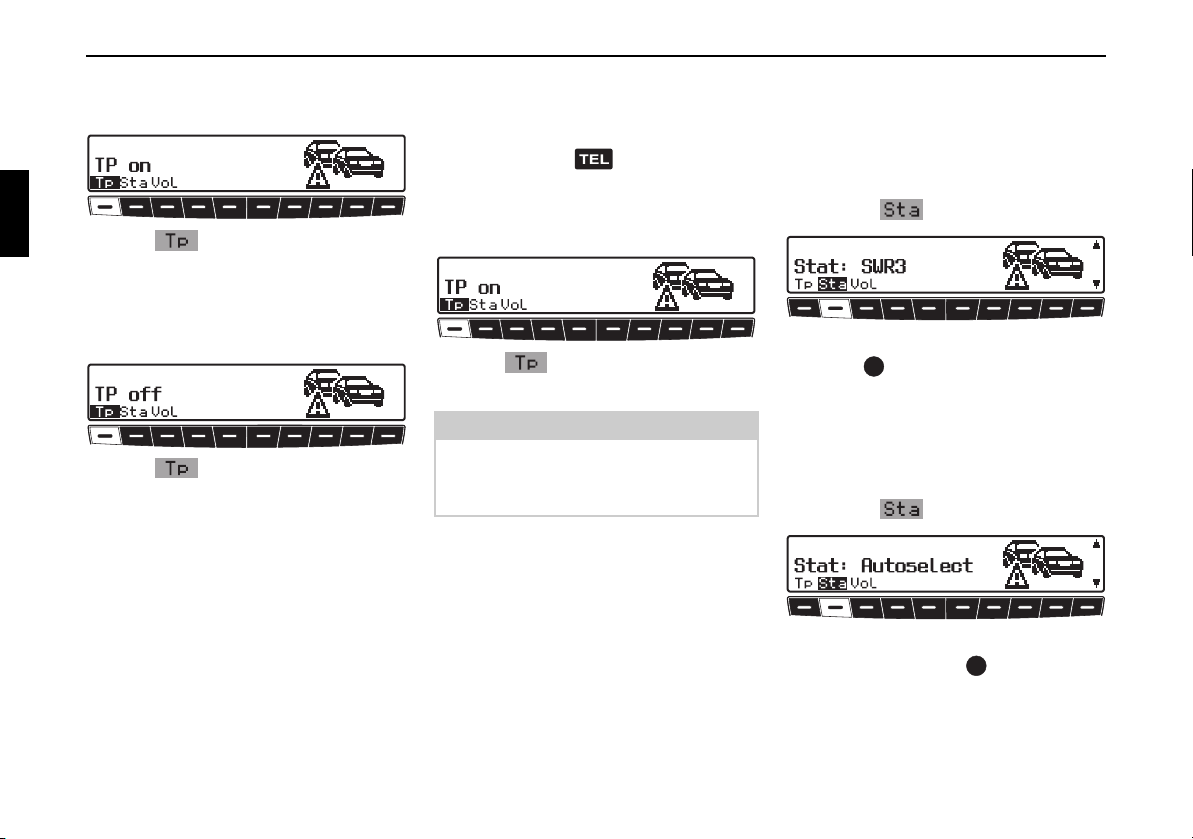
Selecting automatic tracking
In all modes and wavebands, automatic
tracking can be turned on by pressing
and holding the button for more
than 2 seconds.
In the TP menu:
! Press multifunction button re-
peatedly until
Attention:
If a TP station has already been programmed directly, it will once again be
selected as the TP station.
TP on appears.
Selecting / cancelling direct programming
! Switch on TP menu.
Selecting:
! Press the multifunction button.
! Using the right-hand rotary
control , select the desired TP sta-
tion and press to confirm.
After a short delay and without actuation, the selected station is accepted.
Cancelling:
! Press the multifunction button.
! Select Autoselect with the right-
hand rotary control and press the
control to confirm.
After a short delay and without actuation, direct programming is cancelled.
78
Radio mode
Switching mute on/off
Ensure that a TP or EON station is selected.
Switching on:
! Press the button twice.
The mute function is then activated.
Only traffic announcements, navigation
announcements and telephone calls will
be switched through.
Switching off:
! Again, press .
or
! Turn the left rotary control .
The mute function is cancelled.
Interrupting TP announcements
A current TP announcement can be interrupted.
! If the system is in CD, MP3, or CDC
mode, by briefly pressing the button.
or
! If the system is in FM radio mode, by
briefly pressing the button.
or
! If the system is in AM radio mode, by
briefly pressing the button.
The unit switches back to the previously
selected mode.
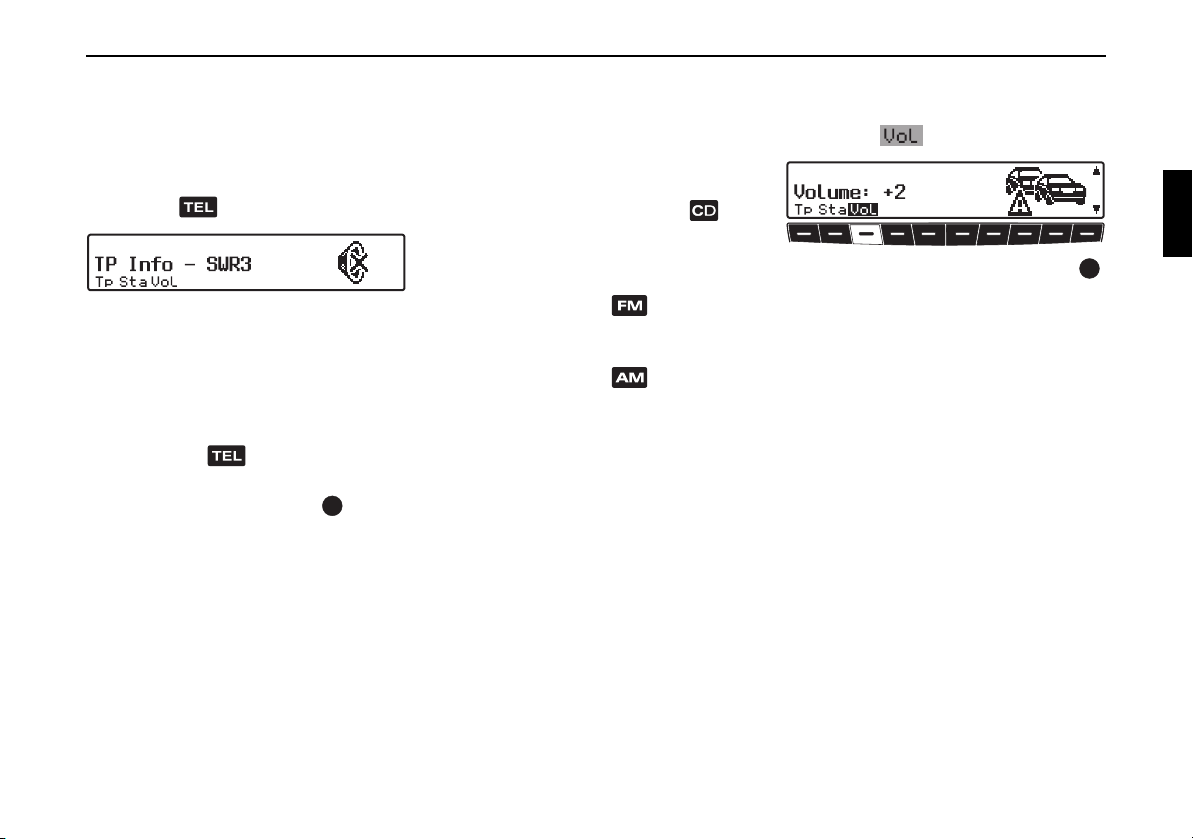
TP announcement volume
! Select TP menu.
! Press the multifunction button.
! With the right-hand rotary control ,
four different settings (
selected.
This means that the volume can be
raised by a fixed amount depending on
the setting.
• Setting
0 - no increase
• Setting 1 - slight increase
• Setting
• Setting
2 - moderate increase
3 - large increase
0 - 3) can be
79
Radio mode
Telephone muting
If a telephone is installed in the vehicle
and its mute control is linked to the car
radio, the User menu (page 105) can be
used to determine how it should behave.
If
Mute is selected, the radio is muted
when a call is received.
With the setting
sound of the telephone will be heard
through the radio unit if a call comes in
(vehicle ignition must be on).
This is only possible if, in addition to the
telephone, a hands-free unit with loudspeaker output is installed and connected to the radio. In both cases
be displayed.
Audio Sig. the
Phone will
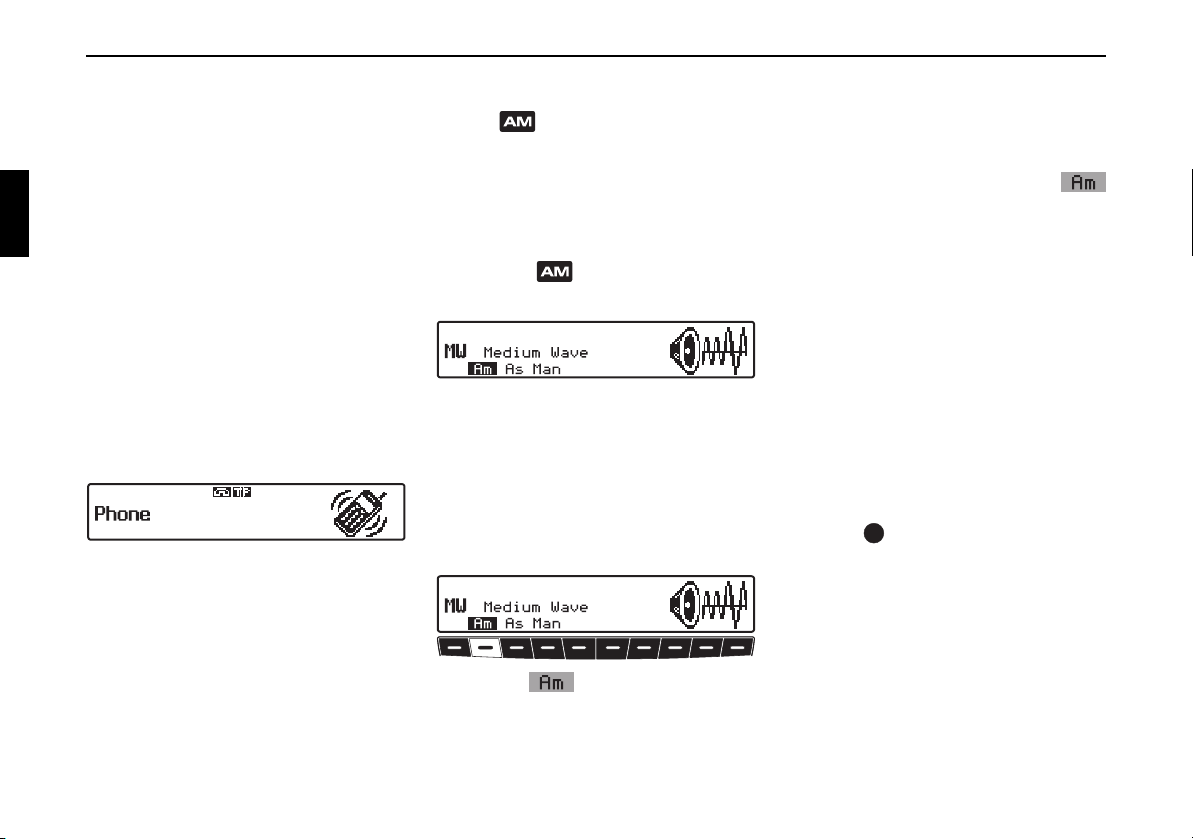
Switching on AM mode
! Press .
The last selected AM station and the corresponding waveband are selected.
Switching on AM menu mode
! Press the button whilst in AM
mode.
The AM menu mode is activated and
displayed. The unit switches back to
radio mode if no button is pressed within
the next 8 seconds.
Selecting the AM waveband
! Request AM menu mode.
The last selected waveband and station
are set.
To select the
MW (Medium Wave), LW
(Long Wave) and SW (Short Wave)
wavebands, repeatedly press the
multifunction button until the desired
waveband is set.
Setting options for station selection
The desired station can be selected via
station search, Autostore (MW, LW),
scan search, manual tuning and station
buttons.
Station search MW, LW, SW
! On the desired waveband (MW, LW,
SW) turn the right-hand rotary
control to the left or right.
The radio searches for reception frequencies in descending or ascending order of frequency.
80
! Press the multifunction button.

Radio mode
Scan search
! In the desired waveband (MW, LW, SW)
press the right-hand rotary control .
appears on the display.
An automatic station search will be initiated. The first run is performed on an insensitive plane, all further runs on a
sensitive plane. Receivable stations will
remain audible for 8 seconds. If you
wish to store the station received, press
the right-hand rotary control .
Calling up/storing MW, LW, SW stations
Storing:
In each case up to 12 stations can be
stored using the station buttons.
! Find desired station.
! To store the desired station, press the
multifunction button - or
- until you hear a signal
tone.
Note
To reach presets 10 – 12, press the
multifunction button.
Calling up stations:
! Press multifunction button -
or - and the stored
station will be called up.
Autostore MW, LW
! Select AM menu mode within the de-
sired waveband.
! Press the multifunction button
repeatedly until
displayed.
! Press the multifunction button
until
Seek Autostore is dis-
played.
The 12 stations with the best reception
are stored under the station buttons in order of quality.
! To exit the Autostore memory level,
turn off the Autostore memory
(
Autostore off) with the
multifunction button.
The radio switches back to the station
button level.
Autostore on is
81
Loading...