

Page 1

1
Press a button on the Beo4 remote
control – just one!
With majestic elegance, the BeoVision
Avant video system turns towards
you, and the curtains slide open
revealing the picture on the screen. A
unique picture and sound experience
awaits you.
The Beo4 remote control is the key to
the BeoVision Avant video system. It
will take you into a world of
entertainment.
This guide explains how...
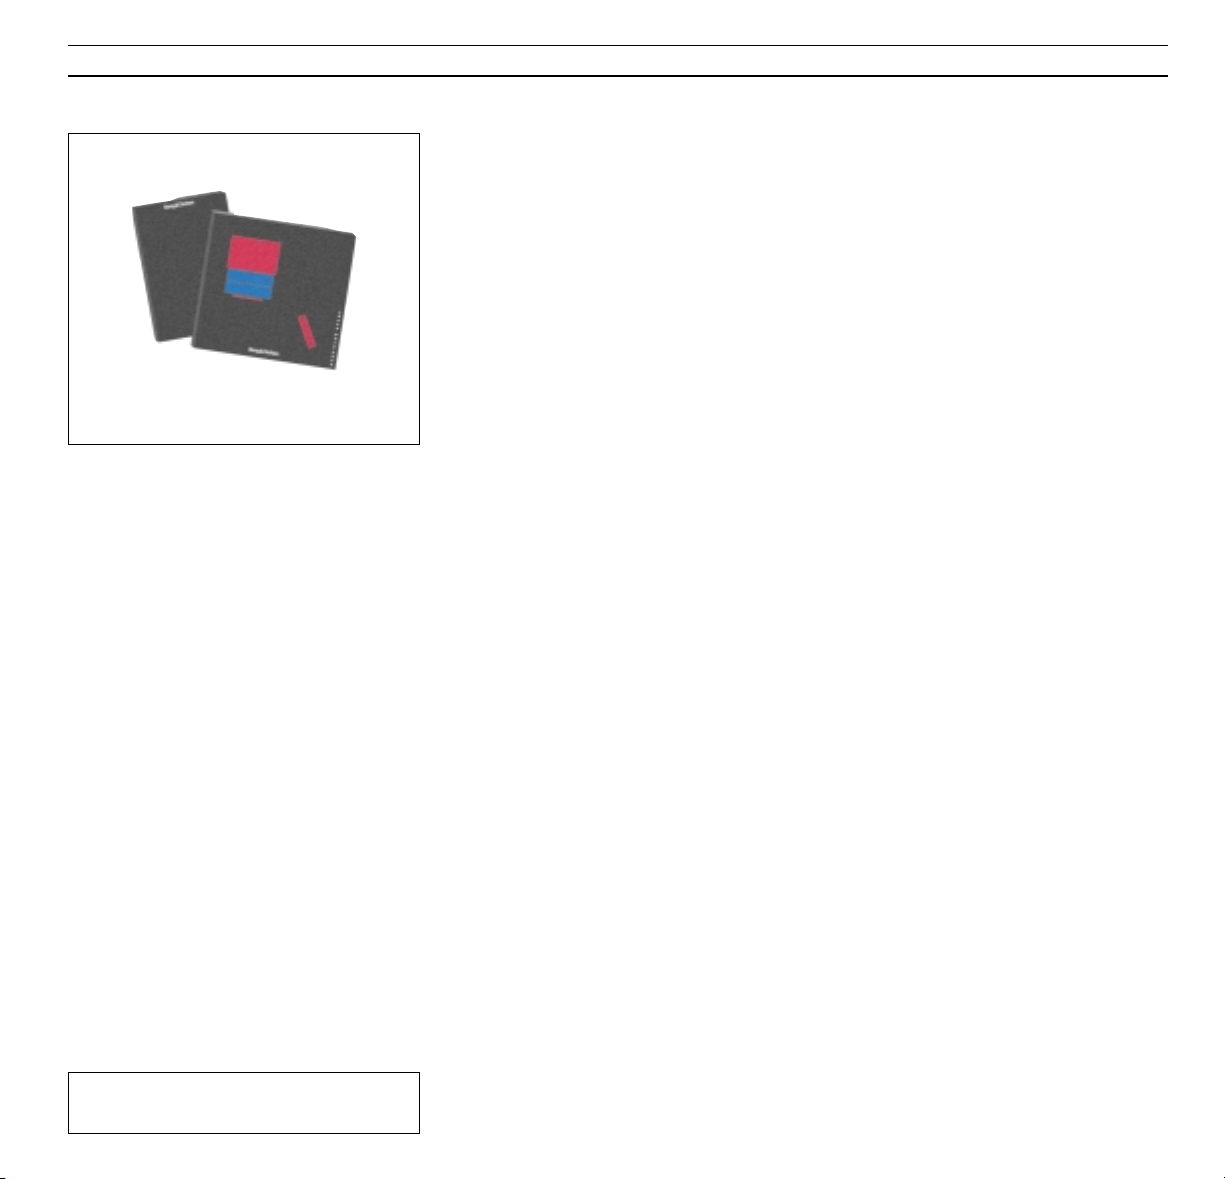
User’s guide
INTRODUCING BEOVISION AVANT
Page 2
USING THE GUIDES
2
Before you start…
Two guides are enclosed with the
BeoVision Avant: A User’s guide and a
Setting-up guide.
This User’s guide explains how to tune
and preset your BeoVision Avant and
operate the various other functions
offered by the system, using the Beo4
remote control.
Most of the functions described in this
guide are accompanied by a set of
buttons which guide you through the
operation step-by-step. Illustrations of
the menus you will be calling up for a
particular operation are also included.
In order to start operating the
BeoVision Avant as described in this
guide, it is essential that you follow the
instructions in the Setting-up guide
carefully.
The Setting-up guide explains how to
set the BeoVision Avant up and make it
ready for use. The Setting-up guide
also includes maintenance instructions
and other vital pieces of information
which you may need from time to time.
”Dolby”, “Pro Logic” and the double-D symbol are
trademarks of Dolby Laboratories Licensing Corporation.
Page 3

3
CONTENTS
4 Principles of operation
Beo4 and BeoVision Avant, 4
Beo4 operating principles, 5
Help to use on-screen menus, 6
Advice on setting up, 7
9 Tuning and presetting
Tuning in, 10
Setting and checking the time, 17
Presetting your favourite stand position,
18
Setting the menu reminder to On or Off,
19
20 Quick guide to daily operations
23 TV, Satellite and Teletext
Daily operations, 24
Using the program lists, 25
Teletext, 26
Picture and sound, 33
Picture-in-picture, 36
37 Video tape recorder
Daily operations, 38
Timer recording, 40
Instant recording, 43
Special types of recording, 45
Special video functions, 48
Extra video equipment, 50
Preferences for the video tape recorder, 52
56 Picture formats
Changing the picture format, 57
58 Timer play
Switching on or off automatically, 58
61 BeoVision Avant and AV systems
Surround sound, 62
Audio system and BeoVision Avant, 65
Link room with BeoVision Avant, 66
Extra functions in Beo4, 67
68 Close-up operation
Displayed information, 68
Buttons on BeoVision Avant close-up
operation panel, 69
Sockets for Headphones and CamCorder,
69
70 Quick Guide to menus
Page 4
4
Before you start operating BeoVision
Avant, it may be a good idea to familiarise yourself with the Beo4 principles
of operation.
Your BeoVision Avant video system is
designed for remote operation using
the Beo4 remote control.
Beo4 integrates remote operation of
your BeoVision Avant and of the basic,
daily functions in recent Bang &
Olufsen audio systems.
• Daily operations are carried out via
the Beo4 remote control. The Beo4
display reads the name of the source
you are watching and/or listening to.
• Additional functions can be obtained
via the Beo4 display, see the
following page.
• The somewhat more advanced
functions in the BeoVision Avant are
guided by menus which you can call
up on the screen (see pages 6-7).
Note: A few basic functions can be operated
directly on the small operation panel on the back
of the BeoVision Avant display bar. Please refer to
BeoVision Avant close-up pages 68-69 for further
information.
Nice to know about Beo4 buttons...
In the step-by-step operating sequences
shown in this guide, the buttons on the Beo4
and cues in the Beo4 display will be illustrated
like this:
Rectangular buttons for source
control, numbers and dedicated
functions
Buttons within the star-shaped
button for stepping and winding
The circular GO button for
accepting and storing instructions
The coloured buttons within the
star-shaped button are used for
special functions, it will be
explained in this guide when and
how to use them
The double-button LIST means
‘press repeatedly’ to reveal more
functions in the Beo4 LIST of
functions
STAND The cues in the Beo4 display
indicate either the current source
you are addressing or an extra
function which you call up by
pressing the LIST button
TV
GO
LIST
Your Beo4 remote control commands are
registered by a small receiver in the
BeoVision Avant display bar, placed on top of
the BeoVision Avant in the upper right hand
corner.
PRINCIPLES OF OPERATION
Beo4 and BeoVision Avant
Page 5
5
The Beo4 remote control is divided into
5 areas. Each area have their own
dedicated functions.
The buttons are arranged so that your
operation of the various functions in
BeoVision Avant is made as simple and
clear as possible. The display reads out
which source you are controlling, but if
you press the LIST button, the cue on
the display changes*.
Please refer to the illustration of the
Beo4 remote control and accompanying texts to the right of this page for
a further explanation of the 5 areas.
*Note: If a cue is mentioned in this guide and you
cannot find it in the display on your Beo4 remote
control, please refer to Extra functions in Beo4,
page 67 in this guide for information about how
to add that particular cue or ‘button’.
Note: Please refer to the special Beo4 User’s guide
for further information about the remote control.
The Beo4 display tells you which source
you are operating. But it is also
used for calling up extra functions.
Source buttons for switching on; and
buttons for recording.
Number buttons; and Teletext and
menu access buttons.
The control buttons within the
star-shaped button are for
winding, stepping and GO. They
are conveniently placed for
thumb-operation. The coloured
buttons have special functions, it
will be specified in this guide
when they are needed.
Volume button; LIST button for
displaying extra functions;
and “stop” buttons.
Beo4 operating principles
TV LIGHT RADIO
SAT DVD CD
V TAPE RECORD A TAPE
789
456
TEXT
0
MENU
123
LIST EXIT
STOP
GO
Page 6
ON-SCREEN MENUS
6
Menu
1 Timer record
2 Timer play
3 TV list
4 Setup
Help to use on-screen menus
Press to call up the main menu
The main menu appears…
Press the relevant number key to
call up the item/menu you want, 1-4,
if Sat is available the main menu
contains 5 items
Press to move the cursor (red text)
and light up the item/menu you
want...
Press to call up the menu
Press any time to return to the
previous menu
Press to remove the menus from the
screen altogether
If a menu appears on the screen
which requires you to fill in
information – A fill-in menu...
Press to key in information for an
item
Press to reveal options for items in
the menu
Press to move from item to item in
the menu
Continue to fill in all the
information needed in the menu…
…press GO to accept it
Main menu:
1 Timer record... Calls up the menu for making a
Timer recording.
2 Timer play... Calls up the menu for making a
Timer play/standby.
3 TV list... Calls up the TV program List .
4 Setup... Calls up the Setup menu, which gives
access to e.g tuning, picture and sound
adjustments, setting the clock, etc..
If your BeoVision Avant is equipped for satellite
reception, Sat list will be included in the main
menu as item number 4 and the item, Setup, will
now be number 5.
A fill-in menu
MENU
STOP
EXIT
GO
or
or
then
tt
ss
0
9
through
GO
1
4
through
then
or
then
or
Or,
To start using your BeoVision Avant,
you must call up the main menu. Each
item in the main menu gives access to a
special menu for a particular function.
Keying in the number for the item you
want, calls up the accompanying menu.
Every time you select an item in a
menu, it is lit up in red.
Some of the menus are menus in which
you must fill in information. You can
key in figures or browse through the
options available for a particular item
until you find the one you want.
Freq Pr Name
210 12 . . . . . . . . . . More
Menu guidance function
Sometimes, you can call up extra functions
from a menu by pressing the Beo4 MENU
button once more. These extra functions are
all described with the relevant menus
throughout this guide.
Page 7
7
From the BeoVision Avant Setup menu, you can
call up the various menus for tuning in and
presetting. See the items in the Setup menu
below...
1 Tuning… Gives access to tuning in TV stations,
(satellite stations) and the Video tape
recorder.
2 Sound… Gives access to adjusting sound.
3 Picture… Gives access to adjusting the picture.
4 Stand… Gives access to presetting your
favourite viewing angles for the
motorised stand.
5 Source… Calls up the AV Source menu in which
you must register any extra video
equipment you connect to the BeoVision
Avant AV socket.
6 Menu… Gives access to switching the menu
guidance function On or Off as you prefer
it.
7 Clock… Gives access to setting the built-in
clock.
8 V.Tape… Calls up the V.Tape access menu
which allows you to call up special V.Tape
menus for adjusting the video picture and
the video tape recorder’s basic setup
menu in which you must register your
preferences for the video tape recorder.
Setup
1 Tuning
2 Sound
3 Picture
4 Stand
5 Source
6 Menu
7 Clock
8 V.Tape
When you want to start tuning in your
BeoVision Avant, you call up the main
menu first, then the Setup menu which
allows you to call up the Tuning menu.
Continue to preset the system after
you have tuned in your stations. Set
the clock, and if you wish set stand
positions and enter your personal
preferences for the system, item, 4,5,6,
and 8 in the Setup menu.
Adjusting the sound and picture levels,
items 2 and 3, is also possible. The
preset neutral sound and picture levels
do, though, suit most situations and
environments.
Press to call up the main menu
Press to call up the Setup menu
If Sat is available Setup will be item
5 instead of 4
Alternatively, use
▼ to light up
Setup and press GO to call up the
Setup menu
The Setup menu appears…
Use the number keys to choose one
of the items and call up their
respective menus…
Most of the menus you call up from
the Setup menu e.g. the Picture
menu are fill-in menus, though e.g.
the first Tuning access menu requires
you to choose yet another item e.g.
TV in order to call up a fill-in menu
Press to key in information for the
item
Press to reveal options for the items
in the menu e.g. start tuning
Press to move from item to item in
the menu
Continue to fill in all the information
needed in the menu…
…press GO to accept it
MENU
4
then
0
9
through
or
or
or
then
tt
ss
GO
Advice on setting up
Page 8

8
Page 9

9
TUNING AND PRESETTING
10 Tuning in
Tuning in TV stations, 10
Video tape recorder and TV
stations, 12
Tuning in Satellite stations, 14
17 Clock
Setting and checking the clock, 17
18 Stand
Presetting your favourite stand
positions, 18
19 Menu reminder
Setting the menu reminder to On
or Off, 19
This section contains operations for
tuning and the presets you (or your
Bang & Olufsen dealer) must
undertake when you set up the
BeoVision Avant for the first time.
You may find this section useful later
on, if you wish to tune in to a new TV
station, or change or readjust some of
the presets you have made.
Page 10

TUNING IN
10
Call up the main menu
The main menu appears…
Press to call up the Setup menu, if
Sat is available, Setup will be item 5
The Setup menu appears…
Press to select Tuning
The Tuning access menu
appears…
Select the first item, TV
The first TV tuning menu
appears...
Press to let the system search for
TV stations
Alternatively,...
Key in the exact frequency you
want, for example 210 MHz
Press to move the cursor to the other
items in the TV tuning menu
Press
▲ or ▼ to reveal options for
the items or use the number keys to
key in values…
Fill in the necessary information…
Press to store your station, or…
Move to More and press GO to call
up the second TV tuning menu…
…fill in the necessary information,
press GO to store and return to first
TV tuning menu...
Press to finally store your station
Press to remove on-screen menus or
press GO to continue tuning
Tuning in TV stations
To tune in TV stations, call up the
menu for tuning and find the TV
tuning menu. You can make the system
find your stations for you; or you can
key in a station’s exact frequency
directly yourself.
You can preset 99 different TV stations
on program numbers of their own and
in the process you will be able to name
each station, too.
When you have filled in the first TV
tuning menu, you can store your new
TV station. If necessary, you can choose
to fine tune the station, determine
availability of a decoder and type of
sound and picture format in a second
tuning menu.
Each item in the two tuning menus is
described in detail on the following
page ...
Note: If the item System appears on the first
tuning menu, you must make sure that the correct
broadcast system is displayed before you start
tuning.
Note: If you have any special preferences for the
recording of a particular program number, you
must enter them into the special V.Tape tuning
menu. See how on page 12, Video tape recorder
and TV stations.
MENU
4
or
then
then
2
1
0
EXIT
Menu
1 Timer record
2 Timer play
3 TV list
4 Setup
Tuning
1 TV
2 V.Tape
Setup
1 Tuning
2 Sound
3 Picture
4 Stand
5 Source
6 Menu
7 Clock
8 V.Tape
The first TV tuning menu
Freq Pr Name
210 12 . . . . . . . . . . More
The second TV tuning menu
Fine Decoder Sound Format
+2 OFF Stereo-1 15:9
Main menu
The Setup menu
The Tuning access menu
GO
GO
or
then
then
tt
ss
GO
GO
Page 11

11
What’s on the first TV tuning menu…
Freq (frequency)... Searching stops at the first
station producing an acceptable signal. If you
know a station’s exact frequency number, key it in
directly using the number buttons.
(System)… If System appears on the menu, make
sure that the correct broadcast system is displayed
before you start tuning:
B/G... for PAL/SECAM B/G
I... for PAL I
L... for SECAM L
M... for NTSC
D/K... for PAL/SECAM D/K
Note: All options may not be available as this
depends on the television type.
Pr (program number)... Key in the program
number (1-99) you wish to preset the station on.
Name (naming)... The name you give a station
will appear in the TV program list.
Press
▲ or ▼ to reveal the character you want.
Press 0 to switch from upper to lower case, or vice
versa. Then press
tt to move on to the next
character position.
Then press GO or move on to More... When
you have entered the information you want, press
GO to store your TV program or….
More… If it is necessary to fill in extra
information, move to More and press GO. A
second TV tuning menu appears for fine tuning,
availability of decoder and type of sound or
format.
What’s on the second TV tuning menu…
Fine (fine tuning)... The TV automatically tunes to
the best possible picture. However, neighbouring
channels may blur the picture slightly, in which
case fine tuning may be required. You fine tune
by 8 steps above or below the standard frequency.
Decoder... If you tune in a coded TV station and
want the decoder to be cut in automatically, set
the item Decoder to one of the On options below:
ON/AV... (decoder on) where both audio and
video signals are coded
ON/V... (decoder on) where only video
signals are coded
OFF... (decoder off) for no decoder
Select ON/AV for most coded programs to get
both sound and pictures. If only the video signal is
coded, select ON/V. If you select ON/AV where
only the video signal is coded, the sound may be
lost when the signal is decoded.
Note: If an extra decoder is connected to the
BeoVision Avant AV socket and Decoder-2 is
entered into the AV Source menu ( see page 50,
Extra video equipment), you can choose between
1/AV or 1/V, for decoder-1, and 2/AV or 2/V for
decoder-2 or OFF for no decoder.
Sound (mono/stereo/language)... Several types of
sound may available for a TV station, for example
both stereo and mono sound, or several different
languages. Press
▲ or ▼ to switch between the
sound modes currently transmitted, when the
sound you wish to store is heard/displayed, press
GO.
Note: Even though you store a type of sound/
language in this way, you can still switch between
the various types of sound while you are watching
this TV station.
Press LIST to display SOUND* or MONO* on the
Beo4 remote control, then press GO repeatedly to
switch sound. See page 35, Switching sound for
more information about the various types of
sound available.
*Note: In order to display SOUND or MONO on
Beo4, you must add the function to the Beo4 LIST
function, see Extra functions in Beo4, page 67.
Format... Two format settings are available, you
can store a format for each TV program. The
default setting is 15:9, but if ”noise” appears in
the right and left side of the picture, choose the
14:9 format instead, enabling the curtains on the
TV screen to hide the ”noise”. You can still
change the picture format for each program even
though you have stored a setting, see page 56-57.
Removing a tuned TV station…
Press MENU to call up the main menu, press 3
to select TV list and press GO to call up the TV
program list, use the
▲ and ▼ buttons to
move the cursor to the station you want to
remove. Then press MENU. When Clr? appears,
press GO to clear the program. See Program
list, page 25, for further information.
Page 12
> Tuning in
12
Video tape recorder and TV stations
When you store the TV stations on
program numbers in your BeoVision
Avant, their program numbers are also
automatically stored in the video tape
recorder.
The TV program numbers in the video
tape recorder are used, for example,
for recording.
Under very special circumstances you
may find it necessary to enter special
information for such a TV program
number with a view to recording. E.g.
information regarding which tuner to
use for a recording, etc… Such information must be entered into the
special V.Tape tuning menu as
described on these pages.
Each item in the V.Tape tuning menu is
described in detail on the following
page…
Press to call up the main menu
The main menu appears…
Press to call up the Setup menu, if
Sat is available Setup will be item 5
instead
The Setup menu appears…
Press to select the first item, Tuning
The Tuning access menu
appears...
Press to select V.Tape, if Sat is
available V.Tape will be item 3
instead
The V.Tape tuning menu
appears...
Key in the TV program number you
want, for example program 12
Press to move the cursor to the other
items in the menu
Press to fine tune as required; or to
reveal other options for the items in
the menu
Press to store the information you
entered
MENU
4
2
1
2
or
then
tt
ss
or
then
then
GO
GO
Menu
1 Timer record
2 Timer play
3 TV list
4 Setup
Tuning
1 TV
2 V.Tape
Setup
1 Tuning
2 Sound
3 Picture
4 Stand
5 Source
6 Menu
7 Clock
8 V.Tape
The V.Tape tuning menu
Pr Fine Source Sound
12 +2 V.Tape tuner Stereo
Main menu
The Setup menu
The Tuning access menu
Page 13

13
What’s on the V.Tape tuning menu…
Pr (TV station)... The TV program number appears
here.
Fine (fine tuning)...To fine tune a station when it
is used via the video tape recorder.
Source (specific source selection)... You can
instruct the video tape recorder to get its
information from a specific source whenever it
records a specific TV programme:
V.Tape tuner... Is the basic setting and it should be
selected in far the most cases. The TV
programme is recorded from the video tape
recorder’s tuner, you can therefore watch
another TV programme while you are
recording.
TV tuner... Should be selected if you want to
record a particular programme directly from
the TV. Here, you cannot watch another TV
programme while you are recording.
V.Tape decoder... Should be used if you want to
record via a decoder connected to the V-tape
decoder socket.
Sound Indicates the type of sound you choose to
store for a specific program number:
Stereo... Indicates that stereo sound will be
selected for a program number or that the best
possible sound or sound quality will be selected.
Mono… Indicates that mono sound will always be
selected.
Page 14
> Tuning in
14
Tuning in to Satellite stations
Press to call up the main menu
The main menu appears…
Press to call up the Setup menu
The Setup menu appears…
Press to select the first item, Tuning
The Tuning access menu
appears...
Press to call up the Sat tuning menu
The first Sat tuning menu
appears...
Press to search for the next (or
previous) Sat station
Alternatively…
key in the exact frequency instead
Press to move to the other items in
the menu
Press
▲ or ▼ to reveal options for
the items or use the number keys to
key in values…
Fill in the necessary information…
Press to store your station, or…
Press to store your Sat station
Press EXIT to remove menus; or press
GO to continue tuning...
Before you start…
If you need to tune in to an alternative broadcast
system, make sure that the correct system is
displayed in the second Sat tuning menu before
you start tuning in a Satellite station, see the item
System on the following page for more
information!
To tune in Satellite stations, you must
call up the Sat tuning menu*.
You can preset 119 different Satellite
stations (TV and radio) on program
numbers of their own, you will also be
able to name each program number.
If necessary, you can call up the second
Sat tuning menu to e.g. fine tune the
station, indicate the presence of a
decoder station, and choose an appropriate type of sound. If it should be
necessary to tune in the sound, call up
the special sound tuning menu via the
second Sat tuning menu.
Each item in the Sat tuning menus is
described in detail on the following
pages…
Menu
1 Timer record
2 Timer play
3 TV list
4 Sat list
5 Setup
Tuning
1 TV
2 Sat
3 V.Tape
Setup
1 Tuning
2 Sound
3 Picture
4 Stand
5 Source
6 Menu
7 Clock
8 V.Tape
The first Sat tuning menu
Freq Pol LNB Pr Name
11.374 Vert Astra 10 . . . . . . . . . . More
The second Sat tuning menu
Fine Decoder System Format Sound
+2 Off PAL 15:9 7.02/7.20
The main menu
The Setup menu
The Tuning access menu
MENU
5
2
or
then
tt
ss
or
then
then
then
GO
GO
GO
Move to More and press GO to call up the second
Sat tuning menu…
…fill in the necessary information, press GO to
store and return to the first Sat tuning menu...
EXIT
*Note: In order to be able to receive Satellite,
your BeoVision Avant must be equipped for
Satellite reception.
Page 15

15
What’s on the primary Sat tuning menu…
Freq (frequency)... Searching stops at the first
station producing an acceptable signal. If this is
not the station you want, press
▲ or ▼ again to
continue searching.
Alternatively, key in the exact frequency number
using the number keys.
Pol (polarity)... Press
▲ or ▼ to change for the
best picture quality. Pol can be set to:
Vert... for vertical polarization
Hor... for horizontal polarization
00 – 63... for numerical indication of polariza-
tion (relevant only if polarity is set to
Skew in the ODU setup menu*).
(Pos (dish position))... Only available if your ODU
(outdoor unit) setup includes a motor controlled
dish. Pos indicates a dish position numerically.
(LNB (Low Noise Block Converter))… Only
available if you have registered more than one
LNB in the ODU setup menu.* The following
options are available: Astra, 1West, Hot Bird,
Uni-LNB, Telecom, SMATV, Custom and None. The
LNB options, you choose, will appear in the first
Sat tuning menu.
*Note: For further information, about the ODU
(Out Door Unit) setup menu, please refer to the
ODU Setting-up guide.
Pr (program number)... The program numbers
(1-119) are available.
Name (program naming)...You can name the
station if you want to.
The name may contain up to ten characters,
including the letters A-Z, numbers and full stop.
When the item is lit up in red, you can start
‘writing’:
Press
▲ or ▼ to reveal a character. Press 0 to
switch from upper to lower case, or vice versa.
Press
tt to move to the next character position.
Continue ‘writing’ the name using this method.
Note: If you have tuned in a satellite radio station,
you may indicate this in the name (e.g R for radio)
to distinguish between satellite radio and TV
stations.
Then press GO or move on to More... When
you have entered the information you want, press
GO to store your Satellite station or…
More… You may find it necessary to fine tune,
determine availability of decoders and satellite
broadcast system, and choose a type of sound.
When More is lit up call up the second Sat tuning
menu.
What’s on the second Sat tuning menu…
Fine (fine tuning)... Fine tune to find the best
possible picture quality.
Decoder... A decoder should be connected for
the reception of coded satellite stations.
To activate the decoder automatically for a
particular program number, set the item Decoder
to one of the following On options when tuning
in to a coded Satellite station:
ON/AV... (decoder on) where both audio and
video signals are coded
ON/V... (decoder on) where only video
signals are coded
OFF... (decoder off) for no decoder.
Select ON/AV for most coded stations to get both
sound and picture. If only the video signal is
coded, select ON/V to get both sound and picture
right for program. If you select ON/AV, the sound
may be lost when the signal is decoded.
Note: Options 1/AV or 1/V for decoder 1, 2/AV or
2/V for decoder 2 are available or OFF for no
decoder, if an extra decoder is connected to the
AV socket and the correct information, Decoder-2,
is entered into the AV Source menu (see page 50,
Extra video equipment).
System (satellite broadcast system)... You can
switch between the following systems, PAL, MAC,
BB (BaseBand), PAL OBW (Optional bandwidth),
MAC OBW, or BB OBW. Note, if you set System up
to any of the MAC or BB options, it will not be
possible to select or set options for Sound, unless
you have selected ON/V for the Decoder item on
this second tuning menu.
>> See the following page for the continued
description of the items in the menus including
the items in the Sound tuning menu…
>> See the following page for information of how
to remove a Sat station!
Please note…
The BeoVision Avant Satellite module is
preprogrammed with stations from some of
the Satellites currently broadcasting.
Page 16

> Tuning in: ...to satellite stations
16
Format… Two format settings are available, you
can store a format for each Satellite program. The
default setting is 15:9, but if ”noise” appears in
the right and left side of the picture, choose the
14:9 format instead, enabling the curtains on the
TV screen to hide the ”noise”. You can still
change the picture format for each program even
though you have stored a setting, see page 56-57.
Sound (mono/stereo/language)... Several types of
sound may be available for a particular satellite
station, e.g. both stereo and mono sound, or
several different languages. Alternatively, you
may have to call up a sound tuning menu to tune
in the appropriate sound frequency.*
Press
▲ or ▼ to switch between the options
currently transmitted, and stop when the sound
you wish to store is heard and/or displayed.
Note: Even though a preferred type of sound/
language is stored, you can still switch between
the different types while you are watching or
listening to a Satellite programme. See page 35
Switching sound for more information about the
various types of sound available.
*Note: Call up the Sound tuning menu by pressing
MENU, when Sound is highlighted.
What’s on the Sound tuning menu…
Sound… Stereo and Mono sound are available.
Use
▲ or ▼ to reveal options.
(Freq)… (Frequency)
Only applies for when Mono sound is selected.
Tune in the mono sound frequency.
Removing a tuned Satellite station…
Press MENU to call up the main menu, press 4
to select Sat list and press GO to call up the Sat
program list, use the
▲ and ▼ buttons to move
the cursor to the station you want to remove.
Then press MENU. When Clr? appears, press GO
to clear the program. See page 25, Program
lists, for further information.
The Sound tuning menu - for manual tuning of
sound frequency for Satellite stations.
Sound Left Right Bandwidth
Stereo 7.02 7.20 130 KHZ
Deemphasis Expand Sound level Picture
75 On Normal On
Bandwidth… For Bandwidth, the following
options are available: 130 KHz, 280 KHz, and 450
KHz. Use
▲ or ▼ to reveal options. If Sound is set
to Stereo, the bandwidth is set to 130 KHz
automatically, and it will not be possible to select
the item at all.
Deemphasis… In order to achieve the best
possible sound, you may have to deemphasise the
sound signal, so that it corresponds to the degree,
to which, it was preemphasised, when it was
transmitted. Select the appropriate option; 50, 75
or J17.
Expand… To achieve the best possible sound,
you may have to expand the sound signal.
Typically applies, when the transmitted sound is a
stereo signal. The function compensates for the
deviations which the sound elements, bass and
treble, undergo during transmission. To activate
the function, set Expand to On, to deactivate the
function, set it to Off.
Sound level… Select a sound level for a station.
As some stations broadcast programmes with
different sound levels, you can shoose to e.g. turn
the preprogrammed sound level down. The
options Normal and Low are available.
Picture… Indicates whether your station is a
Satellite Radio or TV station.
On… Indicates that the picture screen will be
switched on – for Satellite TV stations.
Off… Indicates that the picture screen will not
be switched on, only sound is available – for
Satellite Radio stations.
Page 17
CLOCK
17
Setting and checking the time
BeoVision Avant has a built-in, 24-hour
clock which ensures that your Timer
programming entries are carried out
correctly. You can set and synchronise
the BeoVision Avant clock with the
Teletext time transmitted by e.g. a
national TV program.
To set and synchronise the time…
Make sure that you are switched on to a national
TV station which transmits Teletext. Then call up
the Clock menu and set the item Synch to Yes,
then press GO and the correct time will be set for
you.
To set the clock yourself…
If you do not want to synchronise the clock with
Teletext; the item Synch must read No. You then
set the clock yourself. Use the number keys to key
in the correct time.
Showing the clock permanently…
To show the time on the BeoVision Avant display
whenever it is switched on, set the item Display in
the menu to Yes. Brief feedback on the display for
any operation you carry out will of course still be
displayed.
Showing the time on request…
If you do not want the time displayed when the
system is switched on, Display must read No. Now
you can call up the clock on request. Press LIST
until CLOCK is displayed, then press GO to see the
time.
Switch on to a national TV station
which transmits Teletext…
Press to call up the main menu
The main menu appears…
Press to call up the Setup menu
if Sat is available Setup will be
item 5
The Setup menu appears…
Press to select item number 7, Clock
The Clock menu appears...
To synchronise with Teletext…
Press to move to the item Synch
Press to reveal Yes under Synch
in the menu
then
Press to synchronise the clock
Use
▲, ▼ or the number keys to fill
in the required information for the
remaining items, e.g. Date, Display,
etc, and press GO to store your clock
To set the clock yourself…
Use
tt or ss to move to Time
then
Use the number keys to key in
the correct time
Use
tt to move to the other items
in the menu, then use
▲, ▼ or the
number keys to fill in the required
information for the remaining items...
Press to store your clock
Press to remove the on-screen menus
The Clock menu – The time is now two o’clock pm.
The BeoVision Avant writes:
Jan... for January
Feb... for February
Mar... for March
Apr... for April
May... for May
Jun... for June
Jul... for July
Aug... for August
Sep... for September
Oct... for October
Nov... for November
Dec... for December
Menu
1 Timer record
2 Timer play
3 TV list
4 Setup
Setup
1 Tuning
2 Sound
3 Picture
4 Stand
5 Source
6 Menu
7 Clock
8 V.Tape
The main menu
The Setup menu
Time Date Year Synch Display
14:00 Tue 23 Aug 1994 Yes Yes
Press GO to synchronize with Teletext
Mon... for Monday
Tue... for Tuesday
Wed... for Wednesday
Thu... for Thursday
Fri... for Friday
Sat... for Saturday
Sun... for Sunday
MENU
4
7
tt
or
then
GO
GO
0
9
EXIT
through
Page 18
STAND
18
Press to call up the main menu
The main menu appears…
Press to call up the Setup menu, if
Sat is available Setup will be item 5
The Setup menu appears…
Press to call up the Stand menu
The Stand menu appears...
Press until the position 1, 2, or 0 is
displayed and stop when the one
you wish to store a Stand position
for is displayed
Turn the BeoVision Avant to the
preferred viewing angle
Press to store the current stand
position (as position 1, 2, or 0)
Repeat the procedure, if you wish to
store all three stand positions…
Press to remove the on-screen
menus
BeoVision Avant’s motorised stand,
enables you to turn the entire system
using your Beo4 remote control.
When you switch the system off, it
automatically reverts to a neutral
standby position (0), unless you store a
particular standby position.
You can preset two viewing angles
(stand positions 1 and 2), and a suitable
standby position (0) for the system*.
The BeoVision Avant then automatically turns towards the
position you instruct it to turn to.
When you now switch on BeoVision
Avant, it will now turn to your
favourite preset position (1). You can
now choose which preset position to
turn it to, 2, 0, or 1 again.
*Note: Instead of pressing ss and tt to chose
viewing angles, you may turn the BeoVision Avant
to the position you want manually.
Presetting your favourite stand positions
The Stand position menu enables you to preset
stand positions which suit your favourite viewing
angles.
Menu
1 Timer record
2 Timer play
3 TV list
4 Setup
Setup
1 Tuning
2 Sound
3 Picture
4 Stand
5 Source
6 Menu
7 Clock
8 V.Tape
The main menu
The Setup menu
Stand position
1
Turn TV to preferred position
MENU
4
4
then
GO
EXIT
then
or
then
then
tt
ss
Page 19
19
MENU REMINDER
The menu for the Menu reminder function – You
can switch the automatic menu reminder function
On or Off as you like.
Menu
1 Timer record
2 Timer play
3 TV list
4 Setup
Setup
1 Tuning
2 Sound
3 Picture
4 Stand
5 Source
6 Menu
7 Clock
8 V.Tape
The main menu
The Setup menu
Menu reminder
On
Setting the menu reminder function to On or Off
While you are operating BeoVision
Avant via the on-screen menus, you
can, in some instances, call up extra
functions to aid you with your operations by pressing the MENU button
once more.
You will be reminded automatically
whenever such an extra function is
available – an extra line appears at the
bottom of the menu, for example:
“Press MENU to call up Teletext.”
If you wish, you can, though, switch
the on-screen menu reminder function
off. But it is only the on-screen
guidance you switch off in this way.
You can still operate the extra
functions by pressing the MENU
button.
Call up the main menu
The main menu appears…
Press to call up the Setup menu, if
Sat is available, Setup will be item 5
The Setup menu appears…
Press to select item number 6, Menu
The menu for the Menu
reminder function appears...
Press to switch between Menu
reminder On or Off
Press to store your choice
Press to remove the on-screen menus
MENU
4
6
EXIT
then
then
GO
Page 20
20
Switching on to TV or Satellite
Switches on to the TV program
number you were last watching
Switches on to the Sat program
number you were last watching
Use the number keys to select a
specific program number
Press to step through your
program numbers
TV
SAT
0
V TAPE
STOP
STOP
9
through
GO
QUICK GUIDE TO…
Displays on BeoVision Avant of source indications
and program number
Press the appropriate source button to
switch on: TV or SAT. The BeoVision
Avant turns to its preset position. The
TV or Satellite station you were last
watching appears on the screen.
Now choose the program number you
want to see.
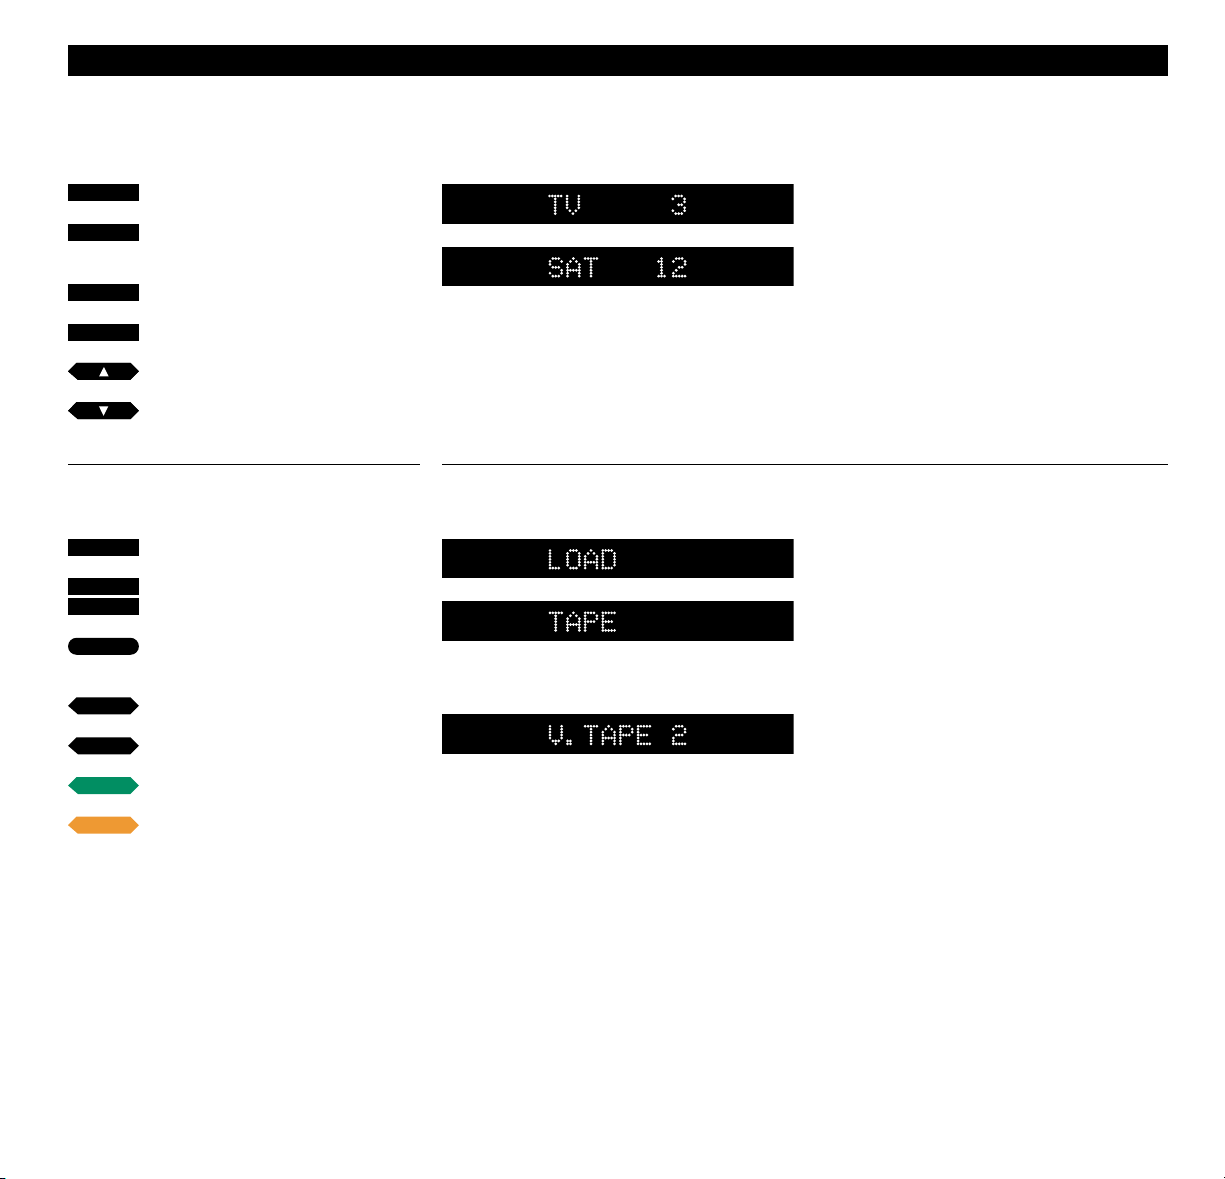
Playing a video tape
Load and Tape are displayed interchangeably,
prompting you to load a tape
This display indicates the source, V.TAPE and the
track you are watching
To play back a video tape you have
loaded, simply press the V TAPE
button.
Now you can pause the tape and
choose to either resume playback, or
stop the video tape recorder. You can
rewind, fast forward, cue the tape you
have loaded backwards or forwards at
any time.
Press to start playing the video tape
Press to pause playback
Press again to stop playback entirely
Press any time to start/resume
playing the tape
Press to rewind the tape
Press to fast forward the tape
Press to cue backwards on a tape
Press to cue forwards on a tape
or
or
or
tt
ss
Page 21
21
… DAILY OPERATIONS
Turning the BeoVision Avant
Indication shows that you can turn or are turning
the stand
When you first switch on the BeoVision
Avant, it will turn towards a viewing
position quite automatically, but you
can turn it to any position you want..
Three positions can be preset in the
system: position 1 (favourite), 2
(secondary), and 0 (neutral).
Press until STAND is displayed
Press to turn the system to the left
Press to turn the system to the right
Alternatively,
Key in the position you want
Press to remove STAND from the
display
Refer back to page 18 for information
of how to preset stand positions…
LIST
or
then
tt
ss
1
2
or
0
EXIT
or
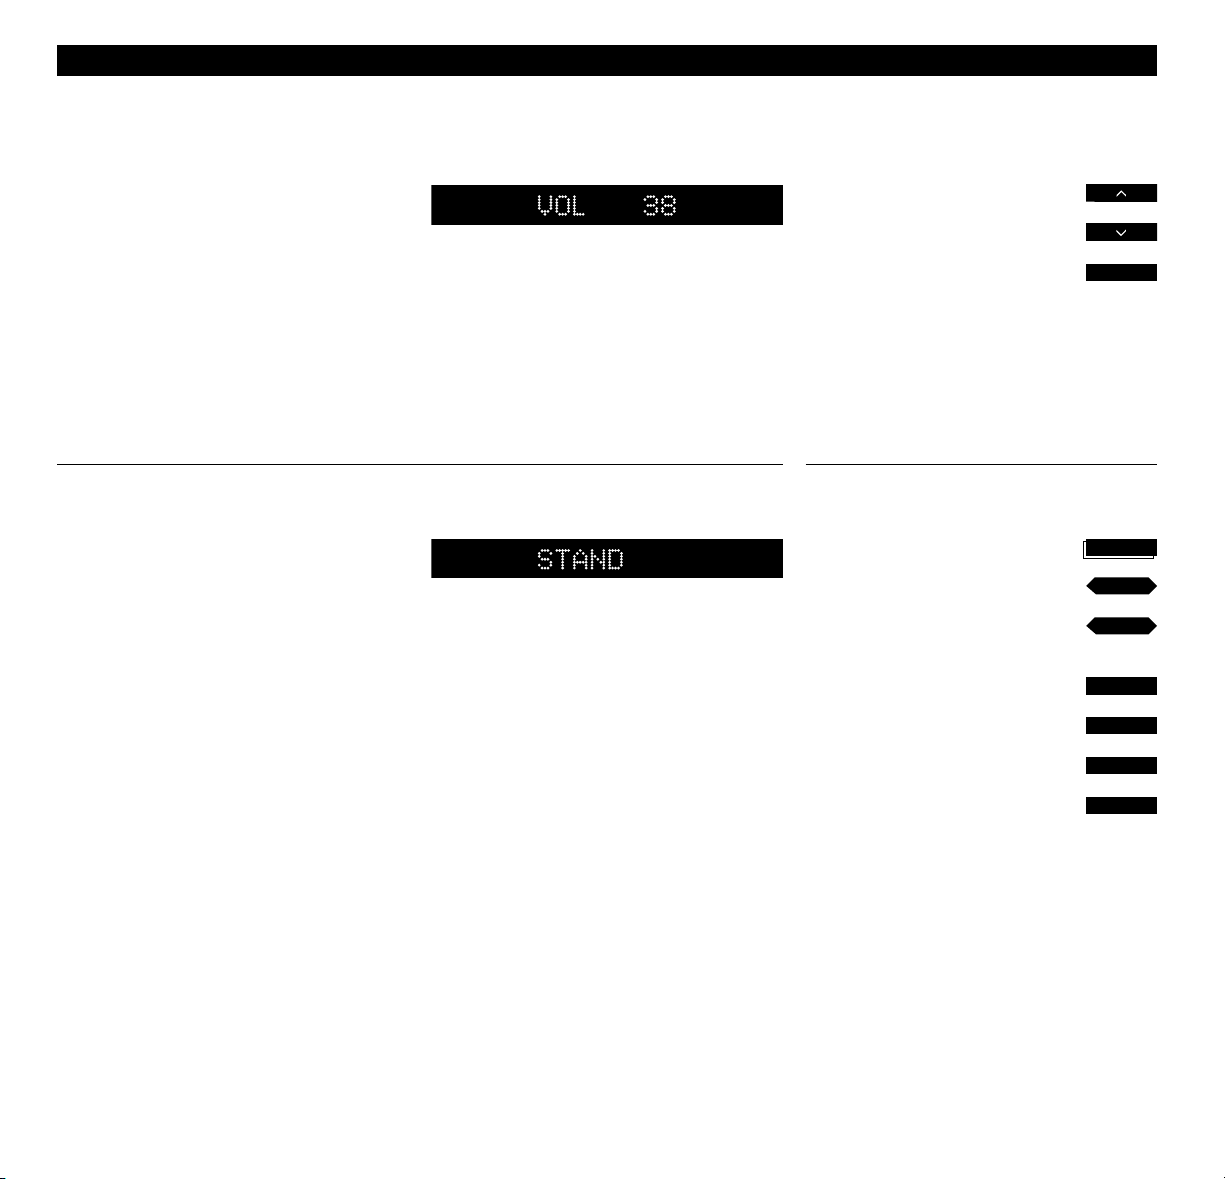
Volume adjustments and switching off
Indication of volume level
You turn the volume level up or down
and silence the speakers via the volume
button on Beo4.
To switch off BeoVision Avant, press
the red standby button •.
Press to raise the volume
Press to lower the volume
Press to switch to standby
•
Page 22

22
Page 23

23
TV, SATELLITE AND TELETEXT
BANG &OLUFSEN
24 Daily operations
25 Program lists
Using the program list, 25
26 Teletext
How to call up Teletext pages, 26
Memory pages, 26
Presetting a Teletext page as a
memory page, 27
Using the basic Teletext functions,
28
Page update, 29
Teletext subtitles , 29
Making video recordings via
Teletext, 30
Using the “Fastext” system, 32
33 Picture and Sound
Adjusting the picture, 33
Adjusting the sound, 34
Switching sound, 35
36 Picture-in-picture
Before you start…
In order to receive Satellite stations, as
described in this section, your
BeoVision Avant must be specially
equipped for Satellite reception.
Page 24

DAILY OPERATIONS
24
Watching a programme
The operations shown on this page are
functions you will be using daily:
• Switching on to a TV program
number
• Switching on to a satellite program
number
• Selecting other programs
• Teletext operation
• Adjusting volume
• Switching off
The program lists described on the next
page may be of help to you when you
select TV or Satellite program
numbers...
BeoVision Avant offers improved
Teletext which reduces the time it
takes to call up Teletext pages.
By presetting the Teletext pages, you
used most often as memory or
favourite pages, you will obtain
greater benefits when using the
Teletext information system*.
*Note: Pages 26-32 give further information
about using Teletext.
Switches on to the TV program
number you were last watching
Switches on to the Sat program
number you were last watching
Press to step through your program
numbers
Press to select a specific program
number (TV 1-99; SAT 1-119)
Switches to Teletext
Press to leaf through the four
memory pages
Use the number keys and key in the
Teletext page number you want
Press to return to watching TV
Raises the volume
Lowers the volume
Switches off the TV
TV LIGHT RADIO
SAT DVD CD
V TAPE RECORD A TAPE
789
456
TEXT
0
MENU
123
LIST EXIT
STOP
GO
TV
SAT
0
TEXT
0
EXIT
9
through
or
•
or
tt
ss
Page 25

25
PROGRAM LISTS
Using the program list
All your TV stations appear in a
program list, which you can call up on
the screen*. This page describes how to
use the program list...
When you call up the TV list, one of the
five pages in the TV list appears, listing
the program numbers 1-19, 20-39, etc.
until 80-99 – and the appropriate
names of the stations if any such exists.
You will always see the page listing the
program number you are currently on.
Follow the procedures to the right of
this page in order to use the list...
*Note: If your BeoVision Avant is equipped to
receive Satellite, a separate program list will exist
for TV and Sat. Both are operated as described on
this page. The Sat program list contains six pages
and 119 program numbers in all.
Press to call up the main menu
The main menu appears…
Press call up the TV list
The page listing the program number
you are currently on appears...
Press to step through the program
numbers in the list one by one
Press to switch to the program
number you have selected
Alternatively...
Press to leaf through the list, page
by page
Key in the number you wish to see,
for example program number 5
To clear a station in the list…
Press to light up the program
number you want to clear
Press the MENU button to call up
the cue Clr? on the screen
Press GO to clear the station, now
you will not be able to call up the
station again
Press any time to remove the menus
from the screen, and return to the
programme you were watching
1 BBC 1
2 BBC 2
3 ITV
4 Sky
5 Super Ch
6 ZDF
7 Children
8 CNN
9 . . . . . . . . . .
10 . . . . . . . . . .
11 . . . . . . . . . .
12 Eurosport
13 . . . . . . . . . .
14 . . . . . . . . . .
15 MTV
16
17
18
19
Press MENU to
clear program
The TV program list – Dotted lines indicate that a
TV station has been stored on that program
number, but it has not been named. Numbers
alone indicate that nothing has been stored on
that program number.
Menu
1 Timer record
2 Timer play
3 TV list
4 Setup
The main menu – if SAT is included in your
system item 4 will be the Sat list, and Setup will
be item 5.
MENU
3
5
MENU
or
then
GO
then
GO
EXIT
or
then
tt
ss
or
then
Page 26

TELETEXT
26
Switches to Teletext
Press to step to one of the four
memory pages
Press to select a specific page,
for example page 302
Alternatively...
Press to step to the next page
Press to step to the previous page
Press to leave Teletext
Alternatively, press a source button,
e.g. TV to leave Teletext
How to call up Teletext pages
Teletext is an information system used
to distribute news, weather forecasts
and other information of general
interest transmitted by some broadcasters.
Press TEXT to see the Teletext transmitted by the TV station you are
currently watching.
The Teletext broadcaster transmits an
index page or table of contents (often
on page 100). It shows the headlines of
the Teletext pages and the relevant
page numbers.
The TV contains four special memory
pages which you can use to preset your
favourite Teletext pages on. Memory
page 1, usually the index page, appears
as the first page when you switch on to
Teletext*.
*Note: If you call up Teletext while you are
watching e.g. a TV programme, leave it, and
return to it again during the same programme,
the page which appears first will now be the page
you called up last.
Memory pages…
Four memory pages are available for each
station you have tuned in to. The first
Teletext page which appears on-screen is the
preset Memory page 1, indicated by the cue
MEMORY 1. Teletext page 100 is preset as
MEMORY 1, page 200 as MEMORY 2, page
300 as MEMORY 3, and page 400 as MEMORY
4.
If you wish, you can change this preset setup
and set your own memory pages.
When you change to e.g. another TV program
number and call up Teletext, the first page
which appears on the screen will either be the
preset MEMORY page 1 or the MEMORY 1
page you yourself have preset.
If you tune in a new station, the memory
pages will be reset to 100, 200, 300, and 400.
TEXT
EXIT
or
tt
ss
3
0
then
2
then
or
Page 27

27
When you access Teletext, BeoVision
Avant provides instant access for both
the four memory pages and any page
you choose to see, as well as their
respective subpages.
Therefore, we recommend that you
preset the pages you use most often as
memory pages in order to get quicker
access to them.
To preset an ordinary Teletext page as
a memory page, follow the procedure
shown to the far right.
Preset memory pages and BeoLink…
If you have BeoLink connected TV sets and
switch to Teletext, the memory pages you
have preset will only appear automatically on
the TV set where they have been preset.
The memory pages, you have preset on e.g.
your main TV set, are not transferred to your
BeoLink connected sets. You have to preset
your memory pages on all your TV sets.
Please note…
The facilities offered by Teletext differ from
country to country, and from one Teletext
broadcaster to the other. For details about
such facilities, we recommend that you consult
the information distributed on-screen or on
paper by your Teletext broadcaster.
Presetting a Teletext page as a memory page…
To preset a current Teletext page on
a memory page...
Press to call up Teletext
Press until STORE is displayed on
Beo4
Press to preset the current page,
for example on memory page 2
TEXT
2
Select the page you want, use the number keys
or
▼ or ▲ to select…
LIST
then
then
then
then
GO
GO
Page 28

> Teletext
28
Using the basic Teletext functions
Once you have found the Teletext
page you want to read, there are
various facilities at your disposal which
make it easier for you to read the
page.
To use each of these functions listed
below, follow the instructions shown
to the left...
STOP/SUBPAGE
Before you use this function, you must call up the
Teletext page of which you want a subpage. A
Teletext page can have a number of subpages.
The subpages are identified by a 4-digit subcode.
Leaf through the subpages by pressing
▲ or ▼ or
key in the number of a subpage.
To retain one of these subpages which “turn”
automatically, press STOP when you get the
page you want. The page is not released until
you instruct the TV to do so by pressing STOP
again.
LARGE
Press LIST to display LARGE, then GO to enlarge
the text so that it becomes easier to read from a
distance.
MIX
Press LIST to display MIX to superimpose the
Teletext page on the TV picture so that you can
see both simultaneously.
REVEAL
You can use the reveal function to reveal a hidden
text on a page. Press LIST to reveal REVEAL* then
GO to reveal concealed text.
*Note: In order to display REVEAL on Beo4, you
must add the function to the Beo4 list of
functions. See Extra functions in Beo4, page 67 for
further instruction.
Call up the Teletext page with the
subpages you want,
Press stop to access subpage
function
Press to see subpages
Alternatively,
Key in the four digits for the
subpage you wish to see,
for example subpage 0005
Press to leave the subpage function
and release the page
Press LIST until LARGE is displayed on
Beo4
Press to enlarge the text in the
upper half of the page
Press GO again to enlarge the text in
the lower half of the page; press
again to return to normal size
Press LIST until MIX is displayed
Press to superimpose the Teletext
page on the TV picture
Press GO again to remove the TV
picture
Press LIST until REVEAL* is displayed
Press to reveal concealed text
Press GO again to conceal the text
STOP
then
0
0
0
5
STOP
then…
Finding a subpage…
LIST
GO
then
LIST
GO
then
LIST
GO
then
or
Page 29

29
Page update
The page update function is used by
the Teletext broadcaster to announce
that the information on a certain
Teletext page has been updated.
You can, for example, make use of this
function when you are watching a TV
programme and want to be told the
minute changes occur on a news page.
To use the page update function,
follow the instructions shown to the
right..
If you want to leave the page update
function before the page has been
updated, press TEXT or GO.
Note: While you are watching the TV programme
waiting for a Teletext page to be updated, don’t
forget that the TV is in the so-called Teletext
mode. This means that if, for example, you key in
a number, the TV will interpret this as if you are
asking for a Teletext page – it starts searching for
the page, and the update function is cancelled!
Call up the relevant Teletext page,
then...
Press LIST until UPDATE is displayed
on Beo4
Press to see the TV picture
When the page has been found, the
cue FOUND appears on the TV
screen
When the page has been updated,
the cue UPDATE appears on the TV
screen
Press to see the page
then
GO
then
GO
Teletext subtitles…
Some TV broadcasters provide Teletext
subtitles for their TV programmes. Such
subtitles are transmitted on a specific
Teletext page.
If you call up the Teletext subtitles
page, the subtitles will be transposed
automatically on the picture of the
current TV programme. The Teletext
subtitles will appear at the bottom of
the TV screen, just as any normally
broadcast subtitles.
You can instruct the TV to insert these
subtitles automatically by presetting
the Teletext subtitles page on the
Teletext memory page 4.
Note: If you preset the subtitles page on memory
page 4, you ensure that the subtitles from
Teletext appear on the screen in accordance with
the picture format you have chosen for the
programme you are watching.
If you do not want the subtitles to appear
automatically any longer, simply store another
Teletext page on memory page 4.
When you are watching TV…
Press to call up Teletext
Press to remove subtitles
To insert subtitles on a specific TV
program number automatically…
Press LIST until STORE is displayed
Press to preset the current page,
on memory page 4
LIST
Call up the Teletext subtitles page
(it is usually indicated on the index page, 100)…
Subtitles will now appear on the TV screen
TEXT
EXIT
4
Switch on to the program number,
then call up Teletext and find the subtitles
page…
LIST
GO
GO
then
Page 30

> Teletext
30
Making video recordings via Teletext
The Video Programming via Teletext
function (VPT) in the video tape
recorder allows you to program a
recording via the Teletext page(s)
which lists TV programmes.
When you are on the Teletext page
listing TV programmes, you can start
programming a recording. Now choose
the programme you want to record.
When you have chosen a programme,
its start time, title and stop time are
highlighted.
When you accept the stop time and as
such accept the programme for
recording, the data from your
recording entry appears over the
Teletext page. Before you store it,
make sure that the information
displayed is correct. You can add to
start or stop times if you wish*.
When you store your recording entry,
the start and stop times of your
recording appear on the status line
together with the indication RECORD.
If you wish you can carry on and make
more recording entries or you can press
a source button or EXIT to leave
Teletext.
*Note: The method of programming described on
this page is valid when PDC/VPS is set to Off or
when PDC/VPS broadcasting signals are not broadcast. Off is the default setting for your BeoVision
Avant.
A Teletext page with the Timer recording facility
activated – PDC/VPS signals are not available.
A status line on top of the page indicates your
recording
Note: You can call up the Timer Index menu for
Timer recordings while you are still on the
Teletext page to check the recording entries you
have made. Press MENU to call up the Timer
index.
Press to switch to Teletext
Call up the Teletext page listing TV
programmes, then...
Press to be able to program a
recording
Press to move the cursor to the
programme you wish to record
Press to accept the start time
Make sure the correct stop time is
highlighted...
Press to accept the stop time for
your recording
Press GO to store the recording
Press to leave Teletext
A cursor appears highlighting the start time of the
first programme on the page…
Alternatively, press
tt or ss to move the cursor
The cursor disappears and a status line appears
over the Teletext page, e.g.
18:55 – 19:40 30.JAN P13 BBCWORLD OK?
If the data is not correct, use
ss or tt to move
the cursor and
▲ or ▼ to reveal the correct data…
GO
then
TEXT
RECORD
or
GO
The status line now indicates your programmed
recording, e.g.
18:55 – 19:40 RECORD
The cursor is placed on the stop time of the
programme you just selected for recording
To program more recordings, continue to select
programmes…
GO
then
or
EXIT
Page 31

31
If PDC/VPS is set to On…
If you have PDC/VPS set to On in the
V.Tape’s Basic setup menu (see page
52-53), the recording procedure is
controlled by the PDC/VPS broadcasting
signals*.
Even though you have set PDC/VPS to
On, the method described to the right
of this page only applies if the PDC/VPS
broadcasting signals accompany the
station you want to record from. If
PDC/VPS is not broadcast with the
station, the method described on the
previous page applies.
Press to switch to Teletext
Call up the Teletext page listing TV
programmes, then…
Press to be able to program a
recording
A cursor appears over the title of the
first programme on the page…
Press to move the cursor to the
programme you wish to record
Then
Press to accept the programme
Press GO to store your recording
TEXT
RECORD
GO
GO
or
*PDC/VPS and Video Programming via
Teletext
The PDC/VPS facility ensures that a TV
programme accompanied by the Program
Delivery Control (PDC) or Video Programming
System (VPS) broadcasting signals will be
recorded in its full length – even if the
programme is delayed or prolonged! If
PDC/VPS is set to On, start and stop times are
controlled automatically on stations which are
broadcast with the PDC/VPS signals.
If PDC/VPS is set to Off instead of On,
recording will start and stop as programmed,
even if the program is delayed or prolonged.
A Teletext page with the Timer recording facility
activated – PDC/VPS signals are available.
On this page it is indicated that you have
accepted the highlighted programme for
recording.
If PDC/VPS is set to On and PDC/VPS
broadcast signals are available…
Alternatively, press
tt to move the cursor
The cursor highlighting the title of the
programme change into a status of your
recording, e.g.
30.JAN P13 ZDF OK?
Check the data, if it is not correct, use
ss or tt
to move the cursor and ▲ or ▼ to reveal the
correct data…
RECORD appears after the title of the programme
you have programmed for recording
To program more recordings, continue to select
programmes…
Page 32

> Teletext
32
Switch to Teletext
Call up a Fastext page…
A small colour bar at the top of the
page indicates that the page is a
Fastext page
Press one of the coloured buttons
to access the Fastext system
Now an extra line appears on top of
the page, indicates the titles of the
four linked pages – each title written
in one of the four colours
Press the coloured button which
matches the colour of the page
you want to see
Press again to leave Fastext
You can now operate Teletext again
in the usual way, or...
Press to leave Teletext
Using the “Fastext” system
Some Teletext broadcasters offer
immediate access facilities, Fastext,
that enable the user to step directly to
one of four different Teletext pages. A
Fastext page is a Teletext page to
which more pages are linked.
Fastext reduces access time to a
number of selected pages and, at the
same time, helps the user find a logical
path through the multiplicity of
Teletext pages.
The Fastext facility (also known as FLOF
= Full Level One Feature) is such a
system. Fastext is supported by the
BeoVision Avant TV.
Whenever you select a Fastext page, a
colour bar appears in the upper righthand corner of the TV screen. The
colour bar only appears if the Teletext
broadcaster is currently providing the
Fastext facility. Press one of the
coloured buttons to access Fastext.
Each linked page or the title of the
page now appears on top of the page,
written in a colour; red, green, yellow,
and blue. You use the coloured buttons
on the Beo4 remote control to call up
the pages.
A Teletext page with the indication that it is a
Fastext page – a small colour bar appears in the
upper right-hand corner of the screen
The titles of the four linked pages appear on top
of the page, each written in a different colour
TEXT
or
or
or
or
then
or
or
TEXT
EXIT
Page 33

PICTURE AND SOUND
33
Adjusting the picture
The picture levels in the BeoVision
Avant are already set to neutral values
which suit most situations, however, if
you wish, you can adjust the picture to
your liking.
When you have made your picture
adjustments, you must store them in
order to make them a permanent
setting.
If you want your picture adjustments to
be temporary, simply remove the menu
by pressing EXIT. The picture levels will
now be reset to their original settings
when you switch off the BeoVision
Avant.
What’s on the Picture menu…
Brilliance... Picture brilliance can be adjusted in
steps of two within a range of 00 to 62; 32 is
the neutral setting.
Colour... Colour intensity can be adjusted in steps
of two within a range of 00 to 62; 32 is the
neutral setting.
Contrast... The contrast level in the picture can
be adjusted in steps of two within a range of 00
to 62; 44 is the neutral setting.
Note: For video sources using the NTSC signal a
fourth option – Tint (colour shade or nuance) will
be available for adjustment.
Call up the main menu
The main menu appears…
Press to call up the Setup menu
if Sat is available, Setup will be
item 5
The Setup menu appears…
Press to select item number 3,
Picture
The Picture menu appears...
Press to adjust the picture as
required
Press to move the cursor from item
to item in the menu
Press to store your adjustment as a
permanent setting of the picture
Alternatively,
press EXIT instead of GO if you do
not want to store your adjustment
Press to remove the on-screen menus
Menu
1 Timer record
2 Timer play
3 TV list
4 Setup
Setup
1 Tuning
2 Sound
3 Picture
4 Stand
5 Source
6 Menu
7 Clock
8 V.Tape
The Picture menu allows you to adjust Brilliance,
colour, and Contrast. In some instances, a forth
adjustment will be available Tint.
Brilliance Colour Contrast
32 32 44
Main menu
The Setup menu
Make the adjustments you find necessary…
MENU
4
3
EXIT
GO
or
then
or
then
then
tt
ss
Page 34

34
Adjusting the sound
The sound levels in the BeoVision
Avant are already set to neutral values
which suit most environments where
BeoVision Avant is placed e.g. against a
wall. You can, of course, choose to
adjust the sound levels to your liking.
You can adjust volume level directly on
the Beo4 remote control at any time
without calling up a menu.
To adjust other elements of sound,
bass, treble, loudness and balance in
BeoVision Avant speakers, you must
call up the Sound menu.
The Sound menu offers two options:
• Adjust, allows you to call up a menu
to adjust volume level, bass, treble,
and Loudness
• Speakers, allows you to call up a
menu to adjust loudspeaker balance.
Once you have finished your adjustments, you can store them in order to
make them a permanent setting. If you
want to make your sound adjustments
temporary, simply remove the menu by
pressing EXIT. The sound levels will
now be reset to their original levels
when you switch off the BeoVision
Avant.
Menu
1 Timer record
2 Timer play
3 TV list
4 Setup
Sound
1 Adjust
2 Speakers
Setup
1 Tuning
2 Sound
3 Picture
4 Stand
5 Source
6 Menu
7 Clock
8 V.Tape
The Adjust menu – for adjustment of sound
elements
The main menu
The Setup menu
The Sound access menu
Call up the main menu
The main menu appears…
Press to call up the Setup menu, if
Sat is available, Setup will be item 5
The Setup menu appears…
Press to select item number 2, Sound
The Sound access menu
appears...
Select the item you want in that
menu
When the Sound menu of your
choice appears...
Press to adjust the sound as
required;
or to set the loudness function to
On or Off
Press to move the cursor from item
to item in the menu and adjust
loudspeaker balance in the Speakers
menu
Make your adjustments…
Press to store your adjustment as a
permanent setting of the sound
Alternatively, press EXIT instead of
GO if you do not want to store your
adjustment
Press to remove the on-screen menus
> Picture and sound
Volume Bass Treble Loudness
32 0 0 On
The Speakers menu – for adjustment of
loudspeaker balance
Balance
0
MENU
4
2
1
EXIT
2
or
then
or
then
or
then
tt
ss
GO
then
Page 35

35
What’s on the Adjust menu…
Volume… The volume level can be adjusted in
steps of two within a range of 00 to 72.
Bass… Bass tone can be adjusted in steps of one
within a range of -6 to +6. 0 is the neutral
setting.
Treble… Treble tone can be adjusted in steps of
one within a range of -6 to +6. 0 is the neutral
setting.
Loudness… Loudness can be set to On or Off.
The loudness function is used to compensate
for the human ear’s lack of sensitivity to high
and low frequencies. It boosts the low and the
high frequencies when you are listening to low
volume levels so that the music becomes more
dynamic.
What’s on the Speakers menu…
Balance… The loudspeaker balance can be
adjusted by a maximum of 6 steps to the left or
to the right. 0 is the neutral setting.
Speakers menu and surround sound…
If your BeoVision Avant is equipped with a
surround sound module, item number two in the
Sound menu, Speakers, gives access to calibrating
your surround sound speaker setup as a
permanent setting instead. See how on pages
15-16 in the Setting-up guide, Calibrating the
speaker balance.
To adjust speaker balance temporarily between
the five speakers in a surround sound setup,
please refer to page 64, Switching speakers, in the
section about BeoVision Avant and AV systems.
Switching sound, mono, stereo, or another language?
Several types of sound may be
available for the TV (or satellite)
programme you are watching, for
example both stereo and mono sound,
or two or three different languages.
While you are watching a programme,
you may switch between the types of
sound and the languages that are
currently transmitted.
The various types of sound which are
available will be displayed on the
BeoVision Avant display as you
proceed.
Note: In the menus for tuning in TV stations or
satellite stations, your favourite type of sound can
be stored on the program number. You will then
hear that particular type of sound (provided it is
transmitted), whenever you switch on to the TV or
satellite program. See how it is done on pages 1016, Tuning in.
Press until SOUND* is displayed
Press to see the current type of
sound in the Avant display
Press repeatedly to switch sound
(stereo/mono) or language in a
multi-language program
*Note: In order to display SOUND on
the Beo4 display, you must add it to
the Beo4 list of functions, please
refer to Extra functions in Beo4 on
page 67 in this guide.
LIST
GO
then
GO
then
Page 36

36
Watching two programmes simultaneously...
The picture-in-picture function enables
you to see two programmes on screen
simultaneously, for example two
different TV programmes, a TV and a
satellite programme, a video tape
playback and a TV programme, etc...
While you are watching e.g. TV, you
can prompt your BeoVision Avant to
insert a small picture on the screen of
the source and program number you
then choose.
The sound in the loudspeakers always
follows the large picture, but your
remote control commands will all be
directed to the small picture.
You can move the small picture to any
corner of the screen – just press the
coloured button pointing in the
direction you desire.
Press LIST until P-IN-P* is displayed
on the Beo4 display
Select the source you want to see in
the small picture
Press LIST until P-IN-P* is displayed
Moves the small picture to the
respective corner on the TV screen
Swaps the large and the small
pictures around
Your commands is directed to the
small picture – the sound always
follows the large picture
Press the button for the source you
wish to see to stop the picture-inpicture function
Please note…
The picture-in-picture function requires that
your BeoVision Avant is equipped with a
picture-in-picture module.
PICTURE-IN-PICTURE
LIST
TV
V TAPE
or
SAT
or
then
Beo4 remote control commands will now be
directed to the small picture
LIST
then
or
or
or
0
TV
V TAPE
or
SAT
or
*Note: If P-IN-P is not available, you must add it
to the Beo4 list of functions, see Extra functions in
Beo4, page 67 in this guide.
Page 37

37
VIDEO TAPE RECORDER
BANG &OLUFSEN
38 Daily operations
Video playback, 38
40 Timer recording
Making a Timer recording, 40
Timer index for Timer recordings,
42
43 Instant recording
Nice to know about recording, 44
45 Special types of recordings
Recording sound alone, 45
Copying video tapes, 46
Copying from a CamCorder, 47
48 Special video functions
Adjusting the video picture –
tracking, 48
Selecting sound track during
playback, 49
50 Extra video equipment
Registering extra video
equipment, 50
52 Setting your preferences for the
video tape recorder
Load a video tape…
Push the tape into the compartment in the centre
below the picture screen, through the door until
you feel the mechanism drawing it into the
compartment.
Press the EJECT button on the operation panel
behind the BeoVision Avant display bar to unload
the tape.
Note: Never leave a tape in the compartment
opening! The open flap keeps the system alert,
wasting energy. The flashing standby indicator
will remind you to unload or load the tape.
Page 38

38
DAILY OPERATIONS
TV LIGHT RADIO
SAT DVD CD
V TAPE RECORD A TAPE
789
456
TEXT
0
MENU
123
LIST EXIT
STOP
GO
Video playback
Please note…
We recommend that you read the section,
‘Preferences for the video tape recorder’ on pages
52-54, as it gives relevant information about the
functions performed by the video tape recorder.
Use the Beo4 remote control to
operate your BeoVision Avant video
tape recorder.
While you are playing a tape, you can
turn the volume up or down as you
like; or mute the speakers.
You can select which tracks to play on
the video tape by stepping from track
to track.
Whatever operation you are
performing, pressing the STOP button
twice always stops the video tape
recorder, pressing the GO button starts
or resumes playback.
Press to start playing the tape you
have loaded
The picture appears on the screen
within a few seconds
Press to raise the volume
Press to lower the volume
Plays the next track on the tape
Plays the current track again – press
twice to play the previous track
Press to find a specific time on the
tape directly, e.g. 2:45, and then
play
Pauses the tape with a still picture
on the screen
Press again to stop playback
Press any time to start/resume
playing the tape
V TAPE
2
4
5
STOP
STOP
or
or
then
GO
Recordings and picture formats…
Video tape recordings will usually be played
back in the 15:9 format. If ”noise” appears
around the picture, you may have to change
the picture format to e.g. the 14:9 format
which lets the BeoVision Avant curtains hide
this ”noise”. See page 56-57 for more
information on formats.
Page 39

39
With the tt and ss buttons and the
four coloured buttons, you can wind
and rewind the tape, cue forwards or
backwards through the tape or play
the tape in slow motion.
Unless otherwise instructed, the video
tape recorder plays the tape through
to the end, rewinds the tape back to
the beginning, and stops automatically.
Press the standby button • to switch off
the BeoVision Avant video tape
recorder. If the video tape recorder is
left unused for more than 8 minutes, it
switches off automatically.
The display indicates that a tape is being fast
forwarded with the counter position shown. The
displayed counter indication can be read out as
Time left, how much playing time is left on the
tape, or Time used, how long the tape has been
playing.
The display indicates that the video tape recorder
is cueing, winding forwards through the tape
with a picture on the screen, double arrows >> or
<< indicate the fast cue function.
The display indicates that the video tape recorder
is playing in slow motion – forwards, double
arrows >> or << indicate ”fast” slow motion.
Press to fast forward
Press to rewind the tape
Press to cue forward through the
tape
Press again to accelerate the speed
Press to cue backwards through the
tape
Press again to accelerate the speed
Press to play the tape in slow
motion
Press again to accelerate the speed
Press to play the tape backwards in
slow motion
Press again to accelerate the speed
Press to switch to standby
tt
ss
•
Please refer to pages 52-54, Preferences for the
video tape recorder, to find more information
about the Time left, and Time used counter
position indications.
Note: If you are playing back NTSC tapes, and
press STOP once, the video tape recorder will stop
entirely, there is no pause or still mode. It will not
be possible to play an NTSC tape in slow motion –
pressing the red and blue button on Beo4, will
produce no reaction whatsoever. The counter
position will not be displayed in the display, when
you are playing back NTSC tapes.
Page 40

TIMER RECORDING
40
Making a Timer recording
Before you start…
Before you make a Timer recording, make sure
that the built-in clock in the BeoVision Avant is set
to the correct time. See how on page 17.
Call up the Timer record menu to make
a recording which starts and stops
automatically at any time you specify.
You can record TV and satellite
programmes, as well as radio
programmes – if a compatible Bang &
Olufsen audio system is connected to
your BeoVision Avant.
You can call up Teletext to assist you
when you are making your recording.
See page 30-31 for further instruction
of how to use Teletext. You can also
call up the Timer Index to check or
delete your Timer recordings.
On the next page, the various options
available for each item in the menu are
listed...
Note: Whenever one or more timer recordings are
waiting to be executed, you will see the display
TIMER light up on the BeoVision Avant display
bar.
Note: Pressing and holding down the V TAPE
button on the close-up operation panel on
BeoVision Avant cancels a timer recording in
progress and switches the video tape recorder off.
Source Pr Start Stop Date
TV 12 14:30 - 15:30 23 Aug OK
Press MENU for Teletext programming
Menu
1 Timer record
2 Timer play
3 TV list
4 Setup
The main menu
The Timer record menu allows you to program a
recording. You can program a recording which is
to take place on a specific date or a recording
which is to take place on specific days at the same
time.
Call up the main menu
The main menu appears…
Press to select the first item, Timer
record
The Timer record menu appears,
you can start programming...
Press to reveal options for the
items in the menu
Alternatively,
Use the number buttons to fill in
program number, start and stop
times etc.
Press to move from item to item in
the menu
If you want to make a recording for
specific days, move to the item
Date…
Press to change the item Date to
Days
When you have filled in the
necessary information in the menu...
Press to accept the information
Press to store your Timer recording
Press to call up Teletext to assist your
programming
Press to call up the Timer index;
MENU
0
MENU
9
through
MENU
MENU
then
or
or
tt
ss
GO
then
GO
then
GO
While Start is lit up in the Timer record menu…
then
While Pr or Source are lit up in the menu…
then
Page 41

41
Source (Which source do you want to record?)
The below sources may be available:
TV... For recording of TV programmes.
SAT... For recording of satellite programmes.
Radio... For recording of radio programmes
(audio only) from a Bang & Olufsen
audio system.
AV... For recording of the signal from any extra
video equipment connected to the
BeoVision Avant AV socket.
Note: The various options appear if they are
actually present in your BeoVision Avant setup.
Pr (Program number)
You must fill in the program number you want to
record from.
Note: If you press the MENU button while either
Pr or Source are lit up, you get access to the
special Timer Index listing your Timer recordings.
See the following page for further information.
Start and Stop (Start and stop times)
Key in the times you want the recording to start
and stop, key in e.g. 21:00 for 9 pm and 22:00 for
10 pm.
Note: While Start is lit up, you can press the MENU
button and call up Teletext to assist you with your
programming – see how on page 30-31.
Date or Days (Recording date or days)
Fill in the date on which you want the recording
to take place.
The video tape recorder writes:
Jan... for January
Feb... for February
Mar... for March
Apr... for April
May... for May
Jun... for June
Jul... for July
Aug... for August
Sep... for September
Oct... for October
Nov... for November
Dec... for December
To fill in days, press the MENU button and Date
changes to Days. You can then select specific
weekdays on which you want recording to take
place.
At first, all the weekdays will be displayed:
M... for Monday
T... for Tuesday
W... for Wednesday
T... for Thursday
F... for Friday
S... for Saturday
S... for Sunday
Press
tt to step through the days, and press ▼ to
remove any day you don’t want. When the
weekdays, on which you want the recording to
take place, are displayed, press GO to accept the
days.
OK...
When OK is lit up, press GO to store your Timer
recording instruction.
Instant timer recording…
If you call up the Timer record menu while you
are watching a TV programme, the video tape
recorder will offer to record the TV
programme you are watching – starting now
and continuing for one hour.
If you accept this programming by pressing
GO, the recording will start immediately and
go on for the next hour. (You can of course
key in another stop time before pressing GO.)
Page 42

> Timer recording
42
Press to call up the main menu
The main menu appears…
Press to select the first item, Timer
record
The Timer record menu appears,
Press to move the cursor to Pr or
Source
Press to call up the Timer index
The Timer Index appears
To edit a Timer recording in the
index…
Press until the Timer you want is lit
up in red
Press to start editing the Timer
The Timer record menu appears, to
edit use
▲ or ▼ to reveal new
options or use the number keys to
key in new values. Use
tt or ss to
move from item to item…
Press to store the Timer again
Press to remove the Timer index
To delete a Timer in the index…
Press until the Timer is lit up in red
Press to reveal Clear? instead of the
date
Press to delete the Timer
Alternatively,
Press to keep the Timer
The Timer index for Timer recordings
Timer index
TV 15 12:30 – 13:30 28 Aug
TV 8 20:00 – 21:15 28 Aug
Sat 101 6:00 – 7:15 26 Aug
TV 15 10:00 – 11:00 M . WT . . .
Press MENU to clear timer
The Timer index lists the timer
recordings you have made that are still
waiting to be executed (eight
programming entries at the most).
You call up the Timer index via the
Timer record menu by pressing MENU
when the items Pr or Source are lit up.
The Timer index allows you to check
the Timers, for example to make sure
that they do not overlap; but it also
enables you to edit or delete a Timer...
Note: The BeoVision Avant also has a Timer Index
for the Timer Play and Timer Standby functions.
Please refer to pages 60 for further information.
Source Pr Start Stop Date
TV 12 14:30 - 15:30 23 Aug OK
Press MENU for Teletext programming
Menu
1 Timer record
2 Timer play
3 TV list
4 Setup
The main menu
The Timer record menu
In the Timer index you can check and delete, that
is clear, your Timer recordings. Each timer
recording waiting to be executed is listed in the
Timer index. When 8 timers are listed, you cannot
call up the Timer record menu to program a new
recording – instead you will see the Timer index.
MENU
MENU
EXIT
EXIT
MENU
then
ss
then
GO
then
GO
then
GO
then
GO
GO
Page 43

INSTANT RECORDING
43
Instant recording
Use the Beo4 remote control to make
an instant recording onto tape.
First, find the programme you want to
record, then start your recording. The
video tape recorder starts recording
instantly.
When you record TV programmes in
this way, the video tape recorder does
all the work on its own. This means
that you can switch to another TV
program number (or Sat program
number) and watch any programme
you like – or you may even switch off
the TV. Whatever you choose to do,
your recording just continues.
Just remember that in order to return
to your recording, you must press the
V TAPE button first .
Unless otherwise instructed the video
tape recorder does not stop recording
until the tape runs out.
Note: If you want to record a Satellite
programme, you cannot watch another Satellite
program number at the same time – it is only your
TV program numbers that are stored in the video
tape recorder – but you can switch to TV and
watch a TV programme while the recording is
progressing.
Switch on to the programme you
want to record...
Press to make the video tape
recorder ready for recording
Press again to start recording
You may now press the TV (or SAT)
button to watch another programme
Press to pause the recording
Press to resume recording
Press to stop recording and return to
watching (for example) TV
Alternatively,...
Press to stop recording and switch
off the entire system at once
TV LIGHT RADIO
SAT DVD CD
V TAPE RECORD A TAPE
789
456
TEXT
0
MENU
123
LIST EXIT
STOP
GO
> See pages 45-47 for information about special
types of recording and special video functions.
RECORD
RECORD
then
V TAPE
STOP
RECORD
then
TV
or
•
Page 44

44
> Timer recording
Nice to know about recording…
• Recordings can be made at two speeds in the
BeoVision Avant – SP Standard play and LP
Long Play. See pages 52-54, Preferences for
the video tape recorder, for further
information.
• If you want to record a specific TV programme
directly from the TV, you must instruct the
video tape recorder to do so in the special
V.Tape tuning menu. Please refer to page 12,
Video tape recorder and TV stations, for
further information.
• If the tape you have loaded is record
protected, it will be ejected automatically
whenever you try to start recording!
• If you have adapted the picture to the
BeoVision Avant picture screen, this will have
no influence on your recording.
• Unless otherwise instructed, the video tape
recorder does not stop recording until the
tape runs out. If this happens, the tape will be
rewound to the beginning.
Page 45

45
SPECIAL TYPES OF RECORDING
Recording sound alone
The BeoVision Avant video tape
recorder can record sound alone –
without any pictures. The sound
recorded will be of very high quality.
When the video tape recorder records
sound alone, it automatically records at
half the usual speed (LP). This enables
you to record uninterruptedly for up to
eight hours if you use an E-240 tape.
Such ‘audio-only’ recordings can be
made from an audio source in your
Bang & Olufsen audio system. You can
also record the sound from your
satellite radio programmes in this way.
Recording from audio system…
There are two ways of recording sound from your
Bang & Olufsen audio system on video tape. The
method you use depends on the way your Bang &
Olufsen audio system is used with the BeoVision
Avant:
• Method 1 – Audio and video system
Your loudspeakers are connected to the audio
system (for more information of such a setup,
see page 65).
• Method 2 – Surround sound AV system
Your loudspeakers are connected to the
BeoVision Avant (for more information of this
setup, see pages 62-64).
Recording from satellite radio…
To record satellite radio programmes on video
tape, just switch on to the programme and press
RECORD twice on Beo4 to start recording. As
described for Method 1 – Audio and video system.
RADIO
3
RADIO
3
V TAPE
STOP
TV
then
RECORD
RECORD
then
RECORD
RECORD
then
LIST
then
GO
LIST
then
GO
Method 1 – Audio and video system:
Press LIST until AV* is displayed
Press to activate the audio/video
function
Press to start playing the audio
source you want to record, for
example radio program number 3
The BeoVision Avant is now in audio mode
Press to switch the video tape
recorder to recording pause
Press again to start recording
Method 2 – AV system:
Start playing the source you want
to record, for example radio
program number 3
Press LIST until AV* is displayed
Press to activate the audio/video
function and use the opposite
recorder
Press to switch the video tape
recorder to recording pause
Press again to start recording
To pause and stop recording…
Press to pause recording
Press e.g. TV to stop recording
entirely and return to normal source
operation
*Note: In order to display AV on Beo4, you must
add the function to Beo4’s list of functions, please
refer to page 67 in this guide.
Page 46

46
Copying video tapes
Via the AV socket on the back of the
BeoVision Avant, you can copy tapes
directly from an extra video tape
recorder, or from a DVD or CDV player
onto a tape in the BeoVision Avant
video tape recorder. Using only Beo4 to
control the process.
Connect the extra video tape recorder
to the AV socket and register it in the
BeoVision Avant Source menu, see
p.50, Extra video equipment, for
further instruction.*
*Note: See p. 12, Expanding your system, Auxiliary
equipment, in the Setting-up guide for
instructions of how to connect extra video
equipment.
While the tape is being copied, you can
watch a TV programme or switch off
the TV. Press V TAPE if you wish to
return to the copying process.
> Special types of recording
LIST
GO
then
RECORD
RECORD
TV
then
then
DVD
or
Switch signal from an extra video tape recorder,
DVD or CDV player to the TV...
Press until V.TAPE2* is displayed
Pictures from the extra video tape
recorder appear on the TV screen
Press to start a DVD or CDV player
Press to prepare BeoVision Avant for
recording
Press to record
Use V TAPE and STOP to pause the recording,
press RECORD to resume recording…
Press e.g. TV or another source
button to stop the recording entirely
*Note: In order to display V.TAPE2 on Beo4, you
must add the functions to the Beo4 list of
functions, see Extra functions in Beo4, page 67 for
further instructions.
Page 47

47
Copying from a CamCorder
In order to copy your CamCorder
recordings onto a video tape in the
BeoVision Avant, you have to connect
your CamCorder to the easy-access
sockets placed on the back of the
BeoVision Avant below the local
operation panel and start playback on
your CamCorder.
Then start recording via Beo4. While
the tape is being copied, you can watch
a TV programme or switch off the TV.
Press V TAPE to return to the copying
process.
Note: The actual recording must be operated with
the Beo4 remote control, but at any time during
the recording, CamCorder playback (pause, stop,
play, etc.) can be operated as usual (see how in
your CamCorder User’s guide).
Connect and start your CamCorder…
then
Press to prepare BeoVision Avant
for recording
then
Press to start recording
Use V TAPE and STOP to pause the recording,
RECORD to resume recording and a source button
e.g. TV to stop the recording entirely…
RECORD
RECORD
PHONES R L VIDEO S–VHS
BeoVision Avant easy-access socket panel
Just below the operation panel on the back of
BeoVision Avant, you will find a small socket
panel conveniently placed for connection of
headphones and CamCorder. The sockets marked
L, R, VIDEO, and S-VHS are for connection of a
video camera.
Page 48

SPECIAL VIDEO FUNCTIONS
48
Tracking Sharpness
+6 0
Adjusting the video picture – tracking
Please note…
Tracking adjustment will be carried out
automatically when a new tape is played. You can
instruct the video tape recorder to carry out such
an automatic tracking adjustment any time during
playback via the Beo4 remote control. In a few
instances, however, a more thorough adjustment
of the picture may be necessary...
Streaks in the picture or noise in the
sound may be due to imprecise
tracking of the video tape. This is seen
most often when you play back prerecorded tapes or tapes recorded on
another video tape recorder.
You can carry out tracking adjustment
at any time during normal playback.
You can adjust any jitter (vertical
flitter) occurring in a still picture when
the video recorder is paused and the
still picture is on the screen.
To adjust the video picture, you must
call up the V.Tape Adjust menu and
adjust as required.
Menu
1 Timer record
2 Timer play
3 TV list
4 Setup
V.Tape
1 Adjust
2 Basic Setup
Setup
1 Tuning
2 Sound
3 Picture
4 Stand
5 Source
6 Menu
7 Clock
8 V.Tape
The main menu
The Setup menu
The V.Tape access menu
The V.Tape Adjust menu – allows you to adjust
the video picture:
Tracking... can be adjusted within a range
of +/- 18.
Sharpness... can be adjusted within a range of
+/- 3. Adjust settings for S.VHS and VHS v.tapes
separately if the quality of the recording or
playback is poor.
Jitter... can be adjusted within a range of +/- 18.
Jitter only appears on the menu when you have
a still picture on the screen.
Press to call up the main menu
The main menu appears…
Press to call up the Setup menu, if
Sat is available Setup will be item 5
The Setup menu appears...
Press to select item 8, V.Tape
The V.Tape access menu
appears...
Press to call up the V.Tape
Adjust menu
The V.Tape Adjust menu
appears…
Press to adjust as required
Press to move from item to
item in the menu
Press to remove the menu from the
screen
MENU
4
then
8
EXIT
then
GO
then
or
then
or
then
tt
ss
Page 49

49
Using Beo4 tracking adjustment directly…
As an easy alternative to the V.Tape
Adjust menu, use the Beo4 tracking
adjustment function: Find TRACKNG in
the Beo4 display by pressing LIST
repeatedly, then press
▲ or ▼ to adjust
as required.
When you use this function, there will
be no menu available on the screen to
guide you.
Alternatively...
Press until TRACKNG* is displayed
Press to adjust the video picture as
required
LIST
then
or
*Note: In order to display TRACKNG on Beo4 you
must add the function to the Beo4 list of
functions, see Extra functions in Beo4, page 67 for
further instructions.
Selecting sound track during playback
Recordings are always made with both
a Hi-Fi and a linear sound track. During
playback, the video tape recorder
automatically reproduces the Hi-Fi
sound track, unless otherwise
instructed.
If you are playing back a recording of a
dual language programme, you can
select either of the two languages.
Note: If you are playing back a ‘worn’ Hi-Fi tape,
the Hi-Fi sound may be of a poor quality, you can
then switch to the mono sound track to achieve
an improved quality. You can, though, try the
tracking adjustment function to improve the
sound (see the previous page).
The current sound mode is indicated in the
BeoVision Avant display:
STEREO Hi-FI sound track
MONO Linear sound track
MONO-1 Left sound channel
(language 1)
MONO-2 Right sound channel
(language 2)
Press LIST until SOUND* is displayed
Press GO repeatedly to switch
between the various sound tracks
on the tape
*Note: In order to display SOUND on Beo4 you
must add the function to the Beo4 list of
functions, see Extra functions in Beo4, page 67
for further instructions.
LIST
GO
then
Page 50

EXTRA VIDEO EQUIPMENT
50
Registering extra video equipment
You can connect extra video
equipment to the AV socket* on the
back of the BeoVision Avant.
Any extra video equipment connected
to the AV socket must be registered
into the AV Source menu. Display the
different options and press GO once
you have found the option matching
the equipment you have connected.
*Note: Please refer to the section Expanding your
system, page 12 in the Setting-up guide for
further information about the AV socket.
Note: When you tune in to a TV station via your
decoder number 2, you must set the item Decoder
in the TV tuning menu to 2.
If only one decoder is connected to the BeoVision
Avant connect it to the socket marked Decoder –
not the AV socket.
Menu
1 Timer record
2 Timer play
3 TV list
4 Setup
Setup
1 Tuning
2 Sound
3 Picture
4 Stand
5 Source
6 Menu
7 Clock
8 V.Tape
The main menu
The Setup menu
The Source menu for the AV socket gives you the
following options to register the extra
equipment you may have connected to the AV
socket, select...
Non B&O V.Tape2… for a non-Bang & Olufsen
video tape recorder
V.Tape2… for a Bang & Olufsen video tape
recorder
S-VHS V.Tape2… for a Super-VHS video tape
recorder
DVD… for a DVD or CDV player
Decoder-2… for a second decoder
Special decoder… for a special decoder
Door camera… for a door camera (this option
only appears, if your TV is equipped with a
P-in-P module)
V.AUX… for other auxiliary equipment
AV
Non B&O V.Tape2
Press to call up the main menu
The main menu appears…
Press to call up the Setup menu, if
Sat is available Setup will be item 5
The Setup menu appears…
Press to select item 5, Source
The AV Source menu appears...
Press repeatedly to display the cue
for the video source you have
connected
Press to register the source
Press to remove the on-screen menus
MENU
4
5
EXIT
then
GO
then
Page 51

51
Switching on and using extra
equipment…
• To switch on a video tape recorder number
2, press LIST to display V.TAPE2* on Beo4,
then press GO.
• To switch on a DVD/CDV player press DVD
on Beo4.
• To switch on a DVD/CDV player press LIST to
display DVD* or CDV*, then press GO.
• The door camera picture may appear
automatically as a picture-in-picture
function on the TV screen, if your TV is
switched on, when the door bell activates
the door camera.
If your TV is switched off when you hear the
door bell, switch your TV on to see the door
camera picture. To remove the door camera
picture, press TV or another source button
on Beo4.
• To activate the other auxiliary equipment,
press LIST to display V.AUX*, then press
GO.
*Note: In order to display V.TAPE2 and V.AUX
on Beo4, you must add the functions to the
Beo4 list of functions, See Extra functions in
Beo4, page 67 for further instructions.
Page 52

52
PREFERENCES FOR VIDEO TAPE RECORDER
Counter Tape Speed PDC/VPS Marker
Timed used 240 SP On On
Menu
1 Timer record
2 Timer play
3 TV list
4 Setup
V.Tape
1 Adjust
2 Basic Setup
Setup
1 Tuning
2 Sound
3 Picture
4 Stand
5 Source
6 Menu
7 Clock
8 V.Tape
The main menu
The Setup menu
The V.Tape menu
The Basic setup menu for the video tape recorder
is for setting up special preferences for the video
tape recorder.
Setting your preferences for the video tape recorder
To gain full benefit of the functions
described for the video tape recorder,
you must enter your special preferences for the video tape recorder into
its Basic setup menu.
When you have entered your preferences, press GO to accept and store
them in the video tape recorder.
Please refer to the next page for information about each item in the menu...
Note: Depending on the function you wish to use,
you may have to change your preferences in the
Basic setup menu from time to time.
Press to call up the main menu
The main menu appears…
Press to call up the Setup menu, if
Sat is available, Setup will be item 5
The Setup menu appears…
Press to select item 8, V.Tape
The V.Tape menu appears...
Select item number 2, Basic setup
The Basic Setup menu for the
video tape recorder appears...
Press to reveal options for the items
in the menu
Alternatively,
use the number keys to key in values
for an item
Press to move from item to item in
the menu
Fill in the information, you find
necessary...
Press to store them in the video
tape recorder
Press to remove the on-screen
menus
MENU
4
then
8
2
EXIT
GO
then
or
or
tt
ss
0
9
through
Page 53

53
What’s on the V.Tape Basic setup menu…
Counter (displayed counter indication)
The video tape recorder calibrates the tape – that
is, registers the position on the tape during
playback, recording and winding.
This information will be read out in the BeoVision
Avant display. The information thus read out can
be set to: Time used or Time left:
Time used... Tells you how long (hours and
minutes) the tape has been playing. This
counter indication is always reset to 0:00 when
a tape is loaded or rewound to the beginning.
Time left... Tells you how much playing time
(hours and minutes) is left on the tape. The
video tape recorder automatically registers the
length of the tape you have loaded – provided
the tape is of standard length. If you load a
nonstandard tape, you must specify the tape
length yourself against the item Tape (see how
below).
Tape (tape length)
The length of the tape you have loaded is
registered automatically, provided the tape is of
standard length, and it will be written out against
the item Tape.
To enter the length of the tape yourself. Press
▲
or ▼ until the correct tape length is displayed.
Alternatively, key in the length (minutes of
playing time) using the number keys.
This function is useful if you use nonstandard
tapes and wish to make use of the Time left
counter indication (see above). Tape lengths from
30 to 300 minutes can be keyed in.
Speed (tape speed)
Recordings can be made at two different speeds:
SP... Standard play – 3 hours for an E-180 cassette.
Select this speed for optimum picture quality.
LP... Long play – 6 hours for an E-180 cassette.
The video tape recorder selects this speed
automatically for audio-only recordings.
In playback, the video tape recorder adjusts
automatically to the speed at which the tape was
recorded.
PDC/VPS – Program Delivery Control/Video
Programming System
The PDC/VPS facility enables you to make use of
the VPS and PDC broadcast signals accompanying
TV programmes in some countries.
The PDC/VPS facility ensures that a TV programme
accompanied by the VPS or PDC signals will be
recorded in its full length – even if the
programme is delayed or prolonged!
The PDC/VPS facility only applies when you are
programming Timer recordings via Teletext. Timer
recordings via the Timer record menu, see pp.40-
41, are executed in accordance with the start and
stop times you have specified, e.g. a Timer
recording from 8 pm (20:00) to 12 pm (24:00).
On... Cuts the PDC/VPS facility in
Off... Cuts the PDC/VPS facility out
If the PDC/VPS facility is not cut in, recording will
start and stop as you program, even if the
programme is delayed or prolonged.
For further information about the PDC/VPS
facility, please refer to p.30-31, Making video
recordings via Teletext.
Marker (track identification marks)
If you want to use the function in the video tape
recorder which enables the video tape recorder to
search for tracks on a tape – Marker must be set
to On during recording.
This means that each separate recording (track)
on the tape will be encoded with a special signal
(track mark) by which it can later be identified.
If you do not want the track marks to be inserted,
set Marker to Off instead.
> Note: The items SECAM sys and Play sys only
appear in BeoVision Avant video systems sold in
certain markets. If they appear in yours, please
refer to the next page for further information.
Page 54

> Preferences for video tape recorder
54
SECAM sys (SECAM system – recording)
This item allows you to select the type of SECAM
system you wish to use, generally, for recording
on to your video tapes:
PAL... Standard setting – select it to achieve a
better picture quality on your recordings. When
you record a SECAM TV programme, the SECAM
signal is transformed into a PAL signal.
SECAM... Ensures that your recordings will be
made in accordance with the SECAM system,
and should therefore be selected for the
recording of SECAM TV programmes.
MESECAM... Should only be selected if you want
to be able to play back your recordings of
SECAM TV programmes on a PAL video
taperecorder. You will then get a modified
PAL/SECAM recording on your tapes.
Press
▲ or ▼ to change.
Play sys (colour system – playback)
This item enables you to select a specific colour
system, manually, when playing back a particular
video tape:
AUTO... Is the standard setting and should be
selected in most cases as the video tape
recorder usually registers the correct type of
system quite automatically.
However, to obtain maximum picture quality (for
example, the right colours) when playing back a
tape, you may have to instruct the video tape
recorder to play back a specific tape using exactly
the same system as the one in which the tape was
recorded:
PAL... For your PAL recordings.
SECAM... For your SECAM recordings.
MESECAM... For your MESECAM (modified
PAL/SECAM) recordings.
Press
▲ or ▼ to change.
Note: Do not forget to switch back to AUTO
afterwards!
Page 55

55
Page 56

56
BeoVision Avant and picture formats…
BeoVision Avant always ensures you
the best possible picture. It automatically adapts the picture so that it
fills out as much of the television
screen as possible.
If a TV programme or film is broadcast
or recorded with specific information
concerning the picture format,
BeoVision Avant will then automatically choose this format.
However, you can choose a specific
picture format for a channel via the
tuning menu, see page 10-11 for information on tuning and picture formats.
On BeoVision Avant, picture formats
are divided into three groups. Each
group relates to specific types of
pictures:
FORMAT 1… for standard TV pictures. Three
‘standard’ picture formats are available, with
black bars surrounding the picture. Each varies
in size: 15:9 gives you the largest picture, 14:9
is slightly smaller and 4:3 is the picture size for
”ordinary” picture tubes.
FORMAT 2… for letter-box pictures. You can
adapt the picture to fill out the screen
completely. If information at the top or bottom
such as subtitles are not displayed, you can
move the picture up or down.
FORMAT 3… for 16:9 wide-screen pictures.
Format 3 will usually be selected
automatically. If this is not the case, you can
select it yourself.
Standard TV picture
BeoVision Avant adapts normal TV transmissions
to fill out as much of the picture screen as
possible. This illustration shows a 15:9 picture.
Letter-box picture
On BeoVision Avant wide-screen TV programmes
or films may appear in the letter-box format, a
lon, narrow picture surrounded by black bars,
however, you can adjust this picture…
The picture can be adapted to fill out the screen,
in a few instances, you may have to move the
picture up or down to see vital information, for
example the subtitles.
PICTURE FORMATS
Page 57

57
Changing the picture format…
In some cases, picture format information is missing or not updated, this
makes it impossible for BeoVision
Avant to detect the picture format
automatically. You can then activate
the ‘format optimise’ function to let
BeoVision Avant select the most
suitable format. The selected picture
format depends on the type of picture
currently shown.
If you still wish to change the picture
format, you can switch between
options within the selected format
group, move the picture up or down,
or even switch to a different format
group altogether.
The BeoVision Avant display will show
you which format group has been
selected.
Once you are satisfied with the picture
format, press EXIT to leave the picture
format function. Make sure, though,
that information, such as subtitles, still
remain visible in the format you
choose.
Picture formats and recordings…
Video tape recordings will usually be shown in the
15:9 format. If ”noise” appears around the
picture, you may have to change the picture to
e.g. the 14:9 format which lets the BeoVision
Avant curtains hide this ”noise”.
To activate ‘Format optimise’…
Press until FORMAT is displayed on
Beo4
Press to optimise the picture
To switch between Format 1–3…
Press until FORMAT is displayed
Press to select a format group
In Format 1…
Press to select a different standard
format
In Format 2…
Press to move the picture up or
down
Press to leave the picture format
function
LIST
GO
then
LIST
or
or
1
2
3
EXIT
Page 58

58
TIMER PLAY
Switching on or off automatically…
Before you start…
In order for your Timers to be executed on
BeoVision Avant, you must switch on the Timer
function, see how on the following page. Do not
forget to set the built-in clock to the correct time
too before programming a Timer play or Timer
standby. See how in ’Setting the Clock’ on p.17.
You can make the BeoVision Avant
start playing, or switch off automatically.
• The Timer Play function is used for
switching the system on automatically if, for example, there is a TV or
Radio programme you do not want
to miss; or want your TV to be your
morning wake-up call.
• The Timer Standby function is used
for switching the system off at a
certain time – for example, after you
leave for work in the morning.
To program a timer you must call up
the Timer play menu. You can make up
to eight such Timer programming
entries*. See the following page for
more information about the individual
items in the menu.
*Note: The entries you have made will be listed in
the Timer index for timer play and standby (see
page 60). By pressing MENU while Pr or Source are
lit up, this index is called up via the Timer play
menu.
Please note…
To program the system to start and stop
recording automatically, please refer to the
section about the video tape recorder on
pp 40-45.
The Timer play menu – You can make a Timer
which is to take place on a specific date or change
the item Date to Days by pressing MENU and
make a Timer for specific days. Under the item
Days, an option for choosing days will appear,
MTWTFSS, each letter indicates a day of the
week. You can now choose which days to include
in your Timer play/standby.
Menu
1 Timer record
2 Timer play
3 TV list
4 Setup
The main menu
Source Pr Start Stop Date
TV 10 6:30 - 8:30 2 Apr OK
Press MENU for Timer index
Call up the main menu
The main menu appears…
Press to call up the Timer play menu
The Timer play menu appears…
Press to reveal options for the items
in the menu
Use the number buttons to fill in
program number, start and stop
times
Press to step from item to item in
the menu
If you want to make e.g. a Timer
play for specific days, move to the
item Date…
Press to change the item Date to
Days
When you have filled in the required
information...
Press to accept the information,
you have entered
Press to store your Timer play/
standby
MENU
2
then
GO
or
or
tt
ss
0
9
through
MENU
then
GO
then
Page 59

59
Source (Which source? or switch off?)
TV… To switch on the TV.
SAT… To switch on satellite TV.
V.TAPE… To switch on the video tape recorder.
RADIO… To switch on the radio. The actual
programming of the Timer takes place on
BeoVision Avant. However, if you have external
speakers connected to your audio system and
wish to hear the sound of your radio through
these speakers, the Timer play function must be
activated on the audio system and not on
BeoVision Avant. Please refer to the User’s
guide for the audio system you have connected.
CD… To switch on the CD player.
A.TAPE… To switch on the audio tape recorder.
Standby… To switch the BeoVision Avant off, if
you have other compatible video or audio
systems connected to your BeoVision Avant,
they will be switched off as well.
Note: You can only select the options listed above
if the source is present in your BeoVision Avant
setup. If RADIO is available, CD and A.TAPE will
also appear regardless of whether they are
actually present or not.
Pr (Program number)
Once your source is chosen, choose the program
number you want.
Note: If you press the MENU button while Pr or
Source is lit up, you access the Timer Index listing
Timer play or standby programming entries
already made (see the next page).
Start and Stop (Start and stop times)
Key in when you want the system to start and/or
stop playing; just the stop time if you want the
system to switch off.
Date or Days (When or how often)
Fill in the date on which you want the system to
start playing or to switch off.
Alternatively, press MENU to change Date into
Days. Select the specific weekdays on which you
want your Timer executed. All the weekdays will
be displayed – starting with M for Monday. Use
tt to move through the days, ▼ to remove any
day you do not want. When the weekday(s) you
want are displayed, press GO to accept the day(s)
and move on to OK.
The system writes…
Setting the Timer function to On or Off…
In order to execute your Timer play or
standby programming entries on the
BeoVision Avant system, you must
activate the Play Timer function. Press
the PLAY TIMER button on the local
operation panel (behind the BeoVision
Avant display) to activate it.
The sound from a Timer play will now
be heard from the BeoVision Avant
speakers. Press PLAY TIMER again to
cancel the function.
The small PT display on the Avant display bar
indicates that the PLAY TIMER function is on.
Jan... for January
Feb... for February
Mar... for March
Apr... for April
May... for May
Jun... for June
Jul... for July
Aug... for August
Sep... for September
Oct... for October
Nov... for November
Dec... for December
M... for Monday
T... for Tuesday
W... for Wednesday
T... for Thursday
F... for Friday
S... for Saturday
S... for Sunday
OK...
When OK is lit up, press GO to store your Timer
play or Timer standby instruction.
Page 60

> Timer play
60
Timer index for Timer play or standby
The Timer index lists your Timer play
and Standby programming entries
waiting to be executed. In the Index
you can check the timers, edit or clear
them.
If you select a Timer in order to edit it,
the Timer play menu appears again; to
edit follow the same procedure as
when you made the Timer entry. Then
store the Timer again and press EXIT to
remove the Timer index from your
screen.
To clear a Timer, you must select the
Timer you want to clear. Then, press
MENU to reveal the cue Clear? instead
of the date for the Timer and press GO
to clear it. Press EXIT to remove the
Timer index.
Note: The BeoVision Avant also has a Timer Index
for the Timer recording function. Please refer to
pages 42 for further information.
The Timer play menu
Menu
1 Timer record
2 Timer play
3 TV list
4 Setup
The main menu
Source Pr Start Stop Date
TV 10 6:30 - 8:30 2 Apr OK
Press MENU for Timer index
Timer index
TV 5 6:30 – 8:30 MTWTF . .
Sat 12 20:00 – 21:15 28 AUG
Standby 00:00 – 23:30 MTWTF . .
Press MENU to clear timer
The Timer index – you can check the Timers you
have programmed into the system – checking that
they do not overlap. On this illustration of the
Timer index menu, examples of the following
Timers are displayed:
• A Timer for switching on the TV in the morning
on working days
• A Timer to switch on at a certain time on a
certain date to watch a Programme on a Sat
program number
• A Timer to switch the system off at a certain
time every night on working days
Press to call up the main menu
The main menu appears…
Press to call up the Timer play menu
The Timer play menu appears…
Press to call up the Timer index
The Timer index appears…
MENU
2
or
MENU
then
MENU
EXIT
EXIT
To edit a Timer in the index…
Press until the Timer you want is lit
up in red
Press to start editing the Timer
The Timer play menu appears…
To edit follow the same procedures
as when you programmed the
Timer…
Press to store the Timer again
GO
then
or
then
GO
GO
GO
then
To clear a Timer in the index…
Press until the Timer is lit up
Press to reveal Clear? instead of the
date
Press to clear the Timer
Alternatively,
Press to keep the Timer
Finally, press to remove the Timer
index from your screen
Page 61

61
BEOVISION AVANT AND AV SYSTEMS
BeoVision Avant may be used in
various combinations. This section
explains the circumstances involving
surround sound and Audio systems
connected to BeoVision Avant. It also
explains how to operate BeoVision
Avant if it is placed in a Link room.
62 BeoVision Avant surround sound
BeoVision Avant as a surround
sound AV system, 62
One or five speakers – what’s the
difference?, 63
Switching speakers, 64
65 Avant and audio system
Transferring from audio to video –
or vice versa…, 65
66 Link room with BeoVision Avant
Using BeoVision Avant in a Link
room, 66
67 Extra functions in Beo4
Page 62

BEOVISION AVANT SURROUND SOUND
62
BeoVision Avant as a surround sound AV system
If your BeoVision Avant is equipped
with a surround sound module, you
can extend your system into a fully
equipped surround sound audio and
video system by connecting four active
Bang & Olufsen loudspeakers and a
Bang & Olufsen audio system* to the
BeoVision Avant.
The BeoVision Avant built-in speakers
will be used as a centre speaker in the
surround sound system.
Using your AV system…
If your BeoVision Avant is set up as a
surround sound system, just choose the
source you wish to hear or see.
It is also possible to record audio
sources on the video recorder or vice
versa if an audio tape recorder is
available. Simulcast audio and video
transmissions are also possible, you can
even record the experience on the
video tape recorder.
In a surround sound AV system, all your
Beo4 remote control commands must
be directed to the BeoVision Avant.
*Note: To display AV on Beo4, you must add the
function to Beo4. Please refer to page 67 for
further instruction.
A BeoVision Avant surround sound system can be
extended with a compatible Bang & Olufsen
audio system, turning your setup into a fully
integrated surround sound AV system.
Please note…
The surround sound module is available as an
optional extra for the BeoVision Avant.
Please contact your Bang & Olufsen dealer for
further information.
TV
7
then
RECORD
RECORD
then
RADIO
9
then
RECORD
RECORD
then
TV
then
RADIO
then
RECORD
RECORD
LIST
GO
LIST
GO
LIST
GO
Record sound from a video source on your audio
tape recorder…
Select e.g. TV program number 7
Press LIST until AV* is displayed
Press GO to activate the audio/video
function
Press to start the actual recording on
the audio tape reocorder
Record sound from an audio source on your video
tape recorder…
Select e.g. RADIO program number 9
Press LIST until AV* is displayed
Press GO to activate the audio/video
function
Press to start recording on the video
tape reocorder
Watch a TV programme and listen to the same
programme on the radio…
Press TV
Press LIST until AV* is displayed
Press GO to activate the audio/video
function
Press RADIO
To record it onto the video tape recorder…
Press to record the simulcast
transmission
To stop any of the recordings, press V TAPE or
A TAPE, and then STOP twice…
*Note: Not all types of Bang & Olufsen audio
systems support audio/video integration with the
BeoVision Avant. Please contact your Bang &
Olufsen dealer for further information.
Page 63

63
One or five speakers – what’s the difference?
BeoVision Avant offers five different
sound modes, SPEAKER 1 to 5.
While you are watching a TV or
satellite programme, a video tape – or
listening to a source from your Bang &
Olufsen audio system, you can choose
how many speakers you want to
activate, provided that the various
sound modes are available in your
system.
To hear and feel the difference
between the five sound modes, we
recommend that you try the five
sound modes – (see how on the next
page), and you will be able to hear and
feel the differences for yourself...
SPEAKER 1… for stereo sound in Avant speakers
only.
Use this sound mode if you want to cut in only
the speakers in the BeoVision Avant – for
example to watch the news.
SPEAKER 2… for stereo sound in the two front
speakers.
Use this sound mode when, for example, you
listen to a stereo music cassette or a CD.
SPEAKER 3… for Dolby 3 Stereo (stereo sound
with the mono sound of e.g. human speech and
sound effects concentrated in the centre
speakers) produced by the BeoVision Avant
speakers (as centre speaker) and the two front
speakers together.
Use this sound mode when you, for example,
watch and listen to a TV programme
transmitted in stereo.
SPEAKER 4… for Stereo-4 (enhanced stereo
sound) in the two front and the two rear
speakers.
Use this sound mode when you want an
enhanced effect of the stereo sound on, for
example, a music cassette or a CD.
SPEAKER 5… for Surround sound reproduced by
all the five speakers in the system together.
Use this sound mode when you , for example,
watch and listen to a TV programme, a video or
a CD pre-recorded in Dolby Pro Logic Surround
to fully enjoy the sound effects. Dolby Pro Logic
Surround gives you a feeling of being in the
middle of the action, with the mono sound of
e.g. human speech and certain sound effects
concentrated in the centre speaker.
Note: Only Dolby Pro Logic Surround encoded
material will be properly reproduced by the
BeoVision Avant surround sound (SPEAKER 5)
function.
”Dolby”, “Pro Logic” and the double-D symbol are
trademarks of Dolby Laboratories Licensing Corporation.
?
Page 64

> BeoVision Avant surround sound
64
Switching speakers
When you switch on one of the sources
in your BeoVision Avant – or in your
Bang & Olufsen audio system, the basic
speaker setup will be cut in quite
automatically*:
• The two front speakers and the
centre speaker for your video sources.
• The two extra front speakers for the
sources in your Bang & Olufsen audio
system.
The five speakers which you may have
in your system can then be included or
excluded, depending on the kind of
sound you want to hear.
Note: Switching speakers for your Bang & Olufsen
audio sources as described on this page requires
that your BeoVision Avant and your audio system
are interconnected and properly set up as an AV
system. See how in the BeoVision Avant Settingup guide.
Nice to know about switching speakers…
• If you switch from an audio source to a video
source (or vice versa), the basic audio or video
speaker setup is activated automatically.
• If you only have one set of speakers connected
to the BeoVision Avant, you will only be able to
switch between the first three sound modes –
SPEAKER 1 – 3.
• While SPEAKER is displayed on Beo4, you can
adjust the balance between the loudspeakers
temporarily: use the
▲ or ▼ buttons to adjust
front/rear balance; use
ss and tt to adjust
left/right balance.
*Automatic change between SPEAKER 3
and SPEAKER 5...
In some instances, you may find that the
BeoVision Avant automatically activates
SPEAKER 3 or SPEAKER 5. This happens if e.g.
a TV programme is broadcast with specific
information concerning how many speakers
should be included. You will, though, still be
able to choose the number of speakers you
want to cut in.
SPEAKER 1 (Stereo):
Press until SPEAKER is displayed
Press to cut in the BeoVision Avant
speakers only
SPEAKER 2 (Stereo):
Press until SPEAKER is displayed
Press to cut in the two front
speakers only
SPEAKER 3 (Dolby 3 Stereo):
Press until SPEAKER is displayed
Press to cut in the centre speakers
and the two front speakers
simultaneously
SPEAKER 4 (Stereo-4):
Press until SPEAKER is displayed
Press to cut in the two front and
the two rear speakers
simultaneously
SPEAKER 5 (Dolby Surround):
Press until SPEAKER is displayed
Press to cut in all the five speakers
simultaneously
Press to remove SPEAKER from
the display and return to operating
the source you are watching
LIST
then
1
LIST
then
2
LIST
then
3
LIST
then
4
LIST
then
5
EXIT
Page 65

BEOVISION AVANT AND AUDIO SYSTEM
65
Transferring from audio to video – or vice versa
If you connect your Bang & Olufsen
audio system to your BeoVision Avant
and have a pair of loudspeakers
connected to the audio system, you can
obtain the benefits of an integrated
audio and video system*.
You can hear any source you like on
the loudspeakers of either system. You
can, for example, hear a music video
through your audio speakers while you
are watching it on the TV screen; or
you can play the radio or any other
audio source on the BeoVision Avant
speakers.
*Note: If you use your audio system without
speakers – your setup is a BeoVision Avant
surround sound setup, please refer to page 62
instead.
Audio/Video recording
The sound you hear in your BeoVision Avant
speakers can be recorded on the video tape
recorder as a ’sound only’ recording. To undertake
such a recording, follow the procedure described
earlier in this guide on page 45.
If the sound from your BeoVision Avant is heard
on your audio system, it can be recorded on your
audio tape recorder (if any such exists). See how
in the User’s guide for your audio system.
Simulcast recording…
For a ‘sound only’ recording on video tape of e.g.
a radio transmission, the picture screen is blank. If
the sound is accompanied, for example, by
pictures from a TV programme broadcast
simultaneously, you can record the pictures along
with the sound from your audio system on your
video tape recorder.
To enable an integrated audio and video system
setup, BeoVision Avant and your Bang & Olufsen
audio system must be interconnected by a special
BeoLink cable.
The BeoLink cable is available at your Bang &
Olufsen dealer.
Please note…
Not all types of Bang & Olufsen audio systems
support audio/video integration with the
BeoVision Avant. Please contact your Bang &
Olufsen dealer for further information.
TV
SAT
V TAPE
TV
then
SAT
then
V TAPE
then
RADIO
then
CD
or
A TAPE
or
TV
RADIO
or
LIST
then
GO
Switch on to a TV programme or a
satellite TV programme; or start
playing a video tape
Press LIST until AV* is displayed
Press to activate the audio/video
function
Press again to switch the sound to
the audio speakers
If you want sound from the BeoVision Avant on
your audio system speakers and a blank TV picture
screen, press LIST until AV is displayed, then TV,
SAT or V TAPE
Press LIST until AV* is displayed
Press to activate the audio/video
function
Press to play the sound from your
audio system on the BeoVision
Avant speakers
To regain full control of any source,
press the appropriate source button
first, for example TV or RADIO
*Note: To display AV on Beo4, you must add the
function to Beo4. Please refer to page 67 for
further instruction.
LIST
then
GO
Page 66

LINK ROOM WITH BEOVISION AVANT
66
Press to switch on your TV
Press to switch on your V TAPE
recorder
Then operate your TV and V TAPE as
usual…
Main room video sources…
Press to switch on to Satellite
Main room audio sources…
Press to switch on radio
Press to start the CD player
Press to start the audio tape
recorder
Continue to operate these main
sources in the usual manner…
To watch sources from your main
system which are also available in
your link room system…
Press LIST until LINK* is displayed
Press to watch TV from your main
system
Press LIST until LINK* is displayed
Press to watch V TAPE from your
main system
Continue to operate in the usual
manner…
If you wish to watch a TV programme
from your main room TV instead of
your link room TV, e.g. in order to
watch a decoded TV programme, you
must press LIST until it displays LINK*
and then press TV.
If you wish to watch a recording which
is being played back on your main
video tape recorder, if any such exists,
you must also press LIST to display
LINK* first before pressing V TAPE.
A Timer play, programmed via the
main system, can also be executed on
your Link room BeoVision Avant.
*Note: In order to display LINK on Beo4, you must
add the function to the Beo4 list of functions, see
the following page for further instructions.
Note: The picture-in-picture function is only
available for local sources when BeoVision Avant
is placed in a Linkroom.
Before you start…
Please refer to the Setting-up guide for further
instruction of how to prepare BeoVision Avant for
use in a Link room.
If you have BeoLink installed in your
home and choose to place your Avant
in a link room, just operate your
BeoVision Avant as if it was placed in a
main room.
You can watch and listen to the sources
available in your link room BeoVision
Avant. The video and audio sources in
your main room are also available. You
can record the sources available in your
Link room BeoVision Avant onto its
own video tape recorder.
Using BeoVision Avant in a link room
TV
V TAPE
SAT
RADIO
CD
A TAPE
TV
LIST
then
V TAPE
LIST
then
Or
Page 67

EXTRA FUNCTIONS IN BEO4
67
Adding to the Beo4 list of functions
The Beo4 buttons give access to direct
remote control of a large number of
functions in your BeoVision Avant. Yet
the display on Beo4 enables you to
operate even more functions…
• Whenever a source is displayed on
Beo4 (TV, RADIO, etc.) you can call
up extra functions in the display to
help you operate that source – just as
if you were calling up extra buttons.
• You can also switch on extra
products connected to your
BeoVision Avant via the display.
However, a cue in the Beo4 display
only gives access to operating a
function, if that function is offered by
your BeoVision Avant. You can,
though, still customise your Beo4 to
suit your system with its added extras
and change the order in which these
extra functions appear*.
Throughout this guide you are
prompted when adding a cue is
necessary in order to use a specific
function.
Add a cue to the Beo4 list…
ADD? in Beo4 gives access to all the
cues in Beo4 which can be added for
daily use. When a new function is
added, you will be able to look up this
new cue in the display by pressing LIST,
the next time you operate your
BeoVision Avant.
LIST
then
LIST
then
LIST
LIST
then
•
GO
GO
then
EXIT
*Note: Please refer to Beo4’s own User’s guide for
information of how to customise your extra
functions.
Press and hold the standby button
down
Press to get access to the special
Beo4 setup function
> Now, let go of both buttons
Press until ADD? is displayed on
the Beo4 display
Press to call up the list of cues you
want
The first cue appears in the display…
Press until the cue you want is
displayed
then, when the cue appears…
Press to add the cue
When a cue in the display stops
blinking, it is to inform you that it
has been added
Press to leave the Beo4 setup
function
Alternatively,
Press again to display more cues
Page 68

68
BEOVISION AVANT CLOSE-UP…
Displayed information…
BeoVision Avant video system...
BeoVision Avant display bar – The display bar
gives information about the system and conceals
the buttons for close-up operation on the back.
3 STEREO
Dolby 3 Stereo* indicator
PRO LOGIC
Surround sound* indicator
TIMER
Indicates that a timer recording has been
programmed into the video tape recorder.
Note: TIMER remains on during standby and
blinks if a timer recording is prevented from being
executed.
RECORD
’Recording in progress’ indication for the video
tape recorder.
PT (Play Timer)
Indicates that the BeoVision Avant Timer function
for timed playback or standby is switched on.
Please refer to page 58-59 for further
information.
Note: PT remains on during standby.
“TV 12” (Status display)
Status display for the BeoVision Avant. The display
keeps you informed about what the system is
doing or about an on-going operation.
• (Standby indicator)
The red standby indicator lights up when you
switch off the BeoVision Avant.
The system may still be active – for example, if a
recording is in progress (RECORD will then be lit).
Note: The standby indicator blinks to inform you
that either a video tape is being rewound, or to
inform you that you have left a video tape in the
flap door – please refer to page 37.
Note: Please refer to the BeoVision Avant
Setting-up guide for information about the
various sockets on the rear panel.
* Manufactured under license from
Dolby Laboratories Licensing Corporation
Note: Dolby 3 Stereo and the Dolby Pro Logic Surround are
only available in BeoVision Avant models equipped with a
Dolby Pro Logic Surround module. Please contact your Bang &
Olufsen dealer for further information.
Page 69

69
… OPERATION
Buttons on the BeoVision Avant operation panel
•
PLAY TIMER TV SAT V.TAPE EJECTREWIND
BeoVision Avant operation panel – The
buttons are placed on the rear side of the display
bar, but you will find that they are easily operated
when you are standing in front of the BeoVision
Avant.
EJECT
Unloads the video cassette you have loaded into
the video tape recorder.
REWIND
Rewinds the tape in the video tape recorder
quickly to the beginning.
V.TAPE
Starts playback of the tape in the video tape
recorder. Press V.TAPE for more than three
seconds, and the video tape recorder switches off
immediately, stopping any function in progress.
SAT
The SAT button enables you to switch on to
satellite TV, and to step through your satellite TV
program numbers.
TV
The TV button enables you to switch on the TV,
and to step through your TV program numbers.
PLAY TIMER
Switches on the BeoVision Avant timer function,
which ensures that any timer play instruction you
have programmed into the system will be
executed with the BeoVision Avant picture screen
and/or speakers cut in.
•
Switches the BeoVision Avant to standby.
Sockets for Headphones and CamCorder
PHONES – Headphones
You can connect stereo headphones to the socket
marked PHONES. The BeoVision Avant
loudspeakers can then be cut out by pressing the
Beo4 volume button on the middle.
L, R, VIDEO, S-VHS – CamCorder
The sockets marked L, R, VIDEO, and S-VHS are for
connection of a video camera:
L R sockets... for audio connection (left and
right respectively).
VIDEO socket... for the video signal.
S-VHS socket... for the connection of S-VHS or
Hi-8 camcorders only.
To watch your CamCorder recordings on the
BeoVision Avant, connect the camera and switch
the BeoVision Avant on by pressing, e.g the TV
button on the Beo4 remote control. Then, when
you start playback on your camera, the BeoVision
Avant automatically registers the signal and you
can see the pictures from the CamCorder on the
screen.
Note: If the signal from the CamCorder is switched
off (accidentally), you must find CAMCORD* in the
Beo4 display and press GO.
*Note: In order to find CAMCORD in the Beo4
display you have to add the function, see page 67
for further instruction.
PHONES R L VIDEO S–VHS
BeoVision Avant easy-access socket panel
Just below the operation panel on the back of
BeoVision Avant, a small socket panel is conveniently placed for connection of headphones
and CamCorder. Please note: The other sockets
are hidden behind a cover which you must
remove before you can connect any equipment to
these three sockets.
Page 70

QUICK GUIDE TO MENUS
70
Main Menu
1 Timer record
2 Timer play
3 TV list
4 Sat list
5 Setup
5 Setup
Setup
1 Tuning
2 Sound
3 Picture
4 Stand
5 Source
6 Menu
7 Clock
8 V.Tape
4 Sat list
1 . . . . . . . . . .
2 Sky
3 Super
4 . . . . . . . . . .
5 . . . . . . . . . .
6
7
8
9
10
11
12
13
14
15
16
17
18
19
Press MENU to
clear program
3 TV list
1 DR1
2 TV2
3 TV1000
4 . . . . . . . . . .
5 . . . . . . . . . .
6
7
8
9
10
11
12
13
14
15
16
17
18
19
Press MENU to
clear program
1 Timer record
Source
TV
Pr1Start
10:25
–
Stop
11:25
Date
2 Apr
OK
Press MENU for teletext programming
2 Timer play
Source
TV
Pr1Start
10:25
–
Stop
11:25
Date
2 Apr
OK
Press MENU for teletext programming
TV
TV
Sat
TV
15
8
101
15
12:30
20:00
6:00
10:00
–
–
–
–
28 Aug
28 Aug
26 Aug
M . WT . .
Press MENU for teletext programming
Timer index (Timer recordings)
13:30
21:15
7:15
11:00
5126:30
20:00
–
–
MTWTF . .
28 Aug
MTWTF . .
Press MENU to clear timer
Timer index (Timer play/standby)
8:30
21:15
23:30
TV
Sat
Standby
The menu guide…
The main menu system in the BeoVision Avant
is displayed on this page. Use the references,
menu item numbers and names on the Main
menu and the Setup menu, to guide you
through the menu system. From the Setup
menu, several submenus can be accessed.
Page 71

71
Page 72

72
Date purchased
Contact person
Dealer
Telephone
Address
Record your serial numbers here:
BeoVision Avant
Beo4 remote control
3508129 0997
Printed in Denmark by
Bogtrykkergården a-s, Struer
Dear Customer,
Your needs as the user of our products are always given careful
consideration during the design and development process, and we strive to
make our products easy and comfortable to operate.
We therefore hope that you will take time to drop us a line, telling us about
your experiences with your Bang & Olufsen system. Anything which you
consider important – positive or negative – may help us in our constant
efforts to refine our products.
Thank you!
Please write
to:
Customer information dept. 7240
Bang & Olufsen a/s
DK-7600 Struer
Denmark
 Loading...