


BeoVision7

Contents
Menu overview, 3
See an overview of on-screen menus.
Digital tuner menu overview, 4
See an overview of the digital tuner menu.
Blu-ray menu overview, 5
See an overview of the Blu-ray menu.
Navigate in menus, 6
See how to use the different remote controls
for menu operation.
First-time setup, 7
Which menus appear when you switch on
the television for the very rst time.
Set positions for the television to turn
to, 9
How to preset positions for a motorised
stand to turn to.
Tuner setup, 10
How to disable the TV tuner or the ATSC
tuner.
Connections, 11
Examples of where to connect additional
equipment and how to connect a PC or
camera.
Register additional video equipment, 15
How to register connected equipment in the
CONNECTIONS menu.
Scan in TV channels, 18
How to register the source of your T V signal
type and scan in TV channels.
Edit scanned TV channels, 20
How to remove, name and ne tune
channels, and how to nd new channels.
Loudspeaker setup – surround sound, 24
How to make your television part of a
surround sound system.
Adaptive Sound Technology, 29
How to set up loudspeakers and optimise
the sound experience with Adaptive Sound
Technology.
Adjust picture and sound settings, 34
How to make settings for picture and how
to adjust bass, treble, etc. How to use game
mode.
Set up 3D television, 37
How to make settings for when you watch
3D television.
Daily use of speaker combinations, 39
How to switch between different speaker
combinations.
See two sources at the same time, 40
How to see two sources at the same time.
Home cinema, 41
How to set up your system for Home cinema.
Set the television to switch itself on or
off, 42
How to make your television switch off
automatically or make it part of a
PLAY TIMER. How to make auto standby
settings and save power.
Wake-up Timer, 45
How to make your television wake you up in
the morning.
Set the time and date, 47
How to set the time and date.
Activate parental control, 48
How to activate parental control to restrict
access to selected channels.
Apply Closed Captioning, 51
How to apply Closed Captioning to sources
and channels.
Settings and preferences for the digital
tuner, 52
How to make channel settings, search for
channels and apply Closed Captioning.
Settings and preferences for the Blu-ray
player, 56
How to make settings and preferences for the
Blu-ray player and its parental lock function.
Blu-ray player - media browser, 58
How to browse your photos and playback
your music les on your television .
The pincode system, 59
How to use the pincode system.
Set up your remote control, 61
Tell the television if the navigation button on
your remote control is enabled or disabled.
Feature activation, 62
How to enter an activation key and get
access to additional features.
HDMI MATRIX, 63
How to enter settings in the HDMI MATRIX
menu.
Operate other equipment with Beo6 or
Beo4, 65
How to operate connected equipment, such
as set-top boxes, DVD players or the like.
Connect and operate an audio system, 67
How to connect an audio system to your
television and operate an integrated audio/
video system.
Distribute sound and picture with
BeoLink, 70
How to make link connections, operate a
link system.
Your television in a link room, 72
How to set up and operate your television in
a link room.
Two televisions in the same room, 74
Option programming and operation of two
televisions in the same room.
Version 1.1 1201
2

Menu overview
1. 2. 3.
CHANNEL SETUP
EDIT CHANNELS
FINE TUNE
3DDISPL AY
SLEEP TIMER
PLAY TIMER
OPTIONS
3D
2D
3DSETTINGS
TIMER ON/OFF
PLAY TIMER INDEX
PLAY TIMER PROGRAMMING
WAKE-UP TIMER
CONNECTIONS
TUNER SETUP
SOUND
(When Adaptive Sound Technology is OFF)
SOUND
(When Adaptive Sound Technology is ON)
ACTIVATE3D
AV1–AV6
PROJECTOROUT
HDMI EXPANDER
LINK
TV TUNER
ATSC
ADJUSTMENT
SPEAKER TYPES
SPEAKER ROLES
SPEAKER DISTANCE
SPEAKER LEVEL
SOUND SYSTEM
AST ON/OFF
ADJUSTMENT
SPEAKER SETUP
LISTENING PRESETS
SOUND SYSTEM
AST ON/OFF
STAND POSITIONS
PICTURE
CLOSED CAPTIONING
PARENTAL CONTROL
CLOCK
STANDBY SETTINGS
REMOTE CONTROL
FEATURE ACTIVATION
VIDEO
AUDIO
STANDBY
STAND ADJUSTMENT
TV PARENTAL GUIDELINES
MPAA RATING
ACCESS CODE
AUTO STANDBY
POWER SAVING
NAVIGATION BUTTON
NO NAVIGATION BUTTON
3

Digital tuner menu overview
Digital tuner settings
1. 2. 3.
CHANNEL
AUTO SCAN
FAVOURITE CHANNEL
CHANNEL ADD/DELETE
SIGNAL STRENGTH
AIR
CABLE AUTO
CABLE STD
CABLE HRC
CABLE IRC
CAPTION
V-CHIP
SETUP
Digital tuner settings (Korea)
ON/OFF
ANALOGUE MODE
DIGITAL MODE
DIGITAL FONT OPTIONS
CHANGING PIN
US RATING SETTING
CANADIAN RATING SETTING
DOWNLODABLE R ATING SETTING
TIME
SOUND
MENU LANGUAGE
VERSION INFORMATION
DAYLIGHT SAVING
TIMEZONE
MULTI-TRACK SOUND
DIGITAL OUTPUT
ENGLISH
SPANISH
FRENCH
1. 2. 3.
CHANNEL
SETUP
AUTO SCAN
FAVOURITE CHANNEL
CHANNEL ADD/DELETE
SIGNAL STRENGTH
MULTI-TRACK SOUND
DIGITAL OUTPUT
VERSION INFORMATION
4
AIR
CABLE

Blu-ray menu overview
1. 2. 3.
SETUP PLAYBACK STATUS
STANDARD
EXTENDED
AUDIO FORMAT
VIDEO FORMAT
LANGUAGE
ACCESS CONTROL
ADVANCED
STANDARD
RE-ENCODE
BITSREAM
24HZ ON
24 HZ OFF
AUDIO
SUBTITLES
DISC MENU
PARENTAL LOCK
RATING
NEW ACCESS CODE
MEMORY MANAGEMENT
NETWORK
MODULE INFORMATION
SOFT WARE UPDATE
DRC
5
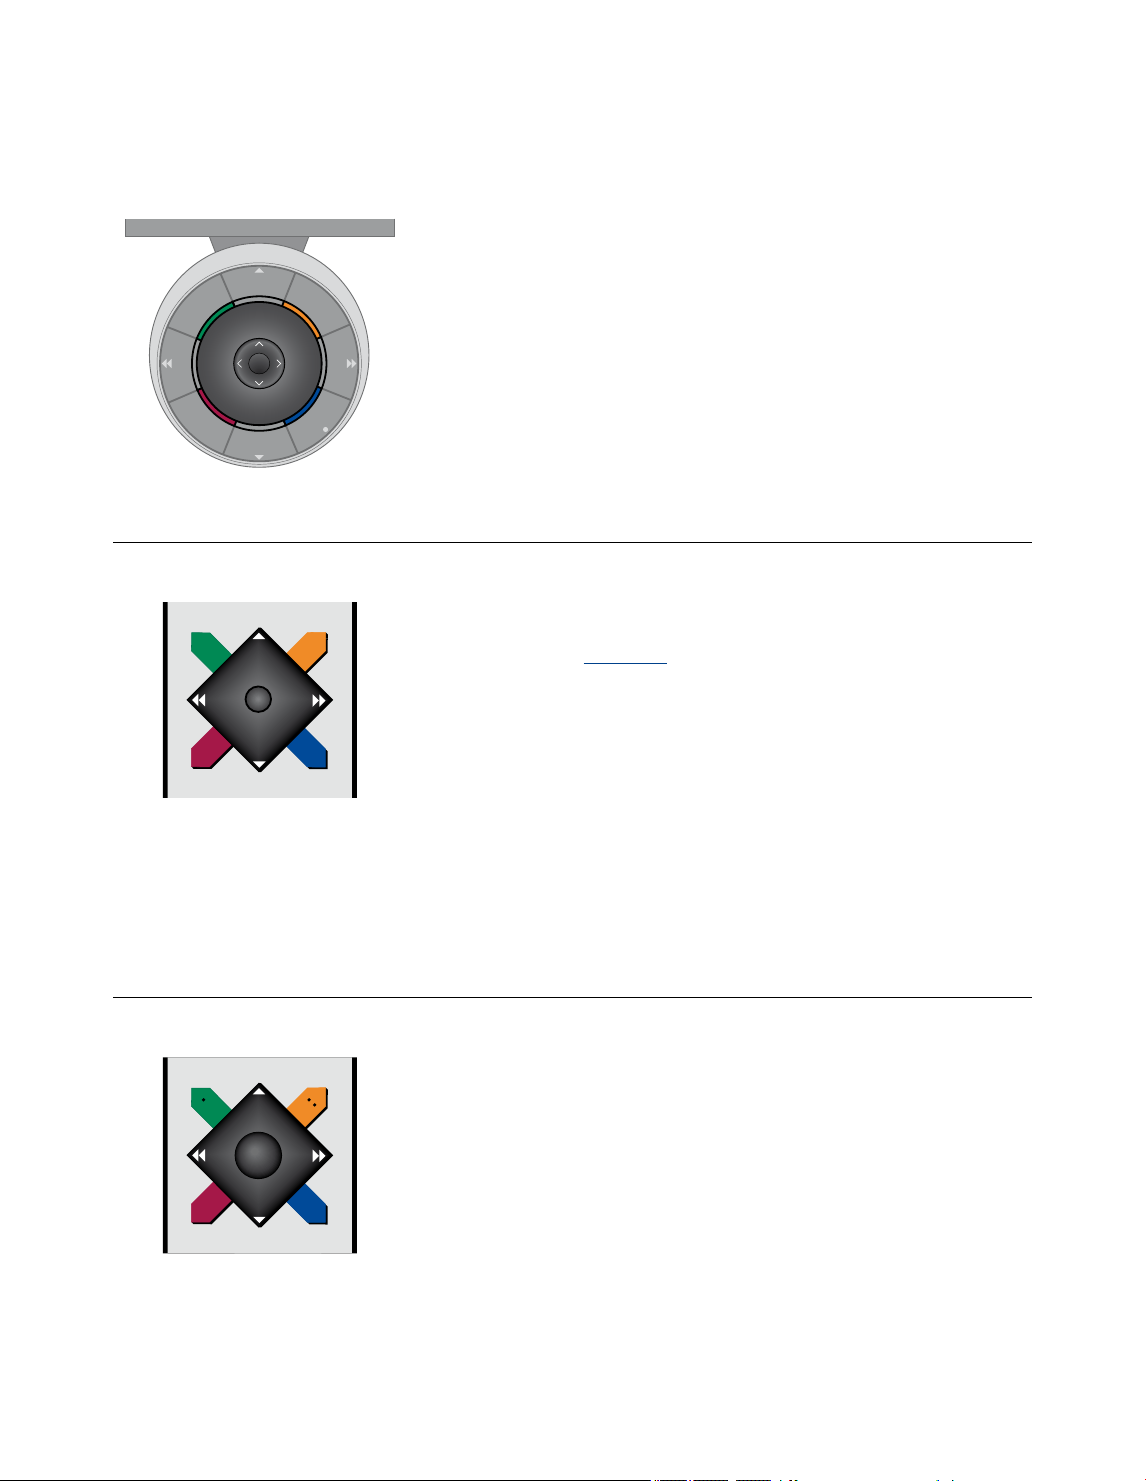
Navigate in menus
Beo6
BACK
STOP
PLAY
If you operate your television with the
Beo6 remote control, you use the centre
button with up, down, lef t and right
movement to navigate in menus. Press
in the middle of the centre button to
conrm selections and settings in menus.
Bring up the T V SETUP menu by pressing
Menu while the TV is on.
To back up through menus, press BACK.
To exit menus, press and hold BACK.
Beo4 with navigation button
If you have a Beo4 remote control with
navigation button and your television is
set up for use with it, see page 61, you
use the centre button with up, down,
left and right movement to navigate in
menus. Press in the middle of the centre
button to conrm selections and
settings in menus.
Bring up the T V SETUP menu by pressing
MENU while the TV is on. If you have
selected a source which has a menu
overlay, you must press MENU twice to
bring up the TV SETUP menu.
If your Beo6 is set up to be used without
navigation button, press STOP to back
up through menus and BACK to exit
menus.
Note that a Beo6 should be recongured
when you add new products to your setup.
You can also operate your television
with Beo5 which is operated similarly
to Beo6.
To back up through menus, press BACK.
To exit menus, press and hold BACK.
If your television is set up for use
without navigation button, you must
use the ‘star’ to navigate up, down, left
and right in menus and press the centre
button to conrm selections and
settings in menus. To back up through
menus, press STOP. To exit menus, press
BACK.
GO
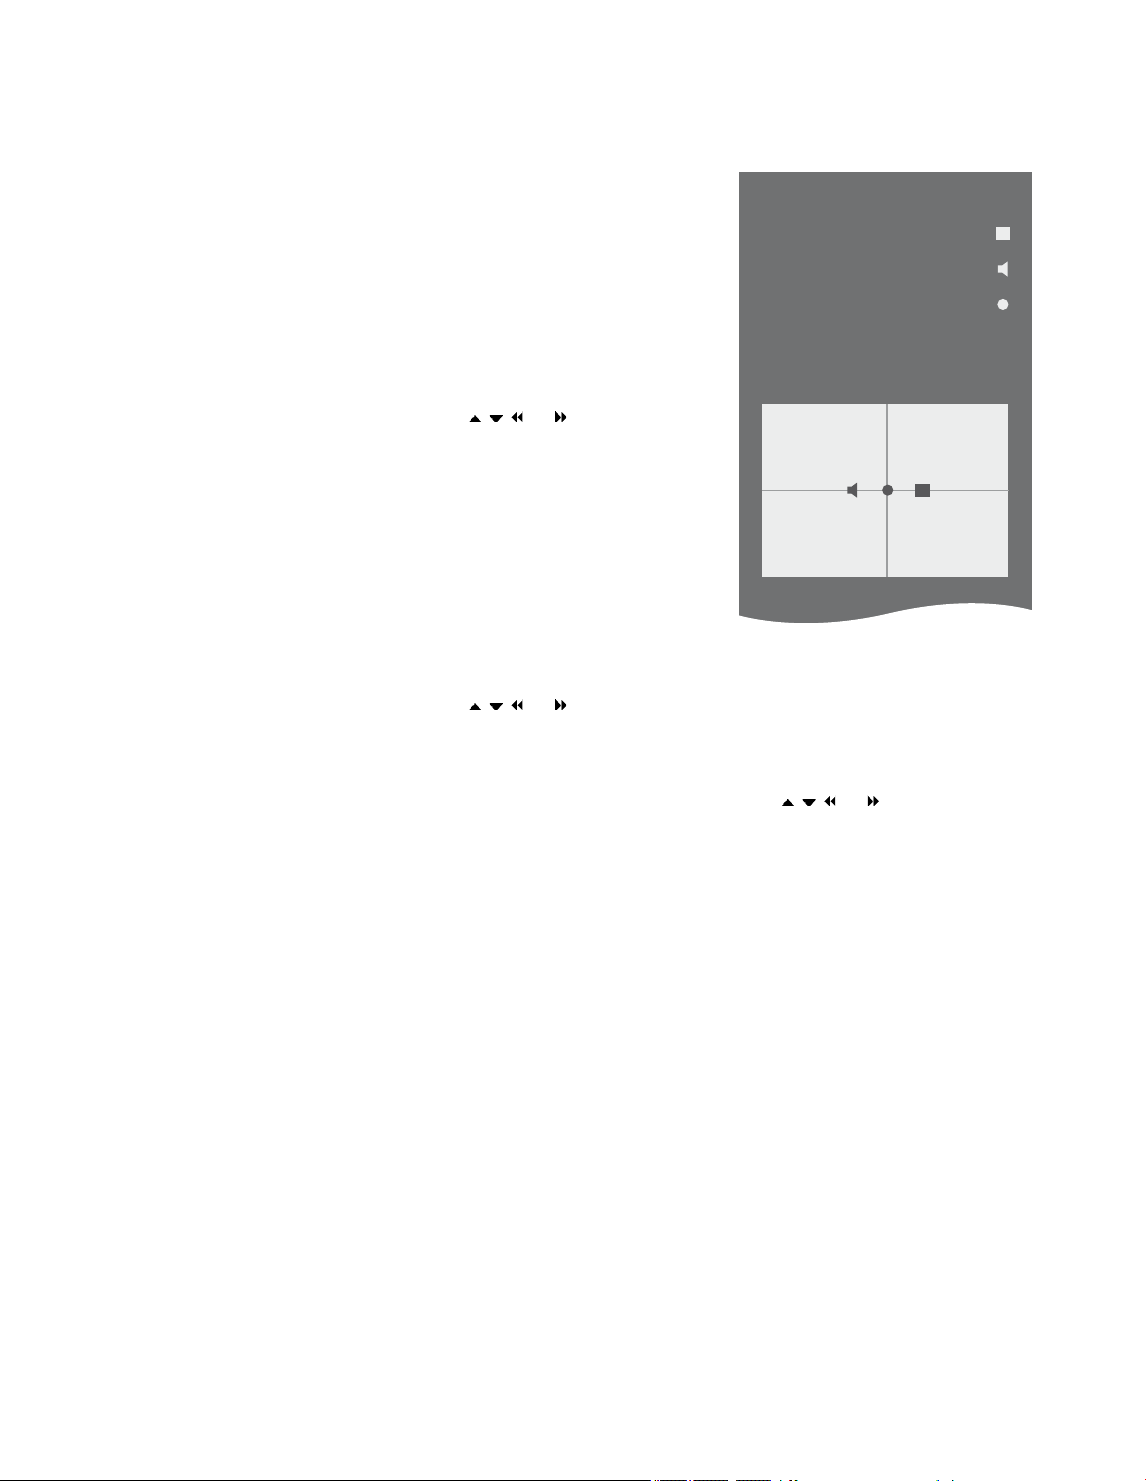
Beo4 without navigation button
If you have a Beo4 remote control
without navigation button, you must
use the ‘star’ to navigate up, down, left
and right in menus and press the centre
button to conrm choices and settings
in menus.
Bring up the T V SETUP menu by pressing
MENU while the TV is on. If you have
selected a source which has a menu
6
overlay, you must press MENU twice to
bring up the TV SETUP menu.
To back up through menus, press STOP.
To exit menus, press EXIT.

First-time setup
The setup procedure is activated
when the television is connected
to the mains and switched on for
the rst time. You are led through
an automatic series of on-screen
menus in which you must register
the extra equipment you have
connected, such as a projector
and loud speakers.
If you change your setup at a later
you can access the same
date,
menus and update your settings.
Remember that you need to set
the speaker types and the
distances in the SOUND SETUP
menu.
The contents of the rst-time
setup sequence varies according
to the setting you make in the
AST ON/OFF menu.
The sequence of menus in rst-time setup
REMOTE CONTROL… Enable or disable the
navigation button on your remote control.
See page61 for information about setting
up your remote control. See page6 for
information about remote controls.*
TUNER SETUP… Disable the television tuner
or ATSC tuner, if you like, or scan in
channels and identify a connected cable
box, see page10.
CONNECTIONS … Select the type of
equipment you have connected to each
socket group, the sockets used, the
product name, and the source name.
For further information about the
CONNECTIONS menu, see page15.
CHECK AERIAL CONNECTION… This
prompt only appears if the television
tuner is enabled.
AST ON /OFF … In this menu, you can
choose between a speaker setup menu
with or without Adaptive Sound
Technology. The default setting is OFF.
For further information about Adaptive
Sound Technology, see page29.
*If you have a Beo4 without a navigation
button or if your Beo4 is not set to the
correct mode, you cannot enable the
navigation button. See the Beo4 guide or
contact your Bang& Olufsen retailer for
further information. However, do not
change mode during rst-time setup,
as this will interrupt the sequence.
Adaptive Sound Technology disabled:
SPEAKER TYPES… In this menu, you select
which speakers are connected to the
television, if any. See page 24 for further
information.
TV SPEAKER ROLES… In this menu, you
select the function for each connected
speaker in your setup, such as front,
back or surround. As you highlight each
speaker, a sound is produced by the
speaker. Check that the speaker type
highlighted in the menu matches the
speaker type making the sound.
See page 25 for further information.
SPEAKER DISTANCE… In this menu, you
select the distance in metres to each of
the speakers in your setup. See page 26
for further information.
SPEAKER LEVEL… In this menu, you can
adjust the volume level of each speaker
in your setup. See page 27 for further
information.
SOUND ADJUSTMENT… In this menu,
you can adjust bass, volume, treble and
loudness. In addition, you can preset two
default speaker combinations; one for
video sources and one for audio sources
connected to your television. See page 36
for further information.
7

>> First-time setup
Adaptive Sound Technology enabled:
SPEAKER SETUP … In this menu, you register
the speaker type in the menu. Enter the
straight-line distances from two points,
Points A and B to each speaker, to the left
and right sides of the television screen and
a projector screen, to a viewing position
and the distance between the two points.
See page31 for further information.
TV … Select the speakers to be active when
you watch television and determine the
distance from your listening position to
three of the activated speakers. You can
enable Adaptive Sound Technology or set
the speaker roles and levels. See page32
for further information.
CINEMA … Select the speakers to be active
for a connected projector and determine
the distance from your listening position
to three of the activated speakers. You can
enable Adaptive Sound Technology or set
the speaker roles and levels. This menu is
only available if you have connected a
projector. See page32 for further
information.
SOUND ADJUSTMENT … In this menu you
adjust volume, bass, treble, and loudness.
In addition, you can select two default
speaker combinations; one for video
sources and one for audio sources
connected to your television. You can also
select which LISTENING PRESET should be
activated when you switch on an audio
source. If you select the option MANUAL,
the preset used when switching on the
audio source continues to be active and if
all your sources are switched off, the
preset used before switching on the audio
source is automatically activated. If you
select one of your LISTENING PRESETS,
this preset is activated every time you
switch on an audio source. See page36
for further information.
SOUND SETUP … Enter the LISTENING
PRESETS menu and select a PRESET eld.
Then select the speakers to be active for
different listening positions, such as at the
dining table or in a favourite armchair, and
determine the distance from your listening
position to three of the activated speakers.
You can enable or disable the Adaptive
Sound Technology and either rotate the
selected speaker setup or set the speaker
roles and level. See page32 for further
information.
Continue rst-time setup:
STAND ADJUSTMENT … Set the maximum
angle for turn and tilt of the television.
Use , , and to tilt and turn the
television and limit the movement of the
stand. See page9 for further information.*
STAND POSITIONS … Set your preferred
preset positions for the television. For
further information about the STAND
POSITIONS menu, see page 9.
STANDBY SETTINGS … The television can be
set to switch itself to standby after some
time with no operation. You can also switch
power saving on or off. See page 44 for
further information.
*If you have a Beo4 remote control without
navigation button, or if the navigation
button on your remote control is disabled,
use the green button to tilt the television up
and the red button to tilt it down.
For information about where and how to
connect extra equipment, see the chapter
about connection panels in Getting Started.
8
Set positions for the television to turn to
If your television is equipped
with the optional motorised
stand, you can tilt and turn it
using the remote control.
Furthermore, you can program
the television to tilt and turn
automatically to face your
favourite viewing position when
you switch on the television. It
can tilt and turn to a different
position when you listen to, for
example, a connected radio, and
tilt or turn away to a standby
position when you switch it off.
You can also turn your television
by hand.
NOTE! For information about rst-
time installation of the motorised
stand, see Getting Started.
Choose one position for when you
switch the television on, one for audio
mode, and one for when you switch it off.
> Bring up the TV SETUP menu and highlight
STAND POSITIONS.
> Press the centre button to bring up the
STAND POSITIONS menu.
> Press the centre button to determine the
VIDEO position.
> Use , , and to tilt and turn the
television and place it according to your
viewing position.
> Press the centre button to store the
position.
To store a stand position for when an
audio source is switched on from the
television …
> Highlight AUDIO.
> Press the centre button to determine the
AUDIO position.
> Use , , and to tilt and turn the
television and place it as you wish.
> Press the centre button to store the
position.
STAND POSITIONS
VIDEO
AUDIO
STANDBY
STAND ADJUSTMENT
To store a stand position for when the
television is switched off and in standby …
> Highlight STANDBY.
> Press the centre button to determine the
STANDBY position.
> Use , , and to tilt and turn the
television and place it as you wish.
> Press the centre button to store the
position.
> During rst-time setup, press the green
button to continue rst time-setup, or …
> …press and hold BACK to leave all
menus.
If you have a Beo4 remote control without
navigation button, or if the navigation
button on your remote control is disabled,
use the green button to tilt the television up
and the red button to tilt it down.
9

Tuner setup
If you disable the TV tuner or
ATSC tuner, you can activate a
connected peripheral unit with
the TV or DTV button.
In this menu you can also scan in
channels or identify a cable box
you may have connected to the
television.
To disable the internal tuner …
> Bring up the TV SETUP menu and highlight
OPTIONS.
> Press the centre button to bring up the
OPTIONS menu, and highlight TUNER SETUP.
> Press the centre button to bring up the
TUNER SETUP menu and highlight T V
TUNER.
> Use the navigation button left or right
to switch between the setting OFF,
ANTENNA, CABLE or CABLE BOX.
> Highlight ATSC.
> Use the navigation button left or right to
switch between the setting ON or OFF.
> Press the centre button to store the
settings, or …
> … press and hold BACK to leave the
menus without storing.
If you select CABLE BOX, follow the on-
screen information to specify which cable
box you have connected to the television.
If you select ANTENNA or CABLE, a scanning
process begins when you store the setting.
TUNER SETUP
TV TUNER CABLE
ATSC ON
You can register the source of your TV video
signals in the TV TUNER eld at any time,
it is not required during the rst-time setup
procedure.
For further information about the TUNER
SETUP menu and about scanning TV
channels, see page18.
10
AV 2
AV 1
Digit al TV
[DTV2 ]
PVR B ox
[V.MEM]
AV 5
MASTER LINK
VGA
BeoMa ster
[PC]
AV 6
Camer a
[CAME RA]
The connection panel on your
television allows you to connect
signal input cables as well as a
variety of extra equipment, such
as a video recorder or a linked
Bang & Olufsen music system.
Any equipment you connect to
these sockets must be registered
in the CONNECTIONS menu. For
further information, see page 15.
Connections
ATSC
TV signal
Digit al ca ble/
HDTV box
Cable
network
Analogue
TV signal
ANALOGUE
ANALOGUE
ATSC
HDMI IN
(A–D)
AV (1–6)
POWER LINK 1
SUB
POWER
LINK
2–6
Before you connect any equipment
to your television, remember to
disconnect the television from the
mains.
There are some restrictions as to the types of
equipment that can be connected to the
sockets.
Equipment with VGA output can only be
connected and registered to the AV5 and
AV6 sockets.
Loudspeakers
Use Bang& Olufsen PowerLink speakers.
Use the cables enclosed with the speakers.
Cables are available from your Bang&
Olufsen retailer.
Equipment with HDMI™ output
Equipment with HDMI output such as a set-
top box can be connected to any available
HDMI socket in the TV, regardless of the
particular AV socket group to which you
have connected the equipment. To distribute
the source to another room you must also
connect a CVBS video signal from the
connected equipment to an AV socket on
the connection panel. For further
information on how to set
up connected
equipment for use, see page15.
11
ML
>> Connections
PROJECTOR OUT
PUC 1+2
Home
Automation
system
IR-IN
CINEMA CONTROL
Home cinema setup with a projector
and a home automation system
Use a projector or connect a home
automation system to the T V so you can
control room lights and curtains.
Audio system
If you have a Bang& Olufsen audio system
with a Master Link socket, you can connect
it to your tele vision. Use a Master Link cable,
and connect it to the Master Link socket on
the main connection panel. See Getting
Started for further information.
If the built-in receiver for the remote control
signals (IR-receiver) is hidden behind the
lowered projection screen, you must set up
an external IR-receiver, as well. The IR-
receiver is available as an optional accessor y
from your Bang& Olufsen retailer.
For further information about Home cinema,
see page 41.
12
Control
>> Connections
In the AV menus you can select how a
PUC controlled product is connected.
You can choose between PLUG (cable)
and IR (IR Blaster). If you selec t PLUG,
you must choose between
MODUL ATION ON and MODUL ATION
OFF. For information about type of cable
and modulation set tings, contact your
retailer.
STB
STB
PLUG
IR
IR-transmitters: To operate non-Bang&
Olufsen products with a Bang& Olufsen
remote control, attach a Bang& Olufsen IR-
transmitter to each of the products. Connect
each transmitter to the corresponding socket
marked PUC on the main connection panel.
13

>> Connections
Connect and use a PC
IMPORTANT! Before connec ting a PC to
the television, disconnect the television,
the computer, and all equipment
connected to the computer from the
mains.
To connect a computer to the
television …
> Using the appropriate type of cable,
connect one end to the DVI, VGA or HDMI
output socket on your computer, and the
other end to the VGA or HDMI socket on
the television.
> To hear sound from the computer in the
speakers connected to the television, use
the appropriate cable and connect the
sound output on the computer to the L–R
or SPDIF sockets on the television when
appropriate.
> Reconnect the television, the computer,
and all equipment connected to the
computer to the mains. Remember, the
computer must be connected to a
grounded wall outlet as specied in its
setting-up instructions.
If you have connected your PC to the VGA
socket on the television, you must register
the PC to the AV5 or AV6 socket in the
CONNECTIONS menu. A PC connected to
the HDMI socket can be registered to any of
the AV socket groups.
Bring up the computer image on the
screen
To see the computer picture on the screen,
you must bring it up with your remote control.
To bring up the computer picture …
> Press PC to bring up the picture. You can
then operate the computer as you
normally would. (Beo4: Press LIST and use
the navigation button up or down to bring
up PC in the Beo4 display and press the
centre button to bring up the picture).
Watch digital pictures on your screen
To watch your camera pictures, connect the
camera to the AV6 socket(s) and switch the
television on. The television automatically
registers the signal and you can see the
pictures on the screen.
If the signal from the camera is switched
off…
> Press CAMERA on Beo6. (Beo4: Press LIST
and use the navigation button up or down
to bring up CAMERA in the Beo4 display
and press the centre button to bring up
the picture).
14

Register additional video equipment
If you connect additional video
equipment to your television,
you must register the equipment
in the CONNECTIONS menu.
When the television is rst set
up, some of the equipment
connected at that particular
moment is detected by the
television. The CONNECTIONS
menu appears automatically on
the screen during rst-time
setup for you to register
connected equipment, if it is not
detected automatically by the
television. If you connect
equipment at a later date, you
must register this equipment in
the CONNECTIONS menu.
What is connected?
Registering the equipment connected
to the television enables you to operate
it with your remote control.
> Bring up the TV SETUP menu and
highlight OPTIONS.
> Press the centre button to bring up the
OPTIONS menu. CONNECTIONS is
highlighted already.
> Press the centre button to bring up the
CONNECTIONS menu.
> Use the navigation button up or down to
step between the different socket groups:
AV1, AV2, AV3, AV5, AV6, PROJECTOROUT,
HDMI EXPANDER and LINK.
> Press the centre button to be able to
register a connected product type to the
highlighted socket group.
> Use the navigation button up and down
to move between the sockets in the
group.
> Use the navigation button left or right to
register what you have connected to the
highlighted socket.
> Press the centre button while SOURCE is
highlighted to be able to select the
product from an on-screen list.
> Use the navigation button left or right to
see lists for other types of products.
> Use the navigation button up or down or
a number button to highlight the name of
the product and press the centre button
to register it.
> Press the green button to be able to
name the source. The naming menu is
now activated.
> Use the navigation button up and down
to nd the individual characters in the
name.
> Press the centre button to accept the
name.
CONNECTIONS
AV1 NONE
AV2 NONE
AV3 NONE
AV4 NONE
AV5 NONE
AV6 NONE
PROJECTOROUT NONE
HDMI EXPANDER NO
LINK
The available sockets may vary according to
your setup.
> Names are shown in the television on-
screen display when the source is selected.
> Press the centre button to bring up the
STANDBY OPTIONS menu.
> Use the navigation button up or down to
highlight a standby option for when the
connected equipment should switch to
standby. See page17.
> Press the centre button to select the
highlighted standby option.
> When you have completed your settings
for a single socket group, press the
centre button to return to the
CONNECTIONS menu.
> Repeat the procedure for each socket
group.
At rst-time setup only, when you have
registered all connected equipment, press
the green button to store the setup.
15

>> Register additional video equipment
What’s on the AV1 – AV6 menus …
SOURCE … Select the source you have
connected. The option you select indicates
which remote control button switches on
the source. For example, a source
registered as V.MEM is switched on when
you press the V.MEM button. A source
registered as DTV2 is switched on when
you press DTV2. (Beo4: Press LIST and
then the navigation button up or down to
display DTV2 and press the centre
button). Options are:
NONE… if nothing is connected.
V.MEM… for a connected video recorder
or hard disk recorder.
DVD… for the optional Blu-ray player.
DVD2… for a connected DVD player or
recorder.
DTV… occupied by the ATSC digital tuner,
unless you disable the ATSC digital tuner
in the TUNER SETUP menu.
DTV2… for other equipment, such as a
set-top box.
V.AUX2… for other equipment, such as a
video game console.
TV … occupied by the TV tuner, unless you
disable the tuner in the TUNER SETUP menu.
PC… for a connected PC.
CENTRE… for connection of a source
centre, which may contain up to six
built-in sources, such as a DVD player and
a set-top box. This option is only available
in the AV1 and the AV2 menus.
NAME … Allows you to name the source
you are registering, the name you enter
appears in the on-screen display when you
activate the source.
AUTO SELECTION… Allows connected
sources to be selected automatically as
soon as the television detects a signal,
provided the television is on at the time.
Options are YES and NO.
(TIMER RECORDER)… Activate the Timer
recording signal for a connected recorder.
Options are YES and NO. Only available in
the AV1 and AV2 menus, and can only be
activated in one of these menus at any time.
HDMI… Indicates whether or not the
equipment is connected to the television
via one of the HDMI sockets. Select the
appropriate socket.
(SOUND INPUT)… Indicates the sound
signal used. This option is only available
when the equipment is registered to an
HDMI socket. Options are HDMI and
S/P-DIF.
(YPbPr)… Indicates whether or not the
equipment is connected to the television
via the YPbPr sockets. Options are YES
and NO. Can only be registered in one of
the AV menus (AV2 or AV3) at any time.
(AV3–>AV1)… Select whether the TV
should route signals from AV3 to AV1,
even when the T V is switched off. You can
use this feature when you have connected
an external TV tuner to AV3 and a video
recorder to AV1. Options are: NO and
AUTO. This option is only available in the
AV3 menu.
(VGA)… Indicates whether or not the
equipment is connected to the television
via the VGA socket. Options are YES and
NO. Can only be registered in one of the
AV menus (AV5 or AV6) at any time.
While it is possible to register equipment
under any of the available source types, the
type you select affects how you can use your
source.
What’s on the PROJECTOROUT menu…
Select the projector type.
What’s on the HDMI EXPANDER menu…
An HDMI Expander must always be
connected to HDMIC, when present. When
connecting an HDMI Expander, additional
HDMI sockets become available; C1, C2, C3
and C4.
What’s on the LINK menu…
Set a link channel and enable the system
modulator.
AV2
SOURCE NONE
NAME . . . . .
AUTO SELECTION NO
TIMER RECORDER NO
HDMI NO
SOUND INPUT
Y/Pb/Pr NO
Regarding High Denition (HD)
sources …
Standard Denition (SD) signals can be
recorded, as well as distributed to a link
room television, but HD signals cannot.
If you watch a DVD or Blu-ray disc in your
main room and you select the same source
in your link room, the signal will change to
standard denition on both televisions.
Connect both the HD and the SD signals to
the television. The best signal is always used.
If no HD signal is available, the SD signal is
shown.
If you want to use Master Link to integrate
your audio/ video system, you must set
POWER SAVING to OFF to make your setup
function correctly, see page 44 for further
information.
16

>> Register additional video equipment
Standby options …
When you register a non-Bang& Olufsen
product in the CONNECTIONS menu, you
can also select different STANDBY OPTIONS
for your product. This means that you can
select if the connected product should
switch to standby automatically.
The options are:
OFF AT SOURCE CHANGE … The product
switches to standby immediately when
you select another source.
OFF AT TV STANDBY … The product
switches to standby when you switch the
television to standby.
ALWAYS ON … The television does not
switch the product to standby, but the
product may switch to standby due to its
own settings.
MANUAL CONTROL … The product can only
be switched on and off by means of the
remote control. For further information
see page65.
17

Scan in TV channels
Register the source of your TV
signal and scan in your TV
channels.
If you have a connected cable
box to your television, you must
identify the cable box and select
an output channel.
Select video signal type
If you have selected TV TUNER in the
TUNER SETUP menu, you can enter the
source of your TV video signals.
To scan in TV channels…
> Bring up the TV SETUP menu and highlight
OPTIONS.
> Press the centre button to bring up the
OPTIONS menu and highlight TUNER SETUP.
> Press the centre button to bring up the
TUNER SETUP menu. TV TUNER is already
highlighted.
> Use the navigation button left and right to
select CABLE, CABLE BOX, ANTENNA or
OFF.
> Press the centre button to store the
setting. If you have selected CABLE or
ANTENNA, scanning begins immediately.
If you have selected CABLE BOX, you can
then register your cable box in a menu, as
described on page19.
Note that if you select OFF, you must register
a source in the CONNECTIONS menu as TV if
you
wish to switch on the television using the
TV butto
n on the remote control. For further
information about the CONNECTIONS menu,
see page 15.
TUNER SETUP
TV TUNER CABLE
ATSC ON
The TUNER SETUP menu.
18

>> Scan in TV channels
Identify the cable box Source for RF input
If you have connected a cable box to the
television, you must register the
connection in the CABLE BOX SETUP
menu.
> Use the navigation button up or down to
highlight the name of your cable box.
> Press the centre button to store the
setting. You can then enter the output
channel for the cable box.
When you connect an RF cable box,
remember to leave it switched on at all times.
When you have registered the specic
cable box , enter the output channel for
the type of cable box and test whether
you can change channels on the box.
When the menu for your cable box
appears …
> Use the navigation button left or right to
select the channel number that
corresponds to the output channel set on
your cable box. Select CH2, CH3, CH4,
CH5 or CH6.
> Highlight CH TEST and use the navigation
button left or right to test whether you
can change channels on the box.
> If you cannot change channels on the
cable box, repeat the rst two steps.
Otherwise…
> … press the centre button to store your
settings.
CABLE BOX SETUP
GE CABLE BUDDY 1
NOKIA 98005 2
NOKIA D.BOX II 3
PACE DTR739-IM 4
PHILIPS DTX627x 5
PACE DSR600 6
SKY DIGITAL 7
CANALdig DK /S/N 8
CANALdigital I 9
. . . .
Select your cable box from the CABLE BOX
SETUP list. Above you see an example of a
CABLE BOX SETUP list. For installation of
external equipment, contact your retailer.
GE CABLE BUDDY
OUTPUT CH 4
CH TEST . .
Select the output channel for your particular
cable box
19

Edit scanned TV channels
You can ‘remove’ channels you
do not use from the channel list.
Channels you ‘remove’ are
skipped over when you step
through channels using the
arrow buttons on the remote
control. You can still select them
in the channel list by pressing the
channel number.
In addition, you can give
channels names of your own
choice, re-scan to nd new
channels or ne-tune existing
channels.
Remove TV channels
At any time, you can remove channels
you do not use. If you wish, you can
restore channels that you have removed.
> Bring up the TV SETUP menu and highlight
CHANNEL SETUP.
> Press the centre button to bring up the
CHANNEL SETUP menu. EDIT CHANNELS
is already highlighted.
> Press the centre button to bring up the
EDIT CHANNELS menu.
> Use the navigation button up and down to
select the channel you wish to remove.
> Press the yellow button once to remove
the channel.
> Press the yellow button to add the
channel again.
> When you have removed the relevant
channels, press and hold BACK to exit all
menus.
If you select CABLE BOX or OFF for TV
TUNER in the TUNER SETUP menu, the EDIT
CHANNELS and FINE TUNE menus are
inaccessible.
EDIT TV CHANNELS
CNN 1
DISCOVERY 2
. . . . . 3
CWNBC 4
BBCWORLD 5
SUPER CH 6
. .
. .
CINEMA 17
RTL 18
20

>> Edit scanned TV channels
Name channels
Give scanned TV channels names of their
own to make them easy to locate in the
TV channel list.
> Bring up the TV SETUP menu and highlight
CHANNEL SETUP.
> Press the centre button to bring up the
CHANNEL SETUP menu. EDIT CHANNELS is
already highlighted.
> Press the centre button to bring up the
EDIT CHANNELS menu.
> Use the navigation button up or down to
select the channel you wish to name.
> Press the green button to be able to
name the channel. The naming menu is
now activated.
> Use the navigation button up and down to
nd the individual characters in the name.
> Move between character places with the
navigation button left or right.
> Press the centre button to store the name.
> If necessary, repeat the procedure and
name other channel numbers.
> When you have named the relevant
channels, press the centre button to
accept your edited list, or press and hold
BACK to exit all menus.
EDIT TV CHANNELS
CNN 1
DISCOVERY 2
A . . . . 3
CWNBC 4
BBCWORLD 5
SUPER CH 6
. .
. .
CINEMA 17
RTL 18
21

>> Edit scanned TV channels
Fine-tune channels
You can ne-tune your TV channels if,
for example, you wish to adjust the
frequency.
> Bring up the TV SETUP menu and highlight
CHANNEL SETUP.
> Press the centre button to bring up the
CHANNEL SETUP menu and highlight FINE
TUNE.
> Press the centre button to bring up the
FINE TUNE menu. CHANNEL is highlighted.
> Use the navigation button left and right to
select a channel to ne-tune.
> Highlight FINE and use the navigation
button left or right to ne-tune the
channel.
> Highlight SOUND and use the navigation
button left or right to select a sound type
– STEREO, MONO or SAP – for the channel.
> Press the centre button to store the settings.
If you select CABLE BOX or OFF for TV
TUNER in the TUNER SETUP menu, the EDIT
CHANNELS and FINE TUNE menus are
inaccessible.
FINE TUNE
CHANNEL 69
FINE +3
SOUND STEREO
What’s on the FINE TUNE menu …
CHANNEL … Select a channel to ne-tune.
FINE … Fine tune the frequency of a channel.
You can ne tune within the range of
-8 – +8.
SOUND (mono, stereo or language) …
Several types of sound may be available
for different
different languages.
channel or frequency select the options
MONO, STEREO or SAP.
Even though you store a type of sound/
language, you can switch between the
various types while watching a TV
programme. For further information,
see Getting Started.
programmes, mono, stereo or
On the relevant
22

>> Edit scanned TV channels
Re-scan TV channels
You can add new channels or update
scanned channels which, for example,
have been moved by the broadcaster.
Note: If you re-scan all your TV channels,
all channel settings you have made
disappear!
> Bring up the TV SETUP menu and highlight
OPTIONS.
> Press the centre button to bring up the
OPTIONS menu and highlight TUNER
SETUP.
> Press the centre button to bring up the
TUNER SETUP menu. TV TUNER is already
highlighted.
> Use the navigation button right to select
the source of your T V video signals –
CABLE, CABLE BOX, ANTENNA or OFF –
and press the centre button to store it.
> If you select CABLE or ANTENNA, scanning
begins automatically. New channels are
added automatically as they are found.
TUNER SETUP
TV TUNER CABLE
ATSC ON
If you only wish to check for a new signal on
a scanned channel that has been empty, do
not re-scan all TV channels. Instead, select
the channel in the channel list using the
number buttons on the remote control. For
further information about the channel list,
see Getting Started.
If you select CABLE BOX or OFF for TV
TUNER in the TUNER SETUP menu, the EDIT
CHANNELS and FINE TUNE menus are
inaccessible.
23

Loudspeaker setup – surround sound
Add Power Link speakers and
a BeoLab subwoofer to your
television and you have a
surround sound system.
A surround sound setup ts
easily into your living room. Let
the picture determine your ideal
viewing and listening position.
You get the best sound
experience in the area created by
the speakers.
If you have several speakers and
a Beo6 remote control, you can
enjoy the advantages of
Adaptive Sound Technology
instead of the setup described in
this chapter. See page29.
Select your speaker types
Switch on the television in TV or Home
cinema mode before you adjust speaker
settings.
To register the speaker types …
> Bring up the TV SETUP menu and highlight
OPTIONS.
> Press the centre button to bring up the
OPTIONS menu and highlight SOUND.
> Press the centre button to bring up the
SOUND SETUP menu and highlight
SPEAKER TYPE.
> Press the centre button to bring up the
SPEAKER TYPE menu and use the
navigation button left or right to reveal
your centre speaker type.
> Highlight CONFIG. This allows you to
select a CENTRE conguration as a single
speaker or a pair. Depending on which
centre speaker or speakers you select,
CONFIG may be greyed out and
inaccessible.
> Press the navigation button down to move
to the next speaker and press use the
navigation button left or right to reveal
your speaker type.
> Press the centre button to store or press
BACK to leave the menu without storing.
SPEAKER TYPE
CENTRE1 BEOLAB7– 4
CONFIG
SPEAKERS:
BEOLAB4000
BEOLAB4000
BEOLAB4000
BEOLAB5
BEOLAB5
BEOLAB4000
NONE
BEOLAB5
NONE
NONE
24

Assign roles to speakers
>> Loudspeaker setup – surround sound
The speakers you connect to the
television can have more than one role.
If, for example, you only use one set of
front speakers when you watch T V on
your television screen, you can turn your
chair ninety degrees towards a projec tor
screen and use those same speakers as
right front and rear speakers in a surround
sound system for Home cinema.
To assign roles to speaker s …
> Bring up the TV SETUP menu and highlight
OPTIONS.
> Press the centre button to bring up the
OPTIONS menu and highlight SOUND.
> Press the centre button to bring up the
SOUND SETUP menu and highlight
SPEAKER ROLES.
> Press the centre button to bring up the
SPEAKER ROLES menu.
> Highlight a speaker role. When you
highlight a speaker role, a sound is
produced by a speaker.
> Use the navigation button left or right to
select a role for the speaker producing the
sound.
>Repeat the procedure for each speaker.
> Press the centre button to store or press
and hold BACK to leave the menu without
storing.
G
2F A
1
E
D C
Assigning roles to the connected
loudspeakers allows you to specify the
speakers’ function in a surround sound
system and the number of speakers to be
used. Assign different roles for watching TV
(1) and Home cinema (2), as shown in the
illustration:
TV viewing (1) …
Speaker A: Left front
Speaker B: Right front
Speaker C: Off
Speaker D: Off
Speaker E: Right surround
Speaker F: Left surround
Speaker G: Off
TV SPEAKER ROLES
SPEAKERS:
NONE
NONE
NONE
RIGHT SURROUND
RIGHT FRONT
NONE
NONE
LEFT SURROUND
B
LEFT FRONT
NONE
NONE
NONE
What’s on the TV SPEAKER ROLES
menu …
Options are NONE, LEF T FRONT, RIGHT
FRONT, LEFT SURROUND, RIGHT
SURROUND, LEFT BACK, RIGHT BACK,
CENTRE BACK.
What’s on the CINEMA SPEAKER ROLES
menu …
Options are NONE, LEF T FRONT, RIGHT
FRONT, LEFT SURROUND, RIGHT
SURROUND, LEFT BACK, RIGHT BACK,
CENTRE BACK, CENTRE, LEFT CENTRE,
RIGHT CENTRE.
You must select the surround speakers
before you can select the back speakers.
Home cinema viewing (2) …
Speaker A: Right front
Speaker B: Right surround
Speaker C: Right back
Speaker D: Left back
Speaker E: Left surround
Speaker F: Left front
Speaker G: Centre
25

>> Loudspeaker setup – surround sound
Set speaker distance
Switch on the television from your
favourite viewing position. Enter the
straight-line distances in metres
between your position and the
individual speakers.
To set the speaker distances …
> Bring up the TV SETUP menu and highlight
OPTIONS.
> Press the centre button to bring up the
OPTIONS menu and highlight SOUND.
> Press the centre button to bring up the
SOUND SETUP menu and highlight
SPEAKER DISTANCE.
> Press the centre button to bring up the
SPEAKER DISTANCE menu.
> Move the cursor from speaker to speaker
and use the navigation button left or right
to select the approximate straight-line
distance in metres between your viewing
position and each of the speakers.
> When you have entered the appropriate
speaker distances, press the centre
button to store or press BACK to leave the
menu without storing.
SPEAKER DISTANCE
CENTRE 1.0 M
LEFT FRONT 1.0 M
RIGHT FRONT 1.0 M
LEFT SURROUND 1.0 M
RIGHT SURROUND 1.0 M
LEFT BACK 1.0 M
RIGHT BACK 1.0 M
FRONT
LEFT
SURROUND
LEFT
LEFT
BACK
CENTRE
RIGHT
FRONT
RIGHT
BACK
RIGHT
SURROUND
26

Calibrate the sound level
>> Loudspeaker setup – surround sound
When you have connec ted speakers in a
surround sound setup to the television,
you must perform a speaker calibration.
A calibration sound is produced
alternately in each of the speakers you
have connected in your surround sound
setup. Your task is to adjust the sound
level from all the connected speakers to
match the sound level from the centre
speaker. You can choose whether you
want the sound sequence to occur
automatically or manually.
Once you have performed your speaker
calibration, you will only need to re-
calibrate the speaker sound if you make
changes to the setup, for example, if
you move one or more of the speakers.
To calibrate the sound level …
> Bring up the TV SETUP menu and highlight
OPTIONS.
> Press the centre button to bring up the
OPTIONS menu and highlight SOUND.
> Press the centre button to bring up the
SOUND SETUP menu and highlight
SPEAKER LEVEL.
> Press the centre button to bring up the
SPEAKER LEVEL menu. SEQUENCE is
highlighted.
> Use the navigation button left or right to
choose between AUTOMATIC and
MANUAL.
> Use the navigation button left or right to
adjust the speaker sound and use the
navigation button up or down to move to
another speaker.
> When you have adjusted the sound for all
the speakers in your surround sound setup,
press the centre button to store or press
BACK to leave the menu without storing.
SPEAKER LEVEL
SEQUENCE AUTOMATIC
LEFT FRONT .... . . . . . .
RIGHT FRONT .... . . . . . .
LEFT SURROUND .... . . . . . .
RIGHT SURROUND .... . . . . . .
LEFT BACK .... . . . . . .
RIGHT BACK .... . . . . . .
27

>> Loudspeaker setup – surround sound
See the name of the active sound system
You can see the name of the active
sound system for a source or programme
on the screen. However, it is not possible
to adjust or preset a sound system.
To see the active sound system …
> Bring up the TV SETUP menu and highlight
OPTIONS.
> Press the centre button to bring up the
OPTIONS menu and highlight SOUND.
> Press the centre button to bring up the
SOUND SETUP menu and highlight
SOUND SYSTEM.
> Press the centre button to bring up the
SOUND SYSTEM menu. The active sound
system is shown.
> Press and hold BACK to exit all menus. An example of a sound system that can
SOUND SYSTEM
INPUT FORMAT:
MONO/STEREO
OUTPUT FORMAT:
STEREO
SPEAKER 1
ADAPTIVE SOUND
TECHNOLOGY:
DISABLED
LISTENING PRESET:
appear in the menu.
Your speaker combination does not need to
match the number of available channels for
the sound system to be in effect.
28

Adaptive Sound Technology
Your system is equipped with
Adaptive Sound Technology
which allows you to enjoy an
optimal sound experience with
a multiple speaker setup even
though your speakers are not
placed correctly for your listening
position. The Adaptive Sound
Technology feature in the
television uses all connected
speakers to create the ultimate
sound experience of perfectly
placed speakers.
To enjoy the advantages of this
setup, several speakers and a
Beo6 remote control are
necessary. If you have only a few
speakers or a Beo4 remote
control, this setup is not
recommended and you should
choose the setup without
Adaptive Sound Technology
described in the chapters about
rst-time setup and loudspeaker
setup on pages7 and 24.
Enable Adaptive Sound Technology
If you choose to switch on the Adaptive
Sound Technology function, you can still
disable it in one or more of the listening
presets you make.
> Bring up the TV SETUP menu and
highlight OPTIONS.
> Press the centre button to bring up the
OPTIONS menu and highlight SOUND.
> Press the centre button to bring up the
SOUND SETUP menu and highlight AST
ON/OFF.
> Press the centre button to bring up the
AST ON /OFF menu.
> Use the navigation button left or right to
enable or disable the technology.
> Press the centre button to store or press
and hold BACK to leave the menu without
storing.
In the SOUND SYSTEM menu you can see
whether the Adaptive Sound Technology is
enabled or not and which listening preset is
currently activated. See page28.
AST ON/OFF
AST ON
In this part of the setup you set
up speakers for your television
and an optional projector.
For information about daily use
of Adaptive Sound Technology,
see Getting Started.
29

>> Adaptive Sound Technology
Points A and B
For Adaptive Sound Technology to
gure out the exact position of each
speaker, you will need to decide on two
xed points, Point A and Point B, before
you can enter the set tings of the speaker
setup menu. These points could,
for example, be on a wall.
Guidelines for xing Point A and Point B:
1 Fix the points in the edge of a room, so all
speakers are placed on the same side of
an imaginary line between Point A and
Point B.
2 Fix the points far apart from each other,
at least two metres.
3 From both Point A and Point B you should
be able to see all speakers in the setup.
However, it is acceptable if a piece of
furniture is in the way.
A(2)
B(2)
A
(1)
B
(1)
Examples of two possibilities for points A
and B with the imaginary line from one
point to the other. You can preset speaker
combinations for several listening positions
such as at the sofa when you watch
television, at the dining table or when you sit
in an armchair reading.
30

Set up the speakers
>> Adaptive Sound Technology
Set the speaker types and the distances
from Points A and B to each speaker, to
the left and right side of the television
screen and a projec tor screen, to a
viewing position and the distance
between the two points.
Set speaker type and distance …
> Bring up the TV SETUP menu and highlight
OPTIONS.
> Press the centre button to bring up the
OPTIONS menu and highlight SOUND.
> Press the centre button to bring up the
SOUND SETUP menu and highlight
SPEAKER SETUP.
> Press the centre button to bring up the
SPEAKER SETUP menu.
> Use the navigation button left or right to
select the speaker types.
> Press the centre button to store the
settings and bring up the DISTANCE TO
POINT A menu.
> Enter the required horizontal distances in
metres. The distance to a stereo speaker
should be measured to the left and right
edges of the speaker.
> Press the centre button to store the
settings and bring up the DISTANCE TO
POINT B menu.
> Enter the horizontal distances.
> Press the centre button to store the
setting. The television can now calculate
your speaker setup.
Select the viewing position from where you
watch television.
When you set the speaker type, the speaker
name highlighted in the menu should match
the speaker producing a sound. In the menu
that follows, you are asked to enter the
horizontal distance in metres from Point A to
each of your speakers, to the left and right
edge of your television screen and a
connected projector screen, to a viewing
position and to Point B.
A
SPEAKER TYPE
CENTRE1 BEOLAB7–2
CONFIG
SPEAKERS:
BEOLAB5
BEOLAB5
BEOLAB9
B
BEOLAB9
BEOLAB4000
BEOLAB4000
BEOLAB4000
BEOLAB4000
BEOLAB4000
NONE
NONE
NONE
NONE
DISTANCE TO POINT A
BEOLAB7–2 LEFT 1.0 M
BEOLAB7–2 RIGHT 1.0 M
BEOLAB5 1.0 M
BEOLAB5 1.0 M
BEOLAB9 1.0 M
BEOLAB9 1.0 M
BEOLAB4000 1.0 M
BEOLAB4000 1.0 M
BEOLAB4000 1.0 M
BEOLAB4000 1.0 M
BEOLAB4000 1.0 M
TV LEF T 1.0 M
TV RIGHT 1.0 M
VIEW POSITION 1.0 M
CINEMA LEFT 1.0 M
CINEMA RIGHT 1.0 M
POINT B 1.0 M
31

Listening presets
>> Adaptive Sound Technology
Select the speakers to be activated in TV
mode and, if you have connected a
projector, in Cinema mode. You can also
make up to ve customised listening
presets, such as at the dining table or in a
favourite armchair. Select three to seven*
speakers and up to two subwoofers to be
activated for a preset and determine the
distance from your listening position to
three of the activated speakers.
For each customised listening preset it is
also possible to rotate the perceived
sound 360 degrees around the listening
position. The default rotation is 0 degrees
which is the direction from your listening
position to the television.
If your speakers are placed correctly for
your listening positions, it is
recommended that you disable Adaptive
Sound Technology and set the speaker
roles, distances and levels. If you
activate fewer than three speakers, it is
not possible to enable the Adaptive
Sound Technology and you must set the
speaker roles, distances and levels. For
further information about speaker roles,
distances and levels, see page25 –27.
*A stereo speaker such as a BeoLab 7–1 or
7–2 counts as two speakers if fewer than six
speakers are activated.
The distance from your listening position to
any speaker in a listening preset should not
exceed 10 metres.
To set speaker presets …
> Bring up the TV SETUP menu and highlight
OPTIONS.
> Press the centre button to bring up the
OPTIONS menu and highlight SOUND.
> Press the centre button to bring up the
SOUND SETUP menu and highlight
LISTENING PRESETS.
> Press the centre button to bring up the
LISTENING PRESET menu and highlight T V,
CINEMA or a custom preset eld.
> Press the centre button to bring up the
highlighted menu.
> Use the navigation button left or right to
enable or disable the Adaptive Sound
Technology.
> Use the navigation button left or right to
activate the preferred speakers. Three to
seven speakers as well as up to two
subwoofers can be activated.
> Check that the Adaptive Sound Technology
is enabled or disabled as you desire.
> Press the centre button to store and bring
up the next menu. If you have selected
OFF to disable the Adaptive Sound
Technology, see pages25–27 about how
to assign roles to speakers, set the speaker
distances and calibrate the sound level.
> Enter the horizontal distance in metres
between your listening position and each
speaker making a sound.
> If you are setting a customised preset and
ADAPTIVE SOUND TECHNOLOGY is
enabled, highlight ROTATION and select
how much the sound stage should be
rotated. A sound will be produced from
the setup if a source is playing and you
rotate until the sound is experienced from
the desired direction.
> Press the centre button to store and
return to the LISTENING PRESETS menu.
During rst-time setup, press the green
button to continue the rst-time setup
procedure when you have created the
desired presets.
CINE MA
TV
Example of a listening position for watching
tele vision and Home cinema. You select which
speakers should be active for each situation.
32

>> Adaptive Sound Technology
LISTENING PRESETS
TV
CINEMA
DINING
READING
CLEANING
PARTY
…
If you have changed the rotation of a preset
during daily use, you can easily create a new
preset with these settings. Enter the
LISTENING PRESETS menu, select an empty
PRESET eld and press the centre button for
each menu, as the current settings will
automatically be applied to each of these
menus.
You can make the television switch to a
customised listening preset automatically
when an audio source is selected.
See page36 about sound adjustment.
Name a customised preset
You can name your customised listening
presets in the television menu yourself.
Your retailer can help you name the
customised listening presets in the
Beo6 display.
To name a customised preset …
> Bring up the TV SETUP menu and highlight
OPTIONS.
> Press the centre button to bring up the
OPTIONS menu and highlight SOUND.
> Press the centre button to bring up the
SOUND SETUP menu and highlight
LISTENING PRESETS.
> Press the centre button to bring up the
LISTENING PRESET menu.
> Highlight a desired customised listening
preset and press the green button to be
able to name the preset.
> Enter a preferred name and store it by
pressing the centre button on your
remote control.
Delete a customised preset
You can delete any customised listening
preset you do not want.
To delete a customised preset …
> Bring up the TV SETUP menu and highlight
OPTIONS.
> Press the centre button to bring up the
OPTIONS menu and highlight SOUND.
> Press the centre button to bring up the
SOUND SETUP menu and highlight
LISTENING PRESETS.
> Press the centre button to bring up the
LISTENING PRESET menu.
> Highlight a desired customised listening
preset and press the yellow button to be
able to delete the preset – the preset is
then dimmed.
> Press the yellow button again to nally
delete the preset.
33

Adjust picture and sound settings
Picture and sound settings are
preset from the factory to
neutral values which suit most
viewing and listening situations.
However, if you wish, you can
adjust these settings to your
liking.
Adjust picture brightness,
contrast or colour. Sound
settings include volume, bass
and treble.
Store your picture and sound
settings temporarily – until your
television is switched off – or
store them permanently.
Activate GAME MODE if you
connect a game console to your
television.
For information about how to
change the picture format,
see Getting Started.
Adjust brightness, colour or contrast
Adjust the picture settings via the
PICTURE menu. Temporary settings are
cancelled when you switch of f the
television.
> Bring up the TV SETUP menu and
highlight OPTIONS.
> Press the centre button to bring up the
OPTIONS menu and highlight PICTURE.
> Press the centre button to bring up the
PICTURE menu.
> Use the navigation button up or down to
move through menu items.
> Use the navigation button left or right to
adjust the values.
> Press BACK to store your settings until
you switch off the television, or
> … press the centre button to store your
settings permanently.
For video sources using the VGA signal, the
following options appear as well:
HOR. SIZE … Adjusts the picture size along
the horizontal axis.
VERT. SIZE … Adjusts the picture size along
the vertical axis.
HOR. POSITION … Adjusts the picture
position along the horizontal axis.
VERT. POSITION … Adjusts the picture
position along the vertical axis.
Note that these four settings only apply for
the screen resolution in effect at the time
you adjust the settings.
When signals are sent in format 1080p or
1080i, the menu item SIZE is available in the
PICTURE menu.
For video sources using the NTSC signal, the
menu item TINT is available.
You cannot adjust brightness or contrast
when using a projector connected to the
television, or when using the television in
Home cinema mode.
PICTURE
BRIGHTNESS .... . . . .
CONTRAST .... . . . .
COLOUR .... . . . .
TINT .... . . . .
SIZE .... . . . .
GAME MODE
To temporarily remove the picture from the
screen, press to bring up the Scene
display on Beo6, press Picture, then press
P.Mute. To restore the picture, press
P.Mute again. (Beo4: press LIST and use the
navigation button up or down to bring up
P.MUTE in the Beo4 display and press the
centre button. To restore the picture,
press a source button.)
34

>> Adjust picture and sound settings
Game mode
If you connect a game console or play a
PC game using the television as a
monitor, you can activate ‘Game mode’.
Game mode minimises the delay caused
by signal processing. The television
remembers if Game mode was activated
the last time each source was selected.
To activate GAME MODE with Beo6
directly …
> Press Game to activate Game mode, press
again to deactivate Game mode.
To activate GAME MODE with Beo4
directly*1 …
> Press LIST and use the navigation button
up or down to bring up GAME in the
Beo4 display.
> Press the centre button repeatedly to
switch between ON and OFF.
1
* If you have a Beo4 without navigation
button, GAME may not be available.
To activate GAME MODE via the T V
SETUP menu …
> Bring up the TV SETUP menu and
highlight OPTIONS.
> Press the centre button to bring up the
OPTIONS menu and highlight PICTURE.
> Press the centre button to bring up the
PICTURE menu.
> Use the navigation button up or down to
move to GAME MODE.
> Press the centre button repeatedly to
switch between ON and OFF.
35

Adjust volume, bass or treble
>> Adjust picture and sound settings
Sound settings are preset at the factory
to neutral values which suit most
listening situations. However, if you
wish, you can adjust these settings to
your liking.
You can preset levels for sound volume,
bass, treble and up to two connected
BeoLab subwoofers.
You can switch the loudness feature on
or off. The loudness feature compensates
for the human ear’s lack of sensitivity to
high and low frequencies. These
frequencies are boosted at low volume
levels so that low music becomes more
dynamic.
In addition, you can select two default
speaker combinations; one to be used
each time you switch on a video source
in your television, and one to be used
each time you switch on an audio source
connected to your television. You can
still select a dif ferent speaker
combination any time you wish.
To adjust sound …
> Bring up the TV SETUP menu and highlight
OPTIONS.
> Press the centre button to bring up the
OPTIONS menu and highlight SOUND.
> Press the centre button to bring up the
SOUND SETUP menu, and highlight
ADJUSTMENT.
> Press the centre button to bring up the
SOUND ADJUSTMENT menu.
> Use the navigation button up or down to
select an item to adjust.
> Use the navigation button left or right to
adjust the values or choose a setting.
> Press BACK to store your settings until you
switch off your television, or…
> …press the centre button to store your
settings permanently.
SOUND ADJUSTMENT
VOLUME .... . . . .
BASS .... . . . .
TREBLE .... . . . .
SUBWOOFER .... . . . .
LOUDNESS ON
DEFAULT VIDEO SPEAKER3
DEFAULT AUDIO SPEAKER2
AUDIO PRESET MANUAL
The content of the SOUND menu varies
according to what you have connected to
the television.
AUDIO PRESET is only available if Adaptive
Sound Technology is enabled in the SOUND
SETUP menu and you have created one or
more customised listening presets. See
pages29 and 32.
When Adaptive Sound Technology is
enabled and a customised listening
preset is created, you can select an
audio preset to be activated
automatically when you switch to an
audio source. The default audio setting
determines which speakers in the
selected audio preset should be
activated.
For further information about speaker
combinations, see page 39.
36

Set up 3D television
You can set up preferences for
watching 3D television, such as
selecting if the television should
automatically switch to 3D mode,
when automatic 3D signalling is
available.
If your TV is equipped with the
optional Blu-ray player, you can
also use it to play 3D Blu-ray discs.
Activate 3D and adjust settings
You can select if the television should
activate 3D mode automatically,
manually or by prompt, when it detects
automatic 3D signalling the rst time
after source or channel change. The
default setting is AUTO.
To activate 3D …
> Bring up the TV SETUP menu and
highlight 3D DISPLAY.
> Press the centre button to bring up the
3D DISPL AY menu and highlight 3D
SETTINGS.
> Press the centre button to bring up the
3D SETTINGS menu, and highlight
ACTIVATE 3D.
> Use the navigation button left or right to
select AUTO, PROMPT or MANUAL.
> Press the centre button to store, or…
> ...press and hold BACK to leave the menu
without storing.
3D SET TINGS
ACTIVATE3D PROMPT
When automatic 3D signalling is available,
the television switches to 3D mode
automatically if ACTIVATE3D is set to AUTO.
If it is set to PROMPT, you must select
between VIEW IN 3D and VIEW IN 2D. If it is
set to MANUAL, you must enter the menu
and switch to 3D mode manually.
37

>> Set up 3D television
If you prefer to watch a television
programme or other Side-by-Side 3D or
Top/Bottom 3D material in 2D format,
you can activate the 3D DISPLAY to view
the material in full screen 2D. You can
also choose to watch the material in 3D*
To activate 2D for 3D formats …
> Bring up the T V SETUP menu and highlight
3D DISPL AY.
> Press the centre button to bring up the
3D DISPL AY menu and highlight 2D.
> Press the centre button to bring up the
2D menu.
> Use the navigation button up or down to
select between SIDE BY SIDE 2D or TOP/
BOTTOM 2D.
> Press the centre button to store, or …
> ... press and hold BACK to leave the menu
without storing.
> To deactivate 3D formats, change source
or select standard 2D.
1
The 2D menu only works with Side-by-Side
and Top/Bottom formats, not with Frame
Packed 3D.
1
* If you do not choose either 2D or 3D
format, your television will continue showing
a distorted picture.
38

Daily use of speaker combinations
You can extend your television into
a surround sound system by adding
Bang & Olufsen loudspeakers and
up to two BeoLab subwoofers.
When you switch on one of the
sources, the television automatically
selects the appropriate speakers,
depending on what kind of sound
suits the source you are using.
The speaker combination is optimised if
you press the Optimise but ton on Beo6.
NOTE! If you have added only two front
speakers to the TV, you will only be able
to choose Mode 1–3.
Select speakers for movie sound
You can select the speaker combination
that suits the source you are using,
provided that the various speaker
modes are available in your television.
> Press to bring up the Scene display on
Beo6, then press Speaker to bring up the
Speaker display. (Beo4: Press LIST and use
the navigation button up or down to
bring up SPEAKER in the Beo4 display).
> Press Optimise if you want to optimise
the sound, or press Mode 1 – 5 to select
the speaker combination you want. (Beo4:
Press the centre button or 1 – 5). The
selected speakers cut in automatically.
> Press to remove the Speaker display
and return to the source you were using.
(Beo4: Press and hold BACK to remove
the SPEAKER from the Beo4 display).
Mode 1
Mode 2
Mode 3
Mode 4
Mode 5
39

See two sources at the same time
Your remote control gives you
access to a dual-screen function
for viewing two video sources at
the same time. You can also
bring up a video source and an
audio source at the same time.
For example, you can view a
video playback and a TV
programme at the same time,
provided that the selected sources
are available in your system.
While watching a programme or
recording, you can divide the
screen between the current
programme or recording and a
new programme or recording.
You can also swap the two
pictures at any time.
You cannot watch two recordings at the
same time.
If you watch 3D and switch on the dual-
screen function, the television will switch
to 2D.
If you have a Beo4, press LIST and use
the navigation button up or down until
P-V.AUX is shown in the Beo4 display,
to view a source registered in the
CONNECTIONS menu as V.AUX, such as
a set-top box.
A B
A B
Volume adjustment always affects picture A,
while other operations, such as selecting
channels, affect picture B. Choosing a new
source cancels dual-screen viewing.
You can view two HDMI (High Denition
Multimedia Interface) sources at the same
time, but only if one of the sources is
connected to either the HDMI A or HDMI B
socket, and the other source is connected to
either the HDMI C or HDMI D socket. For
further information about the HDMI sockets,
see the chapter about connection panels in
Getting Started.
While watching, for example, TV …
> Press P-and-P to bring up the P-and-P
display on Beo6. (Beo4: Press LIST and use
the navigation button up or down to bring
up P-AND-P).
> Press, for example, DVD to select the
source to view on the right side of the
screen (B).
> Press Swap to swap the left picture and
right picture. (Beo4: Press 0).
To leave the dual-screen function …
> Press BACK to leave the function and
return to normal viewing of the source on
the left side of the screen (A) or simply
select a source.
To bring up V.TUNER on the right hand side
of the screen, you must press P-and-P, then
TV. (Beo4: Press LIST and use the navigation
button up or down to bring up P-AND -P,
then press TV). To bring up hard disk
recordings on the right hand side of the
screen, you must press P-and-P, then
V.MEM. (Beo4: Press LIST and use the
navigation button up or down to bring up
P-AND-P, then press V.MEM).
40

Home cinema
If you connect a projector, you can
turn your television into a Home
cinema. When you switch to the
Home cinema setup, the television
switches the picture from its own
screen to the projector screen and
activates the appropriate speakers.
Switch to Home cinema
If a projec tor is connected, you can use
your remote control and move the picture
from the television screen onto a projector
screen for a special occasion or movie.
> Press to bring up the Scene display on
Beo6, then press Cinema to bring up the
Cinema display on Beo6. (Beo4: Press LIST
and use the navigation button up or down
to bring up FORMAT).
> Press Cinema to switch between Home
cinema mode and ordinary T V mode.
(Beo4: Press 0).
> Press to leave the function. (Beo4: Press
BACK).
41

Set the television to switch itself on or off
Your television has a built in
Sleep Timer which means that
you can make it switch off after
a designated number of minutes.
You can also make your television
switch itself on and off
automatically via the timed play
and timed standby functions, for
example, if there is a programme
you do not want to miss.
Enter as many as six Timer
settings, and bring up an onscreen list of the Timer settings
you have entered. From this list,
you can edit or delete your Timer
settings.
If your television is integrated
with a Bang& Olufsen audio or
video system with a Master Link
cable, these systems can perform
the timed play or timed standby
functions as well.
For your timed settings to be
executed correctly, ensure that
the built-in clock is set to the
correct time. For further
information, see page47.
You can also make standby
settings for your television to
switch itself off after some time
with no operation.
Sleep Timer
You can make the television switch off
automatically after a number of minutes.
To activate the Sleep Timer with Beo6 …
> Press Sleep repeatedly to select the
number of minutes or Off.
To activate the Sleep Timer with
Beo4*1 …
> Press LIST and use the navigation button
up or down to bring up SLEEP in the Beo4
display.
> Press the centre button repeatedly to
select the number of minutes.
To deactivate the Sleep Timer …
> Press LIST and use the navigation button
up or down to bring up SLEEP in the Beo4
display.
> Press the centre button repeatedly until
OFF is shown in the television display.
To set the Sleep Timer via the menu …
> Bring up the TV SETUP menu and highlight
SLEEP TIMER.
> Press the centre button to bring up the
SLEEP TIMER menu.
> Press the centre button repeatedly to
switch between the number of minutes
and OFF.
1
* If you have a Beo4 without navigation
button, SLEEP may not be available.
Play Timer
If you connect a Bang & Olufsen audio
or video product to your television with
a Master Link cable, you can exclude or
include it in timed functions via the
PLAY TIMER menu. For example, set the
television Play Timer to ON and an audio
system’s Play Timer to OFF if you wish
timed functions to apply only to the
television.
To switch on the Play Timer …
> Bring up the TV SETUP menu and highlight
PLAY TIMER.
> Press the centre button to bring up the
PLAY TIMER menu, and highlight TIMER
ON/OFF.
> Press the centre button to bring up the
TIMER ON/OFF menu.
> Use the navigation button left or right to
reveal ON.
> Press the centre button to store the
setting.
For further information about how to
program Timers and switch the Play Timer
on or off for a connected Bang & Olufsen
audio or video product, see the guide
enclosed with the product.
Set POWER SAVNG to OFF, if you
have other equipment connected to
your television.
NOTE! For safety reasons, the stand
will not turn if the television is
switched on by a Play Timer.
42

>> Set the television to switch itself on or off
Timed play and timed standby
You can preset your television to start
and stop automatically at the same time
and day ever y week.
To enter settings for timed play or timed
standby…
> Bring up the TV SETUP menu and highlight
PLAY TIMER.
> Press the centre button to bring up the
PLAY TIMER menu and highlight PLAY
TIMER PROGRAMMING.
> Press the centre button to bring up the
PLAY TIMER PROGRAMMING menu.
> Use the navigation button up or down to
move through the menu items.
> Enter information or use the navigation
button left or right to view your choices
for each item. When DAYS is highlighted,
use the navigation button right once to be
able to move through the days, and use
the navigation button up or down to
remove a day you do not want. Use the
navigation button right to move to the
next day, and use the navigation button
left to move back to a previous day. When
the weekday(s) you want are displayed,
press the centre button to accept the day(s).
> When you have lled in the required
information, press the centre button to
store your Timer settings.
> Press BACK to back up through previous
menus or press and hold BACK to exit all
menus.
View, edit or delete a Timer
Bring up an on-screen list of the settings
you have entered. From this list, you can
edit or delete your Timer set tings.
To view, edit or delete your Timer
settings…
> Bring up the TV SETUP menu and highlight
PLAY TIMER.
> Press the centre button to bring up the
PLAY TIMER menu and highlight PLAY
TIMER INDEX.
> Press the centre button to bring up your
list of Timer settings. The rst Timer
setting in the list is already high lighted.
> Use the navigation button up or down to
move the cursor to a Timer setting you
wish to edit.
> To edit a setting, press the centre button
and follow the procedure described under
‘Timed play and timed standby’.
> To be able to delete a selected setting,
press the yellow button.
> If you change your mind, use the
navigation button left to move the setting
back into the list. You can also press and
hold BACK to exit all menus.
> Press the yellow button a second time to
delete the setting.
TIMER PROGRAMMING
SOURCE TV
CHANNEL 18 BBC
SUB CHANNEL
START TIME 15:40
STOP TIME 16:40
DAYS M . . T F . S
PLAY TIMER PROGRAMMING menu
Abbreviations for days of the week:
M … Monday
T … Tuesday
W … Wednesday
T … Thursday
F … Friday
S … Saturday
S … Sunday
If a Wake-up Timer has been programmed,
the television cannot be part of an ordinary
Play Timer or Standby Timer until the
Wake-up Timer has been carried out or
disabled.
If the television is set up in a link room,
Timer programming must be carried out on
your main room television.
43

>> Set the television to switch itself on or off
Standby settings
The television can be set to switch itself
to standby after some time with no
operation. The factory setting is 4 hours.
This function only applies in video mode
not in audio mode. You can also set your
television to save power.
To make standby settings …
> Bring up the TV SETUP menu and highlight
OPTIONS.
> Press the centre button to bring up the
OPTIONS menu and highlight STANDBY
SETTINGS.
> Press the centre button to bring up the
STANDBY SETTINGS menu and use the
navigation button up or down to move
between AUTO STANDBY and POWER
SAVING.
> Use the navigation button left or right to
select the setting you want.
> Press the centre button to store the setting.
> Press BACK to back up through previous
menus or press and hold BACK to exit all
menus.
STANDBY SET TINGS
AUTO STANDBY 4HOURS
POWER SAVING OFF
STANDBY SET TINGS menu.
When no signal has been detected for
15minutes, the television is switched to
standby.
If you want to make recordings on a
Bang& Olufsen hard disk recorder or use
Master Link to integrate your audio/video
system, or if you want external Play Timers
executed on the television, you must set
POWER SAVING to OFF to make your setup
function correctly.
When AUTO STANDBY is activated, a
message appears on your television screen if
the television has not been operated during
the time set in the menu. The television then
switches to standby, if you do not operate it.
When power saving is set to ON, there is no
light in the standby indicator.
44

Wake-up Timer
You can make the television
wake you up in the morning.
The Wake-up Timer is a once-
only Timer, it lasts for one hour.
Like an alarm clock it is disabled
once it has been executed. It
applies only to the television it
has been programmed on.
Once you have made one
Wake-up Timer, the television
automatically suggests the time
you entered for the latest
Wake-up Timer when you enter
a new one.
Wake-up Timers can of course
also be disabled again.
When you have programmed a
Wake-up Timer, the television
cannot be part of an ordinary
Play Timer until the Wake-up
Timer has been carried out or
disabled.
Enter a Wake-up Timer
You must choose the source and channel
number of your Wake-up Timer as well
as the start time.
To enter settings for a Wake-up Timer …
> Bring up the TV SETUP menu and highlight
PLAY TIMER.
> Press the centre button to bring up the
PLAY TIMER menu and highlight WAKE UP
TIMER.
> Press the centre button to bring up the
WAKE UP TIMER menu.
> Use the navigation button up or down to
move through the menu items.
> Enter information or use the navigation
button left or right to view your choices
for each item.
> When you have lled in the required
information, press the centre button to
store your Wake-up Timer.
> Press BACK to back up through previous
menus or press and hold BACK to exit all
menus.
WAKE UP TIMER
SOURCE TV
CHANNEL 21 BBC
SUB CHANNEL
START TIME 07:00
ON/OFF ON
WAKE UP TIMER menu.
45

>> Wake-up Timer
Check or delete a Wake-up Timer
You can bring up the settings for the
Wake-up Timer to check the time or to
disable the Wake-up Timer by setting it
to OFF.
To change settings for a Wake-up Timer
or delete it …
> Bring up the TV SETUP menu and highlight
PLAY TIMER.
> Press the centre button to bring up the
PLAY TIMER menu and highlight WAKE UP
TIMER.
> Press the centre button to bring up the
WAKE UP TIMER menu.
> Use the navigation button up or down to
move through the menu items.
> Use the navigation button left or right to
change settings, or enter a new time.
Change the ON/OFF setting to OFF if you
wish to delete the Wake-up Timer.
> When you have made your changes, press
the centre button to store them.
> Press BACK to back up through previous
menus or press and hold BACK to exit all
menus.
TIMER SETUP
TIMER ON/OFF OFF
TIMER INDEX
TIMER PROGRAMMING
WAKE UP TIMER 07:00
TIMER SETUP menu.
46

Set the time and date
When you preset your television
to switch itself on or off at a
particular time, the clock ensures
that this feature is switched on
and off at the right time.
To bring up the clock on the display,
press Clock on Beo6. The clock display
disappears again after ten seconds.
(Beo4: Press LIST and use the navigation
button up or down to bring up CLOCK in
the Beo4 display and press the centre
button to bring up the clock).
> Bring up the TV SETUP menu and highlight
OPTIONS.
> Press the centre button to bring up the
OPTIONS menu and highlight CLOCK.
> Press the centre button to bring up the
CLOCK menu.
> Use the navigation button up or down to
move through menu items.
> Use the navigation button left or right to
see your choices for each item.
> Press the centre button to store your clock
and calendar options, or…
> …press and hold BACK to exit all menus
without storing.
CLOCK
TIME 20:00
DATE 23
MONTH APR
YEAR 2009
Abbreviations for months
Jan … January
Feb … February
Mar … March
Apr … April
May … May
Jun … June
Jul … July
Aug … August
Sep … September
Oct … October
Nov … November
Dec … December
47

your area, you can switch it on or
off. You can apply TV parental
guidelines and the MPAA rating
system.
If you assign an access code and
switch parental control on, you
will be required to enter this
access code when ever you want
to watch a programme or
channel that has been blocked.
Whenever a blocked programme
or channel is selected, your screen
goes blank, the sound is shut off
and an on-screen menu prompts
you to enter your access code.
If you wish to change or override
your settings, the access code is
also required.
Activate parental control
Assign an access code If parental control is available in
To make full use of the parental control
system, begin by assigning an access
code. This restricts access to the
programmes and channels with broad-
casted restrictions, and prevents the
settings from being changed by others.
Choose a code that is easy to remember.
The default setting is 0000.
> Bring up the TV SETUP menu and highlight
OPTIONS.
> Press the centre button to bring up the
OPTIONS menu and highlight PARENTAL
CONTROL.
> Press the centre button to bring up the
PARENTAL CONTROL menu and highlight
ACCESS CODE.
> Press the centre button to bring up the
ACCESS CODE menu.
> Press and use the number buttons to
enter the default code (0000). (Beo4: Use
the number buttons).
> Highlight NEW CODE and enter a new
code.
>
Enter the new code once more to conrm it.
> Press the centre button to store the code.
> Press and hold BACK or press a source
button, for example TV or DTV to exit all
menus.
ACCESS CODE
OLD CODE . . . .
NEW CODE . . . .
CONFIRM CODE . . . .
Assign an access code.
To change your code at any time, follow the
procedure described above. If, for some
reason, you have forgotten your code, then
you can key in 9999 three times when
OLD CODE is highlighted. This allows you to
enter a new code.
48

>> Activate parental control
Preset TV Parental guidelines
If you choose to apply the system of TV
parental guidelines, you can selec t one
common restriction level for all
categories or preset the restriction level
for the individual categories.
> Bring up the TV SETUP menu and highlight
OPTIONS.
> Press the centre button to bring up the
OPTIONS menu and highlight PARENTAL
CONTROL.
> Press the centre button to bring up the
PARENTAL CONTROL menu. TVPARENTAL
GUIDELINES is already highlighted.
> Press the centre button to bring up the
TV PARENTAL GUIDELINES menu.
> Press and use the number buttons to
enter the access code. If you have not yet
preset your own code, enter the default
code (0000). (Beo4: Use the number
buttons).
> Use the navigation button left or right to
adjust the setting OVER ALL. This
automatically adjusts the different
categories to one common restriction
setting. Options are: TV-Y, TV-Y7, TV-G,
TV-PG, TV-14, TV-MA, and N/A.
Preset the MPAA rating
You can choose to apply the MPAA
rating system as parental control. Select
and store the restriction level that you
want to impose.
> Bring up the TV SETUP menu and highlight
OPTIONS.
> Press the centre button to bring up the
OPTIONS menu and highlight PARENTAL
CONTROL.
> Press the centre button to bring up the
PARENTAL CONTROL menu and highlight
MPAA RATING.
> Press the centre button to bring up the
MPAARATING menu.
> Press
> Use the navigation button left or right to
> Press the centre button to store the
> Press and hold BACK or press a source
and use the number buttons to
enter the access code. If you have not yet
entered your own code, enter the default
code 0000. (Beo4: Use the number
buttons).
adjust the setting RATING. This auto-
matically adjusts the restriction setting.
Options are: G, PG, PG-13, R, NC-17, X,
NOT RATED, N/A, and OFF.
setting.
button, such as TV, to exit all menus.
TV PARENTAL GUIDELINES
ACCESS CODE . . . .
OVERALL OFF
FANTASY VIOLENCE TV-Y7
VIOLENCE TV-PG
SEXUAL SITUATIONS TV-14
LANGUAGE TV-PG
DIALOGUE TV-14
Preset TV Parental guidelines.
MPAA RATING
ACCESS CODE . . . .
RATING PC-13
Preset the MPAA rating.
49

>> Activate parental control
When parental control is active …
When a blocked programme or channel
is selected, the screen goes blank, the
sound is shut off, and the access code
must be entered. All the programmes
and channels then become available,
and parental control is switched off until
you switch the television to standby.
> Select a blocked channel.
> Press
> The selected channel is now available,
> If you do not know the code or you wish
and use the number buttons to
enter your access code. (Beo4: Use the
number buttons).
as are all other blocked channels.
to view another channel, use the
navigation button up or down to change
channels.
If an incorrect access code is entered three
times, the television automatically switches
to standby.
50

Closed Captioning, to all your
sources and channels, provided
that the broadcaster supports
Closed Captioning.
Apply Closed Captioning
Closed Captioning options You can apply subtitles, or
Choose the type of Closed Captioning
you wish to view and whether or not
you want Closed Captioning to be
displayed automatically.
CLOSED CAPTIONING
DISPLAY OFF
TYPE CC1
Select a type of Closed
Captioning via the CLOSED
CAPTIONING menu.
You can, however, choose to
turn Closed Captioning on or off
at any time – for example, while
watching a specic programme
– even if you have preset the
television to display Closed
Captioning at all times.
> Bring up the TV SETUP menu and highlight
OPTIONS.
> Press the centre button to bring up the
OPTIONS menu and highlight CLOSED
CAPTIONING.
> Press the centre button to bring up the
CLOSED CAPTIONING menu.
> Use the navigation button left or right to
adjust the setting for DISPLAY. Choose ON
or OFF.
> Highlight TYPE and use the navigation
button left or right to select a type of
Closed Captioning. Options are: CC1, CC2,
CC3, CC4, TEXT1, TEXT2, TEXT3, or TEXT4.
>
Press the centre button to store.
> Press and hold BACK or press a source
button, such as TV or DTV, to exit all
menus.
To turn Closed Captioning on or off
while watching a programme …
> Press CC to see the status of closed
captioning – CC ON appears on the screen.
(Beo4: Press TEX T).
> Press CC again to turn Closed Captioning
off. (Beo4: Press TEX T).
> Press CC a third time to restore Closed
Captioning. (Beo4: Press TEXT).
Closed Captioning is not available in Korea.
51

Settings and preferences for the digital tuner
In the digital tuner menus you can
make your own settings, enter
information on your current
terrestrial or cable setup and make
channel searches.
The V-CHIP menu allows you to
restrict access to particular channels
or rated contents.
About channels …
Once you have scanned in the channels,
you can make a Channel List of your
favourite channels. This means that you
reduce the time you spend looking for
specic channels.
Contents of the CHANNEL menu …
AUTO SCAN … Scan in all channels
automatically. Select which channels to
scan for. Options are: AIR, CABLE AUTO,
CABLE STD, CABLE HRC and CABLE IRC.
When you have selected the channels to
scan, you must conrm or cancel the
channel search. Default settings are AIR
and CONFIRM. When you scan in channels,
the current channel list and favourite list
will be lost. If you wish to know which
signal type to use, contact your cable
provider.*
FAVOURITE CHANNEL … Make a list af your
favourite channels. If you have not made a
favourite list, the main list will appear
when you press List. (Beo4: Press and
hold the centre button).
CHANNEL ADD/DELETE … Add or delete
channels. The on-screen display gives a
status of whether a channel is added to or
deleted from the main list. A channel can
be added or deleted by pressing the
centre button. When a channel is deleted,
it is removed from the channel sequence,
but it can still be reached if you enter the
channel digits.
SIGNAL STRENGTH … See the strength of
the received signal.
*In Korea options are AIR and CABLE. Default
settings are AIR and CONFIRM.
52

About the CAPTION menu … *
>> Settings and preferences for the digital tuner
You can apply subtitles, or Closed
Captioning, to all your channels.
Choose the type of Closed Captioning
you wish to view and whether or not
you want Closed Captioning to be
displayed automatically.
You can choose to switch Closed
Captioning on or off at any time – for
example, while watching a specic
programme – even if you have preset
the television to display Closed
Captioning at all times.
Contents of the CAPTION menu …
ON/OFF … Choose to display Closed
Captioning or not. The default setting is
OFF.
ANALOGUE MODE … Select the mode to
use for Closed Captioning in your
analogue television receiver, and if the
Closed Captioning function should be set
to ON. Options are: CC1, CC2, CC3, CC4,
TEXT1, TEXT2, TEXT3 and TE XT4. The
default setting is CC1.
DIGITAL MODE … Select the mode to use
for Closed Captioning in your digital
television receiver, and if the Closed
Captioning function should be set to ON.
Options are: SERVICE1, SERVICE2,
SERVICE3, SERVICE4, SERVICE5 and
SERVICE6. The default setting is SERVICE1.
If you press CC repeatedly you change the
mode or switch Closed Captioning on or off,
even if you have preset the Closed Captioning
function to ON. (Beo4: Press TEXT repeatedly).
DIGITAL FONT OPTIONS … Set your
preferences for the digital font, if you have
set the Closed Captioning function to ON:
SIZE … Select the size of the digital font.
Options are: DEFAULT, SMALL, STANDARD
and LARGE. The default setting is DEFAULT.
STYLE … Select a style for the digital font.
You can choose between eight different
styles. The default setting is DEFAULT.
COLOUR … Select a colour for the
background, the foreground and the edge
of the digital font. You can choose
between DEFAULT and eight different
colours and the default setting is DEFAULT.
OPACITY … Select the opacity for the
background and foreground of the digital
font. Options are: DEFAULT, SOLID,
TRANSLUCENT, TRANSPARENT and
FLASHING. The default setting is DEFAULT.
EDGE STYLE … Select an edge style for
the digital font. You can choose between
seven different styles. The default setting
is DEFAULT.
The DEFAULT option in the DIGITAL FONT
OPTIONS menu is the presentation as it is set
by the programme provider.
53
*The CAPTION menu is not available in Korea.

About the V-CHIP menu … *
>> Settings and preferences for the digital tuner
The V-CHIP menu allows you to lock
specic television contents.
When you enter the V-CHIP menu, you
can lock (and later unlock) specic contents
to avoid others from watching the
contents. Select the contents you wish
to lock. Whenever you try to access
locked contents, you are asked to key in
your V-Chip pincode.
If one content lock is released by the
correct V-Chip pincode all contents are
open and content lock will not be active
again before the television enters
standby.
The V-Chip pincode system of the
built-in ATSC tuner is not the same as the
pincode system for your television, but it
may be easier for you, if you choose to
use the same code for both systems.
Contents of the V-CHIP menu …
Before you can change the setting in the
V-CHIP menu, you must enter the V-Chip
pincode. The default setting of the V-Chip
pincode is 0000.
CHANGING PIN
You can change your V-Chip pincode at any
time. Press
to enter a new four-digit V-Chip pincode.
Enter the new V-Chip pincode again to
conrm. (Beo4: Use the number buttons).
US RATING SETTING
In the US RATING SET TING menu you can
apply the MPAA rating system or the T V-PG
system as parental control. Depending on
which system you choose options are:
– ALLOW ALL
– BLOCK ALL
– TV-Y, TV-Y7, TV-G, TV-PG, TV14, TV-MA
– FV, D, L, S, V
– P, PG, PG13, R, NC17, X
The default setting is ALLOW ALL.
and use the number buttons
CANADIAN R ATING SETTING
In the CANADIAN RATING SETTING menu
you can apply the English classication
system or the French classication system as
parental control.
you choose, options are:
– ALLOW ALL
– BLOCK ALL
– E, C, C8+, G, PG, 14+, 18+
– E, G, 8+, 13+, 16+, 18+
The default setting is ALLOW ALL.
Should you forget your code …
If you forget your V-Chip pincode, enter the
V-CHIP menu and key in ‘9999’. You must
now enter a new personal code.
*The V-CHIP menu is not available in Korea.
Depending on which system
54

About the SETUP menu …
>> Settings and preferences for the digital tuner
In the SETUP menu, you set up your
personal preferences. You can selec t a
menu language to be used in the menus.
When you select a preferred language
for audio, this language will be used
when available from the programme
provider.
Contents of the SETUP menu …
TIME … The clock is automatically set by the
programme provider, but it can fail if the
information is sent wrong.
DAYLIGHT SAVING … Select whether to
use daylight saving for the clock or not.
Options are YES and NO. The default
setting is YES. Note that DAYLIGHT
SAVING will only work if the programme
provider’s daylight saving ag is set to ON
and you have set the DAYLIGHT SAVING
to YES. Otherwise, real daylight saving is
set to OFF.
TIMEZONE … Set the local information for
the clock. Options are EASTERN, CENTRAL,
MOUNTAIN, PACIFIC, AL ASK A, HAWAII,
ATLANTIC and NEWFOUNDL AND. The
default setting is EASTERN.
SOUND …
MULTI-TRACK SOUND … Select the
preferred audio language to be used,
if available from the programme provider.
Options are ENGLISH, SPANISH and
FRENCH. The default setting is ENGLISH.
DIGITAL OUTPUT … Select the preferred
sound output. Options are DOLBY DIGITAL
and PCM. The default setting is DOLBY
DIGITAL.
MENU LANGUAGE … Select the language
to be used in the menus. Options are
ENGLISH, SPANISH and FRENCH. The
default setting is ENGLISH.
VERSION INFORMATION … Use this menu
to see the current ATSC tuner version,
model and release date.
In Korea only MULTI-TRACK SOUND,
DIGITAL OUTPUT and VERSION
INFORMATION are available. Options for
MULTI-TRACK SOUND are KOREAN,
ENGLISH and JAPANESE. Default setting is
KOREAN.
55

Settings and preferences for the Blu-ray player
The Blu-ray menus offer options
for settings and adjustments.
Here you nd detailed information
about the individual menus.
For an overview of the Blu-ray
menu structure, see page5.
The Blu-ray player only supports
playback of 12 cm discs.
If you play back a 3D Blu-ray disc,
it is automatically shown in 3D.
Bring up the SETUP menu
> Press DVD Setup to bring up the DVD
SETUP menu. (Beo4: Press LIST and use
the navigation button up or down to bring
up SHIFT then press 8).
What’s on the PLAYBACK STATUS
menu…
STANDARD … Playback status and stop
status will be displayed.
EXTENDED … Playback status, stop status
and automatic status, such as
BONUSVIEW and angle, will be displayed,
if available on the disc.
What’s on the AUDIO FORMAT menu…
STANDARD … Decode all audio formats to
PCM for up to 7.1 (seven sound channels
and one channel for low-frequency sound).
STANDARD audio format is recommended
to be able to play all sound tracks.
RE-ENCODE … Decode all audio formats to
DTS for up to 5.1 (ve sound channels and
one channel for low-frequenc y sound).
BITSTREAM … All audio formats are sent in
its original format for up to 7.1 (seven
sound channels and one channel for low-
frequency sound). If this option is selected,
sound for Picture in Picture and effect
sound for Blu-ray disc menus are not
available.
What’s on the VIDEO FORMAT menu…
24 HZ ON … The signals are sent in format
1080p and 24 HZ. This is recommended.
24 HZ OFF … The signals are sent in native
format.
What’s on the ACCESS CONTROL menu…
When you enter the ACCESS CONTROL
menu, you are asked to enter and conrm
your access code. The rst time you enter
the menu, you are asked to select a new
access code.
PARENTAL LOCK … Enable or disable the
Parental Lock function.
RATING … Some discs feature a Parental
Lock level. If you specify a level lower than
the one contained on the disc, the disc
will not play unless your access code is
entered.
NEW ACCESS CODE … Enter and conrm a
new access code at any time.
What’s on the ADVANCED menu…
MEMORY MANAGEMENT … You can
reset the BD -Live memory.
NETWORK … If you choose the
CONFIGUR ATION eld to be MANUAL
the elds IP ADDRESS, SUBNET MASK,
GATEWAY and DNS become available.
The MAC ADDRESS eld informs you of
the Mac address.
MODULE INFORMATION … See information
about software version and regions.
SOFT WARE UPDATE … If your television is
connected to the Internet, you can update
the Blu-ray player, provided that new
software is available. For further
information contact your retailer.
DRC … The Dynamic Range Compression
function enhances dialogue played at low
volume. The function will only be activated
when the disc is played with a Dolby Digital
audio track.
What’s on the LANGUAGE menu…
AUDIO … Enter the menu and select the
preferred audio language to be used.
SUBTITLE … Enter the menu and select the
preferred subtitle language to be used*.
DISC MENU … Enter the menu and select
the language to be used in disc menus.
56
*Some discs will require you to choose a
subtitle language from a disc menu, even if
you have previously selected a default subtitle
language from the LANGUAGE menu.

>> Settings and preferences for the Blu-ray player
To disable the Parental Lock …
IMPORTANT! You can disable the Parental
Lock completely if, for example, you have
forgotten your access code. You must
remove the disc from the Blu-ray player and
make sure the loader is closed before you
disable the Parental Lock.
> Press DVD to activate the Blu-ray player.
> Press Menu twice to bring up the TV
SETUP menu. (Beo4: Press MENU twice).
> Use the navigation button down to move
the cursor down to the OPTIONS menu.
> Press Menu to reveal the item PARENTAL
LOCK. (Beo4: Press MENU).
> Press the centre button to bring up the
PARENTAL LOCK menu.
> Press the centre button to disable the
Parental Lock, or…
> …press and hold BACK to exit all menus
without storing.
NOTE! When you disable the Parental Lock,
the Blu-ray player restar ts automatically.
All settings you have made for the Blu-ray
player, such as language selection, are reset
and you must make your settings again.
57

Blu-ray player – media browser
You can play music and browse
your photos stored on a USB
device or data disc on your
television. You get access to the
MEDIA BROWSER menu, when
you insert a data disc or USB
device in your television.
If you have music and photos
stored on the same data disc or
USB device, you can start the
music and return to the main
menu to start a slide show of
your photos. Then you can play
music and see your photos at the
same time.
The Blu-ray player only supports
playback of music les in MP3 format
and photo les in JPEG format.
Only remove a USB device when the
Blu-ray player is switched off.
To play content from the USB device,
playback of a loaded disc must be
stopped.
Use the media browser
During playback of your music, you can
see the NOW PLAYING menu with cover,
and information about artist, title and
track, if available. When you browse
your photos you can bring up the INFO
menu and get access to additional
functions.
Listen to your music …
> Press DVD to activate the Blu-ray player.
> Insert a data disc or USB device with your
music.
> Use the navigation button up or down to
select DATA DISC or USB and press the
centre button.
> Use the navigation button up or down to
select the MUSIC menu and press the
centre button.
> Use the navigation button up or down to
browse your les and folders and press
the centre button to open the folder or
start playback of the le.
> Use and to cue during playback.
> Use and to step in tracks during
playback.
> Press STOP to pause.
> Press Repeat to repeat playback (Beo4:
press the yellow button then press 6).
> Press PL AY to resume playback.
> Press BACK to back up through previous
menus or press and hold BACK to return
to the main menu.
MEDIA BROWSER
PHOTO
MUSIC
MEDIA BROWSER menu.
Browse your photos…
> Press DVD to activate the Blu-ray player.
> Insert a data disc or USB device with your
photos.
> Use the navigation button up or down to
select DATA DISC or USB and press the
centre button.
> Use the navigation button up or down to
select the PHOTO menu and press the
centre button.
> Use the navigation button up or down to
browse your les and folders and press
the centre button to open the folder.
> Press the centre button to open your
photo in full screen view. The slideshow
starts automatically.
> Press STOP to pause.
> Press PL AY to resume playback.
> Press BACK to back up through previous
menus or press and hold BACK to return
to the main menu.
58

The pincode system
The pincode system is intended
to make normal use of your
television impossible for
someone who does not know
the pincode. You choose
whether or not to activate the
pincode system.
When the pincode system is
activated and the television has
been disconnected from the
mains for 15–30 minutes, the
pincode system goes into effect.
When reconnected and switched
on, the television automatically
switches itself off after four
minutes. Entering the pincode
returns the television to normal.
Note: If you change your pincode more
than ve times within a three-hour
period, the PINCODE menu becomes
inaccessible for three hours, assuming
that the television is not disconnected
from the mains. Disconnecting the
television resets the three-hour period.
Activate the pincode system
If you wish to deactivate the pincode
system, you can do so by deleting your
pincode.
To activate the pincode system …
> Bring up the TV SETUP menu.
> Press twice, followed by STOP. The
PINCODE menu appears on the screen.
> Enter the four digits of your code.
> Press the centre button after the last digit
is found.
> Re-enter your code to conrm it and press
the centre button again. If the two codes
are not identical, the input elds are
cleared and you must enter the code
again.
To change or delete your pincode …
> Bring up the TV SETUP menu.
> Press twice, followed by STOP. The
PINCODE menu appears on the screen.
> Enter the correct pincode and press the
centre button. DELETE PINCODE is
highlighted.
> To delete your code, press the centre
button.
> To change your code, use the navigation
button down to highlight NEW PINCODE
and press the centre button. Enter the
new code and press the centre button.
Re-enter the new code to conrm it.
PINCODE
PINCODE 0 . . .
CONFIRM PINCODE 0 . . .
PINCODE
DELETE PINCODE
NEW PINCODE
If you inadvertently press a wrong button
while entering a code, press BACK. The
entry is cancelled and the input elds are
cleared.
59

Enter the pincode
>> The pincode system
If your television has been disconnected
from the mains for 15–30 minutes, the
television prompts you for the pincode
when you switch it on. You may not be
able to switch the television on
immediately – wait approximately
30seconds and tr y again.
IMPORTANT! If you are prompted for a
pincode the rst time you switch on
your television, contact your Bang &
Olufsen retailer.
Should you lose or forget your code, contact
your Bang & Olufsen retailer. Your retailer
can provide you with a mastercode, which
disables your pincode.
To enter your pincode …
> Enter the code digits.
> Press the centre button when the last
digit is entered.
> Your television starts up again.
Five incorrect entries will cause the television
to shut down for three hours, during which
operation is not possible.
If you have forgotten your pincode …
> Contact a Bang & Olufsen retailer to
receive a ve-digit mastercode.
> When the television prompts you for your
pincode, press and hold to bring up the
MASTERCODE menu.
> Enter the code digits and press the centre
button to deactivate your pincode and
reactivate your television.
To use the pincode system again …
> Follow the procedure for activating the
pincode system.
PINCODE
PINCODE 0 . . .
MASTERCODE
MASTERCODE 0 . . . .
60

Set up your remote control
You must set up your television
to be operated with a remote
control with or without a
navigation button.
Even though your remote control
has a navigation button, you can
choose to set your television up
for operation without navigation
button. This can be useful if you
have a BeoLink system also
comprising a television without
the REMOTE CONTROL menu.
If you set up your television for
operation without a navigation
button and your Beo4 has a
navigation button, you must also
change the MODE setting of
your Beo4. See the Beo4 Guide
or contact your retailer for
further information.
Remote control settings
In the REMOTE CONTROL menu you set
up whether the Beo4 remote control you
are using has a navigation button or not.
To make remote control settings …
> Bring up the TV SETUP menu and highlight
OPTIONS.
> Press the centre button to bring up the
OPTIONS menu, and highlight REMOTE
CONTROL.
> Press the centre button to bring up the
REMOTE CONTROL menu.
> Use the navigation button up and down to
highlight the setting you want.
> Press the centre button to store the
setting.
> Press BACK to back up through previous
menus or press and hold BACK to exit all
menus.
REMOTE CONTROL
NAVIGATION BUTTON
NO NAVIGATION BUTTON
For information about menu operation with
the different types of remote controls, see
page 6.
61

Feature activation
Additional features in your
television can be made accessible
via the FEATURE ACTIVATION
menu. For information about
additional features, contact your
Bang& Olufsen retailer.
Feature activation key
In order for additional features to
become available, a feature activation
key must be entered. The feature key
can be purchased from your Bang&
Olufsen retailer. The key cannot be
deactivated again.
To enter an activation key …
> Bring up the TV SETUP menu and
highlight OPTIONS.
> Press the centre button to bring up the
OPTIONS menu and highlight FEATURE
ACTIVATION.
> Press the centre button to bring up the
FEATURE ACTIVATION menu.
> Select the feature, you wish to activate
and press the centre button.
> Enter the 12 digit key. An incorrect
number can be deleted by pressing the
navigation button left, all numbers can be
deleted by pressing BACK.
> When the numbers are entered, press the
centre button to accept.
HDMI MATRIX
KEY . . . . - . . . . - . . . .
62

HDMI MATRIX
The HDMI MATRIX feature is an
additional feature which can be
purchased separately. When the
purchased feature activation key
is entered, additional software
becomes available in your
television. The HDMI Matrix itself
is a physical product that can be
connected allowing you to
connect several external sources
to your television and access
them via the Beo6 remote
control. For information about
additional features, contact your
Bang& Olufsen retailer.
Important information
The HDMI MATRIX must be connected
and set up by your Bang& Olufsen
retailer.
– Your Beo6 remote control must be
recongured before you can use the
HDMI Matrix.
– You cannot operate the HDMI Matrix with
a Beo4 remote control.
– You cannot connect more than one HDMI
Matrix in a setup.
– The HDMI Matrix cannot be congured on
an HDMI Expander.
– You cannot congure both the HDMI
Matrix and a source centre.
Settings in the HDMI MATRIX menu…
In the HDMI MATRIX menu, you can select
settings for your HDMI Matrix.
In the CONNECTIONS menu…
> Select the socket group to which you have
connected a HDMI Matrix.
> Select the HDMI MATRIX eld and set it
to YES.
> The eld INPUTS appears and you can
specify the number of sources you want
to connect. Set the eld to a higher number
of sources than you have connected.
> Select an HDMI socket. You cannot select
NONE.
> Press the centre button to store the
settings and bring up the HDMI MATRIX
menu.
> Select the connected HDMI Matrix type.
> Press the centre button to store the
settings and bring up the CONTROL menu.
> Select an IR type to indicate how the TV
control is connected to the HDMI Matrix.
> Press the centre button to store the
settings.
AV1
SOURCE V.AUX2
HDMI MATRIX YES
INPUTS 8
AUTO SELECTION NO
TIMER RECORDER NO
HDMI A
SOUND INPUT HDMI
If you at a later time disable a stored HDMI
Matrix conguration by setting the HDMI
MATRIX eld to NO, your settings are still
saved. This means that if you set the eld to
YES later, all your settings reappear.
When a HDMI Matrix is activated, it is
automatically registered as V.AUX2, also if
another source may already be registered as
V.AUX2. This source must then be registered
to another source name.
When you have stored the settings for the
HDMI Matrix, an input list menu appears for
you to congure the sources connected to
the matrix, see page64.
63

>> HDMI MATRIX
Add sources to your setup…
The sources connected to the HDMI Matrix
must be registered in the television.
Conguration of inputs…
> Congure each input one by one.
> Name each input by following on-screen
instructions. If you do not name an input,
the name from the selected PUC list is used.
> Select a PUC source for the specic input.
The sources are divided into four categories:
SET-TOP BOX, DVD PLAYER/RECORDER,
VIDEO RECORDER and OTHER.
> When you store the input settings, you
can congure the next input. Continue
the procedure until all connected inputs
are congured.
> Press the green button to return to the
CONNECTIONS menu.
HDMI MATRIX
INPUT 1 NONE
INPUT 2 NONE
INPUT 3 NONE
INPUT 4 NONE
INPUT 5 NONE
INPUT 6 NONE
INPUT 7 NONE
INPUT 8 NONE
64

Operate other equipment with Beo6 or Beo4
The built-in Peripheral Unit
Controller acts as an interpreter
between connected video
equipment, such as a set-top
box, video recorder or DVD
player, and your Bang & Olufsen
remote control.
Use the Bang& Olufsen remote
control to gain access to the
functions offered by your nonBang& Olufsen equipment.
When you switch on the
equipment, the functions are
available via the Beo6 display,
or via a menu-overlay on the
television screen, if you use a
Beo4 remote control.
For instruction in the various
functions offered by your
equipment, see the product’s
own guide.
Some features and functions of the
television may not be available when
non-Bang& Olufsen equipment is
connected. Not all connected video
equipment are supported by Bang &
Olufsen. For further information
about supported equipment, contact
your Bang & Olufsen retailer.
Use the Beo6 remote control
The main functions of your equipment
can be operated with the Beo6 remote
control. Not all functions may be
suppor ted by Beo6. The available
services and functions are shown in the
Beo6 display when you activate the
equipment.
> Press a source button, for example DTV,
to switch on connected equipment.
> Press the button on the Beo6 display that
activates the function you want.
Use equipment menus
Once you have activated connected
equipment, you can operate its own
menus with your remote control.
While equipment menus are shown …
> Use the navigation button up, down, left
and right to move in menus.
> Press the centre button to select and
activate a function.
> Press BACK to exit menus, or return to a
previous menu.
> Press and use the number buttons to
enter information in menus or services
when relevant. (Beo4: Use the number
buttons).
> Use the coloured buttons as indicated in
the menus of your connected equipment.
> Press BACK to back up through previous
menus or press and hold BACK to exit all
menus.
D TV
Sky
i Interactive Help
Slow Box office Services
R TV Guide
Example of a Beo6 display used to operate a
set-top box.
When you have selected connected equipment
as a source, press Menu twice to bring up
the television’s main menu.
65

Use the Beo4 remote control
>> Operate other equipment with Beo6 or Beo4
If you have a Beo4 remote control, some
functions are available directly via Beo4
when you switch on the equipment.
Additional functions are available
through a menu-overlay that you bring
up on the screen. In this menu you can
see which Beo4 buttons activate specic
services or functions.
Your Bang& Olufsen retailer can provide
you with a ‘show mapping’ survey which
explains operation of the connected
equipment with Beo4 in more detail.
> Press a source button, for example,
V.MEM, to switch on connected
equipment.
> Press MENU to bring up the menu-overlay.
> Press the number button that activates the
function you want, or press one of the
coloured buttons to activate a function.
The menu-overlay for equipment connected
to a main room television cannot be
displayed on the television screen in the link
room. However, you can still access the
different features if you press LIST and use
the navigation button up or down to bring
up SHIFT and then select a number or colour.
Direct Beo4 operation
If you know which Beo4 button activates
the function you want, you can activate
the function without bringing up the
menu- overlay rst.
While your equipment is on …
> Press one of the coloured buttons to
activate a function.
> Press and hold the centre button to bring
up the Program Guide or the ‘Now/Next’
banner on the screen if you are using
equipment that supports these functions.
> Press MENU and use the number buttons
to activate the function you want.
> Use and to step between channels*.
> Use and to rewind and wind in, for
example, recordings*.
*This operation does not apply to Beo4
without navigation button.
On some connected equipment you have to
press LIST and use the navigation button up
or down to bring up SHIFT and press 9 to
switch the equipment on and off, and on
some you have to press PLAY then 0.
PRO GRAM GUID E
RAD IO/TV MOD E
MEN U
INF ORMAT ION
PRO GRAM GROU PS 1
SUB TITLE LAN GUAG E 2
AUDI O LA NGUA GE 3
SET UP 4
PRO GRAM LIST 5
Example of a menu-overlay. The Beo4
buttons are shown to the right on the menu,
and the functions they control are shown to
the left. The menu may also list buttons on
the remote control included with your
connected equipment.
66

Connect and operate an audio system
If you connect a compatible
Bang & Olufsen audio system to
the television using a Master Link
cable, you obtain the benets of
an integrated audio/video
system.
Play a CD on your audio system
using speakers connected to the
television, or switch on a TV
programme and send the sound
to your audio system speakers.
Your AV system can be placed
together in one room or in two
rooms with the television placed
in one room and the audio
system with a set of speakers
placed in another.
If you want to use Master Link to integrate
your audio/video system, you must set
POWER SAVING to OFF to make your setup
function correctly, see page 44 for
further
information.
Not all Bang & Olufsen audio systems
support integration with the television.
Connect your audio system to the television
Using a BeoLink cable, connect the
sockets marked MASTER LINK on the
television and the audio system.
Program the AV setup with Beo6
If your television has been set up in an
AV system, you may need to set it to the
correct Option with Beo6. Switch the
entire system to standby rst.
Option setting for the television…
> Place yourself in front of the television.
> While holding the • button, press the
centre button to bring up the SETUP
menu on Beo6.
> Let go of both buttons.
> Press Option Pgm to bring up the Option
Programming display on Beo6.
> Press the button that matches the zone in
which the television is placed, for example,
TV Area.
Option setting for the audio system…
> Place yourself in front of the audio system.
> While holding the • button, press the
centre button to bring up the SETUP
menu on Beo6.
> Let go of both buttons.
> Press Option Pgm to bring up the Option
Programming display on Beo6.
> Press the button that matches the zone in
which the audio system is placed, for
example, Audio Area.
Program the AV setup with Beo4
You can set your television, placed in an
AV-system, to the correct Option using
Beo4. Switch the entire system to
standby rst.
Option setting for the television…
> While holding the • button on Beo4,
press LIST.
> Let go of both buttons.
> Use the navigation button up or down to
bring up OPTION? in the Beo4 display
and press the centre button.
> Use the navigation button up or down to
bring up V.OPT in the Beo4 display and
then enter the appropriate number
(1, 2, 4, 5 or 6).
Option setting for the audio system…
> While holding the • button on Beo4,
press LIST.
> Let go of both buttons.
> Use the navigation button up or down to
bring up OPTION? in the Beo4 display
and press the centre button.
> Use the navigation button up or down to
bring up A.OPT in the Beo4 display and
enter the appropriate number
(0, 1, 2, 4, 5 or 6).
If you move your link room products to other
rooms, remember to have your Beo6 remote
control recongured by your Bang& Olufsen
retailer.
67

>> Connect and operate an audio sy stem
Option 0Option 2
If the television and an audio system is set
up in one room with all speakers connected
to the television, set the television to
Option 2 and the audio system to Option 0.
Option 1Option 1
If the television (with or without additional
speakers) and the audio system (with a
connected set of speakers) is set up in the
same room, set the television to Option 1
and the audio system to Option 1.
Option 2Option 2
If the audio system is set up in one room,
and the television (with or without additional
speakers) in another, set the television to
Option 2 and the audio system to Option 2.
For information about Option 4, 5 and 6,
see pages72 and 74. For further information,
contact your retailer.
68

Use an audio/video system
If you integrate your audio system and
your television, you can choose a
speaker combination appropriate to the
current video or audio programme, and
also record video sound on the audio
system.
>> Connect and operate an audio sy stem
Zo ne ‘A’
TV
LI ST
AV
TV
Zo ne ‘B ’
CD
LI ST
AV
CD
To listen to sound from a television source
on your audio system speakers without
switching on the screen, select the zone for
your audio system speakers on Beo6, and
then press a source button, such as TV.
(Beo4: Press LIST and use the navigation
button up or down to bring up AV in the
Beo4 display, then press TV). Beo6
instruction is shown to the left and Beo4
instruction to the right.
To listen to audio sound on the speakers
connected to the television, select the zone
for speakers connected to the television on
Beo6, and then press an audio source
button, such as CD. (Beo4: Press LIST and
use the navigation button up or down to
bring up AV in the Beo4 display, then press
CD). Beo6 instruction is shown to the left
and Beo4 instruction to the right.
69

Distribute sound and picture with BeoLink
The BeoLink system makes it
possible to distribute picture and/
or sound to other rooms
throughout the house.
For example, you can connect
your television in the living room
to another video system or set of
speakers in another room,
thereby making it possible to
‘move’ the picture or sound to
other rooms.
If you have a BeoLink distribution
system installed, you can either
use your television in the main
room, such as a living room, or
in a link room, such as a study or
bedroom.
Under certain circumstances,
it may be necessary to enter
modulator settings.
Link connections
MASTER
LINK
RF Link
Amplifier
LINK TV
OUT
ANALOGUE
The main room television must be
connected to the link room system with
a Master Link cable:
> Connect the Master Link cable to the
socket marked MASTER LINK on the
television.
> If you want to distribute video signals as
well, connect an ordinary aerial cable to
the socket marked LINK T V on the
television. Then run the aerial cable to the
RF Link Amplier and the Master Link
cable to the link room. Follow the
instructions enclosed with the link room
equipment.
To the MASTER LINK socket on
the link room system
Video signal distribution to
link rooms
If an audio system is already connected to
the Master Link socket and you wish to
connect more equipment, the Master Link
cable must be split in two and joined with
the cable from the link room using a special
junction box. Contact your Bang & Olufsen
retailer for assistance.
HDMI, VGA and Y – Pb – Pr signals cannot
be distributed from a main room television
to the link room system.
If you want to use Master Link to integrate
your audio/video system, you must set
POWER SAVING to OFF to make your setup
function correctly, see page 44 for further
information.
70

>> Distribute sound and picture with BeoLink
System modulator
If you have an audio setup, such as a
BeoLink Active/Passive, and you choose
to set up a non-linkable television in the
same room, you must set the sys tem
modulator to ON. The factor y setting is
AUTO, which must be used if you are using
a linkable Bang & Olufsen television.
To switch on the system modulator …
> Bring up the TV SETUP menu and highlight
OPTIONS.
> Press the centre button to bring up the
OPTIONS menu and highlight
CONNECTIONS.
> Press the centre button to bring up the
CONNECTIONS menu, and highlight LINK.
> Press the centre button to bring up the
LINK menu and highlight MODULATOR.
> Use the navigation button left or right to
reveal ON.
> Press the centre button to store the
setting, or …
> … press and hold BACK to exit all menus
without storing.
Link channel
If, for example, a TV channel in your
area is broadcasted on the same channel
as the factory setting for the BeoLink
system; channel 66, you must tune the
system modulator to an unoccupied
channel. When you change the link
channel in the main room television,
make sure that the link channel in the
link room television corresponds to it.
To change the link channel …
> Bring up the TV SETUP menu and highlight
OPTIONS.
> Press the centre button to bring up the
OPTIONS menu and highlight
CONNECTIONS.
> Press the centre button to bring up the
CONNECTIONS menu, and highlight LINK.
> Press the centre button to bring up the
LINK menu and highlight CHANNEL.
> Use the navigation button left or right to
nd an unused channel.
> Press the centre button to store the
setting, or …
> … press and hold BACK to exit all menus
without storing.
LINK
CHANNEL 66
MODULATOR AUTO
The LINK menu.
When tuning in the link channel in the link
room, a test image is shown. FINE TUNE is
only available in link room/Option 4 setups.
71

Your television in a link room
If you have BeoLink installed in
your home and you choose to
place your television in a link
room, you can operate all
connected systems through the
television.
You must follow the procedure
described below when you connect
your television for use in a link room:
1 Connect the link room television to
the mains
2 Using your remote control,
program the link room television
to the correct Option
3 Disconnect the link room television
from the mains
4 Make the necessary connections
5 Reconnect the link room television
to the mains.
Option setting
For your entire system to function
properly, it is essential that the
television in the link room is set to the
correct Option before you connect it to
the television in the main room!
With Beo6 …
> Place yourself in front of the link room
television.
> While holding the • button, press the
centre button to bring up the SETUP
menu on Beo6.
> Let go of both buttons.
> Press Option Pgm to bring up the Option
Programming display on Beo6.
> Press the button that matches the zone in
which the television is placed.
With Beo4 …
> While holding the • button, press LIST on
Beo4.
> Let go of both buttons.
> Use the navigation button up or down to
bring up OPTION? in the Beo4 display
and press the centre button.
> Use the navigation button up or down to
bring up V.OPT in the Beo4 display and
press 6*.
Main room
*If you connect the television for use in a link
room where other link systems are already
connected, such as speakers, you must set
the television to Option 5 instead.
Link room
‘Zone XX’
(Option 6)
72

Link room operation
>> Your television in a link room
When you are in the link room, you can
operate all connected systems with the
remote control.
Use sources present only in one of the
rooms …
> Press the button for the source you wish
to use, for example RADIO.
> Operate the selected source as usual.
Use a main room source – source type
present in both rooms …
> Press Link to bring up a source display.
(Beo4: Press LIST and use the navigation
button up or down to bring up LINK in
the Beo4 display).
> Press the button for the source you wish
to use, for example TV.
> Operate the source as usual.
Use a link room source – source type
present in both rooms …
> Press the button for the source you wish
to use, for example TV.
> Operate the source as usual.
Listen to stereo sound in your link
room …
Usually sound distributed from a main room
video source, such as a set-top box, to the
link room is transmitted in mono. However,
you can select stereo sound:
> Press T V to switch on the television.
> Press AV to bring up a source display.
(Beo4: Press LIST and use the navigation
button up or down to bring up AV in the
Beo4 display).
> Press, for example DTV, to activate a
source connected to the main room
television, such as a set-top box.
While using this function, distribution of
other main room sources to other link room
systems is not possible.
Sound in the main room and the link room is
sometimes not synchronised. In some cases,
you can synchronise the sound by selecting a
source, then pressing AV and selecting the
source again. (Beo4: Select a source, then
press LIST and use the navigation button up
or down to bring up AV in the Beo4 display
and then select the source again).
Main room
Link room
If you switch to a different source in the
main room, the sound volume may change.
73

Two televisions in the same room
If you have placed your television
in a room where you already
have a Bang & Olufsen television,
and commands from your
remote control can be received
by both televisions, you must
change the Option setting of the
television. This prevents
simultaneous activation of both
televisions.
When you Option program the
television, disconnect the television
you do not want to program from
the mains. This ensures that only the
television, you want to program,
receives the Option programming.
One remote control for both televisions
For your television to function properly,
it is essential that the television is set to
the correct Option, see page72 for
information on Option programming.
If you have a Beo4, you must set your
television to Option 4, and if you have a
Beo6, you must set the television to the
correct zone*.
Beo4 – Operate your television in
Option 4 …
Normally, you can activate a source, such
as TV, simply by pressing the relevant
source button on your remote control.
However, when you set your television
to Option 4, you must do the following,
if you have a Beo4:
> Press LIST and use the navigation button
up or down to bring up LINK in the Beo4
display.
> Press a source button, such as T V.
Beo6 operation.
*NOTE! For information about choice of zone,
contact your Bang & Olufsen retailer.
BeoVision 7
Zone ‘A’
Zo ne ‘ A’
TV
BeoVision 7
Zone ‘B’
Zo ne ‘ B ’
TV
BeoVision 7
Option 4
LI ST
LI NK
TV
74
TV
Beo4 operation.
 Loading...