

Page 1
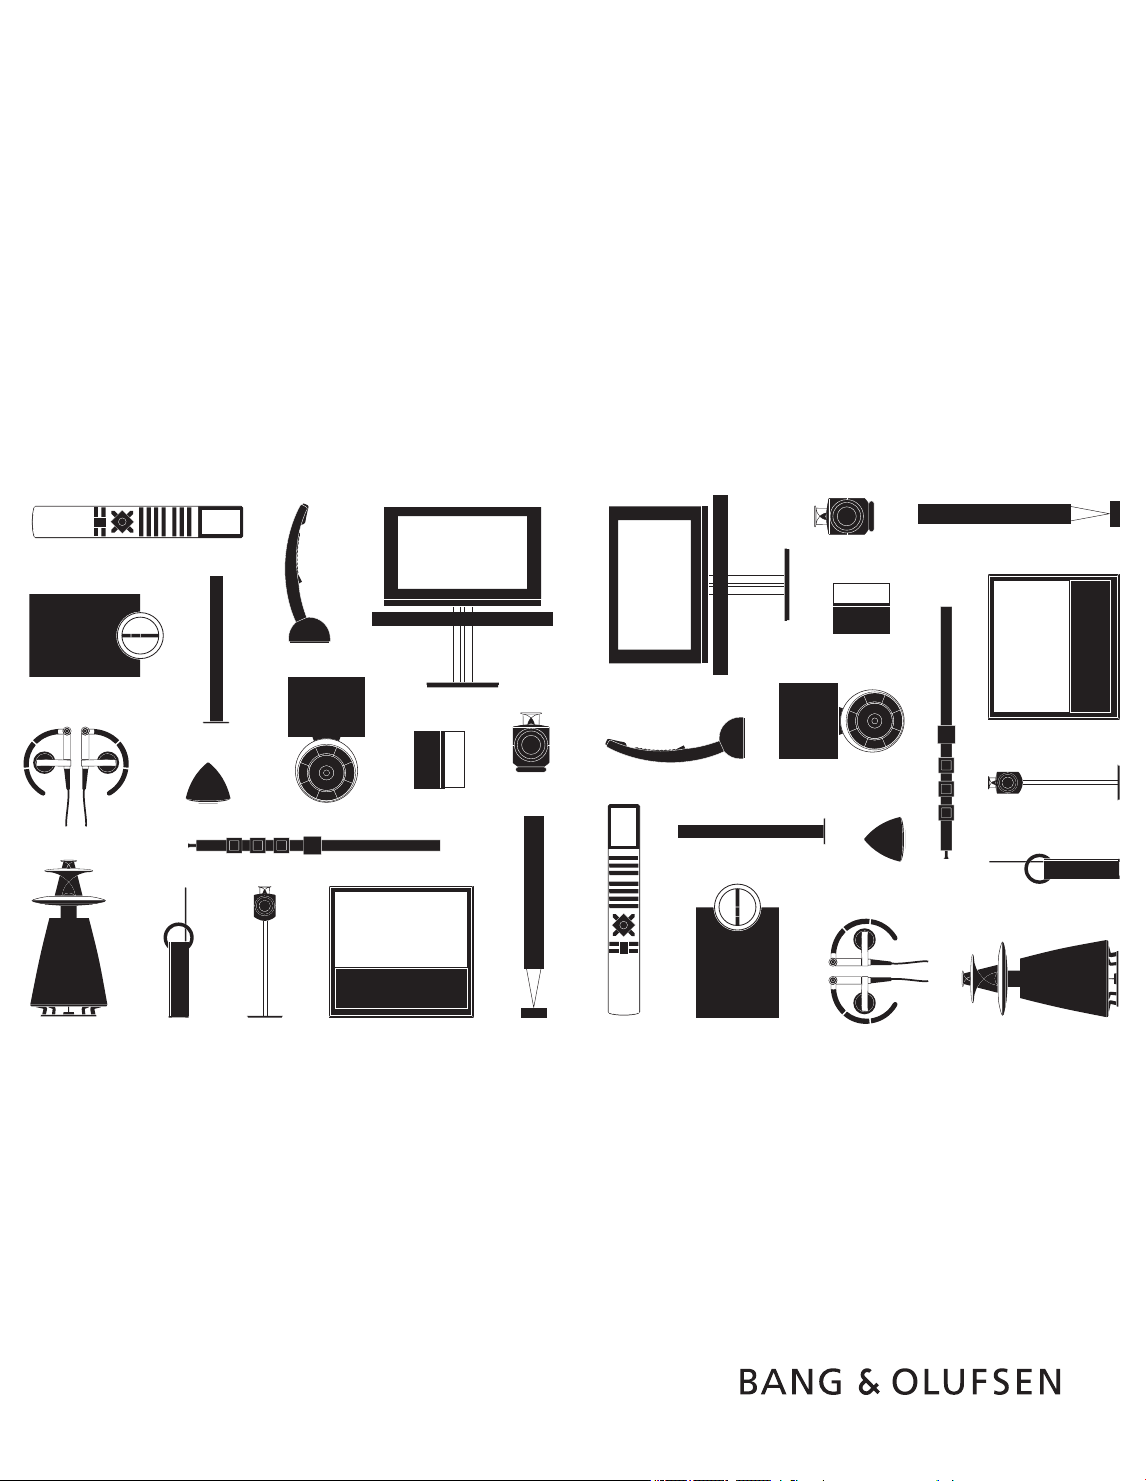
BeoSystem 3
Page 2

Page 3

Dear Customer
This Getting Started contains information about the daily use of your Bang&
Olufsen product and connected equipment. We expect your retailer to deliver,
install and set up your product.
Your television offers more features and functions than described in this Getting
Started. Among other things; Timer functions and auto standby, editing and
naming channels. These and other features are described in more detail in the
product’s Guide.
The Guides are found on www.bang-olufsen.com/guides.
All DVB functions are described in separate Guides. The Guides are also kept up to
date if new software introduces new or modied features and functions in your
television.
On www.bang-olufsen.com you can also nd further information and relevant
FAQs about your product.
Your Bang& Olufsen retailer is your rst stop for all your service queries.
To nd your nearest retailer, visit our website…
www.bang-olufsen.com
Technical specications, features and the use
thereof are subject to change without notice.
3510853 Version 1.0 1106
Page 4
WARNING: To reduce the risk of fire or
electric shock, do not expose this
appliance to rain or moisture. Do not
expose this equip ment to dripping or
splashing and ensure that no objects
filled with liquids, such as vases, are
placed on the equipment.
To completely disconnect this equipment
from the AC Mains, disconnect the mains
plug from the wall socket. The disconnect
device shall remain readily operable.
The lightning flash with arrowhead
symbol within an equilateral triangle,
is intended to alert the user to the
presence of un insulated “dangerous
voltage” within the product’s enclosure that may be of sufficient
magnitude to constitute a risk of
electric shock to persons.
The exclamation point within an equi-
lateral triangle is intended to alert the
user to the presence of important
operating and main tenance (servicing)
instructions in the literature
accompanying the product.
Cautions
– Ensure that the television is positioned, set up
and connected in accordance with the
instructions in this Getting Started. To prevent
injury, use Bang & Olufsen approved stands and
wall brackets only!
– Place your television on a rm, stable surface.
– Do not place any items on top of your television.
– Do not subject the television to rain, high
humidity or sources of heat.
– The television is developed for indoor use in dry,
domestic environments only. Use within a
temperature range of 10–35°C (50 –95°F), and
at an altitude of no more than 1,500m (5,000ft).
– Do not place the television in direct sunlight or
direct articial light, such as a spotlight, as this
may reduce the sensitivity of the remote control
receiver. Also if the screen is overheated, black
spots may appear in the picture. These spots
disappear again, once the television cools down
to normal temperature.
– Leave enough space around the television for
adequate ventilation.
– Connect all cables before connecting or
reconnecting any of the products in your system
to the mains.
– No naked ame sources, such as lighted candles
should be placed on the apparatus.
– To prevent the spread of re, keep candles or
other open ames away from this product at all
times.
– Do not attempt to open the television. Leave
such operations to qualied service personnel.
–
Do not strike the glass with hard or pointed items.
–
The television can only be switched off completely
by disconnecting it from the wall socket.
– The disconnect device shall remain readily
operable.
– The supplied plug and mains cord are specially
designed for the product. Do not change the
plug and if the mains cord is damaged, you
must buy a new one from your Bang& Olufsen
retailer.
Page 5

Contents
Daily use
6 How to use your remote control
8 Introduction
10 Watch television
12 Look up teletext
14 Watch television via the DVB module
16 Watch 3D television
18 Change sound type and picture format
19 Use the Adaptive Sound Technology
Daily use
Installation
22 Set up your television
23 Cleaning
24 Connection panels
26 First-time setup of your television
Page 6
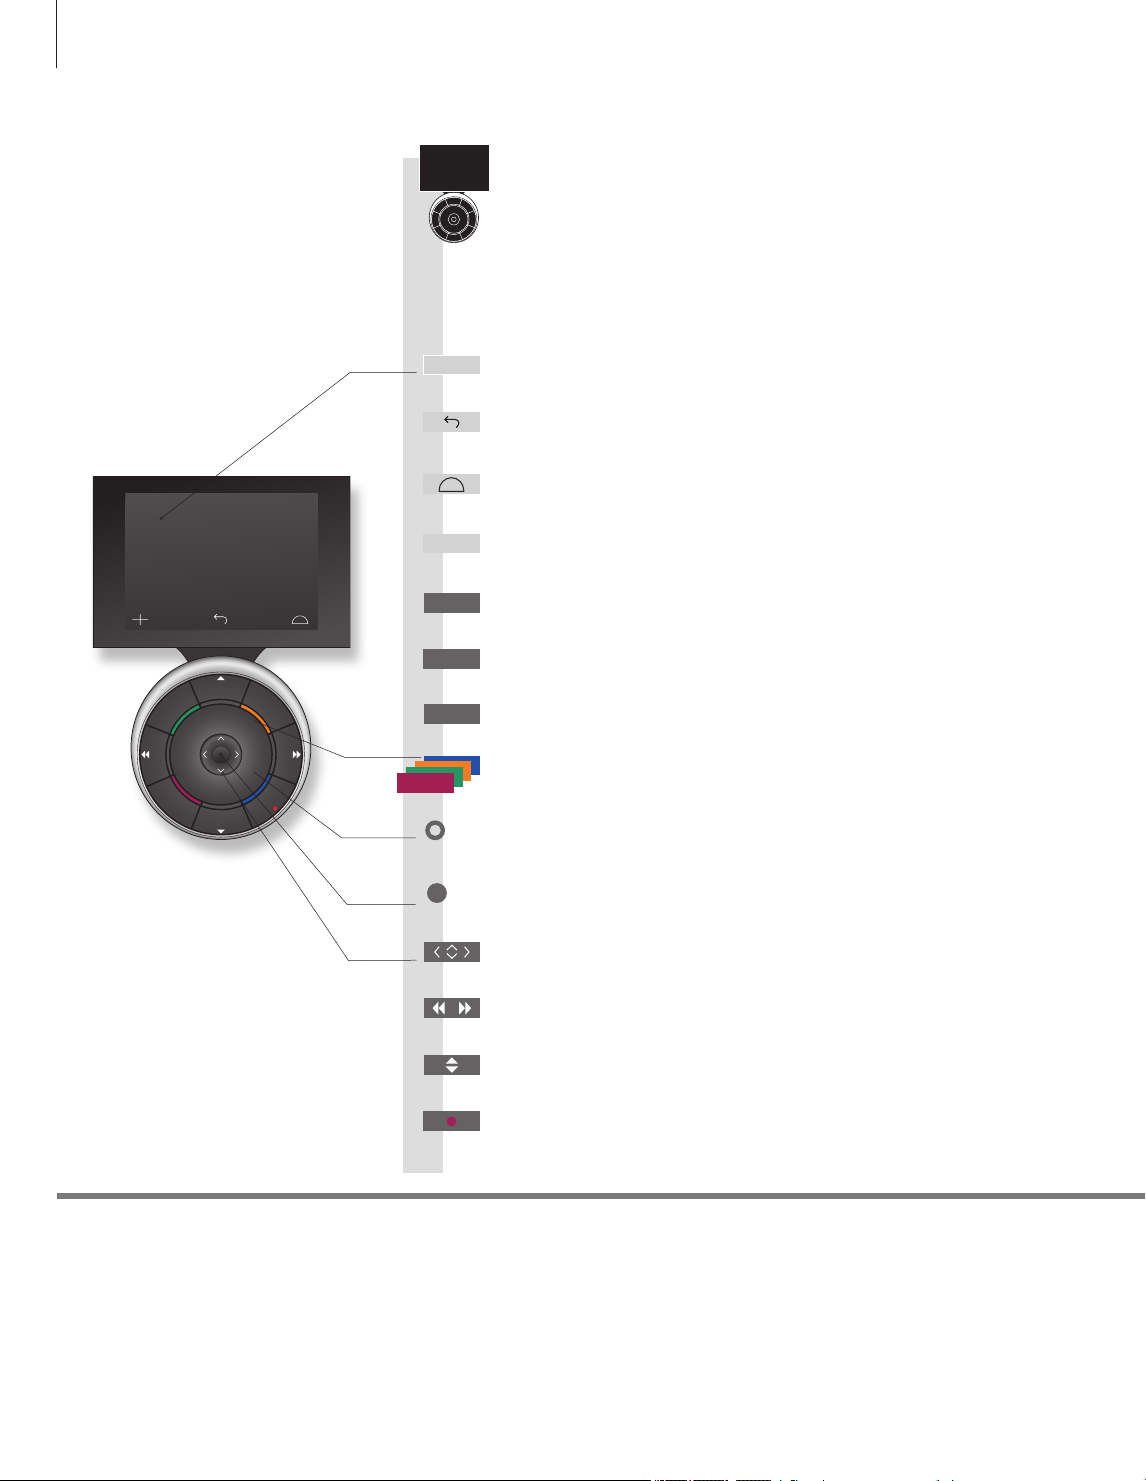
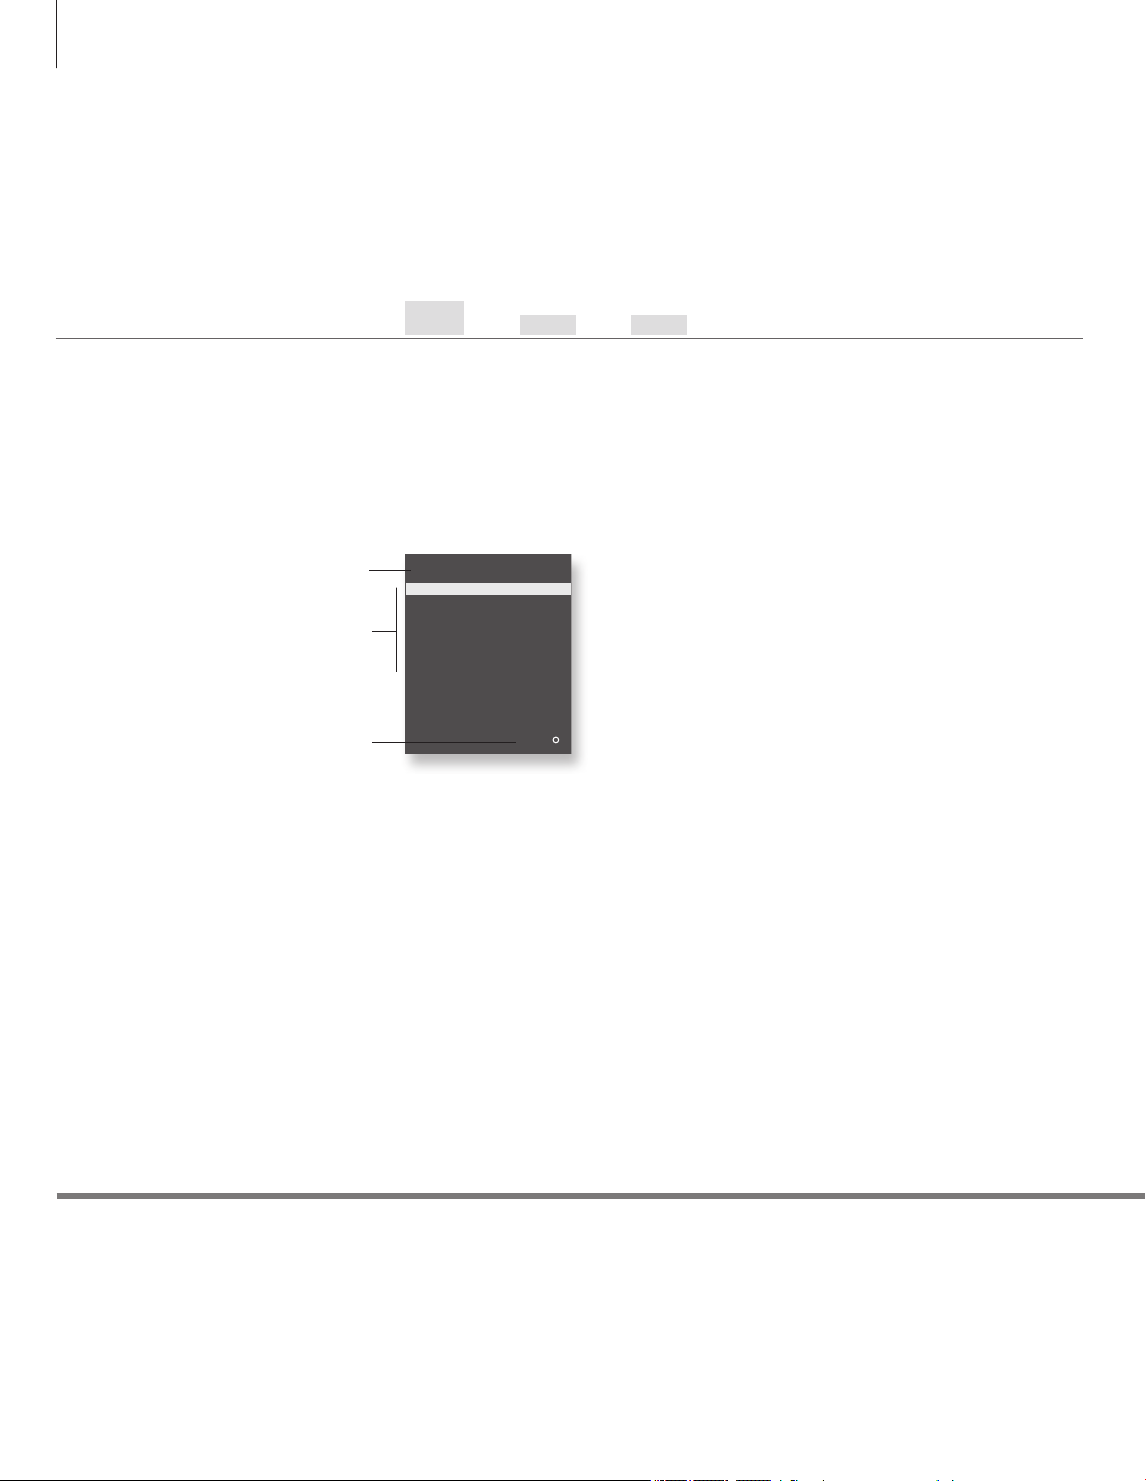
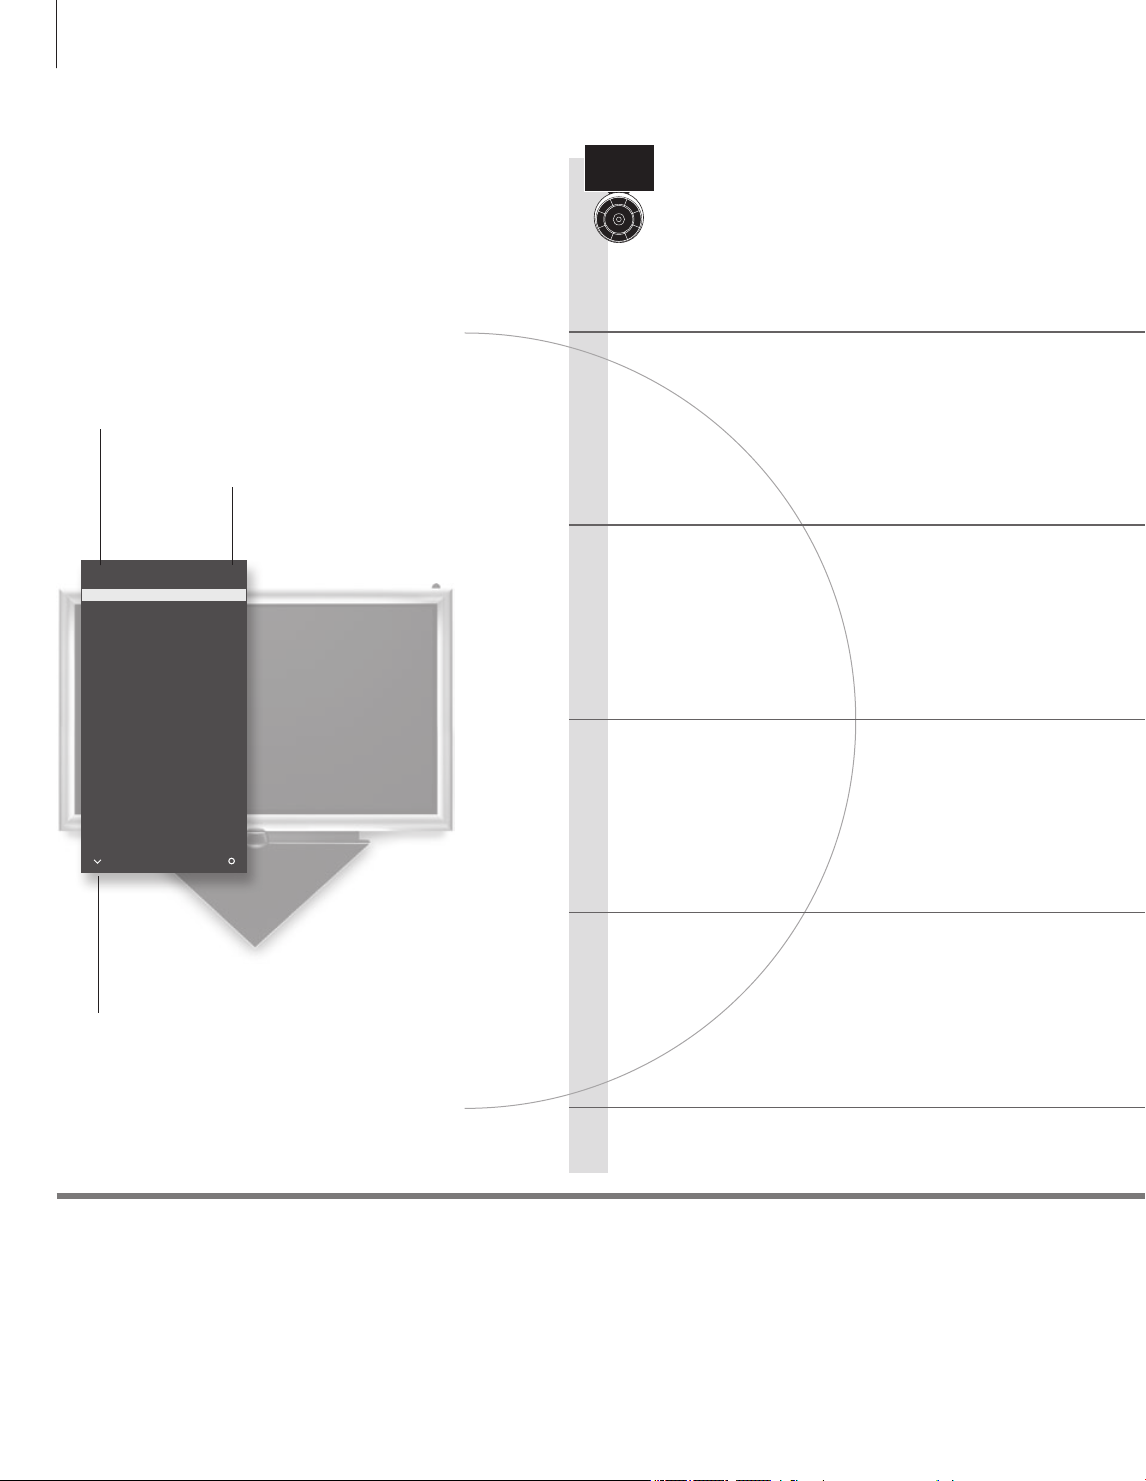
6
How to use your remote control
Beo6 operation
Your television can be operated with the Beo6 remote control as
described in this Getting Started and the Guide, but you can also
operate your television with Beo5 which is operated similarly to Beo6.
Living Room
TV V.MEM RADIO
DTV N.MUSIC N.RADIO
PC DVD CD
STOP
BACK
PLAY
Soft button, touch screen to select*
TV
Switch on a source or select a function
Back up through Beo6 displays
Bring up Scene buttons, such as Zones or Speaker
Press again to return
Bring up digits to select channel
+
Press again to return
Pause and stop playback or recording
STOP
Start playback of a disc or recording
PLAY
Move backwards through menus. Long press to exit menus completely
BACK
Select colour specic functions*2
Press volume wheel next to the colour
Turn to adjust volume
To mute, turn quickly counter-clockwise
Centre button is used for selecting and accepting
1
Important
Soft buttons on Beo6
– for more information: www.bang-olufsen.com
1*
About buttons
2*
Coloured buttons
Actual zone
Light grey buttons indicate that you have to press a text in the display. Dark grey buttons indicate that you have to
press a hard button.
Press the wheel next to the colour to activate a coloured button.
Indicates the actual zone on Beo6 as it was named during the setup process.
Depending on the activated source, different soft buttons appear on the screen. Touch the screen to activate the
function.
Navigation button left, right, up and down – move in menus by pressing the
button in the direction you need
Rewind or wind, search backwards or forwards
Step through channels or recordings
Hold for continuous step
Standby
Page 7
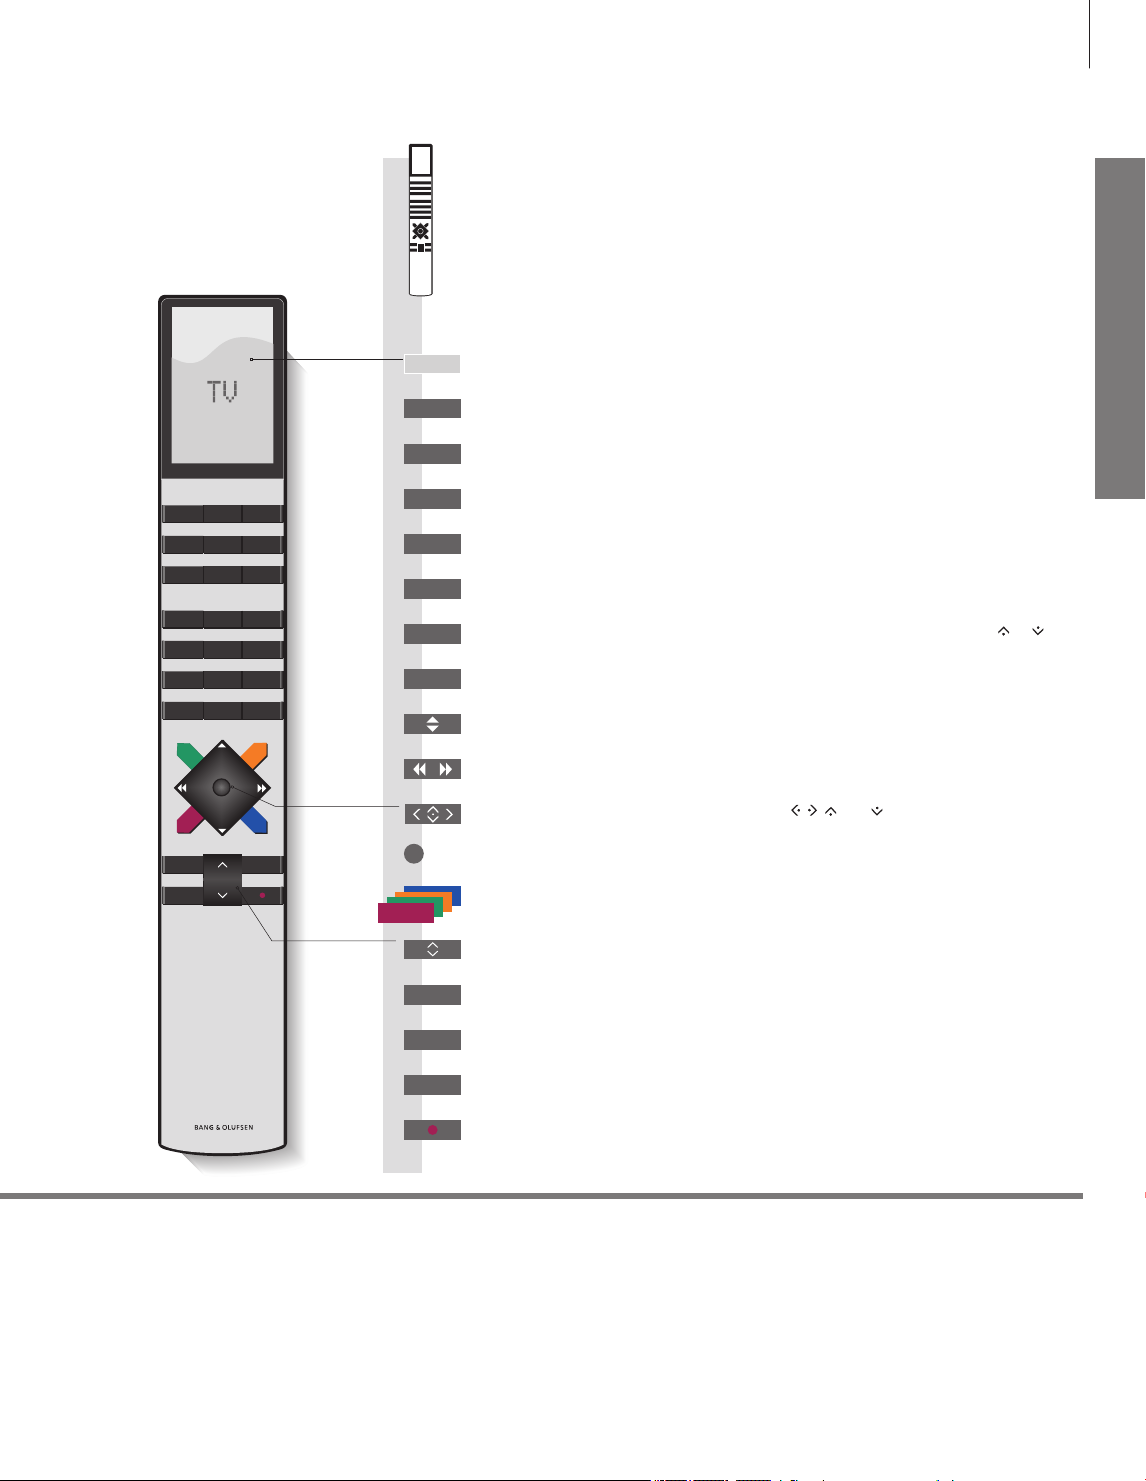
Beo4 operation
7
TV LIGHT RADIO
DTV DVD CD
V.MEM TEXT A.MEM
7 8 9
4 5 6
1 2 3
LIST
MENU
0
TV
TV
DTV
V.MEM
TEXT
0 – 9
LIST
MENU
You can also operate your television with a Beo4. When Beo4 operation is
different from Beo6 operation, it is described separately.
The Beo4 display shows you the activated source or function
3
Switch on the TV*
Switch on the DVB module and watch digital television
Switch on a connected recorder
Switch on teletext
Select channels and enter information in on-screen menus
Display extra “but tons” for functions or sources in the Beo4 display. Use
step in the list
Bring up the main menu of the active source
Step through channels
Hold for continuous step
Rewind or wind, search backwards or forwards
or to
Daily use
STOP PLAY
BACK
3*
Beo4 buttons
Navigation button left, right, up and down
, , and – move in menus by
pressing the button in the direction you need
Centre button is used for selecting and accepting
Select colour specic functions
Adjust volume
To mute, press the middle of the button
Pause and stop playback or recording
STOP
Start playback of a disc or recording
PLAY
Move backwards through menus and the Beo4 list. Long press to exit menus
BACK
completely
Standby
Some buttons can be recongured during the setup process. See the Guide for further information.
NOTE! For general information about remote control operation, see the guide enclosed with your
remote control.
Page 8
8
Display and menus
Information about the selected source is shown in
the display on the remote control. On-screen
menus allow you to adjust settings.
Introduction
Navigate in menus and select settings using your remote control. Pressing Menu
brings up the menu for the selected source.
Living
Room
Select TV’s
zone*1
TV
Switch on TV
Menu
Show menu
Menu name
Menu options
Information eld
TV SETUP
TUN ING
3D DISPL AY
SLE EP TIM ER
PLAY T IMER
OPT IONS
sel ect
Example of on-screen menu
Important
1
*Zone
Zones are named in the Beo6 conguration.
Page 9

9
Daily use
Navigate in menus
When a menu is on the screen, you can move
between menu options, reveal settings or enter
data.
Select option/
setting
+
Enter data Bring up
0 – 9 BACK
sub-menu/
store
setting
Select option Move
backwards
through menus
or
BACK
Press and hold to
exit menus
Remote control
This Getting Started and the Guide describe operation with the REMOTE CONTROL menu set to
NAVIGATION BUT TON. In the OPTIONS menu, you can bring up the REMOTE CONTROL menu and set
up your television to be operated with or without a navigation button. Remember to set your Beo4
remote control to the correct mode. Do not change MODE during rst-time setup, as this will interrupt
the sequence. See the guide enclosed with your remote control or contact your Bang& Olufsen retailer
for further information.
Page 10
10
Watch television
Choose a TV channel by its number, switch to another
channel or adjust the sound volume.
Activate the TV source to use these functions
Channel name
Channel number
TV CHANN EL LI ST
CNN 1
… 2
DIS COVER 3
CWN BC 4
BBC WORLD 5
… 6
… 7
… 8
SUP ER CH 9
… 10
CRI ME TV 11
CIN EMA 12
… 13
MOVI E NW 14
… 15
… 16
… 17
… 18
mor e sele ct
Beo6 operation
Switch on the TV
Select a TV channel
Bring up a channel list
Indicates that more channels are
available
Useful hints
Automatic Colour Management If the screen turns black with a grey scale bar and a sensor arm that swings down from the television
Adjust the volume
Switch off the TV
Automatic colour calibration may start automatically.
frame upon pressing the standby button, an automatic colour calibration has started. Automatic Colour
Management automatically compensates for colour changes on the
approximately. Do not switch off the television or disconnect
it from the mains during the calibration.
screen for every 100 hours of use
Page 11

Beo4 operation
11
Daily use
TV
Press
or
+
Select Activate
Hold for
channel list
numbers
Select page Activate numbers Accept
0–9 0–9 0 Previous
Select channel
or
Select
channel
+
Select previous channel
0–9
TV
Press
Select
Hold for
channel list
or
Select
channel
Select page or channel and accept
Previous channel
or
Adjust volume. To mute, turn quickly
counter-clockwise
Press
Turn either way to bring back the sound
Adjust
volume up
or down
Press
Press in the
middle to
mute sound
Press in the middle to
bring sound back
Page 12

12
Look up teletext
Operate teletext through the menu bar at the top of the
teletext page or the arrow buttons on your remote control.
Activate teletext to use these functions
Current page
Enlarge
teletex t pages
PAGE MEMO1 POINT HALT LARGE SETUP
P100 BBC S100 Wed 13 Oct 12:39:34
Beo6 operation
Start teletext
Access the start page of teletext.
Move to page
Access teletext pages you wish to see.
Point from one page to another
Navigate and point in the current or previous teletext page and bring
up another.
Stop subpages from turning*
1
Stop subpage turning
The arrow indicates that more options are
available Make settings on SETUP and reveal
hidden text on REVEAL
Useful hints
MEMO pages
Dual screen
POINT
REVEAL
Enlarge teletext page
MEMO pages
MEMO is only available, when memo pages are stored.
Exit teletext
To return to the previous page, press BACK. The point feature is only available if your remote control
has a navigation button that is enabled.
For quick access, store a teletext page as a MEMO page. See the Guide for further information.
When teletext is activated, press Text to swap between dual screen and full screen mode.
To reveal hidden text on a teletext page, move to REVEAL and press the centre button.
Page 13

Text TEXT
Press repeatedly to change screen mode
13
Beo4 operation
Daily use
Press
or
0–9
Step up or
down in
pages
or or
Move to
POINT
STOP
Stop turning Select subpage
Move to LARGE Press to switch between upper and lower half of page
Press to switch between
MEMO pages
Step into current page Move between page
or
Press Move to HALT
and normal viewing
Move to MEMO and switch between stored MEMO
pages
Select page Move to PAGE and step
references
Go to index pages (100,
200, 300…)
or
0–9
Select page
Restart
turning
oror
Step up or
down in
pages
POINT
STOP 0–9
Stop turning Select subpage Restart
Move to
LARGE
Switch between MEMO
pages
Move to PAGE and step
Step into page Move to
or
Switch between upper and lower half
oror
Move to MEMO and
switch between pages
or
0–9
Select
page
Move between
page references
and select page
turning
BACK
Press
Teletext subtitles
1
*Subpages
BACK
Press
If you would like available subtitles to appear automatically for a particular
channel, store the teletext subtitles page as MEMO page 9.
Note that after channel change, teletext must register all subpages, before you
can use HALT and step between subpages.
Page 14

14
Watch television via the DVB module
When your television is equipped with the optional DVB
module, you can receive digital terrestrial, cable and satellite
programmes depending on your module options.
Activate the DTV source to use these functions
DVB function
Beo4 button
RA DIO
PR OGR AMM E GUI DE
ME NU
IN FOR MATI ON
CH ANN EL GR OUP S
SU BTI TLE S LAN GUAG E
AUD IO LAN GUAG E
SE TUP
CH ANN EL LI ST
CA UN ITS
MU LTIF EED
1
2
3
4
5
6
7
Beo6 operation
Switch on the TV and the DVB module
Select a DTV channel
Bring up and use the menu overlay*
Step between groups
2
Useful hints
DVB guide
Multifeed
Bring up a channel or station list
Switch off the TV
For more extensive and updated information, look up the DVB guide on www.bang-olufsen.com/guides.
MULTIFEED is only available if supported by your programme provider.
Page 15

Beo4 operation
15
Daily use
DTV
Press
+
or
Select Activate numbers and select channel
…
Select function
Groups+ Groups-
Step between groups
0–9
DTV
Press
or
0–9
Select Select channel
MENU 0–9
Press
Step between groups
Activate the desired func tion
or
Hold for
channel list
Press
or
Select page Select channel Accept
Hold for channel list,
select page or channel
Press
2
*NOTE! Press Menu twice to bring up the TV
SETUP menu.
Accept
Page 16

16
Viewing conditions
Place yourself in front of the screen, a little closer
than when you normally watch 2D television, and
use the 3D glasses. The recommended distance
between your viewing position and the screen
depends on the size of the screen and the picture
resolution. If you move too far to the left or right
of the centre of the screen, or if you move too far
up or down, the quality of 3D T V decreases. Note
that not all screens support 3D technology.
Contact your retailer for further information.
Watch 3D television
You can enhance the experience of watching television with 3D technology, for
example, when you want to watch movies, sports or nature films, if the television
screen or projector supports 3D technology.
You will get the best 3D
experience if you darken
the room, for example,
switch off the lights and
draw the curtains.
Especially lights behind
and around the screen
can cause an irritating
effect. We recommend
not to watch 3D TV in
direct sunlight or bright
surroundings.
Activate 3D or 2D television
To watch lms or other programmes suited for 3D,
you must activate the 3D function and put on the
activated 3D glasses that are available from your
retailer. Switch to 2D mode again to watch TV
that is not suited for 3D, for example, the news.
Important
Important health and
safety information
for 3D pictures
Some viewers may experience discomfort while watching 3D TV such as dizziness, nausea and headaches. If you experience such
symptoms, stop watching 3D T V, remove the 3D glasses and rest. Watching 3D TV for an extended period of time may cause eye
strain. If you feel eye strain, stop watching 3D T V, remove the 3D glasses and rest. If you use eye glasses or contact lenses, wear the
3D glasses over them. Do not use the 3D glasses for other purposes. Adults should supervise children watching 3D TV and ensure
that they do not experience any discomfort as mentioned above. It is recommended that children under 6 years do not watch 3D T V.
Bring up Scene
display on Beo6 or TV
SETUP menu
3D/2D
Select 3D Display on
Beo6 or bring up 3D
DISPL AY menu
If automatic 3D signalling is available, the television automatically switches
to 3D when you select 3D and to 2D when you select 2D. If automatic 3D
signalling is not available, a menu for 3D or 2D mode selection appears on
the screen. See the next page for information about modes.
Select 3D or 2D
Accept and watch 3D or 2D
respectively, or select mode
Page 17

3D modes
Select the 3D mode that matches the signal sent
out by the progamme provider.
SIDE BY SIDE 3D
17
Daily use
TOP/BOT TOM 3D
2D modes
Select the 2D mode that matches the signal sent
out by the progamme provider.
Automatic change of mode
If automatic 3D signalling is no longer available,
the television automatically switches to the last
used mode for the current source. At channel and
source change, the television switches to
STANDARD 2D.
Converts side-by-side 3D
signal into full screen 3D
representation by scaling
two pictures horizontally
STANDARD 2D
Shows an ordinary 2D
TV picture without any
conversion.
Converts top/bottom 3D
signal into full screen 3D
representation by scaling
two pictures vertically
SIDE BY SIDE 2D
Converts side-by-side 3D
signal into full screen 2D
representation by scaling
one picture horizontally
TOP/BOT TOM 2D
Converts top/bottom 3D
signal into full screen 2D
representation by scaling
one picture vertically
Television screens and projectors
Dual screen
Subtitles
Not all connected television screens and projectors support 3D technology. If a television screen or a
projector connected to the system does not support 3D, 3D in the 3D DISPLAY menu is greyed out in
TV or CINEMA mode respectively.
If two sources are brought up on the screen at the same time or if teletext is brought up on one side
and a source on the other, the television will always display a 2D mode.
Subtitles may not always be supported.
Page 18

18
Change sound type and picture format
While you watch TV through the television tuner, you can switch between available
sound types and adjust the picture format.
Change sound type or language
Switch between available sound types and
languages.
Select picture format
The TV automatically adapts the picture to ll out
as much of the screen as possible when you select
a source, but you can select a format yourself.
Sound Sound
Bring up sound type*
Bring up Scene
display on Beo6
1
Press repeatedly to switch
between available sound
types
Select Picture
display*
FORMAT 1
4
For panoramic
view or 4:3
1
FORMAT 2
The picture is
adjusted ver tically
1–3
Select format*
2
Move picture up or down*
3
FORMAT 3
Wide Zoom Standard*
For a genuine
16:9 widescreen
picture
Useful hints
1
*Sound and picture
2
3*
Move picture up or down
*Optimise
4
*Variation
On Beo4 bring up SOUND for sound types and FORMAT for picture formats via the LIST menu. In
order to display SOUND and FORMAT on Beo4, you must rst add it to the Beo4 list of functions.
The picture format is optimised, if you press Optimise on Beo6. On Beo4, press the centre button.
The picture can only be moved up or down in Standard and Zoom.
In Standard, you can select variations of the format, if you press Variation on Beo6. On Beo4, press
or .
Page 19

Use the Adaptive Sound Technology
To optimise the sound experience for your listening position, you can select a
customised listening preset and even rotate the sound to match the direction you
are facing.
19
Daily use
Select listening preset
When you watch television or listen to music, you
can select your own listening preset to optimise
the sound for your listening position. You can also
rotate the preset’s sound so that the sound is
experienced as coming from directly in front of
you. Adaptive Sound Technology must be enabled
and set up. See the Guide for further information.
Press
Preset
Press
…
Select preset
and/or
Rotate Rotate
Rotate sound
Remote control
Automatic selection of listening presets
To enjoy the advantages of this setup, several speakers and a Beo6 remote control are necessary. If you
have only a few speakers or a Beo4 remote control, this setup is not recommended and you should
choose the setup without Adaptive Sound Technology described in the Guide.
The sound automatically switches to the TV preset when you switch on the T V. You can set an AUDIO
PRESET in the SOUND ADJUSTMENT menu to make sound switch to a specic customised listening
preset automatically when you select an audio source.
Page 20

20
Page 21

Contents – Installation and setting up
22 Set up your television
23 Cleaning
24 Connection panels
26 First-time setup of your television
21
Installation and setting up
Page 22

22
Set up your television
Follow the guidelines for placement and connection described on this and the
following pages.
Run cables
When you connect external equipment to the
system, we recommend that you connect
equipment to the sockets at the far ends of the
socket panel rst, and work your way in towards
the middle of the socket panel. This allows you
access to the necessary sockets throughout the
connection procedure.
1 Mount the left and right cable bracket on the
system as shown.
2 Open the cable brackets, make the necessary
connections, run the cables down through the
brackets, and close the brackets.
3 When connections are complete, attach the
cable cover by sliding the cable cover down over
the cable brackets. The tabs (A) should t the
gaps in the cable cover.
4 Press the cable cover down lightly until it clicks
into place. To remove the cable cover, press the
tabs (A) inward with your thumbs while lifting
the cable cover with your ngers.
1 2
3 4
click click
A A
Important
Ventilation NOTE! Do not allow still pictures, such as logos,
To ensure proper ventilation, allow for at least 5cm (2”) of space on each side
of the TV and 10cm (4”) above it. Do not cover the ventilation holes on the
rear. At overheating (ashing standby indicator and an on-screen warning),
switch the T V to standby, not off, in order for the T V to cool down. You cannot
operate the T V during this time.
video games, computer images, and images
displayed in 4:3 format, to be displayed on the
screen for an ex tended period of time. This can
cause a permanent after-image to remain on the
screen.
Page 23

IR-receiver for a projector
If you have both a television screen and a
projector, and the projector screen covers the IRreceiver when in use, you must mount a second
IR-receiver.
The IR-receiver receives signals from your remote
control and sends them to the system, which then
sends control signals to the connected equipment.
Make sure the IR-receiver is placed in such a way
that it can receive remote control signals. If the IRreceiver is placed incorrectly, the light emitted by
the connected equipment can impede remote
control operation of your television.
When you have mounted the IR-receiver as shown
on this page, connect it to the IR-IN (mini-jack)
socket on your system.
23
B C D
Cleaning
B B
Installation and setting up
Green
Yellow
Brown
A
D
D
C
C
B
Maintenance
Cabinet and controls
Never alcohol
Regular maintenance, such as cleaning, is the responsibility of the user.
Wipe dust off the surfaces using a dry, soft cloth. To remove stains or dirt, use a soft, damp cloth and a solution of water
and mild detergent, such as washing-up liquid.
Never use alcohol or other solvents to clean any parts of the TV.
Page 24

24
Connection panels
Any equipment you connect to the main connection panel must be registered in
the CONNECTIONS menu. Equipment connected to the side connection panel can
be registered in the CONNECTIONS menu.
VIDEO
IN
CTRLSPDIFCTRL Pb Pr
AV 1
DISPLAY 1
R INL IN
SPDIF CTRL
AV 5
YSPDIF
AV 2
DISPLAY 2 A B C D
S VIDEO
AV1
Socket group for AV connection of a primary
recorder or set-top box. You can also connect
other types of extra video equipment.
AV2
Socket group for AV connection of additional
video equip ment.
AV3
Socket group for AV connection of additional
video equip ment.
The TV keeps a signal path open between a
recorder connected to the AV1 socket and a
recordable source connected to the AV3 socket.
This allows you to set the source on AV3 to switch
on automatically, as well as set a recorder on AV1
for timed recording of the source on AV3,
provided your connected equipment supports
these functions.
AV4
Socket group for AV connection of additional
video equip ment.
VIDEO
IN
R INL IN
AV 6
YSPDIFCTRL Pb Pr
SPDIF CTRL
VIDEO IN
AV 4AV 3
VGA
L IN R IN
LINK TVS VIDEO
CTRLSPDIF
MASTER LINK
AV5
Socket group for AV connection of additional
video equip ment. You can also connect a
BeoMaster, a camera or a camcorder.
AV6
Socket group for AV connection of additional
video equip ment. You can also connect a camera
or a camcorder.
CTRL (AV1 – AV6)
For IR control signals to external equipment
connected to an AV socket.
L-IN, R-IN (AV4 – AV6)
Right and left line input. AV5 and AV6 is for audio
connection of, e.g., a camera or camcorder.
VIDEO IN (AV4 – AV6)
For video signal. On AV5 and AV6 you can
connect a camera or a camcorder.
Y – Pb – Pr (AV2 – AV3)
For video signals from an external source, e.g.
HDTV source. You can use the socket in
conjunction with an AV socket or a digital audio
socket.
PCMCIA
SMARTCARD
CONTROL
1
DVB-T/C
2
DVB-S
3
ANALOGUE
ANTHDMI INHDMI OUT
DTV DATA
CENTRE 1
IR IN
1(SUB)
CINEMAMONITOR
2 3 4
POWER LINK
TTL
RS232
SPDIF (AV1 – AV6)
Digital audio input socket, e.g. DVD player.
S VIDEO (AV4, AV6)
For the connection of equipment with Y/C output,
e.g., a game console.
HDMI OUT (DISPL AY1 - 2)
Connect a plasma screen and/or a projector. If you
only connect a screen or a projector, connect it to
DISPL AY1, otherwise connect the screen to
DISPL AY1 and the projector to DISPL AY2. You
cannot connect two screens or two projectors at
the same time.
HDMI IN (A–D)
For High Denition Multimedia Interface video
source or PC. An HDMI socket may be occupied
by built-in video equipment. The sources can be
registered to any of the AV socket groups. To
expand the number of HDMI sockets, connect an
HDMI Expander to the HDMIC socket.
ANT (1–3)
Aerial input socket DVB T/C (1) from external
aerial/cable TV network, DVB-S (2) from satellite
dish, external aerial/cable TV network (3) from
external aerial/analogue cable TV network.*
IR IN
IR 1+2
5 6
1
Useful hints
Power saving
Mains cord
Master Link must not be connected if POWER SAVING is set to ON in the STANDBY SETTINGS menu.
If POWER SAVING is set to ON and the TV is in standby, the socket MASTERLINK is deactivated. This
means that you cannot access the T V from your link room audio or video system, while the main room
TV is in standby. Furthermore, it is not possible to make recordings on sources connected to any AV
sockets. See the Guide for further information.
Connect the ~socket on the main connection panel of your TV to the wall outlet. The T V is in standby
mode and ready to be used.
Page 25

Some sockets on the illustration of the main connection panel may be occupied by internal connections. Do not disconnect
the cables from these sockets!
25
LINK TV
Aerial output for distribution of video signals to
other rooms.
DTV DATA
For future use.
MASTER LINK
For a compatible Bang& Olufsen audio or video
system. The socket is also used for BeoLink
distribution of sound and picture throughout the
house.
CENTRE 1
For connection of a centre speaker, e.g. BeoLab 7.
For further information, see the speaker’s own
guide.
POWER LINK 1–6
For connection of external speakers in a surround
sound setup. See the Guide for further
information.
1 (SUB)
For connection of up to two Bang & Olufsen
subwoofers. A cable splitter for such connections
is available from your Bang & Olufsen retailer.
IR IN (9-pin)
For the screen’s IR-receiver enabling remote
control operation.
MONITOR
For a plasma screen.
IR IN (mini-jack)
For an extra IR-receiver when the TV is set up with
a projector.
IR 1+2
For an external IR-transmitter used with Home
cinema setups or an HDMI Expander.
~ – Mains supply
Connection to the mains supply.
VGA
Socket for connection of a High Denition video
source or a PC. You can also use this socket for
connection of a BeoMaster.
PCMCIA (CA module)
For insertion of a card and module for access to
digital channels. For further information about
compatible card and module combinations,
contact your Bang& Olufsen retailer.
SMARTC ARD
For insertion of a card for access to digital
channels. For further information about
compatible card and module combinations,
contact your Bang& Olufsen retailer.
B
For access to the sockets for temporary
connections, press the button (B) on the right side
of the system and the door opens automatically.
You can close the door manually.
PHONES
For connection of stereo headphones.
> To mute speakers turn the volume wheel quickly
counter-clockwise. (Beo4: Press in the middle of
button).
the
> Turn the volume wheel either way to adjust
volume in headphones. (Beo4: Press or ).
> To restore sound in speakers, turn the volume
wheel quickly counter-clockwise. (Beo4: Press
the middle of the button).
NOTE! Prolonged listening at high volume levels
can cause hearing damage!
The USB port ( ) is for software updates. Only
available if you have the optional DVB module. For
further information contact your retailer.
Installation and setting up
CINEMA
For a Home Automation system.
TTL /RS232
Only for use in Hotel setups.
1
*DVB
The number and types of DVB sockets depend on which optional DVB module
Copy-protected
programmes
is installed in the television.
If distorted picture quality is observed while viewing copy-protected pay-per
view programmes, connect the set-top box directly to the TV. Do not connect
through a VCR.
NOTE! Video recorders can only be connected to
the AV1 and AV2 socket groups, as these are the
only sockets groups for video output. Connect the
primary recorder to AV1 and the secondary
recorder to AV2.
Page 26

26
First-time setup of your television
This rst-time setup procedure is activated when the TV is connected to the mains
and switched on for the rst time. If you want to change your setup at a later date,
you can access the same menus and update your settings.
Switch on the TV
It takes the T V approx. 20 seconds to start up and
become ready for use.
Select settings
You are led through the following settings only
when you switch on the TV for the rst time.*1
However, the sequence of menus depend on the
connections and settings you make.
TV
Switch on
or
Select setting Accept and go to next menu item
MENU LANGUAGE
REMOTE CONTROL
TUNER SETUP
CONNECTIONS
AUTO TUNING
Set the on-screen menu language
Disable or enable the navigation button on your remote control*
Disable or enable internal TV tuner or DVB
Register connected equipment
Tune in TV channels automatically. Available only if the TV tuner is enabled.
See the Guide for further information.
2
Information
TV tuner
Connections
Power saving
The TUNING menu is only available if the TV tuner is enabled, see the Guide
for further information.
Select the type of equipment connected to each socket, the sockets used, the
product name, and the source name.
If you have other equipment connected to your television, set POWER SAVING
to OFF. See the Guide for further information.
1
*NOTE! When you have selected the preferred
settings in a menu, you may have to press the
green button to continue to the next menu in the
rst-time setup procedure. Follow on-screen
instructions.
Page 27

27
Calibrate the speakers
Set up the speakers to optimise sound from your
listening position. To enjoy Adaptive Sound
Technology several speakers and a Beo6 remote
control are necessary.
Make standby settings
Set the TV to switch itself to standby after some
time with no operation or switch power saving on
or off. See the Guide for further information.
AST ON/OFF
AST ON:
SPEAKER SETUP
TV LISTENING PRESET
CINEMA LISTENING PRESET
SOUND ADJUSTMENT
SOUND SETUP
STANDBY SETTINGS
Disable or enable Adaptive Sound Technology
AST OFF:
SPEAKER TYPES
SPEAKER ROLES
SPEAKER DISTANCE
SPEAKER LEVEL
SOUND ADJUSTMENT
Make standby settings for the TV
First-time setup of loudspeakers
applies only to speakers for TV viewing.
See the Guide for further information.
Adjust volume, bass, treble and
loudness and preset two default
speaker combinations.
Make settings for each LISTENING
PRESET. See the Guide for further
information.
Installation and setting up
2
*Navigation button
Projector
If you have a Beo4 without navigation button or if your Beo4 is not set to the
correct mode, you cannot enable the navigation button. See the Beo4 guide
or contact your Bang& Olufsen retailer for further information.
If you have connected a projector and not a screen, you must switch off the
television after rst-time setup and then switch it on again for your settings to
take effect.
NOTE! For further information about remote
controls and rst-time setup, see the Guide.
Page 28

28
Waste Electrical and Electronic Equipment
(WEEE) – Environmental protection
Electrical and electronic equipment, parts and
batteries marked with this symbol must not be
disposed of with normal household wastage; all
electrical and electronic equipment, parts and
batteries must be collected and disposed of
separately.
When disposing of electrical and electronic
equipment and batteries by use of the collection
systems available in your country, you protect the
environment, human health and contribute to the
prudent and rational use of natural resources.
All Bang & Olufsen products comply with applicable environmental legislation throughout the world.
This product is in conformity with
the provisions of the Directives
2004/108/EC and 2006/95/ EC.
If the product is equipped with a grounded mains
lead and 3-pin plug, the product shall be
connected to a mains socket wall outlet with a
protective earth connection. The ground pin of
the mains plug must not be removed, due to the
danger of electric shock. If a wall outlet with
protective earth is not available, an electrician
should be contacted.
This product incorporates copyright protection
technology that is protected by U.S. patents and
other intellectual property rights. Use of this
copyright protection technology must be
authorized by Rovi, and is intended for home and
other limited viewing uses only unless otherwise
authorized by Rovi. Reverse engineering or
disassembly is prohibited.
HDMI, the HDMI Logo and High-Denition
Multimedia Interface are trademarks or registered
trademarks of HDMI Licensing LLC.
Collecting electrical and electronic equipment,
batteries and waste prevents the potential
contamination of nature with the hazardous
substances which may be present in electrical and
electronic products and equipment.
Your Bang& Olufsen retailer will advise you of the
correct way of disposal in your country.
If a product is too small to be marked with the
symbol, it will appear in the User Guide, on the
Guarantee certicate, or on the packaging.
Manufactured under license from
Dolby Laboratories. Dolby, Pro Logic,
and the double-D symbol are
registered trademarks of
Dolby Laboratories.
Confidential unpublished works.
Copyright 1992–2003 Dolby
Laboratories.
All rights reserved.
Manufactured under license
under U.S. Patent # ’s: 5,451,942;
5,956,674; 5,974,380; 5,978,762;
6,487,535; 7,003,467; 7,212,872
& other U.S. and worldwide
patents issued & pending.
DTS, DTS Digital Surround, ES,
and Neo:6 are registered
trademarks and the DTS logos,
and Symbol are trademarks of
DTS, Inc.
© 1996–2008 DTS, Inc.
All Rights Reserved.
U.S. Patent’s 6,836,549;
6,381,747; 7,050,698; 6,516,132;
and 5,583,936
Page 29

29
Page 30

Page 31

Page 32

 Loading...