

Page 1

AT&T
999-507-144
®
MERLIN
COMMUNICATIONS SYSTEM
System Manual
PIus
Page 2

Welcome...
...to the magic of MERLIN. Your MERLIN® Plus Communications System is
ready when you are. Once it's installed, you can begin using it immediately. You
can use the MERLIN Plus system voice terminals the same way you use ordinary
telephones.
But sooner or later you'll want to take advantage of the system's advanced
technology and customize it to meet your business needs. This manual shows you
how to choose from the MERLIN Plus system's many options and features to
design a system that fits the way you do business. In no time you'll have at hand
the most efficient and economical telecommunications system available for your
business anywhere today...
...and it's amazingly easy to use!
The people in your business can start using their phones right away. Give each
person one of the user's cards at the back of this book for quick reference. Then
have them look through the training guide included in this package when they
have a few free minutes during the day.
If you'll have an attendant handling most of your incoming calls, give that person
Section 4, "Using the Attendant Console," to read.
Now...
...go ahead, make a call!
Page 3

TO ORDER COPIES OF THIS MANUAL
CALL:
FAX:
ATTMAIL: Free form to !docdist
While reasonable efforts were made to ensure that the information
in this document was complete and accurate at the time of printing,
AT&T can assume no responsibility for any errors. Changes or
corrections to the information contained in this document may be
incorporated into future reissues.
Cincinnati Contract Service Organization
Document Distribution Center on 800-252-4076.
513-352-7031
Please include your name and telephone
number with your order information
Page 4

Contents
Section 1: Introduction
What's in This Manual 1-1
How to Use This Manual 1-3
The MERLIN Plus Communications System 1-5
Section 2: Planning the System
Introduction 2-1
System Configuration Form 2-3
Line Assignments Form 2-7
Call Restrictions and Allowed Lists Directory 2-13
System Speed Dial Directory 2-17
FORMS:
System Configuration Form 2-21
Line Assignments Form 2-23
Call Restrictions and Allowed Lists Directory 2-25
System Speed Dial Directory 2-27
Section 3: Administering the System
Introduction 3-1
Administration Preview 3-3
Basic Administration 3-11
Customized Line Assignments 3-13
Systemwide Options 3-17
Section 4: Using The Attendant Console
Overview 4-1
Handling Calls 4-5
Section 5: Reference
Overview 5-1
MERLIN Plus System Features 5-3
Accessory Equipment 5-85
Section 6: Quick Reference Guides
Quick Reference Guide to System Administration 6-1
Quick Reference Guide to Administration Codes 6-7
Quick Reference Guide to Voice Terminal Features 6-9
Quick Reference Guide to Programming Codes 6-12
Section 7: Troubleshooting the System
Troubleshooting Procedures 7-1
General Test 7-11
Section 8: Installation
MERLIN Plus System Installation 8-1
Index I-1
Page 5

Section 1: Introduction
Page 6

What's in This Manual
You'll find the information in this MERLIN® Plus Communications System
manual convenient y divided into eight sections, as described below. You'll
also find ten copies of the MERLIN Plus System User's Card in the back of this
binder. In addition to the manual, this package also includes a MERLIN Plus
System Training Manual.
SECTION 1.
INTRODUCTION
SECTION 2.
PLANNING THE
SYSTEM
SECTION 3.
ADMINISTERING THE
SYSTEM
SECTION 4.
USING THE ATTENDANT
CONSOLE
SECTION 5.
REFERENCE
This section tells you what's in the manual and how to use it. It also offers a
brief introduction to the system's control unit and the voice terminals
(telephones).
Use the information in this section to make some key decisions about how you
want the system operate. This section includes planning forms to record
your decisions. If someone else will be system administrator, have that person
fill out the planning forms.
This section tells you how to use the information on the planning forms to
customize the system to your business needs. If someone else will be system
administrator, have that person administer the system following the steps in
this section.
If our system will have an attendant to manage incoming call traffic, that
person can find some helpful information in this section on using the
aministrator/attendant telephone.
This section contains a detailed discussion of every component, option, and
feature in the MERLIN Plus system. The entries are organized alphabetically
to help you find the information you need quickly. As you become familiar
with the system, you'll probably go to this section first when you want to
change a system setting or a voice terminal feature, or when you simply want
to find out more about some aspect of the system.
SECTION 6.
QUICK REFERENCE
GUIDES
SECTION 7.
TROUBLESHOOTING
THE SYSTEM
SECTION 8.
INSTALLATION
The guides in this section offer quick access to administration and
programming procedures. Use them when you want to find a particular
procedure fast.
The tables in this section can help you isolate and solve most of the technical
problems that may cause your system to malfunction.
This is a technical reference section. It should answer any questions an
installer or technician may have about MERLIN Plus system wiring and
installation requirements.
What's In This Manual 1-1
Page 7

USER'S CARD
This card is a handy reference for anyone who uses a MERLIN Plus system
voice terminal (telephone) on the job. Give one to everyone in your business
who uses a voice terminal.
MERLIN PLUS SYSTEM
TRAINING MANUAL
This guide offers self-paced instructions on using the MERLIN Plus system
features. Make the guide available to everyone in your business who uses a
voice terminal, and encourage them to use it.
1-2
Section 1: Introduction
Page 8

How to Use This Manual
How you should use this manual at any particular time depends on what you
want to do, as the following information suggests.
ADMINISTERING A NEW
SYSTEM?
MAKING CHANGES TO
A RUNNING SYSTEM?
MANAGING INCOMING
CALL TRAFFIC AS
SYSTEM ATTENDANT?
USING A VOICE
TERMINAL FOR THE
FIRST TIME?
HAVING TROUBLE WITH
THE SYSTEM?
Use the information in Section 2, "Planning the System," to decide which
options and features you want for your system. Then follow the instructions
in Section 3, "Administering the System, " and in Section 5, "Reference," to
set up the system with the options and features you've selected.
Change the planning forms to reflect the changes you want to make. Then
see the relevant entries in Section 5, "Reference," and Section 6, "Quick
Reference Guides," to make the changes.
See Section 4, "Using the Attendant Console," for information on how to use
the attendant's telephone to handle incoming calls.
See the relevant entries in Section 5, "Reference," and the Quick Reference
Guide to Voice Terminal Features in Section 6-and keep the MERLIN Plus
System User's Card handy. Then, when you have time, follow the self-paced
instructions in the MERLIN Plus System Training Manual.
Find the symptom in Section 6, "Troubleshooting." Then follow the
suggestions for solving the problem.
How to Use This Manual 1-3
Page 9
The MERLIN Plus Communications System
The basic MERLIN Plus system supports up to four outside telephone lines
and eight voice terminals (MERLIN system telephones). To accommodate
your growing communications needs, the system expands easily and
economically to support up to eight outside lines and 20 voice terminals. And
if your business eventually outgrows even the fully expanded MERLIN Plus
system, you can protect your investment in voice terminals, accessory
equipment, and training time by moving up to a larger MERLIN system.
The paragraphs that follow offer a brief introduction to the system's control
unit and voice terminals. The optional equipment you can add to your system
is described under the heading "Accessory Equipment" in Section 5,
"Reference."
THE CONTROL UNIT
THE VOICE TERMINALS
The control unit is the system's brain. It manages all incoming, outgoing, and
intercom call traffic. It makes all of the system's decisions and controls all of
the system's responses. For an illustration of the control until with its major
components labeled, see "Administration Preview" in Section 3,
"Administering the System."
A voice terminal is a MERLIN system telephone that provides basic telephone
functions and allows you to take advantage of the special MERLIN system
features. Your MERLIN Plus system works best with the following voice
terminals:
●
5-Button Voice Terminal
●
10-Button Voice Terminal
●
10-Button Hands-Free Answer on Intercom (HFAI) Voice Terminal
●
34-Button Deluxe Voice Terminal
●
34-Button Built-In Speakerphone (BIS) Voice Terminal.
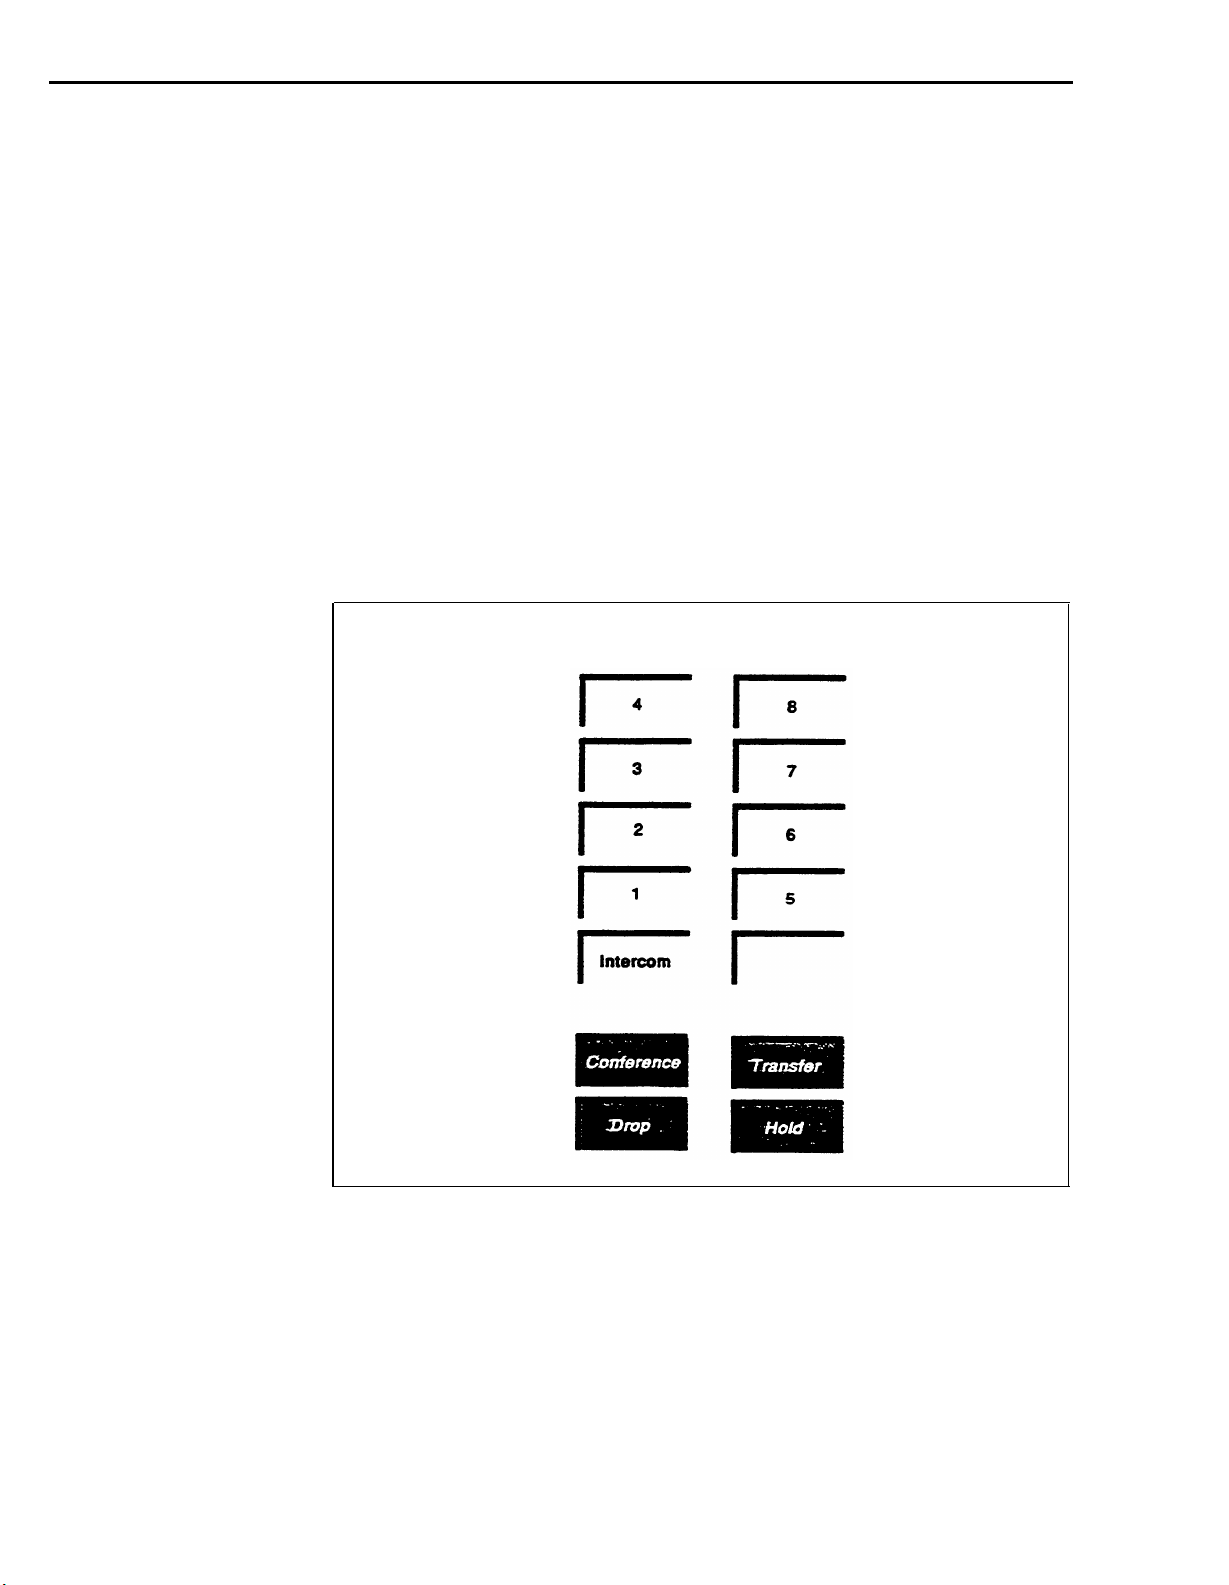
All of these voice terminals have buttons for fixed features such as
Conference, Drop, Transfer, and Hold. They differ from one another in the
number of buttons above and to the right of the dial pad that can be used for
outside lines and programmable features. Some also have additional built-in
speakerphones. The illustrations that follow should help acquaint you with
these voice terminals.
5-Button
The 5-button voice terminal has an Intercom button and four additional
buttons above the dial pad that you can use for outside lines and/or
programmable features.
The MERLIN Plus Communications System
1-5
Page 10

10-Button
The 10-button voice terminal has an Intercom button and nine additional
buttons above the dial pad that you can use for outside lines and
programmable features.
10-Button HFAI
34-Button Deluxe
The 10-button HFAI voice terminal has a built-in speaker that allows you to
answer and talk on intercom calls without liking the handset. It also has an
Intercom button and nine additional buttons above the dial pad for outside
lines and programmable features.
The 34-button deluxe voice terminal has two rows of five buttons located
above the dial pad and two rows of 12 buttons to the right of the dial pad.
You can use the buttons above the dial pad for lines and programmable
features. You can use the 24 buttons to the right of the dial pad for
programmable features. The system attendant usually has this model voice
terminal.
34-Button BIS
1-6
Section 1: Introduction
The 34-button BIS voice terminal has a built-in speakerphone that allows you
to answer and talk on both outside and intercom calls without using the
handset. Above the dial pad are an Intercom button and nine additional
buttons for outside lines and programmable features. The 24 buttons to the
right of the dial pad can be used for programmable features.
Programming a feature onto a voice terminal is easy. Just follow the simple
programming instructions in the entry for the feature in Section 5,
"Reference," on the User's Card, or in the Training Guide.
Page 11

Section 2: Planning the System
Page 12

Introduction
You can begin making and receiving calls as soon as your MERLIN® Plus
Communications System is installed. But to take full advantage of the
system's power, you should customize it to fit your business needs.
Customizing the system is called administering the system throughout this
manual.
Administering the system involves entering information into the system's
memory about how you want the system to operate. You enter this
information by pressing buttons and dialing numbers on the telephone referred
to in this manual as the administrator/attendant console.
This section of the manual helps you decide what information you want to
enter into the system's memory and shows you how to record that information
on forms. A checklist of the forms appears below. You can find copies at the
end of this section. Remove them now, make a photocopy of each, and put
the originals back in this binder. Keep the copies at hand so you can fill
them out as you plan your system.
❑
System Configuration Form
❑
Line Assignments Form
❑
Call Restrictions and Allowed Lists Directory
❑
System Speed Dial Directory
NOTE: In this section of the manual, the information coming before
the boxes helps you make important decisions about your system.
Then the instructions in the boxes tell you where to enter these
decisions on the forms.
Introduction
2-1
Page 13
System Configuration Form
Use the System Configuration Form to record information about the following:
● Dial Signals
● Long Distance Dialing
● Voice Terminals
● Outside Telephone Lines
The following information should help you make the appropriate entries for
your system on the System Configuration Form.
DIAL SIGNALS
LONG DISTANCE
DIALING
Touch-Tone telephone lines can carry both Touch-Tone and rotary (pulse) dial
signals. But rotary-only telephone lines cannot carry Touch-Tone dial signals.
If you don't know whether your outside telephone lines are Touch-Tone or
rotary-only, ask your local telephone company.
The MERLIN Plus system is set to generate Touch-Tones when you dial an
outside call. This means that if one or more of your outside telephone lines
can transmit only rotary (pulse) signals, you have to set the system for rotary
dialing during system administration. Otherwise you won't be able to dial out
over the rotary-only lines.
NOTE: If some of your outside lines are Touch-Tone and some rotary,
you may want to ask your local telephone company to replace the
rotary lines with Touch-Tone lines.
Under "Dial Signals" on the form . . .
Check the box next to "Touch-Tone" if all the outside telephone lines
connected to your system are Touch-Tone lines.
Check the box next to "Rotary (Pulse)" if one or more of the outside lines
connected to your system are rotary-only lines.
Under "Long Distance Dialing" . . .
Check the box next to "Toll-Prefix" if you have to dial a toll prefix
(1 or 0) before the area code when you dial the telephone number for a
long distance call.
VOICE TERMINALS
Check the box next to "Area Code Only" if you do not have to dial a toll
prefix (1 or 0) before the area code when you dial the telephone number
for a long distance call.
Each MERLIN Plus system voice terminal (telephone) in your system will have
a two-digit intercom number. These intercom numbers allow easy dialing
between phones within the system.
The intercom numbers for a system with 10 or fewer voice terminals run from
10 to 19. For a system with more than 10 voice terminals, the intercom
numbers are 10 through 29.
System Configuration Form 2-3
Page 14

Intercom 10
By design, the intercom 10 position is the primary call-handling position in
the system, and it is also the system administration point. You must,
therefore, assign intercom number 10 to the voice terminal at the system
attendant's location. For easy system administration, the voice terminal
assigned intercom 10 should be a 34-button deluxe model, but a 10-button
model will also work.
Under "Voice Terminals" . . .
Write in the name of the system attendant and the attendant's location on
the line next to number 10.
Intercom 19
Intercoms 11 through 29
Notice that "Call Report" appears in parentheses in the "Name" column next
to intercom 19 on the form. If your system has the Call Report option, the
system automatically reserves the intercom 19 position for the data collector
and printer required to print call reports. You can designate an intercom
number other than 19 for the Call Report equipment when you administer the
system, but you cannot assign both the Call Report equipment and a voice
terminal the same intercom number. (For more information on the Call
Report option and equipment, see "Administer the Call Report Option" under
"Systemwide Options" in Section 3, "Administering the System," and also
the "Call Report" entry in Section 5, "Reference.")
Under "Voice Terminals" . . .
Do not write in a name next to intercom number 19 if your system has the
Call Report option (unless you plan to assign an intercom number other
than 19 to the Call Report equipment when you administer the system.)
Cross out "(Call Report)" next to intercom 19 if your system does not have
the Call Report option, and treat intercom 19 just like any other intercom
number as you assign intercom numbers below.
To simplify system administration, you should assign consecutive intercom
numbers beginning with 11 to the remaining voice terminals in your system.
PAGING GROUPS
2-4
Section 2: Planning the System
Under "Voice Terminals" . . .
Write in the names of the people to be assigned voice terminals and their
work locations next to the remaining intercom numbers.
The MERLIN Plus system lets you page the people in your business through
the speakers on their voice terminals. You don't need an external paging
system for this feature.
The system automatically assigns all voice terminals to a single paging group,
called the Page-All Group. You can't change the makeup of the Page-All
Group. (See the "Group Page" entry in Section 5, "Reference," for more
information on the Page-All feature.)
Page 15

The system also assigns intercoms 10 through 19 to Paging Group 1 and
intercoms 20 through 29 to Paging Group 2. You can keep these groups as
they are, or you can change the makeup of Paging Groups 1 and 2 during
system administration to fit the needs of your business.
You can assign as few or as many voice terminals as you want to Groups 1 and
2. You can also assign the same voice terminal to both groups.
Under "Paging Groups" . . .
Check the appropriate column(s) next to the intercom number, name, and
location of each person to indicate the Paging Group(s) you plan to assign
the person to.
OUTSIDE TELEPHONE
LINES
The local telephone company gives you the telephone numbers for your
outside lines. The control unit jacks where the outside lines connect to the
system are labeled alphabetically: A through D for a system with four or fewer
outside lines, and A through H for a system with five to eight outside lines.
To simplify system administration, plan to assign your outside lines to an
unbroken sequence of jacks beginning with jack A. Begin with the lines for
your local published telephone numbers. Group special lines types such as
WATS lines together in the sequence, and place any personal lines at the end
of the sequence.
Under "Outside Telephone Lines" . . .
Write in the telephone number and the line type for each of your outside
lines next to the appropriate letter.
You should now have a completed System Configuration Form.
System Configuration Form 2-5
Page 16
Line Assignments Form
OUTSIDE TELEPHONE
LINES
NAME AND INTERCOM
NUMBER
The information in the lower area of the Line Assignments Form, under the
heading "Outside Telephone Lines," is almost identical to the information
under the same heading on the System Configuration Form you've already
completed. The only difference is that the leftmost column is headed
"Control Unit Jacks" on the System Configuration Form and "Lines" on the
Line Assignments From. This slight difference is to remind you that your
outside lines get their identifiers (A, B, C, etc.) from the control unit jacks
they are plugged into.
Under "Outside Telephone Lines" on the Line Assignments Form . . .
Copy the information already entered in the corresponding area of your
System Configuration Form.
You can also use the information already entered on your System
Configuration Form to complete this part of the Line Assignments Form.
In the "Name" column on the form . . .
Write the names of the people in your business next to their intercom
numbers.
LINE ASSIGNMENTS When your system is first installed, before you do any system administration,
all your outside telephone lines appear on the same buttons on every voice
terminal in the system. These are the voice terminals' original line
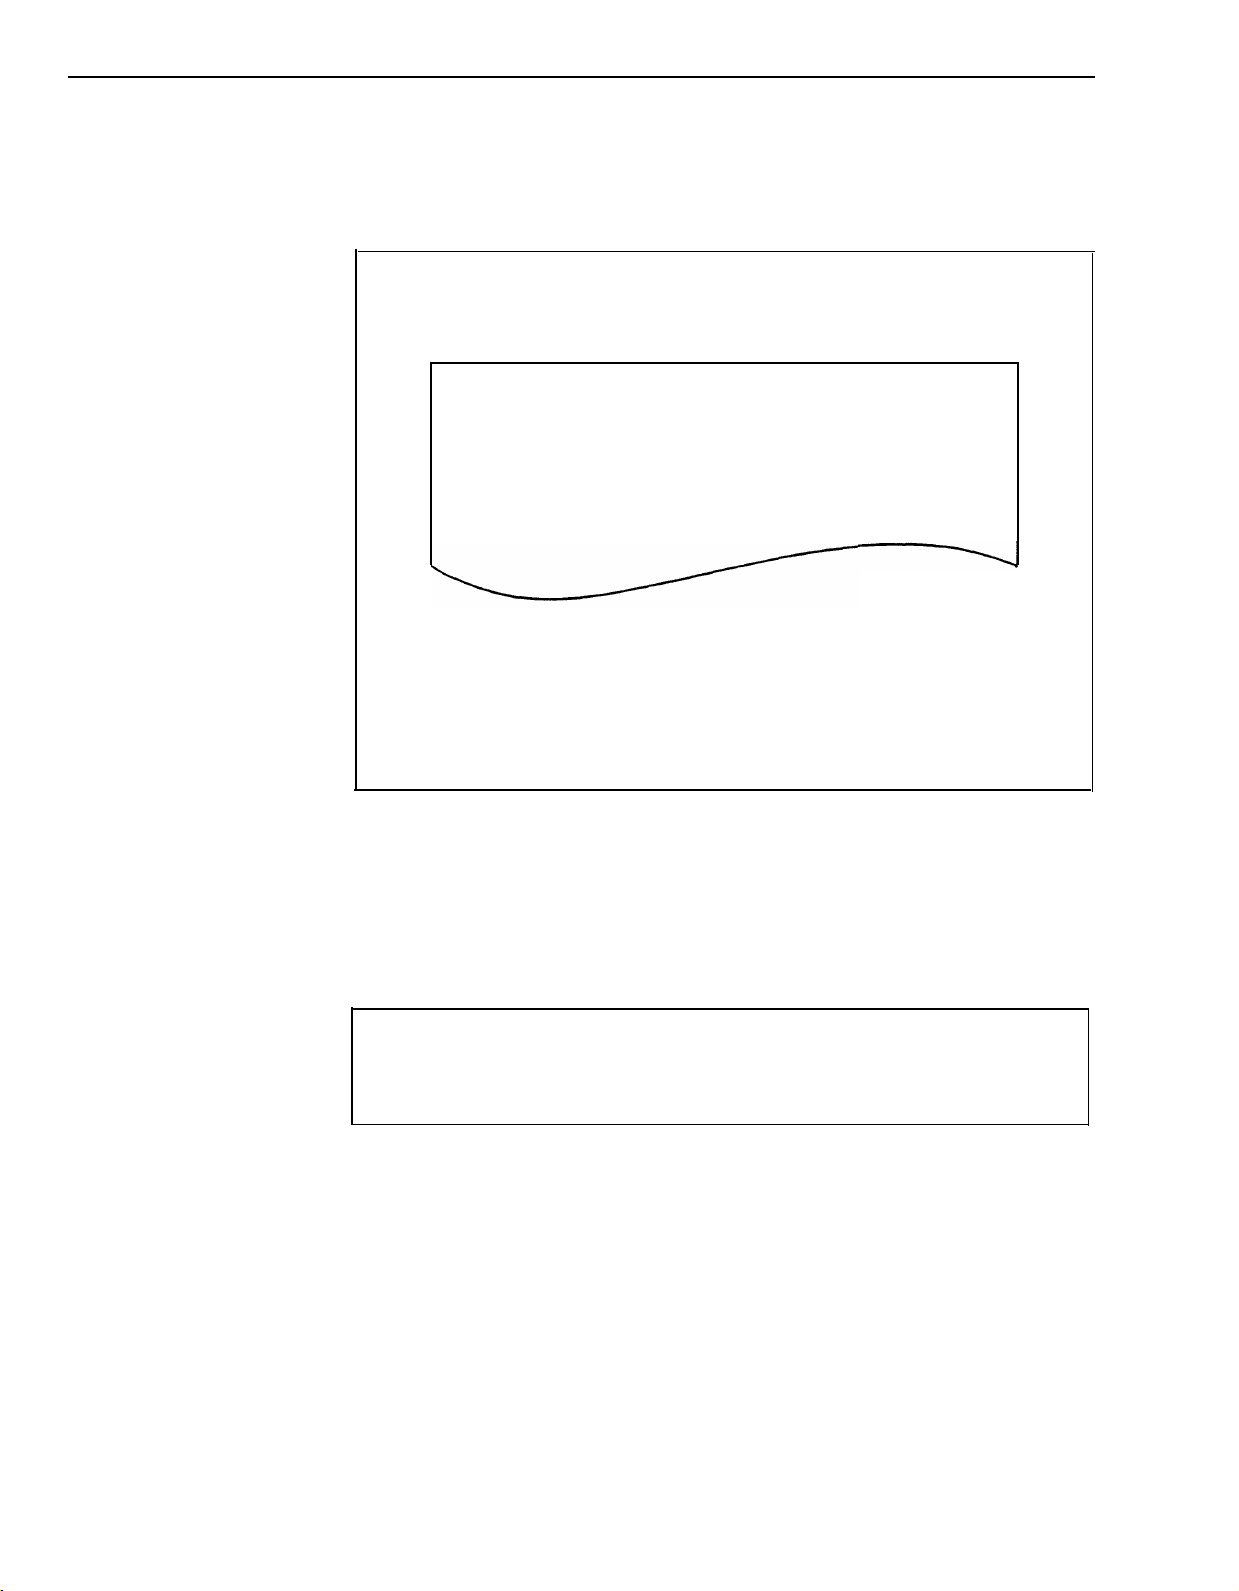
assignments. Figure 2-1 shows the original line assignments for both 10-button
and 34-button voice terminals. A voice terminal retains its original line
assignments until someone administers it differently.
Line Assignments Form 2-7
Page 17
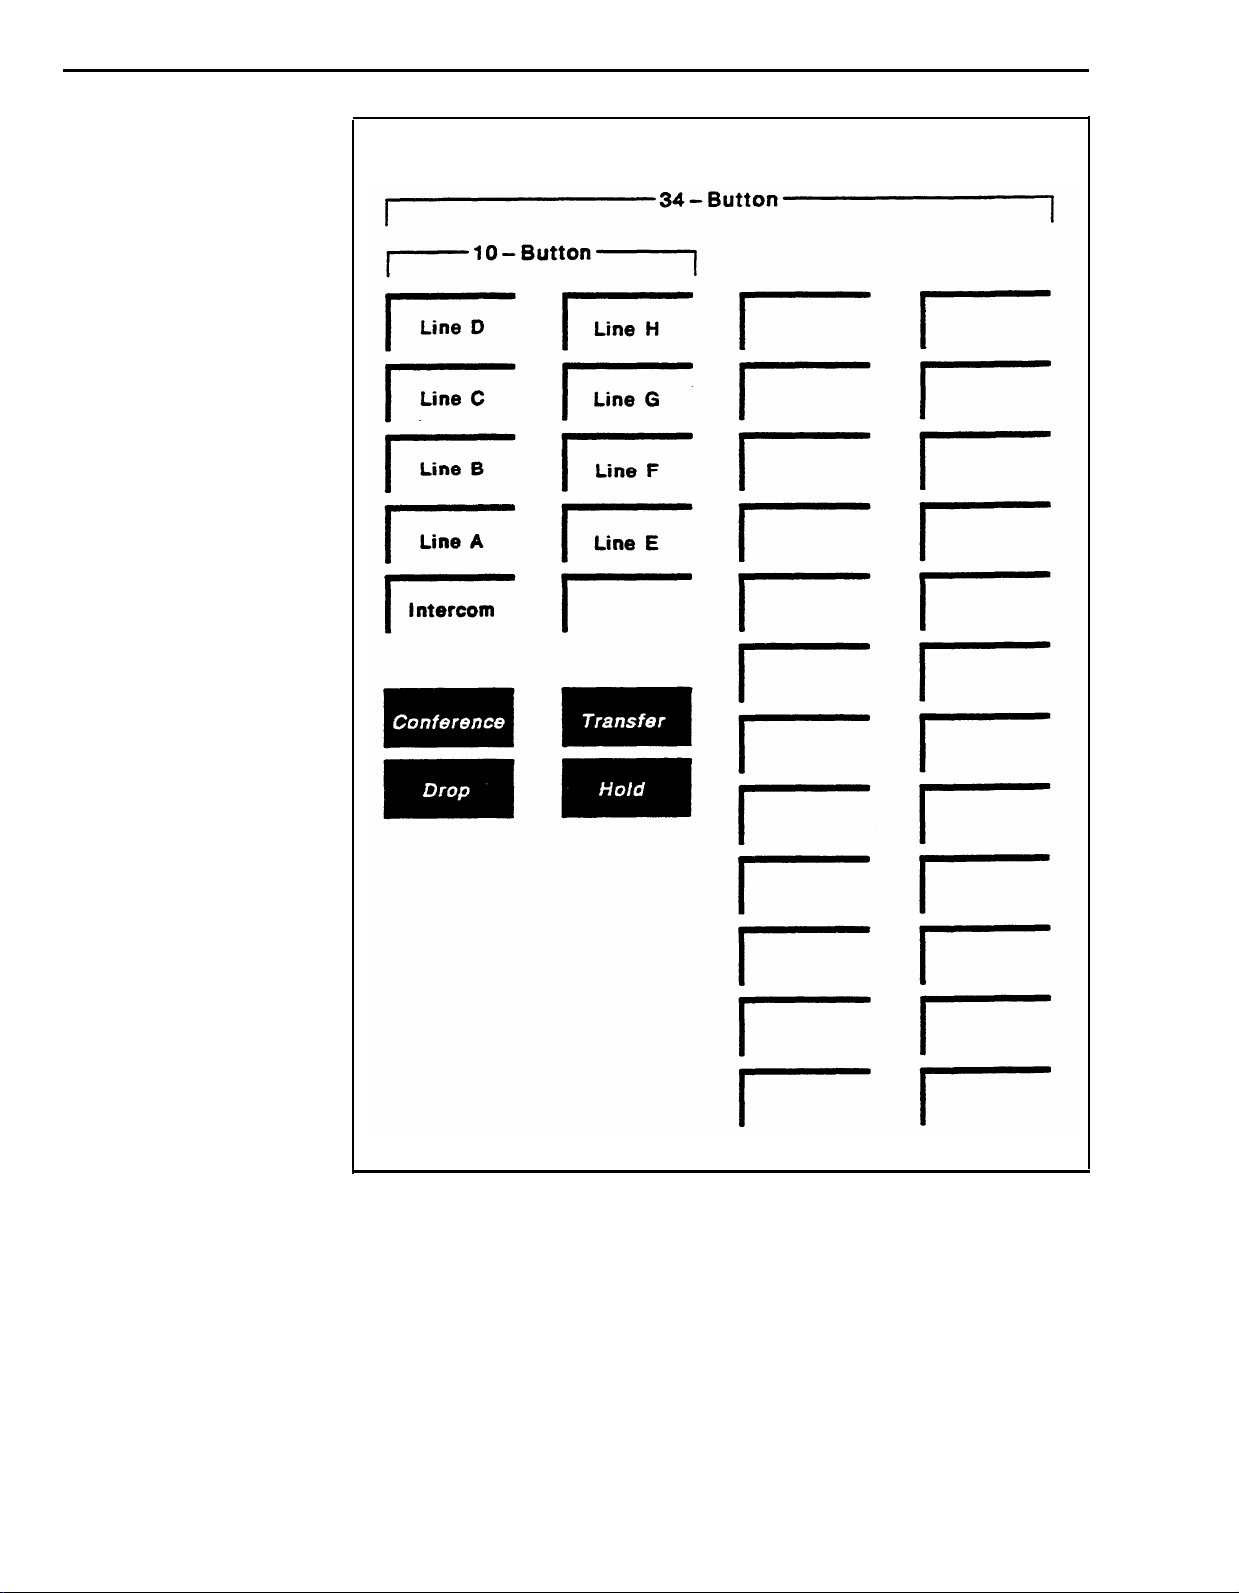
FIGURE 2-1 Original Line Assignments
2-8
Section 2: Planning the System .
MERLIN Plus system line administration offers you these options:
●
Customize the line assignments on some or all of your voice terminals.
●
Keep the original line assignments on some or all of your voice
terminals.
The following paragraphs offer guidelines for choosing a line assignment
option for each voice terminal and recording your choices on the form.
Page 18

Customized Line
Assignments
As you decide whether to customize the line assignments to one or more voice
terminals, review your business calling patterns and each person's telephoning
responsibilities. You may find that customizing line assignments can help you
control costs and increase the efficiency of your communications system.
Let's say, for example, that you are the MERLIN Plus system administrator for
a branch office of a large company. Your system has six outside telephone
lines:
●
Lines A, B, and C are local, general purpose lines with your office's
published telephone numbers. They're listed first, second, and third
respectively in directories and advertisements.
●
Line D is a WATS line to the distant area where most of your
company's suppliers are located.
●
Line E is a foreign exchange (FX) line to the distant city where the
company's headquarters are located.
●
Line F is a general purpose line with an unpublished telephone number
that the branch manager wants as a personal line.
Figure 2-1 shows how these lines appear on all voice terminals before any line
administration.
Now let's consider the following facts about the calling requirements of three
people in the office: the buyer, the branch manager, and the clerk.
●
Most of the buyer's outgoing calls are to suppliers in the area served by
the WATS line and to the purchasing and accounting departments at
company headquarters. The buyer receives relatively few incoming
calls, but they are usually important.
●
The branch manager calls company headquarters often and wants a
personal line for other calls.
●
The clerk handles most of the incoming calls from customers and
prospective customers, and has no need to call suppliers or the
headquarters offices.
Line Assignments Form 2-9
Page 19
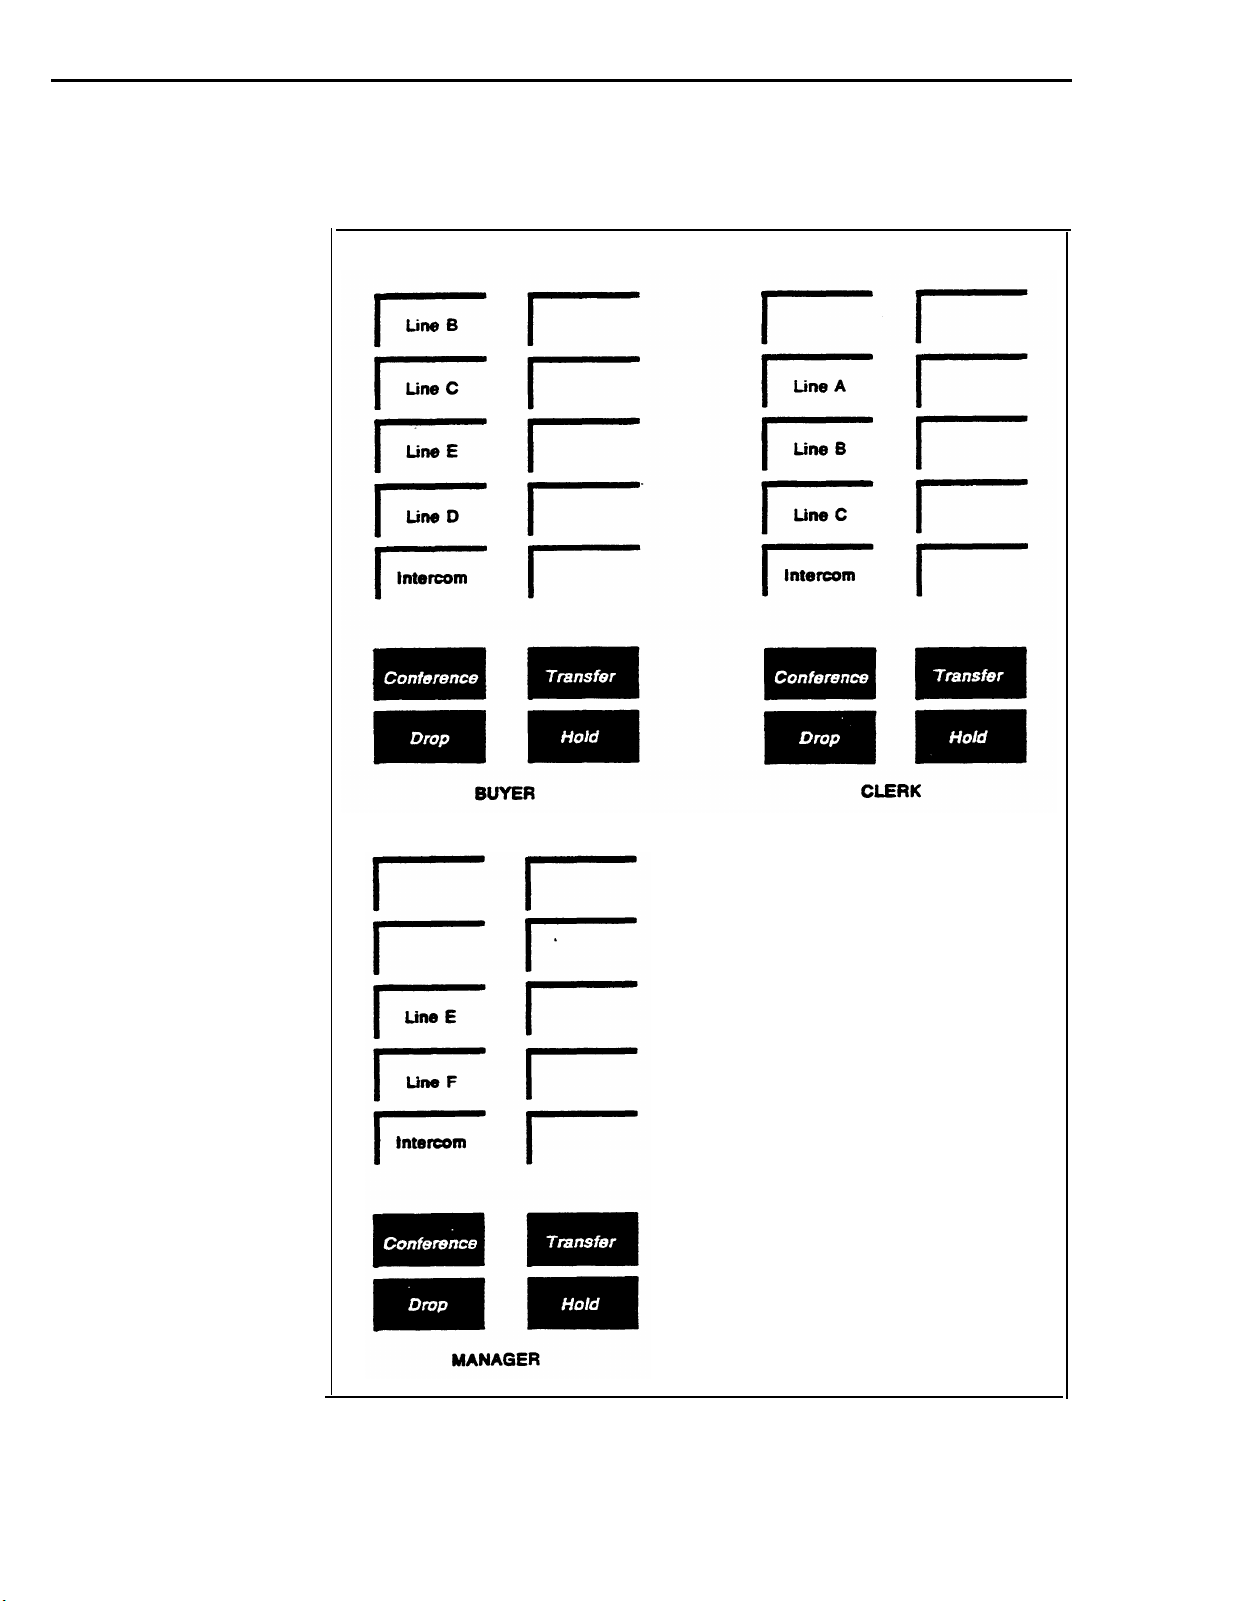
Figure 2-2 shows how you might customize the line assignments to the buyer's,
the manager's, and the clerk's voice terminals to best meet their individual
needs and responsibilities.
FIGURE 2-2 Customized Line Assignments
Line A = Primary listed telephone number
Line B = Second listed telephone number
Line C = Third listed telephone number
Line D = WATS line
Line E = FX line
Line F = Manager's personal line
2-10
Section 2: Planning the System
Page 20
Review the responsibilities of the people in your business and the special
characteristics of your outside lines. Then decide which, if any, should have
customized line assignments. (Your System Configuration Form shows the
telephone number and line type for each of your outside telephone lines.)
In the "Intercom No." column . . .
Find the intercom numbers for the people for whom you want customized
line assignments.
Check the appropriate boxes to the right of the intercom numbers to
indicate which lines you want to assign to each person.
Original Line
Assignments
AUTOMATIC LINE
SELECTION SEQUENCE
You can keep the original line assignments on the voice terminals of those
people who need access to every outside line in the system.
In the "Intercom No." column . . .
Find the intercom numbers for the people who should retain the original
line assignments.
Check the appropriate boxes to the right of the intercom numbers to
indicate that every line will appear at each of those voice terminals.
When you lift the voice terminal handset to make an outside call, the system
automatically scans the outside telephone lines in the order in which they
appear on your voice terminal's line buttons until it finds a free line for your
call. For example, if your voice terminal has the original line assignments, the
system gives you Line A, if it's free, when you lift the handset. If Line A is
busy, the system tries Line B, and so on in alphabetical order until it finds a
free line for your call. Likewise, if your voice terminal has customized line
assignments, the system will search for a free line following the customized
sequence.
In most cases, you probably want a voice terminal's automatic line selection
sequence to be the same as the sequence in which the lines appear on the
voice terminal's line buttons. If, however, you want a special automatic line
selection sequence for a voice terminal, you can program that sequence when
you administer the system's outside lines.
NOTE: A special automatic line selection sequence for a voice terminal
can contain any or all of the lines that appear on the voice terminal's
line buttons.
Line Assignments Form
2-11
Page 21
In the "Intercom No. " column . . .
Find the intercom numbers for the voice terminals you want to program
with special line selection sequences.
Write the line selection sequences in the appropriate spaces in the
"Automatic Line Selection Sequence" column. (For example, if you want
the voice terminal with intercom number 14 to have the automatic line
selection sequence D, C, A, B, write DCAB in the space for intercom
number 14 in the "Automatic Line Selection Sequence" column.)
Unless you program the voice terminal line buttons differently, calls coming in
on each outside line ring immediately at every voice terminal with a line
button for that line. But you can program voice terminal line buttons so that
calls coming in on the lines assigned to those buttons will ring either after a
delay or not at all.
Immediate Ring
Delayed Ring
No Ring
Those people with primary responsibility for answering calls coming in on a
shared line should have the button for that line programmed for immediate
ring.
Those people with backup responsibility for answering calls coming in on a
shared line should have the button for that line programmed for delayed ring.
Then a call coming in on that line will ring only after it has gone unanswered
elsewhere for two rings.
Those people who do not answer incoming calls on a shared line (for example,
someone whose calls are screened) should have the button for that line
programmed for no ring. This option is also useful for a voice terminal
located in a lobby or conference room.
NOTE: Even though a line button has been programmed for delayed
ring or no ring, the green light next to the button still begins to flash
immediately when a call comes in on the line.
To the right of each intercom number, in the boxes containing check
marks . . .
Write in the appropriate letter from the following list to indicate the
ringing option you want for each line.
R
= Immediate Ring
D
= Delayed Ring
N = No Ring
You should now have a completed Line Assignments Form. Keep it in a place
where you can find it when you want to administer the system or program
individual voice terminals.
2-12 Section 2: Planning the System
Page 22

Call Restrictions and Allowed Lists Directory
You can use call restrictions to prevent some or all voice terminals from
making outside calls (both local and long distance) or from making long
distance calls. Then you can use allowed lists of numbers and/or special speed
dial codes to permit restricted voice terminals to call specified telephone
numbers, local exchanges, or area codes. By combining call restrictions with
selected exceptions, you can control your outgoing call traffic and costs
without placing unreasonable constraints on the people in your business.
(Both allowed lists and system speed dial codes are explained in detail later in
this section of the manual.)
NOTE: Call restrictions do not affect a voice terminal's ability to
receive incoming calls or to make intercom calls.
OUTWARD RESTRICTED
TOLL RESTRICTION
Some people in your business may have little need to make any outside calls,
either local or long distance. You can place an outward call restriction on their
voice terminals during system administration, and the system will ignore
attempts to dial outside telephone numbers from those voice terminals. Then
if you want these people to be able to make local calls in business or personal
emergencies, you can assign them an allowed list of local exchanges and,
perhaps, emergency numbers such as 911 when you assign the call restrictions.
You can also use system speed dial codes with restriction override (called
passwords in some telephone systems) to allow restricted voice terminals to call
selected local or long distance telephone numbers. You simply mark the
numbers for restriction override and store them in the system's memory under
speed dial codes when you administer the system. Then anyone in your
system, including those with restricted voice terminals, can use the speed dial
codes to call the stored numbers.
Under "Call Restrictions" on the form . . .
Put a check mark in the "Outward Restricted" column next to the
intercom numbers for the voice terminals you want to place outward
restrictions on when you administer the system.
Some people in your business may need to be able to call any local telephone
number but have little need to make long distance calls. You can place a toll
call restriction on their voice terminals. The system will allow local calls from
those voice terminals but ignore attempts to dial long distance numbers.
Then if there are certain areas of the country these people have to call on
business, you can set up an allowed list of those long distance area codes and
assign the list to the toll restricted voice terminals when you administer the
system. You can also mark selected long distance telephone numbers for
restriction override and store them under speed dial codes in the system's
memory. Then anyone in your system, including those with toll restricted
voice terminals, can use the speed dial codes to dial those long distance
numbers.
Call Restrictions and Allowed Lists Directory 2-13
Page 23
Under "Call Restrictions" . . .
Put a check mark in the "Toll Restricted" column next to the intercom
numbers for those voice terminals you want to place toll restrictions on
when you administer the system.
ALLOWED LISTS
If you plan to administer the system with a 10-button voice terminal, you
cannot assign allowed lists to restricted voice terminals. Go on to "System
Speed Dial Directory."
When you assign an allowed list of numbers to a voice terminal, the person
using the voice terminal can call the numbers on the list regardless of any call
restriction placed on the voice terminal.
The system can store up to eight allowed lists of numbers with up to 10
entries in each list. Each entry can have up to six digits. You might,
therefore, want to create one or more allowed lists with entries such as the
following:
●
Local exchange codes
A local exchange code is the first three digits in a 7-digit telephone
number.
●
Long distance area codes
Although you probably have to dial a 1 before the area code when you
dial a long distance number, you do not have to add the 1 to the area
code in your allowed list entries.
Area codes plus local exchange codes
●
An area code plus a local exchange code amounts to the maximum
allowed six digits.
Allowed Lists Named
Once you've decided how many allowed lists you want and what numbers
should be included in each, you may want to identify each list by name (for
example, "New England Customers" or "local Emergency Numbers") in
addition to the numbers that already appear on the form (List 01, List 02,
etc.).
2-14 Section 2: Planning the System
●
Emergency numbers with six or fewer digits
For example, 911 is a multipurpose emergency number in many areas.
Under "Allowed Lists" . . .
Write the name, if any, that you want to use to identify each list on the
line next to the list's code number (List 01, List 02, List 03, etc.)
Page 24
Allowed Lists Created
Under "Allowed Lists" . . .
Write area codes, local exchange codes, etc., on the lines next to the
"Item" numbers to create your allowed lists.
Allowed Lists Assigned
Now that you've created some allowed lists, you should decide how you want
to assign them to restricted voice terminals when you administer the system.
Under "Call Restrictions," in the "Allowed Lists Assigned" column . . .
Write the allowed list number(s) (01, 02, 03, etc.) on the line for each
restricted voice terminal you want to assign one or more lists to when you
administer the system.
Keep you completed Call Restrictions and Allowed Lists Directory in a place
where you can find it easily for system administration.
Call Restrictions and Allowed Lists Directory 2-15
Page 25
System Speed Dial Directory
You can assign system speed dial codes to frequently called telephone numbers.
Then people in your business can call any of these telephone numbers by
dialing its 3-character code. You can also assign these codes to account
numbers that you want to print out on call reports if your system has the Call
Report (often referred to as Station Message Detail Recording [SMDR])
feature. People can then dial an account's 3-character code during a call to
add the account number to the information on the call report for that call.
Forty speed dial codes (#60 through #99) are available for assignment to
telephone numbers and/or account numbers. Each number can have up to 16
characters, including any of the following special characters:
● p for pause
● r for a switchhook flash (Recall)
● s for stop
● t for Touch-Tone enable
See the "System Speed Dial" entry in Section 5, "Reference," to find out how
to use these special characters.
TELEPHONE NUMBERS
RESTRICTION
OVERRIDE
In the "Telephone Number" column on the form . . .
Write the telephone numbers you want to encode next to the 3-character
dial codes (#60, #61, #62, etc.).
In the "Name" column . . .
Write the name of the person or organization to identify each telephone
number.
When you encode the telephone numbers in this directory during system
administration, you can mark some or all of them for restriction override.
Then people with restricted voice terminals can call these marked numbers by
dialing the 3-character system speed dial codes.
In the "Restriction Override" column . . .
Put a check mark on the line for each telephone number you want to mark
for restriction override when you administer the system.
If your system does not have the Call Report feature, you should now have a
complete set of planning forms. You can go on to Section 3 and administer
the system. If you do have the Call Report feature, read the following before
going on to Section 3.
System Speed Dial Directory 2-17
Page 26
CALL REPORT With the Call Report feature, your system prints out a report on every call
that meets the criteria you set during system administration. Figure 2-3 shows
a printout that contains several typical call reports. Each line beginning with
"C" represents an individual call report.
FlGURE 2-3 A Printout of Typical Call Reports
DATE TIME CALLED NUMBER DURATION LN STN ACCOUNT
C 08/21/86 11:01
C 08/21/86 11:05
C 08/21/86 13:15
C 08/21/86 14:05
C 08/22/86 09:43
C 08/22/86 10:12
C 08/22/86 11:15
C 08/22/86 14:25
C 08/23/86 11:15
C 08/24/86 08:10
Notes:
1
Column headings (DATE, TIME, etc.) do not appear on Call
Report printouts.
2
An IN in the Called Number column indicates an incoming call.
3
A ? at the end of a number in the Called Number column
indicates that thte number called had more than 15 reported
digits.
110869685679714?
110869685679714?
9090334
7879096565
4697896
IN
8889914321
IN
4697896
#67
00:01:13
00:06:24
00:13:06
00:09:00
00:02:16
00:12:18
00:17:09
00:08:15
00:19:11
00:12:14
8
11
15
11
12
11
14
12
11
12
18
32145677
63354324
63354324
6
4
3
4
7
3
4
3
5
Marked Telephone
Numbers
Account Numbers
As you can see from the reports in Figure 2-3, the system prints the number of
each outgoing cdl. If there's a telephone number you'd like to keep private—
say a number containing a long distance access code—you can give the
number a system speed dial code and mark it for privacy when you enter it
during system administration. Then the system will print the system speed
dial code instead of the telephone number on call reports, as the last call
report in Figure 2-3 shows.
In the "Telephone Number" column on the form . . .
Put a star (*) in front of those numbers you want to mark for privacy when
you administer the system.
You can also store account numbers under system speed dial codes. Then you
can use the speed dial code to add the account number to a call report in
order to identify the person or organization to whom the call should be
charged. Figure 2-3 shows three examples of account numbers printed out on
call reports.
NOTE: Do not assign the same 3-character speed dial code to both a
telephone number and an account number.
2-18
Section 2: Planning the System
Page 27
In the "Account Number" column . . .
Write the account numbers next to 3-character dial codes that do not
already have telephone numbers next to them.
In the "Name" column . . .
Write the name of the person or organization to identify each account
number.
You should now have a complete set of planning forms. Keep them together
in a safe place until you are ready to install and administer your system.
System Speed Dial Directory 2-19
Page 28
System Configuration Form
Intercom
Number
10
11
12
13
14
15
16
17
18
19
20
21
22
23
24
25
26
27
28
29
(Attendant)
(Call Report)
Dial Signals
❑ Touch-Tone
❑ Rotary (pulse)
Name
Long Distance Dialing
❑ Toll Prefix
❑ Area Code Only
Voice Terminals
Location
Paging Groups
Group 1 Group 2
Control Unit Jack
A
B
C
D
E
F
G
H
Outside Telephone Lines
Telephone Number Line Type
System Configuration Form 2-21
Page 29
Line Assignments Form
Icom
No.
10
11
12
13
14
15
16
17
18
19
20
21
22
23
24
25
26
27
28
29
LineALineBLineCLineDLineELineFLineGLine
Automatic
Line
Selection
H
SequenceName
Lines
A
B
C
D
E
F
G
H
Outside Telephone Lines
Telephone Number
Line Type
Line Assignments Form 2-23
Page 30
Call Restrictions and Allowed Lists Directory
Call Restrictions
Intercom
Number Unrestricted
10
11
12
13
14
15
16
17
18
19
20
21
22
23
24
25
26
27
28
29
Toll
Restricted
Outward
Restricted Allowed Lists Assigned
List 01
Item Number
01
02
03
04
05
06
07
08
09
10
Allowed Lists
List 02
Item
01
02
03
04
05
06
07
08
09
10
Number
Call Restrictions and Allowed Lists Directory 2-25
Page 31
List 03 List 04
Item Number Item Number
01
02
03
04
05
06
07
08
09
10
01
02
03
04
05
06
07
08
09
10
List 05 List 06
Item Number Item Number
01
02
03
04
05
06
07
08
09
10
01
02
03
04
05
06
07
08
09
10
List 07
Item Number Item
01
02
03
04
05
06
07
08
09
10
2-26
Section 2: Planning the System.
List 08
Number
01
02
03
04
05
06
07
08
09
10
Page 32

System Speed Dial Directory
Dial Restriction
Code Telephone Number
#60
#61
#62
#63
#64
#65
#66
#67
#68
#69
#70
#71
#72
#73
#74
#75
#76
#77
#78
#79
#80
#81
#82
#83
#84
#85
#86
#87
#88
#89
#90
#91
#92
#93
#94
#95
#96
#97
#98
#99
Account Number
Name Override
System Speed Dial Directory 2-27
Page 33

Section 3: Administering the System
Page 34

Introduction
®
You can begin using your MERLIN
Plus Communications System right now.
Just make sure the system is set to generate the right dial signals for your
outside telephone lines and to recognize the long distance dialing procedure
for your area. To make these simple checks, see "Dial Signals" and "Long
Distance Dialing" under "Basic Administration" later in this section.
To take full advantage of your system's advanced technology, however, you
should plan to customize your system to fit the needs of your business. You
don't have to do it all at once. Look through this section for options and
features that best suit the way your business operates, and make the most
important settings first. You can add others later.
Before you begin to customize your system, you should understand the
meaning of the terms "administer" and "program" as they are used in this
manual:
●
Administer means to establish options and features that have
systemwide impact, such as assigning the outside lines each voice
terminal can access or defining system speed dial codes for everyone to
use.
●
Program
means to assign
features to an individual voice terminal. Most
people will probably program their own voice terminals. But you may
want to program certain features that can affect the calling patterns of
your business.
INITIAL
ADMINISTRATION
ONGOING
ADMINISTRATION
As you begin to set up your newly installed system, see the information under
the following headings for time-saving advice and instructions.
● Administration Preview
● Basic Administration
● Customized Line Assignments
● Systemwide Options
Use the Quick Reference Guide to System Administration in Section 6 to
make changes to the system once it has been set up and administered. If you
need more information on an administration procedure than the Quick
Reference Guide provides, look it up in Section 5, "Reference."
Introduction 3-1
Page 35

Administration Preview
PLANNING FORMS
KEY SYSTEM
COMPONENTS
Control Unit
The information about your system recorded on the planning forms listed
below is important to both initial and ongoing system administration.
● System Configuration Form
●
Line Assignments Form
●
Call Restrictions and Allowed Lists Directory
● System Speed Dial Directory
If you haven't filled out any planning forms yet, you should do so now. It
won't take long, and it will save you time later. Section 2, "Planning the
System," contains copies of the forms and instructions for completing them.
When you've completed the forms you need for your system, go on to "Key
System Components."
If this is the first time you've administered the MERLIN Plus system, you
should take a few minutes now to get acquainted with the system's control
unit and the administrator/attendant console.
The control unit is the vital core of the system. It provides the power and
intelligence for all voice terminals, and it directs all incoming and outgoing
call traffic. All the system's memory, including system-wide administration
and voice terminal programming, resides in the control unit. Figure 3-1 shows
the control unit with the front cover removed.
FIGURE 3-1 Control Unit
Top cover
Control unit
label
On/Off swtich
Top cover removed
Power and
warning lights
Line module
Station module
Power light
Warning light
MOH jack
Paging jack
Administration Preview 3-3
Page 36

Administrator/Attendant
Console
A 34-button deluxe voice terminal (Figure 3-2), which has a button with lights
every outside line and voice terminal, is the ideal administrator/attendant
console. The Line Buttons (above the dial pad) and the Auto Intercom
Buttons (to the right of the dial pad) give you one-touch access to each line
and voice terminal. The lights allow you to keep track of administration
procedures as well as changes in the status of the voice terminals is and the
outside lines.
You can perform most (but not all) administration procedures with a 10-button
voice terminal (Figure 3-3). Specifically, you cannot do the following with a
10-button set:
●
Change the makeup of paging groups
(See the "Group Page" entry in Section 5, "Reference," for details.)
●
Assign allowed lists to restricted phones
(See the "Allowed Lists" entry in Section 5 for details.)
●
Change the intercom number (and control unit jack) assignment for
the Call Report data collecter and printer
(See the "Call Report" entry in Section 5 for details.)
You administer the system and, if you choose, program the other voice
terminals in the system with the console in the administration mode (the
Test/Program [T/P] switch on the left side of the console set to P [down]).
You perform the everyday monitoring and call-handling tasks of the system
attendant with the console in the normal mode (the T/P switch set to the
center position).
The functions of some buttons on the administrator/attendant console change
as you switch from one mode to the other. The double entries on some of the
button labels shown in Figure 3-2 and Figure 3-3 indicate these changes in
function. The button's function in the normal call-handling mode is shown
above the line on the label, and its function in administration mode is shown
below the line.
3-4
Section 3: Administering the-System
Page 37

FIGURE 3-2 34-Button Administrator/Attendant Console
T/P Switch
Volume
Control
Line
Buttons
T
P
Hi
Lo
Auto Intercom
Buttons
Dial Pad
Administration Preview 3-5
Page 38

FIGURE 3-3 10-Button Administrator/Attendant Console
T
T/P Switch
P
Line
Buttons
Volume
Control
Hi
Lo
Dial Pad
3-6
Section 3: Administering the System
Page 39

ADMINISTRATION
MODE
As you just learned, you administer the system from the
administrator/attendant position with the console in administration mode.
The information under the next three headings tells you how to:
● Make button labels for the administrator/attendant console
● Enter administration mode,
● Leave administration mode
Button Labels
The button labels on your administrator/attendant console have to show how
the functions of certain buttons change when you shift from the normal callhandling mode to the administration mode. Figure 3-2 shows you what the
button labels shouId look like for a 34-button voice terminal. Figure 3-3
shows the button labels for a 10-button voice terminal.
To make button labels for the voice terminal you plan to use as your
administrator/attendant console, do the foIlowing:
1
Remove the blank button labels from the voice terminal according to the
instructions that came with the voice terminal.
Fill in the button labels with pencil or erasable ink.
2
– For a 34-button voice terminal, follow the button labeling shown in
Figure 3-2.
– For a 10-button voice terminal, follow the button labeling shown in
Figure 3-3.
3
Reinsert the labels following the instructions that came with the voice
terminal.
On the button labels divided by a horizontal line, the term above the line
identifies the button's function when the console is in the normal callhandling mode. The term below the line identifies the button's function in
administration mode. Note that there is no Send Message/Administer button
on a 10-button voice terminal.
Entering Administration
Mode
You have to enter administration mode to set up the system initially and again
each time you use the attendant console to administer the system. Follow the
instructions in the box on the next page whenever you have to enter
administration mode.
Administration Preview 3-7
Page 40

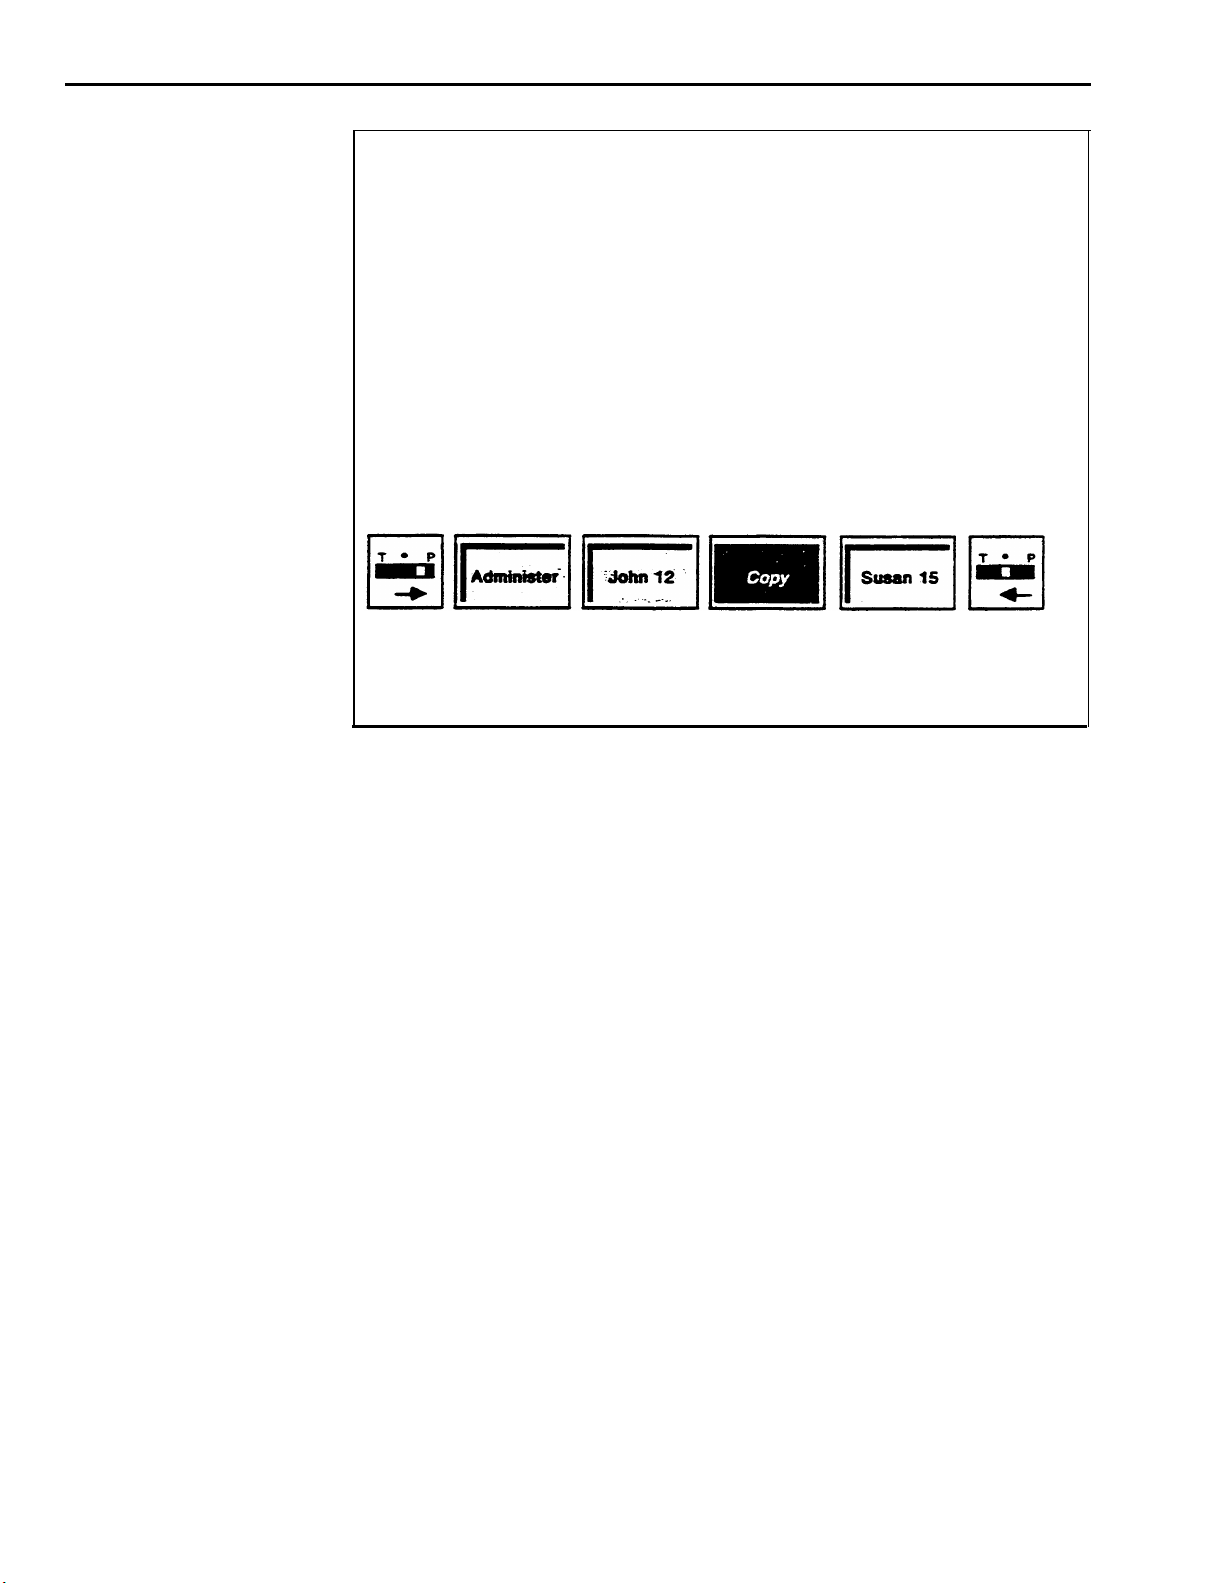
Entering Administration Mode
To enter administration mode:
1
Slide the T/P switch on the left side of the console to P (down).
The green lights next to the line buttons begin flashing.
The console rings every five seconds to remind you that it's in programming mode.
2
Touch Administer, or dial #01.
The green lights go off.
The red lights go on steady next to Administer and Restrict.
Leaving Administration
Mode
CENTRALIZED
PROGRAMMING
NOTE:
A 10-button voice terminal doesn't have a button labeled
Administer. If you are using a 10-button voice terminal at the intercom
10 position, dial the 3-character code #01 in step 2.
Follow the boxed instructions below when you've finished an administration
session.
Leaving Administration Mode
To leave administration mode:
1 Slide the T/P switch on the left side of the console to the center
position.
The red lights next to Administer and Restrict go off.
The red light goes on next to a line button.
The people in your business may want to program their own voice terminals.
If so, the Training Manual, the User's Card, and Section 5, "Reference," all
include instructions for programming features onto voice terminals. Another
option available to you, as system administrator, is to program some or all
voice terminals from the administrator/attendant console. The boxed
instructions on the next page tell you how to do so. If you want two voice
terminals to have the same programming, the information under the next
heading, "Copy," tells you how to copy the programming from one voice
terminal to another.
3-8
Section 3: Administering the System
Page 41

Centralized Programming
To program voice terminals from the administrator/attendant console.
do the following:
1
Enter administration mode.
2
Touch the Auto Intercom button or dial the intercom number for the
first voice terminal you want to program.
Touch Conference.
3
Program the voice terminal according to the instructions in the Training
4
Manual or in Section 5, "Reference."
Leave administration mode, or select another voice terminal for
5
programming as follows:
a
Touch Conference.
b
Touch the Auto Intercom button or dial the intercom number for
the next voice terminal.
Touch Conference.
c
Program the voice terminal.
d
COPY
If you want to copy outside line assignments and programmable features from
one voice terminal ( the source ) onto the same buttons on another voice
terminal ( the target ), the boxed instructions on the next page tell you how to
do so. But first you should understand the following points about the Copy
procedure:
●
The Copy procedure copies the following from the source
—
Line assignments
—
Automatic line selection sequence
—
Call restrictions
—
Line ringing options
Personalized ring
—
Voice announcement enable/disable
—
●
The Copy procedure also copies most other programmable features from
the source onto the same buttons on the target, overwriting any
features previously programmed onto those buttons on the target.
●
The Copy procedure does not copy allowed list assignments.
Administration Preview 3-9
Page 42
Copy
To copy line assignments, call restrictions, and most programmable features
from one voice terminal ( the source ) to another voice terminal ( the target ),
do the following:
1
Enter administration mode.
2 Touch the Auto Intercom button or dial the intercom number of the
target voice terminal.
Touch Copy.
3
4 Touch the Auto Intercom number or dial the intercom number of the
source voice terminal.
Continue to administer the system, or leave administration mode.
5
NOTE: If you want to copy from one source to several targets, you have to
repeat steps 2, 3, and 4 for each target voice terminal.
CONFIRMATION AND
ERROR SIGNALS
Confirmation Signal
Error Signal
Many of the administration and programming procedures described in this
manual require you to enter a star code (that is, dial * plus one or more
digits). Many procedures also require you to enter intercom numbers or other
sequences of digits.
If you enter a star code the system recognizes and then enter intercom
numbers or another sequence of digits consistent with the star code, the
console beeps twice when you touch Administer to conclude the procedure.
The two beeps confirm allowable input.
If you dial a star code the system does not recognize, enter a nonexistent
intercom number, or enter one or more digits inconsistent with the
administration or programming procedure, the attendant console beeps once to
signal that you have made an error.
To recover from the error, do as follows:
1 Touch Administer.
2 Begin the procedure again.
This concludes the preview to system administration. Go on now to make
sure your system is ready to use.
3-10 Salon 3: Administering the System
Page 43

Basic Administration
Basic administration should take no more than a few minutes. All the
information you need should be on your System Configuration Form.
DIAL SIGNALS
Reversing the Procedure
LONG DISTANCE
DIALING
Locate the column headed "Dial Signals" on the System Configuration Form.
Is the box next to "Touch-Tone" checked? If so, you don't have to do anything
here. Your system is factory set to generate Touch-Tones when you dial an
outside call on any of your outside telephone lines.
But if the box next to "Rotary (Pulse)" is checked, you have to set the system
to generate rotary (pulse) signals when you dial outside calls. Set system for
pulse dialing as follows:
1
Enter Administration Mode.
The red lights go on the steady next to Administer and Restrict.
2 Dial *39
Touch Administer.
3
The console beeps twice.
Continue with administration, or leave administration mode.
If you ever have to reset the system for Touch-Tone dialing, follow the above
procedure, but dial *38 instead of *39 in step 2.
Locate the column headed "Long Distance Dialing" on the System
Configuration Form. Is the box next to "Toll Prefix" checked? If so, you
don't have to do anything here. Your system is factory set for this type of longdistance dialing: toll prefix (1 or 0) + area code + telephone number.
Reversing the Procedure
SYSTEMWIDE LINE
ASSIGNMENTS
But if the box next to "Area Code Only" has a check, you have to set the
system for this type of long-distance dialing (area code + telephone number) as
follows:
1
Enter administration mode.
The red lights go on steady next to Administer and Restrict.
2
Dial *37.
Touch Administer.
3
The console beeps twice.
Continue to administer the system, or leave administration mode.
4
If you ever have to reset your system to toll-prefix dialing, follow the above
procedure but dial *36 instead of *37 in step 2.
This simple procedure tells the control unit how many outside telephone lines
your system has. But it works only if your outside lines are plugged into an
unbroken sequence of line jacks on the control unit beginning with line jack
A. The System Configuration Form shows the number of lines you have and
the control unit line jack for each line under the heading "Outside Telephone
Lines."
Basic Administration
3-11
Page 44

To set the systemwide line assignments, do the following:
1
Enter administration mode.
The red lights go on next Administer and Restrict.
2
Dial *4.
3
Dial the number of outside telephone lines in your system.
4
Touch Administer.
The console beeps twice.
5
Continue to administer the system, or leave administration mode.
PAGING GROUPS
When you filled in the "Paging Groups" columns on the System
Configuration Form, you learned the following about paging groups:
●
All voice terminals are automatically assigned to a single paging group,
the Page-All Group, which you cannot change.
●
Intercoms 10 through 19 are automatically assigned to Page Group 1;
intercoms 20 through 29 are automatically assigned to Page Group 2.
●
You can change the makeup of Page Groups 1 and 2 if you are using a
34-button voice terminal as your administrator/attendant console. (You
cannot use a 10-button voice terminal to change a paging group's makeup.)
●
You can assign the same voice terminal to both paging groups.
Look at the "Paging Groups" columns on the System Configuration Form. If
you plan to keep intercoms 10 through 19 in Page Group 1 and the remaining
intercoms in Page Group 2, you don't have to do anything here.
If you plan to change the makeup of the paging groups, do the following:
1
Enter administration mode.
The red lights go on next to Administer and Restrict.
2
Dial the code for the paging group you want to change (*71 for Group 1 or
*72 for group 2).
The green light goes on next to the Auto Intercom button for each voice terminal currently
assigned to the group.
3-12
3
Touch Drop to remove all voice terminals from the group.
All the green lights next to Auto Intercom buttons go off.
4
One after another, touch the Auto Intercom buttons for the voice
terminals you want to include in the paging group.
The green lights next to the Auto Intercom buttons go on as you touch the corresponding buttons.
5
Touch Administer.
The console beeps twice.
6
Repeat steps 2 through 5 to change the makeup of the other paging group.
7
Continue to administer the system or leave administration mode
If you want to change a paging group later on, see the "Group Page" entry in
Section 5, "Reference," or the Quick Reference Guide to System
Administration in Section 6.
This concludes basic administration. You can use your system now, just as it
is, and leave further administration until later. Or you can go on and
customize the outside telephone line assignments to individual voice terminals.
Section 3: Administering the System
Page 45

Customized Line Assignments
As you filled out the Line Assignments Form, you learned that customizing
line assignments to voice terminals can help control costs and increase the
efficiency of your communications system. All the information you need to
customize line assignments should be on the Line Assignments Form.
When you enter administration mode and touch the Auto Intercom button for
a voice terminal, the green lights next to the line buttons on the console
show you which outside lines are currently assigned to that voice terminal.
Green light on =
Green light off =
line is assigned m the voice terminal
line is not assigned so the voice terminal
Your system comes from the factory configured so that all your outside lines
appear on the same line buttons on every voice terminal. These are the
system's original line assignments. A voice terminal retains its original line
assignments until someone administers it differently. If this is the first time
anyone has administered your system, all your voice terminals should have
their original line assignments.
NOTE: If you have not performed the "Systemwide Line Assignments"
procedure described under "Basic Administration" earlier in this
section, the green lights next to the line buttons on your
administrator/attendant console may show that your system has more
outside lines than it really has. If this is the case, go back now to
"Basic Administration" and enter the correct number of outside lines
following the instructions under "Systemwide Line Assignments."
MERLIN Plus system line administration offers two choices:
●
You can keep the original line assignments on some or all of your voice
terminals.
●
You can customize the line assignments to some or all of your voice
terminals to better suit the needs of your business and individual voice
terminal users.
KEEP THE ORIGINAL
LINE ASSIGNMENTS
On the Line Assignments Form, there should be a check mark for each
outside line in the system to the right of the intercom numbers for those voice
terminals keeping their original line assignments. To make sure these voice
terminals have the original line assignments, do the following:
Enter administration mode.
1
The red lights go on next to Administer and Restrict.
One after another, touch the Auto Intercom buttons for each of these
2
voice terminals.
The green lights next to the line buttons should show that all of your
outside lines appear on each of these voice terminals. If you discover that
one or more lines do not appear on a voice terminal designated to keep
the original line assignments, you can use the procedure under the next
heading, "Customize Line Assignments," to give that voice terminal the
original line assignments.
Leave administration mode.
3
Customized Line Assignments 3-13
Page 46
CUSTOMIZE LINE
ASSIGNMENTS
The check marks to the right of the intercom numbers on the Line
Assignments Form should show how you plan to customize the line
assignments to voice terminals.
Customizing a voice terminal's line assignments is simply a matter of removing
and adding lines. But keep the following points in mind:
●
On every voice terminal, the button directly above Conference is always
the Intercom button. You can't assign a line or feature to it.
●
On every voice terminal, the button above Transfer is always a
programmable feature button. You can't assign a line to it.
●
When you assign lines to a voice terminal, the system assigns them to line
buttons in the order shown in Figure 3-4 below. This sequence is also the
voice terminal's automatic line selection sequence—the order in which the
system selects lines for the voice terminal's outgoing calls-unless you
program a defferent automatic line selection sequence.
●
On any voice terminal, line buttons without lines assigned to them can
become programmable feature buttons.
FIGURE 3-4 The order in which the system assigns lines to buttons
3-14
To customize line assignments to voice terminals as indicated on the Line
Assignments Form, do as follows:
1 Enter administration mode.
The red lights go on next to Administer and Restrict.
Touch the Auto Intercom button or dial the intercom number for the first
2
voice terminal.
Green lights go on next to the buttons for lines currently assigned to the voice remind.
Section 3: Administering the System
Page 47

Remove all the lines from the voice terminal.
3
To do this, touch each line button that has a green light on next to it.
The green lights go off as you touch the the corresponding line buttons.
4
Assign lines to the voice terminal in the order in which you want the lines
to appear on the voice terminal's line buttons.
NOTE: This should be the order shown for the voice terminal in the
"Automatic Line Selection Sequence" column on the Line Assignments
Form, unless you have a reason for programming a different automatic line
selection sequence.
To do this, touch the button for the line you want to appear on the first
line button on the voice terminal (button number 1, just above Intercom,
in Figure 34.) Then touch the button for the line you want to appear on
the second line button (number 2 in Figure 3-4), and so on until the line
assignments on the voice terminal match the line assignments for that
voice terminal on the Line Assignments Form.
The green lights go on as you touch the corresponding line buttons.
Touch the Auto Intercom button or dial the intercom number for the next
5
voice terminal you want to customize, and repeat steps 3 and 4.
Continue to administer the system, or leave administration mode.
6
NOTE: If you want to program an automatic line selection sequence for
a voice terminal that is different from the sequence in which outside
lines appear on the voice termird's line buttons, see the entry for
"Automatic Line Selection Sequence" in Section 5, "Reference."
ASSIGN BUTTON-FREE
LINE OPERATION
You can used this option to assign outside lines to a voice terminal without
assigning them to specific line buttons. This leaves the voice terminal's
buttons free for programmable features. See the entry for "Button-Free Line
Operation" in Section 5, "Reference," for more information about assigning
this option to a voice terminal.
This concludes outside line administration. You can go on now to
"Systemwide Options," or you can leave further administration for another
time.
Customized Line Assignments 3-15
Page 48

Systemwide Options
This concluding phase of initial system administration includes instructions for
.
administering the following systemwide options:
●
●
●
●
●
Call Restrictions
Allowed Lists
Call Reports (often referred to as SMDR)
System Feature Reports
System Speed Dial
ASSIGN CALL
RESTRICTIONS TO
VOICE TERMINALS
The Call Restrictions and Allowed Lists Directory should show whether you
plan to restrict any of your voice terminals. Under "Call Restrictions" on the
form, the check marks to the right of the intercom numbers should show the
type of restriction, if any, you plan to place on each voice terminal.
When your system is first installed, all voice terminals are unrestricted. For
those voice terminals with a check mark in the "Unrestricted" column on the
form, you don't have to do anything here.
To assign outward call restrictions or toll call restrictions to voice terminals, do
the following:
Enter administration mode.
1
The red lights go on next to Administer and Restrict.
2
Touch the Auto Intercom button or dial the intercom number for the first
voice terminal you want to restrict.
3
Touch Restrict repeatedly until the green light next to Restrict displays
the signal for the type of call restriction shown for the voice terminal on
the Call Restrictions and Allowed Lists Directory.
Steady green light on = Unrestricted (all calls permitted)
Flashing green light = Toll restricted (only intercom and local calls permitted)
Green light off = Outward restricted (only intercom calls permitted)
Touch Administer.
4
The console beeps twice.
ADMINISTER ALLOWED
LISTS
5
Repeat steps 2 through 4 for the next voice terminal, or leave
administration mode.
If you plan to assign allowed lists of numbers to restricted voice terminals, you
should-have filled in one or more of the lists on the Call Restrictions and
Allowed Lists Directory. As the directory shows, you can have up to eight
allowed lists with up to 10 enties on each list. An entry can have up to six
digits.
The instructions that follow tell you how to:
●
Set up allowed lists
●
Delete a number from an allowed list
●
Remove all numbers from an allowed list
●
Assign allowed lists to voice terminals
Systemwide Options 3-17
Page 49

NOTE: You cannot administer this feature with a 10-button voice
terminal. You must have a 34-button administrator/attendant console
to assign allowed lists to voice terminals.
Set Up Allowed Lists
Delete a Number from
an Allowed List
In order to assign an allowed list to a restricted voice terminal, you first have
to set up the allowed list in the system's memory. To set up an allowed list,
do the following:
1
Enter administration mode.
The red lights go on next to Administer and Restrict.
2
Dial the code for the list you want to set up.
(The codes are *01 through *08 for List 01 through 08 in the directory.)
3
Dial the 2-digit "Item" number (01 through 10 in the Allowed List
Directory) for the number you are adding to the list.
4
Dial the number you are adding to the list (a maximum of six digits).
The console beeps twice on the sixth digit to confirm the entry and remind you that you can't
enter another digit to this list entry.
The console does not beep when you enter a number with fewer than six digits to the list.
5
Touch Administer.
The console beeps twice.
6
To add another number to the same list, repeat steps 2 through 5.
NOTE: You must begin each entry to List 01 by dialing *01, each entry to
List 02 by dialing *02, etc.
7
Repeat steps 2 to 6 to set up another list, or leave administration mode.
To delete a number from an allowed list already in the system's memory, do
the following:
Remove All Numbers
from an Allowed List
1
Enter administration mode.
The red lights go on next to Administer and Restrict.
2
Dial the code for the list.
(The codes for Lists 01 through 08 are *01 through *08.)
3
Dial the "Item" number (01 through 10) of the number you want to delete.
4
Touch Drop.
Touch Administer.
5
The console beeps twice.
6
Continue to administer the system, or leave administration mode.
To clear all entries from a list, do the following:
Enter administration mode.
1
The red lights go on next to Administer and Restrict.
Dial the code for the list you want to clear.
2
(The dial codes for Lists 01 through 08 are *01 through *08.)
Touch Drop.
3
Touch Administer.
4
The console beeps twice.
Continue with administration, or leave administration mode.
5
3-18
Section 3: Administering the System
Page 50

Assign or Remove
Allowed Lists
Use this procedure to assign an allowed list to a voice terminal or to remove
an allowed list from a voice terminal. Your Call Restrictions and Allowed
Lists Directory should show which lists to assign to each voice terminal.
To
assign or remove an allowed list, do the following:
1
Enter administration mode.
The red lights go on next to Administer and Restrict.
2
Dial the code for the list you want to assign.
(The codes for Lists 01 through 08 are *01 through *08.)
3
Dial 00.
Green lights go on next to the Auto Intercom buttons for the voice terminals to which this list is
already assigned.
4
Touch the Auto Intercom button for the voice terminal to which you want
to assign the list.
ADMINISTER THE CALL
REPORT OPTION
Green light on =
Green light off = the list is not assigned to the voice terminal
5
Touch Administer.
The console beeps twice.
6
Continue to administer the system, or leave administration mode.
the list is assigned to the voice terminal
If your system does not have the Call Report option, go on now to
"Administer the System Speed Dial Option." If you do have the Call Report
option, find out how to make it work the way you want in "Administer the
Call Report Option."
You must have a MERLIN Plus System Data Collector and a printer (AT&T
475 or equivalent) to print out call reports. With the Call Report option,
your system prints out a report on every call that meets the criteria you set
during this phase of system administration. Figure 2-3 in Section 2, "Planning
the System," shows some typical call reports.
For the Call Report option to operate correctly, you have to set the following:
●
Current date and time
●
Control unit jack for the printer
●
Minimum length of reported calls
●
Type of calls reported
Date and Time
Set the current date and time as follows:
Enter administration mode.
1
The red lights go on next to Administer and Restrict.
Dial *80.
2
Dial two digits for the month (01 through 12).
3
Dial two digits for the day (01 through 31).
4
Dial two digits for the year (00 through 99).
5
Touch Administer.
6
The console beeps twice.
Systemwide Options
3-19
Page 51

7
Dial *81.
Dial two digits for the hour (00 through 23).
8
Dial two digits for the minute (00 through 59).
9
10
Touch Administer.
The console beeps twice.
11
Go on to assign Call Report to a control unit jack, or leave administration
mode.
Control Unit Jack
Minimum Length of
Reported Calls
The system automatically assigns station jack number 19 on the control unit
to the data collector and printer for the Call Report option. If you want to
keep jack number 19 for the Call Report equipment, you don't have to do
anything here. Go on to "Minimum Length of Reported Calls."
If you want to assign the data collector and printer to a control unit jack
other than 19, do as follows:
1 If you haven't already done so, enter administration mode.
2
Dial *82.
The green light goes on next to the Auto Intercom button for the control unit station jack to
which the data collector and printer are currently assigned (jack 19 unless the setting has alredy
been changed).
Touch the Auto Intercom button for the control unit station jack you
3
want to use to connect the data collector and printer to the system.
The green light next to the Auto Intercom button you touch goes on.
The green light next to Auto Intercom button 19 goes off.
4
Go on to set the minimum length of reported calls, or leave administration
mode.
The system is set to report calls lasting one minute or longer. If you want to
keep one minute as the minimum length for reported calls, you don't have to
do anything here. Go on to "Type of Calls Reported."
If you want a setting other than one minute, do as follows:
1
If you haven't already done so, enter administration mode.
Dial *83.
2
Dial one digit (0 through 9) for the number of minutes.
3
NOTE: The system adds 10 seconds to the number of minutes you enter in
order to account for the time it can sometimes take to connect a call to
the right person. For example, if you dial 0 in this step, the minimum
length of a reported call will be 10 seconds (0 minutes, 10 seconds). If you
dial 9, the minimum length-will be 9 minutes, 10 seconds. The extra 10
seconds is not added to the call's duration on the call report.
4
Touch Administer.
The console beeps twice.
5
Go on to set the type of calls reported, or leave administration mode.
3-20 Section 3: Administering the System
Page 52

Type of Calls Reported
You can set the system to report either outgoing calls only, or both outgoing
and incoming talk. To set the type of calls reported, do as follows:
1
If you haven't already done so, enter administration mode.
Dial *84.
2
Dial the the one-digit code for the calls reported option you want:
3
1=
outgoing calls only
2=
outgoing and incoming calls
4
Touch Administer.
The console beeps twice.
5
Continue to administer the system, or leave administration mode.
If your system is equipped for the Call Report option, it can also print out
System Feature Reports. Go on now to "Administer the System Feature
Reports Option" to learn more about this option.
ADMINISTER THE
SYSTEM FEATURE
REPORTS OPTION
ADMINISTER THE
SYSTEM SPEED DIAL
OPTION
Assign Codes to
Telephone Numbers
With the System Feature Reports option, you can print out reports telling you
how your system is currently administered and configured, and how each voice
terminal is programmed. For descriptions of the reports and instructions for
printing them, see the entry for "System Feature Reports" in Section 5,
"Reference."
Like the Call Report option, the System Feature Reports option requires the
current date and time as well as a station jack on the control unit for the data
collector and printer. If you've already set the date, time, and control unit
jack for the Call Report option, you don't have to do anything here. If you do
have to set the date, time, and control unit jack assignment, follow the
instructions under "Administer the Call Report Option."
You can assign system speed dial codes to frequently called telephone numbers
or to account numbers you want to appear on call reports (if you have the Call
Report option).
As you learned when you planned your system, you can store telephone
numbers under system speed dial codes with or without Restriction Override.
You can also specify which telephone numbers stored under codes will be
printed out in full on call reports and which will be identified in the reports
by system speed dial code only. Your System Speed Dial Directory should
show which, if any, numbers you have designated for Restriction Override and
which, if any, you have designated as private (that is, not to be printed on call
reports).
Systemwide Options
3-21
Page 53

The telephone number can have up to 16 characters, including these special
characters:
– For a p (pause), touch Hold.
– For an s (stop), touch Drop.
– For an r (switchhook flash), touch Recall and then touch Hold.
NOTE: This special character for the switchhook flash works only as the
first character in a sequence of characters stored under a system speed dial
code. If it appears anywhere but first in the sequence, it automatically
disconnects the call at the point when the system dials the switchhook
flash.
– For a t (Touch-Tone enable), touch Transfer.
NOTE: If you want to include a pound symbol (#) in a sequence of
characters to be stored under a system speed dial code, you have to
dial the pound symbol twice (##) at the point in the sequence where
you want it inserted when you enter it in step 2 below. Otherwise the
system will think you're requesting another speed dial code when you
dial the #. The system will enter only one of the two pound symbols
you dial in the stored sequence.
To assign a system speed dial code to a telephone number and store it in the
system's memory, do the following:
1
Enter administration mode.
The red lights go on next to Administer and Restrict.
2
Find the telephone number in the System Speed Dial Directory, and dial
the 3-character code (#60 through #99) you are assigning to that number.
3
Dial one of the following codes:
Dial *90 to a assign the speed dial code without Restriction Override.
or
Dial *92 to assign the speed dial code with Restriction Override.
4
To assign the code to a telephone number and designate the telephone
number as private (will not be printed out on call reports) or public (will be
printed out on call reports), dial one of the following:
Dial * plus the telephone number (private),
or
Dial the telephone number (public).
The console beeps twice on the sixteenth character to confirm the entry and to remind you that
you can't add another character m this entry.
The console does not beep on an entry of fewer than 16 characters.
Touch Administer.
5
The console beeps twice.
6
Repeat steps 2 through 5 for each telephone number you want to encode.
7
Go on to assign codes to account numbers, or leave administration mode.
3-22
Section 3: Administering the System
Page 54

Assign Codes to
Account Numbers
An account number on a call report allows you to identify the person or
organization to whom the call should be charged. As you learned when you
planned your system, you can store account numbers in the system under
system speed dial codes. Your System Speed Dial Directory should show the
codes you plan to assign to your account numbers.
NOTE: The 3-character codes available for account numbers are the
same as those available for telephone numbers #60 through
#99. Do not assign the same 3-character code to both a telephone
number and an account number. If you use a client's telephone
number as that client's account number, you have to assign the
number a 3-character system speed dial code (for example, #61) for
speed dialing the client and another 3-character code (for example,
#81) for entering the number in the account number column on a call
record.
To assign a system speed dial code to an account number and store it in the
system's memory, do the following:
1
If you haven't already done so, enter administration mode.
2
Find the account number in the System Speed Dial Directory, and dial the
3-character code (#60 through #99) you are assigning to that number.
3
Dial *88.
4
Dial the account number (up to 16 digits).
The console beeps twice on the sixteeth character to confirm the entry and to remind you that
you can't add any more characters to this entry.
The console does not beep for an entry of less than 16 characters.
5
Touch Administer.
The console beeps twice.
6
Repeat steps 2 through 5 for each account number you want to encode.
7
Continue to administer the system, or leave administration mode.
This concludes initial system administration. Your system should now be set
to meet your immediate business needs. As you become more familiar with
the system, and as your communications needs grow, you may want to add
some options or features. When you have time, take a few moments to look
through Section 5, "Reference," and read about the many other systemwide
options and programmable features available to you with your MERLIN Plus
Communications System.
Systemwide Options 3-23
Page 55

Section 4: Using The Attendant Console
Page 56

Overview
As your company's system attendant, you will probably answer most calls that
come into the business and transfer many of those calls to other people in the
office. This section includes descriptions, instructions, and suggestions that
will help you transfer calls and use Auto Intercom buttons, the Loudspeaker
Page and Group Page features, the Send Message feature, and the headset.
For more information about any of the MERLIN
®
Plus Communications
System features discussed here, refer to Section 5, "Reference."
THE ATTENDANT
CONSOLE
The main attendant console, plugged into jack 10 on the control unit, also
serves as the administration voice terminal. All of the company's lines appear
on separate buttons on the administrator/attendant console. It is important
that, as the attendant, you have an Auto Intercom button with lights for each
voice terminal in the system. Therefore, most attendants use a 34-button
deluxe voice terminal that has enough buttons for lines and Auto Intercom
buttons. When you plug your 34-button voice terminal into intercom jack 10
on the control unit, your console automatically has a button for every line and
an Auto Intercom button for every person in the system.
If you are using a 10-button voice terminal as an administrator/attendant
console, all the lines to which your system has access will appear on separate
buttons on your voice terminal, but you will probably not have an Auto
Intercom button for each person in your system. Therefore, when you want to
place an intercom call or transfer a call, you may need to dial the person's
intercom number rather than use an Auto Intercom button. Since the
10-button voice terminal does not have a Send Message button, you must use
a special procedure described in "Using the Send Message Feature" in this
section in order to turn on the Message light at the voice terminal of the
person who has a message waiting.
On the following two pages are illustrations of the 34-button deluxe voice
terminal and the 10-button Hands Free Answer on Intercom (HFAI) voice
terminal. Look at the picture of the type of voice terminal that you are using
and check the location of the buttons and the dial pad.
If you need to check the initial button assignments for the 34-button deluxe
administrator/attendant console in regular call-handling mode, see Section 3,
"Administering the System."
Overview 4-1
Page 57

FIGURE 4-1 The 34-button deluxe voice terminal
T/P Switch
Volume
Control
Hi
Lo
Line
Buttons
T
P
Auto Intercom
Buttons
4-2
Section 4: Using The Attendant Console
Dial Pad
Page 58

FIGURE 4-2 The 10-button HFAI voice terminal
T
T/P Switch
P
Line
Buttons
Volume
Control
Hi
Lo
Dial Pad
Overview 4-3
Page 59
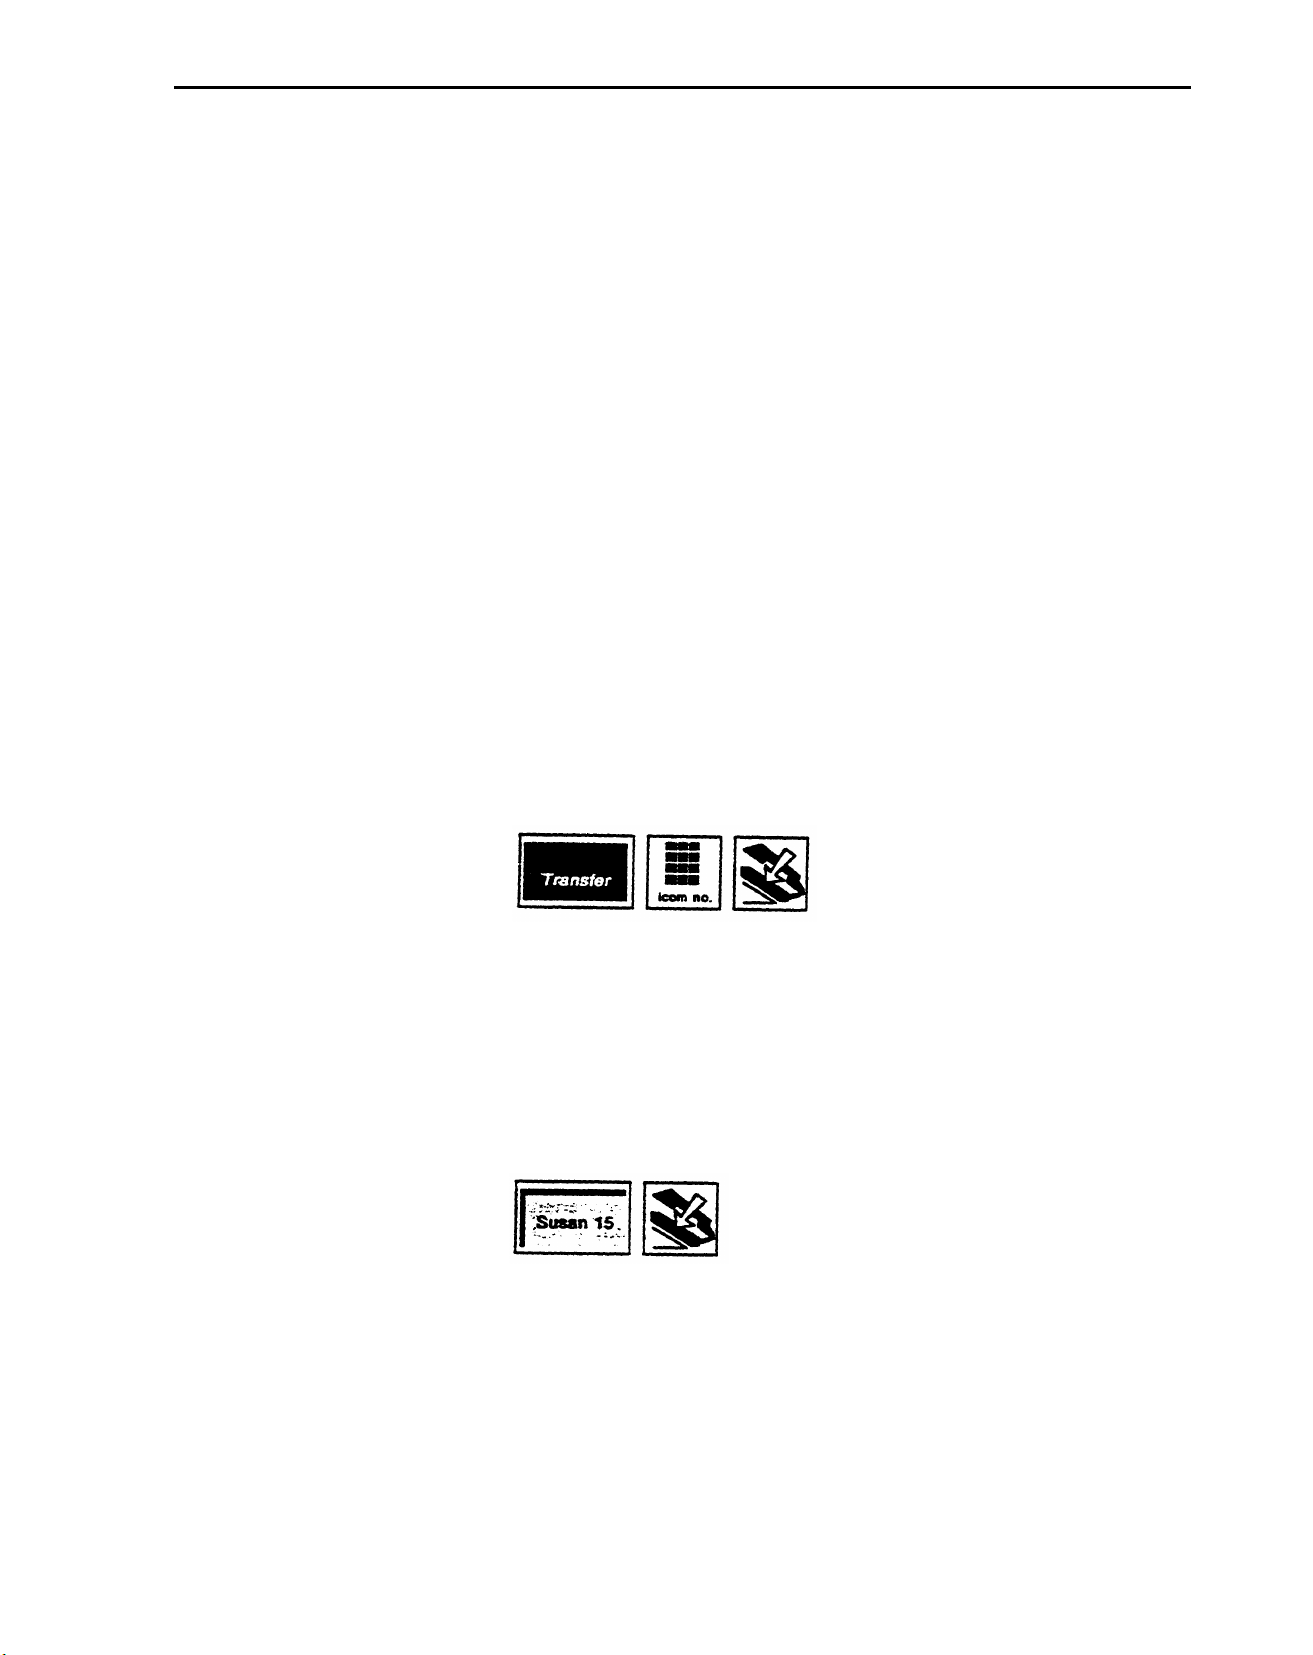
Handling Calls
As the system attendant, you will be answering most of the incoming calls.
To handle the calls efficiently, you may find it helpful to know about the
following features:
●
Transferring calls
●
Using the Auto Intercom buttons for people in your system
●
Making announcement through the loudspeaker paging system, if your
system has one, and through the voice terminal speakers
●
Using the Send Message feature
●
Changing the ringing options on your console or helping others to
change the ringing options for their voice terminals
●
Using Night Service when you are off duty
●
Using the headset
TRANSFERRING CALLS
Since an important part of your job may be to screen calls and then transfer
them to the appropriate people, you should be familiar with either of the
following ways of transferring calls.
●
Transferring Calls by Dialing the Intercom Number
To transfer a call to someone by dialing his or her intercom number:
1
Touch Transfer.
2
Dial the person's intercom number.
3
Hang Up.
●
Transferring Calls with One-Touch Transfer
To transfer a call to someone using One-Touch Transfer:
1
With the call in progress, touch the Auto Intercom button of the
person to whom you want to transfer the call.
2
When you hear a beep, announce the call.
3
Hang up.
If the person has activated the Voice Announcement Disable feature or
if the person is using the intercom line at his or her voice terminal,
you cannot announce the call.
Handling Calls 4-5
Page 60
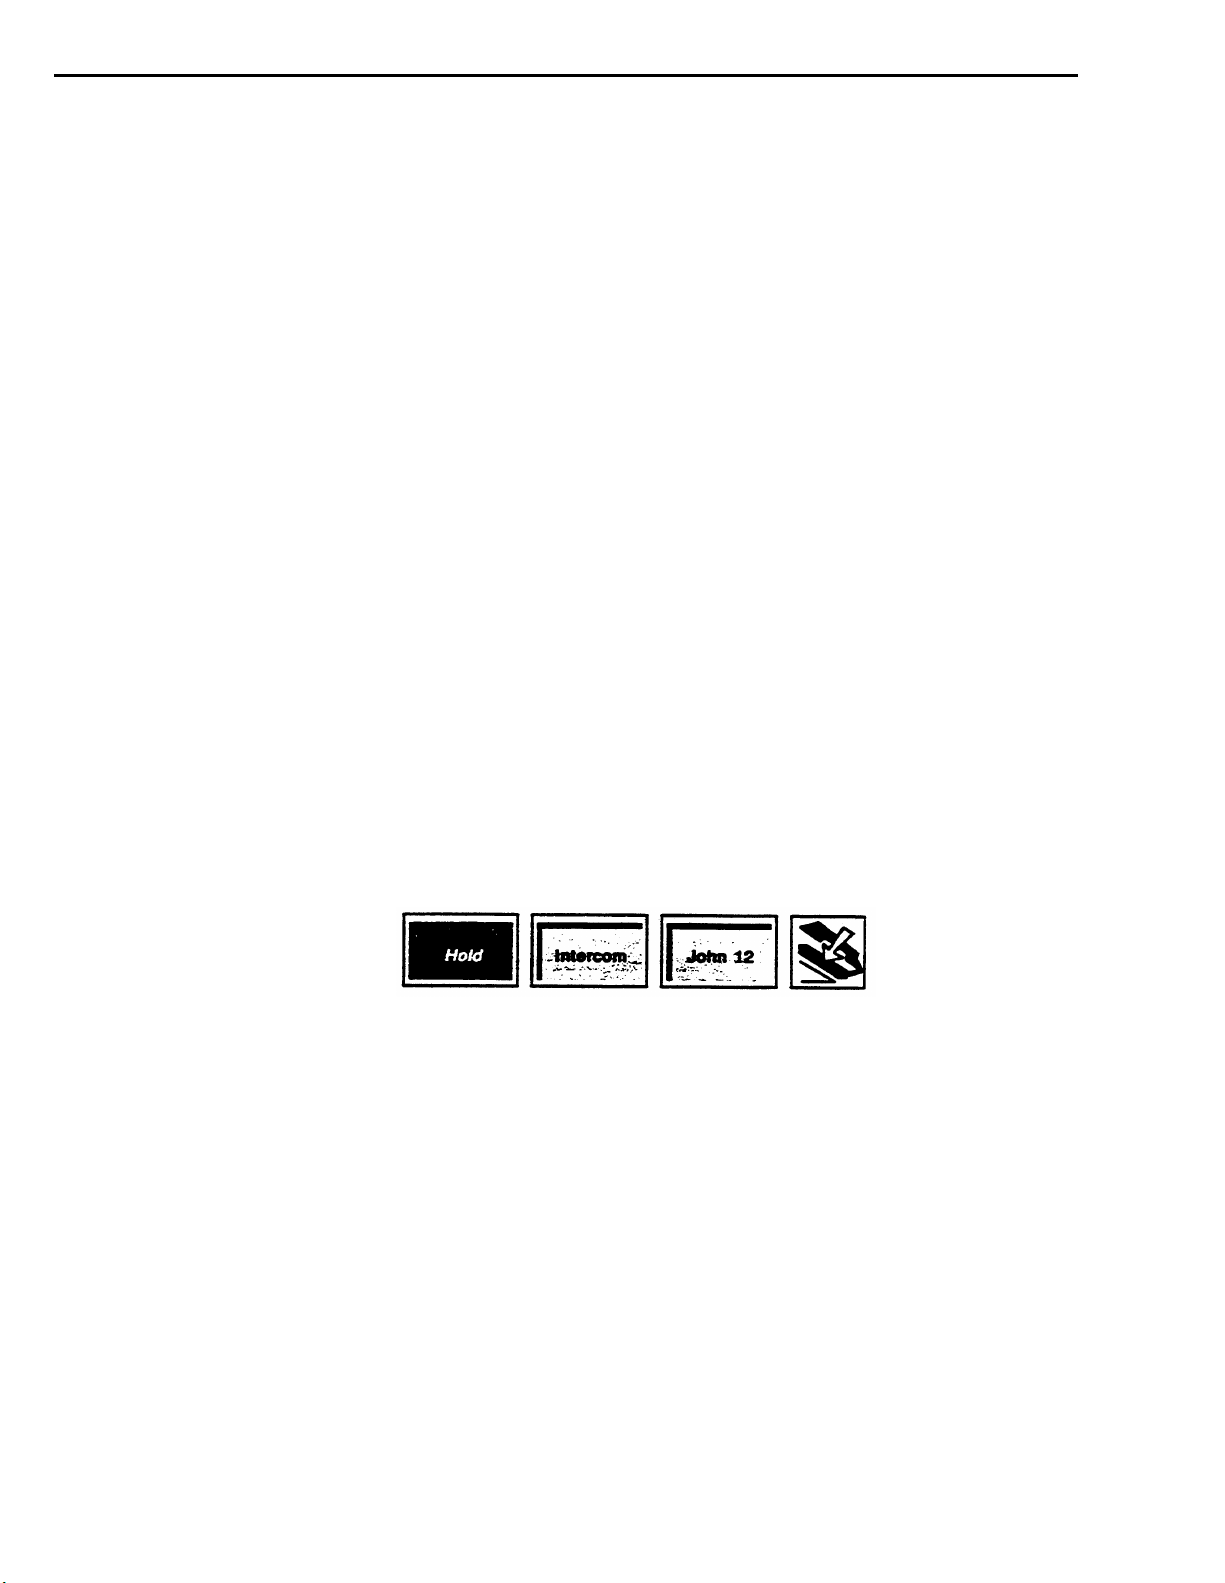
● Screening Calls
When you screen a call, you first discuss the call with the person to
whom it is to be transferred. There are many reasons for consulting
about the call. For example, a person may want to obtain a file before
taking the call, may be busy and not want to answer the call at the
moment, or may want the attendant to answer the call and take a
message.
To screen a call:
1
Touch Hold.
2 Touch Intercom and dial the intercom number of the person to
whom the call may be transferred.
or
Touch the person's Auto Intercom button.
Announce the call and ask if it will be accepted.
3
NOTE: If the person has activated the Voice Announcement
Disable feature or if the person is using the intercom line at his or
her voice terminal, you cannot announce the call.
If the person chooses not to accept the call:
Touch the held calI's line button.
a
Advise the caller.
b
c Hang up.
If the person chooses to accept the call:
Hang up.
a
By programming Auto Intercom buttons on your attendant console, you can
increase the efficiency of call handling in several ways:
●
An Auto Intercom button allows you to quickly and easily transfer
calls:
●
The lights next to Auto Intercom buttons indicate when others in your
office are using their voice terminals. If the green light is on next to
an Auto Intercom button, it means the person at that intercom
number is using the voice terminal or has activated the Do Not Disturb
feature.
●
If the green light next to the person's Auto Intercom button is
flashing, it means that the person is calling you.
4-6
Section 4: Using The Attendant Console
Be sure to type or write the names of the people in your office on the
appropriate Auto Intercom buttons.
Page 61
To call someone in your MERLIN Plus system with one touch:
1
Touch the Auto Intercom button for the person you want to call.
USING THE
LOUDSPEAKER PAGE
AND GROUP PAGE
FEATURES
The Loudspeaker Page or the Group Page feature makes it easy for you to
announce calls to people who are not always at the same location. When a
call comes in, you can put the call on hold and page the person for whom the
call is intended.
The Loudspeaker Page feature requires a loudspeaker paging system connected
to your MERLIN Plus system. (For more information about using the
Loudspeaker Page feature and connecting the loudspeaker paging system to the
MERLIN Plus system control unit, see Section 5, "Reference.") With the
Group Page feature, you can make an announcement through the voice
terminal speakers in your system.
You can program a button or use a dial code to access these features.
To use a Loudspeaker Page button:
1
Touch Loudspeaker Page.
2
When you hear a beep, lift your handset and make your announcement.
To use the Loudspeaker Page feature by dialing a code:
1
Touch Intercom.
2
Lift your handset.
3
Dial 6.
4
When you hear a beep, make your announcement.
When you hang up, the loudspeaker turns off automatically.
Handling Calls 4-7
Page 62
To use a programmed button to make an announcement through a group of
voice terminal speakers:
Touch the Group Page button for the group you want to page.
1
When you hear a beep, lift your handset and make the announcement.
2
To page a group using a dial code:
1
Dial a code for the group you want to page.
70 = Page-All (all voice terminals in the system)
71 = group 1
72 = group 2
2
When you hear a beep, speak into your handset.
USING THE SEND
MESSAGE FEATURE
When someone in the MERLIN Plus system has a message, you can turn on
the Message light at the person's voice terminal to indicate that there is a
message waiting.
Touch Send Message.
1
2 Touch the Auto Intercom button of the person for whom you have a
message.
A red light goes on next to the Auto Intercom button for that person.
To turn off the message light at another voice terminal:
1 Touch Send Message.
Touch the person's Auto Intercom button.
2
The red light goes off.
If you are using a 10-button voice terminal as the attendant console, you can still
use the Send Message feature. However, unless you have an Auto Intercom
button for the person for whom you are saving a message, you will not know if
the Message light at his or her voice terminal is on.
4-8
Section 4: Using The Attendant Console
Page 63

To use a 10-button voice terminal to turn on the Message light at another
voice terminal:
a
Dial #01.
b
Touch an Auto Intercom button, if you have one for the person.
or
Dial the 3-character Send Message button code opposite the person's
intercom number as found on the chart.
If the
person's
intercom
number is:
Intercom 10
Intercom 11
Intercom 12
Intercom 13
Intercom 14
Intercom 15
Intercom 16
Intercom 17
Intercom 18
Intercom 19
Dial this If the
Send
Message
person's Send
intercom
Dial this
Message
button code: number is: button code:
#22 Intercom 20 #03
#21
Intercom 21 #04
#20 Intercom 22 #05
#19 Intercom 23 #06
#18 Intercom 24 #07
#17 Intercom 25 #08
#16 Intercom 26
#15
Intercom 27
#09
#10
#14 Intercom 28 #11
#13 Intercom 29 #12
For example, if you want to turn on the Message light at Intercom 15, but do
not have an Auto Intercom button for that person, look for Intercom 15 on
the chart above. Opposite Intercom 15 you will find the Send Message button
code, #l?. Then you would dial #01 plus #17 to send the message.
SELECTING RINGING
OPTIONS
You can program any outside line to ring immediately at your console, to ring
after a delay, or not ring at all. You will probably want to program most lines
at your console to ring immediately, but if you answer calls on a certain line
only when someone else doesn't answer them, program the line for delayed
ringing. You may want to program the lines at other people's voice terminals
for no ring so that they are not interrupted while they work.
It may be advisable to select someone in the office to answer calls when you
are busy or not at your desk The lines at that person's voice terminal should
be programmed for delayed ring. The backup person may also want to
program a Ring Option Override button for his or her voice terminal. When
the backup person must answer calls that would ordinarily ring at your
console, he or she can touch the Ring Option Override button and have all
calls ring immediately at his or her voice terminal.
Handling Calls 4-9
Page 64

USING NIGHT SERVICE
During the night or on weekends when you are off duty, you can still make it
convenient for someone else, such as a guard, to answer calls. You do so with
the Night Service feature. There are two ways to provide Night Service for
your office:
●
You may want to provide the person with a 34-button voice terminal
that has all the lines, or the person may prefer to monitor the
attendant console and answer calls there. Be sure that all lines on
which calls may come in after hours are set for immediate ring. If the
lines are not normally set for this ringing option, the person can
activate a Ring Option Override that he or she has programmed for the
voice terminal. (See "Ring Option Override" in Section 5,
"Reference.")
●
The backup person can also answer calls that come in after hours by
programming a Call Pickup button so that he or she can pick up calls
that come in at the administrator/attendant console. Since the
attendant console has all the lines of your MERLIN Plus system, the
person answering calls after hours can pick up calls by touching the
Call Pickup button whenever the attendant console rings. (See "Call
Pickup" in Section 5, "Reference.") If the person is in another part of
the building, the attendant can connect his or her console and an
extra alert device to a Supplementary Alert Adapter (see
"Supplementary Alert Adapter" under "Accessory Equipment" in
Section 5, "Reference") so that each time a call comes in, an extra
alert device goes on.
USING THE HEADSET If you have a heavy call-handling load, you may want to use a headset with
the headset adapter rather than lifting the handset throughout the day. (For
more information about the headset and the headset adapter that connects the
headset to the voice terminal, see Section 5, "Reference.")
To place a call using your headset:
Touch On/Quiet on the headset adapter.
1
The green light next to the button goes on.
2
Dial the outside number.
To answer a call:
Touch On/Quiet on the headset adapter.
1
To mute the microphone:
Hold down On/Quiet on the headset adapter.
1
To hang up:
1 Touch Off on the headset adapter.
The green light next to On/Quiet goes off.
4-10
Section 4: Using The Attendant Console
Page 65

Section 5: Reference
Page 66

Overview
This section of the MERLIN® Plus System Manual provides the information
you need to program, administer, and use the many MERLIN Plus system
features. It also tells you how to use the accessory equipment that you can add
to your system.
There are two main groups of information in this section:
●
MERLIN Plus System Features includes those that come with the
MERLIN Plus system voice terminal and that individual users can
program onto the voice terminal, those features that the attendant
uses, and those that the system administrator assigns to the system.
●
Accessory Equipment includes the additional hardware that can be
used with the MERLIN Plus system.
For your convenience, the individual features and the accessories are listed
alphabetically in two separate sections, Therefore, you can quickly refer to
the entry for each feature or accessory when you need to use it.
Overview 5-1
Page 67

MERLIN Plus System Features
Your MERLIN Plus system offers features that provide effective telephone
service both on a business-wide and personal basis. In order to meet company
priorities and needs, the system administrator can assign lines and add features
that will benefit the whole system. The voice terminals (telephones) in the
MERLIN Plus system come ready to use with many preassigned features, such
as Transfer and Hold. However, people in your system can also add features
to their individual voice terminals, such as Privacy or Saved Number Redial,
that will help them handle calls easily and efficiently.
The information included in each feature description in "MERLIN Plus
System Features" is divided into five headings:
●
Description
The description of the feature tells what it does and its advantages for
those people using it.
●
Considerations
Special considerations include any qualifications the person using the
feature should know about. It also includes ways in which the feature
can or cannot be used, or other features it can or cannot be used with.
●
Administration
Administration procedures tell the system administrator how to
administer the feature using the administrator/attendant console. For
complete information on system administration, refer to Section 3,
"Administrating the System."
●
Programming
The term "programming" refers to customizing a voice terminal to suit
the needs of the person who will be using it. Brief programming
instructions and programming codes are included for each
programmable feature. Directions for programming features onto
available programmable buttons on a voice terminal also appear in the
MERLIN Plus System Training Manual.
●
How to Use
Procedures for using each feature are divided into specific steps so that
a person can easily and efficiently use his or her voice terminal.
MERLIN Plus System Features
5-3
Page 68

Abbreviated Ringing
When another line rings while you are busy on a call, your voice terminal
rings only once. In this way you are aware that you have another call, but it
does not interrupt the call in progress.
After the ringing cycle stops, the green light continues to flash to remind you
of the other call.
CONSIDERATIONS
ADMINISTRATION
PROGRAMMING
HOW TO USE
None
None
None
If you want to pickup the new call, you can place the call in progress on hold
and touch the line button of the new call. You don't need to hang up first.
Account Number Entry
DESCRIPTION
You can use account numbers to identify the department, project, or client to
whom the call should be charged. If your system uses the Call Report feature
(often referred to as Station Message Detail Recording [SMDR]), you can
include these account numbers in the call reports. (See "Call Report.")
There are two methods you can use to enter account numbers on a printed
call report: a quick method and a general method.
5-4 Section 5: Reference
Option A—The Quick Method: The quick method of entering an account
●
number on a call report is to dial a 3-character System Speed Dial code
that the system administrator has stored in the system (see "System Speed
Dial") or a 3-character Personal Speed Dial code that you have assigned to
an account number (see "Personal Speed Dial"). While you have a call in
progress, you simply dial the 3-character speed dial code that corresponds
with the account code. You can dial the code with one touch by
programming a button for the 3-character code.
●
Option B—The General Method: The general method of entering an
account number on a call report is to use a programmed Account Number
Entry button. While you have a call in progress, you simply touch the
Account Number Entry button (a light goes on beside the button so that you
know the account number will be entered) and dial all the digits of the
account number. You can also program buttons or speed dial codes for
frequently used account numbers. If necessary, you can dial extra numbers for
sub-accounts.
Page 69

Most businesses will be satisfied with the quick method of entering account
numbers on a call report. The general method is recommended for businesses
that have many accounts, or in which there is no central accounting
organization and users must invent their own codes.
CONSIDERATIONS
ADMINISTRATION
This feature can be used only with outside calls; it cannot be used with
intercom calls.
If the system administrator has specified that the Call Report feature does not
report incoming calls, account codes can be entered only for outgoing calls.
There is a maximum of 16 characters available for an account number entry.
The system beeps twice to remind the administrator that he or she cannot dial
any more characters. If the administrator dials less than 16 characters, the
system does not beep.
The system administrator should give a copy of the System Speed Dial code
assignments to each person in the system who will use those codes.
If your responsibilities do not include system administration, skip this
information.
Before you assign a System Speed Dial code (#60 through #99) to a specific
account number, refer to the System Speed Dial Directory that you have filled
out.
To administer Account Number Entry codes:
1
Enter administration mode by sliding the T/P switch to P and touching
Administer.
2
Dial the 3-character code (#60 to #99) that you are assigning to the
account number. Make certain that you have not already assigned a
telephone number to that speed dial code.
Dial *88.
3
4
Dial the account number.
You can also use a client's telephone number as an account number. For
that purpose dial *88 and then dial the telephone number.
Touch Administer.
5
The console beeps twice.
6
Repeat steps 2 through 5 for each account number or telephone number to
which you are assigning a System Speed Dial code.
7
Leave administration mode by sliding the T/P switch to the center
position.
MERLIN Plus System Features
5-5
Page 70

PROGRAMMING
O program a general Account Number Enter button (program this feature on
T
a button with lights):
1
Label the button Account Number Enter.
2
Slide the T/P switch to P.
The voice terminal rings every 5 seconds to remind you that you are programming and that you
cannot place or receive calls.
3
Touch the button you want to program.
4
Dial *82.
5
Slide the T/P switch to the center position.
To program a button for a specific account number or System Speed Dial code
assigned to an account number:
1
Label the button Account Number plus the name of a client or project.
2
Slide the T/P switch to P.
The voice terminal rings every 5 seconds to remind you that you are programming and that you
cannot place or receive calls.
HOW TO USE
3
Touch the button you want to program.
4
Dial *88 plus the account number.
or
Dial *95 plus the right # code number from 60 through 99 from a list that
your administrator can give you. You do not need to include the # when
you dial.
5
Slide the T/P switch to the center position.
To use a general Account Number Enter button:
1
While you have a call in progress, touch Account Number Enter.
The green light next to the button goes on.
Dial the account number for the account to which you want to charge the
2
call.
or
Dial a System Speed Dial code (#60 through #99) for the account number
to which you want to charge the call.
5-6 Section 5: Reference
Touch Account Number Enter again.
3
The green light goes off.
Page 71

Allowed Lists
If you enter the account code incorrectly, keep the call in progress and repeat
the above procedure.
To use a button for a specific account number:
While you have a call in progress, touch the Account Number button for
1
the particular account number to be recorded.
DESCRIPTION
When the system is installed, people can use their voice terminals to place
intercom, local, and toll calls. However, the system administrator can restrict
any voice terminal to intercom or local calls. (See "Call Restriction.") If
restricted voice terminals require additional Calling access, the administrator
can designate a list of numbers (an allowed list) that people may call despite
the established restrictions.
CONSIDERATIONS Allowed lists allow you to control the cost of your monthly phone bill, but
still let you place all the business calls you need from any voice terminal in
the system.
The administrator may decide to store one or more System Speed Dial codes
with Restriction Override. All voice terminals in the system can use those
codes as a type of password that allows the person to dial certain outside
numbers. Those numbers may be called regardless of toll or outward call
restrictions previously placed on a voice terminal. (See "System Speed Dial.”)
If the system administrator is using a 10-button voice terminal to administer
the system, he or she cannot assign allowed lists. However, the administrator
can store System Speed Dial codes with Restriction Override so that voice
terminals in the system can dial selected outside numbers.
The system administrator can establish eight allowed lists for the system. They
are numbered 01 through 08 and each can have a maximum of 10 entries,
numbered 01 through 10. Each entry consists of an area code (for example,
201), and/or an exchange code (for example, 834), ardor emergency numbers
(for example, 911).
The administrator should not enter a toll prefix number, such as 1, as the first
digit of an allowed list entry. This is done automatically.
When the administrator has dialed the maximum six digits for an allowed list
entry, the system beeps twice to remind the administrator that he or she
cannot dial any more digits. If the administrator dials fewer than six digits,
the system does not beep.
MERLIN Plus System Features
5-7
Page 72

ADMINISTRATION
If your responsibilities do not include system administration, skip this
information.
Before you administer allowed lists for your system, refer to the Allowed List
Directory that you have filled out.
To set up an allowed list:
1
Enter administration mode by sliding the T/P switch to P and touching
Administer.
2
Dial a * and a 2-digit code (01 through 08) that corresponds to the number
of the list.
For example, to add an entry to List 5, dail *05.
Dial the 2-digit number of the item in the allowed list (between 01
3
and 10).
For example, to add an entry to List 3 as the first item on the list, dial
*03 01.
4
Dial the number, area code, or exchange to be added to the list (maximum
six digits).
For example, to add the 201 area code and 834 exchange to List 2 as the
seventh item on the list, dial *02 07 201 834.
Touch Administer.
5
The console beeps twice.
6
Leave administration mode by sliding the T/P switch to the center
position.
To delete an entry from an allowed list:
1
Enter administration mode by sliding the T/P switch to P and touching
Administer.
Dial a * and a 2-digit code (01 through 08) that corresponds to the number
2
of the list.
Dial the 2-digit item number (01 through 10) of the entry you want to
3
delete.
For example, to delete the eighth entry of List 1, dial *01 08.
Touch Drop.
4
Touch Administer.
5
The console beeps twice.
6
Leave administration mode by sliding the T/P switch to the center
position.
5-6
Section 5: Reference
Page 73

To clear all the entries from an allowed list:
1 Enter administration mode by sliding the T/P switch to P and touching
Administer.
2 Dial a * and a 2-digit code (01 through 08) that corresponds to the number
of the list you want to clear.
For example, to clear all entries from List 6, dial '06.
Touch Drop.
3
4
Touch Administer.
The console beeps twice.
5
Leave administration mode by sliding the T/P switch to the center
position.
Before you assign allowed lists to voice terminals in your system, refer to the
Call Restrictions and Allowed Lists Directory that you have filled out.
To assignor remove voice terminals for access to allowed lists:
1
Enter administration mode by sliding the T/P switch to P and touching
Administer.
Dial a * and a 2-digit code (01 through 08) that corresponds to the list you
2
want to assign to the voice terminal.
Dial 00.
3
The green light goes on next to the Auto Intercom button for each voice terminal to which this
list is already assigned.
For example, to assign List 2 to a voice terminal, dial *02 00.
4
Touch the Auto Intercom button for the voice terminal for which you are
giving access or removing access to the allowed list.
Green light on =
Green light off =
5
Touch Administer.
The console beeps twice.
6
Leave administration mode by sliding the T/P switch to the center
the list is assigned to the voice terminal
the list is not assigned to the voice terminal
position.
MERLIN Plus System Features
5-9
Page 74
PROGRAMMING
None
HOW TO USE
Auto Answer-All
DESCRIPTION
CONSIDERATIONS
Ask your system administrator what call restrictions, if any, he or she has
assigned to your voice terminal.
NOTE: This feature requires a General Purpose Adapter and can be used
with a modem, an answering machine, a facsimile machine, or a cordless
telephone.
If you want an optional piece of equipment, such as a modem, an answering
machine, or a facsimile machine, connected to your voice terminal, to turn on
automatically when you receive ringing calls, you need to program an Auto
Answer-All button.
You cannot have both the Auto Answer-All and Auto Answer-Intercom
features activated at the same time.
ADMINISTRATION
PROGRAMMING
None
Program the Auto Answer-All feature on a button with lights.
To program an Auto Answer-Ail button for your voice terminal:
1
Label the button Auto Answer-All.
2
Slide the T/P switch to P.
The voice terminal rings every 5 seconds to remind that you are programming and that you
cannot place or receive calls.
3
Touch the button you want to program.
4
Dial *75.
5
Slide the T/P switch to the center position.
5-10 Section 5: Reference
Page 75
HOW TO USE
To have a modem, answering machine, or facsimile machine answer calls
automatically:
1 Touch Auto Answer-All.
This feature remains active until you:
1 Touch Auto Answer-All again.
Auto Answer-Intercom
NOTE: This feature is used with a hands-free unit.
The green light next to the button goes on.
The green light next to the button goes off.
DESCRIPTION
CONSIDERATIONS
ADMINISTRATION
PROGRAMMING
If you have an optional hands-free unit connected to your voice terminal and
you want it to turn on automatically when you receive intercom calls with
voice announcement, you need to program an Auto Answer-lntercom button.
You can have both Auto Answer-Intercom and Auto Answer-All programmed
for your voice terminal, but the two features cannot be activated at the same
time.
None
Program the Auto Answer-Intercom feature on a button with lights.
To program an Auto Answer-Intercom button for your voice terminal:
1
Label the button Auto Answer-Intercom.
2
Slide the T/P switch to P.
The voice terminal rings every 5 seconds to remind you that you are programming and that you
cannot place or receive calls.
3
Touch the button you want to program.
4
Dial *70.
5
Slide the T/P switch to the center position.
MERLIN Plus System Features
5-11
Page 76

HOW TO USE To have your hands-free unit turn on automatically when you receive
intercom calls with voice announcement:
1
Touch Auto Answer-Intercom.
The green light next to the button goes on.
To return to answering calls yourself:
Touch Auto Answer-Intercom again.
1
The green light next to the button goes off.
Auto Intercom
DESCRIPTION
CONSIDERATIONS
You can use an Auto Intercom button for one-touch dialing of intercom
numbers. Program any 2-digit intercom number onto an Auto Intercom
button and use the button whenever you want to call the intercom number.
In the MERLIN Plus system, you place an intercom call with a voice
announcement. Your coworker hears your voice through the voice terminal
speaker, but must lift the handset to respond to you. If he or she has a
10-button HFAI or a 34-button BIS voice terminal, he or she can speak to you
without lifting the handset.
However, if the person you are calling has activated the Voice Announcement
Disable feature, your intercom call rings rather than beeps at the person's
voice terminal.
Since a voice announcement does not interrupt an outside call in progress,
you can announce an intercom call to a person busy on another line.
You cannot have both an Auto Intercom button and a Manual Signaling
button for the same person. If you try to program both, you deactivate the
one that you programmed earlier. You can use either feature to place an
intercom call. (See "Manual Signaling.")
If you program this feature onto a button with lights, the green light next to
the button goes on when the person at that intercom number uses the voice
terminal or uses the Do Not Disturb feature. When the person calls you, the
green light next to the person's Auto Intercom button flashes.
5-12 Section 5: Reference
Page 77
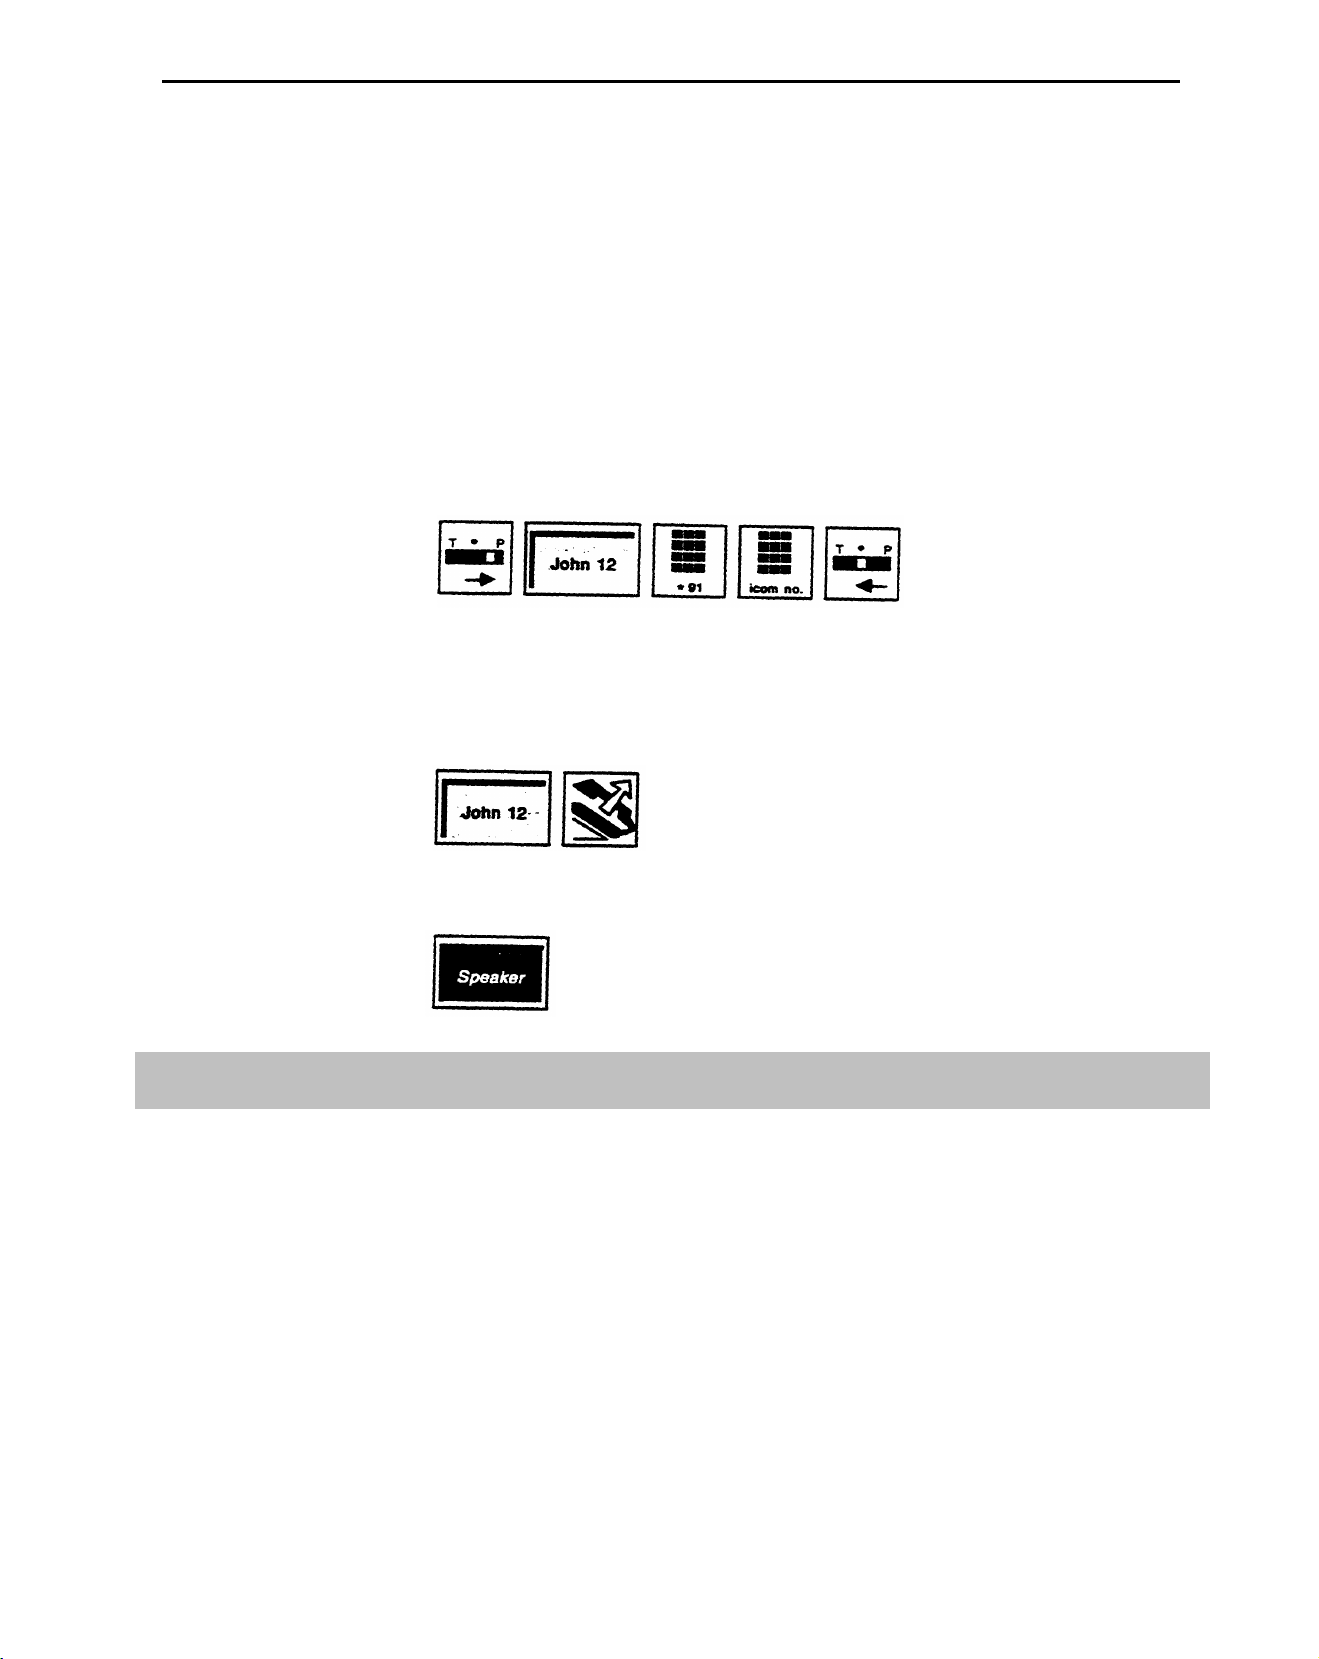
ADMINISTRATION
None
PROGRAMMING
HOW TO USE
A button with lights is recommended but not required for the Auto Intercom
feature.
To program an Auto Intercom button for your voice terminal:
Label the button with a name and intercom number.
1
Slide the T/P switch to P.
2
The voice terminal rings every 5 seconds to remind you that you are programming and that you
cannot place or receive calls.
Touch the button you want to program.
3
4 Dial *91 plus an intercom number.
5 Slide the T/P switch to the center position.
To place an intercom call with one touch:
1
Touch the Auto Intercom button for the intercom number you want to
dial.
Your voice terminal speaker goes on, and you hear a beep.
Lift your handset and begin speaking.
2
If the line is busy or if no one answers:
Touch Speaker to cancel the call.
1
Automatic Line Selection
DESCRIPTION
You can program the order in which your system selects outside lines when
you lift your handset to place a call. For example, you can program the line
you use most often to be the first line in the Automatic Line Selection
sequence. A line you use less often can be programmed to be the next line the
system selects. Then, when you lift your handset, the system automatically
selects the line you usually use. If that line is busy, the system then selects
your second choice unless that line is busy too, and so on.
You can include all or only some of your outside lines in an Automatic Line
Selection sequence.
MERLIN Plus System Features
5-13
Page 78
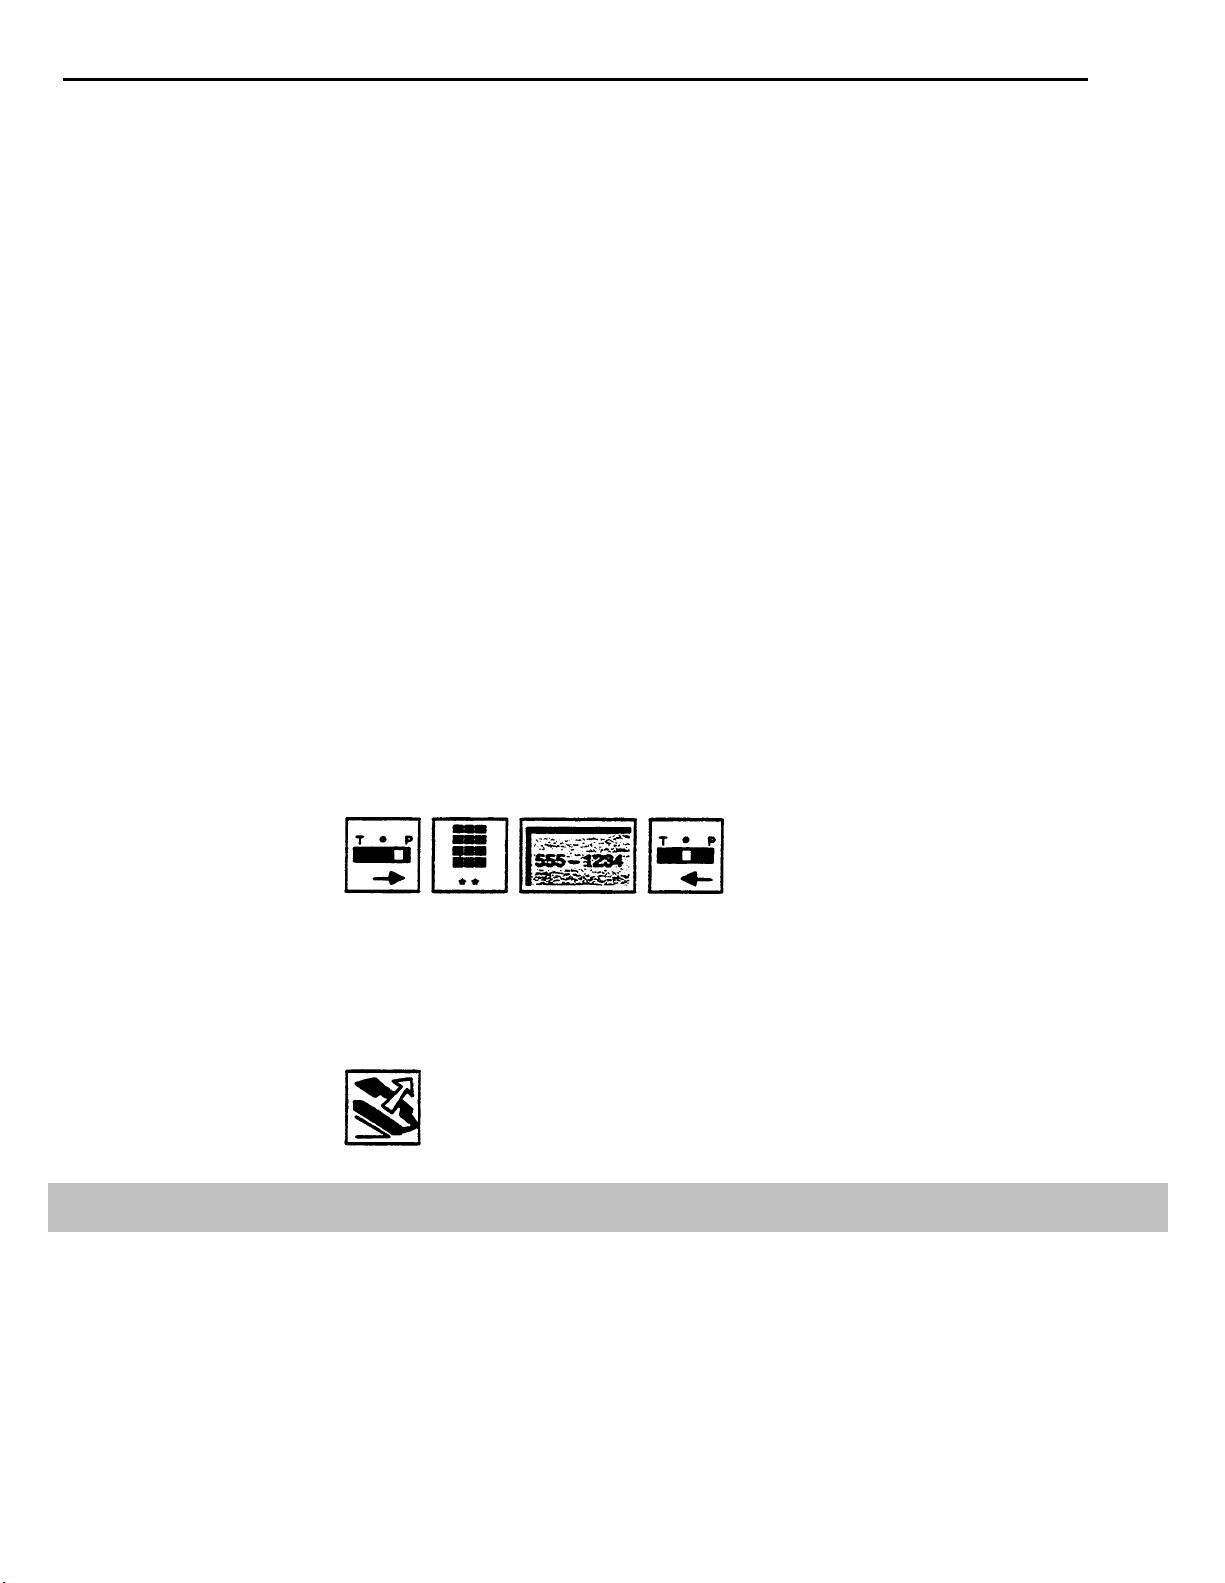
CONSIDERATIONS
If you plan to program other features when you program Automatic Line
Selection, you must program Automatic Line Selection first. If you are
already in the middle of a programming session, slide the T/P switch to the
center position and then back to P before programming this feature.
The Automatic Line Selection order is for only outside lines; the line
selection does not include intercom lines. However, if you remove all outside
lines from your Automatic Line Selection sequence, your system will select an
intercom line when you lift the handset. (See "Intercom Preference.")
If you don't program an Automatic Line Selection sequence, you will get
outside lines according to the sequence in which they are plugged into the
control unit.
ADMINISTRATION
PROGRAMMING
HOW TO USE
None
To program an Automatic Line Selection sequence for your voice terminal:
1
Slide the T/P switch to P.
The voice terminal rings every 5 seconds to remind you that you are programming and that you
cannot place or receive calls.
2
Dial **
3
Touch the line buttons in the order you prefer.
4
If you want to continue programming other feature, dial ** again
Otherwise slide the T/P switch to the center position.
When you want to place an outside call:
Lift your handset.
1
The MERLIN Pluss system connects you to a free line in the Automatic Line Selection sequence.
Auxiliary Lines
DESCRIPTION
5-14 Section 5: Reference
The MERLIN Plus System provides an quxiliary jack, labeled "Aux", at the
top of each Line Module. This auxiliary line is bridged directly to outside Line
A or Line E, and does not go through the MERLIN Plus system control unit.
You can connect accessory devices to the system, and use these devices
independently of the system.. These devices include:
Page 79

●
Basic Telephones — During an electrical power outage, your MERLIN
Plus system will not function. However, you can plug a basic
telephone (not a MERLIN Plus system voice terminal) into the AUX
jack, and use it to place and receive calls .on Line A or Line E.
●
Facsimile Machines — You can also plug a facsimile machine into the
AUX jack. When calls come in on Line A or Line E, the FAX
machine will respond to them as it would if plugged into any other
outside telephone line.
●
Modems and Computers — You can plug a modem into the AUX line
and use it for transmitting and receiving data on Line A or Line E.
The modem will function on this line as it would on any other
outside telephone line. When using a modem, it is important that you
prevent other employees from using voice terminals connected to Line
A or Line E since this could interfere with data transmissions. You can
program Line A or Line E for privacy (see "Privacy on Lines A and
E"), thus preventing others from bridging onto calss on Line A. To
have the modem answer incoming calls automatically, simply set it up
for auto-answer as you would on any telephone line. You can place
outside calls with the modem either by connecting a basic telephone
and dialing manually, or by using the modem's autodial capabilities.
CONSIDERATIONS
ADMINISTRATION
When a call comes in on Line A or Line E, it will ring both on the voice
terminals that are assigned to Line A or Line E and on any device connected
to the Line A or Line E auxiliary jack. If you are using the auxilary line for a
device such as a FAX or modem, you may want to use the No Ring option
(see "Ringing Options") to prevent calls from ringing on the voice terminals.
This will prevent employees from answering calls which should be going to the
accessory device connected to the auxiliary line.
If you do not want the accessory device to ring on incoming calls, you can
simply turn it off or set it not to ring, and program Line A or Line E for
normal ringing.
You cannot use a MERLIN Plus system voice terminal on the auxiliary line.
The system administrator can administer the Privacy feature for Line A and/or
Line E so that no one else in the system can bridge onto or monitor these
lines while a call is active on them. For more information, see "Privacy (on
Lines A and E)."
Decide the kind of device you want connected to the auxiliary jack. If you do
not want calls that come in on the device to ring at the voice terminal
plugged into Line A or Line E, program that voice terminal not to ring on
Line A or Line E. (See "Ringing Options.")
PROGRAMMING
If you want the device connected to the auxiliary jack not to ring and Line A
or Line E to ring immediately when calls come in, or vice versa, use the
Ringing Options feature. (See "Ringing Options.")
MERLIN Plus System Features
5-15
Page 80

Bridging
Use the basic telephone, facsimile machine, or modem and computer
connected to the auxiliary jack as you normally would.
Plug in the auxiliary telephone whenever you want to bridge or monitor Line
A or Line E.
DESCRIPTION
CONSIDERATIONS
ADMINISTRATION
PROGRAMMING
HOW TO USE
If you share a line with another person, you can join (or "bridge" onto) a call
in progress on that line. In this way you can easily join a conference call by
just touching a line button and lifting your handset. (See "Conference.")
Up to three people connected to the MERLIN Plus system, including the
originator of the call, can bridge onto a call at one time.
When a person bridges onto a call in progress, the red and green lights next to
the line button on your voice terminal flash alternately so that you know that
someone else has joined the call.
You cannot use the Bridging feature on a voice terminal with Button-Free
Line Operation.
If the person has activated the Privacy feature on his or her voice terminal,
you cannot bridge onto a call in progress at that voice terminal.
None
None
To bridge onto a call in progress:
5-16
Section 5: Reference
1
Touch the line button associated with the call.
2
Lift your handset.
Page 81

Button-Free Line Operation
DESCRIPTION Button-Free Line Operation allows people with 5-button or 10-button voice
terminals to access lines, even though the lines do not appear on the voice
terminal buttons. Therefore, those voice terminals have additional free
buttons for needed programmed features. This feature is ideal for people who
need several lines, but who rarely handle more than one call at a time. To
place or answer a call, they just lift their handset, and the MERLIN Plus
system selects a free line for outgoing calls or the ringing line for incoming
calls.
CONSIDERATIONS
The system administrator can assign a maximum of eight lines to a button-free
voice terminal. However, if the administrator again wants lines assigned to
buttons on a voice terminal, he or she can assign only the number of lines for
which the voice terminal has line buttons. For example, if the administrator
has assigned eight lines to a 5-button voice terminal with Button-Free Line
Operation and decides to assign lines to voice terminal buttons, only four of
those eight lines appear. The features that the administrator or user has
programmed onto the voice terminal buttons will be replaced by lines.
With Button-Free Line Operation, the system administrator can administer the
individual voice terminals so that they ring or do not ring when calls come in.
(See "Ringing Options.") Button-Free Line Operation with the no ring option
is appropriate for voice terminals in public places, such as lobbies.
●
There are no red and green lights associated with lines to keep track of
call-handling features, such as Transfer or Hold.
The person with Button-Free Line Operation can answer transferred
calls and ringing lines by picking up the handset.
●
There is no way of knowing which line the system has selected for an
outgoing call. Therefore, make sure that all lines assigned to these
voice terminals are of the same type. Do not mix regular lines, WATS
lines, and Foreign Exchange lines.
●
You cannot program an Automatic Line Selection sequence on voice
terminals with Button-Free Line Operation. In this case, only your
system administrator can assign the sequence of lines for your voice
terminal.
ADMINISTRATION
●
You can use the Intercom. Hold, Transfer, and Call Pickup features,
but you cannot use the Bridging or the Conference feature.
If your responsibilities do not include system administration, skip this
information.
To make one or more lines on a voice terminal button-free:
1
Enter administration mode by sliding the T/P switch to P and touching
Administer.
MERLIN Plus System Features 5-17
Page 82

2
Dial the intercom number or touch the Auto Intercom button for the
voice terminal you are administering.
A green light goes on next to the Auto Intercom button. Green lights go on next to the buttons
of any lines already assigned to the voice terminal.
3
Touch the line button until the green light next to it shows the line
assignment you want:
Green light on =
Green light off =
4
To make the line Button-Free, dial one of these two codes:
the line is assigned to the voice terminal
the line is not assigned to the voice terminal
– Dial *31 if you want the voice terminal to ring.
– Dial *32 if you do not want the voice terminal to ring.
Touch Administer.
5
The console beeps twice.
Leave administration mode by sliding the T/P switch to the center
6
position.
PROGRAMMING
HOW TO USE
To reassign lines to separate buttons on a voice terminal that has Button-Free
Line Operation:
1
Enter administration mode by sliding the T/P switch to P and touching
Administer.
Touch the Auto Intercom button for the voice terminal you are
2
administering.
Dial *34.
3
A green light should go on next to the lines that have been assigned to the voice terminal.
4
Touch Administer.
The console beeps twice.
5
Leave administration mode by sliding the T/P switch to the center
position.
None
If you do not have a line button for a call that you have received or that has
been transferred to you, you can still put the call on hold using the Hold
button. To retrieve the call, you can use the Hold Retrieve feature. (See
"Hold Retrieve.")
5-18
Section 5: Reference
Page 83

Call Pickup
DESCRIPTION
CONSIDERATIONS
If you want to pick up a call that is ringing at another voice terminal, use the
Call Pickup feature.
You can use this feature in three different ways:
●
Option A — You can use a dial code and dial the intercom number of
the ringing voice terminal.
●
Option B — You can program a Call Pickup button and dial the
intercom number of the ringing voice terminal.
●
Option C — You can program a One-Touch Call Pickup button for a
specific voice terminal in your business so that when the person is
away, you can answer that person's calls with one touch. You can
program a Call Pickup button for each voice terminal for which you
need to answer calls.
If the line on which the call is coming in appears on a button on your voice
terminal, you do not need to use the Call Pickup feature to answer the call.
You can just touch the line button on which the call is ringing and then lift
your handset.
If you want someone in the office, such as a guard, to answer calls that come
in after hours, program a Call Pickup button for calls that come in at the
administrator/attendant console. Since the attendant console has all the lines
of your MERLIN Plus system, the person answering calls after hours can pick
up all calls by touching the Call Pickup button whenever the attendant
console rings. If the person is in another part of the building, the attendant
can connect his or her console and an extra alert device to a Supplemental
Alert Adapter (see "Supplemental Alert Adapter" under "Accessory
Equipment"), so that each time a call comes in, an extra alert device goes on.
ADMINISTRATION
PROGRAMMING
None
You do not need to program Option A.
To program Option B:
1
Label the button Call Pickup.
2
Slide the T/P switch to P.
The voice terminal rings every 5 seconds to remind you that you are programming and that you
cannot place or recieve calls.
3
Touch the button you want to program.
4
Dial *85.
5
Slide the T/P switch to the center position.
MERLIN Plus System Features
5-19
Page 84

To program Option C:
1
Label the button Call Pickup plus an intercom number.
Slide the T/P switch to P.
2
The voice terminal rings every 5 seconds to remind you that you are programming and that you
cannot place or receive calls.
3
Touch the button you want to program.
4
Dial *85 plus an intercom number.
5
Slide the T/P switch to the center position.
HOW TO USE
You can use a programmed button or a dial code to pick up a call at any other
voice terminal in the system.
To pickup a call ringing at any other voice terminal using Option A:
1 Lift your handset.
Dial #3.
2
3 Dial the intercom number of the voice terminal at which the call is
ringing.
To pick up a call ringing at any other voice terminal using Option B:
1
Lift your handset.
Touch the Call Pickup button you programmed above.
2
3
Dial the intercom number or touch the Auto Intercom button of the voice
terminal at which the call is ringing.
5-20
Section 5: Reference
To pick up ringing calls at a specific voice terminal using Option C:
Lift your handset.
1
2 Touch the One-Touch Call Pickup button you have programmed for the
voice terminal.
Page 85

Call Report
NOTE: This feature is used with a MERLIN Plus system data collector and
an AT&T 475 printer or its equivalent.
DESCRIPTION
CONSIDERATIONS
The Call Report feature, often called Station Message Detail Recording
(SMDR), enables a business to keep records of incoming and outgoing calls.
The information in a printed call report gives details about outgoing and
incoming calls: the date and time of each cdl, its duration, the line and voice
terminal on which the call was made or received, and the dialed numbers of
the outgoing call. Call reports are printed automatically as calls go out or
come in. This information helps a business build records of its telephone
traffic patterns and identify abuses in voice terminal privileges.
If an account code is entered when the call is made, the call report prints that
information for you. Account codes are helpful in billing customers and
different departments of the company for telephone calls that should be
charged to them. (See "Account Number Entry.") The data collector and
the printer can also print a System Feature Report, a list of the features that
have been administered to the system. (See "System Feature Report.")
The Call Report features can only be used at the administrator/attendant
console.
When the system administrator administers the system for the Call Report
feature, he or she can set certain options for the feature.
●
The administrator should set the initial time and date, so that these
details appear correctly on the call report.
●
The system is set to have the data collector and the printer connected
to voice terminal jack 19. However, if the administrator is using a 34button deluxe voice terminal for administration, he or she can connect
the printer to any other voice terminal jack in the system, except jack
10.
●
The administrator can select the type of calls that appear on the call
report. The system is factory-set to have no calls reported. However,
the administrator can set the system for reporting outgoing and
incoming calls, or for reporting only outgoing calls.
●
The system is set to record outgoing calls that last at least 1 minute.
However, the system administrator can change that setting for a longer
(up to nine minutes) or shorter (as little as 10 seconds) minimum
duration.
●
The administrator can also specify which System Speed Dial codes are
printed on call reports, and which ones will be private.
The entries on a call report are preceded by a "C."
MERLIN Plus System Features
5-21
Page 86

ADMINISTRATION
If your responsibilities do not include system administration, skip this
information.
Before you administer the Call Reports options for your system, refer to the
System Conjuration Form that you have filled out.
To administer the various Call Reports options for your system:
The Date and the Time. To set today's date:
1
Enter administration mode by sliding the T/P switch to P and touching
Administer.
2
Dial *80.
3
Dial two digits for the month (01 through 12).
4
Dial two digits for the day (01 through 31).
Dial two digits for the year (00 through 99).
5
For example, if the date is March 24, 1986, dial *80 03 24 86.
Touch Administer.
6
The console beeps twice.
7
Leave administration mode by sliding the T/P switch to the center
position.
.
To set the current time:
1
Enter administration mode by sliding the T/P switch to P and touching
Administer.
2
Dial *81.
Dial two digits for the hour (00 through 23).
3
4
Dial two digits for the minute (00 through 59).
For example, if the time is 2:16 A.M., dial *81 02 16; if the time is 2:16
P.M., dial *81 14 16.
Touch Administer.
5
The console beeps twice.
6
Leave administration mode by sliding the T/P switch to the center
position.
5-22
Section 5: Reference
Page 87
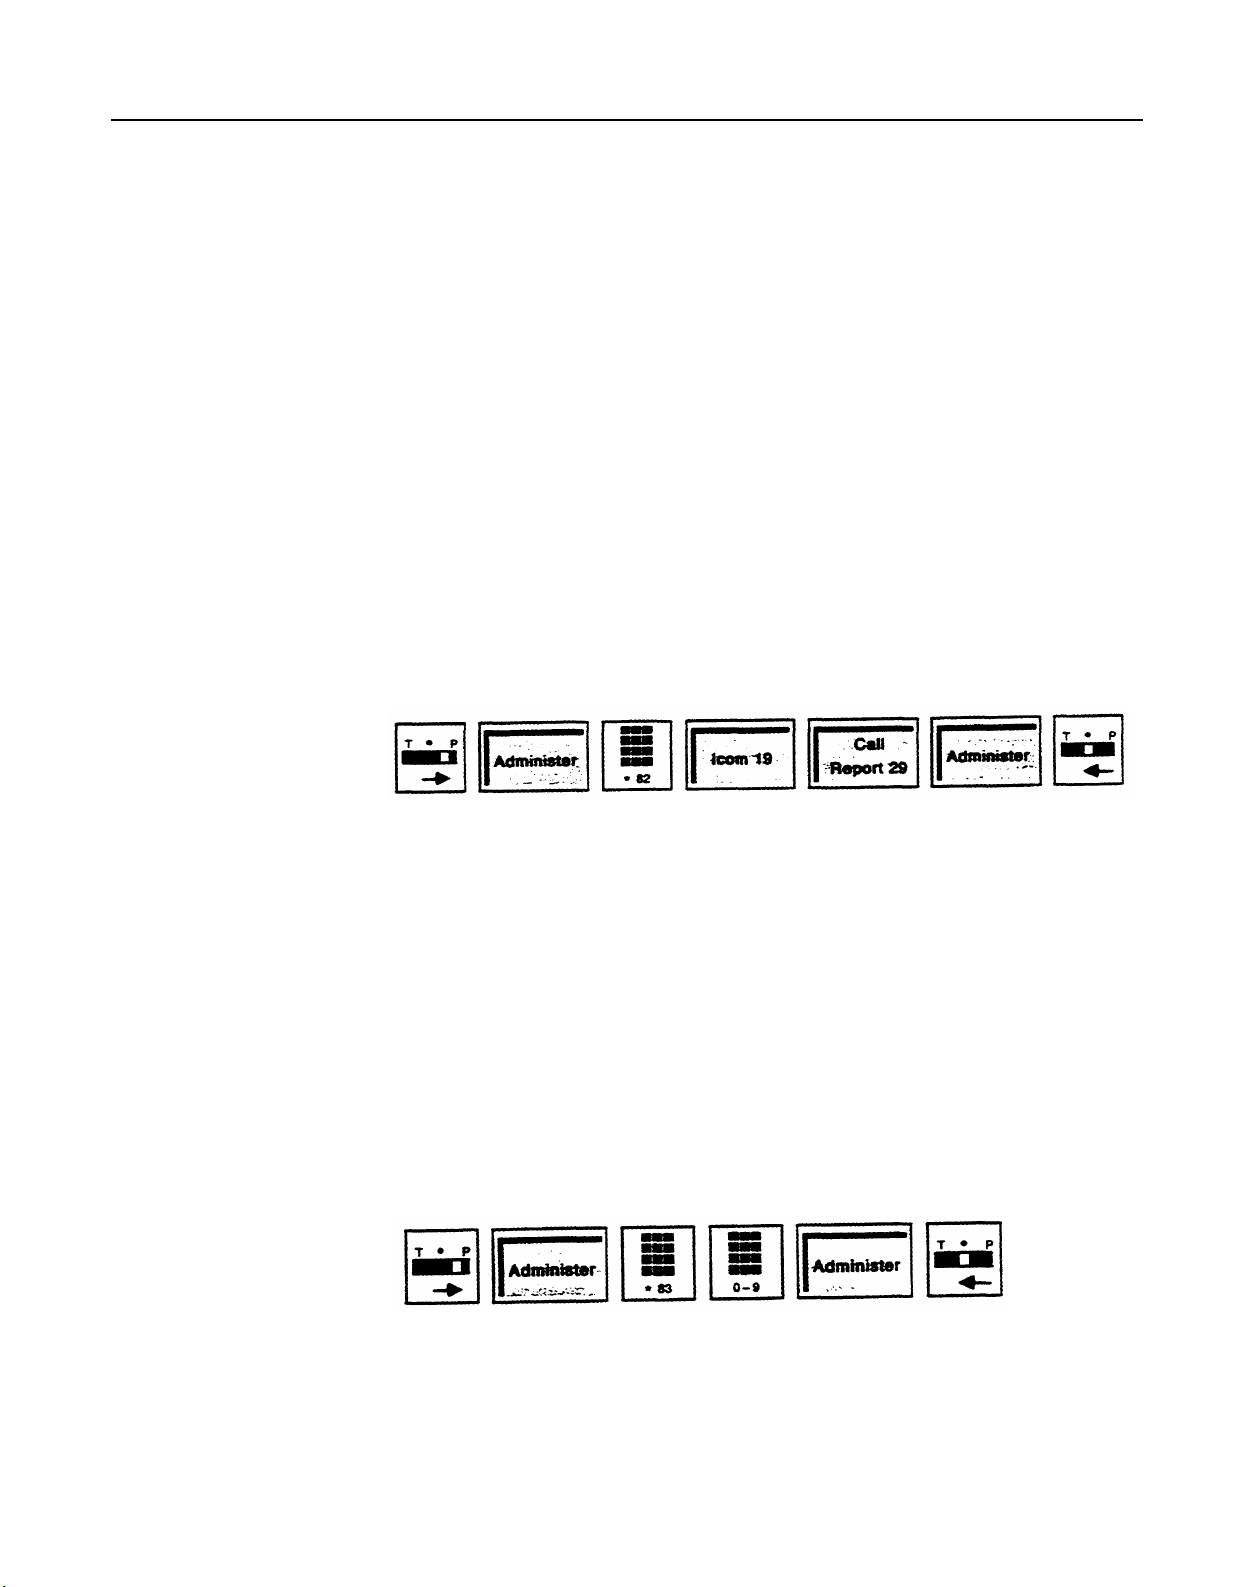
Control Unit Jack Assignment for the Call Report Feature. To specify the
voice terminal jack to which the data collector and the printer will be
connected (the system is factory-set for jack 19; if you are using a 10-button
voice terminal for administration, you cannot change this assignment):
1
Enter administration mode by sliding the T/P switch to P and touching
Administer.
Dial *82.
2
The green light goes on next to the Auto Intercom button that corresponds with the jack to
which the data collector and the printer are currently assigned.
Touch the Auto Intercom button of the jack to which the data collector
3
and the printer are now connected.
The green light goes off.
4
Touch the Auto Intercom button of the jack to which the data collector
and the printer will be connected.
The green light next to the button goes on.
5
Touch Administer.
The console beeps twice.
6
Leave administration mode by sliding the T/P switch to the center
position.
Minimum Call Duration. To specify a minimum call duration other than 1
minute for call reporting:
1 Enter administration mode by sliding the T/P switch to P and touching
Administer.
2 Dial *83.
Dial one digit from 0 to 9 for the number of minutes.
3
For example, to specify a minimum duration of 1 minute, dial *83 1. To
specify a minimum duration of 9 minutes, dial *83 9.
4 Touch Administer.
The console beeps twice.
5
Leave administration mode by sliding the T/P switch to the center
MERLIN Plus System Features
5-23
Page 88
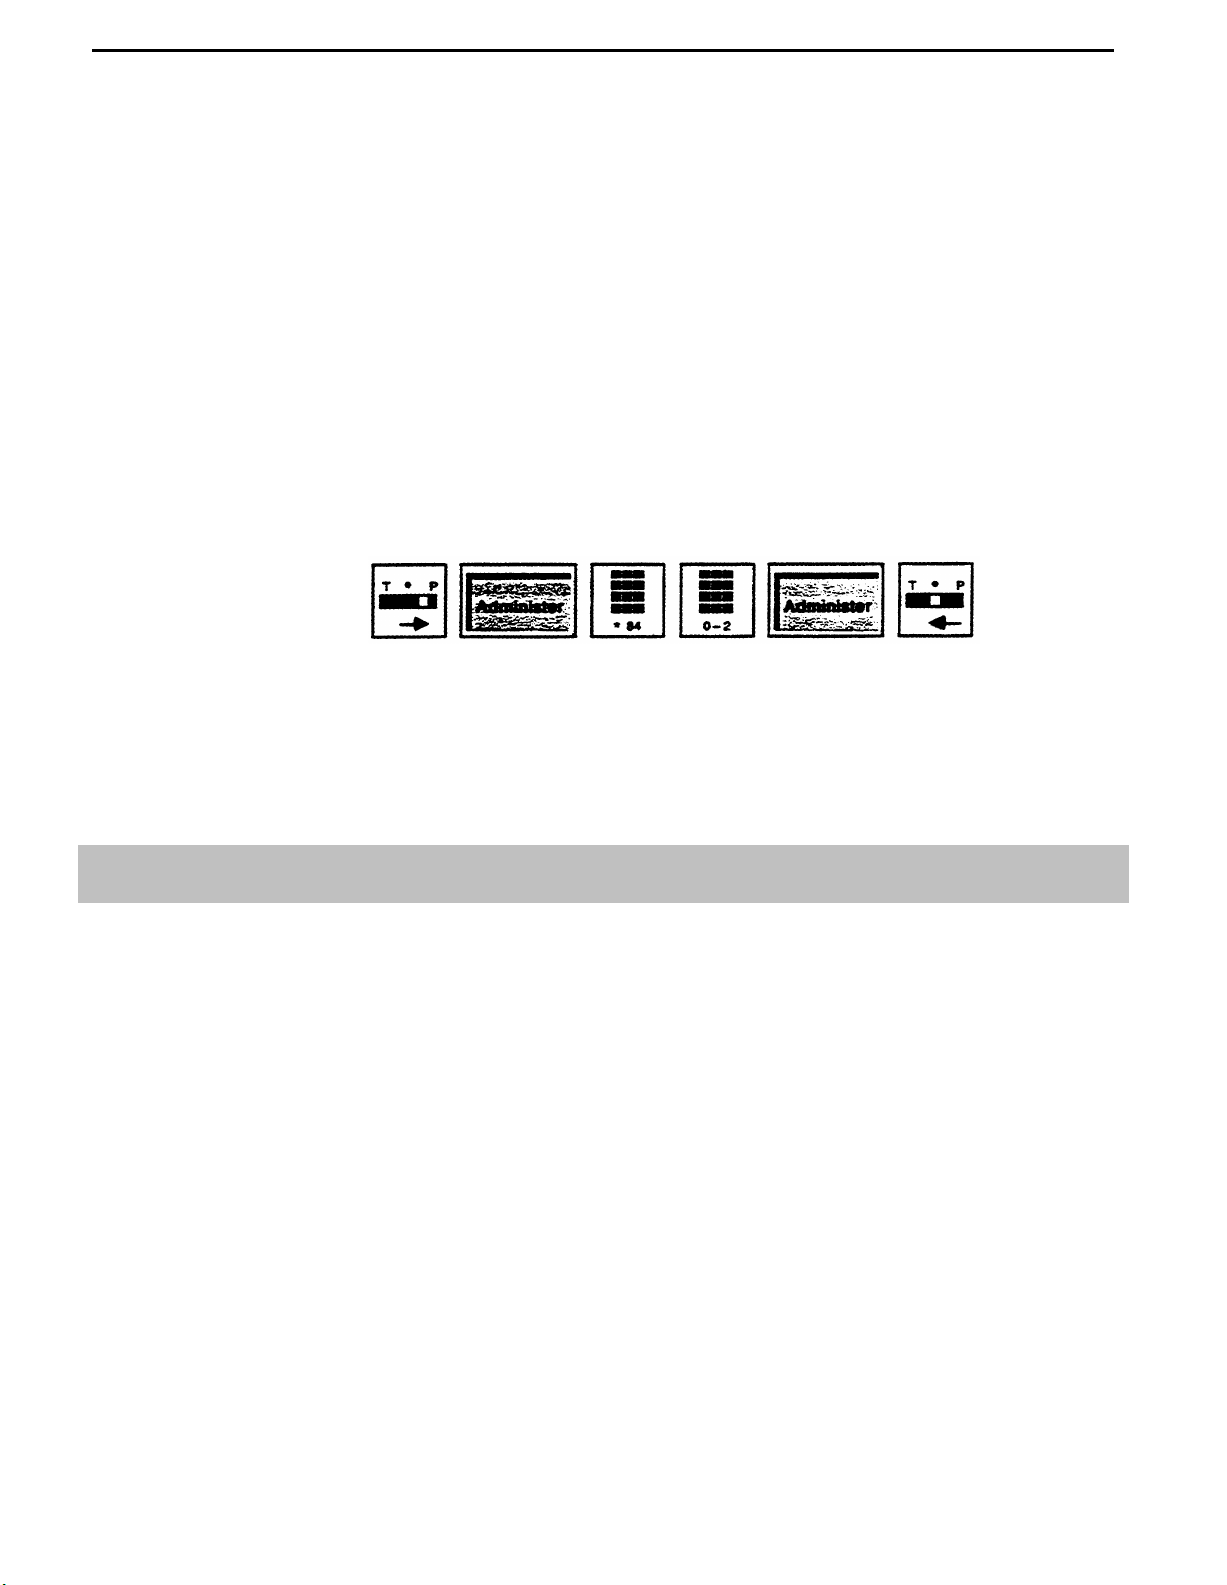
Type of Documented Calls. To specify the type of calls that will be
documented (the system is set to have no calls reported):
1
Enter administration mode by sliding the T/P switch to P and touching
Administer.
Dial *84.
2
Dial a number code 0 through 2 to specify the kind of calls to be reported
3
(the system is factory-set so that no calls are reported):
– If you do not want any calls reported, dial 0.
– If you want only outgoing calls reported, dial 1.
– If you want outgoing and incoming calls reported, dial 2.
Touch Administer.
4
The console beeps twice.
5
Leave administration mode by sliding the T/P switch to the center
position.
PROGRAMMING
HOW TO USE
Call Restriction
DESCRIPTION
CONSIDERATIONS
None
None
When the system is first installed, people can use their voice terminals to
place intercom, local, and toll calls. However, the system administrator can
assign either of two types of call restrictions for selected voice terminals:
●
Outward Call Restriction restricts voice terminals so that only
intercom calls can be placed.
Toll Call Restriction restricts voice terminals so that only intercom
●
and local calls can be placed.
Even if a voice terminal has Outward Call Restriction, the person can bridge
onto calls in progress, answer incoming calls, and place and receive intercom
calls.
5-24
If the outward call restrictions are too limiting, the administrator can
designate a list of numbers that individuals may call beyond the established
restrictions. (See "Allowed Lists.")
Section 5: Reference
Page 89

If the administrator decides to store a System Speed Dial code with Restriction
Override, all voice terminals in the system can use the code as a type of
password that allows the person to access the outside number, regardless of toll
or outward call restrictions previously placed on the voice terminal. (See
"System Speed Dial.")
If there are two or more voice terminals in the system that will have the same
restrictions, the administrator can use the Copy feature to copy these
restrictions from one voice terminal to another. (See "Copy.")
ADMINISTRATION
If your responsibilities do not include system administration, skip this
information.
Before you begin to administer call restrictions for voice terminals in your
system, refer to the Voice Terminal Configuration Forms that you have filled
out.
To administer call restrictions to a voice terminal:
1
Enter administration mode by sliding the T/P switch to P and touching
Administer.
2
Dial the intercom number or touch the Auto Intercom button of the voice
terminal you want to restrict.
3
Touch Restrict until the green light beside it shows the kind of call
restriction you want the voice terminal to have.
Steady green light on =
Flashing green light =
Green light off =
4
Touch Administer.
The console beeps twice.
5
Repeat steps 2 through 4 for each voice terminal you want to restrict.
6
Leave administration mode by sliding the T/P switch to the center
Unrestricted (All calls permitted)
Toll restricted (local and intercom calls only)
Outward restricted (intercom calls only)
position.
PROGRAMMING
HOW TO USE
None
Ask your system administrator what call restrictions, if any, he, or she has
assigned to your voice terminal.
MERLIN Plus System Features 5-25
Page 90
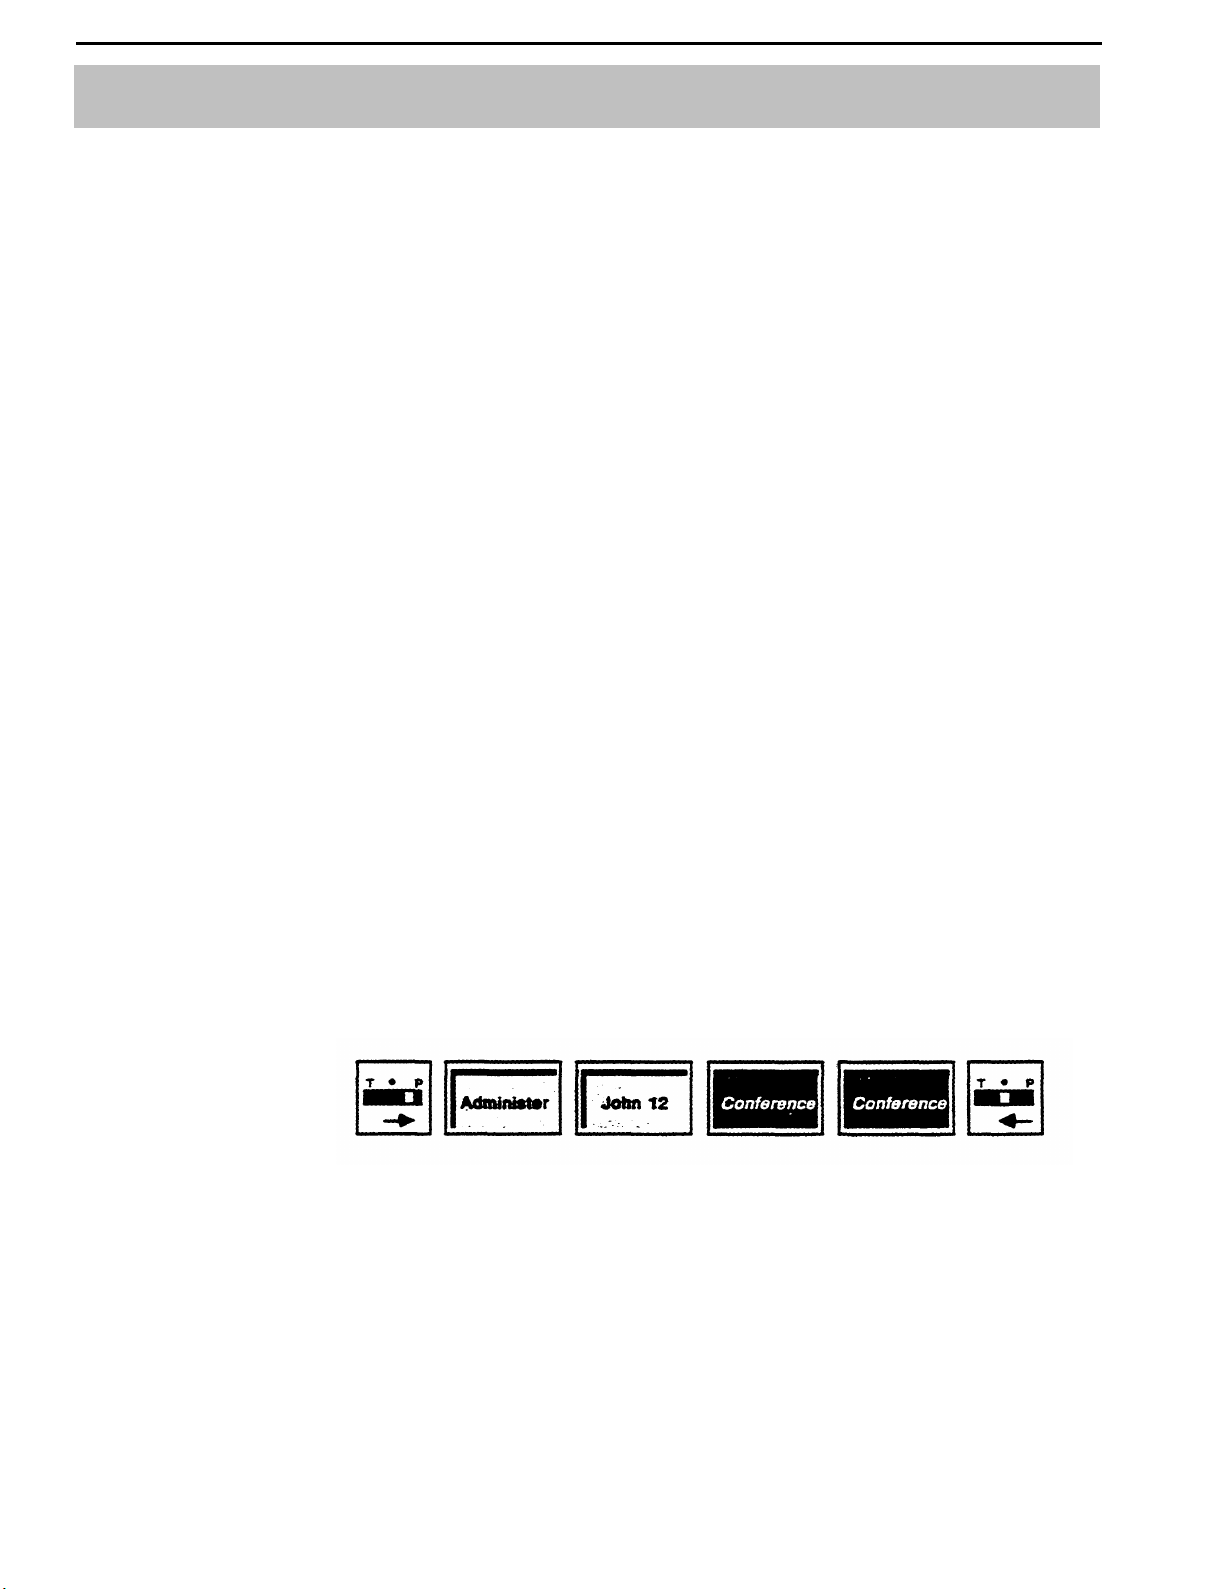
Centralized Programming
DESCRIPTION The Centralized Programming feature allows the system administrator the
convenience of programming-features onto individual voice terminals directly
from the administrator/attendant console. In this way there is no need to go
to each voice terminal to do the programming. This feature is useful when
the administrator is assigning Ringing Options for incoming calls.
CONSIDERATIONS
ADMINISTRATION
The system administrator must be certain that the appropriate feature buttons
on the voice terminals are accurately labeled.
The voice terminal being programmed must be idle. If the voice terminal is
busy or in program mode, the administrator hears a beep at the
administrator/attendant console, indicating that he or she cannot use this
feature until the voice terminal is idle again.
If your responsibilities do not include system administration, skip this
information.
To program a feature onto a voice terminal from the administrator/attendant
console:
1
Enter administration mode by sliding the T/P switch to P and touching
Administer.
Touch the Auto Intercom button for the voice terminal you want to
2
program.
Touch Conference.
3
Green lights go on next to the line button of lines already assigned to the voice terminal.
4
Follow the same steps to program the feature that you would follow if you
were at the voice terminal.
5
When you are finished programming the features for that voice terminal,
touch Conference again.
PROGRAMMING
HOW TO USE
5-26
Section 5: Reference
6
Leave administration mode by sliding the T/P switch to the center
position.
None
None
Page 91

Conference
DESCRIPTION When you want people outside the MERLIN Plus system to join a call in
progress, you can use the Conference feature. You can set up a conference
call that includes up to two outside people and yourself. In addition, up to
two people in your MERLIN Plus system can bridge onto the call. (See
"Bridging.")
CONSIDERATIONS
ADMINISTRATION
PROGRAMMING
HOW TO USE
You must use the Drop feature when you want to disconnect one outside line
at a time from a conference call (See "Drop.") If you press the switchhook,
you end the call.
You cannot use the Conference feature on a voice terminal with Button-Free
Line Operation.
None
None
To set up a conference call when one of the participants is already on the
line:
1 Touch Conference.
2 Touch a free line button.
3 Dial the outside number of the person you want to add to the conference
call.
If you don't want the person already connected to listen while you connect
the second person to the call:
1
Touch Hold.
Touch a line button.
2
Dial the outside number of the second person you want to include in the
3
conference.
Announce the conference call through your handset.
4
Touch Conference.
5
Touch the line button that you put on hold.
6
MERLIN Plus System Features
5-27
Page 92
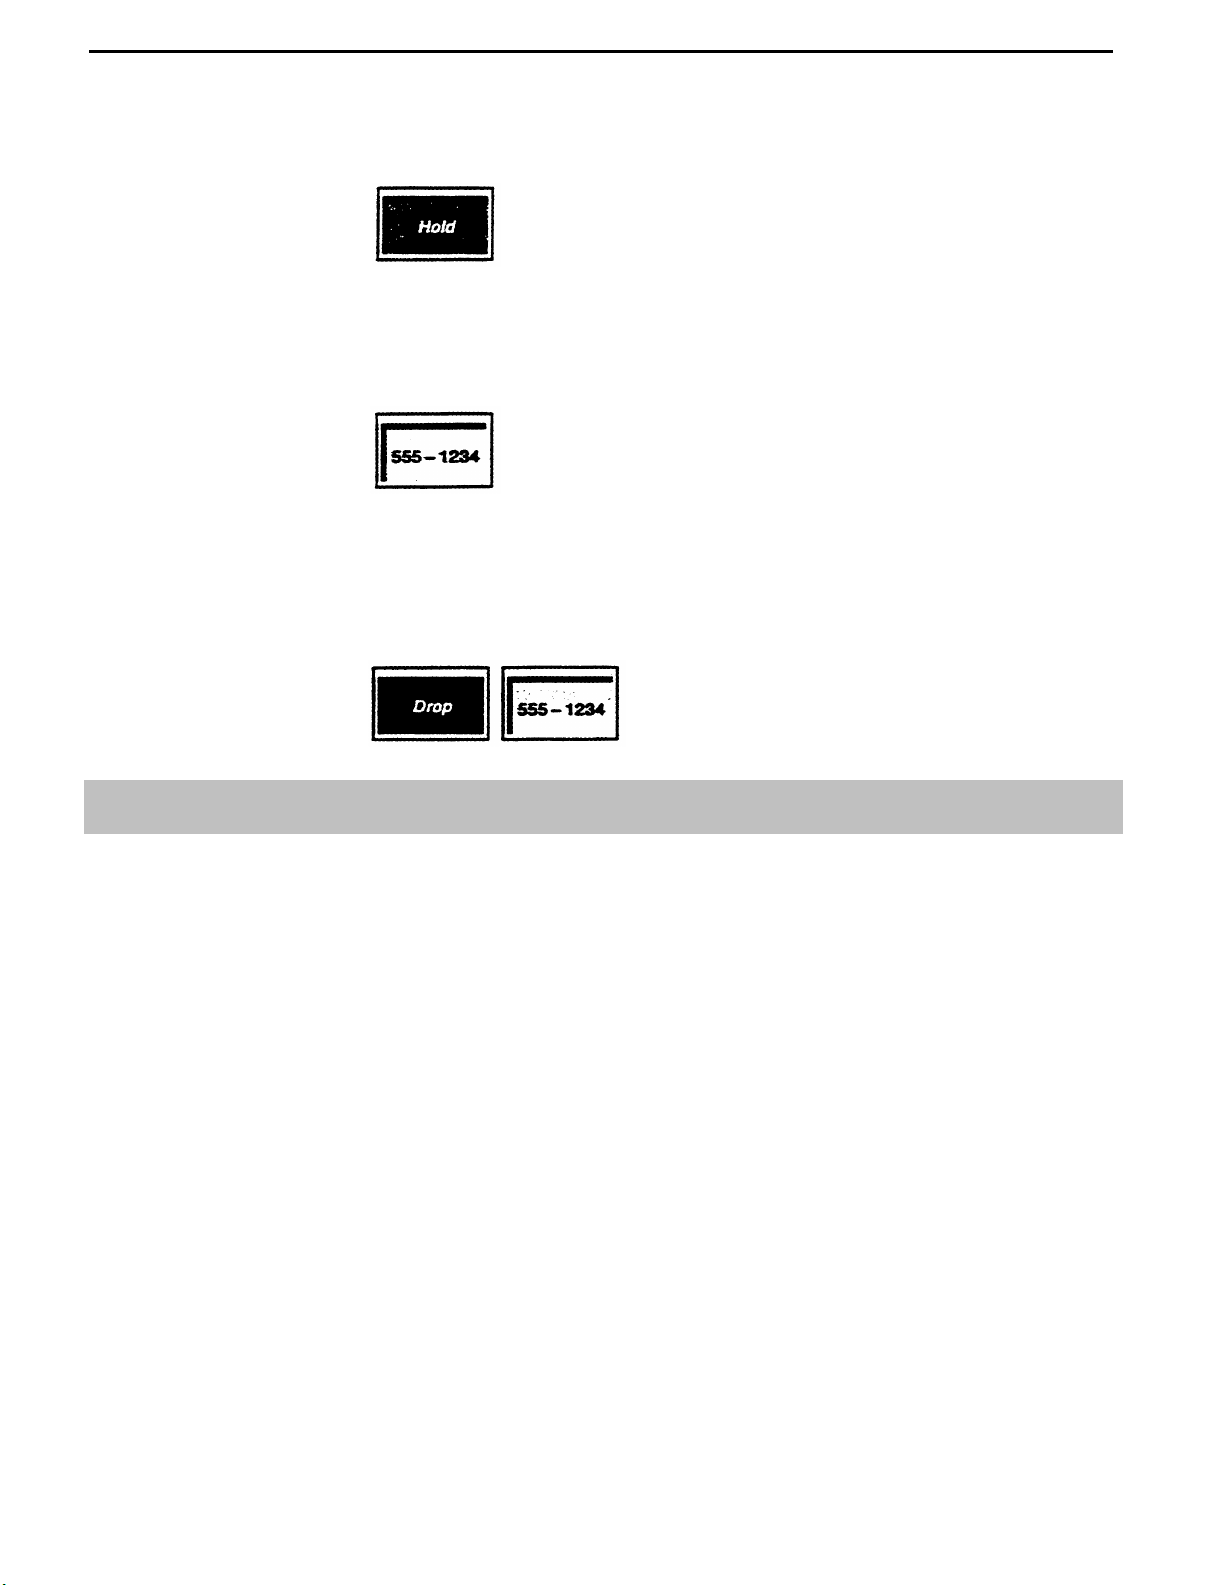
To remove yourself from a conference without ending the call:
Touch Hold.
To rejoin the call:
Touch a line button associated with the call.
1
To disconnect one outside line at a time from the call:
1 Touch Drop.
Touch the button of the line you want to disconnect.
2
Copy
DESCRIPTION
CONSIDERATIONS
If there are two or more voice terminals that require the identical feature
assignments, the system administrator can use the Copy feature to copy the
line and programmable feature assignments from one voice terminal onto
another.
When the administrator uses the Copy feature, the MERLIN Plus system
copies the line assignments from one voice terminal to the other. Feature
assignments are always overwritten by lines.
Several other features are also copied during the Copy process: Ringing
Options, Voice Announcement Enable/Disable, Automatic Line Selection,
and Personalized Ringing.
If you have a 5-button voice terminal, you cannot copy any lines or features
onto a larger voice terminal, or vice versa.
Be sure to label the buttons on the voice terminal to which lines or features
have been copied.
5-28
Section 5: Reference
Page 93
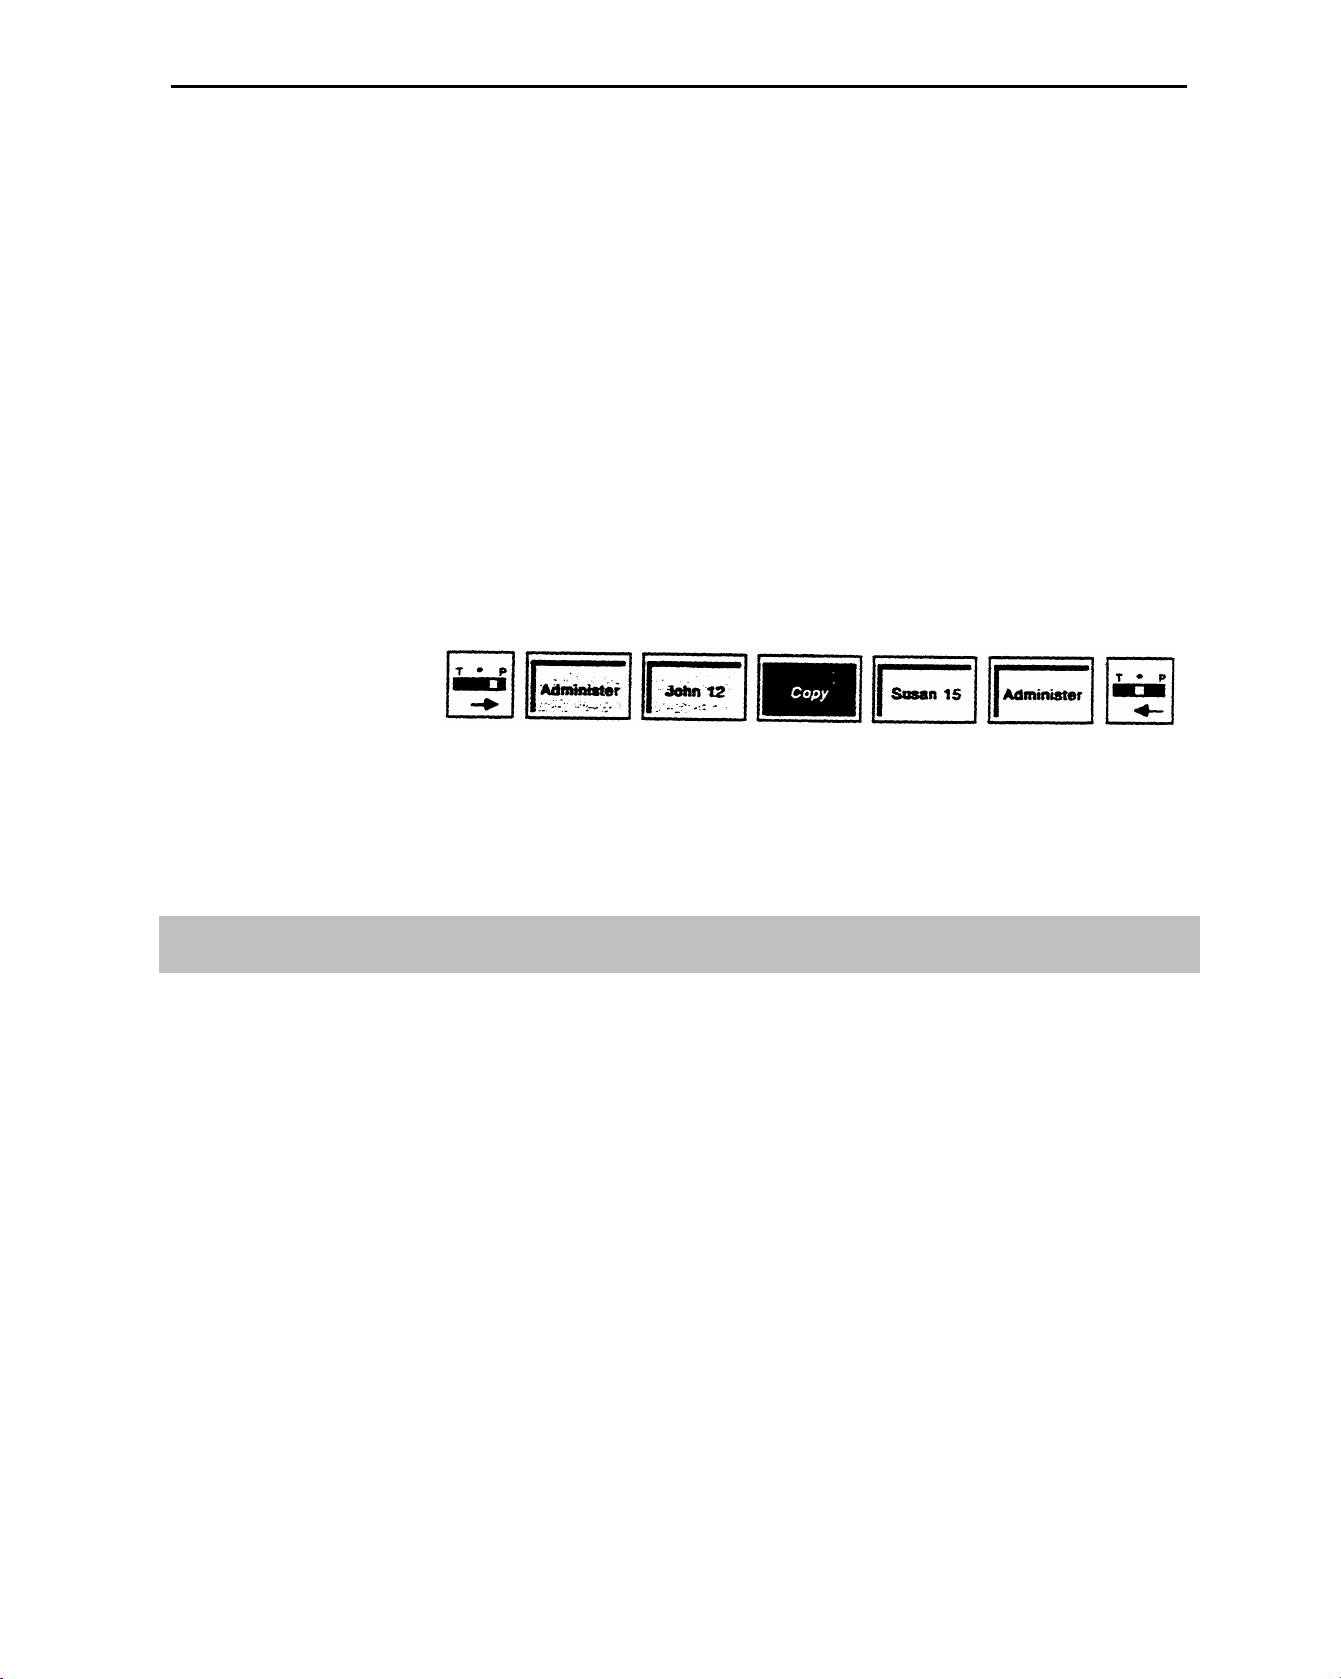
If your responsibilities do not include system administration, skip this
information.
To copy line and feature assignments from one voice terminal to another:
Enter administration mode by sliding the T/P switch to P and touching
Administer.
2
Dial the intercom number or touch the Auto Intercom button of the voice
terminal to which you want to copy line assignments.
3
Touch Copy
4
Dial the intercom number or touch the Auto Intercom button of the voice
terminal from which you are copying line assignments.
5
Touch Administer.
The console beeps twice.
6
Leave administration mode by sliding the T/P switch to the center
position.
7
Be sure to label the new line assignments on the voice terminal to which
you did the copying.
PROGRAMMING
HOW TO USE
None
None
Customized Line Assignment
DESCRIPTION
CONSIDERATIONS
The system administrator can assign lines to any voice terminal in any order,
or choose not to assign particular lines to a voice terminal. The administrator
can use Customized Line Assignment if he or she wants to assign lines or
groups of lines to selected voice terminals with similar requirements for placing
and receiving calls. For example, this might include people within a particular
department who need the same line assignments as each other, but different
from line assignments of people in other departments. The administrator can
also assign personal lines that no one else in the system has access to. (See
"Personal Lines.")
If a person in a system with customized line assignments does not have a
particular line assigned to his or her voice terminal, he or she can pick up a
ringing call on that line by using the Call Pickup feature. (See "Call
Pickup.")
MERLIN Plus System Features
5-29
Page 94
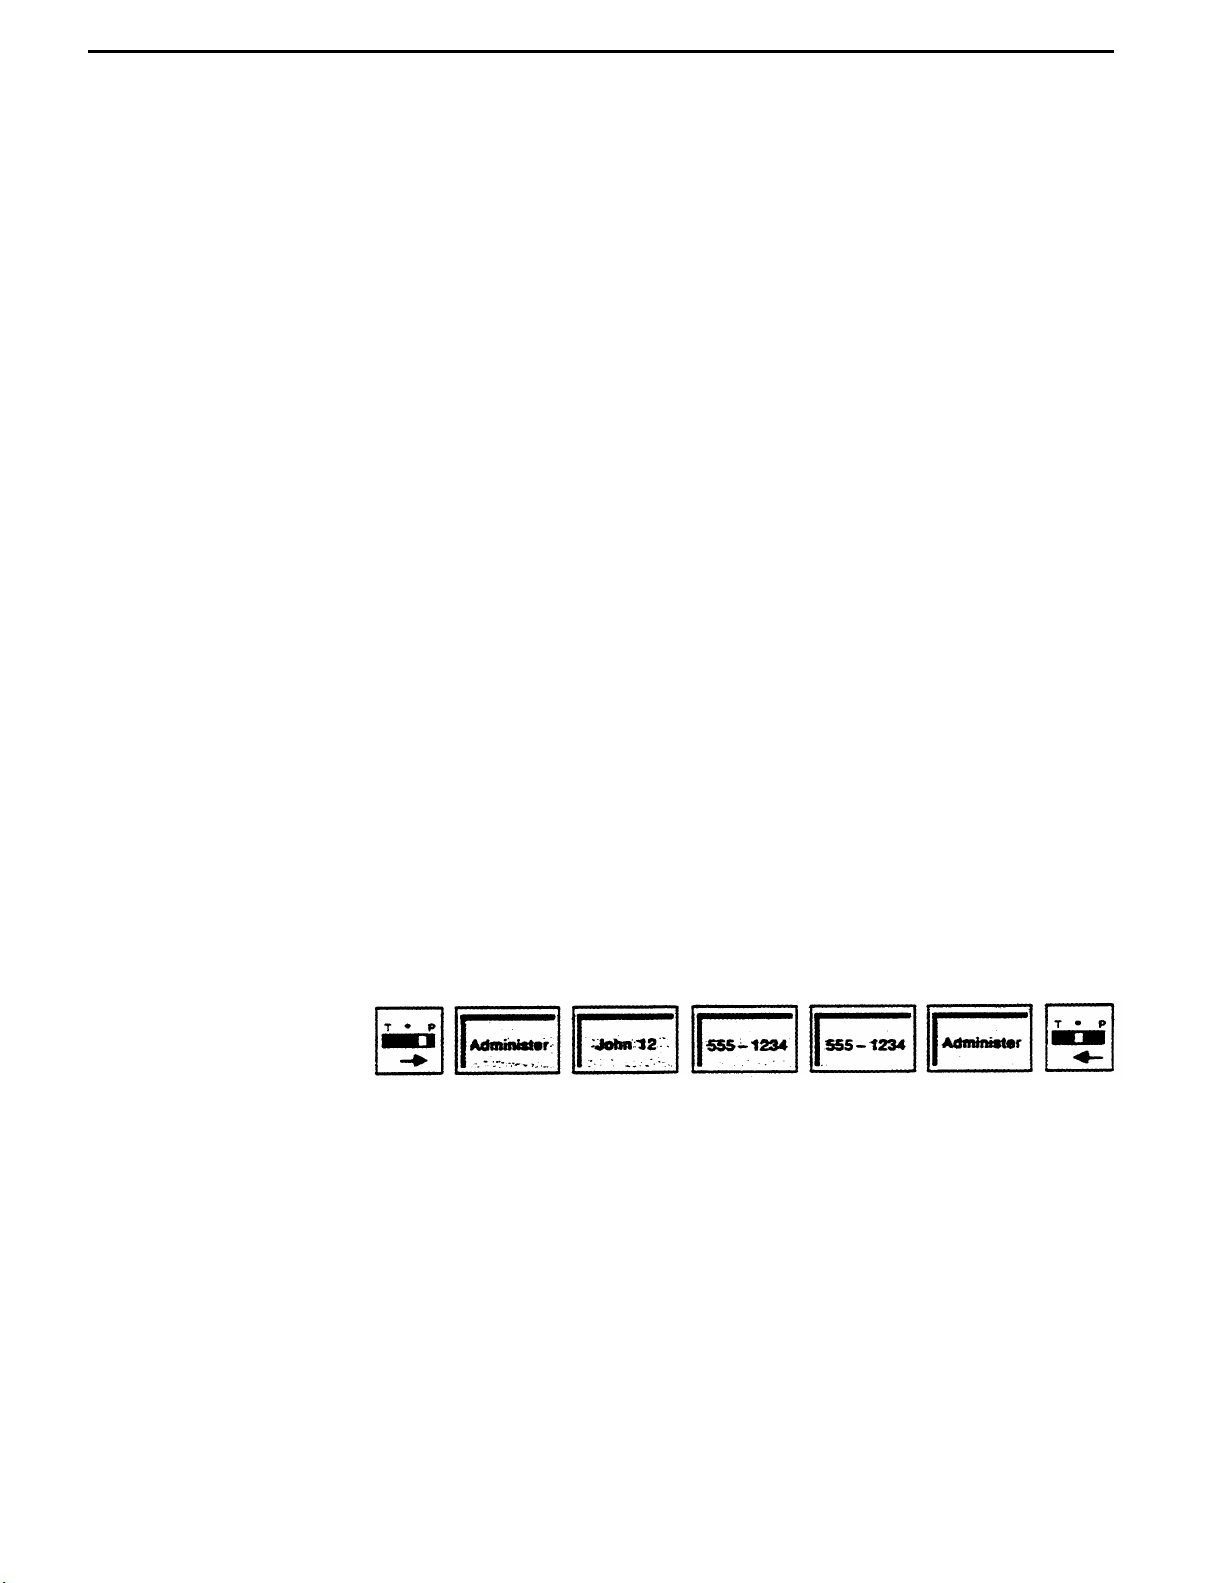
If two or more voice terminals in the system will have the same line
assignments, the administrator can use the Copy feature to copy the line
assignments from one voice terminal to another. (See "Copy.")
A line jack with nothing plugged into it is called a nonequipped line
appearance, or "ghost line." To eliminate ghost lines, the administrator must
specify for the system how many lines the system contains. When the
administrator first sets up the system, the administrator dials *4 and the
number of lines in the system. For example, if the system contains six lines,
the administrator dials *46. (See Section 3, "Administering the System.")
ADMINISTRATION
If your-responsibilities do not include system administration, skip this
information.
Before you assign lines to voice terminals in your system, refer to the Line
Assignments Form that you have filled out.
To assign lines to a voice terminal:
1
Enter administration mode by sliding the T/P switch to P and touching
Administer.
Dial the intercom number or touch the Auto Intercom button for the
2
voice terminal that you are administering.
A green light goes on next to the Auto Intercom button. Green lights also go on next to the
buttons of any lines already assigned to the voice terminal.
Remove all of the lines by touching each line button that has a light next
3
to it.
The green light next to the line button goes off.
4
Touch each line button in the order in which you want them to appear on
the voice terminal.
Green lights go on next to the line buttons you touch.
5
Touch Administer.
The console beeps twice.
6
Leave administration mode by sliding the T/P switch to the center
position.
PROGRAMMING
HOW TO USE
5-30 Section 5: Reference
None
The system administrator assigns lines to buttons for the whole system and for
individual voice terminals. Be sure that the lines that you have access to are
labeled on your voice terminal.
Page 95
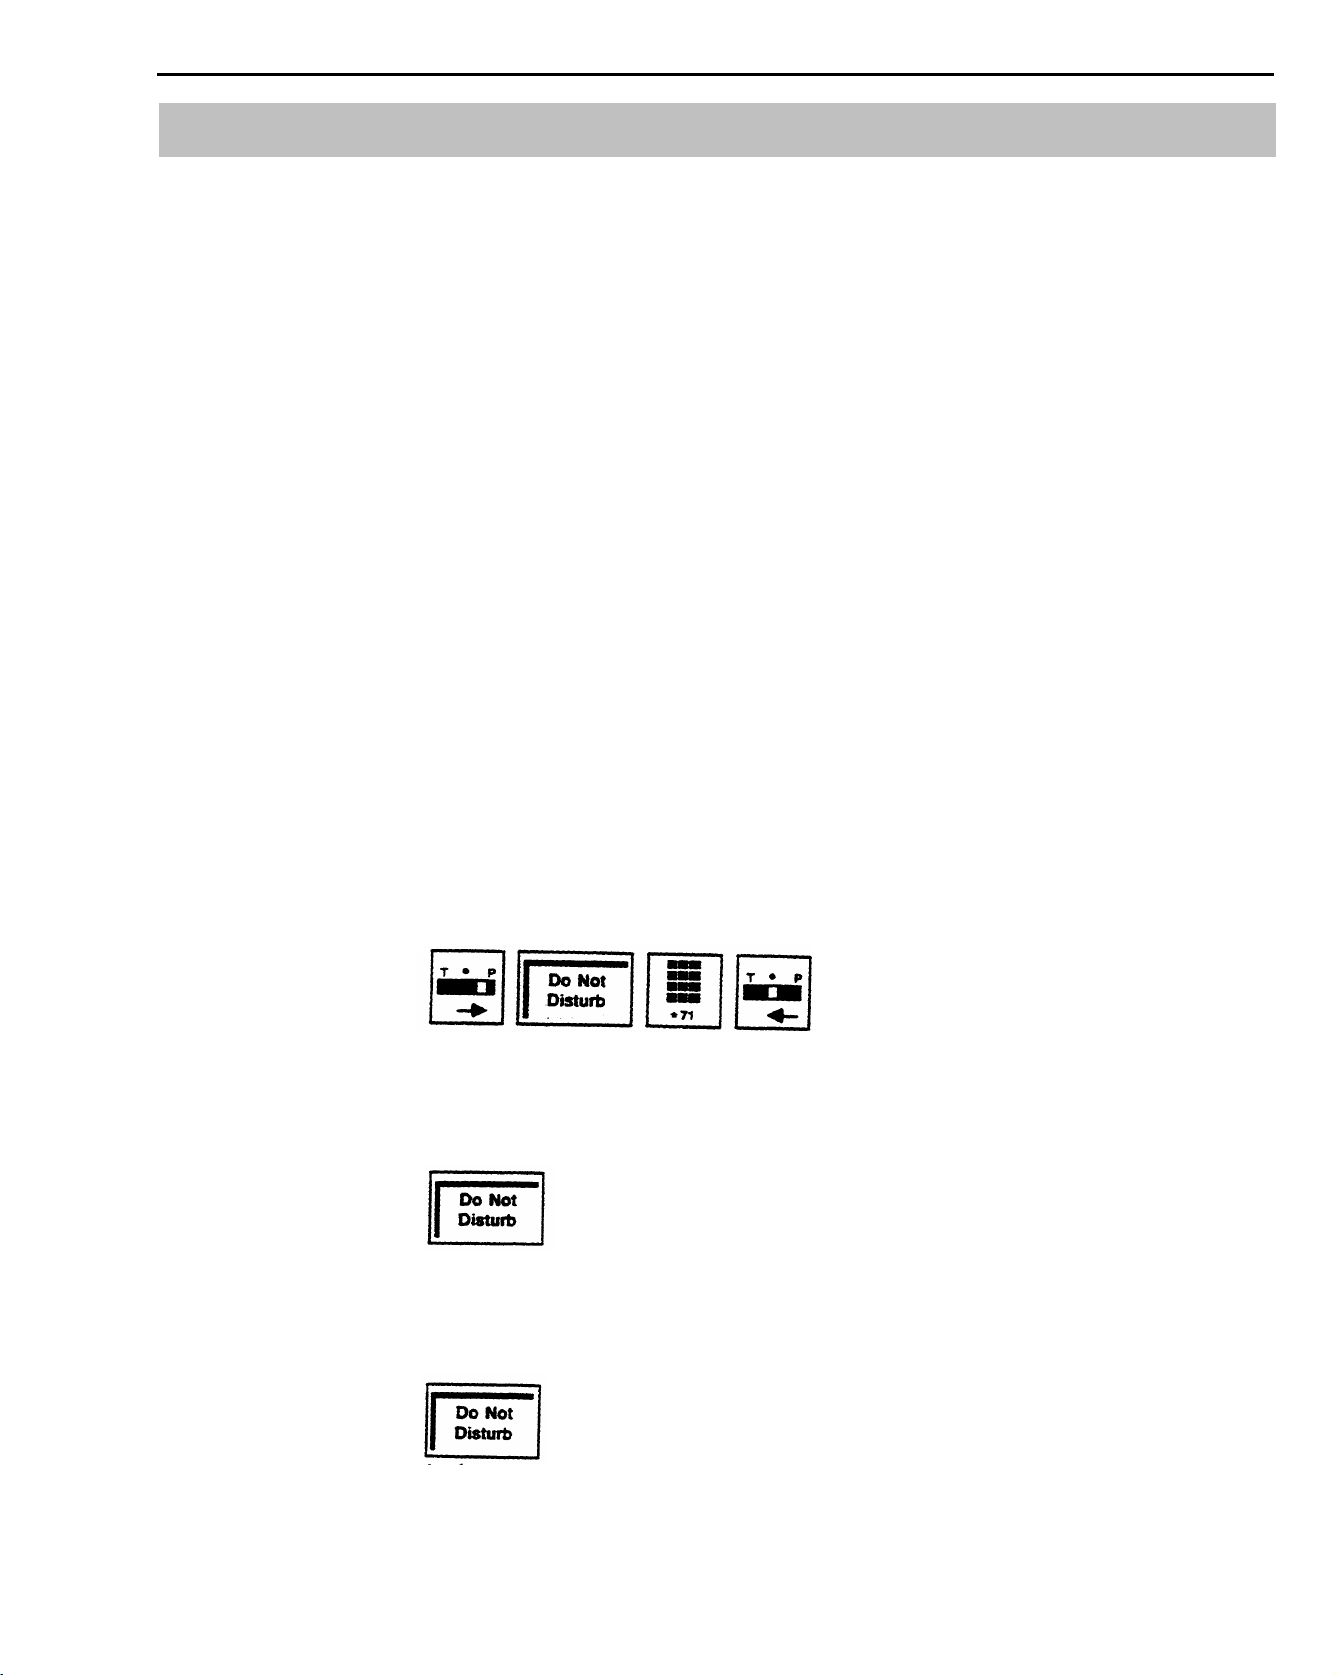
Do Not Disturb
DESCRIPTION
CONSIDERATIONS
ADMINISTRATION
PROGRAMMING
When you are busy and do not want to receive calls, you can touch the Do
Not Disturb button, if you have programmed one onto your voice terminal.
When you receive outside calls, the green light next to the line button flashes,
but your voice terminal does not ring.
Calls transferred to you return to the sender, and intercom calls get a busy
signal.
When you activate the Do Not Disturb at your voice terminal, the green light
goes on next to your Auto Intercom button at other people's voice terminals.
None
None
The Do Not Disturb feature requires a button with lights.
To program a Do Not Disturb button for your voice terminal:
1 Label the button Do Not Disturb.
Slide the T/P switch to P.
2
The voice terminal rings every 5 seconds to remind you that you are programming and that you
cannot place or receive calls.
HOW TO USE
Touch the button you want to program.
3
4
Dial *71.
5
Slide the T/P switch to the center position.
To prevent calls from ringing at your voice terminal:
Touch Do Not Disturb.
1
The green light next to the button goes on.
This feature remains active until you:
1 Touch Do Not Disturb again.
The green light next to the button goes off.
MERLIN Plus System Features
5-31
Page 96

Drop
DESCRIPTION
CONSIDERATIONS
ADMINISTRATION
PROGRAMMING
HOW TO USE
If you get a busy signal or no answer as you set up a conference call, or if you
want to disconnect one outside line at a time from a conference call, use the
Drop feature. For more information about using this feature, see "Conference."
If you press the switchhook, you cut off everyone on the conference call.
None
None
To disconnect one outside line at a time from a conference call:
1 Touch Drop.
2
Touch the button of the line you want to disconnect.
Group Listening
DESCRIPTION
CONSIDERATIONS
ADMINISTRATION
PROGRAMMING
HOW TO USE
If you want other people in your office to hear a call, you can turn on your
voice terminal speaker. Everyone can then hear the voice of the other person
on the call.
Your speaker may make a squealing noise when the handset comes close to it.
To prevent this noise, touch Speaker when you have completed a call and are
ready to hang up your handset. Another way to reduce the squealing sound is
to turn down the volume control on your voice terminal.
None
None
To allow others to hear a call:
1 Without hanging up, touch Speaker, and continue your conversation. If
you have a 34-button BIS voice terminal, touch Speakerphone.
5-32
Section 5: Reference
Page 97

Group Page
DESCRIPTION
CONSIDERATIONS
The system administrator can set up Group Page groups so anyone in the
system can use the Group Page feature to page up to 20 people at a time
directly through the voice terminal speakers.
You can have up to three paging groups. The Page-All group consists of all
voice terminals in the system; groups 1 and 2 can have up to 20 voice
terminals in each group.
If the system administrator is using a 10-button voice terminal to administer
the system, he or she cannot change the factory-set Group Page group
assignments for the system.
If necessary, one voice terminal can be assigned to more than one paging
group.
You can program buttons for the groups you want to page. Or, you can save
available feature buttons for other uses and use a dial code to use this feature.
If someone in the Group Page group pick up the handset during a Group
Page announcement, he or she is connected to the person making the
announcement, and the page announcement is terminated.
When someone in the MERLIN Plus system has activated the Voice
Announcement Disable feature for his or her voice terminal, he or she cannot
hear a Group Page announcement.
If your responsibilities do not include system administration, skip this
information.
When the system is first set up, the system has the following Group Page
groups:
Group 1
Group 2
Page-All
= Voice Terminals 10 through 19
= Voice Terminals 20 through 29
= Voice Terminals 10 through 29
If these group assignments are not satisfactory for the system, the administrator
can add or delete voice terminals from the individual groups.
The Page-All group, the paging group containing all the voice terminals in the
system, cannot be administered.
Before you begin to administer Group Page groups, refer to "Paging Groups"
on your "System Configuration Form."
To add or remove a voice terminal from a paging group:
Enter administration mode by sliding the T/P switch to P and touching
1
Administer.
2 Dial *71 for group 1 or *72 for group 2.
A green light goes on next to the Auto Intercom button of any voice terminal already assigned to
that paging group.
MERLIN Plus System Features 5-33
Page 98

3
Touch Auto Intercom buttons until they show the paging group
assignment you prefer.
Green light on =
Green light off =
4
Touch Administer.
The console beeps twice.
Follow the last three steps for each paging group you want to administer.
5
6
Leave administration mode by sliding the T/P switch to the center
voice terminal is assigned to the group
voice terminal is not assigned to the group
position.
If you want to clear all entries from group 1 or from group 2:
1
Enter administration mode by sliding the T/P switch to P and touching
Administer.
2
Dial *71 for group 1 or *72 for group 2.
Touch Drop.
3
PROGRAMMING
Leave administration mode by sliding the T/P switch to the center
4
position.
To program a Group Page button for your voice terminal:
1
Label the button Group Page plus a group number.
Slide the T/P switch to P.
2
The voice terminal rings every 5 seconds to remind you that yo0u are programming and that you
cannot place or receive calls.
Touch the button you want to program.
3
Dial *91 plus a Group Page code:
4
70 = Page=All (all voice terminals in the system)
71 = group 1
72 = group 2
Slide the T/P switch to the center position.
5
5-34
Section 5: Reference
Page 99

HOW TO USE
You can use a programmed button or a dial code to access this feature.
To use a Group Page button to make an announcement through a group of
voice terminal speakers:
Touch the Group Page button for the group you want to page.
1
When you hear a beep, lift your handset and make the announcement.
2
To page a group using a dial code:
Touch Intercom.
1
Lift your handset.
2
3
Dial the code for the group you want to page:
70 = Page-All (all voice terminals in the system)
71 = group 1
72 = group 2
4 When you hear a beep, Speak into your handsset.
Hands-Free Answer on Intercom
DESCRIPTION
CONSIDERATIONS
ADMINISTRATION
PROGRAMMING
If you are using a 10-button Hands-Free Answer on Intercom (HFAI) voice
terminal or a 34-button Built-In Speakerphone (BIS) voice terminal, you can
touch the HFAI/Mic or HFAI button when you want to answer intercom calls
without lifting your handset. You will hear the other person's voice through
your voice terminal speaker.
When you turn on the HFAI feature, the green light next to the button goes
on.
None
None
MERLIN Plus System Features
5-35
Page 100

HOW TO USE
Hold
If you have a 10-button HFAI voice terminal and you want your intercom
calls answered automatically:
1 Touch HFAI/Mic.
If you have a 34-button BIS voice terminal and you want your intercom calls
answered automatically:
1
Touch HFAI.
DESCRIPTION
CONSIDERATIONS
ADMINISTRATION
PROGRAMMING
HOW TO USE
When you need to put someone on hold, use the Hold feature.
When you leave a call on hold for more than a minute, your voice terminal
rings at one minute intends to remind you the call is still on hold.
None
None
To place a call on hold:
1
Touch Hold.
When you put a call on hold, the green light next to the call's line button
flashes rapidly. If someone else puts a call on hold from another voice terminal,
the green light flashes slowly next to the call's line button on your voice
terminal.
5-36
Section 5: Reference
To take a call off hold:
1
Touch the call's line button.
The green light becomes steady.
 Loading...