

Atmel ATMEGA32U2, AT90USB162 Quick Manual
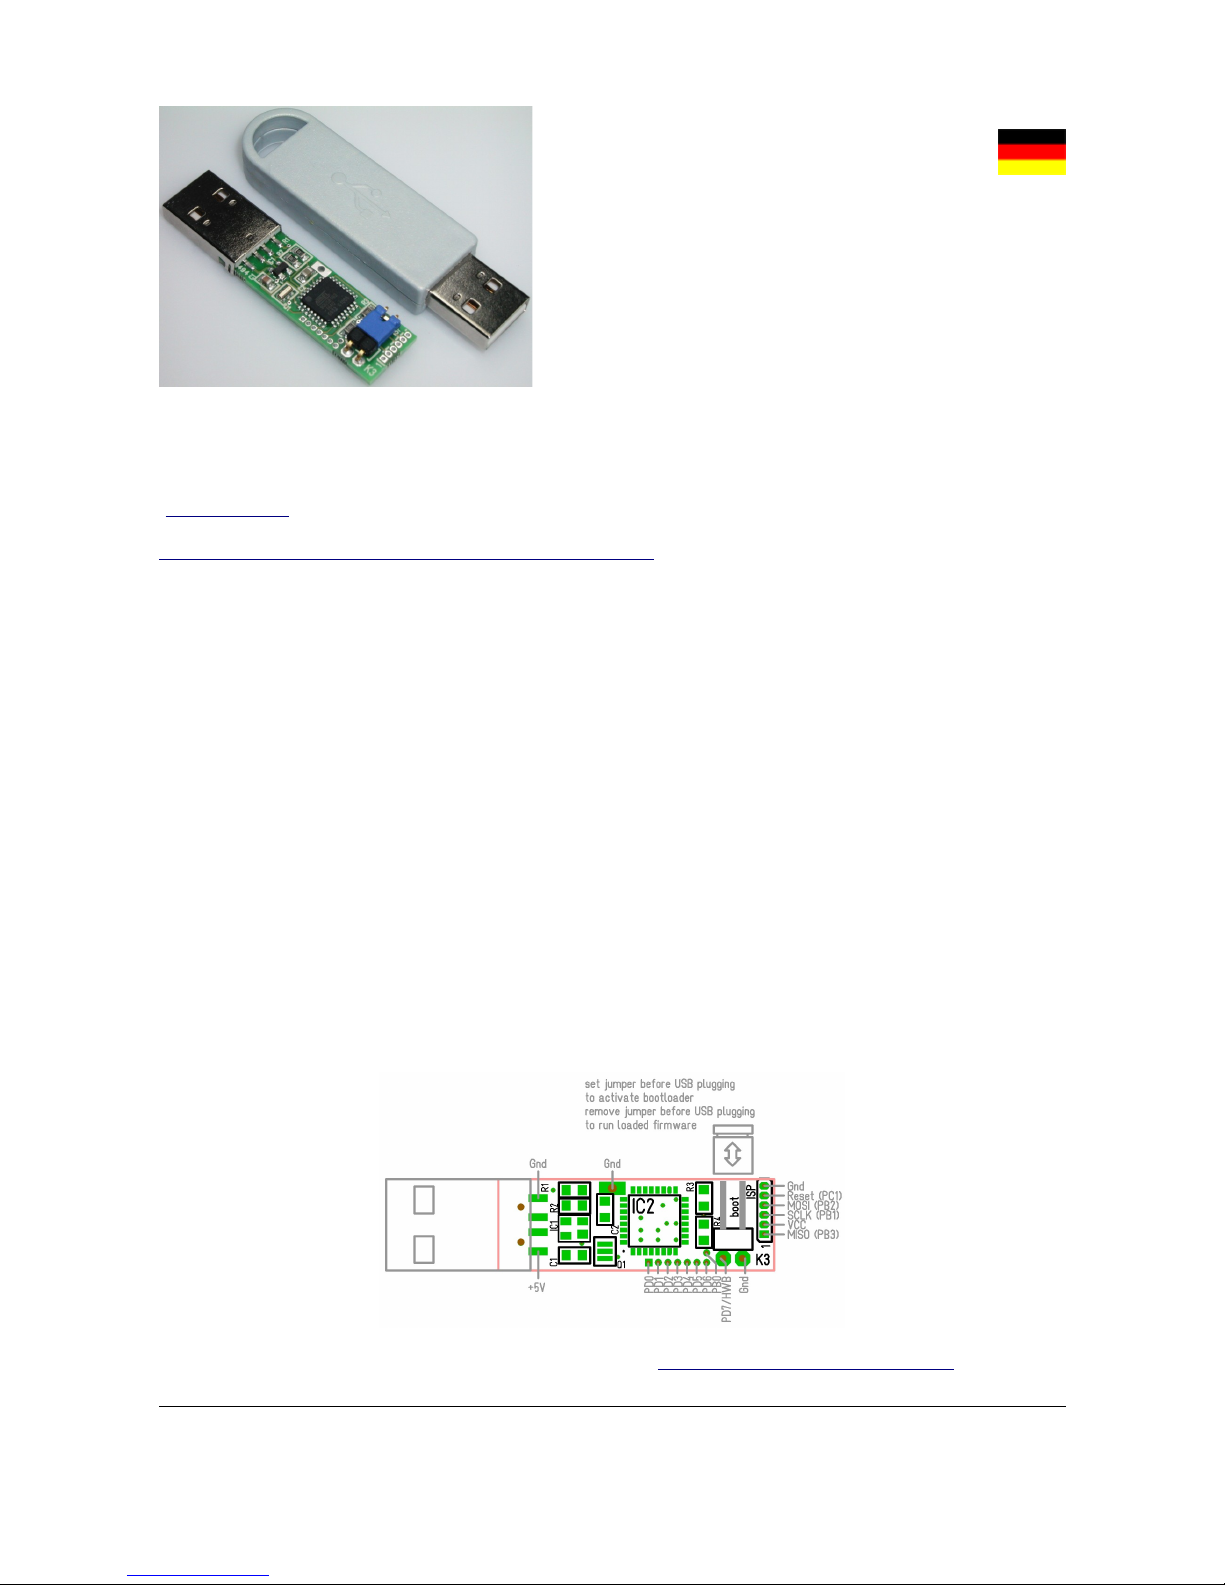
AVR-Stick AR
Kurzbeschreibung
USB-AVR-Mikrocontroller
Atmel ATMEGA32U2 und AT90USB162
als USB-Stick
mit Auto-Reset-Funktion
1. Einführung
Der Mikrocontroller enthält den originalen Atmel Bootloader. Zusammen mit dem PC-Programm „FLIP“ von Atmel
lässt sich der Stick über die USB-Schnittstelle programmieren. „FLIP“ kann von der Atmel-Homepage
(www.atmel.com) herunter geladen werden. Geben Sie als Suchbegriff „FLIP“ ein oder probieren Sie den folgenden
Link:
http://www.atmel.com/dyn/products/tools_card.asp?tool_id=3886
Installieren Sie zuerst „FLIP“, bevor Sie den AVR-Stick einstecken. Zum Lieferumfang von „FLIP“ gehören auch die
USB-Treiber „LibUSB-Win32“, die zur Kommunikation mit dem Bootloader des AVR-Stick benötigt werden.
2. Installation
Beim Einstecken des AVR-Stick wird ein Atmel-Gerät („ATMEGA32U2 DFU“ oder „AT90USB162 DFU“) erkannt
und zur Treiberinstallation aufgefordert. Wählen Sie die Treiber „LibUSB-Win32“, die durch die „FLIP“-Installation
bereits vorhanden sind.
3. Programmierung
Setzen Sie den Jumper und stecken Sie den Stick ein, um eine Firmware zu programmieren. Der im Controller
enthaltene Bootloader wird ausgeführt. Starten Sie „FLIP“, wählen Sie den korrekten Chip (ATMEGA32U2 oder
AT90USB162) aus und öffnen Sie das Gerät. Die zu programmierende Hex-Datei wird geladen und in den FlashSpeicher geschrieben („Run“-Taste). Abschließend wird die Taste „Start Application“ betätigt, um die Verbindung zum
USB-Gerät zu trennen. Ziehen Sie den AVR-Stick und entfernen Sie den Jumper.
Die programmierte Firmware wird ausgeführt, wenn der Stick ohne Jumper eingesteckt wird.
Zur Aktualisierung der Firmware wird der Stick einfach wieder mit gestecktem Jumper eingesteckt. Der dadurch erneut
gestartete Bootloader wartet nun auf Daten von „FLIP“.
Der Bootloader startet immer, wenn keine Firmware geladen ist. Sie können den Betriebsmodus des Stick mit dem
Programm „USBView“ kontrollieren (download auf der AVR-Stick-Homepage).
Eine ausführliche Anleitung in englischer Sprache finden Sie auf: http://produkte.reworld.eu/avrstick.htm
© 2010 Reusch Elektronik
http://products.reworld.eu/
File:
Revision:
Created:
Changed:
AVR_Stick_AR__Quick_Manual
5
2010-12-01
2010-12-01
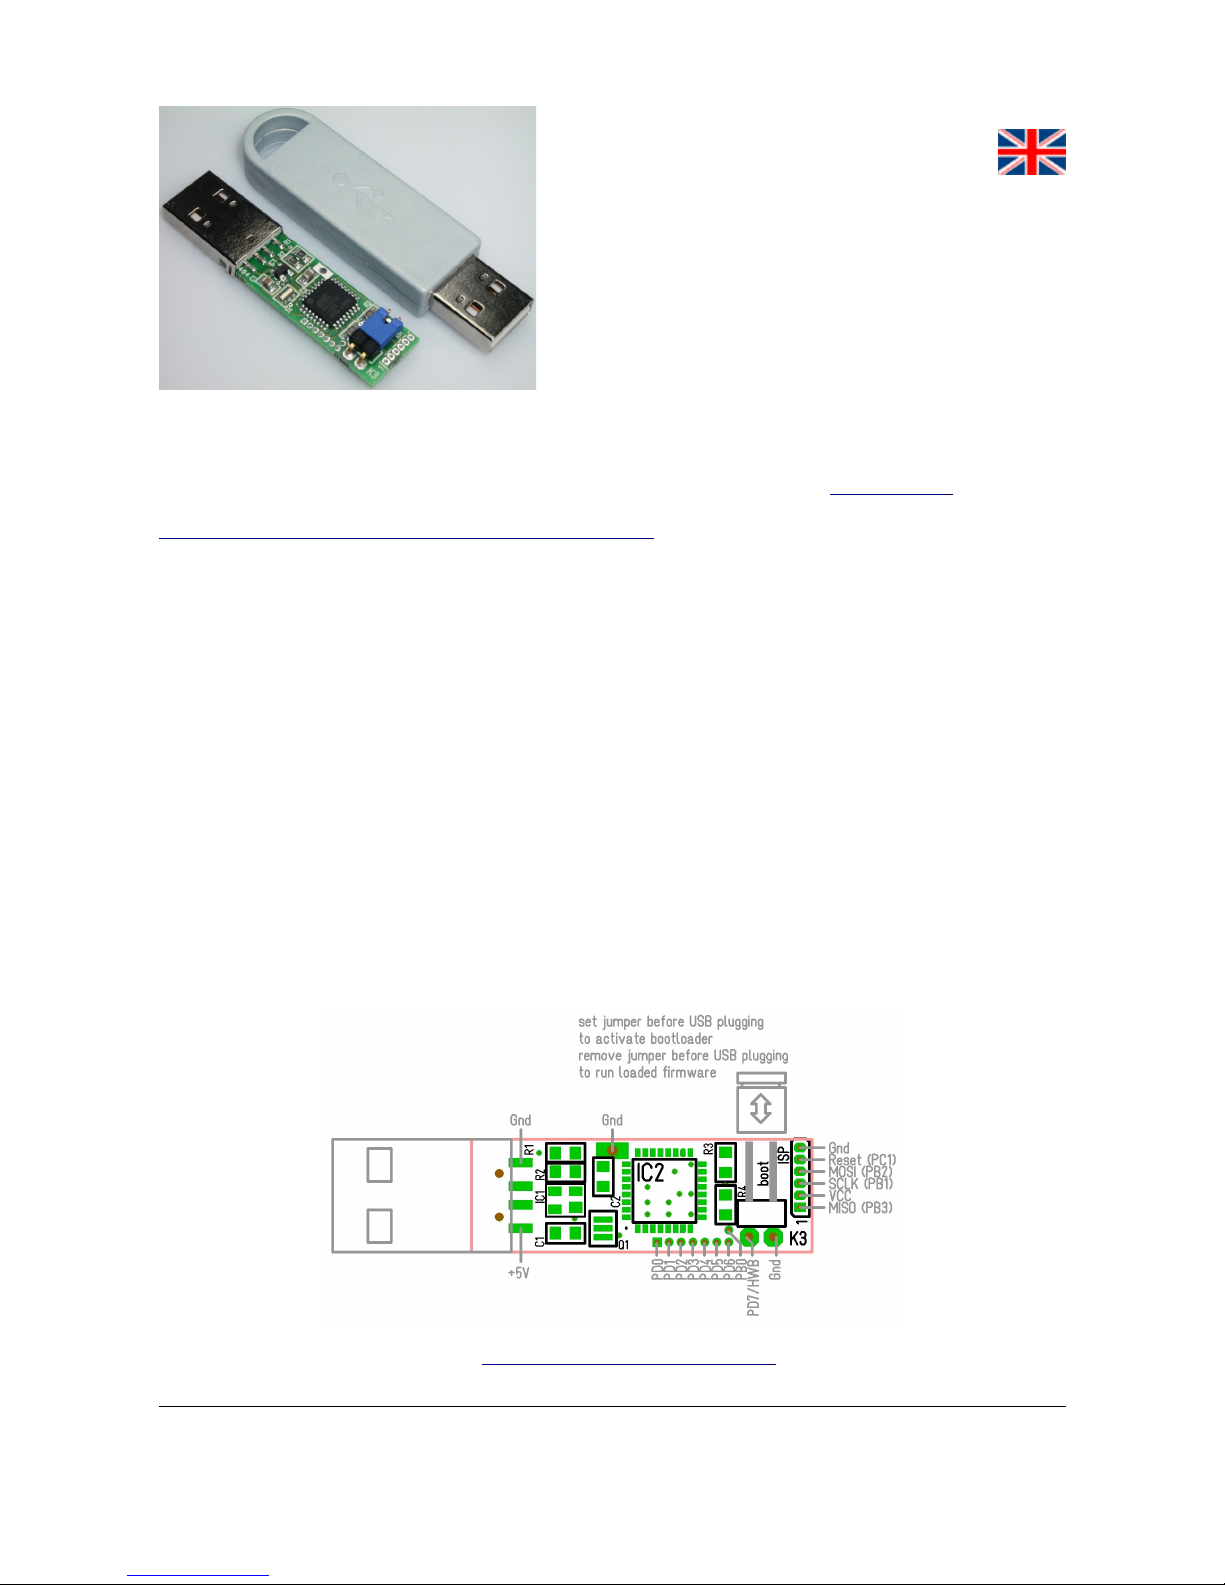
AVR Stick AR
Quick Guide
USB-AVR-Microcontroller
Atmel ATMEGA32U2 and AT90USB162
as USB Stick
with Auto Reset feature
1. Introduction
The microcontroller contains the original Atmel bootloader. The stick can be programmed via USB interface with the
PC program „FLIP“ from Atmel. „FLIP“ can be downloaded from the Atmel homepage (www.atmel.com). Search for
„FLIP“ or try the following link:
http://www.atmel.com/dyn/products/tools_card.asp?tool_id=3886
Install „FLIP“ before you plug the AVR Stick! The FLIP installation package contains the USB driver „LibUSBWin32“, which is required for communication with the bootloader of the AVR Stick.
2. Installation
At plugging of the AVR Stick, an Atmel device („ATMEGA32U2 DFU“ or „AT90USB162 DFU“) will be detected.
Chose the „LibUSB-Win32“ driver, which is available through the „FLIP“ installation.
3. Programming
Set the jumper and plug the stick, to program a firmware into the controller. The bootloader, contained in the controller,
will be executed. Run “FLIP”, chose the correct device (ATMEGA32U2 or AT90USB162) and open the device. Load
your hex file and flash it (“Run” button). Push the “Start Application” button, to close the USB connection to the stick.
Unplug the stick and remove the jumper.
If you are plugging the stick without jumper, your programmed firmware will run.
To update a new firmware, simply unplug the stick, set the jumper and plug again. Now, the bootloader is running again
and is waiting for data from “FLIP”.
The bootloader will always start, if no firmware is loaded. You can check, which mode is active, if you use the tool
“USBView” (download from AVR Stick Homepage).
You will find a detailed description under: http://products.reworld.eu/avrstick.htm
© 2010 Reusch Elektronik
http://products.reworld.eu/
File:
Revision:
Created:
Changed:
AVR_Stick_AR__Quick_Manual
5
2010-12-01
2010-12-01
 Loading...