

Page 1

Brennholzspalter
Bedienungsanleitung – Sicherheitshinweise – Ersatzteile
Seite 7
Log splitter
Operating Manual – Safety instructions – Spare parts
Page 16
Fendeur de bois à brûler
Instructions d’utilisation – Consignes de sécurité
Pièces de rechange
Ŝtípač palivolého dřeva
Návod k použití – Bezpečnostní pokyny – Náhradní díly
Trækløvnings
Brugsanvisning – Sikkerhedshenvisninger – Reservdeler
Page 25
Str 34
Side 42
Brandhoutsplijter
Bedieningshandleiding – Veiligheidsinstructies
Reserveonderdelen
Łuparka do trewna
Instrukcja obsługi
Wskazówki bezpieczeństwa
Części zamienne
Vedklyv
Bruksanvisning – Säkerhetsanvisningar – Reservdelar
Štiepač palivovéha dreva
Návod na obsluhu – Bezpečnostné pokyny
Náhradné dielce
Blz. 51
Stronie 60
Sidan 69
Strana 78
ASP 10-1350
Page 2

EG-Konformitätserklärung entsprechend der Richtlinie 98/37 EG
EC Declaration of Conformity according to Directive 98/37 EC
Déclaration de conformité de la CE conformément à la disposition 98/ 37 CE
Prohlášení o shodě podle směrnice EU č. 98/37 EG
EF-overensstemmelseserklæring i henhold til EF-direktiv 98/37/EF
EG-Verklaring van overeenstemming overeenkomstig de richtlijn van de raad 98/37 EG
EG-Deklaracja zgodności stosownie do Wytycznych 98/37 EG
EG-konformitetsintyg enligt EG-norm 98/37/EG
Prehlásenie o zhode podľa smernice EU č. 98/37 EG
ATIKA GmbH & Co. KG, Schinkelstraße 97, D-59227 Ahlen
erklären in alleiniger Verantwortung, dass das Produkt Brennholzspalter ASP 10 - 1350
auf das sich diese Erklärung bezieht, den einschlägigen grundlegenden Sicherheits- und Gesundheitsanforderungen der Richtlinien 98/37/EG, sowie den Anforderungen der anderen einschlägigen Richtlinien entspricht:
89/336/EWG, 73/23/EWG.
declare under our sole responsibility, that the product Log spliter ASP 10 - 1350
to which this declaration relates correspon ds to the relevant basic safety and health r equirements of the Directive 98/ 37/EC,
and to the requirements for the other relevant Directives: 89/336/EWG, 73/23/EWG.
déclarons en responsabilité propre, que le produit Fendeur de bois à brûler ASP 10 - 1350
auquel se rapporte la présente déclaration, corre spondes aux exigences de sécur ité et de santé fondamentales des dis positions 98/37/CE, ainsi qu’aux exigences des autres dispositions en la matière : 89/336/EWG, 73/23/EWG.
prohlašuje se vší odpovědností, že výrobek Štípač palivového dřeva ASP 10 – 1350
na který se vztahuje toto prohlášení, odpovídá příslušným základním bezpečnostním a zdravotním podmínkám směrnice
98/37 EG, jakož i podmínkám dalších příslušných sm ěrnic: 89/336/EWG, 73/23/EWG.
erklærer på eget ansvar, at produkt, Trækløvnings ASP 10 - 1350
som er omfattet af denne erklæring, overholder de relevante grundlæggende sikkerheds- og sundhedskrav i EF-direktiv
98/37/EF samt kravene i andre EF-direktiver, der kan finde anvendelse: 89/336/EWG, 73/23/EWG.
verklaren, iutsluitende verantwoordelijkheid, dat het produkt Brandhoutsplijter ASP 10 - 1350
waarop deze verklaring betrekking heeft, voldoet aan de desbetreffende veiligheids- en gezonheidseisen van de richtlijn
98/37/EG, alsmede aan de eisen van de ander e desbetreffende richlijnen: 89/336/EWG, 73/ 23/EWG.
oświadcza, przyjmując na siebie wyłączną odpowiedzialność, że następujący produkt, Łuparka do trewna ASP 10 - 1350
którego to oświadczenie dotyczy, odpowiada Wytycznym 98/37/EG określającym wymagania w zakresie bezpieczeństwa i
zdrowotności, a także wymaganiom wszystkich innych Wytycznych znajdujących zastosowanie w powyższym zakresie:
89/336/EWG, 73/23/EWG.
intygar med ensamansvar att nedanstående produkt, Vedklyv ASP 10 - 1350
för vilket detta intyg gäller, uppfyller, grundläggande säkerhets- och hälsoskyddsfäreskrifter enligt EG-n orm 98/37/EG, samt
uppfyller kraven enligt övriga gällnade EG-normer: 89/336/EWG, 73/23/EWG.
vyhlasuje so všetkou zodpovednosťou, že výrobok Štiepačka palivového dreva ASP 10 – 1350,
na ktorú sa vzťahuje toto prehlásen ie zodp ov ed á prís lu šný m zákla dný m b e zpe čnostn ým a zdrav otným podm ie nkam s m ern ice
98/37 EG, ako aj podmienkam ďalších prísluš ných smerníc: 89/336/EWG, 73/23/EWG.
Ahlen, 30.01.2007 A. Pollmeier, Geschäftsführung
1
Page 3

GGeerräätteebbeesscchhrreeiibbuunngg --
DDeessccrriippttiioonn ooff ddeevviiccee
DDeessccrriippttiioonn ddee ll''aappppaarreeiill --
BBeesskkrriivveellssee aaff aappppaarraatteett --
OOppiiss uurrzząąddyyeenniiaa --
BBeesskkrriivvnniinngg --
PPooppiiss ppřřííssttrroojjee
TTooeesstteellbbeesscchhrriijjvvnniinngg
s pprrííssttrroojjaa
PPooppiis
2
Page 4

GGeerräätteebbeesscchhrreeiibbuunng
g
--
DDeessccrriippttiioonn ooff ddeevviicce
e
--
DDeessccrriippttiioonn ddee ll''aappppaarreeiil
Ersatzteil-Nr.
Spare part no.
N° de pièce de
rechange
číslo náhr.dílu
1 Spaltmesser Splitting blade Lame de fendgage Štípací nůž
2 359246 Spaltkreuz Splitting cross Croix de fendage Štípací kříž
3 359247 Fixierschraube Fixing screw Vis de fixation Zajiš ťovací šroub
4 359233 Spannpratze Clamping claw Griffes de serrage Upínací lišty
5 359234 Griffschutz links Handle protection left Protection de la poignée
6 359238 Tischplatte Table plate Dessus de table Stolní deska
7 Tisch Table Table Stůl
8 359239 Arretierungshebel Locking lever Levier de blocage Aretovací páka
9 359248 Öltankverschluss mit
10 Sockel Base Socle Sokl
11 359243 Rad Wheel Roue Kola
12 Ein- / Ausschalter On / Off-switch Interrupteur marche / arrêt Zapínač / vypínač
13 Motor Motor Moteur Motor
14 359232 Griffschutz -rechts Handle protection
15 359231 Bedienungsgriff Control handle Leviers de commande Ovládaci úchyty
16 359245 Handgriff Handle Poignée Držadlo
17 Hubeinstellstange Stroke adjustment
18 359237 Feststellschraube Holding screw Vis de fixation Zajišt' ovaci šroub
19 359235 Oberer Handgriff Upper handle Poignée supérieure Horní madlo
20 Hydraulikventil Hydraulic valve Valve hydraulique Hydraulický ventil
21 359227 Sicherheitsaufkleber Safety label Etiquette de sécurité Bezpečnostní nálepka
22 359228 Sicherheitsaufkleber Safety label Etiquette de sécurité Bezpečnostní nálepka
23 359229 Sicherheitsaufkleber Safety label Etiquette de sécurité Bezpečnostní nálepka
359264 Feder (für Pos. 7) Spring (for pos.7) Ressort (pour pos. 7) Pružina (pos. 7)
400142 Hydrauliköl (1 Liter) Hydraulic oil (1 litre) Huile hydraulique (1 litres) Hydraulický olej (1 liter)
Bezeichnung
Ölmessstab
Description
Oil tank cap with dip
stick
right
rod
l
--
PPooppiiss ppřřííssttrroojje
Désignation
gauche
Bouchon du réservoir d’huile
avec jauge d’huile
Protection de la poignée droit Ochrana držadla levé
Tige de réglage du la course Tyč pro nastavení zdvihu
e
Popis
Ovládaci rameno levé
Zátka olejové nádrže s
měrkou oleje
3
Page 5

BBeesskkrriivveellssee aaff aappppaarraatteet
t
--
TTooeesstteellbbeesscchhrriijjvvnniinng
g
Reservedelsnr.
Reserveonder-
deelnummer
Nr części
zamiennej
Reservdelsnr.
Objednávacie č
1 Spaltekniv Splijtmes Nóż rozłupujący Klyvkniv Štiepací nôž
2 359246 Kløvekryds Splijtkruis Krzyżak łuparki Klyvningkors Štiepací kríž
3 359247 Låseskrue Fixeerbout śruba ustalająca Fixiersskruv Zaisťovacia
4 359233 Spændekløer Spanklauwen Łapa zaciskowa Spännklor Napínacie lišty
5 359234 Grebsbeskyttelse
6 359238 Bordplade Tafelplaat Płyta stołu Bordsplatta Stolová doska
7 Bord Tafel Stół Bord Štiepací nôž
8 359239 Låsearm Vergrendelings-
9 359248 Olietankdæksel
10 Sokkel Sokkel Cokół Sockel Sokel
11 359243 Hjul Wielen Koła Hjul Kolesá
12 Tænd- / slukknap In- / uit-sc hakelaar Wyłącznik Till-/Från-brytare Zapínanie/
13 Motor Motor Silnik Motor Motor
14 359232 Grebsbeskyttelse
15 359231 Betjeningshåndtag Bedieningsgreep Uchwyt obsługowy Manöverspakarna Ovládacie úchytky
16 359245 Håndgreb Handgreep Uchwyt Handtag Držiak
17 Stang til slaglæng-
18 359237 Låseskrue Vergrendelbout Ścruba mocująca Låsskruv Istiaca skrutka
19 359235 Øverste håndgrebf Bovenste
20 Hydraulikventil Hydraulische klep Zawór
21 359227 Sikkerhedsmærkat Veiligheidssticker Naklejka
22 359228 Sikkerhedsmærkat Veiligheidssticker Naklejka
23 359229 Sikkerhedsmærkat Veiligheidssticker Naklejka
359276 Fjeder (for pos. 7) Veer (voor pos. 7) Sprężyna (naprze 400142 Hydraulikolie
OOppiiss uurrzząąddyyeenniia
Betegnelse
til venstre
med oliemålepind
til højre
deinstilling
(1liter)
Benaming
Greepbeveiliging
links
hendel
Olietanksluiting
met oliepeilstok
Greepbeveiliging
rechts
Slaginstelstang Drążek do nasta-
handgreep
Hydraulische olie
(1 l)
a
--
BBeesskkrriivvnniinngg --
Oznaczenie
osłona uchwytu
lewe
Dźwignia
blokująca
Korek zbiornika
oleju z prętem do
pomiaru poziomu
oleju
osłona uchwytu
prawe
wiania wielkości
skoku
Uchwyt górny Övre handtag Horné madlo
hydrauliczny
zabezpieczająca
zabezpieczająca
zabezpieczająca
ciw pos. 7)
Hydraulolja (1 liter) Hydraulolja (1 liter) Hydraulický olej
4
Beteckning
Greppskydd
vänster
Låsspak Aretovacia páka
Oljetanklock med
oljemätsticka
Greppskydd höger Ovládacie rameno
Slagningställings
stång
Hydraulikventil Hydraulický ventil
Säkerhetsklister-
märke
Säkerhetsklistermärke
Säkerhetsklistermärke
Fjäder (för pos. 7) Pružina (pos. 7)
PPooppiis
s
pprrííssttrroojja
a
Označenie
skrutka
Ovládacie rameno
ľavé
Uzáver olejovej
nádrže
s odmerkou oleja
Vypínanie
pravé
Tyč na nastavenie
zdvihu
Bezpečnostná
nálepka
Bezpečnostná
nálepka
Bezpečnostná
nálepka
(1 liter)
Page 6

ZZuussaammmmeennbbaauu --
AAsssseemmbbllyy --
MMoonnttaaggee --
MMoonnttááž
ž
MMoonntteerriinng
g
-
-
MMoonnttaaggee --
MMoonnttaażż --
MMoonntteerriinngg -- MMoonnttáážž
Bedienarme montieren
Positionieren Sie die Unterlegscheibe
Mount control arms
Position the washer.
Montage des bras de commande
Positionnez la rondelle
Montáž ovládacích ramen
Podložky dejte do správné polohy.
Montering af betjeningsarme
Positionér underlægskiven
Bedieningsarmen monteren
Plaats de onderlegring
Montaż ramion obsługowych
Umieścić podkładkę
Montera manöverarmarna
Positionera underläggsbricko rna.
Montáž ovládacích ramien
Podložky dajte do správnej polohy.
Legen Sie die Bedienarme (A) auf und führen
Sie die Querstreben (B) in die Aussparung der
Querverbindung (C).
.
.
.
.
.
Tip: Fetten Sie vorher die Blechlaschen ein!
Tip: grease the metal plates at top and bottom first!
Astuce: Graissez les pattes en tôle au préalable sur le dessus et l e d essous!
Tip: Namažte nejdříve plechové spojky nahoře a dole!
Tip: Smør forinden bliktungerne oppe og nede med fedt!
Tip: vet eerst de plaatlippen boven en onder in!
Wskazówka: Wcześniej przesmaruj blaszane nakładki u góry i od dołu!
Tips: Fetta in bindningsplåtarna i förväg, både upptill och nedtill!
Tip: Natrite najskôr plechové spojky hore a dole!
Position the control arms (A) and insert the
cross struts (B) into the recesses of the cross
connection (C).
Disposez les bras de commande (A) et guidez
les traverses (B) dans l’interstice du raccord
horizontal (C).
Vložte ovládací ramena(A) a veďte
příčné vzpěry do vybrání příčného spojení (C).
Læg betjeningsarmene (A) på og før tværstøt-
terne (B) ind i udsparingen på tværforbindelsen
(C).
Leg de bedienarmen (A) op en voer de
dwarssteunen (B) in de uitsparing van de
dwarsverbinding (C).
Nałożyć ramiona obsługowe (A) i wprowadzić
drążki poprzeczne (B) do wybrania połączenia
poprzecznego (C).
Lägg upp manöverarmarna (A) och för in
tvärsträvorna (B) in i ursparningarna på
tvärförbindningen (C).
Vložte ovládacie ramená (A) a veďte priečne
podpery do vybrania priečneho spojenia (C).
5
Page 7

ZZuussaammmmeennbbaauu --
AAsssseemmbbllyy --
MMoonnttaaggee --
MMoonnttááž
ž
MMoonntteerriinng
g
-
-
MMoonnttaaggee --
MMoonnttaażż --
1 x
MMoonntteerriinngg -- MMoonnttáážž
Sichern Sie die Bedienarme mit den Schrauben,
den Unterlegscheiben und den Muttern.
Secure the operating levers using the scre ws,
washers and nuts.
Fixez les bras de commande à l’aide des vis,
des rondelles et des écrous.
Zajistěte ovládací ramena rouby,podložkami a
maticemi.
Fastgør betjeningsarmene med medfølgende
skruer, skiver og møtrikkerne.
Zeker de bedienarmen met schroeven, onderlegringen en moeren.
Zabezpieczyć ramiona obsługowe śrubami,
podkładkami i nakrętkami.
Säkra manöverarmarna med skruvarna,
underläggsbrickorna och muttrarna.
Zaistite ovládacie ramená skrutkami, podložkami
a maticami.
2 x
1x
Räder montieren.
Mount wheels
Montage des roues
Montáž kol
Montering af hjul
Wielen monteren
Montera hjulen
Montaż kół
Montáž kolies
6
Page 8

Sie dürfen die Maschine nicht in Betrieb
nehmen, bevor Sie diese Bedienungsanleitung gelesen, alle angegebenen Hinweise
beachtet und das Gerät wie beschrieben
montiert haben.
Anleitung für künftige Verwendungen aufbewahren.
Beim Arbeiten Schutzbrille oder Schutzvisier tragen, um die Augen vor Spänen
und Splittern zu schützen.
Halten Sie Ihren Arbeitsbereich in Ord-
nung! Unordnung kann Unfälle zur Folge
haben.
IInnhhaalltt
Konformitätserklärung 1
Gerätebeschreibung / Ersatzteile 2
Zusammenbau 5
Lieferumfang 7
Symbole 7
Bestimmungsgemäße Verwendung 8
Restrisiken 8
Sicheres Arbeiten 8
Transporthinweise 9
Aufstellen 9
Inbetriebnahme 9
Arbeiten mit dem Brennholzspalter 10
Wartung und Pflege 13
Garantie 14
Technische Daten 15
Mögliche Störungen 15
LLiieeffeerruummffaanngg
Überprüfen Sie nach dem Auspacken den Inhalt des
Kartons auf
! Vollständigkeit
! evtl. Transportschäden
Teilen Sie Beanstandungen umgehend dem Händler, Zulieferer bzw. Hersteller mit. Spätere Reklamationen werde n nicht
anerkannt.
1 vormontierte 2 Räder
Geräteeinheit 1 Zubehörbeutel
1 Bedienarm rechts/ links 1 Bedienungsanleitung
1 Achse
SSyymmbboollee GGeerräätt
Vor Inbetriebnahme die Bedienungsanleitung und Sicherheitshinweise lesen
und beachten.
Beim Arbeiten Sicherheitsschuhe tragen,
um den Fuß vor fallenden Stämmen zu
schützen.
Beim Arbeiten Schutzhandschuhe tragen,
um die Hände vor Spänen und Splittern zu
schützen.
Öl ist feuergefährlich und kann explodieren. Rauchen und offenes Feuer verboten.
Entsorgen Sie das Altöl ordnungsgemäß
(Altölsammelstelle vor Ort). Es ist verboten das Altöl in den Boden abzulassen
oder mit Abfall zu vermischen.
Es ist verboten, Schutz- und Sicherheitseinrichtungen zu entfernen oder zu verändern.
Nur der Bediener darf im Arbeitskreis der
Maschine stehen. Unbeteiligte Personen
sowie Haus- und Nutztiere aus dem Gefahrenbereich (Mindestabstand 5 m)
fernhalten.
Entfernen Sie verklemmte Stämme nicht
mit Ihren Händen.
Achtung!
Vor Reparatur-, Wartungs- und Reinigungsarbeiten Motor abstellen und Netzstecker ziehen.
Schnitt- und Quetschgefahr; niemals gefährliche Bereiche berühren, wenn sich
das Spaltmesser bewegt.
Halten Sie das Werkstück während des
Spaltens mit den Spannpratzen fest.
Richten Sie immer Ihre volle Aufmerksamkeit auf die Bewegung des Spaltmessers
Hochspannung, Lebensgefahr
SSyymmbbooll GGeerräätt // VVeerrppaacckkuunngg
Elektrische Geräte gehören nicht in den Hausmüll.
Geräte, Zubehör und Verpackung einer umweltfreundlichen Wiederverwertun g zuführen.
7
Page 9

SSyymmbboollee BBeeddiieennuunnggssaannlleeiittuunngg
Drohende Gefahr oder gefährliche Situation. Das
Nichtbeachten dieser Hinweise kann Verletzungen
zur Folge haben oder zu Sachbeschädigung führen.
L
BBeessttiimmmmuunnggssggeemmääßßee VVeerrwweenndduunngg
Der Brennholzspalter ist nur zum Spalten von Holz ein-
Nur gerade abgeschnittenes Holz ist für den Brennholz-
Fremdkörper (Nägel, Draht, Beton etc.) sind aus dem zu
Jeder darüber hinausgehende Gebrauch gilt als nicht
RReessttrriissiikkeenn
Wichtige Hinweise zum sachgerechten Umgang.
Das Nichtbeachten dieser Hinweise k ann zu Störungen führen.
Benutzerhinweise. Diese Hinweise helfen Ihnen,
alle Funktionen optimal zu nutzen.
Montage, Bedienung und Wartung. Hier wird Ihnen
genau erklärt, was Sie tun müssen.
setzbar.
spalter geeignet.
spaltenden Holz unbedingt zu entfernen.
bestimmungsgemäß. Für daraus resultierende Schäden
haftet der Hersteller nicht – das Risiko dafür trägt ausschließlich der Benutzer.
Auch bei bestimmungsgemäßer Verwendung können
trotz Einhaltung aller einschlägigen Sicherheitsbestimmung en
aufgrund der durch den Verwendungszweck bestimmten
Konstruktion noch Restrisiken bestehen.
Restrisiken können minimiert wer den, wenn die „Sicherheitshinweise“ und die „Bestimmungs gemäß e Verwend ung“, so wie
die Bedienungsanleitung insgesamt be achtet werden.
Rücksichtnahme und Vorsicht verringern das Risiko von Personenverletzungen und Beschädigungen.
Ignorierte oder übersehene Sicherheitsvorkehrungen
können zu Verletzungen beim Be diener oder zu Beschädigungen von Eigentum führen.
Durch Unachtsamkeit, Nichteinhaltung der Sicherheitsb e-
stimmungen und unsachgemäßer Verwendung kann es zu
Verletzungen an der Hand oder an den Fingern durch das
bewegte Spaltmesser kommen.
Gefährdung durch Strom, bei Verwendung nicht ord-
nungsgemäßer Elektro-Anschlussleit ungen.
Berührung spannungsführender Teile bei geöffneten elekt-
rischen Bauteilen.
Des weiteren können trotz aller getroffener Vorkehrungen
nicht offensichtliche Restrisiken bestehen.
SSiicchheerreess AArrbbeeiitteenn
Lesen und beachten Sie vor Inbetriebnahme dieses
Erzeugnisses die folgenden Hinweise und die im jeweiligen Land gültigen Sicherheitsbestimmungen, um sich
selbst und andere vor möglichen Verletzungen zu schützen.
Geben Sie die Sicherheitshinweise an alle Persone n
L
weiter, die mit der Maschine arbeiten.
Bewahren Sie diese Sicherheitshinweise gut auf.
L
Seien Sie aufmerksam. Achten Sie darauf, was Sie tun.
Gehen Sie mit Vernunft an die Arbeit. Verwenden Sie d as
Gerät nicht, wenn Sie müde sind oder unter dem Einfluss
von Drogen, Alkohol oder Medik amenten stehen. Ein Moment der Unachtsamkeit beim Gebrauch des Gerätes
kann zu ernsthaften Verletzungen führen.
Machen Sie sich vor Gebrauch mit Hilfe der Bedien-
ungsanleitung mit der Maschine vertraut.
Benützen Sie die Maschine nicht für Zwecke, für die sie
nicht bestimmt ist (siehe „Bestimmungsgemäße Verwendung“ und „Arbeiten mit dem Brennholzspalter “).
Sorgen Sie für sicheren Stand und halten Sie jederzeit
das Gleichgewicht.
Nehmen Sie eine Arbeitsstellung ein, die sich im Bereich
der Bedienungsgriffe befindet, Abb. 8.
Niemals auf der Maschine stehen.
Tragen Sie beim Arbeiten
− Schutzbrille oder Schutzvisier
− Arbeitshandschuhe
− Gehörschutz
− Sicherheitsschuhe mit Stahlkappe
Tragen Sie geeignete Arbeitskleidung:
− keine weite Kleidung oder Schmuck (sie können von
beweglichen Teilen erfasst werden)
Der Bedienende ist im Arbeitsbereich der Maschine ge-
genüber Dritten verantwortlich.
Kinder und Jugendliche unter 18 Jahren dürfen die
Maschine nicht bedienen.
Kinder von der Maschine fernhalten.
Setzen Sie die Maschine niemals ein, währ end unbetei lig-
te Personen in der Nähe sind.
Lassen Sie die Maschine nie unbeaufsichtigt.
Halten Sie Ihren Arbeitsbereich in Ordnung! Unordnung
kann Unfälle zur Folge haben.
Überlasten Sie die Maschine nicht! Sie arbeiten besser
und sicherer im angegebenen Leistungsbereich.
Betreiben Sie die Maschine nur mit kompletten und kor-
rekt angebrachten Schutzeinrichtungen und ändern Sie
an der Maschine nichts, was die Sicherheit beeinträchtigen könnte.
Die Maschine bzw. Teile der Maschine nicht verändern.
Die Maschine nicht mit Wasser abspritzen. (G efahrenquel-
le elektrischer Strom).
Maschine nicht im Regen stehen lassen oder be i Regen
arbeiten.
Nur an einem trockenen Ort außerhalb der Reichweite
von Kindern aufbewahren.
8
Page 10

Schalten Sie die Maschine ab und ziehen Sie den Netz-
stecker aus der Steckdose bei:
− Reparaturarbeiten
− Wartungs- und Reinigungsarbeiten
− Beseitigun g von Störungen
− Überprüfungen der Anschlussleitungen, ob diese ver-
schlungen oder beschädigt sind
− Transport
− Verlassen (auch bei kurzzeitigen Unterbrechungen)
Überprüfen Sie die Maschine auf eventuelle Beschädi-
gungen:
− Vor weiterem Gebrauch des Gerätes müssen Schutz-
vorrichtungen sorgfältig auf ihre einwandfreie und
bestimmungsgemäße Funktion untersucht werden.
− Überprüfen Sie, ob die beweglichen Tei le einwandfrei
funktionieren und nicht klemmen oder ob Teile beschädigt sind. Sämtliche Teile müssen richt ig montiert
sein und alle Bedingungen erfüllen, um einwandfreien
Betrieb sicherzustellen.
− Beschädigte Schutzvorrichtungen und Teile müs-
sen sachgemäß durch eine anerkannt e Fachwerkstatt
repariert oder ausgewechselt werden, soweit nichts
anderes in der Gebrauchsanweisung an ge ge ben ist.
− Beschädigte oder unleserliche Sicherheitsaufkleber
sind zu ersetzen.
Elektrische Sicherheit
Ausführung der Anschlussleitung nach IEC 60245 (H 07
RN-F) mit einem Aderquerschnitt von mindestens
⇒ 230 V ~
3 x 1,5 mm² bei einer Kabellänge bis max. 10 m
⇒ 400 V 3~
5 x 1,5 mm² bei einer Kabellänge bis max. 10 m
Niemals Anschlussleitungen über 10 m verwenden. Län-
gere Anschlussleitungen erzeugen einen Spannungsabfall. Der Motor erreicht nicht mehr seine maximale Leistung, die Funktion der Maschine wird reduziert.
Beim Verlegen der Anschlussleitungen darauf achten,
dass sie nicht gequetscht, geknickt und die Steckverbindung nicht nass wird.
Verwenden Sie das Kabel nicht für Zwecke, für die es
nicht bestimmt ist. Schützen Sie das Kabel vor Hitze, Öl
und scharfen Kanten. Verwenden Sie das Kabel nicht,
um den Stecker aus der Steckdose zu ziehen .
Kontrollieren Sie Verlängerungskabel regelmäßig und
ersetzen Sie sie, wenn sie beschädigt sind.
Verwenden Sie keine defekten Anschlussleitungen.
Verwenden Sie im Freien nur dafür zugelassene und
entsprechend gekennzeichnete Verlängerun gsk abel.
Keine provisorischen Elektroanschlüsse einsetzen.
Schutzeinrichtungen niemals überbrücken oder außer
Betrieb setzen.
Der Elektroanschluss bzw. Reparaturen an elektri-
schen Teilen der Maschine haben durch eine konzessi-
onierte Elektrofachkraft oder eine unserer Kundendienststellen zu erfolgen. Örtliche Vorschriften insbesondere hinsichtlich der Schutzmaßnahmen sin d zu beachten.
Reparaturen an anderen Teilen der Maschine haben
durch den Hersteller bzw. einer seiner Kundendienststellen zu erfolgen.
Nur Originalersatzteile verwenden. Durch den
Gebrauch anderer Ersatzteile und anderen Zubehörs
können Unfälle für den Benutzer entstehen. Für hieraus
resultierende Schäden haftet der Hersteller nicht.
TTrraannssppoorrtthhiinnwweeiissee
Vor jedem Transport das Spaltmesser ga nz nach unte n
fahren.
Zum Transpor-
tieren fassen Sie
mit einer Hand
5
Transportband
an den Bügel
und kippen den
Holzspalter leicht
zu sich hin. In
dieser Stellung
kann der Spalter
mühelos transportiert werden.
Um Ölaustritt
beim Transport
zu vermeiden,
muss der Öltankverschluss
fest verschraubt
sein.
AAuuffsstteelllleenn
Blockieren Sie die Räder mit Kei len, um ein Rollen während
des Betriebes zu vermeiden.
Achten Sie darauf, dass der Arbeitsbereich folgende Bedingungen erfüllt:
− rutschfest
− eben
− frei von Stolpergefahren
− ausreichende Lichtverhältnisse
Die Maschine nicht in der Nähe von Erdgas, Benzinrinnen oder anderen leicht brennbaren Materialien betreiben.
IInnbbeettrriieebbnnaahhmmee
Vergewissern Sie sich, dass die Maschin e komplett und
vorschriftsmäßig montiert ist.
Überprüfen Sie vor jedem Gebrauch:
− die Anschlussleitungen auf defekte Stellen (Risse,
Schnitte o. dgl.)
verwenden Sie keine defekten Leitungen
9
Page 11

− die Maschine auf eventuelle Beschädigungen
(siehe. Sicheres Arbeiten)
− ob alle Schrauben fest angezogen sind
− die Hydraulik auf Leckstellen
− den Ölstand
− Entlüften: Entlüften Sie die Hydraulikanlage, bevor
Sie den Brennholzspalter in Betrieb nehmen.
¾ Lösen Sie den Öltankverschluss ( 9) einige Umdrehungen, damit Luft aus dem Öltank entweichen kann.
¾ Lassen Sie die Kappe während des Betri ebes geöffnet.
¾ Bevor Sie den Brennholzspalter bewegen, schließen
Se den Öltankverschluss wieder, da sonst Öl ausläuft.
i
L Wenn die Hydraulikanlage nicht entlüftet wird, beschä-
digt die eingeschlossene Luft die Dichtun gen und verursacht eine dauerhaft Beschädigung des Brennholzspalters.
L Netzanschluss
Vergleichen Sie die auf dem Gerätetypenschild angege-
bene Spannung mit der Netzspannung und schließen Sie
das Gerät an die entsprechende und vorschriftsmäßige
Steckdose an.
Verwenden Sie Verlängerungskabel mit ausreichendem
Querschnitt.
Schließen Sie die Maschine über ei nen Fi-Schutzschalter
(Fehlerstrom-Schutzschalter) 30 mA an.
L Absicherung
400 V 3~ Î 16 A
L Ein- / Ausschalten
Überprüfen Sie vor jedem Gebrau ch die Funktion der
Ausschaltvorrichtung (durch Ein- und Ausschalten).
Benutzen Sie kein Gerät, bei dem sich der Schalter nicht
ein und ausschalten lässt. Beschädigte Schalter müssen
unverzüglich vom Kundendienst repariert oder ersetzt
werden.
6
Einschalten
Drücken Sie den grünen
Knopf.
Ausschalten
Drücken Sie den roten
Knopf.
L Wiederanlaufsicherung bei Stromunter-
brechung (Nullspannungsauslöser)
Bei Stromausfall, unbeabsichtigtes Ziehen des Steckers,
defekte Sicherung usw. schaltet das Gerät automatisch ab.
Zum Wiedereinschalten drücken Sie erneut den gr üne n Knopf
am Ein-/Ausschalter.
Brennholzspalter mit 400 V 3~
Achten Sie auf die Drehrichtung des Motors (siehe Motorpfeil), denn der Betrieb mit falscher Drehrichtung beschädigt die Ölpumpe.
Überprüfen der Drehrichtung:
¾ Motor einschalten; das Spaltmesser (1) fährt aut omatisch
in die höchste Position.
¾ Befindet sich das Spaltmesser bereits in der höchsten
Position: greifen Sie beide Bed ienarme (15) und drücken
Sie sie herunter, das Spaltmesser fährt nach unten.
¾ Bewegt sich das Spaltmesser nicht, nachdem der Motor
anläuft, schalten Sie den Motor aus, und ändern die Drehrichtung.
7
Sie können die Drehrichtung ändern,
indem Sie einen
Schraubendreher in
den hierfür vorgesehenen Schlitz im
Steckerkragen führen und mit leichtem
Druck durch Linksoder Rechtsbewegung die richtige
Drehrichtung einstellen.
L Hydraulik
Niemals die Maschine betreiben, wenn eine Gefahr durch
Hydraulikflüssigkeit besteht.
Stellen Sie sicher, dass die Maschine und der Arbeitsbe-
reich sauber und frei von Ölflecken sind.
Rutsch- und Feuergefahr!
Überprüfen Sie regelmäßig, ob genügend Hydrauliköl im
Behälter ist (siehe Wartung und Pflege)
Inhalt: 7,0 Liter
AArrbbeeiitteenn mmiitt ddeemm BBrreennnnhhoollzzssppaalltteerr
zusätzliche SICHERHEITSHINWEISE
Der Holzspalter darf nur von einer einzelnen P erson be-
dient werden.
Nur Personen über 18 Jahre, die die Bedien ungsanleitu ng
gelesen und verstanden haben, dürfen die Maschine bedienen.
Tragen Sie Ihre Schutzausrüstungen (Schutzbrille/-visier,
Handschuhe, Sicherheitsschuhe), um sich vor möglichen
Verletzungen zu schützen.
Niemals Stämme spalten, die Nägel, Draht oder andere
Gegenstände enthalten.
10
Page 12

Bereits gespaltenes Holz und Holzspäne erzeugen einen
gefährlichen Arbeitsbereich. Es besteht die Gefahr des
Stolperns, Ausrutschens oder Hinfallens. Halten Sie den
Arbeitsbereich immer aufgeräumt.
Niemals bei eingeschalteter Maschine die Hände auf sich
bewegende Teile der Maschine leg en.
Spalten Sie nur Holz, das der max. zu verarbeitenden
Länge von 1350 mm entspricht.
L Überprüfen Sie vor dem Spalten, ob die Spaltsäule
ausreichend gefettet ist, damit diese proble mlos ein- und
ausfahren kann.
Was kann ich spalten?
Größe der zu spaltenden Stämme
Holzlänge: max. 1350 mm
Holzdurchmesser: min. 120 – max. 400 mm
Der Holzdurchmesser ist ein empfohlener Richtwert, we il:
− dünnes Holz kann schwer zu spalten sein, we nn es Astlö-
cher enthält oder die Fasern zu stark sind.
− dickeres Holz als ∅ 400 mm kann gespalten werden,
wenn die Fasern glatt und locker sind.
Spalten Sie keine grünen Stämme. Trockene, gelagerte
Stämme spalten sich viel leichter und v erursa che n ni cht so oft
ein Festfressen wie grünes (nasses) Holz.
Bedienung
8
3. Halten Sie den Stamm mit den Spannpratzen fest.
4. Drücken Sie beide Bedienungsgriffe gleichzeitig nach
unten.
Î Das Spaltmesser fährt herunter und der Stamm wird
gespalten.
5. Lassen Sie beide Bedienungsgriffe los, das Spaltmesser
fährt in seine Ausgangsposition zurück.
L Lassen Sie nur einen Bedienungsgriff l os, bleibt das
Spaltmesser stehen.
Besondere Hinweise zum Spalten:
Zweihandbetrieb
Bedienen Sie den Holzspalter niemals mit zwei Perso-
nen.
Blockieren Sie niemals die Bedienungsgriffe (Spann-
pratzen).
1. Drücken Sie den grünen Einschaltknopf. Warten Sie ein
paar Sekunden, damit der Motor seine Enddrehzahl erreicht und der Druck in der Hydraulikpumpe aufgebaut
wird.
L Achten Sie auf die Motorlaufrichtung bei Brennholz-
spaltern mit Drehstrommotor (400 V 3~), denn der Betrieb
mit falscher Drehrichtung beschädigt die Ölpumpe.
L Bei Temperaturen unter –5° C den Holzspalter min-
destens 15 min. im Leerlaufbetrieb laufen lassen, damit
sich das Öl erwärmen kann.
2. Stellen Sie den Stamm auf den Tisch des Spalters.
L Bearbeiten Sie das Spaltgut ausschließlic h in Faser-
richtung.
Vorbereitungen:
Bereiten Sie das zu spaltende Holz auf die maximal zu verarbeitenden Abmessungen vor und achten Sie darauf, dass das
Holz gerade geschnitten ist.
Legen Sie sich das Holz am Holzspalter so zurecht, dass
keine Gefahr für Sie besteht (Stolpergefahr).
Hubhöhenverstellung
Bei kürzeren Holzstücken können Sie die Arbeitsleistung
durch Verkürzen des Spaltmesserrücklaufs steigern.
1. Stell en Sie Stamm auf
den Spalttisch und
fahren das Spaltmesser durch herunterdrücken der beiden
Bedienungsgriffe bis
ca. 3 - 5 cm an den
Stamm heran.
2. Lassen Sie einen
Bedienungsgriff los,
damit das Spaltmesser in dieser Position
stehen bleibt und
schalten Sie das Gerät aus
9
11
Page 13

10
3. Netzstecker ziehen.
4. Lassen Sie den zweiten Bedienungsgriff los.
5. Verk ürzen Sie den Rücklauf an der seitlich angebracht en
Stange, indem Sie die Feststellschraube in der erf orderlichen Höhe fixieren.
12
11
Feststellschraube
Tischhöhe einstellen
obere Position der Tischplatte für Stämme bis 59 cm
mittlere Position des Tisches für Stämme bis 85 cm
untere Position des Sockels für Stämme bis 135 cm
1. Spalten Sie Stämme bis 59 cm auf der Tischplatte (6).
2. Spa lten Sie Stämme bis 85 c m auf dem Tisch (7). Ziehen
Sie die Tischplatte (A) heraus.
3. Spalten Sie Stämme bis 135 cm auf dem Sockel (10).
Drücken Sie den Arretierungshebel (8) herunter und
schwenken Sie den Tisch (7) zur Seite.
Spaltkreuz justieren:
1. Fixierschraube lösen.
2. Das Spaltkreuz in die erforderliche Position schieben.
3. Fixierschraube wieder festziehen.
13
Fixierschraube
Spaltkreuz
Kurzholz spalten:
1. ob ere Pos ition der Tisch platte
2. Stellen Sie den Stamm auf die Tischplatte des Spalters.
L Bearbeiten Sie das Spaltgut ausschließlic h in Faser-
richtung.
3. Halten Sie den Stamm mit den Spannpratzen fest.
12
Page 14

Langholz spalten:
1. Mittlere und
untere Position des Tisches oder
des Sockels.
2. Entfernen Sie
das Spaltkreuz.
3. Stellen Sie
den Stamm
auf den Tisch
oder den Sockel des Spalters.
14
L Mögliche Störung beim Lang holz spalten: Das Spaltgut
wird nicht durchgespalten, klemmt am Spaltmesser fest und
wird beim Rücklauf mit hochgezogen. Der Stamm lässt sich
nicht mehr von Hand lösen.
In diesem Fall gehen Sie folgendermaß en vor:
1. Schalten Sie das Gerät aus.
2. Befestigen Sie, je nach Länge des noch zu spaltendenStammes, die Tischplatte (6) in der oberen Position oder
schwenken Sie den Tisch (7) herum.
3. Sch alten Sie das Gerät ein und setzen Sie den Spaltvorgang fort.
¾ Niemals zwei Stämme in einem Arbeitsgang spalten.
¾ Niemals Holz während des Arbeitvorganges nachlegen
oder ersetzen.
WWaarrttuunngg uunndd PPfflleeggee
Vor Wartungs- und Reinigungsarbeiten
Netzstecker ziehen.
Schutzhandschuhe tragen, um Verletzungen an den
Händen zu vermeiden.
L Bea chten Sie folgendes, um die Funktionsfähigkeit des
Brennholzspalters zu erhalten:
Reinigen Sie die Maschine nach Arbeitsende gründ-
lich.
Entfernen Sie Harzrückstände.
Fetten Sie die Spaltsäule regelmäßig ein oder ölen
Sie diese mit einem umweltfreundlichen Sprühöl ein.
Ölstand prüfen bzw. Öl auswechseln.
Überprüfen Sie Hydraulikschläuche und Schlauch-
verbindungen regelmäßig auf Dichtigkeit und Festig-
Spaltmesser schärfen
Nach langer Betriebsdauer, bei verminderter Spaltleistung
oder bei leichter Verformung der Schneid e das Spaltmesser
abschleifen oder mit einer feinen Feile schärfen (Grate entfernen).
keit.
15
L Niemals durch Aufrechterhalten des Sc hubs über m eh re-
re Sekunden ein Spalten des Stammes erz wingen. Dies kann
zu Beschädigungen an der Maschine führen.
Positionieren Sie den Stamm erneut auf dem Tisch und wiederholen Sie den Spaltvorgang oder legen Sie den Stamm
zur Seite.
Wie wird ein festgeklemmter Stamm gelöst?
Es besteht die Gefahr, dass sich astiges Spaltgut beim Spaltvorgang verklemmt.
1. Gerät ausschalten und Netzstecker ziehen.
2. De n festgeklemmten Stamm vorsichtig hin- und herbewegen, damit sich der Stamm lösen kann.
Beim Lösen niemals auf den festgeklemmten Stamm
hämmern.
Sägen Sie den eingeklemmten Stam m niemals heraus.
Bitten Sie keine zweite Person um Unterstützun g.
Arbeitsende:
¾ Fahren Sie das Spaltmesser in die untere Position (einge-
fahrener Zustand).
¾ Lassen Sie einen Bedienungsgriff los.
¾ Schalten Sie das Gerät aus und ziehen Sie den Netzste-
cker.
¾ Wartungs- und Pflegehinweise beachten.
Kanten
schärfen
Wie überprüfe ich den Ölstand?
1. Die Spaltsäule
muss im eingefahrenen Zustand
sein.
2. Ziehen Sie den
Ölmessstab heraus.
3. Säubern Sie den
Ölmessstab und
die Öldichtung.
4. Stecken Sie den
Messstab bis zum
Anschlag wieder in
die Öffnung.
5. Ziehen Sie den
Ölmessstab wieder
heraus.
16
13
Page 15

Liegt der
Ölpegel zwischen den
beiden Markierungen, ist
genug Öl im
Behälter.
17
Liegt der
Ölpegel unterhalb der unteren Markierung
muss Öl mit
Hilfe eines
sauberen Trichters nachgefüllt
werden.
untere Markierung obere Markierung
6. Überprüfen
Sie die Öldichtung.
Diese muss
bei Beschädigungen ausgetauscht werden.
7. Stecken Sie den Messstab wieder in die Öffnung.
Wann wechsle ich das Öl aus?
Erster Ölwechsel nach 50 Betriebsstunden, dann alle 500
Betriebsstunden.
Es sind zwei Personen erforderlich.
Auswechseln:
1. Die Spaltsäule muss im eingefahrenen Zustand sein.
2. Ziehen Sie den Ölmessstab heraus.
3. Stell en Sie einen Behälter, der mindestens 7 Liter Öl aufnehmen kann, unter den Holzspalter.
4. Schrauben
Sie den Ablassstopfen
ab, damit das
Öl raus laufen
kann.
5. Dichtung und
Ablassstopfen
wieder einsetzen.
6. Füllen Sie das
neue Hydrauliköl (7,0 Liter)
mit Hilfe eines sauberen Trichters ein.
7. Säubern Sie den Ölmessstab und die Öldich tung.
8. Überprüfen Sie die Öldichtung. Diese muss bei Beschädigungen ausgetauscht werden.
9. Stecken Sie den Messstab wieder in die Öffnung.
Entsorgen Sie das Altöl ordnungsgemäß (Altölsammelstelle vor Ort). Es ist verboten das Altöl in den Boden
abzulassen oder mit Abfall zu vermischen.
Ölmess-
stab
18
19
L Hydrauliköl
Für den Hydraulikzylinder empfehlen wir die folgenden
Hydrauliköle:
¾ Shell Tellus T 22
¾ Aral Vitam Gf 22
¾ BP Energol HLP 22
¾ Mobil DTE 11
¾ oder gleichwertiges
Keine anderen Ölsorten verwenden. Der Gebrauch von
anderen Ölsorten beeinflusst die Funktion des Hydraulikzylinders.
GGaarraannttiiee
• Wir übernehmen 2 Jahre Garantie ab Li eferung des G erä-
tes vom Lager des Händlers, und zwar für Mängel, die
durch Material- bzw. Fabrikationsfehler aufgetreten sin d.
• Für Schäden, die durch unsachgemäße Behandlung oder
unzureichende Verpackung beim Rü cktransport der Geräte bzw. Nichtbeachtung der Bedienungsanleitung entstehen, sind Garantieansprüche ausgeschlossen.
• Fehlerhafte Teile sind unserem Werk porto- bzw. frachtfrei
einzuschicken. Die Entscheidung auf kostenlose Ersatzteillieferung obliegt uns.
• Die Garantie erstreckt sich nicht auf den normalen Ver-
schleiß von Spaltkeil, Hydrauliköl, Führungen, Dichtungen
und Laufrädern.
• Anfallende Garantiearbeiten werden von uns ausgeführt.
Es bedarf unserer ausdrücklichen Ge nehmigung, die Behebung des Schadens von einer anderen Firma vornehmen zu lassen.
• Nur bei Verwendung von Original-Ersatzteilen leisten wir
Garantie.
• Änderungen, die dem technischen Fortschritt dienen,
behalten wir uns vor.
14
Page 16

TTeecchhnniisscchhee DDaatteenn
Modell ASP 10-1350
Typ-Bezeichnung ASP 10-1350
Spaltkraft
Holzlänge max. 1350 mm
Holzdurchmesser min. 120 – max. 400 mm
Spalthub
Vorlaufgeschwindigkeit ca. 0,04 m/sek.
Rücklaufgeschwindigkeit ca. 0,11 m/sek.
Hydrauliköl (max.) 7,0 Liter
Hydraulikdruck 21 MPa (210 bar)
Elektromotorleistung (Aufnahmeleistung) Wechselstrom P1 3800 W (S6-40%)
Drehstrom P1 3000 W (S6-40%)
Anschluss Drehstrom 400 V 3~ 50 Hz, 16 A
Abmessungen Länge 840 x Breite 920 x Höhe 1620 mm
Gewicht ca. 209 kg
100 kN (10 t) ± 10 %
≈ 550 mm
MMöögglliicchhee SSttöörruunnggeenn
Problem mögliche Ursache Beseitigung
Stamm wird nicht gespalten
(zu wenig Spaltleistung)
Spaltsäule fährt schwankend oder
mit starken Vibrationen ein
Spaltsäule fährt nicht ein
Motor läuft an, aber die Spaltsäule
wird nicht eingefahren
Motor läuft nicht an
⇒ Stamm ist nicht richtig positioniert
⇒ Stamm überschreitet die zulässigen Ab-
messungen oder das Holz ist für die Leistung der Maschine zu hart
⇒ Spaltmesser spaltet nicht
⇒ Hydraulikdruck zu niedrig
⇒ Auslösegestänge verbogen (Hydraulikstö-
ßel wird nicht ganz eingedrückt)
⇒ falsche Anschlussleitung (länger als 10 m
oder zu kleiner Aderquerschnitt)
⇒ Luft im Kreislauf
⇒ Spaltsäule nicht ausreichend eingefettet
bzw. eingeölt
⇒ Hydraulikpumpe defekt ⇒ Zur Problembehebung wenden Sie sich an den
⇒ falsche Drehrichtung des Motors ⇒ Drehrichtung des Motors überprüfen
⇒ Netzspannung fehlt
⇒ 2-Phasenlauf bei Drehstrommotor
⇒ Anschlusskabel defekt
⇒ Elektromotor defekt
⇒ positionieren Sie den Stamm erneut
⇒ Stamm auf zulässige Abmessungen schneiden
⇒ Spaltmesser schärfen, auf Grat oder Kerben
prüfen
⇒ Ölstand überprüfen; wenn nötig Öl nachfüllen.
Problem ist nicht zu beheben, bitte wenden Sie
sich an den Hersteller oder an von ihm benannte
Firma.
⇒ Gestänge vom Hersteller oder von ihm benannte
Firma nachjustieren lassen
⇒ richtige Anschlussleitung verwenden
⇒ Ölstand überprüfen; wenn nötig Öl nachfüllen.
⇒ Spaltsäule einfetten oder mit einem umwelt-
freundlichen Sprühöl einölen
Problem ist nicht zu beheben, bitte wenden Sie sich
an den Hersteller oder an eine von ihm benannte
Firma.
Hersteller oder an eine von ihm benannte Firma.
Drehstrom: Drehrichtung umstellen (s. Seite 10)
Wechselstrom: Zur Problembehebung wenden
Sie sich an den Hersteller oder an eine von ihm
benannte Firma.
⇒ Absicherung überprüfen
⇒ Sicherung und Zuleitung von einem Elektrofach-
mann überprüfen lassen
⇒ Anschlusskabel austauschen bzw. von einem
Elektrofachmann überprüfen lassen
⇒ Zur Problembehebung wenden Sie sich an den
Hersteller oder an eine von ihm benannte Firma.
15
Page 17

Do not operate machine before having read
the operating instructions, understood all
the notes and assembly the machine as
described here.
Keep the instructions in a safe place for future use.
CCoonntteennttss
Declaration of Conformity 1
Spare parts / Description of device 2
Assembly 5
Extent of delivery 16
Symbols 16
Proper use 17
Residual risks 17
Safe working 17
Transport instructions 18
Positioning 18
Start-up 18
Working with the log splitter 19
Care and maintenance 22
Guarantee 23
Technical data 23
Possible problems 24
Wear safety goggles when working with
the machine to protect the eyes from
chips and splinters.
Keep your work space tidy! Untidiness
may result in accidents.
Oil is a fire hazard and can explode.
Smoking and open fire are prohibited.
Dispose of the old oil properly (local oil
disposal point). The old oil must not be
poured into the ground or drainage
system, or mixed with other waste.
Do not remove or modify any protection
or safety devices.
Nobody else should be in the working
area of the machine other than the
operator. Keep other persons or animals
out of the danger area (minimum distance
5 m).
EExxtteenndd ooff ddeelliivveerryy
After unpacking, check the conte nts of th e box
! That it is complete
! Check for possible transport damage
Report any damage or missing items to your deal er, supplier
or the manufacturer immediately. Complaints made at a later
date will not be acknowledged.
1 ready mounted machine
unit
1 control arm, right / left 1 bag of accessories
1 axle 1 operati ng manual
SSyymmbboollss mmaacchhiinnee
Read the operating and safety
instructions thoroughly before starting the
machine.
Wear safety shoes when working w ith the
machine to protect the feet from falling
logs.
Wear safety gloves when working with
the machine to protect the hands from
chips and splinters.
2 wheels
Do not remove jammed logs with your
hands.
Caution!
Before starting any repair, maintenance
or cleaning work, always switch off the
motor and remove the plug from the
socket.
Cutting and crushing risk! Never touch
dangerous areas when splitting blade is
moving.
Hold the work piece when splitting with
the clamping claw.
Always pay full attention to the splitting
blade’s movement.
High voltage, danger to life!
SSyymmbboollss mmaacchhiinnee // ppaacckkaaggiinngg
Do not dispose of electrical devices as
domestic waste. Dispose of devices,
accessories and packaging by means of
environmentally friendly recycling..
16
Page 18

SSyymmbboollss ooppeerraattiinngg mmaannuuaall
Threatened hazard or hazardous situation. Not
observing this instruction can lead to injuries or
cause damage to property.
Important information on proper handling. Not
L
observing this instruction can lead to faults.
User information. This information helps you t o use
all the functions optimally.
Assembly, operation and servicing. Here you are
explained exactly what to do.
PPrrooppeerr uussee
The log splitter must only be used for splitting logs.
Only straight-cut logs are suitable for use with the log
splitter.
Foreign bodies (nails, wire, concrete etc.) must always be
removed from the wood before it is split.
Every other form of use is considere d improper use. The
manufacturer accepts no liability for any damages
resulting from improper use, and any risk is in this cas e
borne solely by the user.
RReessiidduuaall rriisskkss
Even if used properly, residual risks can exist even if
the relevant safety regulations are co mplied with due to the
design determined by the intended purpose.
Residual risks can be minimised if the “Safe working” and the
“Proper use” as well as the whole of the operating
instructions are observed.
Observing these instructions, and taking proper care, will
reduce the risk of personal injury or damage to the
equipment.
Failure to observe the safety precautions can lead to
injury to the operator or damage to property.
Carelessness, failure to comply with the safety
regulations and incorrect use can result in i njuries to your
hands and fingers when the splitting blade is moving.
Risk from electricity, by using non-standard electrical
connections.
Touching live parts of opened electrical components.
In addition, in spite of all the precautionary measures take n,
non-obvious residual risks can still exist.
SSaaffee wwoorrkkiinngg
Before commissioning this product, read and keep
to the following advice. Also observe the preventive
regulations of your professional association and the
safety provisions applicable in the respective country, in
order to protect yourself and others from possible injury.
Pass the safety instructions on to all persons who
L
work with the machine.
Keep these safety instructions in a safe place.
L
Be observant. Attend to what you do. Start working w ith
rationality. Do not use the device when y ou are tired or
under the influence of drugs, alcohol or medicaments.
One moment of carelessness when using the devic e can
result in serious injuries.
Make yourself familiar with the equipment before using it,
by reading and understanding the operating instructions.
Do not use the machine for unsuitable purposes (see
“Proper use” and “Working with the log splitter”).
Ensure that you have stand in a secure standing
position and maintain your balance at all times.
Take up a working position which is close to the
controls. Fig. 8.
Never stand on top of the machine.
When working with the machine, always wear
− protective goggles or face mask
− safety gloves
− hearing protection
− safety shoes with steel toe-caps
Wear suitable work clothing:
− do not wear any loose-fitting clothing or jewellery,
since these may be caught or trapped by moving
parts
Within his area of work the operator is responsible for
third parties.
The machine may not be operated by children or young
people under the age of 18.
Keep children away form machine.
Never operate the machine if other persons are in the
immediate vicinity.
Never leave the machine unattended.
Keep your workplace in an orderly condition!
Untidiness can result in accidents.
Do not overload the machine! You work bett er and safer
in the given performance range.
Only operate the machine with complete and correctly
attached safety equipment and do not alter anything on
the machine that could impair the safety.
Do
not modify the machine or parts of it.
Do not spray machine with water
(this is hazardous due to live components).
Do not leave t he machine standing in the rain or use
when raining.
Store the unused machine in a dry locked place away
from the reach of children.
Switch the machine off and remove the mains plug
from the socket when
17
Page 19

− carrying out repair works
− carrying out maintenance and
cleaning work
− removing faults
− transporting
− leaving unattended (even during short interruptions)
Check the machine for possible damage
− Before continuing to use the mac hine, the protective
devices must be inspected to ens ure that they work
perfectly and with their intended function
− Check whether the movable parts function perfectly
and do not stick or whether the parts are damaged.
All parts must be correctly installed and fulfil all
conditions to ensure perfect operation of the machine.
− Damaged guards and parts must be properly
repaired or exchanged by a recognized, specialist
workshop; insofar as nothing else is stated in the
instructions for use.
− Damaged or illegible safety warning labels should
be replaced immediately.
Electrical safety
Electrical connections must conform to IEC 60245 (H
07 RN-F) with a cable cross-section of at least
⇒ 230 V ~
3 x 1.5 mm² for a maximum cable length of up to 10 m
⇒ 400 V 3~
5 x 1.5 mm² for a maximum cable length of up to 10 m
Never use the machine with a power supply cable of over
10 m in length. Longer power supply cables will cause a
drop in voltage. The motor will not be able to pr ovide its
maximum performance and the operation of the machine
will be impaired.
When laying the connecting attachments, be sure that
they do get crushed or bent, and that the plug-and -socket
connection does not get wet.
Do not use the cable for purposes for which it is not
meant. Protect the cable against heat, oil and sharp
edges. Do not use the cable to pull the plug from the
socket.
Regularly check the extension cables and replace them
if they are damaged.
Do not use any defective connection cables.
When working outdoors, only use extension cables
especially approved and appropriately labelled for
outdoor use.
Do not set up any provisional electrical connections.
Never bypass protective devices or deactivate them.
The electrical connection or repairs to electrical parts
of the machine must be carried out by a certified
electrician or one of our customer service points. Local
regulations – especially regarding prot ective measures
– must be observed.
Repairs to ot her parts of the machine must be carried
out by the manufacturer or one of his customer service
points.
Use only original spare parts. Accidents can arise for
the user through the use of other spare parts. The
manufacturer is not liable for any damage or injury
resulting from such action.
TTrraannssppoorrtt IInnssttrruuccttiioonnss
Move the splitting blade right down every time before
the machine is transported.
To transport the
machine, grasp
5
Transport belt
the handle and
tilt the log splitter
slightly towards
you. The log
splitter can be
easily
transported in
this position.
Make sure that
the oil tank cap is
securely
tightened to
prevent oil from
leaking during
transport.
PPoossiittiioonniinngg
Place chocks under the wheels to prevent the machine
rolling during operation.
Ensure that the working area meets the following conditions:
− no danger of slipping
− level
− free of obstacles
− sufficiently well lit
Do not operate the machine in the direct vicinity of gas or
petrol pipes or containers, or any other easily inflammable
materials.
SSttaarrtt--uupp
Check that the machine is completely and correctly
assembled.
Before using the log splitter, make sure each time that
− there are no faulty connections (tears, cuts, etc.)
Do not use defective power supply cables.
− there are no damages at the machi ne
− all screws are tight
− check the hydraulic system for any possibl e leaks
− the oil level
− Venting: Vent the hydraulic system befor e putting the
log splitter into operation.
18
Page 20

¾ Unscrew venting cap (9) by severa l turns so that air
may escape from the oil tank.
¾ Leave the cap open during operation.
¾ Close the venting cap before movin g the log splitter,
a otherwise oil will leak at this point.
s
L If the hydraulic system is not vented, the trapped air will
damage the seals and cause perma nent damage to the
log splitter.
L Mains connection
Compare the voltage given on the machin e model plate
e.g. 230 V with the mains voltage and connect the
machine to the relevant and properly earthed plug.
Only use connection cables with sufficient cross-
sections.
Connect the machine via a 30 mA fault current safety
switch.
L Fuse protection
400 V 3~ Î 16 A
L Switching on / off
Prior to every use, check the function of the
disconnection mechanism (by switching on a nd off).
Do not use any device where the switch can not be
switched on and off. Damaged switches must be
repaired or replaced immediately by the customer
service.
6
Switching on
Press the green button.
Switching off
Press the red button.
L Lock in case of power (zero-voltage
initiator)
The equipment will switch off automatically if there is a power
cut. Repress the green button to switch it on again.
Log splitter with 400 V 3~
Make sure that the motor turns in the correct direction
(see motor arrow), because operation in the wrong
direction damages the oil pump.
¾ Switch on motor; the splitting blade automatically m oves
to the highest position.
¾ If the splitting blade is already in its highest position: grip
both operating handles and push them down. The
splitting blade moves downwards.
¾ If the splitting blade does not move after the motor has
started, switch off the motor and change the direct ion of
rotation.
7
You can change
the direction by
placing a
screwdriver in the
slot provided in the
plug collar, and
adjust the correct
direction by moving
to the left or right
applying slight
pressure.
L Hydraulics
Never operate the machine in the event of any possi ble
danger from hydraulic fluid.
Ensure that the machine and working area are clean an d
free of oil.
Danger of slippage or fire!
Check the hydraulic reservoir regularly to ensure that it
contains enough hydraulic oil (see “Care and
maintenance”)
Capacity: 7.0 litres
WWoorrkkiinngg wwiitthh tthhee lloogg sspplliitttteerr
Additional SAFETY INSTRUCTIONS
The log splitter may only be operated by a single person.
The machine may only be operated by persons over the
age of 18 years, and who have read and understood
these operating instructions.
Wear protective equipment (safety goggles/mask, gloves,
safety shoes) to protect yourself from possible injury.
Never try to split logs containing nails, wire or other
similar objects.
Already split wood and wood chips create a dangerous
working area. The operator may stumble, slip or fall.
Always keep the working area neat and tidy.
Never place the hands on or near any moving parts of the
machine when it is switched on. Maintain a safe dist ance
from the log, the ram and the wedge in order to protect
your hands from injury.
The machine should only be used for splitting logs with a
maximum length of 1350 mm.
L Check before splitting if the splitting column has
been sufficiently lubricated to allow its trouble-free
retraction and extension.
19
Page 21

What type of logs can I split?
Special instructions for splitting logs:
Size of logs
Length: max. 1350 mm
Diameter: min. 120 – max. 400 mm
The log diameter is a recommended guideline figure,
because:
− thin logs can be difficult to split if they conta in knots or if
the fibres are too strong.
− logs with a diameter of over 400 m m can be split if the
fibres are smooth and open.
Do not try to split green logs. Dry logs are much easier to
split, and do not cause jams as often as green (damp) wood.
Operation
Two-hand operation
Never operate the log splitter with two people.
Never block the control handles (clamping claws).
1. Press th e green switch on the electric motor. Wait a few
moments until the motor has reached its operating
revolutions and the required pressure has been built up in
the hydraulic pump.
L Check the direction of the motor in the log splitter
with threephase motor (400 V 3~), because operation in
the wrong direction damages the oil pum p.
L At temper atures below –5° C, let the log s plitter run
for at least 15 min. in neutral to heat up the oil.
2. Place the log on the log splitter table.
Preparations:
The logs to be split should be cut to the maximum
dimensions. Ensure also that the logs are cut straight and
square.
Place the log properly on the log splitter, so as not to c ause
any risk of stumbling or falling to the operator.
Adjusting the stroke height
In case of shorter wood pieces the efficiency can be
increased by shortening the return of the splitting cutter.
1. Place the log on the
splitting table and
press the two control
handles to bring the
splitting blade down to
approx. 3 - 5 cm
above the log.
2. Release one control
handle so that the
blade stays in this
position.
3. Switch the machine
off and disconnect the
power.
10
9
L Only split the logs in the direction of the wood fibres.
8
3. Hold the log tight with the clamping claws.
4. Press both operating handles down simultaneously:
Î The splitting blade falls down and splits the log.
5. Release the two control handles, the splitting blade
returns to its initial position.
L If you only release one control handle, then the
splitting blade remains where it is.
4. Release the second control handle.
5. Shorten the return path at the rod fitted to the side by
fixing the holding screw at the necessary height.
11
Holding screw
20
Page 22

Adjusting the table height
Upper table plate position for logs up to 59 cm
Middle table plate position for logs up to 85 cm
Lower table plate position for logs up to 135 cm
1. Split logs
up to 59
cm on the
table plate
(6).
2. Split logs
up to 89
cm on the
table (7).
Pull out
the table
plate (A).
3. Split logs
up to135
cm on the
base (10).
Press the
locking
lever (8)
down and
swing
aside the
table (7).
Adjusting the splitting cross:
1. Loosen fixing screw.
2. Move the splitting cross to the required position.
3. Mount fixing screw.
Fixing screw
13
12
Splitting long wood:
1. Middle or low
position of table
or base.
2. Remove the
splitting cross.
3. Place the log on
the splitter’s table
or base.
14
15
L Possible malfunction when cleaving logs: The log to
be cleaved is not cleaved right through, jams on the cleavin g
blade and is pulled up during the blade’s ret urn movement. It
is no longer possible to release the log manually.
In this case, proceed as follows:
1. Switch off the device.
2. De pending on the lo g still to b e cleaved fix th e table plat e
(6) in the upper position or swing aside the table (7).
3. Switch on the device and continue the splitting op eration.
¾ Never try to split two logs at once.
¾ Never try to remove or replace the log during the splitting
process.
L Never try to force the splitting of the log by maintaining
the pressure for several seconds. This can lead to damage
to the machine.
Position the log on the table again and repeat the splitting
phase, or put the log on one side.
How to release a jammed log?
There is a risk of knotted logs getting stuck during the
splitting process.
Splitting
cross
Splitting short wood:
1. Up per po sition of table pl ate.
2. Place the log on the splitter’s table plate.
L Only split the logs in the direction of the wood fibres.
3. Hold the log tight with the clamping claws.
1. Switch machine off and disconnect the power.
2. Car efully move the stuck log backwards and forwards to
loosen it.
Never hammer on the stuck log.
Never use a saw to cut the stuck log out of the
machine.
Do not enlist the aid of a second p erson - this is a oneman job.
Finishing work:
¾ Bring the splitting blade to the lower position (run-in
state).
¾ Release one of the control handles.
¾ Switch the machine off and disconnect the power.
¾ Follow the care and maintenance instructions.
21
Page 23

CCaarree aanndd mmaaiinntteennaannccee
Remove the plug from the power soc ket before
starting any maintenance or cleaning work.
Wear protective gloves in order to avoid injury to the
hands.
L Obser ve the following in order to k eep the log spl itter in
good working order:
Clean the machine thoroughly after you have
finished using it.
Remove any resin remains on the machine.
Lubricate the splitting column regularly or oil it using
environmentally friendly spray oil.
Check the oil level and change the oil as necessary.
Check hydraulic hoses and hose connections
Sharpening the splitting blade
After longer operating periods, for reduced splitting
performance or slight deformation of the cutting edge, grind
the splitting blade or sharpen it with a fine file (remo ve burrs).
regularly for any leaks and firm fitting.
15
If the oil
level is
between the
two marking
on the
dipstick, there
is sufficient oil
in the
reservoir.
If the oil
level is below
the lower
marking, more
oil should be
added with the
aid of a clean funnel.
upper marking lower marking
6. Check the
oil seal and
replace it if
it is damaged in any
way.
7. Re pl ac e the dipstick int o the oil reservoir.
17
Oil dip stick
18
When should I change the oil?
Sharpen
wedges
How do I check the oil level?
1. The splitting column
must be in run-in
state.
2. Now remove the
dipstick.
3. Clean the dipstick
and the oil seal.
4. Replace the dipstick
fully into the oil
reservoir.
5. Now remove the
dipstick again, and
read off the oil level.
16
The first oil change should be carried out after 50
operating hours, and then every 500 operating hours.
Two persons are required for this.
Changing the oil:
1. The splitting column must be in run-in state.
2. Now remove the dipstick.
3. Place a container under the log sp litter to catch the old
oil. The container should have a capacity of at least
7 litres.
4. Screw off
the drain
plug to
allow the oil
to flow out.
5. Insert the
seal and
drain plug
again.
6. Pour in the
new
hydraulic
oil (7.0
litres) using a clean funnel.
7. Clean the dipstick and the oil seal.
8. Check the oil seal and repl ace it if it is damaged in any
way.
9. Replace the dipstick.
19
22
Page 24

Dispose of the old oil properly (local oil disposal point).
The old oil must not be poured into the ground or
drainage system, or mixed with other waste.
L Hydraulic oil
We recommend the following hydraulic oi ls for the hydraulic
cylinder:
¾ Shell Tellus T 22
¾ Aral Vitam Gf 22
¾ BP Energol HLP 22
¾ Mobil DTE 11
¾ or equivalent
Do not use any other types of oil. The use of any other
type of oil will adversely affect the operation of the
hydraulic cylinder.
GGuuaarraanntteeee
• The machine is guaranteed for a period of 2 years from
the date of purchase/delivery against faults due to
material or manufacturing errors.
• The guarantee is rendered invalid in the event of any
damage caused due to improper use or handling,
improper packaging when returning the machine or
failure to observe the operating instructio ns.
• Faulty parts must be returned to our works carriage-paid.
The decision on free replacement of faulty parts will be
made at our discretion.
• The guarantee does not cover normal wear and tear to
the splitting wedge, hydraulic oil, guide plates, seals or
wheels.
• Any guarantee work will be carried out by the
manufacturer. Our express approval must be obtained
before having any such work carried out by another
company.
• The guarantee only remains valid provided that original
replacement parts are used.
• We reserve the right to make technical changes in the
course of technical progress.
TTeecchhnniiccaall ddaattaa
Model
Type
Splitting force
Log length
Log diameter
Stroke
Feed speed ca. 0.04 m/sec.
Return speed ca. 0.11 m/sec.
Hydraulic oil (max.) 7,0 litres
Hydraulic pressure 21 MPa (210 bar)
Electric motor performance (power consumption) AC P1 = 3800 W (S6-40%)
Threephase P
Power supply Threephase 400 V 3~ 50 Hz, 16 A
Dimensions Length 840 x Width 920 x Height 1620 mm
Weight ca. 209 kg
min. 120 – max. 400 mm
1
ASP 10-1350
ASP 10-1350
100 kN (10 t) ± 10 %
max. 1350 mm
≈ 550 mm
= 3000 W (S6-40%)
23
Page 25

PPoossssiibbllee pprroobblleemmss
Problem Possible cause Remedy
Logs are not being split properly
(insufficient splitting
performance).
Splitting column moves
unsteadily or with strong
vibrations.
Splitting column does not move
in.
Motor starts, but splitting column
does not move in.
Motor will not start.
⇒ The log is not positioned correctly.
⇒ The log exceeds the maximum
dimensions or the wood is too hard for
the performance of the machine.
⇒ Splitting blade does not split log.
⇒ Hydraulic pressure too low.
⇒ Release rods bent (hydraulic tappet not
quite pressed in).
⇒ Incorrect connecting lead (longer than
10 m or too small cable cross-section).
⇒ Air in the circuit.
⇒ Splitting column not sufficiently
lubricated or oiled.
⇒ Hydraulic pump defective. ⇒ To correct the problem, refer to the
⇒ Motor turns in wrong direction ⇒ Check the motor direction
⇒ No electrical power.
⇒ 2-phase mode in threephase motor.
⇒ Connection cable defective.
⇒ Electric motor defective.
⇒ Reposition the log correctly.
⇒ Cut the log to the required dimensions.
⇒ Sharpen splitting blade, check for burrs or
notches.
⇒ Check the oil level and add more oil if
necessary.
If the problem cannot be rectified, refer to the
manufacturer or other approved service centr e.
⇒ Arrange for manufacturer or authorised
company to adjust the rods.
⇒ Use the correct connecting lead.
⇒ Check the oil level and add more oil if
necessary.
⇒ Lubricate splitting column or oil with
environmentally friendly spray oil.
If the problem cannot be rectified, refer to the
manufacturer or other approved service centr e.
manufacturer or other approved service centr e.
Threephase: adjust the motor direction
(s. page 19)
AC: To correct the problem, refer to the manu-
facturer or other approved service centre.
⇒ Check the fuse.
⇒ Have fuse and lead checked by qualified
electrician.
⇒ Replace the connection cable or have it
checked by an electrician.
⇒ To correct the problem, refer to the
manufacturer or other approved service centr e.
24
Page 26

Vous ne devez pas mettre la machine en
route avant d’avoir lu attentivement ce
mode d’emploi, d’avoir observé toutes les
informations indiquées et d’avoir monté la
machine tel que cela est décrit.
Conserver cette notice d’utilisation pour toute
utilisation future.
Durant les travaux, porter des l unettes ou
une visière de protection afin de prot éger
les yeux des copeaux et des éclats.
Gardez votre zone de travail en ordre !
Le désordre peut causer des accidents.
Table des matières
Déclaration de conformité 1
Description de l'appareil/ Pièces de rechang e 2
Montage 5
Fourniture 25
Symboles 25
Utilisation conforme 26
Risques résiduels 26
Consignes de sécurité 26
Consignes de transport 27
Installation 27
Mise en service 28
Travaux avec le fendeur de bûches 28
Entretien et maintenance 31
Garantie 32
Caractéristiques techniques 32
Pannes possibles 33
Fourniture
Après le déballage de la mac hine, vérifiez le conte nu du
carton quant à
! l’intégralité des pièces
! la présence éventuelle de domma ges dus au transport.
Informez immédiatement le revendeur, le transporteur et / ou
le fabricant en cas de réclamation. Sachez que les
réclamations ultérieures ne sont plus acceptées.
1 bloc d'assemblage prémonté 2 roues
1 bras de commande droit/
gauche
1 essieu 1 notice d’utilisation
Symboles utilisés sur cet appareil
Avant la mise en service, lire et respecter
les notices d’utilisation ainsi que les
consignes de sécurité.
Durant les travaux, porter des chaussures
de sécurité afin de protéger les pieds en
cas de chute accidentelle des troncs.
Durant les travaux, porter des gants de
protection afin de protéger les m ains des
copeaux et des éclats.
1 sachet d’accessoires
L’huile est inflammable et peut exploser. Il
est interdit de fumer et de faire un feu nu.
Éliminez l’huile usée conformément à la
réglementation en vigueur (point de
collecte d’huile usée sur place). Il est
interdit de vidanger les huiles usées dans
le sol ou de les mélanger aux déchets.
Il est interdit de démonter ou de modifier
les installations de protection et de
sécurité.
Seul l’utilisateur doit se tenir dans la zone
de travail de la machine. Les autres
personnes, tout comme les animaux
domestiques et de rente, doivent
respecter une distance minimale (5 m).
N'enlevez pas les souches coincées avec
les mains.
Attention !
Avant de réaliser les travaux de réparation, de maintenance et d’entretien, arrêter
le moteur et retirer la fiche secteur.
Danger de coupure et de coincement, n e
jamais toucher les zones dangereuses
tant que le fendeur se déplace.
Pendant le fendage, fixer le morceau de
bois à l'aide des griffes.
Fixez toujours toute votre attention s ur le
mouvement de la lame de fendage
Haute tension, danger de mort
Symboles utilisés sur l’appareil /
l’emballage
Les appareils électriques ne doivent pas être
éliminer via les ordures mé nagères. É lim iner les
appareils, les accessoires et leur emballage par
voie du recyclage écologique.
25
Page 27

Symboles utilisés dans cette notices d’utilisation
Danger imminent ou situation dangereuse.
L’inobservation de ces indications peut entraîner des
blessures ou des dégâts matériels.
Indications importantes pour un emploi conforme
L
à l’usage prévu. L’inobservation de ces indications
peut provoquer des dysfonctionnements.
Indications pour l’usager. Ces indications sont
d’une aide précieuse pour un emploi optimal des
différentes fonctions.
Montage, exploitation et maintenance. Ce symbole
attire votre attention sur ce que vous devez faire.
Utilisation conforme
Le fendeur de bûches convient uniqueme nt pour fendre le
bois.
Seul le bois découpé convient pour le fendeur de bûches.
Éliminer impérativement les corps étrangers (clous, fils de
fer, béton etc.) du bois à fendre.
Toute utilisation autre est non conforme. Le constructeur
décline toute responsabilité pour les dommages en
résultat – le risque incombe alors exclusivement à
l’utilisateur.
Risques résiduels
Même un em ploi conforme à l’usag e prévu et le respect
des consignes de sécurité applicables en la matière ne
sauraient exclure tous les risques résiduels générés par la
construction et l’emploi de la machine, notamment.
Les risques résiduels peuvent être minimisés en respectant
les « consignes de sécurité » et une « utilisation conforme »
ainsi que toutes les indications de cette notice d’utilisation.
La prise de préc autions et la prudence réduise nt les risques
de blessures corporelles et d’endommagements.
Les mesures de sécurité ignorées ou omises peuvent
occasionner des blessures ou des endommagements.
Le fendeur en déplacement risque de causer des
blessures aux mains ou aux doigts pour autant que
l'utilisateur soit inattentif, qu'il ne respecte pas les
consignes de sécurité ou en cas d'emploi non conforme à
l'usage prévu.
Risque d’électrocution en cas d’utilisation de câbles de
raccordement non conformes.
Contact avec des pièces sous tension de composants
électriques ouverts.
Il se pourrait donc que des risques résiduels non apparents
persistent bien que toutes les mesures de protectio n aient été
prises.
Consignes de sécurité
Avant toute mise en service de ce produit, lire et
respecter les indications suivantes et les règlements de
prévention d’accident de l’association préventive des
accidents du travail, particulièrement les consignes de
sécurité en vigueur dans les pays respectifs afin d’éviter
tout risque d’accident sur vous et les autres.
Remettez les consignes de sécurité à toutes les
L
personnes devant travailler avec la machine.
Conservez ces consignes de sécurité en lieu sûr.
L
Soyez attentif. Veillez à ce que vous faites. Travaillez de
façon raisonnable. N'utilisez pas l'équipement si vous êtes
fatigué ou sous l'emprise de drogues, d'alcool ou de
médicaments. La moindre inattention pendant l'utilisation
de l'équipement peut provoquer de graves blessures.
Avant utilisation, familiarisez-vous avec l‘appareil à l‘aide
de la notice d’utilisation.
Ne pas utiliser l’appareil à des fins non appropriées (voir
« Utilisation conforme » et « Travaux avec le fendeur de
bûches » ).
Prenez correctement appui sur vos jambes et veillez à
conserver un bon équilibre.
Veuillez adopter une position de travail située dans la
zone des poignées de commande. Fig. 8.
Ne vous tenez jamais debout sur la machine.
Lors des travaux, portez
− des lunettes ou une visière de protection
− des gants de travail
− un cache-oreilles
− des chaussures de sécurité munies d’un revêtement en
acier.
Portez des vêtements de travail appropriés :
− pas de vêtements amples ni de bijoux (ils pourraient
être happés par les pièces en mouvement)
L’utilisateur est responsable de la machine à l’égard de
tiers dans la zone de travail.
Il est interdit aux enfants et aux adolescents de moins
de 18 ans d’utiliser la machine.
Maintenez les enfants à distance de l’appareil.
Ne mettez jamais l’appareil en marche lorsque des
personnes étrangères se trouvent à proximité.
Ne l aissez jamais l’appareil sans surveillance.
Veillez à maintenir la zone de travail en ordre ! Le
désordre peut être la cause d’accidents.
Ne surchargez pas la machine ! Elle travaille mieux et
avec une sécurité accrue dans la plage indiquée.
Veillez au montage complet et correct des équipements
de sécurité pendant l’exploitation et ne modifi ez rien sur
la machine qui risquerait d’influencer sa sécurité.
Ne pas modifier l'appareil ou des parties ou pièces de
l'appareil.
L’appareil ne doit pas être arrosé d’eau (source de risque
car présence de courant électrique).
Ne pas travailler avec l'appareil lorsqu'il pleut et ne pas
laisser l’appareil sous la pluie.
Conservez les outillages non utilisés dans un endroit
sec et verrouillé et hors de portée de main des enfants.
26
Page 28

Débranchez la machine et retirez la fiche de la prise au
secteur en cas de
− travaux de réparation
− travaux de maintenance et de nettoyage
− réparation de dysfonctionnements
− transport
− et si vous vous éloignez de l’appareil (même s’il ne
s’agit que d’une brève interruption du travail)
Vérifiez si la machine est éventuellement endommagée.
− Contrôlez avec soin le fonctionnement impeccable et
conforme à l’usage prévu des équipements de
sécurité avec soi n avant de poursuivre l’utilisation de
la machine.
− Vérifiez le fonctionnement correct des pièces mobiles
et assurez-vous qu’elles ne sont ni coincées ni
partiellement endommagées. Toutes les pièces sont à
monter correctement et toutes les conditio ns requises
sont à remplir afin de garantir une exploitation
impeccable de l’appareill.
− Les dispositifs de sécurité et les pièces
endommagés doivent être réparés ou remplacés
convenablement dans un atelier spécialisé agréé, à
moins que d’autres informations ne soie nt mentionnées
dans le mode d’emploi.
− Les autocollants de sécurité endommagés ou
illisibles doivent être remplacés.
Sécurité électrique
Réalisation de la ligne d’alimentation conformément à
IEC 60245 (H 07 RN-F) avec une section de conducteur
minimale de
⇒ 230 V ~
3 x 1,5 mm² avec une longueur maximale de 10 m.
⇒ 400 V 3~
5 x 1,5 mm² avec une longueur maximale de 10 m.
Ne jamais employer de lignes d’alimentation de plus de 10
m de long. Les lignes d’alimentation plus longues
occasionnent une chute de tension. Le moteur n’atteint
plus sa puissance, le fonctionnement de la machine est
restreint.
Lors de la pose de la ligne de raccordement, veiller à ce
qu'elle ne soit ni coincée, ni compressée, ni plié e et à ce
que le connecteur ne soit pas soumis à l'humidité ou
tombe dans un liquide quelconque.
N’employez pas le câble à des fins pour lesquelles il
pas prévu. Protégez le câble de la chaleur, de l’huile et
des arêtes tranchantes. Ne tirez pas sur le câble pour
retirer la fiche de la prise au secteur.
Vérifiez le câble de rallonge à intervalles réguliers et
remplacez-le dès que vous constatez un
endommagement.
Ne vous servez jamais de lignes de raccordement
défectueuses.
Servez-vous exclusivement de câbles de rallonge
spéciaux et homologués pour l’extérieur le cas échéant.
Ne vous servez jamais de raccordements électriques
provisoires.
Ne pontez jamais les équipements de s écurité et ne les
mettez jamais hors service.
n’est
Tout raccordement électriqu e, voire toute réparation sur
des parties électriques de la machine doivent être
effectués par des électriciens agréés ou être confiés à
l’un de nos services après-vente. Les règlements loc aux,
particulièrement en ce qui concerne les mesures de
protection sont à respecter.
Toute réparation des différentes pièces de la machine
est à effectuer par le fabricant, ou l’un de ses services
après-vente.
N’utilisez que des pièces de rechange d’origine.
L’utilisation d’autres pièces détachées et d’autres
accessoires pourraient entraîner un risque d’accident
pour l’utilisateur, le fabricant déclinant toute
responsabilité pour tout dommage encour u.
Consignes de transport
Amener toujours le fendeur à sa position la plus
basse avant chaque transport.
Lors du trans-
port, empoignez
l’arceau d’une
main et basculez
le fendeur de
bûches légèrement vers vous.
Le u fendeur
peut se transporter facilement
dans cette position.
Bien visser le
bouchon du
réservoir d’huile
afin d’éviter tout
écoulement
d’huile pendant le transport.
5
Courroie de transport
Installation
Bloquez les roues au moyen de cales afin d’éviter tout
déplacement durant l’exploitation.
Veillez à ce que la zone de travail remplisse les conditions
suivantes :
− antidérapante
− plane
− exempte de risques de trébuchement
− éclairage suffisant.
Il est interdit d’exploiter la machine à proximité de gaz
naturel, de conduits d’essence ou d’autres matériaux très
inflammables.
27
Page 29

Mise en service
Assurez-vous que l'appareil est monté intégralement et
conformément aux réglementations.
Avant toute utilisation, veuillez vérifier
− que les lignes de raccordement ne prése ntent pas de
défectuosités (fissures, coupures ou autres).
− si l‘appareil présente d’éventuels en dommagements
− que toutes les vis sont serrées à fond
− l’absence de fuites sur le système hydraulique.
− le niveau d’huile
Purge d'air : Purgez l'air du système hydraulique avant de
mettre la fendeuse à bois de chauffage en service.
¾ Dévissez un peu le bouchon du réservoir d’huile (9)
pour que l’air puisse s’échapper du réservoir d’huile.
¾ Laissez le capuchon ouvert pendant l'exploitation.
¾ Avant de déplacer le fendeur de bûches, refermez le
bouchon du réservoir d’huile afin d’éviter to ut écoulement
d’huile.
L Si le système hydraulique n'est pas purgé d'air, l'air
enfermé détériorera les joints et la fendeuse de bois de
chauffage de façon durable.
L Branchement au secteur
Comparez la tension de votre secteur avec la tension
indiquée sur la plaque signalétique de la machine et
raccordez la machine à une prise appropri ée et conforme
aux prescriptions.
Utilisez un câble de rallonge de section sufficante.
Raccordez la machine au moyen d’un commutateur de
sécurité (interrupteur de protection co ntre les courants de
court-circuit) de 30 mA.
L Fusible
400 V 3~ Î 16 A
L Mise en marche/ Arrêt
Vérifiez avant chaque mise en marche si le dispositif
de déconnexion (en mettant en marche et en arrêtant
l’appareil) fonctionne correctement.
Ne jamais utiliser un appareil dont l'interrupteur ne
fonctionne pas Les interrupteurs endommagés doivent
être immédiatement réparés ou remplacés par le S.A.V.
Mise en marche
Appuyez sur le bouton vert.
Arrêt
Appuyez sur le bouton
rouge.
6
L Sécurité de remise en marche en cas pan-
ne de courant (déclencheur à tension nulle)
En cas de panne de courant, l‘appareil s’arrête
automatiquement. Pour le remettre en marche, appuyez à
nouveau sur le bouton vert.
Fendeur de bois à brûler d’une
puissance de 400 V 3~
Veiller au sens de rotation du moteur (cf. flèche du
moteur) car toute utilisation dans un sens de rotation
erroné risque d’endommager la pompe à huile.
¾ Mettez le moteur en marche ; la lame de fendage (1) se
déplace automatiquement dans la position la plus él evée.
¾ Si la lame de fendage se trouve déjà dans la position la
plus élevée : Prenez les deux bras de commande (15) en
main et poussez-les vers le bas, la lame de fendage se
déplacera vers le bas.
¾ Si la lame de fendage ne se déplace pas après le
démarrage du moteur, arrêtez le moteur et modifiez le
sens de rotation.
7
Vous pouvez modifier
le sens de rotation en
introduisant un
tournevis dans la
fente du col de la
prise prévue à cet
effet et en effectuant
une légère pression
vers la gauche ou la
droite pour régler le
sens de rotation
correct.
L Système hydraulique
N’exploitez jamais la machine lorsque le liquide
hydraulique présente un risque.
Assurez-vous que la machine et la zone de travail sont
propres et exemptes de tâches d’huiles.
Risque de glissement et d’incendie !
Contrôlez régulièrement si le réservoir contient
suffisamment d’huile hydraulique (cf. entretien et
maintenance)
Contenance : 7,0 litres
Travailler avec le fendeur de bûches
CONSIGNES DE SÉCURITÉ complémentaires
Le fendeur de bûches doit uniquement être utilisé par une
seule personne à la fois.
Seules les personnes de plus de 18 ans ayant lu et
compris la notice d’utilisation peuvent utili ser la machine.
Portez votre équipement de protection personnel
(lunettes/visière de protection, gants, chaussures de
28
Page 30

protection) afin de vous protéger des éventuelles
blessures.
Ne jamais fendre de troncs contenant des clous, du fil ou
d’autres objets.
Le bois fendu et les copeaux de bois rendent la zone de
travail dangereuse. Risque de trébuchement, de
glissement et de chute. Veillez à maintenir la zone de
travail en ordre.
Ne jamais placer les mains sur les pièces mobiles de la
machine lorsque que cette dernière est en marche.
Fendez uniquement du bois dont la longueur maximale à
ne dépasse pas 1350 mm.
L Avant l'utilis ation de la machine, vérifier si la colonne
est suffisamment graissée afin de pouvoir l’insérer et la
sortir sans difficulté.
Que puis-je fendre?
Dimensions des troncs à fendre
Longueur : 1350 mm max.
Diamètre : 120 à 400 mm max.
Le diamètre indiqué est une valeur de référence
recommandée car :
− le bois de faible épaisseur est difficile à fendre car il
contient des trous ou les fibres sont trop épaisses.
− le bois d’épaisseur supérieure à ∅ 400 mm peut être
fendu lorsque les fibres sont lisses et lâches.
Ne fendez pas de troncs verts. Les troncs secs entreposés se
fendent beaucoup plus facilement et occasionnent moins de
grippage que le bois vert (mouillé).
Utilisation
Utilisation à deux mains
Ne vous serve z jamais du fendeur de bûches à deux
personnes.
Ne bloquez jamais les poignées de commande (griffes
de serrage).
1. App uyez sur le bouton vert. Attendez quelques secondes
jusqu’à ce que le moteur atteigne sa vitesse finale et que
la pression soit générée dans la pompe hydraulique.
L Accordez une attention particulière au sens de
rotation du fendeur de bûches à moteur triphasé (400 V
3~) car toute utilisation dans un sens de rotation erroné
endommage la pompe à huile.
L Laissez tourner le fendeur de bûches durant au moins
15 minutes à vide en cas de températures inférieures à –
5° C afin que l’huile puisse chauffer.
2. Posez le tronc sur la table du fendeur.
L Fendez le bois à fendre exclusive ment dans le sens
des fibres. → 8
3. Maintenez le tronc en place à l’aide des griffe s de serrage.
4. Abaissez simultanément les deux leviers de commande.
Î Le fendeur s'abaisse et fend le tronc.
5. Relâchez les deux poignées de commande et le fendeur
retrouve sa position initiale.
L Le fendeur s’immobilise dès que vous relâchez une
poignée de commande.
8
Instructions particulières pour le
fendage :
Préparatifs :
Préparez le bois à fendre en le coupant aux dimensions
maximales et veillez à ce que le bois soit découpé en ligne
droite.
Positionnez le bois sur le fendeur de manière à ne pas vous
mettre en danger (risque de trébuchement).
Réglage de la hauteur de course
Pour les morceaux de bois de faible longueur, l e rendement
peut être augmenté en racc ourcissant la course de retour de
la lame de fendage.
1. Posez le tronc sur la
table du fendeur et
abaissez le fendeur
jusqu’à environ 3 - 5
cm au-dessus du
tronc en abaissant les
deux poignées de
commande.
2. Relâchez une poignée de commande,
ce qui a pour effet
d’immobiliser le
fendeur sur cette
position.
3. Débranchez l'appareil
et retirez la fiche de la prise au secteur. → 10
4. Relâchez la deuxième poignée de commande.
5. Réduisez la marche en retour sur la tige latérale en
immobilisant la vis de fixation à la hauteur souh aitée.
→ 11
9
29
Page 31

10
(10)
Appuyez sur le levier d’arrêt ( 8) et faites pivoter la table
(7) sur le côté.
Ajuster la croix de fendage
1. Desserrez la vis de fixation.
2. Faites coulisser la croix de fendage dans la position
nécessaire.
3. Resserrez la vis de fixation à bloc.
11
Vis de fixation
Régler la hauteur de la table
Position supérieure du dessus de la table pour des troncs
d’une longueur de 59 cm maximum
Position intermédiaire du dessus de la ta ble pour des troncs
d’une longueur de 85 cm maximum
Position inférieure du dessus de la table pour des troncs d’une
longueur de 135 cm maximum
1. Fendez les
troncs d’une
longueur de
59 cm maximum sur le
dessus de
table (6).
2. Fendez les
troncs d’une
longueur de
89 cm maximum sur le
dessus de
table (7).
Tirez le dessus de table
(6).
3. Fendez les
troncs d’une
longueur de
135 maximum sur le
socle
.
12
13
fendeur en
Vis de fixation
croix
Fendre du bois court :
1. Position supérieure du dessus de table
2. Placez le tronc sur le dessus de table du fendeur.
L Fendez le bois à fendre exclusive ment dans le sens
des fibres.
3. Maintenez le tronc en place à l’aide des griffe s de serrage.
Fendre du bois long :
1. Position
intermédiair
e et inférieure de la
table ou du
socle.
2. Enlevez le
fendeur en
croix.
3. Placez le
tronc sur la
table ou sur
le socle du
fendeur.
14
L Dysfonctionnement possible lors du fendage de bois
long : la pièce à fendre n'est pas complèt ement fendue, s'est
coincée dans la lame et remonte avec le mouvement de
retour. Le tronc ne peut plus être retiré à la main.
Dans ce cas, veuillez procéder de la manièr e suivante :
1. Débrancher l'appareil.
2. Fixez, selon la longueur du tronc que vous souhaitez
fendre, le dessus de table (6) dans la position sup érieure
ou faites pivoter la table (7) de l’autre côté.
3. Branchez l'appareil et continuez les opérations de
30
fendage.
Page 32

¾ Ne jamais fendre deux troncs d’un coup.
¾ Ne jamais rajouter ou remplacer le bois durant la
procédure.
L Ne jamais forcer le fendage du tronc en maintenant la
poussée durant plusieurs secondes. Cela pourrait
endommager la machine.
Positionnez à nouveau le tronc sur la table et répétez
l'opération de fendage ou mettez le tronc de côté.
Comment libérer un tronc coincé ?
Il se pourrait que le bois à fendre branchu soit coincé durant le
fendage.
1. Débranchez l'appareil et retirez la fiche de la prise au
secteur.
2. Déplacez le tronc coincé avec précaution par des
mouvements de va et vient afin de le libérer.
Ne jamais tenter d e libérer le tronc coincé en se serv ant
d’un marteau.
Ne tentez jamais de libérer le tronc coincé avec une scie.
Ne demandez pas d’aide à une seconde personne.
Achèvement du travail :
¾ Amenez le fendeur en position inférieure (état rétracté).
¾ Relâchez une poignée de commande.
¾ Débranchez l’appareil et retirez la fiche de la prise au
secteur.
¾ Observez les instructions d’entretien et de maintenance.
Entretien et maintenance
Avant d’effectuer des travaux d’entretien et de
maintenance, retirez la fiche secteur.
les mains.
Portez des gants de protection af in d’éviter de se bles ser
L Obser vez les points suivants afin de ne pas entraver le
bon fonctionnement du fendeur de bûches:
Nettoyez soigneusement la machine après chaque
utilisation.
Éliminez les résidus de résine.
Graissez la colonne de fendage régulièrement ou
huilez-la avec une huile à pulvérisation nonpolluante.
Contrôlez le niveau d’huile et remplacez l’huile si
nécessaire.
Contrôlez régulièrement l’étanchéité et la solidité d es
tuyaux hydrauliques et des tuyaux flexib les.
Affûtage du fendeur
Meuler le fendeur ou l'aiguiser avec une lime fine (enlever les
bavures) après une durée de service prolongée, en cas de
réduction de la puissance de fendage ou d’une légère
déformation de la lame.
15
Affûtage
des arêtes
Comment contrôler le niveau d’huile ?
1. La colonne de fendage
doit adopter son état
rétracté.
2. Retirez la jauge de
l’orifice.
3. Nettoyez la jauge
d’huile et le joint
d’étanchéité.
4. Enfoncez la jauge
jusqu’à la butée dans
l’orifice.
5. Retirez à nouveau la
jauge de l’orifice.
Lorsque
le niveau
d’huile est
compris entre
les deux repères, le réservoir contient
suffisamment
d’huile.
17
Jauge d’huile
Lorsque
le niveau
d’huile se
situe audessous du
repère inférieur, il faut rajouter de l’huile à l’aide d’un
entonnoir propre.
Repère supérieur Repère inférieur
6. Contrôlez
le joint
d’étanchéit
é.
Remplace
z-le en cas
de détérioration.
7. Enfoncez la jauge dans l’orifice.
18
16
31
Page 33

Quand faut-il faire une vidange ?
Première vidange après 50 heures de service, puis toutes
les 250 heures.
Vidange :
1. La colonne de fendage doit se trouver en position
rétractée.
2. Retirez la jauge de l’orifice.
3. Placez un
récipient pouvant contenir
7 litres d’huile
sous le fendeur de bois.
4. Dévissez le
bouchon
d’écoulement
pour que
l’huile puisse
s’écouler.
5. Remettez le
joint et le bouchon d’écoulement en place.
6. Vers ez l’huile hydraulique de rechange (7,0 litres) à l’a ide
d’un entonnoir propre.
7. Nettoyez la jauge d’huile et le joint d’étanc héité.
8. Contrôlez le joint d’étanchéité. Remplacez-le en cas de
détérioration.
9. Réinsérez la jauge dans l’orifice.
Éliminez l’huile usée conformément à la réglementation
en vigueur (point de collecte d’huile usée sur place). Il est
interdit de vidanger les huiles usées dans le sol ou de les
mélanger aux déchets.
19
L Huile hydraulique
Pour le cylindre hydraulique, nous recomma ndons d’utiliser
les huiles hydrauliques suivantes :
¾ Shell Tellus T 22
¾ Aral Vitam Gf 22
¾ BP Energol HLP 22
¾ Mobil DTE 11
¾ ou des huiles équivalentes
Ne pas employer d’autres sortes d’huiles. L’emploi
d’autres sortes d’huiles peut influencer le fonctionnement du cylindre hydraulique.
Conditions de garantie
• Nos appareils sont garantis 2 ans à compter de la livr aiso n
de l’appareil à partir du stock du revendeur pour des
défauts dus à des défauts de matériel ou de fabrication.
• La garantie ne couvre pas les dommages dus à un
maniement incorrect ou au non-respect du mode d’emploi,
même pendant le délai de garantie.
• Les pièces défectueuses devront être expédiées à notre
usine frais de port ou de fret payés et nous nous réserv ons
le droit de décider s’il y a lieu d’accepter une livraison
gratuite de pièces de rechange.
• La garantie ne s’étend pas à l’usure normale de la cale de
fendage, de l’huile hydraulique, des glissières, des joints
d’étanchéité et des roues.
• Les travaux de garantie seront exécutés par nos soins.
Une réparation ne pourra être exécutée par une autre
entreprise qu’après nous avoi r demandé n otre aut orisation
expresse.
• L’appareil n’est sous garantie qu’à c ondition d’utiliser des
pièces de rechange d’origine.
• Sous réserve de modifications dues au perfectionnement
technique.
Caractéristiques techniques
Modèle
Désignation du type
Force de fendage
Longueur du bois
Diamètre du bois
min. 120 – max. 400 mm
Course de fendage
Vitesse d’entrée approx. 0,04 m/sec.
Vitesse de retour approx. 0,11 m/sec.
Huile hydraulique (max.) 7,0 litres
Pression hydraulique 21 Mpa (210 bars)
Puissance du moteur électrique (puissance absorbée) Courant alternatif P1 = 3800 W (S6-40%)
Courant triphasé P1 = 3000 W (S6-40%)
Alimentation électrique Courant triphasé 400 V 3~ 50 Hz, 16 A
Dimensions (longueur x largeur x hauteur) approx. 840 x 920 x 1620 mm
Poids approx. 209 kg
32
ASP 10-1350
ASP 10-1350
100 kN (10 t) ± 10 %
max. 1350 mm
≈ 550 mm
Page 34

Pannes possibles
Problème Source Remède
Le tronc n’est pas fendu
(puissance insuffisante).
La colonne de fendage se
rétracte en oscillant ou en
provoquant de fortes vibrations
La colonne de fendage ne se
rétracte pas
Le moteur tourne, mais la
colonne de fendage ne se
rétracte pas
Le moteur ne fonctionne pas
⇒ Positionnement incorrect du tronc
⇒ Le tronc dépasse les dimensions
maximales autorisées ou le bois est trop
dur pour la puissance de la machine
⇒ Le fendeur ne fend pas
⇒ Pression hydraulique trop basse
⇒ Tringlerie de déclenchement déformée (le
poussoir hydraulique n’est pas totalement
enfoncé)
⇒ Câble d’alimentation incorrect (plus de 10
m de long ou section trop faible)
⇒ Le circuit contient de l’air
⇒ La colonne de fendage n'est pas assez
lubrifiée.
⇒ Pompe hydraulique défectueuse ⇒ S’adresser au constructeur ou à une autre
⇒ Sens de rotation erroné du moteur ⇒ Contrôler le sens de rotation du moteur.
⇒ Absence de courant
⇒ Course diphasée si moteur triphasé
⇒ Câble d’alimentation défectueux
⇒ Moteur électrique défectueux
⇒ Repositionner le tronc
⇒ Couper le tronc aux dimensions maximales
autorisées
⇒ Affûter le fendeur, contrôler la présence
d'éventuelles bavures ou entailles
⇒ Contrôler le niveau d’huile ; le cas échéant,
en rajouter.
Problème insoluble. Prière de s’adresser au
constructeur ou à une autre entreprise afin d’y
remédier.
⇒ Demander au fabricant ou à une entreprise
spécialisée désignée par ce dernier de
procéder à l’ajustage de la tringlerie
⇒ Employer un câble approprié
⇒ Contrôler le niveau d’huile ; le cas échéant,
en rajouter.
⇒ Graisser la colonne de fendage ou l'huiler
avec une huile à pulvérisation non-polluante.
Problème insoluble. Prière de s’adresser au
constructeur ou à une autre entreprise afin d’y
remédier.
entreprise afin de remédier au problème.
Courant triphasé : modifier le sens de rotation
du moteur (voir page 2
8).
Courant alternatif : s’adresser au constructeur
ou à une autre entreprise afin de rem édier au
problème.
⇒ Contrôler les fusibles
⇒ Demander à un électricien de contrôler les
fusibles et les câblages
⇒ Remplacer le câble d’alimentation ou le faire
contrôler par un électricien
⇒ S’adresser au constructeur ou à une autre
entreprise afin de remédier au problème.
33
Page 35

Stroj nesmíte obsluhovat bez dokonalého
prostudování tohoto návodu,respektování
všech daných pokynů a jeho řádného
smontování.
Návod uschovejte pro případné další použití.
Udržujte Váš pracovní prostor v p ořádku!
Nepořádek na pracovišti by mohl vést ke
vzniku úrazů.
OObbssaahh
Prohlášení o shodě 1
Náhradní díly 2
Montáž 5
Obsah dodávky 34
Grafické symboly 34
Působnost stroje 35
Zbytková rizika 35
Bezpečná práce 35
Pokyny pro přepravu 36
Umístění stroje 36
Uvedení do provozu 36
Práce s palivovým dřevem 37
Údržba a péče o stroj 39
Záruka 40
Možné poruchy 41
Technická data 41
OObbssaahh ddooddáávvkkyy
Po rozbalení dodávky z kartonu překontrolujte:
! úplnost dodávky
! event. škody způsobené transportem
Olej je hořlavina a může explodovat.
Kouření a používání otevřeného ohně je
zakázáno.
Starého oleje se zbavte dle zákona
(sběrné místo). Je zakázáno starý olej
vylívat do půdy či smíchat s odpadem.
Je zakázáno namontované ochranné
prvky odmontovat nebo měnit.
Při práci obsluhuje stroj pouze jedna
osoba. Jiné osoby, domácí či užitková
zvířata se nesmějí v pracovní okruhu
stroje pohybovat (pobývat). Minimální
vzdálenost je 5 m.
Nesnažte se uvolnit zaklíněné kmeny
rukama.
POZOR!
Před opravou, údržbou nebo čištěním
vždy motor vypněte a stroj odpojte od sítě
vytažením vidlice ze zásuvky.
Nebezpečí pořezání a zhmoždění. Nikdy
se nedotýkejte nebezpečných oblastí,
když je štípací nůž v pohybu.
Jestliže zjistíte závady, sdělte tyto neprodleně svému prodejci
nebo přímo výrobci. Pozdější reklamace nebudou uzná ny.
1 předmontov a ná přístroj ov á 1 osa
jednotka 2 kola
1 ovládací rameno sáček s příslušenstvím
pravé/levé 1 návod k obsluze
SSyymmbboollyy nnaa ppřřííssttrroojjii
Před uvedením stroje do chodu přečíst
tento návod a všechna bezpečnostní
upozornění v něm uvedena. Striktně dbát
všech pokynů.
Během práce používat bezpečnostní
obuv. Ochrana nohou před padajícími
špalky.
Používejte ochranné rukavice.
Při práci použít ochranné brýle nebo vizír.
Ochrana očí před odštěpky či třískami.
Pevně držte dílec během štípání držáky.
Veškerou pozornost věnujte pohybu
štípacího nože.
Vysoké napětí, smrtelné nebezpečí
SSyymmbbooll zzaařříízzeenníí // bbaalleenníí ll
Elektrická zařízen nepatří do domovního odp adu.
Zařízení, příslušenství a předejte k ekologické
recyklaci.
34
Page 36

GGrraaffiicckkéé ssyymmbboollyy vv nnáávvoodduu
Hrozící nebezpečí nebo nebezpečná situace. Při
nedbání těchto pokynů může dojít ke zraněním nebo
k věcným škodám.
L
Důležité informace správného zacházení se
strojem. Při nedbání těchto pokynů může dojít
k poruchám či poškození stroje.
Pokyny pro uživatele. Tyto informace Vám
pomohou všechny funkce stroje optimálně využít.
Montáž, obsluha a údržba. Zde je přesně
PPůůssoobbnnoosstt ssttrroojjee
vysvětleno co je třeba udělat.
Štípač palivového dřeva je určen výhradně a pouze pro
tuto činnost.
Štípačem lze štěpit pouze špalky, které jsou rovně (kolmo)
nařezány.
Cizí tělesa (hřebíky, drát, beton atd.) je nutné ze
štípaného dřeva bezpodmínečně odstranit.
Každé jiné další užití stroje je kvalifikováno jako
nespadající do okruhu působnosti a při event. škodách se
výrobce vzdává veškeré odpovědnosti. Veškerá rizika
nese obsluha stroje.
ZZbbyyttkkoovváá rriizziikkaa
I přes správné užití stroje a při dodržení všech
předepsaných bezpečnostních pokynů je nutno vzhledem ke
konstrukci stroje a způsobu jeho užití, počítat s jistými
tzv.zbytkovými riziky.
Tato zbytková rizika lze minimalizovat pouze jestliže
bezpečnostní pokyny, návod k obsluze a okruh působnosti
stroje dokonale prostudujete a respektujete.
Při vlastní práci ohleduplnost a opatrnost zmenšují rizika
zranění nebo jiných škod.
Ignorování nebo jen přehlédnutí bezpečnostních pokynů a
opatření mohou mít za následek zran ění obsluhy či jiných
osob nebo majetkových škod.
Při nepozornosti, nedodržení bezpečnostních předpisů a
při neodborném použití může štípací nůž v pohybu
způsobit poranění na ruce nebo na prstech.
Ohrožení el. proudem, při použití nevhodných kabelů
nebo nevhodného připojení k el. síti.
Dotýkání se el. částí pod proudem při odkrytých el. prvků
stroje.
Dále se mohou objevit jistá skrytá rizika i přes veškerá zde
uvedená upozornění.
BBeezzppeeččnnáá pprrááccee
Před uvedením do provozu čtěte a dbejte všech
pokynů zde uvedených jakož i ve Vaší zemi platných
předpisů pro provoz podobných strojů jen tak chráníte
sebe a ostatní před možnými zraněními.
Veškeré bezpečnostní pokyny předejte všem osobám,
L
které se strojem pracují.
Návod spolu s bezpečnostními pokyn y uschovejte.
L
Buďte pozorní. Dávejte pozor na to, co děláte. Přistupujte
k práci odpovědně. Nepoužívejte přístroj, když jste
unavení nebo když jste pod vlivem drog, alkoholu nebo
léků. Okamžik nepozornosti při použití přístroje může mít
za následky vážná zranění.
Před uvedení do provozu se řádně se strojem seznamte
prostřednictvím návodu.
Neužívejte stroj k jiným účelům než je zde popsáno.
Užívejte bezpečné pracovní místo.
Zaujměte pracovní postavení, které je v oblasti
ovládacích úchytů. Obr. 8.
Nikdy nestoupejte na stroj.
Při práci noste ochranné brýle nebo vizír, ochranu uší,
pracovní rukavice, pracovní boty s ocelovou špičkou.
Pracovní oděv bez volných částí a pracujte bez ozdob,
která by mohly být zachyceny pohyblivými částmi stroje.
Obsluhující je při práci zodpovědný vůči dalším osobám.
Děti a mladiství pod 18 let nesmějí stroj obsluhovat.
Nepouštějte děti do pracovního okruhu stroje.
Nikdy nespouštějte stroj nachází-li se v jeho blízkosti další
osoba.
Nenechávejte stroj bez dozoru.
Udržujte pracoviště v pořádku.Nepořádek může být
př
íčinou úrazu.
Nepřetěžujte stroj. Výsledky práce jsou nejlepší pracujete-
li s udanými výkonnostními hodnotami.
Stroj provozujte pouze s řádně namontovanými
ochrannými prvky a neměňte na stroji nic co by mohlo
ovlivnit bezpečnost práce.
Stroj neuzpůsobujte a jeho části neměňte.
Stroj nestříkejte vodou (nebezpečí úrazu el. proudem).
Stroj nenechávejte na dešti a stejně tak při dešti
nepracujte.
Stroj uschovejte v suchém místě a ne v dosahu dětí.
Stroj vypněte a odpojte od sítě při
− opravách
− údržbě a čištění
− odstraňování poruch
− transportu
− opuštění stroje (i krátkodobě)
Kontrolujte stroj z hlediska event.poškození:
− před každým započetím práce musí ochranné prvky
být pečlivě prověřeny z hlediska jejich bezvadné
funkce.
− zkontrolujte zda všechny pohyblivé části js ou funkční,
nelepí, nedrhnou a nejsou poškozené. Zkontrolujte
jeich správné namontování. Tyto části musí splňovat
35
Page 37

podmínky bezvadného provozu a tím bezpečný chod
stroje.
− poškozené bezpečnostní prvky nebo jiné části musí
být prostřednictvím odborné firmy opraveny nebo
vyměněny (není-li uvedeno v návodu jinak).
− poškozené či nečitelné bezpečnostní samolepky na
stroji je třeba vyměnit.
Elektrická bezpečnost
Provedení přípojného kabelu podle IEC 602 45 (H 07 RN-
F) s příčným průměrem od nejméně
⇒ 230 V ~
3 x 1,5 qmm při délce kabelu max. do 10 m.
⇒ 400 V 3~
5 x 1,5 qmm při délce kabelu max. do 10 m.
Nikdy nepoužívejte kabel delší než 10 m. Delší kabely
mohou způsobit výpadek proudu. Motor nedosáhne svého
maximálního výkonu, funkce stroje je redukována.
Při pokládání přípojného kabelu dbejte na to, aby nebyl
překroucen nebo skřípnut a aby přípojná spojení (vidlice,
zásuvka) nebylo vlhké.
Nepoužívejte kabel, který není pro připojení určen.
Chraňte kabel před horkem, olejem a ostrými hranami. Při
vytažení vidlice ze zásuvky netahejte za kabel.
Prodlužovací kabel pravidelně kontrolujte a je-li poškozen
ihned jej vyměňte.
Nepoužívejte žádné defektní přípojné kabely.
Ve venkovním prostředí použijte pouze kabel, který je pro
práci pod širým nebem schválen.
Nikdy nepoužívejte provizorní připojení el. proudu ke
stroji.
Ochranné el. prvky nikdy nepřemosťujte nebo nevyřazujte
z provozu.
El.připojení resp. oprava el.částí stroje musí svěřena
koncesované elektrofimě nebo našemu obchodnímu
oddělení. Dbejte na splnění místních bezpečnostních
předpisů a opatřeních.
Opravy ostatních částí stroje provádí buď výrobce nebo
jím pověřená firma.
Používejte pouze originální náhradní díly. Použitích
jiných náhradních dílů může přinést úrazy či poškození
majetku. V těchto případech se výrobce vzdává veškeré
zodpovědnosti.
PPookkyynnyy pprroo ppřřeepprraavvuu
Před každým transportem sjeďte se štípacím nožem
zcela dolů.
Pro transport uchopte štípač jednou rukou za držadlo a
naklopte jej mírně směrem k sobě. V této poloze je možné
štípač bez námahy přemístit.
Aby jste zabránili úniku oleje při transportu,musíte
odvzdušňovací šroub opět pevně utáhnout.
5
transportní pás
UUmmííssttěěnníí ssttrroojjee
Zablokujte kolečka klíny pro znemožnění posunu během
práce.
Dbejte na to,aby pracoviště splňovalo následující podmínky:
− protiskluzná podlaha
− rovná podlaha
− eliminace možnosti klopýtnutí
− dostatek světla
Stroj neprovozujte v blízkosti zemního plynu, benzinových
výparů nebo dalších těkavých látek, které jsou vznětlivé.
UUvveeddeenníí ddoo pprroovvoozzuu
Ujistěte se, že stroj je kompletně smontován dle předpisů.
Před uvedením do provozu zkontrolujte:
− přípojný kabel na poškození či defekt (takové kabely
nelze použít).
− poškození přístroje (viz bezpečná prá ce)
− že všechny šrouby jsou řádně dotaženy.
− hydrauliku na průsak oleje
− stav oleje
− Odvzdušnění: Před uváděním štípačky na palivové
dříví odvzdušněte hydraulické zařízení.
¾ Uvolněte zátku(šroub) (9) o několik otáček,aby stlačený
vzduch mohl uniknout.
¾ Nechte klapku během provozu otevřenou.
¾ Po skončení práce a před tím,než budete se štípačem
hýbat,opět uzavřete zátku(šroub) aby olej nevytekl.
L Nebude-li hydraulické zařízení odvzdušněno, uzavřený
vzduch poškodí těsnění a způsobí trvalé poškození štípačky
na palivové dříví.
L Připojení k síti
Porovnejte napětí uvedené na typovém štítku stroje
s napětím ve Vaší síti. Stroj připojte na odpovídající napětí
do řádné předpisové zásuvky.
Použijte kabel s dostatečným průřezem.
Připojení stroje proveďte přes Fi-ochranný jistič 30 mA.
36
Page 38

L Jištění:16 A
400 V 3~ Î 16 A
L Zapnutí / Vypnutí
Před každým použitím zařízení nejdřív zkontrolujte
funkci vypínacího systému (zapnutím a vypnutím).
Nepoužívejte žádné přístroje, u kterých se nedá spínač
zapínat a vypínat. Poškozené spínače se musejí dát k
opravě nebo výměně do servisu.
Zapnutí
Přístroj se zapne
stisknutím zeleného
knoflíku
6
Vypnutí
Přístroj se vypne
stisknutím červeného
knoflíku
L Jištěni proti znovurozběhu při výpadku
proudu (vypínač při nulovém napětí)
Při výpadku proudu se přístroj automaticky vypne. Nové
zapnutí se provede opětovným stisknutím zeleného knoflíku.
Štípač palivového dřeva s 400 V 3~
Dbejte na směr otáčení motoru (viz šipka na motoru),
neboť točí-li se motor nesprávným směrem, poškozuje to
olejové čerpadlo.
¾ Zapněte motor; štípací nůž automaticky najede do nejvyšší
polohy.
¾ Pokud se štípací nůž v nejvyšší poloze již nachází:
uchopte obě ovládací páky a zatlačte je směrem dolů,
štípací nůž zajede dolů.
¾ Pokud se štípací nůž po rozběhu motoru nepohy buje, pak
motor vypněte a změňte směr otáčení.
7
Směr otáčení
můžete změnit tak,
že zasunete šroubovák do příslušné
štěrbiny v přírubě
zástrčky a lehkým
tlakem pohybem
doleva nebo doprava
nastavíte správný
směr otáčení.
L Hydraulika
Stroj nikdy nespouštět hrozí-li nebezpečí prostřednictvím
hydraulické kapaliny.
Ujistěte se, že stroj a pracovní místo je čisté bez olejovýc h
skvrn.
Nebezpečí uklouznutí a nebezpečí ohně.
Pravidelně kontrolujte množství hydraulického oleje
v nádrži (viz kapitola o údržbě a péči).
Obsah nádrže: 7,0 l
PPrrááccee ssee ššttííppaaččeemm ppaalliivvoovvééhhoo ddřřeevvaa
Štípač obsluhuje pouze 1 osoba.
Štípač mohou obsluhovat pouze osoby starší 18 let, které
byly dokonale seznámeny s návodem a se všemi
bezpečnostními pokyny.
Při práci vždy noste ochranné brýle, ochran u uší, pr acovní
obuv, rukavice a řádný pracovní oblek.
Nikdy neštípejte špalky, ketré obsahují cizorodé předměty
(kov).
Rozštípané špalky představují nebezpečný pracovní
prostor. Nebezpečí klopýtnutí, uklouznutí nebo pádu.
Udržujte pracoviště vždy uklizené.
Při zapnutém stroji nepřibližujte ruce k pohyblivým částem
stroje. Dodržujte bezpečnou vzdálenost od špalku,
posunovače a štípacího klínu.
Štípejte pouze špalky, které mají max. délku 1350 mm.
L Zkontrolujte před štípáním, jestli je štípací sloupek
dostatečně namazaný, aby mohl bez problémů zajíždět a
vyjíždět.
Co mohu štípat?
Velikost štípaného dřeva (špalku).
Délka: max. 1350 mm
Průměr: min. 120 – max. 400 mm
Průměr špalku je doporučen protože:
− tenké dřevo je obtížné štípat jestliže má více suků nebo
jestliže dřevná vlákna jsou příliš silná.
− silnější dřevo (více než 400 mm) lze štípat jestliže je bez
suků a dřevná vlákna jsou hladká a rovně vedena.
Neštípejte zelené špalky (čerstvé). Suché uskladněné dřevo
rozštípnete snadněji a nebudete mít problémy s častým
„zakousnutím“ dřeva jako u vlhké ho špalku.
Obsluha
Práce obouruč
Neobsluhujte štípač dřeva nikdy ve dvou.
Nikdy neblokujte ovládací úchyty (upínací lišty).
1. Přístroj se zapne stisknutím zeleného knoflíku. Vyčkejte
několik sekund než motor dosáhne svých oráček a než se
hydraulika natlakuje.
L U štípačů palivového dřeva s trojfázovým motorem
(400 V 3~) dbejte na směr chodu motoru, neboť špatný
směr otáčení při provozu motoru poškozuje olejové
čerpadlo.
37
Page 39

L Při teplotách nižších než –5° C nechejte štípač dřeva
běžet alespoň 15 min. naprázdno, aby se olej mohl zahřát.
2. Položte kmen na stůl štípače.
L Materiál určený ke štípání zpracovávejte výhradně ve
směru vláken.
8
10
3. Přidržte kmen upínacími lištami.
4. Stlačte obě ovládací madl a současně dolů.
Î Štípací nůž sjede dolů a rozštípne kmen.
5. Uvolněte oba ovládací úchyty, štípací nůž zajede zpět do
své výchozí polohy.
L Uvolníte-li pouze jeden ovládací úchyt, zůstane
štípací nůž stát.
Zvláštní pokyny pro štípání
Příprava:
Připravte ke štípání špalky, které odpovídají předem
uvedeným rozměrům a dbejte aby špalky byly rovně (kolmo)
nařezány. Špalek vkládejte do štípače tak, aby pro Vás
nevzniklo žádné nebezpečí.
Přestavení výšky zdvihu
U kratších kusů dřeva můžete pracovní výkon zvýšit
zkrácením zpětného chodu štípacího nože.
1. Postavte kmen na
štípací stůl a
popojeďte se
štípacím nožem
stisknutím obou
ovládacích úchytů
směrem dolů až
ca. na 3 - 5 cm ke
kmeni.
2. Uvolněte jeden
ovládací úchyt, aby
štípací nůž zůstal
stát v této pozici.
9
3. Vypněte přístroj a vytáhněte vidlici ze zásuvky.
4. Pusťte druhý ovládací úchyt
5. Zkraťte zpětný chod na tyči umístěné na straně
uchycením zajišťovacího šroubu v potřebné výšce.
11
zajišťovací šroub
Nastavení výšky stolu
horní poloha desky stolu pro kmeny do 59 cm
střední poloha stolu pro kmeny do 85 cm
spodní poloha stolu pro kmeny do 135 cm
1. Špalky do 59 cm
štípejte na stole
(6).
2. Špalky do 89 cm
štípejte na stole
(7). Vytáhněte
stolní desku (6)
ven.
3. Špa lky do 135 cm
postavte na sokl
(10).
12
38
Page 40

Seřízení štípacího kříže
y
1. Pov olte up ev ňovací šroub a matici.
2. Štípací kříž na stavte do žádo ucí polohy.
3. Upevňovací šroub a matici znovu utáhněte.
13
zajišťovací šroub
Štípací kříž
Štípání krátkého dříví:
1. Horní poloha desky stolu
2. Postavte špalek na pracovní desku (6) štípače.
L Dříví na štípání zpracovávejte výhradně ve směru
vláken.
3. Přidržte kmen upínacími lištami.
L Nikdy špalek,který zřejmě nelze rozštípnout,nezkoušejte
donutit ke štěpu tím, že budete po dobu více sekund „tlačit“
na ovládací madla. To může vést k poškození motoru.
Umístěte kmen znovu na stůl a opakujte štípání nebo k men
odložte stranou.
Jak uvolnit zaklínovaný špalek ve stroji.
Existuje nebezpečí, že sukovité dřevo se při štípání zaklíní.
1. Vypněte stroj a vytáhněte vidlici ze zás uvky.
2. Zaklíněný kmen uvolníte tak, že jím budete opatrně
pohybovat sem a tam.
Zaklíněný kmen nikdy neuvolňujte pomocí kladiva.
Nikdy zaklíněný kmen nevyřezávejte pilou.
Nežádejte další osobu o pomoc.
Ukončení práce
¾ Zajeďte štípacím nožem do spodní polohy (v zasunutém
stavu).
¾ Pusťte ovládací úchyt.
¾ Vypněte stroj a potom vytáhněte vidlici ze zásuvky.
¾ Učiňte kroky pospané v kapitole údržba a péče.
ÚÚddrržžbbaa aa ppééččee oo ssttrroojj
Štípání dlouhého dřeva:
1. Postavte
špalek na
pracovní
desku.
2. Sundejte
štípací kříž.
3. Postavte
špalek na sokl
štípače.
14
Možné poruchy při štípání dlouhého dříví: Štípané dřevo
L
není zcela rozštípnuto, pevně svírá štípací nůž a při zpětném
chodu se zvedá i kmen. Kmen již nelze uvolnit rukama.
V takovém případě postupujte takto:
1. Vypněte stroj.
2. Upevněte, podle délky štípaného špalku, pracovní desku
(6) do horní polohy, nebo natočte stolní desku (7) kolem.
3. Zapněte stro j a pokračujte ve štípání
Před těmito pracemi vždy odpojit stroj od sítě
(vytažením vidlice ze zásuvky).
Při těchto pracech vždy noste ochranné rukavice.
L Dbejte na dodržení následných kroků- aby funkce stroje
byla zachována.
Po skončení práce stroj řádně vyčistěte.
Odstraňte veškeré zbytky praskyřice.
Štípací sloupek pravidelně mažte tukem nebo
ekologickým olejem v rozprašovači.
Prověřte množství oleje resp. olej vyměňte.
Kontrolujte pravidelně hydraulické hadice a hadicové
spoje z hlediska jejich těsnosti a p evnosti.
Naostření štípacího nože
Po dlouhé době provozování přístroje, dojde-li ke snížení
štípacího výkonu nebo v případě lehké deformace ostří
štípací nůž přibruste nebo ho naostřete jemným pilníkem
(odstraňte otřep).
15
¾ Nikdy nezkoušejte štípat 2 ks dřeva v jednom pracovním
kroku.
¾ Nikdy špalek v průběhu pracovního kroku neměňte
(neopravovat jeho polohu, nebo jej nahrazo vat jiným).
39
Ostření
hran
Page 41

Jak zkontrolovat stav oleje?
1. Štípací sloupek
musí být zasu-nutý.
2. Měrku vyjmete.
3. Očistěte měrku a
těsnění.
4. Ćistou měrku
vsuňte opět do
otvoru až na doraz.
5. Měrku opět vyjmete
16
leží-li
hladina
oleje mezi
oběma
označeními
, je oleje ve
stroji
dostatek.
17
je-li
hladina
oleje pod
dolní
ryskou, je
třeba olej
doplnit.
Použijte čistý trychtýř.
Horní ryska Dolní ryska
3. Zkontrolujt
e těsnění.
Nesmí být
poškozené.
Při
poškození
vyměnit.
4. Ćistou měrku vsuňte opět do otvoru.
18
Kdy je nutné olej vyměnit?
První olej je třeba vyměnit po 50 pracovních hodinách,
potom každých 500 pracovních hodin.
Výměna oleje:
1. Štípací sloupek musí být v zasunutém stavu.
2.
Upevněte stůl v horní poloze.
3. Nádobu (nejméně 7 l obsah) postavte pod stroj.
4. Vyšroubujte výpustnou zátku, aby olej mohl vytéct.
19
5. Znovu nasaďte těsnění a vložte vypouštěcí zátku.
6. Pomocí čistého trychtýře vlijte nový hydraulicky olej (7,0 l).
7. Očistěte měrku a těsnění.
8. Přezkoušejte těsnost. Je-li těsnění poškozeno musí být
vyměněno.
9. Ćistou měrku vsuňte opět do otvoru.
Starého oleje se zbavte dle zákona (sběrné místo). Je
zakázáno starý olej vylívat do půdy či smíchat
s odpadem.
L Hydraulický olej
Pro stroj doporučujeme následující oleje:
¾ Shell Tellus T 22
¾ Aral Vitam Gf 22
¾ BP Energol HLP 22
¾ Mobil DTE 11
¾ nebo srovnatelné
Jiné oleje nepoužívat. Použití jiného oleje negativně
ovlivňuje funkci hydraulického cylindru.
ZZáárruukkaa
1. Poskyt ujem e záruční dobu 2 roky od data pr odej e výro bku
konečnému uživateli. V průběhu celé záruční doby ručíme
za zachování technických parametrů výrobku, za
správnou funkci všech částí a za jakost použitých
materiálů. Pokud se na přístroji během záruční doby
vyskytne zřejmá vada materiálu, konstrukce nebo v ýroby,
bude bezplatně odstraněna.
2. Záruční nároky zanikají, pokud k poškození došlo při
přepravě nebo v důsledku nesprávného použití,
nerespektování návodu k obsluze, neodborné opravy
nebo pokud bylo způsobeno vyšší mocí. Záruka se
nevztahuje na běžné opotřebení štípacího klínu, hydr.
oleje, posunovacích a vodicích částí, těsnění a koleček.
3. Záruční opravy provádí výrobce nebo jím pověřený
zástupce. Bližší informace jsou uvedeny v Záručním listě.
4. Záruka platí jen při používání originálních náhradních dílů.
5. Změny sloužící technickému pokroku jsou vyhrazeny.
6. Všechny součásti z umělé hmoty jsou označeny pro
tříděnou recyklaci. Další likvidaci obalu a stroje po
ukončení životnosti provádějte v souladu s platnými
předpisy.
40
Page 42

TTeecchhnniicckkáá ddaattaa
Model ASP 10,1350
Typ ASP 10,1350
Síla na klínu 100 kN (10 t) ± 10 %
Délka špalku max. 1350 mm
Průměr špalku min. 120 – max. 400 mm
Posun na klín
Rychlost při chodu vpřed ca. 0,04 m/sek.
Rychlost při zpětném chodu ca. 0,13 m/sek.
Hydraulický olej (max.) 7,0 Liter
Hydraulický tlak 21 Mpa (210 bar)
Výkon motoru střídavý proud P1 = 3800 W ( S6-40% )
Připojení trojfázový proud 400 V 3~ 50 Hz, 16 A
Rozměry délka 840 x šířka 920 x výška 1620 mm
Váha ca. 209 kg
≈ 550 mm
trojfázový proud P
= 3000 W ( S6-40% )
1
MMoožžnnéé ppoorruucchhyy
Závada možná příčina Odstranění
Špalek není rozštípnut (slabý
výkon)
štípací sloupek se při zasouvání
viklá nebo silně vibruje
štípací sloupek se nezasouvá
motor naskočí, ale nedojde k
zasunutí štípacího sloupku
Motor läuft nicht an
⇒ špatná poloha špalku
⇒ špalek překračuje rozměry
⇒ štípací nůž neštípá
⇒ malý tlak oleje
⇒ uvolňovací tyčové ústrojí je ohnuté (nedojde k
úplnému zamáčknutí hydraulické páky)
⇒ použití kabelu přes 10 m nebo kabelu
s malým prům
⇒ vzduch v systému
⇒ Štípací sloupek není dostatečně namazaný
tukem nebo olejem.
⇒ závada v hydr. systému ⇒ odb. firma
⇒ chybný směr otáčení motoru ⇒ zkontrolovat směr otáčení motoru
⇒ závada v el. připojení
⇒ trojfázový motor běží na 2 fáze
⇒ závada příp. kabelu
⇒ defektní motor
⇒ znovu vložit do stroje
⇒ použít dopor. rozměr
⇒ naostřit štípací nůž, zkontrolovat, zda
není ostří otřepené nebo zda na něm
nejsou vruby
⇒ kontrola stavu oleje. Jestliže po
doplnění ne dojde ke zlepšení, obraťe
se na odbornou firmu.
⇒ nechat tyčové ústrojí seřídit výrobcem
nebo jím jmenovanou firmou
⇒ použít předepsaný kabel
⇒ kontrola oleje
⇒ Namažte štípací sloupek tukem nebo
nastříkejte olejem v rozprašovači.
nejde-li závada takto odstranit, obraťe se
na odb. firmu.
trojfázový proud: změnit směr otáčení
motoru (viz str. 37)
střídavý proud: odb. firma
⇒ kontrola jištění
⇒ nechat elektrikářem zkontrolovat
pojistku a přívod
⇒ výměna kabelu
⇒ odb. firma
41
Page 43
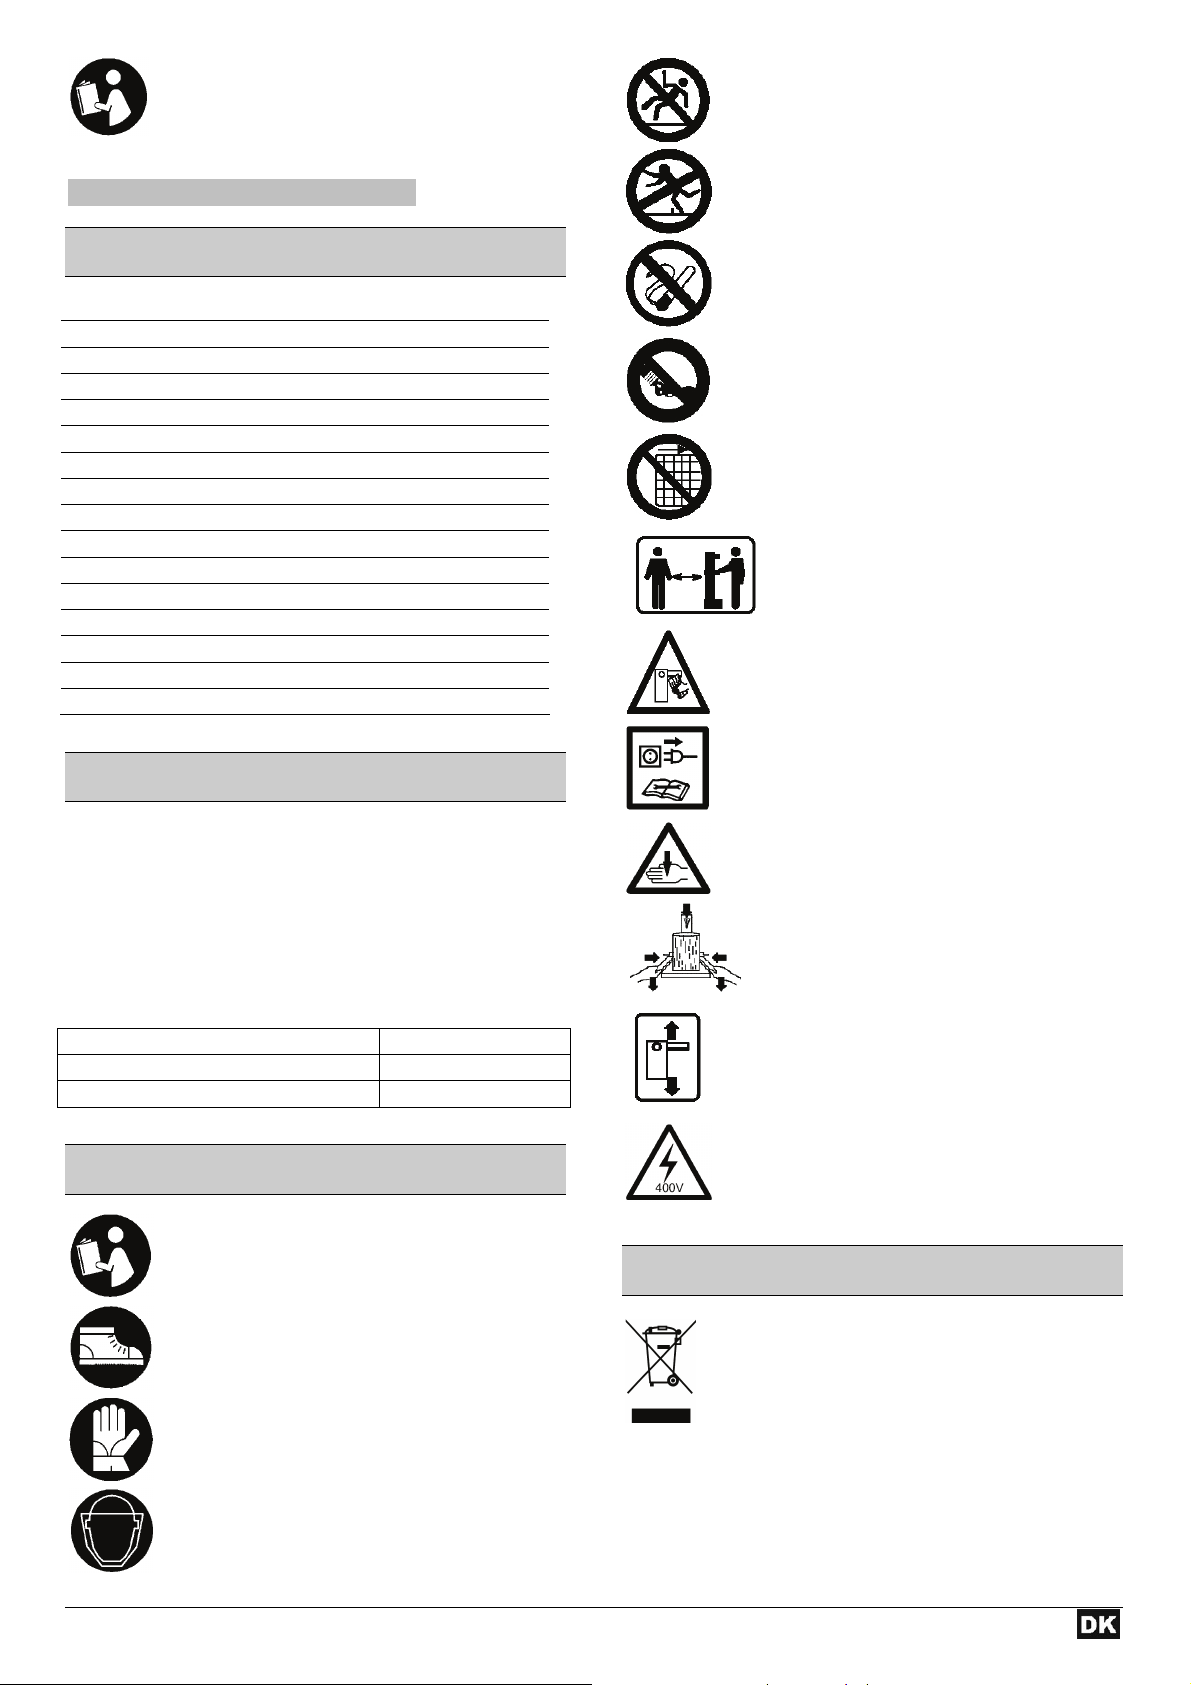
Anvend ikke apparatet, før De har læst betjeningsvejledningen, iagttaget de angivne
henvisnin-ger og monteret apparatet som
beskrevet.
Bør opbevares til senere anvendelse.
IInnddhhoolldd
Overensstemmelseserklæring 1
Reservdele / Beskrivelse af apparatet 2
Montering 5
Leveringsomfang 42
Symboler 42
Formålsbestemt anvendelse 43
Uberegnelige risici 43
Sikkert arbejde 43
Transport 44
Opstilling 44
Igangsætning 44
Arbejde med brændekløveren 45
Vedligeholdelse og pleje 48
Garanti 49
Tekniske data 49
Mulige fejl 50
LLeevveerriinnggssoommffaanngg
Efter ud pakning skal kartonens in dhold kontroller es med
hensyn til
! fuldstændighed
! evt. transportskader
Reklamationer skal omgående meddeles forhandleren,
leverandøren eller producenten. Senere reklamationer
anerkendes ikke.
1 formonteret apparatenhed 2 hjul
1 betjeningsarm til højre/ til venstre 1 tilbehørspose
1 aksel 1 brugsanvisning
SSyymmbboolleerr ppåå aappppaarraatteett
Før igangsætningen skal brugsanvisningen og sikkerhedsforskrifterne læses
igennem og overholdes.
Bær sikkerhedssko under arbejdet for at
beskytte fødderne mod faldende
brændestykker.
Bær beskyttelseshandsker under arbejdet
for at beskytte hænderne mod spån og
splinter.
Bær beskyttelsesbriller eller ansigtsskærm
under arbejdet for at beskytte øjnene mod
spån og splinter.
Hold dit arbejdsområde i orden! Uorden
kan forårsage ulykker.
Olie er brandfarlig og kan eksplodere.
rygning og åben ild forbudt.
Bortskaf spildolien efter forskrifterne ( lokal
modtagestation for spildolie). Det er
forbudt at lede spildolie ned i jorden elle r
at blande den med normal affald.
Det er forbudt at fjerne eller ændre
beskyttelses- og sikkerhedsanordninger.
Kun brugeren må opholde si g i maskinens
arbejdsområde. Uvedkommende personer
samt hus- og nyttedyr skal holdes borte fra
farezonen (minimumsafstand 5 m).
Fjern ikke fastklemte stammer med
hænderne.
Bemærk!
Før reparations-, vedligeholdelses- og
rengøringsarbejde skal motoren afbrydes
og netstikket trækkes ud.
Fare for snitsår og indeklemning; berør
aldrig farlige områder, når kløvekilen
bevæger sig.
Hold materialet under kløvning med
spændekloen
Ret altid din fulde opmærksomhed på
spalteknivens bevægelse.
Højspænding, livsfare
SSyymmbbooll aappppaarraatt // eemmbbaallllaaggee
Elektriske apparater hører ikke i husholdningsaffaldet. Tilfør apparater, tilbehør og
emballage et miljøvenligt genbrug.
42
Page 44

SSyymmbboolleerr ii bbrruuggssaannvviissnniinngg
Truende fare eller farlig situation. Ignorering af
disse henvisninger kan medføre kvæstelser eller
materielle skader.
L
Vigtige henvisninger til saglig korrekt håndtering.
Ignorering af disse henvisninger kan medføre
forstyrrelser.
Brugerhenvisninger. Disse henvisninger hjælper
Dem med at anvende alle funktioner optimalt.
Montering, betjening og vedligeholdelse. Her
forklares nøjagtigt, hvad De skal gøre.
FFoorrmmåållssbbeesstteemmtt aannvveennddeellssee
Brændekløveren må kun anvendes til kløvning af træ.
Kun lige afskåret træ egner sig til brændekløveren.
Fremmedlegemer (søm, tråd, beton osv.) skal under
alle omstændigheder fjernes fra det træ, der skal
kløves.
Ethvert derudover gående brug gælder som ukorrekt
anvendelse. Producenten hæfter ikke for heraf
resulterende skader - risikoen påhviler ene og alene
brugeren.
UUbbeerreeggnneelliiggee rriissiiccii
Også ved formålsbestemt anvendelse kan der, på trods
af overholdelse af alle gældende sikkerhedsbestemmelser,
endnu bestå uberegnelige risici, forårsaget af
konstruktionsforudsætningerne.
Uberegnelige risici kan minimeres, når både
"Sikkerhedshenvisninger" og "Formålsbestemt anvendelse
samt driftsvejledningen iagttages.
Hensyntagen og forsigtighed reducerer risikoen for personog materielle skader.
Ignorering eller tilsidesættelse af sikkerhedsfor-
anstaltninger kan resultere i t ilskadekomst af bruger eller
beskadigelse af materielle ting.
Uopmærksomhed, tilsidesættelse af sikkerheds-
forskrifterne og ukorrekt brug kan forårsage skader på
hænder og fingre på grund af spaltekniven, der b evæges.
Fare på grund af strøm ved anvendelse af ukorrekte
eltilslutningskabler.
Berøring af spændingsførende dele ved åbnede elektriske
komponenter.
Derudover kan der på trods af alle trufne forholdsregler bestå
skjulte uberegnelige risici.
SSiikkkkeerrtt aarrbbeejjddee
Læs og iagttag før igangsætning af dette produkt
følgende henvisninger og din brancheforenings
forskrifter om forebyggelse af ulykker hhv. de gyldige
sikkerhedsbestemmelser i det pågældende land for at
beskytte digselv og andre mod eventuelle skader.
Giv sikkerhedshenvisningerne videre til alle personer,
L
der arbejder med apparatet.
Opbevar disse sikkerhedshenvisninger på et sikkert
L
sted.
Gør dig fortroligtmed apparatet før brug ved hjælp af
betjeningsvejledningen.
Anvend ikke apparatet til formål, som det ikke er beregnet
til (se "Formålsbestemt anvendelse" og "Arbejde med
brændekløveren").
Sørg for en stabil kropsstilling og hold hele tiden
balancen.
Indtag en arbejdsstilling, der er i betjeningshåndtag enes
område. Ill. 8.
Stå aldrig på maskin en.
Vær forsigtig. Vær opmærksom på arbejdet. Påbegynd
arbejdet varsomt. Anvend maskinen ikke:
− når du er træt.
− under påvirkning af narkotika, alkohol eller lægemidler,
som kan have indflydelse på din dømmekraft.
Bær under arbejdet
− beskyttelsesbriller eller ansigtsskærm
− arbejdshandsker
− høreværn
− sikkerhedssko med stålkapper
Anvend egnet arbejdstøj:
− intet løstsiddende tøj eller smykker (de kan gribes af
bevægelige dele)
Brugeren er ansvarlig over for tredjemænd i apparatets
arbejdsområde.
Børn og unge under 18 år må ikke betjene maskinen.
Børn må ikke komme i nærheden af apparatet.
Anvend aldrig apparatet, mens uvedkommende er i
nærheden.
Apparat må aldrig være uden opsyn.
Hold arbejdsområdet i orden! Uorden kan resultere i
ulykker.
Overbelast ikke apparatet! Du arbejder bedre og mere
sikkert i det angivne effektområde.
Apparatet må kun anvendes med komplette og korrekt
anbragte sikkerhedsudstyr og der må ikke ændr es noget
på apparatet, som kan påvirke sikkerheden.
Apparatets værktøj eller dele må ikke ændres.
Spul ikke apparatet med vand (farekilde elektrisk strøm).
Apparatet må ikke stå ude i regn og der må ikke
arbejdes i regnvejr.
Opbevar det kun på et tørt sted uden for børns
rækkevidde.
Sluk for apparatet og træk netstikket ud af
stikkontakten ved:
− reparationsarbejde
− vedligeholdelses- og rengøringsarbejde
− afhjælpning af fejl
− transport
− når apparatet forlades (også ved kortvarige
afbrydelser)
43
Page 45

Kontrol af apparatet for eventuelle beskadigelser:
− Før yderligere brug af apparatet skal
sikkerhedsudstyret omhyggeligt kontrolleres med
hensyn til deres korrekte og tiltænkte funktion.
− Kontroller, om de bevægelige dele fungerer korrekt og
ikke sidder fast eller om dele er beskadigede. Samtlige
dele skal være rigtigt monteret og opfylde alle
betingelser for at sikre upåklagelig drift.
− Beskadiget sikkerhedsudstyr og dele skal repareres
eller udskiftes fagligt korrekt af et autoris eret værkste d
så vidt ikke angivet på anden måde i
brugsanvisningen.
− Beskadigede eller ikke læsbare sikkerhedsmærkater
skal erstattes.
Elektrisk sikkerhed
Udførelse af tilslutningsledningen iht. IEC 60245 (H 07
RN-F) med et tværsnit af korerne på mindst
⇒ 230 V ~
3 x 1,5 mm² ved en kabellængde til max. 10 m
⇒ 400 V 3~
5 x 1,5 mm² ved en kabellængde til max. 10 m
Anvend aldrig tilslutningsledninger over 10 m. Længere
tilslutningsledninger forårsager spændingsfald. Motoren
opnår ikke mere sin maksimale effekt, maskinfunktionen
reduceres.
Ved trækning af tilslutningskablerne skal De være
opmærksom på, at disse ikke klemmes inde, bøjes, o g at
stikforbindelsen ikke bliver våd.
Anvend ikke kablet til formål, som det ikke er beregnet til.
Beskyt kablet mod varme, olie og skarpe kanter.
Anvend kablet ikke til at trække stikket ud af
stikkontakten.
Kontroller forlængerledningen regelmæs sigt og udskift i
tilfælde af beskadigelser.
Anvend ingen defekte tilslutningskabler.
Anvend udendørs kun de hertil tilladte og tilsvarende
markerede forlængerledninger.
Anvend ingen provisoriske eltilslutninger.
Sikkerhedsudstyr må aldrig suspenderes eller sættes ud
af drift.
Den elektriske tilslutning hhv. reparationer på
apparatets elektriske dele må kun udføres af en
autoriseret elektriker eller en af vore serviceafdeli nger.
Lokale forskrifter især i henseende til
beskyttelsesforanstaltninger skal i agttages.
Reparationer på apparatets andre dele skal lades
udføre af producenten hhv. en af hans
serviceafdelinger.
Anvend kun origina le reservede le. Gennem anvendelse
af andre reservedele og andet tilbehør kan der opstå
ulykker for brugeren. For heraf resulterende skader
overtager producenten intet ansvar.
TTrraannssppoorrtt
Kør spaltekniven helt ned før hver transport.
Til transport hold
med en hånd fast
og vip
5
Transport band
brændekløveren
hen imod dig. I
denne stilling kan
kløveren nu nemt
transporteres.
For at forhindre at
der løber olie ud
under transporten
skal
olietankdækslet
være skruet
stramt på.
OOppssttiilllliinngg
Hjulene skal blokeres med kiler for at undgå, at maskinen
ruller væk under brug.
Kontroller, at arbejdsområdet opfylder følgende betingelser:
− skridsikkert
− plant
− fri for farer med hensyn til at snuble
− tilstrækkeligt lys
Anvend ikke maskinen i nærheden af biogas, benzinrender
eller andre let brændbare materialer.
IIggaannggssæættnniinngg
Kontroller, at apparatet er monteret komplet og efter
reglementerne.
Kontroller før hver brug:
− Tilslutningskablerne med hensyn til defekte
områder (revner, snit o.l.)
Anv end ingen defekte kabler.
− Eventuelle beskadigelser (se "Sikkert arbejde")
− Om alle skruer er strammede.
− hydraulikken for lækager
− oliestanden
− Udluftning: Udluft hydraulikanlægget inden du tager
Transportbånd
brændespalteren i brug
¾Løsn olietankdækslet (9) nogle omdrejninger, således
at luften kan undvige fra olietanken.
¾ Lad kappen være åben under driften.
¾ Inden brændekløveren bevæges, luk olietankdækslet,
da der ellers vil løbe olie ud.
L Hvis hydraulikanlægget ikke bliver udluftet, beskadiger
den indesluttede luft pakningerne og forårsager en
permanent beskadigelse af brændekløveren.
44
Page 46

L Nettilslutning
Sammenlign på apparatets mærkeplade den angivne
spænding med netspændingen og tilslut apparatet til en
tilsvarende og korrekte stikkontakt.
Anvend forlængerledninger med tilstrækkeligt tværsnit.
Tilslut maskinen via et Fi-relæ (fejlstrømsrelæ) på 30 mA.
L Sikring
400 V 3~ Î 16 A
L Indkobling / Frakobling
Kontrollér inden enhver brug funktionen af
afbrydelsesanordningen (ved at tænde/slukke).
Anvend intet apparat, hvor kontakten ikke kan omskiftes
til og fra. Beskadigede kontakter skal straks repareres
eller udskiftes af kundeservice.
Indkobling
Tryk på den grønne knap
6
Frakobling
Tryk på den røde knap
LStrømsvigt (nulspændingsrelæ)
I tilfælde af strømsvigt kobler apparatet automatisk fra. For at
genindkoble, tryk igen på den grønne knap.
Brændekløver med 400 V 3~
Vær opmærksom på motorens drejeretning (se
motorpilen), da drift med forkert drejeretning beskadiger
oliepumpen.
¾ Tænd motoren; spalte-kniven kører automatisk i den
højeste position.
¾ Befinder spaltekniven sig allerede i den højeste position:
Grib om begge betjeningsgreb og tryk dem ned,
spaltekniven kører ned.
¾ Bevæger spaltekniven sig ikke ned efter af motor er
startet, slukkes motoren, og drejeretningen ændres.
Drejeretningen kan
ændres ved at stikke en
skruetrækker i den hertil
beregnede slids i stikkraven og dreje den mod
venstre eller højre med
et let tryk.
7
L Hydraulik
Anvend aldrig maskinen, når der består far e på grund af
hydraulikvæske.
Kontroller, at maskinen og arbejdsområdet er rent og frit
for oliepøle.
Glide- og brandfare!
Kontroller regelmæssigt, om der er nok hydraulikolie i
beholderen (se Vedligeholdelse og pleje)
Indhold: 7,0 liter
AArrbbeejjddee mmeedd bbrræænnddeekklløøvveerreenn
Ekstra SIKKERHEDSHENVISNINGER
Brændekløveren må kun betjenes af én person.
Kun personer over 18 år, som har læst og forstået
brugsanvisningen, må betjene maskinen.
Anvend beskyttelsesudstyret (beskyttelsesbriller/
ansigtsskærm, handsker, sikkerhedssko) for at beskytte
dig mod mulige kvæstelser.
Kløv aldrig stammer, som indeholder søm, metaltråde
eller andre genstande.
Træ og træspåner, der aller ede er blevet kløvet, udgør et
farligt arbejdsområde. Der er fare for at snuble, glide eller
falde. Arbejdsområdet skal altid være ryddet op.
Læg aldrig hændern e på maskinens bev ægelige de le, når
den er i gang. Overhold en sikkerhedsafstand til
træstamme, skubber og kløvekile for at beskytte
hænderne mod kvæstelser.
Kløv kun træ, som svarer til maks. længde på 1350 mm,
der må forarbejdes.
Opstilling
Hjulene skal blokeres med kiler for at undgå, at maskinen
ruller væk under brug.
Kontroller, at arbejdsområdet opfylder følgende betingelser:
− skridsikkert
− plant
− fri for farer med hensyn til at snuble
− tilstrækkeligt lys
Anvend ikke maskinen i nærheden af biogas, benzinrender
eller andre let brændbare materialer.
Hvad kan jeg kløve?
Stammernes størrelse, der må kløves
Trælængde: max. 1350 mm
Trædiameter: min. 120 – max. 400 mm
Trædiameteren er en anbefalet referencevæ r di, fordi:
− tyndt træ kan være vanskeligt at kløve, hvis det har
knasthuller eller fibrene er for stærke.
− tykkere træ end ∅ 400 mm kan kløves, når fibrene er
glatte og løse.
Forarbejd ingen grønne træstammer. Det er meget nemmere
at kløve tørre, oplagrede træstammer. Disse hænger ikke så
tit fast i maskinen som grønt (vådt) træ.
45
Page 47

Betjening
Tohåndsbetjening
Brændekløveren må aldrig betjenes af to personer.
Bloker aldrig betjeningshåndtagene (spændekløer).
1. Tryk på den grønne knap. Vent et par sekunder, indtil
motoren har nået sin sluthastighed og trykket i
hydraulikpumpen er oprettet.
L Vær opmærksom på motorens drejeretning ved
brændekløvere med drejestrømsmotor (4 00 V 3~), da drift
med forkert drejeretning beskadiger olie pumpen.
L Ved temperaturer under –5 °C skal brænde kløveren
køre i tomgang i mindst 15 min. for at olien kan opvarme
sig.
2. Anbring stammen på kløverens bord.
L Træet må udelukkende be-arbejdes i fiber-retningen.
8
1. Anbring stammen
på kløvebordet og
kør spaltekniven til
ca. 3 - 5 cm mod
stammen ved at
trykke de to
betjeningshåndtag
ned.
2. Slip et af betjeningshåndtagene for
at standse spaltekniven i denne
position.
10
9
3. Hold stammen fast med spæn-dekløerne.
4. Tryk samtidigt begge betjen-ingshåndtag nedad.
Î Spaltekniven kører ned og kløver stammen.
5. Sli p de to betjeningshån dtag; spaltekniven kører tilb age til
sin udgangsposition.
L Når betjeningshåndtaget slippes, standser
spaltekniven.
Særlige henvisninger til kløvning:
Forberedelser:
Forbered træet, der skal kløves, til de maksimale størr elser,
som må forarbejdes, og kontroller, at træet er skåret lige.
Anbring træet således ved brændekløveren, at du ikke
kommer i fare (fare for at snuble).
Slaglængdeindstilling
Ved kortere træstykke kan ydelsen øges ved at forkorte
spalteknives tilbageløb.
3. Sluk for kløveren og træk netstikket ud af kontakten.
4. Slip det andet betjeningshåndtag.
5. Forkort tilbageløbet med stangen på siden ved at fiksere
stopskruen i den nødvendige højde.
11
Låseskrue
Indstilling af bordhøjde
bordpladens øverste position for stammer op til 59 cm
bordpladens midterste position for stammer op ti l 85 cm
soklens nederste position for stammer op til 135 cm.
46
Page 48

12
1. Kløv stammerne op til 59 cm på bordpladen (6).
2. Kløv stammerne op til 89 cm på bordpladen (7). Træk
bordpladen (6) ud.
3. Kløv stammerne op til 135 cm på soklen (10). DrTryk
låsearmen (8) ned og drej bordet (7) til side n.
Justering af spaltekryds
1. Løsn fikseringsskruen.
1. Skub spaltekrydset i den korrekte position.
2. Stram igen fikseringsskruen.
13
Spaltekryds
Fikseringsskrue
Spaltning af kort træ:
1. Øvre position af bordpladen.
2. Læg stammen på brændekløverens bordplade.
L Træet må udelukkende bearbejdes i fiberretningen
3. Hold stammen fast med spændekløerne.
Spaltning af langt træ:
1. Midterste og
laveste
indstilling af
bord eller
sokkel.
2. Fjern
spaltekrydset.
3. Sæt stammen
på
brændekløver
ens bord eller
sokkel.
14
L Mulig fejl ved spaltning af langtømmer: Spaltegodset
bliver ikke spaltet helt, klemmer fast på spaltekniven og b liver
trukket op ved returløb. Stammen kan ikke mere løsnes
manuelt.
I dette tilfælde benytter du følgende fremgangs-måde:
1. Sluk for apparatet.
2. Fastspænd, alt efter længden på den stamme der skal
spaltes, bordpladen (6) i øverste position eller drej
bordet (7) ud.
3. Tænd apparatet og fortsæt spalteproceduren.
¾ Kløv aldrig to stammer i én arbejdsgang.
¾ Læg ikke mere træ på og udskift ikke træ under
arbejdsprocessen.
L Fremtving aldrig kløvning af en stamme ved at
opretholde fremføringen i flere sekunder. Dette kan m edføre
skader på maskinen.
Anbring stammen igen på bordet og g entag kløvningen eller
læg stammen til side.
Hvordan løsnes en fastsiddende stamme?
Der er risiko for at knastfyldte emner kommer i klem me under
kløvningen.
1. Sluk for kløveren og træk netstikket ud af kontakten.
2. Bevæg forsigtigt den fastklemte stamme frem og tilbage
for at løsne den.
Bank aldri g på den fastklemte stamme for at frigøre den.
Sav aldrig den indeklemte stamme ud.
Spørg ikke en ekstra person om hjælp.
Arbejdsslut:
¾ Kør spaltekniven til den nedre position (tilbagekørt
tilstand).
¾ Slip et af betjeningshåndtagene.
¾ Sluk for kløveren og træk netstikket ud af kontakten.
¾ Følg vedligeholdelses- og plejehenvisningerne.
47
Page 49

VVeeddlliiggeehhoollddeellssee oogg pplleejjee
Træk netstikket ud før vedligeholdelses- og
rengøringsarbejde.
Bær sikkerhedshandsker for at undgå skader på
hænderne.
L Iagttag følgende for at opretholde brændekløverens
funktionsdygtighed:
Rengør maskinen grundigt efter afslutning af
arbejdet.
Fjern harpiksrester.
Smør kløvesøjlen jævnligt med fet eller sprøjt den
med miljørigtig sprøjteolie.
Kontroller oliestanden resp. udskift olien.
Kontroller hydraulikslangerne og slangeforbindel-
serne regelmæssigt for tæthed og fasthed.
Slibning af spaltekniven
Efter længere driftstid, ved reduceret ydelse eller ved let
deformering skal spalteknivens skær slibes eller skærpes
med en fin fil (fjern grater).
15
17
Olie-
målepind
Når oliestanden er mellem de to marke ringer, er der nok
olie i beholderen.
Hvis oliestanden er under den nederste markering skal
der efterfyldes olie ved hjælp af en ren tragt.
nederste markering øverste markering
6. Kontroller
olietætningen.
Udskift den
i tilfælde af
beskadigel
ser.
7. Før målepinden igen ind i åbningen.
18
skærpning
af kant
Hvordan kontrolleres oliestanden?
1. Spaltesøjlen skal
være i tilbagekørt
tilstand.
2. Træk oliemålepinden ud.
3. Rengør
oliemålepin-den og
olietætnin-gen.
4. Før målepinden
igen ind i åbningen
til stoppet.
5. Træk oliemålepinden ud igen.
16
Hvornår skal olien udskiftes?
Første olieskift efter 50 driftstimer, derefter alle 500
driftstimer.
Udskiftning:
1. Spaltesøjlen skal være i tilbagekørt tilstand.
2. Træk oliemålepinden ud.
3. Stil e n beholder , som kan rumme mi ndst 7 liter oli e, under
brændekløveren.
4. Skru udløbsproppen af
således olien
kan løbe ud.
5. Genmonter
pakningen og
aftapningspro
ppen.
6. Påfyld ny
hydraulikolie
(7,0 liter) ved
hjælp af en
ren tragt.
7. Rengør oliemålepinden og olietætningen.
8. Kontroller olietætningen. Udskift den i tilfælde af
beskadigelser.
9. Før målepinden igen ind i åbningen.
19
48
Page 50

Bortskaf spildolien efter forskrifterne (lokal
modtagestation for spildolie). Det er forbudt at lede
spildolie ned i jorden eller at blande den med normal
affald.
L Hydraulikolie
Til hydraulikcylinderen anbefaler vi følgende hydraulikolier:
¾ Shell Tellus T 22
¾ Aral Vitam Gf 22
¾ BP Energol HLP 22
¾ Mobil DTE 11
¾ eller olie af samme kvalitet.
Anvend ingen andre oliesorter. Brug af andre oliesorter
har indflydelse på hydraulikcylinderens funktion.
GGaarraannttii
• Vi yder to års garanti på kværnen fra og med
leveringsdagen med hensyn til materiale- eller
fabrikationsfejl.
• Der kan i garantiperioden ikke gøres garantikrav
gældende for skader, der måtte være opstået pga.
usagkyndig behandling, utilstrækkelig indpakning i
forbindelse med transport eller tilsidesættelse af
betjeningsvejledningen.
• Komponenter med fejl skal sendes til producenten, som
også afgør, hvad der skal udføres gratis. Garantien
omfatter arbejds- og materialeudgifter i forbindelse med
udbedringen af den eventue lle fejl.
• Garantien dækker ikke normal slitage af kløvekile,
hydraulikolie, føringer, tætninger og løbeh jul.
• Alle garantireparationer udføres af producenten, undtagen
hvis vi udtrykkeligt giver et andet værkst ed besked på at
udføre dem.
• Garantien gælder kun, når der er benyttet originale
reservedele.
• Vi forbeholder os ret til tekniske ændringer.
TTeekknniisskkee ddaattaa
Model
Typ
Kløvetryk
Trælængde
Trædiameter
Kløvelængde
Fremløbshastighed
Tilbageløbshastighed
Hydraulikolie (max.)
Hydrauliktryk
ASP 10-1350
ASP 10-1350
100 kN (10 t) ± 10 %
max. 1350 mm
min. 120 – max. 400 mm
≈ 550 mm
ca. 0,04 m/sek.
ca. 0,11 m/sek.
7,0 Liter
21 MPa (210 bar)
Elmotoreffekt (optaget effekt) Vekselstrøm P1 = 3800 W ( S6-40% )
Trefasestrøm P
= 3000 W ( S6-40% )
1
Tilslutning Trefasestrøm 400 V 3~ 50 Hz, 16 A
Dimensioner længde 840 x bredde 920 x højde 1620 mm
Vægt ca. 209 kg
49
Page 51

MMuulliiggee ffeejjll
Problem Mulig årsag Afhjælpning
Stammen kløves ikke
(for lav kløveydelse)
Spaltesøjlen kører usikkert ind
eller med stærke vibrationer
Spaltesøjlen kører ikke tilbage
Motoren starter, men
spaltesøjlen kører ikke tilbage
Motor starter ikke
⇒ Stammen er ikke placeret korrekt
⇒ Stammen overskrider de tilladte størrelser
eller træet er for hårdt for maskinen
⇒ Spaltekniven kløver ikke
⇒ Hydrauliktryk for lavt
⇒ Udløserarm bøjet (hydraulikproppen
skubbes ikke helt ind)
⇒ Forkert tilslutningsledning (længere end 10
m eller for småt koretværsnit)
⇒ Luft i kredsløbet
⇒ Kløvesøjlen ikke tilstrækkeligt fedtet eller
olieret.
⇒ Hydraulikpumpe defekt ⇒ Kontakt producenten eller et autoriseret firma
⇒ Forkert drejeretning af motoren ⇒ Kontroller og omstil motorens drejeretning
⇒ Netspænding mangler
⇒ 2-faseløb ved drejestrømsmotor
⇒ Tilslutningskabel er defekt
⇒ Elmotor er defekt
⇒ Anbring stammen på ny
⇒ Afkort stammen til de tilladte størrelser
⇒ Skærp spaltekniven, og kontroller den for
grater og kærve
⇒ Kontroller oliestanden; efterfyld om
nødvendigt olie.
Hvis problemet ikke kan afhjælpes, kontakt
producenten eller et autoriseret firma.
⇒ Lad producenten eller et autoriseret firma
justere stangen
⇒ Anvend den rigtige tilslutningsledning
⇒ Kontroller oliestanden; efterfyld om
nødvendigt olie.
⇒ Smør kløvesøjlen eller sprøjt med m iljørigtig
sprøjteolie..
Hvis problemet ikke kan afhjælpes, kontakt
producenten eller et autoriseret firma.
til afhjælpning af problemet
Trefasestrøm: omstil motorens drejeretning
(se side 45)
Vekselstrøm: kontakt producenten eller et
autoriseret firma til afhjælpning af pr oblemet.
⇒ Kontroller sikringen.
⇒ Lad en elektriker kontrollere sikring og
tilførselsledning
⇒ Udskift tilslutningskablet eller lad det efterse
af en elektriker.
⇒ Kontakt producenten eller et autoriseret firma
til afhjælpning af problemet.
50
Page 52

U mag het apparaat niet in bedrijf nemen,
voordat u deze gebruiksaanwijzing heeft
gelezen, alle instructies hebt gevolgd en het
apparaat volgens de beschrijving heeft
gemonteerd.
Bewaar deze bedieningsaanwijzing voor alle toekomstige
toepassingen.
Bij het werken een veiligheidsbril of een
veiligheidsvizier dragen, om de ogen
tegen spanen en splinters te beveiligen.
Houd uw werkplek in orde! Wanorde kan
ongevallen tot gevolg hebben.
IInnhhoouudd
Conformiteitsverklaring 1
Reserveonderdelen/Beschrijving van het toestel 2
Montage
Levering 51
Symbolen 51
Reglementaire toepassing 52
Restrisico’s 52
Veilig werken 52
Transportinstructies 53
Opstellen 53
Ingebruikname 53
Werken met de brandhoutsplijter 54
Onderhoud en verzorging 57
Garantie 58
Technische gegevens 58
Storingen 59
LLeevveerriinngg
4
Controleer na het uitpakken de inhoud van de ver-
pakking op:
! aanwezigheid van alle onderdelen
! eventuele transportschade
Meld mogelijke gebrekken direct aan uw leverancier. Latere
reclamaties worden niet in behandeling genomen.
1 voorgemonteerde
apparaatunit
1 bedieningsarm rechts/ links 1 zakje met toebehoren
1 as 1 gebruiksaanwijzing
SSyymmbboolleenn aappppaarraaaatt
Voor de inbedrijfstelling de gebruiksaanwijzing en de veiligheidsinstructies
lezen en in acht nemen.
Bij het werken veiligheidsschoenen dragen, om de voet tegen vallende stammen
te beveiligen.
Bij het werken veiligheidshandschoenen
dragen, om de handen tegen spanen en
splinters te beveiligen.
2 wielen
Olie is licht ontvlambaar en kan
exploderen. Roken en open vuur
verboden.
Verwijder de oude olie volgens de
voorschriften (verzamelpunt voor oude ol ie
in uw buurt). Het is verboden, de oude oli e
in de grond af te laten of met afval te
mengen.
Het is verboden bescherming- of
veiligheidsinrichtingen te verwijdere n of te
wijzigen.
Alleen de bediener mag in de werkcirkel
van de machine staan. Niet betrokken
personen, alsook huisdieren en vee uit de
gevarenzone (minimum afstand 5 m)
verwijderd houden.
Verwijder vastgeknelde stammen niet met
uw handen.
Attentie!
Voor reparatie-, onderhouds-, en
reinigingswerkzaamheden de motor
uitschakelen en de netstekker uit het
stopcontact halen.
Gevaar voor snijwonden en beknelling,
grijp nooit in gevarenzones, wanneer het
splijtmes beweegt.
Houd het werkstuk tijdens het kloven vast
met de klembekken.
Richt steeds uw volledige opmerkzaamheid op de beweging van het splijtmes.
Hoogspanning, levensgevaar.
SSyymmbbooooll ttooeesstteell // vveerrppaakkkkiinngg
Elektrische toestellen horen niet bij het huisvuil.
Toestellen, accessoires en verpakking naar een
milieuvriendelijke recyclage verwijderen.
51
Page 53

SSyymmbboolleenn bbeeddiieenniinnggssaaaannwwiijjzziinngg
Dreigend gevaar of gevaarlijke situatie. Het niet
opvolgen van deze aanwijzingen kan schade of
verwondingen tot gevolg hebben.
L
RReegglleemmeennttaaiirree ttooeeppaassssiinngg
De brandhoutsplijter is alleen bruikbaar voor het splijten
Alleen pas gezaagd hout is geschikt voor de
Vreemde voorwerpen (spijkers, draad, beton enz.) moet en
Elk verder leidend gebruik geldt als niet conform de
RReessttrriissiiccoo’’ss
Belangrijke aanwijzing voor het vakkundig
gebruik van de machine. Het niet opvolgen van
deze aanwijzingen kan storing aan de machine
veroorzaken.
Gebruiksaanwijzingen. Deze aanwijzingen helpen u
de machine optimaal te benutten.
Montage, gebruik en onderhoud van de machine.
Hier wordt precies uitgelegd wat u moet doen.
van hout.
brandhoutsplijter.
absoluut uit het te splijten hout worden verwijderd.
voorschriften. Voor daaruit resulterende schade is de
fabrikant niet aansprakelijk – het risico daarvoor wordt
alleen door de gebruiker gedragen.
Ook bij het gebruik volgens de voorschriften zijn er op
grond van de constructie voor de toepassing van deze
machine nog een aantal restricties.
De restricties kunnen geminimaliseerd worden, wanneer de
veiligheids-, gebruiks-, gezondheid- en
onderhoudsvoorschriften nauwkeurig in acht genomen
worden.
Consideratie en voorzichtigheid verminderen het risico van
personenletsels en beschadigingen.
Geïgnoreerde of over het hoofd geziene
veiligheidsmaatregelen kunnen leiden tot letsels voor de
bediener of tot beschadiging van eigendom.
Onoplettendheid, het niet aanhouden van de
veiligheidsvoorschriften en onreglem entair gebr uik kunnen
door het bewegende splijtmes tot verwon dingen aan hand
of vingers leiden.
Gevaar door stroom door het niet juist aansluiten van de
aansluitdraden.
Het aanraken van onder spanning staa nde delen bij een
geopende elektrische delen.
Verder kunnen er ondanks alle genomen maatregelen niet
zichtbare restricties bestaan.
VVeeiilliigg wweerrkkeenn
Lees en volg de onderstaande aanwijzingen, de
voorschriften ter voorkoming van ongevallen en de
algemene veiligheidsvoorschriften op, om u zelf en
anderen tegen verwondingen te beschermen.
Geef de veiligheidsvoorschriften aan alle personen,
L
die met deze machine werken, door.
Bewaar deze veiligheidsvoorschriften goed.
L
Wees oplettend. Let op dat, wat u doet. Ga met vgerstand
te werk. Gebruik het toestel niet, wanneer u moe bent of
onder de invloed van drugs, alcohol of medicamenten
staat. Een moment van onoplettendheid bij het gebruik
van het toestel kann tot ernstige verwondingen l eiden.
Maak u voor gebruik met het apparaat vertrouwd, met
behulp van de gebruiksaanwijzing.
Gebruik de machine alleen waar hij voor g emaakt is (zie
het betreffende hoofdstuk en “Werken met de
brandhoutsplijter”).
Zorg voor een stabiele en uitgebalanceerde houding.
Neem een werkhouding aan, die zich binnen het bereik
van de bedieningsgrepen bevindt. afb. 8.
Ga nooit op de machine staan.
Draag tijdens het werken
− veiligheidsbril of veiligheidsvizier
− veiligheidshandschoenen
− gehoorsbeschermers
− veiligheidsschoenen met stalen tippen
Draag geschikte werkkleding:
− geen wijde kleding of sieraden (zij kunnen door
beweeglijke delen worden gegrepen)
De bedienende persoon is binnen het arbeidsbereik van
de machine verantwoordelijk t en opzichte van derden.
Kinderen en jongeren van minder dan 18 jaren mogen
de machine niet bedienen.
Kinderen dienen uit de buurt van het apparaat te worden
geweerd.
Zet het toestel nooit aan, terwijl niet betrokken personen
in de buurt zijn.
Laat de machine niet zonder toezicht achter.
Zorg dat uw werkomgeving op orde is. Rommel kan
ongevallen veroorzaken.
Overbelast de machine niet. U werkt beter en zeker met
de juiste belasting van de machine.
Werk alleen met alle veiligheidsvoorzieningen op de
juiste wijze aangebracht. Verander ni ets aan de machine
wat de veiligheid in gevaar kan brengen.
Apparaat resp. onderdelen van het apparaat niet
veranderen.
Het apparaat mag niet met water worden afgespoten
(bron van gevaar voor elektrische stroom).
Machine niet in de regen laten staan. Niet in de regen
met die machine werken.
Als u de machine niet gebruikt moet u hem op een
droge plaats, buiten het bereik van kinderen opslaan.
Schakel de machine uit en neem de steker uit het
stopcontact bij:
52
Page 54

− Reparatiewerkzaamheden
− Onderhouds- en reinigings-
werkzaamheden
− Transport van de machine
− Het verlaten van de machine (ook voor een korte tijd).
Onderzoek de machine op eventuele beschadigingen.
− Voor het verdere gebruik van de machine moeten alle
veiligheidsvoorzieningen gecontroleerd worden op
de juiste montage en het goed functioneren.
− Controleer of alle bewegende delen van de machine
goed functioneren en niet klemmen of beschadi gd zijn.
Alle delen moeten juist gemonteerd zijn en goed
functioneren om de machine correct te laten werken.
− Beschadigde bescherminrichtingen en delen moeten,
indien noodzakelijk, door een erkende
reparatiewerkplaats gerepareerd of verwisseld worden.
Met uitzondering indien in de gebruiksaanwijzing
anders aangegeven.
− Beschadigde of onleesbare veiligheidsstickers
dienen te worden vervangen.
Elektrische veiligheid
Uitvoering van de aansluitleiding volgens de IEC 60245
(H 07 RN-F) norm met een aderdiameter van minimum
⇒ 230 V ~
3 x 1,5 mm² bij een kabellengte tot max. 10 m.
⇒ 400 V 3~
5 x 1,5 mm² bij een kabellengte tot max. 10 m.
Gebruik nooit aansluitleidingen die langer dan 10 m zijn.
Langere aansluitleidingen v eroorzaken een daling van de
spanning. De motor bereikt zijn maximum vermogen niet
meer, de functie van de machine wordt g ereduceerd.
Bij het leggen van de aansluitleiding erop letten dat deze
niet gekneusd of geknikt wordt en dat de
stekerverbinding niet nat wordt.
Gebruik de kabel niet voor doeleinden waarvoor hij niet
geschikt is. Bescherm de kabel tegen hitte, olie of
scherpe randen. De steker niet met de kabel uit het
stopcontact trekken.
Controleer de verleng kabel regelmatig op bescha-
digingen en vervang hem als hij beschadigd is.
Gebruik geen defecte kabels.
Gebruik alleen toegestane en gemerkte verlengkabels.
Maak geen geknutselde elektrische aansluitingen.
Veiligheidsvoorzieningen nooit overbruggen of buiten-
werking stellen.
Elektrische aansluitingen of reparaties mogen alleen
door een erkend bedrijf of een erkende
reparatiewerkplaats uitgevoerd worden. De plaatselijke
voorschriften moeten opgevolgd worden.
Reparaties aan andere delen van de machine mogen
alleen door de fabrikant of een door hem erkende
werkplaats uitgevoerd worden.
Alleen de originele onderdelen gebruiken. Bij het
gebruik van niet originele onderdelen kunnen risico’s
voor de gebruiker ontstaan. De fabrikant kan niet
aansprakelijk gesteld worden voor ongevallen hierdoor
ontstaan
TTrraannssppoorrttiinnssttrruuccttiieess
.
Het splijtmes voor elk transport helemaal omlaag
brengen.
Voor het transport
pakt u de beugel
met één hand
5
Transportband
vast en kantelt de
houtsplijter iets
naar u toe. In
deze stand kan
de splijter
probleemloos
worden getransporteerd.
Om een vrijkomen van olie bij
het transport te
voorkomen, moet
de deksel van de
olietank vast
dichtgeschroefd zijn.
OOppsstteelllleenn
Blokkeer de wielen met keilen, om een rollen tijdens het
werken te vermijden.
Let er op, dat de werkplek de volgende voorwaarden vervult:
− slipbestendig
− vlak
− geen struikelgevaren
− voldoende lichtomstandigheden
Gebruik de machine niet in de buurt van aardgas,
benzinegoten of andere licht ontvlambare material en.
IInnggeebbrruuiikknnaammee
Overtuigt u zich er van, dat het apparaat compleet en
volgens voorschrift is gemonteerd.
Controleer voor ieder gebruik
− Aansluitleidingen op defecte plaatsen (scheuren,
sneden o. d.)
− de machine op eventuele bescha digingen
− of alle schroeven goed zijn vastgedraaid
− het hydraulisch systeem op lekkages
− het oliepeil
− Ontluchten: Ontlucht de hydraulische installatie, voor
u de brandhoutkliever in gebruik neemt.
¾ Maak de deksel van de olietank (9) enkele omdraaiin gen
los, opdat lucht uit de olietank kan ontwijken.
¾ Laat de kap tijdens de werking geopend.
53
Page 55

¾ Alvorens u de brandhoutsplijter beweegt, sluit de deksel
van e olietank weer omdat anders olie uitloopt.
d
L Wanneer de hydraulische installatie nie t wordt ontlucht,
beschadigt de ingesloten lucht de dichtingen en veroorzaakt
een duurzame beschadiging aan de brandhoutkliever.
L Aansluiting op het net
Vergelijk de netspanning met de spanning (bijv. 230 V) die
op het type plaatje is aangegeven. Sluit de machine
volgens de voorschriften en op een geaard stopcontact
aan.
Gebruik verleng kabel met voldoende diameter
Sluit de machine aan via een Fi-veiligheidsschakelaar
(differentiaaluitschakelaar) met 30 mA.
L Beveiliging
400 V 3~ Î 16 A
L In-/Uitschakelaar
Controleer voor elk gebruik de functie van de
uitschakelinrichting (door in- en uitschakelen).
Gebruik geen toestel waarbij de schakelaar niet kan
worden in- en uitgeschakeld. Beschadigde schakelaars
moeten onmiddellijk worden gerepareerd of vervangen
door de klantenservice.
Inschakelen
Druk op de groene knop
6
Uitschakelen
Druk op de rode knop
L Beveiliging tegen opnieuw aanlopen bij het
uitvallen van de stroom (nulspanningsinitiator)
Bij spanningsuitval schakelt het apparaat automatisch uit .
Druk op de groene knop om het apparaat weer in te
schakelen.
Brandhoutsplijter met 400 V 3~
Let op de draairichting van de motor (zie de pijl op de
motor), want door een onjuiste draairichting beschadigt
de oliepomp.
¾ Motor inschakelen; het splijtmes (1) beweegt automatisch
naar de bovenste positie.
¾ Wanneer het bovenste mes zich reeds in de bovenste
positie bevindt: dan grijp de beide b edieningsgrepen (15)
en druk deze naar beneden, het splijtmes beweegt naar
beneden.
¾ Indien het splijtmes niet beweegt, nadat de motor aanloopt,
dan schakelt u de motor uit en wijzigt u de draairichting.
7
U kunt de draairichting veranderen
door een schroevendraaier in de
daarvoor bestemde
gleuf in de stekkerkraag te steken en
met lichte druk door
een links- of rechtsdraaiende beweging de juiste draairichting in te stellen.
L Hydraulisch systeem
Gebruik de machine nooit, wanneer een gevaar door
hydraulische vloeistof bestaat.
Zorg erv oor da t de machine en de w erkplek zuiv er zijn en
er geen olievlekken aanwezig zijn.
Gevaar voor uitglijden en brand!
Co ntroleer regelmatig, of voldoende hydraulische olie in
het reservoir is (zie onderhoud en verzorging)
Inhoud: 7,0 liter
WWeerrkkeenn mmeett ddee bbrraannddhhoouuttsspplliijjtteerr
aanvullende VEILIGHEIDSINSTRUCTIES
De houtsplijter mag slechts door één enkele persoon
worden bediend.
Alleen personen van meer dan 18 jaren, die de
gebruiksaanwijzing hebben gelezen en begrepen mogen
de machine bedienen.
Draag uw beschermuitrustingen (veiligheidsbril/-vizier,
handschoenen, veiligheidsschoenen), om u tegen
mogelijke letsels te beschermen.
Splijt nooit stammen, die nagels, draad of andere
voorwerpen bevatten.
Reeds gespleten hout en houtspaanders veroorzaken een
gevaarlijk werkterrein. Er bestaat gevaar voor struikelen,
uitglijden of vallen. Houd uw werkplek stee ds opgeruimd.
Leg bij ingeschakelde machine nooit uw handen op
bewegende delen van de machine. Bewaar een
veiligheidsafstand van de houtstam, de schuif en de
splijtwig, om uw handen tegen letsels te beschermen.
Splijt alleen hout, dat aan de max. te verwerken lengte
van 1350 mm voldoet.
L Controleer vóór het splijten, of de splijtzuil voldoende
is gevet, opdat deze zonder problemen kan in- en
uitschuiven.
54
Page 56

Wat kan ik splijten?
Maten van de te splijten stammen
Lengte van het hout: max. 1350 mm
Diameter van het hout: min. 120 – max. 400 mm
De diameter van het hout is een aanbevolen richtwaarde,
omdat:
− dun hout kan moeilijk te splijten zijn, wanneer het
knoestgaten bevat of de vezels te sterk zijn.
− dikker hout met meer dan ∅ 400 mm kan worden
gespleten, wanneer de vezels glad en los zijn .
Splijt geen groene stammen. Droge, opgeslagen stammen
kunnen veel beter worden gespleten en veroorzaken niet zo
vaak een vast vreten dan groen (nat) hout.
Bediening
Tweehandige werking
Bedien de houtsplijter nooit met twee personen.
Blokkeer in geen geval de bedieningsgreep (span-
klauwen).
1. Druk op de groene knop. Wacht een paar seconden,
zodat de motor zijn eindtoerental bereikt en de druk in de
hydraulische pomp wordt opgebouwd.
L Let bij brandhoutsplijters met een draaistroommotor
(400 V 3~) op de draairichting, want door het gebr uik met
een onjuiste draairichting raakt de oliepomp beschadigd.
L De houtsplijter bij temperaturen onder –5°C ten
minste 15 min. stationair laten draaien, zodat de o lie kan
opwarmen.
2. Plaats de stam op de tafel van de splijter.
L Laat u slechts één van de bedi eningsgrepen los, dan
blijft het splijtmes staan.
Bijzondere instructies voor het splijten:
Voorbereidingen:
Bereid het te splijten hout voor op de maximum te verwer ken
afmetingen en let er op, dat het hout recht is gezaagd.
Legen het hout zodanig klaar aan de houtsplijter, dat er geen
gevaar voor u bestaat (struikelgevaar).
Verstelling van de slaghoogte
Bij kortere stukken hout kunt u het vermogen vergroten door
de terugloop van het kloofmes te verkorten.
1. Zet de stam op de
splijttafel en breng het
splijtmes ca. 3 - 5 cm
dichter bij de stam
door het naar
beneden drukken van
de beide
bedieningsgrepen.
2. Laat één bediening-greep los, zodat het
splijtmes in die positie
blijft staan.
10
9
8
L Bewerk het te splijten materiaal uitsluitend in de
vezelrichting.
3. Zet de stam met de spanklauwen vast.
4. Druk beide bedieningshendels gelijktijdig naar onder.
Î Het splijtmes gaat omlaag en de stam wordt
gespleten.
5. La at beide bedieningsgrepen los, h et splijtmes keert weer
terug in zijn uitgangspositie
3. Het apparaat uitschakelen en de stekker uit het
stopcontact trekken.
4. Laat de tweede bedieningsgreep los.
5. Verkort het teruglooptraject met de aan de zijkant
aangebrachte stang, door deze met de stelbout op de
vereiste hoogte vast te zetten.
55
Page 57

11
Tafelhoogte instellen
Vergrendelbout
bovenste positie van de tafelplaat voor stam men tot 59 cm
middelste positie van de tafel voor stammen tot 85 cm
onderste positie van de sokkel voor stammen tot 135 cm
1. Splijt de
stammen
12
tot 59 cm
op de
tafelplaat
(6).
2. Splijt
stammen
tot 89 cm
op de tafel
(7). Trek
de tafelplaat (A)
eruit.
3. Splijt stammen tot
135 cm op
de sokkel
(10). Druk
de vergrendeling
shendel (8)
omlaag en
zwenk de
tafel (7)
naar opzij.
Splijtkruis justeren
13
Splijtkruis
Fixeerbout
1. Fixeerbout losmaken.
2. Het splijtkruis in de vereiste positie schuiven.
3. Fixe erb out weer aantr ekk en.
Korthout splijten:
1. Bovenste positie van het tafelblad
2. Zet de stam op de tafelplaat van de splijter.
L Bewerk het te splijten materiaal uitsluitend in de
vezelrichting.
3. Zet de stam met de spanklauwen vast.
Langhout splijten:
1. Middelste en
onderste positie van de
tafel of van de
sokkel
2. Verwijder het
splijtkruis.
3. Stel de stam
op de tafel of
de sokkel van
de
splijter.
14
L Mogelijke storing bij het splijten van langhout: Het te
splijten materiaal wordt niet volledig gespleten, klemt vast aan
het splijtmes en wordt bij de terugloop mee omhoog
getrokken. De stam kan niet meer handmatig worden
losgemaakt.
In dit geval handelt u als volgt:
1. Schakel het toestel uit.
2. Bevestig, al naar lengte van de nog te splijten stam,
de tafelplaat (6) in de bovenste positie en zwenk de
tafel (7) omheen.
3. Schakel het toestel in en ga verder met het splijtproces.
¾ Splijt nooit twee stammen in één werkcyclus.
¾ Nooit hout tijdens het werkproces bijleggen of vervangen.
L Nooit door het in stand ho uden van de druk gedurende
meerdere seconden een splijten van een stam proberen te
dwingen. Dit kan leiden tot beschadigingen aan de machine.
Plaats de stam nogmaals op de tafel en herhaal de
splijtprocedure of leg de stam weg.
Hoe wordt een vastgeklemde stam losgemaakt?
Het risico bestaat dat knoestig materiaal bij het splijten
vastklemt.
1. Het apparaat uitschakelen en de stekker uit het
stopcontact trekken.
2. De vastgeklemde stam voorzichtig heen en weer
bewegen, zodat hij los kan komen.
56
Page 58

In geen geval met een hamer op de vastgeklemde stam
slaan.
Een vastgeklemde stam ook niet loszagen.
Vraag geen tweede persoon om hulp.
Einde van het werk:
¾ Zet het splijtmes in de onderste positie (ingeschoven
toestand).
¾ Laat één bedieningsgreep los.
¾ Schakel het apparaat uit en trek de stekker uit het
stopcontact.
¾ Onderhouds- en verzorgingsinstructies in acht nemen.
OOnnddeerrhhoouudd eenn vveerrzzoorrggiinngg
Voor onderhouds- en reinigingswerkzaamheden de
handen te vermijden.
netstekker uit de contactdoos halen.
Draag veiligheidshandschoenen om letsels aan de
L Neem het onderstaande in acht om de functionaliteit van
de brandhoutsplijter te behouden:
Reinig de machine grondig na het beëindigen van
het werk.
Verwijder harsresten.
Vet de splijtzuil regelmatig in of olie deze met een
milieuvriendelijke sproei-olie in.
Oliepeil controleren c.q. olie wisselen.
Controleer de hydraulische slangen en
slangverbindingen regelmatig op lekkage en een
Splijtmes slijpen
correcte bevestiging.
15
Hoe controleer ik het oliepeil?
1. De splijtk olom moet
in ingeschoven toestand staan.
2. Trek de
oliepeilstaaf er uit.
3. Reinig de
oliepeilstaaf en de
oliedichting.
4. Steek de peilstaaf
weer tot aan de
aanslag in de
opening.
5. Trek de
oliepeilstaaf er
weer uit.
Wanneer
het oliepeil
tussen
beide
merkstrepe
n ligt is er
voldoende
olie in het
reservoir.
17
Oliepeilstaaf
Wanneer
het oliepeil
onder de
onderste
merkstreep ligt, dient met behulp van een zuivere trechter
olie te worden bijgevuld.
onderste merkstreep bovenste merkstreep
16
Kant
scherpen
Het splijtmes na een langere gebruiksduur, bij een
verminderde splijtcapaciteit of bij lichte vervorming van het
lemmet afslijpen of met een fijne vijl weer scherp maken
(bramen verwijderen).
6. Controleer
de oliedichting.
Deze dient
bij
18
beschadigin
gen te worden vervangen.
7. Steek de pe ilst aaf we er in de openin g.
Wanneer hoef ik de olie te wisselen?
Eerste oliewisseling na 50 bedrijfsuren, daarna alle 500
bedrijfsuren.
Olie wisselen:
1. De splijtkolom moet in ingeschoven toestand staan.
2. Trek de oliepeilstaaf er uit.
3. Plaats een recipiënt, die minimum 5 liter olie kan opnemen
onder de houtsplijter.
4. Schroef de aftapstop los, opdat de olie eruit kan lopen.
57
Page 59

5. Pakking en
aftapstop weer
19
aanbrengen.
6. Vul de nieuwe
hydraulische
olie (7,0 liter)
met behulp van
een zuivere
trechter in de
machine.
7. Reinig de
oliepeilstaaf en
de oliedichting.
8. Controleer de oliedichting. Deze dient bij beschadigingen
te worden vervangen.
9. Steek de pe ilst aaf we er in de openin g.
Verwijder de oude olie volgens de voorschriften
(verzamelpunt voor oude olie in uw buurt). Het is
verboden, de oude olie in de grond af te laten of met afval
te mengen.
L Hydraulische olie
Voor de hydraulische cilinder bev elen wij de volgende
hydraulische oliesoorten aan:
¾ Shell Tellus T 22
¾ Aral Vitam Gf 22
¾ BP Energol HLP 22
¾ Mobil DTE 11
¾ of gelijkwaardige olie
Gebruik geen andere oliesoorten. Het gebruik van andere
oliesoorten beïnvloedt de functie van de hydraulische
cilinder.
GGaarraannttiieevvoooorrwwaaaarrddeenn
• Wij aanvaarden 2 jaren garantie vanaf levering van het
apparaat vanuit het magazijn van de handelaar en voor
gebreken die zijn opgetreden door materiaal- resp.
Fabricagefouten.
• Voor schade die ontstaat door ondeskundige behandeling
of onvoldoende verpakking bij het terugzenden van de
apparaten c.q. het verontachtzamen van de
gebruiksaanwijzing, zijn aanspraken op garantie ook
tijdens de garantieperiode uitgesloten.
• Gebrekkige onderdelen dienen vrij van porto- resp.
Vrachtkosten an onze fabriek te worden opgestuurd. De
beslissing i. v. m. een gratis levering van vervangende
onderdelen ligt bij ons.
• De garantie geldt niet voor de normale slijtage van
splijtwig, hydraulische olie, geleidingen, dichtingen en
loopwielen.
• Noodzakelijke garantiewerkzaamheden worden door ons
uitgevoerd. Het verhelpen van de scha de do or e en a n der e
firma dient uitdrukkelijk door ons te worden goedgekeurd.
• Alleen indien originele reserveonderdelen worden
gebruikt, bieden wij garantie.
• Wijzingen die de technische vooruitgang dienen., houden
wij bij ons.
TTeecchhnniisscchhee ggeeggeevveennss
Type
Benaming van het type
Splijtkracht
Lengte van het hout
Diameter van het hout
Splijtlengte
ASP 10-1350
ASP 10-1350
100 kN (10 t) ± 10 %
max. 1350 mm
min. 120 – max. 400 mm
≈ 550 mm
Voorloopsnelheid ca. 0,04 m/sec.
Terugloopsnelheid ca. 0,11 m/sec.
Hydraulische olie (max.) 7,0 Liter
Hydraulische druk 21 Mpa (210 bar)
Vermogen van de elektromotor (opnamevermogen) Wisselstroom P1 = 3800 W ( S6-40% )
Draaistroom P
= 3000 W ( S6-40% )
1
Aansluiting Draaistroom 400 V 3~ 50 Hz, 16 A
Afmetingen lengte 840 x breedte 920 x hoogte 1 620 mm
Gewicht ca. 209 kg
58
Page 60

MMooggeelliijjkkee ssttoorriinnggeenn
Probleem Mogelijke oorzaak Oplossing
Stam wordt niet gespleten
(te weinig splijtvermogen)
Splijtkolom schuift schommelend of met veel trillingen
in
Splijtkolom schuift niet naar
binnen
Motor draait wel, maar de
splijtkolom wordt niet ingeschoven
Motor loopt niet aan
⇒ Stam is niet correct gepositioneerd
⇒ Stam overschrijdt de toegelaten afme-
tingen of het hout is te hard voor het
vermogen van de machine
⇒ Splijtmes splijt niet
⇒ Hydraulische druk te laag
⇒ Activeringsstang verbogen
(hydraulische stoter wordt niet
helemaal ingedrukt)
⇒ Verkeerde aansluitleiding (langer dan
10 m of te kleine aderdiameter)
⇒ Lucht in de kringloop
⇒ Splijtzuil niet voldoende ingevet resp.
ingeolied
⇒ Hydraulische pomp defect ⇒ Om het probleem op te lossen neemt u contact op
⇒ Onjuiste draairichting van de motor ⇒ Dra airichting van de motor controleren
⇒ Netspanning ontbreekt
⇒ 2-fase beweging bij draaistroommotor
⇒ Aansluitkabel defect
⇒ Elektromotor defect
⇒ Positioneer de stam opnieuw
⇒ Stam op de toegelaten afmetingen zagen
⇒ Splijtmes slijpen, op bramen en kerven controleren
⇒ Oliepeil controleren; indien noodzakelijk olie
bijvullen.
Probleem kan niet worden opgelost, gelieve co ntact
op te nemen met de fabrikant of een door hem
genoemde firma.
⇒ Stang door fabrikant of door hem geautoriseerde
firma laten afstellen
⇒ Correcte aansluitleiding gebruiken
⇒ Oliepeil controleren; indien noodzakelijk olie
bijvullen.
⇒ Splijtzuil invetten of met een milieuvriendelijke
sproeiolie inolien
Probleem kan niet worden opgelost, g elieve contact op
te nemen met de fabrikant of door hem genoemde firma
met de fabrikant of een door hem genoemde firma.
Draaistroom: Draairichting van de motor omzetten
(zie blz. 54)
Wisselstroom: Om het probleem op te lossen neemt
u contact op met de fabrikant of een door hem
genoemde firma
⇒ Zekering controleren
⇒ Zekering en toevoerleiding door een elektricien laten
controleren
⇒ Aansluitkabel vervangen c.q. door een elektricien
laten controleren
⇒ Om het probleem op te lossen neemt u contact op
met de fabrikant of een door hem genoemde firma
59
Page 61

Zanim nie przeczytają Państwo niniejszej
Instrukcji obsługi, nie przyjmą do wiadomości i
przestrzegania zawartych w niej wskazówek oraz
nie zmontują urządzenia w opisany poniżej
sposób, nie wolno uruchomić urządzenia.
Niniejszą instrukcję należy przechować dla późniejszego
wykorzystania.
W celu ochrony oczu przed skaleczeniami
przez wióry i drzazgi należy stosować
okulary ochronne lub wizjer ochronny.
W miejscu pracy zachowaj ład i porządek.
Nieporządek może być przyczyną
wypadków.
SSppiiss ttrreeśśccii
Deklaracja zgodności 1
Części zamienne / Opis urządzenia 2
Montaż 5
Zakres dostawy 60
Symbole 60
Stosowanie zgodne z przeznaczeniem 61
Pozostałe elementy ryzyka 61
Bezpieczna praca 61
Wskazówki transportowe 62
Ustawienie urządzenia 62
Włączenie urządzenia 62
Praca łuparką do drewna opałowego 63
Obsługa i konserwacja 66
Dane techniczne 67
Ewentualne zakłócenia 67
Gwarancja 68
ZZaakkrreess ddoossttaawwyy
Po rozpakowaniu kartonów należy sprawdzić
! kompletność dostawy
! ew. szkody transportowe
Należy odwrotnie poinformować dystrybutora, dostawcę bądź
producenta o zastrzeżeniach. Późniejsze reklamacje nie
zostaną uwzględnione.
1 wstępnie zmontowany
moduł urządzenia
1 ramię obsługowe, prawe/
lewe
1 oś 1 instrukcja obsługi
Olej stanowi zagrożenie pożarowe i może
eksplodować. Obowiązuje zakaz palenia
oraz zbliżania się z otwartym ogniem.
Przepracowany olej należy zagospodarować
zgodnie z obowiązującymi przepisami
(lokalna składnica przepracowanego oleju).
Zabrania się spuszczania przepracowanego
oleju do podłoża lub mieszania go z innymi
odpadkami.
Zabrania się demontowania lub
dokonywania zmian w urządzeniach
ochronnych i zabezpieczających.
W obszarze roboczym maszyny może się
znajdować tylko obsługujący. Ze strefy, w
której występuje zagrożenie, należy usunąć
osoby postronne oraz zwierzęta domowe i
użytkowe (minimalna odległość 5 m).
Nie usuwać rękoma zakleszczonych
kawałków drewna.
Uwaga! Przed rozpoczęciem wykonywania
czynności związanycdh z naprawą, obsługą
i czyszczeniem urządzenia należy wyłączyć
2 koła
1 worek z wyposażeniem
silnik i wyjąć wtyczkę z gniazda sieciowego.
Zagrożenie przecięcia i zmiażdżenia, nigdy nie
dotykać obszarów niebezpiecznych, gdy nóż
rozłupuj ący jest w ruchu
Podczas rozłupywania trzymać drewno za
pomocą łap zaciskowych.
Zawsze obserwować ze szczególną uwagą
ruchy noża.
SSyymmbboollee nnaa uurrzząąddzzeenniiuu
Przed uruchomieniem należy przeczytać
instrukcję obsługi oraz wskazówki dotyczące
bezpieczeństwa i następnie się do nich
stosować.
W celu ochrony stóp przed uderzeniami
przez spadające pnie należy podczas
prowadzenia robót nosić obuwie ochronne.
W celu chrony dłoni przed skaleczeniami
przez wióry i drzazgi należy stosować
rękawice ochronne.
Wysokie napięcie, zagrożenie życia
SSyymmbbooll uurrzząąddzzeenniiee // ooppaakkoowwaanniiee
60
Urządzeń elektrycznych nie należy usuwać z
zanieczyszczeniami komunalnymi. Urządzenia,
wyposażenie i opakowanie usunąć jako surowce
wtórne, chroniąc w ten sposób środowisko
naturalne.
Page 62

SSyymmbboollee ww IInnssttrruukkccjjii oobbssłłuuggii
Zagrażające niebezpieczeństwo lub niebezpieczna
sytuacja. Nieprzestrzeganie niniejszych wskazówek
może prowadzić do obrażeń lub szkód rzeczowych.
L
Ważne wskazówki dotyczące prawidłowej obsługi.
Nieprzestrzeganie niniejszych wskazówek może
prowadzić do zakłóceń w pracy urządzenia.
Wskazówki dla użytkownika. Wskazówki te pomagają
w optymalnym wykorzystaniu wszystkich funkcji
urządzenia.
Montaż, obsługa i konserwacja. Tutaj następuje
dokładne objaśnienie czynności, które należy wykonać.
SSttoossoowwaanniiee zzggooddnnee zz pprrzzeezznnaacczzeenniieemm
Łuparkę do drewna opałowego należy stosować wyłącznie do
Do obróbki w łuparce nadaje się wyłącznie prosto przycięte
Z łupanego drewna należy usunąć obce ciała (gwoździe, drut,
Każdy inny sposób użycia urządzenia, wykraczający poza
rozszczepiania drewna.
drewno.
beton itp.).
opisany powyżej jest uważany za sprzeczny z
przeznaczeniem. Za szkody wynikające z takiego
użytkowania producent nie ponosi odpowiedzialności - ryzyko
ponosi wyłącznie użytkownik.
PPoozzoossttaałłee eelleemmeennttyy rryyzzyykkaa
Także przy posługiwaniu się urządzeniem w sposób zgodny
ze wszystkimi obowiązującymi przepisami dotyczącymi
bezpieczeństwa mogą, w związku z jego przeznaczeniem i
konstrukcją, pozostać jeszcze pewne elementy ryzyka.
Te pozostałe elementy ryzyka można ograniczyć do minimum
przestrzegając łącznie „wskazówek dotyczących bezpieczeństwa“
oraz „stosowania zgodnego z przeznaczeniem“.
Praca wykonywana w przemyślany sposób i z zachowaniem
należytej ostrożności zmniejsza ryzyko odniesienia obrażeń przez
osoby oraz ryzyko spowodowania szkód.
Ignorowanie lub lekceważenie środków bezpieczeństwa może
prowadzić do odniesienia obrażeń przez obsługującego oraz
uszkodzenia rzeczy.
Nieuwaga, nie przestrzeganie zasad bezpieczeństwa i
niewłaściwe stosowanie może spowodować zranienie dłoni
lub palców ruchomym nożem rozłupującym.
Zagrożenie porażeniem prądem przy stosowaniu
nieprawidłowych przewodów zasilania energią elektryczną.
Dotknięcie elementów pod napięciem przy otwartych
podzespołach elektrycznych.
Ponadto, pomimo wszystkich zastosowanych środków
zapobiegawczych mogą wystąpić elementy utajonego ryzyka.
-
BBeezzppiieecczznnaa pprraaccaa
W celu ochrony siebie samego i innych przed
ewentualnymi obrażeniami, przed włączeniem niniejszego
produktu należy przeczytać i stosować się do następujących
wskazówek i przepisów o zapobieganiu wypadkom,
opracowanych przez zrzeszenia branżowe lub do
obowiązujących lokalnie w danym kraju regulacji
dotyczących bezpieczeństwa.
Należy przekazać niniejsze wskazówki dotyczące
L
bezpieczeństwa wszystkim osobom, które użytkują
maszynę.
Niniejsze wskazówki dotyczące bezpieczeństwa należy
L
starannie przechowywać.
Pracować uważnie i zwracać uwagę na wykonywane
czynności. Zachować rozsądek podczas pracy. Nie używać
urządzenia w stanie zmęczenia, po d wpływem narkotyków,
alkoholu lub leków. Moment nieuwagi podczas używania
urządzenia może doprowadzić do poważnych obrażeń.
Przy pomocy niniejszej instrukcji należy zapoznać się z
urządzeniem przed rozpoczęciem użytkowania.
Nie należy stosować urządzenia do celów, do których nie jest
ono przeznaczone (zob. „Stosowanie zgodne z
przeznaczeniem” i „Praca łuparką do drewna opałowego”).
Przyjąć bezpieczną postawę i stale utrzymywać
równowagę.
Przyjąć pozycję do pracy, znajduje się ona w obszarze
uchwytów obsługowych, rys. 8.
Nigdy nie stawać na maszynie.
Podczas pracy należy nosić:
− okulary ochronne lub wizjer ochronny
− rękawice robocze
− osłonę narządu słuchu
− obuwie ochronne z noskami okutymi blachą
Należy nosić odpowiednią odzież roboczą:
− nie nosić odzieży czy ozdób, (które mogłyby się wplątać w
części maszyny znajdujące się w ruchu)
Obsługujący maszynę odpowiada w miejscu użytkowania
maszyny w stosunku do osób trzecich.
Dzieci oraz młodzież poniżej lat 18 nie mogą obsługiwać
maszyny.
Dzieci muszą pozostawać z dala od urządzenia.
Nie należy pozostawiać urządzenia bez dozoru.
Nigdy nie używać urządzenia, gdy w pobliżu są osoby nie
biorące udziału w pracy.
Na stanowisku pracy należy utrzymywać porządek!
Następstwem nieporządku mogą być wypadki.
Nie należy przeciążać urządzenia! Praca w podanym
zakresie wykorzystania mocy jest łatwiejsza i
bezpieczniejsza.
Użytkować urządzenie tylko z kompletnymi i prawidłowo
zamontowanymi urządzeniami ochronnymi i nie dokonywać
przy maszynie żadnych zmian, które mogą mieć wpływ na
zmniejszenie bezpieczeństwa.
Nie zmieniać maszyny wzgl. jej części.
Nie spryskiwać urządzenia wodą (zagrożenie porażeniem
prądem elektrycznym).
Nie pozostawiać urządzenia oraz nie pracować w czasie
podczas deszczu.
61
Page 63

Przechowywać urządzenie w suchym miejscu i uniemożliwić
p
dostęp dzieciom.
ochronne.
Do wykonywania następujących robót należy wyłączyć
maszynę i wyjąć wtyczkę z gniazda zasilania sieciowego:
− Naprawy
− Prace konserwacyjne i naprawcze
− Usuwanie zakłóceń
− Transport
− Pozostawienie urządzenia (także na krótki
okres czasu)
Sprawdzić maszynę, czy nie wykazuje ona ewentualnych
uszkodzeń:
− Przed dalszym użytkowaniem urządzenia należy
starannie sprawdzić, czy urządzenia ochronne zostały w
prawidłowy sposób zamontowane i czy spełniają swoją
funkcję.
− Sprawdzić, czy części ruchome należycie funkcjonują, czy
nie są blokowane oraz, czy jakieś części nie uległy
uszkodzeniu. Żeby uzyskać pełną sprawność
eksploatacyjną, wszystkie podzespoły muszą być
prawidłowo zamontowane i spełniać wszystkie
wymagania.
− Jeżeli niniejsza instrukcja nie stanowi inaczej, wszystkie
uszkodzone urządzenia ochronne muszą zostać
fachowo naprawione lub wymienione przez autoryzowany
warsztat.
− Uszkodzone lub nieczytelne etykiety bezpieczeństwa
należy wymienić na nowe.
Bezpieczeństwo urządzeń elektrycznych
Wykonanie przewodu zasilania zgodnie z IEC 60245 (H 07
RN-F) o minimalnych przekrojach:
⇒ 230 V ~
3 x 1,5 mm², przy długości przewodu do maks. 10 m
⇒ 400 V 3~
5 x 1,5 mm², przy długości przewodu do maks. 10 m
Nie należy nigdy stosować przewodów zasilania o długości
powyżej 10 m. Dłuższe przewody zasilające powodują
spadek napięcia. Silnik nie osiąga swojej maksymalnej mocy i
w konsekwencji zredukowaniu ulega sprawność funkcjonalna
maszyny.
Przy układaniu przewodu zasilania sieciowego należy
zwrócić uwagę na to, żeby nie został zgnieciony ani złamany
oraz żeby wtyk nie uległ zawilgoceniu.
Nie należy stosować przewodu zasilającego do celów, do
których nie jest on przewidziany. Należy chronić przewód
zasilania przed wysokimi temperaturami, olejem i ostrymi
krawędziami. Nie wyciągać wtyku z gniazda zasilania
sieciowego ciągnąc za przewód.
Regularnie sprawdzać stan techniczny przewodu
przedłużacza i wymienić go, jeżeli jest uszkodzony . Nie
należy posługiwać się uszkodzonymi przewodami
zasilającymi.
Podczas pracy na otwartej przestrzeni należy stosować tylko
dozwolone do tego i odpowiednio oznakowane przedłużenia
przewodów zasilających.
Nie należy posługiwać się prowizorycznymi przyłączami
elektrycznymi.
Nie należy nigdy stosować obejść urządzeń
zabezpieczających ani ich wyłączać.
Przyłącze elektryczne lub naprawy podzespołów
elektrycznych maszyny mogą być wykonywane wyłącznie
przez koncesjonowanego elektrotechnika lub jedną z
naszych stacji obsługi klienta. Należy przy tym stosować się
do lokalnych przepisów dotyczących bezpieczeństwa.
Naprawy innych podzespołów maszyny wykonuje
producent lub jedna z jego stacji obsługi klienta.
Stosować wyłącznie oryginalne części zamienne. Wskutek
stosowania innych części zamiennych oraz elementów
wyposażenia użytkownik może ulec wypadkowi. Za szkody
wynikłe wskutek powyższego producent nie przyjmuje na
siebie odpowiedzialności.
WWsskkaazzóówwkkii ttrraannssppoorrttoowwee
Przed każdym transportem nóż rozłupujący sprowadzić w
dolne położenie.
W celu prze-
transportowania
łuparki do drewna
uchwyć dłonią
5
taśma
ortowa
trans
pałąk i przechylić
maszynę lekko ku
sobie. W takiej
pozycji łuparkę
można bez problemu transportować.
Aby podczas transportu nie nastąpił
wyciek oleju,
poziomowskaz,
musi być mocno
zakręcony korek
zbiornika oleju.
UUssttaawwiieenniiee uurrzząąddzzeenniiaa
W celu uniemożliwienia maszynie toczenia się podczas pracy
należy zablokować koła klinami.
Należy zwrócić uwagę, żeby stanowisko pracy spełniało
następujące wymagania:
− nie stwarzało zagrożenia poślizgnięciem
− było równe
− nie stwarzało zagrożenia potknięciem
− posiadało wystarczające oświetlenie
Nie należy eksploatować maszyny w pobliżu gazu ziemnego,
benzyny oraz innych materiałów łatwopalnych.
WWłłąącczzeenniiee uurrzząąddzzeenniiaa
Należy upewnić, czy urządzenie jest kompletne i czy jest
prawidłowo zmontowane.
Przed każdym użyciem sprawdzić:
− czy przewody zasilania nie wykazują uszkodzeń (pęknięć,
przecięć itp.),
62
Page 64

Nie należy posługiwać się uszkodzonymi
przewodami.
− czy nie występują inne uszkodzenia (patrz – Bezpieczne
wykonywanie pracy)
− czy wszystkie śruby zostały prawidłowo dokręcone.
− szczelność układu hydraulicznego
− poziom oleju
− Odpowietrzenie: Przed uruchomieniem łuparki do
drewna należy odpowietrzyć instalację hydrauliczną.
¾ Odkręcić na kilka obrotów korek zbiornika oleju (9), aby
powietrze mogło ujść ze zbiornika oleju.
¾ Podczas pracy kaptur pozostawić otwarty.
¾ Zanim przesuniemy łuparkę, należy ponownie zakręcić
korek zbiornika oleju, aby nie wyciekał olej.
L Odpowietrzenie instalacji hydraulicznej przed rozpo-
częciem pracy jest konieczne, gdyż w przeciwnym razie
zamknięte w układzie powietrze może spowodować
uszkodzenie uszczelek i trwałe uszkodzenie łuparki do
drewna.
L Przyłącze sieciowe
Należy porównać wartość napięcia znamionowego podaną na
tabliczce urządzenia z wartością napięcia sieciowego i
podłączyć urządzenie do przepisowego gniazda wtykowego.
Stosować przedłużenia przewodów zasilania sieciowego o
wystarczającym przekroju.
Podłączyć maszynę poprzez wyłącznik ochronny Fi
(wyłącznik ochronny różnicowy) 30 mA .
L Zabezpieczenie: 16 A
400 V 3~ Î 16 A
L Włączenie / wyłączenie
Przed każdym uruchomieniem urządzenia sprawdzić
funkcjonowanie wyłącznika (przez włączenie i wyłączenie).
Nie używać urządzenia, którego wyłącznik nie da się
włączyć lub wyłączyć. Uszkodzone wyłączniki muszą być
niezwłocznie naprawiane lub wymieniane przez serwis.
Włączenie
6
Wciśnij zielony przycisk
Wyłączenie
Wciśnij czerwony przycisk
L Zabezpieczenie przed samorozruchem w
przypadku zaniku napięcia (z wyzwalaczem
zanikowym)
Przy przerwie w dopływie prądu następuje automatyczne
wyłączenie urządzenia. W celu ponownego uruchomienia
urządzenia należy powtórnie nacisnąć zielony przycisk.
Łuparka do drewna z zasilaniem 400 V 3~
Zwróć uwage na kierunek obrotów silnika (strzałka na
silniku), ponieważ praca z odwróconym kierunkiem obrotów
silnika prowadzi do uszkodzenia pompy olejowej.
Sprawdzenie kierunku obrotów:
¾ Włączyć silnik; nóż rozłupujący automatycznie przemieszcza
się w maksymalne górne położenie.
¾ Jeżeli nóż rozłupujący już znajduje się w najwyższym
położeniu: złapać obydwa uchwyty obsługowe i wcisnąć je w
dół – nóż rozłupujący przesuwa się w dół.
¾ Jeżeli po włączeniu silnika nóż rozłupujący nie porusza się,
wyłączyć silnik i zmień kierunek obrotów.
Kierunek obrotów
7
można zmienić przez
włożenie wkrętaka w
przewidzianą do tego
szczelinę w kołnierzu
wtyczki i odpowiednie
ustawienie lekkim
naciskiem przełączni-
ka.
L Układ hydrauliczny
Nigdy nie eksploatować maszyny, jeżeli zagraża
niebezpieczeństwo ze strony cieczy hydraulicznej.
Upewnić się, czy maszyna i jej otoczenie są czyste oraz
wolne od plam oleju.
Niebezpieczeństwo poślizgnięcia oraz zapłonu!
Należy regularnie sprawdzać, czy w zbiorniku znajduje się
wystarczająca ilość oleju hydraulicznego (patrz rozdział
„Obsługa techniczna i konserwacja”)
zawartość: 7,0 Liter
PPrraaccaa łłuuppaarrkkąą ddoo ddrreewwnnaa ooppaałłoowweeggoo
dodatkowe WSKAZÒWKI DOT. BEZPIECZEŃSTWA
PRACY
Łuparka do drewna może być obsługiwana wyłącznie przez
Maszynę mogą obsługiwać wyłącznie osoby w wieku powyżej
W celu ochrony przed możliwymi onrażeniami należy
Nigdy nie rozszczepiać wyrzynków, w których znajdują się
Rozszczepione drewno i wióry stwarzają na stanowisku pracy
Przy włączonej maszynie nie należy nigdy opierać dłoni na jej
jedną osobę.
18 lat, które przeczytały i zrozumiały instrukcję obsługi.
stosować wyposażenie ochronne (okulary / maska ochronna,
rękawice, obuwie ochronne).
gwoździe, drut czy inne przedmioty.
nowe zagrożenia. Występuje zagrożenie potknięcia,
poślizgnięcia lub upadku. Stanowisko pracy powinno być
stale uporządkowane.
ruchomych podzespołach.
63
Page 65

Rozszczepiać można wyłącznie drewno, którego maksymalna
długość nie przekracza 1350 mm.
L Sprawdzić przed łupaniem, czy kolumna łuparki jest
nasmarowana, tak aby mogła bez pr oblemów ws uwać się i
wysuwać.
Co można rozszczepiać?
Wielkość wyrzynków przeznaczonych do rozszczepiania
długość wyrzynka: maks. 1350 mm
średnica wyrzynka: min. 120 – maks. 400 mm
Średnica wyrzynka jest zalecaną wartością odnośną, ponieważ:
− drewno o mniejszej średnicy może być trudniejsze do
rozszczepiania ze względu zawarte w nim sęki i grube
włókna
− drewno o średnicy więszej niż ∅ 400 mm może być
rozszczepiane gdy, włókna są gładkie i niespójne
Nie należy rozszczepiać zielonych wyrzynków. Wyschnięte i
wysezonowane wyrzynki można łatwiej rozszczepiać i nie
powodują tylu zacięć materiału w maszynie jak drewno zielone
(wilgotne).
Obsługa
Obsługa urządzenia dwoma rękami
Łuparki do drewna nigdy nie mogą obsługiwać
jednocześnie dwie osoby.
Nigdy nie blokować uchwytów obsługowych (łap
zaciskowych).
1. Wcisnąć zielony przycisk. Odczekać kilka sekund, aż silnik
uzyska maksymalne obroty, a w pompie zostanie wytworzone
prawidłowe ciśnienie.
L W łuparkach do drewna wyposażonych w silniki prądu
trójfazowego (400 V 3~) zwracać uwagę na kierunek obrotów
silnika. Praca silnika w kierunku niewłaściwym
uszkodzenia pompy.
L Przy temperaturze poniżej –5° C przed przystąpieniem
do pracy rozgrzać łuparkę przez co najmniej 15 minut pracy
na biegu jałowym, aby nagrzać olej.
2. Pień ustawić na stole łuparki.
L Łupany element obrabiać wyłącznie wzdłuż włókien.
prowadzi do
3. Pień trzymać łapami zaciskowymi.
4. Jednocześnie wcisnąć w dół obydwa uchwyty obsługowe .
Î Nóż łupiący przesuwa się w dół, rozłupując pień.
5. Zwolnić obydwa uchwyty obsługowe, nóż powraca do swojej
pozycji wyjściowej.
L Jeżeli zwolni się tylko jeden uchwyt obsługowy, nóż
pozostanie w zajmowanej pozycji.
Szczególne wskazówki dotyczące
rozszczepiania:
Przygotowania:
Drewno, które ma być rozszczepiane należy przygotować
nadając mu maksymalne wymiary umożliwiające obróbkę.
Zwrócić uwagę na to, żeby drewno było równo pocięte.
Położyć drewno przy łuparce tak, żeby nie stanowiło dla nikogo
zagrożenia (niebezpieczeństwo potknięcia).
Regulacja wysokości
Przy krótszych elementach drewnianych wydajność pracy można
zwiększyć przez skrócenie powrotu noża rozłupującego.
Ustawić pień na stole
1.
łuparki i sprowadź nóż
przez wciśnięcie w dół
obu uchwytów obsług-
owych na wysokość 3 5 cm powyżej powierzchni pnia.
2. Zwolnić jeden uchwyt,
aby nóż pozostał w
zajmowanej pozycji.
10
9
8
3. Wyłączyć urządzenie i wyciągnąć wtyczkę z gniazdka
4. Zwolnić drugi uc hwyt obsługowy.
5. Skrócić skok na umieszczonym z boku drążku, poprzez
ustawienie śruby mocującej na odpowiedniej wysokości.
64
Page 66

11
j
śruba ustalająca
Ustawienie wysokości stołu
górna pozycja płyty stołu dla wyrzynków do 59 cm
środkowa pozycja płyty stołu dla wyrzynków do 85 cm
dolna pozycja płyty stołu dla wyrzynków do 135 cm
1. Rozłupywać
wyrzynki do
59 cm na
płycie stołu
(6).
2. Rozłupywać
wyrzynki do
89 cm na
stole (7).
Wyciągnąć
płytę stołu
(6).
3. Rozłupywać
wyrzynki do
135 cm na
cokole (10).
Nacisnąć w
dół dźwig-
nię bloku-
ącą l (8) i
odchylić
stół (7) w
bok.
Ustawienie krzyżaka łuparki
13
śruba ustalająca
12
Łupanie drewna krótkiego:
1. górna pozycja płyty stołu
2. Postawić wyrzynek na płycie stołu łuparki.
L Obrabiany element łupać wyłącznie w kierunku
przebiegu włókien.
Pień trzymać w łapach zaciskowych.
3.
Łupanie drewna długiego:
1. Środkowa i
dolna pozycja
stołu lub cokołu.
2. Usunąć
krzyżak łuparki.
3. Postawić
wyrzynek na
stole lub
cokole łuparki.
14
L Możliwe zakłócenia podczas łupania drewna: Drewno nie
zostaje rozłupane na całej długości, nóż rozłupujący zakleszcza
się, tak że wracając do pozycji wyjściowej unosi ze sobą drewno.
Drewna nie można już usunąć ręcznie. W takim wypadku
postępować następująco:
1. Wyłączyć urządzenie.
2. Zamocować płytę stołu (6), zależnie od długości
przeznaczonego do rozłupania wyrzynka, w górnej pozycji i
obrócić stół (7).
3. Włączyć urządzenie i kontynuować łupanie drewna.
¾ Nigdy nie rozszczepiać dwóch wyrzynków jednocześnie.
¾ Nie należy nigdy podczas fazy pracy urządzenia dokładać lub
zamieniać drewna.
L Nigdy nie kontynuować posuwu przez dłuższy czas (kilka
sekund) w celu wymuszenia rozszczepienia wyrzynka. Może to
doprowadzić do uszkodzenia maszyny.
Pień umieścić ponownie na stole i powtórzyć czynność łupania
lub odłożyć go na bok.
W jaki sposób można uwolnić wyrzynek zaciśnięty w maszynie?
Drewno sękate może powodować zakleszczanie podczas
łupania.
Krzyżak
łuparki
1. Wyłączyć urządzenie i wyciągnąć wtyczkę z gniazda
sieciowego.
2. Zakleszczony pień ostrożnie poruszać w obie strony, aby go
poluzować i wyjąć.
Zakleszczonego pnia nigdy nie pobijać młotkiem.
Zakleszczonego pnia nigdy nie próbować uwolnić przez
1. Poluzować śrubę ustalającą.
2. Przesunąć krzyżak łuparki do wymaganej pozycji.
3. Ponownie dokręcić śrubę ustalającą .
65
piłowanie.
Nie należy także prosić innej osoby o pomoc.
Page 67

Zakończenie pracy:
¾ Sprowadzić nóż rozłupujący w górne położenie (pozycja
wyjściowa).
¾ Zwolnić jeden uchwyt obsługowy.
¾ Wyłączyć urządzenie i wyciągnąć wtyczkę z gniazdka.
¾ Przestrzegać przepisów dotyczących obsługi technicznej i
konserwacji.
OObbssłłuuggaa tteecchhnniicczznnaa ii kkoonnsseerrwwaaccjjaa
Przed rozpoczęciem i konserwacji i czyszczenia
należy wyjąć z gniazda wtyczkę przewodu
zasilającego.
W celu uniknięcia obrażeń rąk należy nosić rękawice
ochronne.
L W celu zachowania sprawności funkcjonalnej łuparki do
drewna opałowego należy zwrócić uwagę na następujące
zagadnienia:
Po zakończeniu pracy należy dokładnie oczyścić
maszynę.
Usunąć pozostałości żywicy.
Regularnie smarować kolumnę łuparki lub oliwić ją
nieszkodliwym dla środowiska rozpylonym olejem.
Sprawdzać poziom oleju wzgl. wymienić olej.
Regularnie sprawdzaj szczelność i stan węży
hydraulicznych.
Ostrzenie noża rozłupującego
Po dłuższej eksploatacji i przy zmniejszeniu wydajności łuparki,
oraz przy lekkim odkształceniu ostrza noża należy je
przeszlifować lub naostrzyć drobnym pilnikiem (usunąć zadziory).
15
Jak sprawdzić poziom oleju?
1. Kolumna łuparki
musi znajdować się
w pozycji schowanej.
2. Wyjąć pręt pomiaru
poziomu oleju z
otworu.
3. Oczyścić pręt
pomiaru poziomu
oleju i uszczelkę
olejową.
4. Ponownie włożyć aż
do oporu pręt pomiaru poziomu oleju
do otworu.
5. Ponownie wyjąć pręt
pomiaru pozio-mu z
otworu.
16
Jeżeli
poziom oleju
znajduje się
pomiędzy
dwoma
oznaczenia
mi krańco-
wymi, to w
zbiorniku
znajduje się
wystarczając
a ilość oleju.
17
pręt pomiaru
stanu oleju
Jeżeli
poziom oleju
znaduje się
poniżej dolnego oznaczenia krańcowego, należy uzupełnić
olej, stosując do tego czysty lejek.
dolne oznaczenie górne oznaczenie
6. Sprawdzić
ostrzenie
krawędzi tnącej
stan
techniczny
uszczelki
olejowej. W
przy-padku
uszkodzeń uszczelka musi zostać wymieniona.
7. Ponownie włożyć aż do oporu pręt pomiaru poziomu oleju do
otworu.
18
Kiedy należy wymienić olej?
Pierwsza wymiana oleju po upływie 50 godzin
eksploatacyjnych, następne po upływie każdych kolejnych
500 godzin eksploatacyjnych.
Wymiana:
1. Kolumna łuparki musi znajdować się w pozycji schowanej.
2. Ponownie wyjąć pręt pomiaru poziomu oleju z otworu.
3. Ustawić pod łuparką zbiornik, który będzie mógł pomieścić
minimum 7 litrów oleju.
66
Page 68

4. Odkręcić korek spustowy, aby mógł wyciekać olej.
5. Ponownie
założyć
uszczelkę i
korek spustowy.
6. Stosując czysty
lejek, wlać do
maszyny
świeży olej
hydrauliczny
(7,0 litrów).
7. Oczyścić pręt
pomiaru
poziomu oleju i
uszczelkę
olejową.
8. Sprawdzić stan uszczelki olejowej. W przypadku uszkodzeń
uszczelka musi zostać wymieniona.
9. Ponownie włożyć aż do oporu pręt pomiaru poziomu oleju do
otworu
Przepracowany olej należy zagospodarować zgodnie z
obowiązującymi przepisami (lokalna składnica
przepracowanego oleju). Zabrania się spuszczania
przepracowanego oleju do podłoża lub mieszania go z
innymi odpadkami.
L Olej hydrauliczny
Zaleca się stosowanie do siłownika następujących gatunków
oleju hydraulicznego:
¾ Shell Tellus T 22
¾ Aral Vitam Gf 22
¾ BP Energol HLP 22
¾ Mobil DTE 11
¾ lub o równorzędnych właściwościach
Nie stosować żadnych innych gatunków oleju. Stosowanie
innych gatunków oleju wywiera wpływ na sprawność
funkcjonalną siłownika hydraulicznego.
GGwwaarraannccjjaa
• Przez pierwsze 2 lata, począwszy od dostawy urządzenia z
magazynów dystrybutora, udzielamy gwarancji z tytułu wad
materiałowych i produkcyjnych.
• Wykluczone są roszczenia gwarancyjne z tytułu szkód, jakie
powstaną wskutek nieprawidłowego obchodzenia się z
urządzeniem lub nieprawidłowego opakowania go podczas
transportu zwrotnego wzgl. nieprzestrzegania instrukcji
obsługi .
• Wadliwe podzespoły należy odesłać nieodpłatnie do naszego
zakładu. Decyzja o nieodpłatnej dostawie części zamiennych
pozostaje w naszej gestii. Rozstrzygnięcie o bezpłatnej
dostawie części zamiennych pozostaje w naszej gestii.
• Udzielona gwarancja nie obejmuje normalnego zużycia
eksploatacyjnego klina rozłupującego, oleju hydraulicznego,
prowadników, uszczelek oraz kół jezdnych.
Prace związane z roszczeniem gwarancyjnym zostaną
•
wykonane przez nas. Zlecenia naprawy innej firmie wymaga
udzielenia przez nas jednoznacznej zgody.
• Gwarancja zostaje przez nas udzielona pod warunkiem
stosowania oryginalnych części zamiennych.
• Zastrzegamy sobie prawo do zmian technicznych służących
dalszemu rozwojowi technicznemu urządzenia.
DDaannee tteecchhnniicczznnee
Model
Typ
Siła rozszczepiania
Długość wyrzynków drewnianych
Średnica wyrzynków drewnianych
Długość skoku rozszczepiania
Prędkość ruchu roboczego ca. 0,04 m/sek.
Prędkość ruchu powrotnego ca. 0,11 m/sek.
Olej hydrauliczny (maks.) 7,0 Liter
Ciśnienie w układzie hydraulicznym 21 MPa (210 bar)
Moc silnika elektrycznego (pobór mocy) prąd zmienny P1 = 3800 W ( S6-40% )
Przyłącze prąd trójfazowy 400 V 3~ 50 Hz, 16 A
Wymiary długość 840 x szerokość 920 x wysokość 1620 mm
Ciężar ca. 209 kg
ASP 10-1350
ASP 10-1350
100 kN (10 t) ± 10 %
max. 1350 mm
min. 120 – max. 400 mm
≈ 550 mm
prąd trójfazowy P
= 3000 W ( S6-40% )
1
67
Page 69

EEwweennttuuaallnnee zzaakkłłóócceenniiaa
rodzaj zakłócenia ewentualna przyczyna usuwanie
Wyrzynek nie zostaje
rozszczepiony
(zbyt mała siła rozszczepiania)
Kolumna rozłupująca porusza się
kołysząc się lub silnie wibrując
Kolumna rozłupująca nie daje się
wprowadzić
Silnik pracuje. lecz kolumna
rozłupująca nie daje się
wprowadzić
Silnik urządzenia nie podejmuje
pracy
⇒ Wyrzynek znajduje się w niewłaściwej
pozycji.
⇒ Wymiary wyrzynka wykraczają poza
dozwolone lub drewno jest zbyt twarde jak
na możliwości maszyny.
⇒ Nóż łuparki nie rozłupuje
⇒ Zbyt niskie ciśnienie w układzie hydraulic-
znym.
⇒ Dźwignie wyzwalające pogięte (popychacz
hydrauliki nie pozwala się całkowicie
wcisnąć)
⇒ Niewłaściwy przewód przyłączeniowy
(dłuższy niż 10 m lub o zbyt małym
przekroju żył).
⇒ Powietrze w układzie.
⇒ Kolumna rozłupująca niedostatecznie
nasmarowana wzgl. naoliwiona.
⇒ Niesprawna pompa hydrauliczna ⇒ W celu usunięcia zakłócenia nawiązać
⇒ Odwrotny kierunek obrotów silnika ⇒ Sprawdzić kierunek obrotów silnika.
⇒ Brak napięcia sieciowego
⇒ Brak jednej fazy w silnikach trójfazowych
⇒ Uszkodzony przewód przyłączeniowy
⇒ Niesprawny silnik elektryczny
⇒ Ponownie umieścić wyrzynek w
urządzeniu.
⇒ Skorygować wymiary wyrzynka do
dozwolonych.
⇒ Naostrzyć nóż łuparki, zwrócić uwagę na
zadziory i karby
⇒ Sprawdzić poziom oleju i jeżeli zachodzi
potrzeba, uzupełnić. Jeżeli zakłócenie nie
ustąpiło, nawiązać kontakt z
producentem lub wskazaną przez niego
firmą.
⇒ zlecić producentowi lub podanej przez
niego firmie serwisowej regulację dźwigni
wyzwalających
⇒ Zastosować prawidłowy przewód
przyłączeniowy
⇒ Sprawdzić stan oleju i w razie potrzeby,
uzupełnić.
⇒ Nasmarować kolumnę łuparki lub naoliwi ć
ją nieszkodliwym dla środowiska
rozpylonym olejem.
Jeżeli zakłócenie nie ustąpiło, nawiązać
kontakt z producentem lub wskazaną przez
niego firmą.
kontakt z producentem lub wskazaną
przez niego firmą.
prąd trójfazowy: Przestawić kierunek
obrotów (sk. lpp. 63)
prąd przemienny: W celu usunięcia
zakłócenia nawiązać kontakt z
producentem lub wskazaną przez niego
firmą.
⇒ Sprawdzić zabezpieczenie
⇒ Zlecić fachowemu personelowi
sprawdzenie zabezpieczenia przewodów
zasilających
⇒ Wymienić przewód zasilania sieciowego,
lub zlecić jego sprawdzenie elektrykowi
⇒ W celu usunięcia zakłócenia nawiązać
kontakt z producentem lub wskazaną
przez niego firmą.
68
Page 70

Det är inte tillåtet att ta maskinen i drift om
man inte noga har läst igenom bruksanvisningen, följt alla anvisningar och har
monterat maskinen enligt monteringsanvisningarna.
Förvara bruksanvisningen väl.
Använd skyddsglasögon eller visir under
arbetet för att skydda ögonen mot spån
och flisor.
Håll arbetsområdet rent och snyggt!
Olyckor kan inträffa p.g.a. slarv.
IInnnneehhåållll
Konformitetsförklaring 1
Reservdelar / Beskrivning 2
Montering
Leveransomfattning 69
Symboler 69
Föreskriven användning 70
Faror och risker 70
Säker användning 70
Transportinstruktioner 71
Placering 71
Idrifttagande 71
Att arbeta med vedklyven 72
Underhåll och skötsel 75
Garanti 76
Teknisk data 76
Möjliga störningar 77
LLeevveerraannssoommffaattttnniinngg
5
Kontrollera innehållet i kartongen dvs.
! om leveransen är komplett
! om leveransen ev. har tagit skada
Informera din återförsäljare, leverantören resp. tillverkaren
omgående om någon del fattas eller har tagit skada. Senare
reklamationer kan inte accepteras.
1 förmontera d klyvenhet 2 hjul
1 manöverarm höger/ vänster 1 tillbehörspåse
1 axel 1 bruksanvisning
MMaasskkiinnssyymmbboolleerr
Olja är brandfarlig och kan explodera.
Rökning och öppen eld är förbjudet.
Ta hand om den gamla oljan på
föreskrivet sätt (avfallsanläggning). Det är
inte tillåtet att hälla ut oljan i marken el ler
att blanda ut den i annat avfall.
Det är förbjudet att avlägsna eller
modifiera skydds- och säkerhetsanordningar.
Endast operatören får vistas i maskinens
arbetsområde. Se till att inga andra
personer, husdjur o.s.v. finns i riskområdet
(minimiavstånd 5 m).
Ta inte bort fastklämda vedträn med
händerna.
OBS!
Stäng av motorn och dra ur kontakten vid
reparations-, underhålls- och rengöringsarbete.
Risk för skär- och klämskador; vidrör
aldrig farliga områden när kniven rör sig.
Håll fast arbetsstycket med en
fastspänningsklo under klyvningen.
Titta på klyvkniven och dess rörelser hela
tiden.
Läs igenom och beakta manualen och
säkerhetsanvisningarna innan apparaten
tas i bruk.
Använd skyddsskor under arbetet så att
fötterna inte skadas av nedfallande
vedträn.
Använd skyddshandskar under arbetet för
att skydda händerna mot spån och flisor.
SSyymmbbooll aappppaarraatt // fföörrppaacckknniinngg
Elektrisk utrustning får inte slängas med övriga
sopor. Lämna apparater, tillbehör och till
miljöstation.
69
Högspänning, livsfara
Page 71

SSyymmbboolleerr II bbrruukkssaannvviissnniinnggeenn
En fara hotar eller farlig situation. Om denna
symbol resp. hänvisning inte beaktas finns risk för at t
personer kan skada sig eller maskinen resp. andra
föremål kan ta skada.
Viktiga anvisningar för den rätta användningen.
L
Om denna symbol resp. hänvisning inte beaktas
finns risk för maskin- eller funktionsstörningar.
Användningstips. Här får ni information och tips om
hur man använder maskinen på optimalt sätt .
Montering, hantering och underhåll. Här förklaras
allt i detalj som ni måste göra.
FFöörreesskkrriivveenn aannvväännddnniinngg
Vedklyven får användas enbart till klyvning av ved.
Använd endast rakt avsågade stockar i klyven.
Avlägsna främmande partiklar (spik, tråd, betong etc.) ur
det trä som skall klyvas.
All annan användning än ovannämnd är otillåten. För
skador som förorsakas av otillåten användning bär
tillverkaren inget ansvar – användaren ensam har
ansvaret i ett sådant fall.
FFaarroorr oocchh rriisskkeerr
Även om man använder maskinen på föreskrivet sätt
och beaktar alla säkerhetsanvisningar finns alltid en viss risk
att skada sig på grund av maskinens speciella konstruktion.
Risken att skada sig kan man i första hand reducera genom
att i detalj följa alla anvisningar i avsnittent "Föreskriven
användning" och "Säkerhetsanvisni ngar", Därutöver bör man
vara extra försiktig vad det gäller följande risker:
Hänsyn och försiktighet minskar riskerna för person- och
sakskador.
Om säkerhetsåtgärderna ignoreras kan person- eller
sakskador uppstå.
Händer och fingrar kan skadas av den rörliga kniven på
grund av oaktsamhet, försummelse att följa
säkerhetsbestämmelserna samt icke ändamålsenlig
användning.
Risk att skada sig genom ström om man använder
bristfälliga elektriska anslutningsledni ngar.
Risk att skadas sig om man vidrör spännin gsförande delar
om elektriska komponenter har öppnats.
Dessutom kan det alltid finnas en viss risk at t skada sig även
om denna risk inte är direkt uppenbar.
SSääkkeerr aannvväännddnniinngg
Läs noga igenom och beakta anvisningarna nedan
samt alla tillämpliga nationella säkerhetsbestämmelser
innan ni börjar använda maskinen för att skydda både er
själv och andra för möjliga faror.
Överlämna säkerhetsanvisningarna till alla personer
L
som använder maskinen.
Förvara säkerhetsanvisningarna väl så att de alltid
L
finns till hands.
Var uppmärksam. Koncentrera Dig på arbetet. Arbeta
förnuftigt. Använd inte apparaten om Du är trött eller
påverkad av narkotika, alkohol eller läkemedel. Ett
ögonblicks oaktsamhet kan leda till allvarliga
personskador.
Informera er med hjälp av bruksanvisningen om maskinen
och dess funktioner.
Använd maskinen aldrig för andra ändamål än den är
avsedd för (se avsnitten "Föreskriven användning" och
"Att arbeta med vedklyven“).
Se till att ni står stadigt så att ni har god balans.
Arbetsställningen skall vara i närheten av
manöverspakarna. Bild 8.
Stå aldrig ovanpå maskinen.
Använd
− skyddsglasögon eller -visir
− arbetshandskar
− hörselskydd
− säkerhetsskor med stålhätta
Använd lämpliga arbetskläder:
− inga vida kläder, eller smycken (kan fasta i de rörlig a
delarna)
Den som använder maskinen ansvarar för att inga andra
personer kan ta skada av den.
Barn och ungdomar under 18 år får inte använda
maskinen.
Håll barn på avstånd från maskinen.
Använd alldrig maskinen när obehöriga personer
uppehåller sig i närheten.
Låt maskinen aldrig vara utan uppsikt.
Se alltid till att det är rent och städat kring maskinen!
Oordning kan leda till olycksfall.
Överbelasta inte maskinen! Håll er alltid till den angivna
effekten.
Använd maskinen endast om alla skyddsanordningar är
monterade enligt anvisningar na och förändra ingenting på
maskinen som skulle kunna påverka säkerheten.
Förändra ingenting på maskinen.
Rengör maskinen aldrig med en vattenstråle (riskfaktor:
elektrisk ström).
Låt maskinen aldrig stå ute i regn och använd den inte
när det regnar.
Förvara maskinen endast på en torr plats och där barn
inte kann komma åt den.
Stäng av maskinen och dra ur nätkontakten i samband
med:
− reparationer
− underhåll och rengöring
70
Page 72

− att ni åtgärdar en störning
− transport
− att ni lämnar maskinen (även vid korta arbetsav brott)
Kontrollera regelbundet om maskinen event uellt kan vara
skadat:
− Varje gång innan ni börjar använda maskinen igen
måste ni kontrollera att skyddsanordningarna
fungerar felfritt.
− Kontrollera om de rörliga delarna fungerar felfritt och
inte sitter i kläm eller om det finns skadade delar.
Samtliga delar måste vara rätt monterade o ch uppfylla
alla villkor för att maskinen ska fungera korrekt.
− Skyddsanordningar som har tagit skada resp. som
inte fungerar felfritt måste repereras eller bytas ut på
en auktoriserad fackverkstad såvida det inte står något
annat i bruksanvisningen.
− Skadade eller oläsliga etiketter med
säkerhetsanvisningar måste ersättas.
Elektrisk säkerhet
Utförande av anslutningsledningen enligt IEC 60245
(H 07 RN-F) med ett ledartvärsnitt på minst
⇒ 230 V ~
3 x 1,5 mm² vid en kabellängd på upp till max. 10 m
⇒ 400 V 3~
5 x 1,5 mm² vid en kabellängd på upp till max. 10 m
Använd aldrig anslutningsledningar längre än 10 m. De
kan förorsaka spänningsfall. Motorn kan inte nå full eff ekt
och maskinens prestanda reduceras.
När man drar anslutningsledningen är det viktigt att se
till att ledningen inte kläms eller böjs för mycket och att
insticksförbindelsen inte kan bli fuktig.
Använd kabel aldrig för ändamål som de inte är avsedda
för. Skydda kablar för kraftig värme, olja och vassa
kanter. Drag aldrig i själva kabeln för att dra ut en
stickkontakt ur ett eluttag.
Om ni använder en skarvkabel är det viktigt att
regelbundet kontrollera den att den inte har tagit skada.
Skadade kablar ska alltid bytas ut omgående.
Använd aldrig defekt anslutningsledningar.
Använd endast skarvkablar som är godkända och märkta
för utomhusbruk.
Använd inga provisoriska elanslutningar.
Skyddsanordningar får aldrig överkopplas eller tas ur
drift.
Elanslutningar resp. reparationer på maskinens
elektriska komponenter får endast iordningställas resp.
genomföras av auktoriserad elfackman eller på en av
våra service-verkstäder. De lokala föreskrifterna, i
synnerhet vad det gäller skyddsåtgärder, ska alltid
beaktas.
Reparationer på övriga delar på maskinen får endast
genomföras av tillverkaren eller på en av våra serviceverkstäder.
Använd endast originalreservdelar. Om andra delar än
originaldelar används kan detta leda till olycksfall. För
skador som följd av att andra delar än origina ldelar har
använts ansvarar tillverkaren inte.
TTrraannssppoorrttiinnssttrruukkttiioonneerr
Före all
transport skall
kniven köras helt
ned.
5
Transportband
För transport
griper ni tag med
en hand i bygeln
och tippar
vedklyven lätt mot
er. Nu är det
enkelt att flytta
klyven.
För att undvika att
olja rínner ut under transporten,
måste locket till
oljetanken vara ordentligt fastskruvat.
PPllaacceerriinngg
Blockera hjulen med kilar för att undvika rullning under
arbetet.
Kontrollera att arbetsytan uppfyller följande krav:
− Halksäker
− Jämn
− Ingen risk att någon sn ubblar
− Tillräckligt god belysning
Använd inte maskinen i närheten av naturgas, bensin eller
annat lätt brännbart material.
IIddrriiffttttaaggaannddee
Kontrollera att maskinen är komplett monterad och att
alla anvisningar har beaktats i samband med
monteringen.
Kontrollera följande inför varje gång som ni använder
maskinen:
− Om anslutningsledningar är skadade (sprickor, snitt
eller dylikt).
Använd inga defekta ledningar
− Om själva maskinen eventuellt kan vara skadad (se
avsnittet "Säker användning")
− Om alla skruvar är ordentligt åtdragna.
− hydrauliken (läckage)
− oljenivån
− Avluftning: avlufta hydraulikanläggningen innan ni
sätter igång klyven.
¾Lossa locket till oljetanken (9) några varv, så att luften
kan komma ut från oljetanken.
¾ Låt kåpan vara öppen under gång.
71
Page 73

¾ Innan ni flyttar vedklyven, stänger ni locket till
oljetanken, så att inte olja rinner ut.
L Om inte hydraulikanläggningen avluftas, kommer den
inneslutna luften att skada packningarna, vilket ger en
permanent skada på klyven.
L Nätanslutning
Kontrollera att spänningen som står på maskin ens ty psky lt
stämmer överens med nätspänningen och anslut
maskinen till ett föreskrivet el-uttag.
Använd endast skarvledningar med tillräckligt stort
tvärsnitt.
Anslut maskinen med en jordfelsbrytare, 30 mA.
L Säkringar: 16 A
400 V 3~ Î 16 A
L Till-/Från-brytare
Innan arbetet börjar: kontrollera alltid att
avstängningsanordningen funger ar (genom att koppla till och
koppla från maskinen).
Använd ingen apparat vars brytare inte slår till och ifrån.
Skadade brytare måste omedelbart rep areras eller bytas
av kundtjänsten.
Tillkoppling
Tryck på den gröna
knappen
6
Frånkoppling
Tryck på den röda
knappen
L Återstartsspärr vid strömavbrott
(jordfelsbrytare)
Vid strömbortfall (elavbrott) frånkopplas maskinen automatiskt. För att tillkoppla maskinen igen behöver man bara
trycka på den gröna knappen en gång till.
Vedklyv med 400 V 3~
Kontrollera motorns rotationsriktning (se motorpilen) –
om riktningen är felaktig, skadas oljepumpen.
¾ Koppla till motorn; kniven går automatiskt upp i det h ögsta
läget.
¾ Om kniven redan befinner sig högst upp: fatta tag i båda
manöverhandtagen och tryck dem nedåt. N u åker kniven
ned.
72
¾ Om inte kniven rör sig efter det att motorn har startats,
skall ni stänga av motorn och ändra rotatio nsriktningen.
7
Det går att ändra
rotationsriktningen
genom att man för in
en skruvmejsel i
härför avsedd
öppning i kontaktkragen och ställer in
rätt rotationsriktning
med en lätt
tryckande vänstereller högerrörelse.
L Hydraulik
Använd aldrig maskinen om risker uppstår p.g.a.
hydraulikvätska.
Kontr ollera att maskinen och arbetsområdet är rena och
inte uppvisar några oljefläckar.
Risk för halka och brand!
Kontr ollera med jämna mellanrum att det finns tillräckligt
med hydraulolja i tanken (se Underhåll och skötsel)
Innehåll: 7,0 liter
AAtttt aarrbbeettaa mmeedd vveeddkkllyyvveenn
Kompletterande SÄKERHETSANVISNINGAR
Vedklyven får användas av endast en person.
Maskinen får användas endast av personenr över 18 års
ålder vilka har läst och förstått manualen.
Använd skyddsutrustning (skyddsglasögon/-visir,
handskar, skyddsskor), som skydd mot ev. skador.
Klyv aldrig stockar som innehåller spik, tråd eller andra
föremål.
Kluven ved och spån utgör i sig en fara – man kan
snubbla, slinta eller falla omkull på veden – håll därför
ordning i området runt klyven.
Lägg aldrig händerna på rörliga maski nd el ar när m ask in en
är igång. Beakta säkerhetsavståndet till st ock, påskjutare
och kniv så att inte händerna skadas.
Klyv endast stockar som inte är längre än max.längden
1350 mm.
L Kontrollera i nnan klyvningen, om k lyvningspelaren är
tillräckligt infettad, så att den problemfritt kan röra sig in
och ut.
Vad kan jag klyva
Storlek på stockarna
Längd på stocken: max. 1350 mm
Diameter på stocken: min. 120 – max. 400 mm
Diametern är ett rekommenderat riktvärde eftersom:
− Tunnare stockar kan vara svåra att klyva om de innehåller
kvisthål eller om fibrerna är för starka.
Page 74

− Tjockare trä än ∅ 400 mm kan klyvas om fibrerna är
glatta och mjuka.
Klyv inga gröna stockar. Torra, lagrade stockar går mycket
enklare att klyva och fastnar inte lika lätt som gröna (våta)
stockar.
Handhavande
Tvåhandsfattning
Två personer får aldrig använda vedklyven samtidigt.
Blockera aldrig manöverspakarna (spännklor).
1. Tryck på den gröna knappen. Vänta ett ögonblick tills att
motorn har kommit upp i slutvarvtalet och trycket i
hydraulikpumpen har genererats.
L Beakta motorns rotationsriktning hos vedklyvar med
trefasmotor (400 V 3~), eftersom oljepumpen k an skadas
om rotationsriktningen är felaktig.
L Vid temperaturer un der –5° C skall man låta klyven
gå på tomgång i minst 15 min. så att oljan värm s upp.
2. Ställ vedträt på klyvbordet .
L Arbeta endast i fiberriktningen.
Inställning av slaghöjd
Vid mindre träbitar kan arbetseffekten höjas genom att man
minskar klyvens återgångsrörelse.
1. Ställ vedträt
på klyvbordet
och kör fram
kniven till ca 3
- 5 cm
avstånd från
vedträt
genom att
hålla båda
manöverspak
arna nedtryckta.
2. Släpp upp en
av de båda
manöverspakarna.
10
9
8
3. Håll fast vedträt med spännklorna.
4. Tryck bägge manöverhandtagen nedåt samtidigt.
Î Kniven åker ned och vedträt klyvs.
5. Slä pp upp båda manöverspakarna. Kniven går tillbaka till
utgångsläget.
L Om man släpper upp bara den ena av
manöverspakarna, står kniven kvar.
3. Stän g av mask in en och dra ut nätsla dden.
4. Slä pp up p de n andra ma nö ver spake n.
5. Korta ned återgånsrörelsen hos den stång som sitter på
sidan genom att fixera låsskruven i erforderlig höjd.
11
Låsskruv
Att tänka på:
Förberedelser:
Förbered stockarna så att de ligger inom max.dimensinerna.
Se till att veden är rakt kapad.
Lägg stocken i klyven så att risken för personskador
minimeras (risk för snubbling).
Inställning av bordshöjden
övre position för bordsplattan för stockar upp till 59 cm
mellanposition för bordet för stockar upp till 85 cm
undre position för sockeln för stockar upp till 13 5 cm
73
Page 75

12
1. Klyv stockar upp till 59 cm på bordsplatta (A).
2. Klyv stockar upp till 89 cm på bordet (7). Dra ut
bordsplatta (6).
3. Klyv stockar upp till 135 cm på sockeln (10). Tryck på
låsspaken I (8) neråt och sväng bordet (7) åt sidan.
Justera klyvkorset
1. Lossa fixeringsskruv.
2. Skjut klyvkorset till den erforderliga positionen.
3. Dra åt fixer ings skruv en igen.
13
Fixiersskruv
Klyvning av långa vedträn:
1. Mellersta och
undre position
av bordet eller
sockeln.
2. Ta bort
klyvkorset.
3. Ställ stammen
på bordet
eller
klyvarens
sockel.
14
L Möjliga pr oblem vid klyvning av långa vedträn: trät klyvs
inte helt igenom, fastnar på kniven och åker med upp när
kniven går tillbaka. Det går inte att ta bort trät för hand.
Då gör Du så här:
1. Stäng av apparaten.
2. Fäst bordsplattan (6), beroende av längden på
stammen som ska klyvas, i dess övre position eller
så svänger ni runt bordet (7).
3. Sätt igång apparaten och fortsätt med klyvningen.
¾ Klyv aldrig två stockar i ett och samma moment.
¾ Lägg aldrig på extrastockar eller byt ut stockar under
pågående klyvning.
L Försök aldrig framtvinga klyvning genom att hålla kvar
påskjutningen i flera sekunder. Detta kan förorsaka skada på
maskinen.
Placera vedträt på nytt på bordet och upprepa klyvningen,
eller lägg undan vedträt.
Hur lossar jag en fastklämd stock?
Det finns en risk att kvistigt trä fastnar under klyvning.
Klyvkors
Klyvning av korta vedträn:
1. Övre position för bordsplattan
2. Ställ vedträt på klyvarens bordsplatta
L Arbeta endast i fiberriktningen.
3. Håll fast vedträt med spännklorna.
1. Stän g av mask in en och dra ut nätsla dden.
2. Rucka försiktigt på det fastnade vedträt så att det lossnar.
Hamra aldrig på ett fastnat vedträ.
Såga aldrig loss ett fastnat vedträ.
Be inte om hjälp.
arbetet är klart:
¾ Kör fram kniven till den nedre positionen (inkört läge).
¾ Släpp upp en av de båda manöverspakarna.
¾ Stäng av maskinen och dra ut nätsladden.
¾ Beakta varningarna och skötselanvisningarna.
74
Page 76
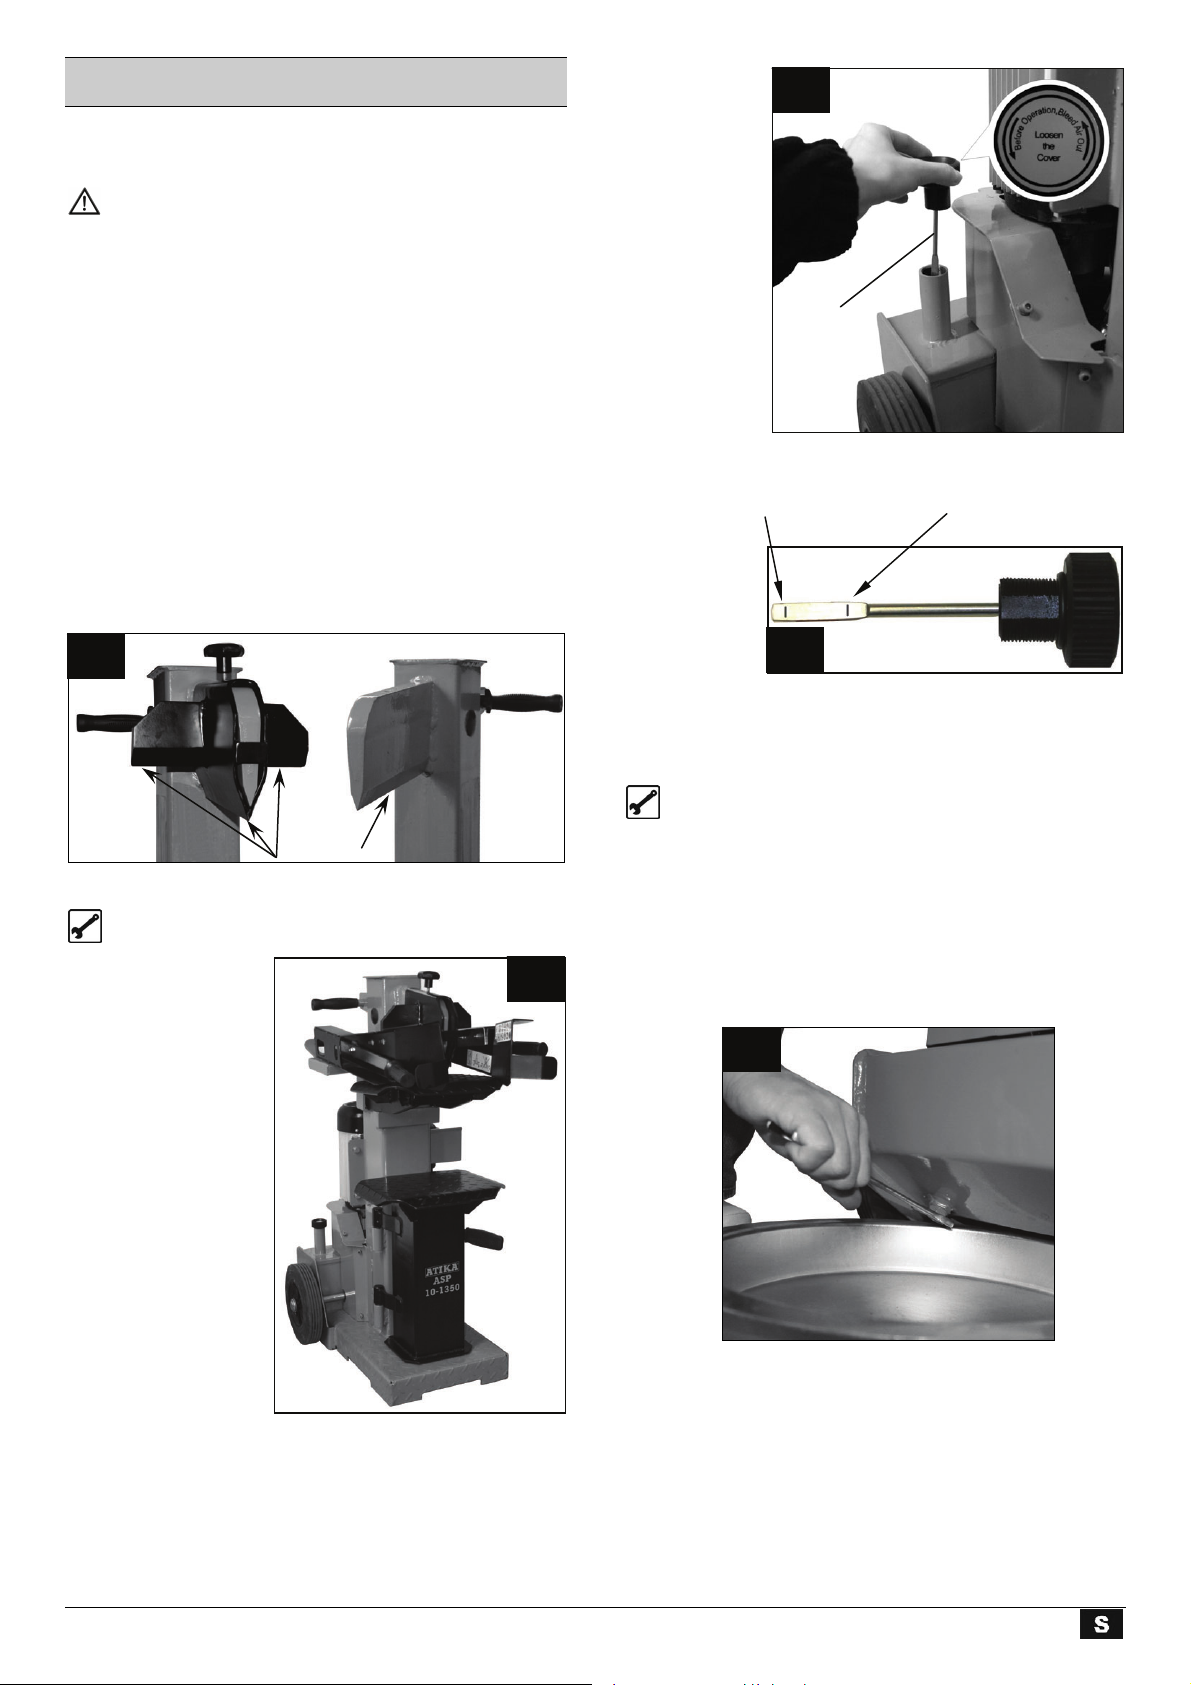
UUnnddeerrhhåållll oocchh sskkööttsseell
Dra ur nätkontakten före underhåll och skötsel.
Använd skyddshandskar för att undvika skador på
händerna.
L Beakta följande för att få en lång livstid på maskinen:
Rengör maskinen ordentligt efter avslutat arbete.
Ta bort kådrester.
Olja in klyvpelaren med jämna mellanrum. Använd
en miljövänlig sprejolja.
Kontrollera oljenivån resp. byt ut oljan
Kontrollera hydraulslangar och slangförbindningar
med jämna mellanrum (täthet, sits).
Slipning av kniven
Efter en längre tids användning, när klyvkapaciteten minskar
eller när snittet blir något skevt, kan man s lipa av kniven eller
skärpa den med en fin fil (ta bort grader).
15
Om
oljenivån
ligger
mellan de
båda
markeringar
na, finns det
tillräckligt
med olja i
behållen.
Om
oljenivån
ligger
nedanför
den nedre
markeringen, måste man fylla på olja. Använd en ren tratt.
nedre markering övre markering
6. Kontrollera
oljetätningen.
Om den är
skadad
måste den
bytas ut.
7. Sätt tillbaka stickan i öppningen så långt in det går.
17
Oljemätstickan
18
Skärpa
kanten
Hur kontrolleras oljenivån?
1. Klyvpelaren måste
vara i inkört läge
2. Dra ut oljestickan.
3. Rengör
oljemätstickan och
oljetätningen.
4. Sätt tillbaka stickan
i öppningen så
långt in det går.
5. Dra ut oljestickan
igen.
16
När skall oljan bytas?
Första oljebyte efter 50 arbetstimmar, därefter var 500:e
arbetstimme.
Utbyte:
1. Klyvpelaren måste vara i inkört läge.
2. Dra ut oljestickan.
3. Ställ ett kärl, som rymmer minst 5 liter olja, under klyven.
19
4. Skruva loss avtappningsskruven, så att oljan kan rinna ut.
5. Sätt tätning och avtappningspropp.
6. Fyll på ny hydraulikolja (7,0 liter) med hjälp av en ren tratt.
7. Rengör oljemätstickan och oljetätningen.
8. Kontrollera oljetätningen. Om den är skadad måste den
bytas ut.
9. Sätt tillbaka stickan i öppningen så långt in det går.
75
Page 77

Ta hand om den gamla oljan på föreskrivet sätt (avfallsanläggning). Det är inte tillåtet att hälla ut oljan i marken
eller att blanda ut den i annat avfall.
L Hydraulolja
Vi rekommenderar följande hydrauloljor för hydraulikcylindern:
¾ Shell Tellus T 22
¾ Aral Vitam Gf 22
¾ BP Energol HLP 22
¾ Mobil DTE 11
¾ eller likvärdig
Använd inga andra oljesorter. Används andra oljesorter, påverkas hydraulcylinderns funktion.
GGaarraannttiivviillllkkoorr
• Vi står för två års garanti från och med leverans av maskinen från affärens lager och detta innefattar brister om up pstått på
grund av material- eller tillverkningsfel.
• För skador till följd av en ofackmannamässig hantering eller bristfällig förpackning i samband med apparatens återtransport resp.
till följd av att bruksanvisningen inte har beaktats, frånsäger vi oss allt ansvar och kunden förlorar sina garantianspråk. Detta
gäller även för garantitiden.
• Felaktiga delar skall porto- fraktfritt skickas till vår fabrik. Beslutet att kostnadsfritt leverera reservdel åligger oss.
• Garantin gäller inte normal förslitning på kniv, hydraulolja, styrningar, tätningar och löphjul.
• Förekommande garantiarbeten utförs av oss eller av ett av oss rekommenderat ser viceställe. Vårt uttryc kliga medgivan de krävs
för att låta utföra garantireparation genom annan firma.
• Garantin är endast tillämplig vid användning av original-reservdelar.
• Vi förbehåller oss ändringar som gagnar den tekniska utvecklingen.
TTeekknniisskkaa ddaattaa
Model
Typ
Klyvningskraft
Vedlängd
Stockdiameter
Klyvlängd
ASP 10-1350
ASP 10-1350
100 kN (10 t) ± 10 %
max. 1350 mm
min. 120 – max. 400 mm
≈ 550 mm
Hastighet framåt ca. 0,04 m/sek.
Hastighet bakåt ca. 0,11 m/sek.
Hydraulolja (max.) 7,0 liter
Hydrauliktryck 21 Mpa (210 bar)
Elmotoreffekt (effektbehov) Växelström P1 = 3800 W ( S6-40% )
Trefasström P
= 3000 W ( S6-40% )
1
Anslutning Trefasström 400 V 3~ 50 Hz, 16 A
Dimensioner Längd 840 x bredd 920 x höjd 1620 mm
Vikt ca. 209 kg
76
Page 78

PPrroobblleemmllöössnniinnggssgguuiiddee
Problem Möjlig orsak Åtgärd
Stocken klyvs inte
(för låg klyvkraft)
Klyvpelaren rör sig svajigt eller med
kraftiga vibrationer
Klyvpelaren går inte in
Motorn startar men klyvpelaren körs inte in
Motorn startar inte
⇒ Stocken ligger fel
⇒ Stocken är längre/större än tillåtet, eller
trät är för hårt
⇒ Kniven klyver inte
⇒ För lågt hydrauliktryck
⇒ Böjda spärrarmar (hydraulkolven trycks
inte in helt)
⇒ fel anslutningsledning (längre än 10 m
eller för litet ledartvärsnitt)
⇒ Luft i kretsloppet
⇒ Klyvningspelaren är inte tillräckligt
infettad resp. Inoljad.
⇒ Defekt hydraulikpump ⇒ Kontakta tillverkaren eller av denne
⇒ Fel rotationsriktning hos motorn ⇒ Kontrollera och justera motorns
⇒ Ingen nätspänning
⇒ 2-fasgång vid trefasmotor
⇒ Defekt anslutningskabel
⇒ Elektromotor defekt
⇒ Lägg i stocken rätt
⇒ Kapa stocken till rätt mått
⇒ Slipa kniven. Kontrollera grader och
skåror
⇒ Kontrollera oljenivån. Fyll ev. på olja.
Om problemet inte löses: Kontakta
tillverkaren eller av denne angivet
företag.
⇒ Låt tillverkaren eller dennes
representant justera armarna
⇒ Använd rätt anslutningsledning
⇒ Kontrollera oljenivån. Fyll ev. på olja.
⇒ Fetta in klyvningspelaren eller olja in
den med en miljövänlig sprayolja.
Om problemet inte löses: Kontakta
tillverkaren eller av denne angivet företag.
angivet företag.
rotationsriktning.
Trefasström: justera motorns
rotationsriktning (
Växelström: Kontakta tillverkaren eller
av denne angivet företag.
⇒ Kontrollera säkringen
⇒ Låt behörig elektriker kontrollera
säkring och tilledning
⇒ Byt ut anslutningskabeln, eller låt
elektriker kontrollera den
⇒ Kontakta tillverkaren eller av denne
angivet företag.
se sidan 72)
77
Page 79
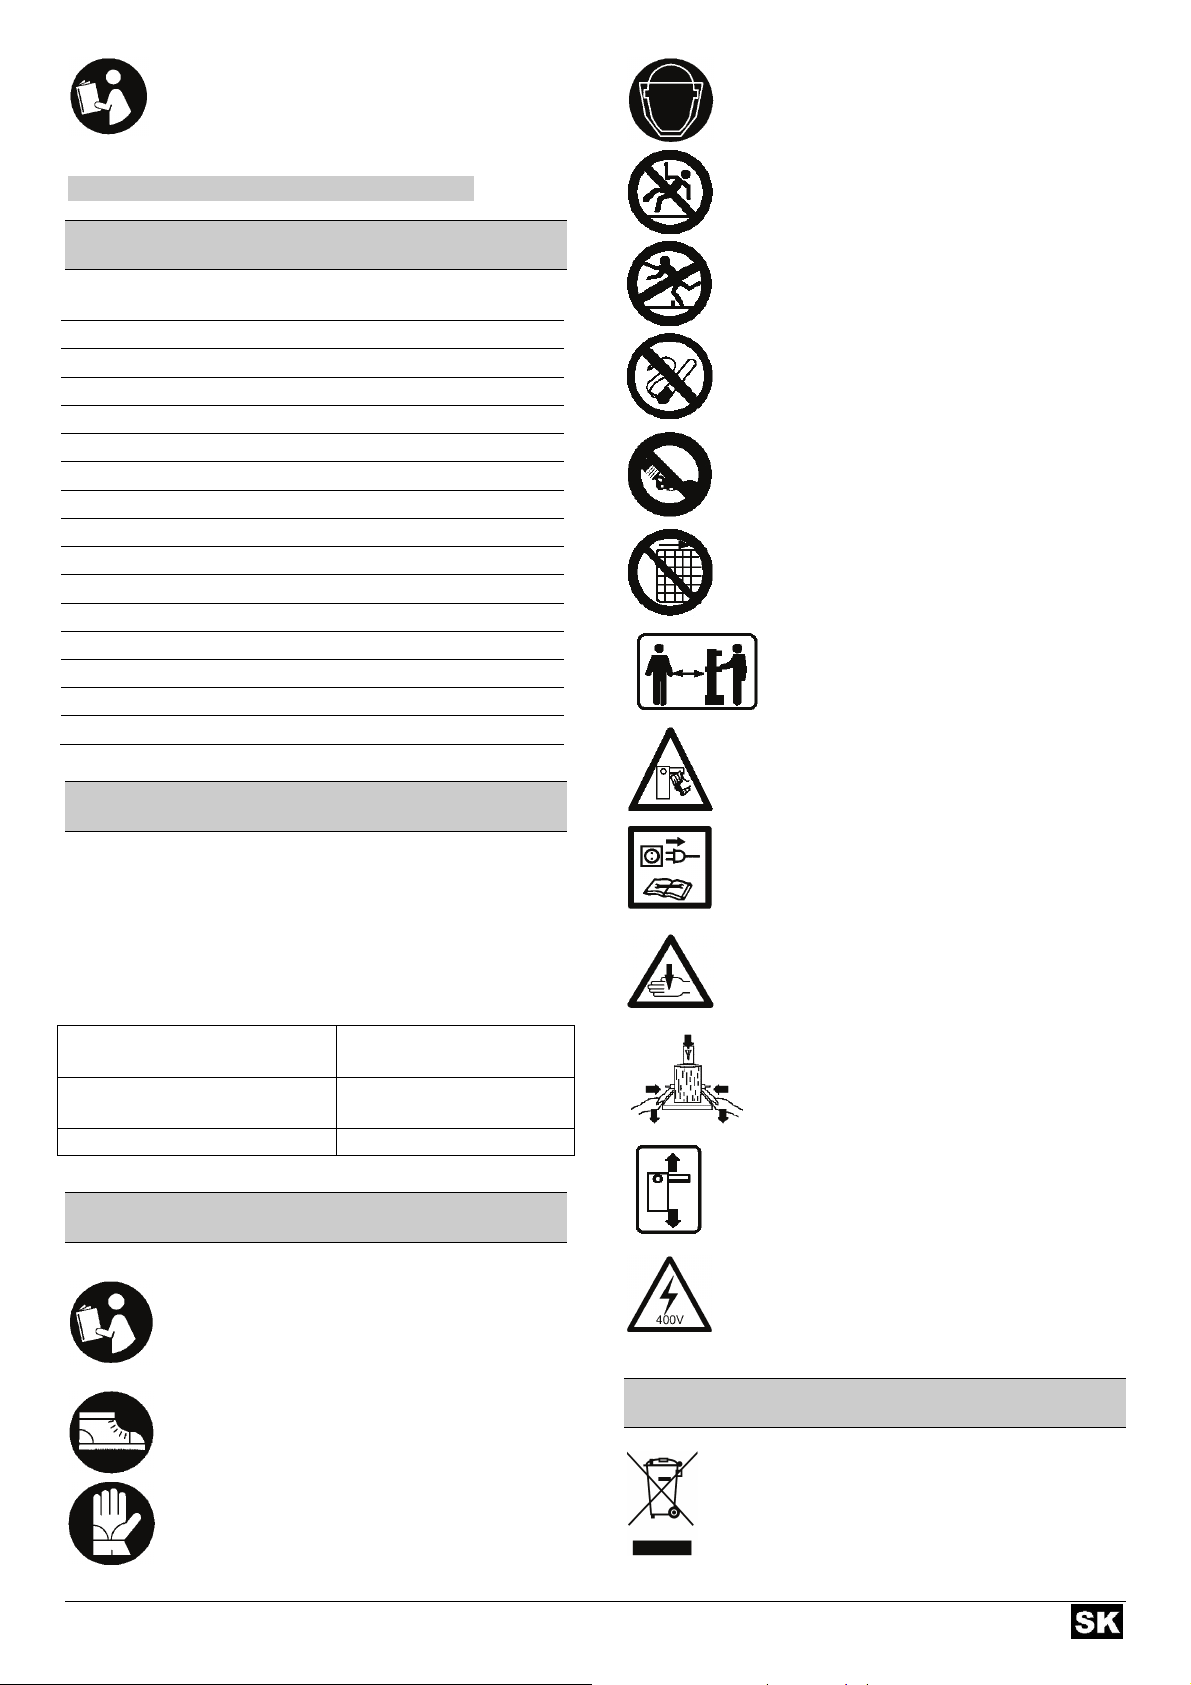
Stroj nesmiete obsluhovať bez dokonalého
preštudovania tohto návodu, rešpektovania
všetkých uvedených pokynov a jeho
riadneho zmontovania.
Návod uschovajte pre prípad ďalšieho použitia.
OObbssaahh
Prehlásenie o zhode 1
Náhradné diely 2
Montáž 5
Obsah dodávky 78
Grafické symboly 78
Pôsobnosť stroja 79
Ostatné riziká 79
Bezpečnosť práce 79
Pokyny na prepravu 80
Umiestnenie stroja 80
Uvedenie do prevádzky 80
Práca s palivovým drevom 81
Údržba a starostlivosť o stroj 84
Záruka 85
Možné poruchy 85
Technické dáta 86
OObbssaahh ddooddáávvkkyy
Po rozbalení dodávky z kartónu skontrolujte:
! úplnosť dodávky
! prípadne škody spôsobené transportom
Ak zistíte nedostatky, oznámte ich ihneď svojmu predajcovi
alebo priamo výrobcovi. Neskoršie rek lamácie nebudú
uznané.
1 predmontovaná prístrojová
2 kolesá
jednotka
1 ovládacie rameno
pravé/ľavé
1 os 1 návod na obsluhu
SSyymmbboollyy nnaa pprrííssttrroojjii
1 vrecko s
príslušenstvom
Pred uvedením stroja do prevádzky
prečítať tento návod a všetky
bezpečnostné upozornenia v ňom
uvedené. Starostlivo dodržiavať všetky
pokyny.
Počas práce používať bezpečnostnú
obuv. Ochrana nôh pred padajúcimi
polenami.
Používajte ochranné rukavice.
Pri práci použiť ochranné okuliare alebo
ochranný štít tváre. Ochrana očí pred
úlomkami alebo trieskami.
Udržiavajte Váš pracovný priestor
uprataný! Neporiadok na pracovisku by
mohol byť príčinou úrazu.
Olej je horľavina a môže explodovať.
Fajčenie a používanie otvoreného ohňa je
zakázané.
Starého oleja sa zbavte podľa zákona
(zberné miesto).Je zakázané vylievať
starý olej do pôdy alebo zmiešať ho
s odpadom.
Je zakázané namontované ochranné
prvky odmontovať alebo meniť.
Pri práci obsluhuje stroj iba jedna os oba.
Iné osoby, zvieratá sa nesmú
v pracovnom okruhu stroja pohybovať
(zdržiavať). Minimálna vzdialenosť je 5m.
Nesnažte sa uvolniť zaklieštené kmene
rukami.
POZOR!
Pred opravou, údržbou alebo čist ením po
každé motor vypnite a stroj odpojte zo
siete vysunutím kolíka zo zásuvky.
Nebezpečenstvo porezania a
pohmoždenia. Nikdy sa nedotýkajte
nebezpečných oblastí, keď je štiepací nôž
v pohybe.
Pevne držte diel počas štiepenia držiakmi.
Všetku pozornosť venujte pohybu
štiepacieho noža.
Vysoké napätie, smrteľné
nebezpečenstvo.
SSyymmbbooll zzaarriiaaddeenniiaa // bbaalleenniiee ll
Elektrické zariadenia nepatria do domového
odpadu. Zariadenie, príslušenstvo odovzdajte ku
ekologickej recyklácii.
78
Page 80

GGrraaffiicckkéé ssyymmbboollyy vv nnáávvooddee
Hroziace nebezpečenstvo alebo nebezpečná
situácia. Pri nedodržaní týchto pokynov môže dôjs ť
k poraneniu alebo vecným škodám.
L
PPôôssoobbnnoossťť ssttrroojjaa
Štiepačka palivového dreva je určená výhradne iba na
Štiepačkou je možné štiepiť iba polená, ktoré sú rovno
Cudzie telesá (klince, drôt, betón, atď.) je nutné zo
Každé iné ďalšie použitie stroja je kvalifikované ako
OOssttaattnnéé rriizziikkáá
predpísaných bezpečnostných pokynov je nutné vzhľadom ku
konštrukcii stroja a spôsobu jeho použitia počítať s určitými
tzv. ostatnými rizikami.
Tieto ostatné riziká je možné minimalizovať iba ak
bezpečnostné pokyny, návod na obsluhu a okruh pôsobnosti
stroja dokonale preštudujete a rešpektujete.
Pri samotnej práci ohľaduplnosť a opatrnosť zmenšujú riziká
zranenia alebo iných škôd.
Ignorovanie alebo iba prehliadnutie bezpečnostných
Pri nepozornosti, nedodržaní bezpečnostných predpisov
Ohrozenie el. prúdom pri použití nevhodných káblov alebo
Dotýkanie sa el. častí pod prúdom pri odkrytých el.
Ďalej sa môžu objaviť určité skryté riziká i napriek všetkým tu
uvedeným upozorneniam.
Dôležitá informácia správneho zaobchádzania so
strojom. Pri nedodržaní týchto pokynov môže dôjsť
k poruchám či k poškodeniu stroja.
Pokyny pre užívateľov. Tieto informácie Vám
pomôžu všetky funkcie stroja optimálne využiť.
Montáž, obsluha a údržba. Tu je presne vysvetlené
čo je potrebné vykonať.
túto činnosť.
(kolmo) narezané.
štiepaného dreva bezpodmienečne odstrániť.
nespadajúce do okruhu pôsobnosti a pri prípadných
škodách sa výrobca vzdáva akejkoľvek zodpovednosti.
Všetky riziká nesie obsluha stroja.
Aj pri správnom použití stroja a pri dodržaní všetkých
pokynov a opatrení môžu mať za následok poranenie
obsluhy či iných osôb alebo majetkových škôd.
a pri neodbornom použití môže štiepací nôž v pohybe
spôsobiť poranenia na ruke alebo na prstoch .
nevhodného pripojenia k el. sieti.
prvkoch stroja.
BBeezzppeeččnnáá pprrááccaa
Pred uvedením do prevádzky čítajte a dodržiavajte
všetky pokyny tu uvedené ako aj vo Vašej krajine
platných predpisov na prevádzku podobných strojov. Tak
chránite seba i ostatných pred možnými poraneniami.
Všetky bezpečnostné pokyny odovzdajte všetkým
L
osobám, ktoré so strojom pracujú.
Návod spolu s bezpečnostnými pokynmi uschovajte.
L
Buďte pozorní. Dávajte pozor na to, čo robíte. K práci
pristupujte s rozumom. Prístroj nepoužívajte, ak ste
unavení alebo ste pod vplyvom drog, alkoholu alebo
liekov. Moment nepozornosti pri používaní prístroja môže
viesť k vážnym poraneniam.
Pred uvedením do prevádzky sa so strojom riadne
zoznámte prostredníctvom návodu.
Nepoužívajte stroj k iným účelom ako je popísané.
Pracujte na bezpečnom pracovnom mieste.
Zaujmite pracovné postavenie, ktoré je v oblasti
ovládacích úchytiek. Obr.8.
Nikdy nestúpajte na stroj.
Pri práci noste ochranné okuliare alebo ochranný štít
tváre, ochranu uší, pracovné rukavice, pracovnú obuv
s oceľovou špičkou. Pracovný odev bez voľných častí
a pracujte bez ozdôb, ktoré by mohli byť zachytené
pohyblivými časťami stroja.
Obsluhujúci je pri práci zodpovedný voči ostatným
osobám.
Deti a mladiství pod 18 rokov nesmú stroj obsluhovať.
Nepúšťajte deti do pracovného okruhu stroja.
Nikdy nepúšťajte stroj ak sa v jeho blízkosti nachádza
ďalšia osoba.
Nenechávajte stroj bez dozoru.
Udržiavajte pracovisko v poriadku. Neporiadok môže byť
príčinou úrazu.
Nepreťažujte stroj. Najlepšie výsledky dosiahnete ak
pracujete s udanými výkonnostnými hodnotami.
Stroj prevádzkujte iba s riadne namontovanými
ochrannými prvkami a nemeňte na stroji nič čo by mohlo
ovplyvniť
Stroj neprispôsobujte a jeho časti nemeňte.
Stroj nestriekajte vodou (nebezpečenstvo úrazu el.
prúdom).
Stroj nenechávajte na daždi a taktiež ani počas dažďa
nepracujte.
Stroj uložte na suchom mieste a nie v dosahu detí.
Stroj vypnite a odpojte zo siete pri
− opravách
− údržbe a čistení
− odstraňovaní porúch
− transporte
− opustení stroja (i krátkodobo)
Kontrolujte stroj z hľadiska príp. poškodenia:
− Pred každým začatím práce musia byť dôkladne
bezpečnosť práce.
preverené ochranné prvky z hľadiska ich bezchybnej
funkcie.
79
Page 81

− Skontrolujte či sú všetky pohyblivé časti funkčné,
nelepia, nezadrhávajú sa a nie sú poškodené.
Skontrolujte ich správne namontovanie. Tieto časti
musia spĺňať podmienky bezchybnej prevádzky a tým
bezpečný chod stroja.
− Poškodené bezpečnostné prvky alebo iné časti musia
byť prostredníctvom odbornej firmy opravené alebo
vymenené (ak nie je v návode inak uvedené).
− Poškodené alebo nečitateľné bezpečnostné
samolepky na stroji je potrebné vymeniť.
Elektrická bezpečnosť
Prevedenie prípojného káblu podľa IEC 60245 (H 07 RN-
F) s priečnym priemerom od najmenej
⇒ 230 V ~
3 x 1,5 qmm pri dĺžke káblu max. do 10 m.
⇒ 400 V 3~
5 x 1,5 qmm pri dĺžke káblu max. do 10 m.
Nikdy nepoužívajte kábel dlhší ako 10 m. Dlhšie káble
môžu spôsobiť výpadok prúdu. Motor nedosiahne svojho
maximálneho výkonu, funkcia stroja je redukovaná.
Pri pokladaní prípojného kábla dbajte na to, aby nebol
prekrútený alebo priškrtený a aby prípojné spojenie (kolík,
zásuvka) neboli vlhké.
Nepoužívajte kábel, ktorý nie je určený na pripojenie.
Chráňte kábel pred teplom, olej om a ostr ými hranami. Pri
vyťahovaní kolíka zo zásuvky neťahajte za kábel.
Predlžovací kábel pravidelne kontrolujte a ak je
poškodený ihneď ho vymeňte.
Nepoužívajte žiadne defektné prípojné káble.
Vo vonkajšom prostredí používajte iba kábel, ktorý je pre
prácu vo vonkajšom prostredí určený.
Nikdy nepoužívajte provizórne pripojenie el. prúdu ku
stroju.
Ochranné el. prvky nikdy nepremosťujte alebo
nevyraďujte z prevádzky.
El. pripojenie resp. oprava el. častí stroja musia byť
zverené koncesiovanej elektrofirme alebo nášmu
obchodnému oddeleniu. Dbajte na splnenie miestnych
bezpečnostných predpisov a opatrení.
Opravy ostatných častí stroja vykonáva buď predajca,
alebo ním poverená firma.
Používajte iba originálne náhradné di ely. Použitie iných
náhradných dielov môže viesť k úrazom alebo
k poškodeniu majetku. V týchto prípadoch sa výrobca
vzdáva akejkoľvek zodpovednosti.
PPookkyynnyy nnaa pprreepprraavvuu
Pred každým transportom prejdite so štiepacím nožom
celkom nadol.
Pre transport
uchopte
štiepačku jednou
5
transportný pás
rukou za držadlo
a naklopte ju
mierne smerom
k sebe. V tejto
polohe je možné
štiepačku bez
námahy
premiestniť.
Aby ste zabránili
úniku oleja pri
transporte,
musíte odvzdušňovaciu skrutku
opäť pevne utiahnuť.
UUmmiieessttnneenniiee ssttrroojjaa
Zablokujte kolieska klinmi na znemožnenie posunu počas
práce.
Dbajte na to, aby pracovisko spĺňalo nasledujúce podm ie n ky:
− protišmyková podlaha
− rovná podlaha
− eliminácia možnosti potknutia sa
− dostatok svetla
Stroj neprevádzkujte v blízkosti zemného plynu, benzínových
výparov alebo ďalších tekutých látok, ktoré sú horľavé.
UUvveeddeenniiee ddoo pprreevvááddzzkkyy
Uistite sa, že stroj je kompletne zmontovaný podľa
predpisov.
Pred uvedením do prevádzky skontrolujte:
− prípojný kábel či nie je poškodený al eb o defektný (také
káble sa nesmú použiť).
− poškodenie prístroja (viď bezpečná práca).
− či sú všetky skrutky riadne zatiahnuté.
− hydrauliku na prietok oleja.
− stav oleja
− Odvzdušnenie: Pred uvedením štiepačky na palivové
drevo odvzdušnite hydraulické zariadenie.
¾ Uvoľnite uzáver (skrutku) (9) o niekoľko otáčok, aby
mohol stlačený vzduch uniknúť.
¾ Nechajte klapku počas prevádzky otvorenú.
¾ Po ukončení práce a skôr ako budete so štiepačkou
hýbať opäť uzavrite uzáver (skrutku), aby olej
nevytiekol.
80
Page 82

L Ak nebude hydraulické zariadenie odvzdušnené,
uzavretý vzduch poškodí tesnenie a spôsobí trvalé
poškodenie štiepačky na palivové drevo.
L Pripojenie k sieti
Porovnajte napätie uvedené na typovom štítku stroja
s napätím vo vašej sieti. Stroj pripojte k zodpovedajúcemu
napätiu do riadnej predpisovej zásuvky.
Použite kábel s dostatočným prierezom.
Pripojenie stroja vykonajte cez Fi-ochranný istič 30 mA.
L Istenie:16 A
400 V 3~ Î 16 A
L Zapnutie / Vypnutie
Pred každým použitím zariadenia najskôr skontrolujte
funkciu vypínacieho systému (zapnutím a vypn utím).
Nepoužívajte žiadne prístroje, u ktorých sa nedá spínač
zapínať a vypínať. Poškodené spínače sa musia dať
opraviť alebo vymeniť do servisu.
Zapnutie
Prístroj sa zapne
stlačením zeleného
gombíka.
6
Vypnutie
Prístroj sa vypne
stlačením červeného
gombíka.
L
Istenie proti opätovnému rozbehu pri
výpadku prúdu (vypínač pri nulovom napätí)
Pri výpadku prúdu sa prístroj automaticky vypne. Nové
zapnutie sa vykoná opätovným stlačením zeleného gombíka.
Štiepačka palivového dreva s 400 V 3~
Dbajte na smer otáčania motora (viď šípka na motore),
pretože ak sa točí motor nesprávnym smerom
poškodzuje to olejové čerpadlo.
¾ Zapnite motor, štiepací nôž automaticky zájde do najvyššej
polohy.
¾ Pokiaľ sa štiepací nôž v najvyššej polohe už nachádza :
uchopte obe ovládacie páky a zatlačte ich smerom nadol,
štiepací nôž zájde nadol.
¾ Pokiaľ sa štiepací nôž po rozbehu motora nepohybuje, tak
motor vypnite a zmeňte smer otáčania.
Smer otáčania môžete
7
zmeniť tak, že zasuniete
skrutkovač do príslušnej
štrbiny v prírube zástrčky
a ľahkým tlakom pohybom
doľava alebo doprava
nastavíte správny smer
otáčania.
L Hydraulika
Stroj nikdy nespúšťajte ak hrozí nebezpečenstvo
prostredníctvom hydraulickej kvapaliny.
Uistite sa, že stroj a pracovné miesto sú čisté bez
olejových škvŕn.
Nebezpečenstvo pošmyknutia a nebezpečenstvo
ohňa.
Pravidelne kontrolujte množstvo hydraulického oleja
v nádrži (viď kapitola o údržbe a starostlivosti).
Obsah nádrže: 7,0 l
PPrrááccee ssoo ššttiieeppaaččkkoouu ppaalliivvoovvééhhoo
ddrreevvaa
Štiepačku obsluhuje iba 1 osoba.
Štiepačku môžu obsluhovať iba osoby staršie ako 18
Pri práci vždy noste ochranné okuliare, ochranu uší,
Nikdy neštiepajte polená, ktoré obsahujú cudzorodé
Rozštiepané polená predstavujú nebezpečný pracovný
Pri zapnutom stroji nepribližujte ruky k pohyblivým častiam
Štiepajte iba polená, ktoré majú max. dĺžku 1350 mm.
rokov, ktoré boli dokonale oboznámené s návodom a
všetkými bezpečnostnými pokynmi.
rukavice a riadny pracovný oblek.
predmety (kov).
priestor. Nebezpečenstvo potknutia, pošmyknutia alebo
pádu. Udržiavajte pracovisko upratané.
stroja. Dodržiavajte bezpečnú vzdialenosť od polena,
posunovača a štiepacieho klina.
L Skontrolujte pred štiepaním, či je štiepací stĺpik
dostatočne namazaný, aby mohol bez problémov
zachádzať a vychádzať.
Čo môžem štiepať?
Veľkosť štiepaného dreva (polena).
Dĺžka: max. 1350 mm
Priemer: min. 120 – max. 400 mm
Priemer polena je doporučený pretože:
− Tenké drevo je obtiažne štiepať ak má viac výrastkov
alebo ak sú drevené vlákna príliš silné.
− Silnejšie drevo (viac ako 400 mm) sa dá štiepať ak je bez
výrastkov a drevené vlákna sú hladké a rovno vedené.
81
Page 83

Neštiepajte zelené polená (čerstvé). Suché uskladnené drevo
rozštiepate jednoduchšie a nebudete mať problémy s častým
„zakusnutím“ dreva ako pri vlhkom p olene.
Obsluha
Práca obojručne
Neobsluhujte š tiepačku dreva nikdy vo dvojici.
Nikdy neblokujte ovládaci e úchytky (napínacie lišty).
1. Prístroj sa zapne stlačením zeleného gombíka. Počkajte
niekoľko sekúnd pokiaľ motor dosiahne svojich otáčok
a pokiaľ sa natlakuje hydraulika.
L U štiepačky palivového dreva s trojfázovým motorom
(400 V 3~) dbajte na smer chodu motora, pretože zlý smer
otáčania pri prevádzke motora poškodzuje olejové
čerpadlo.
L Pri teplotách nižších ako –5° C nechajte štiepačku
dreva bežať aspoň 15 min. naprázdno, aby sa mohol
zohriať olej.
2. Položte kmeň na stôl štiepačky.
L Materiál určený na štiepanie spracovávajte výhradne
iba v smere vlákien.
Prestavenie výšky zdvihu
Pri kratších kusoch dreva môžete pracovný výkon zvýšiť
s krátením spätného chodu štiepacieho noža.
1. Postavte kmeň na
štiepací stôl
a prejdite štiepacím
nožom stlačením
oboch ovládacích
úchytiek smerom
nadol až cca na 3-5
cm ku kmeňu.
2. Uvoľnite jednu
ovládaciu úchytku,
aby štiepací nôž
zostal stáť v tejto
pozícii.
10
9
8
3. Pridržte kmeň napín acími lišt ami.
4. Stlačte obe ovládacie madla súčasne nadol.
Î Štiepací nôž zíde nadol a rozštiepi kmeň.
5. Uvoľnite obe ovládacie úchytky, štiepací nôž zájde späť
do svojej východzej polohy.
L Ak uvoľnite len jednu ovládaciu úchytku, zostane
štiepací nôž stáť.
3. Vypnite prístroj a vytiahnite kolík zo zásuvky.
4. Pustite druhú ovládaciu úchytku.
5. Skrate spätný chod na tyči umiestnenej na strane
uchytením zaisťovacej skrutky v potrebnej výške.
11
Zaisťovacia skrutka
Špeciálne pokyny na štiepanie
Príprava:
Pripravte na štiepanie polená, ktoré zodpovedajú vopred
uvedeným rozmerom a dbajte aby boli polená rovno (kolmo)
narezané. Poleno vkladajte do štiepačky tak, aby pre Vás
nevzniklo žiadne nebezpečenstvo.
Nastavenie výšky stola
Horná poloha dosky stola pre kmene do 59 cm
Stredná poloha stola pre kmene do 85 cm
Spodná poloha stola pre kmene do 135 cm
82
Page 84

1. Polená do
59cm
štiepajte na
stole (6).
2. Polená do
89 cm
štiepajte na
stole (7).
Vytiahnite
stolnú
dosku (6)
von.
3. Polená do
135 cm
postavte na
sokel (10).
Zatlačte
aretovaciu
páku (8)
smerom
nadol a
pootočte
stôl (7) na
stranu.
12
Zloženie štiepacieho kríža
1. Povoľte pripevňovaciu skrutku a maticu.
2. Štiepací kríž nastavte do požadovanej polohy.
3. Pripevňovaciu skrutku a maticu opäť pritiahnite.
13
Štiepací kríž
zaisťovacia
Štiepanie krátkeho dreva:
1. Horná poloha dosky stola.
2. Postavte poleno na pracovnú dosku (6) štiepačky.
L Drevo na štiepanie spracovávajte iba v smere
vlákien.
3. Pridržte kmeň upevňovacími lištami.
Štiepanie dlhého dreva:
1. Postavte poleno na
pracovnú dosku.
2. Zložte štiepací kríž.
3. Postavte poleno na
sokel štiepačky.
14
Možné poruchy pri štiepaní dlhého dreva: Štiepané
L
drevo nie je celkom rozštiepené, pevne zviera štiepací nôž
a pri spätnom chode sa zdvíha aj kmeň. Kmeň sa už nedá
uvolniť rukami.
1. Vypnite stroj.
2. Up evnite podľa dĺžky štiepaného polena pracovnú dosku
(6) do hornej polohy, alebo natočte stolovú dosku (7)
okolo.
3. Zapnite stroj a pokračujte v štiepaní.
¾ Nikdy neskúšajte štiepať 2 ks dreva v jednom pracovnom
kroku.
¾ Nikdy poleno v priebehu pracovného kroku nemeňte
(neopravovať jeho polohu, alebo ho nahradzovať iným).
L Nikdy poleno, ktoré očivid ne nejde rozštiepať neskúšajte
prinútiť ku štiepaniu tým, že budete dlhšie (viac s ekúnd) tlačiť
na ovládacie madlá. To môže viesť k poškodeniu motora.
Umiestnite kmeň opäť na stôl a opakujte štiepanie, alebo
odložte kmeň nabok.
Ako uvoľniť zaseknuté poleno v stroji.
Existuje nebezpečie, že výrastkove drevo sa pri štiepaní
zasekne.
1. Vypnite stroj a vytiahnite kolík zo zásuvky.
2. Zaseknutý kmeň uvoľnite tak, že ním budete opatrne
pohybovať sem a tam.
Zaseknutý kmeň nikdy neuvoľňujte pomocou kladiva.
Nikdy zaseknutý kmeň nevyrezávajte pílou. Nežiadajte
ďalšiu osobu o pomoc.
Ukončenie práce
¾ Zájdite štiepacím nožom do spodnej polohy (v zasunutom
stave).
¾ Pustite ovládaciu úchytku.
¾ Vypnite stroj a potom vytiahnite kolík zo zásuvky.
¾ Vykonajte kroky opísané v kapitole údržba a starostlivosť.
83
Page 85

y
ÚÚddrržžbbaa aa ssttaarroossttlliivvoossťť oo ssttr
roojj
Pred týmito prácami vždy odpojiť stroj zo
siete(vytiahnutím kolíka zo zásuvky).
Pri týchto prácach vždy noste ochranné rukavic e.
L Dbajte na dodržanie nasledujúcich krokov, aby funkcie
stroja boli zachované.
Po skončení práce stroj riadne vyčistite.
Odstráňte všetky zbytky živice.
Štiepací stĺpik pravidelne natierajte tukom alebo
ekologickým olejom v rozprašovači.
Preverte množstvo oleja resp. olej vymeňte.
Kontrolujte pravidelne hydraulické hadic e a hadicové
spoje z hľadiska ich tesnosti a pevnosti.
Naostrenie štiepacieho noža
Po dlhšom čase prevádzky prístroja, ak príde ku zníženiu
štiepacieho výkonu alebo v prípade ľahkej deformácie ostrie
štiepacieho noža pribrúste alebo ho naostríte jemným
pilníkom (odstráňte zbytky).
15
17
Odmerka oleja
Horná ryska Dolná ryska
6. Skontrolujt
e tesnenie.
Nesmie byť
poškodené.
7. Čistú
odmerku
vsuňte opäť do otvoru.
18
ak leží
hladina oleja
medzi oboma
označeniami,
je oleja v stroji
dostatok.
ak je
hladina oleja
pod dolnou
ryskou, je
potrebné olej
doplniť.
Použite čistý
lievik.
Ostrenie
hran
Ako skontrolovať stav oleja?
1. Štie pací stĺpik musí
byť zasunutý.
2. Odmerku
vytiahnite.
3. Očistite odmerku
a tesnenie.
4. Čistú odmerku
opäť zasuňte do
otvoru až na
doraz..
5. Odmerku opäť
vytiahnite.
16
Kedy je potrebné olej vymeniť?
Prví olej je potrebné vymeniť po 50 pracovných hodinách
a potom po každých 500 pracovných hodinách.
Výmena oleja:
1. Štiepací stĺpik musí byť v zasunutom stave.
2. Pripevnite stôl v hornej polohe.
3. Nádobu (najmenej 7 l obsah) postavte pod stroj.
19
4. Odskrutkujte výpustný uzáver, aby mohol vytiecť olej.
5. Opäť nasaďte tesnenie a vložte vypúšťaciu zátku.
6. Pomocou čistého lievika vlejte nový hydraulický olej
(7.0 l).
7. Očistite odmerku a tesnenie.
8. Preskúšajte tesnosť. Ak je tesnenie poškodené musí byť
vymenené.
9. Čistú odmer ku vsu ňte opäť do otvoru.
84
Page 86

Starého oleja sa zbavte podľa zákona (zberné miesto). Je z akázané starý olej vylievať do pôdy alebo zmiešať s odpadom.
L Hydraulický olej
Pre stroj doporučujeme nasledujúce oleje:
¾ Shell Tellus T 22
¾ Aral Vitam Gf 22
¾ BP Energol HLP 22
¾ Mobil DTE 11
¾ Alebo porovnateľné
Iné oleje nepoužívať. Použitie iného oleja negatívne ovplyvňuje funkciu hydraulického cylindra.
ZZáárruukkaa
1. Poskytujeme záručnú dobu 2 roky od dátumu predaja výroku konečnému užívateľovi. Počas celej záručnej doby ručíme za
zachovanie technických parametrov výrobku, za správnu funkc iu všetkých častí a za akosť použitých materiálov. Pokiaľ sa na
prístroji počas záručnej doby vyskytne zrejmá chyba materiálu, konštrukcie alebo výroby, bude bezplatne odstránená.
2. Záručné nároky zanikajú, pokiaľ k poškodeniu prišlo pri preprave alebo v dôsledku nesprávneho použitia, nerešpektovaním
návodu na obsluhu, neodbornej opravy, alebo pokiaľ bolo spôsobené v dôsledku vyššej moci. Záruka sa nevzťahuje na bežné
opotrebovanie štiepacieho klina, h ydraulického oleja, posuvných a v odiacich častí, tesnenia a kolečiek.
3. Záručné opravy vykonáva výrobca alebo ním poverený zástupca. Bližšie informácie sú uvedené v Záručnom liste.
4. Záruka platí iba pri používaní originálnych náhradných dielov.
5. Zmeny slúžiace k technickému pokroku sú vyhradené.
6. Všetky s účasti z plastu sú označené pre triedenú recykláciu. Ďalšiu likvidáciu obalu a stroja po ukončení životnosti vykonávajte
v súlade s platnými predpismi.
TTeecchhnniicckkéé ddááttaa
Model ASP 10,1350
Typ ASP 10,1350
Sila na klina 100 kN (10 t) ± 10 %
Dĺžka polena Max. 1350 mm
Priemer polena min. 120 – max. 400 mm
Posuv na klin
Rýchlosť pri chode vopred cca. 0,04 m/sek.
Rýchlosť pri spätnom chode cca. 0,13 m/sek.
Hydraulický olej (max.) 7,0 Liter
Hydraulický tlak 21 Mpa (210 bar)
Výkon motora striedavý prúd P1 = 3800 W ( S6-40% )
Pripojenie trojfázový prúd 400 V 3~ 50 Hz, 16 A
Rozmery Dĺžka 840 x Šírka 920 x Výška 1620 mm
Váha cca. 209 kg
≈ 550 mm
trojfázový prúd P
= 3000 W ( S6-40% )
1
85
Page 87

MMoožžnnéé ppoorruucchhyy
Porucha možná príčina Odstránenie
Poleno nie je rozštiepené (slabý
výkon)
štiepací stĺpik sa pri zasúvaní myká
alebo silno vibruje
štiepací stĺpik sa nezasúva
motor naskočí, ale nedôjde k
zasunutiu štiepacieho stĺpiku
Motor nebeží
⇒ zlá poloha polena
⇒ poleno prekračuje rozmery
⇒ štiepací nôž neštiepi
⇒ malý tlak oleja
⇒ uvoľňovacia tyčová ústroj je ohnutá (nedôjde
k úplnému zatlačeniu hydraulickej páky)
⇒ použitie káblu cez 10 m alebo káblu s malým
priemerom
⇒ vzduch v systému
⇒ Štiepací stĺpik nie je dostatočne namazaný
tukom alebo olejem.
⇒ závada v hydr. systéme ⇒ odb. firma
⇒ chybný smer otáčania motora ⇒ skontrolovať s m er otáčania motora
⇒ závada v el. pripojenie
⇒ trojfázový motor beží na 2 fáze
⇒ závada príp. kábla
⇒ defektný motor
⇒ opäť vložiť do stroja
⇒ použiť odporučený rozmer
⇒ naostriť štiepací nôž, skontrolovať, či
nie je ostrie zanesené alebo či na ňom
nie sú vruby
⇒ kontrola stavu oleja. Ak po doplnení ne
dôjde k zlepšeniu, obráťte sa na
odbornú firmu.
⇒ Nechať tyčovú ústroj zriadi(napraviť)
výrobcom alebo ním menovanou firmou
⇒ použiť predpísaný kábel
⇒ kontrola oleja
⇒ Namažte štiepací stĺpik tukom alebo
nastriekajte olejom v rozprašovači.
Ak nejde závada takto odstrániť, obráťte
sa na odb. firmu.
trojfázový prúd: zmeniť smer otáčania
motora (viď str. 81)
striedavý prúd: odb. firma
⇒ kontrola istenie
⇒ nechať elektrikárom skontrolovať
poistku a prívod
⇒ výmena kábla
⇒ odb. firma
86
Page 88

ATIKA GmbH & Co. KG
Schinkelstraße 97, 59227 Ahlen
Postfach 21 64, 59209 Ahlen
Germany
Tel.: 0 23 82 / 8 92-0 • Fax: 0 23 82 / 8 18 12
E-mail: info@atika.de • Internet: www.atika.de
 Loading...