


English


 BDP300
H A N D B O O K Blu-ray Disc player
ULTRA HIGH PERFORMANCE 24-BIT DAC
POWER
safety guidelines
CAUTION |
|
ATTENTION |
|
|
|
RISK OF ELECTRIC |
RISQUE DE CHOC ELECTRIQUE |
|
SHOCK DO NOT OPEN |
|
NE PAS OUVRIR |
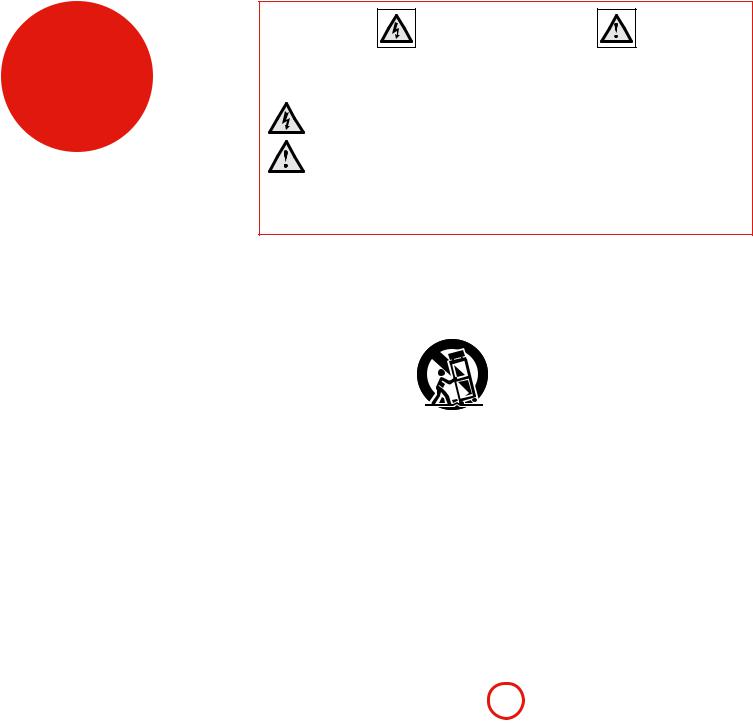
CAUTION: To reduce the risk of electric shock, do not remove cover (or back). No user serviceable parts inside. Refer servicing to qualified service personnel.
WARNING: To reduce the risk of fire or electric shock, do not expose this apparatus to rain or moisture.
The lightning flash with an arrowhead symbol within an equilateral triangle is intended to alert the user to the presence of uninsulated ‘dangerous voltage’ within the product’s enclosure that may be of sufficient magnitude to constitute a risk of electric shock to persons.
The exclamation point within an equilateral triangle is intended to alert the user to the presence of important operating and maintenance (servicing) instructions in the literature accompanying the product.
CAUTION: In Canada and the USA, to prevent electric shock, match the wide blade of the plug to the wide slot in the socket and insert the plug fully into the socket.
CAUTION: Use of any controls, adjustments or procedures other than those specified herein may result in hazardous radiation exposure.
Important safety instructions
1.Read these instructions.
2.Keep these instructions.
3.Heed all warnings.
4.Follow all instructions.
5.Do not use this apparatus near water.
6.Clean only with dry cloth.
7.Do not block any ventilation openings. Install in accordance with the manufacturer’s
instructions.
8.Do not install near any heat sources such as radiators, heat registers, stoves, or other apparatus (including amplifiers) that produce heat.
9.Do not defeat the safety purpose of the polarized or grounding-type plug.
A polarized plug has two blades with one wider than the other. A grounding type plug has two blades and a third grounding prong. The wide blade or the third prong are provided for your safety. If the provided plug does not fit into your outlet, consult an electrician for replacement of the obsolete outlet.
10. Protect the power cord from being walked on or pinched particularly at plugs, convenience
receptacles, and the point where they exit from the apparatus.
11.Only use attachments/accessories specified by the manufacturer.
12.Use only with the cart, stand, tripod, bracket, or table specified by the manufacturer, or sold with the apparatus.
When a cart is used, use caution when moving the cart/apparatus combination to avoid injury from tip-over.
13.Unplug this apparatus during lightning storms or when unused for long periods of time.
14.Refer all servicing to qualified service personnel.
Servicing is required when the apparatus has been damaged in any way, such as power-supply cord or plug is damaged, liquid has been spilled or objects have fallen into the apparatus, the apparatus has been exposed to rain or moisture, does not operate normally, or has been dropped.
15. Object or liquid entry
WARNING – Take care that objects do not fall and liquids are not spilled into the enclosure through any openings. The equipment shall not be exposed to dripping or splashing. Liquid-filled objects such as vases should not be placed on the equipment.
16. Climate
The equipment has been designed for use in moderate climates and in domestic situations.
17. Cleaning
Unplug the unit from the mains supply before cleaning.
The case should normally only require a wipe with a soft, lint-free cloth. Do not use chemical solvents for cleaning.
We do not advise the use of furniture cleaning sprays or polishes as they can cause permanent white marks.
18. Power sources
Only connect the equipment to a power supply of the type described in the operating instructions or as marked on the equipment.
The primary method of isolating the equipment from the mains supply is to remove the mains plug. The equipment must be installed in a manner that makes disconnection possible.
19. Abnormal smell
If an abnormal smell or smoke is detected from the equipment, turn the power off immediately and unplug the equipment from the wall outlet. Contact your dealer and do not reconnect the equipment.
20. Damage requiring service
The equipment should be serviced by qualified service personnel when:
A.the power-supply cord or the plug has been damaged, or
B.objects have fallen, or liquid has spilled into the equipment, or
C.the equipment has been exposed to rain, or
D.the equipment does not appear to operate normally or exhibits a marked change in performance, or
E.the equipment has been dropped or the enclosure damaged.
WARNING - The mains plug is used as a disconnect device, the disconnect device shall remain readily operable.
WARNING - The batteries shall not be exposed to excessive heat, such as sunshine or fire.
CAUTION - Danger of explosion if batteries are incorrectly replaced. Replace only with the same or equivalent type.
Safety compliance
This equipment has been designed to meet the IEC/EN 60065 international electrical safety standard.
This device complies with Part 15 of the FCC Rules. Operation is subject to the following two conditions:
(1)This device may not cause harmful interference, and
(2)this device must accept any interference received, including interference that may cause undesired operation.
E-2

welcome
Thank you and congratulations for purchasing your Arcam FMJ Blu-ray Disc player. |
|
|
Arcam has been producing specialist hi-fi and home cinema products of remarkable quality |
|
|
for over three decades and the BDP300 – which plays Blu-ray Discs, DVD-Video discs and |
English |
|
Audio CDs – is the latest in a long line of award winning home cinema equipment. The design |
||
of the FMJ range draws upon all of Arcam’s experience as one of the UK’s most respected audio |
||
|
||
companies and is built to give you years of trouble-free listening enjoyment. |
|
|
This handbook has been designed to give you all the information you need to install, connect |
|
|
and use the Arcam BDP300 Blu-ray Disc player. The CR104 remote control handset supplied |
|
|
with this equipment is also described. Use the contents list shown on this page to guide you to |
|
|
the section of interest. |
|
|
We hope that your FMJ Blu-ray Disc player will give you years of trouble-free operation. In the |
|
|
unlikely event of any fault, or if you simply require further information about Arcam products, |
|
|
our network of dealers will be happy to help you. Further information can also be found on the |
|
|
Arcam website at www.arcam.co.uk. |
|
The FMJ development team
Contents
safety guidelines....................................... |
E-2 |
Important safety instructions........................... |
E-2 |
Safety compliance................................................. |
E-2 |
welcome...................................................... |
E-3 |
installation.................................................. |
E-4 |
Placing the unit ..................................................... |
E-4 |
Power......................................................................... |
E-4 |
The remote control and trigger inputs......... |
E-4 |
Interconnect cables.............................................. |
E-4 |
Making video connections................................ |
E-6 |
Making audio connections................................ |
E-6 |
The HDMI interface............................................... |
E-7 |
Troubleshooting HDMI........................................ |
E-7 |
disc & file formats...................................... |
E-8 |
Playable discs.......................................................... |
E-8 |
Video file requirements (USB/Disc)................. |
E-8 |
MP3/WMA audio file requirements (USB/Disc). |
|
...................................................................................... |
E-8 |
Photo file requirements (USB/Disc)................ |
E-8 |
Region coding........................................................ |
E-8 |
Network connection............................................ |
E-9 |
.......................................basic operation |
E-10 |
remote control........................................ |
E-11 |
The CR104 remote............................................... |
E-12 |
remote control........................................ |
E-12 |
Playback and advanced controls................... |
E-13 |
Useful information.............................................. |
E-14 |
Device Mode / Source keys.............................. |
E-14 |
Controlling other devices ................................ |
E-14 |
Code blink-back................................................... |
E-15 |
advanced operation............................... |
E-16 |
Disc information.................................................. |
E-16 |
Search...................................................................... |
E-16 |
Menus...................................................................... |
E-16 |
Soundtrack selection......................................... |
E-16 |
Subtitles.................................................................. |
E-16 |
Bonusview and BD-Live.................................... |
E-16 |
Playing media files.............................................. |
E-17 |
Advanced playback controls........................... |
E-18 |
settings menus........................................ |
E-19 |
Display..................................................................... |
E-19 |
Audio........................................................................ |
E-20 |
Language................................................................ |
E-21 |
Network................................................................... |
E-21 |
|
|
.....................................................................System |
E-22 |
Security/Parental Control................................. |
E-22 |
troubleshooting...................................... |
E-24 |
Audio output format.......................................... |
E-25 |
audio & video output formats............. |
E-25 |
customising the CR104......................... |
E-26 |
Code learning....................................................... |
E-26 |
Creating Macros................................................... |
E-27 |
Volume punch-through.................................... |
E-27 |
Key mover............................................................... |
E-27 |
Mode mover.......................................................... |
E-28 |
Locking/unlocking a specific Device Mode E-28 |
|
Mode key IR punch-through........................... |
E-29 |
Resetting the CR104........................................... |
E-29 |
Command summary.......................................... |
E-29 |
Device codes......................................................... |
E-29 |
specifications........................................... |
E-30 |
Radio interference............................................... |
E-30 |
Laser radiation...................................................... |
E-30 |
software licencing.................................. |
E-31 |
product guarantee................................. |
E-33 |
device code tables.................................. |
E-34 |
|
|
E-3

installation
Arcam’s BDP300 provides class-leading sound quality from Blu-ray Discs, DVD-Video discs and compact discs.
The BDP300 has a state-of-the-art Delta-Sigma DAC (Digital-to- Analogue Converter) which provides audiophile sound quality for video and audio discs.
The BDP300 is supplied with the CR104 ‘universal’ remote control, which is simple to use and can control up to eight audio devices – such as an amplifer, television or Personal Video Recorder.
The high performance BDP300 Blu-ray Disc player is designed to truly bring your movies and music to life.
Placing the unit
<<Place the BD player on a level, firm surface, avoiding direct sunlight and sources of heat or damp.
<<Do not place the BD player on top of an amplifier or other source of heat.
<<Do not place the BD player in an enclosed space such as a bookcase or closed cabinet unless there is good provision for ventilation. The BD player is designed to run warm during normal operation.
<<Do not place any other component or item on top of the BD player as this may obstruct airflow around the unit, causing the BD player to run hot.
<<Make sure the remote-control receiver (next to the display on the front panel) is unobstructed, or remote control will be impaired.
<<Do not place your record deck on top of this unit. Record decks are very sensitive to the noise generated by mains power supplies which will be heard as a background ‘hum’ if the record deck is too close.
Power
The BD player is supplied with a moulded mains plug already fitted to the lead. Check that the plug supplied fits your supply – should you require a new mains lead, please contact your Arcam dealer.
If your mains supply voltage or mains plug is different, please contact your Arcam dealer immediately
Push the IEC plug end of the power cable into the socket on the back of the BD player, making sure that it is pushed in firmly. Plug the other end of the cable into your mains socket and, if necessary, switch the socket on.
The remote control and trigger inputs
The REMOTE IN input can be used to pass RC5 codes to the BDP300 if it is installed in a position, or a system, where infrared cannot be used. If this is required, please contact your dealer for further information.
The TRIGGER IN input can be used to switch the BDP300 in and out of standby. Connecting the trigger output of your Arcam amplifier (or other compatible device), will cause the BDP300 to come out of standby automatically when the amplifier is switched on, returning to standby when the amplifier is switched off. Please see your amplifier handbook for further information.
In normal use there is no need to make any connections to these inputs.
NOTE
The remote control input requires a mono 3.5mm jack, with the tip active and the sleeve grounded.
The remote control signals must be in modulated RC5 format (at 36kHz), with a voltage level of between 5V and 12V.
The RS232 input is for optional connection to a home automation system or a computer. Various third-party systems are available providing sophisticated control over all your entertainment devices using touch screens etc. Contact your dealer or installer for further details. The technical details of the remote control protocol are available from Arcam on request (email support@ arcam.co.uk).
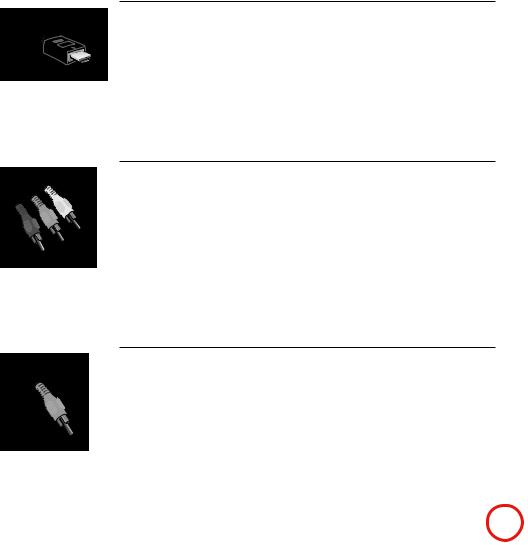
Interconnect cables
We recommend the use of high-quality screened cables that are designed for the particular application. Other cables will have different impedance characteristics that will degrade the performance of your system (for example, do not use cabling intended for video use to
carry audio signals). All cables should be kept as short as is practically possible.
It is good practice when connecting your equipment to make sure that the mains power-supply cabling is kept as far away as possible from your audio cables. Failure to do so may result in unwanted noise in the audio signals.
E-4
Zone 1 audio output |
Coaxial digital output |
Connect these to your amplifier’s CD (or other |
Use this socket if you are using an AV receiver |
|
|
line-level) input using suitable high quality |
with a coaxial digital input. Connect to the |
USB connection |
|
interconnect cables. Ensure that the left and |
digital input using a suitable 75Ω screened cable. |
||
right audio outputs from the BD player are |
CAUTION: Never connect the digital output |
Insert USB flash memory devices |
|
connected to the same left and right inputs on |
socket to a conventional audio input. |
here. USB memory can be used |
|
your amplifier. |
|
to save downloaded content. The |
|
|
|
BDP300 can also play certain digital |
|
12V trigger input |
|
files stored on USB memory drives: |
|
Composite video output |
see page E-8. |
||
This socket allows the BDP300 to be switched |
|||
|
|||
in and out of standby mode by an amplifier |
Connect this output to your display |
|
|
(or another item of AV equipment) with a |
if the display does not support any |
|
|
12V TRIG OUT function: see page E-4. |
other connection types. |
|
Power inlet |
VIDEO |
L |
R |
|
Connect the correct |
|
|||
|
|
|
|
|
mains cable here. |
Y |
Cb/Pb |
Cr/Pr |
USB |
|
VIDEO OUT / AUDIO OUT |
|||
|
|
|||
|
|
|
|
Optical digital output |
RS232 |
Component video output |
|
|
Use this socket if you are using an AV |
This connection allows for remote |
If your display does not support |
|
|
receiver with an optical digital audio input. |
|
|
|
||
control from a third-party home |
HDMI but has a component |
|
|
|
automation system or computer: see |
input (Y, Pb, Pr), connect it to |
|
|
|
page E-4 for more information. |
this video output. |
|
|
Network connection |
|
|
|
|
Connect this socket to a port on your network |
|
L, R audio output |
|
router using an Ethernet patch cable: see |
|
Remote in |
|
page E-9. An internet connection enables |
||
Use this analogue output (L, R), |
|
|||
This allows remote-control signals to be received |
|
interactive content for BD-Live discs. For |
||
to provide audio for use in your |
|
|||
|
setup details, see ‘Network’ on page E-21. |
|||
by the BDP300 if the remote sensor is covered |
AV receiver’s Zone 2. It can also be |
|
||
|
|
|||
(or otherwise not ‘visible’ to the remote-control: |
used to connect a recording device |
|
|
|
see page E-4 for more information. |
or headphone amplifier. |
|
|
|
|
HDMI digital video output |
|
||
|
Connect this output to your display or AV |
|
||
|
receiver if available for the best digital video |
|
||
|
and audio connection: see page E-7 . |
|
||
English
E-5
Making video connections
To view the pictures from the BD player you need to connect one of its video outputs to your display device (TV, monitor, projector, etc.) or AV receiver (such as the Arcam AVR600).
The BDP300 has three video output options, described below. You need only use one type of video from the list; choose a type that your display device or AV receiver supports. If your equipment does not support any of the above connection types then you will be unable to use it directly with the BDP300 and a video converter device may be required. In this case, please contact your dealer for further assistance.
AV receivers and other video processing devices may be connected between the BDP300 and your display. Ensure that all the equipment supports the type of video signal you intend to use. For instructions on how to connect AV equipment, consult the manual for that equipment.
HDMI DIGITAL VIDEO
The HDMI connector offers uncompressed digital video and audio transmission between the BDP300 and the display device, and provides the highest quality output. Generally, it is also the easiest connection type to configure.
To use this video connection, you will require a HDMI or HDMI/DVI cable between the BDP300 and your display device or receiver. See page E-7 for further details.
COMPONENT VIDEO
Use three 75Ω phono cables to connect the Component Y, Pb, Pr outputs of the BD player to the Y, Pb, Pr inputs of the display device. Ensure that the cables are suitable for video use and that they are approximately the same length.
If your television is capable of accepting a progressively scanned (de-interlaced) video signal, you may wish to use the progressive video output from the BDP300. If you are unsure whether your display device can accept progressive video, please refer to its instruction manual or consult your dealer.
COMPOSITE VIDEO
If your display device offers only a composite input (sometimes labelled CVBS or just ‘video’), connect this to the COMPOSITE video output of the BD player using a 75Ω phono cable suitable for video use. Note that a composite video connection gives the lowestquality output; if your display device supports other video connection types, we advise that those are used instead.
Making audio connections
The BDP300 offers a number of alternatives for connecting audio. The connection type to use depends on the rest of your system; chose the type most appropriate to your amplifier.
If you want to listen to |
… we recommend the following: |
audio through… |
|
Your television |
|
How you listen to audio through your TV depends on the inputs it has and your video connection:
<<HDMI: If you are using an HDMI connection (not DVI), this will carry both audio and video. No further connection is required.
<<Digital Audio (Coaxial or Optical): If your TV has Digital Audio inputs on Coaxial or Optical connectors, connect the appropriate digital audio lead between the TV input and the appropriate BDP300 digital output. Do not make a connection between the BDP300 and a TV’s Digital Audio output.
<<Stereo phono: If your TV has stereo phono inputs, follow the instructions below for a stereo amplifier.
Your stereo amplifier
If you wish to listen to audio from your player through a stereo amplifier, then use the stereo analogue outputs. These outputs provide a stereo down-mix of the source material.
Using a stereo phono cable of a suitable length, connect the outputs labeled ZONE 1 AUDIO to the left and right inputs (respectively) for DVD or CD on your amplifier.
Your surround-sound receiver
Connect the HDMI output to your receiver (for audio and video) if the receiver supports audio over HDMI. The HDMI connection supports all possible audio formats including Dolby TrueHD, DTS Master Audio and multichannel PCM.
If your receiver does not support HDMI audio, connect one of the Digital Audio outputs (Optical or Coaxial) to the ‘Blu-ray’, ‘BD’ or ‘DVD’ input of your receiver. These digital outputs provide PCM, Dolby Digital, DTS or MPEG multi-channel audio, depending on the source material. The BDP300 can also be set to re-encode all audio to DTS (‘Bitstream Mixed’) (see ‘Audio’ on page E-21). This option provides the best surround sound quality for Digital Audio connections.
You may also wish to connect the stereo analogue audio outputs to the CD input on your receiver, for listening to CDs. This will allow the BDP300’s audiophile digital- to-analogue circuitry to be utilised, for the best stereo sound quality.
E-6

The HDMI interface
If you have a HDMIor DVI-equipped monitor or display, you can connect it to the BDP300 using a HDMI cable. The HDMI connector carries uncompressed digital video, as well as digital audio.
About HDMI
HDMI (High Definition Multimedia Interface) supports both video and audio on a single digital connection
for use with Blu-ray Disc players, digital TV, set-top boxes, and other AV devices. HDMI was developed to combine the technologies of High-bandwidth Digital Content Protection (HDCP) and the Digital Visual Interface (DVI) in one specification, with the addition of transmission of digital audio information; HDCP is used to protect digital content transmitted to DVI-compliant displays.
HDMI has the capability to support standard or high-definition video, together with stereo or multichannel surround-sound audio. HDMI features include uncompressed digital video, one connector (instead of several cables and connectors), and communication between the AV source and AV devices.
Connecting using HDMI
Use a HDMI cable to connect the HDMI socket on this player to a HDMI socket on a compatible display device or receiver. The arrow on the cable connector body should be face up for correct alignment with the connector on the BDP300. If the BDP300 video
resolution has been configured to ‘HDMI Auto’, then the BDP300 will configure its video output automatically to match the capabilities of the attached HDMI device.
NOTE
<<A HDMI connection can be made only with HDMI or DVI-equipped components compatible with both DVI and HDCP. Note
that if you choose to connect to a DVI device, you will need an adaptor (HDMI to DVI) to do so; a DVI/HDCP connection, however, does not support audio signals.
<<If you require further information on the possibilities for connecting your BDP300 to your DVI/HDMI equipped display device, please contact your Arcam dealer.
Troubleshooting HDMI
Problems with video
No video (blank screen)
<<Check that the HDMI cable is connected correctly at both ends. If an HDMI-equipped A/V receiver is in use, try connecting the BDP300 directly to the display device, in order to isolate where the fault may lie.
<<Check that the display device is set to display the HDMI input (i.e., has not been set to some other video input, instead).
<<Check that the HDMI input of the receiver and/or display device is enabled. See the user handbook of the connected device for details on doing this.
<<Using an alternative video display device (e.g., connected via the composite video out), check that video is output.
<<Consult the user handbook of the display device to ensure that it can handle the output formats provided by the BDP300. The BDP300 can provide the following:
720 x 480p |
(NTSC progressive scan) |
1280 x 720p |
|
720(1440) x 480i |
(NTSC interlaced) |
1920 x 1080i |
|
720 x 576p |
(PAL progressive scan) |
1920 x 1080p |
|
720(1440) x 576i |
(PAL interlaced) |
|
|
At least one of these standards must be supported by the connected device in order for it to work with the BDP300.
No video (random noise)
Random noise will be displayed if the contentprotection algorithm fails to authenticate the attached device. This will occur, for example, if a DVI device that does not support HDCP (such as a computer monitor) is connected to the BDP300.
To attempt to isolate this problem, remove all discs from the BDP300, then power-off both the BDP300 and the connected display device. Switch the display device on, then the BDP300 – at this point, the idle logo of the BDP300 should be shown on the display device. If this is not the case, please check the items listed above for a blank screen.
If the noise appears when a copy-protected disc (Blu-ray/DVD) is played, then it is the authentication that is failing. Please contact your dealer for further information.
Problems with audio
The type of audio provided by the HDMI connector depends on the configuration of the BDP300 (see ‘Audio’ on page E-20). Choose a setting according to the capabilities of your audio system. Note that pure DVI devices (connections requiring a HDMI to DVI converter cable) do not support audio via this connection.
English
E-7
disc & file formats
Playable discs
The player supports the following disc types:
Blu-ray 3D
Blu-ray Disc
DVD-Video
DVD-R
DVD-RW
CD-Audio
CD-R
CD-RW
Video file requirements (USB/Disc)
<<Video file compatibility with your player is limited as follows:
•Maximum resolution size: 1920x1080 (W x H) pixels
•File extensions: .wmv, .avi, .mp4, .mpeg, .mpg,
.vob, .mkv (Note: Files encoded by Divx cannot be played on this player)
•Playable Audio format: Dolby Digital, DTS,
MP3, WMA, AAC, AC3
•Sampling frequency: within 32 to 48kHz
(WMA), within 8 to 48kHz (Mp3)
•Bit rate: within 32 to 192kbps (WMA), within 32 to 320kbps (Mp3)
<<CD-R/RW, DVD R/RW, BD-R/RE Format: ISO 9660+JOLIET, UDF and UDF Bridge format
<<Maximum Files/Folder: Less than 1000. The movie file name and subtitle are limited to 180 characters.
<<Not all of the WMA and AAC Audio formats are compatible with your player.
<<HD WMA movie files contained on a USB 1.0/1.1 flash drive may not play correctly.
<<Blu-ray, DVD, or USB 2.0 are recommended to play back HD WMA movie files.
<<Your player does not support files that are recorded with GMC (Global Motion
Compensation) or Qpel (Quarter pixel). Those are video encoding techniques in MPEG4 standard, like DivX.
MP3/WMA audio file requirements (USB/Disc)
<<File extensions: .mp3, .wma
<<Sampling frequency: Within 32 to 48kHz (WMA), within 8 to 48kHz (Mp3)
<<Bit rate: Within 32 to 192kbps (WMA) 32 to 320kbps (MP3)
<<CD-R/RW, DVD R/RW, BD-R/RE Format: ISO 9660+JOLIET, UDF and UDF Bridge format
<<Maximum Files/Folder: Less than 2000 (total number of files and folders)
<<Depending on the size and number of the MP3/ WMA files, it may take several minutes to read the contents of the media.
<<HD WMA movie files contained on a USB 1.0/1.1 flash drive may not play correctly. Blu-ray, DVD, or USB 2.0 are recommended to play back HD WMA movie files.
Photo file requirements (USB/Disc)
<<File extensions: .jpg, .jpeg, .png, .gif
<<Recommended size:
•PNG: 5120 × 5120 pixels
•GIF: 10000 × 10000 pixels
•JPEG/JPG: 8192 × 8192 pixels, 32MB
<<CD-R/RW, DVD R/RW, BD-R/RE Format: ISO 9660+JOLIET, UDF, and UDF Bridge format
<<Maximum Files/Folder: Less than 1000 (total number of files and folders)
<<Progressive and lossless compression photo image files are not supported.
<<Depending on the size and number of the photo files, it may take several minutes to read the contents of the media.
Region coding
Blu-ray Disc players and Blu-ray or DVD Video discs are assigned region codes according to the region in which they are sold. If the region codes do not match, the disc will not play.
Blu-ray Disc Area region code
ANorth America, Central America, South America, Korea, Japan, Taiwan, Hong Kong and South East Asia
BEurope, Greenland, French territories, Middle East, Africa, Australia and New Zealand
CIndia, China, Russia, Central and South Asia
A + B + C All areas
DVD region Area code
1North America
2Europe, Japan, Middle East, Egypt, South Africa, Greenland
3Taiwan, Korea, the Philippines, Indonesia, Hong Kong
4Mexico, South America, Central America, Australia, New Zealand, Pacific Islands, Caribbean
5Russia, Eastern Europe, India, most of Africa, North Korea, Mongolia
6China
All |
All areas |
Symbols indicating disc will play in North America:
Blu-ray Discs: |
DVDs: |
Symbols indicating disc will play in Europe:
Blu-ray Discs: |
DVDs: |
E-8
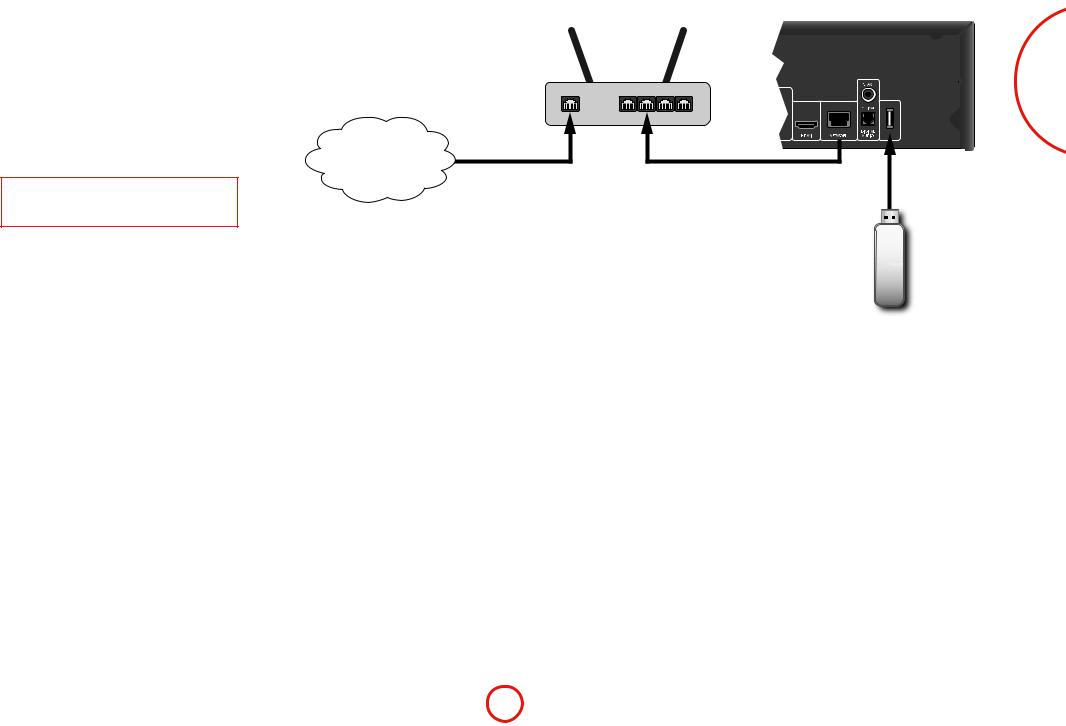
Network connection
BD-Live discs can enable the downloading of extra content from the Internet. To enjoy on-line content, connect the Network socket of the BDP300 to a LAN port on your network router using an Ethernet patch cable (available from a computer supplies retailer).
A local network with Internet connection is required. If |
|
you do not connect to the Internet through a router (e.g. |
|
you connect a single computer directly), please contact |
|
your Internet Service Provider or an IT professional |
|
regarding setting up a home network. |
Internet |
NOTE |
|
Arcam BDP300
LAN
Router |
USB |
When the player is powered on with no network configured, a pop-up is shown on-screen.
USB connection
USB memory devices (flash drives) can be used for media playback and are necessary for storage of downloaded BD-Live content. To enjoy BD-Live content, the following specification is recommended:
<< Capacity 2GB USB Flash Drive
<<Formatted FAT32
<<USB2.0 high speed (480Mbps).
Connect the USB device to the USB socket on the rear of the unit.
English
E-9
basic operation
Introduction
‘Basic operation’ explains how to play a Blu-ray Disc (BD), DVD, CD or other type of disc. Note that it may be necessary to configure your player correctly for your system before optimum – or any – playback can be achieved. Player configuration is described beginning on page E-19.
More sophisticated features – such as special playback modes, programming jumps and playback sequences – are described in ‘advanced operation’ on page E-16.
Switching on
Switch the unit on by pressing the POWER button. The status LED glows green when the unit is powered up and red when in standby mode. The remote control is used to enter and exit standby mode. If the POWER button is pressed (or power is removed) whilst in standby, the unit will enter standby mode when power is re-applied.
Note that the remote control sensor is located on the right-hand side of the display window. Do not obstruct this or the remote control will not work.
Loading a disc
Press </1on the front panel (or 1on the handset) and place the disc on the tray, with the playback side facing down (some discs are double sided, in which case the side labelled ‘side A’ should face up to play side A).
Press </1on the front panel to close the tray. The disc loads after a pause of a few seconds.
Playing a disc
A disc may take some time to load once the tray is closed. When the ‘Optical Disc Autoplay’ setting is set to On (the default setting), playback starts automatically. (For details, refer to ‘Optical Disc AutoPlay’ on page E-21).
If Autoplay is set to Off, the player’s Main Menu will appear on your TV. Use the cursor keys to select the disc in MY MEDIA, then press Oto start playback.
Some titles begin by displaying a menu. Select the menu item ‘Play movie’ (or similar) using the cursor pad, then press Oto start playback.
For discs that do not play automatically, press 4/ ;on the front panel or press 4on the remote control.
ULTRA HIGH PERFORMANCE 24-BIT DAC
Fast play
Press 8or 7on the front-panel or remote control to play fast forwards or backwards. The following speeds for fast playback are available: x2, x4, x8, x16 and x32 (depending on disc type). Press the button repeatedly to cycle through the different speeds. To resume normal playback speed, press PLAY.
Skipping chapters/tracks
To skip chapters (or tracks on a CD), press /or 0.
When skipping back, the first button press takes you to the beginning of the current chapter. Pressing the button again takes you to the start of the previous chapter.
Pausing playback
Press 4/ ;on the front panel or ;on the remote control to pause playback. To resume playback, press 4/ ;on the front panel or 4on the handset.
Stopping playback
Press the </1button on the front panel or < on the remote control to stop playback.
When playing a BD/DVD, pressing < once performs a ‘resume stop’. If you now press 4, playback resumes from the point it was stopped.
If you press </1on the front panel or < on the remote control twice, this is a ‘complete stop’, and playback resumes from the beginning of the disc.
NOTE
When you press a button, if the unit does not accept its operation, appears on the TV screen.
Invalid operation may also occur if :
<<The region codes of the unit differs from that of the disc, so playback is not allowed.
<<The parental control is set to prevent operation: see ‘Security/Parental Control’ on page E-22.
<<Some operations may be prohibited due to disc manufacturer’s settings.
E-10
remote control
The BDP300 may be supplied with the CR104 universal remote control.
Using the remote control
Please keep in mind the following when using the remote control:
<<Ensure there are no obstacles between the remote control and the remote sensor on the front panel. The remote has a range of about 7 metres. (If the remote sensor is obscured, the IR in remote control input jack on the rear panel is available. Please consult your dealer for further information.)
<<Remote operation may become unreliable if strong sunlight or fluorescent light is shining on the remote sensor of the unit.
<<Replace the batteries when you notice a reduction in the operating range of the remote control.
English
Inserting batteries into the remote control
1.Open the battery compartment by pressing the button on the back of the handset.
2.Insert four ‘AAA’ batteries into the battery compartment – two facing the top of the unit, and two facing the end, as in the diagram.
3.Lower the end cap onto the plastic locating plate in the handset. This acts as a hinge, and you can now push the end cap firmly into its locked position with a click.
Notes on batteries:
<<Incorrect use of batteries can result in hazards such as leakage and bursting.
<<Do not mix old and new batteries together.
<<Do not use non-identical batteries together – although they may look similar, different batteries may have different voltages.
<<Ensure the plus (+) and minus (-) ends of each battery match the indications in the battery compartment.
<<Remove batteries from equipment that is not going to be used for a month or more.
<<When disposing of used batteries, please comply with governmental or local regulations that apply in your country or area.
E-11
The CR104 complies with Part 15 of the FCC rules
This equipment has been tested and found to comply with the limits for a class B digital device, pursuant to part 15 of the FCC Rules. These limits are designed to provide a reasonable protection against harmful interference in a residential installation. This equipment generates, uses, and can radiated radio frequency energy and if not installed and used in accordance with the instructions, may cause harmful interference to radio communications. However, there is no guarantee that interference will not occur in a particular installation. If this equipment does cause harmful interference to radio or television reception, which can be determined by turning the equipment off and on, the user is encouraged to try to correct the interference by one or more of the following measures:
Reorient or relocate the receiving antenna.
Increase the separation between the equipment and receiver.
Connect the equipment into an outlet or a circuit different from that to which the receiver is connected.
Consult the dealer or an experienced radio/TV technician for help.
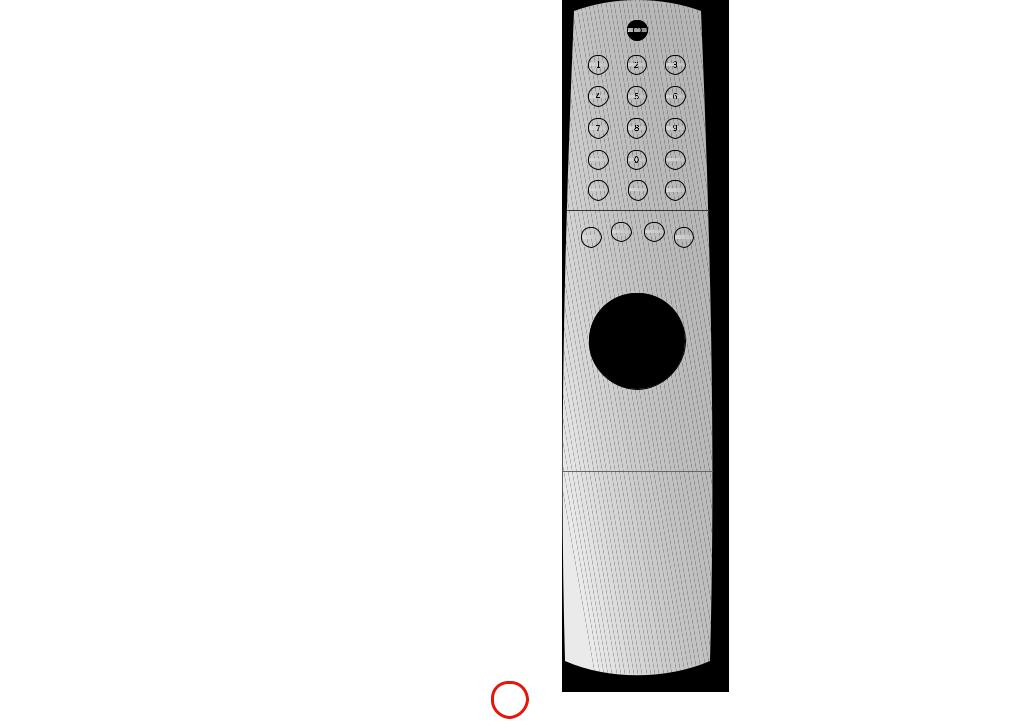
The CR104 remote
The CR104 is a sophisticated ‘universal’ remote control that can control up to eight devices – including the
BDP300.remoteAs it’s a ‘learning’ remote, it can copy almost any function from an existing single-device remote.
You can alsocontrolprogram the CR104 to issue a sequence of commands (‘macros’) from a single button press.
Select the source key first
Remember to select a source key before pressing command buttons – commands vary depending on the source selected.
To operate the BDP300 from the remote, first press the BD source button.
BD |
SAT |
AV |
TUN |
|
|
AMP PVR VCR CD
DISP (display)
Press to cycle through the front panel display’s brightness options (dim to bright, off).
Source selection and handset configuration
BD |
BD input/BD controls |
SAT |
Satellite decoder input/SAT controls |
AV |
Television (sound) input/AV controls |
TUN |
Radio tuner input/TUN controls |
AMP |
Arcam amplifier |
PVR |
Personal Video Recorder input/controls |
VCR |
Video Cassette Recorder input/controls |
CD |
CD player input/CD controls |
Press the relevant button once to select input and reconfigure the handset.
Press and hold the button until the power LED blinks once if you wish to reconfigure the handset without changing the input.
Navigation buttons
Arrow buttons allow navigation around the settings menus on the BDP300 and disc menus.
Confirm a selection by pressing O.
MODE
This button activates the Picture-in-Picture Secondary Video function, where available.
MUTE
Press once to mute an Arcam amplifier. Press again (or use +/– volume) to un-mute.
VOLUME +/–
Adjusts the volume of an Arcam amplifier.
OPEN
Opens and closes the disc tray.
SETUP
Press SETUP to access the system settings menu.
CANCEL |
|
|
RPT |
DISP |
|
TV |
RND |
|
AV |
||
|
|
|
|
|
HDMI |
|
NET |
SHIFT |
STATUS |
|
iPOD |
SAT |
AV |
BD |
TUN |
PVR |
VCR |
AMP |
CD |
MODE |
|
|
MENU |
|
|
RTN |
|
|
|
CH |
|
DIRECT |
EQ |
EFFECT |
BASS |
TRIM |
SYNC |
ANGLE/SUB |
TREBLE |
|
|
|
SRCH |
FAV + |
FAV - |
HOME |
INFO |
SETUP |
TITLE |
AUDIO |
SUBT |
CR104
On/Standby
This allows the BDP300 to be put into and taken out of standby remotely.
Numeric keys, 0–9
Used for data entry. Also gives direct access to individual tracks on audio CDs.
RND
Toggles random (‘shuffle’) play of chapters/tracks on and off.
Press Sfollowed by Rto cycle through repeat play options (chapter, title, disc, etc.).
STATUS
Toggles the disc information display.
Press Sfollowed by STATUS to cycle through the HDMI output resolutions (only available from the Home screen).
MENU
Activates the BD ‘popup’ menu or the DVD Video menu.
RTN
Navigates to the previous menu.
0/
Press to skip backwards to the previous track(0) or forwards to the next track (/).
 Playback control
Play (4), Pause (;) and Stop (<).
SHIFT+;activates slow playback.
Advanced controls
These buttons are described on the next page.
E-12

Playback and advanced controls
NOTE
Many of these controls are labelled according to the functions assigned to other device modes. For example, the 8key activates the Bass control of an A/V receiver when the remote is in AMP mode.
Transport control buttons |
|
|
7 |
Fast rewind. |
|
4 |
Starts playback. |
English |
; |
Pause playback. Press 4to resume playback. |
|
|
When paused, pressing ;advances one frame. |
|
|
SHIFT + ;activates slow motion playback. |
|
8 |
Fast forward. |
|
1 |
Open / Close the disc tray. |
|
< |
Stop playback |
|
= |
Cycles through different camera angles, if present on the disc. |
|
|
|
|
RED/GREEN/YELLOW/BLUE |
|
|
|
|
|
The colour-coded buttons RED, GREEN, YELLOW and BLUE |
DIRECT |
EQ |
EFFECT |
BASS |
|
provide interactive controls for Blu-ray Discs and some |
|
|
|
|
|
player functions and will be displayed on-screen. They |
|
|
|
|
|
are accessed by first pressing SHIFT followed immediately |
|
|
|
|
|
by the button required. Their function depends on the |
|
SYNC |
ANGLE/SUB |
|
ANGLE |
disc and the part of the disc being viewed. |
TRIM |
TREBLE |
Displays Angle menu, to allow selection of |
||
|
|
|
|
|
|
|
|
|
|
SRCH |
different camera angles, if present on the disc. |
|
|
|
|
|
|
|
FAV + |
FAV - |
HOME |
INFO |
|
|
SETUP |
TITLE |
AUDIO |
SUBT |
|
|
SRCH |
|
SETUP |
Displays Search menu with Time, Title and |
|
Track options. |
||
|
Ensure no disc is playing and press SETUP to access the ‘Settings’ menu.
|
|
|
|
|
|
|
|
|
|
|
|
AUDIO |
|
|
|
||
TITLE |
|
|
Some discs offer the facility to select different |
|
|
SUBT |
||
|
|
|
|
|||||
|
|
|
|
|
|
|||
Press TITLE to access the DVD’s ‘Title’ menu (a |
|
|
audio tracks. Press AUDIO to access a menu |
|
|
Cycles through the available subtitle languages, |
||
feature that only applies to multi-title discs) or |
|
|
that allows selection of the available tracks. See |
|
|
including ‘Off’. Some discs force subtitles on, |
||
to access the main menu if a Blu-ray Disc. |
|
|
‘Soundtrack selection’ on page E-16. |
|
|
overriding any set up preferences. |
||
E-13
 Loading...