

Page 1

Keynote 2
User’s Guide
Page 2

K
Apple Computer, Inc.
2005 Apple Computer, Inc. All rights reserved.
©
Under the copyright laws, this manual may not be
copied, in whole or in part, without the written consent
of Apple. Your rights to the software are governed by
the accompanying software license agreement.
The Apple logo is a trademark of Apple Computer, Inc.,
registered in the U.S. and other countries. Use of the
“keyboard” Apple logo (Option-Shift-K) for commercial
purposes without the prior written consent of Apple
may constitute trademark infringement and unfair
competition in violation of federal and state laws.
Every effort has been made to ensure that the
information in this manual is accurate. Apple is not
responsible for printing or clerical errors.
Apple
1 Infinite Loop
Cupertino, CA 95014-2084
408-996-1010
www.apple.com
Apple, the Apple logo, AppleWorks, iBook, iLife, iTunes,
Mac, Mac OS, PowerBook, and QuickTime are
trademarks of Apple Computer, Inc., registered in the
U.S. and other countries.
Finder, iPhoto, iWork, Keynote, Pages, and Safari are
trademarks of Apple Computer, Inc.
AppleCare is a service mark of Apple Computer, Inc.,
registered in the U.S. and other countries.
Adobe and Acrobat are trademarks or registered
trademarks of Adobe Systems Incorporated in the U.S.
and/or other countries.
Other company and product names mentioned herein
are trademarks of their respective companies. Mention
of third-party products is for informational purposes
only and constitutes neither an endorsement nor a
recommendation. Apple assumes no responsibility
with regard to the performance or use of these
products.
Page 3

Contents
7 Preface: Welcome to Keynote 2
7
Keynote Features at a Glance
12
Resources for Learning More
15 Chapter 1: Overview of Keynote
15
The Keynote Window
16
The Slide Canvas
17
The Slide Organizer
21
The Notes Field
22
Keynote Tools
25 Chapter 2: Creating a Presentation
25 Step 1:
27 Step 2:
32 Step 3:
33 Step 4:
35 Step 5:
37 Chapter 3: Working With Text, Graphics,
37
44
47
52
56
61
62
Select a Theme
Create Your Slides
Organize Your Slides
Save Your Slideshow
Play Your Slideshow
and Other Media
Editing Text and Text Properties
Adding Images
Resizing, Moving, and Layering Objects
Including Sound and Other Media
Adding Webpages and Hyperlinks
Modifying Layouts
Changing the Slide Background
3
Page 4

64
Retaining or Undoing Your Style Changes
65 Chapter 4: Changing Object Properties
65
Using Color and Image Fills
69
Changing Line Style and Position
71
Adding Shadows
72
Adjusting Opacity
73
Changing an Object’s Orientation
74
Changing an Object’s Size and Position
77 Chapter 5: Creating Tables
77
Adding a Table
78
Selecting Table Cells and Borders
80
Formatting Tables
86
Adding Images or Background Colors
89 Chapter 6: Creating Charts
89
About Charts
92
Adding a Chart
93
Editing Chart Data
94
Formatting Charts
105 Chapter 7: Slide Transitions and Object Builds
105
Adding Transitions Between Slides
107
Creating Object Builds
113 Chapter 8: Viewing, Printing, and Exporting Your Slideshow
113
Customizing a Presentation for Your Audience
115
Full-Screen Presentations
118
Setting Presentation Options
122
Printing Your Slides
124
Exporting to Other Viewing Formats
4
Contents
Page 5

129 Chapter 9: Designing Your Own Master Slides and Themes
130
Modifying Master Slide Backgrounds and Layouts
135
Changing Default Styles for Text and Objects
137
Saving a Custom Theme
138
Creating a Custom Theme
139 Appendix A: Presentation Keyboard Shortcuts
141 Appendix B: Inspectors at a Glance
141
Document Inspector
141
Slide Inspector
142
Build Inspector
142
Text Inspector
143
Graphic Inspector
143
Metrics Inspector
144
Table Inspector
144
Chart Inspector
145
Hyperlink Inspector
145
QuickTime Inspector
147 Index
Contents
5
Page 6

Page 7

Welcome to Keynote 2
With Keynote, impressive presentations are just the
beginning. This preface provides an overview of the
features of Keynote and a list of resources for using
it.
Keynote is a robust program for creating professional-quality presentations. Keynote’s
powerful and simple tools make it easy to deliver compelling presentations, create
studio-quality storyboards and portfolios, and author interactive slideshows. You can
incorporate photos, movies, or music from your iLife libraries, as well as Safari web
snapshots.
Present your data using any of the charts and tables built right into Keynote. Use the
handsome and versatile themes that come with Keynote, or customize themes to suit
your specific needs.
Your Keynote presentation can be viewed in several ways, including watching it on a
computer, projecting it from a computer to a large screen, printing it, or exporting it
as a set of image files or to Flash, QuickTime, PowerPoint, or PDF format so that it can
be viewed on other computer platforms. (For more information about viewing
options, see Chapter 8, “Viewing, Printing, and Exporting Your Slideshow.”)
Preface
Keynote Features at a Glance
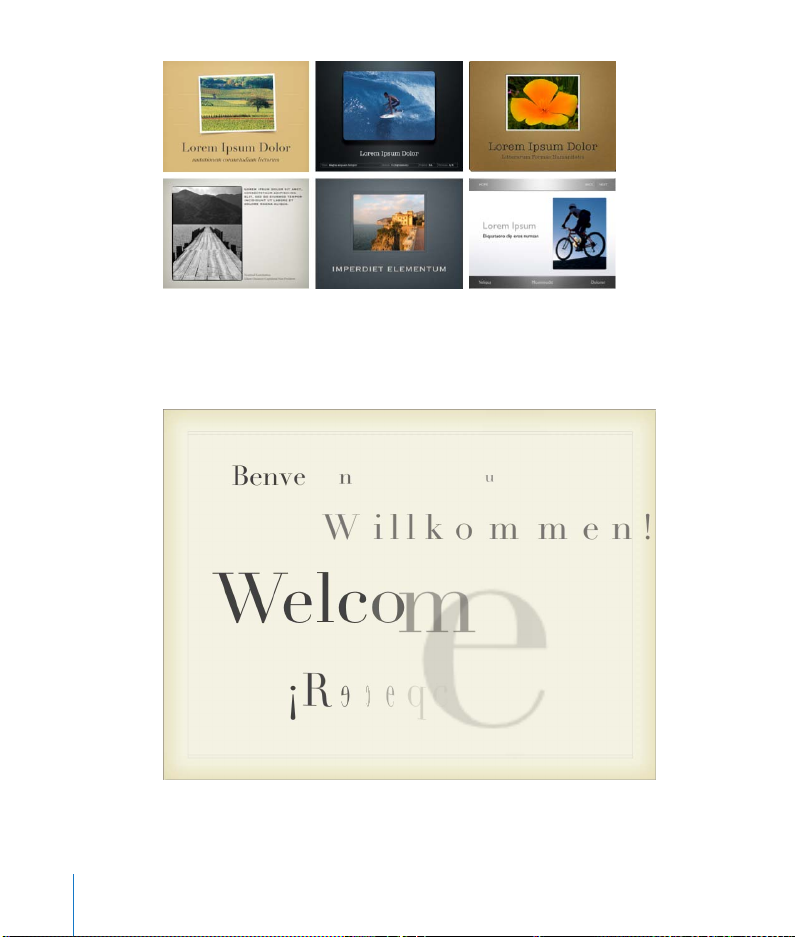
Professional-Quality Designs
Keynote provides a wide variety of themes for creating stunning presentations in a
snap. Every theme includes coordinated colors, text, charts, and tables. You can easily
change a slideshow’s theme at any time, and you can modify themes to suit your
needs. You can even set off sections of your slideshow by using multiple themes in
the same presentation.
7
Page 8
Real-Time Animated Text
Bring your text to life with Keynote’s studio-quality text animations. Choose from an
array of text and word animations. The real-time preview makes it easy to quickly
audition effects and make adjustments.
8 Preface
Welcome to Keynote 2
Page 9
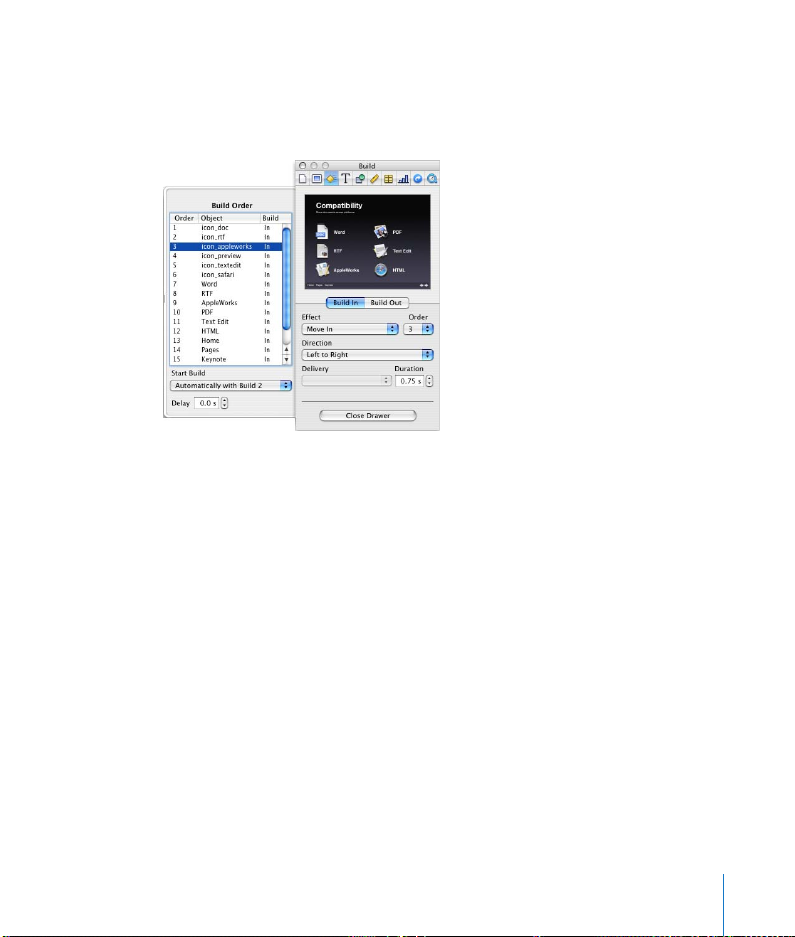
Powerful Animation Tools
Create complex slide animations quickly and easily. Keynote 2 adds auto-advance
between slides, and advanced timing options for object builds so that you can
precisely time all aspects of your slide animations.
Create sophisticated
animations and slide
transitions. Synchronize
the entry, motion, and
exit of multiple objects
on a slide.
Preface
Welcome to Keynote 2
9
Page 10
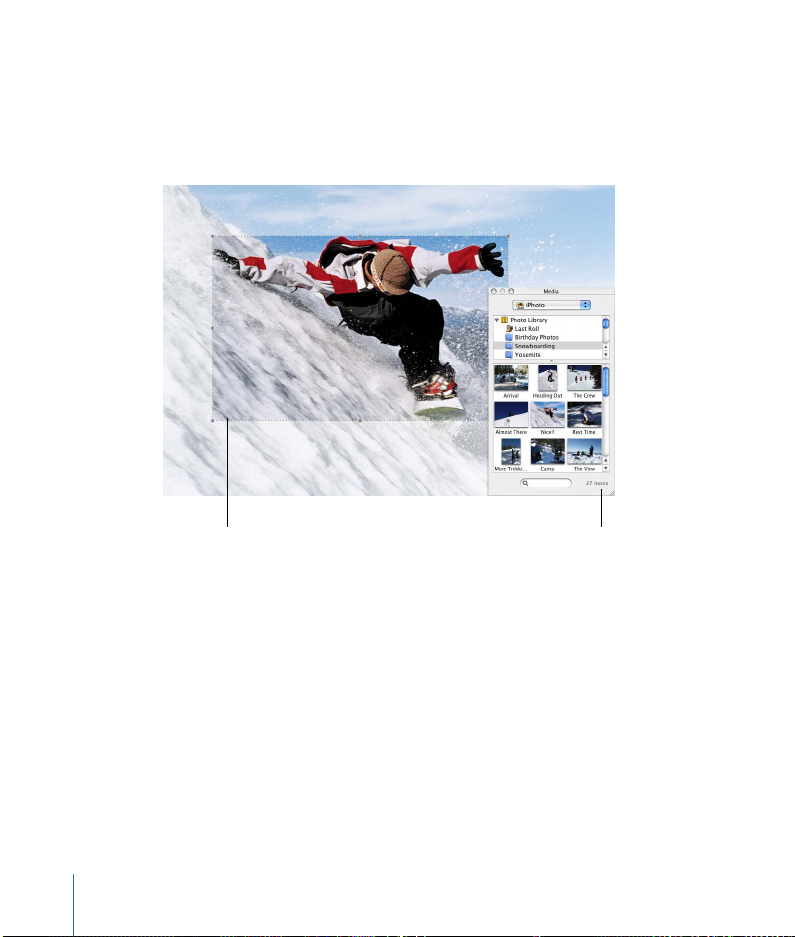
Easy-to-Use Media Tools
Preview items in your iPhoto or iTunes Library, or your Movies folder, and drag them
right to a slide.
Use the Mask feature to reveal only the part of an image you want to focus on,
without altering the original image file.
10 Preface
Use a mask to frame
part of a photo.
Welcome to Keynote 2
Drag an image, movie, or
audio file from the iLife
Media Browser to a slide.
Page 11
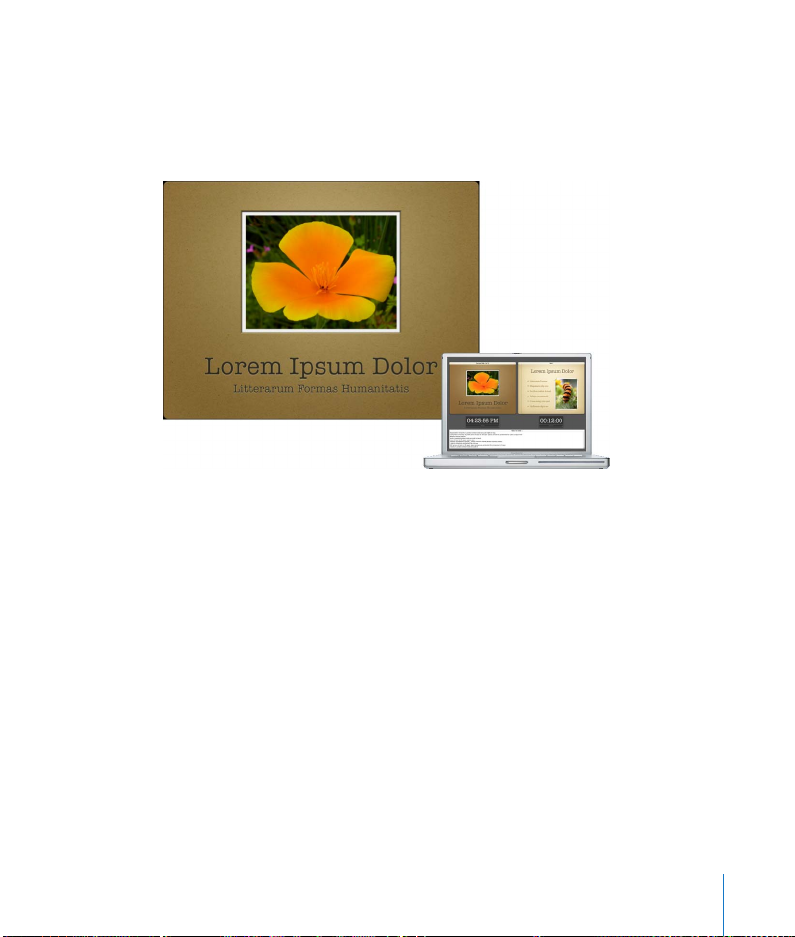
Present With Confidence
Set up the main display for the audience and an alternate presenter display. While you
give your presentation, you can view information such as the current and next slide,
elapsed time or time remaining, a clock, and slide notes. Jump to any slide by typing
its slide number.
Preface
Welcome to Keynote 2
11
Page 12
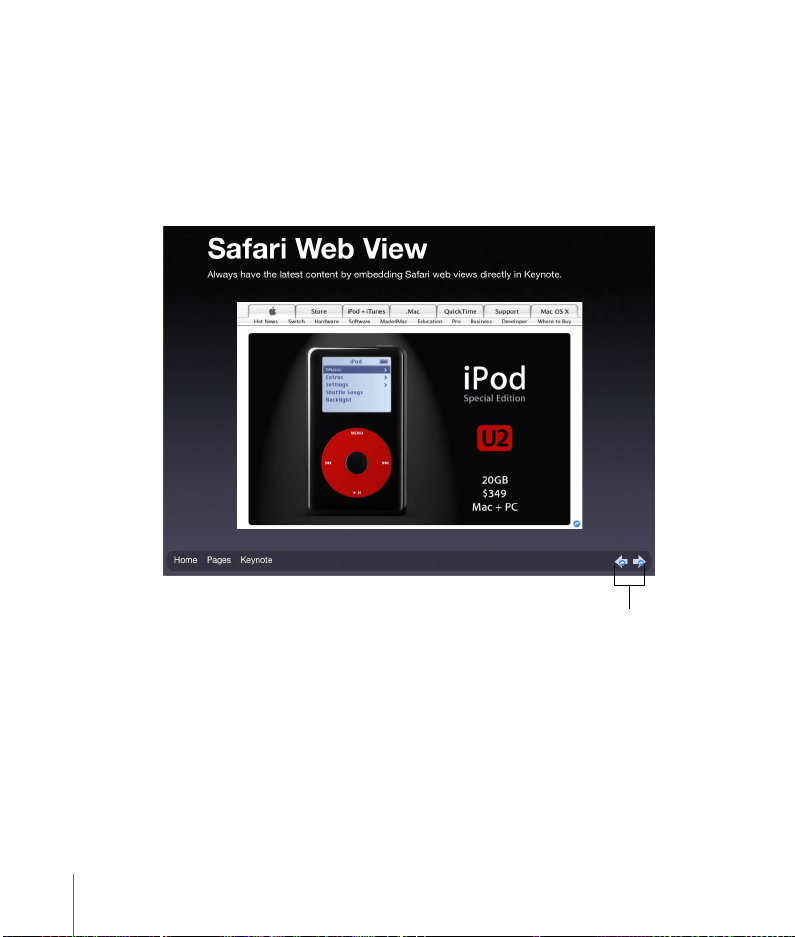
Self-Guided Presentations and Kiosks:
Tell your story even when you’re not there. For kiosk presentations, create self-playing
slideshows that automatically loop. Or use hyperlinks to create slideshows that
viewers can navigate through. Turn any object into a hyperlink to perform such
actions as going to another slide, opening another Keynote document, or going to a
website. Embed a snapshot of the content of any webpage— without the browser
frame. Optionally auto-update the web page snapshot at presentation time.
Easily add “previous” and
“next” slide links across
your presentation using
slide masters.
Resources for Learning More
To get the most from Keynote, consult the following resources:
12 Preface
Welcome to Keynote 2
Page 13

Tour
For an onscreen demonstration of what you can do with Keynote, view the tour. Open
the tour by choosing Help > iWork Tour.
User’s Guide
This guide (what you’re reading now) describes the features of Keynote and shows
you how to use it. To see a full-color PDF file of this guide, choose Help > Keynote
User Guide.
Chapter 1, “Overview of Keynote,” describes the tools for creating presentations.
Chapter 2, “Creating a Presentation,” shows the basic step-by-step workflow. For more
detailed information about each step, refer to Chapters 3 through 8. To learn how to
create your own themes, read Chapter 9, “Designing Your Own Master Slides and
Themes.”
Note:
To complete many of the tasks in this book (and in Keynote Help), you use
menu commands. The instructions look like this:
m
Choose Help > iWork Tour.
The first term after
from that menu.
Choose
is the menu you click; the next term is the item you choose
Preface
Welcome to Keynote 2
13
Page 14
Onscreen Help
To see the help, open Keynote and choose Help > Keynote Help. You can browse
through the table of contents to find a specific topic, or enter a question in the search
field to find an answer about how to accomplish a task.
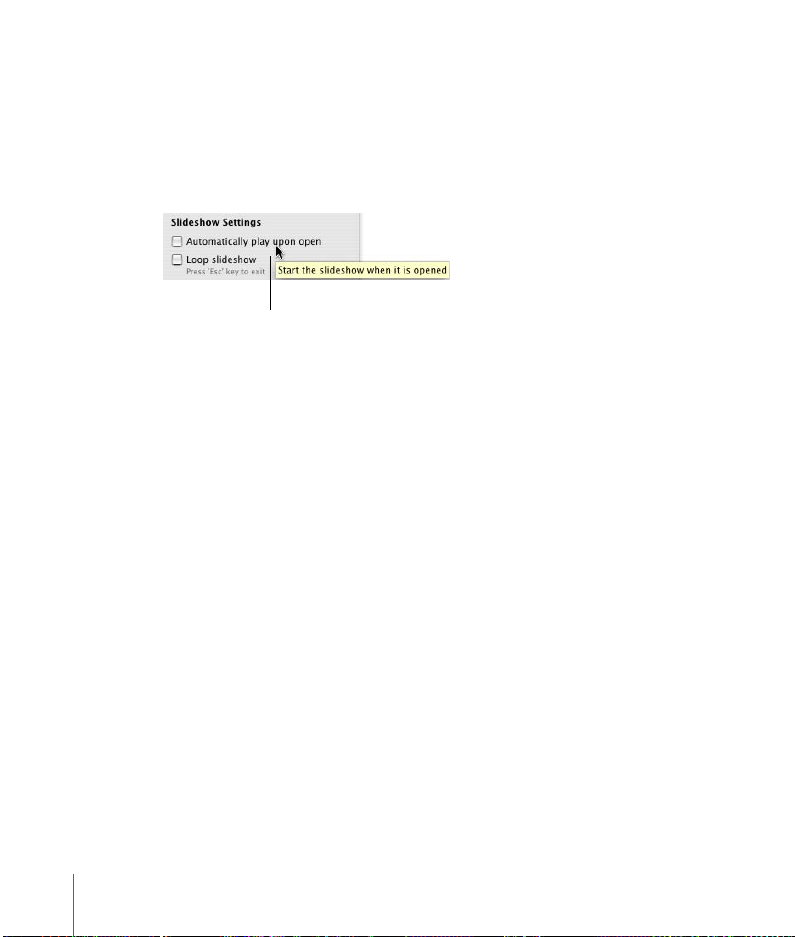
Help tags are also available for many onscreen items. To see a help tag, let the pointer
rest over an item for a few seconds.
To display a help tag, rest
the pointer over an item.
Keynote Quick Reference
The quick reference card lists many of the keyboard shortcuts for Keynote. ( To see a
complete list of shortcuts, choose Help > Keynote Keyboard Shortcuts or search for
“keyboard shortcuts” in the onscreen help.)
Web Resources
Go to www.apple.com/keynote to get the latest software updates and information.
You can also purchase Keynote products on the web.
To find out about Keynote products and get up-to-date information:
m
Choose Help > Keynote on the Web.
Technical Support
A variety of support options are available to Keynote users. For more information, see
the AppleCare Software Service and Support Guide that comes with your Keynote
documentation or choose Help > Keynote Support.
14 Preface
Welcome to Keynote 2
Page 15

1
Overview of Keynote
1
This chapter introduces you to the windows and
tools you’ll use in Keynote.
When you create slides in Keynote, you create a Keynote document. The entire
slideshow, including all of the graphics, media, and chart data, is contained within this
one document, which can be easily moved from one computer to another. If you add
movies or sounds to your document, you can save them as a part of your Keynote
document so that you don’t have to transfer those files separately.
The Keynote Window
The Keynote window contains three sections—the slide canvas, the slide organizer,
and the notes field—which display detailed views of your slides and slideshow as you
work. It’s easy to keep your slides organized and navigate through even long
slideshows.
15
Page 16

The slide canvas:
Create each slide by typing
text and adding media.
The toolbar:
Customize it to include the
tools you use most often.
The slide organizer: Create a
visual outline of your slide
presentation. You can view a
thumbnail of each slide or a
text outline.
The Slide Canvas
The slide canvas is where you create each slide. You can easily drag graphics files,
movie files, and sound files to the canvas to add them to your slideshow.
16 Chapter 1
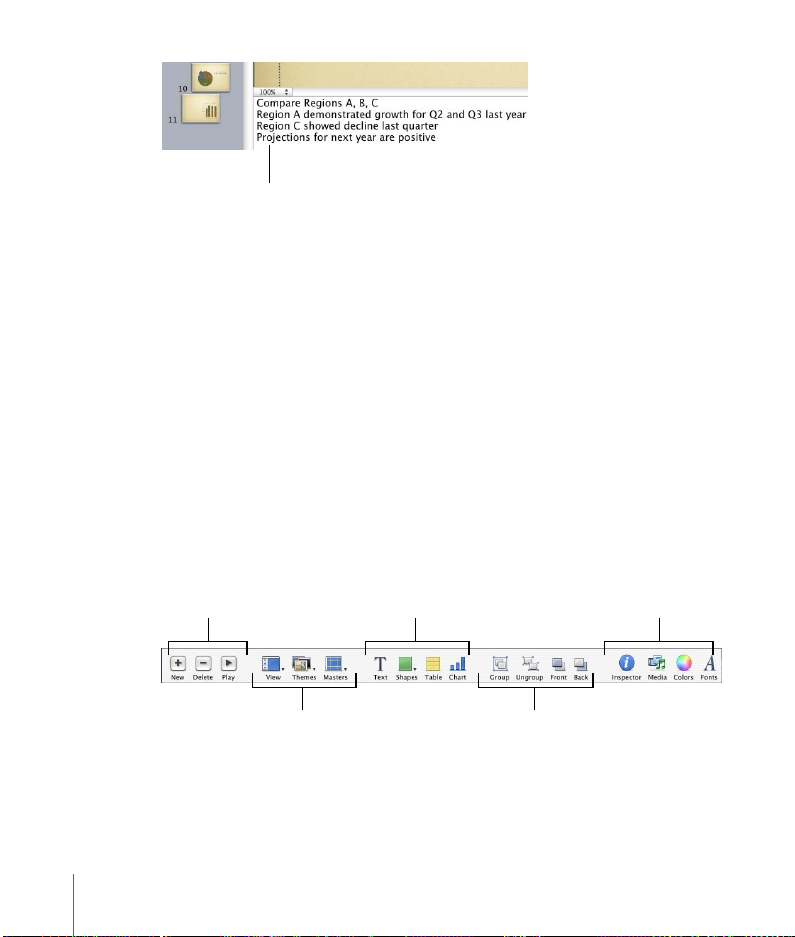
The notes field: Add text about
individual slides. You can refer
to these notes during your
presentation—the audience
won’t see them.
Overview of Keynote
Page 17

You create a slideshow using a
theme
—a family of master slides—to ensure a
handsome and cohesive look throughout your presentation. Master slides provide
predesigned layouts for various kinds of slides, with coordinated fonts, textures, chart
properties, and more. Each theme contains a variety of master slides, making it easy to
add titles, bulleted text, and graphics.
As you work on your slides, you may want to zoom in or out to get a better view of
what you are doing.
To zoom in or out on the slide canvas:
m
Choose View > Zoom > [
zoom level
]. Or choose a magnification level from the pop-up
menu at the bottom left of the slide canvas.
The Slide Organizer
Use the slide organizer at the left side of the Keynote window to organize the slides in
your presentation. In the organizer, you can rearrange slides by dragging them, and
you can indent slides to group them.
The slide organizer has two views: navigator view, which is most useful for graphicsintensive presentations, and outline view, best for presentations that are mainly text.
To change from one view to the other:
m
Choose View > Outline or View > Navigator (or click View in the toolbar and choose
an option).
To hide the slide organizer:
m
Choose View > Slide Only.
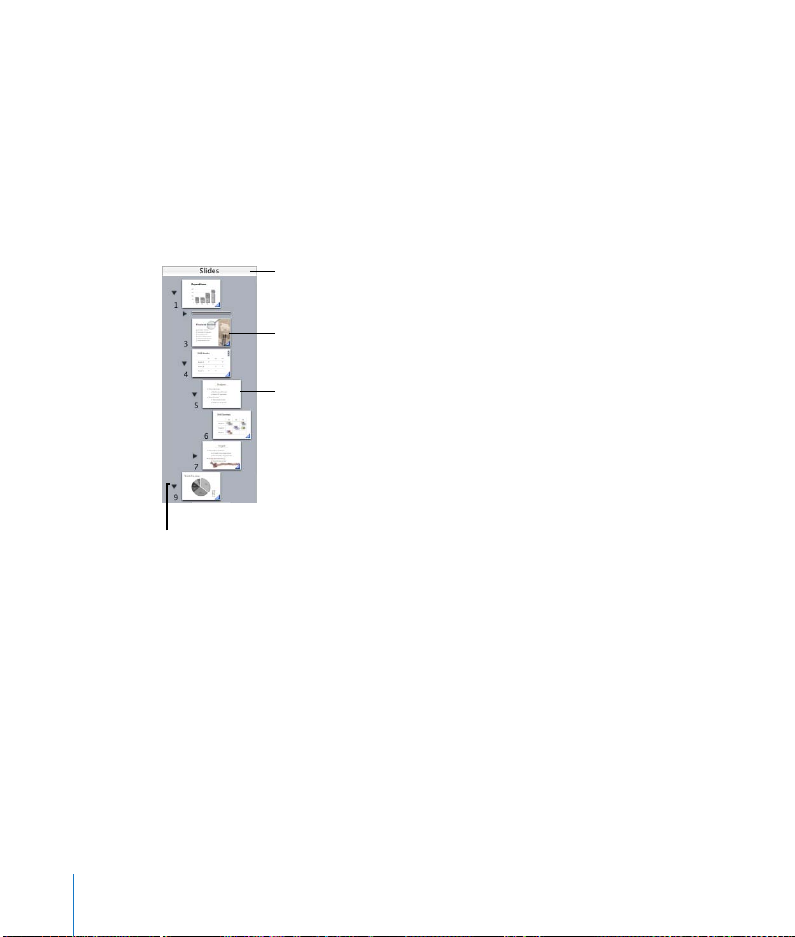
Navigator View
In navigator view, the slide organizer displays a thumbnail image of each slide in your
presentation, making it easy to see the flow of graphics-rich presentations.
To help you organize your presentation as you work, you can group slides by
indenting them, creating a “visual outline” of the slideshow. You can show or hide
groups of slides by clicking the disclosure triangles. You can also skip slides so that
they will not appear when you present your slideshow.
Chapter 1
Overview of Keynote
17
Page 18
To show navigator view:
m
Choose View > Navigator (or click View in the toolbar and choose Navigator).
To hide navigator view:
m
Choose View > Slide Only (or click View in the toolbar and choose Slide Only).
You can see your master slides in navigator view by dragging the bar at the top. Use
the master slides to design your own themes and master slide layouts. (For
information about designing your own themes and master slide layouts, see
Chapter 9, “Designing Your Own Master Slides and Themes.”)
Drag the bar at the top of
navigator view to display
the master slides.
See the graphics on each
of your slides at a glance.
Organize slides by
indenting them. To indent
a slide, drag it or select it
and press Tab.
Click the disclosure triangles
to show or hide groups of
indented slides.
To add a slide, do one of the following:
Â
Choose Slide > New Slide.
Â
Select a slide and click New in the toolbar or press Return (these options create a
slide with the same master as the selected slide).
Â
Press Option and drag a slide until you see a blue triangle (this duplicates the
dragged slide).
Â
Select a slide and choose Edit > Duplicate.
Â
Select a slide, choose Edit > Copy, select another slide, and choose Edit > Paste (this
copies the first slide and puts a duplicate of it after the second slide you selected).
18 Chapter 1
Overview of Keynote
Page 19

To indent slides:
1
In navigator view, select the slide you want to indent.
To select multiple slides, hold down the Shift key and select the first and last slides in
a range.
2 Press Tab (or drag the selected slide to the right until a blue triangle appears).
You can create more indent levels by pressing Tab again. You can indent a slide only
one level deeper than the previous (the “parent”) slide.
To move slides to a higher outline level:
m Select the slides and press Shift-Tab (or drag the selected slides to the left).
To show or hide a group of slides:
m Click the disclosure triangle to the left of the first slide in the group.
To skip a slide when you play your slideshow:
m Select the slide and choose Slide > Skip Slide.
To display a skipped slide:
m Select the slide (it looks like a line in the slide organizer) and choose Slide > Don’t Skip
Slide.
To delete a slide:
m Select the slide in the slide organizer and press the Delete key.
If the slide had children (subordinate slides grouped below it), they are moved up by
one outline level.
To delete a slide and all the slides grouped below it:
m Collapse the group of slides (click the arrow to the left of the top slide) and press the
Delete key.
If you accidentally delete slides, you can recover them immediately by choosing Edit >
Undo Delete.
To move a group of slides:
m Select the first slide in the group and drag the group to a new location in the slide
organizer.
Chapter 1
Overview of Keynote
19
Page 20
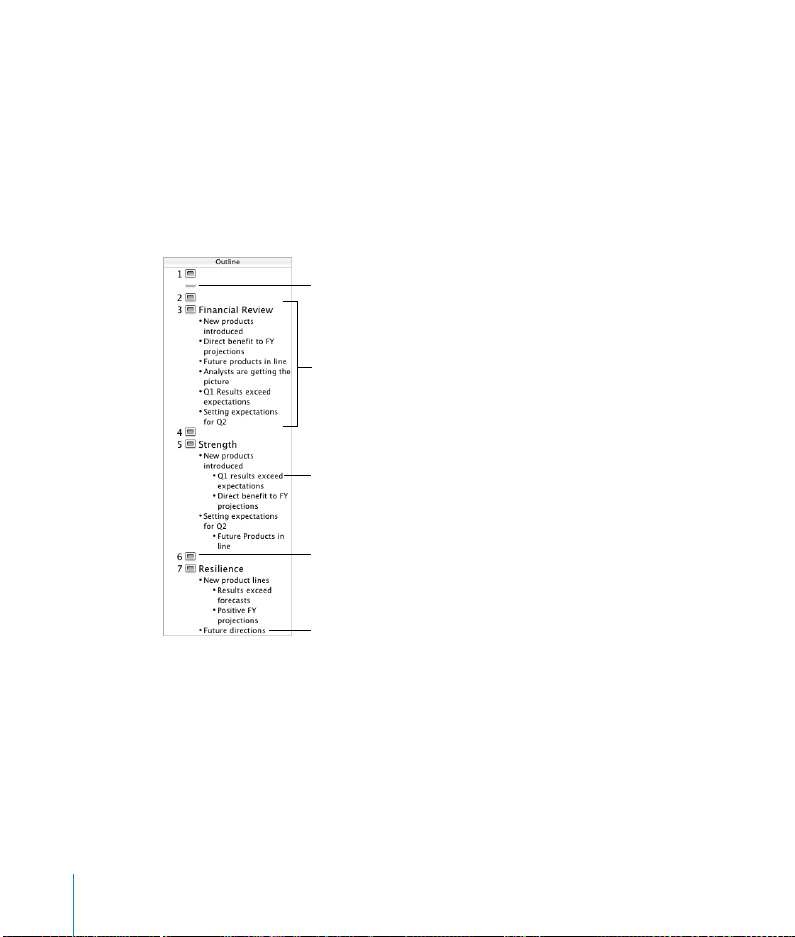
Outline View
Outline view displays the text of each slide in your slideshow. This view is most useful
for seeing the flow of text-rich presentations. All of the titles and bullet points appear
legibly in the slide organizer.
Outline view provides an easy way to order and reorder your bullet points as you
organize your presentation. You can add bullet points to existing text directly in the
slide organizer. You can also drag bullets from one slide to another, or drag them to a
higher or lower level within the same slide.
As in navigator view, you
can skip slides so that they
don’t appear when you
play your slideshow.
In outline view, you see the
text in titles and bullet
points. You can add or edit
text directly in the outline
view.
Drag bullets left or right to
move them to a higher or
lower outline level.
Double-click a slide icon to
hide its bulleted text in the
slide organizer.
Drag bullets to another
slide or drag them to
create a new slide.
To show outline view:
m Choose View > Outline (or click View in the toolbar and choose Outline).
To change the font used in outline view:
1 Choose Keynote > Preferences and click General.
2 Choose a font and size from the Outline View Font pop-up menus.
20 Chapter 1 Overview of Keynote
Page 21

To select a bullet and its text in outline view:
m Click the bullet.
To select a bullet (or bullets) and its subordinate bullets:
m Click between a bullet and its text, then drag down.
To move a bullet to a lower outline level on the same slide:
m Click anywhere in the text and press Tab, or drag the bullet to the right, until a blue
triangle appears.
You can also select (highlight) any number of bullets and press Tab.
To move a bullet to a higher outline level on the same slide:
m Click anywhere in the text and press Shift-Tab, or drag the bullet to the left until a
blue triangle appears.
To move bullets to another slide:
m Drag the selected bullets out of the current slide to a different slide.
To move bullets from one slide and create a new slide:
m Drag the bullets to the left of the other bullets on the slide until a blue triangle
appears above the slide.
To place all slide bullets subordinate to the bullets on the previous slide:
m Drag the slide icon to the right.
All bullets on the slide are moved to the previous slide, with the first bullet at the
same level as the last bullet on the previous slide.
To print out the outline view:
1 Choose File > Print.
2 In the Print dialog, choose Keynote from the Copies & Pages pop-up menu.
3 Select Outline.
The Notes Field
Use the notes field to type or view notes for each slide. You can print these notes or
view them on an alternate display that only you see while you give your presentation.
Chapter 1 Overview of Keynote 21
Page 22
The notes field is an area
where you can keep track
of what you want to say as
you show each slide.
To see the notes field:
m Choose View > Show Notes (or click View in the toolbar and choose Show Notes).
To learn how to view your notes during slideshow playback, see Chapter 8, “Viewing,
Printing, and Exporting Your Slideshow.”
Keynote Tools
The Toolbar
The Keynote toolbar gives you one-click access to many of the actions you’ll use as
you create presentations. As you work in Keynote and get to know which commands
you use most often, you can add, remove, and rearrange toolbar buttons.
Click these buttons
to add or delete
slides, or play the
slideshow.
Add a free
text box, a
shape, a table,
or a chart.
Open the
Inspector window,
Media Browser,
Colors window, or
Font panel.
Click to choose a
new view, theme,
or master slide.
22 Chapter 1 Overview of Keynote
Turn a group of objects
into one object (or one
into its components); move
an object on top of or
underneath other objects.
Page 23
To customize the toolbar:
1 Choose View > Customize Toolbar.
2 To add an item to the toolbar, drag its icon to the toolbar at the top.
3 To remove an item from the toolbar, drag it out of the toolbar.
4 To rearrange items in the toolbar, drag them.
5 To make the toolbar icons smaller, select Use Small Size.
6 To display only icons or only text, choose an option from the Show pop-up menu.
You can restore the default set of toolbar buttons by dragging the default set to the
toolbar.
If you’re not sure what a button does, drag it into the toolbar (in the Customize dialog)
and place the pointer over the icon until you see its description (help tag).
The Inspector Window
The Inspector window makes it easy to format your slides as you work. Most elements
of your slideshow are formatted using the ten panes of the Inspector window.
Click one of these buttons
to display a different
Inspector pane.
To open the Inspector window:
m Choose View > Show Inspector (or click Inspector in the toolbar).
Click one of the buttons at the top to display its inspector pane. Clicking the second
button from the left, for example, displays the Slide Inspector. You can have several
Inspector windows open at the same time.
Chapter 1 Overview of Keynote 23
Page 24
To open more than one Inspector window at the same time:
m Choose View > New Inspector.
The Font Panel
Keynote uses the Mac OS X Font panel, so you can use any of the fonts on your
computer in your presentations.
To open the Font panel:
m Choose Format > Font > Show Fonts (or click Fonts in the toolbar).
Note: If you use special fonts in a Keynote document and you send it to others, be
sure the recipients have those fonts installed on their computer.
The Colors Window
You use the Mac OS X Colors window to choose colors for text, shapes, or shadows.
To open the Colors window:
m Choose View > Show Colors (or click Colors in the toolbar).
Shortcuts
You can use the keyboard to perform many of the Keynote menu commands and
tasks. A comprehensive list of keyboard shortcuts is available in onscreen help. Many
keyboard shortcuts are also listed in the Keynote Quick Reference card.
To see the list of keyboard shortcuts:
m In Keynote, choose Help > Keynote Keyboard Shortcuts.
Many commands are also available in shortcut menus that you can access directly
from the object you are working with.
To open a shortcut menu:
m Press the Control key while you click an object.
Shortcut menus are especially useful for working with tables and charts.
24 Chapter 1 Overview of Keynote
Page 25

2 Creating a Presentation
This chapter outlines the basic tasks and steps for
completing a professional-quality slide
presentation.
Importing a PowerPoint or AppleWorks Presentation
If you already have a slide presentation that you created in Microsoft PowerPoint or
AppleWorks, you can import it into Keynote and continue to work on it. Simply drag
the PowerPoint or AppleWorks document icon onto the Keynote application icon.
The document opens in Keynote and you can select a theme.
You can also export Keynote documents to PowerPoint. For more information, see
“PowerPoint” on page 127.
Step 1: Select a Theme
To start a Keynote project from scratch, double-click the Keynote icon and select a
theme.
By using a Keynote theme, you can create an attractive presentation without having
to do a lot of design work. Each Keynote theme includes a set of templates (called
master slides) with styled text, bullets, layouts, and other formatting features already
set for you. Keynote themes come in a broad variety of textures and moods to suit
different kinds of presentations.
Whenever you create a new Keynote document, you must select a theme in the
Theme Chooser. You can easily change the theme of a Keynote slideshow at any time.
You can also make Keynote use a particular theme for new documents.
2
25
Page 26

To apply a different theme to a slide presentation:
1 Choose File > Choose Theme (or click Themes in the toolbar and choose Theme
Chooser), and then select a theme.
2 Select a slide size.
About slide size: Most projectors work best with slides at the default size, 800 x 600.
Newer ones may display slides well at a resolution of 1024 x 768. If your display is
larger than one of these sizes, you can set a custom slide size for your Keynote
presentation. For more information, see “Changing the Slide Size” on page 121.
3 Click Choose.
You can specify that new documents always use a particular theme.
To specify the theme used for new documents:
1 Choose Keynote > Preferences and click General.
2 Select “Use theme” and click Choose.
3 Select a theme and click Choose.
To modify themes or create your own, see Chapter 9, “Designing Your Own
Master Slides and Themes.” You can also use more than one theme in a presentation;
see “Using Multiple Themes” on page 33.
Kinds of Slideshows
You can make three different kinds of presentations in Keynote, depending on how
the presentation will be used. It’s a good idea to keep the kind of presentation in
mind as you design it.
 Normal. These presentations are controlled by clicking the mouse or using the
keyboard. By default, a slideshow is normal (interactive) unless you make it a selfplaying or hyperlinks-only slideshow.
 Self-playing. These presentations advance automatically, like a movie (no user
interaction is possible). You can use this option, for example, to play a presentation
in a kiosk setting. To learn about creating these kinds of presentations, see “SelfPlaying Presentations” on page 113.
 Hyperlinks only. Viewers navigate through these presentations by clicking
hyperlinks. For more information about creating these kinds of presentations, see
“Hyperlinks-Only Presentations” on page 115.
26 Chapter 2 Creating a Presentation
Page 27

Step 2: Create Your Slides
When you select a theme, a single slide appears in the slide organizer. You can begin
working in this first slide, adding text, graphics, movies, and sound. You can add new
slides to the document as needed.
To add a slide, do one of the following:
 Choose Slide > New Slide (or click New in the toolbar).
 Click New in the toolbar.
 Select a slide in the slide organizer and press Return.
Important: Save your work often by choosing File > Save. For more details about
saving Keynote documents, see “Step 4: Save Your Slideshow” on page 33.
As you work, you’ll want to use different slide layouts to place your text and graphics
on individual slides. Master slides provide the layouts you are most likely to need.
Using Master Slides
Each Keynote theme includes a family of master slides. Each master slide has a
different layout that may include title and body placeholder text, as well as object
placeholders for graphics, tables, and charts.
Most themes come with the master slide layouts described here:
Master slide Recommended use
Title Title page or section titles within your presentation
Title & Subtitle Title page or section titles requiring a subtitle
Bullets General content pages that require bulleted text; the text area
Title & Bullets—Left Content pages on which you can place bulleted text on the left
Title, Bullets & Photo Title page or section title with text and photo
Blank Graphics-rich layouts
fills the entire slide
and a graphic on the right
When you create a new slide, it uses the master slide of the selected slide. (Except
when the selected slide is the first slide, Title & Subtitle.) You can change a slide’s
master slide layout at any time.
Chapter 2 Creating a Presentation 27
Page 28

To change the master for a slide:
1 Select the slide whose master slide layout you want to change.
2 Click Masters in the toolbar.
3 Choose a master slide in the list.
For more information about modifying themes and master slides, see Chapter 9,
“Designing Your Own Master Slides and Themes.”
Adding Text
Master slides provide placeholder text (which you replace with your text) for slide
titles and body text. Title text is larger than body text. Most body text is bulleted,
although some master slides offer non-bulleted body text. Choose a master slide with
the combination of title text and body text that best suits the slide’s content.
To add title text to a slide:
m Double-click in a title text box in the slide canvas and type your text.
To add bulleted text:
m Click in a bulleted body text box in the slide canvas and begin typing.
To move to the next bulleted line, press Return. To indent a bulleted line, press Tab. To
move a bulleted line to a higher indent level, press Shift-Tab.
For information about creating text without bullets, see “Adding Text Without Bullets”
on page 37.
28 Chapter 2 Creating a Presentation
Page 29
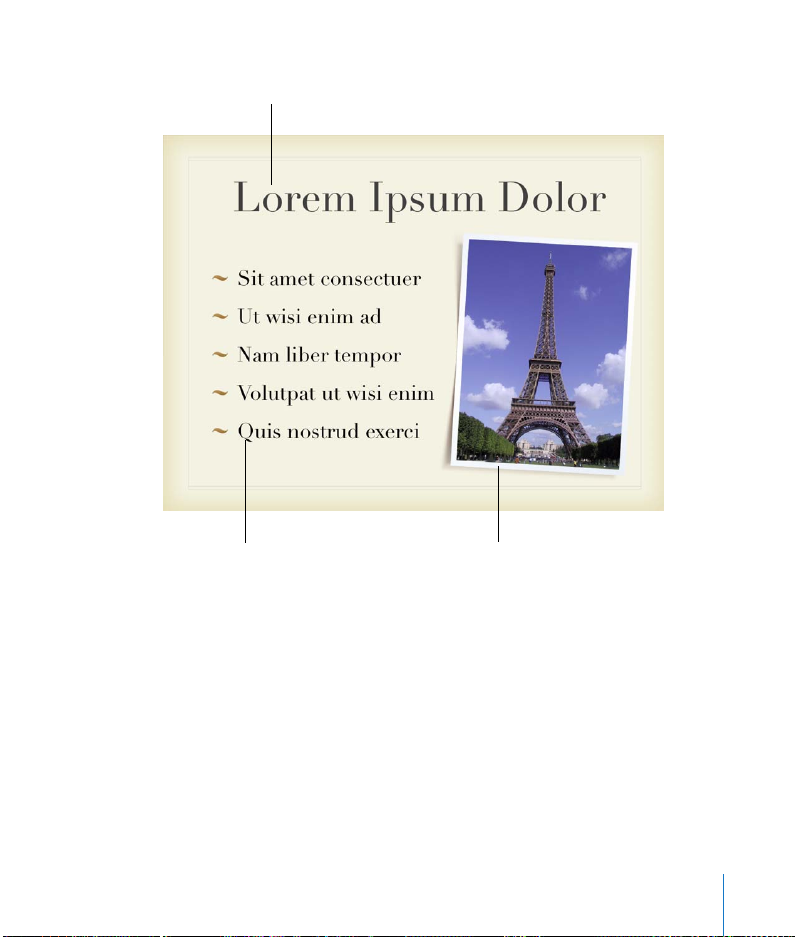
Double-click in a title text box
and type a title. The font and
text size are already set for you.
Double-click in a body
text box and type to
create bulleted text. The
Drag a graphic file from
the Media Browser or
Finder to your slide.
bullet style, font, and text
size are already set.
You can change the look of the text and bullets in any of your slides using the Text
Inspector and the Graphic Inspector. For more details about how to use inspectors to
change text, including how to change the style of bullets or add text without bullets,
see Chapter 3, “Working With Text, Graphics, and Other Media.”
Chapter 2 Creating a Presentation 29
Page 30

Adding Graphics
To add a graphic to a slide, do one of the following:
 Choose View > Show Media Browser (or click Media in the toolbar), choose iPhoto,
and drag a photo to the slide canvas.
 Drag a graphic file from the Finder to the slide canvas.
 Choose Insert > Choose, select the graphic file, and click Insert.
 To create a new slide with the graphic on it, drag the graphic file from the Finder to
the slide organizer.
You can modify a graphic’s colors, alignment, orientation, and other properties. You
make these adjustments using the Inspectors. You set object placement, size, and
orientation in the Metrics Inspector. Shadow, fill color, and opacity are set using the
Graphic Inspector. For more information about setting attributes using the inspectors,
see Chapter 3, “Working With Text, Graphics, and Other Media.”
To present complex or numerical data in an easily digestible visual format, you can
use a table or chart; Keynote supplies tables and charts for each theme. For more
information about adding tables and charts, see Chapter 5, “Creating Tables,” and
Chapter 6, “Creating Charts.”
Using Alignment Guides and Rulers
As you move text and graphics around on the slide canvas, you will notice yellow
alignment guides. These pop-up guides help you center and align objects on the
canvas. They appear whenever the center or edge of an object aligns with the center
or edge of another object, or with the center of the slide canvas. You can create your
own alignment guides to help you place slide elements precisely in the same position
from one slide to the next. Alignment guides (even those you create) don’t appear
during a presentation; they are visible only when you are editing a slide.
Keynote also displays the X and Y coordinates of an object’s top-left corner as you
move the object around the slide canvas, or the object’s angle as you rotate it. When
you resize an object, size tags display the object’s height and width.
You can turn on rulers to help you align objects on the slide canvas. Rulers show you
how far (in increments you specify) an object is from the edge of the slide.
30 Chapter 2 Creating a Presentation
Page 31

To turn rulers on:
m Choose View > Show Rulers.
To change the unit of measure in the rulers:
1 Choose Keynote > Preferences and click Rulers.
2 Choose an item from the Ruler Units pop-up menu.
Make sure that “Display ruler units as percentage” is deselected. Selecting this option
displays measurements as a percentage of the distance across the slide, rather than in
the chosen unit of measure.
To place the ruler’s horizontal origin point at the left edge of the slide:
m In the Rulers pane of Keynote Preferences, deselect “Place origin at center of ruler.”
After you’ve placed graphics exactly where you want them on the slide, you can lock
them to the slide canvas to prevent them from being accidentally moved as you work.
To lock an object to the slide canvas:
m Select the object and choose Arrange > Lock.
You cannot modify an object that has been locked to the slide canvas. To unlock an
object, choose Arrange > Unlock.
Note: If you often lock and unlock objects, you can add buttons to the toolbar for
these commands. Choose View > Customize Toolbar.
Changing the Appearance and Behavior of Alignment Guides
You can place your own alignment guides on any slide to help you line up objects
where you want them.
To place alignment guides on a slide:
1 Choose View > Show Rulers to make the rulers appear at the top and left side of the
slide canvas.
2 Place the pointer on a ruler and drag to the slide canvas.
3 Drag the yellow guide wherever you want on the slide canvas.
You can add alignment guides to a master slide so that they appear on any new slide
based on that master. For more information, see “Adding Alignment Guides” on
page 132.
Chapter 2 Creating a Presentation 31
Page 32

To remove alignment guides that you have placed on a slide:
m Drag the alignment guide off the edge of the slide canvas.
If alignment guides are getting in the way as you work, you can temporarily hide
them.
To temporarily hide pop-up alignment guides:
m Hold down the Command key while dragging an object.
You can turn off pop-up alignment guides and size and position tags in the Rulers
pane of Keynote Preferences. You can also make alignment guides appear only when
object edges are aligned, or only when object centers are aligned.
To change the behavior of alignment guides and tags displayed when you move
objects:
1 Choose Keynote > Preferences and click Rulers.
2 To turn off the guides that appear when an object’s center aligns with another object
or the center of the slide canvas, deselect “Show guides at object center.”
3 To turn on the alignment guides that appear when an object’s edges align with
another object or the center of the slide canvas, select “Show guides at object edges.”
4 To turn off size and position tags, click General and deselect “Show size and position
when moving objects.”
To change the color of alignment guides:
m In the Rulers pane of Keynote Preferences, click the Alignment Guides color well and
select a color in the Colors window.
Step 3: Organize Your Slides
Change the order of slides in your presentation by dragging them in the slide
organizer.
You can organize your slides into an outline by indenting related sets of slides. You
can also show or hide individual slides or groups of slides as you work. Indenting or
hiding slides in the slide organizer does not affect the flow of the final presentation. It
is only a tool to make it easier to organize and navigate through large sets of slides.
32 Chapter 2 Creating a Presentation
Page 33

For more information about indenting and organizing slides, see “Navigator View” on
page 17 and “Outline View” on page 20.
Using Multiple Themes
As your presentation takes shape, you may want to use different themes for different
slides within the same presentation. For example, you could have one look for slides
about past business performance and another for sales projections.
To use multiple themes in a document:
1 In the slide organizer, select the slide or slides you want to have a different theme.
2 Choose File > Choose Theme.
3 Select the theme and choose Selected Slides from the Apply Theme To pop-up menu.
4 If you modified theme defaults on individual slides, and you want to incorporate these
overrides into the new theme, select “Retain changes to theme defaults.”
For example, if you change the background fill on a few slides, and you want to use
the same fill in the new theme, then select this option. If you don’t select this option,
the slides will use the new theme’s background fill.
5 Click Choose.
You can also select slides, click Themes in the toolbar, and choose a theme; the new
theme is applied to the selected slides.
Getting Around Your Presentation
You can easily go to the first or last slide in your presentation, and to the previous or
next slide.
To quickly jump to a particular slide:
m Choose Slide > Go To > [option].
Step 4: Save Your Slideshow
You should save your document often. Keynote provides some special options for
saving your slideshow, including saving a previous version and saving audio and
movie files as part of the document. (For more information, see “Kinds of Slideshows”
on page 26.)
Chapter 2 Creating a Presentation 33
Page 34

To save a Keynote document:
1 Choose File > Save.
2 Type a name for the document and choose where you want to store it.
3 Click Save.
There are advanced saving options available for special circumstances. To see these
options, click the disclosure triangle (to the right of the filename) in the Save dialog.
 If you added sound or movies to your document, and you plan to transfer the
slideshow to another computer, select “Copy audio and movies into document.”
(This option is on by default.)
If you deselect this option, and then transfer the slideshow to another computer,
you need to transfer the sound and movie files as well. Selecting this option makes
the document file larger; you may want to include media files (using Save As) only
when you’re ready to move the slideshow to another computer.
 If the document will be opened on a computer that doesn’t have the theme
installed, select “Copy theme images into document.”
This option ensures that all theme components appear correctly even if the theme is
missing. Selecting this option makes the document file larger.
As you make changes to your slideshow, you can save one previous version.
To save a copy of the previous version when you save a Keynote document:
1 Choose Keynote > Preferences and click General.
2 Select “Back up previous version.”
3 Choose File > Save.
With this preference selected, each time you save your document, the previously
saved version of your document is renamed “Backup of <document name>” and is
saved in the same folder as your document. This backup file does not include the
changes made since the last save; the document that includes the latest changes
remains open. (Even if this option is selected, you won’t get a backup version the first
time you save a document.)
34 Chapter 2 Creating a Presentation
Page 35

Step 5: Play Your Slideshow
You can show your finished presentation on your computer’s display, or project it onto
a screen for a larger audience.
To play the presentation on your computer:
1 In the Finder, double-click the Keynote document icon.
2 Choose View > Play Slideshow (or click Play in the toolbar).
Note: Clicking Play plays the slideshow starting with the currently selected slide. To
play the slideshow from the beginning (if the first slide is not selected), press the
Option key while you click Play.
3 Click to advance to the next slide or through the next object build on the slide.
4 To stop the slideshow, press Q or Esc.
Keynote provides many options for sharing your slideshow, including playing it on a
large screen or secondary display, creating a QuickTime or Flash movie, PDF file, or
PowerPoint presentation, or printing it. For more details about viewing and sharing
your slideshow, see Chapter 8, “Viewing, Printing, and Exporting Your Slideshow.”
Chapter 2 Creating a Presentation 35
Page 36

Page 37

3 Working With Text, Graphics,
and Other Media
3
You can easily add and modify text, graphics,
sound, and movies. This chapter describes in detail
how to add various media to your presentations.
Editing Text and Text Properties
To add text to a text box or shape, simply click to select the text box or shape and
start typing.
To enter and edit text in a text box:
1 Double-click the text and start typing.
2 Adjust the text color, alignment, and font using the Text Inspector or Font panel, as
described in “Formatting Bulleted Text and Numbered Lists” on page 38.
Adding Text Without Bullets
If you want a text box without bullets, you can add a “free text box” to the slide.
Note: Some themes provide master slides with body text boxes that don’t use bullets.
You can also create bullet-less body text by choosing “No Bullets” as the bullet style;
you can still indent this text as you do bulleted text.
Text in free text boxes does not appear in outline view.
To create a free text box (text without bullets):
1 Choose Insert > Text (or click Text in the toolbar).
2 In the text box that appears, double-click the text and type.
Note: You cannot use formatted bullets in free text boxes. To get formatted bullets (in
which carryover text aligns with the text above and the bullet “hangs” ), you must use
a body text box. (See “Modifying Layouts” on page 61.)
37
Page 38

3 When you’re finished typing, click outside the text box. Or, to stop editing text and
select the text box, press Command-Return.
4 Drag the handles on the text box to change its width.
Free text boxes automatically grow or shrink vertically to accommodate the length of
your text. You cannot make them taller by dragging. To make a free text box taller
without expanding its contents, drag the selection handles to make the box narrower
(that is, force the box to grow vertically).
You can drag text boxes anywhere on a slide. For more information about modifying
text boxes, see “Resizing, Moving, and Layering Objects” on page 47.
Note: You can also put text within a shape. See “Adding Text to Shapes” on page 45.
Formatting Bulleted Text and Numbered Lists
You can change the properties—including the font, color, or spacing of lines and
words—of text at any time. For bulleted text, you can select from a range of bullet
and numbering styles. You can even use an image of your own as a bullet. You make
most text changes using the Text Inspector and Font panel.
You can also create engaging visual effects with text by changing its color, shadow,
opacity, and orientation on the screen. To learn more about these options, see
Chapter 4, “Changing Object Properties.”
To change the font:
1 Select the text you want to change and choose Format > Font > Show Fonts (or click
Fonts in the toolbar).
2 In the Font panel, select a font and size.
Using the Text Inspector
In the Text Inspector, you can adjust all basic text properties in your slides. Use it to
change the color, alignment, and spacing of selected text. If you select bulleted text,
you can also change the bullet style.
38 Chapter 3 Working With Text, Graphics, and Other Media
Page 39

The Text Inspector button
Click the color well to
change the color of
selected text.
Use these buttons to align
text.
Drag the sliders to adjust
character, line, and
paragraph spacing for
selected text.
Change the space between
text and the text box,
table cell, or shape that
contains it.
To open the Text Inspector:
m Choose View > Show Inspector (or click Inspector in the toolbar) and click the Text
Inspector button.
To change text color:
1 Select the text you want to change (or click in the text to place the insertion point).
2 In the Text Inspector, click the color well.
3 In the Colors window, select a color.
You can align text within a text box left, right, center, or both right and left (called
“justified”). You can also “grow” text from the top, center, or bottom of the text box.
Chapter 3 Working With Text, Graphics, and Other Media 39
Page 40

Use the vertical alignment
buttons to “grow” text
from the top, center, or
bottom of the text box.
Use the horizontal alignment
buttons to align text on the
left, center, right, or both left
and right (justified).
To adjust text alignment:
1 Select the text you want to change.
2 Click the horizontal or vertical alignment buttons at the top of the Text Inspector.
Note: A body text box with too much text (more text than can be displayed) always
aligns at the top. Vertical alignment has no effect on free text boxes.
To adjust the spacing between lines of text within a paragraph or bullet:
1 Select the text you want to change (or select a text box).
2 In the Text Inspector, drag the Line slider to adjust the line spacing.
Dragging the slider to the left brings the selected lines closer together; dragging it to
the right moves them farther apart.
You can also set precise point values for spacing between lines of text in a paragraph,
or use preset measurements, which you can select in the Line Spacing pop-up menu.
Line Spacing field:Type a
value (or click the arrows)
to specify the space
between lines of text in a
paragraph.
Line Spacing pop-up
menu: Click the arrows to
choose preset line spacing.
To set precise values for spacing between the lines of text in a paragraph:
1 Select the text you want to change.
2 In the Text Inspector, type a value in the Line Spacing field.
40 Chapter 3 Working With Text, Graphics, and Other Media
Page 41

3 Choose an option from the Line Spacing pop-up menu.
 Single: Standard space between lines of text.
 Double: Adds an extra line space between lines of text.
 Multiple: Set line spacing values between single and double, or greater than
double.
 At Least: The distance between lines is never less than the value you specify,
and may be more to prevent larger fonts from overlapping. Use this setting when
the distance between lines should remain fixed, but overlap is not desired if the text
should get large.
 Between: The value you specify is added to or subtracted from the font size. As
font size changes, the distance between the bottom of one line of text and the top
of the next changes too. Use this option to set a specific distance between
ascenders and descenders, regardless of font size.
To adjust the amount of space before or after a paragraph or bullet:
1 Select the text you want to change.
2 In the Text Inspector, drag the Before Paragraph or After Paragraph slider. You can also
type a specific amount (5 points, for example) in the text box.
To adjust the amount of space between characters:
1 Select the text you want to change.
2 In the Text Inspector, drag the Character slider.
Dragging the slider to the left brings the letters closer together; dragging it to the
right moves them farther apart.
You can change the amount of space between text and its container (a text box,
shape, or table cell). This measurement is called the “inset margin.” The amount you
specify is applied equally around the text on all four sides.
Specify how much space
there is around text.
Note: You can’t adjust the inset margin for bulleted text.
Chapter 3 Working With Text, Graphics, and Other Media 41
Page 42

To adjust the amount of space around text:
1 Select the text.
2 In the Text Inspector, drag the Inset Margin slider, type a number in the Inset Margin
box, or click the arrows, and press Return.
To change the symbol used for bullets:
1 Select the text whose bullet you want to change, or select a body text box to change
all bullets.
2 In the Text Inspector, click Bullets & Numbering.
3 Choose an option from the pop-up menu. For some options, you can adjust the size
and vertical alignment using the fields on the right.
 Text Bullets: Choose an option from the bullet style pop-up menu, or type the
character(s) you want to use (any keyboard character) in the text box. To change a
text bullet’s color, click the color well and choose a color in the Colors window.
 Image Bullets: Choose from one of the images provided.
 Custom Image: Select one of your own image files or drag an image from the
Finder or Media Browser to the image well. Most images must be scaled very small
to be used as text bullets.
 Numbers: Choose a format from the number style pop-up menu.
 No Bullets: Use this option to create bullet-less text. (You can use free text boxes
instead, but text in free text boxes doesn’t display or print in outline view.)
Click to format bullets.
Select the bullet type, style,
color, position, and size.
Important: Selecting the “Scale with text” checkbox maintains the bullet-to-text ratio
specified in the Size field, even if you change the font size.
42 Chapter 3 Working With Text, Graphics, and Other Media
Page 43

To adjust the vertical alignment of a bullet (relative to its text):
1 Select the text you want to change.
2 In the Bullets & Numbering pane of the Text Inspector, type a number in the Align box
(or click the arrows).
Setting Text Indents and Tabs
All text boxes have default indents and tabs already set. You can see indent and tab
markers on the horizontal ruler when you choose View > Show Rulers and select some
text on a slide. You can drag these markers to change text indents and tabs.
Click the ruler to create a tab.
Double-click the tab icon to
change its type.
These markers indicate the
left alignment of the bullet,
the first line of bulleted text,
and subsequent lines of
bulleted text.
To create a tab:
1 Click in the text you want to adjust.
2 Click the horizontal ruler and drag the tab where you want it.
To change a tab to a different type:
m Control-click the tab icon and choose a tab type from the shortcut menu. Or double-
click the tab icon in the ruler repeatedly until the type of tab you want appears.
Choose from among
these tab types.
To insert a tab in bulleted text or table text:
m Press Option-Tab.
Chapter 3 Working With Text, Graphics, and Other Media 43
Page 44

You can also adjust the indents used in bulleted text. You can specify where to put the
left edge of a bullet (so that you can have indented sub-bullets, for example), the
amount of space between the bullet and its text, and where to begin bulleted text
that wraps to the next line (carryover text).
Drag to set the left edge
of the bullet.
Drag to set the left edge
of text after the bullet.
Drag to set the left edge
of text that wraps
(carryover text).
To set the indents for bulleted text:
1 Select the bulleted text you want to adjust.
2 To set the left edge of the bullet, drag the square icon.
3 To set where to begin the text after the bullet, drag the rectangular icon.
4 To set the left margin of carryover text, drag the leftmost down arrow.
5 To set the right margin, drag the rightmost down arrow.
Adding Images
You can add many types of graphics to your presentation, including photos, graphic
files created in other applications, and simple objects that you draw directly in
Keynote.
Keynote accepts all standard graphic file formats, including the following:
 PICT
 GIF
 TIFF
 JPEG
 PDF
 MOV
44 Chapter 3 Working With Text, Graphics, and Other Media
Page 45

Adding Shapes
You can draw shapes—such as lines, rectangles, rounded rectangles, ellipses, triangles,
and arrows—directly in Keynote.
To add a shape:
1 Choose Insert > [shape] (or click Shapes in the toolbar and choose a shape).
2 Drag the selection handles to resize the shape.
You can also draw shapes at the desired size on the slide canvas.
To draw a shape on the slide canvas:
1 Hold down the Option key while you click Shapes in the toolbar and choose a shape.
2 Release the Option key and move the pointer over the slide canvas until it becomes a
crosshair.
3 Drag across the slide canvas to create the shape.
To constrain the shape (for example, to keep triangles equal on all sides), press the
Shift key as you drag.
Adding Text to Shapes
You can add text to any shape.
To add text to a shape:
m Double-click the shape and type your text.
You can format the text within a shape like any other text. If there is more text than
can show in the shape, the clipping indicator (+) appears. You can display the rest of
the text by resizing the shape.
The “+” means the shape
contains more text than
can be seen. To display
the rest of the text, resize
the object.
You can change the line colors and fill colors of drawn objects. For more information,
see Chapter 4, “Changing Object Properties.”
Chapter 3 Working With Text, Graphics, and Other Media 45
Page 46

Adding Pictures From iPhoto
You can drag images directly from the Media Browser (or your iPhoto library) to a
slide.
To add an image from the Media Browser:
1 Choose View > Show Media Browser.
2 Choose iPhoto from the pop-up menu.
3 Drag the photo to the slide.
Adding Other External Graphics
You can easily add graphic files created in other applications to your Keynote slides.
To add a graphic file from another source:
m Choose Insert > Choose and select the file (or drag the file from the Finder to your
slide).
You can adjust the opacity and shadow of graphic objects, as well as make precise
adjustments to their location and orientation on the slide. To learn more, see
Chapter 4, “Changing Object Properties.”
Using PDF Files as Graphics
If you intend to greatly enlarge or reduce a graphic’s dimensions, consider converting
it to a PDF file before bringing it into Keynote. PDF files don’t lose their crispness
when they are significantly resized. Other file types may not retain their clarity as well
when they are enlarged or reduced.
PDF files also provide a great way to move tabular data from Excel or AppleWorks
documents into Keynote. If you have extensively formatted tables in these
applications that you want to display in your slideshow, you can save the spreadsheet
as a PDF file and then place that PDF file on a slide as you would any other external
graphic file.
To convert an Excel or AppleWorks file to a PDF file:
1 If you are converting an Excel spreadsheet, select the range of cells you want to
display in your slideshow.
2 Choose File > Print.
3 If you are converting an Excel document, select Selection (instead of Active Sheets).
46 Chapter 3 Working With Text, Graphics, and Other Media
Page 47

4 Choose Output Options from the Copies & Pages pop-up menu and select the “Save
as File” checkbox.
Select “Save as File.”
Choose Output Options
from this pop-up menu.
Choose PDF.
Click to save the file as a PDF.
5 Choose PDF from the Format pop-up menu.
6 Click Save As PDF.
7 In the Save dialog, type a name for the PDF file and select a location, then click Save.
You can include other kinds of objects, such as movies, charts, tables, hypertext links,
and webpages. To learn more, see “Adding a Movie or Animation” on page 54 and
“Adding Webpages and Hyperlinks” on page 56, as well as Chapter 5, “Creating Tables,”
and Chapter 6, “Creating Charts.”
Resizing, Moving, and Layering Objects
Once text and graphics are on the slide canvas, they behave very much the same.
They can be moved in front or in back of one another, and formatted or manipulated
in similar ways.
To move an object:
m Click the object to select it (make the selection handles appear), and then drag it.
Avoid dragging the object by the selection handles so that you don’t inadvertently
resize the object.
To resize an object:
1 Click the object to select it.
Chapter 3 Working With Text, Graphics, and Other Media 47
Page 48

If text is selected, you can select the text box, shape, or table cell by pressing
Command-Return.
2 Move the pointer close to a selection handle until it changes to a double-headed
arrow.
3 Drag the selection handle to expand or shrink the object.
To resize the object from its center, press the Option key as you drag.
To constrain the object’s proportions as it expands or shrinks, press the Shift key as
you drag.
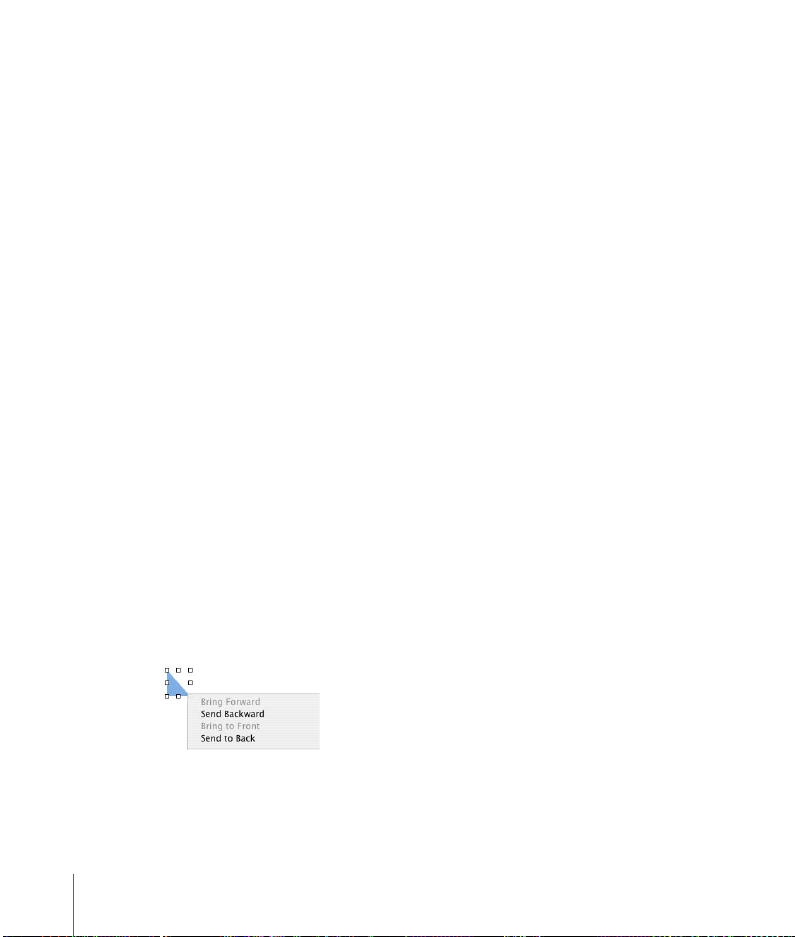
To move an object in front or in back of another object on the slide canvas:
1 Select the object you want to move.
2 Choose Arrange > Bring Forward or Send Backward.
3 Repeat step 2 until the object is in the desired position.
4 To move an object to the very top or bottom of the layered objects, choose Arrange >
Bring to Front or Send to Back.
These buttons move an
object to the very top or
bottom layer.
These buttons move an
object up or down one layer.
Note: You can add the Forward and Backward buttons to the toolbar; choose View >
Customize Toolbar.
To rotate an object:
1 Select the object.
2 Hold down the Command key and move the pointer toward a selection handle until it
changes to a curved, double-headed arrow.
3 Drag the selection handle to rotate the object.
You can also use the Rotate wheel or Angle field in the Metrics Inspector.
48 Chapter 3 Working With Text, Graphics, and Other Media
Page 49

Cropping (Masking) Images
Cropping an image means removing unwanted parts. With Keynote, you can get the
effect of cropping without actually changing the original image. This process is called
masking.
To mask an image:
1 Select the image and choose Format > Mask.
A mask appears over the image with a resizable “window” in the center.
2 Drag the window to reposition it; drag the selection handles to reveal the part of the
image you want to show. (You can also drag the image to recenter it within the mask
window.)
 To constrain the window’s proportions, hold down the Shift key as you drag the
selection handles.
 To rotate the window, hold down the Command key as you drag the selection
handles. (To learn more about manipulating objects using the selection handles, see
“Resizing, Moving, and Layering Objects” on page 47.)
3 To exit mask mode, press Return or double-click the image.
Note: If you often mask objects, you can add a Mask button to the toolbar by
choosing View > Customize Toolbar.
To reenter mask mode for a masked image:
1 Double-click the image.
The masked image is selected.
2 To select the mask window, click the viewable image.
3 Drag to resize and position the image and mask window to reveal the part of the
image you want to show.
To unmask an image (so the whole image appears):
m Select the image and choose Format > Unmask.
Chapter 3 Working With Text, Graphics, and Other Media 49
Page 50

Grouping and Locking Objects
You can group objects together so that they can be moved, copied, and oriented as a
single object. Lock objects to the canvas to avoid inadvertently moving them as you
work.
Note: After you group objects, you can’t edit the individual objects that compose the
group unless you ungroup them. To edit locked objects, unlock them first.
To group objects:
1 Hold down the Command (or Shift) key as you select the objects you want to group
on the slide canvas.
2 Choose Arrange > Group (or click Group in the toolbar).
To ungroup a grouped object:
m Select the object and choose Arrange > Ungroup (or click Ungroup in the toolbar).
Note: If you group an object that has a build effect assigned to it, the effect is
removed. Ungrouping a grouped object assigned a build removes the build effect.
To lock objects to the slide canvas:
1 Hold down the Command (or Shift) key as you select the objects you want to lock to
the slide canvas.
2 Choose Arrange > Lock.
To unlock an object:
m Select the object and choose Arrange > Unlock.
Note: If you often lock or unlock objects, you can add Lock and Unlock buttons to the
toolbar by choosing View > Customize Toolbar.
Working With Photo Cutouts (Alpha-Channel Graphics)
Keynote themes provide photo “cutouts” in which you can place your own images.
The result can look, for example, as if your image is in a picture frame. This effect is
created by using a graphic (the picture frame part) that contains a transparent area
where your image shows through. The transparent area is created using an alpha
channel (a way of defining transparency); an alpha-channel graphic is an image that
contains a transparent area.
50 Chapter 3 Working With Text, Graphics, and Other Media
Page 51

You can also use alpha-channel graphics to create transparency around an irregularly
shaped image, like a tree, so that the image doesn’t have a rectangular white area
around it.
This textured foreground
with photo corners and a
white border is an alphachannel graphic. The area
between the photo
corners is a transparent
alpha channel.
Your photograph is placed
behind the alpha-channel
graphic and can be seen
through its transparent
region, so it appears that
the photo is in the photocorner frame.
To place an image behind a photo cutout window in a Keynote theme:
1 Drag your image from the Media Browser or the Finder to a cutout window on the
slide canvas.
2 To resize the image within the cutout, drag one of the selection handles.
3 Drag the image to adjust its position in the window.
Importing Alpha-Channel Graphics Into Keynote
When you bring an alpha-channel image into Keynote, there’s nothing else you have
to do to make the transparency work. Just place it, manipulate it, and move it to the
back or front as you would any other image.
Many PDF, TIFF, and PSD files contain alpha-channel graphics. You can use various
applications to create alpha-channel images, including Adobe Photoshop, Corel Draw,
Adobe Illustrator, and Adobe Acrobat. See the instructions that come with the
application to learn how to create alpha-channel images. To learn how to create your
own frame in Keynote with an imported alpha-channel graphic, see “Layering
Background Objects and Objects on Slides” on page 132.
Chapter 3 Working With Text, Graphics, and Other Media 51
Page 52

Including Sound and Other Media
You can add sound files to your project so that, for example, recorded music plays
throughout your slideshow or a narration accompanies each slide. You can also add
video or Flash movies that play within a slide.
Keynote accepts any QuickTime file type, including the following:
 MOV
 FLASH
 MP3
 MP4
 AIFF
 AAC
 MPEG-4
Important: When you add a media file to a slideshow, the file does not automatically
become part of the Keynote document. This feature keeps your Keynote document
from becoming too large. As long as you play the slideshow on the computer where
you created it, you see the media files play where you placed them. However, if you
want to play your slideshow on a different computer, you can save media files as part
of the document, so that you can transfer the slideshow to the other computer
without transferring the media files separately.
To save media files as part of your Keynote document:
1 Choose File > Save As.
2 Select “Copy audio and movies into document.” (You may need to click the disclosure
triangle in the Save dialog to display this checkbox.)
3 Type a title and choose a location for the document, then click Save.
Note: Including media files in a document makes the document file much larger; you
may want to save the media files with the document only immediately before you
move or send the slideshow.
Using the Media Browser
The Media Browser lists all the media files in your iPhoto and iTunes Libraries, and in
your Movies folder. You can drag an item from the Media Browser to a slide or to an
image well in one of the inspectors.
52 Chapter 3 Working With Text, Graphics, and Other Media
Page 53

Choose iTunes, iPhoto,
or Movies.
Select an album.
Drag a thumbnail to a slide
or to an image well in one
of the inspectors.
Search for a file by name.
To open the Media Browser:
m Choose View > Show Media Browser (or click Media in the toolbar).
Adding Narration and Other Audio
You can add music—a file or playlist from your iTunes music library, or any other
sound file—to a Keynote document. You can add sound as a soundtrack for the entire
slideshow, or you can add sound to a single slide.
If you add a soundtrack, the music starts playing when the slideshow starts. You can
specify whether to play the audio once or repeatedly (or you can turn it off).
If you add a sound file to an individual slide, the sound plays when the slide appears
and stops when you move to the next slide. You could, for example, record narration
for each slide as an MP3 file; this technique is especially useful if you plan to export
the slideshow as a self-playing QuickTime movie. (For more information, see
“QuickTime” on page 125.)
Note: To ensure that the audio plays on other computers, select “Copy audio and
movies into document” in the expanded Save dialog. For more information, see
“Including Sound and Other Media” on page 52.
Chapter 3 Working With Text, Graphics, and Other Media 53
Page 54

To add a soundtrack:
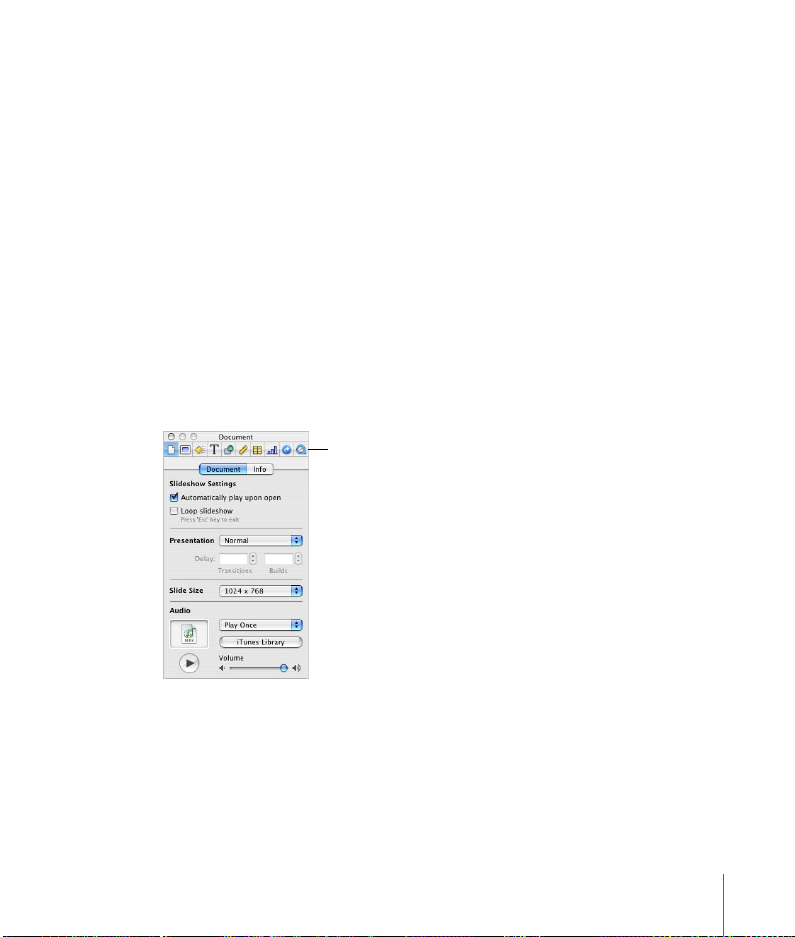
1 Open the Document Inspector.
The Document Inspector
button
Drag a sound file here to
play it throughout the
slideshow.
To repeat the sound file,
choose Loop.
Set the volume for the
soundtrack.
Preview your audio file.
2 In the Audio area, click iTunes Library.
3 Drag an audio file or playlist from the Media Browser to the Audio well in the
Document Inspector.
Note: You can also drag a sound file from the Finder.
4 To repeat the sound file as long as the presentation is playing, choose Loop from the
pop-up menu in the Document Inspector.
To add sound to a slide:
m Click Media in the toolbar, choose iTunes from the pop-up menu, and drag a file to
the slide canvas. (You can also drag a file from the Finder.)
You can more finely control when music starts and stops by moving it on or off the
screen in an object build. To learn more about producing object builds, see “Creating
Object Builds” on page 107.
Adding a Movie or Animation
You can include movies in your slide presentation. After you put a movie on a slide,
you can resize and position the movie like any other object.
54 Chapter 3 Working With Text, Graphics, and Other Media
Page 55

To add a movie to a slide, do one of the following:
 Click Media in the toolbar, choose Movies from the pop-up menu, and drag a file to
the slide canvas. (For movies to appear in the Media Browser, they must be in the
Movies folder in the Finder.)
 Choose Insert > Choose, select the file, and click Insert.
 Drag the movie file from the Finder to the slide canvas.
When your slideshow plays, the movie starts the moment the slide appears.
Note: To ensure that the movie plays on other computers, select “Copy audio and
movies into document” in the expanded Save dialog. For more information, see
“Including Sound and Other Media” on page 52.
Adjusting Media Playback Settings
In the QuickTime Inspector, you can set the playback volume for sound and movies in
your slideshow, and specify whether to play media files once, continuously, or forward
and backward (Loop Back and Forth).
To set media playback preferences:
1 Choose View > Show Inspector (or click Inspector in the toolbar) and click the
QuickTime Inspector button.
2 Click the movie to select it, then drag the Volume slider.
3 Choose an option from the Repeat pop-up menu.
Chapter 3 Working With Text, Graphics, and Other Media 55
Page 56

The QuickTime Inspector
button
Select the frame to display
until the movie starts
playing.
Set playback repeat options.
Set the playback volume.
Use these controls to view
the movie as you edit your
slideshow.
You can also specify which frame of the movie to display on the slide (called the
“poster frame”) until the movie starts playing.
To set the movie poster frame:
1 Click the movie to select it.
2 In the QuickTime Inspector, drag the Poster Frame slider until the movie displays the
image you want.
Adding Webpages and Hyperlinks
You can display a snapshot of a webpage (called a “web view”) on a slide; when the
document is opened or the slideshow starts, Keynote can automatically update the
snapshot with the current webpage. (The computer running the slideshow must be
connected to the Internet.) By default, the snapshot is a hyperlink you can click during
a presentation to open the webpage in a browser; you can turn off the link in the
Hyperlink Inspector.
56 Chapter 3 Working With Text, Graphics, and Other Media
Page 57

Insert a snapshot of a webpage
that updates automatically
when the slideshow plays.
The blue arrow means that,
during a slideshow, you can
click the web view to open
the webpage in a browser.
To add a webpage snapshot to a slide:
1 Choose Insert > Web View.
2 In the Hyperlink Inspector, type the page’s URL (www.apple.com, for example).
The homepage specified in your default browser is inserted as placeholder text.
3 To automatically update the webpage when the presentation starts to play, select
“Update automatically.”
If you don’t select “Update automatically,” you can update the webpage at any time by
clicking Update Now.
Chapter 3 Working With Text, Graphics, and Other Media 57
Page 58

The webpage image is imported at full size, but you can resize and reposition it like
any other object. (The webpage image stays the same resolution, but you can resize
the web view to display less of the image.)
The webpage image is automatically a hyperlink, which you can click during a
presentation to open the webpage in a browser. To turn off this feature, deselect
“Enable as a hyperlink.”
When this option is
selected, you can click the
web view during a
presentation to open the
webpage in a browser.
Select to update the web
view when the slideshow
begins.
You can also create a web view by dragging a URL from a browser to the slide canvas.
You can also add hyperlinks—text, images, or shapes—that you can click during a
presentation to do any of the following:
 Go to a particular slide
 Open a webpage on the Internet
 Open another Keynote document
 Open an email message
 Exit the slideshow
Turn text or images into hyperlinks
that open another slide, a Keynote
document, a webpage, or an email
message. The blue arrow badge
(visible in edit mode) means the
item is a clickable hyperlink.
58 Chapter 3 Working With Text, Graphics, and Other Media
Page 59

To add a hyperlink:
1 Select the text, shape, image, or movie you want to turn into a hyperlink.
2 In the Hyperlink Inspector, select “Enable as a hyperlink” and choose an option from
the Link To pop-up menu.
3 Enter the required information.
For text hyperlinks, if you
want the slide to display
text other than the URL,
type the hypertext here.
(Select the text first.)
Use this type of hyperlink To perform this action Notes
Slide Go to another slide in the
presentation
Webpage Open the webpage in a
browser (Safari, for example)
Keynote File Open another Keynote
document
Email Message Open a new mail message
with the specified subject and
addressee
Exit Slideshow Stop the slideshow Keynote opens in edit mode
Choose whether to display the
next, previous, first, or last
slide; the last slide viewed; or a
specific slide number.
Keynote opens your default
browser (specified in the
browser’s Preferences).
If you transfer the presentation
to another computer,
remember to transfer the
other document as well.
Keynote opens your default
mail application.
to the last slide shown.
You can also drag a URL from a browser to an object on the slide canvas to create a
web veiw hyperlink. By default, any text you type or drag that begins with “www,”
“ftp,” or “http” automatically becomes a hyperlink as well. You can prevent URLs from
being automatically turned into hyperlinks.
Chapter 3 Working With Text, Graphics, and Other Media 59
Page 60

To turn off automatic detection of URLs:
1 Choose Keynote > Preferences and click General.
2 In the Hyperlinks section, deselect “Automatically detect email and web addresses.”
By default, all new text hyperlinks are underlined automatically (you can change this
setting in Preferences). If you turn off this setting, you can add an underline to existing
text if you decide to enable it as a hyperlink later.
To turn automatic underlining of new text hyperlinks on or off:
1 Choose Keynote > Preferences and click General.
2 In the Hyperlinks section, select or deselect “Underline text hyperlinks on creation.”
To underline an existing text hyperlink:
1 Select the text you want to underline.
2 Click Fonts in the toolbar and choose Single from the Underline pop-up menu (or
choose Format > Font > Underline).
To make a hyperlinks-only presentation, choose “Hyperlinks only” from the
Presentation pop-up menu in the Document Inspector. For more information, see
“Hyperlinks-Only Presentations” on page 115.
During a presentation, the pointer appears only on slides with hyperlinks. You can
change this default so that the pointer appears whenever the mouse moves.
To specify when the pointer appears during a presentation:
1 Choose Keynote > Preferences.
2 Click Slideshow.
3 Choose one of the options for showing the pointer.
60 Chapter 3 Working With Text, Graphics, and Other Media
Page 61

Modifying Layouts
Certain slide elements—such as a body text box and object placeholders—are
preformatted and located in specific places on each master slide. You can easily add
these elements to individual slides.
To change a slide’s layout:
1 Select the slide whose layout you want to change.
2 Choose View > Show Inspector and click the Slide Inspector button.
3 Click Appearance.
4 Select the elements you want to add.
The Slide Inspector button
To make new charts,
tables, and images appear
in a specific place on
slides, select Object
Placeholder.
Select items to add them
to a slide.
Note: If you delete one of these items from a slide, the checkbox in the Slide
Inspector is automatically deselected.
If none of the available master slide layouts meet your needs, you can create your
own master slide with whatever elements you want on it, and then create a new slide
based on that master. If you are going to create a number of slides that include a
graphic, you can add a “placeholder” box to contain it. You can also add a slide
number.
To learn how to design your own master slide layouts, see Chapter 9, “Designing Your
Own Master Slides and Themes.”
Chapter 3 Working With Text, Graphics, and Other Media 61
Page 62

Changing the Slide Background
You can use your own image as the background of any individual slide, or change the
slide’s background color. Make these changes in the Slide Inspector.
To change the slide background:
1 Choose View > Show Inspector to open the Inspector window (or click Inspector in
the toolbar) and click the Slide Inspector button.
2 Click Appearance.
Choose a slide layout from
among the master slides.
Choose a background
color or image.
Drag an image here from
the Media Browser or the
Finder.
3 Choose a background type from the Background pop-up menu.
 Color Fill gives the background a single, solid color. Click the color well and choose
a color in the Colors window.
 Gradient Fill colors the background with a color gradient. Click each color well and
choose colors in the Colors window.
 Image Fill lets you use your own image as a background. Click Choose and select
your image.
 Tinted Image Fill lets you use your own image with a semi-opaque color tint over it.
62 Chapter 3 Working With Text, Graphics, and Other Media
Page 63

4 If you chose either of the image fills, choose a scaling option from the pop-up menu
(see “Filling an Object With an Image” on page 68).
To read more about working with image fills, color fills, and gradient fills, see “Using
Color and Image Fills” on page 65.
Retaining or Undoing Your Style Changes
If you make style and formatting changes on a slide and then decide that you want to
return to the theme’s default styles, you can reset the slide to the default styles.
To reset a slide to the default styles for the theme:
m Select the slide and choose Format > Reapply Master to Slide.
You can reset multiple slides at once by selecting them in the slide organizer.
If you make style and formatting changes throughout a Keynote document and then
change the entire document to another theme, you can reset all styles to the theme
defaults or keep the overrides you made. (For example, if you change the background
fill on a few slides, you can keep the same fill in the new theme or use the new
theme’s background fill.)
To retain style overrides when applying a new theme:
1 Choose File > Choose Theme. (Or click Themes in the toolbar and choose Theme
Chooser.)
2 Select a new theme.
3 Select “Retain changes to theme defaults.”
4 Click Choose.
Chapter 3 Working With Text, Graphics, and Other Media 63
Page 64

Page 65

4 Changing Object Properties
Want to take your creativity to the next level?
This chapter describes more advanced features
for enhancing graphics and other objects in your
presentation.
You can directly manipulate object properties such as color, line style and thickness,
shadow, opacity, and orientation using the inspectors and the Colors window, as
described in the following sections.
Using Color and Image Fills
You can create interesting effects with color in Keynote. A shape can be filled with
solid color, color gradients, or even with an image, such as a photo or other graphic.
You can also adjust an object’s opacity (transparency). You can even use fill and
opacity effects to modify individual bars or pie wedges in charts.
Selecting Colors
You use the Colors window to select color for text, shapes, backgrounds, and shadows
in Keynote.
To open the Colors window:
 Choose View > Show Colors (or click Colors in the toolbar).
 Or click a color well in one of the Inspector panes.
4
65
Page 66

The color selected in the
color wheel appears in
this color well.
Use the slider to show
lighter or darker hues in
the color wheel.
Click to select a color in
the color wheel.
Drag colors from the
color well to store them
in the color palette.
Drag the handle to open
the color palette.
You can use the color wheel in the Colors window to select colors. Your color selection
appears in the well at the top of the Colors window. You can save that color for future
use by placing it in the color palette.
To open the color palette:
m Drag the handle at the bottom of the Colors window.
To save a color in the color palette:
m Drag a color from the color well to the color palette.
To apply a color from the Colors window to an object on the slide canvas, you must
place the color in the appropriate color well of an inspector pane.
To remove a color from the color palette:
m Drag a blank square to the color you want to remove.
To apply a color to an object on the slide canvas, do one of the following:
 Select a color well in one of the inspector panes and then click a color in the color
wheel.
 Drag a color from the color palette to a color well in one of the inspector panes.
 Drag a color from the color palette to an object on the slide.
To change the color of an object, you use the Graphic Inspector.
66 Chapter 4 Changing Object Properties
Page 67

The Graphic Inspector
button
Fill a drawn object with a
solid color, a color
gradient, an image, or a
tinted image.
To open the Graphic Inspector:
m Choose View > Show Inspector (or click Inspector in the toolbar), and then click the
Graphic Inspector button.
Filling an Object With Color
Objects can be filled with a solid color or a color gradient, in which two colors
gradually blend with each other.
To set the solid fill color of an object:
1 On the slide canvas, select the object whose color you want to change.
2 In the Graphic Inspector, choose Color Fill from the Fill pop-up menu.
3 Click the color well below the Fill pop-up menu to open the Colors window.
4 Select a color in the Colors window.
To fill an object with a color gradient:
1 On the slide canvas, select the object whose color you want to change.
2 In the Graphic Inspector, choose Gradient Fill from the Fill pop-up menu.
3 Click each color well and choose a color in the Colors window to set the gradient.
4 To invert the gradient, click the double-headed arrow.
5 To change the direction of the gradient, use the Angle wheel and arrows.
Chapter 4 Changing Object Properties 67
Page 68

Click the double-headed
arrow to invert the gradient.
Set the direction of the
gradient with the Angle
wheel, or type in a value.
Click each color well to
make color selections.
Filling an Object With an Image
You can place an image inside of a drawn shape or inside a table cell.
To fill an object with an image:
1 Select the object in which you want to place an image.
2 In the Graphic Inspector, choose Image Fill or Tinted Image Fill from the Fill pop-up
menu, and select an image.
3 To change the image, click Choose, select the image, and click Open (or drag the
image file from the Media Browser or Finder to the image well in the Graphic
Inspector).
Use the pop-up menu to
set a scaling option for the
image within the object.
To change the image,
drag a file from the Media
Browser or the Finder into
the image well.
4 Choose a scaling option from the pop-up menu.
 Scale to Fit resizes the image to fit the object’s dimensions as well as possible. If the
object’s shape is different from that of the original image, parts of the image may
not appear; blank space may also appear around the image.
 Scale to Fill makes the image appear larger or smaller, sizing it to leave no space
around the image, even if the object and image have different shapes.
68 Chapter 4 Changing Object Properties
Page 69

 Stretch sizes the image to fit the object’s dimensions but distorts it if the object has
a shape different from the original image.
 Original Size places the image inside the object without altering its original
dimensions. If the image is larger than the object, you see only a part of the image
in the object. If the image is smaller than the object, there is blank space around it.
 Tile repeats the image inside the object, if the image is smaller than the object. If
the image is larger than the object, you see only part of the image inside the object.
Original Size Scale to Fit
Stretch Tile (small
image)
Scale to Fill
Tile (large
image)
Changing Line Style and Position
For drawn shapes, you can choose a style and color for the object’s border, or you can
specify no border. You set border line style and color using the Graphic Inspector and
the Colors window.
To set the line style and color around an object:
1 Select the object that you want to modify.
2 In the Graphic Inspector, choose a line style (or None) from the Stroke pop-up menu.
Chapter 4 Changing Object Properties 69
Page 70

Choose a solid line,
dotted line, dashed
line, or no line.
Click the color well to
choose a line color.
Enter the line thickness
in this field.
(Note: “px” means pixels.)
Choose line
endpoints from these
pop-up menus.
3 To change the line thickness, type a value in the Stroke size field (or click the arrows).
4 To change the line color, click the color well and select a color.
5 To give a line endpoints, such as arrowheads or circles, choose left and right end
points from the pop-up menus.
Note: Keynote also provides shapes in the form of arrows and double-headed arrows.
You can add one using the Insert menu or the Shapes button in the toolbar.
You can set the precise position of a line using the Metrics Inspector.
To set the precise position of a line:
1 Select the line.
2 In the Metrics Inspector, enter the X and Y coordinates for the line’s start point and
end point.
70 Chapter 4 Changing Object Properties
Page 71

Adding Shadows
Shadows behind objects give your slide an appearance of depth. Using the Graphic
Inspector, you can create a variety of shadow effects, or remove the shadow from an
object.
This object has default
shadow properties.
This object has a
different shadow color.
This object’s shadow
has a high offset value.
This object’s shadow has
the lowest blur factor.
This object’s shadow
has a high blur factor.
This object’s shadow is
set to a different angle.
Select the checkbox to add a
shadow to the selected object.
Change the angle of the
shadow with the Angle wheel.
Offset, Blur, and Opacity
fields can change the look
of the shadow, as shown
above.
Click to change the shadow
color.
To create or remove a shadow for an object:
1 Select the object you want to modify.
2 In the Graphic Inspector, select the Shadow checkbox to add a shadow to the object.
Deselect the Shadow checkbox to make the shadow go away.
Chapter 4 Changing Object Properties 71
Page 72

3 Set the angle for the shadow using the Angle wheel.
4 Adjust the shadow offset by typing a number in the Offset field (or click the arrows to
increase or decrease the number).
A high shadow offset value makes an object’s shadow appear longer and slightly
separated from the object.
5 Set the shadow blur by typing a number in the Blur field (or click the arrows).
A high blur value makes the object’s shadow appear more diffuse; a low value gives
the shadow more sharply defined edges.
6 Set the shadow opacity by typing a number in the Opacity field. (Shadow opacity is
separate from object opacity, which is set using the Opacity slider at the bottom of
the Graphic Inspector.)
7 To change the color for the shadow, click the color well and select a color.
Adjusting Opacity
You can create interesting effects by making objects more opaque or less opaque.
When you put a low-opacity object on top of another object, for example, the bottom
object shows through the top object. Depending on how high or low you set the
opacity, the objects beneath can be highly visible, partly obscured, or completely
blocked from view (at 100-percent opacity). You can change opacity settings for any
visual object on the slide canvas, including drawn shapes, pictures and other image
files, and movies. Set object opacity using the Graphic Inspector.
To change an object’s opacity:
1 Select the object.
2 In the Graphic Inspector, drag the Opacity slider.
Note: For drawn shapes, you can set fill-color opacity separately from object opacity. If
you move the Opacity slider in the Colors window to modify a fill color, the opacity
value becomes equivalent to 100-percent object opacity. Then, when you change the
object opacity in the Graphic Inspector, you are changing it relative to the opacity you
set in the Colors window.
72 Chapter 4 Changing Object Properties
Page 73

This circle is set
to 100% opacity.
This circle is set
to 50% opacity.
This circle is set to 100%
opacity. The fill color is set
to 50% opacity in the
Colors window. The circle’s
outline is set to 100%
opacity in the Colors
window.
Changing an Object’s Orientation
You can flip or rotate any object by using the Metrics Inspector. For instance, if you
have a nice image of an arrow that you want to use in your slideshow, but you need it
to point in different directions, you can reverse its direction vertically or horizontally,
or point it at any angle.
To open the Metrics Inspector:
m Choose View > Show Inspector (or click Inspector in the toolbar), and then click the
Metrics Inspector button.
Chapter 4 Changing Object Properties 73
Page 74

The name of the selected
image or movie appears
here.
Resize objects to exact
dimensions by specifying
height and width.
Click to return a resized
object to its original size.
Place an object precisely
on the canvas by
specifying X and Y
coordinates.
Flip an image sideways or
upside down using these
buttons.
Rotate an object with this wheel.
To flip or rotate an object:
1 Select the object you want to rotate.
2 In the Metrics Inspector, use the Rotate wheel to set the orientation of the object, or
click the horizontal or vertical Flip buttons to flip it horizontally or vertically. You can
also specify the angle by typing a number in the Angle field.
Note: You can add Flip Vertically and Flip Horizontally buttons to the toolbar by
choosing View > Customize Toolbar.
Changing an Object’s Size and Position
In addition to dragging objects and their selection handles, you can use the Metrics
Inspector to make precise adjustments to the size and position of objects on the
canvas.
To set the precise size of an object:
1 Select the object you want to resize.
2 In the Metrics Inspector, type a number in the Width and Height fields (or click the
arrows to increase or decrease the number).
74 Chapter 4 Changing Object Properties
Page 75

To maintain the width/height ratio when you resize an object:
m Select “Constrain proportions,” or hold down the Shift key as you drag a selection
handle.
Select to maintain the
aspect ratio when you
resize the object.
To return an object to its original size:
m Select the object and click Original Size in the Metrics Inspector.
To set the precise position of an object:
1 Select the object you want to position.
2 In the Metrics Inspector, enter X and Y values in the Position fields.
The specified coordinates determine the position of the object’s upper-left corner.
 The X value is measured from the left edge of the slide canvas.
 The Y value is measured from the top edge of the slide canvas.
The X and Y coordinates specify the location of the upper-left corner of the object’s
container box. If an object is rotated, the X and Y coordinates specify the location of
the “new” upper-left corner.
Chapter 4 Changing Object Properties 75
Page 76

Page 77

5 Creating Tables
Tables are useful for visually comparing sets of data
or organizing information. This chapter covers the
basics of designing tables.
Keynote provides powerful features for making attractive, compelling tables that can
contain text or graphics.
Adding a Table
To place a table on a slide:
1 Choose Insert > Table (or click Table in the toolbar).
2 To resize the table, drag a selection handle.
3 To reposition the table, drag it to where you want it.
You can also draw a table on the slide canvas.
To draw a table on the slide canvas:
1 Hold down the Option key and click Table in the toolbar.
2 Release the Option key, and move the pointer over the slide canvas until it becomes a
crosshair.
3 Drag across the slide canvas to create a table any size you want.
As you drag, the number of rows and columns increases or decreases with the size of
the table. To constrain the table’s proportions, press the Shift key as you drag.
5
77
Page 78

Selecting Table Cells and Borders
You enter text in a table cell by typing it. You put graphics in tables by inserting them
in individual cells, the same way you fill an object with an image. (For information
about adding graphics or setting background colors inside table cells, see “Adding
Images or Background Colors” on page 86.)
You can apply changes to an entire table at once (by selecting it) or to individual cells.
To place text or graphics inside table cells or groups of cells, you select only the cells
you want to work with.
To select the entire table, do one of the following:
 Click the table.
 If a table cell is already selected, press Command-Return to select the entire table.
Selection handles appear on the edges of the table, which you can use to resize the
table.
Selecting Table Cells
When a single cell is selected, you can move between cells by pressing the arrow keys
on your keyboard. If you type text in this mode, it replaces text already in the cell. You
can also use the Tab key to navigate through cells. Pressing Tab moves you to the
right and downward; pressing Shift-Tab moves the selection to the left or upwards. If
you press the Tab key when the bottom-right cell of the table is selected, a new row is
added to the table.
To select a single table cell:
1 Select the table.
2 Click in a cell.
The border of the selected cell is highlighted in yellow and an insertion point appears.
You can enter text in the cell by typing.
3 To select the cell itself, Command-click the cell or press Command-Return.
To select a contiguous (rectangular) group of table cells:
1 Double-click a single cell.
2 Drag across the adjacent cells, or press the Shift or Command key as you select
adjacent cells.
78 Chapter 5 Creating Tables
Page 79

To select a discontinuous group of table cells:
m Hold down the Command key as you select cells.
To select an entire row or column:
1 Choose View > Show Inspector (or click the Inspector button in the toolbar) and click
the Table Inspector button.
2 Select a cell in the row or column you want to select.
3 In the Table Inspector, click Row or Column.
The Table Inspector
button
Click Column to select an
entire table column.
Click a button to select
cell borders.
Click Row to select an entire
table row.
Selecting Table Cell Borders
To select an individual border:
 If the table is not selected, double-click the border.
 If the table is selected, click the border.
To select multiple borders:
1 Select the table cells whose borders you want to select.
2 Choose View > Show Inspector (or click the Inspector button in the toolbar) and click
the Table Inspector button.
3 Click one of the Borders buttons to select all borders, or only the inside, outside,
horizontal, or vertical borders of the selected cells.
You can also select a border and press the Shift key as you select multiple borders.
Chapter 5 Creating Tables 79
Page 80

To select one segment of a cell border:
1 Select the table.
2 Option-click to select a single border segment.
3 To select additional border segments, press the Option and Shift keys as you click.
Note: If the table isn’t selected, Option–double-click selects a single border segment.
Entering and Editing Text in Table Cells
To type text in a table cell:
 If the cell is empty, click it and begin typing.
 To replace text already in a cell, double-click the text and type.
To place an insertion point within existing text in a table cell:
m Select the table and click to place the insertion point.
To switch the contents of two cells:
m Select a single cell and drag it to another cell.
To replace the contents of one cell with the content of another:
m Select the cell whose contents you want to copy, then press the Option key as you
drag it to another cell.
To delete the contents (including background fill) of table cells:
m Select the cells and press the Delete key.
To exit text-edit mode in a cell:
m Press Command-Return to select the cell, or Command-click the cell.
Formatting Tables
You can design tables in a variety of creative ways simply by changing the thickness
and color of cell borders, selectively removing cell borders, or merging and splitting
cells to create useful asymmetries within the table. Most table formatting is done in
the Table Inspector. You can also choose Format > Table to do such tasks as evenly
distributing rows or columns.
You can accomplish many of the tasks described in this section using shortcut menus.
80 Chapter 5 Creating Tables
Page 81

To open a table’s shortcut menu:
m Select the table, then hold down the Control key as you click the table again.
Adding Rows and Columns to a Table
To specify where you want to add a new row or column in your table, use the Format
menu commands.
To add a new row to a table:
m Select a table cell or row, and then choose Format > Table > Add Row Above or Add
Row Below.
To add a new column to a table:
m Select a table cell or column, and then choose Format > Table > Add Column Before
or Add Column After.
To change the number of rows or columns in a table:
1 In the Table Inspector, type the number of rows you want in the Rows field (or click
the arrows to increase or decrease the number).
Rows are added to the bottom of the table.
Note: You can also add a row by selecting the last table cell and pressing Tab.
2 Type the number of columns you want in the Columns field.
Columns are added to the right side of the table.
Chapter 5 Creating Tables 81
Page 82

Type the number of table
rows and columns.
Combine adjacent cells or
split rows and columns.
Select to add a specially
formatted row or column
on the top or the left side
of the table.
Select to resize rows to fit text.
Note: If “Automatically resize to fit content” is not selected, Keynote tries to keep the
outside dimensions of the table the same when you add rows and columns.
Deleting Table Rows or Columns
You can delete the contents from an entire table row or column, leaving the cells
empty, or you can delete rows or columns from a table.
To delete a row or column from a table:
1 Select the row or column.
2 Choose Format > Table > Delete Row (or Delete Column).
To delete the contents (including background fill) of a row or column:
m Select the row or column and press Delete.
Adding Table Header Rows and Columns
Header rows and columns contain special formatting to set them off from the rest of
the table text (header text might be boldface and bigger, for example). Header rows
and columns have a different look than the rest of the table cells, but their style can
be changed like that of any other cells. However, you cannot split a header row into
multiple rows, or header columns into multiple columns.
82 Chapter 5 Creating Tables
Page 83

To add a header row or column:
1 Select the table.
2 Choose Format > Table > Add Header Row or Add Header Column, or in the Table
Inspector, select the checkboxes labeled Header Row or Header Column.
Merging, Splitting, and Resizing Table Cells
Merging table cells combines adjacent cells into one, eliminating the border so that
they behave as a single cell. For cells that are horizontally contiguous, merging them
joins the text from both of the original cells, separated by tabs. For cells that are
vertically continguous, merging them joins the text from both cells, separated by a
carriage return. In both cases, the cell background takes on the image or color that
was in the top-most or left-most cell.
Splitting cells divides each selected cell into two equal parts, horizontally (rows) or
vertically (columns). Both of the new cells have identical background colors or images.
Any text that was in the original cell remains in the top-most or left-most cell.
You can merge and split cells using menu commands, shortcut menu commands, or
the Table Inspector. To resize table cells, use the Table Inspector.
To merge table cells:
1 Select a group of two or more adjacent table cells.
The group of cells you choose must form a rectangle.
2 Choose Format > Table > Merge Cells.
You can also merge cells by clicking Merge Cells in the Table Inspector.
To split cells horizontally or vertically:
1 Select a table cell or cells. To split an entire row or column, select all the cells in the
row or column.
2 Choose Format > Table > Split Into Rows (or Split Into Columns).
You can also click Split Rows or Split Columns in the Table Inspector.
You can repeat the split operation to create smaller and smaller units within a table
cell. To rejoin split cells, select them and choose Format > Table > Merge Cells (or click
Merge Cells in the Table Inspector).
Chapter 5 Creating Tables 83
Page 84

To resize table cells:
m Select the cells and enter values in the Column Width and Column Height fields of the
Table Inspector, and then press Return.
m Select cell borders and drag to resize.
To make all table cells the same size:
m Select the table and choose Format > Table > Distribute Rows Evenly and Distribute
Columns Evenly.
If there is too much text in a table cell, a clipping indicator appears at the bottom of
the cell.
The clipping indicator
appears when a table cell
contains more text than
can be seen.
To avoid clipping, you can drag the cell borders to resize them, or select the table and
drag a selection handle to resize the entire table. You can also make table rows
automatically shrink or expand in height to accommodate the text inside them.
To make table rows automatically grow or shrink to fit their contents:
1 Select the table.
2 In the Table Inspector, select the checkbox labeled “Automatically resize to fit content.”
Note: With this option selected, table rows automatically get bigger when text
extends beyond a cell boundary, and adding rows or columns increases the outside
dimensions of the table. As text is removed from a cell, the row height may decrease
(if the cell determines the row height). If “Automatically resize to fit content” is not
selected, Keynote tries to keep the outside dimensions of the table the same when
you add rows and columns.
Aligning Text in a Table Cell
You can align text horizontally and vertically in a table cell. To align text, use the Text
pane of the Text Inspector.
84 Chapter 5 Creating Tables
Page 85

To align text horizontally within a table cell:
m Select the cell and click one of the horizontal alignment buttons in the Text pane of
the Text Inspector.
Center text.
Justify text
(align text right and left).
Align text right.
Align text left.
To align text vertically within a table cell:
m Select the cell and click one of the vertical alignment buttons in the Text pane of the
Text Inspector.
Begin text in the center
of the cell.
Grow text from the
bottom of the cell.
Place text at the top of the cell.
You can specify the amount of space between text and its cell border using the Inset
Margin slider or field. The amount you specify is applied equally around the text on all
four sides.
To adjust the space around text within a table cell:
1 Click in the cell (or select the table to apply the same setting to all cells).
2 In the Text pane of the Text Inspector, drag the Inset Margin slider to the right to
increase the space, or enter a value in the field and press Return.
Formatting Cell Borders
You format cell borders the same way you format other graphics. You can change the
line thickness and color of cell borders, or you can hide the cell border of any cell.
Chapter 5 Creating Tables 85
Page 86

To set line thickness and color:
1 Select a cell border or set of cell borders.
2 Choose View > Show Inspector (or click Inspector in the toolbar), and click the Graphic
Inspector button.
3 Type a value in the Stroke field (or click the arrows).
4 Click the Stroke color well and select a color in the Colors window.
Click to choose a color
for selected cell borders.
Enter a line thickness for
selected cell borders (“px”
means “pixels”).
To hide selected cell
borders, choose None.
To hide a cell border:
1 Select a cell border or set of cell borders.
2 In the Graphic Inspector, choose None from the Stroke pop-up menu.
To create a table with no outside borders:
1 Select the table.
2 In the Table Inspector, click the second Borders button to select the outside borders.
3 In the Graphic Inspector, choose None from the Stroke pop-up menu.
Adding Images or Background Colors
You add images or color to a table cell using the Fill pop-up menu in the Graphic
Inspector. You can add images or color to individual table cells, or to the entire table.
To add an image to a table cell:
1 Select a table cell, a group of cells, or the whole table.
2 In the Graphic Inspector, choose Image Fill or Tinted Image Fill from the Fill pop-up
menu. (If there’s already an image in the cell, click Choose.)
86 Chapter 5 Creating Tables
Page 87

Choose an image fill, color
fill, or gradient fill for any
cell or the whole table.
Set the scaling option of
the image within the cell.
Drag an image to the well,
or click Choose.
3 Select an image and click Open.
4 Use the Scale pop-up menu to fill the cell the way you want.
For more details about working with image fills, see “Filling an Object With an Image”
on page 68. For more details about working with color and gradient fills, see “Using
Color and Image Fills” on page 65.
Note: If you add an image to the entire table, then when you select an individual
table cell, the Fill pop-up menu in the Graphic Inspector displays None.
To add a background color or gradient fill:
1 Select a table cell, a group of cells, or the whole table.
2 In the Graphic Inspector, choose Color Fill or Gradient Fill from the Fill pop-up menu.
3 Click a color well and select a color in the Colors window.
For more details about working with color and gradient fills, see “Using Color and
Image Fills” on page 65.
Note: If you add color to the entire table, then when you select an individual table
cell, the Fill pop-up menu in the Graphic Inspector displays None.
Chapter 5 Creating Tables 87
Page 88

Page 89

6 Creating Charts
You can turn spreadsheet data into attractive
charts. This chapter outlines the basics of creating
charts in Keynote.
Keynote provides tools for creating your own visually appealing charts to present
numerical data. You can copy and paste data from a spreadsheet or type it directly
into Keynote’s Chart Data Editor to create and edit your charts right on the slide
canvas.
About Charts
Charts show the relationship of two types of data with respect to each other. For
example, if you chart business growth over time, you are showing the relationship
between the size of the business versus the passage of years. If you chart voting
results among different demographic groups, you are showing the relationship
between the number of people who voted a certain way versus their demographic
affiliation. When you enter data for a chart, the two different types of data are
represented as data series and data sets.
In a business chart, an example of a data series could be one region’s profits over four
successive quarters; the data sets could be all of the regions’ profits for only one of
those years. In the illustration below, the data series (each region’s profits) are in rows,
and the data sets (each year’s profits) are in columns. Each individual value (for
example, 17 for Region 1, 2004) is a data point.
6
89
Page 90

These squares indicate which
color represents each data
series.
The colored squares next to the row labels (Region 1 and Region 2) show which color
represents each data series in the chart.
The illustration below shows how this data looks as a column chart.
The chart legend denotes
the two data series.
These four bars represent
one data series.
The data sets contain one
data point (one bar) from
each of the data series.
In this chart, the data series are represented by rows in the Chart Data Editor. The
data points are represented as a series of dark-colored bars and a series of lightcolored bars.
Transposing Data Series and Data Sets
You can easily switch the data series and data sets in your charts—without having to
retype the data—by using the Plot Row vs. Column button in the Chart Data Editor.
90 Chapter 6 Creating Charts
Page 91

This button makes the
columns of data in the Chart
Data Editor the data series.
This button makes the rows of
data in the Chart Data Editor
the data series.
The illustration below shows the same data, but with the data sets and data series
transposed.
These two bars represent
one data series.
The data sets contain one data
point (one bar) from each of
the four data series.
For this chart, the data series are represented by columns in the Chart Data Editor
pictured on page 89. There are now four data series represented as four differentcolored bars.
Data series are represented differently in the different kinds of charts provided by
Keynote.
 In column charts and bar charts, a data series is represented by a series of bars in
the same color.
 In a line chart (also called a graph), a data series is represented by a single line.
 In an area chart, a data series is represented by an area shape.
Chapter 6 Creating Charts 91
Page 92

 In a pie chart, only a single data set—the first data point in each series—is
represented on the chart (whichever is listed first in the Chart Data Editor).
Choose from eight
different chart types in
the Chart Inspector.
Adding a Chart
To place a chart on the slide canvas:
1 Choose Insert > Chart (or click Chart in the toolbar).
A chart containing placeholder data appears on the slide, and the Chart Inspector and
Chart Data Editor open.
2 To resize the chart, drag a selection handle.
3 To reposition the chart, drag it (avoid placing the pointer on a selection handle).
4 To change the chart type, choose an option from the pop-up menu in the Chart
Inspector.
You can also draw a chart on a slide.
To draw a chart on the slide canvas:
1 Hold down the Option key and click Chart in the toolbar.
2 Release the Option key, and move the pointer over the slide canvas until it becomes a
crosshair.
3 Drag across the slide canvas to create a chart any size you want.
To constrain the chart’s proportions, hold down the Shift key as you drag.
92 Chapter 6 Creating Charts
Page 93

Editing Chart Data
To edit chart data, open the Chart Data Editor and enter your data by typing it or
copying and pasting from Excel, AppleWorks, or other spreadsheet applications.
To open the Chart Data Editor:
1 Select a chart on a slide.
2 Choose Format > Chart > Show Data Editor (or click Edit Data in the Chart Inspector).
Click these buttons to add
another row or column for
data.
Type chart data directly
into these spreadsheet
cells.
Drag labels to reorder them.
To copy data from another spreadsheet into the Chart Data Editor:
1 Open the spreadsheet and select cells you want to copy.
2 Choose Edit > Copy (or press Command-C).
3 Select the top cell in the first column of the Chart Data Editor.
4 Choose Edit > Paste (or press Command-V).
To edit the names of rows and columns, or the data in a cell:
m Double-click a cell or a row or column label and type.
To reorder rows or columns in the Chart Data Editor:
m Drag a row or column label to a new position.
To add rows or columns in the Chart Data Editor, do one of the following:
 Click Add Row or Add Column to place a row above the selected row or a column to
the left of the selected column. If no row or column is selected, the new row or
column appears at the bottom or right edge of the table. (To see the new row or
column, you may have to press the Return or Tab key or expand the Chart Data
Editor window.)
Chapter 6 Creating Charts 93
Page 94

 Select any blank cell, type your data, and press Return. A new row or column is
automatically created.
To delete rows or columns:
m Select the row or column header label and press Delete.
Formatting Charts
You can resize and reposition charts and chart legends just like any other object. You
can format chart elements—fonts, colors, axis labels, and tick marks—to suit your
preferences. You can also hide the chart legend. Most chart formatting tasks are done
using the Chart Inspector.
To open the Chart Inspector:
1 Choose View > Show Inspector (or click Inspector in the toolbar).
2 In the Inspector window, click the Chart Inspector button.
You can also accomplish many of the tasks described in this section using shortcut
menus.
To open the shortcut menu for a chart:
m Hold down the Control key and click a chart.
To hide the chart legend:
1 Select the chart.
2 In the Chart Inspector, deselect the Show Legend checkbox.
You can also select the legend and press Delete; you can always display the legend
again by selecting Show Legend in the Chart Inspector.
94 Chapter 6 Creating Charts
Page 95

Setting Chart Colors
You can format the bars, wedges, and area shapes that appear on each type of chart
just as you format any other drawn object. You can give them color fills, gradient fills,
image fills, shadows, opacity, or different line styles. You set these attributes in the
Graphic Inspector.
To change the color or image in a bar, wedge, or area shape:
1 Select the item (bar, wedge, or area shape).
If you select one bar in a bar chart, all the bars in that data series are selected.
2 Change chart properties as you would for any drawn object using the Graphic
Inspector.
For more information about changing object properties, see Chapter 4, “Changing
Object Properties.”
Changing Chart Fonts
You can change the fonts and text colors used for axis labels, data point labels, and
legends.
To change chart fonts:
1 Select the text you want to change.
To change the font on all chart elements, click the chart to select it. If you select the
text for one data point or axis label, all the text of that kind is also selected. You
change the font for a chart legend separately.
2 Choose Format > Fonts > Show Fonts (or click Fonts in the toolbar) to open the Font
panel.
3 Select a font.
For information about changing text colors, see “Formatting Bulleted Text and
Numbered Lists” on page 38.
Chapter 6 Creating Charts 95
Page 96

Adding Labels and Axis Markings
Use the Axis pane in the Chart Inspector to format the grid and general look of the
axes for bar charts, line charts, and area charts. You can set the range of values to be
displayed along the value axis, the axis on which you read the data point values. For
column charts (vertical bars), line charts, and area charts, the Y-axis is the value axis.
For horizontal bar charts, the X-axis is the value axis. (Pie charts don’t have a value
axis. To read about formatting pie charts, see “Pie Charts” on page 99.)
Show or hide chart borders
and axes.
Set styles for labels and
tick marks along the chart
grid.
Set the range of values
and the number of axis
markings on the chart grid.
Select units for values in
the chart.
To show or hide axes and chart borders:
1 Select the chart.
2 In the Chart Inspector, click the Axis button if it is not already selected.
3 Choose one or more items in the Axes & Borders pop-up menu to select it.
A selected item has a checkmark next to it; choose the item again to deselect it.
To set the range of numerical values displayed on the chart grid:
1 Select the chart.
2 In the Chart Inspector, click the Axis button if it is not already selected.
3 To set the value at the chart origin, type a number in the Minimum field (under Value
Axis Format).
The Minimum value cannot be higher than the minimum value of your entire data set.
4 To set the highest number displayed on the value axis, type a number in the
Maximum field.
96 Chapter 6 Creating Charts
Page 97

The Maximum value cannot be lower than the maximum value of your entire data set.
5 To specify the number of axis markings between the minimum and maximum values,
type a number in the Steps field.
To display the minimum data value on the value axis:
1 Select the chart.
2 In the Chart Inspector, click the Axis button if it’s not already selected.
3 Select Show Value Labels and Show Minimum Value from the value axis pop-up menu
(the X- or Y-axis pop-up menu, depending on the chart).
An item is selected when it has a checkmark next to it.
To specify units for axis values:
1 Select the chart.
2 In the Chart Inspector, click the Axis button if it is not already selected.
3 Under Number Format, type text in the Prefix or Suffix field (or choose a symbol from
the pop-up menus).
Placing Grid Labels and Tick Marks
The X-Axis and Y-Axis pop-up menus in the Axis pane of the Chart Inspector provide
an array of options for placing tick marks, labels, and gridlines along the value axis or
the series axis. The options in these pop-up menus (pictured below) vary depending
on the kind of chart you select.
For vertical bar charts (column charts), line charts, and area charts, the Y-axis is the
value axis and the X-axis is the series axis; for horizontal bar charts, the X-axis is the
value axis. Pop-up menus are pictured below as they appear when a column chart is
selected.
To place grid labels and tick marks along an axis:
1 Select the chart.
2 In the Chart Inspector, click the Axis button if it is not already selected.
3 To add grid labels and tick marks along the series axis, choose an option from the X-
Axis pop-up menu. (For horizontal bar charts, choose from among these same options
in the Y-Axis pop-up menu.)
Chapter 6 Creating Charts 97
Page 98

Show or hide series axis labels.
Set the text direction for
the series axis labels.
Place tick marks along
the X-axis.
Show or hide the X-axis
gridlines.
4 To add grid labels and tick marks to the value axis, choose from the Y-Axis pop-up
menu. (For horizontal bar charts, choose from among these same options in the XAxis pop-up menu.)
Show or hide value axis
labels.
Place tick marks along
the Y-axis.
Show or hide the Y-axis
gridlines.
Formatting the Elements in a Data Series
You can display the numerical value for each data point in a series.
To add data point labels:
1 Select the chart or an element in a data series.
For all chart types except pie charts, selecting one element (bar) of a series
automatically selects the full series. For pie charts, you can select individual pie
wedges.
2 In the Chart Inspector, click the Series button.
3 Choose Show Value from the Data Point Settings pop-up menu.
4 To specify the number of decimal places you want to display, type a number in the
Decimals field (or click the arrows to increase or decrease the number).
98 Chapter 6 Creating Charts
Page 99

5 To change the position of data point values, choose an option from the Data Point
Settings pop-up menu.
6 Use the Font panel (Format > Font > Show Fonts) to choose a font, font size, and style
for the data-point labels.
For pie charts, you can show data point labels as a percentage of the whole or as
absolute values by selecting or deselecting “Show Pie Values as Percentages” in the
Data Point Settings pop-up menu. You can also show the series names.
Some chart types offer further options for formatting series elements. See the
following sections for information about special formatting options for pie charts, bar
charts, line charts, and area charts.
Pie Charts
For pie charts, Keynote charts only the first data set in the Chart Data Editor (the first
data point for each data series). If the data series are in rows in the Chart Data Editor,
only the first column is charted; if the data series are in columns in the Chart Data
Editor, only the first row is charted. Thus, one pie chart represents a single data set,
and each wedge is one element in that set. Other data sets in the Chart Data Editor
are maintained, but they are not displayed in the pie chart. You can chart any data set
by moving it to the first position in its row or column.
To select individual pie wedges:
1 Select the chart, then click to select a single wedge.
2 To select additional wedges, do one of the following:
 To select all the wedges, choose Edit > Select All (or press Command-A).
 To select noncontiguous wedges, hold down the Command key as you select each
wedge.
Chapter 6 Creating Charts 99
Page 100

 To select a continuous range of wedges, select the first wedge, then hold down the
Shift key as you select the last wedge.
On pie charts, in addition to showing values for wedges, you can display the series
name.
To show a series name in a pie chart:
1 Select the chart or individual pie wedges.
2 In the Chart Inspector, click the Series button.
3 Select Show Series Name from the Data Point Settings pop-up menu (an item is
selected when it has a checkmark next to it).
4 Choose Inside or Outside from the Data Point Settings pop-up menu.
For pie charts, place the data
point values and series name
inside or outside the selected pie
wedge. Display values as
percentages or numbers.
You can separate any (or all) of the pie wedges.
To separate individual pie wedges:
1 Select individual pie wedges. (To select more than one pie wedge, hold down the
Command key as you click each wedge.)
2 In the Chart Inspector, click the Series button.
3 Drag the pie wedges or the Explode slider until the pie wedges are separated as far as
you want.
You can also type a number in the Explode field, or use the arrows to increase or
decrease the number.
Add shadows to individual
wedges or the whole pie.
100 Chapter 6 Creating Charts
Separate individual pie
wedges.
 Loading...