

Page 1
Aperture
User Manual
Page 2

K
Apple Computer, Inc.
© 2006 Apple Computer, Inc. All rights reserved.
The owner or authorized user of a valid copy of Aperture
software may reproduce this publication for the purpose
of learning to use such software. No part of this
publication may be reproduced or transmitted for
commercial purposes, such as selling copies of this
publication or for providing paid for support services.
Every effort has been made to ensure that the
information in this manual is accurate. Apple is not
responsible for printing or clerical errors. Because Apple
frequently releases new versions and updates to its
system software, applications, and Internet sites, images
shown in this book may be slightly different from what
you see on your screen.
The Apple logo is a trademark of Apple Computer, Inc.,
registered in the U.S. and other countries. Use of the
“keyboard” Apple logo (Option-Shift-K) for commercial
purposes without the prior written consent of Apple
may constitute trademark infringement and unfair
competition in violation of federal and state laws.
Apple, the Apple logo, Apple Cinema Display, ColorSync,
FireWire, iPhoto, iTunes, Mac, Macintosh, Mac OS, and
QuickTime are trademarks of Apple Computer, Inc.,
registered in the U.S. and other countries.
Aperture, Finder, and MacBook are trademarks of Apple
Computer, Inc.
.Mac is a service mark of Apple Computer, Inc.
Adobe, Adobe RGB, Photoshop, and PostScript are
trademarks or registered trademarks of Adobe Systems
Incorporated in the U.S. and/or other countries.
Other company and product names mentioned herein
are trademarks of their respective companies. Mention
of third-party products is for informational purposes
only and constitutes neither an endorsement nor a
recommendation. Apple assumes no responsibility with
regard to the performance or use of these products.
Page 3

1
Contents
Preface 11 Introducing Aperture
12
What’s Next?
Part I Interface and Acquisition
Chapter 1 15 An Overview of Aperture
16
A First Look at Aperture
17
Creating Projects and Importing Your Photos
20
Photo Editing with Aperture
31
Image Processing
32
Distribution
37
Backing Up Your Work
Chapter 2 39 The Aperture Interface
40
The Aperture Main Window
41
Projects Panel
42
Viewer and Browser
43
Control Bar
45
Toolbar
49
Adjustments Inspector
50
Metadata Inspector
52
Import Panel
53
Vaults Panel
54
Book Layout Editor
57
Webpage Editor
60
Light Table
61
Heads-Up Displays
64
Workspace Layouts
65
Customizing the Toolbar
67
Setting Aperture Preferences
3
Page 4

Chapter 3 71 Working with Aperture Projects
72
Basic Components of Aperture
78
Working with Projects
79
Creating and Naming Projects
80
Opening and Closing Projects
82
Creating and Showing Favorite Projects
82
Deleting Images from Projects and Albums
83
Deleting Items from the Projects Panel
83
Working with Library Files
85
Quickly Accessing Commands
Chapter 4 87 Importing Images
88
An Overview of Importing Images
89
File Formats You Can Import into the Library
90
Planning Your Import Strategy
91
Importing from Your Digital Camera or Card Reader
97
Importing Image Files Stored on Your Computer
10 5
Automatically Naming Your Imported Images
10 8
Adding Metadata to Images During Import
10 9
Creating Stacks Automatically During Import
11 0
Adjusting the Image File’s Time When Importing
11 0
Dragging Files from the Finder to the Projects Panel
111
Importing Folders of Images from the Finder
112
Importing Your iPhoto Library
11 4
Transferring Projects from Another System
11 4
Making an Immediate Backup
11 5
Where Aperture Stores Your Managed Files in the Library
Part II Photo Editing
Chapter 5 119 Working with Images in the Browser
12 0
An Overview of the Browser
12 2
Navigating Through and Selecting Images
12 4
Working with a Selection of Images
12 5
Working with Images in Grid View
12 6
Working with Images in List View
12 7
Searching for Images in the Browser
12 8
Rearranging Images in the Browser
12 9
Sorting Images in Grid View
13 0
Rotating Images
13 0
Creating Versions of an Image
13 2
Deleting Images from the Browser
4
Contents
Page 5

13 4
Dragging Images into Different Projects and Albums
13 5
Working with Referenced Images
141
Working with Two Projects Open
14 2
Displaying Specific Metadata with Your Images
Chapter 6 145 Displaying Images in the Viewer
14 6
An Overview of the Viewer
14 8
Showing or Hiding the Viewer
14 8
Changing the Viewer Background
14 9
Changing the Number of Images in the Viewer
15 0
Comparing Images
151
Viewing Stacks
151
Viewing Images with the Loupe
15 2
Using the Color Meter
15 4
Showing Hot Areas in Your Images
15 5
Viewing Images at Full Resolution
15 6
Viewing Master Images
15 6
Setting Up the Viewer for Onscreen Proofing
157
Viewing Images on Multiple Displays
15 8
Displaying Metadata Associated with Images
160
Selecting Image Preview Options
162
Quickly Accessing Commands
Chapter 7 163 Viewing Images in Full Screen Mode
164
An Overview of Full Screen Mode
165
Entering and Exiting Full Screen Mode
165
Working with the Filmstrip in Full Screen Mode
169
Working with the Toolbar in Full Screen Mode
171
Using HUDs in Full Screen Mode
17 3
Changing the Display of Metadata in Full Screen Mode
174
Using Keyboard Shortcuts in Full Screen Mode
174
Quickly Accessing Commands
Chapter 8 175 Stacking Images and Making Picks
17 5
An Overview of Stacking Images
17 7
Creating Stacks
18 0
Working with Stacks
18 6
Keyboard Shortcuts for Working with Stacks
Contents
5
Page 6

Chapter 9 187 Rating Images
18 8
An Overview of the Aperture Rating System
19 0
Rating Images
19 2
Sorting Images by Rating
19 4
Including Image Rating in Your Workflow
19 5
Comparing and Rating Images
19 7
Keyboard Shortcuts for Displaying Images with Specific Ratings
Chapter 10 199 Applying Keywords to Images
200
An Overview of Keywords
202
Viewing Keywords Applied to Images
206
Applying Keywords Using the Keywords HUD
213
Applying Keywords Using Keyword Controls and Keyword Presets
218
Applying Keywords Using the Lift & Stamp HUD
222
Applying Keywords Using the Metadata Inspector
223
Applying Keywords to Images in the Light Table
223
Removing Keywords from an Image
224
Importing and Exporting Keyword Lists
Chapter 11 225 Working with Metadata
226
An Overview of Metadata, Metadata Views,
and Metadata Presets
228 Displaying Metadata with Your Images
231 Turning the Display of Metadata On or Off
232 Viewing and Changing Metadata in the Metadata Inspector
235 Working with Metadata Views
238 Working with Metadata Presets
241 Batch Changing Metadata
242 More Information About IPTC Metadata
243 Understanding Badge Overlays
Chapter 12 247 Searching for and Displaying Images
248 An Overview of Searching
252 Controls in the Query HUD
253 Searching Across the Entire Library
253 Searching by Image Name, Caption, or Other Text
255 Searching by Keyword
Searching by Date
256
258 Searching by Rating
259 Searching by IPTC Information
260 Searching by EXIF Information
261 Searching by Import Session
262 Searching by File Status
6
Contents
Page 7

263 Searching by Other Metadata
264 Searching by a Combination of Criteria
265 Saving Your Search Results
Chapter 13 267 Grouping Images with Smart Albums
268 An Overview of Smart Albums
270 Collecting Images in a New Smart Album
271 Searching Within a Smart Album
272 Revising the Contents of a Smart Album
272 Transferring Smart Album Images to Another Project or Album
273 Deleting a Smart Album
Part III Distribution and Backup
Chapter 14 277 Printing Your Images
277 An Overview of Printing
279 Controls in the Print Dialog
281 Printing a Single Image
282 Printing a Series of Images
282 Printing a Contact Sheet or Series of Contact Sheets
283 Printing a Book
284 Printing a Light Table Arrangement
284 Creating and Modifying Print Presets
286 Proofing Your Images Onscreen
287 Turning Off Color Management in Your Printer
Chapter 15 291 Exporting Your Images
292 An Overview of Exporting Images
293 Exporting Copies of Digital Master Files
296 Exporting Image Versions
306 Working with Export Presets
Chapter 16 311 Creating Slideshow Presentations
312 An Overview of Slideshows
314 Creating a Slideshow
315 Controlling a Slideshow
315 Arranging the Order of a Slideshow’s Images
315 Controls in the Slideshow Presets Dialog
317 Creating Slideshow Presets
318 Modifying Slideshow Presets
319 Creating a Growing Grid of Images
320 Playing Your Slideshow on Your Main Display Only
321 Displaying Your Images to Music
Contents 7
Page 8

Chapter 17 323 Using the Light Table
324 An Overview of the Light Table
325 Creating a Light Table Album
326 Placing and Viewing Images in the Light Table
327 Moving and Resizing Images in the Light Table
328 Aligning and Arranging Images in the Light Table
330 Adjusting the Light Table View
331 Setting View Options for the Light Table
331 Transferring Images from the Light Table
332 Printing a Light Table Arrangement
332 Deleting a Light Table Album
Chapter 18 333 Creating Webpages
334 An Overview of Creating Webpages
336 Creating Web Galleries
339 Creating Web Journals
341 Viewing and Navigating Through Webpages
342 Choosing and Modifying Themes
345 Working with Web Gallery Pages
346 Working with Web Journal Pages
348 Exporting Webpages
351 Working with Web Export Presets
Chapter 19 357 Creating Books
358 An Overview of Creating Books
363 Planning Your Book
365 Creating a Book Album
366 Controls in the Book Layout Editor
369 Choosing a Theme
370 Viewing Pages
372 Placing Images in a Book
374 Adding and Removing Pages
379 Working with Pages
383 Working with Images
388 Working with Text
393 Working with Master Pages
396 Copying a Book Album
397 Printing Books
8 Contents
Page 9

Chapter 20 399 Backing Up Your Images
400 An Overview of the Backup Workflow
401 Planning Your Backup System
402 Working with the Vaults Panel
404 Creating Vaults
405 Updating Vaults
406 Disconnecting a Vault’s Hard Drive from Your System Temporarily
406 Reconnecting a Vault’s Hard Drive to your System
407 Deleting a Vault Permanently
407 Backing Up Images from a Portable in the Field
409 Restoring Your Aperture System
Part IV Appendixes and Glossary
Appendix A 413 Setting Up an Aperture System
414 Setting Up a Basic System
415 Optional Equipment to Consider
417 Setting Up Your System with Two Displays
419 Configuring Mac OS X for Multiple Displays
Appendix B 423 Calibrating Your Aperture System
423 An Overview of Color Management
427 Calibrating Your Camera
428 Calibrating and Profiling Your Display
430 Calibrating and Profiling Your Printer
Appendix C 431 Credits
Glossary 433
Index 453
Contents 9
Page 10

Page 11

Introducing Aperture
Aperture is a powerful and easy-to-use digital image
management system that can track thousands of digital
images and provides the professional photographer with
high-quality image management and adjustment tools.
Designed for the needs of professional photographers, Aperture is an all-in-one
post-production tool that provides:
 An advanced RAW workflow: From capture to output, you can work with your images
captured as RAW files, without having to first convert them to another format before
viewing, adjusting, organizing, or printing them. Aperture supports RAW formats
from leading digital camera manufacturers (including Canon and Nikon).
 Flexible image management: A new, open Library structure lets you store photos
anywhere you want. You can have Aperture either store image files in the Library or
simply link to image files in their current locations. You can also have Aperture link to
your iPhoto Library without copying the images into the Aperture Library. Aperture
can work with photos stored on any number of hard disk drives and other storage
media. You can catalog and search for images that are stored on multiple hard disks,
including offline volumes, CDs, and DVDs.
 Professional project management: Aperture allows you to manage thousands of
projects and provides flexible organizational tools, comprehensive metadata support,
and powerful search tools that let you find files instantly.
 Nondestructive image processing: Designed to protect your images from the moment
they’re imported, Aperture identifies your original images as digital “master files,” and
it has built-in safeguards to help ensure that you don’t accidentally overwrite or
modify them.
 Versatile printing and publishing: Working directly with your RAW images, you can
create color-accurate prints, custom contact sheets, stunning websites, and unique
bound books with tools that are intuitive and powerful.
Preface
11
Page 12

With Aperture you can efficiently import digital images, perform a photo edit, adjust
and retouch images, publish images for the web or print, and back up your entire
image library for safekeeping. Aperture lets you work with high-quality JPEG, TIFF, and
RAW image files directly from your camera or card reader and maintain that high
quality throughout your workflow.
What’s Next?
This manual is only one of several types of documentation you can use as you work
with Aperture.
 For instructions for installing Aperture software, see Installing Your Software.
 For an introduction to the basic concepts, procedures, and digital photography
workflow for using Aperture, see Aperture Getting Started.
 For an overview of Aperture, an introduction to the Aperture interface, and
detailed instructions for using the many features and tools in Aperture, continue
reading this manual.
 For information about making image corrections and adjustments in Aperture, see
Performing Image Adjustments in the Aperture Help menu.
 For a list of the keyboard shortcuts you can use to perform tasks in Aperture, see
Aperture Quick Reference.
 For an introduction to the fundamentals of digital photography, see
Digital Photography Fundamentals in the Aperture Help menu.
 For information about ordering printed books of your images, see
Ordering Books and Prints in the Aperture Help menu.
 For the most recent technical and release information about Aperture, see
Late-Breaking News in the Aperture Help menu.
 For information about new features in Aperture, see New Features in the Aperture
Help menu.
 For the latest articles about technical issues and solutions, go to the Aperture
Support website, available from the Aperture Help menu.
12 Preface Introducing Aperture
Page 13

Part I: Interface and Acquisition
This section provides introductory information about the
application and its interface. It also explains how to set up
your image management system and import images into it.
Chapter 1 An Overview of Aperture
Chapter 2 The Aperture Interface
Chapter 3 Working with Aperture Projects
Chapter 4 Importing Images
I
Page 14

Page 15

1 An Overview of Aperture
1
Aperture is designed to be the center of your digital
photography workflow, from capturing new images to the
final delivery of professional-quality photographs.
This chapter provides an overview of how Aperture works and what you can do with it. If
you’re new to Aperture, this chapter is for you. If you’re familiar with the Aperture features
and interface, feel free to skip this chapter. The chapter doesn’t provide all the detailed
information and instructions needed to perform work on your images. Once you’re
familiar with Aperture, you’ll find in-depth explanations and instructions in later chapters.
This chapter covers:
 A First Look at Aperture (p. 16)
 Creating Projects and Importing Your Photos (p. 17)
 Photo Editing with Aperture (p. 20)
 Image Processing (p. 31)
 Distribution (p. 32)
15
Page 16
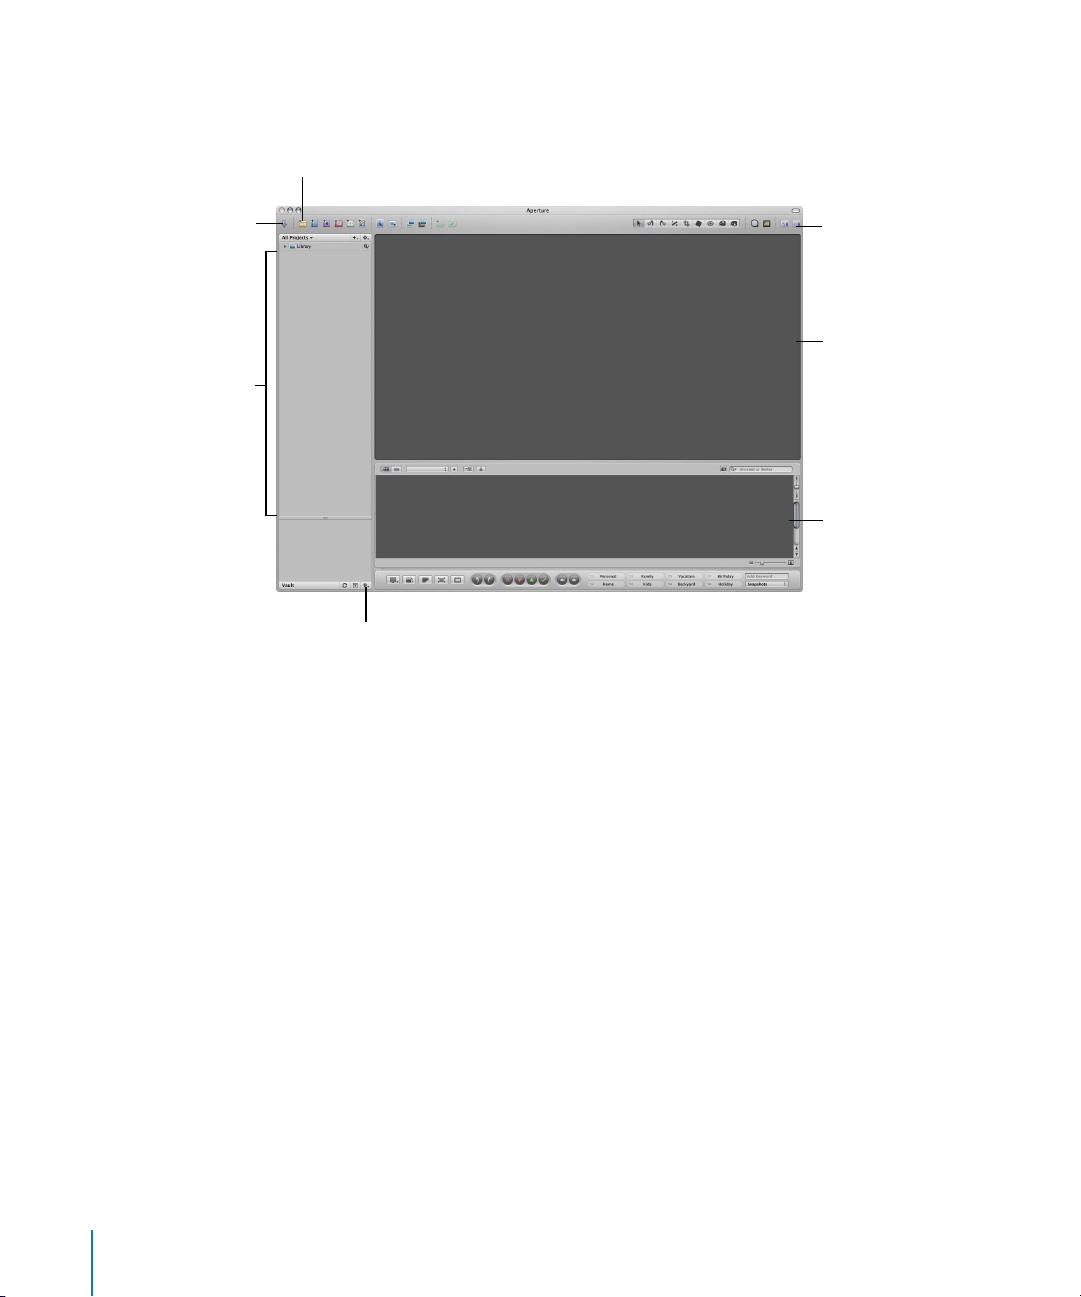
A First Look at Aperture
When you first open Aperture, you see the following areas:
To create a project to hold your
imported images, click here.
Click here to open the
Import panel.
Your projects appear
here.
Toolbar
Viewer
Browser
Click here to open the Vaults panel.
You select a hard disk to use for
backing up images here.
Note: Because you can customize the toolbar, adding and deleting the buttons you
want, your toolbar may appear different from the one pictured in this manual. For more
information about changing the toolbar, see “Customizing the Toolbar” on page 65.
16 Part I Interface and Acquisition
Page 17
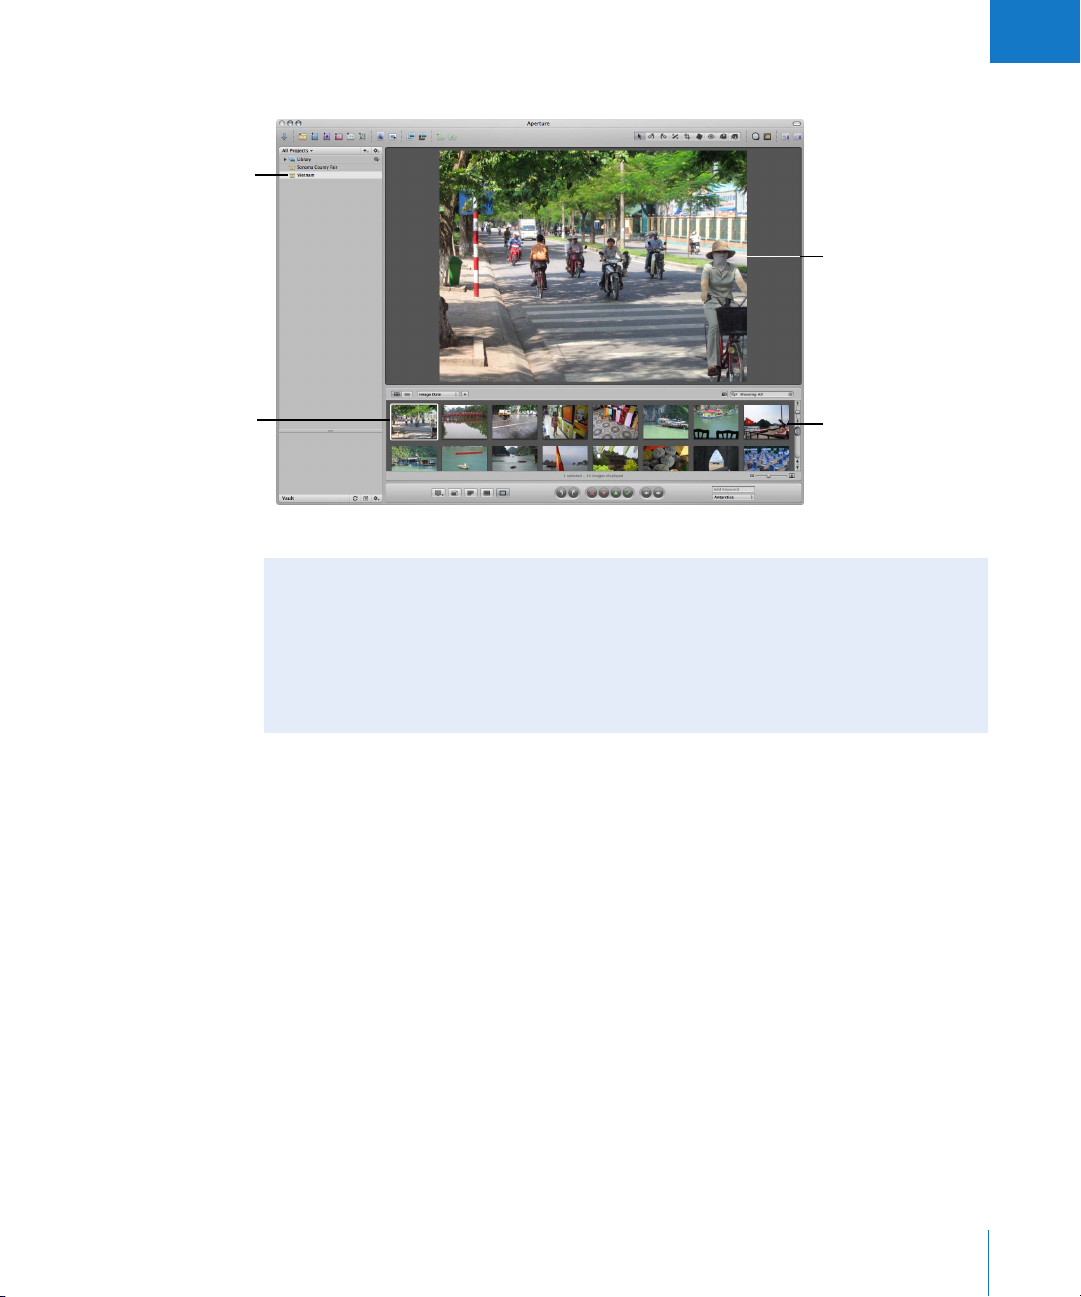
Aperture imports the
images into a project.
Click the project to
see its images in
the Browser.
I
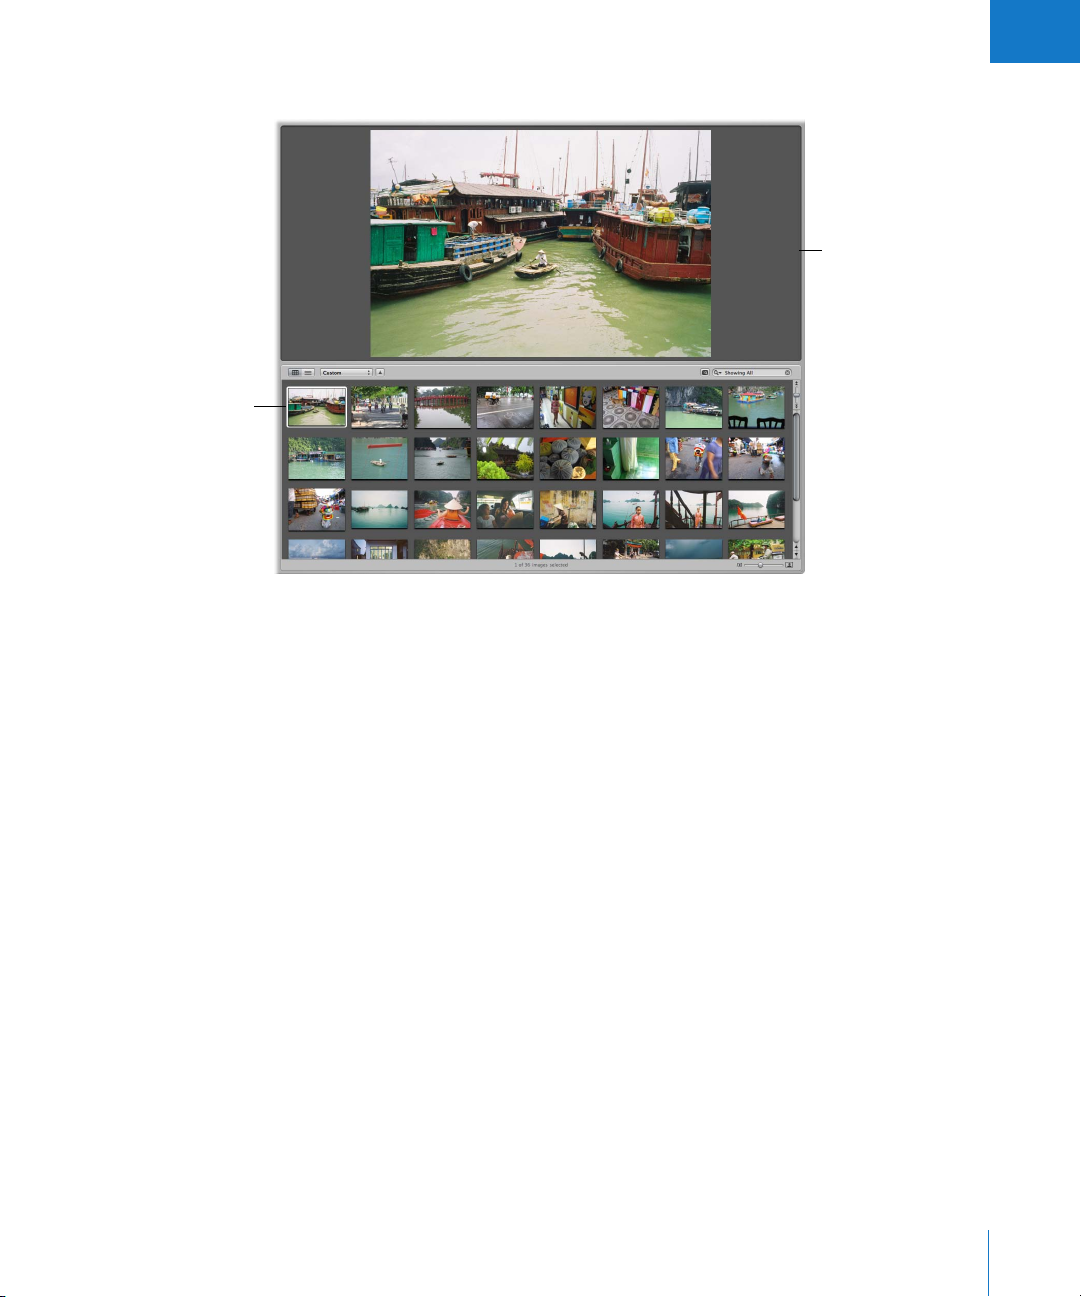
After you import images into a new project, your screen will look similar to this:
The Viewer shows the
selected image.
Select a thumbnail
in the Browser.
Your project’s image
thumbnails
About Aperture Sample Projects
The Aperture installation disc includes several sample projects containing high-resolution
images. When you first open Aperture, a dialog appears asking if you’d like to install a
sample project. Other sample projects are available in the Sample Projects folder on the
Aperture installation disc. You can import these projects into Aperture from the Aperture
installation disc at any time after installing the application.
Creating Projects and Importing Your Photos
To use Aperture, you first import your photos. You can import digital photos directly
from your camera or a card reader and from hard disks or other storage devices where
you’ve archived digital files. After a shoot, you can connect your card reader or digital
camera to your computer and Aperture automatically detects it. You can then easily
import your new images into Aperture.
Creating Projects
As you work with Aperture, you create projects to hold your images. A project is similar
to a folder that can hold dozens, hundreds, or even thousands of images. For example,
after completing a travel shoot to Antarctica, you might create a new project named
Antarctica and import the photos into it.
Chapter 1 An Overview of Aperture 17
Page 18
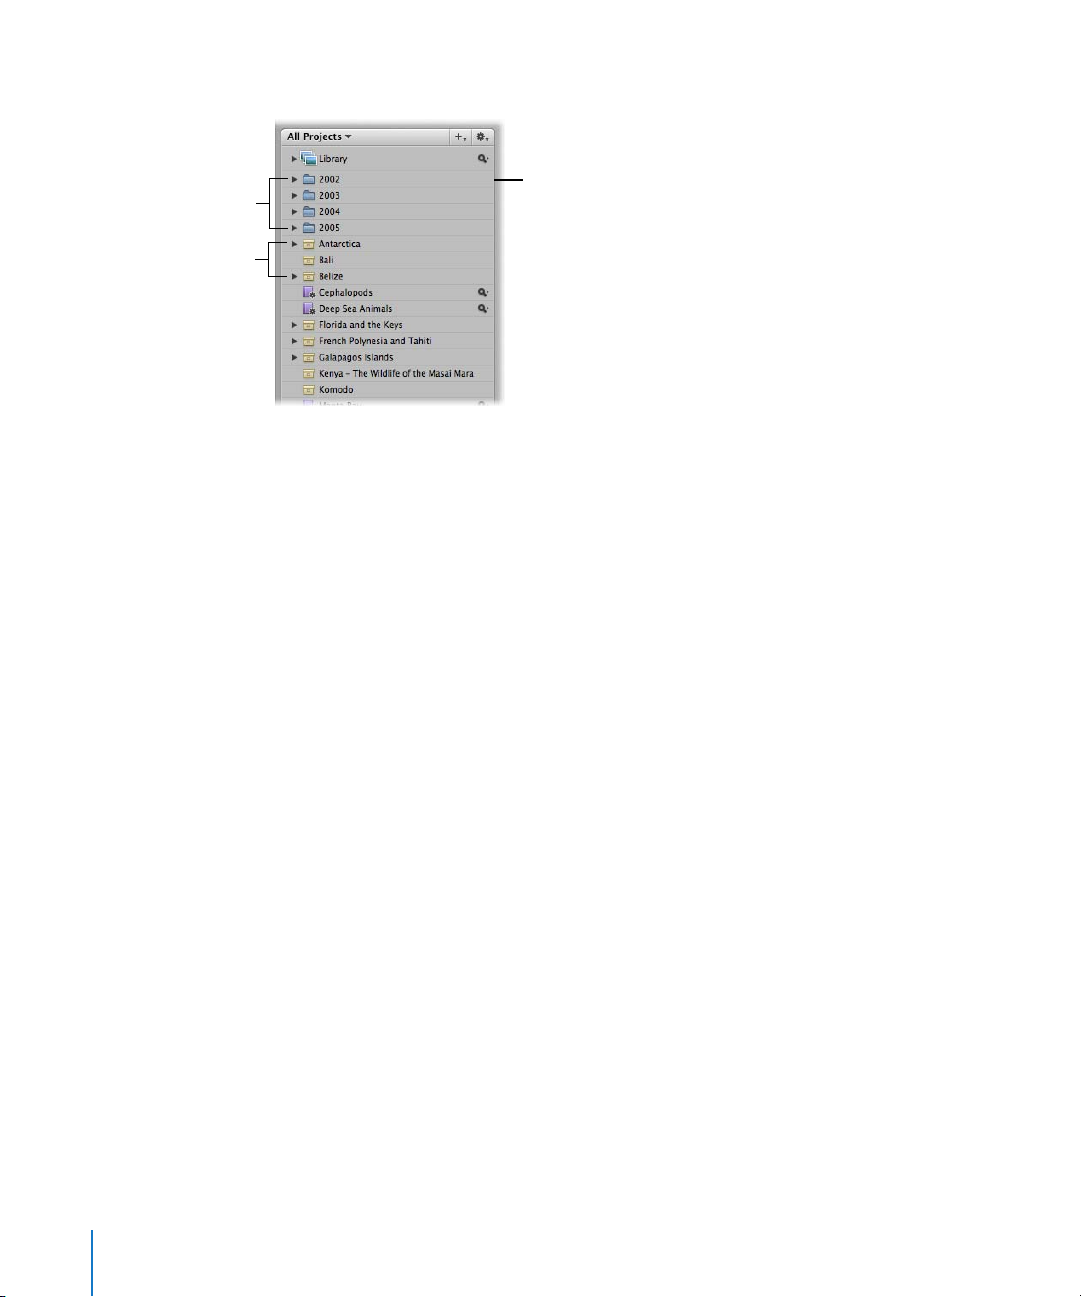
Your new project appears in a list in the Projects panel.
Examples of items in
Folders
Projects
the Projects panel
As your portfolio increases and you create more and more projects, you can organize
your work into hierarchies of folders, projects, and albums.
You can create as many projects as you need and name them according to any naming
scheme you prefer. It’s important to name projects so that they will be easy to identify
and access. When you need to further subdivide and organize images in a project, you
can create albums.
Over the long term you may be using Aperture to track years of projects, so you’ll want
to develop a naming system that is easy to use and understand. For more information
about organizing your images in projects and albums, see Chapter 3, “Working with
Aperture Projects,” on page 71.
18 Part I Interface and Acquisition
Page 19
Select your camera, card
reader, or hard disk here.
I
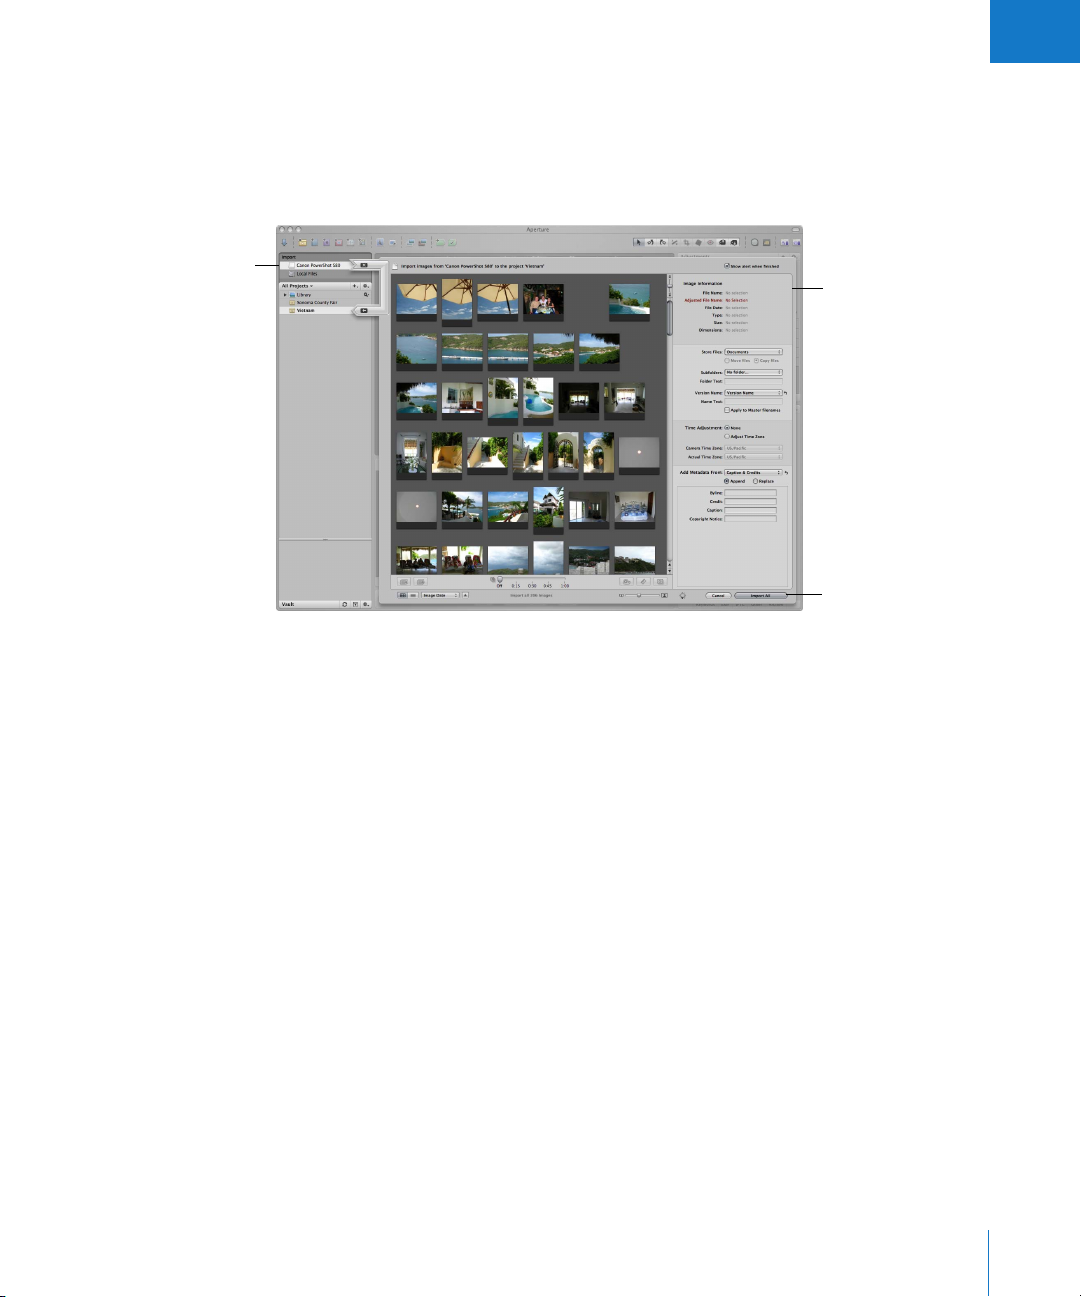
Importing Images
When you connect a camera or card reader to your computer, the Import dialog appears.
You can select your camera or card reader and see the images you’re about to import.
You can select all the images on a memory card or select and import only those you
want. You can also select image files on your hard disk for importing.
Specify import
options here.
When you click
Import All, your images
are imported into the
selected project or a new
project.
You can then specify options for importing your images. For example, you can specify
that your images be imported into the Aperture Library in your Pictures folder, or
specify another location to store them. If you have images already stored on a hard
disk, you can simply allow Aperture to access them without changing their current
locations. You can choose how images are named and include other information that is
recorded with each image to help identify it. For example, you can specify the event
name, date, time, photographer, and location, as well as copyright information.
You can also specify other import options, such as whether you want Aperture to
group related images together in stacks. For example, if you have bracketed images or
images shot in quick succession, you can have Aperture import and stack these images
together to make reviewing and working with them easier.
Chapter 1 An Overview of Aperture 19
Page 20

Importing Files from Your Body of Work
You can easily import your collection of archived digital images into Aperture from any
hard disk or storage device connected to your computer. When importing legacy
images from your portfolio, you can move them into the main Aperture Library, or
simply identify where the images are located, and Aperture adds them to its
management system without changing the image locations. This means that with
Aperture, you can still work with your images in their current organization and on
multiple hard disks without relocating or reorganizing your current files. You can also
move or copy images to new locations when needed.
Aperture can also import your iPhoto Library and files stored in a variety of common
file types and formats, including:
 GIF
 JPEG
 JPEG2000
 PNG
 PSD
 RAW files from a variety of supported digital cameras
 TIFF
Note: For a list of supported digital cameras, go to http://www.apple.com/aperture.
For more information about importing images, see Chapter 4, “Importing Images,” on
page 87.
Photo Editing with Aperture
Aperture allows you to easily view and work with your images onscreen. It provides
easy-to-use tools and controls, as well as efficient methods for rating images, searching
for images, and comparing and adjusting them.
Viewing and Working with Images in the Browser and Viewer
To work with your images, you select a project in the Projects panel and Aperture
displays that project’s images in the Browser. You use the Browser to review, organize,
and select images.
20 Part I Interface and Acquisition
Page 21
Select images here.
A selected image appears
with a white outline.
I
When you select a thumbnail image in the Browser, the image appears in the Viewer.
The Viewer displays the
selected image.
The Browser can show your images as thumbnails arranged in a grid. You can click an
individual image to select it, and a white border appears around the image. To quickly
move to and select other images, press the arrow keys. You can drag images to
rearrange them in the Browser, or drag them into different projects or albums. You can
also display your images as a list of files.
Chapter 1 An Overview of Aperture 21
Page 22
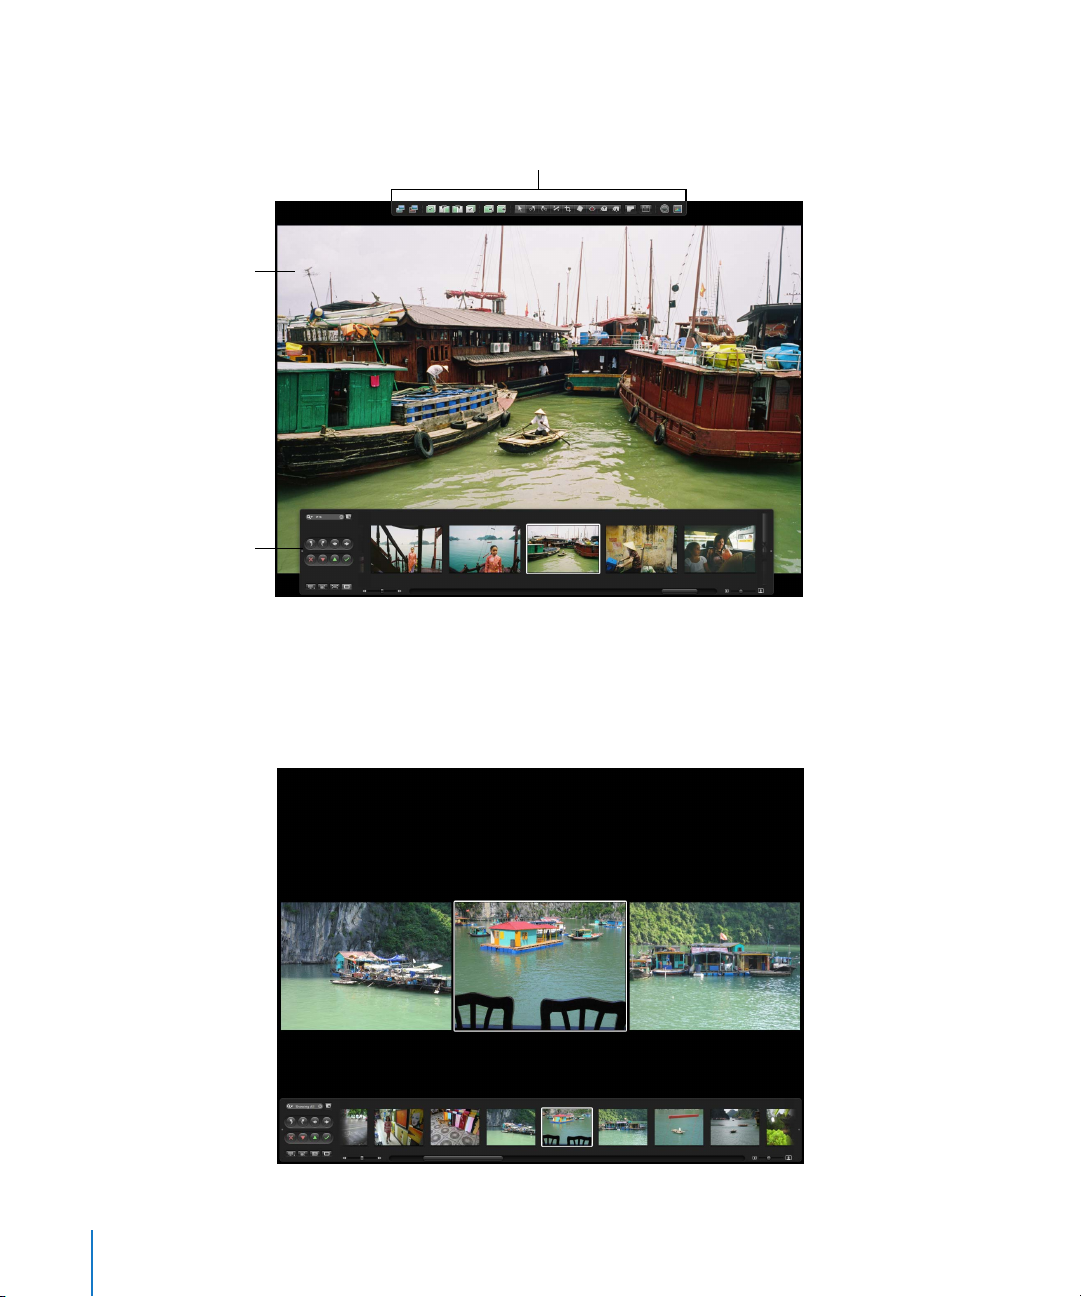
You can also view your images in Full Screen mode, where you can work with them
in detail.
Toolbar available in
Full Screen mode
The displayed image fills
the screen.
Filmstrip available
in Full Screen mode
To see images in Full Screen mode, you press F. Press F again to switch back to the Viewer.
In Full Screen mode, you can change the display of images to show single images,
three images, or up to ten images at once. For more information about using Full
Screen mode, see Chapter 7, “Viewing Images in Full Screen Mode,” on page 163.
22 Part I Interface and Acquisition
Page 23
I
Displaying your images clearly and accurately is a pivotal function of Aperture. With
Aperture you can take advantage of the latest display technology and view and work
with your images in Full Screen mode and on dual displays.
Using Aperture with two displays is ideal for creating a large workspace. You can easily
compare and adjust images, play slideshows, and present the best of your photos at
optimal size during client reviews.
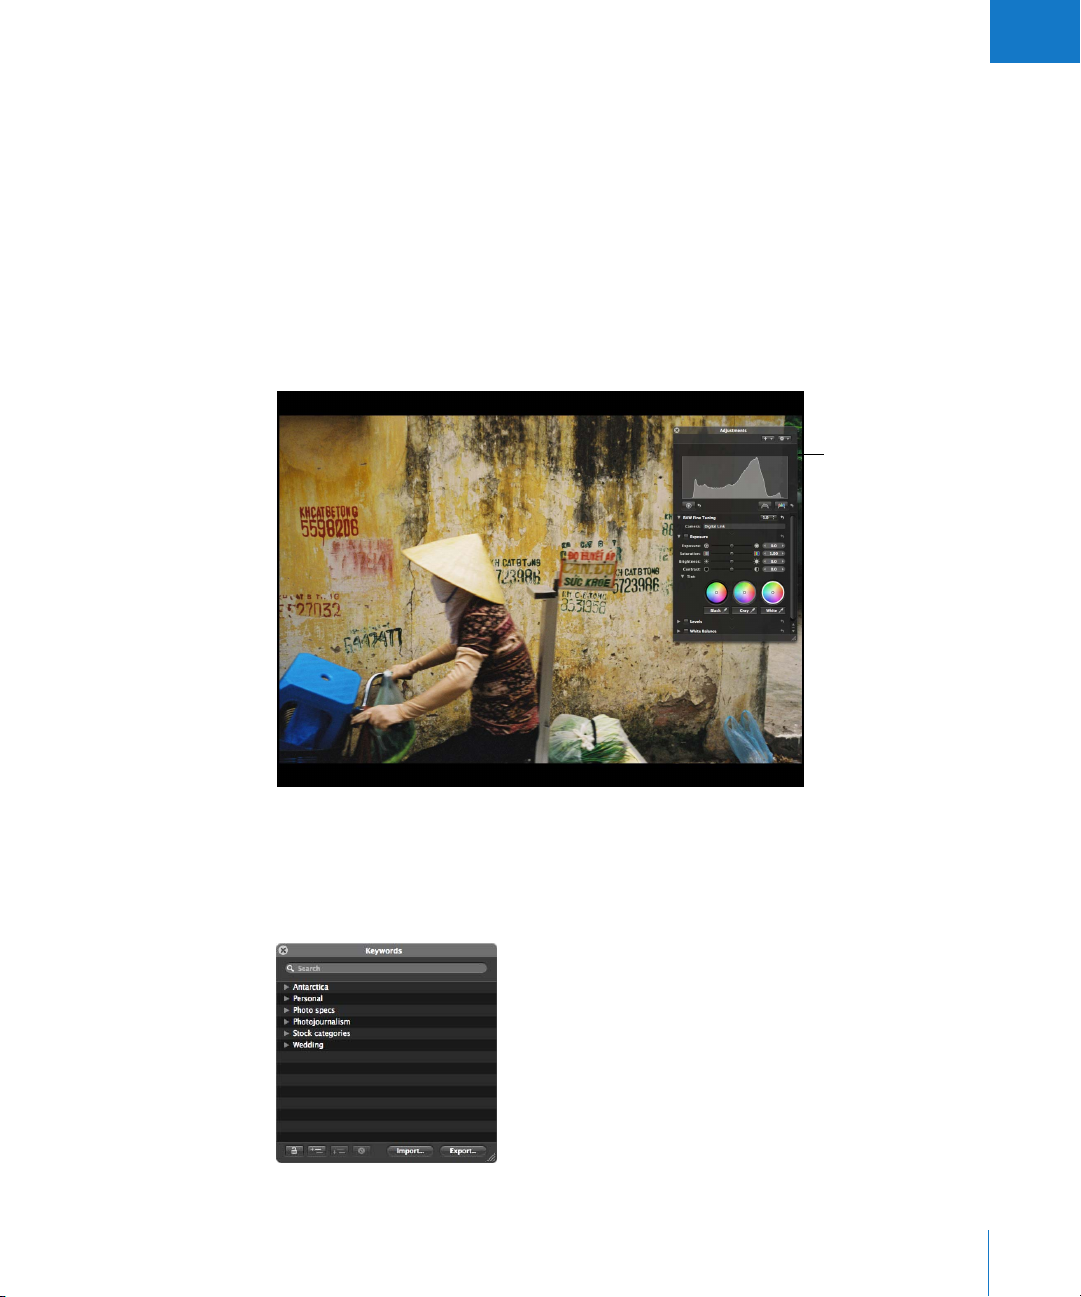
Working with Heads-Up Displays
To work efficiently in Aperture, you can use floating panels of controls called heads-up
displays (HUDs) to change images. For example, when you view images in Aperture in
Full Screen mode, you can open an Adjustments HUD to adjust your images.
HUDs are available for
use in Full Screen mode
and can make adjusting
images easier.
As you work on your images, you can position HUDs anywhere on the screen and use
them to make changes. For example, Aperture provides a Keywords HUD that you can
use to quickly assign keywords to your images. To assign a keyword, you simply drag it
from the Keywords HUD to the image.
Chapter 1 An Overview of Aperture 23
Page 24
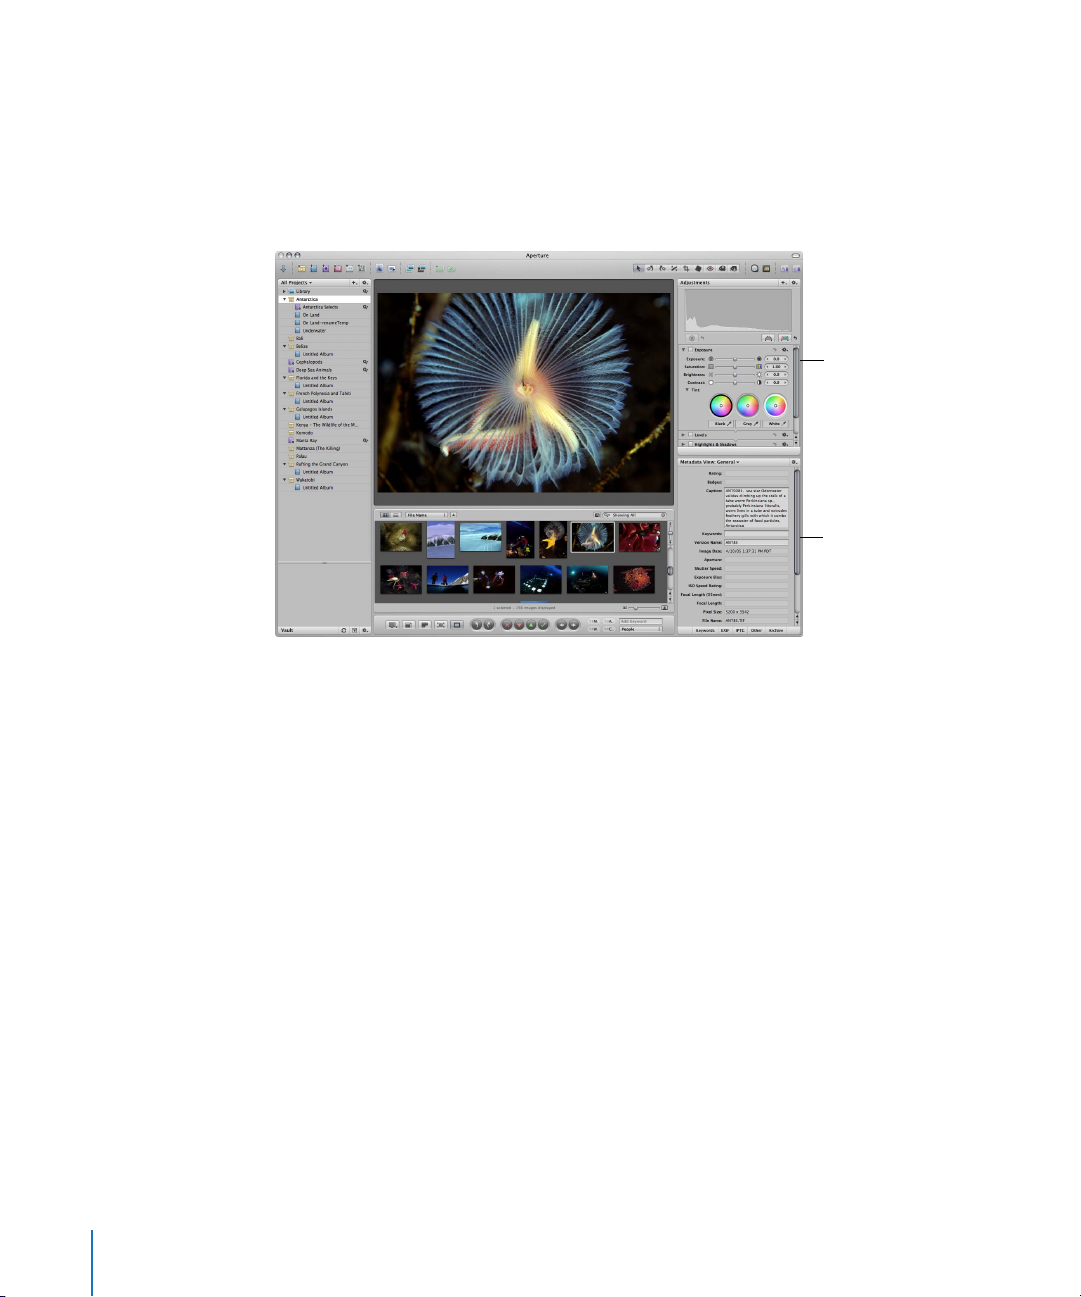
Working with Inspectors
Aperture also provides an Adjustments Inspector for applying adjustments and a
Metadata Inspector that allows you to review and assign metadata to your images. You
can show or hide the Adjustments and Metadata Inspectors together or individually
whenever you want. Showing the Inspectors panel is as easy as double-clicking an
image in the Browser or pressing the I key.
Adjustments Inspector
Metadata Inspector
For more information about making adjustments and retouching your images, see
Performing Image Adjustments in the Aperture Help menu.
24 Part I Interface and Acquisition
Page 25
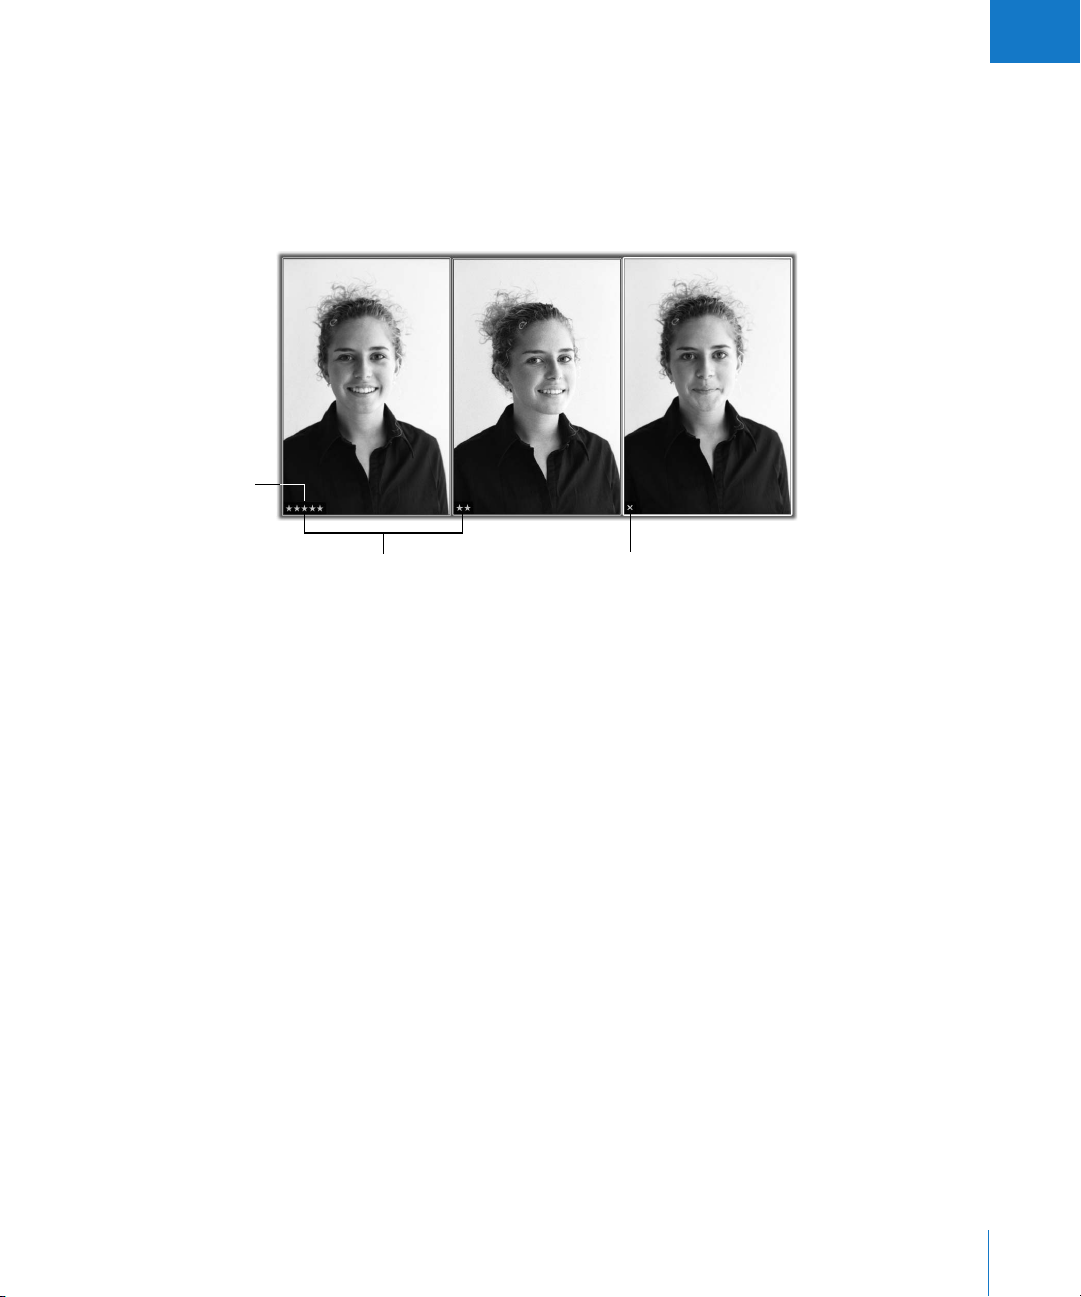
Five stars indicate the
highest rating (Select).
I
Rating Images with Aperture
You can rate images as you review them in the Viewer or the Browser, or in Full Screen
mode. Rating controls appear below the Browser and in the filmstrip in Full Screen
mode. By selecting an image and clicking a rating button, you can quickly rate images
as rejected, or assign them from one to five stars (with five stars being the highest, or
Select, rating). Image ratings appear as easy-to-read overlays on the image.
Stars indicate a
positive rating.
An X indicates a negative
rating (Reject).
Once images are rated, you can have Aperture display only images of a certain rating,
so you can focus on a particular group of images. For more information about rating
your images, see Chapter 9, “Rating Images,” on page 187.
Chapter 1 An Overview of Aperture 25
Page 26
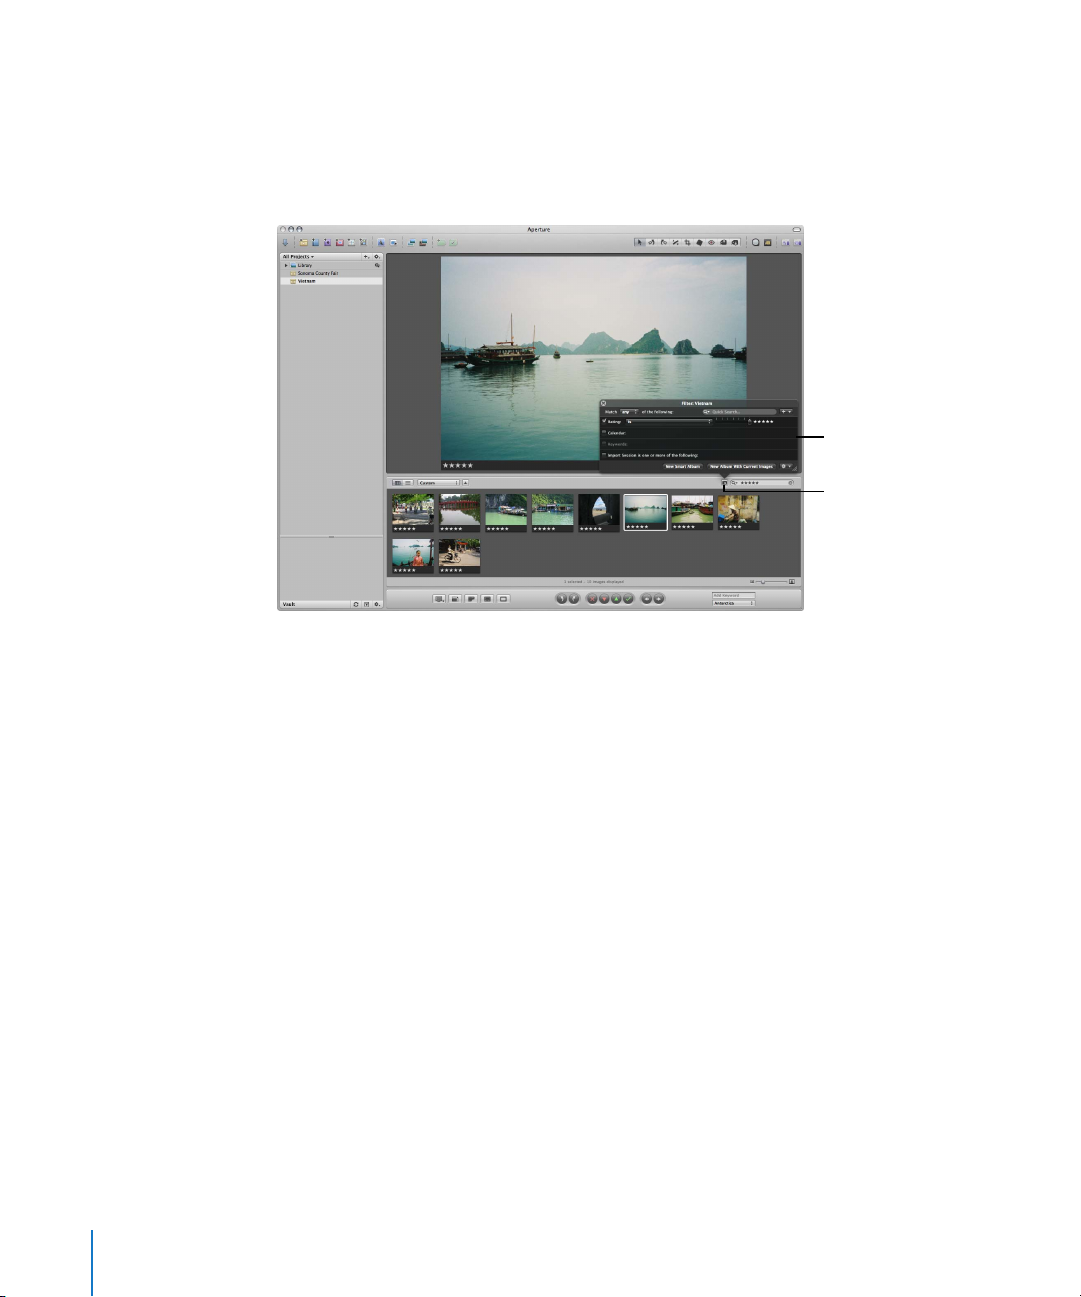
Finding and Displaying Images with the Query HUD
You can use the Query HUD to search for and display only certain photos in a project
or album. Click the Query HUD button beside the search field in the Browser and the
Query HUD appears. In the Query HUD, you can specify criteria for the photos you
want to work with.
The Query HUD is set
to show images rated
five stars.
Click the Query HUD
button to open the
Query HUD.
You can enter any search criteria you want to display specific images. You can also
display images based on rating, date when shot, keywords, or import group. After you
specify the search criteria, Aperture displays only those images that match the criteria
and hides the rest. For more information about searching for images, see “Searching for
and Displaying Images” on page 247.
26 Part I Interface and Acquisition
Page 27
I
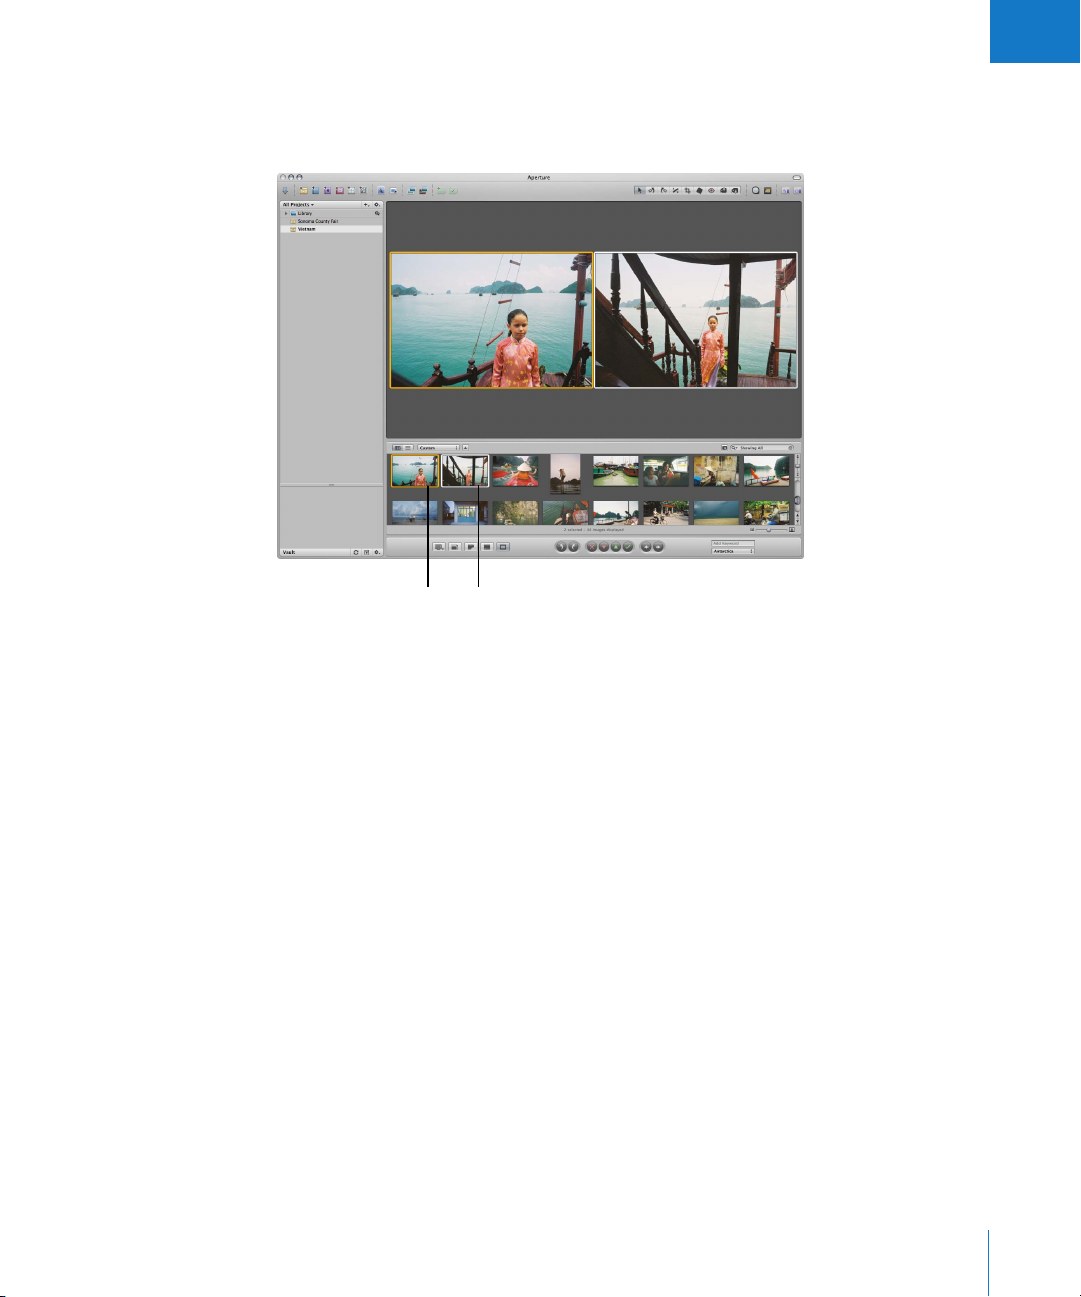
Comparing Photos
Aperture allows you to carefully compare images. You select an image and press Return
to have Aperture display it for comparison against other images in a selection.
Select an image and
press Return to select it
as the “compare” image.
Select an image for
comparison by pressing
the arrow keys.
While comparing images, you can rate the selected images or make adjustments to
them. For example, you might use the comparison method to make final selections
of the best images in a series. Or, you might compare two versions of an image and
make adjustments.
Chapter 1 An Overview of Aperture 27
Page 28
The Stack button
indicates the number of
images in the stack.
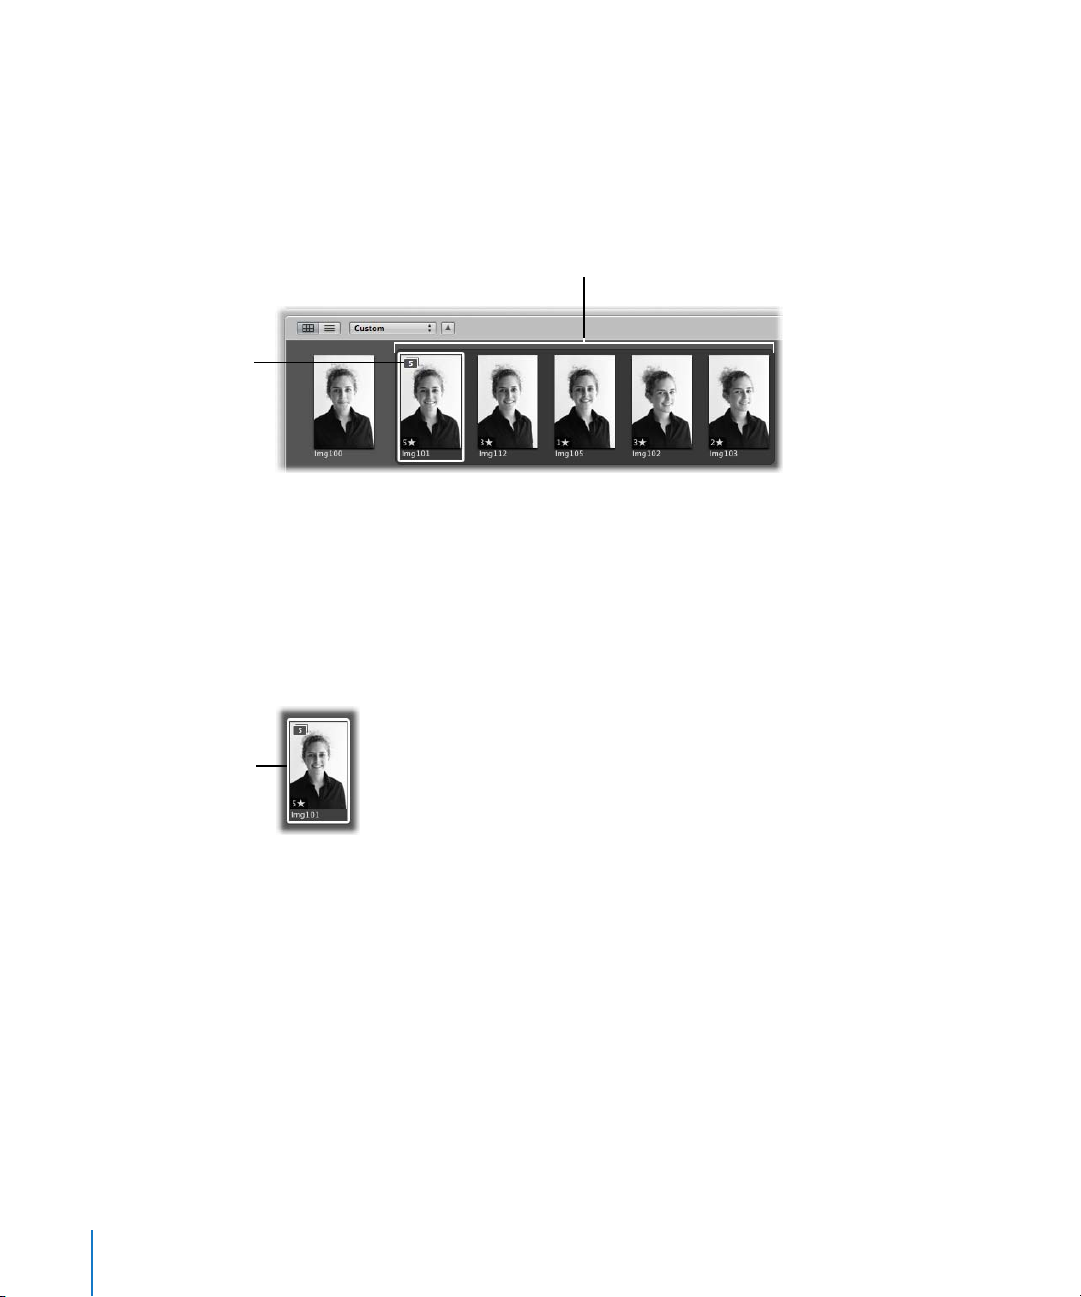
Stacking Images
Photographers frequently work with large selections of images. To help you work
efficiently with a series of shots, such as bracketed shots or shots taken in quick
succession, Aperture can automatically stack related shots. You can also select and
manually stack related shots yourself and review them for a “pick”, the image that you
intend to use.
A stack with five images is
shown expanded, or open.
Once photos are in a stack, you can work with them as if they were a single image
instead of many individual photos. A stack appears as a series of linked photos in the
Browser. The pick of the stack appears on the left with a Stack button. You can drag an
image in the stack into the pick position. By clicking the Stack button, you can close
the stack so that only the pick image appears. You can then work with the single pick
image without the encumbrance of the other stacked photos. You can expand a stack
to see all its images whenever you want.
Only the pick image
is shown when the
stack is closed.
Working with stacks can greatly increase the efficiency of reviewing large collections of
photos. For more information about working with stacks of images, see Chapter 8,
“Stacking Images and Making Picks,” on page 175.
28 Part I Interface and Acquisition
Page 29
I
Assigning Keywords to Images
Carefully assigning keywords to images is critical for the photographer who needs a
means to easily locate specific images among thousands. Applying keywords is also
required if you plan to sell images to image libraries, such as Corbis or Getty Images.
You can use Aperture to assign keywords to images using standard IPTC fields (the
standard metadata fields defined by the International Press Telecommunications
Council). You can also select images and assign keywords that you define.
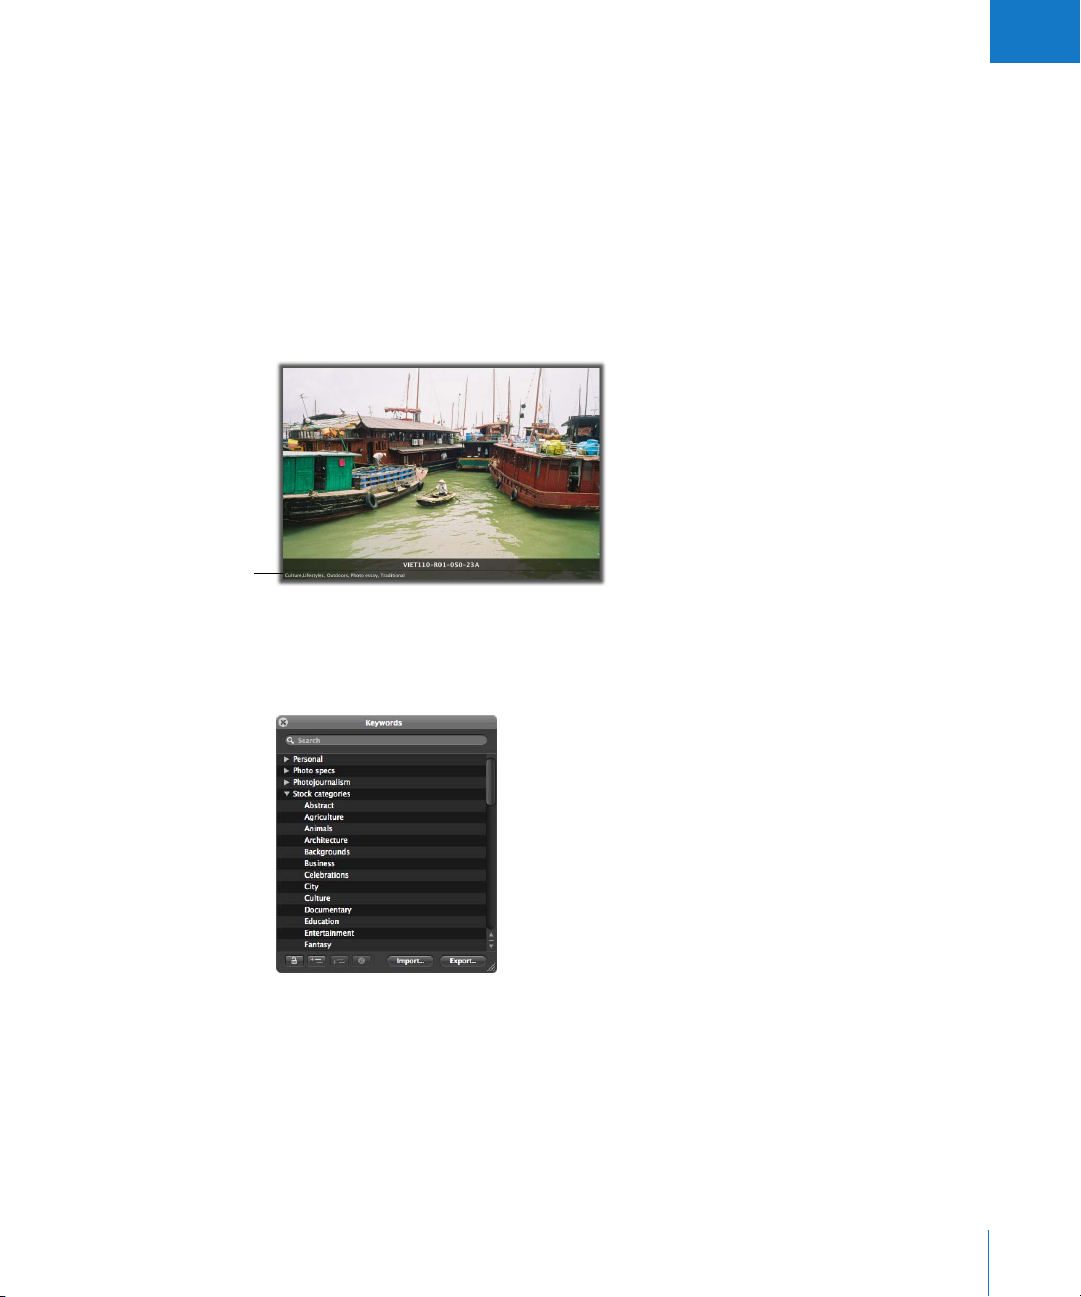
You can display images in the Viewer with their version names and any assigned
keywords appearing on or below the image.
Keywords and
other metadata
The Keywords HUD lists all the keyword categories and keywords that you define. For
example, if you shoot weddings, you might create a wedding category with specific
keywords that include Candid, Ceremony, Guests, and so on.
You can apply a keyword directly to a selected image or group of images by dragging
it from the Keywords HUD to the selection in the Viewer or Browser.
Chapter 1 An Overview of Aperture 29
Page 30

You can also show keyword controls in the control bar at the bottom of the Aperture
main window by choosing Window > Show Keyword Controls.
Using these simple controls, you can display different categories of keywords and easily
apply those keywords with a quick click or keystroke.
Your Aperture keyword scheme can ensure comprehensive accessibility to your images,
and even help with the management of your copyrights, sales, and usage rights. For
more information about assigning keywords, see Chapter 10, “Applying Keywords to
Images,” on page 199.
Grouping Images with Smart Albums
Photographers often need an easy way of regrouping and presenting images based on
the needs of a client or project. For example, a corporate client might call to request
images of a general location or subject, such as airports or Asian temples, to be
included with future collateral. Aperture allows you to easily make selections from
across the entire library of images and group them in Smart Albums, which are albums
that can be dynamically generated based on search criteria you specify.
Disclosure triangle
A Library Smart Album
has this icon.
Aperture comes with a selection of predefined Smart Albums set up in the Library for
you. For example, there are Smart Albums that gather all your select images, all images
taken in the last week, and all images taken in the last month. When you click the
Library disclosure triangle, you see the list of Smart Albums created for you. Select a
Smart Album to see its contents in the Browser
Although a Smart Album appears similar to the other projects or albums in the Projects
panel, the contents of the album are specified by search criteria. You don’t import
master files or versions into a Smart Album. You use the Query HUD to specify the
image keywords or other criteria that identify the images you want, and image versions
automatically appear in the album. By adjusting the search criteria, you change the
contents of the Smart Album.
30 Part I Interface and Acquisition
Page 31
I
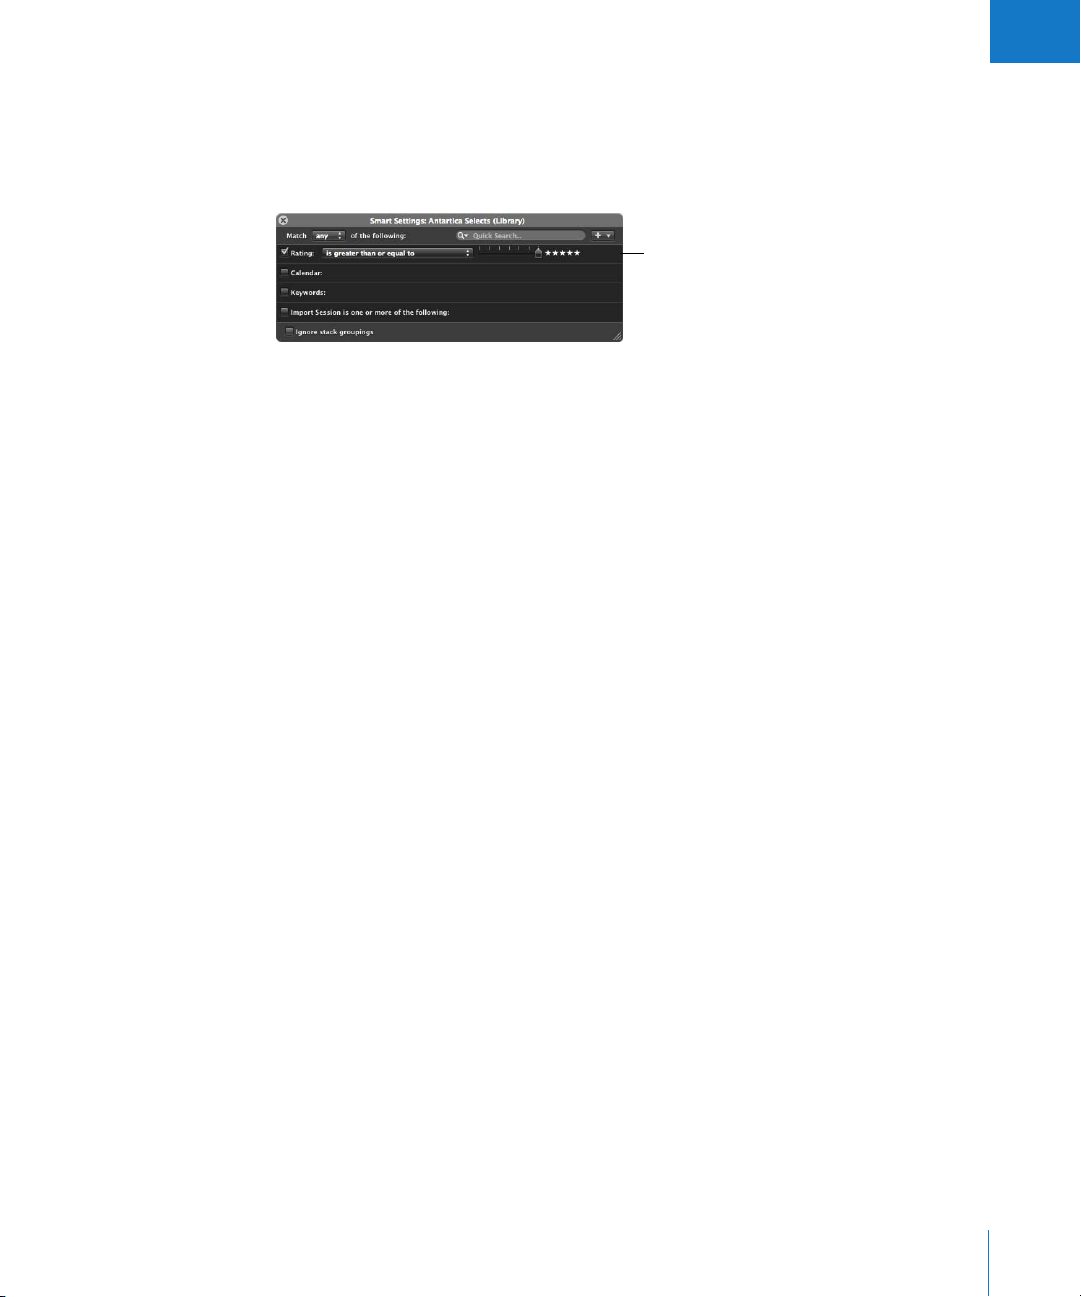
For example, after creating an empty Smart Album in the Projects panel, you might
specify that you want any image that is rated five stars.
Aperture searches across the Library and displays all the images rated five stars in the
Smart Album. New images rated five stars are added to the Smart Album automatically.
In the Query HUD,
specify the search criteria
for images you want in
the Smart Album.
You can work with the photos in the Smart Album just as you can with images in any
other album.
You can make Smart Albums that gather images from across the entire Library or from
within a specific project only. When you no longer need a Smart Album, you can delete
it, and the contents of the Library remain the same (the Smart Album’s images are not
deleted from the Library). For more information about using Smart Albums, see
Chapter 13, “Grouping Images with Smart Albums,” on page 267.
Image Processing
You can use Aperture to crop, rotate, horizontally align, and remove red-eye from
images, as well as adjust color and exposure, reduce noise, and so on.
Aperture provides controls for performing many types of image adjustments, including:
 RAW image fine-tuning
 Exposure adjustments
 Color adjustments
 White-balance adjustments
 Red-eye correction
 Spot and patch corrections
 Straightening
 Cropping
 Highlights and shadows adjustments
 Monochrome color mixing
 Choosing monochrome colors
 Applying sepia tones
 Noise-reduction adjustments
 Image sharpening
 Edge-sharpening adjustments
Chapter 1 An Overview of Aperture 31
Page 32

For especially efficient image adjusting, you can save adjustment settings as presets
(collections of saved adjustments) and apply the same adjustments to many images
at once.
You can adjust your images using the controls in the Adjustments HUD.
Add Adjustments
pop-up menu
Adjustment Action
pop-up menu
The controls in the Adjustments HUD are also available in the Adjustments Inspector.
You can also easily export your images to a third-party application such as Adobe
Photoshop, make adjustments, and then bring the adjusted image back into Aperture.
For detailed information about making adjustments to your images, see
Performing Image Adjustments in the Aperture Help menu.
Distribution
When it’s time to show your work to others, Aperture provides the following methods
of distribution:
 Creating slideshow presentations
 Performing Light Table reviews
 Creating web galleries and web journals
 Ordering printed books
 Printing and exporting images
32 Part I Interface and Acquisition
Page 33

I
Presenting Your Images in Slideshows
You can use Aperture to make slideshow presentations to clients or viewers. Using one
or two large-screen displays, you can set Aperture to present slideshow images in a
variety of ways. For example, you can present images as a sequence of single images or
as multiple images in columns and rows on your screen. You can also customize your
slideshow by setting the display interval, choosing accompanying music, using
transitional fades, changing the background, and more. You can control the slideshow
using the arrow keys on your keyboard or have images appear automatically.
To create a slideshow, you select the images you want to show and choose
File > Slideshow. For more information about creating slideshows, see Chapter 16,
“Creating Slideshow Presentations,” on page 311.
Chapter 1 An Overview of Aperture 33
Page 34
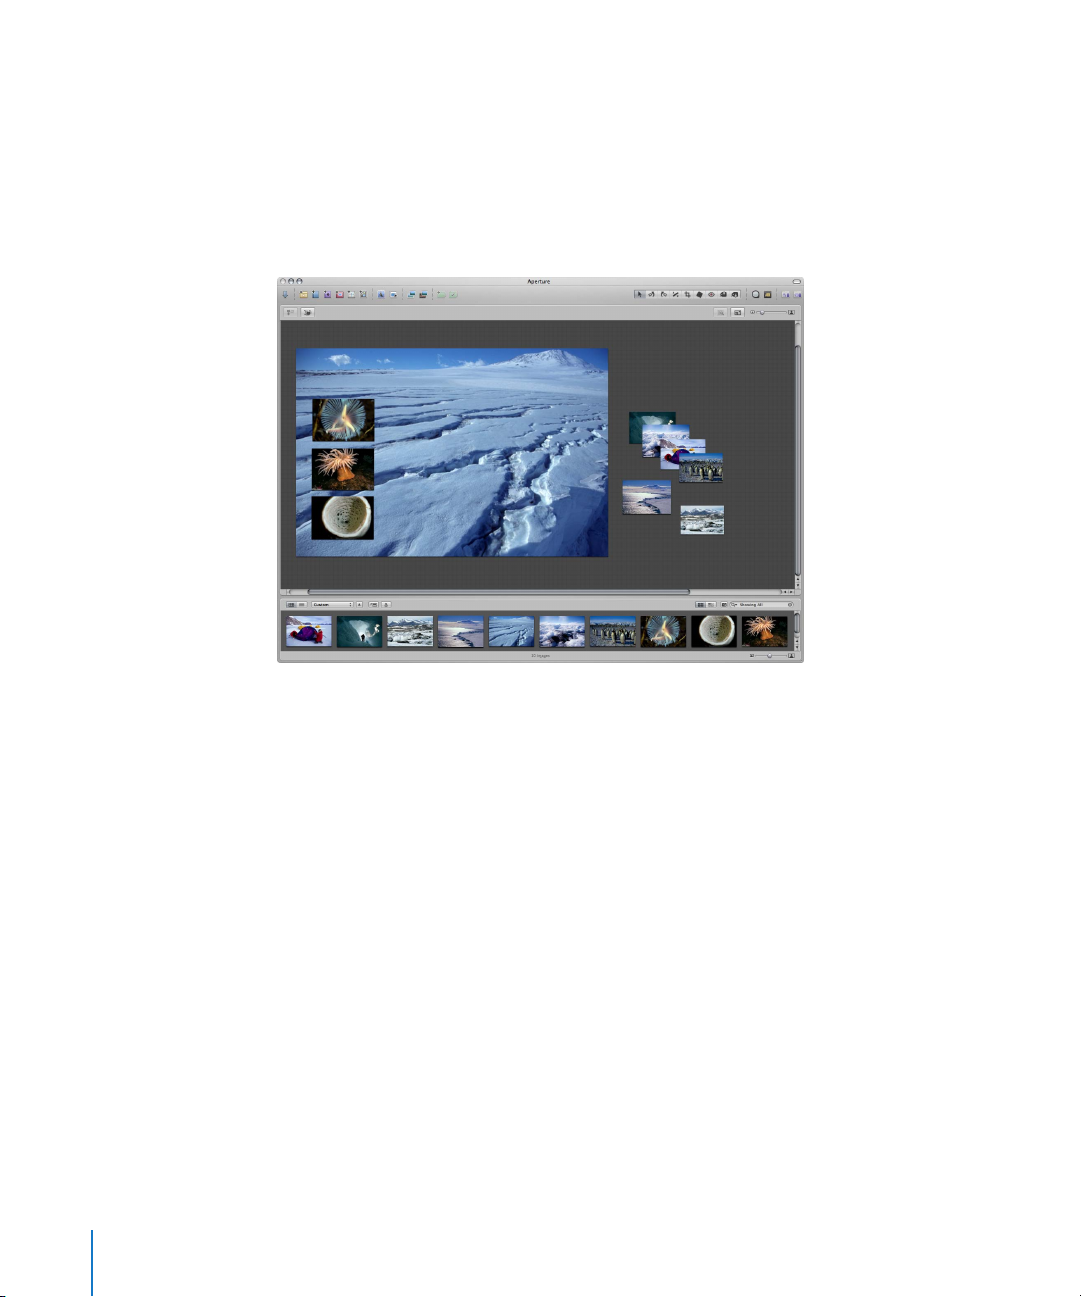
Reviewing Images in the Aperture Light Table
You can use the Aperture Light Table to freely arrange and organize a group of images
visually to see how various combinations of images work together. Or, you can arrange
a combination of images and print them in specific geometric arrangements. When
viewing a selection of images in the Light Table, you can freely drag the images into
any position or arrangement you want, and resize them to determine how they might
look grouped on a page.
For more information about using the Light Table, see Chapter 17, “Using the Light
Table,” on page 323.
Publishing Your Images in Web Galleries and Web Journals
To provide clients or the public the convenience of an online review, you can use
Aperture to create webpages and websites. With Aperture, you can easily post your
webpages to your .Mac account, or you can post them to your own website server and
then provide the Internet address to clients or other reviewers.
34 Part I Interface and Acquisition
Page 35
I
Aperture provides ready-made themes and webpage layouts that you can quickly
choose for the design of your pages.
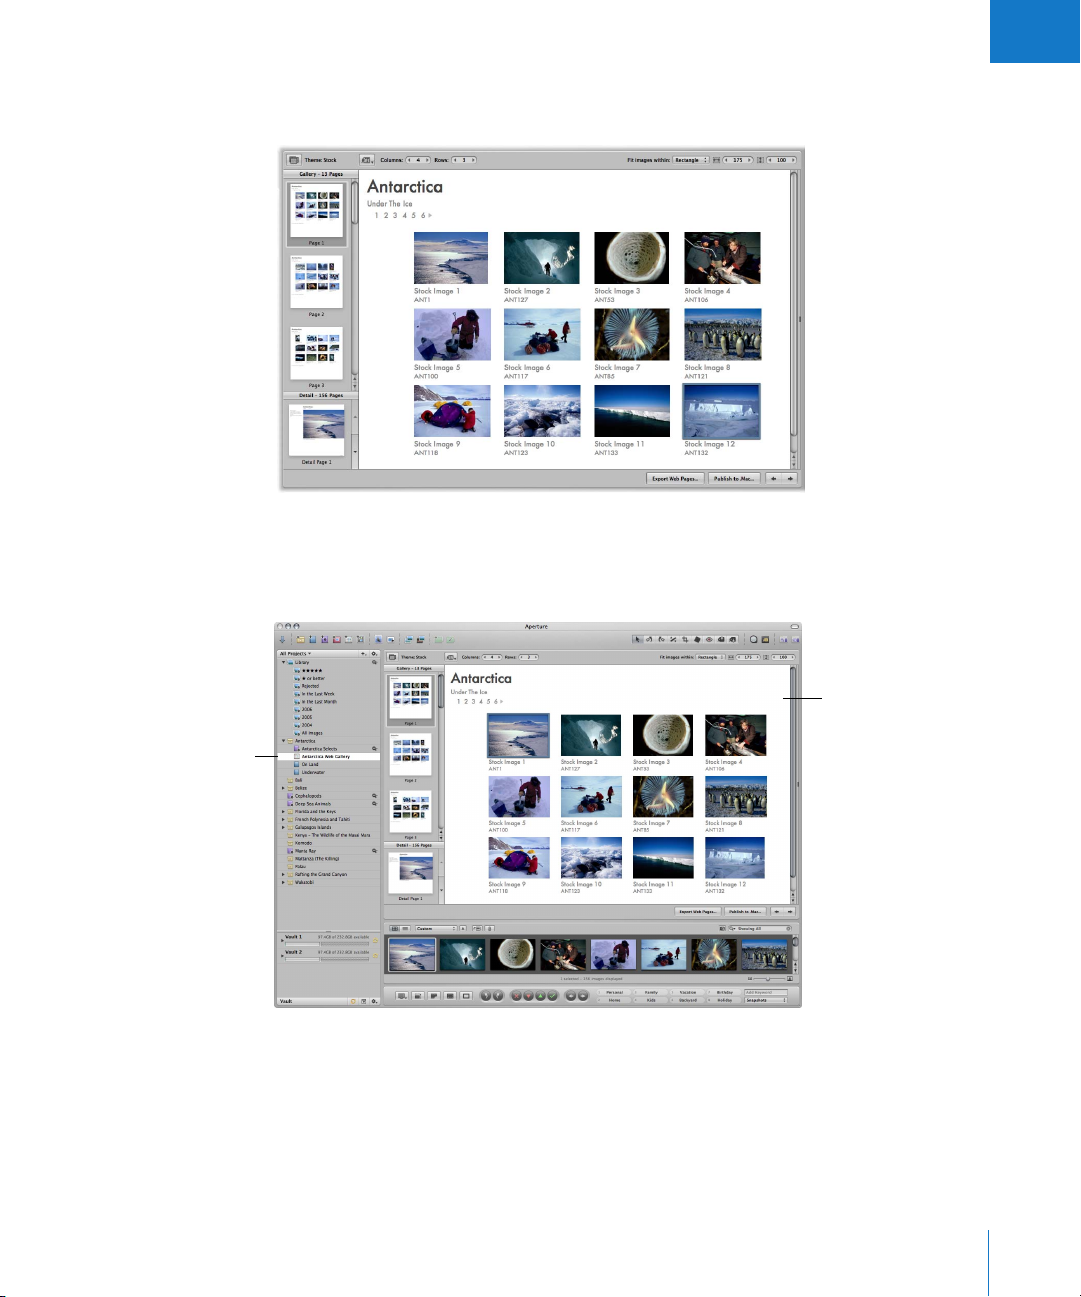
To create webpages that present a gallery of your images, you create a web gallery
album and use the Webpage Editor to design your pages. When you place images in
the album, Aperture automatically populates your web gallery with your images.
The new album you
created appears in the
Projects panel.
The Webpage Editor
shows with the selected
images.
You can also create a web journal, which allows you to mix text and images on the
webpage. For example, you might create a web journal that chronicles your latest trip and
include your photos. You create web journal pages by creating a web journal album and
using the Webpage Editor to design your pages. For more information about creating web
galleries and web journals, see Chapter 18, “Creating Webpages,” on page 333.
Chapter 1 An Overview of Aperture 35
Page 36

Printing Your Images in Books
You can lay out images and combine them with text to create books. Aperture provides
a Book Layout Editor that allows you to easily combine your images with text on the
page. Aperture also provides master templates that you can use to compose pages. You
can easily create professional-looking pages for art books, wedding albums, picture
books, and more.
You create a book by creating a book album and using the Book Layout Editor to
design the book’s pages.
In the Book Layout Editor, you select a page’s thumbnail image to see an enlarged view
of the page’s layout and contents. You can also change the page design, and the
current page is automatically updated to the format you chose. To add an image, you
drag it from the Browser into a photo box on the page. For more information about
creating books, see Chapter 19, “Creating Books,” on page 357.
36 Part I Interface and Acquisition
Page 37

I
Printing and Exporting Images
You can also easily print individual images in standard and custom print sizes and print
collections of images on contact sheets. Aperture has many preset printing options to
help facilitate printing. You can also customize print settings to get the optimum use of
your printer and meet custom print requirements. For more information about print
options, see Chapter 14, “Printing Your Images,” on page 277.
When you need to deliver digital files to clients, prepare files for posting on websites, or
transfer files to other computers or users, you can export images in a variety of formats.
You can export your original digital master files as well as versions that you’ve created.
Aperture provides many preset options for exporting files in a variety of file sizes and
formats, and you can add custom touches such as watermarks or copyright
information. When you export images, you can assign custom filenames and export all
or a selection of the metadata associated with an image. For example, you can send an
editor a digital file complete with the IPTC information you’ve added. Aperture also
enables you to quickly email images. For more information about exporting images,
see Chapter 15, “Exporting Your Images,” on page 291.
Backing Up Your Work
After importing images from your camera and erasing memory cards in preparation for
the next shoot, the only record of your images is stored on your hard disks. It’s vital that
you back up your files on storage media separate from your computer and its hard disks.
Backing up your photos and storing the backups in a safe place can save your work from
catastrophes such as fire, theft, storm-related disruptions, or equipment failure.
Aperture backs up your managed images (images that are stored in the Aperture
Library) and all information, such as versions, metadata, and previews, associated with
them on vaults located on hard disk drives. Aperture doesn’t back up the digital master
files of referenced images located outside the Aperture Library. You must maintain your
own backup system of referenced image master files. Aperture does back up the
versions, previews, and metadata information associated with referenced images, but
does not back up the master images themselves.
Chapter 1 An Overview of Aperture 37
Page 38

You can view your vaults in the Vaults panel. There are several controls that you’ll use
when you update vaults to back up your images.
Disclosure triangle
Vault Status button
Vault Action
pop-up menu
Update All Vaults
button
Vaults Panel
button
You can create multiple vaults to provide duplicate backups. Each vault holds a backup
copy of the entire Aperture Library.
After you import new images into Aperture, you should immediately make a backup of
the newly imported files. Once the images are backed up, you can depend on the
reliable Aperture backup functions to track all the versions of your photos and the work
you have done with them.
For an explanation of the Aperture backup and archiving features, see Chapter 20,
“Backing Up Your Images,” on page 399.
38 Part I Interface and Acquisition
Page 39

2 The Aperture Interface
2
The Aperture interface is modeled around acquiring, editing,
processing, and distributing photos.
This chapter describes the names and functions of the Aperture interface elements.
Use this chapter to orient yourself while learning Aperture. To find detailed information
about the concepts described in this chapter, read the chapter about the topic. You
can also search for terms associated with Aperture in the index and glossary.
This chapter covers:
 The Aperture Main Window (p. 40)
 Projects Panel (p. 41)
 Viewer and Browser (p. 42)
 Control Bar (p. 43)
 Toolbar (p. 45)
 Adjustments Inspector (p. 49)
 Metadata Inspector (p. 50)
 Import Panel (p. 52)
 Vaults Panel (p. 53)
 Book Layout Editor (p. 54)
 Webpage Editor (p. 57)
 Light Table (p. 60)
 Heads-Up Displays (p. 61)
 Workspace Layouts (p. 64)
 Customizing the Toolbar (p. 65)
 Setting Aperture Preferences (p. 67)
39
Page 40
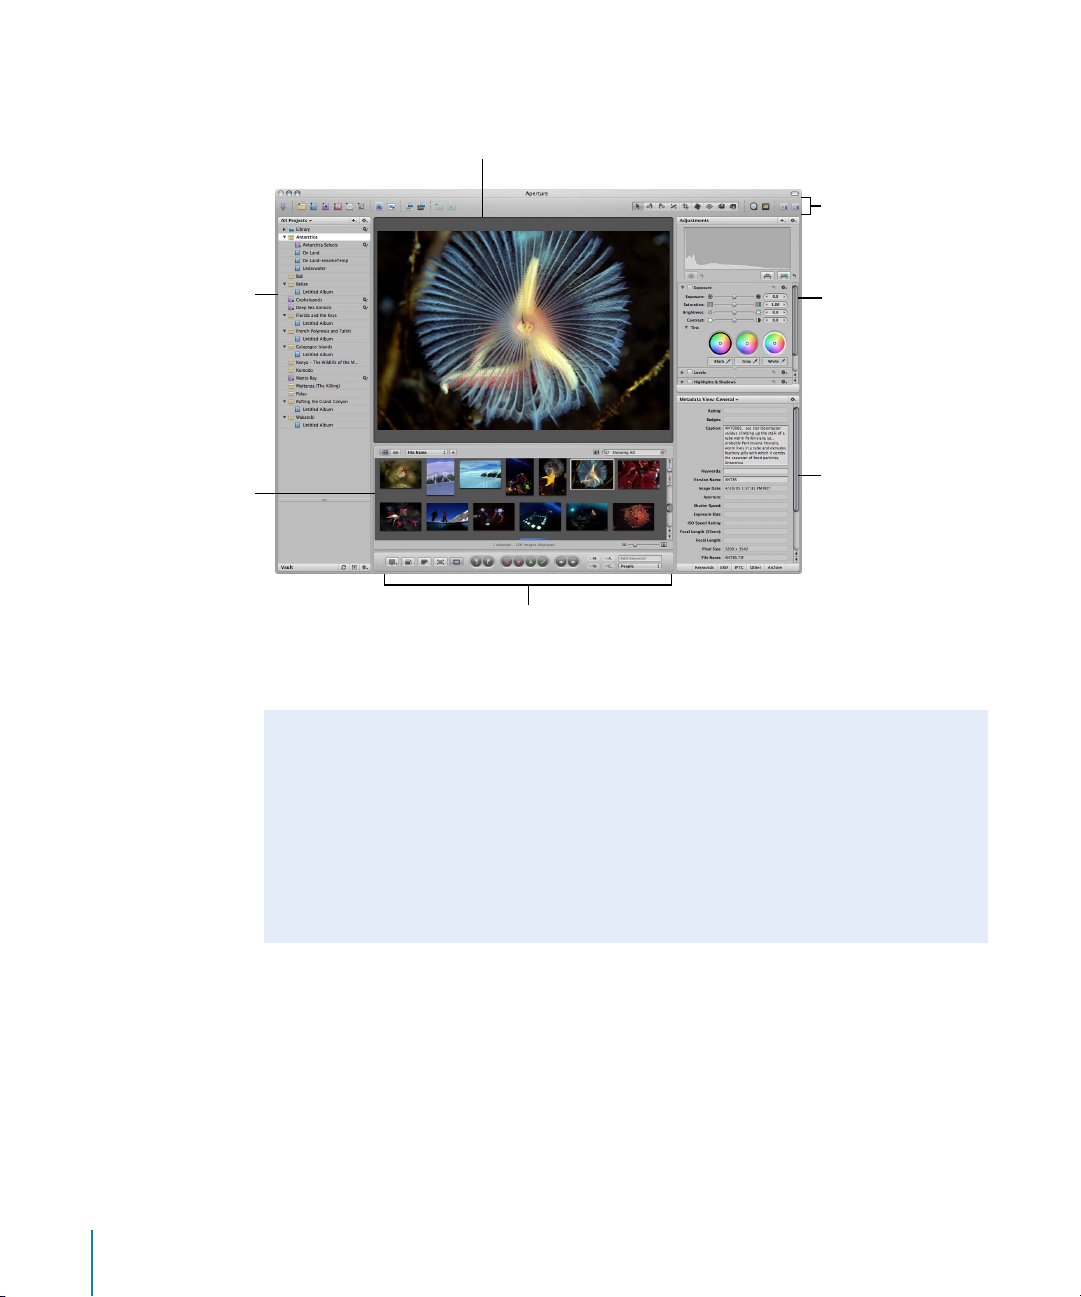
The Aperture Main Window
The Aperture main window contains the following areas.
Viewer
Toolbar
Projects panel
Browser
Adjustments Inspector
Metadata Inspector
Control bar
Note: The inspectors are not shown by default. You can show or hide the Inspectors
panel by pressing I.
Arranging the Interface
Aperture provides three preconfigured workspace layouts: Basic, Maximize Browser,
and Maximize Viewer. The areas in the Aperture interface are resizable, and you can
customize any of these workspaces to suit your workflow.
To view the workspace layout shown above, choose Window > Layouts > Basic, then
press I to show the Inspectors panel.
For more information about workspace layouts, see “Workspace Layouts” on page 64.
40 Part I Interface and Acquisition
Page 41
I
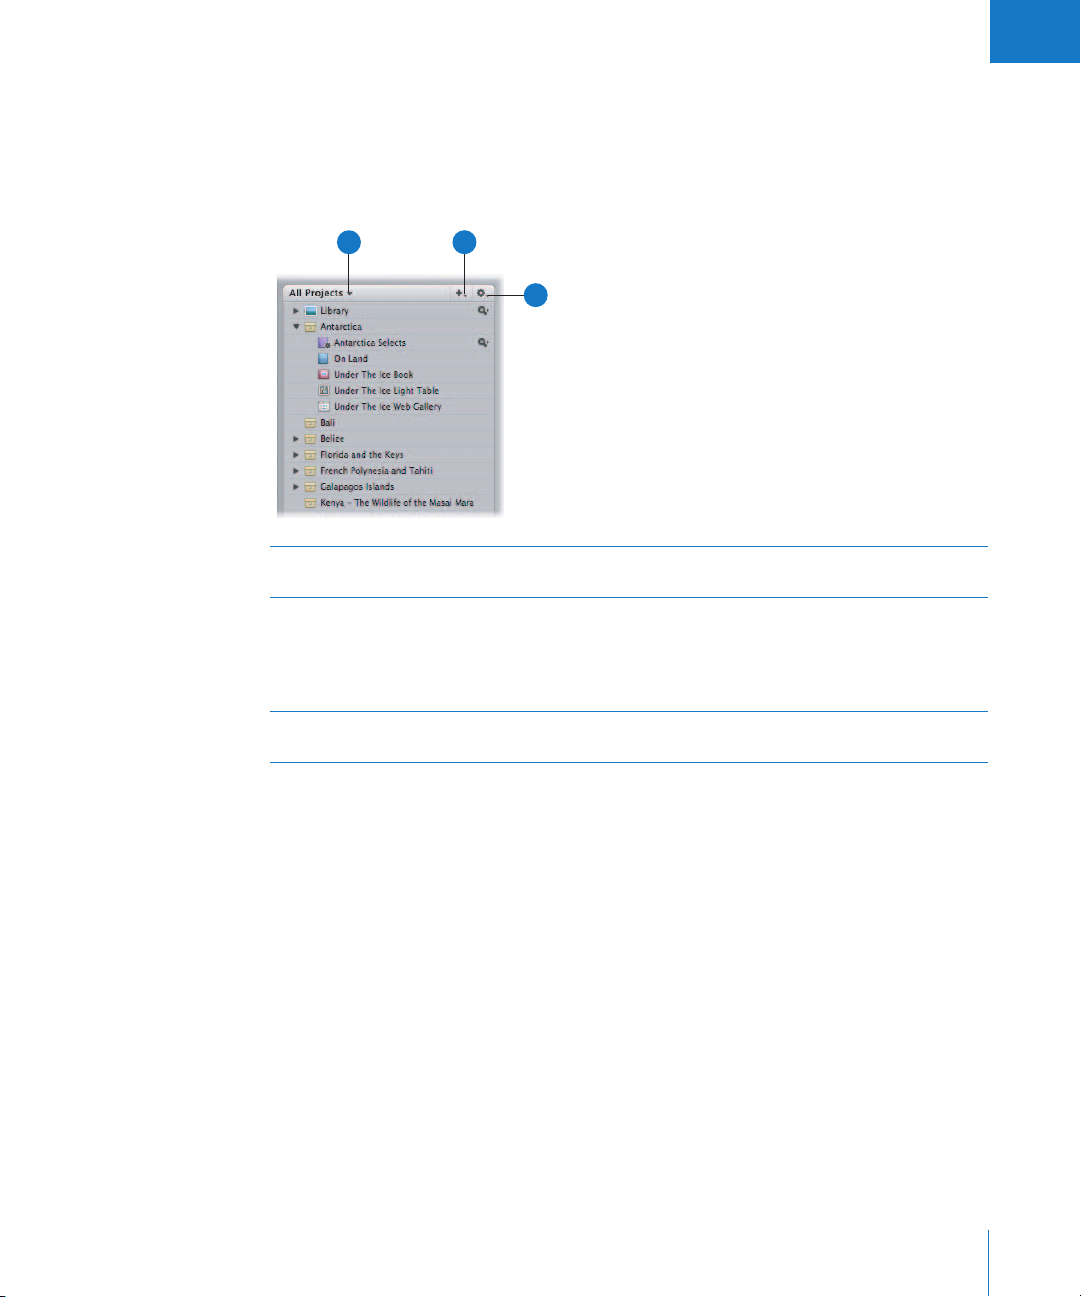
Projects Panel
The Projects panel holds containers—projects, folders, and albums—with which you
can organize your images. You can create Smart Albums that automatically find and
store images based on search criteria you specify. You can also create webpages (photo
galleries and online journals), Light Table arrangements, and books.
B
C
Choose to show all, your favorite, or recently selected projects by
choosing an option from the pop-up menu.
Create new projects and albums, including web gallery, web journal,
Light Table, and book albums, from this pop-up menu. You can
automatically fill your albums with selected images or create empty
albums. You can also create Smart Albums, which you fill by
specifying search criteria such as filenames or dates.
Add and remove favorite items or export projects from this
pop-up menu
A
B
C
A
Projects
pop-up menu
Add to Library
pop-up menu
Project Action
pop-up menu
To learn more about using the Projects panel, see Chapter 3, “Working with Aperture
Projects,” on page 71.
Chapter 2 The Aperture Interface 41
Page 42

Viewer and Browser
The Viewer and Browser work together to display a project’s or album’s images. When
you select a project or album in the Projects panel, images appear in the Browser.
When you select one or several image thumbnails in the Browser, those images are
displayed in the Viewer. You can use the Viewer to examine an image at its full size or
compare multiple images side by side.
E
D
C
B
A
F
G
H
Browser The Browser displays the contents of any project or album selected
A
Grid View/List View
B
buttons
Sorting pop-up menu Sort your images by a variety of sort properties in this pop-up
C
Sort Direction button Use this button in conjunction with the Sorting pop-up menu to
D
Viewer The Viewer displays the images you’ve selected in the Browser.
E
Query HUD button
F
and search field
42 Part I Interface and Acquisition
I
in the Projects panel. By default, the Browser displays images in a
project or album as a set of gridded image thumbnails. You can
also view your images in list view.
Display the Browser contents in grid view (a grid of image
thumbnails) or in list view (a list of sortable file data).
menu, or define your own custom sort criteria.
arrange the order of your images.
You can apply adjustments, keywords, and metadata to an image
in the Viewer.
Search for images by entering a term in the search field or
choosing an option from the search field pop-up menu (with a
magnifying glass icon). To perform a more complex search for
images using the Query HUD, click the Query HUD button (to the
left of the search field).
Page 43
I
Shuttle control Use the Shuttle control to quickly move through your
G
Scroll bar Use the scroll bar to scroll through your image thumbnails.
H
Thumbnail Resize slider Use the Thumbnail Resize slider to quickly change the size of your
I
To learn more about using the Browser and Viewer, see Chapter 5, “Working with
Images in the Browser,” on page 119 and Chapter 6, “Displaying Images in the Viewer,”
on page 145.
Control Bar
The control bar contains buttons and controls you can use to rotate, rate, and navigate
through images, as well as apply keywords to them. It runs across the bottom of the
Aperture main window. If you don’t need the control bar, you can hide it by choosing
Window > Hide Control Bar (or press D).
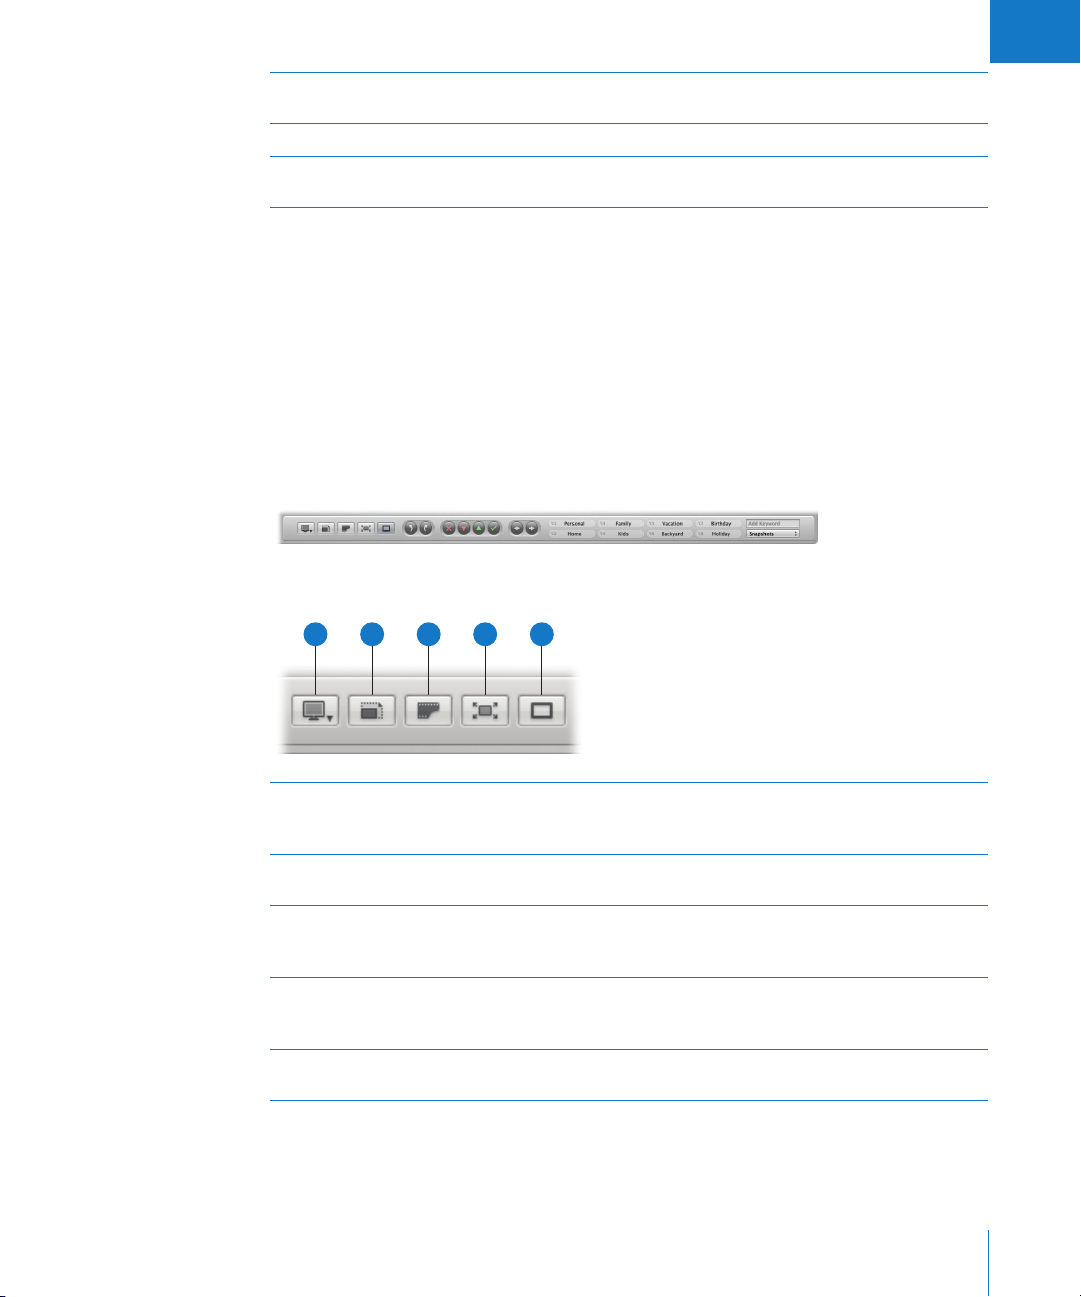
Display Controls
image thumbnails.
image thumbnails.
A
Viewer Mode
A
pop-up menu
Zoom Viewer button Click this button to move between viewing an image at actual size
B
Show Master Image
C
button
Full Screen button Click this button to switch to Full Screen mode. For more
D
Primary Only button Click this button to temporarily change between making metadata
E
C
B
D
E
Choose how to view your images and arrange your displays from
this pop-up menu. For more information, see Chapter 6, “Displaying
Images in the Viewer,” on page 145.
and fitting the image to the Viewer’s screen size.
Click this button to view the original digital master file without any
applied adjustments. Click again to switch the view back to the
current version.
information, see Chapter 7, “Viewing Images in Full Screen Mode,”
on page 163.
changes to all selected images or the primary selection only.
Chapter 2 The Aperture Interface 43
Page 44

Rotate Buttons
A
A
B
Rating Buttons
A
A
B
C
D
B
Rotate Left Click this button to rotate the selected image to the left.
Rotate Right Click this button to rotate the selected image to the right.
B
C
D
Reject Click this button to give the selected image a Reject rating.
Decrease Rating Click this button to decrease the rating of the selected image.
Select Click this button to give the selected image a Select rating
(five stars).
Increase Rating Click this button to increase the rating of the selected image.
To learn more about rating your images, see Chapter 9, “Rating Images,” on page 187.
Navigation Buttons
A
Previous Image Click this button to go to the previous image.
A
Next Image Click this button to go to the next image.
B
44 Part I Interface and Acquisition
B
Page 45

I
Keyword Controls
A
Individual keyword
A
buttons
Add Keyword field Enter a new keyword, then press Return. Aperture creates a new
B
Keyword Preset Group
C
pop-up menu
Click any of these buttons to apply a preset keyword to a selected
image or group of images Hold down Shift and click the button to
remove the keyword.
keyword and applies it to the selected image.
Choose a keyword preset group to display on the keyword buttons,
or edit the buttons in an existing keyword preset group.
B
C
Note: If the Adjustments and Metadata Inspectors are shown, there may not be
enough room to show the entire control bar. In that case, the keyword controls are not
shown. You can hide the Inspectors panel by pressing I.
To learn more about applying keywords, see Chapter 10, “Applying Keywords to
Images,” on page 199.
Toolbar
The toolbar is a collection of buttons and tools located at the top of the Aperture main
window. Its buttons and tools are grouped by function: there are buttons for creating
projects, organizing images, and configuring the Aperture workspace, as well as tools
for applying adjustments. The toolbar is shown by default, but you can hide it by
choosing View > Hide Toolbar.
You can customize the toolbar. For more information, see “Customizing the Toolbar”
on page 65.
Note: Because you can customize the toolbar, adding and deleting the buttons you
want, your toolbar may appear different from the one pictured in this manual.
Chapter 2 The Aperture Interface 45
Page 46
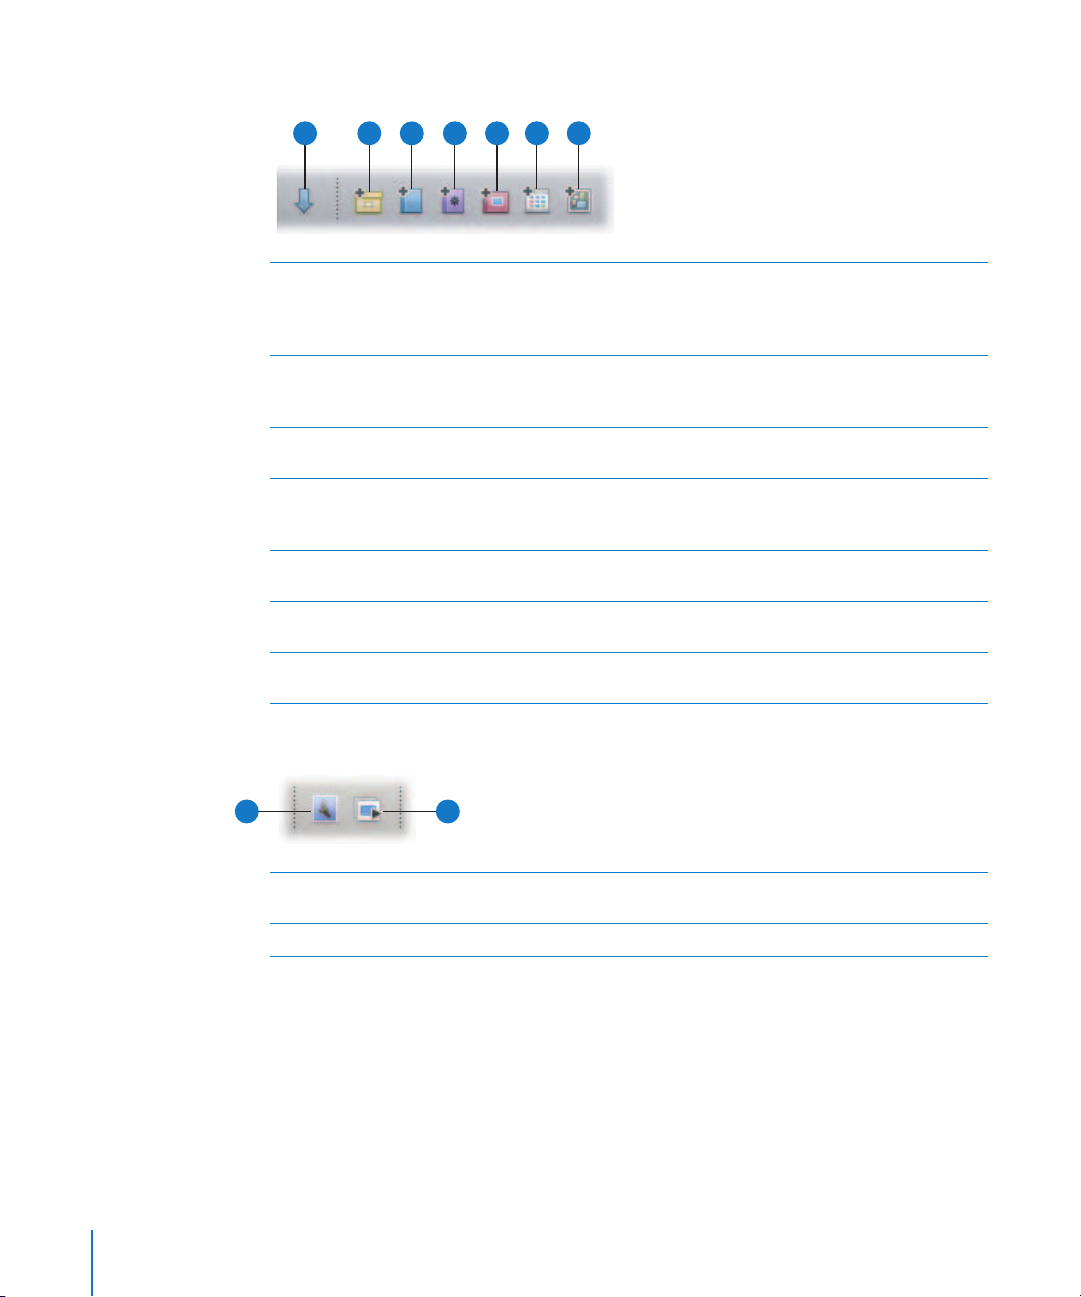
Import and Project Buttons
A
A
B
C
D
E
F
G
B
Import Panel
New Project
New Album
New Smart Album
New Book Album
New Web Gallery Album
New Light Table Album
C
D
E
G
F
Click this button to show or hide the Import panel. When you
select either the camera, a memory card, or a mounted drive, the
Import dialog appears. For more information, see “Import Panel” on
page 52.
Click this button to create a new project. You will have the option
to create an empty project, a project with any images you’ve
selected, or a project with all the images in the Browser.
Click this button to create a new album containing your current
image selection.
Click this button to create a new Smart Album. For more
information, see Chapter 13, “Grouping Images with Smart Albums,”
on page 267.
Click this button to create a new book album. For more
information, see Chapter 19, “Creating Books,” on page 357.
Click this button to create a new web gallery album. For more
information, see Chapter 18, “Creating Webpages,” on page 333.
Click this button to create a new Light Table album. For more
information, see Chapter 17, “Using the Light Table,” on page 323.
Email and Slideshow Buttons
A
A
B
46 Part I
B
Email
Slideshow
Interface and Acquisition
Click this button to open your email program and attach
selected images.
Click this button to initiate a slideshow of the selected images.
Page 47
I
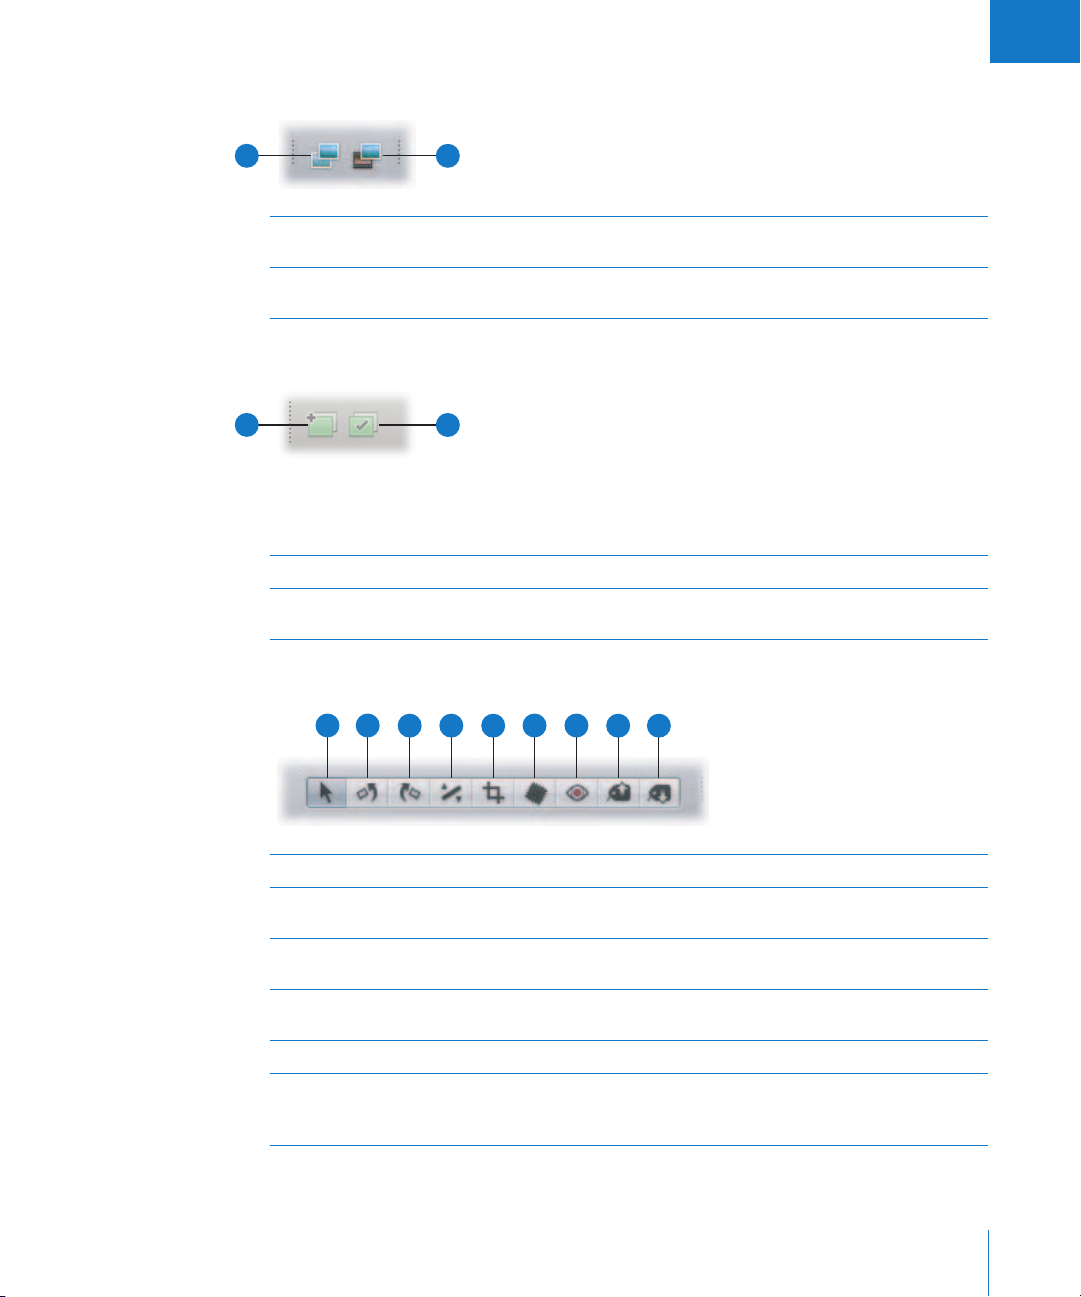
Version Buttons
A
Duplicate Version
A
New Version
B
From Master
B
Click this button to duplicate the selected image version, with all
applied metadata and adjustments.
Click this button to create a new version from a selected image’s
digital master file.
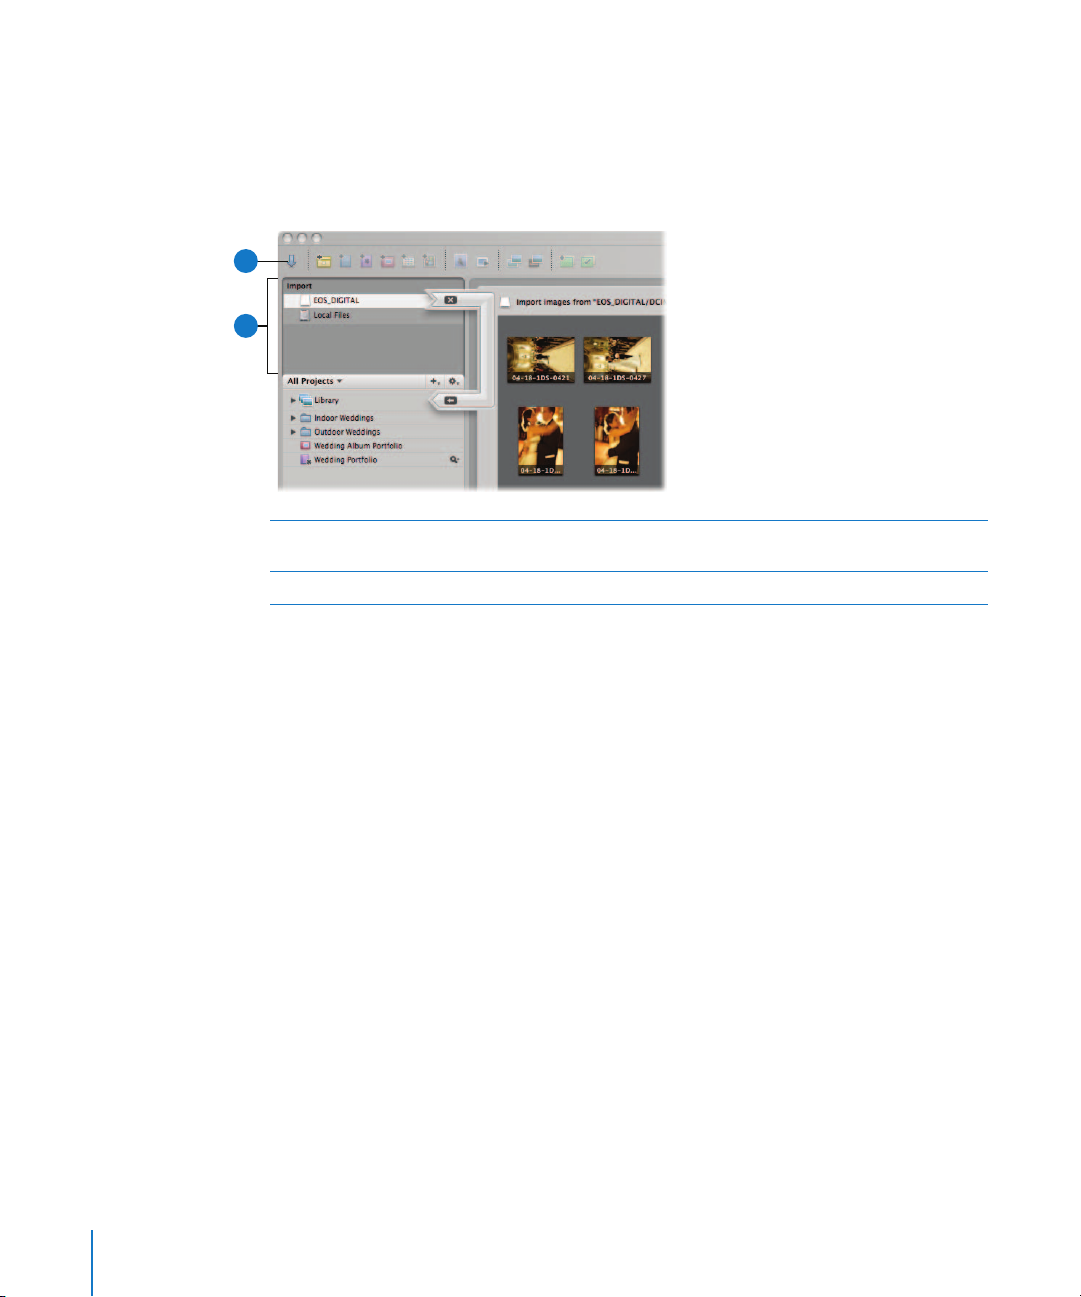
Stacking Buttons
A
B
For details about working with stacks, see Chapter 8, “Stacking Images
and Making Picks,” on page 175.
A
B
Stack
Stack Pick
Click this button to group the selected images in a stack.
Click this button to mark the selected image as the stack’s pick, or
best image.
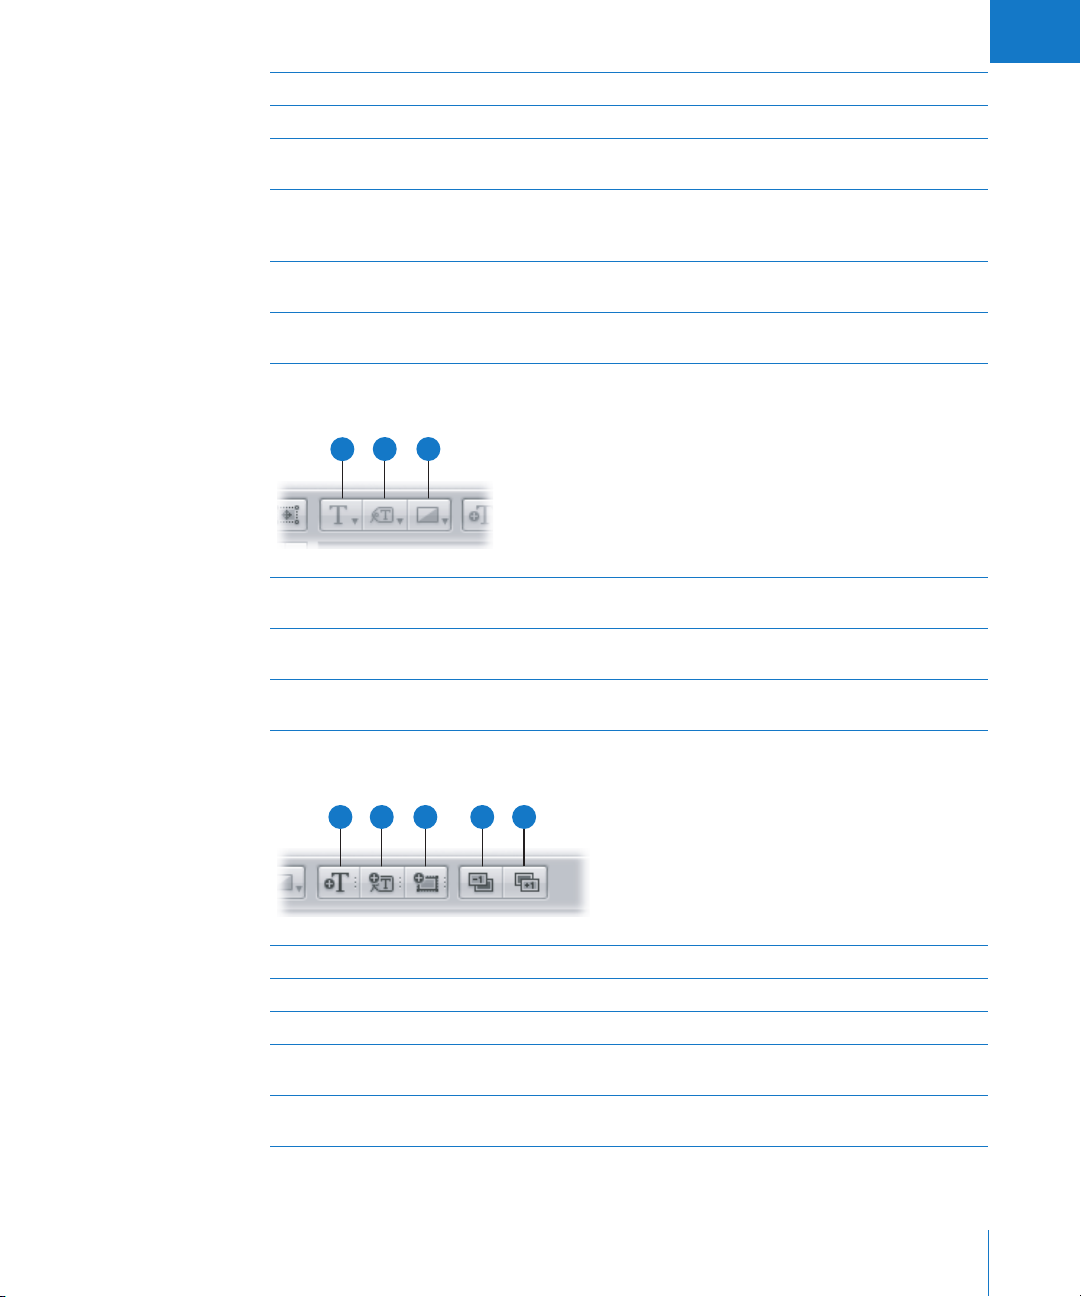
Adjustment Tools
A B
C
D
E
G
F
H
I
Selection
A
Rotate Left
B
Rotate Right
C
Straighten
D
Crop
E
Spot & Patch
F
Chapter 2
The Aperture Interface
Select projects, albums, and images with this tool.
Rotate an image to the left with this tool. You can use this tool to
rotate an image displayed in the Viewer or Browser.
Rotate an image to the right with this tool. You can use this tool to
rotate an image displayed in the Viewer or Browser.
Use the guides to help manually straighten (or level) the
selected image.
Trim the selected image with this tool.
Remove imperfections in the image, such as sensor dust, with this
tool. The tool either copies the pixels around the blemish (“spotting”)
or copies pixels from another area of the image (“patching”).
47
Page 48

Red Eye Reduce red-eye, occurring when the subject’s retinas reflect light
G
Lift Copy a set of metadata and adjustments, including cropping and
H
Stamp Stamp, or apply, a copied set of adjustments or metadata to one or
I
from your camera’s flash, with this tool.
straightening of images, from a selected image with this tool.
several images with this tool.
For more information about working with the adjustment tools, see
Performing Image Adjustments in the Aperture Help menu.
Loupe and Keywords HUD Buttons
B
A
Loupe Click this button to open the Loupe tool, which zooms in on your
A
Keywords HUD Click this button to show or hide the Keywords HUD.
B
image by magnifying the area of the image it is placed over. You
can adjust the diameter of the Loupe by choosing View > Increase
Diameter or View > Decrease Diameter.
Adjustments and Metadata Inspector Buttons
Aperture provides three layout buttons that you can use to quickly change the
workspace layout.
A
B
Adjustments Inspector Click this button to show or hide the Adjustments Inspector.
A
Metadata Inspector Click this button to show or hide Metadata Inspector.
B
For more information about workspace layouts, see “Workspace Layouts” on page 64.
48 Part I Interface and Acquisition
Page 49

I
Adjustments Inspector
You can use controls in the Adjustments Inspector to apply, edit, and remove image
adjustments. Controls in the Adjustments Inspector are grouped according to the type
of image adjustment they perform. You can see the controls for an adjustment by
clicking its disclosure triangle.
To show the Adjustments Inspector, do one of the following:
m Choose Window > Show Inspectors (or press I) to open the Inspectors panel.
m Double-click an image in the Browser to open the Inspectors panel.
m Choose Window > Show Adjustments (or press Control-A).
B
C
A
D
Adjustments Click the disclosure triangle for an adjustment to view its controls.
A
Add Adjustments
B
pop-up menu
Adjustment Action
C
pop-up menu
Reset button Click the Reset button for an adjustment to reset the controls to
D
Chapter 2 The Aperture Interface 49
Select the checkbox for an adjustment to apply changes using the
adjustment controls.
Choose the types of adjustments you want to apply to an image
from this pop-up menu. When you choose an adjustment, its
controls appear in the Adjustments Inspector.
Choose a histogram view and remove selected or all
adjustments made.
their default settings.
Page 50

To remove an adjustment from an image, deselect the checkbox for the adjustment. For
more information about using adjustment controls, see Performing Image Adjustments in
the Aperture Help menu.
Although you can apply initial adjustments with the Adjustments Inspector, it’s often
more convenient to use the Adjustments HUD in Full Screen mode. For more
information, see Chapter 7, “Viewing Images in Full Screen Mode,” on page 163.
Metadata Inspector
The Metadata Inspector displays an image’s caption text, keywords, version number,
filename, and file size. You can also view EXIF (Exchangeable Image File) and IPTC
(International Press Telecommunications Council) data associated with your image. EXIF
metadata is embedded with an image file by the digital camera and includes camera
settings such as shutter speed, date and time, focal length, exposure, metering pattern,
and flash information. IPTC information can be embedded in a digital image with most
software programs used to edit photos, and can include a caption, the place and date a
photo was taken, and copyright information.
To show the Metadata Inspector, do one of the following:
m Choose Window > Show Inspectors (or press I) to open the Inspectors panel.
m Double-click an image in the Browser to open the Inspectors panel.
50 Part I Interface and Acquisition
Page 51

I
m Choose Window > Show Metadata (or press Control-D).
B
C
A
Metadata display
A
buttons
Metadata View
B
pop-up menu
Metadata Action
C
pop-up menu
Click a button to select the type of metadata to display.
Choose the metadata view being displayed from this pop-up menu.
Choose options for editing and arranging your metadata views and
for creating metadata presets from this pop-up menu.
Chapter 2 The Aperture Interface 51
Page 52
Import Panel
The Import panel displays a list of connected cameras, card readers, and external hard
disk drives, as well as local hard disks and mounted servers. To import images into
Aperture, you select a device in the panel or connect a camera or card reader, and the
Import dialog appears.
B
A
Import panel This list displays all locations from which you can currently import
A
Import Panel button Click this button to show or hide the Import panel.
B
images, including internal disks and connected drives.
For more information, see Chapter 4, “Importing Images,” on page 87.
52 Part I Interface and Acquisition
Page 53

I
Vaults Panel
The Vaults panel lists your backup vaults and their locations. Vaults are usually located
on external FireWire drives.
As you add images to the Library, Aperture automatically tracks which managed image
files have been backed up to your vault. When your vault is up to date, the Vault Status
button appears black. When a change to at least one version occurs, such as an
adjustment, the Vault Status button appears yellow. When Aperture determines that
even a single master file has not been backed up, the Vault Status button appears red.
You can have Aperture update your vaults whenever you want.
A
B
C
D
Vault Status buttons Click the Vault Status button next to a vault to update the vault.
A
Vaults Panel button Click this button to show or hide the Vaults panel.
B
Vault Action
C
pop-up menu
Update All Vaults
D
button
The Vault Status button changes color to indicate the current
update status of the vault. Black means the vault is up to date.
Yellow means that changes have been made to images that have
not been backed up. Red means that images have been added to
the Library that have not been backed up.
Add, remove, and update vaults from this
pop-up menu.
Click this button to update all your existing vaults.
For more information, see Chapter 20, “Backing Up Your Images,” on page 399.
Chapter 2 The Aperture Interface 53
Page 54

Select a page to edit in
the Pages panel.
Book Layout Editor
When you create a new book album, the Book Layout Editor appears. In it, you can
create a variety of printed books to showcase your images.
Design each page in
the Book Layout Editor.
Pages Panel Area
D
E
C
B
A
G
H
A
B
F
Add Pages
pop-up menu
Pages panel Select an individual book page in the Pages panel to view, or
Choose to add one or several pages to your book from this
pop-up menu.
rearrange your book pages.
54 Part I Interface and Acquisition
Page 55
I
Theme button Click this button to choose a theme and layout for your book’s pages.
C
Edit Content button Click this button to change images or edit text on your pages.
D
Edit Layout button Click this button to change the page layout, moving and resizing
E
Book Action
F
pop-up menu
Set Master Page
G
pop-up menu
Delete Pages button Click this button to delete one or several selected pages from
H
Book Layout Controls
C
B
A
text, metadata, and photo boxes on pages.
Choose options to reflow the images in a book, add an index and
page numbers, or add and change the look of text, metadata, and
photo boxes from this pop-up menu.
Choose the master page you want to apply to a selected page from
this pop-up menu.
your book.
Text Style
A
pop-up menu
Metadata Format
B
pop-up menu
Photo Filter
C
pop-up menu
Choose the style of text you want for a selected text box using this
pop-up menu.
Choose the type of metadata you want to display with your images
from this pop-up menu.
Choose a filter to change the look of images. For example, you might
apply filters that change an image to black and white or sepia.
Text, Metadata, and Photo Box Buttons
A
Add Text Box Click this button to add a text box to the page.
A
Add Metadata Box Click this button to add a metadata box to the page.
B
Add Photo Box Click this button to add a photo box to the page.
C
Send Backward Click this button to move a selected box backward in the stacking
D
Bring Forward Click this button to move a selected box forward in the stacking
E
C
B
D
E
order of overlapping text or image boxes.
order of overlapping text or image boxes.
Chapter 2 The Aperture Interface 55
Page 56

Page Display Controls
B
A
Scale To Fit button Click this button to scale the display of your pages to fit the Book
A
Actual Size button Click this button to view the selected page at its actual size.
B
Display Size slider Drag this slider to increase or decrease the size of the page.
C
C
Layout Editor screen size.
Cover and Page Display Buttons
B
A
Large Hardcover Click this button to choose a large hardcover book format.
A
Large Softcover Click this button to choose a large softcover book format.
B
Show Full Spreads Click this button to display two facing pages.
C
Show Single Pages Click this button to display single pages.
D
C
D
Printing and Page Navigation Buttons
A
Print Click this button to print your book’s pages.
A
Buy Book Click this button to purchase a printed copy of your book from
B
Previous Page Click this button to go to the previous page of your book.
C
Next Page Click this button to go to the next page of your book.
D
B
To learn more about creating books, see Chapter 19, “Creating Books,” on page 357.
56 Part I Interface and Acquisition
C
D
Apple’s print vendor.
Page 57

I
Webpage Editor
You can use the Webpage Editor to create professional-quality, gallery-style pages and
web journal pages for displaying your images. After designing your pages, you can post
them to your .Mac account or web server. The controls in the Webpage Editor differ slightly
depending on whether you have selected a web gallery album or a web journal album.
Web Gallery Controls
To work with a web gallery in the Webpage Editor, select a web gallery album in the
Projects panel and select a page to view from the thumbnail pages on the left side.
When the selected page appears, you can add and arrange images and text.
D
E F
C
B
A
Detail Images panel Click the thumbnail image in this panel to see the enlarged version
A
Gallery Pages panel Click a page’s thumbnail to see the enlarged version.
B
Site Theme button Click this button to choose a theme, or layout, for your webpages.
C
Metadata View
D
pop-up menu
Columns value slider Specify the number of columns you want on a page.
E
Rows value slider Specify the number of rows you want on a page.
F
“Fit images within”
G
pop-up menu
Width value slider Specify the width of the images displayed on the page.
H
Height value slider Specify the height of the images displayed on the page.
I
of the selected image.
Choose a metadata view to use with the webpage images from
this pop-up menu.
Choose how to display images on the webpage.
G
H
I
J
K
L M
Chapter 2 The Aperture Interface 57
Page 58
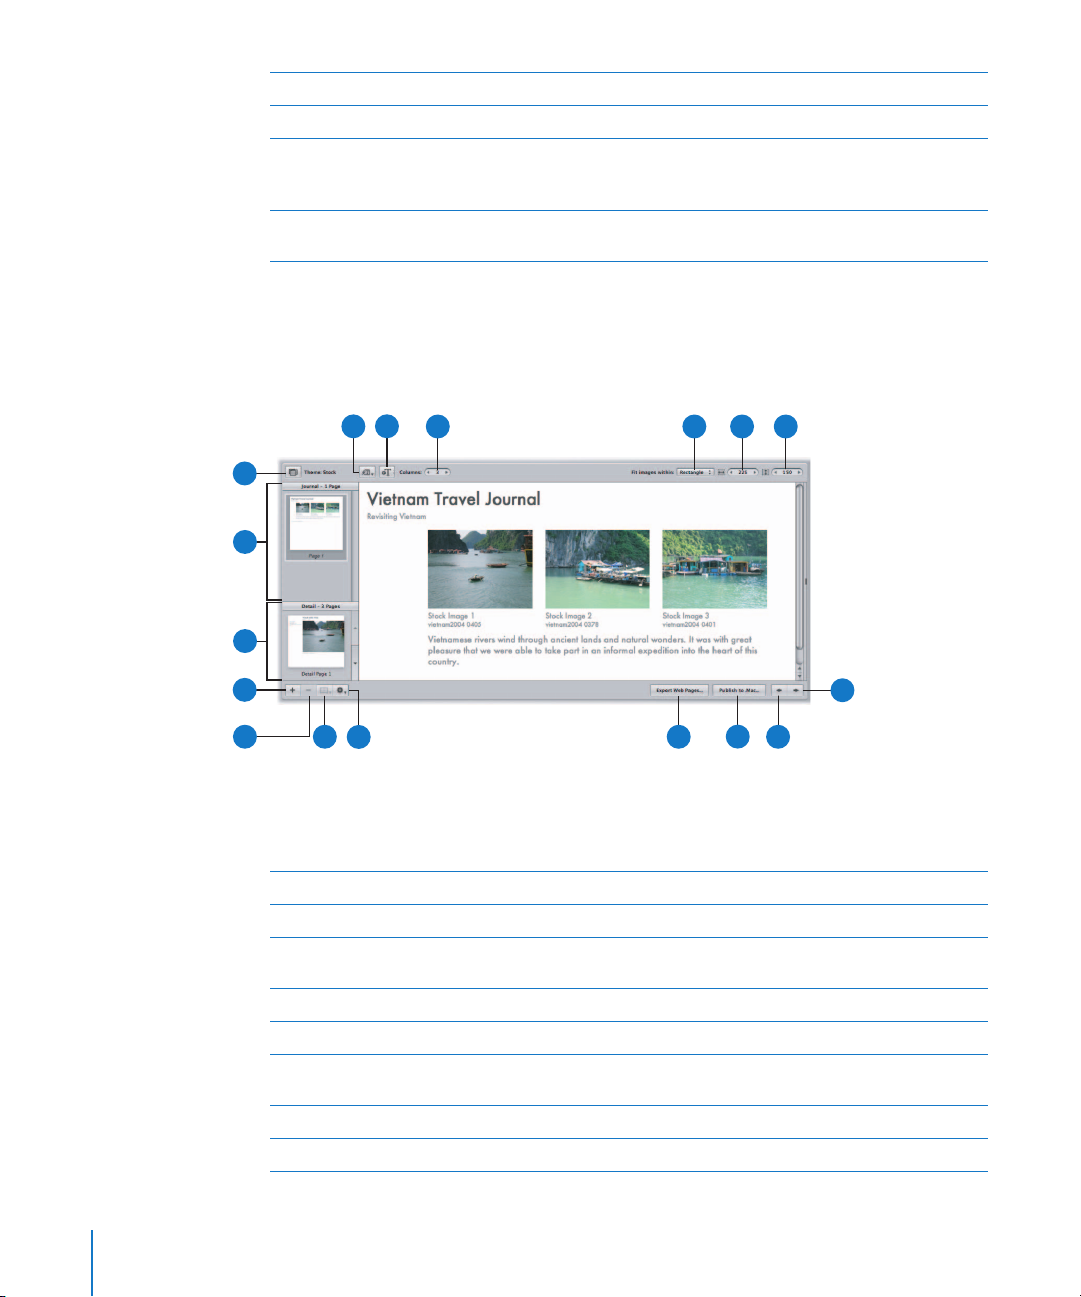
Next Page button Click this button to go to the next web gallery page.
J
Previous Page button Click this button to go to the previous web gallery page.
K
Publish to .Mac button Click this button to publish your finalized webpages to your .Mac
L
Export Web Pages
M
button
account. For more information, see “Exporting to .Mac” on
page 348.
Click this button to export your webpages. For more information,
see “Exporting Webpages as HTML Files” on page 350.
Web Journal Controls
You can also create journal-style webpages, mixing paragraphs of text and images, to
display on the web. When working with a web journal, you can manually arrange
images and text on the page.
G
F
E
D
C
B
A
Q
P
H
I
O
K
J
L
N
M
To work with a web journal in the Webpage Editor, select a web journal album in the
Projects panel, and select a page to view from the thumbnail pages on the left side.
When the selected page appears, you can add and arrange images and text.
Remove Page button Click this button to remove a selected page from your web journal.
A
Add Page button Click this button to add a page to your web journal.
B
Detail Images panel Click the thumbnail image in this panel to see the enlarged version
C
Journal Pages panel Select a page’s thumbnail in this panel to see the enlarged version.
D
Site Theme button Click this button to choose a theme, or layout, for your webpage.
E
Metadata View
F
pop-up menu
Add Text Box button Click this button to add a text box to the current webpage.
G
Columns value slider Specify the number of columns you want on a page.
H
of a selected image.
Choose a metadata view to use with the webpage images from
this pop-up menu.
58 Part I Interface and Acquisition
Page 59

I
“Fit images within”
I
pop-up menu
Width value slider Specify the width of the images displayed on the page.
J
Height value slider Specify the height of the images displayed on the page.
K
Next Page button Click this button to go to the next webpage.
L
Previous Page button Click this button to go to the previous webpage.
M
Publish to .Mac button Click this button to publish your finalized webpages to your .Mac
N
Export Web Pages
O
button
Page Action
P
pop-up menu
Page Template
Q
pop-up menu
Choose how images appear on the webpage from this pop-up menu.
account. For more information, see “Exporting to .Mac” on
page 348.
Click this button to export your webpages. For more information,
see “Exporting Webpages as HTML Files” on page 350.
Rearrange the order of images and choose the conditions for
automatically adding pages to your web journal from this
pop-up menu.
Choose a page template, or layout, from this pop-up menu.
To learn more about creating webpages, see Chapter 18, “Creating Webpages,” on
page 333.
Chapter 2 The Aperture Interface 59
Page 60

Light Table
The Light Table provides an open workspace where you can freely arrange images. You
can use the Light Table to review and compare images, create mockups of webpages,
compare color values in a selection of images before applying color corrections, or do
anything else that involves viewing and comparing your images.
B
A
Put Back button Click this button to remove a selected image from the Light Table.
A
Uncover button Click this button to reveal images that are covered by other images
B
Light Table Zoom slider Drag the Light Table Zoom slider to change the Light Table’s size.
C
Scale to Fit All
D
Items button
Navigator button When the Light Table is larger than your screen, click this button to
E
Show All Images button Click this button to see the entire contents of the Light Table album
F
Show Unplaced
G
Images button
in the Light Table.
Click this button to fit the entire Light Table on your screen.
reposition your view on another area of the Light Table.
in the Browser.
Click this button to see only images in the Browser that are not yet
placed in the Light Table.
C
D
E
F
G
To learn more about the Light Table, see Chapter 17, “Using the Light Table,” on page 323.
60 Part I Interface and Acquisition
Page 61

I
Heads-Up Displays
Heads-up displays, or HUDs, are collections of related tools and controls contained in a
floating panel. You can move a HUD as far as your display screen extends. You can use
HUDs in regular and Full Screen mode.
Adjustments HUD
The Adjustments HUD contains controls for Aperture image adjustments, such as
Exposure, Levels, and White Balance. The controls in the Adjustments HUD are the
same as those in the Adjustments Inspector. You can use the HUD in the Viewer or in
Full Screen mode. To show controls for an adjustment, click its disclosure triangle; to
remove the adjustment applied to the image, deselect the adjustment’s checkbox.
To show the Adjustments HUD:
m Choose Window > Show Adjustments HUD (or press H).
F
E
D
C
B
A
M
A
B
C
D
E
F
G
L K
White Balance controls Adjust color temperature and tint using these controls.
Exposure controls Use these controls to adjust exposure, contrast, saturation, and
RAW Fine Tuning controls Use these controls to select the setting for treatment of RAW images.
Auto Exposure button Click this button to have Aperture automatically adjust the
Auto Exposure
Reset button
Add Adjustments
pop-up menu
Adjustment Action
pop-up menu
G
H
I
J
brightness, or adjust the tint of the black, gray, and white color
values in the selected image.
image’s exposure.
If you don’t like the Auto Exposure adjustments, click this Reset
button to remove them.
Choose the type of adjustment you want to apply to an image
from this pop-up menu. When you choose an adjustment, its
controls appear in the Adjustments HUD.
Choose a histogram view and remove selected or all
adjustments made.
Chapter 2 The Aperture Interface 61
Page 62

Auto Levels
H
Combined button
Auto Levels
I
Separate button
Auto Levels
J
Reset button
Levels controls Use these controls to adjust the shadows, midtones, and highlights
K
Highlights & Shadows
L
controls
Noise Reduction
M
controls
Click this button to have Aperture automatically adjust the levels in
the selected image based on the combined luminance values of all
three color channels.
Click this button to have Aperture automatically adjust the levels in
the selected image by individual color channels.
If you don’t like the Auto Levels adjustments, click this Reset button
to remove them.
in the image based on a histogram that can be set to show
luminance; combined red, green, and blue channels (RGB); or
individual red, green, and blue channels.
Use these controls to adjust the shadows and highlights in the image.
Use these controls to adjust the noise in the image.
For more information about using the Adjustments HUD and its controls, see
Performing Image Adjustments in the Aperture Help menu.
Individual Adjustment Tool HUDs
Many of the Aperture adjustment tools, including Crop, Spot & Patch, Red Eye, Lift, and
Stamp, work in conjunction with HUDs.
To view any of these HUDs:
m Select the adjustment tool in the toolbar.
To learn more about the adjustment tools, see Performing Image Adjustments in the
Aperture Help menu.
62 Part I Interface and Acquisition
Page 63
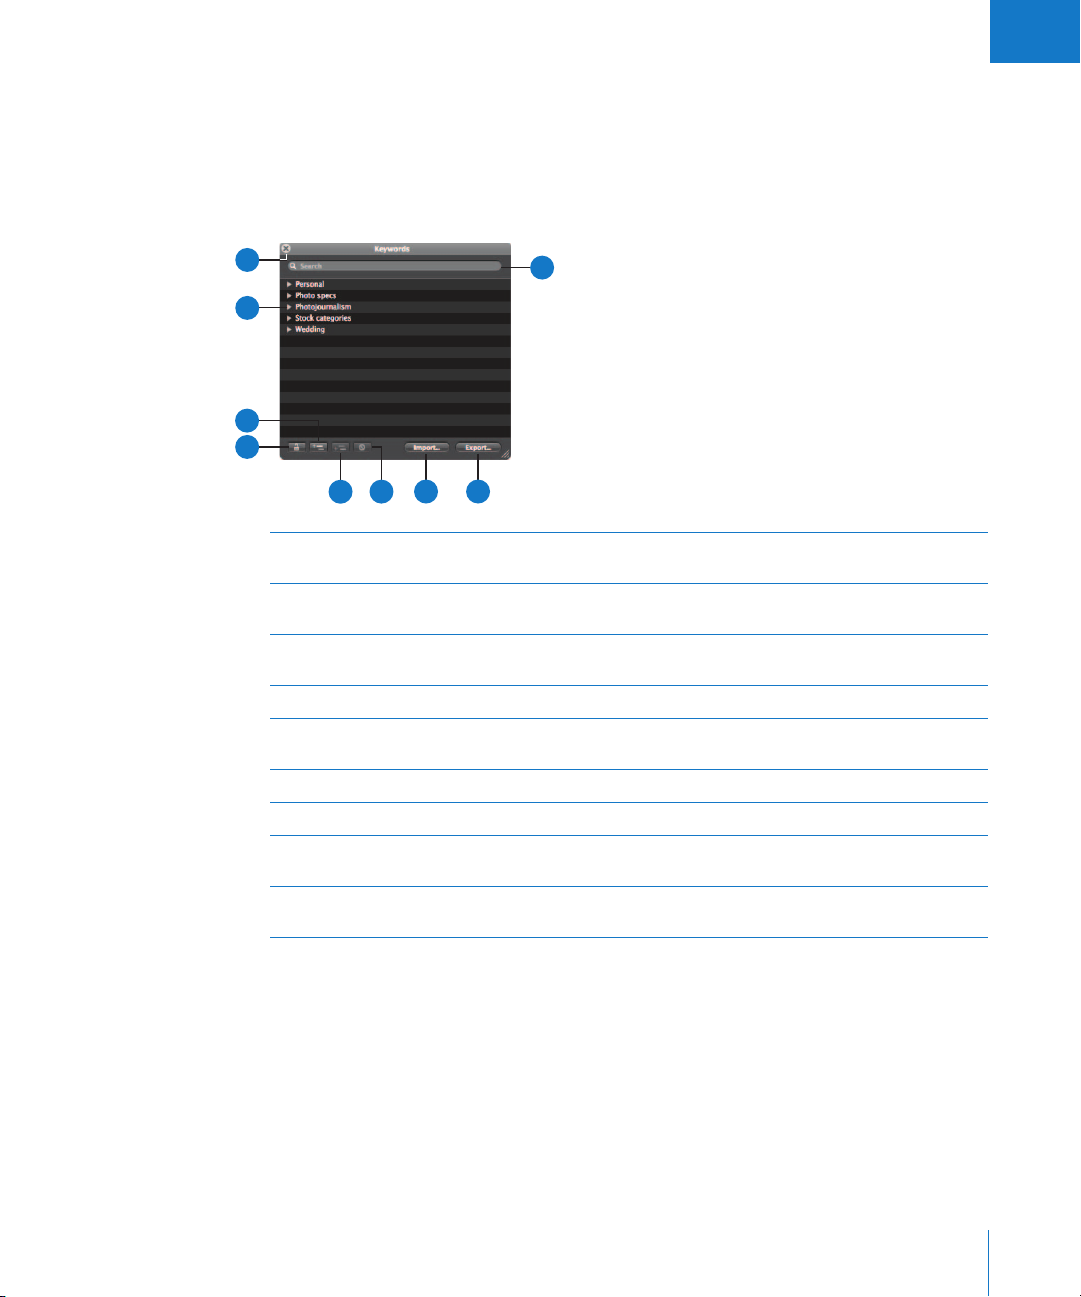
I
Keywords HUD
The Keywords HUD contains a library of keywords, allowing you to efficiently organize
and apply keywords to your images.
To show the Keywords HUD:
m Choose Window > Show Keywords HUD (or press Shift-H).
D
C
B
A
H
I
Lock button Click this button to lock the Keywords HUD and prevent changes.
A
Add Keyword button Click this button to add a keyword to the keyword library of the
B
Disclosure triangle Click the disclosure triangle for a keyword group to view all
C
Close button Click this button to close the Keywords HUD.
D
Search field Enter text to search for keywords that match the text. Click the
E
Export button Click this button to export your Aperture keyword list.
F
Import button Click this button to import keywords into the Keywords HUD.
G
Remove Keyword
H
button
Add Subordinate
I
Keyword button
G F
E
Click it again to unlock the HUD.
Keywords HUD.
keywords in the group.
Reset button (with an X) to clear the field.
Click this button to remove one or more selected keywords.
Click this button to add a subordinate keyword, such as a keyword
within a keyword group.
Chapter 2 The Aperture Interface 63
Page 64

Workspace Layouts
In addition to allowing you to show and hide areas of the interface, Aperture offers
three preconfigured workspace layouts, created to accommodate different workflows.
 Basic: Use the Basic workspace layout to review images, perform initial rating passes,
and create and work with stacks of images.
 Maximize Browser: Use the Maximize Browser workspace layout to work with
multiple projects.
 Maximize Viewer: Use the Maximize Viewer workspace layout to see an enlarged view
of images with the Browser and Viewer controls still available. This workspace layout
is useful when working with the Light Table.
You can easily switch between workspace layouts by choosing commands or pressing
keyboard shortcuts.
To choose a workspace layout, do one of the following:
m Choose Window > Layouts, then choose the layout you want from the submenu.
m Press Command-Option and the letter corresponding to the layout you want: S for
Basic, B for Maximize Browser, or V for Maximize Viewer.
64 Part I Interface and Acquisition
Page 65

I
You can use keyboard shortcuts to quickly show or hide different areas of your workspace.
Keyboard shortcut Function
shift I
Show/Hide Import panel
shift R
W
V
shift
I
option W
shift W
shift T
F
D
Show/Hide Vaults panel
Show/Hide Projects panel
Show/Hide Viewer
Show/Hide keyword controls
Show/Hide Inspectors panel
Swap workspace
Rotate workspace
Show/Hide toolbar
Turn on/off Full Screen mode
Customizing the Toolbar
The toolbar can be customized to display exactly the tools you need. You can
customize the toolbar by selecting the tools to include, rearranging them, and
choosing whether both the tool’s icon and text appear.
Hiding and Showing the Toolbar
You can choose to hide the toolbar completely.
To hide the toolbar:
m Choose View > Hide Toolbar (or press Shift-T).
To show a toolbar that has been hidden:
m Choose View > Show Toolbar (or press Shift-T).
∏ Tip: You can also quickly hide or show the toolbar by clicking the Toolbar button (a
gray oblong button) in the top-right corner of the Aperture main window.
Chapter 2 The Aperture Interface 65
Page 66
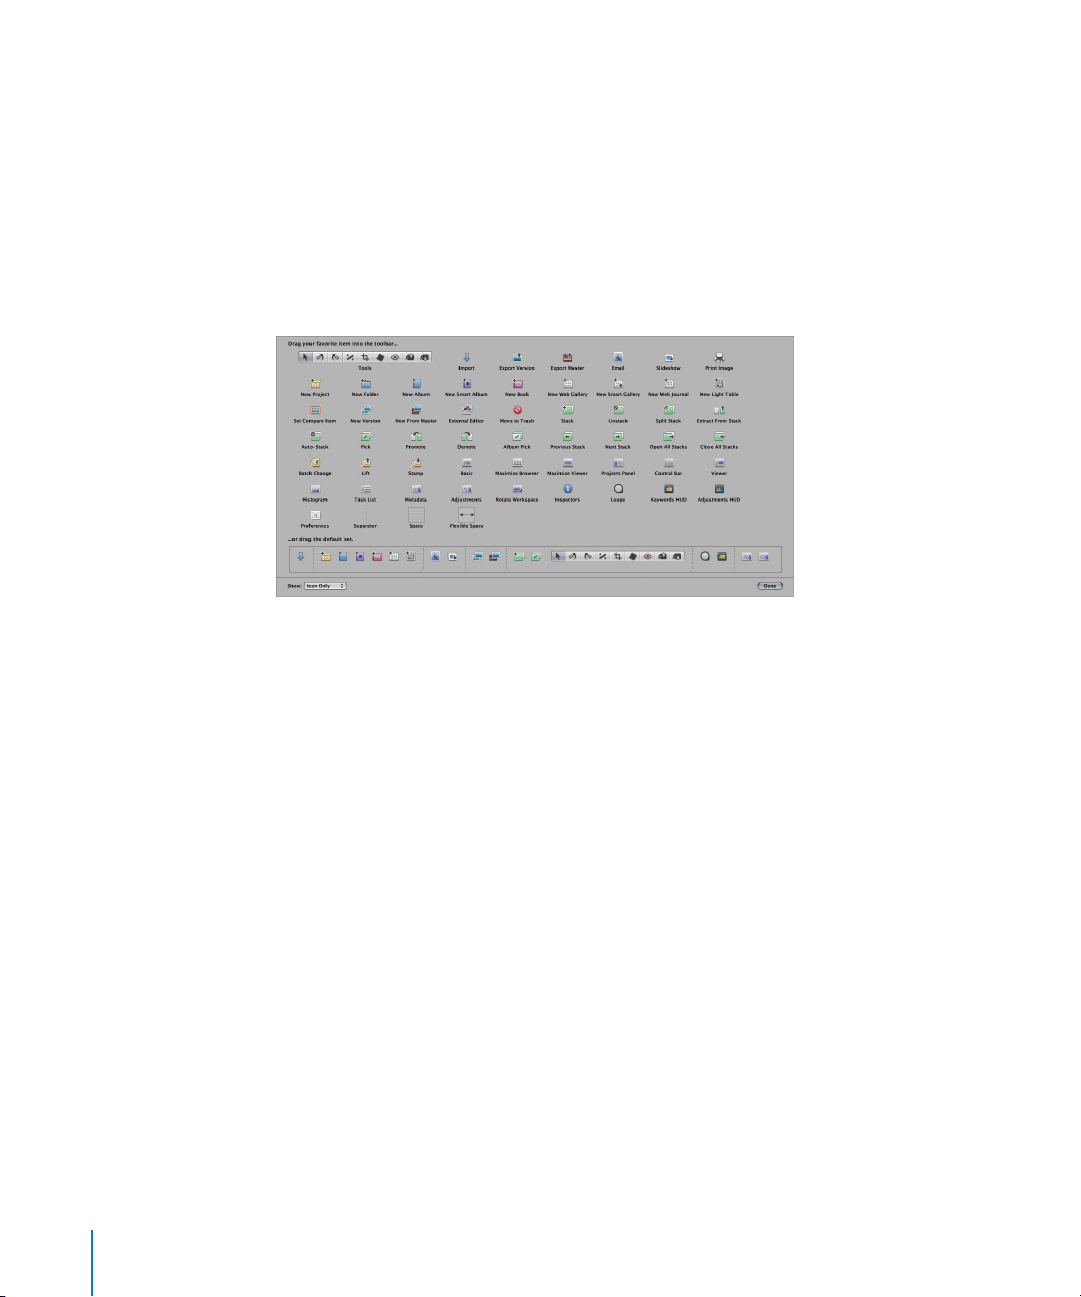
Customizing the Toolbar Buttons
Aperture provides a simple drag-and-drop interface for adding, deleting, and
rearranging the toolbar buttons.
To customize the toolbar:
1 Do one of the following:
 Choose View > Customize Toolbar.
 Control-click the toolbar, then choose Customize Toolbar from the shortcut menu.
A dialog appears, showing icons for toolbar buttons and tools.
2 Configure the toolbar by doing any of the following:
 To add tools to the toolbar: Drag their icons from the dialog to the location where you
want them to appear in the toolbar.
 To remove items from the toolbar: Drag them out of the toolbar, or Control-click the
item you want to remove and choose Remove Item from the shortcut menu.
 To change the order of the items in the toolbar: Drag each item to its new position.
 To control whether each tool’s icon and text appear in the toolbar: Choose Text Only,
Icon Only, or Icon & Text from the Show pop-up menu in the lower-left corner of the
dialog, or Control-click the toolbar and choose Text Only, Icon Only, or Icon & Text
from the shortcut menu.
3 Click Done when you have finished configuring the toolbar.
To reset the toolbar:
m To return the toolbar to its default state, drag the default toolbar up from the bottom
of the dialog and into the toolbar area.
66 Part I Interface and Acquisition
Page 67
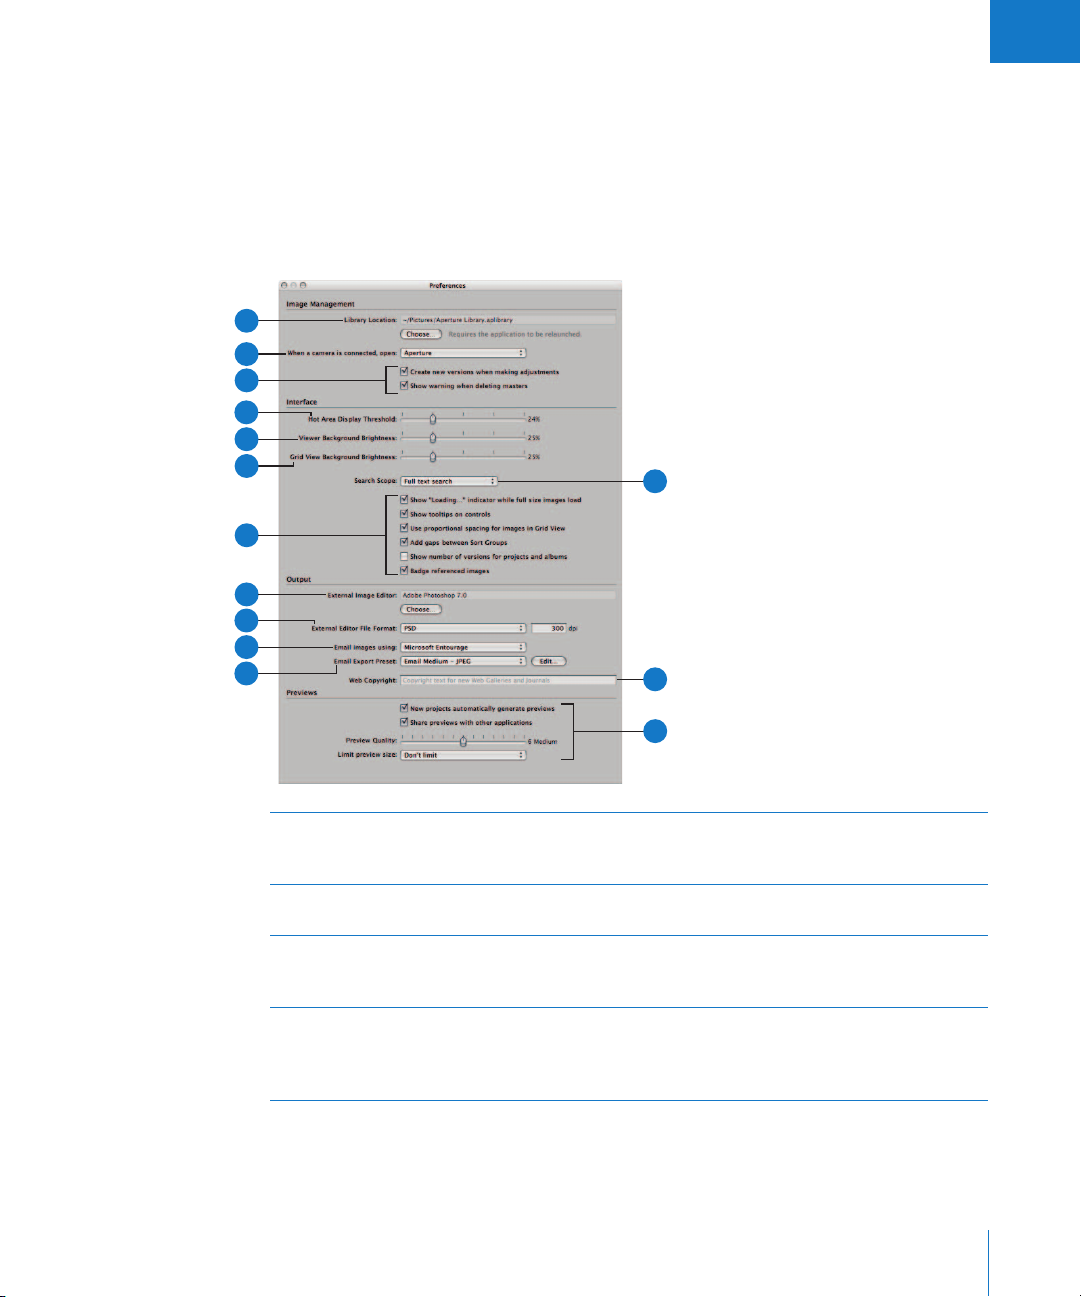
I
Setting Aperture Preferences
You can use the Preferences window to specify settings in Aperture. By taking time to
specify your preference settings, you can speed up your workflow.
To open the Preferences window:
m Choose Aperture > Preferences, or press Command-comma (,).
The Preferences window appears.
K
J
I
H
G
F
E
D
C
B
A
L
M
N
Email Export Preset
A
pop-up menu
“Email images using”
B
pop-up menu
External Editor File
C
Format pop-up menu
External Image
D
Editor field
Chapter 2 The Aperture Interface 67
Choose an export preset to use when exporting images to your
email client. If you want to create a custom export preset, click Edit
and create a new preset in the Export Presets dialog.
If you want to export images to an email client, choose the email
application from this pop-up menu.
Choose a file format in which to export an image to an external
editor from this pop-up menu. You can also specify the dotper-inch (dpi) resolution of the image in the dpi field.
You can use an external editor to make adjustments to your
images. To identify an external image editor, click Choose and
select an application. To open an image in the external editor,
select the image, then choose Images > Open With External Editor.
Page 68

Image display
E
checkboxes
Grid View Background
F
Brightness slider
Viewer Background
G
Brightness slider
Hot Area Display
H
Threshold slider
Aperture options
I
checkboxes
“When a camera is
J
connected”
pop-up menu
Library Location field Displays the default location of the Library. To specify a custom
K
Search Scope
L
pop-up menu
Select the “Show Loading indicator while full size images load”
checkbox to have Aperture display an initial proxy image if there is
any delay when loading a full-size image.
Select the “Show tooltips on controls” checkbox to have Aperture
display the names of interface items when you place your pointer
over them.
Select the “Use proportional spacing for images in Grid View”
checkbox to change the spacing of images in the Browser.
Select the “Add gaps between Sort Groups” checkbox to add space
between groups when sorting by a particular category. For example,
when sorting images by rating, you can have Aperture add a gap
between the last five-star image and the first four-star image.
Select the “Show number of versions for projects and albums”
checkbox to have Aperture display the number of versions in a
project or album in the Projects panel.
Select the “Badge referenced images” checkbox to display badges
that identify referenced images.
Adjust the Browser background brightness using this slider.
Adjust the Viewer background brightness using this slider.
You can view an image’s hot areas (where exposure goes beyond
the current screen or print gamut) by choosing View > Highlight
Hot Areas. To adjust the threshold used to determine an image’s
hot areas, drag the slider.
Select the “Create new versions when making adjustments”
checkbox to have Aperture automatically create a new version
when you adjust a selected image.
Select the “Show warning when deleting masters” checkbox to
have Aperture display an alert message when you delete master
image files.
Choose an application to open when a camera is connected to
your computer.
location for the Aperture Library, click Choose and navigate to a
location to store the Library. Reopen Aperture to complete the
location change.
Use this pop-up menu to set your preferences for how Aperture
searches. You can have Aperture search for your entered text
throughout all the metadata associated with your images, or
perform a limited text search that doesn’t search through your
images’ EXIF information.
68 Part I Interface and Acquisition
Page 69

I
Web Copyright field Enter copyright text for web galleries and web journals here.
M
Previews options To set Aperture to create previews for the images in all new
N
projects and new Libraries, select the “New projects automatically
generate previews” checkbox. Deselect this option if you don’t
want previews created for images in new projects.
To enable sharing of JPEG preview images with other applications,
select the “Share previews with other applications” checkbox.
To change the image quality of the previews, drag the Preview
Quality slider. The higher the quality you select, the more disk
space the preview requires.
To set a maximum pixel size for your previews, choose a size from
the “Limit preview size” pop-up menu.
Chapter 2 The Aperture Interface 69
Page 70

Page 71

3 Working with Aperture Projects
3
The basic components of Aperture, including projects,
albums, and versions, provide the building blocks for working
in a nondestructive environment.
This chapter explains basic elements in Aperture and describes how to set up and use
projects to hold your images.
This chapter covers:
 Basic Components of Aperture (p. 72)
 Working with Projects (p. 78)
 Creating and Naming Projects (p. 79)
 Opening and Closing Projects (p. 80)
 Creating and Showing Favorite Projects (p. 82)
 Deleting Images from Projects and Albums (p. 82)
 Deleting Items from the Projects Panel (p. 83)
 Working with Library Files (p. 83)
 Quickly Accessing Commands (p. 85)
71
Page 72

Basic Components of Aperture
Aperture uses the following basic components in your image management system:
 Digital master files: The original image files imported from your camera, memory
card, computer, or external storage media.
 Versions: Files derived from the digital master files and used to display your images
with any changes you’ve made, including image adjustments or changes to metadata.
 Projects: Containers that hold digital master files, versions, and albums. Projects
can hold up to 10,000 digital master files, although it’s recommended that for
practical usage, you limit the number of files (both digital master files and versions)
below 10,000.
 Albums: Containers that hold versions. You can create albums to organize images
within projects or outside of them.
 Folders: Containers used to organize projects and albums.
 Library: The Aperture database that records and tracks your digital master files and
all corresponding versions. You can also create multiple Aperture Library files in
different locations. The Library tracks all the information about projects and albums
you create to organize your images.
 Managed and referenced images: Master files stored in the Aperture Library are called
managed images because Aperture manages the location of the images in its database.
Managed images are physically located in the Aperture Library file in the Pictures
folder. You can also import images into Aperture without storing the digital master files
in the Library. Images that are not stored in the Library file are called referenced images.
Aperture links to referenced images in their current locations on your hard disk,
without placing them in the Aperture Library file.
 Vaults: Containers that each hold a backup of the Library and all its images
and information.
The next sections explain details about each of these elements and how you work with
them in Aperture.
What Are Digital Master Files?
A digital master file is the original RAW, JPEG, TIFF, or PNG file that was imported into
Aperture from your camera, a memory card, a computer, or external storage media
such as an external hard disk drive or CD. Aperture never changes the master file, so
you always have originals to work from.
Important: Digital master files—especially RAW files—tend to be quite large. Projects
consisting of several thousand digital master files require high-capacity hard disks.
For information about importing your digital master files, see Chapter 4, “Importing
Images,” on page 87.
72 Part I Interface and Acquisition
Page 73

I
What Are Versions?
Once you have digital master files on your hard disk, you can review and make
adjustments to your images. For example, you can change the exposure, contrast, or
saturation, or add information to an image, such as the photographer’s name, event,
and location. To work with images, Aperture creates a “version” of each master file that
includes your adjustments and embedded information, and leaves the master file
unchanged. A version refers to the master file on your hard disk, but it is not the master
file itself. Versions store only the thumbnail image, adjustments, and embedded
information. A full image file is not created until you are ready to print or export, saving
valuable storage space on your hard disk.
In many cases, your workflow may call for different renderings of the same image. For
example, a client may request a color as well as a black-and-white version of the same
head shot. You can create multiple versions of the same image in Aperture at any time.
1A
Versions
1B
1
Master
1C
1D
from
Master 1
Versions
2A
2B
3A
3B
3C
from
Master 2
Versions
from
Master 3
Computer
Pictures
folder
Aperture
Library file
2
Master
3
Master
When you create a version, several things occur:
 Aperture reads the original master file on disk and displays it on the screen.
 As you make adjustments or add information to the image, Aperture displays the
image with your changes to the version, but the original master file is never changed.
Chapter 3 Working with Aperture Projects 73
Page 74
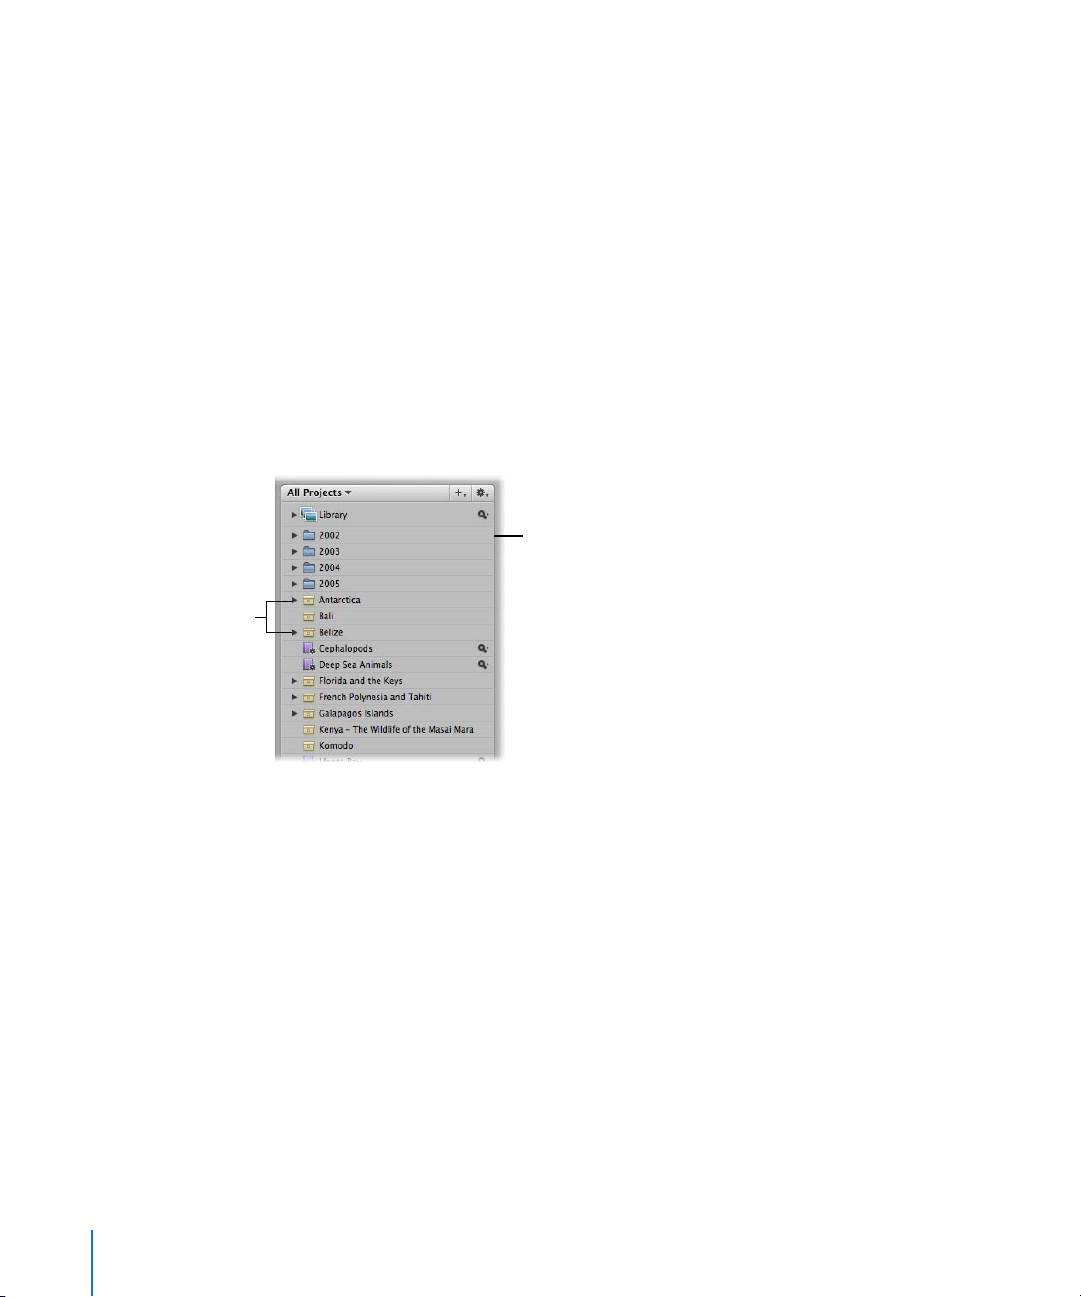
What Are Projects?
You organize your digital master files and versions using projects. A project is a
container consisting of image versions and their corresponding master files. A project
can hold up to 10,000 master files, and you can create as many projects as you wish up
to the limitations of your disk space. For example, you can create a new project for
each of your shoots. Or if you do several shoots of the same subject, you may want to
create a project that encompasses all of the shoots. Projects are the most basic
component of Aperture because they contain your digital master files and track all
changes to versions.
You can easily transfer projects from one Aperture system to another. All links between
versions and their master files are maintained when projects are transferred. This is
particularly useful if you use a portable computer when on location or away from your
studio, and a workstation at your studio. For more information, see “Transferring
Projects from Another System” on page 114.
Examples of items in
the Projects panel
Projects
You can have multiple projects open at the same time, each represented by its own
icon in the Projects panel and tab in the Browser.
What Are Albums?
An album is a container in the Aperture Library that holds only image versions (not the
digital master files to which they refer). You use albums to organize images in the
Library, making your selections of versions easier to manage. You can create albums at
the Library level or within a project.
You use albums created at the Library level to organize versions from multiple projects.
For example, you can create an album to consolidate your favorite images, or “selects,”
from multiple projects. You can then publish this collection of selects on your website
or export the album’s contents for review by a prospective client.
74 Part I Interface and Acquisition
Page 75
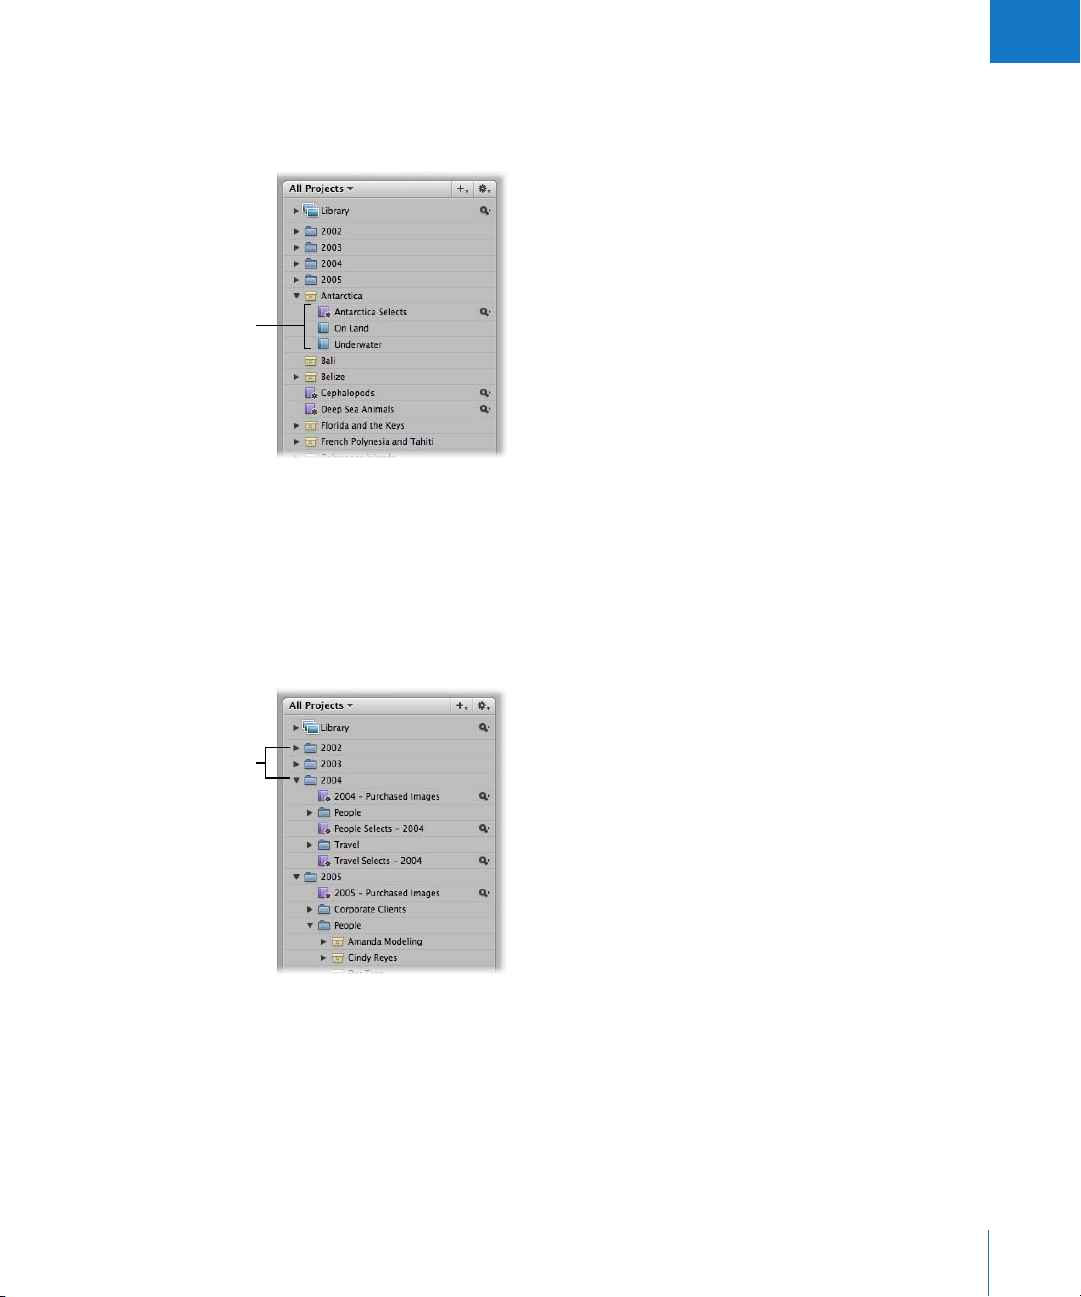
Three albums created
within one project
I
You can also create albums within projects to help you organize your images into
relevant groups. For example, images in your Antarctica project can be divided into
three albums: Antarctica Selects, On Land, and Underwater.
You can also place versions from other projects into an album that resides within a project.
What Are Folders?
In Aperture, you use folders to organize projects and albums. For example, you can
import images into projects and then place the projects in folders based on the year,
such as 2002, 2003, 2004, and 2005. If you shoot multiple projects for the same client,
you can create a folder that holds the client’s individual projects.
These folders organize
images based on what
year they were shot.
Folders contain only albums, projects, and other folders. They don’t contain master
files or versions.
Chapter 3 Working with Aperture Projects 75
Page 76

What Is the Library?
The Aperture Library tracks every project, album, master file, and version no matter
whether the images are stored in the Aperture Library file or in other hard disk
locations. Aperture automatically creates a Library file in your Pictures folder the first
time you open Aperture. You can choose to import images into your Library or have
Aperture access them from other locations on different hard disks. The Library tracks all
your images and the information recorded about them, as well as information about
where backup files are stored. You can access images in the Library by clicking Library
at the top of the Projects panel.
You can change the location of the Library file to a different folder or a different disk.
You can specify where the Library should be located using the Preferences window. For
more information about working with multiple Library files in Aperture, see “Working
with Library Files” on page 83.
Projects that you transfer from other Aperture systems to your Aperture system are also
added to the Library. And when you back up your digital master files to your vaults on
external FireWire drives, those actions are tracked by the Aperture Library as well.
What Are Managed Images and Referenced Images?
Aperture lets you choose how you organize your photos on disk. You can store your
photos in the Aperture Library, or you can import images by simply linking to the
image files in their current locations, without placing them in the Library.
Images whose digital master files are stored in the Aperture Library are called managed
images. These master files are stored in the Library exactly as they were in previous
versions of Aperture. Aperture manages master image files in the Library, keeping them
always accessible, and provides benefits such as one-click backup of digital master files
to vaults.
Imported images whose digital master files haven’t been placed in the Library are
called referenced images. Using referenced images in your Aperture system can provide
a number of substantial benefits to your photography workflow. You can incorporate
your existing portfolio of images into Aperture without changing the current location
of the files. Importing images by reference does not result in a duplication of your
image files in the Aperture Library, thus saving hard disk space. You can also connect
and disconnect hard disks holding your referenced images’ master files as you need
them. This allows you to keep master files for less-used images offline or to make
specific types of images available for editing or adjustments as needed. Using
referenced images in your Aperture system provides a means of building a flexible
image management system customized to your work style.
76 Part I Interface and Acquisition
Page 77

I
You specify that an image will be a managed image or a referenced image when you
import it. When importing images, you can:
 Specify that master files be stored in the Aperture Library.
 Import images as referenced images, so that their master files remain in their
current locations.
 Move or copy image files to a new location. For example, you might decide that a
certain group of referenced image files, such as wedding photos, will always be
placed in one hard disk location, while other groups, such as sports photos, will
reside in a different hard disk location.
You can work with referenced images—creating versions, making adjustments,
cropping, and adding metadata—just as you can with images whose master files are
stored in the Library. Versions that you create from a referenced image are stored in the
Library. In order for you to make adjustments to a version from a referenced image, the
referenced image’s master file must be available on your hard disk or other storage
device. For example, if you delete a referenced image’s master file in the Finder,
Aperture no longer has access to the master file and so no longer allows you to change
your versions or create new ones.
To help you identify referenced images, Aperture marks them with a badge overlay that
you can display or hide. When a referenced image’s master file is missing or offline, its
badge changes to show that the image is not accessible. For example, if you disconnect
a hard disk that holds master files for many referenced images, Aperture automatically
marks the referenced images in the Browser and Viewer as offline. If you reconnect the
hard disk or other storage device later, Aperture accesses the master files automatically
and you can work with and change their versions again.
You can also relocate master files, moving them out of the Library or moving referenced
master files to different hard disk locations. If needed, you can also move referenced
master files into the Aperture Library by choosing the Consolidate command.
You can search for images based on whether they are managed images, referenced
images, or online or offline images. Aperture also provides robust file-management
tools that let you quickly determine which images are offline and easily reconnect
images that have been moved to different volumes.
Chapter 3 Working with Aperture Projects 77
Page 78

What Is a Vault?
To ensure you have backup copies of your images, you create a vault to hold the
backup. A vault is a container that holds an exact copy of the Library. This includes your
projects, digital master files, and any versions you’ve created. You can easily create and
update a vault to back up the Library. It’s a good idea to create multiple vaults on
multiple external hard drives to safeguard copies of the Library.
You can have as many vaults as you deem necessary. Creating more than one vault is
useful if you work at different locations; you can always keep one vault on a FireWire
drive onsite and another one offsite. All vaults and backup files are tracked by the
Library so that even if you disconnect the external hard drive that contains your vault,
Aperture can access it the next time you reconnect the drive and update your vault.
All the managed master file images, versions, and all metadata, previews, and adjustment
information associated with your images are backed up. The versions, previews, and
metadata associated with referenced images’ master files are also backed up in the vault.
Referenced images’ master files are not backed up in the vault with the Library.
Important: Because the digital master files for referenced images are stored outside of
the Library, you must manage the backup and archiving of them yourself.
Working with Projects
How you use and organize your projects depends on the scope of your workflow as
well as your particular organizational style. These factors also affect your decision to
use one or more albums in your project.
Organizing Your Projects
Typically, you create a new project for each photographic project or job that you work
on, regardless of its duration. For example, if you’re working on a documentary in
Thailand, you would create a project for it. If you’re also shooting the temples in the
interior of the country, that could be a second, separate project. Both projects could
conceivably refer to some of the same images, but they are completely independent
structures, each with its own versions, master files, and albums.
Very large photography projects, such as documentaries and sporting events, often
consist of large numbers of captured images. You can always break one project into
several should the need arise.
78 Part I Interface and Acquisition
Page 79
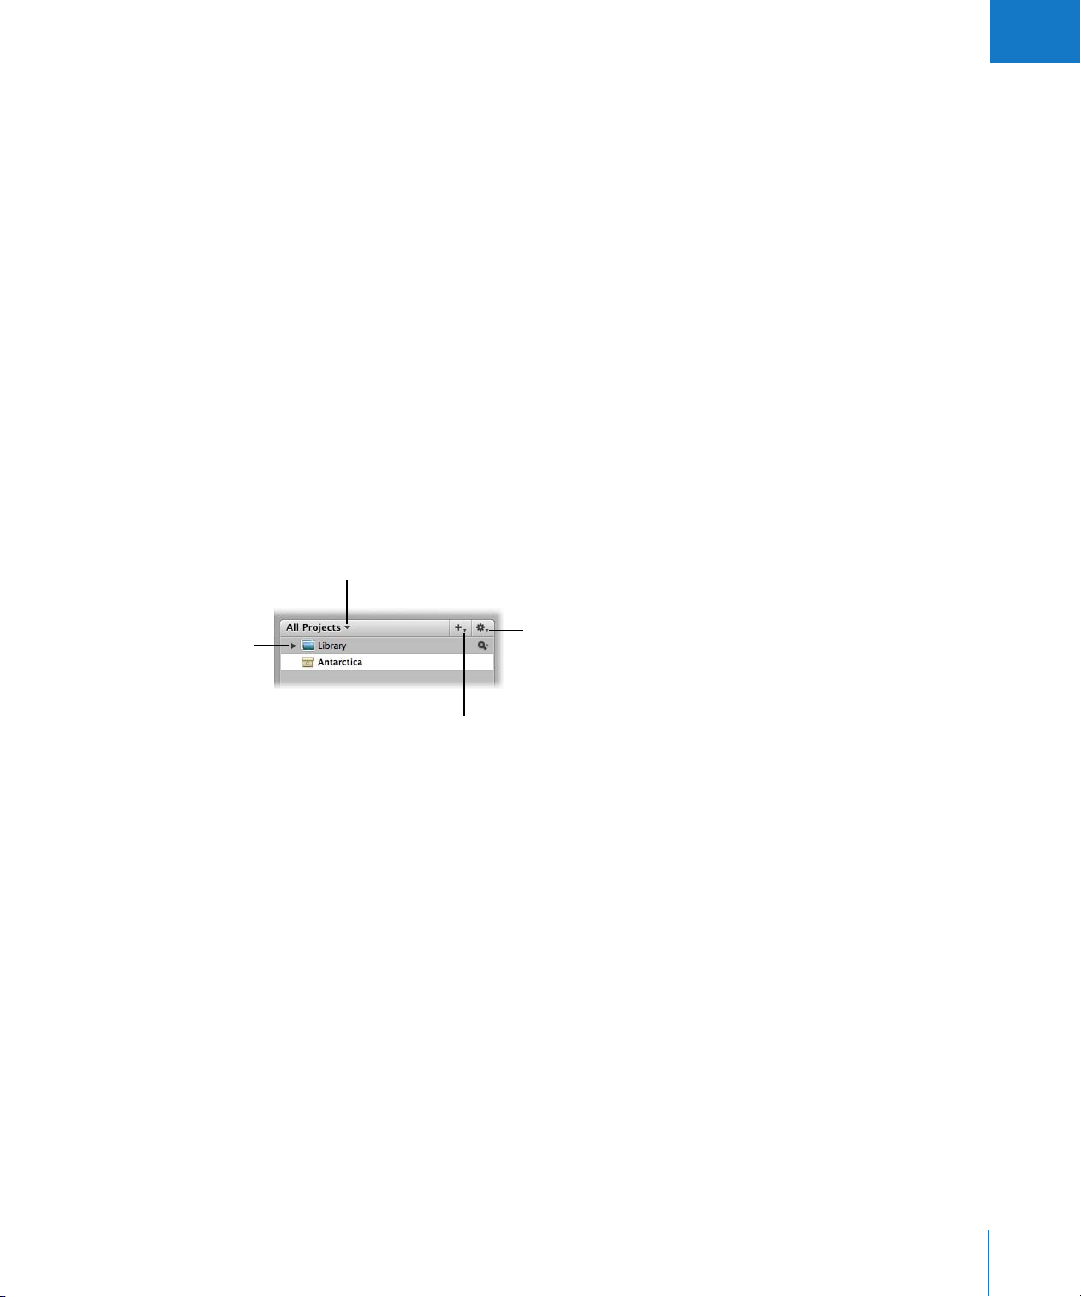
I
Using More Than One Album in a Project
For some projects, it makes sense to use several albums within the project. You can use
albums in several ways, including:
 Albums as events: Break a project into a series of albums according to specific events.
For example, a wedding project can be divided into albums for each of the following
events: Preparation, Ceremony, and Reception.
 Albums as days: Break a project that spans multiple days into albums for individual
days. For example, a project consisting of a two-week trip to Japan can be divided
into 14 individual albums corresponding to each day.
 Albums for specific subjects: Break a project consisting of multiple photographed
subjects into individual albums dedicated to each subject. For example, a studio
photographer may shoot three models for a single project. The photographer can
create an album for each model. Or you might create albums to hold specific image
types, such as candid shots, landscapes, or close-ups.
Creating and Naming Projects
There are several controls in the Projects panel that you’ll use when working with projects.
Projects pop-up menu
Disclosure triangle
Project Action
pop-up menu
Add to Library
pop-up menu
 Disclosure triangle: Click this to see all items within the Library, project, or folder.
 Projects pop-up menu: Choose to display all projects, favorites, or recent projects.
 Add to Library pop-up menu: Choose to add a new item, such as a project or Smart
Album, to the Library or selected project.
 Project Action pop-up menu: Add the selected item to a list of favorites, or remove it
from the favorites list.
You can create projects at any time, although typically you create them when you
import images. When you import images into the Aperture Library and no project is
selected, a new project is created to contain those images. However, you can create a
new empty project at any time. For more information about importing files and
creating projects automatically, see Chapter 4, “Importing Images,” on page 87.
Chapter 3 Working with Aperture Projects 79
Page 80

A new, untitled
project appears in the
Projects panel.
The project now has the
name you entered.
To create a new project:
1 Choose File > New Project (or press Command-N).
2 Enter the name you want for the project, then press Return.
For information about naming files, see “Automatically Naming Your Imported Images”
on page 105.
Opening and Closing Projects
To work with your images in Aperture, you first select a project in the Projects panel to
open it in the Browser and Viewer. You can open and work on more than one project at a
time. When multiple projects are open, each project appears in the Browser with its own
tab. You can click a project’s tab to bring it to the front. You can also open a project in its
own pane to view two projects in the Browser side by side. When you finish working and
quit Aperture, Aperture remembers which projects were open. The next time you open
Aperture, all projects that were open at the end of your last session open automatically.
To open a project:
m Select the project in the Projects panel.
Select a project to view
its images in the Browser.
All images in the project
appear in the Browser.
80 Part I Interface and Acquisition
Page 81
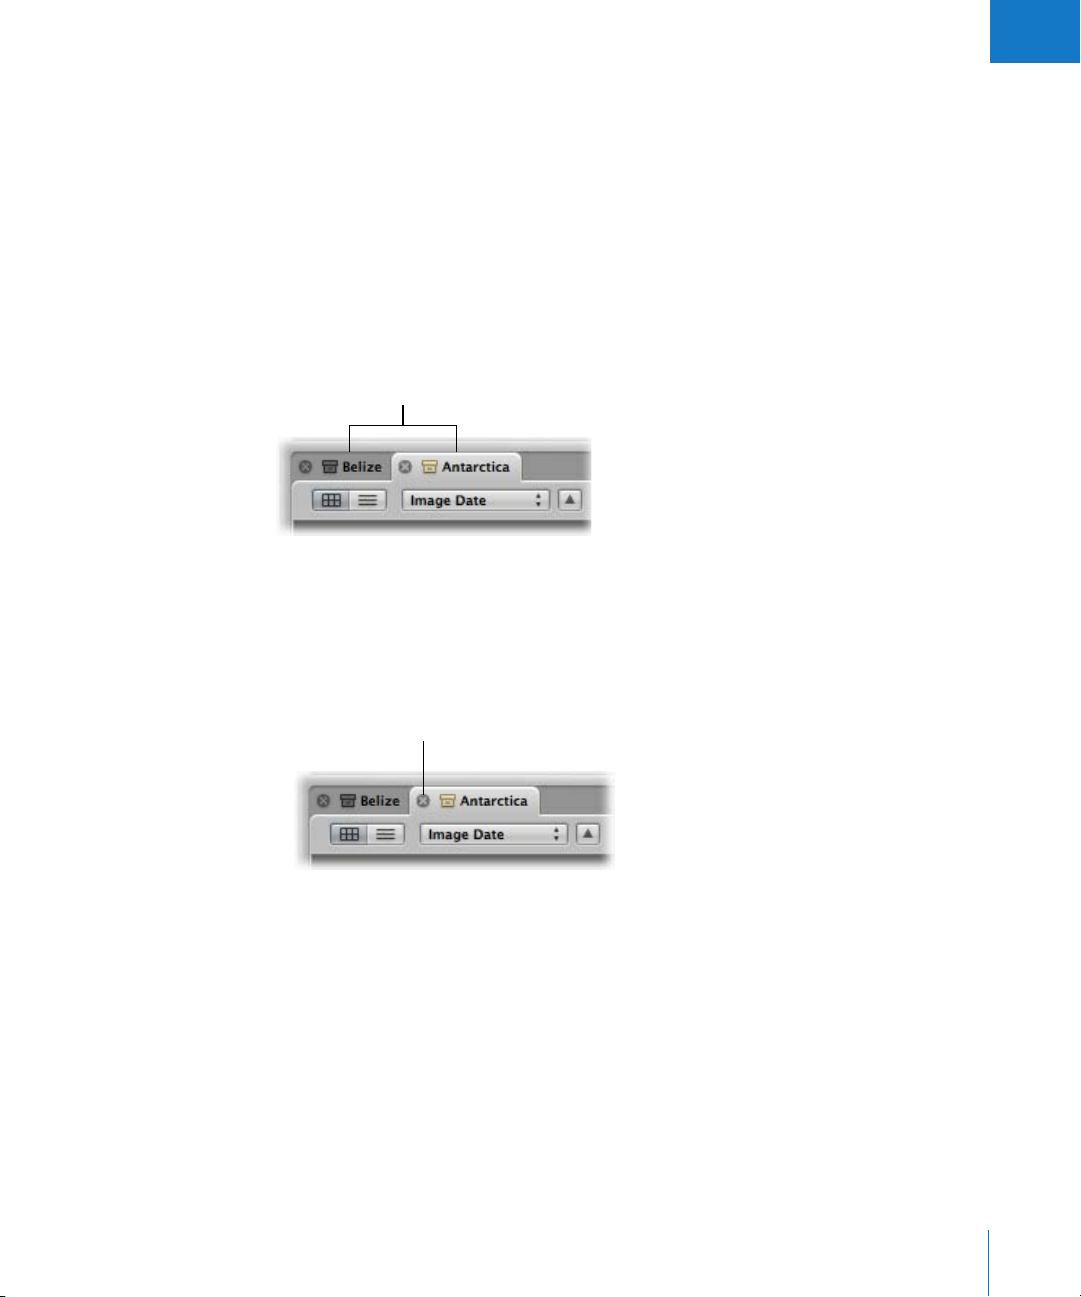
I
To open additional projects in the Browser:
m Command-click a project in the Projects panel.
The newly opened project appears in the Browser with its own tab, in front of any
other open projects.
To open another project in its own pane:
m Option-click a project in the Projects panel.
The newly opened project appears in the Browser in its own pane.
To switch between several open projects:
m In the Browser, click a project’s tab.
Projects are identified
by their tabs.
To close a project:
1 Click the project’s tab to bring it to the front.
2 Do one of the following:
 Choose File > Close Tab (or press Command-W).
 Click the tab’s close button.
Close button in a tab
Chapter 3 Working with Aperture Projects 81
Page 82

Creating and Showing Favorite Projects
If you have certain projects that you work on most often or projects that you work on
together, you can make them favorites to quickly view them all at the same time.
To make a project or folder a favorite:
m In the Projects panel, select a project, then choose Add to Favorites from the Project
Action pop-up menu.
To view favorite projects or folders:
m In the Projects panel, choose Show Favorites from the Projects pop-up menu at the
top-left corner.
To remove a project or folder as a favorite:
m In the Projects panel, select a project, then choose Remove From Favorites from the
Project Action pop-up menu.
Deleting Images from Projects and Albums
Aperture allows you to delete versions separately from their digital master files. You can
also delete a master file and all its versions in a project. If you delete a version in an
album, its master file and related versions are not deleted.
To delete a master file and all its versions from a project:
1 Select the image, then choose File > Delete Master Image and All Versions.
A dialog appears asking if you want to continue.
2 Click the Move to Trash button.
The digital master file and all versions are deleted.
Warning: This action cannot be undone. Once you click the Move to Trash button, the
master file is moved to the Trash. All versions and their adjustments and metadata are
permanently deleted. To permanently remove the master file from your hard disk,
empty the Trash.
To delete only a version from an album:
m Select the image, then choose Images > Remove From Album (or press Delete).
The version is deleted. The digital master file and its other versions are not deleted.
82 Part I Interface and Acquisition
Page 83

I
Deleting Items from the Projects Panel
You can also delete items from the Projects panel. When you delete an item from the
Projects panel, the contents of the item are deleted with it.
Note: If you delete a project or a project within a folder, the digital master files
contained in the project are also deleted.
To delete projects and folders:
1 Select the item, then do one of the following:
 To delete a project: Choose File > Delete Project (or press Command-Delete).
 To delete a folder: Choose File > Delete Folder (or press Command-Delete).
A dialog appears asking if you want to continue.
2 Click the Delete button.
The selected item is deleted along with its contents.
Warning: This action cannot be undone. Once you click the Delete button, the master
files are moved to the Trash. All versions and their adjustments and metadata are
permanently deleted. To permanently remove the master files from your hard disk,
empty the Trash.
To delete an album, a Light Table album, a web gallery album, a web journal album,
or a book album:
m Select the album, then choose File > Delete [Item].
The selected item is deleted along with its contents.
Working with Library Files
When the Library file becomes large and requires more disk space than is available in
its current location, you can move it to a hard disk with more storage capacity.
Aperture is preset to create the Library in the Pictures folder on your internal hard disk.
You can specify that the Library be located in a different folder or on a different disk.
Each time you open Aperture, the application opens the Library in the location you
specified. To change the location of the Library, you move it to a new location and then
use the Aperture Preferences window to specify the new location.
∏ Tip: To maximize performance, place the Library file on an internal hard disk.
Chapter 3 Working with Aperture Projects 83
Page 84

To change the location of a Library file:
1 Quit Aperture.
2 Locate the Aperture Library file in the Pictures folder on your hard disk and move it to
the new location in a different folder or on a different hard disk.
3 Open Aperture and choose Aperture > Preferences, or press Command-comma (,).
4 Click Choose under the Library Location option.
5 Navigate to the new location of the Library, select it, and click Select.
6 Quit Aperture and then reopen it.
When you reopen Aperture, it accesses the Library in the new location.
If the Aperture Library becomes large, you can create additional separate Library files to
hold more images. For example, you might create different Library files in different
locations on your internal hard disk, or on different hard disks. You then specify in the
Aperture Preferences window which Library the application should access when it
opens. Creating a new empty Library file is as easy as specifying a different folder for
the Library in the Preferences window and then quitting and reopening Aperture. You
can also rename Library files as needed. Thus, you might have multiple Library files
with different names in the same location and set Aperture to access the Library file
you want.
To create a new, empty Library file in a new location:
1 Choose Aperture > Preferences, or press Command-comma (,).
2 Click Choose under the Library Location option.
3 Navigate to and select the folder where you want to place the new Library, then click Select.
4 Quit Aperture and then reopen it.
By default, Aperture creates a new Library file named Aperture Library. It’s
recommended that you rename Library files to avoid any mix-ups or the possibility of
overwriting one Library file with another accidentally. After renaming a Library file,
make sure to open Aperture and select the renamed Library file.
When you have multiple Library files and you want to switch between them, you use
the Preferences window to select the Library you want. You then quit and reopen the
application to complete the switch.
To access a different Aperture Library:
1 Choose Aperture > Preferences, or press Command-comma (,).
2 Click Choose under the Library Location option.
3 Navigate to and select the Library you want, then click Select.
4 Quit Aperture and then reopen it.
84 Part I Interface and Acquisition
Page 85

I
Adding Times and Dates to Aperture Album Names
It is common to differentiate albums in a project by adding the dates to the album names.
If you add dates to an album name, avoid using special characters like the slash (/), since
that may be interpreted by Mac OS X as a file separator.
Quickly Accessing Commands
You can access commands via a shortcut menu, as an alternative to using the menu bar
at the top of the screen or pop-up menus within a window.
To view the shortcut menu:
m Position the pointer over the Projects panel, then Control-click.
Note: Although accessing commands from shortcut menus can help you work more
quickly, keep in mind that not all commands are available in shortcut menus.
Chapter 3 Working with Aperture Projects 85
Page 86

Page 87

4 Importing Images
4
Aperture provides tools and workflow options that make it
easy to import your images.
This chapter describes a variety of methods for importing images into Aperture. You can
import images directly from your camera or card reader, import images stored on your
computer hard disk or other storage devices, import your iPhoto Library, and more.
This chapter covers:
 An Overview of Importing Images (p. 88)
 File Formats You Can Import into the Library (p. 89)
 Planning Your Import Strategy (p. 90)
 Importing from Your Digital Camera or Card Reader (p. 91)
 Importing Image Files Stored on Your Computer (p. 97)
 Automatically Naming Your Imported Images (p. 105)
 Adding Metadata to Images During Import (p. 108)
 Creating Stacks Automatically During Import (p. 109)
 Adjusting the Image File’s Time When Importing (p. 110)
 Dragging Files from the Finder to the Projects Panel (p. 110)
 Importing Folders of Images from the Finder (p. 111)
 Importing Your iPhoto Library (p. 112)
 Transferring Projects from Another System (p. 114)
 Making an Immediate Backup (p. 114)
 Where Aperture Stores Your Managed Files in the Library (p. 115)
87
Page 88

An Overview of Importing Images
When you import from a camera or card reader, Aperture places the images in a
project. If you don’t select an existing project, a new one is created automatically.
As Aperture imports images, it generates a version file and an image thumbnail
corresponding to each digital master file.
Import
RAW
& JPEG
Aperture Library
(system disk)
Project
Versions
Digital
master files
Importing
to Aperture
Camera
You can import digital master images directly from a camera or card reader and from
your hard disk drives.
When you import images, you can choose whether to have the digital master files stored
in the Aperture Library or store them on your hard disk outside of the Library where they
can be accessed as referenced images. For more information about referenced images,
see “What Are Managed Images and Referenced Images?” on page 76.
Vault
(FireWire drive)
Back up
88 Part I Interface and Acquisition
Page 89

I
As you import images, you can have Aperture automatically name and record
information about them. Aperture can assign filenames using custom naming
conventions, as well as record metadata such as captions, keywords, dates, copyright
and credit information, and IPTC information. You can even set Aperture to stack
related images together, keeping bracketed shots or a series of shots taken in quick
succession in groups that you can easily select and work with. For more information
about stacks, see Chapter 8, “Stacking Images and Making Picks,” on page 175.
Does Aperture Support Tethered Shooting?
You can use an Automator workflow to set up tethered shooting between your
camera and your computer to automatically import images into Aperture. Aperture
works with Automator to automate common tasks. For information about using an
Automator workflow for tethered shooting, go to http://automator.us/aperture.
File Formats You Can Import into the Library
Aperture is a QuickTime-compatible application, so it supports standard
QuickTime-compatible still-image file formats, as well as some other file formats
and file types. The following file types and formats can be imported:
 GIF
 JPEG
 JPEG2000
 PNG
 PSD (8 and 16 bit)
 RAW files from a variety of supported digital cameras
 TIFF (8 and 16 bit)
Note: For a list of supported digital cameras, go to http://www.apple.com/aperture.
Chapter 4 Importing Images 89
Page 90

Planning Your Import Strategy
Before you import images into Aperture, it’s a good idea to plan the organization of
your images. Eventually your image library may contain many thousands of images that
you’ll want organized in a flexible and easy-to-manage system. It’s important to take a
long-term view of what makes for an effective and efficient organization of your
projects based on your specific type of photography.
You may already have a large digital portfolio that you eventually want to import into
the Aperture Library. As an import strategy, it’s best to try out importing images in a
series of steps:
 Open and use the sample project as you explore Aperture features.
 If you have an iPhoto Library, you can import it so that you can use your images in
Aperture. For more information about importing your iPhoto Library, see “Importing
Your iPhoto Library” on page 112.
 Make trial imports of a small group of images directly from your digital camera or
card reader. Learn about the filenaming and automatic metadata features of
Aperture. For information about importing from your digital camera or card reader,
see “Importing from Your Digital Camera or Card Reader,” next.
 Plan how you want to import your legacy digital images. Because you may have many
thousands of images previously stored on disk, you need to decide whether you’ll store
newly imported images in the Aperture Library, or store them as referenced images,
leaving them in their current hard disk locations. You can also copy or move images to
a different hard disk location when importing them. Also, plan the project organization
you’ll need to hold the images. For more information about importing files, see
“Importing Image Files Stored on Your Computer” on page 97.
 Try out the different methods for importing individual files into your system. You can
import individual files, import files stored in folders, and drag files or folders from the
Finder into Aperture. For more information, see “Dragging Files from the Finder to
the Projects Panel” on page 110 and “Importing Folders of Images from the Finder”
on page 111.
Once you’re familiar with Aperture, you can begin to create and organize your
professional image management system.
90 Part I Interface and Acquisition
Page 91

I
Importing from Your Digital Camera or Card Reader
You can import images from a camera or card reader into Aperture using the Import
dialog in two ways:
 Import all images on the camera or card reader at once.
 Import a selection of images from the camera or card reader.
You can also:
 Choose to store imported images in the Aperture Library or select a different location
on your hard disk and import them as referenced images.
 Have Aperture automatically reformat your memory card after the images are imported.
 Have Aperture automatically create stacks of bracketed images or images shot in
quick succession.
 Apply a naming convention to standardize the names of the image files in the Library.
 Apply metadata to the image files, such as keywords, captions, copyright
information, and the photographer’s name. You can also apply or replace existing
metadata associated with an image when you import the image.
 Adjust the shoot time of images that were shot in a different time zone.
When connecting your camera directly to the computer, make sure that you turn the
camera on and set it to the mode for transferring images (PC, PTP, Normal, or another
mode, depending on the type of camera). Some cameras automatically select the
correct transfer mode when connected to a computer. See your camera’s manual for
specific instructions.
Chapter 4 Importing Images 91
Page 92

Importing All Images from a Camera or Card Reader
You can import all the image files located on your camera or card reader into
Aperture at once.
To import all the images from a camera or card reader into Aperture:
1 Connect your camera or card reader to your computer.
The Import panel and Import dialog appear, showing the images on the camera or card.
Note: If iPhoto opens when you connect your camera or card reader, quit iPhoto and
then, in Aperture, choose Aperture > Preferences. Choose Aperture from the “When a
camera is connected” pop-up menu. Disconnect and reconnect your camera to have
Aperture open the Import dialog.
Import panel
Import arrow
Import dialog
92 Part I Interface and Acquisition
Import button
Page 93
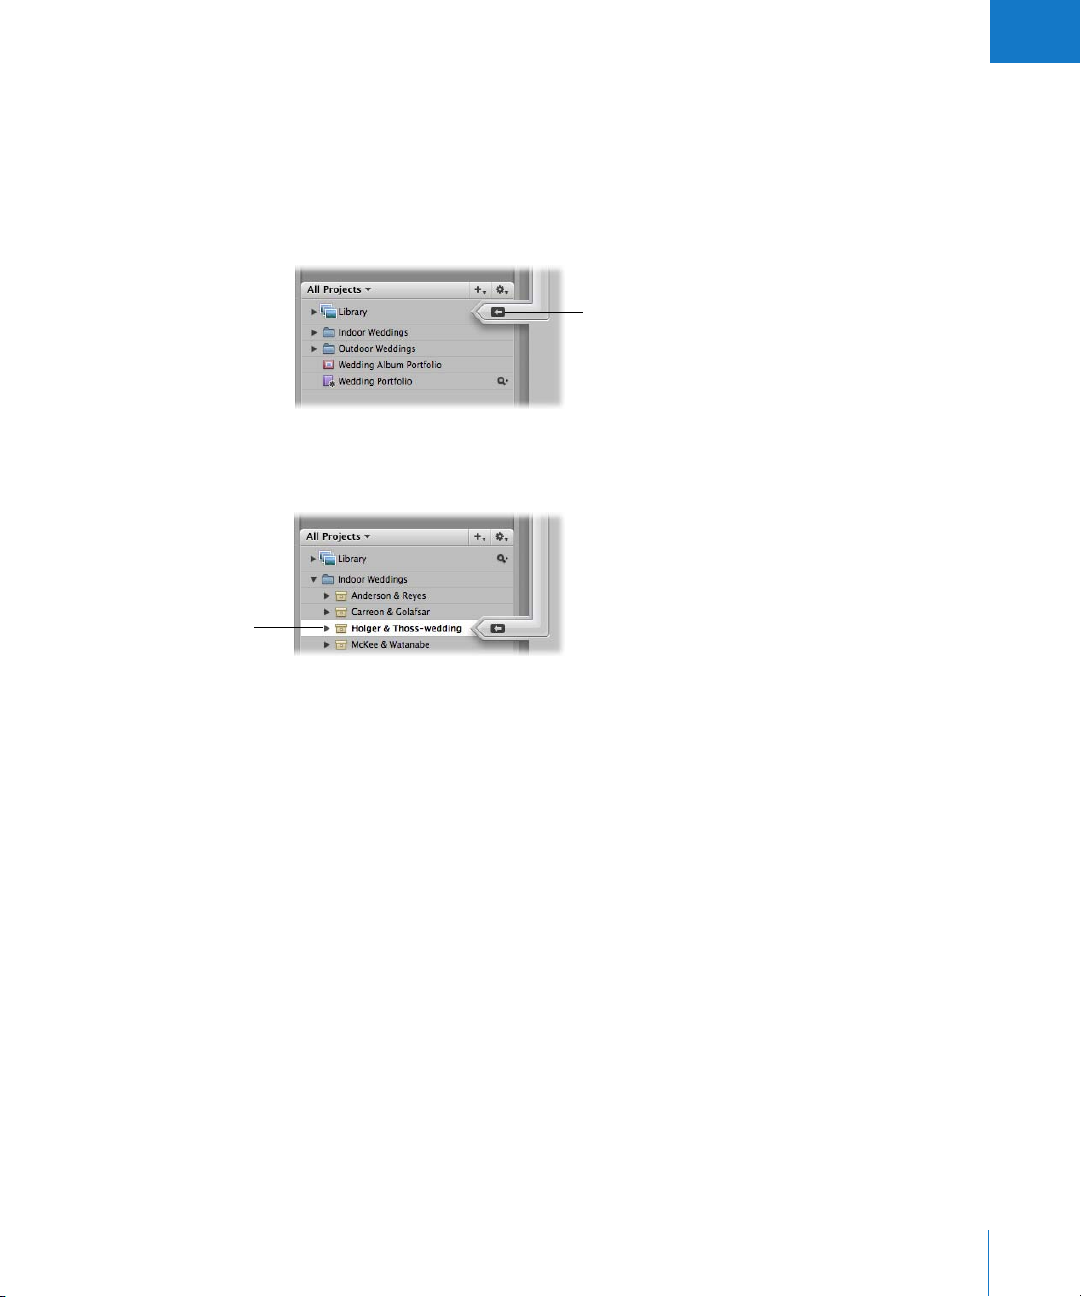
Select the project
into which you want to
import images.
I
2 Do one of the following:
 If you want to import into a new, empty project: Choose File > New Project (or press
Command-N) to create a new project.
Note: You can also click the Library icon in the Projects panel, if necessary, to select
it. When you select the Library (not a project), a new, untitled project is automatically
created when images are imported.
Make sure the Import arrow
is pointing to the Library to
import the images into a
new project.
 If you want to import the images into an existing project: Select the project. The Import
arrow points at the currently selected project, indicating the destination for the import.
The top-left portion of the Import dialog updates, displaying where the images are
being placed.
3 Choose a location for the imported images by doing one of the following:
 To store imported master image files in the Aperture Library: Choose In the Aperture
Library from the Store Files pop-up menu.
 To store imported master image files as referenced images in the Pictures folder on your
hard disk: Choose Pictures from the Store Files pop-up menu.
 To store imported master image files as referenced images in a location other than the
Pictures folder: Choose “Choose” from the Store Files pop-up menu and select the
folder you want. Choose “No folder” from the Subfolders pop-up menu to specify
that the files be stored as separate individual files in the selected folder. You can also
specify that Aperture create and store your files in a hierarchy of subfolders with
specific folder names. For more information about specifying folders to hold your
imported images, see “Importing Master Files for Referenced Images into Folders” on
page 103. Choose whether you want the image files moved or copied to a new
location by clicking the “Move files” or “Copy files” button. For more information
about moving and copying files, see “Changing the Location of Images When You
Import Them” on page 100.
Chapter 4 Importing Images 93
Page 94
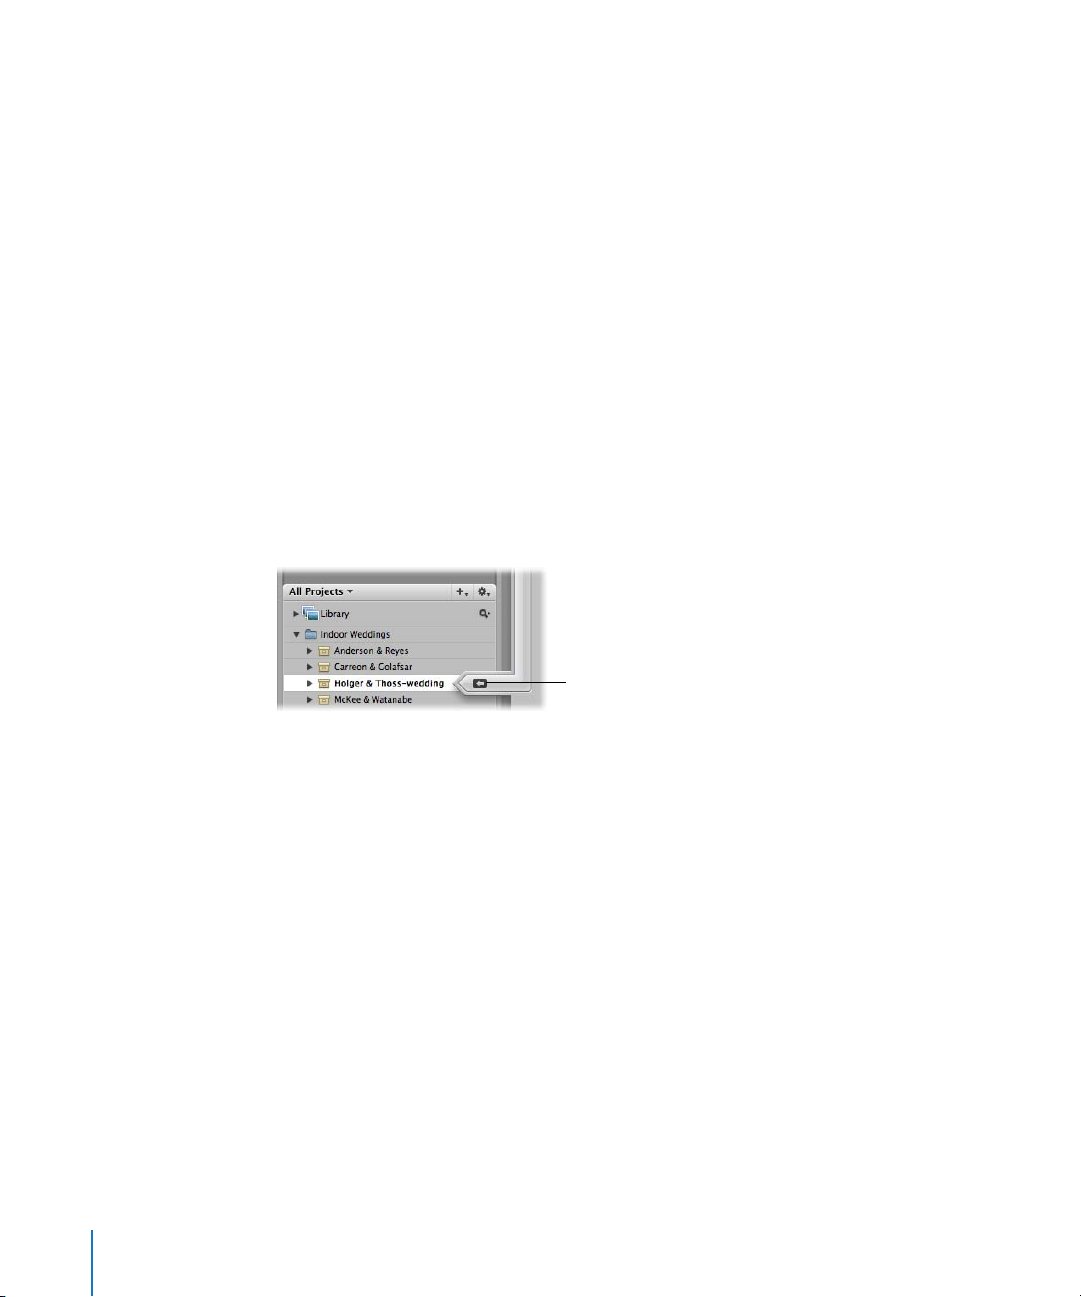
4 Choose a naming convention from the Version Name pop-up menu to specify how you
want the images named.
For example, choose Master Filename from the Version Name pop-up menu to have
your files stored using the current master filenames from your camera or card. Choose
a name format from the Version Name pop-up menu to have your images stored
using a specified name. If you choose a custom name format, enter the name you
want in the Name Text field. You can also apply the name format to the master file as
well. Choose Edit from the Version Name pop-up menu to define a new naming
scheme. For more information about naming files, see “Automatically Naming Your
Imported Images” on page 105.
5 To add metadata to your images as they’re imported, choose a metadata preset from
the Add Metadata From pop-up menu. For more information about setting up and
using metadata presets, see “Working with Metadata Views” on page 235.
6 With no images selected in the dialog, click the Import arrow or the Import button in
the lower-right corner of the dialog.
If you select images, only the selected images are imported. To reset the image
selection so that no images are selected, click in the background beside a thumbnail.
When you’re ready to import,
click the Import arrow.
The import process begins and an indicator appears next to the project’s name,
showing the progress of the import. When images are imported, a dialog appears.
7 Click Eject Card, Erase and Eject Card, or Done.
As the images appear in the Browser, you can begin working with them. Images may
temporarily appear as gray boxes until the loading is complete.
94 Part I Interface and Acquisition
Page 95

I
Importing a Selection of Images
You can also import a selection of images from your camera or card reader.
To import a selection of images:
1 Connect your camera or card reader to your computer.
The Import panel and Import dialog appear, showing the images on the camera or card.
2 In the Projects panel, do one of the following:
 Choose File > New Project (or press Command-N) to create a new project.
 Select an existing project to hold your images. (The Import arrow points at the
selected project.)
The top-left portion of the Import dialog updates, displaying where the images are
being placed.
3 Select the images you want to import by Shift-clicking to select a range of adjacent
images, Command-clicking to select nonadjacent images, or dragging a selection
rectangle around the images you want.
The current number of images selected for import is displayed on the Import button in
the lower-right corner of the dialog.
Import button showing
the number of images
selected for import
To reset the image selection so that no images are selected, click in the background
beside a thumbnail.
If necessary, adjust the size of the thumbnails by dragging the Thumbnail Resize slider
at the bottom of the dialog.
Chapter 4 Importing Images 95
Page 96

4 Choose a location for the imported images by doing one of the following:
 To store imported master image files in the Aperture Library: Choose In the Aperture
Library from the Store Files pop-up menu.
 To store imported master image files as referenced images in the Pictures folder on your
hard disk: Choose Pictures from the Store Files pop-up menu.
 To store imported master image files as referenced images in a location other than the
Pictures folder: Choose “Choose” from the Store Files pop-up menu and select the
folder you want. Choose “No folder” from the Subfolders pop-up menu to specify
that the files be stored as separate individual files in the selected folder. You can also
specify that Aperture create and store your files in a hierarchy of subfolders with
specific folder names. For more information about specifying folders to hold your
imported images, see “Importing Master Files for Referenced Images into Folders” on
page 103. Choose whether you want the image files moved or copied to a new
location by clicking the “Move files” or “Copy files” button. For more information
about moving and copying files, see “Changing the Location of Images When You
Import Them” on page 100.
5 Choose a naming convention from the Version Name pop-up menu to specify how you
want the images named.
For example, choose Master Filename from the Version Name pop-up menu to have
your files stored using the current master filenames from your camera or card. Choose a
name format from the Version Name pop-up menu to have your images stored using a
specified name. If you choose a custom name format, enter the name you want in the
Name Text field. You can also apply the name format to the master image as well.
Choose Edit from the Version Name pop-up menu to define a new naming scheme. For
more information about naming files, see “Automatically Naming Your Imported
Images” on page 105.
6 To add metadata to your images as they’re imported, choose a metadata preset from
the Add Metadata From pop-up menu. For more information about setting up and
using metadata presets, see “Working with Metadata Views” on page 235.
7 When you are satisfied with your image selection, click the Import arrow or the Import
button in the lower-right corner of the dialog.
The import process begins and an indicator appears next to the project’s name,
showing the progress of the import. When images are imported, a dialog appears.
8 Click Eject Card, Erase and Eject Card, or Done.
As the images appear in the Browser, you can begin working with them. Images may
temporarily appear as gray boxes until the loading is complete.
96 Part I Interface and Acquisition
Page 97

I
Importing Image Files Stored on Your Computer
You can import image files stored on your computer and other storage devices. You
have a choice of storing imported images in the Aperture Library, importing images as
referenced images and leaving them in their current locations, or importing images as
referenced images and moving or copying them to a different location.
Note: If you have folders of images to import, you can import them using the Import
Folders as Projects command. For more information, see “Importing Folders of Images
from the Finder” on page 111.
You can import image files in many common image formats, including images scanned
from nondigital sources such as film and photographic prints. Adding these image files
to your Aperture database is as simple as navigating to the folder where they reside on
your hard disk using the Import dialog.
When you import images from a folder on your computer system, you have the choice
of importing the images into a new project or an existing one.
To import image files stored on your computer’s hard disk or other storage device:
1 If the Import panel is hidden, click the Import Panel button in the toolbar to show it (or
press Shift-I).
2 Select the disk that holds the image files you want to import.
Import Panel button
Select the disk where the
images you want to
import are located.
The Import dialog appears with the file browser at the top.
Chapter 4 Importing Images 97
Page 98

3 In the file browser, navigate to the folder containing the image files you want to import.
Select the folder
of images you
want to import.
When you have selected the folder containing the image files you want to import,
image thumbnails appear in the Import dialog.
4 In the Projects panel, do one of the following:
 Select Library to create a new, untitled project or choose File > New Project (or press
Command-N). (The Import arrow points at the Library.)
 Select an existing project to hold your images. (The Import arrow points at the
selected project.)
The top-left portion of the Import dialog updates, displaying where the images are
being placed.
5 Select the images you want to import by Shift-clicking to select a range of adjacent
images, Command-clicking to select nonadjacent images, or dragging a selection
rectangle around the images you want.
98 Part I Interface and Acquisition
Page 99

I
6 Choose a location for the imported images by doing one of the following:
 To store imported master image files in the Aperture Library: Choose In the Aperture
Library from the Store Files pop-up menu.
 To import the files as referenced images stored in their current locations on your hard
disk: Choose “In their current location” from the Store Files pop-up menu.
 To store imported master image files as referenced images in the Pictures folder on your
hard disk: Choose Pictures from the Store Files pop-up menu.
 To store imported master image files as referenced images in a location other than the
Pictures folder: Choose “Choose” from the Store Files pop-up menu and select the
folder you want. Choose “No folder” from the Subfolders pop-up menu to specify
that the files be stored as separate individual files in the selected folder. You can also
specify that Aperture create and store your files in a hierarchy of subfolders with
specific folder names. For more information about specifying folders to hold your
imported images, see “Importing Master Files for Referenced Images into Folders” on
page 103. Choose whether you want the image files moved or copied to a new
location by clicking the “Move files” or “Copy files” button. For more information
about moving and copying files, see “Changing the Location of Images When You
Import Them” on page 100.
7 Choose a naming convention from the Version Name pop-up menu to specify how you
want the images named.
For example, choose Master Filename from the Version Name pop-up menu to have
your files stored using the current master filenames from your camera or card. Choose
a name format from the Version Name pop-up menu to have your images stored using
a specified name. If you choose a custom name format, enter the name you want in
the Name Text field. You can also apply the name format to the master image as well.
Choose Edit from the Version Name pop-up menu to define a new naming scheme.
For more information about naming files, see “Automatically Naming Your Imported
Images” on page 105.
8 To add metadata to your images as they’re imported, choose a metadata preset from
the Add Metadata From pop-up menu. For more information about setting up and
using metadata presets, see “Working with Metadata Views” on page 235.
9 When you are satisfied with your image selection, click the Import arrow or the Import
button in the lower-right corner of the dialog.
As the images appear in the Browser, you can begin working with them.
Note: If the folder contains subfolders of images and you want those imported too,
choose File > Import > Folders as Projects as described in “Importing Folders of Images
from the Finder” on page 111.
Chapter 4 Importing Images 99
Page 100
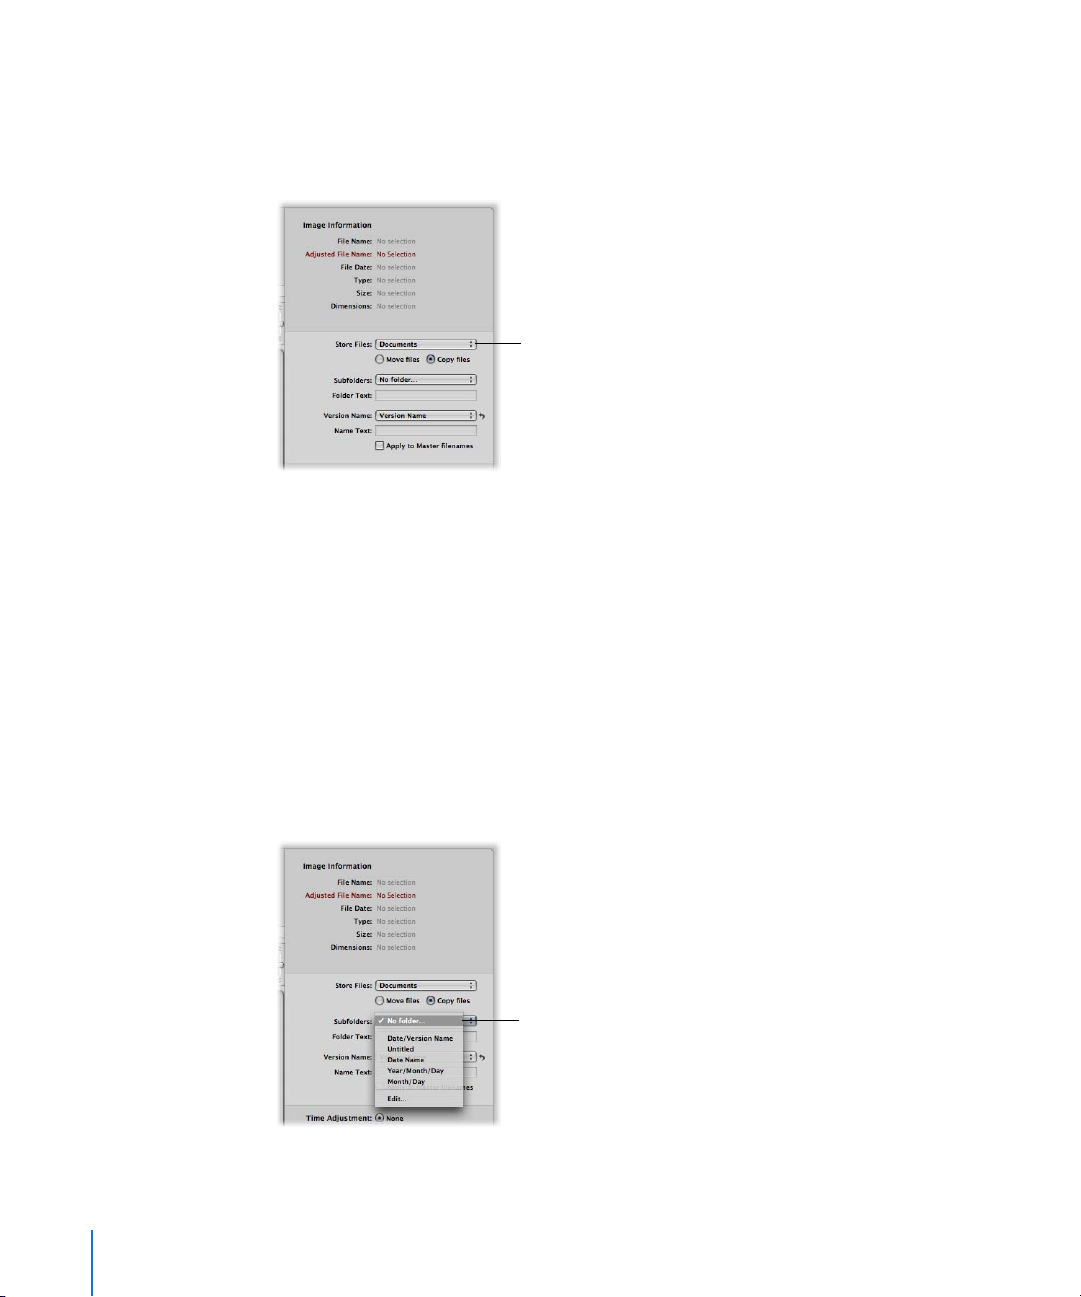
Changing the Location of Images When You Import Them
When you import images stored on a hard disk, you can copy or move those images to
a new location. You specify a new location for the moved or copied files by choosing a
destination folder from the Store Files pop-up menu in the Import dialog.
Choose a folder
destination for the files
you are moving or
copying using this
pop-up menu.
You specify filenames used within Aperture by choosing a name format from the
Version Name pop-up menu. You can also have Aperture change the Finder filename of
images to the selected name format by selecting the “Apply to Master filenames”
checkbox. Then an image will have the same filename in the Finder and in Aperture.
When you move or copy image files to a different location, you can have Aperture
place them as individual files in the destination folder, or place them in subfolders
within the destination folder. For example, a group of images might be copied into a
destination folder with each image placed in a subfolder identified by a date. Or, each
image might be placed in a hierarchy of subfolders organized by year, month, and day.
You choose the subfolder organization you want from the Subfolders pop-up menu. You
can also specify your own custom folder organizations by choosing the Edit command.
Subfolders pop-up menu
100 Part I Interface and Acquisition
 Loading...