

Page 1
Update to Your Manual
This document contains five sections that update your
manual. When you reach the corresponding sections in your
manual, return to this update first for information.
The information in this update applies to you whether your
manual is the Apple TV/Video System User’s Guide or the
Apple Video System User’s Guide.
What you should have
In addition to the items shown in your manual in the section
“What You Should Have,” in Chapter 1, look for the metal
grounding clip for the video input card (as shown below).
Grounding clip
Note: The grounding clip may be attached to the video
input card, or it may be a separate piece in your package.
Page 2
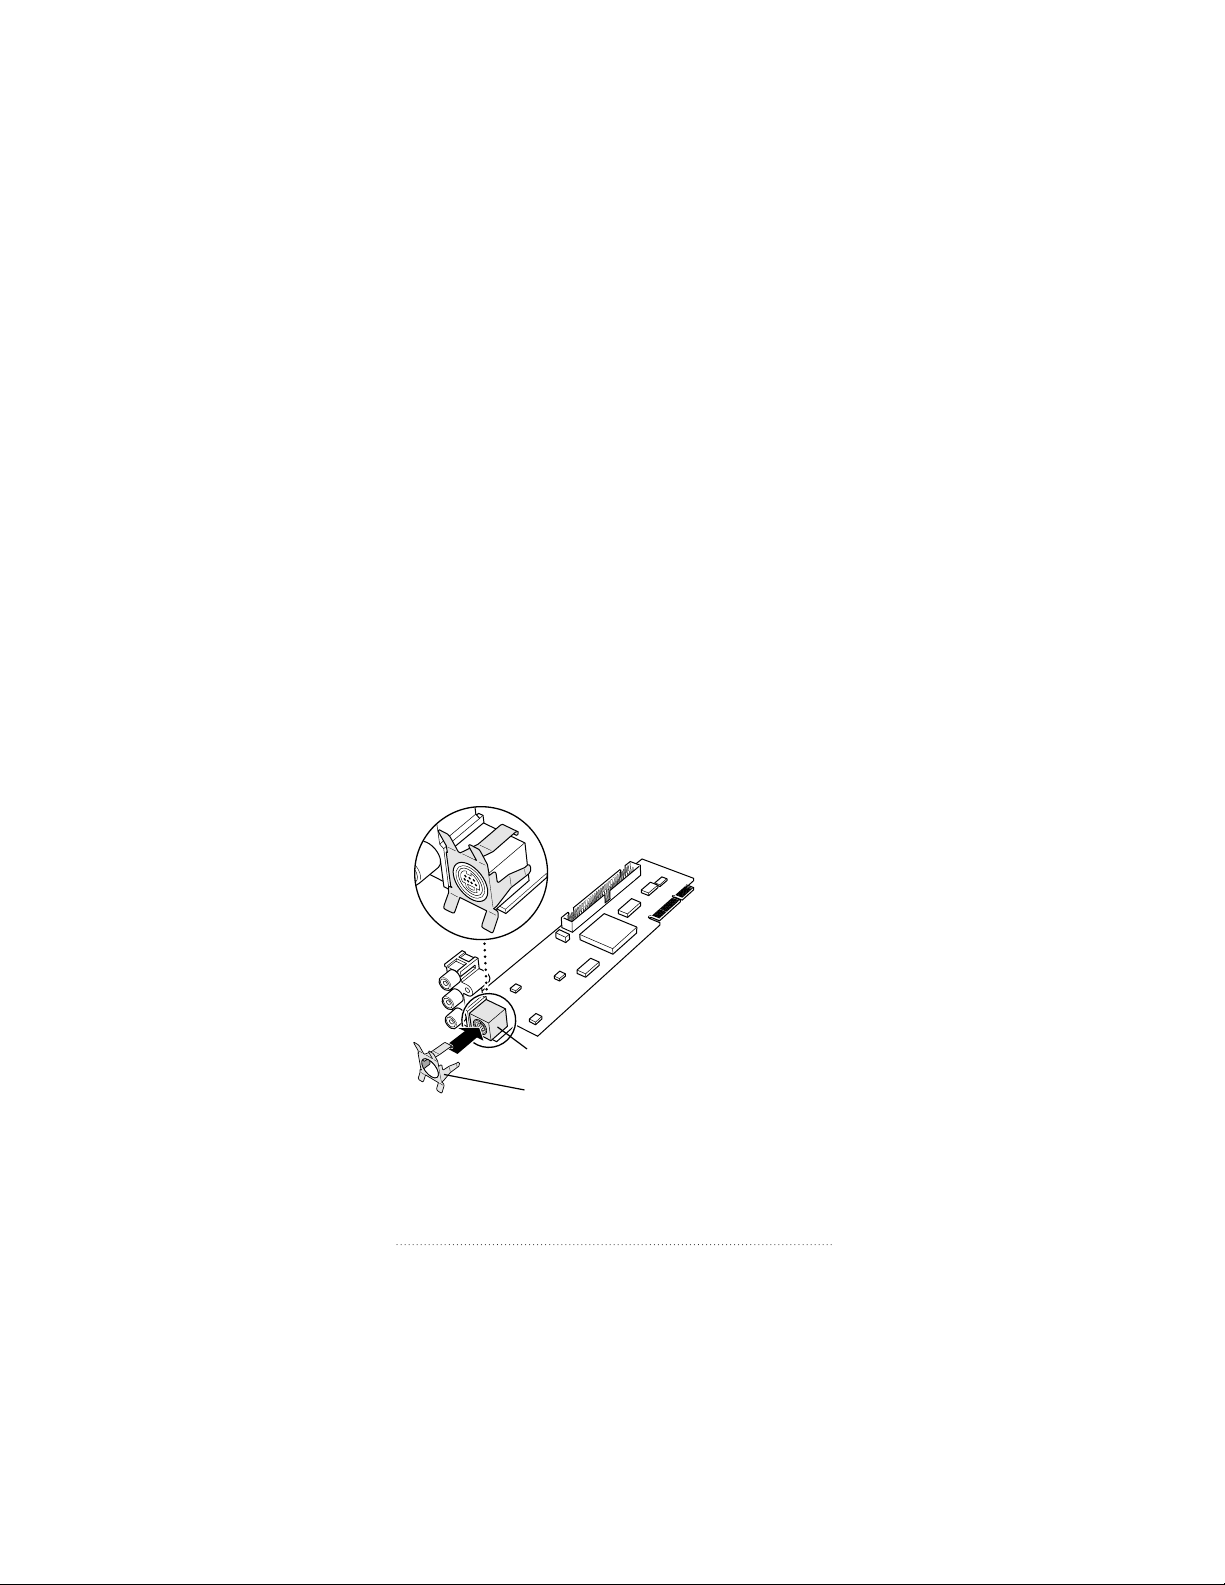
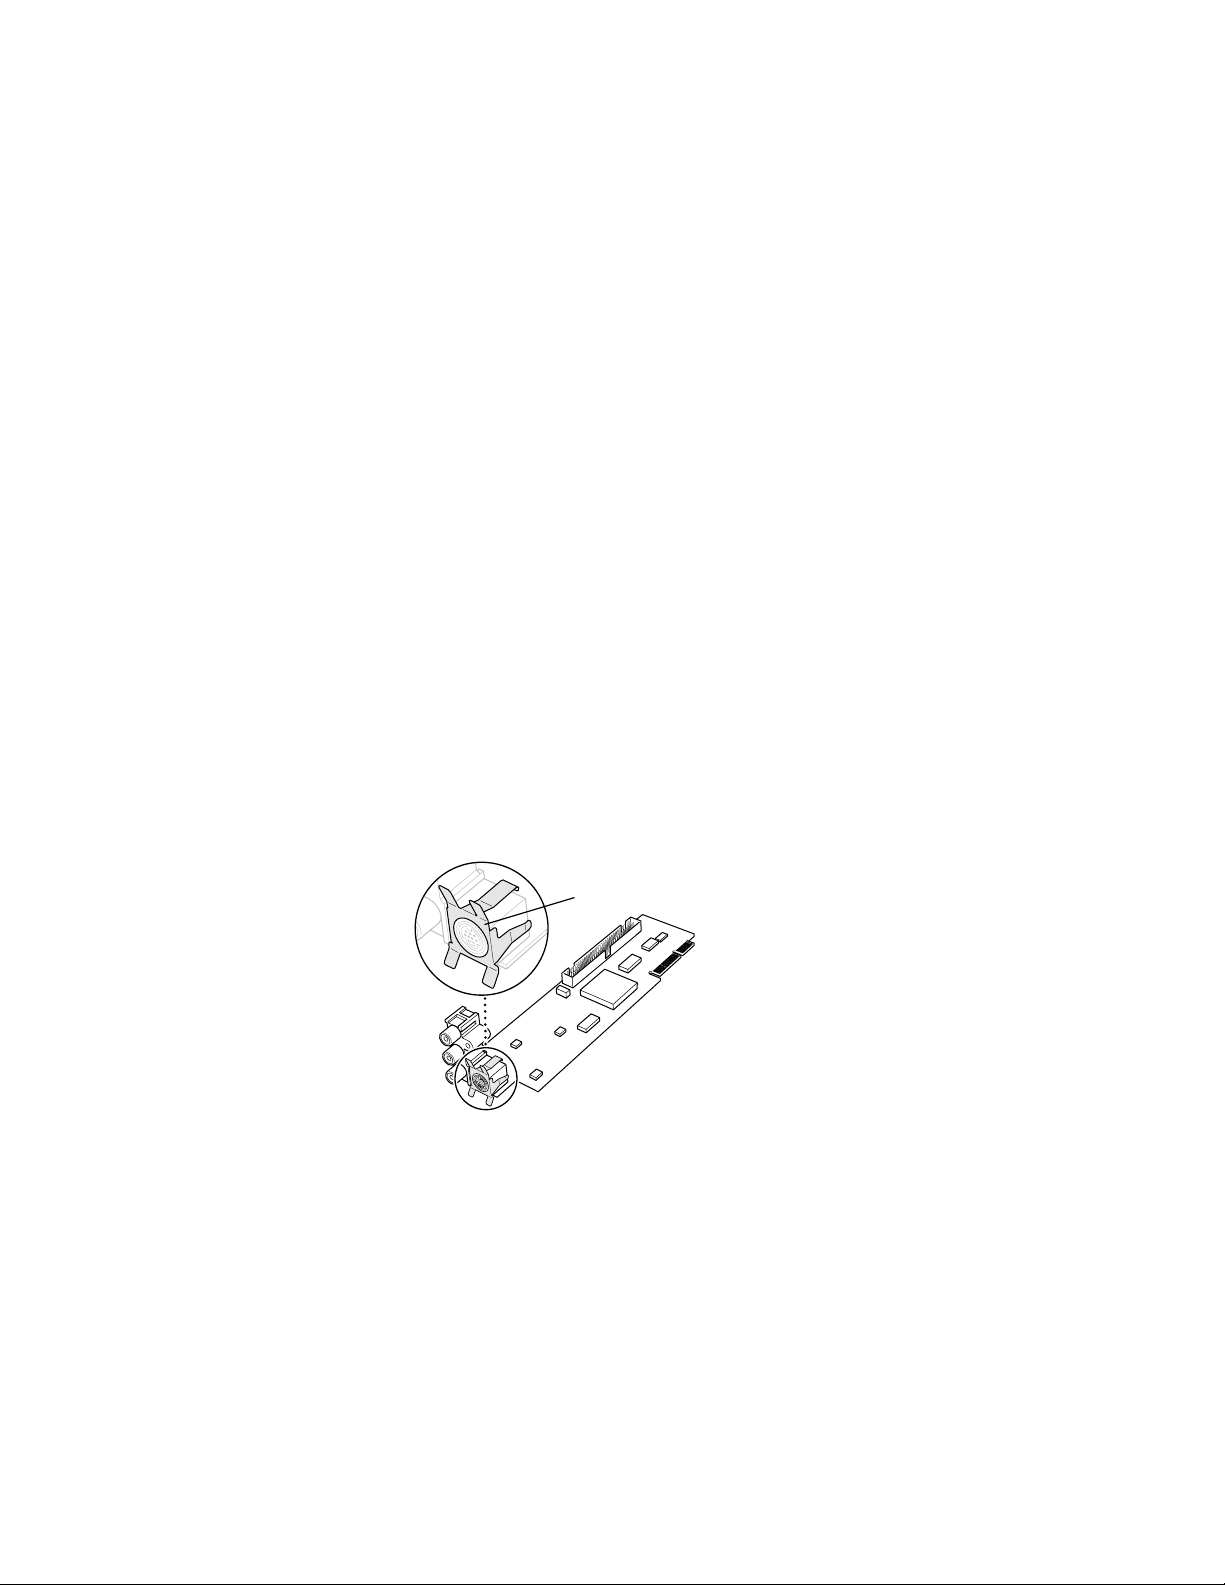
Installing the video input card
Before you install the video input card in your Macintosh
computer, make sure that the metal grounding clip is
attached to the S-video port on the card. Without the
grounding clip, devices attached to the S-video port might
not receive sufficient power.
The following instructions apply whether you are installing
the card in a compact computer (a computer with a built-in
monitor) or in a modular computer (a computer with a
separate monitor).
1 Follow the instructions in your manual up to and including
the step (in the section called “Installing the Video Input
Card” in Chapter 1) that tells you to remove the video input
card from its static-proof bag. Then return to this update.
2 Attach the grounding clip to the S-video port of the video
input card, if it isn’t attached already.
S-video port
Grounding clip
3 Continue the installation process as shown in your manual.
Start with the step following the one where you removed the
card from the static-proof bag. Make sure the grounding clip
stays attached to the video input card when you install it.
2
Update to Your Manual
Page 3

Installing the software
When you get to the section “Installing the Software,” in
Chapter 1 of your manual, follow these updated instructions
to install the Apple Video Player application.
1 Start the computer.
2 Insert the first disk of the Video Software Installer disk set
into the floppy disk drive.
3 Double-click the disk icon to open it.
4 Double-click the Installer icon.
5 Click Install.
6 Follow the instructions on the screen.
The instructions on the screen tell you when you need to
insert other disks.
7 When the installation is complete, click Restart.
You can now find the Apple Video Player icon in the Apple
Video Player folder, in the Apple Extras folder on your hard
disk.
Update to Your Manual
3
Page 4

Adjusting the picture
The video controls in the Apple Video Player software that
comes in your package look a little different from what is
shown in the manual. Instead, they look like those shown
here:
Although these controls look different from those in your
manual, they work just as your manual says: you drag the
sliders to adjust the picture to your liking.
4
Update to Your Manual
Page 5

Troubleshooting
Your manual contains a chapter called “Troubleshooting”
that gives you instructions for what to do if you have
problems using the hardware and software in this package.
If you can’t find the solution to your problem in the
Troubleshooting chapter (or anywhere else in the manual),
you may be able to find it here.
You don’t hear any sound.
m Adjust the volume slider in the video window, or the volume
controls on the front of your computer if you have them.
m Check the sound-related control panel on your computer to
see if the volume has been turned off. For instructions on
turning the sound back on in the control panel, choose
Macintosh Guide from the Guide (h) menu. (Make sure
that you’re in the Finder first.) If you don’t have Macintosh
Guide, see the manuals that came with your computer for
information on your computer’s sound-related control
panel.
The following items apply if you have video equipment
(such as a VCR) connected to the video input card:
The image is too white or too dark.
m Adjust the video screen controls. (Choose Show Controls
Window from the Windows menu and click the video screen
icon.)
m If you have a VCR connected to your video input card, make
sure you’re not having a problem with the videotape or the
VCR itself. (Connect the VCR back to your TV and play the
tape to see if the image is still bad.)
Update to Your Manual
5
Page 6

m The voltage output of your video equipment may be too
high or too low for the video input card. Therefore, your
video equipment may be sending video signals that are too
strong (causing a white picture) or too weak (causing a very
dark picture) for the video input card. Try connecting
different video equipment to the card.
You have a dark or “rolling” picture.
m Adjust the video screen controls. (Choose Show Controls
Window from the Windows menu and click the video screen
icon.)
m If you have a VCR connected to your video input card, make
sure you’re not having a problem with the videotape or the
VCR itself. (Connect the VCR back to your TV and play the
tape to see if the image is still bad.)
m If your VCR is connected to a TV monitor and to the video
input card, make sure that your cables go in this order: the
first cable must go from the Video Out port on the VCR to
the video in port on the TV monitor; the second cable must
go from the TV monitor video out port (or loop-through
video input port, whichever your TV monitor has) to the
computer’s video input card. (The connection must end at
the video input card, not the TV monitor.) Also check that
your TV monitor is set to loop-through (also known as
“Hi-Z”) input.
The sound is intermittent or clipped.
m Turn down the volume controls on your video equipment.
They may be set too high for the video input card.
m The voltage output of your video equipment may be too
high for the video input card. Therefore, your video
equipment may be sending signals that are too strong for the
video input card. Try connecting different video equipment
to the card.
6
Update to Your Manual
Page 7

The sound is full of static.
m Be sure your video equipment is securely connected to the
appropriate ports on the video input card.
m Adjust the sound controls in the Controls window. (Choose
Show Controls Window from the Windows menu and click
the sound icon.)
m Turn up the volume controls on your video equipment.
You’re playing a videotape with closed captions,
but the closed captions do not appear.
m To view a videotape with closed captions, you must connect
your VCR to a TV tuner port, not the video input card. If you
do not have a TV tuner card in your computer, you can
purchase one from an Apple-authorized dealer. Then follow
the instructions that come with the TV tuner card to see how
to view closed captions on videotape.
If your computer has a built-in monitor, the TV tuner port
(if you have one) is as shown in the computer on the left. If
your computer has a separate monitor, the TV tuner port is
as shown in the computer on the right.
If this port is present, then a TV tuner card is installed.
(The ports on your computer may look different.)
Update to Your Manual
7
Page 8

Apple, the Apple logo, Apple Video Player, and Macintosh are trademarks of
© 1996 Apple Computer, Inc. All rights reserved.
Apple Computer, Inc., registered in the U.S. and other countries.
030-9106-A
 Loading...