


ÖKO_LAVAMAT 41250 ELECTRONIC
The washing machine that respects the environment
User’s Instructions

Dear Customer,
Please read these user’s instructions carefully.
In particular, observe the safety instructions on the first pages! Keep these instructions so that you can refer to them later. If you sell or give your washing machine to someone else, don’t forget to include the User’s instructions.
This triangular symbol and/or the warning (Warning !) highlight important instructions for your safety or for operation of your washing machine. Please respect them in all cases.
This symbol introduces a step by step description of operations for your washing machine.
This location contains additional information about the operation and practical use of your washing machine.
This symbol identifies advice on how to operate your washing machine economically or ecologically.
Please refer to the “Troubleshooting” section in these instructions if a problem occurs. You will sometimes be able to solve the problem yourself using this information.
If you have a technical problem, you can call one of our AFTER SALES SERVICES near your home at any time (the addresse and corresponding telephone numbers are given in the Guarantee conditions / After Sales Service part).
This |
manual |
is |
printed on paper that protects the environment. |
It is not |
enough |
to |
think about the environment, action is necessary. |
2

CONTENTS |
|
User's instructions .............................................................. |
5 |
Important warnings ........................................................................................... |
5 |
Before using your washing machine for the first time ......................... |
5 |
Usage .......................................................................................................................... |
5 |
Installation ............................................................................................................... |
6 |
Safety devices ......................................................................................................... |
7 |
Protection of the environment ....................................................................... |
8 |
Wasching machine description ....................................................................... |
9 |
Front view ................................................................................................................ |
9 |
Detergent dispenser ............................................................................................. |
9 |
Using your washing machine ....................................................................... |
10 |
Control panel ....................................................................................................... |
10 |
Timer ......................................................................................................................... |
10 |
Other buttons and their functions ............................................................... |
11 |
Spinning speed selector ................................................................................... |
13 |
Delayed start selector ........................................................................................ |
13 |
Display of program progress .......................................................................... |
14 |
Consumption and program duration ......................................................... |
15 |
Washing guide ................................................................................................. |
16 |
Products .............................................................................................................. |
20 |
International symbols for care of textiles ................................................ |
22 |
How to do your washing................................................................................ |
23 |
Programs table ................................................................................................. |
27 |
Cleaning and maintenance ............................................................................ |
29 |
Troubleshooting............................................................................................... |
31 |
3

Contents
Installation and connection instructions ..................... |
33 |
Safety instructions for the installation ..................................................... |
33 |
Washing machine dimensions ..................................................................... |
34 |
Installing your washing machine ................................................................ |
35 |
Position .............................................................................................................. |
37 |
Leveling and moving the washing machine ............................................ |
37 |
Electrical connection ....................................................................................... |
38 |
Water connections ........................................................................................... |
39 |
Technical characteristics ................................................................................ |
41 |
Guarantee conditions and After sales services ........... |
41 |
4

User's instructions
USER'S INSTRUCTIONS
 Important warnings
These warnings were written for your own safety and for the safety of others.
Before using your washing machine for the first time
 Respect the “Installation and connection instructions” given below.
Usage
 This washing machine was designed for use by adults. Make sure that children do not touch it or play with it.
 Unpack your washing machine immediately when you receive it, or ask someone else to unpack it for you. Check its general appearance. If you have any reserves, make them in writing on the delivery form, and keep a copy of it.
 Your washing machine is designed for normal domestic use. Do not use it for commercial or industrial purposes or for anything other than the purposes for which it was designed.
 Do not modify or attempt to modify the characteristics of this washing machine. This would be dangerous for you.
 Always pull out the plug and turn off the water supply tap when you have finished using the washing machine.
 Only wash articles that will resist machine washing. Follow the instructions on the label attached to each article.
 Do not use your washing machine to wash articles with whalebones, material without hems or torn material.
 Remember to take out coins, safety pins, broaches, screws, etc. before you put clothes in the washing machine. This type of item can cause serious damage if it is left in the washing.
 Do not put articles in the washing machine if you have just cleaned them using a stain remover containing gasoline, alcohol, trichloroethylene, etc. If you use this type of stain remover, wait until the product has evaporated before you put your washing in the drum.
5

User's instructions
 Put all small items such as socks, belts, etc., together inside a small cloth bag or pillow case, so that they cannot get trapped between the drum and the tank.
 Leave the cover and the drum open when you are not using your washing machine, to air the tank and prevent the formation of mould and bad smells.
 Always unplug the washing machine before cleaning and servicing it.
 Use only detergents designed for the washing machine. Follow the recommendations made by the manufacturer of these products.
 If the washing machine is installed in a location subject to frost, completely drain the washing machine and unscrew the tap supply pipe and put it down on the floor.
 Elements forming part of the packaging (for example plastic films, pieces of polystyrene) can be dangerous for children. Keep these packaging elements out of reach of children.
 Make sure that pets cannot get into the drum of your washing machine.
 Never use the washing machine if the power supply cable, the control panel, the working surface or the base are damaged so that the inside of the washing machine is accessible.
Installation
 If the electrical installation in your house needs to be modified so that you can plug your washing machine in, have the work done by a qualified electrician.
 Please read the instructions in the “Electrical connection” chapter carefully before plugging in your washing machine.
 Ask a qualified plumber to make the water connections for your washing machine.
 After you have put your washing machine into place, make sure that the power supply cable is not trapped under it.
 This washing machine is heavy. Take care when you move it.
6

User's instructions
 All packing devices must be removed from the washing machine before you use it. Severe damage may occur to the washing machine or adjacent furniture if you forget to remove any of the transport protection packing. Always unplug the washing machine before removing packing.
 All repairs to the washing machine must be made by qualified personnel.
Satety devices
 Cover: your washing machine is equipped with a safety device preventing the washing machine cover from closing when the drum doors are open. It is impossible to start it until the doors are closed. An electromechanical safety device prevents you from opening the cover while the washing machine is operating, and for about 2 minutes after the end of the program.
 Washing motor: a temperature safety device protects the motor against risks of mechanical overload, or overvoltage or undervoltage.
 Heating: heating will not start until the water quantity necessary for washing has been added into the tank. This safety device is effective mainly when the water supply is cut off or if you forget to open the water supply tap.
 The anti-foam system: water consumption is very low, due to the electronic spin cycle with an intermediate spin after the main wash and three rinse cycles for white and color programs. The spin cycle remains under the control of the foam detection system after the wash cycle has finished. If necessary, the spin cycle will stop until all foam is removed.
7

User's instructions
Protection of the environment
All materials marked with the 
 symbol can be recycled. Place them in a waste collection bin provided for this purpose (ask your local municipal services) so that they can be recovered and recycled.
Plastics are identified as follows:
>PE< for polyethylene, for example for the surrounding cover and envelopes containing the documentation;
>PS< for expanded polystyrene, for example packing parts practically free of HCFC.
Cardboard is made from recycled paper and therefore should be discarded in waste paper collection bins.
We recommend that the following instructions should be followed to save water and energy, and therefore contribute to protecting the environment:
-When possible, use full loads rather than partial loads in your washing machine (however do not overload the drum).
-Only use programs with prewash for very dirty washing.
-Adapt the amount of detergent to the water hardness, to the amount of your washing, and how dirty it is.
If you scrap your old washing machine, make sure that you put everything that could be dangerous out of service; cut the power supply cable flush with the washing machine, and prevent the door latch from closing.
Automatic adjustment of water consumption
This automatic adjustment system adapts the water consumption as a function of the quantity and nature of the washing.
If you have an operating problem, refer to the “TROUBLESHOOTING” section. If you need help after you have made all these verifications, you should normally call the After Sales Service of the company that sold you the washing machine.
8

User's instructions
Washing machine description
Front view
Lid
Filter access door
Adjustable stands
Detergent dispenser
Powder detergent for programs with prewash or powder stain remover for the STAIN program " " (compartment 1).
Powder or liquid detergent for the main wash (compartment 2).
Bleach detergent (compartment 3)
Control panel
Handle for opening the lid
Lever for lifting the washing machine onto rollers
1 4
2 3
5
|
Liquid additives (softener, crease remover, starch, etc. |
|
(compartment 4). |
5 |
Softener overflow. |
9

User's instructions
Using your washing machine
Control panel |
Spinning speed |
Program progress |
Timer |
||||
Delayed |
variator |
indication |
|
|
|||
|
|
||||||
start |
|
|
|
|
|
|
|
|
|
|
|
|
|
||
|
|
|
|
|
|
|
|
|
|
|
|
|
|
|
|
|
|
|
|
|
|
|
|
|
|
|
|
|
|
|
|
|
|
|
|
|
|
|
|
OKÖ_LAVAMAT |
41250 ELECTRONIC |
Pushbuttons
Timer
The timer controls the washing mode (for example water level, drum movement, number of rinses) as a function of the nature of the washing and how dirty it is, and the temperature of the wash water.
This timer can be turned to the right or to the left.
STOP ( )
The washing machine is switched off. It is switched on for the other positions. Allows also the re-initialization of the appliance in case of error.
WHITE/COLOREDS ( )
)
Main washing step for washing to be boiled / coloreds from cold (" ") to 95°C.
SAVING ENERGY (E)
Programme saving energy to about 67°C for not soiled or lightly soiled laundry with a prolonged washing time (not compatible with Short option " ").
").
SYNTHETICS ( )
)
Main wash for easy care textiles from cold (" ") to 60°C.
10
User's instructions
DELICATE ( )
)
Main wash for delicate washing (cold (" ") up to 40°C).
WOOL ( /
/  )
)
Main wash, cold (" ") up to 40°C for machine washable wool.
RINSING ( )
)
Separate rinse, for example for rinsing hand washed textiles in two steps - rinse and delicate spin.
DELICATE RINSING ( )
)
Separate treatment, starching, sperate softener, separate waterproofing (with the rinsing, the liquid detergent is carried from the compartment 4).
DRAIN ( )
)
Drain water after a rinse hold (without spin afterwards).
SPINNING ( )
)
Drain water after rinse hold and spin or separate spin of hand washed white / colored washing.
SHORT SPINNING ( )
)
Drain water after rinse hold and delicate spin or separate spin of hand washed synthetics, delicates (mixed laundry, delicate laundry, wool).
Other buttons and their functions
Other buttons have the effect of adapting wash program depending on how dirty the washing is. No
other buttons need to be used for washing that is not dirtier than normal.
Different functions can be combined depending on the program.
When you push these buttons, the corresponding lights light on. To push them again, the lights light off. When you push on a button whom the function is not compatible with the selected program, its light blinks. It lights off after about 2 seconds.
11

User's instructions
PREWASH ( )
)
Prewash with a duration of about 25 minutes to 40°C before the washing who links automatically.
SOAKING ( )
)
The soaking function (not compatible with wool programs) allows to realize a cleaning of the laundry with a selective duration from 1h to 19h. After this time, the appliance realizes automatically the selected main wash.
To adjust the time of the soaking program:
-Press on the soaking button.
-Select the duration program that you wish (it appears in the display window) by pressing the "delayed start" button. However, after 45 minutes,
the light of the on/off button " " blinks. It is possible then to link the program at any moment by pressing the on/off button "
 ".
".
SHORT ( )
)
This pushbutton allows to reduce the washing time for small loads of not soiled laundry for the cotton/coloreds programs about 50 minutes, synthetics programs about 20 minutes and delicates programs about 10 minutes. This pushbutton is not compatible with wool programs.
BIO
For very soiled or stained laundry (fruit, vegetables, tea). You can wash intensively your laundry. The washing time of the main washing is prolonged about 10 minutes. This function is not compatible with the wool and delicate programs.
STAIN ( )
)
For treatment with a stain removal salt for very dirty or stained washing (main wash extended by 10 minutes, with optimized product entrainment during the wash). This function is not compatible with wool, soaking and prewash programs.
RINSE HOLD ( )
)
You can use this button with any program. The water used in the last rinse is not drained at the end of the selected program so that the washing will not become creased if you do not take it out of the drum immediately that the washing machine stops.
Select the DRAIN " " program when you want to drain the water. Release the RINSE HOLD "
 " button to spin.
12
User's instructions
EXTRA RINSE (

 )
)
By pressing this button, the appliance realizes an additonnal rinsing on the cotton, synthetics and delicates programs.
It is possible to memorize (and to cancell) the EXTRA RINSE "
 " function in order to have it on the cotton, synthetics and delicates programs each time you start up your washing machine by processing as follow:
-put the timer on SHORT SPINNING ( )
)
-press on the SOAKING " " button during 5 seconds ; the light EXTRA RINSE
"
 ' blinks in order to take in account this action. Then, put the timer on STOP
( ).
ON / OFF ( )
)
During the selection of your program and the different options, the light of the on/off button blinks. Press on the button on/off in order to start the washing cycle. The light keeps lighted. This button allows also to break the cycle in progress (by example, in order to add laundry). For your safety, you will not be able to open the lid if the temperature of the washing is superior to 50°C or if a spinning cycle has been planned. In no case, this button does not allow the reprogramming of the appliance.
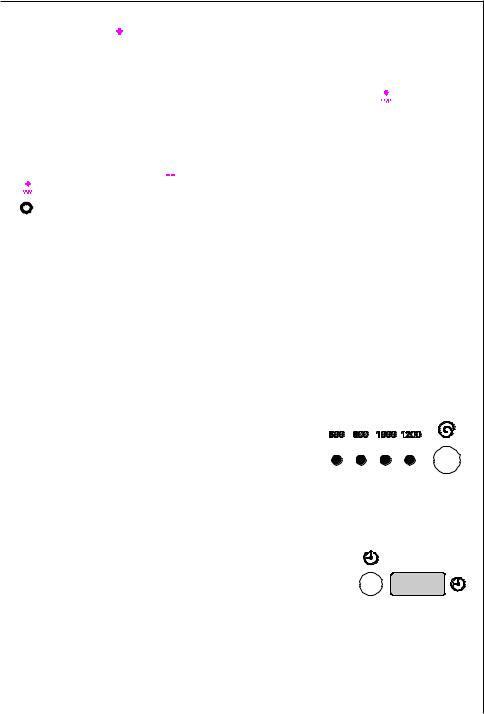
Spinning speed selector
With this button, you can choose the spinning
speed and decide if the laundry must be spinned more slightly. During the selection of the program,
the light corresponding to the adviced spinning
speed lights on. By pressing this button, the spinning speed can only be reduced.
Delayed start selector
The delayed start allows you to delay the program start until 19 hours (to take advantage possible night tariff). To adjust the selection of the time :
-choose the program and the options
-indicate the number of the hours at the end of which you want that your program starts (this number appears in the display window).
-make continuous pression on the button in order to have a quick progress of the time or press several times on the button to move hourly.
-press the on/off button. The deduction is displayed hour by hour, then, 5
minutes by 5 minutes during the last hour. |
13 |
 Loading...