

Page 1

User Guide
version
™
Adobe® GoLive
4.0
Page 2

1999 Adobe Systems Incorporated. All rights reserved.
Adobe GoLive 4.0 User Guide for Macintosh
This manual, as well as the software described in it, is furnished under license and may be used or copied only in accordance with the terms
of such license. The content of this manual is furnished for informational use only, is subject to change without notice, and should not be
construed as a commitment by Adobe Systems Incorporated. Adobe Systems Incorporated assumes no responsibility or liability for any
errors or inaccuracies that may appear in this book.
Except as permitted by such license, no part of this publication may be reproduced, stored in a retrieval system, or transmitted, in any form
or by any means, electronic, mechanical, recording, or otherwise, without the prior written permission of Adobe Systems Incorporated.
Please remember that existing artwork or images that you may want to include in your project may be protected under copyright law. The
unauthorized incorporation of such material into your new work could be a violation of the rights of the copyright owner. Please be sure
to obtain any permission required from the copyright owner.
Any references to company names in sample templates are for demonstration purposes only and are not intended to refer to any actual organization.
Adobe, the Adobe logo, GoLive, Illustrator and Photoshop are trademarks of Adobe Systems Incorporated. Apple, AppleScript, ColorSync,
CyberDog, HotSauce, Mac, Macintosh, Power Macintosh, QuickTime, WorldScript, and WebScript are trademarks of Apple Computer,
Inc., registered in the United States and other countries. QuickTime and the QuickTime logo are trademarks used under license. QuickTime
is registered in the U.S. and other countries. Microsoft, Windows, Windows NT and ActiveX are either registered trademarks or a trademarks of Microsoft Corporation in the United States and/or other countries. Netscape and Netscape Navigator are trademarks or registered
trademarks of Netscape Communications Corporation. Java, Java Applet, JavaScript and HotJava are trademarks or registered trademarks
of Sun Microsystems, Inc. in the United States and other countries. Graphic Interchange Format is copyright-protected property of
CompuServe Incorporated. All other trademarks are the property of their respective owners.
U.S. Patents 4,837,613; 5,146,346; 5,185,818; 5,384,902; 5,546,528; 5,634,064; 5,666,543; 5,724,498; 5,729,637; 5,737,599; 5,754,873;
5,781,785; 5,808,623; 5,819,278; 5,819,301; 5,822,503; 5,831,632; 5,832,531; 5,835;634; 5,860,074; patents pending.
Contains an implementation of the LZW algorithm licensed under U.S. Patent 4,558,302.
International ProofReader© Dutch
text proofing software © 1995 by
Inso Corporation
. All rights reserved. Reproduction or disassembly of
embodied algorithms or database prohibited.
International ProofReader© English
text proofing software © 1995 by
Inso Corporation
. All rights reserved. Reproduction or disassembly of
embodied algorithms or database prohibited.
International ProofReader© French
word list supplied by
Librairie Larousse
International ProofReader© German
word list supplied by
Langenscheidt K.G
International ProofReader© Italian
word list supplied by
Zanichelli S.p.A
International ProofReader© Portuguese
Dicionario Academico da Lingua Portuguesa
text proofing software © 1995 by
Inso Corporation
. All rights reserved. Spelling database adapted from
. Reproduction or disassembly of embodied algorithms or database prohibited.
text proofing software © 1995 by
Inso Corporation
. All rights reserved. Spelling database adapted from
. Reproduction or disassembly of embodied algorithms or database prohibited.
text proofing software © 1995 by
Inso Corporation
. All rights reserved. Spelling database adapted from
. Reproduction or disassembly of embodied algorithms or database prohibited.
text proofing software © 1995 by
© 1992 by
Porto Editora
Inso Corporation
. All rights reserved. Portions adapted from the
. Reproduction or disassembly of embodied algorithms or database
prohibited.
International ProofReader© Spanish
word list supplied by
The section
Präsentieren im Internet
Librairie Larousse
Part 1—A Brief Introduction to HTML
, by Petra Vogt, published by SmartBooks Publishing AG, Switzerland. Their Web site can be found at:
text proofing software © 1995 by
Inso Corporation
. All rights reserved. Spelling database adapted from
. Reproduction or disassembly of embodied algorithms or database prohibited.
in
Chapter 2—Adobe GoLive QuickStart Guide
is based on ideas from the book
Erfolgreich
www.smartbooks.ch.
Adobe Systems Incorporated, 345 Park Avenue, San Jose, California 95110, USA
Adobe Systems Europe Limited, Adobe House, Edinburgh EH11 4DU, Scotland, United Kingdom
Adobe Systems Co., Ltd., Yebisu Garden Place Tower, 4-20-3 Ebisu, Shibuya-ku, Tokyo 150, Japan
Adobe Systems Pty. Ltd., P.O. Box 672, 18-20 Orion Road, Lane Cove, New South Wales 2066, Australia
Notice to U.S. government end users. The software and documentation are “commercial items,” as that term is defined at 48 C.F.R. §2.101,
consisting of “commercial computer software” and “commercial computer software documentation,” as such terms are used in 48 C.F.R.
§12.212 or 48 C.F.R. §227.7202, as applicable. Consistent with 48 C.F.R. §12.212 or 48 C.F.R. §§227.7202-1 through 227.7202-4, as applicable, the commercial computer software and commercial computer software documentation are being licensed to U.S. government end
users (A) only as commercial items and (B) with only those rights as are granted to all other end users pursuant to the terms and conditions
set forth in the Adobe standard commercial agreement for this software. Unpublished rights reserved under the copyright laws of the United
States.
Printed in the U.S.A.
Part Number:
90016250 (3/99)
Page 3

Table of Contents
Chapter 1 Welcome to Adobe GoLive
How to Navigate Through This Manual ......................................................................................................... 3
Symbols ........................................................................................................................................................... 5
System Requirements ..................................................................................................................................... 5
Upgrading Information................................................................................................................................... 5
Installation ...................................................................................................................................................... 6
Maintaining Your Application ........................................................................................................................ 6
What Goes Where When Installing Adobe GoLive?...................................................................................6
Using the Modules Manager..................................................................................................................... 8
Optimizing Program Performance ............................................................................................................... 11
Registration ................................................................................................................................................... 12
About Adobe Products and Services............................................................................................................. 12
Chapter 2 Adobe GoLive QuickStart Guide
Part 1—A Brief Introduction to HTML
General .......................................................................................................................................................... 15
Getting Started: Create a File to Hold Your HTML ....................................................................................... 16
Step One: Formatting Text............................................................................................................................ 16
HTML Tags Used for Formatting Text ..................................................................................................... 17
Step Two: Inserting Images........................................................................................................................... 19
Step Three: Creating Links ............................................................................................................................ 19
Where to Go from Here................................................................................................................................. 20
Part 2—Making First Steps with Adobe GoLive
What You Need to Get Going ........................................................................................................................ 20
Installing Adobe GoLive ................................................................................................................................ 21
How to Work in QuickStart ........................................................................................................................... 21
Creating Individual Pages: Working Bottom-Up.......................................................................................... 21
The Main Window ......................................................................................................................................... 22
Your First Page .............................................................................................................................................. 23
The Palette .................................................................................................................................................... 23
The Layout Grid............................................................................................................................................. 24
The Color Palette........................................................................................................................................... 27
The Inspector ................................................................................................................................................ 28
Inserting Graphics ......................................................................................................................................... 30
Adjusting Your Graphic................................................................................................................................. 31
Other Objects You Can Use........................................................................................................................... 31
.......................................................................... 15
...................................................... 20
Page 4

iv
Saving Your Work .......................................................................................................................................... 31
The Site Window: Gathering and Storing Resources.................................................................................... 32
Creating a Site by Importing a Folder .................................................................................................... 32
Managing Web Pages and Media in the Site Window............................................................................ 34
Creating Links................................................................................................................................................ 36
Inserting Text to Link From .................................................................................................................... 36
Linking with the Site Window................................................................................................................. 37
Linking from a Graphic........................................................................................................................... 37
Adding Other Media to the Site Window...................................................................................................... 38
Previewing Your Work................................................................................................................................... 39
Part 3—Using Advanced Features
Multiple Ways to Insert Graphics.................................................................................................................. 41
Multiple Ways to Create Links....................................................................................................................... 41
Linking Directly from Selected Text........................................................................................................ 41
Linking from Inspectors.......................................................................................................................... 41
Linking via Drag & Drop ......................................................................................................................... 42
Create a Whole Site: Working Top-Down ..................................................................................................... 42
Building Your Site with Site View ................................................................................................................. 43
Using FTP to Upload Your Site...................................................................................................................... 46
Summing Up ................................................................................................................................................. 49
Table of Contents
.................................................................................... 40
Chapter 3 Adobe GoLive Basics
General .......................................................................................................................................................... 53
Part 4—Adobe GoLive Feature Overview
Creating Web Pages with Adobe GoLive....................................................................................................... 54
The Palette .................................................................................................................................................... 56
Inspectors...................................................................................................................................................... 57
The Color Palette........................................................................................................................................... 58
Point & Shoot................................................................................................................................................ 59
Multiple Document Views ............................................................................................................................ 60
Choosing an Editing Environment.......................................................................................................... 60
Previewing..................................................................................................................................................... 61
Layout............................................................................................................................................................ 62
Frames........................................................................................................................................................... 63
Outline........................................................................................................................................................... 64
Source............................................................................................................................................................ 65
Creating Animations ..................................................................................................................................... 66
Cascading Style Sheets .................................................................................................................................. 68
The Site Window ..................................................................................................................................... 69
.................................................................... 54
Page 5

Table of Contents
Site Management Tools................................................................................................................................. 70
The Site View ................................................................................................................................................. 71
Macintosh Technology Support .................................................................................................................... 72
Part 5—New Features in Adobe GoLive 4
User Interface Enhancements....................................................................................................................... 74
Multiple Cell Selection and Text Formatting................................................................................................ 75
Improved Web Technology Support ............................................................................................................. 75
New Site Management Capabilities.............................................................................................................. 75
Link Maintenance for QuickTime™ Movies and Shockwave or Flash Files ........................................... 75
Subfolder Rescan Capability ................................................................................................................... 76
Contextual Menu Support for Troubleshooting Missing File Problems................................................. 76
Absolute Paths in URLs ........................................................................................................................... 76
URL Mappings.......................................................................................................................................... 76
New CyberObjects ......................................................................................................................................... 76
QuickTime Authoring.................................................................................................................................... 78
Part 6—Common Controls in Adobe GoLive
List Window Controls..................................................................................................................................... 78
General Window Controls ............................................................................................................................. 79
Contextual Menus ......................................................................................................................................... 80
Controls in the Document Window .............................................................................................................. 81
Inspector Features and Controls................................................................................................................... 81
................................................................... 74
............................................................. 78
v
Chapter 4 Building Web Pages
General ..........................................................................................................................................................85
Web Page Design Tools ................................................................................................................................. 86
The Toolbar .............................................................................................................................................86
The Palette .............................................................................................................................................. 86
The Inspector........................................................................................................................................... 89
The Color Palette..................................................................................................................................... 90
Other Tools .............................................................................................................................................. 90
Chapter Overview .......................................................................................................................................... 92
Part 7—Basic Steps
Useful Tips..................................................................................................................................................... 93
Creating a New Page ..................................................................................................................................... 94
Working with Foreign Languages ................................................................................................................. 94
Things to Remember When Writing Foreign-Language Text in Adobe GoLive ..................................... 95
Things to Remember When Importing Foreign-Language Text Files from Other Sources ...................95
Things to Know About Foreign-Language Text Shown in Source Mode................................................ 97
Selecting a Language............................................................................................................................... 97
....................................................................................................................... 93
Page 6

vi
Language and Font Preferences ................................................................................................................... 97
Setting General Preferences........................................................................................................................ 101
Making Basic Page Settings......................................................................................................................... 102
Saving Your Page......................................................................................................................................... 108
Part 8—Basic HTML Tags
Layout Grid.................................................................................................................................................. 111
Inserting a Layout Grid ......................................................................................................................... 111
Layout Grid Resizing Options................................................................................................................ 112
Setting Layout Grid Properties.............................................................................................................. 113
Adding Content ..................................................................................................................................... 114
Manipulating Objects on the Layout Grid............................................................................................ 114
Inserting Text .............................................................................................................................................. 120
Formatting Text........................................................................................................................................... 123
Font Sets ................................................................................................................................................ 128
Tables .......................................................................................................................................................... 137
Inserting a Table ................................................................................................................................... 138
Resizing a Table .................................................................................................................................... 138
Making Selections Within a Table ........................................................................................................ 139
Customizing a Table with the Table Inspector..................................................................................... 141
Adding and Manipulating Text............................................................................................................. 149
Selecting in Nested Tables .................................................................................................................... 149
Images ......................................................................................................................................................... 149
Inserting an Image................................................................................................................................ 151
Setting Up an Image ............................................................................................................................. 152
Low-Resolution Images......................................................................................................................... 153
Opening Images in Their Native Application....................................................................................... 158
Alternative Ways of Handling Images................................................................................................... 158
Image Preferences ................................................................................................................................ 160
Clickable Image Maps ................................................................................................................................. 162
Inserting a Clickable Map ..................................................................................................................... 162
Editing a Clickable Map ........................................................................................................................ 163
Linking a Clickable Map with a Page.................................................................................................... 164
Using Actions with Images Maps .......................................................................................................... 165
Color Sync™ 2.5 ..................................................................................................................................... 165
Horizontal Lines.......................................................................................................................................... 167
Inserting Lines....................................................................................................................................... 168
Resizing Lines ........................................................................................................................................ 168
Editing Line Attributes .......................................................................................................................... 169
Horizontal, Vertical, and Block Spacers ..................................................................................................... 170
Inserting Spacers ................................................................................................................................... 171
Toggling Spacer Style ............................................................................................................................ 171
Resizing Spacers .................................................................................................................................... 171
Editing Spacer Attributes ...................................................................................................................... 172
Table of Contents
....................................................................................................... 110
Page 7

Table of Contents
Unknown Start and End Tags ..................................................................................................................... 173
Inserting an Unknown Tag.................................................................................................................... 174
Specifying a New Tag ............................................................................................................................ 175
Links and Anchors....................................................................................................................................... 175
Point & Shoot Insertion of Links and Anchors ..................................................................................... 176
Things to Know About Anchors ............................................................................................................ 177
Inserting an Anchor from the Palette................................................................................................... 177
Inspecting and Creating Hyperlinks with the Text Inspector............................................................... 179
Link Warnings........................................................................................................................................180
Customizing Resize Handles .................................................................................................................181
Comments ...................................................................................................................................................182
Line Breaks .................................................................................................................................................. 183
Part 9—Advanced Tags
JavaScript..................................................................................................................................................... 185
JavaScript Versus Java ........................................................................................................................... 186
JavaScript Information Resources......................................................................................................... 186
Inserting JavaScript Placeholders ......................................................................................................... 186
Inserting a JavaScript into the Head Section........................................................................................ 187
Setting Up a JavaScript.......................................................................................................................... 187
The JavaScript Editor ............................................................................................................................. 188
The JavaScript Inspector........................................................................................................................ 189
Adding Code to a JavaScript.................................................................................................................. 191
Basic JavaScript Examples..................................................................................................................... 192
Using Text Macros ................................................................................................................................. 192
JavaScript Preferences........................................................................................................................... 193
Java Applets................................................................................................................................................. 196
Inserting a Java Applet Placeholder ..................................................................................................... 196
Selecting a Java Applet.......................................................................................................................... 196
Setting Up a Java Applet ....................................................................................................................... 197
Inserting Java Applets via Point & Shoot............................................................................................ 200
Using Java Applets as HTML Containers ...............................................................................................201
Plugins ......................................................................................................................................................... 202
Inserting a Plugin Placeholder ............................................................................................................. 202
Selecting a Media File ........................................................................................................................... 203
Setting Up a Plugin................................................................................................................................ 203
Plugin Preferences ................................................................................................................................ 209
Custom Interfaces for Unknown Plugins.............................................................................................. 210
Floating Boxes ............................................................................................................................................. 212
Stacking-Related Issues ......................................................................................................................... 213
Inserting a Floating Box ........................................................................................................................ 214
Setting Up the Floating Box .................................................................................................................. 214
Filling a Floating Box with Content ......................................................................................................216
............................................................................................................ 185
vii
Page 8

viii
Table of Contents
Part 10—Internet Explorer-Specific Tags
Internet Explorer Objects in the Palette..................................................................................................... 217
ActiveX Controls .......................................................................................................................................... 218
Scrolling Marquee ....................................................................................................................................... 224
................................................................. 217
Chapter 5 Dynamic HTML
General ........................................................................................................................................................ 229
Basic Animation.......................................................................................................................................... 229
Advanced Animation .................................................................................................................................. 231
Part 11—Using Basic DHTML Objects
Date and Time Stamps ............................................................................................................................... 235
Button Images............................................................................................................................................. 236
Components................................................................................................................................................ 241
URL Popup .................................................................................................................................................. 245
Action Item.................................................................................................................................................. 246
Inline Action Item ....................................................................................................................................... 248
Browser Switch Item ................................................................................................................................... 249
Part 12—Creating Advanced Animations
Creating an Object to Be Animated............................................................................................................ 251
Animating a Floating Box ........................................................................................................................... 254
Working with Multiple Floating Boxes ....................................................................................................... 259
Inserting Actions in Your Animation .......................................................................................................... 266
Using Multiple Scenes................................................................................................................................. 267
Part 13—Using Actions
General ........................................................................................................................................................ 271
Get Form Value ........................................................................................................................................... 275
Get Floating Box Position ........................................................................................................................... 276
Preload Image............................................................................................................................................. 277
Random Image ........................................................................................................................................... 278
Set Image URL ............................................................................................................................................. 280
Go Last Page ................................................................................................................................................ 281
Goto Link ..................................................................................................................................................... 282
Navigate History.......................................................................................................................................... 283
Open Window.............................................................................................................................................. 284
Document Write.......................................................................................................................................... 285
Open Alert Window..................................................................................................................................... 286
Set Status ..................................................................................................................................................... 287
Drag Floating Box ....................................................................................................................................... 288
............................................................................................................ 269
.......................................................................... 234
................................................................. 250
Page 9

Table of Contents
Flip Move ..................................................................................................................................................... 289
Move By ....................................................................................................................................................... 290
Move To ....................................................................................................................................................... 292
Play Scene & Stop Scene ............................................................................................................................. 293
Play Sound & Stop Sound ........................................................................................................................... 294
Show Hide ................................................................................................................................................... 296
Stop Complete ............................................................................................................................................. 297
Wipe Transition ........................................................................................................................................... 297
Netscape CSS Fix .......................................................................................................................................... 299
Resize Window............................................................................................................................................. 300
Scroll Down, Left, Right, Up........................................................................................................................ 300
Set Back Color.............................................................................................................................................. 301
Condition..................................................................................................................................................... 302
Action Group ............................................................................................................................................... 303
Call Action.................................................................................................................................................... 304
Call Function ............................................................................................................................................... 305
Idle, Intersection, and Timeout.................................................................................................................. 305
Key Compare ............................................................................................................................................... 308
Variables......................................................................................................................................................309
Declaring a Variable.............................................................................................................................. 310
Initializing a Variable............................................................................................................................ 311
Reading a Cookie................................................................................................................................... 312
Testing a Variable at Runtime ..............................................................................................................313
Setting a Variable’s Value at Runtime .................................................................................................. 314
Writing a Cookie .................................................................................................................................... 315
Part 14—Shifting Code to an External Library
General ........................................................................................................................................................316
Benefits of Using External JavaScript Libraries........................................................................................... 317
Using the JavaScript Library at Page Level .................................................................................................317
Using the JavaScript Library by Default...................................................................................................... 318
..................................................... 316
ix
Chapter 6 Cascading Style Sheets
General ........................................................................................................................................................323
Controlling Typography with Cascading Style Sheets........................................................................... 323
Controlling Positioning with Cascading Style Sheets............................................................................ 324
CSS1 Support in Adobe GoLive.................................................................................................................... 325
Chapter Overview ........................................................................................................................................ 325
Part 15—A Short Primer on Cascading Style Sheets
History ......................................................................................................................................................... 327
Basic Style Sheet Syntax ..............................................................................................................................327
........................................ 326
Page 10

x
Selectors ...................................................................................................................................................... 328
Inheritance.................................................................................................................................................. 329
How Style Sheets Are Embedded in HTML ................................................................................................. 329
External Style Sheets ............................................................................................................................. 330
Internal Style Sheets.............................................................................................................................. 331
How Style Sheets Cascade ........................................................................................................................... 333
The CSS1 Formatting Model........................................................................................................................ 334
About Units in Style Sheets......................................................................................................................... 335
Part 16—CSS1 Tools in Adobe GoLive
Style Sheet Creation and Editing Tools....................................................................................................... 337
The Stylesheet Window............................................................................................................................... 337
The Stylesheet Toolbar ............................................................................................................................... 338
The CSS Selector Inspector.......................................................................................................................... 339
Part 17—Creating and Applying Styles
Creating a Style Sheet ................................................................................................................................. 340
Creating Tag Selectors................................................................................................................................. 341
Creating Classes........................................................................................................................................... 343
Creating IDs................................................................................................................................................. 344
Managing Styles .......................................................................................................................................... 346
Naming Styles and Viewing Properties ...................................................................................................... 346
Applying Styles from Internal Style Sheets................................................................................................. 347
Referencing External Style Sheets............................................................................................................... 349
Previewing with Cascading Style Sheets..................................................................................................... 350
Part 18—CSS1 Style Property Reference
General ........................................................................................................................................................ 352
Font Properties............................................................................................................................................ 353
Text Properties ............................................................................................................................................ 355
Box Properties............................................................................................................................................. 356
Positioning Properties ................................................................................................................................ 359
Border Properties........................................................................................................................................ 361
Background Properties ............................................................................................................................... 362
List Properties ............................................................................................................................................. 363
Specifying Unsupported Properties............................................................................................................ 364
Part 19—Cascading Style Sheets Tutorial
Cascading StyleSheets Example .................................................................................................................. 365
Tips and Tricks ...................................................................................................................................... 371
Table of Contents
.......................................................................... 337
....................................................................... 339
................................................................... 351
................................................................. 365
Page 11

Table of Contents
xi
Chapter 7 QuickTime Authoring
General ........................................................................................................................................................377
Chapter Overview ........................................................................................................................................ 378
QuickTime™ Editing Tools........................................................................................................................... 379
The
Track Editor
The QuickTime™ Tab of the Palette .....................................................................................................381
The QuickTime™ Movie Viewer............................................................................................................. 381
The QuickTime™ Inspector ...................................................................................................................382
Other Inspectors for QuickTime™ Movies............................................................................................. 383
Opening and Creating a QuickTime™ Movie..............................................................................................384
Saving a QuickTime™ Movie .......................................................................................................................384
Placing a QuickTime™ Movie on Your Page............................................................................................... 384
Using Video Tracks ...................................................................................................................................... 384
Inserting a Video Track and Importing Media ..................................................................................... 385
Inspecting a Video Track.......................................................................................................................386
Using Effect Tracks ......................................................................................................................................388
Inserting an Effect Track .......................................................................................................................389
Applying a Generic Video Effect............................................................................................................ 390
Applying a Single-Source Video Effect .................................................................................................. 392
Applying a Dual-Source Effect............................................................................................................... 394
Video Effects Available in Adobe GoLive .............................................................................................. 395
Using Sprite Tracks...................................................................................................................................... 401
Inserting a Sprite Track ......................................................................................................................... 402
Preparing the Stage: Setting General Sprite Track Properties ............................................................. 404
Hiring Actors: Importing Graphics........................................................................................................ 405
Conducting Actors: Creating and Editing Sprites.................................................................................. 407
Making Actors Interact with the Audience: Using Wired Sprites .........................................................410
Using Sound and Music Tracks ................................................................................................................... 413
Inserting a Sound or Music Track and Importing Media ..................................................................... 414
Inspecting a Sound or Music Track.......................................................................................................415
Using HREF Tracks....................................................................................................................................... 416
Inserting an HREF Track........................................................................................................................ 416
Specifying Destinations on the Web ..................................................................................................... 418
Using Chapter Tracks................................................................................................................................... 419
Inserting a Chapter Track...................................................................................................................... 420
Creating Chapters .................................................................................................................................. 422
Using Text Tracks......................................................................................................................................... 423
Inserting a Text Track............................................................................................................................424
Creating Text Segments......................................................................................................................... 425
..................................................................................................................................... 379
Page 12

xii
Table of Contents
Chapter 8 Working with Frames
General ........................................................................................................................................................ 429
Chapter Overview........................................................................................................................................ 430
Things to Know About Frames ................................................................................................................... 430
Editing Frames in Adobe GoLive................................................................................................................. 432
Inserting Frames ......................................................................................................................................... 434
Setting Up Frames....................................................................................................................................... 434
Moving Frames............................................................................................................................................ 436
Drag & Drop Editing of Frame Content...................................................................................................... 437
Previewing Frames...................................................................................................................................... 438
Example Frame Sets.................................................................................................................................... 440
Chapter 9 Working with Forms
General ........................................................................................................................................................ 445
Common Gateway Interfaces—The “Non-Visual Component” ................................................................. 446
Building the “Visual Component” of Forms............................................................................................... 446
Using Forms Tags .................................................................................................................................. 446
The Form Element ...................................................................................................................................... 447
Basic Forms Tags......................................................................................................................................... 451
Submit Button....................................................................................................................................... 451
Reset Button.......................................................................................................................................... 452
Radio Button ......................................................................................................................................... 454
Check Box .............................................................................................................................................. 455
Text Field............................................................................................................................................... 456
Password Field ...................................................................................................................................... 458
Text Area................................................................................................................................................ 459
Hidden................................................................................................................................................... 461
List Box .................................................................................................................................................. 462
Popup Menu.......................................................................................................................................... 463
Input Image........................................................................................................................................... 465
Key Generator ....................................................................................................................................... 467
File Browser........................................................................................................................................... 468
HTML 4.0 Forms Tags and Features ........................................................................................................... 469
Form Navigation Support ..................................................................................................................... 470
Read-Only Forms Elements................................................................................................................... 473
Disabled Form’s Elements .................................................................................................................... 473
Button ................................................................................................................................................... 474
Label...................................................................................................................................................... 475
Field Set & Legend ................................................................................................................................ 477
Page 13

Table of Contents
xiii
Chapter 10 Working with Head Tags
General ........................................................................................................................................................483
Opening the Head Tab.......................................................................................................................... 483
Inserting Head Tags..................................................................................................................................... 483
IsIndex ...................................................................................................................................................484
Base ....................................................................................................................................................... 485
Keywords ...............................................................................................................................................487
Link ........................................................................................................................................................ 488
Meta.......................................................................................................................................................489
Refresh...................................................................................................................................................491
Unknown Tag ........................................................................................................................................492
Comment............................................................................................................................................... 494
Script......................................................................................................................................................495
Chapter 11 The Color Palette
General ........................................................................................................................................................499
Opening the Color Palette........................................................................................................................... 499
Collapsing the Color Palette........................................................................................................................ 499
Coloring Text and Objects ........................................................................................................................... 500
Extracting Text and Object Color ................................................................................................................500
Color Spaces................................................................................................................................................. 501
The RGB Tab .......................................................................................................................................... 501
The CMYK Tab........................................................................................................................................ 501
The Grayscale Tab ................................................................................................................................. 502
The Indexed Colors Tab......................................................................................................................... 503
The Apple Colors Tab ............................................................................................................................503
The Real Web Colors Tab....................................................................................................................... 504
The Web Named Colors Tab.................................................................................................................. 505
The Site Colors Tab................................................................................................................................ 506
Chapter 12 Using the Outline Editor
Outline Editor Features............................................................................................................................... 509
The Outline Toolbar .............................................................................................................................. 510
Outline Editor Commands in Your Adobe GoLive Menus .................................................................... 511
User Profiles .......................................................................................................................................... 511
Launching the Outline Editor ...............................................................................................................512
Creating a New Web Page ..................................................................................................................... 512
Opening an Existing Web Page .............................................................................................................513
Finding Your Way Through the Outline View............................................................................................. 514
Page 14

xiv
Using the Palette with the Outline Editor.................................................................................................. 517
Editing HTML Code in the Outline View............................................................................................... 518
Inserting New HTML Tags ..................................................................................................................... 518
Inserting Text ........................................................................................................................................ 520
Inserting Comments.............................................................................................................................. 521
Inserting Attributes ............................................................................................................................... 523
Toggling the Binary Format.................................................................................................................. 525
Table of Contents
Chapter 13 Using the Source Editor
General ........................................................................................................................................................ 529
User Profiles ................................................................................................................................................ 530
Basic Features ............................................................................................................................................. 530
Text Formatting........................................................................................................................................... 531
Syntax Highlighting..................................................................................................................................... 532
Syntax Checking .......................................................................................................................................... 533
Drag & Drop Support .................................................................................................................................. 534
Using Text Macros with Source Code Editors ............................................................................................. 535
Source Editor Preferences........................................................................................................................... 540
General Settings .................................................................................................................................... 540
Browser Sets .......................................................................................................................................... 542
Font Preferences ................................................................................................................................... 543
Syntax Highlighting Preferences........................................................................................................... 544
Printing Preferences.............................................................................................................................. 545
Automating Operations Using AppleScript ................................................................................................ 546
Containers ............................................................................................................................................. 546
Lines, Characters, and Selections ......................................................................................................... 547
Cursor Positioning................................................................................................................................. 548
Core Elements ....................................................................................................................................... 548
General Text Handling Elements .......................................................................................................... 549
HTML Extensions ................................................................................................................................... 553
Chapter 14 Previewing Your Work
General ........................................................................................................................................................ 561
Standard Previewing............................................................................................................................. 562
Using the Built-In Preview Module ............................................................................................................ 562
Using Browsers for Previewing ................................................................................................................... 563
Using the Browser Launcher................................................................................................................. 563
Customizing the Browser Launcher ..................................................................................................... 564
Viewing Document Statistics ...................................................................................................................... 567
Page 15

Table of Contents
xv
Chapter 15 Find & Replace
General ........................................................................................................................................................571
Chapter Overview ........................................................................................................................................ 572
Local Search................................................................................................................................................. 573
Find Next ...............................................................................................................................................574
Searching Selected Text......................................................................................................................... 575
Drag & Drop Searching .........................................................................................................................575
Global Search............................................................................................................................................... 576
Local Find & Replace................................................................................................................................... 578
Global Find & Replace................................................................................................................................. 580
The Replace Menu Command............................................................................................................... 581
The Replace & Find Next Menu Command .......................................................................................... 582
The Replace All Menu Command .........................................................................................................582
Wildcard Search........................................................................................................................................... 583
Examples................................................................................................................................................ 584
Using Wildcard Search........................................................................................................................... 584
Wildcard Character Reference............................................................................................................... 585
Wildcard Searching Rules...................................................................................................................... 586
Using Back-References .......................................................................................................................... 586
Index Search ................................................................................................................................................ 587
Search Engine Basics ............................................................................................................................. 587
General ..................................................................................................................................................588
Using Index Search................................................................................................................................ 589
Find File.......................................................................................................................................................592
Find Preferences.......................................................................................................................................... 593
The Preferences - Find Dialog Box........................................................................................................ 593
The Preferences - Regular Expr. Dialog Box ......................................................................................... 595
Chapter 16 Spellchecking Your Work
General ........................................................................................................................................................599
Using the Spellchecking Tool......................................................................................................................600
Personal Dictionary.....................................................................................................................................601
Additional Languages.................................................................................................................................. 601
Chapter 17 Managing Web Sites with Adobe GoLive
General ........................................................................................................................................................605
Why Manage Web Sites in the Site Window?.............................................................................................. 606
Basic Concepts.............................................................................................................................................607
Chapter Overview ........................................................................................................................................ 608
Page 16

xvi
Table of Contents
Part 20—Site Management Tools
The Site Window ......................................................................................................................................... 609
Tabs in the Site Window ....................................................................................................................... 610
Site Window Controls ............................................................................................................................ 613
Site-Specific Inspectors ............................................................................................................................... 615
The Site Toolbar .......................................................................................................................................... 615
Menu Commands........................................................................................................................................ 617
The Site Tab of the Palette ......................................................................................................................... 620
Part 21—Creating a Site and Importing Resources
Creating a Site ............................................................................................................................................. 622
Creating a Site from Scratch ................................................................................................................. 623
Creating a Site by Importing Pages and Resources.............................................................................. 624
Importing Selected Resources .................................................................................................................... 629
Importing from the Finder ................................................................................................................... 629
Importing URLs and E-Mail Addresses ................................................................................................. 630
Part 22—Managing Resources
Finder-Style File Management.................................................................................................................... 633
Opening Files ........................................................................................................................................ 634
Creating Folders and Groups ................................................................................................................ 637
Moving Files via Drag & Drop............................................................................................................... 638
Duplicating Files ................................................................................................................................... 639
Deleting Files......................................................................................................................................... 639
Recovering Deleted and Removed Files............................................................................................... 640
Clearing the Site Folder .............................................................................................................................. 641
Managing Files Using the File Inspector .................................................................................................... 644
Inspecting Pages ................................................................................................................................... 644
Inspecting Images and Media Files ...................................................................................................... 647
Renaming Files...................................................................................................................................... 649
Managing Stationery in the Site Window................................................................................................... 650
Managing URLs and E-Mail Addresses in the Site Window........................................................................ 651
Managing Colors in the Site Window.......................................................................................................... 654
Managing Fontsets in the Site Window ...................................................................................................... 657
Changing Hyperlinks and File References.................................................................................................. 660
Toggling Between the Site Window and Document Windows .................................................................. 661
Part 23—Viewing the Structure of a Site
Viewing Your Site in the Site View Tab....................................................................................................... 662
Switching to Link Hierarchy Mode ............................................................................................................. 663
Cleaning Up the Site View........................................................................................................................... 663
Navigating the Site View............................................................................................................................. 663
The Site Navigator................................................................................................................................. 663
Navigation Keys..................................................................................................................................... 664
.................................................................................... 609
.......................................... 622
........................................................................................... 632
.................................................................. 661
Page 17

Table of Contents
Zooming In and Out.................................................................................................................................... 664
Collapsing and Expanding the Site View .................................................................................................... 665
Customizing the Site View........................................................................................................................... 666
The Site View Controller........................................................................................................................ 667
Inspecting Links in the Site View ................................................................................................................ 671
How Links Are Displayed in the Site View ............................................................................................ 672
Inspecting Links in the Link Inspector.................................................................................................. 672
Part 24—Designing a Site
Designing a Site Using the Site View........................................................................................................... 678
Switching to Navigation Mode.................................................................................................................... 679
Adding New Pages in the Site View ............................................................................................................680
Turning Navigational Links into Hyperlinks............................................................................................... 683
Part 25—Site Maintenance
Maintaining Site Integrity ...........................................................................................................................684
Error Indicators ..................................................................................................................................... 684
Common Sources for Errors .................................................................................................................. 686
Analyzing Missing File Problems .......................................................................................................... 686
Analyzing Error Messages Caused by External References ................................................................... 687
Repairing Broken Links and Invalid File References............................................................................ 687
Troubleshooting Broken Links at Page Level ....................................................................................... 687
Troubleshooting a Renamed File at Site Level.....................................................................................688
Troubleshooting a Moved or Deleted File at Site Level .......................................................................689
Using the Contextual Menu for Troubleshooting Missing File Problems............................................ 689
Part 26—Uploading and Downloading
General ........................................................................................................................................................690
Uploading Your Site Using the Built-In FTP Tool ....................................................................................... 691
Connecting to an FTP Server ................................................................................................................. 692
Setup for FTP Access..............................................................................................................................693
Uploading Your Site ..............................................................................................................................695
Downloading Files................................................................................................................................. 695
Using the Standalone FTP Upload & Download Window.......................................................................... 696
Setting FTP Preferences............................................................................................................................... 697
Exporting Your Site ..................................................................................................................................... 701
Using the Web Download Feature..............................................................................................................704
Part 27—Post-Publishing Tasks
Finding an ISP to Host Your Web Site.........................................................................................................706
Acquiring a Domain Name ......................................................................................................................... 706
Making Your Site Known on the Web.........................................................................................................707
Registering with the Search Engines........................................................................................................... 708
...................................................................................................... 677
.................................................................................................. 684
....................................................................... 690
........................................................................................ 706
xvii
Page 18

xviii
Table of Contents
Part 28—Site Preferences and Options for Advanced Users
The Site Preferences Dialog Box................................................................................................................. 709
Export Preferences ...................................................................................................................................... 711
The Folder Names Dialog Box .................................................................................................................... 712
The Page Status Dialog Box ........................................................................................................................ 713
The Site View Dialog Box ............................................................................................................................ 714
URL Mappings ............................................................................................................................................. 715
Mapping to an External Folder............................................................................................................. 715
Multiserver Support .............................................................................................................................. 718
Setting Up Adobe GoLive to Use Absolute Paths........................................................................................ 719
Part 29—Using Adobe GoLive Project Files
Updating Version 2.0 Project Files ............................................................................................................. 722
Importing Version 2.0 Project Files ............................................................................................................ 724
............................................................ 722
..................... 708
Chapter 18 The Web Database
General ........................................................................................................................................................ 729
Things to Remember When Editing the Web Database............................................................................. 730
The Global Tab............................................................................................................................................ 730
The HTML Tab ............................................................................................................................................. 733
Looking Up HTML Tags in the Web Database ...................................................................................... 734
Editing HTML Tags in the Web Database ............................................................................................. 736
The Chars Tab.............................................................................................................................................. 744
Viewing Special Characters ................................................................................................................... 745
Adding and Editing Special Characters................................................................................................. 746
The CSS Tab ................................................................................................................................................. 748
Chapter 19 Web Technology Support
General ........................................................................................................................................................ 755
Adobe GoLive and XML ......................................................................................................................... 755
Adobe GoLive and ASP .......................................................................................................................... 757
Visual Indicators for Foreign Code ....................................................................................................... 758
Page 19

Table of Contents
xix
Shortcuts
Visual Index
....................................................................................................................................... 763
.............................................................................................................................. 769
Creating Actions
Index
................................................................................................................................................... 803
................................................................................................................. 777
Page 20

Page 21

Chapter 1 Welcome to Adobe
GoLive
Welcome to Adobe GoLive, the complete solution for
HTML layout, design, and Web site management. It gives
Macintosh users unprecedented creative control and flexibility when designing a Web site. Adobe GoLive lets
graphic designers and publishers visually design and
manage a professional-quality Web site—including the
latest multimedia features—without any HTML programming. Yet Adobe GoLive includes HTML source-code
and JavaScript tools, which help Web designers and programmers integrate interactivity into their sites. Designed with the future in mind, Adobe GoLive also
supports Cascading Style Sheets, Dynamic HTML, and
QuickTime™, three proven technologies that give Web
designers a wealth of new creativity tools.
How to Navigate Through This Manual
The nineteen chapters of this manual reflect the major activities Web
publishers and Web masters can cover using Adobe GoLive:
• The present chapter, Welcome to Adobe GoLive, outlines basic
system requirements, tells you where to find installation instructions, and contains registration and support information. This
chapter also includes basic program maintenance instructions.
• The Adobe GoLive QuickStart Guide chapter outlines the basic
steps for using Adobe GoLive.
• The Adobe GoLive Basics chapter contains briefly describes the
most important features built into Adobe GoLive.
• Building Web Pages provides step-by-step instructions for page
design, highlighting Adobe GoLive’s powerful tools in the process.
• The Dynamic HTML chapter describes Adobe GoLive’s basic and
advanced DHTML tools that let users animate Web pages with
drag & drop ease.
Page 22

4
CHAPTER 1
Welcome to Adobe GoLive
• The Cascading Style Sheets chapter introduces Web style sheets
and provides instructions for using Adobe GoLive’s user-friendly
implementation of the Cascading Style Sheets technology.
• QuickTime Authoring explains Adobe GoLive’s multimedia
authoring environment for time-based data.
• Working with Frames introduces the user to HTML frames.
• The chapter Working with Forms describes Adobe GoLive’s builtin tools for building fill-in forms.
• Working with Head Tags provides instructions on how to control
browsers and use specific head tags.
• The Color Palette chapter presents Adobe GoLive’s drag & drop
coloring tool.
• The Using the Outline Editor chapter introduces the Outline Edi-
tor, one of Adobe GoLive’s powerful page-editing tools.
• Using the Source Editor tells experienced users how to use the
Source Editor and the extra scripting capabilities available by
using AppleScript®.
• The Previewing Your Work chapter explains how Adobe GoLive
helps you preview your work—with and without a Web browser.
• The Find & Replace chapter presents Adobe GoLive’s powerful
tools for finding and replacing text.
• Spellchecking Your Work covers the use of this tool.
• Managing Web Sites with Adobe GoLive explains how to use the
advanced graphical site management tools built into Adobe
GoLive.
• The Web Database introduces Adobe GoLive’s Web Database.
• The Web Technology Support chapter explains how Adobe GoLive
helps Web authors handle non-HTML code in Web pages.
In addition, three appendixes with reference information follow the
final chapter:
• Shortcuts lists keyboard and mouse shortcuts you may find useful when working with Adobe GoLive.
• Visual Index is a visual guide to the objects on Adobe GoLive’s
Palette.
• Creating Actions is a guide to JavaScript developers who wisk to
write their own scripted actions for Adobe GoLive’s DHTML
authoring environment.
Page 23
5Symbols
A separate manual, Using WebObjects with Adobe GoLive,
included in the standard package, describes Adobe GoLive’s
WebObjects editing tools.
Symbols Throughout this manual, look for these symbols to learn more about
Adobe GoLive:
The Caution symbol alerts you to special background information that helps you use Adobe GoLive more efficiently.
The How To symbol marks step-by-step instructions on using
Adobe GoLive.
The Multiple Paths symbol indicates alternative ways to achieve
a given goal.
System Requirements Adobe GoLive runs on any Apple Power Macintosh™ or 100% compat-
ible computer with a minimum of 16 Megabytes (MB) of free RAM
(random access memory). As a rule of thumb, we recommend a
memory allocation of at least 24 MB. Adobe GoLive requires approximately 26 MB of storage space on your hard disk when installed
with the complete set of standard modules shipped with the software.
Adobe GoLive requires Mac® OS 8.0 or later installed on your system.
To use all Adobe GoLive features, be sure you have the following system extensions and control panels installed on your Macintosh and
selected in the Extensions Manager control panel:
• QuickTime™ and QuickTime Power Plug, Version 3.0 or later
• Sound Manager, Version 3.3 or later
• AppleScript system extension
• Text Encoding Converter system extension
• Text Encodings folder (in System folder)
• Apple Guide™ system extension
Upgrading
Information
Note the following information if you are upgrading from an earlier
version or a trial version of Adobe GoLive:
• If you are upgrading from a Trial version of Adobe GoLive to a
Purchased version, please select Register Adobe GoLive from the
Trial menu and enter your activation key. It can be found in the
Page 24

6
CHAPTER 1
Welcome to Adobe GoLive
email confirming shipment of your order if you ordered the
“Download +” package direct from Adobe GoLive. Otherwise, it
can be found on the Registration card.
• If you are updating from Version 2.x to Version 4, be sure to drag
the following items out of the Adobe GoLive 2.x Modules and
Plug Ins folders before you move the old version to the Trash:
- items you have stored in the Custom tab of the Palette (these
are contained in the Palette file)
- any personal dictionaries you have created
- plugins from the 2.x Plug Ins folder
Note that the HTML tag database from version 2 is not compatiable with version 4 and can’t be moved.
• Existing project files from earlier versions must be updated for
use in Adobe GoLive 4. Chapter 17, Managing Web Sites with
Adobe GoLive, presents step-by-step instructions for updating
Adobe GoLive project files (see Part 29 — Using Adobe GoLive
Project Files).
Installation For instructions on how to install Adobe GoLive, please refer to the
Read Me First! file on the CD-ROM.
Maintaining Your Application
What Goes Where When Installing Adobe GoLive?
When installing Adobe GoLive, the installer program copies either of
two default sets of program files to your hard disk, according to the
preferences you select in the installer window. The following section
briefly describes the application files and folders and their respective
locations on your hard disk, letting you keep track of what goes
where when you install the program.
This section also describes the Modules Manager, which lets you
customize the application by disabling or enabling individual
program modules from within the Preferences dialog box.
The Adobe GoLive installer program copies all files to the Adobe
GoLive program folder.
Page 25
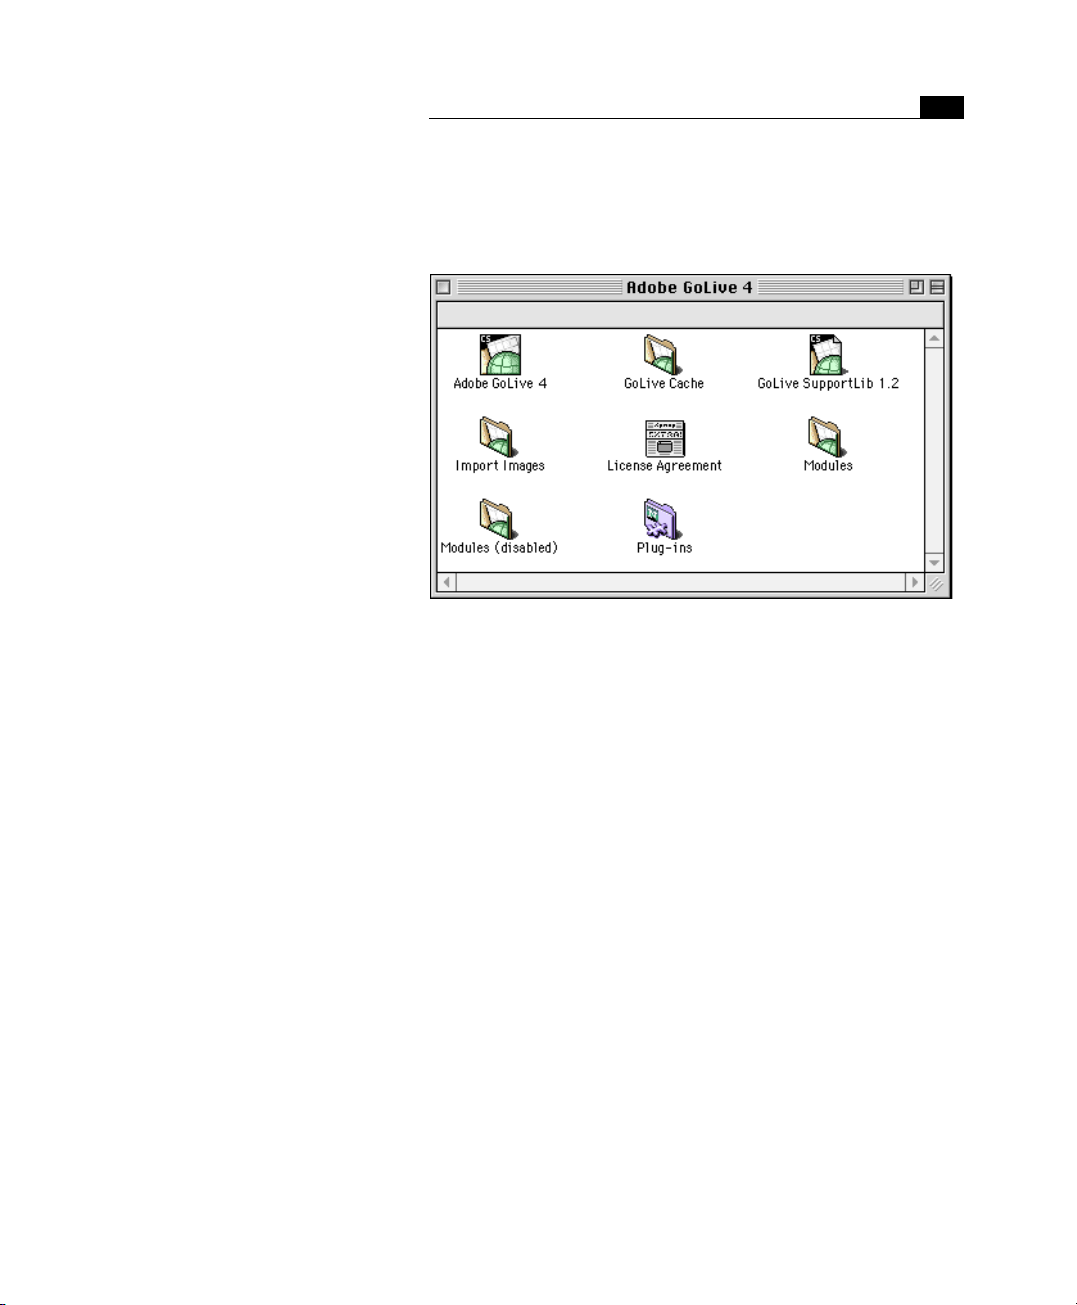
The Adobe GoLive Program Folder after
Installation
Items in the Adobe GoLive Program Folder
The following screenshot shows the contents of the Adobe GoLive
program folder after installation.
Here is a brief explanation of the program components and their
respective functions:
Component Function
Adobe GoLive 4
Adobe GoLive Cache Adobe GoLive uses this folder for intermediate storage of image files at runtime.
Modules Adobe GoLive uses this folder to store its active program modules. Program
Modules (disabled) Adobe GoLive uses this folder as a repository for program modules you have dis-
Import Images This folder is created when you specify a folder for imported images in the Gen-
Plugins This folder holds plugin components that let Adobe GoLive behave exactly like
CyberStudio
SupportLib
This is the application program file. Program maintenance may require that you
select this icon in the Finder, open the Information dialog box, and change the
program’s memory allocation. For more information, please refer to the Mac OS
documentation that came with your computer.
modules add extra features to the program’s default functionality (for more information, see the section Using the Modules Manager later in this chapter).
abled in the Modules Manager (see the Using the Modules Manager section in
this chapter). When installing Adobe GoLive, the WebObjects, AIAT, Asia Encodings, and Mac OS Encoding modules are automatically disabled and copied to
this folder.
eral - Images Preferences dialog box. It stores images that are automatically created when you import a PICT, TIFF, or Adobe Photoshop image file via drag &
drop.
a Web browser–for example, play back QuickTime movies in its Layout and Pre-
view modes. Installing plugins is a simple drag & drop procedure. Drag the new
plugin icon from the plugins folder of your Web browser at the Plugins folder in
the program folder, then relaunch Adobe GoLive. The plugin component should
be ready for use now.
CyberStudio SupportLib is a shared library that contains common routines
that are frequently accessed by the program and its modules
7Maintaining Your Application
Page 26
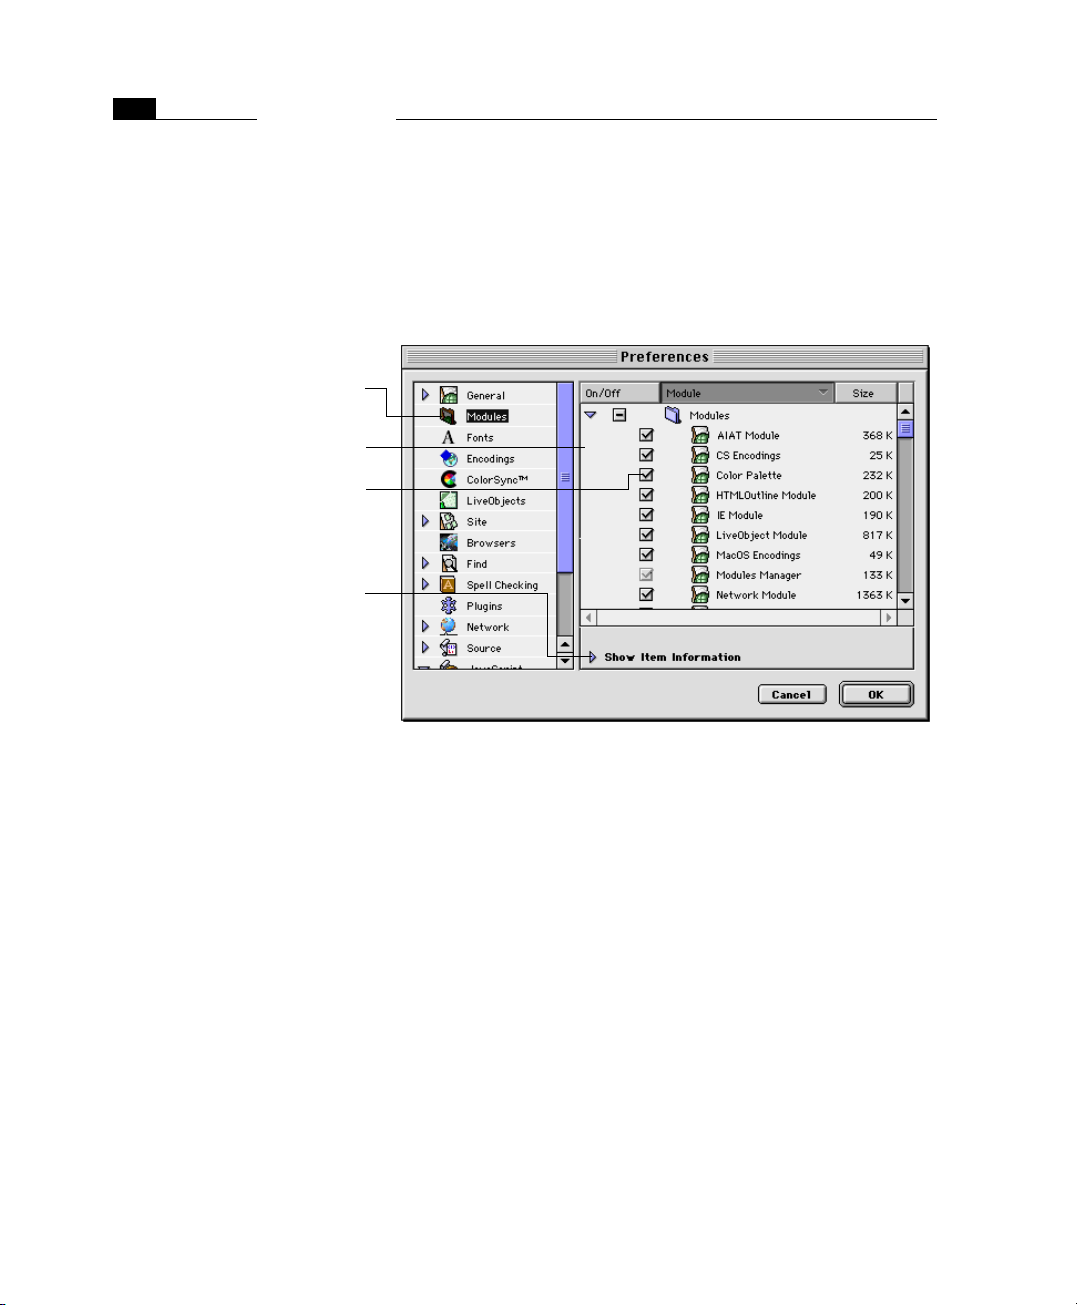
8
CHAPTER 1
Welcome to Adobe GoLive
Using the Modules Manager
The Modules Manager
Click the Modules icon to display the Modules
Manager pane in the Preferences dialog box.
Scroll through the Modules list to view the program modules currently installed.
Check or uncheck these boxes to activate and
deactivate individual program modules, then
relaunch the application.
Click the small triangle to show or hide the Item
Information pane below the Modules list. The
Item Information pane shows background information on the currently selected module.
General
The Modules Manager is a unique feature that makes Adobe GoLive
fully scalable to meet individual needs. Not only does it reproduce
the “look-and-feel” of the MacOS Extension Manager but it also works
much like this useful system utility, giving both experienced and novice users a familiar graphical interface for customizing Adobe GoLive.
The Modules Manager allows you to disable or enable selected
modules to customize Adobe GoLive’s command inventory to meet
your needs. For example, if you don’t create dynamic Web pages
using Apple’s WebObjects development environment, you may
choose to disable the WebObjects module.
Application Memory Considerations
The Modules Manager lets you streamline the application to shorten
its launch time, improve its responsiveness (slightly), and reduce
overall memory requirements. For example, when your computer is
low on RAM and the size of your job allows you to manage your site
in the Finder, you can use the Modules Manager to disable Adobe
GoLive’s WebObjects Module. This lets Adobe GoLive run with less
RAM. By disabling further modules, you can reduce the program’s
memory requirements to the minimum recommended 16 MB, but
be aware that this results in major tradeoffs in functionality.
Page 27

Adobe GoLive Module Reference
The following brief descriptions of the program modules shipped
with Adobe GoLive are a reference for users who are not sure
whether they should disable or enable a specific module.
Module Function Added
AIAT Module Based on Apple Information Access Technology (AIAT), this component en-
CS Encodings This component adds several application-specific Asian encodings (identi-
Color Palette This component activates the Color Palette, adding the Color Palette com-
CyberFlash Module This module enables support for using Macromedia Flash and Shockwave
CyberMovie Module This component enhances Adobe GoLive by the built-in QuickTime™ author-
CyberObjects Module This component enables support for Dynamic HTML. It adds the CyberObjects
HTML Outline Module This component activates Adobe GoLive’s Outline Editor, adding the Outline
IE Module This component activates support for Microsoft Internet Explorer-specific
Mac OS Encoding This is the key component to Adobe GoLive’s multiple-language support, en-
Modules Manager Enabled by default, this component adds the Modules Manager pane to the
Network Module This component activates Adobe GoLive’s built-in FTP support, adding the
Open Recent Module This component allows Adobe GoLive to record the Web pages and site doc-
PNG Image Format This component enables Adobe GoLive to import PNG (Portable Network
ables Adobe GoLive to search your site like an index-based search engine. It
changes the appearance of the Find dialog box by adding the Use index
checkbox and a dedicated Search in Site Index tab rider.
fied by leading “CS-”) to the Document Encodings submenu (see illustration
on the next page). It also adds the same encoding options to the Font &
Scripts and Encodings panes of the Preferences dialog box, as well as to the
popup menu at the bottom of Open… and Find & Replace dialog boxes.
mand to the Window menu.
animations as plugins.
ing environment, enabling the Open command to open QuickTime movies as
well as the Track Editor, the Movie Viewer, and media-specific Inspectors. It
also adds the QuickTime tab to the Palette and the New QuickTime Movie
command to the New Special submenu of the File menu.
tab to the Palette and enables the Timeline Editor and the associated button
in the document window.
Editor tab to the tab bar at the top of the main document window, a contextsensitive Outline Toolbar, and several editor-specific items to the Special
menu.
features, adding the two ActiveX and Marquee objects to the Basic Tags tab of
the Palette.
abling the program to work with the Mac OS TecEncoder system extension. It
adds multiple standard encodings to the Document Encodings submenu, including European, Chinese, Japanese, Arab, Greek, Hebrew, Cyrillic, Devanagari, Thai, Korean, and many others. It also adds the same encoding options
to the Font & Scripts and Encodings panes of the Preferences dialog box, as
well as to the popup menu at the bottom of Open… and Find & Replace dialog boxes. Do not disable when you are working with foreign-language en-
codings! Disabling the Mac OS Encoding module reduces your options to the
program’s three application-specific Western default encodings (see illustration on the next page).
Preferences dialog box.
FTP vertical tab to the right pane of the Site Window, the FTP Upload & Down-
load command to the File menu, and the Network options to the Preferences
dialog box.
uments recently edited. It adds the Open Recent Files command to the File
menu. In the submenu, the most recent site document and Web page are
listed with keyboard shortcuts.
Graphics) and TIFF (Tagged Image File Format) image files using Point &
Shoot, drag & drop, or any other optional methods supported by the application. It also adds PNG-specific options to the General Preferences - Image di-
alog box.
9Maintaining Your Application
Page 28
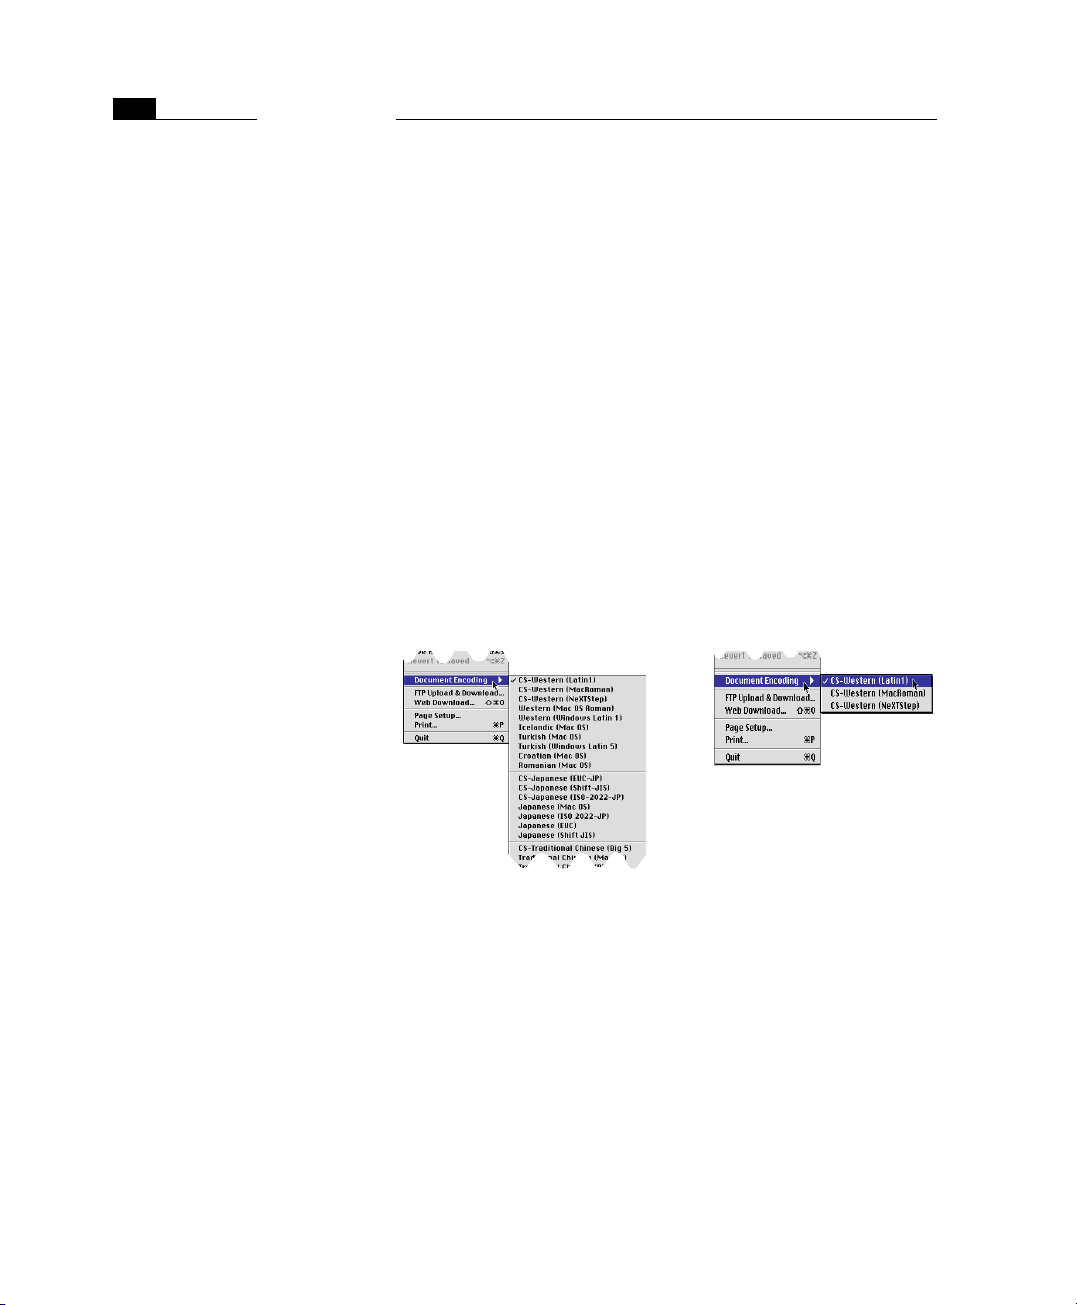
CHAPTER 1
10
The Document Encodings Menu with the
Mac OS Encodings Enabled and Disabled
Welcome to Adobe GoLive
Module Function Added
Preview Module This component activates Adobe GoLive’s Preview feature, adding the Pre-
Scripting Module This component activates Adobe GoLive’s JavaScript support for body and
Site Module This component activates the Site Window with its management capabilities
Spellchecker Module This component activates Adobe GoLive’s built-in spellchecker, adding the
Web Download Module This component enables Adobe GoLive to download individual Web pages,
WebObjects Module This component activates Adobe GoLive’s WebObjects support, adding the
view and Frames Preview tabs to the tab bar at the top of the main document
window.
head scripts in Web pages. It adds the JavaScript icon to the Basic tab of the
Palette and enables the Body and Head Script Inspectors. Behind the scenes,
this component makes Adobe GoLive scriptable with AppleScript.
for Web pages, media files, URLs and E-mail addresses, colors, and font sets,
as well as its site viewing and design tools. It adds the Site menu to Adobe
GoLive’s menu bar, the New Site and Import Site Folder commands to the File
menu, and the Site group of options to the Preferences dialog box.
Spellchecking… command to the Edit menu and the Spell Checking option to
the Preferences dialog box.
including all links, plugins, and images. It adds the WWW download… command to the File menu. In order for this module to be fully functional, the
Network module must be enabled.
WebObjects submenu to the Special menu, the WebObjects tab to the Palette,
the Declaration Editor tab to the main document window, and several op-
tions to the Preferences dialog box.
An example of how a disabled module impacts Adobe GoLive’s
menus appears below.
Mac OS Encodings enabled Mac OS Encodings disabled
Page 29
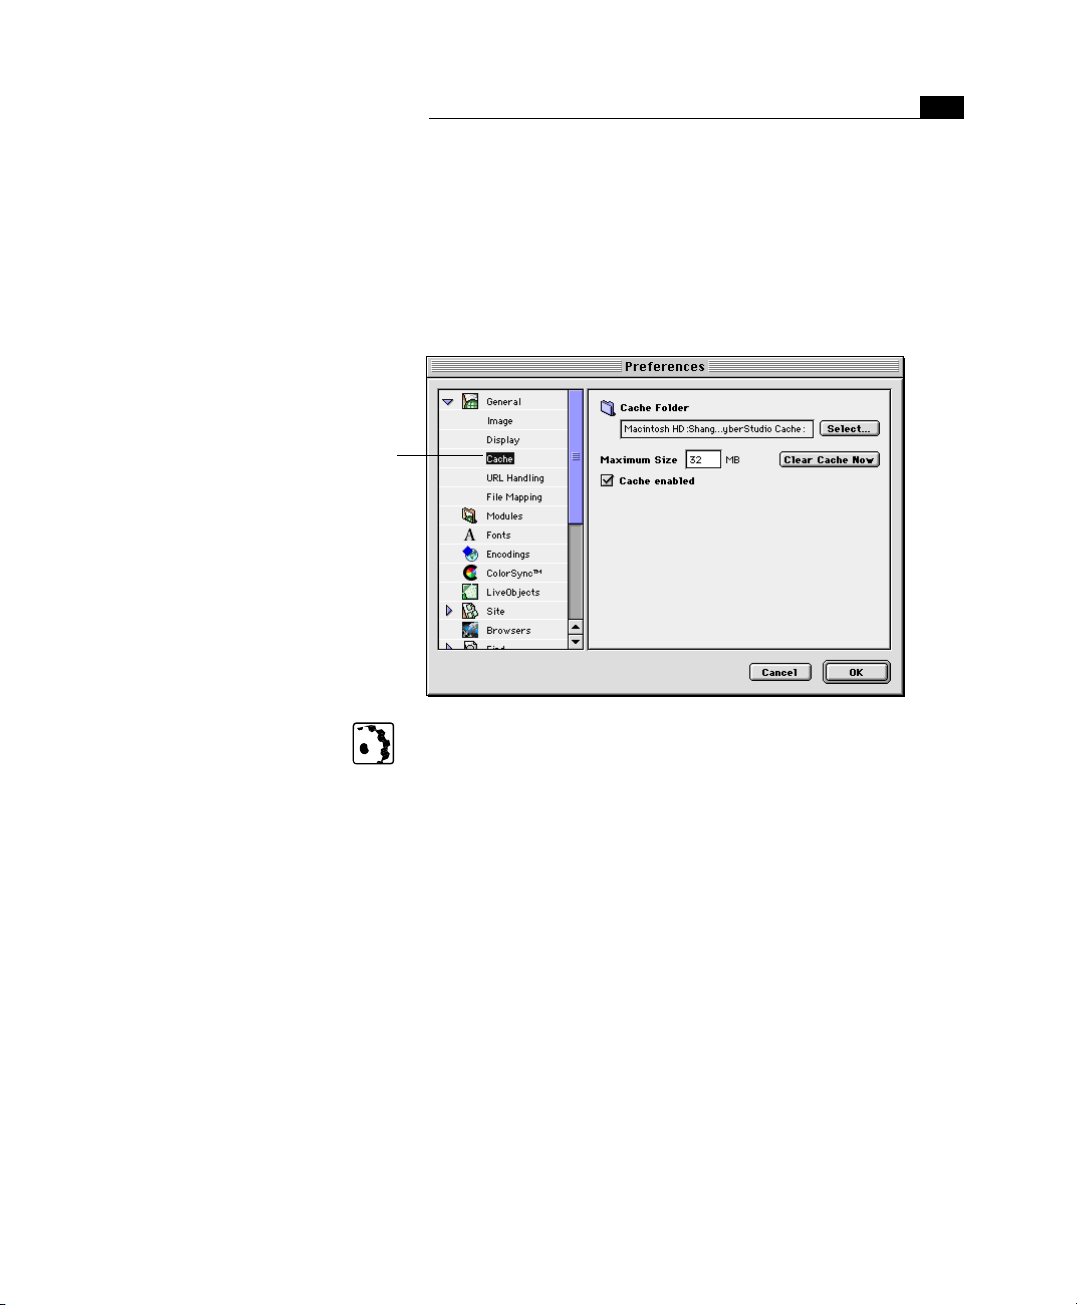
11Optimizing Program Performance
Optimizing Program Performance
The Preferences - General - Cache
Dialog Box
Click this icon to view Adobe GoLive’s program
cache options.
To optimize the program’s responsiveness, Adobe GoLive uses a dedicated folder as cache storage for compressed images. The Cache
view of the Preferences dialog box gives you extensive control over
this program cache: For example, you can specify another folder, increase cache size to improve overall performance, flush the contents
of the cache to remedy low-memory conditions, and turn the program cache on and off.
To set up the program cache, proceed as follows:
1 Choose Preferences from the Edit menu
2 Click the small arrow next to the General icon in the scrolling
sidebar to expand the General group of options.
3 If desired, click the Select… button to specify another folder.
4 Place the cursor in the Maximum Size text box to increase the
storage space allocation for Adobe GoLive’s program cache. This
may speed up the program when you are dealing with imagerich pages.
Tip:The size of the program cache defaults to 32 megabytes. Although the application works with less cache allocated, you
shouldn’t use less-than-default values. If your hard disk runs out
of storage space, try deleting unused files instead.
5 Clear Cache Now flushes the content of Adobe GoLive’s cache
folder, thus freeing hard disk space. Use this button as a last resort when Adobe GoLive’s cache threatens to consume even the
last few megabytes of remaining hard disk space.
Page 30

12
CHAPTER 1
Welcome to Adobe GoLive
6 The Cache enabled checkbox toggles the program cache on and
off. We recommend that you leave the program cache enabled at
all times.
Registration Adobe is confident you will find that the Adobe GoLive program
greatly increases your productivity. So that Adobe can continue to
provide you with the highest quality software, offer technical
support, and inform you about new software developments, please
register your copy by filling out and returning the warranty registration card included with your software package.
About Adobe Products and Services
If you have an Internet connection and a Web browser installed on
your system, you can access the Adobe Systems Home Page on the
World Wide Web (at http://www.adobe.com) for information on
services, products, and tips pertaining to GoLive.
Page 31

Chapter 2 Adobe GoLive
QuickStart Guide
Adobe GoLive is a rich program with many features; the best way to
learn about them all is to refer to the User Manual. However, Adobe
GoLive also lets you accomplish many things without having to
spend a long time with documentation. This QuickStart Guide can’t
replace the User Manual, but it will get you designing Web sites
quickly.
Here’s what the three parts of the QuickStart Guide cover:
• A Brief Introduction to HTML explains the basics of World Wide
Web technology and tells you how to “hand-code” a simple Web
page.
• Making First Steps with Adobe GoLive on page 20 acquaints you
with the program’s basic features using a series of step-by-step
instructions. It discusses:
- creating pages
- adding content to pages, including text and graphics
- creating a site document
- linking
- previewing your work
• Using Advanced Features on page 40 introduces program’s
advanced features. It explains:
- inserting images in multiple ways
- making links in several ways
- designing a site
Part 1 — A Brief Introduction to HTML
General You must use HyperText Markup Language (HTML) to publish on the
World Wide Web so your audience’s browsers can read your material.
The following section introduces HTML for those who are new to Web
publishing. In detailed step-by-step instructions, you will learn how
to hand-code your first page.
Page 32

16
CHAPTER 2
Adobe GoLive QuickStart Guide
Using Adobe GoLive doesn’t require extensive knowledge of
HTML. If you prefer, you can skip this section and go directly to
Part 2 — Making First Steps with Adobe GoLive.
Getting Started: Create a File to Hold Your HTML
Unlike other popular file formats, such as Microsoft Word, an HTML
page can be created using any program that can save in text-only format, including Simple Text and Claris Works. This is because the formatting instructions are written to a simple text file using a special
markup pattern instead of the hidden binary code of conventional
word processor files. HTML markup instructions are enclosed in angle brackets (“less than” and “greater than” signs) and look like this:
<B> or </H2>. HTML markup instructions are referred to as “tags”.
They instruct the browser how to display text and do not appear on
the screen themselves.
Common to all HTML files is the following basic “skeleton”:
<HTML>
<HEAD>
<TITLE>This title appears in the title bar of the
browser window.</TITLE>
</HEAD>
<BODY>
This section contains text with markup.
</BODY>
</HTML>
This basic structure tells the browser that it is receiving an HTML
page, subdivided into a header (<HEAD>) and a body (<BODY>) section. Except for the text enclosed in the <TITLE>… </TITLE> section, which appears in the title bar of the browser, the content of the
header section is invisible. The text in the body section constitutes
the visible content of the HTML page and displays in the browser’s
main document window.
Task: Use a simple word processor to hand-code the structure shown
above and save the result as a text file with the extension .html– for
example, as mypage.html. You will use this skeleton page in the following steps.
Step One:
Formatting Text
To appear formatted in the browser, text must be enclosed in a pair
of tags, known as the start tag and the end tag. The end tag with its
extra slash character (“/”) indicates the end of the formatting. Here’s
how boldface type is coded in HTML:
<B>This is text set in boldface.</B>
Page 33

17A Brief Introduction to HTML
Tags can also be nested to assign multiple formats:
<B><I>This is text set in boldface and italics.</I></B>
Unlike word processors and DTP programs, however, the final appearance of an HTML page is not based on specific formatting you
apply. Rather than assigning an exact size and font, you specify the
function of the text within the document—for example, that it
should be displayed as a first-level header (<H1>). There is a simple
reason for this: Web pages are supposed to display evenly on any
computer platform and any monitor size.
Other than a printed brochure, which will use the font size(s) selected in the DTP program, you have no way of knowing which hardware and software your audience will use. Text formatted in 14 point
size may look good on a 14-inch monitor but is definitely oversized
for a PDA (Personal Digital Assistant) display. HTML solves that problem by assigning a structure to a text and letting hardware and software interpret it as the user specifies.
Task: Use a simple word processor to hand-code the examples
given above, save the resulting file with an .html extension,
then drag them at the program icon of the browser for previewing.
HTML Tags Used for Formatting Text
Type the examples given above anywhere in the section enclosed by
the two <BODY>…</BODY> tags in the hand-coded example page
you have created in the previous step. Save the page, then drag it at
the program icon of the browser to preview the styles.
Header <H1>…</H1> through <H6>…</H6>
Headers are displayed in a larger font size and frequently in boldface
to make them stand out from the body text. The digits 1 through 6
represent the different levels in the hierarchy: H1 is a first-level
header, H2 a second-level sub-header, H3 a third-level sub-header,
and so on.
Font Styles
Font style options include Bold (<B>), Italics (<I>), and Underline
(<U>), as well as Teletype (<TT>), a monospaced style. Additional logical styles are Strong <STRONG> and Emphasis <EM>,
Page 34

18
CHAPTER 2
Adobe GoLive QuickStart Guide
which display as boldface and italics in most (but not all) browsers,
respectively.
Paragraphs and Line Breaks
To break HTML text at a selected location, you must insert a paragraph tag <P> or a line break tag <BR>. Both of these are start tags
without end tags–that is, they do not need a closing </.> tag. The
paragraph tag creates an empty line break above the following text.
It can include attributes, such as in <P ALIGN="CENTER"> or
<P ALIGN="RIGHT"> that control the alignment. The break tag lets
the text wrap without creating subsequent whitespace.
Unlike word processors or DTP programs, inserting carriage return characters doesn’t cause the text to break; the browser ignores them. Also, inserting multiple space characters will cause
them to show up temporarily, but all but one will be removed.
Lists
Formats for lists include numbers or characters such as bullets.
Numbered lists start with <OL>, unnumbered lists with <UL>. An
<LI> tag precedes each item in the list. The list ends with a </OL>
or </UL> end tag, depending on whether it is numbered or unnumbered.
Special Characters
To enter special characters, you must use a special notation, such as
& for the ampersand (“&”) character.
Rulers
The <HR> tag inserts horizontal rulers. This tag can have WIDTH and
SIZE attributes. You can indicate the width in pixels or in percent of
the browser’s window. For example, to specify a ruler that takes up
75 percent of the screen and is three pixels high, you can modify the
<HR> tag as follows:
<HR WIDTH=75% SIZE=3>
Task: Type the example given above anywhere in the section enclosed by the two <BODY>…</BODY> tags in the hand-coded file
you have created before. Save the file, then drag it at the program
icon of the browser to preview the tags.
Page 35

19Step Two: Inserting Images
Step Two:
Inserting Images
To repeat, HTML files are text-only files. So, rather than physically inserting images in the page, you must use a special notation to tell the
browser which image to display and which image to load. Images are
referenced using the <IMG> tag, which is a simple tag without an
end tag. Here is an example:
<IMG SRC="myimage.gif" WIDTH="32" HEIGHT="32"
ALT="Please enable image loading in your browser!>
This element displays the image file myimage.gif, sets its width and
height to 32 pixels, and displays an alternative message if image
loading is disabled in the browser.
Images can have more attributes than the example above indicates—for example, ALIGN, which controls the position of the image
relative to adjacent text, or HSPACE and VSPACE, which create extra
horizontal or vertical spacing between the image and adjacent elements.
Task: Copy a GIF, JPEG, or PNG image file— the three image formats
the World Wide Web uses—into the folder where you have saved the
hand-coded example page. Type the <IMG> tag shown above anywhere in the section enclosed by the two <BODY>…</BODY> tags
in the example page, replacing myimage.gif with the name of your
image file. Save the example page, then drag it at the program icon
of the browser to preview the image. If it comes out distorted because the image is rectangular, go back to the example page and
change the width and height settings accordingly.
Step Three: Creating Links
What makes HTML such a unique tool is that it lets authors link related items of information, either locally within a site or across the
whole World Wide Web. Information is linked by inserting hyperlinks,
which use the following basic notation:
<A HREF="mypage.html">Don’t Miss Our Special WWW Feature</A>
The example above shows how to reference a page that is in the
same folder as the source page of the link—for example, on your
hard disk. The HREF attribute contains the reference to that page.
The text that the start and end tags enclose is the clickable link that
appears in the browser.
By using Universal Resource Locators (URLs), you can link to any page
on the World Wide Web by specifying its exact location:
<A HREF="http://www.mysite/home/index.html">Be Sure Not
to Miss XYZ’s Homepage</A>
Page 36

20
CHAPTER 2
Adobe GoLive QuickStart Guide
If you use this type of URL specification, you can only access the page
via the Internet. It doesn’t work when the file is on your local hard
disk.
Task: Save a copy of the example page– for example, under the
name yourpage.html– and add text enclosed in <B>…</B>
style tags. Go to the HEAD section and edit the text in the
<TITLE>…</TITLE> tags. Save the new page, then open
mypage.html again and type the following code anywhere in
the section enclosed by the two <BODY>…</BODY> tags:
<A HREF="yourpage.html">Go to your page.</A>
Save the page, then drag it at the program icon of the browser
to preview the link. The link appears as underlined text. Click
the link. The browser will jump to the new page and show its
content.
Where to Go from Here
Now that you have mastered HTML at source code level, it is time to
move on and see how easily Adobe GoLive lets you format text, insert
images, and create links. Part 2 of this chapter introduces the basic
features.
Part 2 — Making First Steps with Adobe GoLive
What You Need to Get Going
Minimum System Requirements
• A Power Mac (or equivalent) running Mac OS 8.0 or later
For Full Functionality
• QuickTime and QuickTime Power Plug, Versions 3.0 or later
• Sound Manager 3.3 or later
• AppleScript and Apple Guide system extensions
• Text Encoding Converter system extension
• Text Encodings folder (in System folder)
Page 37

21Installing Adobe GoLive
Installing Adobe GoLive
How to Work in QuickStart
1 If you are updating from Adobe GoLive Version 2.x to Version 4,
be sure to make backup copies of the following items before you
move the old version to the Trash:
- the Adobe GoLive Palette file from the Modules folder; this file
contains the items you have stored in the Custom tab of the
Palette
- any personal dictionaries you have created (from the Modules
folder)
- plugins from the Adobe GoLive 2.x Plugins folder
2 Insert the Adobe GoLive CD into your CD-ROM drive.
3 Double-click the installer icon.
4 Follow the instructions on the screen. When the installation is
complete, copy contents of the Plugin folder for the browser
you’ll be using to Adobe GoLive’s Plugin folder (which you’ll find
in the same place as the Adobe GoLive application).
With Adobe GoLive, you can both create and manage Web pages.
That means you can start either by creating individual pages or by
blocking out the structure of a new site—or some combination of
the two. You can move back and forth between these modes whenever you want.
In this QuickStart Guide, you’ll begin by working bottom-up and create a personal homepage. You’ll include text, graphics, and multimedia, as well as identify the places on the page from which you’ll link
to others. After you’ve created some content, you’ll continue to the
advanced features and start thinking of the organization of the other
pages that will make up the site. Part 3 — Using Advanced Features,
later in this chapter, introduces this top-down approach.
Creating Individual Pages: Working Bottom-Up
When you work bottom-up, you build individual pages first and then
organize them into a site. For example, if you’re designing a personal
homepage, you probably already have a good idea of what to include: your resume, goals, and personal interests. You might then
want to break these down further; your resume could include work
history and samples of what you’ve done on other pages. You may
want to lay out the first page, inserting text about who you are,
graphics (like a photo of yourself), or multimedia elements (perhaps
a clip from a favorite movie). At any time, you can stop working on
one page and start another.
Page 38

22
CHAPTER 2
Adobe GoLive QuickStart Guide
After you’ve created some pages, you’ll want to bring them together
and insert links. Adobe GoLive will help you manage linking and also
give you a snapshot of how the site looks.
To repeat, at any time you can switch from one style of working to
the other.
The Main Window Launch Adobe GoLive (and fill in your activation key if you haven’t al-
ready). Adobe GoLive opens in the Layout mode, where you’ll do
most of your work:
Along the top of the window are tabs for Adobe GoLive’s different
modes:
• Layout Editor, where you enter content and where Adobe GoLive
starts
• Frame Editor, where you create and manage frame sets
• HTML Source Editor, which shows you the HTML that makes up
your page and which you can examine and edit
• HTML Outline Editor, which shows your HTML and is structured
like an outline with sections you can expand or collapse
• WebObjects Declaration Editor (which isn’t present when you
choose the basic installation)
• Layout Preview, where you can see what your finished page will
look like
Page 39

23Making First Steps with Adobe GoLive
• Frame Preview, which shows what your completed frames and
frame sets will look like
At the bottom right of the window is a popup menu where you set
the width of your page.
Your First Page As with other WYSIWYG Web editors, Adobe GoLive will let you enter
and format text just as you would with a word processor. You can also
lay out your page with the precision of a desktop publishing program. That means you insert various objects—text, graphics, and
multimedia—exactly where you want them and get a good idea of
how they’ll look in a browser. Better yet, you can preview multimedia objects like QuickTime movies and Java applets right in the Lay-
out mode. You don’t have to use a browser.
The Palette In addition to the main window, when you launch Adobe GoLive, it
opens the Palette window, which looks like this:
(If the Palette window is not open, choose Palette from the Window
menu to open it.)
The Palette contains icons for the objects you can place on your page.
Click the Palette’s first tab (if it isn’t clicked already) to see the Basic
Tags objects.
Here’s a key idea: You work with Adobe GoLive by dragging objects
from the Palette and dropping them onto your page.
Page 40
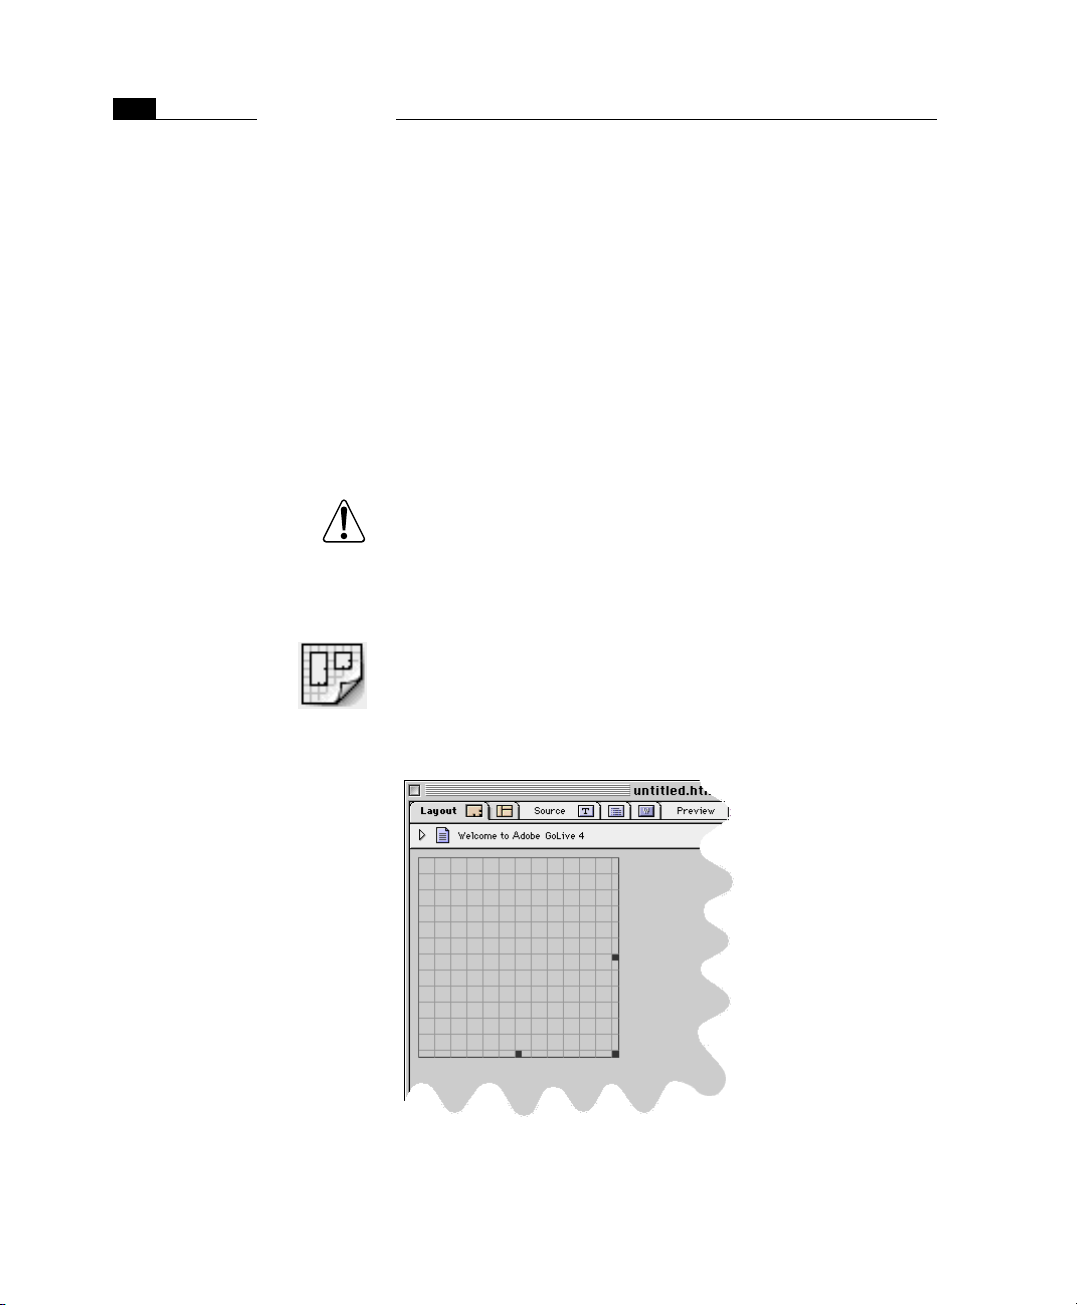
24
CHAPTER 2
Adobe GoLive QuickStart Guide
The Layout Grid You can lay out Web pages by typing text and placing images directly
on your page, or you can use the Layout Grid to place objects precisely on a page. You can also combine the two methods on a single
page by typing text and placing objects outside a grid. The grid automatically expands to accommodate the size of the objects you place
on it. You can also enlarge it by selecting it and dragging the length
of the handle.
You don’t have to use a Layout Grid that spans the entire length of
the page. (Actually, using Layout Grids is optional on a page-by-page
basis, but it is much more convenient to do so.) Instead, you can mix
and match Layout Grids and normal HTML for design flexibility and
smaller HTML files.
To avoid spacing problems when the page is displayed in the
browser, don’t put multiple Layout Grids side by side. They will
separate if the browser window is made wider than the combined width of the grids.
Let’s start by putting some text and a horizontal rule on the page:
1 Go to the Palette and locate the Layout Grid icon.
2 Hold down the mouse button and drag the Layout Grid icon to
your page (or double-click the icon in the Palette).
Release the mouse button. The grid is now on your page something
like this:
To repeat, what you’ve just done is the basic method for inserting objects into your page: Locate an object on the Palette and drag it to
where you want on your page.
Page 41

Now add text:
1 Go back to the Palette and locate the Layout Text Box icon.
2 Hold the mouse button down and drag the Text Box icon onto
your grid (or click the edge of the Layout Grid and double-click
the icon in the Palette). Position it at the top to act as the main
heading.
3 Place the cursor within the text box. (It will change into an I-
Beam.)
4 Enter “My Home Page.”
Here’s what the page looks like (more or less):
25The Layout Grid
You’ll want to reposition the text box and make “My Home Page”
bold, larger, and properly aligned. Here’s how:
1 Select the Layout Grid by clicking one of its edges; handles ap-
pear on the bottom and on the right side.
2 Drag the handles to stretch the grid over the width of the window.
3 Select the layout text box by clicking one of its edges; handles ap-
pear on the bottom and on the right side.
Page 42

26
CHAPTER 2
Adobe GoLive QuickStart Guide
4 Drag the handles until the layout text box is a convenient size.
5 If you need to reposition any object, de-select it and move the
cursor to any one of its edges. The cursor turns into a hand. Hold
the mouse button down and drag the object box to where you
want it.
Alternatively, you can select the object and move it one pixel at
a time by holding the Option key and pressing the Left, Right, Up,
or Down Arrow key.
6 Select the text “My Home Page” in the usual Mac way.
7 Go the Format menu and choose Header 1.
8 Go the Format menu and choose Alignment, then Center.
Instead of using menus, you could make the same changes with the
icons on the toolbar—for example, by choosing for the
first-level header, and for center alignment.
Now let’s add a horizontal rule:
1 Go back to the Palette and locate the Line icon.
2 Hold the mouse button down and drag the Line icon onto your
grid.
3 Position it somewhere under the text.
Page 43

27The Color Palette
Your screen should look something like this:
The Color Palette Before we add other objects, let’s add color to what we already have.
We’ll change the colors of both the background and the text we’ve
entered. Once again, we’ll use drag & drop, but this time for the Color
Palette, which looks like this:
The Color Palette has seven tabs with different color spaces; the default is the system tab (selected here); it’s always wise to use the
browser-safe colors that will prevent your colors from dithering
across platforms. These colors reside in the sixth tab from the left
(the one with the Roman numeral “I”).
Page 44

28
CHAPTER 2
Adobe GoLive QuickStart Guide
To change your page’s background color:
1 Go to the Window menu and choose the Color Palette (if it isn’t
opened).
2 Go to the Color Palette and click on a color to select it. The color
will appear on the Color Preview Pane in the upper part of the
Color Palette.
3 With the mouse button up, move the cursor to the Color Preview
Pane.
4 With the mouse button down, drag the color from the Color Pre-
view Pane to the Page icon at the upper left corner of the Layout
window.
5 When the Page icon highlights, release the mouse button and the
background color changes.
To change text color:
1 Select the text “My Home Page.”
2 Go to the Window menu and choose Color Palette (if it isn’t
opened).
3 Go to the Color Palette and click on a color to select it. The color
will appear on the Color Preview Pane in the upper part of the
Color Palette.
4 Move the cursor to the Color Preview Pane.
5 With the mouse button down, drag from the Color Preview Pane
to the selected text.
6 Release the mouse button and the text color changes.
The Inspector You can continue adding objects to your page, but before that, you’ll
need to know how to examine and change the attributes of the objects you insert. You do that with the Inspector, a context-sensitive
window whose information changes depending on what you have
selected at any given time.
To use the Inspector:
1 Go to the Window menu and choose Inspector.
Page 45

29The Inspector
2 Click on the Page icon in the upper left corner. The Inspector’s
name changes to Page Inspector and looks like this:
Here you see information about your page—for example, its default
color for text and links. You can also see the background color for
your page. To change any of these colors from here, click on the
small color preview panes beside each attribute. The Color Palette
module opens and you choose a new color.
To see that the Inspector is truly context sensitive, go back to your
page and click on the horizontal rule to select it.
Page 46

30
CHAPTER 2
Adobe GoLive QuickStart Guide
The Inspector changes to the Line Inspector and looks like this:
Enter various values into the Width and Height boxes; Adobe GoLive
updates the Layout window immediately.
The Inspector is one of the key features of Adobe GoLive: it always dis-
plays information about the object you have currently selected. So
rather than having to click through a series of menus and sub-menus
to change the attributes of an object, you can rapidly make changes
via the Inspector.
Inserting Graphics You also use the Palette and the Inspector together to insert and ad-
just graphics. Adobe GoLive assumes that you have already created
the graphics you’ll need in some other application and that they are
available in typical Web-compatible formats:
• GIFs or PNG in indexed colors at 72 dpi resolution, saved with
the typical .gif or .png file name extension
• JPEGs in RGB at 72 dpi resolution, saved with the typical .jpg file
name extension
Here’s how to insert them:
1 Go to the Palette and locate the Image icon.
2 Drag it to the location on the grid you want. (If you are not using
the Layout Grid, the Image icon will appear at the current loca-
tion of the cursor.)
3 Select the Image icon on your page.
Page 47

31Adjusting Your Graphic
4 Open the Inspector; it is now titled the Image Inspector and dis-
plays a series of tabs.
5 Select the Basic tab. The Source field will show “Empty Reference”
because you have not yet selected the graphic to insert here.
6 Click Browse. A file selection dialog box will open.
7 Navigate to the file you want and click Open. Your graphic will re-
place the Image icon.
You also could have typed the path name and file name; however,
it’s simpler to let Adobe GoLive do the work.
Adjusting Your Graphic
Other Objects
You Can Use
The Image Inspector lets you change various attributes of your image.
The Basic tab has fields for your graphic’s height, width, and alignment. Other tabs have fields for alternate text, border width, creating
links, and making the graphic into a client-side image map. Experiment with the other settings.
Move your mouse over the Palette’s objects; at the bottom of the Pal-
ette window, you’ll see the name of each one. These include:
• tables
• JavaScripts
• comments
• spacers (Netscape Navigator-only)
• scrolling marquees (Internet Explorer-only)
• new HTML tags that Adobe GoLive doesn’t yet know about
Experiment with these features if you wish after reading about them
in the Adobe GoLive User Manual.
Saving Your Work As with most other programs, Adobe GoLive does not automatically
save your work. It’s good practice to periodically do so yourself and
avert potential data loss.
When you save your pages, remember to give them appropriate
names for the platform that will be serving your pages. For example:
• DOS-based server machines can handle only up to eight charac-
ters in their names, plus three more in their extensions (for
example, mypage.htm). This file name format is also preferable
if you stage the site for previewing on a local server.
Page 48

32
CHAPTER 2
Adobe GoLive QuickStart Guide
• UNIX server machines do not accept names with any blanks,
spaces, or special characters like “%”, “/”, etc. If in doubt, ask
your server administrator for a list of rules for his server.
The Site Window: Gathering and Storing Resources
To this point, we’ve worked with just a single page that included text,
graphics, and multimedia elements. As you add more pages and objects to a site, you can easily lose track of the resources you use.
Adobe GoLive’s Site Window helps you see what you’re using, based
on a “one site, one folder” principle. In other words, any page you
create and any image or multimedia item you place on a page is
stored in the site folder.
To show you how this works, you first need to save the page you’ve
been working on to the folder you’ll use for the site you’re building.
Here’s how:
1 Go to the File menu and choose Save.
2 In the subsequent dialog box, create a new folder (call it “Quick-
Start Test Site”).
3 Save the page you’ve been working on as index.html. This is the
standard file name most Internet Service Providers require you to
use for your homepage.
4 Close the page.
5 Create a second page, named resume.html.
6 Add some content–for example, a Layout Grid, layout text boxes,
and text.
7 Save the new page to the “QuickStart Test Site” folder and close it.
Now you’re going to create a site by importing the folder you have
just saved your files to. You will store all your resources there—including your new pages, multimedia objects, and graphics.
Creating a Site by Importing a Folder
1 Go to the File menu and choose New Site > Import from Folder.
2 A dialog box appears, prompting you to indicate which folder
you want to use and what the homepage should be.
3 Click both Browse buttons and locate the folder and the
index.html page you have saved in previous steps.
4 When you are done, click Import.
5 Name the new site something like “QuickStart.Site”.
6 Save it in the same folder where you saved index.html.
Page 49

33The Site Window: Gathering and Storing Resources
7 Your site document should now look something like this.
8 Two green bug icons may appear in the Site Window—one at the
top and one next to the file in the list. Don’t worry if this happens; this bug is easily fixed.
9 Sit back, relax, and try to recall what you have done to the “bug-
gy” page.
10 Have you made your guess? You saved the page that contains it
(actually the page only contains a reference to the image), but
you haven’t moved the image into the site folder, so the page
can’t find it.
Tip: This bug doesn’t occur if the image was in the same folder
as the page when you created the link.
11 Go to the Finder and locate the image file, then drag it at the Site
Window and drop it there. The image file will now appear in the
Site Window.
12 Double-click index.html to open it.
13 Locate the image in the page. Where the image used to be, there
is only an image placeholder (the icon with the question mark).
14 You will now use Point & Shoot to fix the “lost image” problem.
Page 50

34
CHAPTER 2
Adobe GoLive QuickStart Guide
15 Command-click the image placeholder and drag at the image file
in the Site Window (see the illustration below).
16 Release the mouse button when the small file icon and the file
name highlight. The interconnecting line blinks twice and the
image reappears. You will also notice that the “bugs” have disappeared from the Site Window. This is because your site no longer
has broken links.
Managing Web Pages and Media in the Site Window
The Site Window is a key element in Adobe GoLive: It shows the folder
where you store everything you need to create a site (such as pages,
graphics, and movies).
So, whatever item you want to use in your site, be sure to drag it to
the Site Window. There are some important reasons to store items in
the Site Window:
• You can use Adobe GoLive’s Point & Shoot feature to easily link
to them.
• The Site Window provides an easy way to manage resources.
Inspectors appear for each selected item to let you preview its
content, rename it, choose a Finder label, and use other filerelated options.
• The Site Window is Adobe GoLive’s window to the Finder. Instead
of locating files in Finder windows or file selection dialogs, you
simply double-click a page directly within the application to
open it.
Page 51

35The Site Window: Gathering and Storing Resources
• Adobe GoLive manages all links for you to maintain the integrity
of your site. Whenever you move or rename an item in the Site
Window, you will be prompted to automatically update the
links.
We will now create a folder in the Site Window to see how Adobe
GoLive interacts with the Finder.
Here’s how you create a folder:
1 Go to the Palette and click the Site tab.
2 Locate the Folder item and drag it onto the Site Window.
3 You have just created a new folder. Open the Inspector window,
now titled Folder Inspector, and name the new item. (You can
also rename the folder the Macintosh way: Click the name of the
folder in the Site Window and type, then press Return.)
4 Drag the resume.hmtl onto the new folder.
5 When prompted to confirm whether you want to have all refer-
ences updated, click OK. Adobe GoLive "knows" the location of
each object in the Site Window and needs to update the links.
6 Click the small triangle next to the folder icon to open the folder
and view its content.
7 Switch to the Finder and open the site folder. You’ll notice that a
new folder has appeared.
8 Open the new folder and view its content. You’ll find the re-
sume.html page you moved in the Site Window.
This action demonstrates how tightly the Site Window is integrated
with the Macintosh Finder: If you move a file in Adobe GoLive, the
same happens in the Finder. For your everyday work, this means that
you don’t have to resort to the Finder to manage the files that make
up your site; you can do it all in Adobe GoLive. You will benefit from
this capability later when your links are in place.
Page 52

36
CHAPTER 2
Adobe GoLive QuickStart Guide
The Site Window also lets you view the content and general properties of the files it contains.
Here’s how you view the content of a page:
1 Select index.html in the Site Window.
2 Open the Inspector window, now titled File Inspector, and click
the Content tab. You’ll see a thumbnail preview of your page.
3 Click the Page and File tabs to view other properties, such as
HTML title, Finder Label, file size, and many more.
Creating Links Although you now have two pages with varying amounts of content,
a site visitor cannot get from one to the other. You need to add some
links. Adobe GoLive provides several ways of linking, but we’ll restrict
ourselves to using Point & Shoot, which is the most intuitive way of
creating links in Adobe GoLive.
Inserting Text to Link From
First, you have to create the text that site visitors will click on to go to
another page:
1 Go to the Site Window, locate the index.html icon, and double-
click. The page opens for editing.
2 Go to the Palette, locate the Layout Text Box icon, and drag it to
the Layout Grid you’ve inserted before.
3 Place the cursor in the text box and enter “Resume”.
Page 53

37Creating Links
Linking with the Site Window
Here’s how you create a link from selected text using Point & Shoot:
1 In index.html, select “Resume” so that it’s highlighted.
2 Bring the Site Window forward and locate the resume.html icon.
3 Command-click the selected text (a small curly line appears on
the cursor) and drag to the resume.html page icon in the Site Win-
dow. The screenshot below illustrates this process.
4 Release the mouse button when the small page icon and the file
name highlight. The interconnecting line blinks twice and the
text is now displayed in blue and underlined.
5 You have just created your first hyperlink in Adobe GoLive.
6 Go back to the source of the link and Control-click the Resume
text item to try out the new link.
7 The resume.html page opens on top of the other windows.
Unlike browsers, which open linked pages in the same window,
Adobe GoLive opens new pages in a new window.
Linking from a Graphic In addition to linking from text, you can also link from a graphic.
Here’s how:
1 Open index.html and locate the graphic you inserted earlier.
2 Select the graphic. The Inspector is now titled the Image Inspector.
3 In the Image Inspector, click the Link tab.
4 Select the New Link icon.
5 Find the Point & Shoot button in the Image Inspector. It’s located
below the URL text box at the top of the main window area.
Page 54

38
CHAPTER 2
Adobe GoLive QuickStart Guide
6 Click the Point & Shoot button and drag to the resume.html page
in the Site Window.
7 Release the mouse button when the small page icon and the file
name highlight. The interconnecting line blinks twice and
resume.html appears in the URL text box.
8 Go back to index.html. A blue border appears around the image
to indicate that it is a clickable hyperlink.
9 Control-click the image.
10 The resume.html page will open in a separate window on top of
index.html.
Remember, Adobe GoLive opens new pages in a new window,
unlike browsers, which open linked pages in the same window.
When site visitors click the graphic, it will take them to the second
page.
If you find the blue border around the image annoying, here’s how
to remove it:
1 Click the image to select it.
2 Go to the Image Inspector and click the Spec. tab rider.
3 Locate the Border checkbox and text box combination.
4 Click the Border checkbox and make sure that “0” appears in the
text box next to it. The border around the image will disappear.
Did you notice the difference between linking from text and linking
from an image? You can’t link from an image directly using Point &
Shoot: To repeat, linking from an image requires that you go to the
Image Inspector and click the New Link button before using Point
& Shoot.
Adding Other Media to the Site Window
As we’ve said, the Site Window stores all of the resources you need for
your site. Let’s see how this works with objects other than pages:
1 Copy any GIF, PNG, or JPEG graphic file to the QuickStart Site fold-
er and then click the Update button (checkmark icon) in the Toolbar. Or drag & drop it from the Finder to the content area of the
Files tab in the Site Window.
2 Whichever way you choose, the graphic file will be listed in the
Site Window.
3 Double-click the index.html icon. The page will open.
4 Go to the Site Window and click on the Files tab, if it is not open.
Page 55

39Previewing Your Work
5 Drag & drop the graphic’s icon to your page. The graphic will ap-
pear on the page.
You could have entered the graphic as you did previously—that is,
by using the Graphic icon from the Palette. Adobe GoLive gives you
several ways to perform many operations, but using the Site Window
to insert objects is particularly convenient. You can use the same
technique for other objects as well.
Previewing Your Work Now that the links are in place, you’ll want to test them by using ei-
ther Adobe GoLive’s Layout Preview mode or your browser.
To use Adobe GoLive’s Layout Preview mode:
1 Open the page you want to preview—in this case, index.html.
2 In the document window, click the Layout Preview tab (the sec-
ond from right, labeled Preview).
3 Adobe GoLive shows a preview of your page.
4 Go to the Inspector window, now titled Layout View Controller,
and locate the Root menu.
5 Select an option from the Root menu—for example, Navigator 4
(Win)—to see how your page displays in Navigator 4 on a Win-
dows platform. Switch between the menu options and observe
how your page changes in Preview mode.
You will notice that the text “grows” whenever you switch to a
Windows-based browser. This feature shows the vast differences
between browsers and platforms—a fact you should keep in
mind when designing your pages.
Because browsers and platforms perform their own ways, a page
that looks fine on one system can look terrible on another. It’s al-
ways a good idea to use the Root menu options in the Layout
View Controller or, better yet, try out your pages on as many dif-
ferent browsers and platforms as you can.
6 Locate the Resume link, just as you would in a browser. The cur-
sor turns into a hand when you are over the link.
7 Click the link and resume.html opens in a new window.
To use a browser:
1 Go to the Edit menu and choose Preferences.
2 Select the Browsers icon (if it isn’t visible, scroll to it).
3 In the Browsers settings, you can click Add and then manually se-
lect the browser you want. Or you can click Find All and let Adobe
Page 56

40
CHAPTER 2
Adobe GoLive QuickStart Guide
GoLive automatically find all the browsers installed on your hard
drive.
4 If you have more than one browser, click to select the checkbox
beside the one you want to be the default (see the following illustration). Click OK.
5 Close the Preferences dialog box to return to your page.
6 Locate and click the Show in Browser icon at the extreme right of
the toolbar. (The icon varies with each browser.) Your browser
will launch and display your page.
7 Locate the Resume link on the browser’s display.
8 Click the link and resume.html opens in the same window.
Part 3 — Using Advanced Features
This section introduces some of the advanced features of Adobe
GoLive, including its multiple image selection and link creation options, the site designer, and FTP.
Page 57

41Multiple Ways to Insert Graphics
Multiple Ways to Insert Graphics
After working with Adobe GoLive for some time, you’ll appreciate its
alternative ways of accomplishing a particular task. The following list
sums up your options for inserting images:
• You can insert them directly via drag & drop from the Site Win-
dow.
• You can insert an image placeholder from the Palette, then
Command-click it and Point & Shoot at an image in the Site Win-
dow.
• You can insert an image placeholder from the Palette and use
any of the following options in the Image Inspector:
- The Source text box will show “Empty Reference” when you
have not yet selected a file name to insert there. You can type
directly in this text box to specify a folder path and an image
file name. The folder path is necessary only if the image file
resides in another folder.
- Clicking the Browse button opens a file selection dialog box.
Navigate to the file you want and click Open. Adobe GoLive
will insert the file’s name into the URL field and replace the
image placeholder with the image.
- You can click the Point & Shoot button and drag to an image
in the Site Window to have Adobe GoLive replace the image
placeholder with the image.
Multiple Ways to Create Links
Linking Directly from Selected Text
Adobe GoLive also gives you various options for creating links from
selected text or images. The following sections present an overview
of your options.
As explained earlier in this chapter, you can Command-click selected
text and drag to a page icon in the Site Window.
Linking from Inspectors In a Web page, only images and text can have clickable links, so only
two Inspectors in Adobe GoLive offer link creation tools: the Image Inspector and the Text Inspector. Both Inspectors have the same set of
options for creating links:
• The URL text box will show “Empty Reference” when you have
not yet selected a file name to insert there. You can type directly
in this text box to specify a folder path and a file name. The
folder path is necessary only if the destination file resides in
another folder.
Page 58

42
CHAPTER 2
Adobe GoLive QuickStart Guide
• Clicking the Browse button opens a file selection dialog box.
Navigate to the file you want and click Open. Adobe GoLive will
insert the file’s name into the URL field.
• The Point & Shoot button lets you click on and drag a page in
the Site Window.
Linking via Drag & Drop You can also drag a page icon (not an image or other media item)
from the Site Window and drop it on selected text to create a link.
However, this shortcut is not available for placing a link on an image.
Create a Whole Site: Working Top-Down
Adobe GoLive lets you create a site top-down, which means you
structure your site before creating content.
Working top-down with Adobe GoLive, you can insert placeholders
for all your pages. At any time, however, you can change your mind
about what to include. You can also temporarily stop structuring
your site and start adding content. Here’s how:
1 Go to the File menu and choose New Site > Blank.
2 In the subsequent dialog box, name the site something like
QuickStart.Site.
3 Leave the Create Folder checkbox selected to have Adobe GoLive
create a new site folder. Click Save.
4 Adobe GoLive will create a new folder named QuickStart.Site ƒ
with the following content:
- The QuickStart.Site.π site document: This is the document
that displays in the Site Window.
- The QuickStart.Site folder: This is the folder that stores your
pages and media. Its content appears in the Files tab of the
Site Window. When you create a new site, it already contains
a blank homepage, titled index.html.
- The QuickStart.Site.data folder: This folder holds things that
you need to build and maintain your site but that don’t need
to be uploaded. For more details, please see Chapter 17, Man-
aging Web Sites with Adobe GoLive, starting on page 605.
Page 59

43Building Your Site with Site View
5 The Site Window appears, with a homepage already in place. It
will look something like this:
Now you’re ready to design a site.
Building Your Site with Site View
In working top-down, you're going to decide what pages your site
will have and then return later to add content to them. Although
you’ll be adding placeholders for pages, you can change your mind
any time about what should go where.
Suppose you want your site to show visitors your resume, your career
goals, and your interests. Suppose again that under your resume you
want additional pages for your work history and some samples of
your work. Here’s how to add placeholders for those pages:
1 In the Site Window, click the Site tab.
2 Click the “eye” in the upper right corner of the document window
to display the Site View Controller.
3 Click the Display tab and enable the File Name radio button in
the Item Label group of options. (This displays the true file names
rather than the page titles.)
4 Move the mouse cursor over the solitary symbol at the top of the
window. This is the index.html page that Adobe GoLive inserted
when you created the new site.
5 A small document icon (we’ll call it a “Create New Page” live but-
ton here) appears at the bottom of the homepage symbol, as
shown below.
Page 60

44
CHAPTER 2
Adobe GoLive QuickStart Guide
This is a “Create New Page” live button.
6 Click the “Create New Page” live button to add a new page. Adobe
GoLive has created a new page symbol, titled New 2.html, that is
the “child” of index.html. This action creates an empty page in a
new folder named New Pages in the Site Window.
7 Now, move the mouse cursor over the new page symbol. Four
Add Page Handles appear at the top, left, right, and bottom of
the new page symbol.
8 Click the right or left “Create New Page” live button to create a
new page that is a sibling of the first page you have just created.
The new page is named New 21.html because it’s the first page
you create on the second level of the site’s hierarchy.
9 Repeat this step once, so that you have the index.html and three
other pages, all children of index.html and siblings of each other.
Your screen should look something like this:
Page 61

45Using Advanced Features
You now have a snapshot of the site and can see how the four pages
relate to each other.
Because you want two separate pages that will be sub-pages of the
resume, create them here.
In the Site View window:
1 Move the mouse cursor over the page that you’ll use for your re-
sume.
2 Click the bottom “Create New Page” live button to create a new
page that is a child of your resume page.
3 Repeat this step to create a second child page.
Your screen will resemble the following screenshot:
You could continue adding, re-arranging, or deleting pages. This
gives you a chance to work top-down and plan your site.
But switch modes once again: add some content to these pages, give
them permanent names, add links to the homepage or parent page
so they’re connected, then save them:
1 In the Site View, double-click New 2.html. It opens for editing.
2 As you did with index.html, add content about your resume (con-
tact information, for example) and a header that will immediate-
ly tell your visitor about the page. Keep your text brief for now.
3 When you’re done adding content, select the page in the the Site
View and rename it as resume.html in the File tab of the File In-
spector.
Page 62

46
CHAPTER 2
Adobe GoLive QuickStart Guide
4 In the Site View, double-click index.html. It opens for editing.
5 Insert text—for example, “Please see my resume”—and link to
resume.html as explained before.
6 Repeat with New 21.html, adding content for Goals.
7 Continue these steps until you have added content to and linked
all new pages previously created in the Site View.
8 When you’re done, you’ll want to drag the files from the New Pag-
es folder to move them to the same level as index.html. Here’s
how:
- Go to the Files tab of the Site Window.
- Locate the folder New Pages and click the small triangle con-
trol to open it.
- Drag or Shift-click to select the files.
- Drag the files at the column head (labeled Name) of the Files
tab and drop them there.
- When prompted to confirm whether you want to have all ref-
erences updated, click OK.
- Adobe GoLive will move the files now and update all links to
ensure that your site remains intact.
You have just created a site from scratch and added basic content
and hyperlinks. You can now add more content, as outlined in Part
2 —Making First Steps with Adobe GoLive.
Using FTP to Upload
Your Site
FTP (File Transfer Protocol) is the medium for transferring files between computers on the World Wide Web. Typically, an FTP session
involves a client and a server. If you have already signed up with an
Internet Service Provider (ISP), it may have created a personal FTP account and given you an FTP address, a user ID, a password, and the
path to your personal directory (optional). You need this information
to access the ISP’s server and upload your site after you are finished
with your design, so the ISP can post it on its Web server. If you are
not sure, ask the server administrator for information on your FTP
account.
Page 63

47Using FTP to Upload Your Site
Adobe GoLive features an easy-to-use FTP client with drag & drop capability that is integrated into the Site Window. Before using FTP, you
need to make several settings, including the FTP address, the target
directory, your user ID and password, and various communicationrelated settings:
1 Make sure that you have all communications-related control
panels (PPP, TCP/IP, and Modem) set up properly on your Macin-
tosh. For more details, please consult the user manual of your
modem or ISDN adapter.
2 With the Site Window in the front, click the Site Settings button
in the Site Toolbar.
3 The Site Settings dialog box appears (see below).
4 In the left section of the dialog box, click the FTP icon.
5 In the Server text box, type in the FTP address specified by your
ISP for the Web server you want to upload to.
6 If required, type in the directory path to your personal folder on
the Web server in the Directory text box.
7 In the Username text box, type in the user ID that the server ad-
ministrator gave you.
8 In the Password text box, type in the personal password that the
server administrator assigned you.
9 Place the cursor in the Port text box and type in the number of
the port you will use to access your Web server—for example
“21”, which is the most common port specification.
Page 64

48
CHAPTER 2
Click this icon bar,
followed by the FTP
tab rider.
Adobe GoLive QuickStart Guide
10 If a firewall protects the FTP server, you may have to check the
Use passive mode checkbox.
Now that you’ve made the basic settings, you can connect to the FTP
server:
1 If the Site Window displays a single pane only, click the icon bar
in the upper right corner of the window, then click the vertical
tab labeled “FTP” to display the FTP tab in the right pane.
If the Site Window displays two panes, click the vertical tab rider
labeled FTP in the right pane (if not already open).
2 Click the FTP Server Connect/Disconnect button in the Site
Toolbar to access the server.
3 Adobe GoLive starts connecting to the FTP server. Wait for the
Connected message to appear in the status line at the bottom of
the FTP tab.
4 When connected, drag files or folders from the left pane of the
Site Window onto the FTP tab, as the example below shows.
5 This is all you need to do to upload files to your ISP’s server. You
can also download files by dragging them in the reverse direction
or open HTML pages in Adobe GoLive by double-clicking.
6 When you are done copying, click the FTP Server Connect/Discon-
nect button in the Site Toolbar one more time to terminate
the FTP session.
Page 65

Summing Up In this QuickStart Guide, you’ve done the following tasks:
• created pages
• added content, including text and graphics
• added new pages and created a site document
• made links
• previewed your work
• designed a site
• uploaded files via FTP
Once you’re comfortable with the material in this QuickStart Guide,
you’ll want to learn how to use frames, insert QuickTime movies and
Java applets, write JavaScripts, build DHTML animations, format your
document with Cascading Style Sheets, and much more. The User
Manual remains your best guide to Adobe GoLive’s many features.
49Summing Up
Page 66

Page 67

Chapter 3 Adobe GoLive Basics
This chapter describes the rich functionality built into
Adobe GoLive, the complete solution for HTML layout,
design, and Web site management. The following pages
outline the major features that reduce the workload on
Web designers, programmers, and Web masters alike in
their daily chores. Chapter 3 also describes common controls shared by the various windows and palettes used
within the application.
General Adobe GoLive contains virtually everything graphic artists and pro-
fessional publishers are looking for in a Web publishing package. It
goes well beyond the scope of basic WYSIWYG editors and gives you
a set of tools that will really boost your productivity. Adobe GoLive
provides authoring tools for users at any level of expertise—from the
“newbie” to the proficient Web programmer.
Adobe GoLive is the first Web page editor to abandon overloaded
toolbars for a more user-friendly Palette-with-Inspector approach.
It’s also the first editor to feature a fully context-sensitive toolbar. By
shifting all HTML objects to the Palette and introducing context-sensitivity, Adobe GoLive always offers a tailored set of functions for any
given task. This simplicity lets you concentrate on the Web design job
at hand, rather than cope with the complexities of the user interface.
For either layout or raw HTML code, Adobe GoLive supplies the best
of both worlds. It also offers the Outline Editor, a unique feature not
found with any competing product. A simple mouse-click switches
you between document views.
Add the comprehensive support for multimedia plugin technology
and DHTML animation, the seamless integration of Cascading Style
Sheets, a wide selection of color options, sophisticated graphical site
management capabilities, a fully fledged site designer, and an editing environment with maximum ease of use, and you’ll get a good
impression of the power Adobe GoLive offers.
Page 68

54
CHAPTER 3
Adobe GoLive Basics
Finally, Adobe GoLive features a state-of-the-art site management
tool that lets you keep it all together. When you manage your site in
Adobe GoLive’s Site Window, you will never lose any data—whether
you are dealing with tens or hundreds of pages, images, media
items, and other site components.
Part 4 — Adobe GoLive Feature Overview
Creating Web Pages with Adobe GoLive
The Adobe GoLive Screen
The Toolbar always offers the right set of tools for
the current selection.
The Palette contains a full selection of HTML
tags—ready for drag & drop insertion.
The main document window gives you seven different views to choose from—each on a tab of its
own.
The Inspector lets you preview files and set up tag
attributes.
The Color Palette is Adobe GoLive’s drag & drop
coloring tool.
The Site Window is a container for Web pages and
resources.
Adobe GoLive is HTML-based authoring software to allow you to visually lay out Web pages with drag & drop ease. This ease of use is
possible primarily because of its unique Layout mode and a complete set of companion authoring tools.
The following screenshot illustrates the Adobe GoLive publishing environment and explains its key features.
When editing Web pages, you’ll use the following major components:
• the context-sensitive Toolbar, which offers the proper set of for-
matting shortcuts for any given selection in the document window
• the Palette, which holds a selection of iconized HTML tags
Page 69

55Adobe GoLive Feature Overview
• the context-sensitive Inspector, which lets you preview resources
and set up objects, links, and HTML tag attributes
• the Color Palette, which enables you to drag & drop color to text
and objects
• the Site Window, which lets you manage your Web pages and
resources in major site building projects
Authoring tools available in Layout mode include:
• An HTML table editor that lets you flexibly use tables as a page
design tool or for arranging information. The table editor supports such features as column and row spanning, drag & drop
coloring, drag & drop content insertion, and data import from
spreadsheet applications.
• A visual JavaScript editor that features drag & drop scripting and
color syntax checking.
• An easy-to-use interface for embedding third-party multimedia
items and Java applets, complete with live playback capability.
• A customizable interface for new plugins and Java applets.
• Browser-specific options—for example, the marquee tag that
Microsoft Internet Explorer uses.
• Consistent use of an HTML native file format.
• Seamless integration of the latest Web imaging standards,
including PNG (Portable Network Graphics) support.
• Full support for foreign languages and script systems.
• A built-in multi-language spellchecking tool.
• Elaborate find & replace options.
• Thumbnail previewing of HTML pages.
• An easy-to-use graphical front end for interactive WebObjects
elements.
Page 70

56
CHAPTER 3
Adobe GoLive Basics
The Palette Arranged in nine context-specific tabs, the Palette window holds a
wealth of iconized tags, structural page elements, and generic site
objects. It also lets you store often-used items of any description and
degree of complexity for future use.
The Palette
The following table lists the Palette tabs and their respective functions:
Symbol Function
Click this icon to select the Basic Tags tab. Each object on this tab represents an HTML
tag that goes into the body section of the page.
Click this icon to select the Forms Tag tab. Each object on this tab represents an HTML
form tag that goes into the body section of the page.
Click this icon to select the Header Tags tab. Each object on this tab represents an HTML
header tag that goes into the header section of the page.
Click this icon to select the Frames tab. Each object on this tab represents an HTML
frame set tag that goes into Adobe GoLive’s Frames view.
Click this icon to select the Site tab. Each object on this tab represents a generic site object that goes into Adobe GoLive’s Site Window.
Click this icon to select the Extra tab. Each object on this tab represents a stationery
page that goes into Adobe GoLive’s Site Window.
Click this icon to select the CyberObjects tab. Each object on this tab represents a grouping of HTML tags and JavaScript code that goes into the body section of the page.
Click this icon to select the WebObjects tab. Each object on this tab represents a WebObjects-specific HTML tag that goes into the body section of the page.
Click this icon to select the Custom tab. You can drag objects from the Layout view to
store them in this tab and insert them back in any document when you need them.
The number of tabs in the Palette may vary, depending on the set of
modules you have installed or enabled in Adobe GoLive’s preferences. For example, the default installation doesn’t copy the
WebObjects module to your hard disk, so the WebObjects tab will not
appear in the Palette.
Page 71

57Inspectors
Inspectors Accompanying each element dropped in your page is a context-sen-
sitive Inspector window that saves you from clicking OK repeatedly in
multi-level dialog boxes. When you insert a tag or other element, the
proper set of options appears in the Inspector window, allowing you
to set your tag attributes instantly.
The Image Inspector
Inspectors let you create hyperlinks, reference image files or other re-
sources, resize elements with pixel-level precision, align objects with
respect to adjacent text, control inter-object spacing, and make
many tag-specific settings.
If an object references another file, as is the case with images, the In-
spector serves as the point of departure for Point & Shoot, Adobe’s
proprietary hyperlink and file reference creation tool.
The illustration below shows the interaction between the Palette and
Inspector windows: Whenever you drag an element from the Palette
onto the main document window, context-sensitivity ensures that
the Inspector offers the appropriate tag attributes.
Interaction Between the Palette and
Inspector Windows
Dragging the Image icon from the Palette onto the
document window…
… opens the Basic Tab of the Image Inspector in
the Inspector window.
Page 72

58
CHAPTER 3
Adobe GoLive Basics
The Color Palette The Color Palette is Adobe GoLive’s drag & drop coloring tool. You
color objects by selecting a color from a rich choice of different color
spaces and drop it at a color field in the Inspector window or selected
text in the document window.
The Color Palette
The Color Palette offers seven color spaces and a grayscale, each on
a separate tab:
• RGB
• CMYK
• Indexed colors
• Apple system colors
• Real Web Colors (a palette of 216 Web-safe colors that display
without dithering on any platform)
• Web Named Colors
Additionally, a dedicated tab is supplied for colors you collect in the
Site Window, Adobe GoLive’s site management tool.
Page 73

59Point & Shoot
Point & Shoot Point & Shoot is Adobe’s proprietary technology that makes the cre-
ation of links more convenient and completely intuitive. You can
start Point & Shoot linking from various sources and link to an object
in the Site Window or to a destination on another page.
The example below shows Point & Shoot linking of text to a page in
the Site Window.
Point & Shoot
Point & Shoot from text on one page…
… to create a link to another page.
When working with Adobe GoLive, you’ll also use Point & Shoot for
other purposes—for example, to link Web pages or to assign an image, media file, or other items to a placeholder inserted from the
Palette.
Page 74

60
CHAPTER 3
Adobe GoLive Basics
Multiple Document Views
Choosing an Editing
Environment
For easy access to the editing mode that best suits your purposes,
Adobe GoLive offers a choice of five different document views:
• The Layout view lets you design a page visually with pixel-level
precision.
• The Frames view allows you to structure your page layout using
HTML frames.
• The Outline Editor adds structure to your HTML code.
• The Source Editor lets you write and edit HTML source-code.
• The WebObjects editor enables you to edit declarations files for
dynamic Web pages for use with Apple’s WebObjects Server. (This
is only available if the WebObjects module is installed; see separate Using WebObjects manual for more information.)
Each document view has a dedicated tab, which you can select by
clicking at the desired tab rider. Switching between views is fully
transparent—what you see in the individual views is always based
on the same code. Also, Adobe GoLive tracks your selection: What you
select in one view remains selected in the other when you switch
views.
As already noted in the “General” section of this chapter, Adobe
GoLive offers various alternative editing environments for adding
content to and editing Web pages:
• In the Layout view, you can insert a layout grid that lets you
place text and other objects—just like in a frame-oriented desktop publishing program. As with a conventional page layout program, Adobe GoLive gives you a good sense of how your pages
will appear to your audience. The Layout view is also where you
create DHTML animation and use the advanced formatting controls available from Cascading Style Sheets.
The Layout view allows you to work in the conventional “freeflowing Web pages” mode, too. You can type text and insert objects from the Palette (see page 56) one by one, but you will have
to preview your work more frequently to check the results.
To switch to the Layout view, click the Layout tab in the document window.
• The Outline view permits a closer look at the “selection” of your
document, displaying the structure of your HTML code.
To switch to the Outline view, click the Outline tab in the document window.
Page 75

61Previewing
• The Source view is a fully featured HTML text editor that sup-
ports drag & drop editing and syntax highlighting.
To switch to the Source view, click the Source tab in the document
window.
• The Frames view lets you subdivide your Web page and display
pages in frames.
To switch to the Frames view, click the Frames tab in the document window.
• The WebObjects tab lets you edit the WebObjects declaration file.
To switch to the WebObjects declaration tab, click the WebObjects
tab in the document window.
Previewing Adobe GoLive offers Preview modes that enable you to preview the
results of your work instantly, without launching a browser.
• The Layout Preview tab lets you preview pages created in the
Layout, Source, and Outline modes.
• The Frame Preview tab lets you preview pages created with the
frames editor.
Page 76

62
CHAPTER 3
Adobe GoLive Basics
Layout In the Layout mode, Adobe GoLive works much like a frame-oriented
desktop publishing program, giving you a realistic impression of how
the page will look when viewed with a Web browser. Resizable layout
grids let you drag objects from the Palette onto your page and position them exactly where you want them to appear to the Web surfer.
After inserting a grid, you can add frame-like text boxes, then drag &
drop or type to insert text. You can also add images, forms, lists, and
multimedia elements—precisely placing each object on the page,
just as you would with page layout software.
The Layout View
Click at this tab to select the Layout view.
You’ll do most of your editing in the Layout view. You can drag any
object from the Palette onto the document window, then “tweak” its
appearance for best results using the tag-sensitive Inspector window.
Drag & drop support is also available for images, URLs, E-mail addresses, colors from the Site Window, and colors from the Color Pal-
ette. Additionally, you can drag & drop between the Finder and the Layout view to preview images.
For more details, see the descriptions of the Palette, Inspector, Point
& Shoot, and Color Palette windows earlier in this chapter.
Page 77

63Frames
Frames The Frames mode lets you use HTML frames to subdivide your page
into independent panes.
Subdividing your page helps you organize your display and makes it
easier to work with. Because each pane displays a separate page, you
can change and scroll it independently.
Adobe GoLive’s Frames mode is fully drag & drop-based: You can use
drag & drop to insert a page into each frame, as well as resize frames
and rearrange frame sets.
The Frames View
Click this tab to select the Frames view.
Click this tab to select the Frames preview.
A preview tab in the main document window eliminates the need to
launch a Web browser for previewing HTML frames. Also, you can
preview frame sets selectively by disabling individual frames.
Page 78

64
CHAPTER 3
Adobe GoLive Basics
Outline The Outline mode lets you view your document in a structured ap-
proach to building, fine-tuning, and debugging HTML code.
The Outline view shows the hierarchy of HTML tags in your document, using a box metaphor to display individual tags.
The Outline View
Click this tab to select the Outline view.
In the Outline view, you can collapse and expand individual tags or
entire parts of the document hierarchy with a mouse-click.
Editing is also possible in the Outline mode: You can insert tags and
attributes, text and comments using either the shortcut buttons on
the context-sensitive toolbar or menu commands.
Page 79

Source The Source mode lets you view the HTML code behind your docu-
ment, much the same way text-oriented Web editors do. This document view is particularly useful for experienced HTML programmers
who want to fine-tune their work and check their HTML code before
publication.
To ensure that your code is absolutely error-free, however, the Source
mode uses syntax highlighting. In syntax highlighting, separate colors visually separate tags, attributes, and document content, making
it easy for users to keep track of their HTML code.
The Source View
Click this tab to select the Source view.
65Source
For maximum ease of use, all syntax highlighting and checking commands are available as shortcut buttons above the main window
area.
Consistent with Adobe GoLive’s overall design, the Source view provides full drag & drop support for all Basic Tags from the Palette.
Page 80

66
CHAPTER 3
Adobe GoLive Basics
Creating Animations Adobe GoLive provides comprehensive support for DHTML (Dynamic
HTML)—a new technology for the 4.x generation of Web browsers.
Dynamic HTML lets Web authors create animated pages without typing a single line of code or using third-party animation software that
produces bulky, slow-loading files. DHTML has two major components:
• floating boxes
• Netscape’s JavaScript and Microsoft’s JScript scripting languages
Adobe GoLive features a complete set of DHTML tools that let you insert floating boxes with drag & drop ease, then set them up in dedicated editor windows. An example of Adobe GoLive’s DHTML editing
environment appears below.
Creating DHTML Animations in Adobe
GoLive
Dragging the Floating Box icon from the Palette
into the document window inserts a floating box.
This floating box contains an animated GIF image.
It moves along a curved path from the upper left
to the upper right corner of the page.
The Timeline Editor lets you control the motion of
the floating box over time.
The Floating Box Inspector controls the initial position, layering, and visibility, of the floating box,
as well as the curve shape of the animation.
Adobe GoLive’s DHTML Animation Tools
Adobe GoLive’s DHTML animation editing environment consists of
three major components:
• The Floating Box icon in the Basic Tags tab of the Palette lets you
insert a floating box via drag & drop or double-clicking.
• The Floating Box Inspector allows you to set both static and
dynamic properties of the floating box, including initial position, width and height, and background color or image displayed in the floating box, visibility, dynamic layering of
multiple floating boxes, and shape of the animation path.
Page 81

The CyberObjects Tab of the Palette
67Creating Animations
• The Timeline Editor lets you determine the behavior of floating
boxes within the page. Keyframes mark specific times at which
the animated item is supposed to change its path or appearance. Keyframes can also be connected with JavaScript-based
actions. Actions can jump to another page or perform other
browser-specific actions.
The Floating Box Inspector is the companion inspector window to the
Timeline Editor. It lets you control the position and appearance of
each animated item, temporarily hide selected items to simulate relative motion, and control their stacking order.
You can connect many Adobe GoLive objects with actions, which are
ready-to-use JavaScript scripts compatible with all major browsers.
You can use them to animate objects, flip or move items across the
page, open specified URLs or windows, swap the content of an image, play an audio track, show or hide an object, and perform many
more activities.
Additional DHTML objects reside in the CyberObjects tab of the Pal-
ette.
They let you do the following:
• add a date & time stamp
• create animated navigation buttons
• insert components to reference visual design elements that
occur on multiple pages
• include a popup menu listing selected destinations on the Web
• insert actions into the header section of the page to trigger the
execution of a script before the browser loads the body section
of the page
• insert a script into the header section of the page that reads the
application name and version number of the browser and
jumps to a browser-specific version of the current page
Page 82
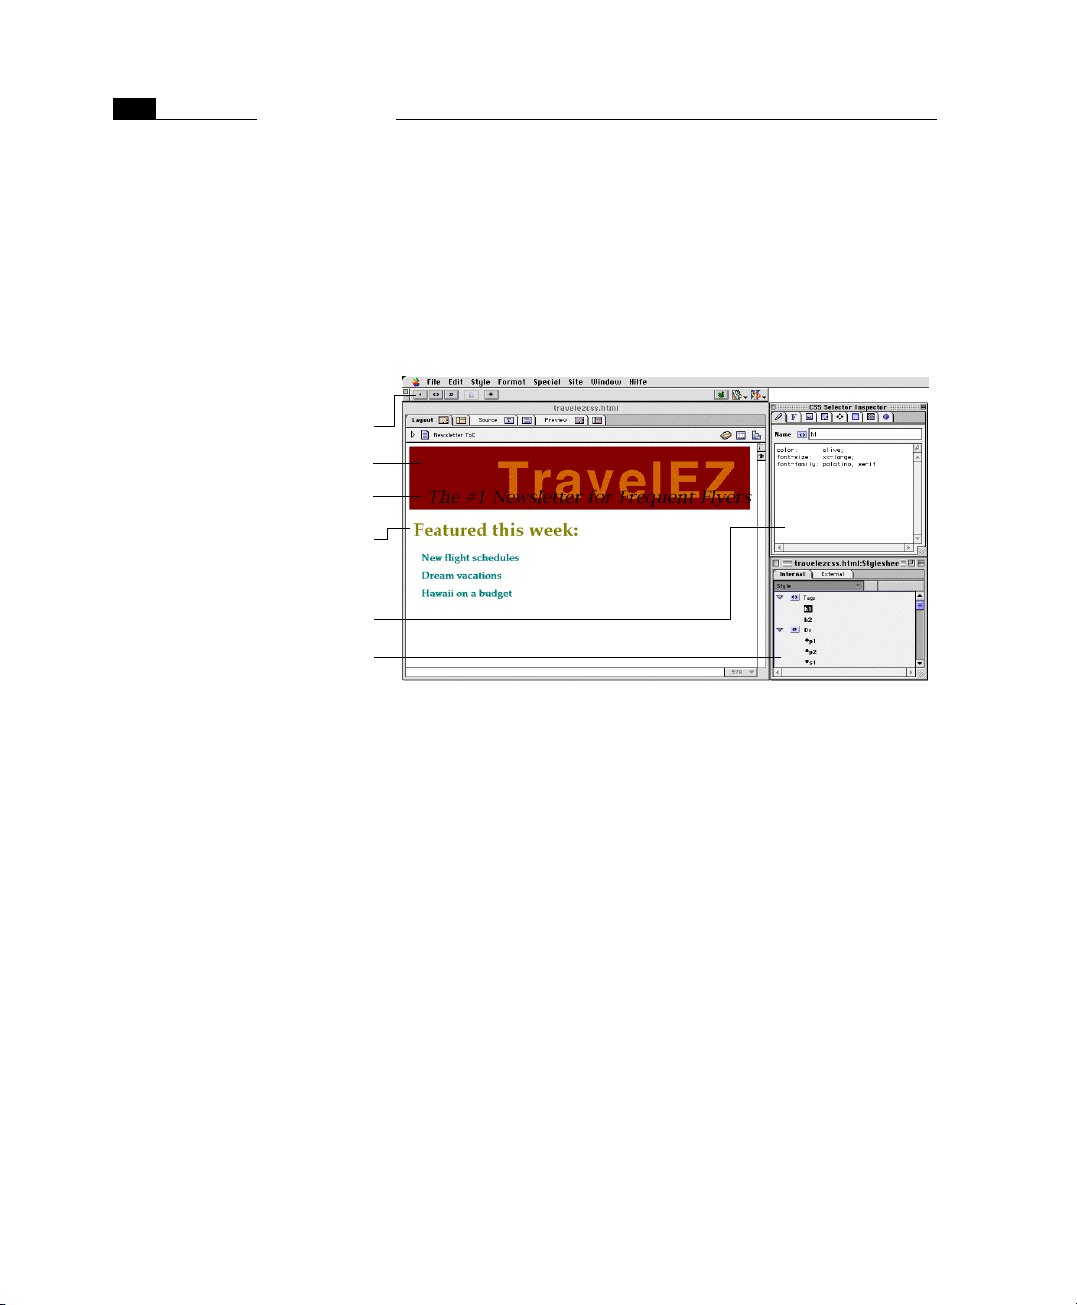
68
T
CHAPTER 3
Adobe GoLive Basics
Cascading Style Sheets Adobe GoLive contains all the tools necessary to let Web designers
use Cascading Style Sheets (CSS) for building pages that really stand
out—with minimum effort. Cascading Style Sheets not only give the
user tighter control over the on-screen presentation of documents
but they also introduce platform-independent typography. As more
and more Web surfers migrate to the 4.x generation of browsers, Web
authors will soon be able to abandon using GIFs to render type. The
screenshot below shows Adobe GoLive’s CSS editing tools.
Creating Text Styles with Cascading Style
Sheets
Shortcut buttons on the Stylesheet Toolbar let you
add styles to the Stylesheet Window.
This oversized headline was created using a CSS ID
selector.
A negative leading allows this subheader to “grow”
into the headline.
his is a normal H1 header—formatted with CSS.
These are normal H2 headers—also formatted
with CSS.
The CSS Selector Inspector lists Adobe GoLive’s inventory of style properties.
The Stylesheet Window shows all styles you have
created within your document.
{
Adobe GoLive lets you create a style sheet either within the current
page or—to make it available site-wide—as an external document.
You can then add styles by clicking buttons on the Stylesheet Toolbar
and edit their properties in the CSS Selector Inspector. Style variants
that CSS supports include:
• Tag selectors: This type of style reformats standard HTML tags.
Once created, it is applied automatically.
• Classes: Much like text styles in a word processor, this type of
style can be applied universally to elements you select in your
page. Classes have a dedicated tab in the Text Inspector, which
works like a style palette.
• IDs: This type of style identifies a unique element in your page.
• Referenced style sheet: You can reference an external style sheet
from within any page in your site. Whenever you make changes
to the style sheet, your pages are automatically reformatted
throughout your site.
Page 83

69Cascading Style Sheets
The Site Window Adobe GoLive’s state-of-the-art site manager module lets you keep it
all together. The Site Window makes site management a snap—
whether you are dealing with tens or hundreds of pages, images, media items, and other site components. Transparent integration with
the Macintosh Finder makes site management very intuitive: The
Site Window shows an exact replica of the folder structure on your
hard disk, so when you move an item around in the Site Window, the
same happens to the physical file in the Finder.
Adobe GoLive lets you design, create, import, edit, and view an entire
site as a complete project. With Adobe GoLive, you can graphically
see a site’s structure, adjust its hierarchy, add pages, delete pages,
and open individual pages, as well as verify, change, and update
links and anchors.
State-of-the-art technology—Point & Shoot linking, FTP-based editing access to Web servers with bidirectional update capability,
graphic displays of physical document hierarchies, and import capability for homepages—plus referenced files, automatic URL reference parsing, and continuous link integrity validation save time,
increase productivity, and ensure Web compatibility.
The Site Window
The left pane of the Site Window shows the items
that make up your site, replicating the physical
file and folder structure on your hard disk.
The right pane of the Site Window shows missing
items in the Errors tab.
The Site Window is the key to site management. It lets you collect and
manage your resources using iconized lists of Web pages, text documents, media files, images, Uniform Resource Locators, mail addresses, colors, and font sets.
Page 84

70
CHAPTER 3
Adobe GoLive Basics
The Site Window is subdivided in five horizontal tabs:
• The Files tab is in turn divided into two panes. The left pane
shows the HTML pages, media files, and images used in your
site. The right pane has three vertical tabs:
- Along with other errors indicators, the Errors tab alerts you to
missing file and orphan file problems.
- The FTP tab lets you view your site on the Web server, open
files remotely for editing, and make incremental updates in
either direction.
- With the Extra tab, you can create and store stationery you
want to use when designing your site.
• The Site tab contains Adobe GoLive’s graphical site viewing and
design tools (see later in this section).
• The External tab can store URLs and E-mail addresses you want
to insert into pages.
• The Colors tab can store site colors for later use. Site colors are
available for drag & drop coloring while you are designing
pages.
• The Fontsets tab can store fontsets for later use. Fontsets are also
available for drag & drop insertion.
Site Management Tools
The Site Toolbar
Creates a new folder in the Finder.
Opens the selected file or folder.
Deletes the current selection.
Equivalent to Get Info in Finder.
Shows file in Finder.
Opens a Find Files dialog box.
Accompanying the Site Window are companion windows with site
management tools, including a context-sensitive toolbar, two tabs in
the Palette, and specific Inspectors for the items listed in the Site Win-
dow. The example below shows the Site Toolbar and explains its mul-
tiple shortcut buttons.
Bidirectional update via FTP.
Connects to Web server via FTP.
Opens Settings panel.
Changes links across the board.
Opens the Link Inspector.
Updates the Site Window.
Page 85

71The Site View
The Site View The Site View tab in the Site Window gives you an overview of the hi-
erarchy within your site, using user-selectable document icons and a
spiderweb of interconnecting lines to display the hyperlinks.
Beyond its viewing functionality, however, the Site View is also a fully
fledged site design tool, allowing you to lay out the architecture of
your site before you start adding content.
The Site View
The home page is the parent page.
Interconnecting lines represent forward links.
Referenced pages are children of the parent page
and siblings to each other.
Horizontal lines represent backward links between siblings or between a child and a parent.
An associated Site View Controller window lets you customize the Site
View in many ways to suit your personal viewing preferences.
Invoked via a button on the toolbar or a menu command, the Link
Inspector functions much like a magnifying glass, permitting you to
zoom in on selected items in your site. The resulting spiderweb view
lets you walk through your site and inspect individual pages and the
links they maintain with other pages and resources.
Page 86

CHAPTER 3
72
The Link Inspector
Small icons indicate pages or resources referenced by the current page.
The threads of the spiderweb represent links or
references to resource files.
The large symbol (a generic symbol, thumbnail,
or standard file icon) indicates the current page
you have zoomed in on.
Point & Shoot buttons let you edit multiple hyperlinks or file references at a time.
Adobe GoLive Basics
The Link Inspector is also a convenient hyperlink editing tool. For ex-
ample, using Point & Shoot from within the Link Inspector, you can
replace a reference to an image in all pages throughout your site.
Macintosh
Technology Support
Adobe GoLive is designed specifically for Macintosh users. It allows
you to drag & drop files directly from the Finder onto your page. It
works smoothly with your other Macintosh applications. And Adobe
GoLive supports all the latest Apple technologies, including Apple
Guide, QuickTime 3.0 , QuickTimeVR™, ColorSync 2.5, and others.
Adobe GoLive provides for full compatibility with MacOS 8.5 technologies, such as the Appearance Manager and Navigation Services. A
brief description of the new features incorporated in release 4.0 can
be found in Part 5 —New Features in Adobe GoLive 4, on page 74
later in this chapter.
WebObjects Support
Adobe GoLive provides a convenient, easy-to-use front end for WebObjects, the powerful high-end development environment for dynamic interactive Web applications from Apple Computer (formerly
from NeXT Software, Inc.).
Adobe GoLive’s WebObjects support makes it easy for designers and
programmers to work together and build dynamic Web pages. While
designers create the visual presentation, programmers can use the
WebObjects development environment (not included in Adobe
GoLive) to develop the logic.
Page 87

The WebObjects Tab of the Palette
73Macintosh Technology Support
The WebObjects tab of the Palette offers a complete set of WebObjects
elements, all ready for drag & drop insertion. Each WebObjects tag
has its own Inspector window with a specific set of configuration options.
When the user chooses configuration options, the result is written to
a declaration file that links the WebObjects tags on your HTML page
with the corresponding WebObjects components on the Web server
and specifies the actions to be taken. This declaration file appears in
a dedicated tab in the document window.
For instructions on using WebObjects, see the separate Using WebOb-
jects manual shipped with the Adobe GoLive package.
World Script and Text Encoding Converter Support
Adobe GoLive uses World Script and Text Encoding Converter, Apple’s
proprietary system extension for multi-language documents, so you
can build Web pages that Web surfers worldwide can read.
Page 88

74
CHAPTER 3
Adobe GoLive Basics
AppleScript Support
Adobe GoLive’s HTML source mode provides comprehensive support
for AppleScript, Apple’s proprietary tool for automating repetitive
tasks on Macintosh computers. Scripting Adobe GoLive allows you,
for example, to build pages automatically.
Part 5 — New Features in Adobe GoLive 4
This section, directed to users of the 3.x versions of Adobe GoLive,
contains a rundown of new features introduced with Release 4.
Where required, cross-references are made to individual chapters
that provide in-depth coverage of the features listed here.
User Interface
Enhancements
The Preferences - General - Display
Dialog Box
Use this option to enable or disable Appearance
Manager support, as desired.
Use this option to enable or disable Navigation
services, as desired.
Adobe GoLive’s support for the Mac OS 8.5 Appearance Manager has
been further enhanced. When you enable the Smart Scrolling option
on the Options tab of the Mac OS Appearance control panel, the scroll
box in the scroll bar is continuously resized according to the visible
content of the window. This feature is available for all windows in
Adobe GoLive 4.0, including document windows, the Site Window,
the Inspector, the Palette, the Floating Box Controller, and the Color
Palette.
Two new options have been added to the Preferences - General - Dis-
play dialog box (see below) to let you control Appearance Manager
support.
Page 89

75New Features in Adobe GoLive 4
The Appearance Theme Savvy checkbox lets you enable or disable
Mac OS 8.5 Appearance support for Adobe GoLive.
The Use Navigation Services checkbox lets users who prefer working
with standard Open and Save dialog boxes disable Mac OS 8.5 Navigation services for Adobe GoLive.
Multiple Cell
Selection and
Text Formatting
Improved Web
Technology Support
New Site Management Capabilities
Link Maintenance for QuickTime™ Movies and Shockwave or Flash Files
Adobe GoLive 4.0 lets you select multiple cells in a table and apply
colors, font sets, and relative font sizes, even to single cells within the
selection. Unlike table editors in word processors, however, the cells
you select do not have to form a contiguous block. A detailed description of the new cell selection and formatting options appears
Making Selections Within a Table on page 139 in Chapter 4, Building
Web Pages.
Adobe GoLive 4.0 provides basic viewing and editing support for various emerging Web technologies, including Extensible Markup Language (XML) and Microsoft’s Active Server pages.
It preserves hidden non-HTML code found in the page, including
special locations such as the space before the first opening <HTML>
tag or between table cells. These new capabilities are the subject of
a dedicated chapter, Web Technology Support, starting on page 755.
This section familiarizes you with the new site management features
in Adobe GoLive 4.0 and uses cross-references to guide you to the
pages in this manual where more detailed information appears.
Adobe GoLive’s link parser has unlimited access to the URLs on the
HREF tracks of QuickTime™ movies and Macromedia Shockwave or
Flash files, allowing it to monitor both file formats for broken links
and rewrite internal URLs when the user changes a link or file reference.
Page 90

76
CHAPTER 3
Adobe GoLive Basics
Subfolder Rescan
Capability
Contextual Menu Support for Troubleshooting Missing File Problems
Unlike previous 3.x versions, which scanned the entire site folder
when the user clicked the Update button on the Site Toolbar or
chose the Update command from the Site menu, the new 4.0 release
has the ability to scan subfolders of the site folder. In terms of usability, this means that when you use the Update command while you
are browsing a subfolder, the program won’t return the Site Window
to the root level anymore after completing the rescan.
Adobe GoLive 4.0 features a new Find shortcut on the contextual
menu that appears when you Control-click a missing file item in the
Error tab in the right pane of the Site Window. This feature is de-
scribed in the section Using the Contextual Menu for Troubleshooting
Missing File Problems on page 689 in Chapter 17, Managing Web Sites
with Adobe GoLive.
Absolute Paths in URLs Adobe GoLive 4.0 lets the author decide whether the path specifica-
tions within URLs that reference other items in subfolders of the site
folder should be relative or absolute. This feature has been introduced to accommodate applications in which path specifications
must be relative to the root folder of the site. It also enables Adobe
GoLive to import sites that use absolute URLs without producing
multiple error messages. For more details, please refer to the section
Setting Up Adobe GoLive to Use Absolute Paths on page 719 in
Chapter 17, Managing Web Sites with Adobe GoLive.
URL Mappings The new URL Mappings feature lets experienced Web authors work
with Web sites that are distributed over several folders. This feature
provides the flexibility to handle complex sites that reside in separate directories on the Web server or on different Web servers. Indepth coverage of this feature is given in the section URL Mappings
on page 715 in Chapter 17, Managing Web Sites with Adobe GoLive.
New CyberObjects Adobe GoLive 4.0 comes with many enhancements to the Cyberob-
jects DHTML authoring environment.
Following is a brief list of the new features:
• You can now embed and display scripted actions, floating boxes,
scenes, button images, and URL popups in dynamic components. The new release also lets you nest dynamic components.
Page 91

• Adobe GoLive 4.0 gives you the option of creating an external
JavaScript library file that stores common code from JavaScript
actions, scenes, and image buttons. This library is uploaded
together with the pages to make the code accessible. For more
details, please refer to the section Shifting Code to an External
Library, starting page 316 in Chapter 5, Dynamic HTML.
• New triggers give Web authors more options for launching
scripted actions. Actions can now be started when the browser
loads or leaves the page, by calling a named action from the
head section, or when the browser hits an inline action trigger.
in the body of the page. For more details, please refer to the section Action Triggers on page 273 in Chapter 5, Dynamic HTML.
• The following actions have been added:
- Get Floating Box Position monitors the current location of a
floating box on the screen.
- Get Form Value reads text the visitor enters in a text field.
- Document Write interworks with the new Inline Action Item
from the Palette (see page 248) to let you dynamically insert
HTML code in the body section of the page.
- Move by moves a floating box horizontally and/or vertically.
- Call Action calls an action from the head section of the page.
- Call Function calls a function from the head section of the
page or an external JavaScript library.
- KeyCompare launches an action when the visitor hits a selected key.
- Declare Variable lets you declare a variable of a well-defined
data type.
- Init Variable lets you assign an initial value to each variable.
- Read Cookie reads the content of a cookie.
- Set Variable lets you dynamically assign a value to a variable.
- Test Variable reads the current value of a variable.
- Write Cookie saves the value of a variable in a cookie on the
visitor’s hard disk.
The new actions appear in the section Using Actions, starting on
page 269 in Chapter 5, Dynamic HTML.
77New CyberObjects
Page 92

78
CHAPTER 3
Adobe GoLive Basics
QuickTime Authoring Adobe Systems has licensed QuickTime™ from Apple Computer, Inc.
for use in Adobe GoLive 4.0. The new release comes with a robust
QuickTime™ editor loaded with a wealth of authoring features, including the ability to create new movies and add effects and transitions. Also featured are sprite animations, audio and MIDI, hypertext
references, chapter-based navigation, and subtitling. It enables multimedia authors to create movies for the Web and edit them using
many of the new features included in Apple’s QuickTime™ 3.0 authoring suite.
This new authoring environment is described in Chapter 7.
Part 6 — Common Controls in Adobe GoLive
Part 6 introduces common controls used in many windows and palettes throughout the application.
List Window Controls List windows in Adobe GoLive, such as the Site Window or the Web
Database window, share a set of controls that let you manipulate the
order of columns and rows in lists.
List Sort Controls
You can sort the items listed in the active column in ascending or descending order. To change the sort order for the active column, proceed as follows:
1 Click the small triangle control in the column header.
2 This control sorts lists as follows:
Descending order Ascending order
Column Resize Controls
You can resize the columns of any tab in a list window to display
more of their content. To resize a column, proceed as follows:
1 Click the right border of the column header. The resize cursor
appears.
2 Drag to the right to increase column width or to the left to de-
crease.
Page 93
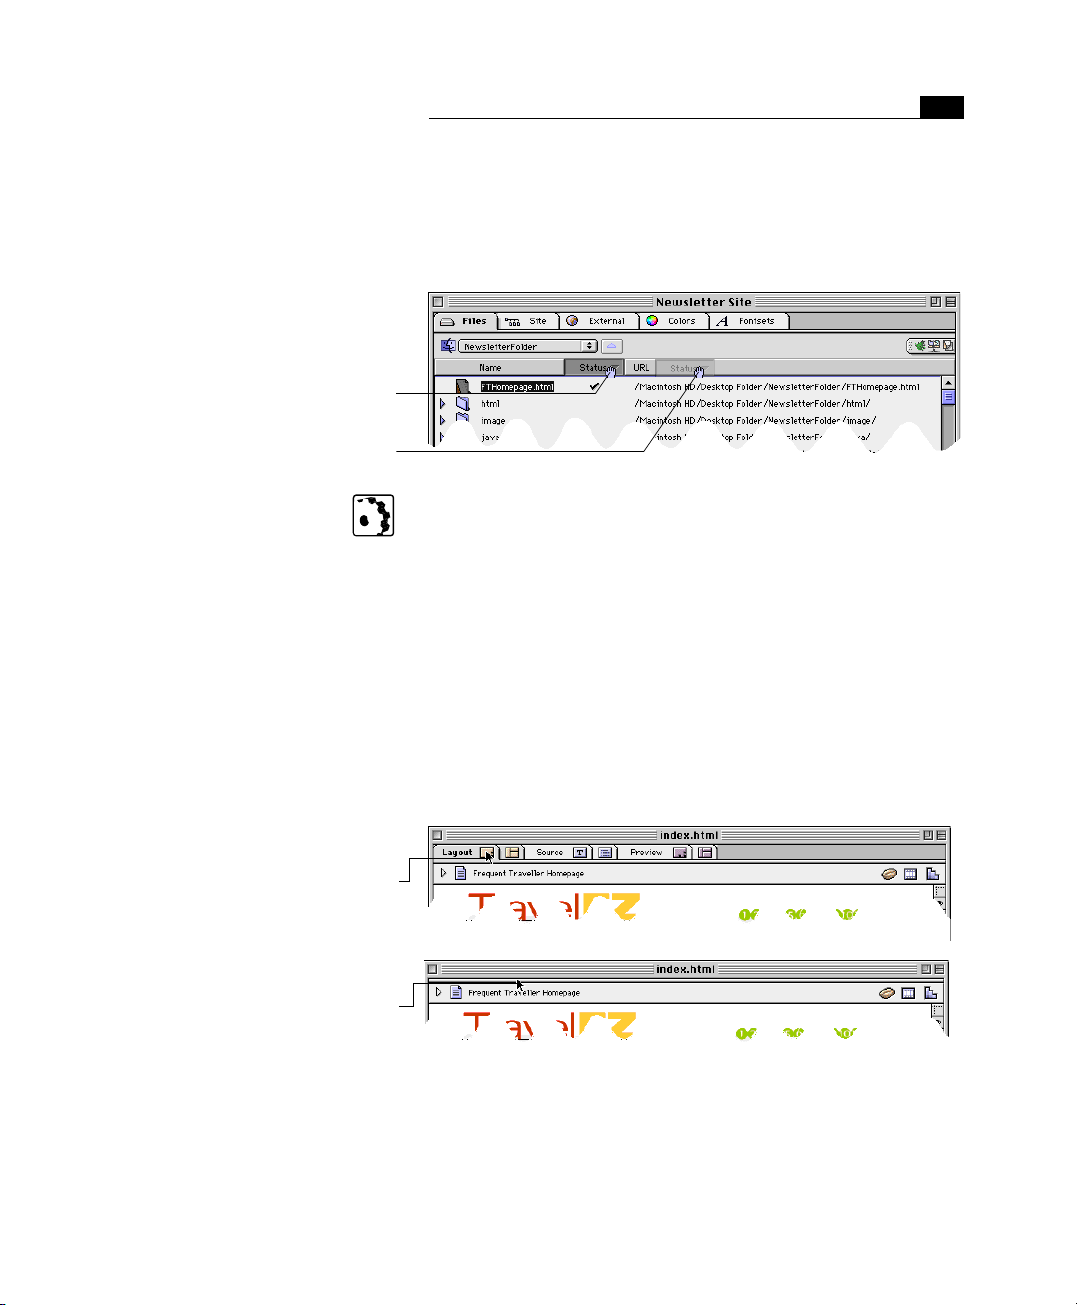
Swapping Columns
Command-click the column header to activate it
for dragging.
Drag to the new location to rearrange the order of
the columns.
79General Window Controls
Column Swap Controls
To rearrange the content of each tab in a list window, you can swap
columns via drag & drop. An example of swapping columns in the
Files tab of the Site Window appears below.
To swap columns, proceed as follows:
1 Command-click the head of the Status or URL column (you can-
not shift the Name column).
2 Drag the column sideways in the desired direction and drop it at
the desired location.
General Window Controls
Collapsing and Expanding Tab Riders
Double-click any tab rider to collapse all tabs
within the active window…
… then click the narrow ledge below the title bar
to expand all tabs again.
Collapsing and Expanding Tab Riders
To increase the visible display area, Adobe GoLive lets you collapse
the tab in any of its windows.
The following example illustrates how to collapse and expand tab
riders.
Page 94

CHAPTER 3
80
Adobe GoLive Windows Reduced to
Pop-up Windows
Adobe GoLive Basics
Pop-up Windows
To reduce desktop clutter, Adobe GoLive lets you use Apple’s pop-up
windows technology. You can collapse any document window and
the Site Window by clicking its title bar and dragging it to the bottom
of the screen, which reduces the window to a named tab. Similar to
the MacOs 8 Finder, you can open pop-up windows by clicking their
title tab. The following screenshot shows pop-up views of a document window and the Site Window.
Adobe GoLive’s pop-up windows are easily identified by the shape of
their corners: Pop-up windows from the Finder have rounded edges,
while Adobe GoLive’s pop-up windows don’t.
Collapsible Palette, Inspector, and Color Palette Windows
You can collapse the Palette, Inspector and Color Palette windows by
dragging them to the right edge of the screen. Double-clicking expands them to their previous size.
Contextual Menus Contextual menus are available for many items in Adobe GoLive’s
windows, including the document window and the Site Window (see
The Site Window starting on page 609 in Chapter 17, Managing Web
Sites with Adobe GoLive). The following screenshot shows a contextu-
al menu on top of the Site Window.
A Contextual Menu on Top of the Site
Window
A contextual menu pops up when you Control-click an item in any of
Adobe GoLive’s windows.
Page 95

81Common Controls in Adobe GoLive
Controls in the
Document Window
Inspector Features and Controls
In Layout mode, Adobe GoLive’s document window has four built-in
buttons:
Clicking this button opens the JavaScript editor. For a description and instructions, please
refer to the section JavaScript on page 185 in Chapter 4, Building Web Pages.
Clicking this button opens the Timeline Editor. For a description and instructions, see the
section The Timeline Editor on page 232 in Chapter 5, Dynamic HTML.
Clicking this button opens the Stylesheet Window. For a description and instructions, please
refer to the section The Stylesheet Window on page 337 in Chapter 6, Cascading Style Sheets.
While in Layout mode, clicking the “eye” button above the right scroll bar opens the Layout
View Controller (see page 90 in Chapter 4, Building Web Pages). Clicking this button in the Site
tab of the Site Window opens the Link Inspector (see page 673 in Chapter 17, Managing Web
Sites with Adobe GoLive).
Although the appearance of the Inspector window varies with the
current selection, the controls you use to set tag attributes remain
the same.
The following table lists the Inspector’s controls and their respective
functions:
Control Function
You can use text boxes to enter numerals, measurements (in pixels or percent),
URLs, etc.
Proceed as follows:
1 Click at the text box to place the cursor.
2 Make the desired entry. As soon as you enter text, a Carriage Return symbol
appears to the right of the text box, prompting you to confirm.
3 Press the Return key.
Color fields let you color the currently element. They are frequently accompanied by a checkbox.
Proceed as follows:
1 Click the checkbox to enable the color attribute.
2 Go to the Color Palette and choose a color. Your selection should appear in
the color preview pane of the Color Palette.
3 Drag the color from the preview pane of the Color Palette at the color field in
the Inspector. The color of the selection should change now.
Checkboxes toggle an option—object color, for example—on and off.
Proceed as follows:
1 Click the checkbox.
2 The check mark indicates that the option is selected.
Radio buttons let you select one item out of a group of options.
Proceed as follows:
1 Click the desired radio button.
2 A black bullet indicates that the option is selected.
Popup menus let you make a selection from a set of options, such as measurement units, object alignment, and others.
Proceed as follows:
1 Click to pop up the menu.
2 Drag to the menu item of your choice.
3 Release the mouse button to make your selection.
Page 96

82
CHAPTER 3
Adobe GoLive Basics
Control Function
The Point & Shoot button appears in any Inspector window that lets you make a
hyperlink to another page or embed an image or media item.
Proceed as follows:
1 Click the Point & Shoot button.
2 Drag to an item in the Site Window. An interconnecting line appears.
3 Release the mouse button when the desired object highlights.
4 The interconnecting line blinks twice to indicate that Point & Shoot has been
5 The item you have linked to appears in the URL text box of the Inspector. Text
successful. (If it recoils back to the Point & Shoot button, you have released
the mouse button before the object was highlighted.)
links are clickable now and images are displayed instead of placeholders.
Examples for using Point & Shoot appear at throughout this manual.
Page 97

Chapter 4 Building Web Pages
This chapter provides step-by-step instructions for building Web pages in Layout view, revealing the capabilities
of Adobe GoLive’s page building environment.
General Adobe GoLive’s Layout mode provides a comprehensive set of fea-
tures for building Web pages. It includes all the tools you need to create pages and add content, including text, images, color, and
animation.
The following screenshot illustrates the Adobe GoLive page building
environment (Layout view shown) and explains the major features.
The Page Building Environment
The Toolbar helps you format text, arrange
items on a layout grid, and launch browser(s).
These tabs in the document window let you
switch document views.
The Palette contains a complete inventory of
Web page building blocks, all ready for drag &
drop insertion.
The Inspector helps you edit tags and attributes, and it is the origin for Point & Shoot
linking.
The document window lets you drop objects
on to a layout grid, allowing you to place
them exactly as you would with page layout
software.
The Site Window lets you manage pages and resources dynamically using drag & drop and
Adobe’s proprietary Point & Shoot technology.
The Color Palette lets you drag & drop colors on
your HTML objects.
Page 98

86
CHAPTER 4
Building Web Pages
Web Page Design Tools
Adobe GoLive’s page building environment contains four major tools
you will use for building Web pages (see the preceding screenshot for
reference).
The Toolbar The context-sensitive Toolbar changes with the current selection:
• While you are working with normal HTML tags and text, the Text
Toolbar offers the text formatting tools shown below (see
page 123 for more details).
• While you are working with objects on a layout grid, the Layout
Grid Toolbar offers the alignment and grouping tools shown
below (see page 114 for more details).
• When you are working with the Site window as the front-most
window, the Site Toolbar offers tools to manage files and FTP
them to or from your Web server.
The Palette The Palette window holds iconized representations of tags that can
be inserted in your document.
The Basic Tags Tab of the Palette
There are two ways to insert tags:
• Drag & drop lets you insert a tag into an HTML flow or on a layout grid by clicking it in the Palette, dragging it to the desired
location, and releasing the mouse button.
Page 99

The Custom Tab of the Palette
87Web Page Design Tools
• Double-clicking an icon in the Palette lets you insert a tag or
object at the current cursor location in the HTML flow or in the
upper left corner on the currently selected layout grid.
Because this chapter focuses on adding content to pages and formatting it for maximum visual impact, it only deals with the first and the
last tabs of the Palette. These tabs—the Basic Tags and Custom
tabs—contain the following tools:
The Basic Tags Tab
The Basic Tags tab contains everything you need to build pages, including the layout grid, floating boxes, tables, and images. For further details, please refer to the instructions starting on page 110.
The Custom Tab
The Custom tab lets you store frequently used objects for insertion
into your page and keeps them handy, while offering full drag &
drop convenience. You can drag almost any desired item on the Cus-
tom tab to store it there. The Custom tab accepts anything from sim-
ple images to composite objects (for example, a layout grid packed
with text, images, and lines), with the exception of text from HTML
text flows.
The Custom tab stores all objects complete with their URLs, attributes, and other definitions. Thumbnail previews help the user
identify the desired item.
Click here to open the Custom tab.
Drag any desired object to the Custom tab to store
it for future use.
To store an object for future use, proceed as follows:
1 Drag the object from the document window onto the Custom tab.
If the Custom tab is not open, drag the object on the tab first, wait
for the Custom tab to open, then drag it onto the storage area.
Page 100

CHAPTER 4
88
The Palette Item Editor
Use this text box to name the newly inserted item
on the Custom tab.
Building Web Pages
2 After dropping the object on the Custom tab, double-click it for
renaming. Double-clicking an item opens the Palette Item Editor.
3 Place the cursor in the Item Name text box, type in a descriptive
name, and click OK to confirm your entry.
4 To place an object from the Custom tab in your document, simply
drag it from the tab and drop it at the desired location on a layout grid or in the HTML text flow.
5 To delete an object from the Custom tab, select it and press the
Delete or Backspace key.
A text field at the bottom of the Palette will display the name of the
item at the current cursor location to help the user identify individual elements.
Other Tabs in the Palette
The remaining tabs contain other collections of tools that are described in other chapters.
The Forms Tags tab contains all you need to create forms. For more details, see Chapter 9,
Working with Forms, starting on page 445.
The Head tab includes a variety of structure tags that provide document-related information to the browser. For additional details, please refer to Chapter 10, Working with
Head Tags, starting on page 483.
The Frames tab contains a collection of frames and frame sets you can use to structure your
page layout. Please refer to Chapter 8, Working with Frames, starting on page 429 for more
details.
The Site tab features a selection of generic site elements for site management. It does not
contain any HTML objects that can be used to build pages. For more information, see section "The Site Tab" on page 611 in chapter “Managing Web Sites with Adobe GoLive“.
The Extra tab is a companion tab to the Site Window. It contains stationery you can use for
designing sites as well as pages or page fragments you want to use for dynamic components.
For more information, see Chapter 5, Dynamic HTML, starting on page 229, and Chapter 17,
Managing Web Sites with Adobe GoLive starting on page 605.
The CyberObjects tab contains a selection of ready-to-use script objects that add dynamic
behavior to Web pages. For more information, see Chapter 5, Dynamic HTML, starting on
page 229.
The WebObjects tab contains a group of ready-to-use WebObjects tags that let you build dynamic pages. For more details, please refer to the separate manual shipped with Adobe
GoLive, Using Web Objects with Adobe GoLive.
 Loading...