

Page 1

®
ADOBE
FLASH® CS3
PROFESSIONAL
USER GUIDE
Page 2

Copyright
© 2007 Adobe Systems Incorporated. All rights reserved.
Using Adobe® Flash® CS3 Professional for Windows® and Mac OS
If this guide is distributed with software that includes an end user agreement, this guide, as well as the software described in it, is furnished under license and may be used or
copied only in accordance with the terms of such license. Except as permitted by any such license, no part of this guide may be reproduced, stored in a retrieval system, or transmitted, in any form or by any means, electronic, mechanical, recording, or otherwise, without the prior written permission of Adobe Systems Incorporated.Pleasenotethatthe
content in this guide is protected under copyright law even if it is not distributed with software that includes an end user license agreement.
Thecontentofthisguideisfurnishedforinformationaluseonly,issubjecttochangewithoutnotice,andshouldnotbeconstruedasacommitmentbyAdobe Systems Incorporated. Adobe Systems Incorporated assumes no responsibility or liability for any errors or inaccuracies that may appear in the informational content contained in this guide.
Please remember that existing artwork or images that you may want to include in your project may be protected under copyright law. The unauthorized incorporation of such
material into your new work could be a violation of the rights of the copyright owner. Please be sure to obtain any permission required from the copyright owner.
Any references to company names in sample templates are for demonstration purposes only and are not intended to refer to any actual organization.
Adobe, the Adobe logo, Adobe Premiere, ActionScript, ColdFusion, Director, Fireworks, Flash, Flash Lite, FreeHand, Illustrator, and Photoshop are either registered trademarks
or trademarks of Adobe Systems Incorporated in the United States and/or other countries.
Microsoft and Windows are either registered trademarks ortrademarks ofMicrosoft Corporation inthe United States and/or other countries. Macintoshis a trademark of Apple
Inc. registered in the U.S. and other countries. All other trademarks are the property of their respective owners.
ThisproductincludessoftwaredevelopedbytheApacheSoftwareFoundation(
www.apache.org). MPEG Layer-3 audio compression technology licensed by Fraunhofer IIS and
Thomson Multimedia (http://www.iis.fhg.de/amm/). You cannot use the mp3 compressed audio within the Software for real time or live broadcasts. If you require an mp3
decoder for real time or live broadcasts, you are responsible for obtaining this mp3 technology license. Speech compression and decompression technology licensed from Nellymoser, Inc. (
www.nellymoser.com) Flash CS3 video is powered by On2 TrueMotion video technology. © 1992-2005 On2 Technologies, Inc. All Rights Reserved.
http://www.on2.com. This product includes software developed by the OpenSymphony Group (http://www.opensymphony.com/)
Sorenson Spark™ video compression and decompression technology licensed from Sorenson Media, Inc.
Adobe Systems Incorporated, 345 Park Avenue, San Jose, California 95110, USA.
Notice to U.S. Government End Users: The Software and Documentation are “Commercial Items,” as that term is defined at 48 C.F.R. §2.101, consisting of “Commercial
Computer Software” and “Commercial Computer Software Documentation,” as such terms are used in 48 C.F.R. §12.212 or 48 C.F.R. §227.7202, as applicable. Consistent with
48 C.F.R. §12.212 or 48 C.F.R. §§227.7202-1 through 227.7202-4, as applicable, the Commercial Computer Software and Commercial Computer Software Documentation are
being licensed to U.S. Government end users (a)only as Commercial Items and (b) with onlythose rightsas are grantedtoall other end users pursuant totheterms andconditions
herein. Unpublished-rights reserved under the copyright laws of the United States. Adobe agrees to comply with all applicable equal opportunity laws including, if appropriate,
the provisions of Executive Order 11246, as amended, Section 402 of the Vietnam Era Veterans Readjustment Assistance Act of 1974 (38 USC 4212), and Section 503 of the
Rehabilitation Act of 1973, as amended, and the regulations at 41 CFR Parts 60-1 through 60-60, 60-250, and 60-741. The affirmative action clause and regulations contained in
the preceding sentence shall be incorporated by reference.
Page 3

Contents
Chapter 1: Getting started
Installation . . . . . . . . . . . . . . . . . . . . . . . . . . . . . . . . . . . . . . . . . . . . . . . . . . . . . . . . . . . . . . . . . . . . . . . . . . . . . . . 1
Using Help . . . . . . . . . . . . . . . . . . . . . . . . . . . . . . . . . . . . . . . . . . . . . . . . . . . . . . . . . . . . . . . . . . . . . . . . . . . . . . . . 2
Resources . . . . . . . . . . . . . . . . . . . . . . . . . . . . . . . . . . . . . . . . . . . . . . . . . . . . . . . . . . . . . . . . . . . . . . . . . . . . . . . . 6
What’s new . . . . . . . . . . . . . . . . . . . . . . . . . . . . . . . . . . . . . . . . . . . . . . . . . . . . . . . . . . . . . . . . . . . . . . . . . . . . . . 12
Chapter 2: Workspace
Flash workflow and workspace . . . . . . . . . . . . . . . . . . . . . . . . . . . . . . . . . . . . . . . . . . . . . . . . . . . . . . . . . . . 15
Using the Stage and Tools panel . . . . . . . . . . . . . . . . . . . . . . . . . . . . . . . . . . . . . . . . . . . . . . . . . . . . . . . . . . 23
The Timeline . . . . . . . . . . . . . . . . . . . . . . . . . . . . . . . . . . . . . . . . . . . . . . . . . . . . . . . . . . . . . . . . . . . . . . . . . . . . . 33
Using Flash authoring panels . . . . . . . . . . . . . . . . . . . . . . . . . . . . . . . . . . . . . . . . . . . . . . . . . . . . . . . . . . . . . 40
Accessibility in the Flash workspace . . . . . . . . . . . . . . . . . . . . . . . . . . . . . . . . . . . . . . . . . . . . . . . . . . . . . . 44
Undo, redo, and history . . . . . . . . . . . . . . . . . . . . . . . . . . . . . . . . . . . . . . . . . . . . . . . . . . . . . . . . . . . . . . . . . . 48
Automating tasks with the Commands menu . . . . . . . . . . . . . . . . . . . . . . . . . . . . . . . . . . . . . . . . . . . . .50
iii
Chapter 3: Creating and managing documents
Working with Flash documents . . . . . . . . . . . . . . . . . . . . . . . . . . . . . . . . . . . . . . . . . . . . . . . . . . . . . . . . . . . 52
Creating and previewing mobile content with Adobe Device Central . . . . . . . . . . . . . . . . . . . . . . 56
Working with projects . . . . . . . . . . . . . . . . . . . . . . . . . . . . . . . . . . . . . . . . . . . . . . . . . . . . . . . . . . . . . . . . . . . . 61
Adding media to the library . . . . . . . . . . . . . . . . . . . . . . . . . . . . . . . . . . . . . . . . . . . . . . . . . . . . . . . . . . . . . . 65
Working with timelines . . . . . . . . . . . . . . . . . . . . . . . . . . . . . . . . . . . . . . . . . . . . . . . . . . . . . . . . . . . . . . . . . . 69
Working with scenes . . . . . . . . . . . . . . . . . . . . . . . . . . . . . . . . . . . . . . . . . . . . . . . . . . . . . . . . . . . . . . . . . . . . . 75
Find and Replace . . . . . . . . . . . . . . . . . . . . . . . . . . . . . . . . . . . . . . . . . . . . . . . . . . . . . . . . . . . . . . . . . . . . . . . . 77
Templates . . . . . . . . . . . . . . . . . . . . . . . . . . . . . . . . . . . . . . . . . . . . . . . . . . . . . . . . . . . . . . . . . . . . . . . . . . . . . . . 80
Chapter 4: Adobe Version Cue
Working with Adobe Version Cue . . . . . . . . . . . . . . . . . . . . . . . . . . . . . . . . . . . . . . . . . . . . . . . . . . . . . . . . . 83
Working with the Version Cue Server . . . . . . . . . . . . . . . . . . . . . . . . . . . . . . . . . . . . . . . . . . . . . . . . . . . . . 90
Working with Version Cue projects . . . . . . . . . . . . . . . . . . . . . . . . . . . . . . . . . . . . . . . . . . . . . . . . . . . . . . . 95
Working with files in Version Cue . . . . . . . . . . . . . . . . . . . . . . . . . . . . . . . . . . . . . . . . . . . . . . . . . . . . . . . . 101
Version Cue versions . . . . . . . . . . . . . . . . . . . . . . . . . . . . . . . . . . . . . . . . . . . . . . . . . . . . . . . . . . . . . . . . . . . .109
Editing and synchronizing offline files . . . . . . . . . . . . . . . . . . . . . . . . . . . . . . . . . . . . . . . . . . . . . . . . . . . 112
Version Cue Server Administration . . . . . . . . . . . . . . . . . . . . . . . . . . . . . . . . . . . . . . . . . . . . . . . . . . . . . . .114
Version Cue PDF reviews . . . . . . . . . . . . . . . . . . . . . . . . . . . . . . . . . . . . . . . . . . . . . . . . . . . . . . . . . . . . . . . . 125
Chapter 5: Using imported artwork
Placing artwork into Flash . . . . . . . . . . . . . . . . . . . . . . . . . . . . . . . . . . . . . . . . . . . . . . . . . . . . . . . . . . . . . . . 133
Working with Illustrator AI files . . . . . . . . . . . . . . . . . . . . . . . . . . . . . . . . . . . . . . . . . . . . . . . . . . . . . . . . . . 140
Working with Photoshop PSD files . . . . . . . . . . . . . . . . . . . . . . . . . . . . . . . . . . . . . . . . . . . . . . . . . . . . . . . 148
Imported bitmaps . . . . . . . . . . . . . . . . . . . . . . . . . . . . . . . . . . . . . . . . . . . . . . . . . . . . . . . . . . . . . . . . . . . . . . 156
Page 4

Chapter 6: Drawing
Drawing Basics . . . . . . . . . . . . . . . . . . . . . . . . . . . . . . . . . . . . . . . . . . . . . . . . . . . . . . . . . . . . . . . . . . . . . . . . . . 160
Using Flash drawing and painting tools . . . . . . . . . . . . . . . . . . . . . . . . . . . . . . . . . . . . . . . . . . . . . . . . . . 165
Drawing with the Pen tool . . . . . . . . . . . . . . . . . . . . . . . . . . . . . . . . . . . . . . . . . . . . . . . . . . . . . . . . . . . . . . . 173
Reshaping lines and shape outlines . . . . . . . . . . . . . . . . . . . . . . . . . . . . . . . . . . . . . . . . . . . . . . . . . . . . . . 178
Snapping . . . . . . . . . . . . . . . . . . . . . . . . . . . . . . . . . . . . . . . . . . . . . . . . . . . . . . . . . . . . . . . . . . . . . . . . . . . . . . . 181
Chapter 7: Working with color, strokes, and fills
Working with color . . . . . . . . . . . . . . . . . . . . . . . . . . . . . . . . . . . . . . . . . . . . . . . . . . . . . . . . . . . . . . . . . . . . . . 184
Modifying color palettes . . . . . . . . . . . . . . . . . . . . . . . . . . . . . . . . . . . . . . . . . . . . . . . . . . . . . . . . . . . . . . . . 186
Strokes, fills, and gradients . . . . . . . . . . . . . . . . . . . . . . . . . . . . . . . . . . . . . . . . . . . . . . . . . . . . . . . . . . . . . . 187
Chapter 8: Working with graphic objects
About graphic objects . . . . . . . . . . . . . . . . . . . . . . . . . . . . . . . . . . . . . . . . . . . . . . . . . . . . . . . . . . . . . . . . . . 196
Selecting objects . . . . . . . . . . . . . . . . . . . . . . . . . . . . . . . . . . . . . . . . . . . . . . . . . . . . . . . . . . . . . . . . . . . . . . . 197
Moving, copying, and deleting objects . . . . . . . . . . . . . . . . . . . . . . . . . . . . . . . . . . . . . . . . . . . . . . . . . . 199
Arranging objects . . . . . . . . . . . . . . . . . . . . . . . . . . . . . . . . . . . . . . . . . . . . . . . . . . . . . . . . . . . . . . . . . . . . . . . 201
Transforming objects . . . . . . . . . . . . . . . . . . . . . . . . . . . . . . . . . . . . . . . . . . . . . . . . . . . . . . . . . . . . . . . . . . . 203
Chapter 9: Using symbols, instances, and library assets
Working with symbols . . . . . . . . . . . . . . . . . . . . . . . . . . . . . . . . . . . . . . . . . . . . . . . . . . . . . . . . . . . . . . . . . . 208
Working with symbol instances . . . . . . . . . . . . . . . . . . . . . . . . . . . . . . . . . . . . . . . . . . . . . . . . . . . . . . . . . 213
Library assets . . . . . . . . . . . . . . . . . . . . . . . . . . . . . . . . . . . . . . . . . . . . . . . . . . . . . . . . . . . . . . . . . . . . . . . . . . . 217
Using shared library assets . . . . . . . . . . . . . . . . . . . . . . . . . . . . . . . . . . . . . . . . . . . . . . . . . . . . . . . . . . . . . . 219
Working with button symbols . . . . . . . . . . . . . . . . . . . . . . . . . . . . . . . . . . . . . . . . . . . . . . . . . . . . . . . . . . . 221
Scaling and caching symbols . . . . . . . . . . . . . . . . . . . . . . . . . . . . . . . . . . . . . . . . . . . . . . . . . . . . . . . . . . . . 223
Symbols and ActionScript . . . . . . . . . . . . . . . . . . . . . . . . . . . . . . . . . . . . . . . . . . . . . . . . . . . . . . . . . . . . . . . 225
iv
Chapter 10: Creating animation
Animation basics . . . . . . . . . . . . . . . . . . . . . . . . . . . . . . . . . . . . . . . . . . . . . . . . . . . . . . . . . . . . . . . . . . . . . . . 229
Using Timeline effects . . . . . . . . . . . . . . . . . . . . . . . . . . . . . . . . . . . . . . . . . . . . . . . . . . . . . . . . . . . . . . . . . . . 237
Tweened animation . . . . . . . . . . . . . . . . . . . . . . . . . . . . . . . . . . . . . . . . . . . . . . . . . . . . . . . . . . . . . . . . . . . . . 240
Chapter 11: Special effects
About filters . . . . . . . . . . . . . . . . . . . . . . . . . . . . . . . . . . . . . . . . . . . . . . . . . . . . . . . . . . . . . . . . . . . . . . . . . . . . 250
About blend modes . . . . . . . . . . . . . . . . . . . . . . . . . . . . . . . . . . . . . . . . . . . . . . . . . . . . . . . . . . . . . . . . . . . . . 257
Chapter 12: Working with text
Text and fonts in Flash . . . . . . . . . . . . . . . . . . . . . . . . . . . . . . . . . . . . . . . . . . . . . . . . . . . . . . . . . . . . . . . . . . 261
Creating text . . . . . . . . . . . . . . . . . . . . . . . . . . . . . . . . . . . . . . . . . . . . . . . . . . . . . . . . . . . . . . . . . . . . . . . . . . . . 265
Setting text attributes . . . . . . . . . . . . . . . . . . . . . . . . . . . . . . . . . . . . . . . . . . . . . . . . . . . . . . . . . . . . . . . . . . . 272
Chapter 13: Creating multilanguage text
Creating multilanguage text . . . . . . . . . . . . . . . . . . . . . . . . . . . . . . . . . . . . . . . . . . . . . . . . . . . . . . . . . . . . 276
Encoding text formats . . . . . . . . . . . . . . . . . . . . . . . . . . . . . . . . . . . . . . . . . . . . . . . . . . . . . . . . . . . . . . . . . . 280
Authoring multilanguage text . . . . . . . . . . . . . . . . . . . . . . . . . . . . . . . . . . . . . . . . . . . . . . . . . . . . . . . . . . .282
XML file format . . . . . . . . . . . . . . . . . . . . . . . . . . . . . . . . . . . . . . . . . . . . . . . . . . . . . . . . . . . . . . . . . . . . . . . . . 286
Multilanguage text and ActionScript . . . . . . . . . . . . . . . . . . . . . . . . . . . . . . . . . . . . . . . . . . . . . . . . . . . . 289
Page 5

Chapter 14: Working with sound
Using sounds in Flash . . . . . . . . . . . . . . . . . . . . . . . . . . . . . . . . . . . . . . . . . . . . . . . . . . . . . . . . . . . . . . . . . . . 292
Exporting Sounds . . . . . . . . . . . . . . . . . . . . . . . . . . . . . . . . . . . . . . . . . . . . . . . . . . . . . . . . . . . . . . . . . . . . . . . 296
Sound and ActionScript . . . . . . . . . . . . . . . . . . . . . . . . . . . . . . . . . . . . . . . . . . . . . . . . . . . . . . . . . . . . . . . . 299
Chapter 15: Working with video
Creating and publishing Flash Video . . . . . . . . . . . . . . . . . . . . . . . . . . . . . . . . . . . . . . . . . . . . . . . . . . . . . 301
Importing and modifying Flash Video files . . . . . . . . . . . . . . . . . . . . . . . . . . . . . . . . . . . . . . . . . . . . . . . 302
About digital video and Flash . . . . . . . . . . . . . . . . . . . . . . . . . . . . . . . . . . . . . . . . . . . . . . . . . . . . . . . . . . . 310
Encoding video . . . . . . . . . . . . . . . . . . . . . . . . . . . . . . . . . . . . . . . . . . . . . . . . . . . . . . . . . . . . . . . . . . . . . . . . . 313
Working with Premiere Pro and After Effects . . . . . . . . . . . . . . . . . . . . . . . . . . . . . . . . . . . . . . . . . . . . . 317
Using ActionScript to play external Flash Video . . . . . . . . . . . . . . . . . . . . . . . . . . . . . . . . . . . . . . . . . . 321
Chapter 16: Creating e-learning content
Getting started with Flash e-learning . . . . . . . . . . . . . . . . . . . . . . . . . . . . . . . . . . . . . . . . . . . . . . . . . . . . 326
Including a Flash learning interaction in a document . . . . . . . . . . . . . . . . . . . . . . . . . . . . . . . . . . . . .327
Adding, naming, and registering assets . . . . . . . . . . . . . . . . . . . . . . . . . . . . . . . . . . . . . . . . . . . . . . . . . 335
Configuring learning interactions . . . . . . . . . . . . . . . . . . . . . . . . . . . . . . . . . . . . . . . . . . . . . . . . . . . . . . . 338
Changing the appearance of a learning interaction . . . . . . . . . . . . . . . . . . . . . . . . . . . . . . . . . . . . . . 346
Tracking to AICC- or SCORM-compliant learning management systems . . . . . . . . . . . . . . . . . . . 348
Extending learning interaction scripts . . . . . . . . . . . . . . . . . . . . . . . . . . . . . . . . . . . . . . . . . . . . . . . . . . . 350
v
Chapter 17: Creating accessible content
About accessible content . . . . . . . . . . . . . . . . . . . . . . . . . . . . . . . . . . . . . . . . . . . . . . . . . . . . . . . . . . . . . . . 353
Using Flash to enter accessibility information for screen readers . . . . . . . . . . . . . . . . . . . . . . . . . . 356
Specifying advanced accessibility options for screen readers . . . . . . . . . . . . . . . . . . . . . . . . . . . . . 361
Creating accessibility with ActionScript . . . . . . . . . . . . . . . . . . . . . . . . . . . . . . . . . . . . . . . . . . . . . . . . . . 363
Chapter 18: Working with screens
Screen-based documents and the screen authoring environment . . . . . . . . . . . . . . . . . . . . . . . . 367
Working with screens . . . . . . . . . . . . . . . . . . . . . . . . . . . . . . . . . . . . . . . . . . . . . . . . . . . . . . . . . . . . . . . . . . . 369
Adding content to screens . . . . . . . . . . . . . . . . . . . . . . . . . . . . . . . . . . . . . . . . . . . . . . . . . . . . . . . . . . . . . . 374
Chapter 19: ActionScript
Working with ActionScript . . . . . . . . . . . . . . . . . . . . . . . . . . . . . . . . . . . . . . . . . . . . . . . . . . . . . . . . . . . . . . 381
Script Assist mode and behaviors . . . . . . . . . . . . . . . . . . . . . . . . . . . . . . . . . . . . . . . . . . . . . . . . . . . . . . . . 387
Writing and managing scripts . . . . . . . . . . . . . . . . . . . . . . . . . . . . . . . . . . . . . . . . . . . . . . . . . . . . . . . . . . . 390
Debugging ActionScript 1.0 and 2.0 . . . . . . . . . . . . . . . . . . . . . . . . . . . . . . . . . . . . . . . . . . . . . . . . . . . . . 401
Debugging ActionScript 3.0 . . . . . . . . . . . . . . . . . . . . . . . . . . . . . . . . . . . . . . . . . . . . . . . . . . . . . . . . . . . . . 411
ActionScript publish settings . . . . . . . . . . . . . . . . . . . . . . . . . . . . . . . . . . . . . . . . . . . . . . . . . . . . . . . . . . . . 414
Chapter 20: Publishing Flash content
Publishing Flash documents . . . . . . . . . . . . . . . . . . . . . . . . . . . . . . . . . . . . . . . . . . . . . . . . . . . . . . . . . . . . . 419
Using Flash Player . . . . . . . . . . . . . . . . . . . . . . . . . . . . . . . . . . . . . . . . . . . . . . . . . . . . . . . . . . . . . . . . . . . . . . . 420
Developing applications for mobile devices . . . . . . . . . . . . . . . . . . . . . . . . . . . . . . . . . . . . . . . . . . . . . . 432
Configuring a web server for Flash . . . . . . . . . . . . . . . . . . . . . . . . . . . . . . . . . . . . . . . . . . . . . . . . . . . . . . . 433
Flash security features . . . . . . . . . . . . . . . . . . . . . . . . . . . . . . . . . . . . . . . . . . . . . . . . . . . . . . . . . . . . . . . . . . . 434
Using publish profiles . . . . . . . . . . . . . . . . . . . . . . . . . . . . . . . . . . . . . . . . . . . . . . . . . . . . . . . . . . . . . . . . . . . 435
Page 6

HTML publishing templates . . . . . . . . . . . . . . . . . . . . . . . . . . . . . . . . . . . . . . . . . . . . . . . . . . . . . . . . . . . . . 436
Editing Flash HTML settings . . . . . . . . . . . . . . . . . . . . . . . . . . . . . . . . . . . . . . . . . . . . . . . . . . . . . . . . . . . . . 440
Chapter 21: Exporting from Flash
About exporting from Flash . . . . . . . . . . . . . . . . . . . . . . . . . . . . . . . . . . . . . . . . . . . . . . . . . . . . . . . . . . . . . 448
Exporting Flash content, images, and video . . . . . . . . . . . . . . . . . . . . . . . . . . . . . . . . . . . . . . . . . . . . . . 448
Chapter 22: Printing with Flash
Printing from the Flash authoring tool . . . . . . . . . . . . . . . . . . . . . . . . . . . . . . . . . . . . . . . . . . . . . . . . . . . 456
Chapter 23: Best practices
Structuring FLA files . . . . . . . . . . . . . . . . . . . . . . . . . . . . . . . . . . . . . . . . . . . . . . . . . . . . . . . . . . . . . . . . . . . . 465
Organizing ActionScript in an application . . . . . . . . . . . . . . . . . . . . . . . . . . . . . . . . . . . . . . . . . . . . . . . . 467
Behaviors conventions . . . . . . . . . . . . . . . . . . . . . . . . . . . . . . . . . . . . . . . . . . . . . . . . . . . . . . . . . . . . . . . . . . 468
Video conventions . . . . . . . . . . . . . . . . . . . . . . . . . . . . . . . . . . . . . . . . . . . . . . . . . . . . . . . . . . . . . . . . . . . . . .470
Projects and version control guidelines . . . . . . . . . . . . . . . . . . . . . . . . . . . . . . . . . . . . . . . . . . . . . . . . . .473
Flash application authoring guidelines . . . . . . . . . . . . . . . . . . . . . . . . . . . . . . . . . . . . . . . . . . . . . . . . . . 474
Accessibility guidelines . . . . . . . . . . . . . . . . . . . . . . . . . . . . . . . . . . . . . . . . . . . . . . . . . . . . . . . . . . . . . . . . . 479
Advertising with Flash . . . . . . . . . . . . . . . . . . . . . . . . . . . . . . . . . . . . . . . . . . . . . . . . . . . . . . . . . . . . . . . . . . 483
Optimizing FLA files for SWF output . . . . . . . . . . . . . . . . . . . . . . . . . . . . . . . . . . . . . . . . . . . . . . . . . . . . . 485
Tips for creating content for mobile devices . . . . . . . . . . . . . . . . . . . . . . . . . . . . . . . . . . . . . . . . . . . . . . 494
vi
Index . . . . . . . . . . . . . . . . . . . . . . . . . . . . . . . . . . . . . . . . . . . . . . . . . . . . . . . . . . . . . . . . . . . . . . . . . . . . . . . . . . 502
Page 7

Chapter 1: Getting started
If you haven’t installed your new software, begin by reading some information on installation and other preliminaries. Before you begin working with your software, take a few moments to read an overview of Adobe® Help and
of the many resources available to users. You have access to instructional videos, plug-ins, templates, user communities, seminars, tutorials, RSS feeds, and much more.
Installation
Requirements
❖ To review complete system requirements and recommendations for your Adobe® software, see the Read Me file
on the installation disc.
Install the software
1 Close any other Adobe applications open on your computer.
2 Insert the installation disc into the disc drive, and follow the on-screen instructions.
1
Note: For more information, see the Read Me file on the installation disc.
Activate the software
Ifyouhaveasingle-userretaillicenseforyourAdobesoftware,youwillbeaskedtoactivateyoursoftware;thisisa
simple, anonymous process that you must complete within 30 days of starting the software.
For more information on product activation, see the Read Me file on your installation disc, or visitthe Adobe website
at www.adobe.com/go/activation.
1 If the Activation dialog box isn’t already open, choose Help > Activate.
2 Follow the on-screen instructions.
Note: If you want to install the software on a different computer, you must first deactivate it on your computer. Choose
Help > Deactivate.
Register
Register your product to receive complimentary installation support, notifications of updates, and other services.
❖ To register, follow the on-screen instructions in the Registration dialog box, which appears after you install and
activate the software.
If you postpone registration, you can register at any time by choosing Help > Registration.
Change or reinstall Flash Player
1 Close your browser.
2 Remove any currently installed version of the player.
Page 8

FLASH CS3
User Guide
For instructions, see TechNote 14157 on the Adobe® Flash® Support Center at www.adobe.com/go/tn_14157.
3 To begin installation, run one of the following in your Players folder:
• For the ActiveX control for Windows® (Internet Explorer or AOL), run the Install Flash Player 9 AX.exe file.
• For the plug-in for Windows (CompuServe, Firefox, Mozilla, Netscape, or Opera), run the Install Flash Player
9.exe file.
• For the plug-in for Macintosh® (AOL, CompuServe, Firefox, Internet Explorer for Macintosh, Netscape, Opera, or
Safari), run Install Flash Player 9 (Mac OS 9.x) or Install Flash Player 9 OS X (Mac OS X.x).
Note: To verify installation in Netscape, select Help > About Plug-ins from within the browser.
Using Help
About Flash Help
The Flash Help panel (Help > Flash Help) contains the full set of user-assistance information provided with Flash.
To view a Help topic, click its title in the table of contents. Above the topic, you can see its relative location in the
hierarchy of topics.
2
You can hide the table of contents. To display it again, click the Table of Contents button . When you search Help,
the returned topics take the place of the table of contents. To redisplay the table of contents, click Clear.
The Help panel also displays context-sensitive reference information that you access from the Actions panel.
Adobe Help resources
Documentation for your Adobe software is available in a variety of formats.
In-product and LiveDocs Help
In-product Help provides access to all documentation and instructional content available at the time the software
ships. It is available through the Help menu in your Adobe software.
Page 9
FLASH CS3
User Guide
LiveDocs Help includes all the content from in-product Help, plus updates and links to additional instructional
content available on the web. For some products, you can also add comments to the topics in LiveDocs Help. Find
LiveDocs Help for your product in the Adobe Help Resource Center, at www.adobe.com/go/documentation.
3
Most versions of in-product and LiveDocs Help let you search across the Help systems of multiple products. Topics
may also contain links to relevant content on the web or to topics in the Help of another product.
Think of Help, both in the product and on the web, as a hub for accessing additional content and communities of
users. The most complete and up-to-date version of Help is always on the web.
Adobe PDF documentation
The in-product Help is also available as a PDF that is optimized for printing. Other documents, such as installation
guides and white papers, may also be provided as PDFs.
All PDF documentation is available through the Adobe Help Resource Center, at www.adobe.com/go/documen-
tation.To see thePDF documentation included with your software, look in the Documents folder on theinstallation
or content DVD.
Printed documentation
Printed editions of the in-product Help are available for purchase in the Adobe Store, at www.adobe.com/go/store.
You can also find books published by Adobe publishing partners in the Adobe Store.
A printed workflow guide is included with all Adobe Creative Suite® 3 products, and stand-alone Adobe products
may include a printed getting started guide.
Searching Flash Help
Flash can search all Flash Help systems or a single Help system (such as Using Flash).
You can also search the text of a single topic: Click in the topic to give it focus and press Ctrl+F (Windows) or
Command+F (Macintosh).
Page 10

FLASH CS3
User Guide
You can search Flash Help for a combination of words and phrases:
Single-word searches Return a list of help pages that contain the specified word. For example, if you type timeline
in the search text field, Flash returns a list of help pages that contain the word timeline or Timeline.
Multiple-word searches Return a list of help pages that each contain all of the search terms you enter. In this case,
the word and is implicit in the search. For example, if you type
movie clip in the search text field, Flash returns a
list of pages that contain both movie and clip—that is, clip movie, movie clip,movie...clip, and so on.
Explicit AND/OR searches Use t he word s AND or OR to refine the search results. For example, ifyou type timeline
AND keyframe in the search text field, Flash returns a list of help pages that contain both timeline and keyframe. If
you type
timeline OR tween in the search text field, Flash returns a list of help pages that contain timeline and
pages that contain tween.ThewordsANDandORmustbeallcapitallettersandmustbeinEnglish,evenifyouare
searching a non-English version of Flash Help.
Exact phrase searches Use quotation marks to return only pages that contain the specific phrase you enter. For
example, if you type
“motion tween” in the search text field, Flash returnsa listof help pages that containthe phrase
motion tween, but not pages that contain separate instances of motion and tween.
Exact phrase with explicit AND/OR searches Use a combination of quotation marks and the words AND or OR to
further refine your searches. For example, if you type
“motion tween” AND “ActionScript” in the search field,
Flash returns a list of pages that contain both the phrase motion tween and the word ActionScript.
4
Access context-sensitive Help from the Actions panel
1 To select an item for reference, do any of the following:
• Select an item in the Actions panel toolbox pane (on the left side of the Actions panel).
• Select an ActionScript term in the Actions panel in the Script pane.
• Place the insertion point before an ActionScript term in the Actions panel in the Script pane.
2 To open the Help panel reference page for the selected item, do one of the following:
• Press F1.
• Right-click the item and select View Help.
• Click Help above the Script pane.
Choosing the right Help documents
Flash Help contains many documents. The following list describes each document’s purpose and contents:
• Using Flash contains an introduction to what Flash is, what you can do with it, and how the Flash user interface
works. It also contains detailed information about using all of the tools and features in the Flash authoring tool.
• Programming ActionScript 3.0 provides a detailed description of the ActionScript 3.0 language, intended for
beginning and experienced scripters. Programming ActionScript 3.0 explains the basic concepts of writing code,
including how to use logic to write code that makes decisions, how to make your Flash projects respond to user
actions, and how to write code to perform the most common tasks in Flash. ActionScript 3.0 is faster and more
appropriate for computationally intensive applications thanActionScript 2.0, andis somewhat morecomplexthan
ActionScript 2.0.
Page 11

FLASH CS3
User Guide
• The ActionScript 3.0 Language and Components Reference includes dictionary-style entries for all of the actions,
methods, and properties in the ActionScript 3.0 application programming interface (API), as well as the APIs for
the ActionScript 3.0 components included with Flash. This reference is a fast way to find specific ActionScript
terms to accomplish specific tasks. Each entry includes details of the term’s syntax and functionality, and code
examples.
• Using ActionScript 3.0 Components contains information on using and configuring ActionScript 3.0 components
in a Flash document. Components are reusableuser interface elements suchas buttons, menus, and so on, that you
can use in your own projects without having to create and script them yourself. Some components do not have a
visual presence, but instead help you store and manage data for your application. This document also contains
information about creating your own reusable components with ActionScript 3.0.
• Learning ActionScript 2.0 inAdobeFlash provides a detailed description of theActionScript2.0 language, intended
for both new and more experienced scripters. Learning ActionScript 2.0 in Adobe Flash describes the basic
concepts of writing code, including which scripts you can use in Flash, when to use each type, how to use logic to
write code that makes decisions, how to make your Flash projects respond to user actions, and how to write
specific code to perform the most common tasks in Flash.
• The ActionScript 2.0 Language Reference includes dictionary-style entries for all of the actions, methods, and
properties in the ActionScript 2.0 application programming interface (API). This reference is a fast way to find
specific ActionScript terms to accomplish specific tasks. Each entry includes details of the term’s syntax and
functionality, as well as code examples.
• Using ActionScript 2.0 Components contains information on using and configuring components in a Flash
document. Components are reusable user interface elements such as buttons, menus, and so on, that you can use
in your own projects without having to create and script them yourself. Some components do not have a visual
presence, but instead help you store and manage data for your application. These documents also contain information about creating your own reusable components with ActionScript.
• ActionScript 2.0 Components Language Reference includes dictionary-style entries for all of the methods and
properties that areavailableto each component included with Flash.You control the behavior of components with
these APIs. After you understand the basics of how to use components, this reference is a fast way to find specific
APIs that can help you accomplish specific tasks.
• Extending Flash describes how to add functionality and automation to the Flash authoring tool with custom
JavaScript APIs created for that purpose.
• Getting Started with Flash Lite 2.x provides an introduction to the process of developing content with Adobe®
Flash® Lite™ 2.x for delivery on mobile phones and devices. Flash Lite 2.x supports a subset of ActionScript 2.0.
• Developing Flash Lite 2.x Applications provides techniques and guidelines for creating content and applications for
Flash Lite 2.x, the most current version of Adobe® Flash® Player designed for mobile phones and other devices.
Because Flash Lite 2.x supports different features than the desktop version of Flash Player, techniques for creating
content for Flash Lite are different from techniques for creating Flash desktop content.
• Introduction to Flash Lite 2.x ActionScript describes in detail the ActionScript features available in Flash Lite 2.x
and explains how to accomplish common scripting tasks when using Flash Lite 2.x.
• Flash Lite2.x ActionScript Language Reference provides dictionary-style entries for all of the actions, methods, and
properties available in Flash Lite 2.x. Each entry includes the details of the term’s syntax and functionality, as well
as sample code.
• Getting Started with Flash Lite 1.x provides an introduction to the process of developing content with Flash Lite
1.x for delivery on mobile phones and devices. Flash Lite 1.x supports a subset of ActionScript 1.0.
5
Page 12
FLASH CS3
User Guide
• Developing Flash Lite 1.x Applications provides techniques and guidelines for creating content and applications for
Flash Lite 1.x, the first version of Flash Player designed for mobile phones and other devices. Because Flash Lite
1.x supports different features than the desktop version of Flash Player, techniques for creating content for Flash
Lite 1.x are different from techniques for creating Flash desktop content.
• Learning Flash Lite 1.x ActionScript describes in detail the ActionScript features available in Flash Lite 1.0 and 1.1
and explains how to perform common scripting tasks when using Flash Lite 1.x.
• Flash Lite1.x ActionScript Language Reference provides dictionary-style entries for all of the actions, methods, and
properties available in Flash Lite 1.0 and 1.1. Each entry includes the details of the term’s syntax and functionality,
as well as sample code.
Resources
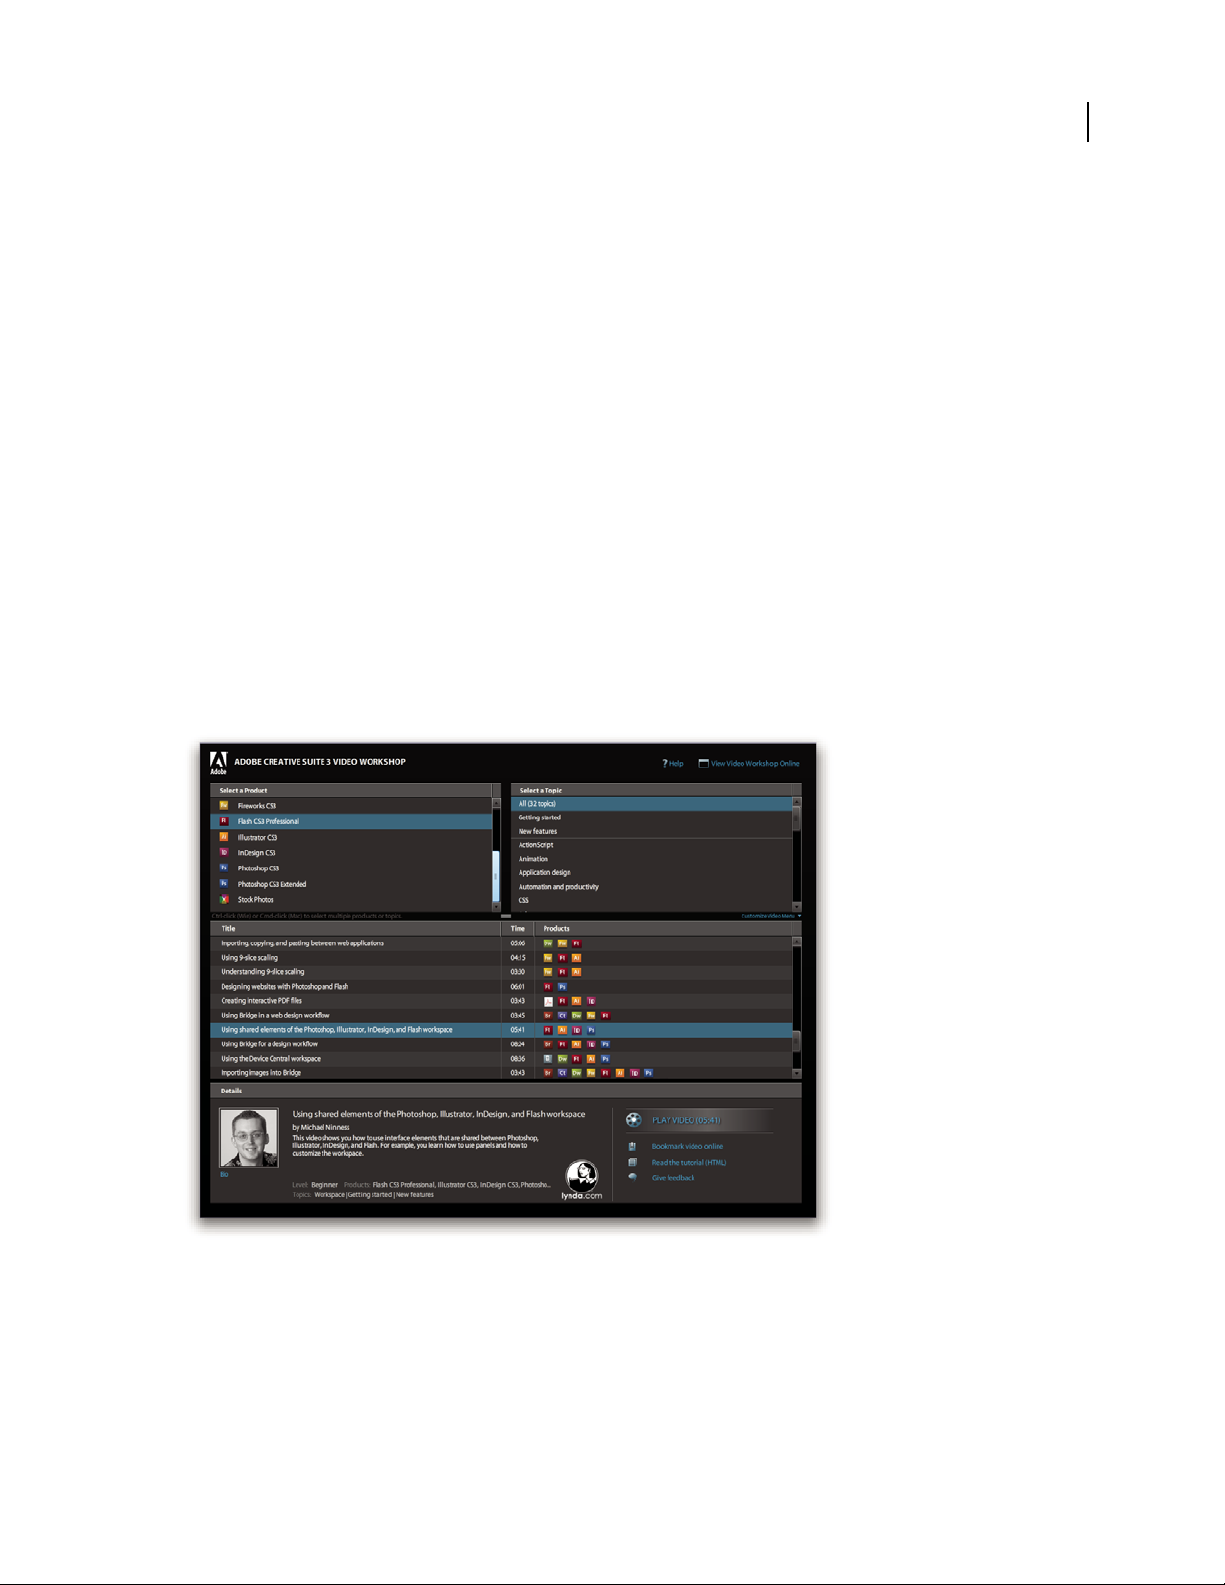
Adobe Video Workshop
The Adobe Creative Suite 3 Video Workshop offers over 200 training videos covering a wide range of subjects for
print, web, and video professionals.
YoucanusetheAdobeVideoWorkshoptolearnaboutanyCreativeSuite3product.Manyvideosshowyouhowto
use Adobe applications together.
6
Page 13
FLASH CS3
User Guide
When you start the Adobe Video Workshop, you choose the products you want to learn and the subjects you want
to view. You can see details about each video to focus and direct your learning.
7
Community of presenters
With this release, Adobe Systems invited the community of its users to share their expertise and insights. Adobe and
lynda.com present tutorials, tips, and tricks from leading designers and developers such as Joseph Lowery, Katrin
Eismann, and Chris Georgenes. You can see and hear Adobe experts such as Lynn Grillo, Greg Rewis, and Russell
Brown. In all, over 30 product experts share their knowledge.
Tutorials and source files
The Adobe Video Workshop includes training for novices and experienced users. You’ll also find videos on new
features and key techniques. Each video covers a single subject and typically runs about 3-5 minutes. Most videos
come with an illustrated tutorial and source files, so you can print detailed steps and try the tutorial on your own.
Using Adobe Video Workshop
YoucanaccessAdobeVideoWorkshopusingtheDVDincludedwithyourCreativeSuite3product.It’salsoavailable
online at www.adobe.com/go/learn_videotutorials. Adobe will regularly add new videos to the online Video
Workshop, so check in to see what’s new.
Flash CS3 Professional videos
Adobe Video Workshop covers a wide range of subjects for Adobe Flash® CS3 Professional, including these:
• Drawing with the Pen tool
• Creating animations using motion tweens
• Creating and animating masks
• Getting started with ActionScript 3.0
Page 14

FLASH CS3
User Guide
• Using the Flash Video Encoder
Videos also show you how to use Flash CS3 with other Adobe components:
• Using symbols effectively between Illustrator® and Flash
• Understanding the Fireworks® and Flash workflow
• Designing websites with Flash and Photoshop
• Creating mobile content in Flash
To access Adobe Creative Suite 3 video tutorials, visit Adobe Video Workshop at
www.adobe.com/go/learn_videotutorials.
Extras
You have access to a wide variety of resources that will help you make the most of your Adobe software. Some of
these resources are installed on your computer during the setup process; additional helpful samples and documents
are included on the installation or content disc. Unique extras are also offered online by the Adobe Exchange
community, at www.adobe.com/go/exchange.
Installed resources
During software installation, a numberof resources are placedin your applicationfolder. To view thosefiles, navigate
to the application folder on your computer.
8
• Windows®: [startup drive]\Program Files\Adobe\[Adobe application]
• Mac OS®: [startup drive]/Applications/[Adobe application]
The application folder may contain the following resources:
Plug-ins Plug-in modules are small software programs that extend or add features to your software. Once installed,
plug-in modules appear as options in the Import or Export menu; as file formats in the Open, Save As, and Export
Original dialog boxes; or as filters in the Filter submenus. For example, a number of special effects plug-ins are
automatically installed in the Plug-ins folder inside the Photoshop CS3 folder.
Presets Presets include a wide variety of useful tools, preferences, effects, and images. Product presets include
brushes, swatches, color groups, symbols, custom shapes, graphic and layer styles, patterns, textures, actions,
workspaces, and more. Preset content can be found throughout the user interface. Some presets (for example,
Photoshop Brush libraries)become available only when you select the corresponding tool.If you don’t want to create
an effect or image from scratch, go to the preset libraries for inspiration.
Templates Template files can be opened and viewed from Adobe Bridge CS3, opened from the Welcome Screen, or
opened directly from the File menu. Depending on the product, template files range from letterheads, newsletters,
Page 15

FLASH CS3
E
T
V
E
R
O
E
O
S
E
T
A
C
C
U
S
A
M
E
T
J
U
S
T
O
D
U
O
D
O
L
O
R
E
S
E
T
E
A
R
E
B
U
M
.
S
T
E
T
C
L
I
T
A
K
A
S
D
.
ET
C
O
S
E
T
E
T
U
R
S
A
D
I
P
S
C
I
N
G
01
Pelletir
Inc
.
C
O
R
E
I
N
V
E
S
T
M
E
N
T
S
P
E
C
T
R
U
M
Vel
i
ll
u
m
d
o
lore
e
u
fe
u
giat
n
u
ll
a
fac
ilis
is
at
vero
e
ros
e
t
a
cc
u
m
s
a
n
e
t
iu
s
to
o
d
io
d
i
gn
is
s
im
q
u
i.
R
E
T
I
R
E
M
E
N
T
S
A
V
I
N
G
P
L
A
N
Ve
l
ill
u
m
d
o
lore e
u
fe
u
giat
n
u
ll
a
fac
ilis
i
s
a
t vero
e
ro
s
e
t a
ccu
m
s
a
n
e
t
iu
s
to
o
d
io
d
i
gn
iss
im
q
u
i.
Y
o
u
r In
v
e
s
tm
e
n
t
G
u
id
e
A
r
e
y
o
u
l
e
a
v
in
g
m
o
n
e
y
o
n
t
h
e
t
a
b
l
e
?
0
1
Ty
p
i
n
o
n
h
a
b
e
nt c
la
ritate
m
in
s
it
a
m
;
e
s
t
u
s
u
s
l
e
g
ent
is
in ii
s
q
u
i fa
c
it
e
o
r
u
m
c
l
a
ritate
m
.
Inve
s
t
ig
ati
o
n
e
s
d
e
m
o
n
s
trave
r
u
nt l
e
ctore
s
le
g
e
re
m
e
l
i
u
s
q
u
o
d
ii
le
g
u
nt s
a
e
p
i
us. C
la
ritas
e
s
t
e
t
ia
m
p
roce
s
s
u
s.
Ty
p
i
n
o
n
h
a
b
ent
c
la
ritate
m
i
n
s
itam
;
e
s
t
u
s
u
s
l
e
g
ent
is
in
iis
q
u
i fa
c
i
t
e
o
r
u
m
c
la
ritate
m
.
Inve
s
t
ig
at
io
n
e
s
d
e
m
o
n
s
trave
r
u
nt
l
e
ctore
s
le
g
e
re
m
e
li
u
s
q
u
o
d
ii
le
g
u
nt
s
a
e
p
i
us. C
la
rit
a
s
e
s
t
e
t
ia
m
proce
s
s
u
s.
SU
R
V
I
C
E
M
E
N
U
N
U
L
C
H
E
vero
d
i
o
eu
m
n
ul
c
he
agiam
e
t ad
lorpe
ri
t
sum a
$
45
a
giam
e
t ad
atin
u
t
et
v
ero dio
e
u
m
n
u
l
che
su
m
a
ag
aim
et
ad
eu
m
n
ullam
$25
lo
r
p
e
r
it
sum
a
agiam
e
t ad
lo
rp
eri
t
vero dio
eum n
u
l
lam
$
35
SU
CCIVERO
S
sucicver
o
dio
ve
r
o dio
eu
m
n
ul
che
s
u
m
a
$15
eum
n
u
l
lam
vero dio
eum
n
u
l
c
he
su
m
a
agaim
e
t
a
d e
u
m
nu
l
lam
$3
5
N
eum n
ul
lam
$
35
S
UCC
I
VERO
S
su
cicver
o d
io
vero dio
eu
m
n
ul
c
he
su
m
a
$
1
5
e
um
nullam
ve
r
o d
io
eu
m
n
u
l
ch
e su
m
a
agaim
et
ad
e
um
nu
llam
$35
CC
a
s
i
o
p
i
a
S
p
A
User Guide
and websites to DVD menus and video buttons. Each template file is professionally constructed and represents a
best-use example of product features. Templates can be a valuable resource when you need to jump-start a project.
9
Travel Earth
Best 100 places to see on the planet
in your lifetime
Vel: Ad : Vulputate:
volute
ipsummy
, commy
re eugiarud tem
eraes-
exer
n ullutet
Samples Sample files include more complicated designsand are a great way to see new features in action. These files
demonstrate the range of creative possibilities available to you.
Fonts Several OpenType® fonts and font families are included with your Creative Suite product. Fonts are copied to
your computer during installation:
• Windows: [startup drive]\Windows\Fonts
• Mac OS X: [startup drive]/Library/Fonts
For information about installing fonts, see the Read Me file on the installation DVD.
DVD content
The installation or content DVD included with your product contains additional resources for use with your
software. The Goodies foldercontainsproduct-specific files such astemplates,images, presets, actions, plug-ins, and
effects, along with subfolders for Fonts and Stock Photography. The Documentation folder contains a PDF version
of the Help, technical information, and other documents such as specimen sheets, reference guides, and specialized
feature information.
Adobe Exchange
For more free content, visit www.adobe.com/go/exchange, an online community where users download and share
thousands of free actions, extensions, plug-ins, and other content for use with Adobe products.
Bridge Home
Bridge Home, a new destination in Adobe Bridge CS3, provides up-to-date information on all your Adobe Creative
Suite 3 software in one convenient location. Start Adobe Bridge, then click the Bridge Home icon at the top of the
Favorites panel to access the latest tips, news, and resources for your Creative Suite tools.
Page 16
Note: Bridge Home may not be available in all languages.
FLASH CS3
User Guide
10
Adobe Design Center
Adobe Design Center offers articles, inspiration, and instruction from industry experts, top designers and Adobe
publishing partners. New content is added monthly.
You can find hundreds of tutorials for design products and learn tips and techniques through videos, HTML
tutorials, and sample book chapters.
Page 17
FLASH CS3
User Guide
New ideas are the heart of Think Tank, Dialog Box, and Gallery:
• ThinkTankarticlesconsiderhowtoday’sdesignersengagewithtechnologyandwhattheirexperiencesmeanfor
design, design tools, and society.
• In Dialog Box, experts share new ideas in motion graphics and digital design.
• The Gallery showcases how artists communicate design in motion.
Visit Adobe Design Center at www.adobe.com/designcenter.
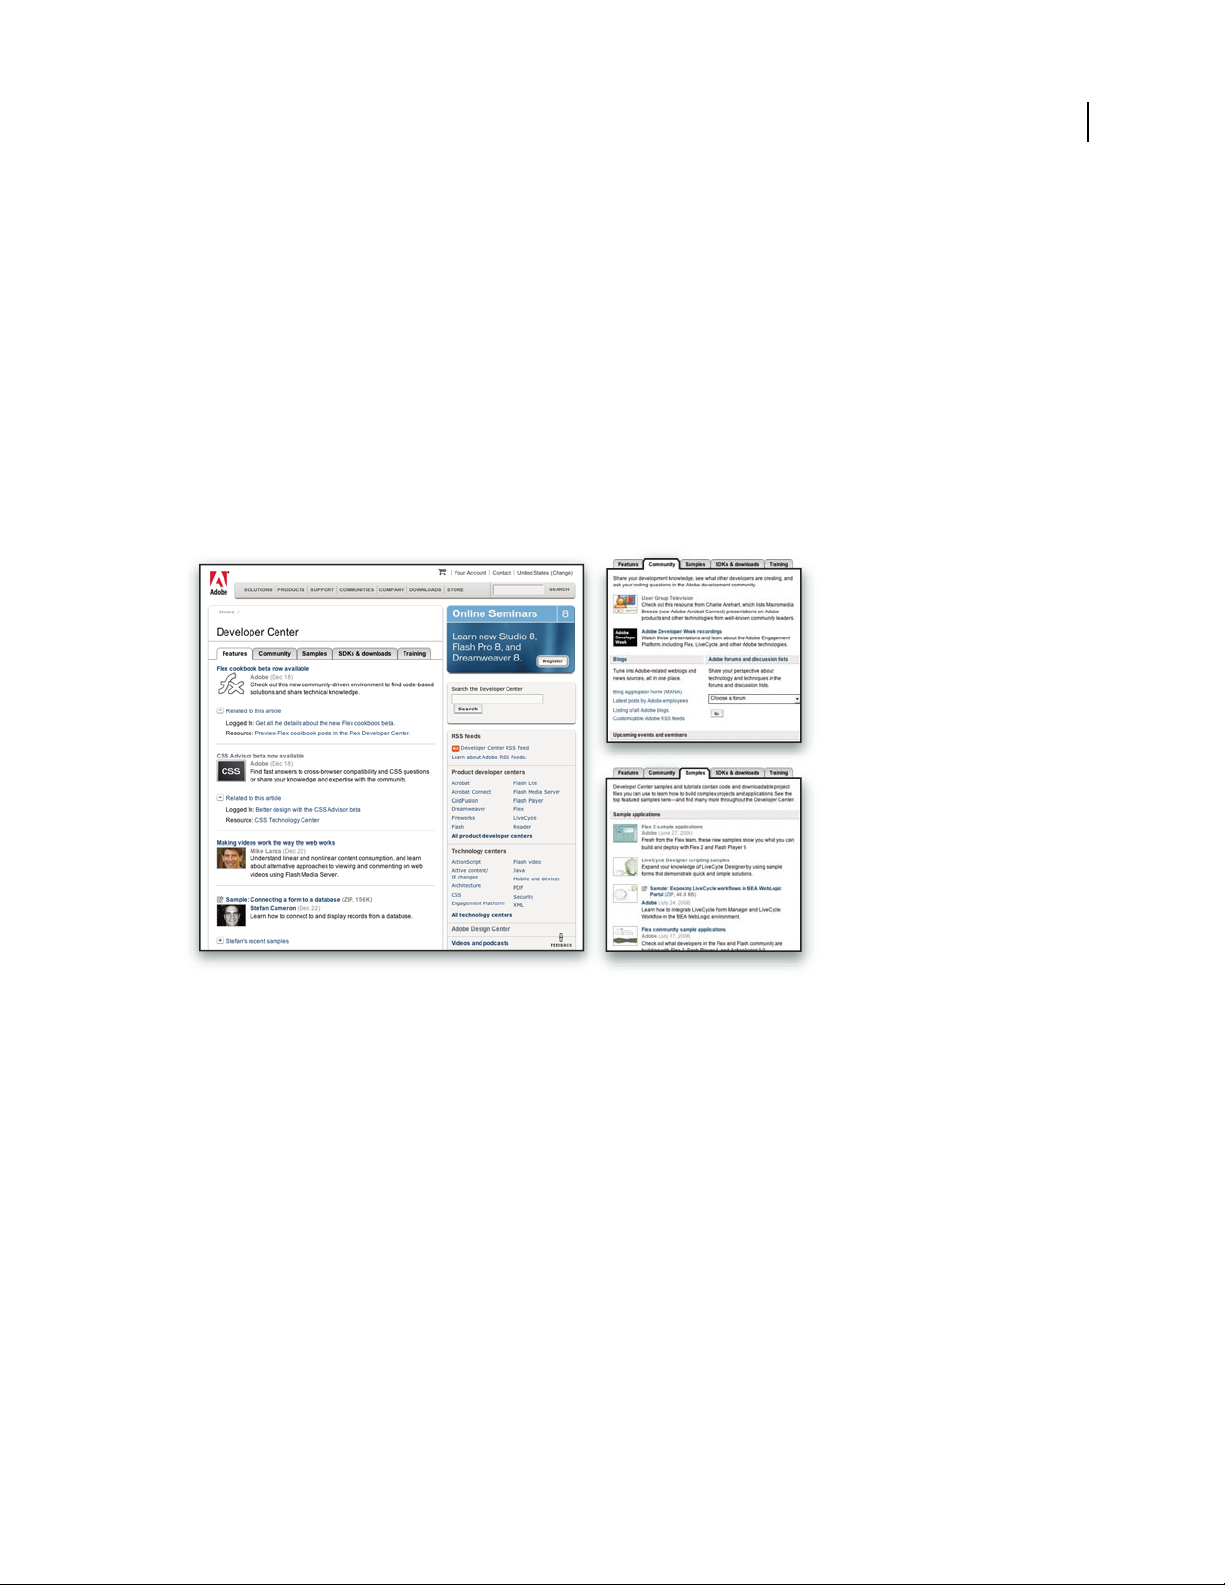
Adobe Developer Center
Adobe Developer Center provides samples, tutorials, articles, and community resources for developers who build
rich Internet applications,websites, mobile content, and other projects usingAdobe products. TheDeveloper Center
also contains resources for developers who develop plug-ins for Adobe products.
11
In addition to sample code and tutorials, you'll find RSS feeds, online seminars, SDKs, scripting guides, and other
technical resources.
Visit Adobe Developer Center at www.adobe.com/go/developer.
Customer support
VisittheAdobeSupportwebsite,atwww.adobe.com/support, to find troubleshooting information for your product
and tolearn about free and paid technical support options. Follow theTraining linkfor accessto Adobe Press books,
a variety of training resources, Adobe software certification programs, and more.
Downloads
Visit www.adobe.com/go/downloads to find free updates, tryouts, and other useful software. In addition, the Adobe
Store (at www.adobe.com/go/store) provides access to thousands of plug-ins from third-party developers, helping
you to automate tasks, customize workflows, create specialized professional effects, and more.
Page 18

FLASH CS3
User Guide
Adobe Labs
Adobe Labs gives you the opportunity toexperience and evaluate new andemerging technologies andproducts from
Adobe.
At Adobe Labs, you have access to resources such as these:
• Prerelease software and technologies
• Code samples and best practices to accelerate your learning
• Early versions of product and technical documentation
• Forums, wiki-based content, and other collaborative resources to help you interact with like-minded developers
Adobe Labs fosters a collaborative software development process. In this environment, customers quickly become
productive with new products and technologies. Adobe Labs is also a forum for early feedback, which the Adobe
development teams use to create software that meets the needs and expectations of the community.
Visit Adobe Labs at www.adobe.com/go/labs.
User communities
User communities feature forums, blogs, and other avenues for users to share technologies, tools, and information.
Users can ask questions and find out how others are getting the most out of their software. User-to-user forums are
available in English, French, German, and Japanese; blogs are posted in a wide range of languages.
12
To participate in forums or blogs, visit www.adobe.com/communities.
What’s new
New features
The following features are new to Adobe® Flash® CS3 Professional.
CS3 Interface
The Flash user interface is updated to share a common interface with other Adobe Creative Suite CS3 components.
A consistent appearance across all Adobe software helps users work more easily with multiple applications. See
“Workspace” on page 15.
Adobe Bridge and Version Cue
Organize and browse Flash and other creative assets using Adobe Bridge, an independent file-management system
that you can launch from within Flash. Through Adobe Bridge, you can automate workflows across Adobe Creative
Suite components, apply consistent color settings across Adobe software, and access version control features and
online stock photo purchase services. A Welcome screen provides centralized control of settings, as well as ongoing
access to tips and tutorials in Adobe Design Center. See “Adobe Version Cue” on page 83.
Bitmap Symbol Library Item dialog box
The Bitmap Symbol Library Item dialog box has been enlarged to provide a larger preview of the bitmap. See “Using
symbols, instances, and library assets” on page 208.
Page 19

FLASH CS3
User Guide
Multicolored bounding boxes
You can change the selection color of specific types of elements to identify each element easily. See “Get information
about instances on the Stage” on page 216.
Adobe Device Central
A new way to test content created with Adobe products on emulated mobile devices, Device Central lets you select
a target device from the beginning of the development process, and gives you a clear idea of what a device’s limitations are. See “Developing applications for mobile devices” on page 432.
Active content detections
To eliminate the need to first activate Flash Player so that users can interact with Flash content, Flash publishes
HTML templates that you can use to embed Flash SWF files. Using these templates, embedded SWF files are
activated seamlessly without the need for an additional mouse click or other user activation. See “Publishing Flash
documents” on page 419.
9-slice onstage preview
Because 9-slice scaling now provides onstage preview, you can see changes and adjustments to 9-slice scaled movie
clips on stage. See “About 9-slice scaling and movie clip symbols” on page 223.
13
Filter copy and paste
You can now copy and paste graphic filter settings from one instance to another. See “Apply filters” on page 251.
Copy and paste motion
Copy and paste motion letsyou copy amotion tween andpaste (or apply) theframes, tween, and symbol information
to another object. When pasting the motion tween to another object, you can choose to paste all properties
associated with the motion tween, or choose specific properties to apply to the other object. See “Copy and paste a
motion tween” on page 233.
Copy motion as ActionScript 3.0
In addition to copying the properties of one motion tween and applying those properties to another object, you can
copy the properties that define a motion tween in the Timeline as ActionScript 3.0 and apply that motion to another
symbol, either in the Actions panel or in the source files (such as class files) for a Flash document that uses ActionScript 3.0. See “Copy motion as ActionScript” on page 234.
Pen tool enhancements
The Pen tool has been improved.
• The Pen tool now behaves similarly to the Illustrator Pen tool to provide a more consistent user experience across
Adobe software
• The cubic-to-quadratic conversion is now more efficient, resulting in better accuracy and fewer points.
See “Drawing with the Pen tool” on page 173.
Adobe Photoshop import
You can now import Adobe Photoshop PSD files directly into Flash documents. Most Photoshop data types are
supported, and several import options are provided so that you can find the best balance of image fidelity and
editability within Flash. See “Import Photoshop PSD files” on page 150.
Page 20

FLASH CS3
User Guide
Adobe Illustrator import
You can now import Adobe Illustrator AI files directly into Flash documents. Most Illustrator data types are
supported, and several import options are provided so that you can find the best balance of image fidelity and
editability within Flash. See “Import Adobe Illustrator files” on page 141.
Primitive Rectangle and Oval drawing tools
NewRectangleandOvaldrawingtoolsletyoucreaterectanglesandovalswhoseproperties(suchasstrokeorcorner
radius) you can edit at any time in the Property inspector. See “Draw rectangles and ovals” on page 167.
Enhanced Quicktime video support
QuickTime export is intended for users who want to distribute Flash content, such as animation, in the QuickTime
video format. This release improves the quality of the exported QuickTime video file, which you can distribute as
streaming video or on a DVD, or import into a video-editing application such as Adobe® Premiere Pro®. See
“Exporting QuickTime” on page 454.
Save and load cue points for Flash video
Save and load functionality has been added to the Cue Points tab to allow you to save the cue points added to one
file and apply them to another. You can generate a cue points XML file based on known time codes and import it
into the encoder before encoding, eliminating the need to manually add each cue point through the Flash Video
Encoder user interface. See Flash Video Encoder Help.
14
Script Assist mode for ActionScript 3.0
Script Assist mode has been updated to include support for ActionScript 3.0. See “Script Assist mode and behaviors”
on page 387.
Improvements in ActionScript
Flash has a new, improved version of ActionScript. ActionScript 3.0 offers a robust programming model familiar to
developers with a basic knowledge of object-oriented programming. ActionScript 3.0 facilitates the creation of
highly complex applications with large data sets and object-oriented, reusable code bases. While ActionScript 3.0 is
not required for content that runs in Adobe Flash Player 9, it allows performance improvements that are available
only with the new ActionScript Virtual Machine (AVM2). ActionScript 3.0 code can execute up to ten times faster
than legacy ActionScript code.
The older version of ActionScript Virtual Machine, AVM1, executes ActionScript 1.0 and ActionScript 2.0 code.
Flash Player 9 supports AVM1 for backward compatibility with existing and legacy content.
To learn about ActionScript 3.0, see Programming ActionScript 3.0.
Page 21

Chapter 2: Workspace
The Adobe® Flash® CS3 Professional workspace includes tools and panels that help you create and navigate your
documents. Understanding these tools will help you maximize the application’s capabilities.
Flash workflow and workspace
General Flash workflow
To build a Flash application, you typically perform the following basic steps:
Plan the application.
Decide which basic tasks the application will perform.
Add media elements.
Create and import media elements, such as images, video, sound, text.
15
Arrange the elements.
Arrange the media elements on the Stage and in the Timeline to define when and how they appear in your application.
Apply special effects.
Apply graphic filters (such as blurs, glows, and bevels), blends, and other special effects as you see fit.
Use ActionScript to control behavior.
Write ActionScript code to control how the media elements behave, including how the elements respond to user
interactions.
Test and publish your application.
Testtoverifythatyourapplicationisworkingasyouintended,andfindandfixanybugsyouencounter.Youshould
test the application throughout the creation process. Publish your FLA file as a SWF file that can be displayed in a
web page and played back with Flash Player.
Depending on your project and your working style, you might use these steps in a different order.
For video tutorials about the Flash workflow, see the following:
• Flash workflow: www.adobe.com/go/vid0132
• Creating your first interactive Flash file: www.adobe.com/go/vid0118
For a text tutorial about creating an application, see Create an Application on the Flash Tutorials page at
www.adobe.com/go/learn_fl_tutorials.
Page 22

FLASH CS3
User Guide
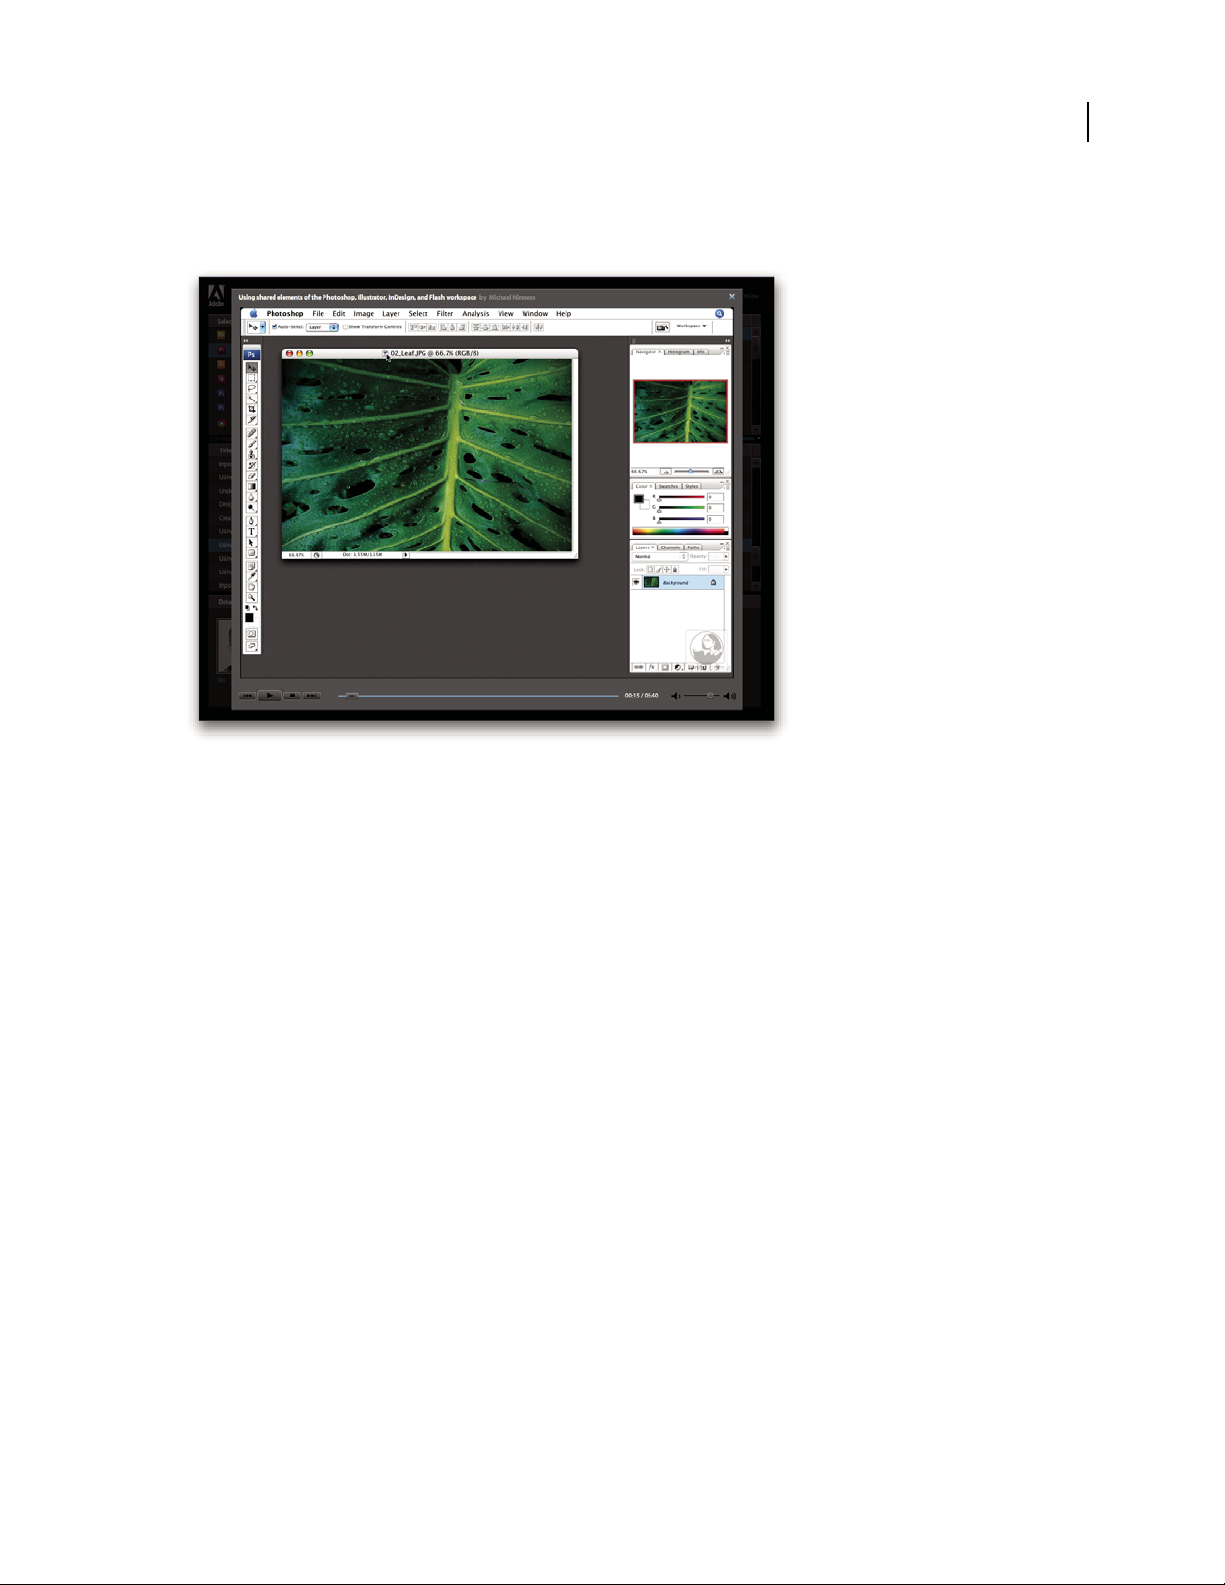
Workspace overview
You create and manipulate your documents and files using various elements such as panels, bars, and windows. Any
arrangement of these elements is called a workspace.WhenyoufirststartanAdobeCreativeSuitecomponent,you
see the default workspace, which you can customize for the tasks you perform there. For instance, youcan create one
workspace for editing and another for viewing, save them, and switch between them as you work.
You can restore the default workspace at any time by choosing the default option on the Window > Workspace menu.
Although default workspaces vary across Flash, Illustrator, InCopy, InDesign, and Photoshop, you manipulate the
elements much the same way in all of them. The Photoshop default workspace is typical:
• The menu bar across the top organizes commands under menus.
• The Tools panel (called the Tools palette in Photoshop) contains tools for creating and editing images, artwork,
page elements, and so on. Related tools are grouped together.
• The Control panel (called the options bar in Photoshop) displays options for the currently selected tool. (Flash has
no Control panel.)
• The Document window (called the Stage in Flash) displays the file you’re working on.
• Panels (called palettes in Photoshop) help you monitor and modify your work. Examples include the Timeline in
Flash and the Layers palette in Photoshop. Certain panels are displayed by default, but you can add any panel by
selecting it from the Window menu. Many panels have menus with panel-specific options. Panels can be grouped,
stacked, or docked.
16
Page 23
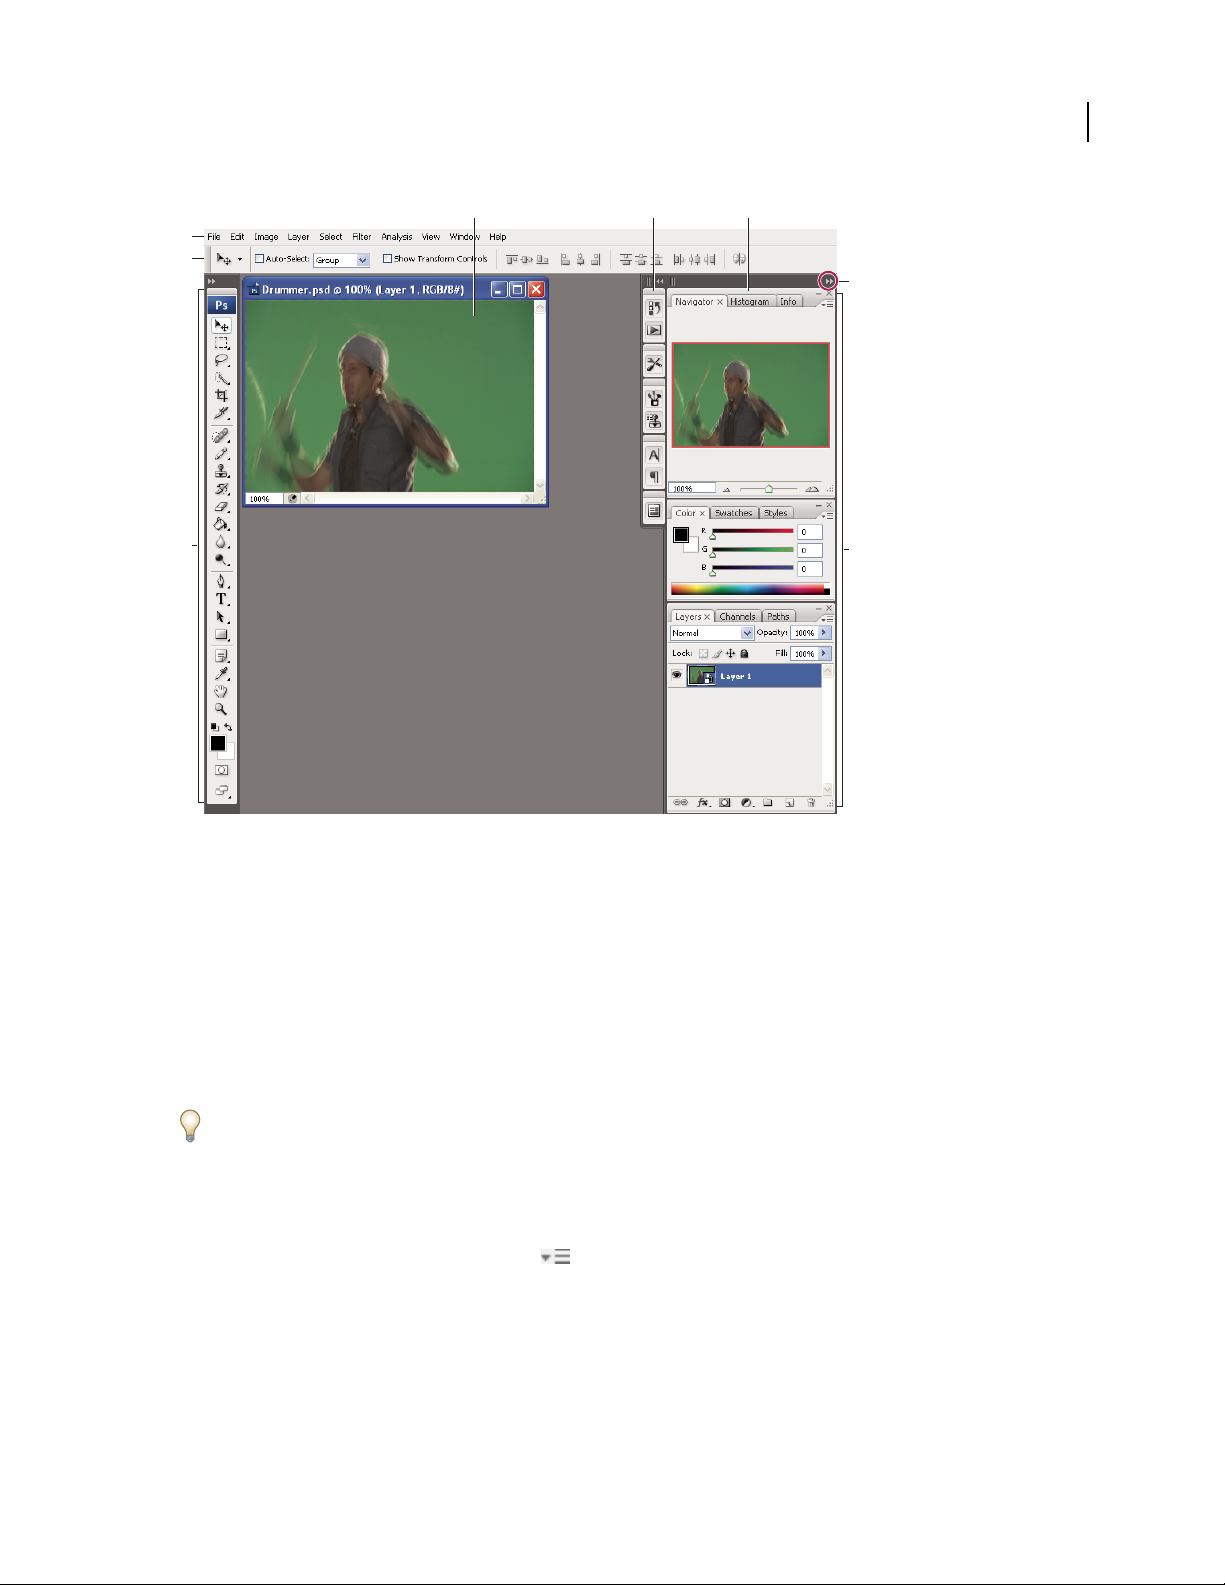
FLASH CS3
User Guide
A B C
D
E
G
17
F
Default Photoshop workspace
A. Document window B. Dock of panels collapsed to icons C. Panel title bar D. Menu bar E. Options bar F. Tools palette G. Collapse To
Icons button H. Three palette (panel) groups in vertical dock
H
For a video on understanding the workspace, see www.adobe.com/go/vid0187.
Hide or show all panels
• (Illustrator, InCopy, InDesign, Photoshop) To hide or show all panels, including the Tools panel and options bar
or Control panel, press Tab.
• (Illustrator, InCopy, InDesign, Photoshop) To hide or show all panels except the Tools panel and options bar or
Control panel, press Shift+Tab.
You can temporarily display panels hidden by these techniques by moving the pointer to the edge of the application
window (Windows) or to the edge of the monitor (Mac OS) and hovering over the strip that appears.
• (Flash) To hide or show all panels, press F4.
Display panel menu options
❖ Position the pointer on the panel menu icon in the upper-right corner of the panel, and press the mouse
button.
(Illustrator) Adjust panel brightness
❖ In User Interface preferences, move the Brightness slider. This control affects all panels, including the Control
panel.
Page 24
Reconfigure the Tools panel
You can display the tools in the Tools panel in a single column, or side by side in two columns.
In InDesign, you also can switch from single-column to double-column display by setting an option in Interface
preferences.
❖ Click the double arrow at the top of the Tools panel.
Customize the workspace
To create a custom workspace, move and manipulate panels (called palettes in Photoshop and in Adobe Creative
Suite 2 components).
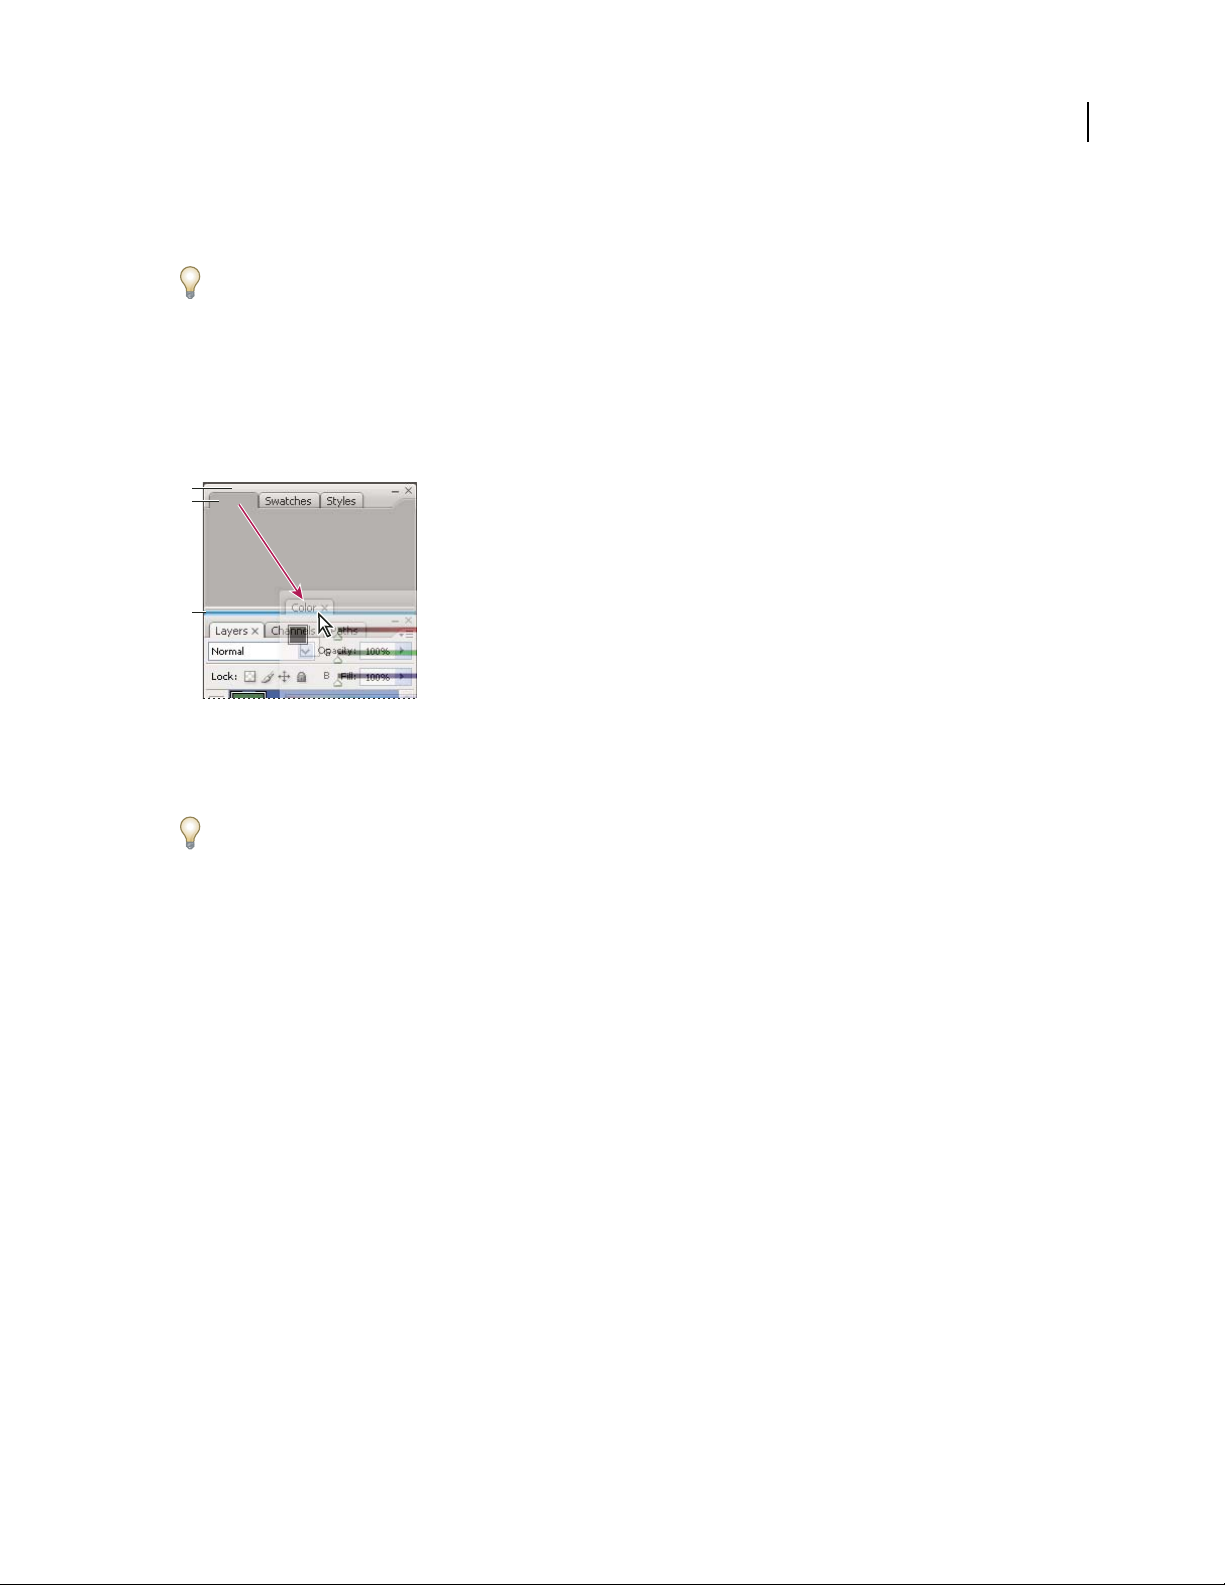
A
B
C
FLASH CS3
User Guide
18
Narrow blue drop zone indicates Color panel will be docked on its own above Layers panel group.
A. Title bar B. Ta b C. Drop zone
You can save custom workspaces and switch among them.
In Photoshop, you can change the font size of the text in the options bar, palettes, and tool tips. Choose a size from
the UI Font Size menu in General preferences.
Note: For a video on customizing the workspace in Illustrator, see www.adobe.com/go/vid0032. For a video on custom-
izing the workspace in InDesign, see www.adobe.com/go/vid0065.
Dock and undock panels
A dock is a collection of panels or panel groups displayed together, generally in a vertical orientation. You dock and
undock panels by moving them into and out of a dock.
Note: Docking is not the same as stacking. A stack is a collection of free-floating panels or panel groups, joined top to
bottom.
• To dock a panel, drag it by its tab into the dock, at the top, bottom, or in between other panels.
• To dock a panel group, drag it by its title bar (the solid empty bar above the tabs) into the dock.
• To remove a panel or panel group, drag it out of the dock by its tab or title bar. You can drag it into another dock
or make it free-floating.
Page 25
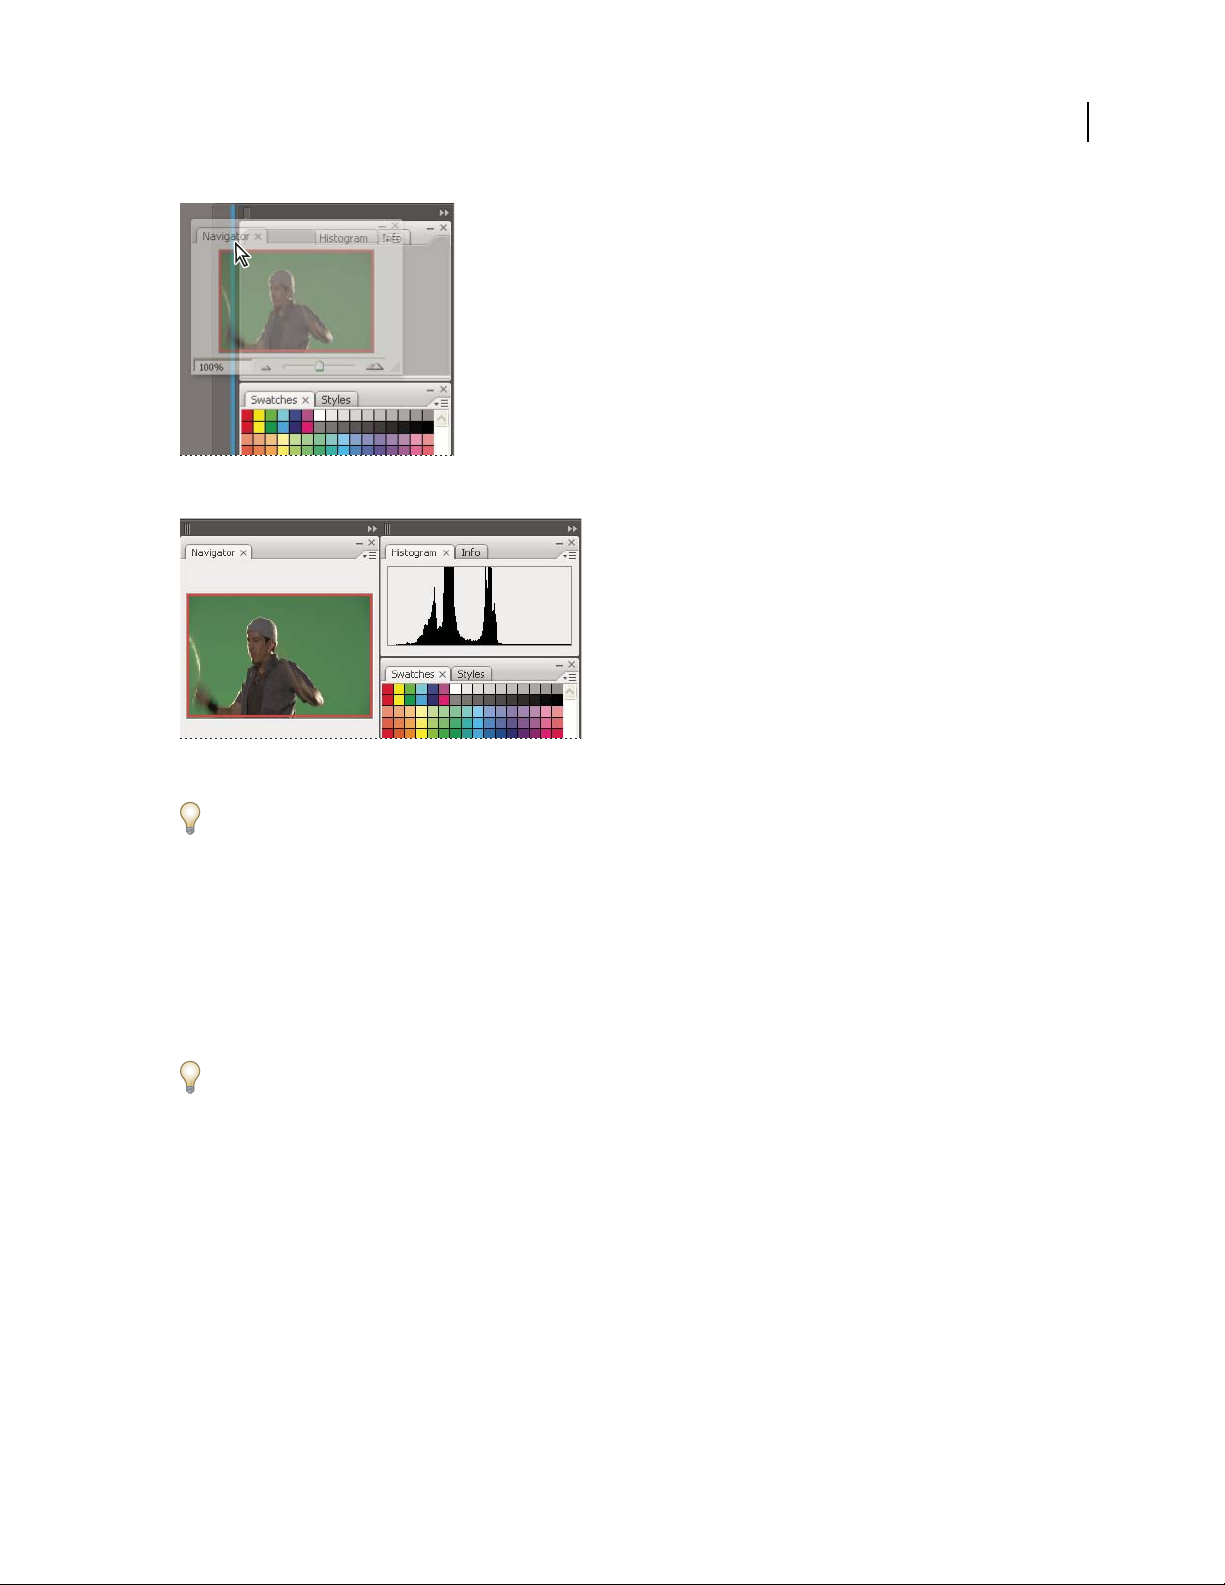
Navigator panel being dragged out to new dock, indicated by blue vertical highlight
FLASH CS3
User Guide
19
Navigator panel now in its own dock
To prevent panels from filling all space in a dock, drag the bottom edge of the dock up so it no longer meets the edge
of the workspace.
Move panels
As you move panels, you see blue highlighted drop zones,areaswhereyoucanmovethepanel.Forexample,youcan
moveapanelupordowninadockbydraggingittothenarrowbluedropzoneaboveorbelowanotherpanel.Ifyou
drag to an area that is not a drop zone, the panel floats freely in the workspace.
• To move a panel, drag it by its tab.
• To move a panel group or a stack of free-floating panels, drag the title bar.
Press Ctrl (Windows) or Control (Mac OS) while moving a panel to prevent it from docking.
Add and remove docks and panels
If you remove all panels from a dock, the dock disappears. You can create new docks by moving panels to drop zones
next to existing docks or at the edges of the workspace.
• To remove a panel, click itsclose icon (the X at the upper-right corner of the tab), or deselect it from the Window menu.
• To add a panel, select it from the Window menu and dock it wherever you wish.
Manipulate panel groups
• To move a panel into a group, drag the panel’s tab to the highlighted drop zone at the top of the group.
Page 26
FLASH CS3
User Guide
Adding a panel to a panel group
• To rearrange panels in a group, drag a panel’s tab to a new location in the group.
• To remove a panel from a group so that it floats freely, drag the panel by its tab outside the group.
• To make a panel appear at the front of its group, click its tab.
• To move grouped panels together, drag their title bar (above the tabs).
Stack free-floating panels
When you drag a panel out of its dock but not into a drop zone, the panel floats freely, allowing you to position it
anywhere in the workspace. Panels may also float in the workspace when first selected from the Window menu. You
can stack free-floating panels or panel groups together so that they move as a unit when you drag the topmost title
bar. (Panels that are part of a dock cannot be stacked or moved as a unit in this way.)
20
Free-floating stacked panels
• To stack free-floating panels, drag a panel by its tab to the drop zone at the bottom of another panel.
• To change the stacking order, drag a panel up or down by its tab.
Note: Be sure to release the tab over the narrow drop zone between panels, rather than the broad drop zone in a title bar.
• To remove a panel or panel group from the stack, so that it floats by itself, drag it out by its tab or title bar.
Resize or minimize panels
• To resize a panel, drag any side of the panel or drag the size box at its lower-right corner. Some panels, such as the
Color panel in Photoshop, cannot be resized by dragging.
• To change the width of all the panels in a dock, drag the gripper at the top left of the dock.
• To minimize a panel, panel group, or stack of panels, click the Minimize button in its title bar.
You can open a panel menu even when the panel is minimized.
Page 27
FLASH CS3
User Guide
Minimize button
Manipulate panels collapsed to icons
Collapse panels to icons to reduce clutter on the workspace. (In some cases, panels are collapsed to icons in the
default workspace.) Click a panel icon to expand the panel. You can expand only one panel or panel group at a time.
21
Panels collapsed to icons
Panels expanded from icons
• To collapse or expand all panels in a dock, click the double arrow at the top of the dock.
• To resize panel icons so that you see only the icons (and not the labels), drag the gripper at the top of the dock
toward the icons until the text disappears. (To display the icon text again, drag the gripper away from the panels.)
• To expand a single panel icon, click it.
• To collapse an expanded panel back to its icon, click its tab, its icon, or the double arrow in the panel’s title bar.
If you select Auto-Collapse Icon Panels from the Interface or User Interface Options preferences, an expanded panel
icon will collapse automatically when you click away from it.
• To add a panel or panel group to an icon dock, drag it in by its tab or title bar. (Panels are automatically collapsed
to icons when added to an icon dock.)
• To move a panel icon (or panel icon group), drag the bar that appears above the icon. You can drag panel icons up
and down in the dock, into other docks (where they appear in the panel style of that dock), or outside the dock
(where they appear as free-floating, expanded panels).
Page 28

FLASH CS3
User Guide
Save, delete, and switch between workspaces
Bysavingthecurrentsizeandpositionofpanelsasanamedworkspace,youcanrestorethatworkspaceevenifyou
move or close a panel. The names of saved workspaces appear in the Window > Workspace menu.
In Photoshop, the saved workspace can include a specific keyboard shortcut set and menu set.
Save a custom workspace
1
With the workspace in the configuration you want to save, do one of the following:
• (Photoshop, Illustrator, InDesign) Choose Window > Workspace > Save Workspace.
• (Flash) Choose Window > Workspace > Save Current, or choose Save Current from the Workspace menu in the
Edit bar.
• (Photoshop) Choose Save Workspace from the Workspace menu in the options bar.
2 Type a name for the workspace.
3 (Photoshop) Under Capture, select one or more options:
Palette Locations Saves the current palette locations.
Keyboard Shortcuts Saves the current set of keyboard shortcuts.
Menus Saves the current set of menus.
22
4 Click OK.
Display or switch between workspaces
Flash, Illustrator, InDesign, and Photoshop include preset workspaces designed to make certain tasks easier.
• Choose Window > Workspace, and select a workspace.
• (Photoshop) Select a workspace from the Workspace menu in the options bar.
• (Flash) Select a workspace from the Workspace menu in the Edit bar.
(InDesign and Photoshop) Assign keyboard shortcuts to each workspace to navigate among them quickly.
Delete a custom workspace
• (Illustrator)Choose Window > Workspace > Manage Workspaces, select the workspace, and then click theDelete icon.
• (InDesign) Choose Window > Workspace > Delete Workspace, select the workspace, and then click Delete.
• (Flash) Choose Manage from the Workspace menu in the Edit bar, select the workspace, and then click Delete.
Alternatively, choose Window > Workspace > Manage, select the workspace, and then click Delete.
• (Photoshop) Choose Delete Workspace from the Workspace menu in the options bar. Alternatively, choose
Window > Workspace > Delete Workspace, select the workspace, and then click Delete.
(Photoshop) Start with the last or default palette locations
When you start Photoshop, palettes can either appear in their original default locations, or appear as you last used them.
❖ In Interface preferences:
• To display palettes in their last locations on startup, select Remember Palette Locations.
• To display palettes in their default locations on startup, deselect Remember Palette Locations.
Page 29
FLASH CS3
User Guide
Using the Stage and Tools panel
Welcome screen overview
When Flash is running with no documents open, the Welcome screen appears. The Welcome screen contains the
following four areas:
Open a Recent Item Lets you open your most recent documents (click the Open icon).
Create New Lists Flash file types, such as Flash documents and ActionScript™ files.
Create from Template Lists the templates most commonly used to create Flash documents.
Extend Links to the Flash Exchange website, where you can download helper applications, extensions, and related
information.
The Welcome screen also offers quick access to Help resources. You can take a tour of Flash, learn about documentation resources, and find Adobe Authorized Training facilities.
• To hide the Welcome screen, select Don’t Show Again.
• To show the Welcome screen, select Edit > Preferences (Windows) or select Flash > Preferences (Macintosh), and
select Show Welcome screen in the General category.
23
Using the Stage
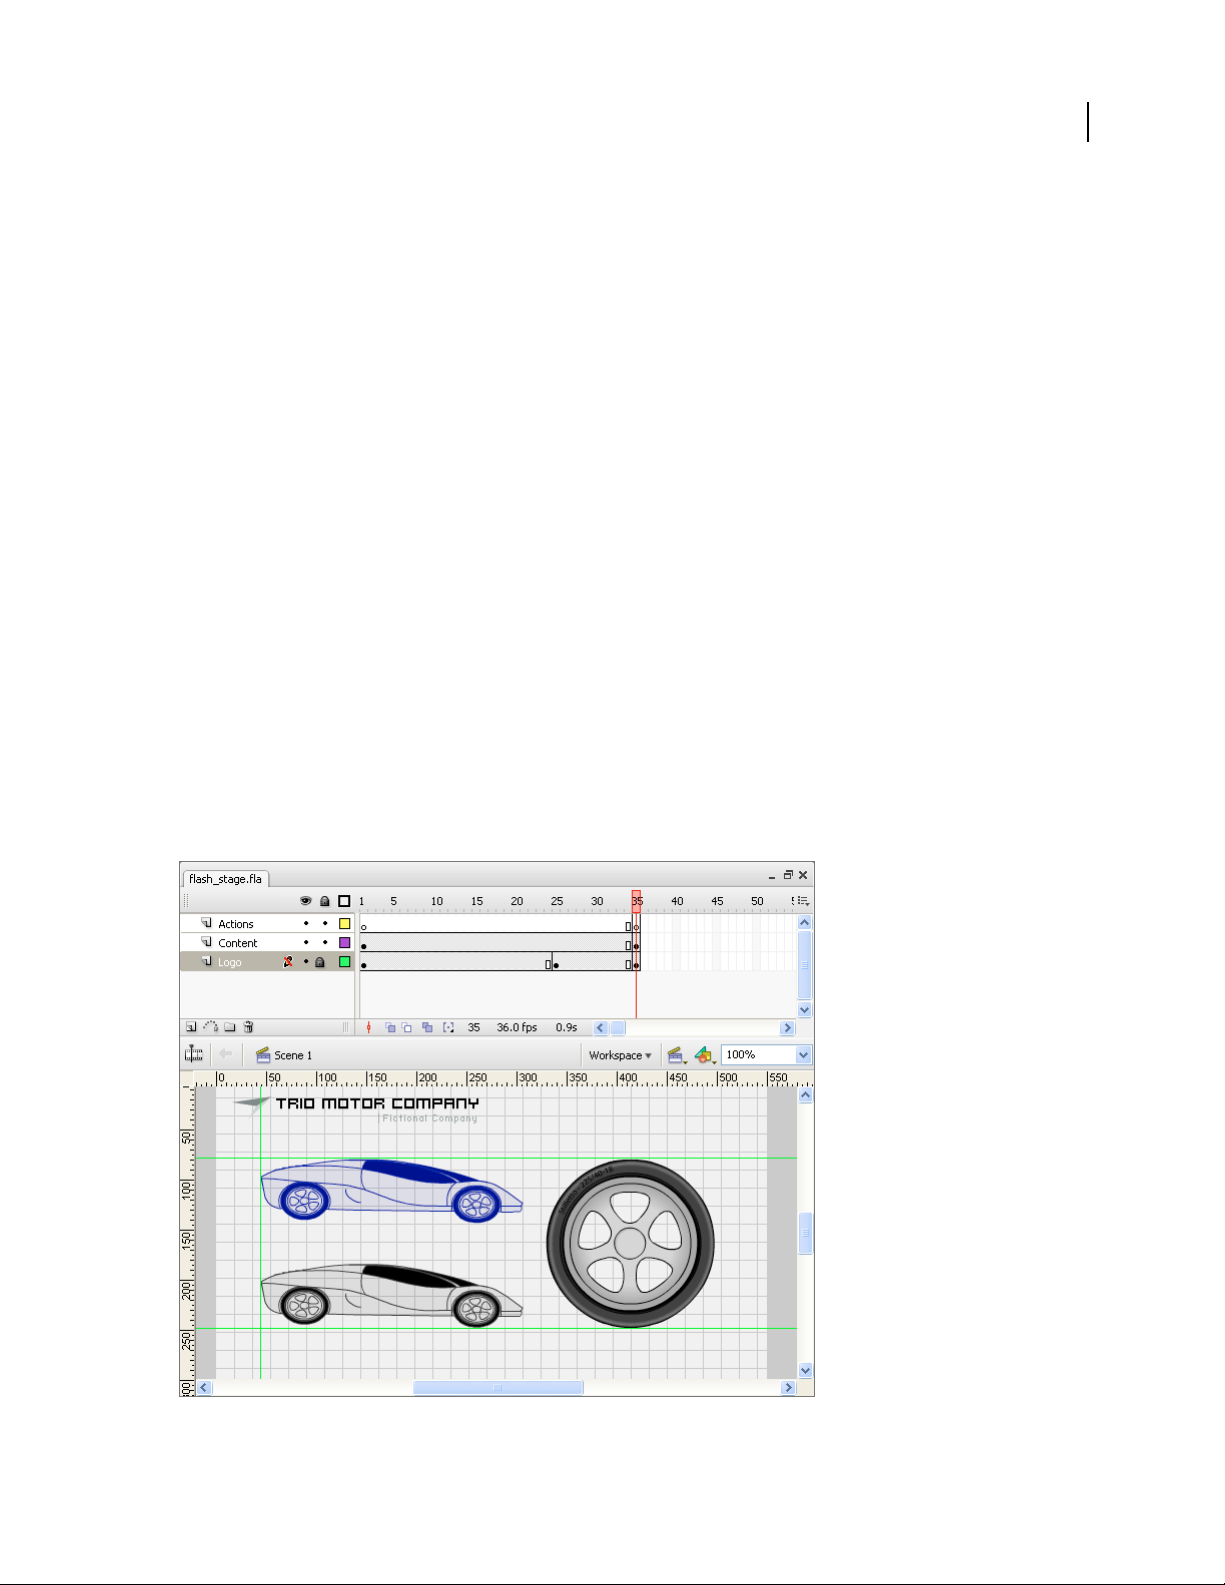
TheStageistherectangularareawhereyouplacegraphiccontentwhencreatingFlashdocuments.TheStageinthe
authoring environment represents the rectangular space in Flash Player or in a web browser window where your
document appears during playback. To change the view of the Stage as you work, zoom in and out. To help you
position items on the Stage, you can use the grid, guides, and rulers.
The Timeline and Stage with content
Page 30

FLASH CS3
User Guide
For a video tutorial about the Flash interface, see www.adobe.com/go/vid0116.
Zoom the Stage
To view the entire Stage on the screen, or to view a particular area of your drawing at high magnification, change the
magnification level. The maximum magnificationdepends on theresolutionof your monitor and thedocument size.
The minimum value for zooming out on the Stage is 8%. The maximum value for zooming in on the Stage is 2000%.
• To zoom in on an element, select the Zoom tool in the Tools panel, and click the element. To switch the Zoom
tool betweenzooming in orout, use the Enlarge or Reduce modifiers (in the optionsarea of theTools panel
when the Zoom tool is selected) or Alt-click (Windows) or Option-click (Macintosh).
• To zoom in so that a specific area of your drawing fills the window, drag a rectangular selection on the Stage with
the Zoom tool.
• To zoom in on or out of the entire Stage, select View > Zoom In or View > Zoom Out.
• To zoom in or out by a specified percentage, select View > Magnification, and select a percentage from the
submenu or select a percentage from the Zoom control at the upper-right corner of the Timeline.
• To scale the Stage so that it fits completely in the application window, select View > Magnification > Fit in
Window.
• To show the contents of the current frame, select View > Magnification > Show All, or select Show All from the
Zoom control at the upper-right side of the application window. If the scene is empty, the entire Stage appears.
• ToshowtheentireStage,selectView>Magnification>ShowFrameorselectShowFramefromtheZoomcontrol
at the upper-right corner of the Timeline.
• To show the workspace surrounding the Stage, or to view elements in a scene that are partly or completely outside
of the Stage area, select View > Pasteboard. The pasteboard appears in light gray. For example, to have a bird fly
into a frame, initially position the bird outside of the Stage in the pasteboard and animate it into the Stage area.
24
Move the view of the Stage
When the Stage is magnified, you may not be able to see all of it. To change the view without having to change the
magnification, use the Hand tool to move the Stage.
❖ In the Tools panel, select the Hand tool and drag the Stage. To temporarily switch between another tool and the
Hand tool, hold down the Spacebar and click the tool in the Tools panel.
Use rulers
Whenrulersshow,theyappearalongthetopandleftsidesofthedocument.Youcanchangetheunitofmeasureused
in the rulers from the default of pixels to another unit. When you move an element on the Stage with the rulers
displayed, lines indicating the element’s dimensions appear on the rulers.
• To show or hide rulers, select View > Rulers.
• To specify the rulers’ unit of measure for a document, select Modify > Document, and select a unit from the Ruler
Units menu.
See also
“Snapping” on page 181
Page 31

FLASH CS3
User Guide
Use guides
When rulers show (View > Rulers), you can drag horizontal and vertical guides from the rulers onto the Stage.
When you create nested timelines, draggable guides appear on the Stage only when the Timeline in which they were
created is active.
To create custom guides or irregular guides, use guide layers.
• To display or hide the drawing guides, select View > Guides > Show Guides.
Note: If the grid is visible and Snap to Grid is turned on when you create guides, guides snap to the grid.
• To turn snapping to guides on or off, select View > Snapping > Snap to Guides.
Note: Snapping to guides takes precedence over snapping to the grid in places where guides fall between grid lines.
• Tomove a guide,click anywhere on theruler with the Selection tool and drag theguide to the desired place on the
Stage.
• Toremove a guide, use the Selection tool with guides unlocked todrag the guide to thehorizontal or vertical ruler.
• To lock guides, select View > Guides > Lock Guides or use the Lock Guides option in the Edit Guides (View >
Guides > Edit Guides) dialog box.
• To clear guides, select View > Guides > Clear Guides. If you are in document-editing mode, all guides in the
document are cleared. If you are in symbol-editing mode, only guides used in symbols are cleared.
25
See also
“Use guide layers” on page 40
Set guide preferences
1
Select View > Guides > Edit Guides and do any of the following:
• To set Color, click the triangle in the color box and select a guide line color from the palette. The default guide
color is green.
• To display or hide guides, select or deselect Show Guides.
• To turn snapping to guides on or off, select or deselect Snap To Guides.
• Select or deselect Lock Guides.
• To set Snap Accuracy, select an option from the pop-up menu.
• To remove all guides, click Clear All. Clear All removes all guides from the current scene.
• To save the current settings as the default, click Save Default.
2 Click OK.
Use the grid
The grid appears in a document as a set of lines behind the artwork in all scenes.
Display or hide the drawing grid
❖ Do one of the following:
• Select View > Grid > Show Grid.
• Press Control+'' (quote) (Windows) or Command+'' (quote) (Macintosh).
Page 32

FLASH CS3
User Guide
Turn snapping to grid lines on or off
❖ Select View > Snapping > Snap to Grid.
Set grid preferences
1
Select View > Grid > Edit Grid and select from the options.
2 To save the current settings as the default, click Save Default.
About the main toolbar and edit bar
The menu bar at the top of the application window contains menus with commands for controlling functionality.
The edit bar, at the top of the Stage, contains controls and information for editing scenes and symbols, and for
changing the magnification level of the Stage.
See also
“Using symbols, instances, and library assets” on page 208
“Working with scenes” on page 75
26
Tools panel overview
The tools in the Tools panel let you draw, paint, select, and modify artwork, as well as change the view of the Stage.
The Tools panel is divided into four sections:
• The tools area contains drawing, painting, and selection tools.
• The view area contains tools for zooming and panning in the application window.
• The colors area contains modifiers for stroke and fill colors.
• The options area contains modifiers for the currently selected tool. Modifiers affect the tool’s painting or editing
operations.
To specify which tools to display in the authoring environment, use the Customize Tools Panel dialog box.
See also
“Using Flash drawing and painting tools” on page 165
“Selecting objects” on page 197
Use the Tools panel
To show or hide the Tools panel, select Window > Tools.
Select tools
❖ Do one of the following:
• Click the tool in the Tools panel. Depending on the tool you select, a set of modifiers might appear in the options
area at the bottom of the Tools panel.
• Press the tool’s keyboard shortcut. To view the keyboard shortcuts, select Edit > Keyboard Shortcuts (Windows)
or Flash > Keyboard Shortcuts (Macintosh). On the Macintosh, youmight need to move the mouse to see the new
pointer appear.
Page 33

FLASH CS3
User Guide
• Toselect a toollocatedin the pop-up menufor a visible tool such as the Rectangle tool, press the icon of thevisible
tool and select another tool from the pop-up menu.
Customize the Tools panel
To specify which tools appear in the authoring environment, use the Customize Tools Panel dialog box to add or
remove tools from the Tools panel.
When more than one tool appears in a location, the top tool in the group (the most recently used) appears with an
arrow in the lower-right corner of its icon. This arrow indicates that additional tools are present in a pop-up menu.
Thesamekeyboardshortcutfunctionsforalltoolsinthepop-upmenu.Whenyoupressandholdthemousebutton
on the icon, the other tools in the group appear in a pop-up menu.
1 To show the Customize Tools Panel dialog box, do one of the following:
• (Windows) Select Edit > Customize Tools panel.
• (Macintosh) Select Flash > Customize Tools panel.
The Available Tools menu indicates the tools that are currently available. The Current Selection menu indicates the
tools currently assigned to the selected location in the Tools panel.
2 To browse through the tools to specify the location to assign to another tool, click a tool in the Tools panel image
or use the arrows.
3 To add a tool to the selected location, select the tool in the Available Tools list and click Add. You can assign a tool
to more than one location.
4 To remove a tool from the selected location, select the tool in the Current Selection scroll list and click Remove.
5 To restore the default Tools Panel layout, click Restore Default in the Customize Tools Panel dialog box.
6 Click OK to apply your changes and close the Customize Tools Panel dialog box.
27
Use context menus
Context menus contain commands relevant to the current selection. For example, when you select a frame in the
Timeline window, the context menu contains commands for creating, deleting, and modifying frames and
keyframes. Context menus exist for many items and controls in many locations, including on the Stage, in the
Timeline, in the Library panel, and in the Actions panel.
❖ Right-click (Windows) or Control-click (Macintosh) an item.
Set preferences in Flash
You can set preferences for general application operations, editing operations, and clipboard operations.
Page 34

FLASH CS3
User Guide
28
The General category in the Preferences dialog box
See also
“Specify drawing preferences” on page 164
“Change the display of frames in the Timeline” on page 36
“About the Timeline” on page 33
“Creating and managing documents” on page 52
“Substituting missing fonts” on page 264
“Set Pen tool preferences” on page 174
“AI File Importer preferences” on page 144
“PSD file import preferences” on page 151
Set preferences
1
Select Edit > Preferences (Windows) or Flash > Preferences (Macintosh).
2 Make a selection in the Category list and select from the respective options.
Set AutoFormat preferences for ActionScript
❖ Select any of the options. To see the effect of each selection, look in the Preview pane.
Page 35

FLASH CS3
User Guide
Set text preferences
• For Font Mapping Default, select a font to use when substituting missing fonts in documents you open in Flash.
• For Vertical Text options, select Default Text Orientation (deselected by default).
• To reverse the default text display direction, select Right To Left Text Flow (deselected by default).
• To turn off kerning for vertical text, select No Kerning (deselected by default). Turning off kerning is useful to
improve spacing for some fonts that use kerning tables.
• For Input Method, select the appropriate language.
Set warning preferences
• Toreceive a warning when you try to save documents with content that is specific to the Adobe® Flash® CS3 Profes-
sional authoring tool as a Flash 8 file, select Warn On Save For Adobe Flash 8 Compatibility (default).
• To receive a warning when you open a Flash document that uses fonts that are not installed on your computer,
select Warn On Missing Fonts (default).
• To receive a warning if the URL for a document changed since the last time you opened and edited it, select Warn
On URL Changes In Launch And Edit.
• To place a red X over any Generator objects as a reminder that Generator objects are not supported in Flash 8,
select Warn On Reading Generator Content.
• To receive an alert when Flash inserts frames in your document to accommodate audio or video files that you
import, select Warn On Inserting Frames When Importing Content.
• To receive an alert when selecting Default Encoding could potentially lead to data loss or character corruption,
select Warn On Encoding Conflicts When Exporting .as Files. (For example, if you create a file with English,
Japanese, and Korean characters and select Default Encoding on an English system, the Japanese and Korean
characters are corrupted.)
• To receive a warning when you attempt to edit a symbol with timeline effects applied to it, select Warn On
Conversion Of Effect Graphic Objects.
• ToreceiveawarningwhenyouexportadocumenttothisearlierversionofFlashPlayer,selectWarnOnExporting
To Flash Player 6 r65.
• To receive a warning when you create a site in which the local root folder overlaps with another site, select Warn
On Sites With Overlapped Root Folder.
• To receive a warning when you convert a symbol with a behavior attached to a symbol of a different type—for
example, when you convert a movie clip to a button—select Warn On Behavior Symbol Conversion.
• To receive a warning when you convert a symbol to a symbol of a different type, select Warn On Symbol
Conversion.
• To receive awarning when Flash converts agraphic object drawn in Object Drawing mode to a group, select Warn
On Automatically Converting From Drawing Object To Group.
• TodisplaywarningsoncontrolsforfeaturesnotsupportedbytheFlashPlayerversionthatthecurrentFLAfileis
targeting in its Publish settings, select Show Incompatibility Warnings On Feature Controls.
29
Set General preferences
On Launch Specify which document opens when you start the application.
Undo To set the number of undo or redo levels, enter a value from 2 to 300. Undo levels require memory; the more
undo levels you use, the more system memory is consumed. The default is 100.
Page 36

FLASH CS3
User Guide
Document- or Object-level undo Document-level undo maintains a single list of all your actions for the entire Flash
document. Object-level undo maintains separate lists of your actions for each object in your document. Object-level
lets you undo an action on one object without having to also undo actions on other objects that might have been
modified more recently than the target object.
Printing (Windows only) To disable PostScript output when printing to a PostScript printer, select Disable
PostScript. By default, this option is deselected. Select this option if you have problems printing to a PostScript
printer; however, this option slows down printing.
Test Movie To open a new document tab in the application window when you select Control > Test Movie, select
Open Test Movie In Tabs. The default is to open the test movie in its own window.
Selection To control how multiple elements are selected, select or deselect Shift Select. When Shift Select is off,
clicking additional elements adds them to the current selection. When Shift Select ison, clicking additional elements
deselects other elements unless you hold down Shift.
Show Tooltips Shows tooltips when the pointer pauses over a control. To hide the tooltips, deselect this option.
Contact Sensitive Select objects when any part of them is included in the marqueerectangle when dragging with the
Selection or Lasso tools. The default is that objects are only selected when the tool’s marquee rectangle completely
surrounds the object.
Timeline To use span-based selection in the Timeline, rather than the default frame-based selection, select Span
Based Selection.
30
Named Anchor On Scene Make the first frame of eachscene in a document anamed anchor.Named anchors let you
use the Forward and Back buttons in a browser to jump from scene to scene.
Highlight Color To use the current layer’s outline color, select a color from the panel, or select Use Layer Color.
Project To have all files in a project close when the project file is closed, select Close Files With Project.
Save Files On Test Or Publish Project Save each file in a project whenever the project is tested or published.
Clipboard preferences
Bitmaps (Windows only)
To specify Color Depth and Resolution parameters for bitmaps copied to the clipboard, select their respective
options.
To apply anti-aliasing, select Smooth.
To specify the amount of RAM that is used when placing a bitmap image on the Clipboard, enter a value in the Size
Limit text field. Increase this value when working with large or high-resolution bitmap images.
Gradient Quality (Windows only) To specify the quality of gradient fills placed in the Windows metafile, select an
option. Choosing a higher quality increases the time required to copy artwork. To specify gradient quality when
pasting items to a location outside of Flash, use this setting. When you are pasting in Flash, the full gradient quality
of the copied data is preserved regardless of the Gradients setting on the Clipboard.
PICT Settings (Macintosh only) To specify how PICT files are handled, use the following settings.
• Type To preserve data copied to the Clipboard as vector artwork, select Objects. To convert the copied artwork to
a bitmap, select one of the bitmap formats.
• Resolution Enter a value.
• Include PostScript Select to include PostScript data.
Page 37

FLASH CS3
User Guide
• Gradients To specify gradient quality in the PICT file, select an option. Choosing a higher quality increases the
time required to copy artwork. To specify gradient quality when pasting items to a location outside of Flash, use the
Gradients setting. When you are pasting in Flash, the full gradient quality of the copied data is preserved regardless
of the Gradient setting.
• FreeHand Text To keep text editable in a pasted FreeHand file, select Maintain Text As Blocks.
Customize keyboard shortcuts
To match the shortcuts you use in other applications, or to streamline your workflow, select keyboard shortcuts. By
default, Flash uses built-in keyboard shortcuts designed for the application. You can also select a built-in keyboard
shortcut set from one of several graphics applications.
View or print the current set of keyboard shortcuts
1
Select Edit > Keyboard Shortcuts (Windows) or Flash > Keyboard Shortcuts (Macintosh).
2 In the Keyboard Shortcuts dialog box, select the shortcut set to view from the Current Set pop-up menu.
3 Click the Export Set As HTML button .
4 Select a nameand location for the exported HTML file. The default file name is the name ofthe selected shortcut set.
5 Click Save.
6 Find the exported file in the folder you selected and open the file in a web browser.
7 To print the file, use the browser’s Print command.
31
Select a keyboard shortcut set
1
Select Edit > Keyboard Shortcuts (Windows) or Flash > Keyboard Shortcuts (Macintosh).
2 In the Keyboard Shortcuts dialog box, select a shortcut set from the Current Set pop-up menu.
Create a keyboard shortcut set
1
Select a keyboard shortcut set and click the Duplicate Set button.
2 Enter a name for the new shortcut set and click OK.
Rename a custom keyboard shortcut set
1
In the Keyboard Shortcuts dialog box, select a shortcut set from the Current Set pop-up menu.
2 Click the Rename Set button, enter a new name, and click OK.
Add or remove a keyboard shortcut
1
Select Edit > Keyboard Shortcuts (Windows) or Flash > Keyboard Shortcuts (Macintosh) and select the set to
modify.
2 From the Commands pop-up menu, select a category to view shortcuts for the selected category.
3 In the Commands list, select the command for which you want to add or remove a shortcut. An explanation of
the selected command appears in the description area in the dialog box.
4 Do one of the following:
• To add a shortcut, click the Add Shortcut (+) button.
• To remove a shortcut, click the Remove Shortcut (-) button and proceed to step 6.
Page 38

5 If you are adding a shortcut, enter the new shortcut key combination in the Press Key box.
Note: To enter the key combination, press the keys on the keyboard. You do not need to spell out key names, such as
Control, Option, and so on.
6 Click Change.
7 Repeat this procedure to add or remove additional shortcuts, and click OK.
Delete a keyboard shortcut set
1
Select Edit > Keyboard Shortcuts (Windows) or Flash > Keyboard Shortcuts (Macintosh). In the Keyboard
Shortcuts dialog box, click Delete Set.
2 In the Delete Set dialog box, select a shortcut set and click Delete.
Note: You cannot delete the keyboard shortcut sets built into Flash.
Create custom keyboard shortcuts
You can create and modify keyboard shortcuts.
Customize keyboard shortcuts
1
Select Edit > Keyboard Shortcuts (Windows) or Flash > Keyboard Shortcuts (Macintosh).
FLASH CS3
User Guide
32
The Keyboard Shortcuts dialog box appears.
2 Use the following options to add, delete, or edit keyboard shortcuts:
Current Set Lets you choose a set of predeterminedshortcuts (listed at thetop of the menu), or any custom setyou’ve
defined.
Commands Lets you select a category of commands to edit (for example, menu commands). The command list
displaysthecommandsassociatedwiththecategoryyouselectedfromtheCommandspop-upmenu,alongwiththe
assigned shortcuts. The Menu Commands category displays this list as a tree view that replicates the structure of the
menus. The other categories list the commands by name (such as Quit Application), in a flat list.
Shortcuts Displays all shortcuts assigned to the selected command.
Add Item Adds a new shortcut to the current command. To add a new blank line to the Shortcuts box, click this
button. To add a new keyboard shortcut for this command, enter a new key combination and click Change. Each
command can have two different keyboard shortcuts; if two shortcuts are already assigned to a command, the Add
Item button does nothing.
Remove Item Removes the selected shortcut from the list of shortcuts.
Press Key Displays the key combination you enter when you’re adding or changing a shortcut.
Change Adds the key combination shown in the Press Key box to the list of shortcuts, or changes the selected
shortcut to the specified key combination.
Duplicate Duplicates the current set. Give the new set a name; the default name is the current set’s name with
the word copy appended to it.
Rename Renames the current set.
Export Set As HTML Saves the current set in an HTML table format for easy viewing and printing. Open the
HTML file in your browser and print the shortcuts for easy reference.
Delete Deletes a set. You cannot delete the active set.
Page 39

FLASH CS3
User Guide
3 Click OK.
Remove a shortcut from a command
1
FromtheCommandspop-upmenu,selectacommandcategory,selectacommandfromtheCommandslist,and
select a shortcut.
2 Click Remove Item (-).
Add a shortcut to a command
1
From the Commands pop-up menu, select a command category and select a command.
2 Prepare to add a shortcut by doing one of the following:
• If fewer than two shortcuts are already assigned to the command, click Add Item . A new blank line appears in
the Shortcuts box, and the insertion point moves to the Press Key box.
• Iftwoshortcutsarealreadyassignedtothecommand,selectoneofthemtobereplacedbythenewshortcut,and
click in the Press Key box.
3 Press a key combination.
Note: If a problem occurs with the key combination (for example, if the key combination is already assigned to another
command), an explanatory message appears just below the Shortcuts box and you may be unable to add or edit the
shortcut.
33
4 Click Change.
Edit an existing shortcut
1
FromtheCommandspop-upmenu,selectacommandcategory,selectacommandfromtheCommandslist,and
select a shortcut to change.
2 Click in the Press Key box, enter a new key combination, and click Change.
Note: If a problem occurs with the key combination (for example, if the key combination is already assigned to another
command), an explanatory message appears just below the Shortcuts box and you may be unable to add or edit the
shortcut.
The Timeline
About the Timeline
The Timeline organizes and controls a document’s content over time in layers and frames. Like films, Flash
documentsdividelengthsoftimeintoframes.Layersarelikemultiplefilmstripsstackedontopofoneanother,each
containing a differentimage that appearson theStage. The majorcomponents of the Timeline are layers, frames, and
the playhead.
Layers in a document are listed in a column on the left side of the Timeline. Frames contained in each layer appear
in a row to the right of the layer name. The Timeline header at the top of the Timeline indicates frame numbers. The
playhead indicates the current frame displayed on the Stage. As a document plays, the playhead moves from left to
right through the Timeline.
The Timeline status displayed at the bottom of the Timeline indicates the selected frame number, the current frame
rate, and the elapsed time to the current frame.
Page 40

FLASH CS3
User Guide
Note: When an animation is played, the actual frame rate is displayed; this may differ from the document’s frame rate
setting if the computer can’t calculate and display the animation quickly enough.
B
A
34
C
D
I
H KJ L
Parts of the Timeline
A. Playhead B. Empty keyframe C. Timeline header D. Guide layer icon E. Frame View pop-up menu F. Frame-by-frame animation
G. Tweened animation H. Scroll To Playhead button I. Onion-skinning buttons J. Current Frame indicator K. Frame Rate indicator
L. Elapsed Time indicator
E
F
G
The Timeline shows where animation occurs in a document, including frame-by-frame animation, tweened
animation, and motion paths.
Controls in the layers section of the Timeline let you hide, show, lock, or unlock layers, as well as display layer
contents as outlines. You can drag frames to a new location on the same layer or to a different layer.
For a video tutorial about the Timeline, keyframes, and frame rates, see www.adobe.com/go/vid0123.
See also
“Manage frames and keyframes in the Timeline” on page 70
“Creating motion” on page 229
Change the appearance of the Timeline
By default, the Timeline appears at the top of the main application window, above the Stage. To change its position,
detach the Timeline from the Stage and float it in its own window or dock it to any other panel you choose. You can
also hide the Timeline.
To change the number of layers and frames that are visible, resize the Timeline. To view additional layers when the
Timeline contains more layers than can be displayed, use the scroll bars on the right side of the Timeline.
Page 41

FLASH CS3
User Guide
Dragging the Timeline
• To move the Timeline when it is docked to the application window, drag the gripper (2 dotted vertical bars) at the
upper-left corner of the Timeline.
• To dock an undocked Timeline to the application window, drag the gripper (2 dotted vertical bars) to the top of
the application window.
• To dock an undocked Timeline to other panels, drag the Timeline title bar tab to the location you choose. To
prevent the Timeline from docking to other panels, press Control while you drag. A blue bar appears to indicate
where the Timeline will dock.
• To lengthen or shorten layer name fields in the Timeline panel, drag the bar separating the layer names and the
frames portions of the Timeline.
35
Resize the Timeline
• If the Timeline is docked to the main application window, drag the bar separating the Timeline from the Stage
area.
• If the Timeline is not docked to the main application window, drag the lower-right corner (Windows) or the size
box in the lower-right corner (Macintosh).
Move the playhead
The playhead moves through the timeline as a document plays to indicate the current frame displayed on the Stage.
The Timelineheader shows the frame numbers of the animation. To display a frame on the Stage, move the playhead
to the frame in the Timeline.
To display a specific frame when you’re working with a large number of frames that can’t all be displayed in the
Timeline at once, move the playhead along the Timeline.
• To go to a frame, click the frame’s location in the Timeline header, or drag the playhead to the desired position.
• To center the Timeline on the current frame, click the Scroll To Playhead button at the bottom of the Timeline.
Moving the playhead
Page 42

FLASH CS3
User Guide
Change the display of frames in the Timeline
1 To display the Frame View pop-up menu, click Frame View in the upper-right corner of the Timeline.
Frame View pop-up menu
2 Select from the following options:
• To change the width of frame cells, select Tiny, Small, Normal, Medium, or Large. (The Large frame-width setting
is useful for viewing the details of sound waveforms.)
• To decrease the height of frame cell rows, select Short.
36
Short and Normal frame view options
• To turn the tinting of frame sequences on or off, select Tinted Frames.
• To display thumbnails ofthe content of eachframe scaled to fit the Timelineframes, select Preview. This can cause
the apparent content size to vary and requires extra screen space.
• To display thumbnails of each full frame (including empty space), select Preview In Context. This is useful for
viewing the way elements move in their frames over the course of the animation, but previews are generally
smaller than with the Preview option.
About layers
Layers help youorganize the artworkin your document.You candraw and edit objects on one layer without affecting
objects on another layer. In areas of the Stage with nothing on a layer, you can see through it to the layers below.
To draw, paint, or otherwise modify a layer or folder, select the layer in the Timeline to make it active. A pencil icon
next to a layer or folder name in the Timeline indicates that the layer or folder is active. Only one layer can be active
at a time (although more than one layer can be selected at a time).
When you create a Flash document, it contains only one layer. To organize the artwork, animation, and other
elements in your document, add more layers. You can also hide, lock, or rearrange layers. The number of layers you
can create is limited only by your computer’s memory, and layers do not increase the file size of your published SWF
file. Only the objects you place into layers add to the file size.
Page 43

FLASH CS3
User Guide
To organize and manage layers, create layer folders and place layers in them. You can expand orcollapse layer folders
in the Timeline without affecting what you see on the Stage. Use separate layers or folders for sound files, ActionScript, frame labels, and frame comments. This helps you find these items quickly to edit them.
To help create sophisticated effects, use special guide layers to make drawing and editing easier, and mask layers.
Create layers and layer folders
When you create a layer or folder, it appearsabovethe selected layer. The newly addedlayerbecomes the active layer.
Create a layer
❖ Do one of the following:
• Click the Insert Layer button at the bottom of the Timeline.
• Select Insert > Timeline > Layer.
• Right-click (Windows) or Control-click (Macintosh) a layer namein theTimeline and select Insert Layerfrom the
context menu.
Create a layer folder
❖ Do one of the following:
• Select a layer or folder in the Timeline and select Insert > Timeline > Layer Folder.
• Right-click (Windows) or Control-click (Macintosh) a layer name in the Timeline and select Insert Folder from
the context menu. The new folder appears above the layer or folder you selected.
37
View layers and layer folders
A red X next to the name of a layer or folder in the Timeline indicates that a layer or folder is hidden. In the Publish
Settings, you can choose whether hidden layers are included when you publish a SWF file.
To distinguish which layer an object belongs to, display all objects on a layer as colored outlines.
Show or hide a layer or folder
❖ Do one of the following:
• To hide a layer or folder, click in the Eye column to the right of the layer or folder name in the Timeline. To show
the layer or folder, click in it again.
• To hide all the layers and folders in the Timeline, click the Eye icon. To show all layers and folders, click it again.
• To show or hide multiple layers or folders, drag through the Eye column.
• To hide all layers and folders other than the current layer or folder, Alt-click (Windows) or Option-click
(Macintosh) in the Eye column to the right of a layer or folder name. To show all layers and folders, Alt-click or
Option-click it again.
View the contents of a layer as outlines
❖ Do one of the following:
• To display all objects on that layer as outlines, click in the Outline column to the right of the layer’s name. To turn
off outline display, click in it again.
• To display objects on all layers as outlines, click the outline icon. To turn off outline display on all layers, click it
again.
Page 44

FLASH CS3
User Guide
• To display objects on all layers other than the current layer as outlines, Alt-click (Windows) or Option-click
(Macintosh) in the Outline column to the right of a layer’s name. To turn off the outline display for all layers,
Alt-click or Option-click in it again.
Change a layer’s outline color
1
Do one of the following:
• Double-click the layer’s icon (the icon to the left of the layer name) in the Timeline.
• Right-click (Windows) or Control-click (Macintosh) the layer name and select Properties from the context menu.
• Select the layer in the Timeline and select Modify > Timeline > Layer Properties.
2 In the Layer Properties dialog box, click the Outline Color box, select a new color, and click OK.
Change layer height in the Timeline
1
Do one of the following:
• Double-click the layer’s icon (the icon to the left of the layer name) in the Timeline.
• Right-click (Windows) or Control-click (Macintosh) the layer name and select Properties from the context menu.
• Select the layer in the Timeline and select Modify > Timeline > Layer Properties.
2 In the Layer Properties dialog box, select an option for Layer Height and click OK.
38
Change the number of layers displayed in the Timeline
❖ Drag the bar that separates the Timeline from the Stage area.
Edit layers and layer folders
By default, new layers are named by the order in which they are created: Layer 1, Layer 2, and so on. To better reflect
their contents, rename layers.
Select a layer or folder
❖ Do one of the following:
• Click the name of a layer or folder in the Timeline.
• Click any frame in the Timeline of the layer to select.
• Select an object on the Stage that is located in the layer to select.
• To select contiguous layers or folders, Shift-click their names in the Timeline.
• To select discontiguous layers or folders, Control-click (Windows) or Command-click (Macintosh) their names
in the Timeline.
Rename a layer or folder
❖ Do one of the following:
• Double-click the name of the layer or folder in the Timeline and enter a new name.
• Right-click (Windows) or Control-click (Macintosh) the name ofthe layer or folderand select Properties fromthe
context menu. Enter the new name in the Name box and click OK.
• Select the layer or folder in the Timeline and select Modify > Timeline > Layer Properties. Enter the new name in
the Name box and click OK.
Page 45

FLASH CS3
User Guide
Lock or unlock one or more layers or folders
❖ Do one of the following:
• To lock a layer or folder, click in the Lock column to the right of the name. To unlock the layer or folder, click in
the Lock column again.
• To lock all layers and folders, click the padlock icon. To unlock all layers and folders, click it again.
• To lock or unlock multiple layers or folders, drag through the Lock column.
• To lock all other layers or folders, Alt-click (Windows) or Option-click (Macintosh) in the Lock column to the
right of a layer or folder name. To unlock all layers or folders, Alt-click or Option-click in the Lock column again.
Copy a layer
1
To select the entire layer, click the layer name in the Timeline.
2 To create a layer, click the Insert Layer button.
3 Select Edit > Timeline > Copy Frames.
4 Click the new layer and select Edit > Timeline > Paste Frames.
Copy the contents of a layer folder
1
Collapse the folder (click the triangle to the left of the folder name in the Timeline) and click the folder name to
select the entire folder.
2 Select Edit > Timeline > Copy Frames.
3 To create a folder, select Insert > Timeline > Layer Folder.
4 Click the new folder and select Edit > Timeline > Paste Frames.
39
Delete a layer or folder
1
To select the layer or folder, click its name in the Timeline or any frame in the layer.
2 Do one of the following:
• Click the Delete Layer button in the Timeline.
• Drag the layer or folder to the Delete Layer button.
• Right-click (Windows) or Control-click (Macintosh) the layer or folder name and select Delete Layer from the
context menu.
Note: When you delete a layer folder, all the enclosed layers and all their contents are also deleted.
Organize layers and layer folders
To organize your document, rearrange layers and folders in the Timeline.
Layer folders help organize your workflow by letting you place layers in a tree structure. To see the layers a folder
contains without affecting which layers are visible on the Stage, expand or collapse the folder. Folders can contain
both layers and other folders, allowing you to organize layers in much the same way you organize files on your
computer.
The layer controls in the Timeline affect all layers within a folder. For example, locking a layer folder locks all layers
within that folder.
•
Tomovealayerorlayerfolderintoalayerfolder,dragthelayerorlayerfoldernametothedestinationlayerfoldername.
Page 46

FLASH CS3
User Guide
• To change the order of layers or folders, drag one or more layers or folders in the Timeline to the desired position.
• To expand or collapse a folder, click the triangle to the left of the folder name.
• To expand or collapse all folders, Right-click (Windows) or Control-click (Macintosh) and select Expand All
Folders or Collapse All Folders.
Use guide layers
For help in aligning objects when drawing, create guide layers and align objects on other layers to the objects you
create on the guide layers. Guide layers are not exported and do not appear in a published SWF file. Any layer can
be a guide layer. Guide layers are indicated by a guide icon to the left of the layer name.
To control the movement of objects in a motion tweened animation, create a motion guide layer.
Note: Dragging a normal layer onto a guide layer converts the guide layer to a motion guide layer. To prevent accidentally converting a guide layer, place all guide layers at the bottom of the layer order.
❖ Select the layer and Right-click(Windows) or Control-click (Macintosh) and select Guide fromthe context menu.
To change the layer back to a normal layer, select Guide again.
See also
“Tween motion along a path” on page 245
40
Using Flash authoring panels
About the Property inspector
The Property inspector provideseasy access to the most commonly used attributes of the currentselection, either on
the Stage or in the Timeline. You can make changes to the object or document attributes in the Property inspector
without accessing the menus or panels that also control these attributes.
Depending on what is currently selected, the Property inspector displays information and settings for the current
document,text,symbol,shape,bitmap,video,group,frame,ortool.Whentwoormoredifferenttypesofobjectsare
selected, the Property inspector displays the total number of objects selected.
The Property inspector showing the properties for the Text tool
To display the Property inspector, Select Window > Properties > Properties, or press Control+F3 (Windows) or
Command+F3 (Macintosh).
Page 47

FLASH CS3
User Guide
About the Library panel
The Library panel is where you store and organize symbols created in Flash, as well as imported files, including
bitmap graphics, sound files, and video clips. The Library panel lets you organize library items in folders, see how
often an item is used in a document, and sort items by type.
The Library panel showing a movie clip symbol
41
To display the Library panel, select Window > Library, or press Control+L (Windows) or Command+L (Macintosh).
See also
“Managing media assets with the Flash document library” on page 65
About the Actions panel
The Actions panel lets you create and edit ActionScript code for an object or frame. Selecting a frame, button, or
movie clip instance makes the Actions panel active. The Actions panel title changes to Button Actions, Movie Clip
Actions, or Frame Actions, depending on what is selected.
Page 48

The Actions panel showing a stop() action in a frame
FLASH CS3
User Guide
42
To display the Actions panel, select Window > Actions or press F9.
See also
“Actions panel overview” on page 383
“Script window overview” on page 384
Use the Movie Explorer
The Movie Explorer lets you view and organize the contents of a document and select elements in the document for
modification. It contains a display list of currently used elements, arranged in a navigable hierarchical tree.
Use the Movie Explorer to perform the following actions:
• Filter which categories of items in the document appear in the Movie Explorer.
• Display the selected categories as scenes, symbol definitions, or both.
• Expand and collapse the navigation tree.
• Search for an element in a document by name.
• Familiarize yourself with the structure of a Flash document that another developer created.
• Find all the instances of a particular symbol or action.
• Print the navigable display list that appears in the Movie Explorer.
The Movie Explorer has a Panel menu and a context menu with options for performing operations on selected items
or modifyingthe Movie Explorer display. Acheck mark with a triangle below itin the MovieExplorer panel indicates
the Panel menu.
Note: The Movie Explorer has slightly different functionality when you are working with screens.
Page 49

FLASH CS3
User Guide
See also
“Working with screens” on page 367
View the Movie Explorer
❖ Select Window > Movie Explorer.
Filter the categories of items that appear in the Movie Explorer
• To show text,symbols, ActionScript, imported files, or frames and layers,click one ormore of the filtering buttons
to the right of the Show option. To customize which items to show, click the Customize button. Select options in
the Show area of the Movie Explorer Settings dialog box to view those elements.
• To show items in scenes, select Show Movie Elements from the Movie Explorer Panel menu.
• To show information about symbols, select Show Symbol Definitions from the Movie Explorer Panel menu.
Note: The Movie Elements option and the Symbol Definitions option can be active at the same time.
Search for an item using the Find box
❖ In the Find box, enter the item name, font name, ActionScript string, or frame number. The Find feature searches
all items that appear in the Movie Explorer.
43
Select an item in the Movie Explorer
❖ Click the item in the navigation tree. Shift-click to select more than one item.
The full path for the selected item appears at the bottom of the Movie Explorer. Selecting a scene in the Movie
Explorer shows the first frame of that scene on the Stage. Selecting an element in the Movie Explorer selects that
element on the Stage if the layer containing the element is not locked.
Use the Movie Explorer Panel menu or context menu commands
1
Do one of the following:
• To view the Panel menu, click the Panel menu control in the Movie Explorer panel.
• To view the context menu, right-click (Windows) or Control-click (Macintosh) an item in the Movie Explorer
navigation tree.
2 Select an option from the menu:
Go To Location Jumps to the selected layer, scene, or frame in the document.
Go To Symbol Definition Jumps to the symbol definition for a symbol that is selected in the Movie Elements area of
the Movie Explorer. The symbol definition lists all the files associated with the symbol. (The Show Symbol Definitions option must be selected. See its definition in this list.)
Select Symbol Instances Jumps to the scene containing instances of a symbol that is selected in the Symbol Defini-
tions area of the Movie Explorer. (The Show Movie Elements option must be selected.)
Find In Library Highlights the selected symbol in the document’s library. (Flash opens the Library panel if it is not
already visible.)
Rename Lets you enter a new name for a selected element.
Edit In Place Lets you edit a selected symbol on the Stage.
Edit In New Window Lets you edit a selected symbol in a new window.
Show Movie Elements Shows the elements in your document organized into scenes.
Page 50

FLASH CS3
User Guide
Show Symbol Definitions Shows all the elements associated with a symbol.
Copy All Text To Clipboard Copies selected text to the clipboard. For spell checking or other editing, paste the text
into an external text editor.
Cut, Copy, Paste, And Clear Performs these common functions on a selected element. Modifying an item in the
display list modifies the corresponding item in the document.
Expand Branch Expands the navigation tree at the selected element.
Collapse Branch Collapses the navigation tree at the selected element.
Collapse Others Collapses the branches in the navigation tree that do not contain the selected element.
Print Prints the hierarchical display list that appears in the Movie Explorer.
About the Web Services panel
Youcanviewalistofwebservices,refreshwebservices,andaddorremovewebservicesintheWebServicespanel
(Window > Other Panels > Web Services). When you add a web service to the Web Services panel, the web service
is then available to any application you create.
You can use the Web Services panel to refresh all your web services at once by clicking the Refresh Web Services
button. If you are not using the Stage but instead are writing ActionScript code for the connectivity layer of your
application, you can use the Web Services panel to manage your web services.
44
For detailed information about using the web services panel, see www.adobe.com/go/learn_fl_web_services.
Accessibility in the Flash workspace
About accessibility support
Accessibility support in the authoring environment provides keyboard shortcuts for navigating and using interface
controls,includingpanels,thePropertyinspector,dialogboxes,theStage,andobjectsontheStage,sothatyoucan
work with these interface elements without using the mouse.
Note: Certain keyboard controls and authoring environment accessibility features are available only in Windows.
To customize the keyboard shortcuts for accessibility in the authoring environment, use the Workspace Accessibility
Commands section of the Keyboard Shortcuts dialog box.
See also
“Customize keyboard shortcuts” on page 31
About Flash authoring accessibility on the Macintosh
Accessibility for the authoring environment on the Macintosh has the following limitations:
• The Panel Focus keyboard shortcut (Command+Option+Tab) is not supported for the Property inspector.
• ThePanelControlFocuskeyboardshortcut(Tab)issupportedonlyfortheTimeline,notforotherpanelsorthe
Property inspector.
Page 51

FLASH CS3
User Guide
Select panels or the Property inspector with keyboard shortcuts
To select a panel or the Property inspector (also referred to as applying focus to the panel or Property inspector), use
the keyboard shortcut Control+F6 (Windows) or Command+F6 (Macintosh).
Apply focus to a panel or the Property inspector only when the panel or Property inspector is visible in the application window. The panel can be expanded or collapsed.
When you use the keyboard shortcut to select panels, focus is applied to panels using the following criteria:
• Docked panels are given focus first.
• If the Timelineis showing and docked, the Timeline is given focus the first time you press Control+F6 (Windows)
or Command+F6 (Macintosh).
• If the Timeline is not showing and docked, or if you press the keyboard shortcut again, focus moves to the
rightmostandhighestdockedpanel.Pressingthekeyboardshortcutrepeatedlythenmovesthefocusthroughthe
other docked panels, from right to left and from top to bottom of the workspace.
• If you move the focus through all the docked panels, or if no docked panels are showing, focus moves to the
rightmostandhighestfloatingpanel.Pressingthekeyboardshortcutrepeatedlythenmovesthefocusthroughthe
other floating panels, from right to left and from top to bottom of the workspace.
Use keyboard shortcuts to select or deselect, expand, or collapse panels or the Property inspector
• To move the focus through the panels currently displayed in the workspace, press Control+F6 (Windows) or
Command+F6 (Macintosh). A dotted line appears around the title of the currently focused panel.
• To move the focus to the previously selected panel, press Control+Shift+F6 (Windows) or Command+Shift+F6
(Macintosh).
• To deselect a panel, press Escape, or move, dock, or undock the panel.
• Tomovethefocustothepanelaboveorbelowthecurrentpanelinapanelgroup,pressUpArroworDownArrow.
• TohideallpanelsandthePropertyinspector,pressF4.TodisplayallpanelsandthePropertyinspector,pressF4
again.
45
Use keyboard shortcuts to expand or collapse panels or the Property inspector
1
Press Control+F6 (Windows) or Command+F6 (Macintosh) until the panel to expand or collapse has focus. A
dotted line appears around the title of the currently focused panel.
2 To expand or collapse the currently selected panel, press the Spacebar.
Select controls in a panel or the Property inspector using keyboard shortcuts
To move the focus through the panel controls when a panel or the Property inspector has the current focus, use the
Tabkey.Toactivatethecontrolthathasthecurrentfocus,use the Spacebar (that is, pressing Spacebar is equivalent
to clicking a control in the panel).
When you use the keyboardshortcut for panelcontrols, focusis applied to a control and thecontrolis activated using
the following criteria:
• ToselectacontrolinthepanelwiththeTabkey,thepanelwiththecurrentfocusmustbeexpanded.Ifthepanel
is collapsed, pressing Tab has no effect.
• Whenthepanelwiththecurrentfocusisexpanded,pressingTabthefirsttimemovesthefocustothepanel’sPanel
menu.
Page 52

FLASH CS3
User Guide
• To move the focus between the Panel menu and the panel title bar, use Right Arrow and Left Arrow.
• If the focus is on the Panel menu, press Tab again to move the focus through the other controls in the panel.
Pressing Tab again does not return the focus to the Panel menu.
• To display the Panel menu items when the Panel menu has the focus, press Enter (Windows only).
• To move the focus between the Panel menus of the panels in the group in panels that are grouped, use Up Arrow
and Down Arrow.
• You canmove the focus toa panelcontrol only if the control isactive. Ifa controlis dimmed (inactive), youcannot
apply focus to the control.
Move the focus from a panel title bar to a panel options menu
❖ Do one of the following:
• Press Tab.
• Press Right Arrow. To return the focus to the panel title bar, press Left Arrow or Shift+Tab.
• To move the focus to the Panel menu of the panel immediately above the panel with the current focus if the panel
is in a group, press Up Arrow. To move the focus to the Panel menu of the panel immediately below the panel with
the current focus, press Down Arrow.
46
Move the focus through the items in the Panel menu of a panel
1
To display the Panel menu items with the focus currently applied to the Panel menu, press the Spacebar.
2 To move through the items in the Panel menu, press Down Arrow.
3 To activate the currently selected Panel menu item, press Enter (Windows) or Return (Macintosh).
Move the focus through the controls in a panel
1
Press Tab when the focus is currently applied to the Panel menu. To move the focus through the controls in the
panel, press Tab repeatedly.
2 To activate the currently selected panel control, press Enter (Windows only).
Navigate dialog box controls using keyboard shortcuts (Windows only)
• To move through the controls in the dialog box, press Tab.
• To move through the controls within one section of a dialog box, press Up Arrow and Down Arrow.
• To activate the button (equivalent to clicking the button), when the focus is applied to a dialog box control button,
press Enter.
• To apply the current settings and close the dialog box (equivalent to clicking OK), when the focus is not applied
to any dialog box control button, press Enter.
• To close the dialog box without applying the changes (equivalent to clicking Cancel), press Escape.
• To view the Help content for the dialog box (equivalent to clicking Help), when the focus is applied to the Help
button, press Enter or Spacebar.
Select the Stage or objects on the Stage using keyboard shortcuts
Selecting the Stage with a keyboard shortcut is equivalent to clicking on the Stage. Any other element currently
selected becomes deselected when the Stage is selected.
Page 53

FLASH CS3
User Guide
After the Stage is selected, use the Tab key to navigate through all objects on all layers, one at a time. You can select
instances (including graphic symbols, buttons,movie clips, bitmaps, videos, or sounds), groups, or boxes. You cannot
select shapes (such as rectangles) unless those shapes are instances of symbols. You cannot select more than one
object at a time using keyboard shortcuts.
To select Objects on the Stage, use the following criteria:
• To select the previous object when an object is currently selected, press Shift+Tab.
• To select the first object that was created on the active frame in the active layer, press Tab. When the last object on
the top layer is selected, press Tab to move to the next layer beneath it and select the first object there, and so on.
• Whenthelastobjectonthelastlayerisselected,pressTabtomovetothenextframeandselectthefirstobjecton
the top layer there.
• Objects on layers that are hidden or locked cannot be selected with the Tab key.
• To select the Stage, press Control+Alt+Home (Windows) or Command+Option+Home (Macintosh).
• To select an object on the Stage, with the Stage selected, press Tab.
Note: If you are currently typing text in abox, you cannot select an object using the keyboard focus. You must first change
the focus to the Stage and then select an object.
47
Navigate tree structures using keyboard shortcuts
To n a v ig a te tree structures, the hierarchical displays of file structures in certain Flash panels, use keyboard shortcuts.
• To expand a collapsed folder, select the folder and press Right Arrow.
• To collapse an expanded folder, select the folder and press Left Arrow.
• To move to the parent folder of an expanded folder, press Left Arrow.
• To move to the child folder of an expanded folder, press Right Arrow.
Work with library items using keyboard shortcuts
1 To copy or paste aselected library item,pressControl+X (Windows)or Command+X (Macintosh) to cutthe item,
or press Control+C (Windows) or Command+C (Macintosh) to copy the item.
2 To paste a cut or copied item, click the Stage or in another library to set the insertion point, and press Control+V
(Windows) or Command+V (Macintosh) to paste in the center of the Stage; or press Control+Shift+C (Windows)
or Command+Shift+C (Macintosh) to paste in place (in the same location as the original).
To cut, copy, and paste items, use the following criteria:
• Cut or copy one item or multiple items.
• Cut or copy an item from the Library panel and paste it onto the Stage or into another library, or paste a folder
into another library.
• You cannot paste a shape from the Stage into the library.
• You cannot paste a library item into a common library, because common libraries cannot be modified. However,
you can create a common library.
• When you paste a library item onto the Stage, the item is centered.
• If you paste a folder, each item in the folder is included.
• To paste a library item into a folder in the destination library, click the folder before pasting.
Page 54

FLASH CS3
User Guide
• You can paste a library item into a different location in the same library where it originated.
• Ifyouattempttopastealibraryitemintoalocationcontaininganotheritembythesamename,selectwhetherto
replace the existing item.
See also
“Work with common libraries” on page 69
Undo, redo, and history
Undo, Redo, and Repeat commands
To undo or redo actions on individual objects, or all objects within the current document, specify either object-level
or document-level Undo and Redo commands (Edit > Undo or Edit Redo). The default behavior is document-level
Undo and Redo.
You cannot undo some actions when using object-level Undo. Among these are entering and exiting Edit mode;
selecting, editing, and moving library items; and creating, deleting, and moving scenes.
48
To remove deleted items from a document after using the Undo command, use the Save And Compact command.
To reapply a step to the same object or to a different object, use the Repeat command. For example, if you move a
shape named shape_A, select Edit > Repeat to move the shape again, or select another shape, shape_B, and select
Edit > Repeat to move the second shape by the same amount.
By default, Flash supports 100 levels of undo for the Undo menu command. Select the number of undo and redo
levels, from 2 to 9999, in Flash Preferences.
See also
“Set preferences in Flash” on page 27
“Automating tasks with the Commands menu” on page 50
Permanently remove items deleted with Undo
By default, when you undo a step using Edit > Undo or the History panel, the file size of the document does not
change, even if you delete an item in the document. For example, if you import a video file into a document, and
undo the import, the file size of the document still includes the size of the video file. Any items that you delete from
a document when performing an Undo command are preserved to restore the items with a Redo command. To
permanentlyremovethedeleteditemsfromthedocument,andreducethedocumentfilesize,selectFile>SaveAnd
Compact.
Using the History panel
The History panel (Window > Other Panels > History) shows a list of the steps you’ve performed in the active
document since you created or opened that document, up to a specified maximum number of steps. (The History
panel doesn’t show steps you’ve performed in other documents.) The slider in the History panel initially points to
the last step that you performed.
Page 55

FLASH CS3
User Guide
To undo or redo individual steps or multiple steps at once, use the History panel. Apply steps from the History panel
to the same object or to a different object in the document. However, you cannot rearrange the order of steps in the
History panel. The History panel is a record of steps in the order in which they are performed.
Note: If you undo a step or a series of steps and then do something new inthe document, you can no longer redo the steps
in the History panel; they disappear from the panel.
To remove deleted items from a document after you undo a step in the History panel, use the Save And Compact
command.
By default, Flash supports 100 levels of undo for the History panel. Select the number of undo and redo levels, from
2 to 9999, in Flash Preferences.
Toerasethehistorylistforthecurrentdocument,cleartheHistorypanel.Afterclearingthehistorylist,youcannot
undo thesteps that arecleared. Clearing the history list does not undo steps;it removes therecord of those steps from
the current document’s memory.
Closing a document clears its history. To use steps from a document after that document is closed, copy the steps
with the Copy Steps command or save the steps as a command.
See also
“Set preferences in Flash” on page 27
49
“Automating tasks with the Commands menu” on page 50
Undo steps with the History panel
When you undo a step, the step is dimmed in the History panel.
• To undo the last step performed, drag the History panel slider up one step in the list.
• To undo multiple steps at once, drag the slider to point to any step, or click to the left of a step along the path of
the slider. The slider scrolls automatically to that step, undoing all subsequent steps as it scrolls.
Note: Scrolling to a step (and selecting the subsequent steps) is different from selecting an individual step. To scroll to a
step, click to the left of the step.
Replay steps with the History panel
When you replay steps with the History panel, the steps that play are the steps that are selected (highlighted) in the
History panel, not necessarily the step currently indicated by the slider.
Apply steps in the History panel to any selected object in the document.
Replay one step
❖ In the History panel, select a step and click the Replay button.
Replay a series of adjacent steps
1
Select steps in the History panel by doing one of the following:
• Drag from one step to another. (Don’t drag the slider; drag from the text label of one step to the text label of
another step.)
• Select the first step, then Shift-click the last step; or select the last step and Shift-click the first step.
2 Click Replay. The steps replay in order, and a new step, labeled Replay Steps, appears in the History panel.
Page 56

FLASH CS3
User Guide
Replay nonadjacent steps
1
Select a step in the History panel, and Control-click (Windows) or Command-click (Macintosh) other steps. To
deselect a selected step, Control-click or Command-click.
2 Click Replay.
Copy and paste steps between documents
Each open document has its own history of steps. To copy steps from one document and paste them into another,
use the Copy Steps command in the History panel options menu. If you copy steps into a text editor, the steps are
pasted as JavaScript code.
1 In the document containing the steps to reuse, select the steps in the History panel.
2 In the History panel options menu, select Copy Steps.
3 Open the document to paste the steps into.
4 Select an object to apply the steps to.
5 Select Edit > Paste to paste the steps. The steps play back as they’re pasted into the document’s History panel. The
History panel shows them as only one step, called Paste Steps.
50
Automating tasks with the Commands menu
Create and manage commands
To repeat the same task, create a command in the Commands menu from steps in the History panel and reuse the
command. Steps replay exactly as they were originally performed. You can’t modify the steps as you replay them.
TousestepsthenexttimeyoustartFlash,createandsaveacommand.Savedcommandsareretainedpermanently,
unless you delete them. Steps that you copy using the History panel Copy Steps command are discarded when you
copy something else.
Create a command from selected steps in the History panel. Rename or delete commands in the Manage Saved
Commands dialog box.
See also
“Copy and paste steps between documents” on page 50
Create a command
1
Select a step or set of steps in the History panel.
2 Select Save As Command from the History panel options menu.
3 Enter a name for the command and click OK. The command appears in the Commands menu.
Note: The command is saved as a JavaScript file (with the extension .jsfl) in your Commands folder. This folder is in the
following locations: Windows 2000 or Windows XP: boot drive\Documents and Settings\<user>\Local Settings\Application Data\Adobe\Flash CS3\<language>\Configuration\Commands; Mac OS X: Macintosh
HD/Users/<username>/Library/Application Support/Adobe/Flash CS3/<language>/Configuration/Commands.
Page 57

FLASH CS3
User Guide
Edit the names of commands in the Commands menu
1
Select Commands > Manage Saved Commands.
2 Select a command to rename. enter a new name for it, and click Close.
Delete a name from the Commands menu
1
Select Commands > Manage Saved Commands, and select a command.
2 Click Delete, and click Close.
Run commands
• To use a saved command, select the command from the Commands menu.
• To run a JavaScript or Flash JavaScript command, select Commands > Run Command, navigate to the script to
run, and click Open.
Get more commands
Use the Get More Commands option in the Commands menu to link to the Flash Exchange website at
www.adobe.com/go/flash_exchange and download commands that other Flash users have posted. For more infor-
mation on the commands posted there, see the Flash Exchange website.
51
1 Make sure you are connected to the Internet.
2 Select Commands > Get More Commands.
Steps that can’t be used in commands
Some tasks can’t be saved as commands or repeated using the Edit > Repeat menu item. These commands can be
undone and redone, but they cannot be repeated.
Examples of actions that can’t be saved as commands or repeated includeselecting a frameor modifying a document
size. If you attempt to save an unrepeatable action as a command, the command is not saved.
Page 58

Chapter 3: Creating and managing documents
When you create and save Adobe® Flash® CS3 Professional documents within the Flash authoring environment, the
documents are in FLA file format. To display a document in Adobe® Flash® Player, you must publish or export the
document as a SWF file.
You can add media assets to a Flash document and manage the assets in the library, and you can use the Movie
Explorer to view and organize all the elements in a Flash document. The Undo and Redo commands, the History
panel, and the Commands menu let you automate tasks in a document.
Working with Flash documents
About Flash files
In Flash you can work with a variety of file types, each of which has a separate purpose:
52
• FLA files, the primary files you work with in Flash, contain the basic media, timeline, and script information for
aFlashdocument.Media objects are the graphic, text, sound, and video objects that comprise the content of your
Flash document. The Timeline is where you tellFlash when specific media objects should appear on the Stage.You
can add ActionScript™codetoFlashdocumentstomorefinelycontroltheirbehaviorandtomakethemrespond
to user interactions.
• SWF files, the compiled versions of FLA files, are the files you display in a web page. When you publish your FLA
file, Flash creates a SWF file.
• AS files are ActionScript files—you can use these to keep some or all of your ActionScript code outside of your
FLA files, which is helpful for code organization and for projects that have multiple people working on different
parts of the Flash content.
• SWC files contain the reusable Flash components. Each SWC file contains a compiled movie clip, ActionScript
code, and any other assets that the component requires.
• ASC files are files used to store ActionScript that will be executed on a computer running Flash Media Server.
These files provide the ability to implement server-side logic that works in conjunction with ActionScript in a
SWF file.
• JSFL files are JavaScript files that you can use to add new functionality to the Flash authoring tool.
• FLP files are Flash project files. You can use Flash projects to manage multiple document files in a single project.
Flash projects allow you to group multiple, related files together to create complex applications.
For video tutorials about working with Flash files, see the following:
• www.adobe.com/go/vid0117
• www.adobe.com/go/vid0118
See also
“About the Timeline” on page 33
Page 59

FLASH CS3
User Guide
Create or open a document and set its properties
You can create a new document or open a previously saved document in Flash, and you can open a new window as
you work. You can set properties for new or existing documents.
For a text tutorial about creating your first Flash file, see Create your First File on the Flash Tutorials page at
www.adobe.com/go/learn_fl_tutorials.
For video tutorials, see:
• Working with Flash files: www.adobe.com/go/vid0117
See also
“Set preferences in Flash” on page 27
“Publishing Flash content” on page 419
Create a new document
1
Select File > New.
2 On the General tab, select Flash Document.
53
Create a new document of the same type as the last document created (Windows only)
❖ Click the New File button in the main toolbar.
Create a new document from a template
1
Select File > New.
2 Click the Templates tab.
3 Select a category from the Category list, select a document from the Category Items list, and click OK. You can
select standard templates that come with Flash or a template you have already saved.
Open an existing document
1
Select File > Open.
2 In the Open dialog box, navigate to the file or enter the path to the file in the Go To box.
3 Click Open.
Open a new window in the current document
❖ Select Window > Duplicate Window.
Set properties for a new or existing document
1
With the document open, select Modify > Document.
The Document Properties dialog box appears.
2 To embed metadata within your SWF files, enter a descriptive title in the Title box, and enter a description in the
Description box.
Embedding metadata improves the ability of web-based search engines toreturn meaningful search results for Flash
content. Descriptions can author and copyright information, and short descriptions about the content and its
purpose. The search metadata is based on the RDF (Resource Description Framework) and XMP (Extensible
Metadata Platform) specifications and is stored in Flash in a W3C-compliant format.
Page 60

FLASH CS3
User Guide
The title and description you enter is a human readable title and a human readable description. These fields are not
intended for keywords to provide greater search results. Instead, thesefields are madeavailable to search enginesthat
index SWF files, and display the contents of the title and description field in their search results. Search metadata
can be exported to any version of Flash. While it was introduced in Flash 8, Flash Player ignores tags it does not
understand, thus Flash 8 exports it to all versions.
Note: Flash lets you make the settings you specify in the Document Properties dialog box the default settings for any
Flash document that you create. The exception to this is the Title and Description, which you need to specify for each
Flash document that you create.
3 For Frame Rate, enter the number of animation frames to appear every second.
For most computer-displayed animations, especially those playing from a website, 8 frames per second (fps) to 12
fps (the default) is sufficient.
4 For Dimensions, set the Stage size:
• To specify the Stage size in pixels, enter values in the Width and Height boxes. The minimum size is 1 x 1 pixels;
the maximum is 2880 x 2880 pixels.
• To set the Stage size so that there is equal space around the content on all sides, click the Contents button to the
right of Match. To minimize document size, align all elements to the upper-left corner of the Stage, and then click
Contents.
• To set the Stage size to the maximum available print area, click Printer. This area is determined by the paper size
minus the current margin selected in the Margins area of the Page Setup dialog box (Windows) or the Print
Margins dialog box (Macintosh).
• To set the Stage size to the default size, 550 x 400 pixels, click Default.
5 To set the background color of your document, click the triangle in the Background Color control and select a
color from the palette.
6 To specify the unit of measure for rulers that you can display along the top and side of the application window,
select an option from the pop-up menu in the upper right. (This setting also determines the units used in the Info
panel.)
7 Do one of the following:
• To make the new settings the default properties for the current document only, click OK.
• To make the new settings the default properties for all new documents, click Make Default.
54
Change document properties using the Property inspector
1
Deselect all assets, then select the Selection tool.
2 In the Property inspector (Window > Properties > Properties), click the Size control to display the Document
Properties dialog box.
3 To select a background color, click the triangle in theBackground color control and select a color fromthe palette.
4 For Frame Rate, enter the number of animation frames to appear every second.
5 For Publish, click the Settings button to display the Publish Settings dialog box with the Flash tab selected. For
more information, see “Publishing Flash documents” on page 419.
6 If you are developing content for mobiledevices such as cell phones, clickthe Settings button to display the Device
Settings dialog box, which lets you choose devices to test mobile content and provides information on ActionScript
support for each device you select.
Page 61

FLASH CS3
User Guide
Note: The Device Settings button can be used only if your publish settings are set to a supported version of Flash Lite.
View a document when multiple documents are open
When you open multiple documents, tabs at the top of the Document window identify the open documents and let
you easily navigate among them. Tabs appear only when documents are maximized in the Document window.
❖ Click the tab of the document you want to view.
By default,tabs appear in the order in which the documents were created.You can drag the document tabs to change
their order.
Save Flash documents
You can save a Flash FLA document using its current name and location or using a different name or location.
When a document contains unsaved changes, an asterisk (*) appears after the document name in the document title
bar, the application title bar, and the document tab. When you save the document, the asterisk is removed.
Save a Flash document
1
Do one of the following:
• To overwrite the current version on the disk, select File > Save.
• To save the document in a different location and/or with a different name, or to compress the document, select
File > Save As.
2 If you selected Save As, or if the document has never been saved before, enter the filename and location.
3 Click Save.
55
Revert to the last saved version of a document
❖ Select File > Revert.
Save a document as a template
1
Select File > Save As Template.
2 In the Save As Template dialog box, enter a name for the template in the Name box.
3 Select a category from the Category pop-up menu, or enter a name to create a new category.
4 Enter a description of the template in the Description box (up to 255 characters), and click OK.
The description appears when the template is selected in the New Document dialog box.
Save a document as a Flash 8 document
1
Select File > Save As.
2 Enter the filename and location.
3 Select Flash 8 Document from the Format pop-up menu, and click Save.
Important: If an alert message indicates that content will be deleted if you save in Flash 8 format, click Save As Flash 8
to continue. This might happen if your document contains features, such as graphic effects or behaviors, that are
available only in Flash 9. Flash does not preserve these features when you save the document in Flash 8 format.
Page 62

FLASH CS3
User Guide
Save documents when quitting Flash
1
Select File > Exit (Windows) or Flash > Quit Flash (Macintosh).
2 If you have documents open with unsaved changes, Flash prompts you to save or discard the changes for each
document.
• Click Yes to save the changes and close the document.
• Click No to close the document without saving the changes.
Working with other Adobe applications
Flash is designed to work with other Adobe applications to enable a broad range of creative workflows. You can
import Illustratorand Photoshop files directly into Flash. You can also create video from Flash andedit it in Premiere
Pro or After Effects, or import video from either of those applications into Flash. When publishing your Flash
content, you can use Dreamweaver to embed the content in your web pages, and launch Flash directly from within
Dreamweaver to edit the content.
See also
“Working with Illustrator and Flash” on page 135
“Working with Photoshop and Flash” on page 148
56
“Working with Premiere Pro and After Effects” on page 317
“Edit a SWF file from Dreamweaver in Flash” on page 420
Creating and previewing mobile content with Adobe Device Central
Access Adobe components from Adobe Device Central
1 Start Device Central.
2 Select File > New Document In > Flash, Illustrator, or Photoshop.
In Device Central, the New Document panel appears with the correct options to create a new mobile document in
the selected application.
3 Make any necessary changes, such a selecting a new Player Version, ActionScript Version, or Content type.
4 Do one of the following:
• Select the Custom Size for All Selected Devices option and add a width and height (in pixels).
• Select a device or multiple devices from the Device Sets list or Available Devices list.
5 If you selected multiple devices, Device Central selects a size for you. If you want to select a different size, click on
a different device or set of devices.
6 Click Create.
The selected application opens with a new mobile document ready to edit.
Page 63

FLASH CS3
User Guide
Create mobile content with Adobe Device Central and Flash CS3
1 Start Flash.
2 On the main Flash screen, select Create New > Flash File (Mobile).
Flash opens Device Central and displays the New Document tab.
3 In Device Central, select a Player version and ActionScript version.
The Available Devices list on the left is updated. Devices that do not support the selected Player version and ActionScript version are dimmed.
4 Select a content type.
The Available Devices list on the left is updated and shows the devices that support the content type (as well as the
Player version and ActionScript version) selected.
5 In the Available Devices list, select a single target device or multiple devices (or select a set or individual device in
the Device Sets list).
Device Central lists proposed document sizes based on the device or devices you selected (if the devices have
different display sizes). Depending on the design or content you are developing, you can create a separate mobile
document for each display size or try to find one size appropriate for all devices. When choosing the second
approach,youmaywanttousethesmallestorlargestsuggesteddocumentsizeasacommondenominator.Youcan
even specify a custom size at the bottom of the tab.
57
6 Click Create.
Flash starts up and creates a document with preset publish settings from Device Central, including the correct size
for the device (or group of devices) specified.
7 Add content to the new Flash document.
8 To test the document, select Control > Test Movie.
The new document is displayed in the Device Central Emulator tab. If one or more devices were selected in the
Available Devices list in step 5, a new device set is created (named according to the FLA file) and listed in the Device
Sets panel. The device shown in the Emulator tab is listed in the Device Sets panel with a special icon . To test the
new Flash document on another device, double-click the name of a different device in the Device Sets or Available
Devices lists.
For tutorials about creating content using Flash and Device Central, see http://www.adobe.com/go/vid0186 and
http://www.adobe.com/go/vid0206.
Create mobile content with Adobe Device Central and Photoshop
1 Start Photoshop.
2 Select File > New.
3 Click Device Central to close the dialog box in Photoshop and open Device Central.
4 Select a content type.
The available Devices list on the left is updated and shows the devices that support the content type selected.
5 In the Available Devices list, select a single target device or multiple devices (or select a set or individual device in
the Device Sets list).
Page 64

FLASH CS3
User Guide
Device Central lists proposed document sizes based on the device or devices you selected (if the devices have
different display sizes). Depending on the design or content you are developing, you can create a separate mobile
document for each display size or try to find one size appropriate for all devices. When choosing the second
approach,youmaywanttousethesmallestorlargestsuggesteddocumentsizeasacommondenominator.Youcan
even specify a custom size at the bottom of the tab.
6 Click Create.
A blank PSD file with the specified size opens inPhotoshop. The new file has the following parameters set by default:
• Color Mode: RGB/8bit
• Resolution: 72 ppi
• Color Profile: SRGB IEC61966-2.1
7 Fill the blank PSD file with content in Photoshop.
8 When you finish, select File > Save For Web & Devices.
9 In the Save For Web & Devices dialog box, select the desired format and change other export settings as desired.
10 Click Device Central.
A temporary file with the export settings specified is displayed in the Device Central Emulator tab. To continue
testing, double-click the name of a different device in the Device Sets or Available Devices lists.
58
11 If, after previewing the file in Device Central, you need to make changes to the file, go back to Photoshop.
12 In the Photoshop Save For Web & Devices dialog box, make adjustments, such as selecting a different format or
quality for export.
13 To test the file again with the new export settings, click the Device Central button.
14 When you are satisfied with the results, click Save in the Photoshop Save For Web & Devices dialog box.
Note: To simply open Device Central from Photoshop (instead of creating and testing a file), select File > Device Central.
For a tutorial about creating content using Photoshop and Device Central, see http://www.adobe.com/go/vid0185.
Create mobile content with Adobe Device Central and Illustrator
1 Start Illustrator.
2 Select File > New.
3 In New Document Profile, select Mobile and Devices.
4 Click Device Central to close the dialog box in Illustrator and open Device Central.
5 Select a content type.
The available Devices list on the left is updated and shows the devices that support the content type selected.
6 In Device Central, select a device, several devices, or a device set.
Based on the device(s) selected and content type, Device Central suggests one or multiple artboard sizes to be
created.Tocreateonedocumentatatime,selectasuggesteddocumentsize(orselecttheCustomSizeforallselected
Devices option and enter custom values for Width and Height).
7 Click Create.
A blank AI file of the specified size opens in Illustrator. The new file has the following parameters set by default:
• Color Mode: RGB
Page 65

FLASH CS3
User Guide
• Raster Resolution: 72 ppi
8 Fill the blank AI file with content in Illustrator.
9 When you finish, select File > Save For Web & Devices.
10 In the Save for Web & Devices dialog, select the desired format and change other export settings as desired.
11 Click Device Central.
A temporary file with the export settings specified is displayed in the Device Central Emulator tab. To continue
testing, double-click the name of a different device in the Device Sets or Available Devices lists.
12 If, after previewing the file in Device Central, you need to make changes to the file, go back to Illustrator.
13 On the Illustrator Save for Web & Devices dialog, make adjustments such as selecting a different format or
quality for export.
14 To test the file again with the new export settings, click the Device Central button.
15 When you are satisfied with the results, click Save in the Illustrator Save for Web & Devices dialog.
Note: To simply open Device Central from Illustrator (instead of creating and testing a file), select File > Device Central.
For a tutorial about creating content with Illustrator and Device Central, see http://www.adobe.com/go/vid0207.
59
Preview a movie on a virtual mobile device using Adobe Premiere Pro
Using Adobe Device Central, you can preview movies formatted for mobile devices in emulations of those devices.
This option is available for most of the H.264 formats listed in the Adobe Media Encoder.
1 On Windows computers, make sure QuickTime is installed.
2 Start Adobe Premiere Pro.
3 Open the file to preview.
4 Select the file in the project area or Timeline.
5 Choose File > Export > Adobe Media Encoder.
6 In the Export Settings area of the Export Settings Window, select H.264 from the Format drop-down menu.
7 Select a mobile preset (e.g., 3GPP).
Open in Device Central should be checked by default.
8 Click OK.
9 Name and save the file.
The file is rendered.
10 A temporary file is displayed in the Device Central Emulator tab. To continue testing, double-click the name of
a different device in the Device Sets or Available Devices lists.
Preview a movie on a virtual mobile device using After Effects
Using Adobe Device Central, you can preview movies formatted for mobile devices in emulations of those devices.
This option is available for most of the H.264 formats listed in the Adobe Media Encoder.
1 Start After Effects.
2 In the Project panel, select the composition to preview.
Page 66

FLASH CS3
User Guide
3 Choose Composition > Add to Render Queue.
4 In the Render Queue panel, click the underlined text to the right of Output Module, or select Custom from the
Output Module menu.
5 In the Output Modules Settings dialog box, choose H.264 from the Format menu.
6 In the Export Settings section of the H.264 dialog box, select Open in Device Central.
7 Modify other settings as desired and click OK.
8 Click OK to close the Output Module Settings dialog box.
9 In the Render Queue panel, click Render.
Rendering may take a few minutes, depending on the size of the file. When rendering is complete, a temporary file
is displayed in the Adobe Device Central Emulator tab. To continue testing, double-click the name of a different
device in the Device Sets or Available Devices lists.
Preview mobile content with Adobe Device Central and Dreamweaver
To preview pages created in Dreamweaver on various mobile devices, use Device Central with its built-in Opera
Small-Screen Rendering feature. Different devices have different browsers installed, but the preview can give a good
impression of how content will look and behave on a selected device.
60
1 Start Dreamweaver.
2 Open a file.
3 Do one of the following:
• Select File > Preview in Browser > Device Central.
• On the document window toolbar, click and hold the Preview/Debug In browser button and select Preview In
Device Central.
The file is displayed in the Device Central Emulator tab. To continue testing, double-click the name of a different
device in the Device Sets or Available Devices lists.
Access Adobe Device Central from Adobe Bridge
To access Device Central from Adobe Bridge, select an individual file. The supported formats are: SWF, JPG, JPEG,
PNG, GIF, WBM, MOV, 3GP, M4V, MP4, MPG, MPEG, AVI, HTM, HTML, XHTML, CHTML, URL, and
WEBLOC.
1 Start Adobe Bridge.
2 Do one of the following:
• Select a file and click File > Test in Device Central.
• Right-click a file and select Test in Device Central.
The file is displayed in the Device Central Emulator tab. To continue testing, double-click the name of a different
device in the Device Sets or Available Devices lists.
Note: To browse device profiles or to create mobile documents, select Tools > Device Central. Device Central opens with
the Devices Profiles tab shown.
For a tutorial about using Adobe Bridge and Device Central, see http://www.adobe.com/go/vid0208.
Page 67

FLASH CS3
User Guide
Working with projects
About projects
You can use Flash projects (FLP files) to manage multiple document files in a single project. Flash projects allowyou
to group multiple, related files together to create complex applications.
You can use version-control features with projects to ensure that thecorrect file versions are used during editing, and
to prevent accidental overwriting.
Flash projects include the following features:
• A Flash project can contain any Flash or other file type, including previous versions of FLA and SWF files.
• YoucanaddanexistingfiletoaFlashproject.EachfilecanbeaddedtoaparticularFlashprojectonlyonce.Files
can be organized in nested folders.
• A Flash project is an XML file with the file extension .flp—for example, myProject.flp. The XML file references all
the document files contained in the Flash project.
• A Flash project can contain another Flash project (FLP file).
• Changes that you make to a project are updated to the FLP file immediately, so the file is always current; you do
not need to do save the file.
• You can create a Flash project in the Flash authoring environment, or you can create the XML file for a Flash
project in an external application.
• Flash projects use UTF-8 text encoding. All filenames and folder names in a Flash project must be UTF-8
compatible.
61
Create and manage projects
You use the Project panel (Window > Project) to create and manage projects. The panel displays the contents of a
Flash project in a collapsible tree structure. The panel title bar displays the project name.
If a project file is missing (not in its specified location), a Missing File icon appears next to the filename. You can
search for the missing file or delete the file from the project.
When you publish a project, each FLA file in the project is published with the publish profile specified for that file.
Onlyoneprojectcanbeopenatonetime.Ifaprojectisopenandyouopenorcreateanotherproject,Flashautomatically saves and closes the first file.
See also
“Using publish profiles” on page 435
View the Project pop-up menu
❖ When a project is open, click the Project button at the upper-left corner of the Project panel.
Create a new project
1
Do one of the following:
• Select File > New. On the General tab, select Flash Project.
• Select New Project from the Project pop-up menu in the Project panel (visible only if a project is open).
Page 68

FLASH CS3
User Guide
• If no other project is open, open the Project panel and select Create A New Project in the panel window.
• If no project is currently open, right-click (Windows) or Control-click (Macintosh) in the Document window of
a saved Flash document or ActionScript file and select Add To New Project from the context menu.
2 In the New Project dialog box, enter a name for the project and click Save.
Open an existing project
❖ Do one of the following:
• Select Open Project from the Project pop-up menu in the Project panel. Navigate to the project and click Open.
• Double-click the filename.
• If no other project is open, open the Project panel and select Open An Existing Project in the panel window.
Navigate to the project and click Open.
• Select File > Open. Navigate to the project and click Open.
Add a file to a project
❖ Do one of the following:
• Click the Add Files (+) button atthe lower-right corner of the Project panel. Select one or more files and clickAdd.
• Right-click (Windows) or Control-click (Macintosh) in the Document window of an open FLA or AS file and
select Add To Project from the context menu.
62
Note: Afilemustbesavedbeforeyoucanaddittoaproject.Youcanaddafiletoagivenprojectonlyonce.Ifyouattempt
to add a file to the same project more than once, an error message appears.
Create a folder
1
Click the Folder button at the lower-right corner of the Project panel.
2 Enter a name for the folder and click OK.
Note: Folders at the same level on the same branch of the project tree structure must have unique names. If there is a
folder name conflict, an error message appears.
Move a file or folder
❖ Drag the file or folder to a new location in the project tree structure. When you move a folder, all of its contents
are moved.
Note: If you drag afolder to a location with another folder of the same name, Flash merges the contents of the two folders
in the new location.
Delete a file or folder
1
Select the item in the Project panel.
2 Do one of the following:
• Click the Remove button at the lower-right corner of the Project panel.
• Press the Delete key.
• Right-click (Windows) or Control-click (Macintosh) the file or folder and select Remove from the context menu.
Open a file from the Project panel in Flash
❖ Double-click the filename in the Project panel.
Page 69

FLASH CS3
User Guide
If the file is of a native file type (a type supported by the Flash authoring tool), the file opens in Flash. If the file is a
nonnative file type, the file opens in the application used to create it.
Test a project
1
Click Test Project in the Project panel.
2 If the project contains no FLA, HTML, or HTM file, an error message appears. Click OK and add a file of the
appropriate type.
3 If no FLA, HTML, or HTM file is designated as the default document, an error message appears. Click OK. In the
Select Default Document dialog box, select a document and click OK.
When a default document is present, the Test Project feature publishes all FLA files in the document. If the default
document is a FLA file, the Test Movie command is executed. If it is an HTML file, a browser is opened.
Specify a publish profile for a FLA file in a project
1
Select the file in the Project panel and do one of the following:
• Select Settings from the Project pop-up menu.
• Right-click (Windows) or Control-click (Macintosh) and select Settings from the context menu.
2 In the Project Settings dialog box, select the FLA file in the tree structure.
3 Select a publish profile from the Profile menu.
63
Publish a project
❖ Select Publish Project from the Project pop-up menu.
Note: Flash uses default publish profiles to publish FLA files in the project, unless you select other profiles.
Save files in a project when testing or publishing
1
Select Edit > Preferences (Windows) or Flash > Preferences (Macintosh) and click General in the Category list.
2 Under Project Preferences, click Save Files On Test or Publish Project.
When this option is selected, Flash saves all open files in the current project before executing the Test Project or
Publish Project operation.
Close a project
❖ Select Close Project from the Project pop-up menu.
Set preferences to close all files or not close all files when you close a project
1
Select Edit > Preferences (Windows) or Flash > Preferences (Macintosh) and click General in the Category list.
2 Under Project Preferences, select or deselect Close Files with Project. When this option is selected, by default,
Flash closes all files in a project when you close the project.
Rename a project or a folder
1
Select the project name or folder name in the Project panel and do one of the following:
• Select Rename from the Project pop-up menu.
• Right-click (Windows) or Control-click (Macintosh) the item and select Rename from the context menu.
2 Enter a new name and click OK.
Page 70

FLASH CS3
User Guide
Note: By default, a project is given the same name as the first file added to the project. To rename a project, you must
use the Rename menu item. Renaming the FLP file for a project does not rename the project.
Find a missing file in a project
A file that is part of a project can appear to be missing if it is moved from its original location relative to the other
files in the project.
1 Select the filename (designated by a Missing File icon) in the Project panel.
2 Select Find Missing File from the Project pop-up menu, or right-click (Windows) or Control-click (Macintosh)
and select Find Missing File from the context menu.
3 Navigate to the file and click OK.
Use version control with projects
Version control lets you ensure that each author working in a project file is always using the latest version of a file,
and that multiple authors do not overwrite each other’s work.
To use version-control features, you must define a site for the project. You can specify a local, network, or FTP
connection, or you can specify custom plug-ins for version-control systems.
On Windows, you can use Flash projects with SourceSafe.
64
Define a site for version control
1
Create a new project and add files.
2 Select File > Edit Sites.
3 In the Edit Sites dialog box, click New.
4
IntheSiteDefinitiondialogbox,enterthesitename,thelocalrootpath,andthee-mailaddressandnameoftheuser.
5 To specify a local, network, or FTP connection, select Local/Network or FTP from the Connection menu. Enter
the location information for the Local/Network path or for the FTP connection and skip the next step.
6 (Windows only) To specify a Visual SourceSafe database, select SourceSafe Database from the Connection menu.
a In the Database Path box, click Browse to browse for the VSS database you want, or enter the full file path. The
file you select becomes the srcsafe.ini file used to initialize SourceSafe.
b IntheProjectbox,entertheprojectwithintheVSSdatabasethatyouwanttouseastheremotesite’srootdirectory.
c In the Username and Password boxes, enter your login user name and password for the selected database. If you
don’t know your user name and password, check with your system administrator.
d Click OK to return to the Site Definition dialog box.
Note: You must have Microsoft Visual SourceSafe Client version 6 installed.
7 In the Project panel (Window > Project), select Settings from the Project pop-up menu or context menu.
8 In the Project Settings dialog box, select the site definition from the Site menu in the Version Control section.
Click OK.
9 In the Project pop-up menu, select Check In. Flash checks all files in the current project into the site.
Edit a file with version control applied
1
Open the project that contains the file.
Page 71

FLASH CS3
User Guide
2 Select the file in the tree structure in the project panel and select Check Out from the project context menu.
The icon next to the filename indicates that the file is checked out.
3 To check a file back in, select the file in the project panel and select Check In from the project context menu.
The icon next to the filename indicates that the file is checked in.
Open a file from a version-control site
1
Select File > Open from Site.
2 In the Open From Site dialog box, select the site from the Site menu.
3 Select the file in the site.
4 If thefile existson your local system, amessage appears indicating whetherthe file is checked out and, ifso, asking
whether you want to overwrite it. Click Yes to overwrite the local version with the version from the remote site.
Troubleshooting remote folder setup for Flash projects
A web server can be configured in many ways. The following information can help you resolve some common issues
in setting up a remote folder for version control:
• The Flash FTP implementation may not work properly with certain proxy servers, multilevel firewalls, and other
forms of indirect server access. If youhave problems with FTP access, askyour local system administrator for help.
• In some applications, you can connect to any remote directory, then navigate through the remote file system to
find the directory you want. However, for the Flash FTP implementation, you must connect to the remotesystem’s
root folder. Be sure to indicate the remote system’s root folder as the host directory.
• If you have problems connecting, and you’ve specified the host directory using a single slash (/), you might need
to specify a relative path between the directory you are connecting to and the remote root folder. For example, if
the remote root folder is a higher-level directory, you may need to specify a ../../ for the host directory.
• Filenames and folder names that contain spaces and special characters often cause problems when transferred to
a remote site. Use underscores in place of spaces, and avoid special characters wherever possible, especially colons,
slashes, periods, and apostrophes.
• If problems persist, try uploading with an external FTP program to determine if the problem is specific to using
FTP in Flash.
65
Adding media to the library
Managing media assets with the Flash document library
The library in a Flash document stores media assets that you create in the Flash authoring environment or import to
use in the document. You can create vector artwork or text directly in Flash; import vector artwork, bitmaps, video,
and sound; and create symbols. A symbol is a graphic, a button, a movie clip, or text that you create once and can
reuse multiple times. You can also use ActionScript to add media content to a document dynamically.
The library also contains any components that you have added to your document. Components appear in the library
as compiled clips.
You can open the library of any Flash document while you are working in Flash, to make the library items from that
file available for the current document.
Page 72

FLASH CS3
User Guide
You can create permanent libraries in your Flash application that are available whenever you start Flash. Flash also
includes several sample libraries containing buttons, graphics, movie clips, and sounds.
You can export library assets as a SWFfile to a URLto create a runtime-sharedlibrary. Thislets you link to the library
assets from Flash documents that import symbols using runtime sharing.
See also
“Working with text” on page 261
“Using imported artwork” on page 133
“Working with sound” on page 292
“Working with video” on page 301
“Using symbols, instances, and library assets” on page 208
Work with libraries
The Library panel (Window > Library) displays a scroll list with the names of all items in the library, which lets you
view andorganize these elementsas you work. Anicon next toan item’s name inthe Library panel indicates theitem’s
file type.
66
Open a library in another Flash file
1
From the current document, select File > Import > Open External Library.
2 Navigate to the Flash file whose library you want to open and click Open.
The selected file’s library opens in the current document, with the filename at the top of the Library panel. To use
items fromthe selected file’s library in the current document, drag the items to the current document’s Library panel
or to the Stage.
Resize the Library panel
❖ Do one of the following:
• Drag the lower-right corner of the panel.
• Click the Wide State button to enlarge the Library panel so it shows all the columns.
• Click the Narrow State button to reduce the width of the Library panel.
Change the width of columns
❖ Position the pointer between column headers and drag to resize.
You cannot change the order of columns.
Access the Panel menu for the Library panel
❖ Click the Panel menu button in the Library panel’s title bar.
Work with library items
When you select an item in theLibrary panel, a thumbnailpreviewof the item appears at the top of theLibrary panel.
If the selected item is animated or is a sound file, you can use the Play button in the library preview window or the
Controller to preview the item.
Page 73

Use a library item in the current document
❖ Drag the item from the Library panel onto the Stage.
The item is added to the current layer.
Convert an object on the Stage to a symbol in the library
❖ Drag the item from the Stage onto the current Library panel.
Use a library item from the current document in another document
❖ Drag the item from the Library panel or Stage into the Library panel or Stage of another document.
Copy library items from a different document
1
Select the document that contains the library items.
2 Select the library items in the Library panel.
3 Select Edit > Copy.
4 Select the document that you want to copy the library items to.
5 Select that document’s Library panel.
6 Select Edit > Paste.
FLASH CS3
User Guide
67
Work with folders in the Library panel
YoucanorganizeitemsintheLibrarypanelusingfolders.Whenyoucreateanewsymbol,itisstoredintheselected
folder. If no folder is selected, the symbol is stored at the root of the library.
Create a new folder
❖ Click the New Folder button at the bottom of the Library panel.
Open or close a folder
❖ Double-click the folder, or Select the folder and select Expand Folder or Collapse Folder from the Panel menu for
the Library panel.
Open or close all folders
❖ Select Expand All Folders or Collapse All Folders from the Panel menu for the Library panel.
Move an item between folders
❖ Drag the item from one folder to another.
If an item with the same name exists in the new location, Flash prompts you to replace it with the item you are
moving.
Sort items in the Library panel
Columns in the Library panel list the name of an item, its type, the number of times it’s used in the file, its linkage
status and identifier (if the item is associated with a shared library or is exported for ActionScript), and the date on
which it was last modified.
Page 74

FLASH CS3
User Guide
You can sort items in the Library panel alphanumerically by any column. Items are sorted within folders.
❖ Click the column header to sort by that column. Click the triangle button to the right of the column headers to
reverse the sort order.
Edit a library item
1 Select the item in the Library panel.
2 Select one of the following from the Panel menu for the Library panel:
• To edit an item in Flash, select Edit.
• To edit an item in another application, select Edit With and then select an external application.
Note: When starting a supported external editor, Flash opens the original imported document.
Rename a library item
Changing the library item name of an imported file does not change the filename.
1 Do one of the following:
• Double-click the item’s name.
• Select the item and select Rename from the Panel menu for the Library panel.
• Right-click (Windows) or Control-click (Macintosh) the item and select Rename from the context menu.
2 Enter the new name in the box.
68
Delete a library item
Whenyoudeleteanitemfromthelibrary,allinstancesoroccurrencesofthatiteminthedocumentarealsodeleted
unless you specify that they not be.
1 Select the item and click the trash can icon at the bottom of the Library panel.
2 In the warning box that appears, select Delete Symbol Instances (the default) to delete the library item and all its
instances. Deselect the option to delete only the symbol, which leaves the instances on the Stage.
3 Click Delete.
Find unused library items
To organize your document, you can find unused library items and delete them.
Note: It is not necessary to delete unused library items to reduce a Flash document’s file size, because unused library
items are not included in the SWF file. However, items linked for export are included in the SWF file.
❖ Do one of the following:
• Select Unused Items from the Panel menu for the Library panel.
• Sort library items by the Use Count column, which indicates whether an item is in use.
See also
“Using shared library assets” on page 219
Page 75

FLASH CS3
User Guide
Update imported files in the library
If you use an external editor to modify files that you have imported into Flash, such as bitmaps or sound files, you
can update the files in Flash without reimporting them. You can also update symbols that you have imported from
external Flash documents. Updating an imported file replaces its contents with the contents of the external file.
1 Select the imported file in the Library panel.
2 Select Update from the Panel menu for the Library panel.
Work with common libraries
You can use the sample common libraries included with Flash to add buttons or sounds to your documents. You can
also create custom common libraries, which you can then use with any documents that you create.
See also
“Configuration folders installed with Flash” on page 417
Use an item from a common library in a document
1
Select Window > Common Libraries, and select a library from the submenu.
2 Drag an item from the common library into the library for the current document.
69
Create a common library for your Flash application
1
Create a Flash file with a library containing the symbols that you want to include in the common library.
2 Place the Flash file in the user-level Libraries folder on your hard disk.
• On Windows, the path is C:\Documents and Settings\username\Local Settings\Application Data\Adobe\Flash
CS3\language\Configuration\Libraries\.
• On Mac OS, the path is Hard Disk/Users/username/Library/Application Support/Adobe/Flash
CS3/language/Configuration/Libraries/.
Working with timelines
About frames and keyframes
Like films, Flash documents divide lengths of time into frames. In the Timeline, you work with these frames to
organize and control your document’s content. You place frames in the Timeline in the order you want the objects
in the frames to appear in your finished content.
A keyframe is a frame in which you define a change to an object’s properties foran animation or includeActionScript
code to control some aspect of your document. You can also arrange keyframes in the Timeline to edit the sequence
of events inan animation. Flashcan tween, or automatically fill in, the frames between keyframes in order to produce
fluid animations. Because keyframes let you produce animation without drawing each individual frame, they make
creating animation easier.
For a video tutorial about the Timeline, keyframes, and frame rates, see www.adobe.com/go/vid0123.
Page 76

FLASH CS3
User Guide
See also
“Creating animation” on page 229
“The Timeline” on page 33
Manage frames and keyframes in the Timeline
You can perform the following modifications on frames or keyframes:
• Insert, select, delete, and move frames or keyframes.
• Drag frames and keyframes to a new location on the same layer or on a different layer.
• Copy and paste frames and keyframes.
• Convert keyframes to frames.
• Drag an item from the Library panel onto the Stage to add the item to the current keyframe.
Flash offers two different methods for selecting frames in the Timeline. In frame-based selection (the default) you
select individual frames in the Timeline. In span-based selection, the entire frame sequence, from one keyframe to
the next, is selected when you click any frame in the sequence. You can specify span-based selection in Flash preferences.
70
Specify span-based frame selection
1
Select Edit > Preferences.
2 Select the General category.
3 In the Timeline section, select Span Based Selection.
4 Click OK.
Insert frames in the Timeline
• To insert a new frame, select Insert > Frame.
• To create a new keyframe, select Insert > Keyframe, or right-click (Windows) or Control-click (Macintosh) the
frame where you want to place a keyframe, and select Insert Keyframe from the context menu.
• To create a new blank keyframe, select Insert > Blank Keyframe, or right-click (Windows) or Control-click
(Macintosh) the framewhere you want to place the keyframe, and select Insert BlankKeyframe from the context menu.
Select one or more frames in the Timeline
• Toselect one frame, clickthe frame. If you have Span Based Selection enabled, clicking one frameselects the entire
frame sequence between two keyframes.
• To select multiple contiguous frames, Shift-click additional frames.
• To select multiple discontiguous frames, Control-click (Windows) or Command-click (Macintosh) additional
frames.
• To select all frames in the Timeline, select Edit > Timeline > Select All Frames.
Page 77

Copy or paste a frame or frame sequence
❖ Do one of the following:
• Select the frame or sequence and select Edit > Timeline > Copy Frames. Select the frame or sequence that you
want to replace, and select Edit > Timeline > Paste Frames.
•
Alt-click (Windows) or Option-click (Macintosh) and drag the keyframe to the location where you want to paste it.
Delete a frame or frame sequence
❖ Select the frame or sequence and select Edit > Timeline > Remove Frame, or right-click (Windows) or
Control-click (Macintosh) the frame or sequence and select Remove Frame from the context menu.
Surrounding frames remain unchanged.
Move a keyframe or frame sequence and its contents
❖ Drag the keyframe or sequence to the desired location.
Change the length of a tweened sequence
❖ Drag the beginning or ending keyframe left or right. To change the length of a frame-by-frame animation
sequence, see “Create frame-by-frame animations” on page 231.
FLASH CS3
User Guide
71
Extend the duration of a keyframe animation
❖ Press Alt (Windows) or Option (Macintosh) and drag the keyframe to the frame that you want to be the final
frame of the sequence.
Convert a keyframe to a frame
❖ Select the keyframe and select Edit > Timeline > Clear Keyframe, or right-click (Windows) or Control-click
(Macintosh) the keyframe and select Clear Keyframe from the context menu.
The Stage contents of the cleared keyframe and all frames up to the subsequent keyframe are replaced with the Stage
contents of the frame preceding the cleared keyframe.
Add an item from the library to the current keyframe
❖ Drag the item from the Library panel onto the Stage.
About multiple timelines and levels
Flash Player has a stacking order of levels. Every Flash document has a main Timeline located at level 0 in Flash
Player. You can use the
levels.
If you load documents into levels above level 0, the documents stack on top of one another like drawings on transparent paper; when there is no content on the Stage, you can see through to the content on lower levels. If you load
a document into level 0, it replaces the main Timeline. Each document loaded into a level of Flash Player has its own
Timeline.
loadMovie action to load other Flash documents (SWF files) into Flash Player at different
Timelines can send messages to each other with ActionScript. For example, an action on the last frame of one movie
clip can tell another movie clip to play. To use ActionScript to control a Timeline, you must use a target path to
specify the location of the Timeline.
For a video tutorial about using multiple timelines, see www.adobe.com/go/vid0128.
Page 78

FLASH CS3
User Guide
About nested movie clips and parent-child hierarchy
When you create a movie clip instance in a Flash document, the movie clip’s Timeline is nested inside the main
Timeline of the document. Each movie clip symbol has its own Timeline. You can also nest a movie clip instance
inside another movie clip symbol.
When a movie clip is nested inside another movie clip, or inside a document, it becomes a child of that movie clip or
document, which becomes the parent. Relationships between nested movie clips are hierarchical: modifications
made to the parent affect the child. The root Timeline for each level is the parent of all the movie clips on its level,
andbecauseitisthetopmostTimeline,ithasnoparent.IntheMovieExplorer,youcanviewthehierarchyofnested
movie clips in a document.
To understand movie clip hierarchy, consider the hierarchy on a computer: the hard disk has a root directory (or
folder) and subdirectories. The root directory is analogous to the main (or root) Timeline of a Flash document: it is
the parent of everything else. The subdirectories are analogous to movie clips.
You can use the movie clip hierarchy in Flash to organize related objects. For example, you could create a Flash
document containing a car that moves across the Stage. You can use a movie clip symbol to represent the car and set
up a motion tween to move it across the Stage.
To add wheels that rotate, you can create a movie clip for a car wheel, and create two instances of this movie clip,
frontWheel and backWheel. Then you can place the wheels on the car movie clip’s Timeline—not on the
named
main Timeline. Aschildren of
with the car as it tweens across the Stage.
car, frontWheel and backWheel areaffectedbyanychangesmadetocar;theymove
72
To make both wheel instances spin, you can set up a motion tween that rotates the wheel symbol. Even after you
frontWheel and backWheel,theycontinuetobeaffectedbythetweenontheirparentmovieclip,car;the
change
wheels spin, but they also move with the parent movie clip
car across the Stage.
For a video tutorial about using multiple timelines, see www.adobe.com/go/vid0128.
See also
“Using symbols, instances, and library assets” on page 208
About absolute paths
An absolute path starts with the name of the level into which the document is loaded and continues through the
display list until it reaches the target instance. You can also use the alias
the current level. For example, an action in the movie clip
use the absolute path
_root.westCoast.oregon.
california that refers to the movie clip oregon could
The first document to open in Flash Player is loaded at level 0. You must assign each additional loaded document a
level number. When you use an absolute reference in ActionScript to reference a loaded document, use the form
_levelX,whereX is the level number into which the documentis loaded. For example,the first document that opens
in Flash Player is called
_level0; a document loaded into level 3 is called _level3.
To communicate between documents on different levels, you must use the level name in the target path. The
following example shows how the
georgia (georgia is at the same level as oregon):
called
_level5.georgia.atlanta
portland instance would address the atlanta instance located in a movie clip
_root to refer to the topmost Timeline of
Page 79

FLASH CS3
User Guide
Yo u c a n u s e t h e _root alias to refer to the main Timeline of the current level. For the main Timeline, the _root alias
stands for
equal to
florida are both loaded into the same level, an action called from the instance southcarolina could use the
following absolute path to target the instance
_root.eastCoast.florida
_level0 whentargetedbyamovieclipalsoon_level0.Foradocumentloadedinto_level5, _root is
_level5 when targeted by a movie clip also on level 5. For example, if the movie clips southcarolina and
florida:
About relative paths
A relative path depends on the relationship between the controlling Timeline and the target Timeline. Relative paths
can address targets only within their own level of Flash Player. For example, you can’t use a relative path in an action
_level0 that targets a Timeline on _level5.
on
73
In a relative path, use the keyword
to indicate the parent Timeline of the current Timeline. You can use the
in the movie clip hierarchy within the same level of Flash Player. For example,
this to refer to the current Timeline in the current level; use the _parent alias
_parent aliasrepeatedlytogouponelevel
_parent._parent controls a movie
clip up two levels in the hierarchy. The topmost Timeline at any level in Flash Player is the only Timeline with a
_parent value that is undefined.
An action in the Timeline of the instance
following target path to target the instance
_parent
charleston, located one level below southcarolina, could use the
southcarolina:
To target the instance eastCoast (one level up) from an action in charleston, you could use the following relative path:
_parent._parent
To target the instance
_parent._parent.georgia.atlanta
atlanta
from anaction in the Timeline of
charleston
, you could use the following relativepath:
Relative paths are useful for reusing scripts. For example, you could attach the following script to a movie clip that
magnifies its parent by 150%:
onClipEvent (load) {_parent._xscale = 150;_parent._yscale = 150;
}
You can reuse this script by attaching it to any movie clip instance.
Note: Flash Lite 1.0 and 1.1 support attaching scripts only to buttons. Attaching scripts to movie clips is not supported.
Whetheryouuseanabsoluteorarelativepath,youidentifyavariableinaTimelineorapropertyofanobjectwith
.) followed by thename of the variable or property.Forexample, the following statement sets the variable name
adot(
in the instance form to the value "Gilbert":
_root.form.name = "Gilbert";
Using absolute and relative target paths
You can use ActionScript to send messages from one timeline to another. The timeline that contains the action is
called the controlling timeline,andthetimelinethatreceivestheactioniscalledthetarget timeline. For example, there
could be an action on the last frame of one timeline that tells another timeline to play. To refer to a target timeline,
you must use a target path, which indicates the location of a movie clip in the display list.
The following example shows the hierarchy of a document named westCoast on level 0, which contains three movie
california, oregon, and washington. Each of these movie clips in turn contains two movie clips.
clips:
Page 80

FLASH CS3
User Guide
_level0
westCoast
california
sanfrancisco
bakersfield
oregon
portland
ashland
washington
olympia
ellensburg
As on a web server, each timeline in Flash can be addressed in two ways:with an absolute path or with a relative path.
Theabsolutepathofaninstanceisalwaysafullpathfromalevelname,regardlessofwhichtimelinecallstheaction;
for example, the absolute path to the instance
different when called from different locations; for example, the relative path to
_parent, but from portland, it’s _parent._parent.california.
california is _level0.westCoast.california. A relative path is
california from sanfrancisco is
See also
“Structuring FLA files” on page 465
“Organizing ActionScript in an application” on page 467
74
Specify target paths
To control a movie clip, loaded SWF file, or button, you must specify a target path. You can specify it manually, or
by using the Insert Target Path dialog box, or by creating an expression that evaluates to a target path. To specify a
target path for a movie clip or button, you must assign an instance name to the movie clip or button. A loaded
document doesn’t require an instance name, because you use its level number as an instance name (for example,
_level5).
Assign an instance name to a movie clip or button
1
Select a movie clip or button on the Stage.
2 Enter an instance name in the Property inspector.
Specify a target path using the Insert Target Path dialog box
1
Select the movie clip, frame, or button instance to which you want to assign the action.
This becomes the controlling Timeline.
2 In the Actions panel (Window > Actions), go to the Actions toolbox on the left, and select an action or method
that requires a target path.
3 Click the parameter box or location in the script where you want to insert the target path.
4 Click the Insert Target Path button above the Script pane.
5 Select Absolute or Relative for the target path mode.
6 Select a movie clip in the Insert Target Path display list, and click OK.
Specify a target path manually
1
Select the movie clip, frame, or button instance to which you want to assign the action.
Page 81

FLASH CS3
User Guide
This becomes the controlling Timeline.
2 In the Actions panel (Window > Actions), go to the Actions toolbox on the left, and select an action or method
that requires a target path.
3 Click the parameter box or location in the script where you want to insert the target path.
4 Enter an absolute or relative target path in the Actions panel.
Use an expression as a target path
1
Select the movie clip, frame, or button instance to which you want to assign the action.
This becomes the controlling Timeline.
2 In the Actions panel (Window > Actions), go to the Actions toolbox on the left, and select an action or method
that requires a target path.
3 Do one of the following:
• Enter an expression that evaluates to a target path in a parameter box.
• Click to place the insertion point in the script. Then, in the Functions category of the Actions toolbox, double-
click the
targetPath function. The targetPath function converts a reference to a movie clip into a string.
• Click to place the insertion point in the script. Then, in the Functions category of the Actions toolbox, select the
eval function. Theeval function converts a string to a movie clip reference that canbe used to call methods such
play.
as
The following script assigns the value 1 to the variable
movieclipinstanceandassignsittothevariable
i. It then uses the eval function to create a reference to a
x.Thevariablex isnowareferencetoamovieclipinstanceandcan
call the MovieClip object methods.
75
0i = 1;
0x = eval("mc"+i);
0x.play();
0// this is equivalent to mc1.play();
You can also use the eval function to call methods directly, as shown in the following example:
0eval("mc" + i).play();
Working with scenes
About scenes
To organize a document thematically, you can use scenes. For example, you might use separate scenes for an introduction, a loading message, and credits. Though using scenes has some disadvantages, there are some situations in
which fewof thesedisadvantages apply, suchas when you create lengthy animations. When youuse scenes, you avoid
having to manage a large number of FLA files.
Page 82

FLASH CS3
User Guide
Using scenes is similar to using several SWF files together to create a larger presentation. Each scene has a Timeline.
When the playhead reaches the final frame of a scene, the playhead progresses to the next scene. When you publish
a SWF file, the Timeline of each scene combines into a single Timeline in the SWF file. After the SWF file compiles,
it behaves as if you created the FLA file using one scene. Because of this behavior, scenes have some disadvantages:
• Scenes can make documents confusing to edit, particularly in multiauthor environments. Anyone using the FLA
document might have to search several scenes within a FLA file to locate code and assets. Consider loading
content or using movie clips instead.
• Scenes often result in large SWF files. Using scenes encourages you to place more content in a single FLA file,
which results in larger FLA files and SWF files.
• Scenes force users to progressively download the entire SWF file, even if they do not plan or want to watch all of
it. If you avoid scenes, users can control what content they download as they progress through your SWF file.
• Scenes combined with ActionScript might produce unexpected results. Because each scene Timeline is
compressed onto a single Timeline, you might encounter errors involving your ActionScript and scenes, which
typically requires extra, complicated debugging.
Use scenes
When you publish a Flash document that contains more than one scene, the scenes in the document play back in the
order they are listed in the Scene panel. Frames in the document are numbered consecutively through scenes. For
example, if a document contains two scenes with ten frames each, the frames in Scene 2 are numbered 11–20.
76
To stop or pause a document after each scene, or to let users navigate the document in a nonlinear fashion, you use
actions.
Display the Scene panel
❖ Select Window > Other Panels > Scene.
View a particular scene
❖ Select View > Go To, and then select the name of the scene from the submenu.
Add a scene
❖ Select Insert > Scene, or click the Add Scene button in the Scene panel.
Delete a scene
❖ Click the Delete Scene button in the Scene panel.
Change the name of a scene
❖ Double-click the scene name in the Scene panel and enter the new name.
Duplicate a scene
❖ Click the Duplicate Scene button in the Scene panel.
Change the order of a scene in the document
❖ Drag the scene name to a different location in the Scene panel.
Page 83

FLASH CS3
User Guide
Find and Replace
About Find and Replace
The Find and Replace feature lets you do the following:
• Search for a text string, a font, a color, a symbol, a sound file, a video file, or an imported bitmap file.
• Replace the specified element with another element of the same type. Different options are available in the Find
and Replace dialog box depending on the type of specified element.
• Find and replace elements in the current document or the current scene.
• Search for the next occurrence or all occurrences of an element, and replace the current occurrence or all occur-
rences.
Note: In a screen-based document, you can find and replace elements in the current document or the current screen, but
you can’t use scenes.
The Live Edit option lets you edit the specified element directly on the Stage. If you use Live Edit when searching for
a symbol, Flash opens the symbol in edit-in-place mode.
The Find and Replace Log at the bottom of the Find and Replace dialog box shows the location, name, and type of
the elements for which you are searching.
77
See also
“Working with screens” on page 367
Find and replace text
1 Select Edit > Find and Replace.
2 Select Text from the For pop-up menu.
3 In the Text box, enter the text to find.
4 In the Replace With Text box, enter the text to replace the existing text.
5 Select options for searching text:
Whole Word Searches for the specified text string as a whole word only, bounded on both sides by spaces, quotes, or
similar markers. When Whole Word is deselected, the specified text can be searched as part of a larger word. For
example, when Whole Word is deselected, a search for place will yield the words replace, placement, and so on.
Match Case Searches for text that exactly matches the case (uppercase and lowercase character formatting) of the
specified text when finding and replacing.
Regular Expressions Searches for text in regular expressions in ActionScript. An expression is any statement that
Flash can evaluate that returns a value.
Text Field Contents Searches the contents of a text field.
Frames/Layers/Parameters Searches frame labels, layer names, scene names, and component parameters.
Strings in ActionScript Searches stringsin ActionScriptin thedocument or scene(external ActionScript files are not
searched).
6 To select the next occurrence of the specified text on the Stage and edit it in place, select Live Edit.
Note: Only the next occurrence is selected for live editing, even if you select Find All in step 7.
Page 84

FLASH CS3
User Guide
7 To find text, do one of the following:
• To find the next occurrence of the specified text, click Find Next.
• To find all occurrences of the specified text, click Find All.
8 To replace text, do one of the following:
• To replace the currently selected occurrence of the specified text, click Replace.
• To replace all occurrences of the specified text, click Replace All.
Find and replace fonts
1 Select Edit > Find And Replace.
2 Select Font from the For pop-up menu, then select from the following options:
• Tosearchbyfontname,selectFontNameandselectafontfromthepop-upmenuorenterafontnameinthebox.
When Font Name is deselected, all fonts in the scene or document are searched.
• To search by font style, select Font Style and select a font style from the pop-up menu. When Font Style is
deselected, all font styles in the scene or document are searched.
• To search by font size, select Font Size and enter a value for minimum and maximum font size to specify the range
of font sizes to be searched. When Font Size is deselected, all font sizes in the scene or document are searched.
• To replace the specified font with a different font name, select Font Name under Replace With and select a font
namefromthepop-upmenuorenteranameinthebox.WhenFontNameisdeselectedunderReplacewith,the
current font name remains unchanged.
• Toreplacethespecifiedfontwithadifferentfontstyle,selectFontStyleunderReplaceWithandselectafontstyle
fromthepop-upmenu.WhenFontStyleisdeselectedunderReplacewith,thecurrentstyleofthespecifiedfont
remains unchanged.
• To replace the specified font with a different font size, select Font Size under Replace With and enter values for
minimum and maximum font size. When Font Size is deselected under Replace With, the current size of the
specified font remains unchanged.
3 To select the next occurrence of the specified font on the Stage and edit it in place, select Live Edit.
78
Note: Only the next occurrence is selected for live editing, even if you select Find All in step 4.
4 To find a font, do one of the following:
• To find the next occurrence of the specified font, click Find Next.
• To find all occurrences of the specified font, click Find All.
5 To replace a font, do one of the following:
• To replace the currently selected occurrence of the specified font, click Replace.
• To replace all occurrences of the specified font, click Replace All.
Find and replace colors
You cannot find and replace colors in grouped objects.
Note: To find and replace colors in a GIF or JPEG file in a Flash document, edit the file in an image-editing application.
1 Select Edit > Find And Replace.
2 Select Color from the For pop-up menu.
Page 85

FLASH CS3
User Guide
3 To search for a color, click the Color control and do one of the following:
• Select a color swatch from the color pop-up window.
• Enter a hexadecimal color value in the Hex Edit box in the color pop-up window.
• Click the System Color Picker button and select a color from the system color picker.
• To make the eyedropper tool appear, drag from the Color control. Select any color on your screen.
4 To select a color to replace the specified color, click the Color control under Replace With and do one of the
following:
• Select a color swatch from the color pop-up window.
• Enter a hexadecimal color value in the Hex Edit box in the color pop-up window.
• Click the System Color Picker button and select a color from the system color picker.
• To make the eyedropper tool appear, drag from the Color control. Select any color on your screen.
5 To specify which occurrence of the color to find and replace, select the Fills, Strokes, or Text option or any combi-
nation of those options.
6 To select the next occurrence of the specified color on the Stage and edit it in place, select Live Edit.
Note: Only the next occurrence is selected for live editing, even if you select Find All in the next step.
79
7 To find a color, do one of the following:
• To find the next occurrence of the specified color, click Find Next.
• To find all occurrences of the specified color, Click Find All.
8 To replace a color, do one of the following:
• To replace the currently selected occurrence of the specified color, click Replace.
• To replace all occurrences of the specified color, click Replace All.
Find and replace symbols
When you find and replace symbols, search for a symbol by name. Replace a symbol with another symbol of any
type—movie clip, button, or graphic.
1 Select Edit > Find And Replace.
2 Select Symbol from the For pop-up menu.
3 For Name, select a name from the pop-up menu.
4 Under Replace With, for Name select a name from the pop-up menu.
5 To select the next occurrence of the specified symbol on the Stage and edit it in place, select Live Edit.
Note: Only the next occurrence is selected for editing, even if you select Find All in the next step.
6 To find a symbol, do one of the following:
• To find the next occurrence of the specified symbol, click Find Next.
• To find all occurrences of the specified symbol, click Find All.
7 To replace a symbol, do one of the following:
• To replace the currently selected occurrence of the specified symbol, click Replace.
• To replace all occurrences of the specified symbol, click Replace All.
Page 86

FLASH CS3
User Guide
Find and replace sound, video, or bitmap files
1 Select Edit > Find and Replace.
2 Select Sound, Video, or Bitmap from the For pop-up menu.
3 For Name, enter a sound, video, or bitmap filename or select a name from the pop-up menu.
4 Under Replace With, for Name enter a sound, video, or bitmap filename or select a name from the pop-up menu.
5 Toselectthenextoccurrenceofthespecifiedsound,video,orbitmapontheStageandedititinplace,selectLive
Edit.
Note: Only the next occurrence is selected for editing, even if you select Find All in the next step.
6 To find a sound, video, or bitmap, do one of the following:
• To find the next occurrence of the specified sound, video, or bitmap, click Find Next.
• To find all occurrences of the specified sound, video, or bitmap, click Find All.
7 To replace a sound, video, or bitmap, do one of the following:
• To replace the currently selected occurrence of the specified sound, video, or bitmap, Click Replace.
• To replace all occurrences of the specified sound, video, or bitmap, click Replace All.
80
Templates
About templates
The Flash templates provide you with easy-to-use starting points for a range of common projects. There are
templates for projects such as photo slideshows, quizzes, mobile content, and more.
Mobile device templates
Adobe® Flash® CS3 Professional content is viewable across multiple browsers, platforms, and mobile phones. You can
author the following:
• High-quality animations
• Games
• Rich-media custom user interfaces for devices and desktop systems
• E-commerce and business solutions
Flash files are compact, which makes them suitable for wireless carrier networks, where transfer rates vary between
9.6 and 60 kilobytes per second (Kbps). Mobile devices have limited storage capability, so the small memory
requirement of Flash is ideal.
Mobile device templates let you create content for many mobile devices. Use the device skins in the templates to
preview content as it will look on the device.
Note: The skins are on guide layers and won’t export with your content or appear at runtime.
For more information on authoring Flash files for mobile devices, see the Adobe Mobile Devices site at
www.adobe.com/go/devnet_devices.
Page 87

FLASH CS3
User Guide
Quiz templates
Use the quiz templates to create self-scoring quizzes with several interaction types.
Advertising templates
Advertising templates facilitate the creation of standard rich media types and sizes defined by the Interactive Advertising Bureau (IAB) and accepted by the industry. For more information on IAB-endorsed ad types, see the IAB site
at IAB.net.
Test ads for stability in a variety of browser and platform combinations. Your application is considered stable if it
doesn’t cause error messages, browser crashes, or system crashes.
Work with webmasters and networkadministratorsto create detailed testing plans that include tasks relevant to your
users. Make these plans publicly available and update them regularly. Vendors should publish detailed plans
indicating the browser and platform combinations in which their technologies are stable. Examples are available at
the IAB Rich Media testing section of IAB.net. Size and file format requirements of ads might vary by vendor and
site. Check with your vendor, ISP, or the IAB to learn about these requirements that can affect the ad’s design.
Photo slideshow templates
Use the photo slideshow template to exhibit your photos with text captions and playback controls.
81
To use templates
1 Select File > New.
2 Click the Templates tab.
3 Select a template and click OK.
4 Add content to the FLA file.
5 Save and publish the file.
Use the Photo Slideshow template
Photos must be in a suitable format for use in the Photo Slideshow template. You can import images in a variety of
formats,but JPEGs typicallyworkbest for photographs.For best results, save photos as JPEGs using an image-editing
program. Images should be 640 x 480 pixels and should be named in a numbered sequence, for example, photo1.jpg,
photo2.jpg, and photo3.jpg.
Import photos to a SWF file
1
Select the layer of photos included in the example called “picture layer,” and click the trash can icon to delete it.
2 Create a layer by clicking the Insert Layer button, and name this new layer My Photos.
Make sure that this new layer is the bottom layer.
3 Select the first blank keyframe in the My Photos layer, select File > Import > Import to Stage, and locate your
photo sequence.
4 Select the first image in the series, click Open (Windows) or Import (Macintosh), and click Import.
5 Flash recognizes that your image is part of a series and asks you to import all files in the series. Click Yes.
Page 88

FLASH CS3
User Guide
Add finishing touches
Flash places each image on separate keyframes. If you have more than four images, all of the other layers must have
an equal number of frames. Your images appear in the Library panel.
1 Delete the old images that were included in this document from the library.
2 Change the title, date, and caption at the top for each image. Replace text as desired.
Thetemplateautomaticallydetermineshowmanyimagesareinyourdocumentandindicateswhichphotoyouare
currently using.
Use autoplay mode
The Photo Slideshow template also has a built-in autoplay mode that automatically changes the photo after a set
delay. The template is set to a default delay time of 4 seconds, but you can change this setting.
1 Select the controller component on the Stage. It is an instance “mc, controller” component.
2 Open the Component inspector (Window > Component Inspector).
The Parameters tab is selected by default.
3 Select the delay, and change this value to a new delay value, in seconds.
4 Save and publish your document.
82
Page 89

Chapter 4: Adobe Version Cue
Adobe Version Cue® CS3 is a file-version manager included with Adobe Creative Suite 3 Design Premium and
Standard, Adobe Creative Suite 3 Web Premium and Standard, and Adobe Creative Suite 3 Master Collection.
Version Cue enables versioning and asset management in Version Cue-enabled Creative Suite components,
including Adobe Acrobat, Adobe Flash, Adobe Illustrator, Adobe InDesign, Adobe Photoshop, Adobe Bridge, and
Adobe InCopy.
Working with Adobe Version Cue
About Version Cue
Version Cue is a file-version manager included with Creative Suite 3 Design, Web, and Master Collection editions
that consists of two pieces: the Version Cue Server and Version Cue connectivity. The Version Cue Server can be
installed locally or on a dedicated computer and hosts Version Cue projects and PDF reviews. Version Cue connectivity, included with all Version Cue-enabled Creative Suite components (Acrobat, Flash, Illustrator, InDesign,
InCopy, Photoshop, and Bridge) enables you to connect to Version Cue Servers.
83
Use Version Cue to track versions of a file as you work and to enable workgroup collaboration such as file sharing,
version control, backups, online reviews, and the ability to check files in and out. You can organize Version Cuemanaged files into private or shared projects.
Version Cue is integrated with Adobe Bridge: use Bridge as a file browser for Version Cue projects. With Bridge, you
can access Version Cue Servers, projects, and files, and view, search for, and compare information about
Version Cue-managed assets.
Use Version Cue Server Administration to create and manage user access, projects, and PDF reviews; administer
backups; export content; and to specify advanced Version Cue Server information.
For a video on using Version Cue, see www.adobe.com/go/vid0112.
See also
“Version Cue Server Administration” on page 114
“Version Cue PDF reviews” on page 125
What’s new
Initial server configuration When you first start the Version Cue Server (which is turned off by default), the Initial
Configuration window in Version Cue Server Administration enables you specify initial server configuration
settings.
Improved integration with Adobe Bridge Use the Inspector in Bridge to display and act on context-sensitive infor-
mation about Version Cue Servers, projects, and assets. Version Cue options in the Content panel in Bridge let you
connect to Version Cue Servers, create Version Cue projects, and work with Version Cue-managed assets.
Faster upload/download and more efficient server storage Version Cue transfers and stores only the differences
between local files and their counterparts on the Version Cue Server.
Page 90

FLASH CS3
User Guide
Welcome Screen and updated terminology A Welcome screen in Bridge enables you to quickly access Version Cue
Servers and projects. Updated terminology makes it easier to work with Version Cue.
New users and groups interface A new interface for managing user access to Version Cue includes the ability to
assign permissions based on group membership.
LDAP If your workgroup uses LDAP directories for user account management, you can set up Version Cue to search
and add users from these directories. Users can then log in to Version Cue using their LDAP credentials.
SSL Enabling SSL (Secure Sockets Layer, a security protocol), in Version Cue Server Administration allows for
secure communication between the Version Cue Server and Version Cue-enabled Creative Suite components.
Version Cue SDK Java developers can use the Version Cue CS3 SDK to create plug-ins that customize workflows or
create connections to a DAM (Digital Asset Management) system. The API enables developers to deploy a serverside plug-in to integrate custom solutions into Creative Suite 3 components and Bridge. For more information, see
www.adobe.com/go/developer.
See also
“Create projects” on page 96
“Editing and synchronizing offline files” on page 112
“Create and manage users” on page 116
84
Version Cue basics
Version Cue Server
When you perform the default installation of Creative Suite 3 Design, Web, and Master Collection editions, a
Vers ion C ue Se r v er is installed on your computer, but is not turned on. Version Cue Servers store Version Cue
projects and their related assets. You access the Version Cue Server by using Adobe Bridge or the Adobe dialog box
in Version Cue-enabled Creative Suite components. You can start the Version Cue Server on your computer, or,
optimally, install and run the Version Cue Server on a dedicated computer accessible to others on your network.
When you first turn on the Version Cue Server, you’ll be prompted to specify initial server settings, including a
system administrator password, server name and visibility settings, and user account creation settings.
Version Cue Server Administration
Once you’ve installed and turned on the Version Cue Server, use Ve r si o n C ue S e r ve r A dm in i st ra t io n to set up users,
create projects and edit their properties, create and administer PDF reviews, and configure the Version Cue Server.
Version Cue projects
Ve rs i o n C u e u s es projects to store related files and folders. Projects are stored on Version Cue Servers. Projects store
the master copies of files added to the project, as well as file metadata such as version information and comments.
Local project files and server versions
Local project files are created on your hard drive when you open and edit a file from a Version Cue project
(Version Cue marks the file as checked out by you). As you work with the local project file, you save changes to it by
choosing File > Save. This updates the local file on your hard drive, but not the file on the Version Cue Server.
When you’re ready to check in the local project file changes back to the Version Cue Server, you create a version by
using the Check In command. Versions represent a snapshot of the file at a given time.
Page 91

FLASH CS3
User Guide
The Version Cue Server stores all versions of a file so you can view earlier versions, promote earlier versions to be
the current version, or delete unnecessary or obsolete versions.
Version control
Version Cue allows multi-user access to files on the Version Cue Server. If two users try to edit a file on the
Version Cue Server, Version Cue institutes version control by notifying the second user that the file is checked out.
Version Cue then lets you decide how to proceed.
See also
“Version Cue Server Administration” on page 114
“Working with Version Cue projects” on page 95
“Version Cue Server Administration” on page 114
“Version Cue versions” on page 109
“Edit files checked out by another user” on page 104
Version Cue workflow
Before you begin using Version Cue features, you’ll need to install and configure the Version Cue Server, create a
project, and assign users to it.
85
1. Install and configure the Version Cue Server
When you install Creative Suite 3 Design, Web, and Master Collection editions, a Version Cue Server is installed on
your computer, but is not turned on. You can turn on the server to enable simple file sharing; however, if you want
to share Version Cue-managed assets with a workgroup, you should install it on a dedicated computer accessible to
others on your network.
When you start the server for the first time, you’ll be prompted to specify initial server settings, including a system
administrator password, server name and visibility settings, and default user access rights. See “About Version Cue
Server Administration” on page 114.
Configure the server further by specifying settings in Version Cue Server preferences and in Version Cue Server
Administration. See “Version Cue Server Administration” on page 114 and “Advanced Version Cue Server Administration tasks” on page 123.
2. Create a project and assign users
After you’ve set up and configured the Version Cue Server, you can create projects and assign users to them. By
default, projects you create in Version Cue are private. You change a project’s shared status at any time, and restrict
access to the project, by specifying that users log in when they access the project.
Create projects by using Bridge, the Adobe dialog box, or Version Cue Server Administration. To specify advanced
project properties, such as requiring user login and assigning user access permissions, you must use Version Cue
Server Administration. See “Create projects” on page 96 and “Create and manage projects in Version Cue Server
Administration” on page 119.
Page 92

FLASH CS3
User Guide
3. Add files to a project
Once you’ve created a project, add files to the project so users can check them out, make changes, and check them
back in. You can add multiple Adobe or non-Adobe files by using Bridge, or add files one at a time from within a
Version Cue-enabled Creative Suite component by using the Adobe dialog box. See “Add files and folders to a
project” on page 99.
Accessing Version Cue features
Access to Version Cue features, by way of the Adobe dialog box or Bridge, varies depending on whether or not you
use Version Cue-enabled software and whether or not you use one of the Adobe Creative Suite products (for
example, Adobe Creative Suite Design Premium).
For instance, you have access to the full feature set, either through the Adobe dialog box or Bridge, when you use
Photoshopaspartofasuiteproduct.Bycontrast,ifyouusePhotoshopasstandalonesoftware,youmustbegranted
access to a shared project in order to use the full Version Cue feature set. In Dreamweaver, Contribute, and
Fireworks, you have access to Version Cue features only through Bridge. The following table explains the scenarios
in which you have access to Version Cue features, and how you access those features.
Software component Access via the Adobe dialog box Access via Bridge
86
Acrobat, Bridge, Illustrator, InCopy,
InDesign, Photoshop, Flash
Dreamweaver, Contribute, Fireworks, No When used as part of a Creative Suite
When used as part of a Creative Suite
product: Yes
When used as standalone software:
Only if granted access to a shared
project
When used as part of a Creative Suite
product: Yes
When used as standalone software:
Only if granted access to a shared
project
product: Yes
When used as standalone software:
Only if granted access to a shared
project
Adobe recommends managing non-Adobe files with Bridge. However, if you’re collaborating with other users who
don’t have access to Bridge, you can use the Version Cue WebDAV Server URL to access projects on a Version Cue
Server.
IT administrators can use the Adobe Version Cue Access Utility, available for download from the Adobe website, to
access and extract current versions of files stored in a Version Cue project. For more information, visit the Adobe
website.
Using Creative Suite 2 components and Acrobat 8 with Version Cue CS3
You can use Adobe Creative Suite 2 components and Acrobat 8 with the Version Cue CS3 Server; however, there are
some differences to keep in mind.
• If you’re using Acrobat 8 or an Adobe Creative Suite 2 component to access Version Cue CS3-managed files, the
files must be part of a Version Cue CS2-compatible project. You can specify that a Version Cue CS3 project is
Version Cue CS2-compatible when you create it. (You cannotspecify thata project isVersion Cue CS2-compatible
after you create it.)
Note: Projects migrated from Version Cue CS2 to Version Cue CS3 remain compatible with Acrobat 8 and Adobe
Creative Suite 2 components.
Page 93

FLASH CS3
User Guide
• Acrobat 8 and Adobe Creative Suite 2 components can’t connect to a Version Cue CS3 Server if you enable SSL in
Version Cue Server Administration.
• Adobe Creative Suite 2 components can’t work with Version Cue CS3 servers that are installed on the same
computer. Adobe Creative Suite 2 components can, however, connect to Version Cue CS3 Servers that reside on
the network.
• The Version Cue CS2 Workspace and the Version Cue CS3 Server can be installed and function on the same
computer simultaneously (and must be installed on the same computer if you want to migrate projects from
Version Cue CS2 to Version Cue CS3).
• If a Version Cue CS2 Workspace and a Version Cue CS3 Server are installed on the same computer, Adobe
Creative Suite 2 components work only with the Version Cue CS2 Workspace, because they can communicate
only with the port that the Version Cue CS2 Workspace uses.
• Version Cue CS3 doesn’t support alternates; however, Adobe Creative Suite 2 components can work with alter-
nates in Version Cue CS2-compatible projects on a Version Cue CS3 Server. Adobe Creative Suite 3 components
cannot access alternates in a Version Cue CS2-compatible project on a Version Cue CS3 Server.
For help using Acrobat 8 with Version Cue CS2, see “Using Version Cue” in Acrobat 8 Help. For help using Adobe
Creative Suite 2 components with Version Cue CS2, see Version Cue CS2 Help.
See also
“Create and manage projects in Version Cue Server Administration” on page 119
87
Use the Adobe dialog box
In Version Cue-enabled Creative Suite components, you can use the Adobe dialog box when you choose the Open,
Import, Export, Place, Save, or Save As commands. The Adobe dialog box gives you access to Version Cue
commands and controls, and displays thumbnails and other information that makes it easy to identify files.
To use the Adobe dialog box, click Use Adobe Dialog in the Open, Import, Export, Place, Save, or Save As dialog
boxes.
IftheUseAdobeDialogbuttondoesn’tappearintheOpen,Import,Export,Place,Save,orSaveAsdialogbox,make
sure that you have enabled Version Cue file management in Bridge or in the Creative Suite component you’re using.
Use the View menu options to customize the display. You can change back to the OS dialog box at any time by
clicking Use OS Dialog.
Page 94

A B C D E
The Adobe dialog box
A. Favorites panel B. Look In menu C. Toggl e me ta data D. To ols m enu E. Vi ew menu
FLASH CS3
User Guide
88
Version Cue Server and project icons
BridgeandtheAdobedialogboxdisplaystatusiconsforVersionCueServersandprojectstoletyouknowwhether
they’re online (available), offline, local, or remote.
Shared Project Indicates a project that’s available and shared with other users.
Private Project Indicates a project that’s available and not shared with other users.
Offline Project Indicates a project that’s not available.
VC2 Compatible Project Indicates a project that is compatible with Adobe Creative Suite 2 components and
Adobe Acrobat 8.
Offline Server Indicates an offline Version Cue Server.
My Server Indicates a Version Cue Server that is local to your computer.
Network Server Indicates a remote Version Cue Server that’s available.
Enable Version Cue file management
Version Cue file management, whichprovidesaccess to Version Cue projects, isenabled by default in Bridge CS3 and
all Version Cue-enabled Creative Suite components, except for Acrobat 8. (You must always enable or disable
Version Cue file management manually in Acrobat 8.)
If youdisable Version Cue file management inone Creative Suitecomponent, you disable it in all other Version Cueenabled Creative Suite components, except Acrobat and Bridge. If you disable Version Cue file management in
Bridge, you disable it in all Version Cue-enabled Creative Suite components, except Acrobat.
Page 95

FLASH CS3
User Guide
Disabling Version Cue file management means that you disableaccess to all Version Cue projects on all Version Cue
Servers.
• In the Startup Scripts preferences in Bridge, select Version Cue, and click OK.
• In File Handling & Clipboard preferences in Illustrator, select Enable Version Cue, and click OK.
• In File Handling preferences in InDesign, select Enable Version Cue, and click OK.
• In File Handling preferences in Photoshop, select Enable Version Cue, and click OK.
• In General preferences in Flash, select Enable Version Cue, and click OK.
• In Documents preferences in Acrobat, select Enable Version Cue File Version Manager, and click OK.
• In File Handling preferences in InCopy, select Enable Version Cue, and click OK.
View Version Cue information
Note: You can perform this task only if you have access to the full Version Cue feature set. See “Accessing Version Cue
features” on page 86.
You can view information about Version Cue Servers, projects, and assets in the Adobe dialog box or by using the
Inspector in Bridge. For help on viewing information in Bridge, see “Inspect Version Cue files” in Bridge Help.
If you’ve already opened a Version Cue-managed file in a Version Cue-enabled Creative Suite component, you can
view information about it in the status bar at the lower-left of the document window (in Acrobat, this information
appears in the lower-left of the navigation pane).
89
Status bar
1 In Acrobat, Flash, Illustrator, InCopy, InDesign, or Photoshop, choose File > Open.
2 Click Use Adobe Dialog. (If you see Use OS Dialog instead, you are already using the Adobe dialog box.)
3 Click Version Cue in the Favorites panel.
4 To change the display of Version Cue Servers, projects, or files in the dialog box, choose a display option from
View menu .
Note: If a Version Cue Server for which you want to view information is outside your subnet, use the Connect To Server
command from the Tools menu (or Connect To from the Project Tools menu in Acrobat) to access it.
5 To display information about a Version Cue Server, project, or file, do one of the following:
• Click the toggle to display the Properties panel and view the properties of a file.
• Place the pointer over the item. Information appears in a tool tip.
• SelectthefileandchooseVersionsfromtheToolsorProjectTools(Acrobat)menutodisplayinformationabout
a file’s versions.
Page 96

FLASH CS3
User Guide
See also
“File statuses” on page 102
Working with the Version Cue Server
About Version Cue Server installation
Version Cue Servers store Version Cue projects and their related assets. When you perform a default installation of
Creative Suite 3 Design, Web, or Master Collection editions, Version Cue installs the Version Cue Server on your
computer, but does not turn it on. When the Version Cue Server is installed on your computer, the server is available
only if your computer is turned on and networked to the other users in your group. This scenario is adequate for
personal use or for file sharing between individuals.
Alternatively, you can install the Version Cue Server on a dedicated computer accessible to others on your network,
so that Version Cue-managed assets are always available to a workgroup.
For a video on using Version Cue in a workgroup, see www.adobe.com/go/vid0113.
90
INDIVIDUAL
Individuals
Local or server-based file sharing:Version Cue can be set up tooperate in auser-orserver-basedenvironment. In a user-based implementation,
filesandprojectsaresharedfromanindividual’sownharddrive.Inaserver-basedenvironment,theVersionCueServerresidesonaseparate,
dedicated computer.
USER-BASED CONFIGURATION
Workgroups
SERVER-BASED CONFIGURATION
Workgroups
```
The Version Cue Server is installed in the Program Files/Common Files/Adobe/Adobe Version Cue CS3/Server
folder (Windows) or in the Library/Application Support/Adobe/Adobe Version Cue CS3/Server folder (Mac OS).
You cannot change this location.
To install the Version Cue Server on a dedicated computer, run the Creative Suite 3 Design, Web, or Master
Collection edition installer on the dedicated computer, following the on-screen prompts to install only the
Vers ion Cue Se r ver.
Note: Consult the End-User License Agreement (EULA) for your copy of Adobe Creative Suite before installing the
Version Cue Server on a dedicated computer.
Turn on and configure the Version Cue Server
To use a Version Cue Server, you’ll need to turn it on and configure initial settings. Once you’ve configured initial
settings, you can configure additional Version Cue Server settings in the Version Cue preferences and specify
advanced server settings (such as enabling SSL) in Version Cue Server Administration.
Page 97

FLASH CS3
User Guide
For a video on setting up the Version Cue server, see www.adobe.com/go/vid0114.
1 Do either of the following:
• Click Start My Server in the Adobe dialog box or in Adobe Bridge.
• Open the Control Panel and double-click Adobe Version Cue CS3 (Windows) or click Adobe Version Cue CS3 in
System Preferences (Mac OS), and then click Start.
Version Cue starts Version Cue Server Administration and displays the Initial Configuration window.
2 In the Initial Configuration window, specify a system administrator password in the Password box.
Note: Be sure to note the password you specify. If you forget the system administrator password, you’ll need to reinstall
the Version Cue Server.
3 Specify a name for the server in the Server Name box.
4 Choose an option from the Server Visibility menu:
• To prevent other users in your network from seeing the server, choose Private. Private Version Cue Servers can be
accessed only from your local computer.
• To make the server visible to other users in your network, choose Visible To Others. (You must configure the
server to be visible to grant others access to projects on the server.)
Note: If Version Cue is installed on a Windows computer that uses a firewall and you want to share the server with
others, make sure that TCP ports 3703 and 5353 are left open. If you've enabled SSL for the Version Cue Server, also
leave port 3704 open. If Version Cue CS2 is installed on the same computer, also leave port 50900 open (and 50901 if
you’ve enabled SSL). For instructions, see Windows Help.
91
5 Choose an option from the User Accounts menu: I
• To enable users to access the server without an existing user account, choose Automatic User Creation. If you
select this option, Version Cue creates a new user account without a password when a new user accesses the server.
If you enable Automatic User Account Creation and then subsequently enable LDAP support, LDAP users are
automatically imported when they access the server with their LDAP account name. Users imported in this fashion
are added to the Everyone group, given a user access level of None, and are not able to log into Version Cue Server
Administration. Use this technique to automatically assign LDAP users default access rights toprojects on a Version Cue
server without having to explicitly import users.
• To specify that only named users, defined in Version Cue Server Administration, can access the server, choose
Manual User Creation.
6 Click Save & Continue to log in to Version Cue Server Administration and specify advanced server settings.
See also
“Version Cue Server Administration” on page 114
“Use the Adobe dialog box” on page 87
“Create and manage users” on page 116
Page 98

FLASH CS3
User Guide
Set Version Cue Server preferences
You can configure many Version Cue Server settings in Version Cue preferences, such as the amount of RAM
available to Version Cue and the location of the Data folder. To configure advanced settings, such as enabling SSL,
changing the name of the Version Cue Server, specifying server log options, resetting user locks, or backing up the
server, you must use Version Cue Server Administration.
See also
“Advanced Version Cue Server Administration tasks” on page 123
Access Version Cue Server preferences
1
Do one of the following to access Version Cue preferences:
• In Windows, double-click the Version Cue icon in the system tray at the lower-right of the screen.
• In Mac OS, click the Version Cue icon in the menu bar at the top of the screen, and choose Version Cue CS3
Preferences from the menu.
• Open the Control Panel and double-click Adobe Version Cue CS3 (Windows) or click Adobe Version Cue CS3 in
System Preferences (Mac OS).
2 Click the Settings tab in the Adobe Version Cue CS3 dialog box.
92
Make the Version Cue Server visible
1
To grant others access to shared Version Cue projects on the server, choose This Server Is Visible To Others from
the Server Visibility menu. To hide the Version Cue Server from other users, choose This Server Is Private.
Note: If Version Cue is installed on a Windows computer that uses a firewall and you want to share the server with
others, make sure that TCP ports 3703 and 5353 are left open. If you've enabled SSL for the Version Cue Server, also
leave port 3704 open. If Version Cue CS2 is installed on the same computer, also leave port 50900 open (and 50901 if
you’ve enabled SSL). For instructions, see Windows Help.
2 Click Apply.
Specify a workgroup size
1
From the Workgroup Size menu, choose the number of people who use the Version Cue Server on a typical day.
This setting controls how the Version Cue Server handles the potential load.
2 Click Apply.
Specify RAM
The default amount of allocated RAM (128 MB) is sufficient for workgroups of fewer than 10 people and projects
with fewer than 1000 assets. Allocate at least 256 MB of RAM for larger workgroups and projects with up to 1000
assets. Allocate at least 512 MB of RAM if you work with more than 1000 assets per project or morethan 50 projects,
regardless of workgroup size.
1 IntheMemoryUsagebox,entertheamountofRAMthatyouwanttomakeavailabletoVersionCue(thedefault
is 128 MB).
2 Click Apply.
Keep the Version Cue icon visible
1
Select Show Version Cue CS3 Tray Icon (Windows) or Show Version Cue CS3 Status in Menu Bar (Mac OS) to
keep the Version Cue icon visible.
Page 99

FLASH CS3
User Guide
2 Click Apply.
Turn Version Cue on when the computer starts
1
Select Turn Version Cue CS3 On When The Computer Starts.
2 Click Apply.
Change the location of the Data folder
The Data folder contains files that maintain the integrity of Version Cue projects, file versions, and metadata. You
canchangethelocationoftheDatafolder;however,youcannotmoveittoanetworkvolume.IfyoumovetheData
folder to an external disk in Mac OS, make sure to deselect Ignore File Permissions in the disk’s Get Info dialog box.
Important: Shut down the Version Cue Server before you change the folder location. Do not attempt to move this folder
manually or edit any of the files in the Version Cue Data folder.
1 Do one of the following to access Version Cue preferences:
• In Windows, double-click the Version Cue icon in the system tray at the lower-right of the screen.
• In Mac OS, click the Version Cue icon in the menu bar at the top of the screen, and choose Version Cue CS3
Preferences from the menu.
• Open the Control Panel and double-click Adobe Version Cue CS3 (Windows) or click Adobe Version Cue CS3 in
System Preferences (Mac OS).
2 Click the Locations tab in the Adobe Version Cue CS3 dialog box.
3 Click the Choose buttonnext to the current Data folder location, and select anew locationfor the folder. You must
choose a location on the computer (including external disks) where the Version Cue Server is installed.
4 Click OK.
5 Click Apply. If prompted, click Yes (Windows) or Restart (Mac OS) to restart the Version Cue Server.
93
See also
“Shut down or restart the Version Cue Server” on page 95
Connect to remote servers
Note: You can perform this task only if you have access to the full Version Cue feature set. See “Accessing Version Cue
features” on page 86.
When you need to work on Version Cue projects that are located on a different subnet, you can use the IP address of
the computer to access the remote Version Cue Server, as long as it is configured to be visible to other users.
Version Cue Servers within your subnet that are configured to be visible are visible automatically.
1 Do one of the following:
• In Acrobat, Flash, Illustrator, InCopy, InDesign, or Photoshop, choose File > Open. If you’re using the OS Dialog
box, click Use Adobe Dialog. Click Version Cue in the Favorites panel, and choose Connect To Server from the
Tools menu or Connect To from the Project Tools (Acrobat) menu .
• In Bridge, choose Tools > Version Cue > Connect To Server.
2 In the Connect To Server dialog box, type the IP or DNS address and port of the Version Cue Server, for example,
http://153.32.235.230. If you’re connecting to a server that is on the same system as a Version Cue CS2 workspace,
append the port number 50900 to the end of the Version Cue URL, for example, http://153.32.235.230:50900.
Page 100

FLASH CS3
User Guide
Display the Version Cue Server Administration login page to identify the Version Cue URLs that remote users and
WebDAV applications need to access the server. Alternatively, view the URLs in the Inspector in Bridge.
3 Click OK.
A shortcut to the remote server is automatically included in your list of available Version Cue Servers.
Connect to a Version Cue Server using WebDAV
Adobe recommends managingnon-Adobe files with Adobe Bridge.However, if you’re collaborating withother users
who don’t have access to Adobe Bridge, you can use the Version Cue WebDAV Server URL to access projects on a
Vers ion Cue Se r ver.
YoucanaccessaVersionCueServerbyusingaWebDAV-enabledapplication,suchasaMicrosoftOfficeapplication.
In Windows, specify a project on a Version Cue Server as a network place by specifying the project’s WebDAV URL.
In Mac OS, specify the project’s WebDAV URL by using the Connect To Server Command from the Finder. Before
attempting to connect, refer to your application’s documentation on using its WebDAV features.
❖ Enter the Version Cue WebDAV URL, the port number (3703, or 50900 if you’re connecting to a server that is
running on the same system as a Version Cue CS2 workspace), “webdav,” and the project name. For example:
http://153.32.235.230:3703/webdav/project_name
94
Migrate projects to the Version Cue 3.0 Server
If you currently use Version Cue CS2, you need to migrate your projects to Version Cue CS3. When you migrate
Version Cue CS2 projects to Version Cue CS3, users assigned to those projects are also migrated.
You cannot migrate Version Cue CS2 projects to Version Cue CS3 on Intel-based Macintosh computers.
Before migrating projects, ask all users to synchronize their assets so project data is up to date.
1 Locate the folder “com.adobe.versioncue.migration_2.0.0” on the computer on which Version Cue CS3 is
installed and copy it to the Version Cue CS2 Plugins folder.
2 Restart Version Cue CS2.
3 Log in to Version Cue CS3 Server Administration.
4 Click the Advanced tab, and then click Import Version Cue CS2 Data.
5 Enter a Version Cue CS2 administrator login and password, and click Log In.
6 Select the project you want to migrate, and click Migrate.
Note: If the Version Cue CS2 project has the same name as a project that exists on the Version Cue CS3 Server,
Version Cue will append a number to the end of the Version Cue CS2 project name (for example, Test Project (2)). If a
Version Cue CS2 user has the same user name as an existing user on the Version Cue CS3 Server, Version Cue will use
the existing Version Cue CS3 user account.
7 When Version Cue Server Administration displays the confirmation page, click End.
8 Stop the Version Cue CS2 workspace.
9 Uninstall Version Cue CS2.
10 Restart the Version Cue CS3 Server. This resets the port to allow access from both Adobe Creative Suite 2 and
Adobe Creative Suite 3 components.
 Loading...