

Page 1

USER GUIDE
Page 2

© 2007 Adobe Systems Incorporated. All rights reserved.
Adobe® Acrobat® 8 Standard for Windows® and Mac OS
If this guide is distributed with software that includes an end user agreement, this guide, as well as the software described in it, is furnished under license and may be used or
copied only in accordance with the terms of such license. Except as permitted by any such license, no part of this guide may be reproduced, stored in a retrieval system, or transmitted, in any form or by any means, electronic, mechanical, recording, or otherwise, without the prior written permission of Adobe Systems Incorporated.Pleasenotethatthe
content in this guide is protected under copyright law even if it is not distributed with software that includes an end user license agreement.
Thecontentofthis guideisfurnishedforinformational useonly, is subjecttochangewithoutnotice,andshouldnotbeconstruedas acommitmentbyAdobe Systems Incorporated. Adobe Systems Incorporated assumes no responsibility or liability for any errors or inaccuracies that may appear in the informational content contained in this guide.
Please remember that existing artwork or images that you may want to include in your project may be protected under copyright law. The unauthorized incorporation of such
material into your new work could be a violation of the rights of the copyright owner. Please be sure to obtain any permission required from the copyright owner.
Any references to company names in sample templates or images are for demonstration purposes only and are not intended to refer to any actual organization.
Adobe, the Adobe logo, Acrobat, Acrobat Capture, Acrobat Connect, Breeze, Creative Suite, Distiller, Flash, FrameMaker, FreeHand, GoLive, Illustrator, InCopy, InDesign,
LiveCycle, Photoshop, PostScript, PostScript 3, Reader, and Version Cue are either registered trademarks or trademarks of Adobe Systems Incorporated in the United States
and/or other countries.
Apple, Mac and Macintosh are trademarks of Apple Inc., registered in the United States and other countries. Microsoft, MS-DOS, OpenType, Vista, and Windows are either registered trademarks or trademarks of Microsoft Corporation in the United States and/or other countries. UNIX is a registered trademark op The Open Group in the US and other
countries. Helvetica and Times are trademarks of Heidelberger Druckmaschinen AG exclusively licensed through Linotype Library GmbH, and may be registered in certain jurisdictions. All other trademarks are the property of their respective owners.
The Spelling portion of this product is based on Proximity Linguistic Technology. © Copyright 1989, 2004 All Rights Reserved Proximity Technology A Division of Franklin
Electronic Publishers, Inc. Burlington, New Jersey USA. © Copyright 1990 Merriam-Webster Inc. © Copyright 1990 All Rights Reserved Proximity Technology A Division of
Franklin Electronic Publishers, Inc. Burlington, New Jersey USA. © Copyright 2003, 2004 Franklin Electronic Publishers, Inc. © Copyright 2003, 2004 All Rights Reserved
Proximity Technology A Division of Franklin Electronic Publishers, Inc. Burlington, New Jersey USA. © Copyright 1991 Dr. Lluis de Yzaguirre I Maura. © Copyright 1991 All
Rights Reserved Proximity Technology A Division of Franklin Electronic Publishers, Inc. Burlington, New Jersey USA. © Copyright 1990 Munksgaard International Publishers
Ltd. © Copyright 1990 All Rights Reserved Proximity Technology A Division of Franklin Electronic Publishers, Inc. Burlington, New Jersey USA. © Copyright 1990, 1995 Van
Dale Lexicografie bv © Copyright 1990, 1996 All Rights Reserved Proximity Technology A Division of Franklin Electronic Publishers, Inc. Burlington, New Jersey USA. ©
Copyright 1990, 2004 IDE a.s. © Copyright 1990, 2004 All Rights Reserved Proximity Technology A Division of Franklin Electronic Publishers, Inc. Burlington, New Jersey USA.
© Copyright 1992 Hachette / Franklin Electronic Publishers, Inc. © Copyright 2004 All Rights Reserved Proximity Technology A Division of Franklin Electronic Publishers, Inc.
Burlington, New Jersey USA. © Copyright 1991 Text & Satz Datentechnik © Copyright 1991 All Rights Reserved Proximity Technology A Division of Franklin Electronic
Publishers, Inc. Burlington, New Jersey USA. © Copyright 2004 Bertelsmann Lexikon Verlag © Copyright 2004 All Rights Reserved Proximity Technology A Division of Franklin
Electronic Publishers, Inc. Burlington, New Jersey USA. © Copyright 2004 MorphoLogic Inc. © Copyright 2004 All Rights Reserved Proximity Technology A Division of Franklin
Electronic Publishers, Inc. Burlington, New Jersey USA. © Copyright 1990 William Collins Sons & Co. Ltd. © Copyright 1990 All Rights Reserved Proximity Technology A
Division of Franklin Electronic Publishers, Inc. Burlington, New Jersey USA. © Copyright 1993, 1994, 1995 Russicon Company Ltd. © Copyright 1995 All Rights Reserved
Proximity Technology A Division of Franklin Electronic Publishers, Inc. Burlington, New Jersey USA.
Portions of Adobe Acrobat include technology used under license from Autonomy and are copyrighted.
This product contains either BISAFE and/or TIPEM software by RSA Data Security, Inc.
e_Db is a licensed product from Simple Software Solutions, Inc.
Adobe Systems Incorporated, 345 Park Avenue, San Jose, California 95110, USA.
Notice to U.S. Government End Users. The Software and Documentation are “Commercial Items,” as that term is defined at 48 C.F.R. §2.101, consisting of “Commercial
Computer Software” and “Commercial Computer Software Documentation,” as such terms are used in 48 C.F.R. §12.212 or 48 C.F.R. §227.7202, as applicable. Consistent with
48 C.F.R. §12.212 or 48 C.F.R. §§227.7202-1 through 227.7202-4, as applicable, the Commercial Computer Software and Commercial Computer Software Documentation are
being licensed to U.S. Government end users (a) only as Commercial Items and (b) with only those rights as are granted to all other end users pursuant to the terms and conditions
herein. Unpublished-rights reserved under the copyright laws of the United States. Adobe agrees to comply with all applicable equal opportunity laws including, if appropriate,
the provisions of Executive Order 11246, as amended, Section 402 of the Vietnam Era Veterans Readjustment Assistance Act of 1974 (38 USC 4212), and Section 503 of the
Rehabilitation Act of 1973, as amended, and the regulations at 41 CFR Parts 60-1 through 60-60, 60-250, and 60-741. The affirmative action clause and regulations contained in
the preceding sentence shall be incorporated by reference.
Page 3

Contents
Chapter 1: Before you begin
Installation . . . . . . . . . . . . . . . . . . . . . . . . . . . . . . . . . . . . . . . . . . . . . . . . . . . . . . . . . . . . . . . . . . . . . . . . . . . . . . . 1
Using Adobe Help . . . . . . . . . . . . . . . . . . . . . . . . . . . . . . . . . . . . . . . . . . . . . . . . . . . . . . . . . . . . . . . . . . . . . . . . 2
Resources . . . . . . . . . . . . . . . . . . . . . . . . . . . . . . . . . . . . . . . . . . . . . . . . . . . . . . . . . . . . . . . . . . . . . . . . . . . . . . . . 4
What’s new . . . . . . . . . . . . . . . . . . . . . . . . . . . . . . . . . . . . . . . . . . . . . . . . . . . . . . . . . . . . . . . . . . . . . . . . . . . . . . . 9
Chapter 2: Workspace
Quickstart . . . . . . . . . . . . . . . . . . . . . . . . . . . . . . . . . . . . . . . . . . . . . . . . . . . . . . . . . . . . . . . . . . . . . . . . . . . . . . . 12
Work area basics . . . . . . . . . . . . . . . . . . . . . . . . . . . . . . . . . . . . . . . . . . . . . . . . . . . . . . . . . . . . . . . . . . . . . . . . . 14
Customizing the work area . . . . . . . . . . . . . . . . . . . . . . . . . . . . . . . . . . . . . . . . . . . . . . . . . . . . . . . . . . . . . . . 18
Viewing PDF pages . . . . . . . . . . . . . . . . . . . . . . . . . . . . . . . . . . . . . . . . . . . . . . . . . . . . . . . . . . . . . . . . . . . . . . 24
Adjusting PDF views . . . . . . . . . . . . . . . . . . . . . . . . . . . . . . . . . . . . . . . . . . . . . . . . . . . . . . . . . . . . . . . . . . . . . 36
Grids, guides, and measurements . . . . . . . . . . . . . . . . . . . . . . . . . . . . . . . . . . . . . . . . . . . . . . . . . . . . . . . . . 41
Saving PDFs . . . . . . . . . . . . . . . . . . . . . . . . . . . . . . . . . . . . . . . . . . . . . . . . . . . . . . . . . . . . . . . . . . . . . . . . . . . . . 43
Organizer . . . . . . . . . . . . . . . . . . . . . . . . . . . . . . . . . . . . . . . . . . . . . . . . . . . . . . . . . . . . . . . . . . . . . . . . . . . . . . . . 45
Maintaining the software . . . . . . . . . . . . . . . . . . . . . . . . . . . . . . . . . . . . . . . . . . . . . . . . . . . . . . . . . . . . . . . . 50
Non-English languages . . . . . . . . . . . . . . . . . . . . . . . . . . . . . . . . . . . . . . . . . . . . . . . . . . . . . . . . . . . . . . . . . . 51
iii
Chapter 3: Creating PDFs
Quickstart . . . . . . . . . . . . . . . . . . . . . . . . . . . . . . . . . . . . . . . . . . . . . . . . . . . . . . . . . . . . . . . . . . . . . . . . . . . . . . . 53
Overview of creating PDFs . . . . . . . . . . . . . . . . . . . . . . . . . . . . . . . . . . . . . . . . . . . . . . . . . . . . . . . . . . . . . . . 56
Creating simple PDFs with Acrobat . . . . . . . . . . . . . . . . . . . . . . . . . . . . . . . . . . . . . . . . . . . . . . . . . . . . . . . 58
Using the Adobe PDF printer . . . . . . . . . . . . . . . . . . . . . . . . . . . . . . . . . . . . . . . . . . . . . . . . . . . . . . . . . . . . . 67
Creating PDFs with PDFMaker . . . . . . . . . . . . . . . . . . . . . . . . . . . . . . . . . . . . . . . . . . . . . . . . . . . . . . . . . . . . 70
Application-specific features of PDFMaker . . . . . . . . . . . . . . . . . . . . . . . . . . . . . . . . . . . . . . . . . . . . . . . . 74
Converting web pages to PDF . . . . . . . . . . . . . . . . . . . . . . . . . . . . . . . . . . . . . . . . . . . . . . . . . . . . . . . . . . . . 82
Creating PDFs with Acrobat Distiller . . . . . . . . . . . . . . . . . . . . . . . . . . . . . . . . . . . . . . . . . . . . . . . . . . . . . . 89
Adobe PDF conversion settings . . . . . . . . . . . . . . . . . . . . . . . . . . . . . . . . . . . . . . . . . . . . . . . . . . . . . . . . . . 92
Fonts . . . . . . . . . . . . . . . . . . . . . . . . . . . . . . . . . . . . . . . . . . . . . . . . . . . . . . . . . . . . . . . . . . . . . . . . . . . . . . . . . . . 106
Chapter 4: Combining PDF content
Quickstart . . . . . . . . . . . . . . . . . . . . . . . . . . . . . . . . . . . . . . . . . . . . . . . . . . . . . . . . . . . . . . . . . . . . . . . . . . . . . . 109
Combining files into PDFs . . . . . . . . . . . . . . . . . . . . . . . . . . . . . . . . . . . . . . . . . . . . . . . . . . . . . . . . . . . . . . . 112
Adding unifying page elements . . . . . . . . . . . . . . . . . . . . . . . . . . . . . . . . . . . . . . . . . . . . . . . . . . . . . . . . . 118
Rearranging pages in a PDF . . . . . . . . . . . . . . . . . . . . . . . . . . . . . . . . . . . . . . . . . . . . . . . . . . . . . . . . . . . . . 126
Chapter 5: Exporting PDFs
Quickstart . . . . . . . . . . . . . . . . . . . . . . . . . . . . . . . . . . . . . . . . . . . . . . . . . . . . . . . . . . . . . . . . . . . . . . . . . . . . . . 131
Exporting PDFs to other file formats . . . . . . . . . . . . . . . . . . . . . . . . . . . . . . . . . . . . . . . . . . . . . . . . . . . . . 133
Reusing PDF content . . . . . . . . . . . . . . . . . . . . . . . . . . . . . . . . . . . . . . . . . . . . . . . . . . . . . . . . . . . . . . . . . . . . 137
Page 4

Chapter 6: Review and comment
Quickstart . . . . . . . . . . . . . . . . . . . . . . . . . . . . . . . . . . . . . . . . . . . . . . . . . . . . . . . . . . . . . . . . . . . . . . . . . . . . . . 140
Preparing for a PDF review . . . . . . . . . . . . . . . . . . . . . . . . . . . . . . . . . . . . . . . . . . . . . . . . . . . . . . . . . . . . . . 143
Starting and managing a review . . . . . . . . . . . . . . . . . . . . . . . . . . . . . . . . . . . . . . . . . . . . . . . . . . . . . . . . . 146
Meetings . . . . . . . . . . . . . . . . . . . . . . . . . . . . . . . . . . . . . . . . . . . . . . . . . . . . . . . . . . . . . . . . . . . . . . . . . . . . . . . 150
Participating in a PDF review . . . . . . . . . . . . . . . . . . . . . . . . . . . . . . . . . . . . . . . . . . . . . . . . . . . . . . . . . . . . 151
Tracking PDF reviews . . . . . . . . . . . . . . . . . . . . . . . . . . . . . . . . . . . . . . . . . . . . . . . . . . . . . . . . . . . . . . . . . . . 155
Commenting . . . . . . . . . . . . . . . . . . . . . . . . . . . . . . . . . . . . . . . . . . . . . . . . . . . . . . . . . . . . . . . . . . . . . . . . . . . 158
Managing comments . . . . . . . . . . . . . . . . . . . . . . . . . . . . . . . . . . . . . . . . . . . . . . . . . . . . . . . . . . . . . . . . . . . 170
Importing and exporting comments . . . . . . . . . . . . . . . . . . . . . . . . . . . . . . . . . . . . . . . . . . . . . . . . . . . . . 177
Approval workflows . . . . . . . . . . . . . . . . . . . . . . . . . . . . . . . . . . . . . . . . . . . . . . . . . . . . . . . . . . . . . . . . . . . . . 180
Chapter 7: Forms
Quickstart . . . . . . . . . . . . . . . . . . . . . . . . . . . . . . . . . . . . . . . . . . . . . . . . . . . . . . . . . . . . . . . . . . . . . . . . . . . . . . 183
Forms basics . . . . . . . . . . . . . . . . . . . . . . . . . . . . . . . . . . . . . . . . . . . . . . . . . . . . . . . . . . . . . . . . . . . . . . . . . . . . 184
Filling in PDF forms . . . . . . . . . . . . . . . . . . . . . . . . . . . . . . . . . . . . . . . . . . . . . . . . . . . . . . . . . . . . . . . . . . . . . 186
Submitting forms . . . . . . . . . . . . . . . . . . . . . . . . . . . . . . . . . . . . . . . . . . . . . . . . . . . . . . . . . . . . . . . . . . . . . . . 190
Collecting and managing form data . . . . . . . . . . . . . . . . . . . . . . . . . . . . . . . . . . . . . . . . . . . . . . . . . . . . . 192
iv
Chapter 8: Security
Quickstart . . . . . . . . . . . . . . . . . . . . . . . . . . . . . . . . . . . . . . . . . . . . . . . . . . . . . . . . . . . . . . . . . . . . . . . . . . . . . . 193
Opening restricted documents . . . . . . . . . . . . . . . . . . . . . . . . . . . . . . . . . . . . . . . . . . . . . . . . . . . . . . . . . 195
Removing sensitive content . . . . . . . . . . . . . . . . . . . . . . . . . . . . . . . . . . . . . . . . . . . . . . . . . . . . . . . . . . . .196
Creating or obtaining digital IDs . . . . . . . . . . . . . . . . . . . . . . . . . . . . . . . . . . . . . . . . . . . . . . . . . . . . . . . . . 198
Sharing and managing certificates . . . . . . . . . . . . . . . . . . . . . . . . . . . . . . . . . . . . . . . . . . . . . . . . . . . . . . 203
Directory servers . . . . . . . . . . . . . . . . . . . . . . . . . . . . . . . . . . . . . . . . . . . . . . . . . . . . . . . . . . . . . . . . . . . . . . . 207
Securing PDFs . . . . . . . . . . . . . . . . . . . . . . . . . . . . . . . . . . . . . . . . . . . . . . . . . . . . . . . . . . . . . . . . . . . . . . . . . . 208
Security policies . . . . . . . . . . . . . . . . . . . . . . . . . . . . . . . . . . . . . . . . . . . . . . . . . . . . . . . . . . . . . . . . . . . . . . . . 214
Chapter 9: Digital signatures
Quickstart . . . . . . . . . . . . . . . . . . . . . . . . . . . . . . . . . . . . . . . . . . . . . . . . . . . . . . . . . . . . . . . . . . . . . . . . . . . . . . 219
Digital signatures . . . . . . . . . . . . . . . . . . . . . . . . . . . . . . . . . . . . . . . . . . . . . . . . . . . . . . . . . . . . . . . . . . . . . . . 220
Signing PDFs . . . . . . . . . . . . . . . . . . . . . . . . . . . . . . . . . . . . . . . . . . . . . . . . . . . . . . . . . . . . . . . . . . . . . . . . . . . 223
Validating signatures . . . . . . . . . . . . . . . . . . . . . . . . . . . . . . . . . . . . . . . . . . . . . . . . . . . . . . . . . . . . . . . . . . . . 227
Chapter 10: Accessibility, tags, and reflow
Accessibility features . . . . . . . . . . . . . . . . . . . . . . . . . . . . . . . . . . . . . . . . . . . . . . . . . . . . . . . . . . . . . . . . . . . . 231
Checking the accessibility of PDFs . . . . . . . . . . . . . . . . . . . . . . . . . . . . . . . . . . . . . . . . . . . . . . . . . . . . . . . 233
Reading PDFs with reflow and accessibility features . . . . . . . . . . . . . . . . . . . . . . . . . . . . . . . . . . . . . . 235
Creating accessible PDFs . . . . . . . . . . . . . . . . . . . . . . . . . . . . . . . . . . . . . . . . . . . . . . . . . . . . . . . . . . . . . . . . 241
Making existing PDFs accessible . . . . . . . . . . . . . . . . . . . . . . . . . . . . . . . . . . . . . . . . . . . . . . . . . . . . . . . . . 245
Chapter 11: Editing PDFs
Quickstart . . . . . . . . . . . . . . . . . . . . . . . . . . . . . . . . . . . . . . . . . . . . . . . . . . . . . . . . . . . . . . . . . . . . . . . . . . . . . . 247
Page thumbnails and bookmarks . . . . . . . . . . . . . . . . . . . . . . . . . . . . . . . . . . . . . . . . . . . . . . . . . . . . . . . . 249
Links and attachments . . . . . . . . . . . . . . . . . . . . . . . . . . . . . . . . . . . . . . . . . . . . . . . . . . . . . . . . . . . . . . . . . . 255
Actions and scripting . . . . . . . . . . . . . . . . . . . . . . . . . . . . . . . . . . . . . . . . . . . . . . . . . . . . . . . . . . . . . . . . . . . 260
Page 5

Converted web pages . . . . . . . . . . . . . . . . . . . . . . . . . . . . . . . . . . . . . . . . . . . . . . . . . . . . . . . . . . . . . . . . . . . 263
Articles . . . . . . . . . . . . . . . . . . . . . . . . . . . . . . . . . . . . . . . . . . . . . . . . . . . . . . . . . . . . . . . . . . . . . . . . . . . . . . . . . 264
Editing text and objects . . . . . . . . . . . . . . . . . . . . . . . . . . . . . . . . . . . . . . . . . . . . . . . . . . . . . . . . . . . . . . . . . 267
Setting up a presentation . . . . . . . . . . . . . . . . . . . . . . . . . . . . . . . . . . . . . . . . . . . . . . . . . . . . . . . . . . . . . . . 271
Document properties and metadata . . . . . . . . . . . . . . . . . . . . . . . . . . . . . . . . . . . . . . . . . . . . . . . . . . . . . 273
Layers . . . . . . . . . . . . . . . . . . . . . . . . . . . . . . . . . . . . . . . . . . . . . . . . . . . . . . . . . . . . . . . . . . . . . . . . . . . . . . . . . . 277
Chapter 12: Searching and indexing
Quickstart . . . . . . . . . . . . . . . . . . . . . . . . . . . . . . . . . . . . . . . . . . . . . . . . . . . . . . . . . . . . . . . . . . . . . . . . . . . . . . 280
Searching PDFs . . . . . . . . . . . . . . . . . . . . . . . . . . . . . . . . . . . . . . . . . . . . . . . . . . . . . . . . . . . . . . . . . . . . . . . . . 281
Creating PDF indexes . . . . . . . . . . . . . . . . . . . . . . . . . . . . . . . . . . . . . . . . . . . . . . . . . . . . . . . . . . . . . . . . . . . 287
Chapter 13: Movies, sounds, and 3D models
Movies and sounds . . . . . . . . . . . . . . . . . . . . . . . . . . . . . . . . . . . . . . . . . . . . . . . . . . . . . . . . . . . . . . . . . . . . . 288
Interacting with 3D models . . . . . . . . . . . . . . . . . . . . . . . . . . . . . . . . . . . . . . . . . . . . . . . . . . . . . . . . . . . . . 289
Chapter 14: Color management
Understanding color management . . . . . . . . . . . . . . . . . . . . . . . . . . . . . . . . . . . . . . . . . . . . . . . . . . . . . . 304
Keeping colors consistent . . . . . . . . . . . . . . . . . . . . . . . . . . . . . . . . . . . . . . . . . . . . . . . . . . . . . . . . . . . . . . . 306
Color-managing imported images . . . . . . . . . . . . . . . . . . . . . . . . . . . . . . . . . . . . . . . . . . . . . . . . . . . . . . . 309
Color-managing documents for online viewing . . . . . . . . . . . . . . . . . . . . . . . . . . . . . . . . . . . . . . . . . . 311
Proofing colors . . . . . . . . . . . . . . . . . . . . . . . . . . . . . . . . . . . . . . . . . . . . . . . . . . . . . . . . . . . . . . . . . . . . . . . . . 312
Color-managing documents when printing . . . . . . . . . . . . . . . . . . . . . . . . . . . . . . . . . . . . . . . . . . . . . . 314
Working with color profiles . . . . . . . . . . . . . . . . . . . . . . . . . . . . . . . . . . . . . . . . . . . . . . . . . . . . . . . . . . . . . . 315
Color settings . . . . . . . . . . . . . . . . . . . . . . . . . . . . . . . . . . . . . . . . . . . . . . . . . . . . . . . . . . . . . . . . . . . . . . . . . . . 320
v
Chapter 15: Printing
Basic printing tasks . . . . . . . . . . . . . . . . . . . . . . . . . . . . . . . . . . . . . . . . . . . . . . . . . . . . . . . . . . . . . . . . . . . . . 325
Other ways to print PDFs . . . . . . . . . . . . . . . . . . . . . . . . . . . . . . . . . . . . . . . . . . . . . . . . . . . . . . . . . . . . . . . . 329
Printing custom sizes . . . . . . . . . . . . . . . . . . . . . . . . . . . . . . . . . . . . . . . . . . . . . . . . . . . . . . . . . . . . . . . . . . . 332
Advanced print settings . . . . . . . . . . . . . . . . . . . . . . . . . . . . . . . . . . . . . . . . . . . . . . . . . . . . . . . . . . . . . . . . . 333
Chapter 16: Adobe Version Cue
Using Adobe Version Cue . . . . . . . . . . . . . . . . . . . . . . . . . . . . . . . . . . . . . . . . . . . . . . . . . . . . . . . . . . . . . . . 336
Working with Version Cue projects . . . . . . . . . . . . . . . . . . . . . . . . . . . . . . . . . . . . . . . . . . . . . . . . . . . . . . 339
Working with files in Version Cue . . . . . . . . . . . . . . . . . . . . . . . . . . . . . . . . . . . . . . . . . . . . . . . . . . . . . . . . 344
Disconnecting from projects . . . . . . . . . . . . . . . . . . . . . . . . . . . . . . . . . . . . . . . . . . . . . . . . . . . . . . . . . . . . 350
Deleting files, folders, and projects . . . . . . . . . . . . . . . . . . . . . . . . . . . . . . . . . . . . . . . . . . . . . . . . . . . . . . 351
Version Cue versions . . . . . . . . . . . . . . . . . . . . . . . . . . . . . . . . . . . . . . . . . . . . . . . . . . . . . . . . . . . . . . . . . . . . 353
Editing and synchronizing offline files . . . . . . . . . . . . . . . . . . . . . . . . . . . . . . . . . . . . . . . . . . . . . . . . . . . 355
The Version Cue Administration utility . . . . . . . . . . . . . . . . . . . . . . . . . . . . . . . . . . . . . . . . . . . . . . . . . . . 357
Creating, editing, and managing projects in Version Cue Administration . . . . . . . . . . . . . . . . . . 362
Working with users and privileges . . . . . . . . . . . . . . . . . . . . . . . . . . . . . . . . . . . . . . . . . . . . . . . . . . . . . . 369
Viewing logs, reports, and workspace information . . . . . . . . . . . . . . . . . . . . . . . . . . . . . . . . . . . . . . . 372
Version Cue PDF reviews . . . . . . . . . . . . . . . . . . . . . . . . . . . . . . . . . . . . . . . . . . . . . . . . . . . . . . . . . . . . . . . . 373
Page 6

Chapter 17: Keyboard shortcuts
Keyboard shortcuts . . . . . . . . . . . . . . . . . . . . . . . . . . . . . . . . . . . . . . . . . . . . . . . . . . . . . . . . . . . . . . . . . . . . . 378
Index . . . . . . . . . . . . . . . . . . . . . . . . . . . . . . . . . . . . . . . . . . . . . . . . . . . . . . . . . . . . . . . . . . . . . . . . . . . . . . . . . . 385
vi
Page 7

Chapter 1: Before you begin
Installation
Requirements
To review complete system requirements and recommendations for your Adobe® software, see the Read Me file
included with your software.
Install the software
1 Close any other Adobe applications open on your computer.
2 Insert the installation disc into the disc drive, and follow the on-screen instructions.
Note: For more information, see the Read Me file included with your software.
Activate the software
Adobe software may include license management technology to ensure compliance with the product license
agreement. When present, this technology prompts you to verify the license of your product within 30 days after you
first use it. Verification is mandatory.
1
You may be prompted to activate the software. The verification process doesn’t collect, transmit, or use any information about the identity of users. For more information on this topic, see the Read Me file on your installation disc,
or visit the Adobe website at www.adobe.com/go/activation.
1 If the Activation dialog box isn’t already open, choose Help > Activation > Activate.
2 Follow the on-screen instructions.
Note: Ifyouwanttoinstallthesoftwareonadifferentcomputer,youmustfirstdeactivatethesoftwareonyourcomputer:
Choose Help > Activation > Deactivate.
Register
Register your product to receive complimentary installation support, notifications of updates, and other services.
❖ To register, follow the on-screen instructions in the Registration dialog box, which appears after you install and
activate the software.
If you postpone registration, you can register at any time by choosing Help > Registration.
Read Me
The installation disc contains the Read Me file for your software. (This file is also copied to the application folder
during product installation.) Open the file to read important information about the following topics:
• System requirements
• Installation
• Registration
Page 8

ADOBE ACROBAT 8 STANDARD
User Guide
• Electronic licensing
• Legal notices
Using Adobe Help
Adobe Help resources
Documentation for your Adobe software is available in a variety of formats.
In-product and LiveDocs Help
In-product Help provides access to all documentation and instructional content available at the time the software
ships. It is available through the Help menu in your Adobe software.
LiveDocs Help includes all the content from in-product Help, plus updates and links to additional instructional
content available on the web. For some products, you can also add comments to the topics in LiveDocs Help. Find
LiveDocs Help for your product in the Adobe Help Resource Center, at www.adobe.com/go/documentation.
2
Most versions of in-product and LiveDocs Help let you search across the Help systems of multiple products. Topics
may also contain links to relevant content on the web or to topics in the Help of another product.
Think of Help, both in the product and on the web, as a hub for accessing additional content and communities of
users. The most complete and up-to-date version of Help is always on the web.
How To topics
The How To topics provide a brief overview of the most common tasks. If you need more information, click the link
at the bottom of the How To topic to view the related Help topic.
Page 9

ADOBE ACROBAT 8 STANDARD
User Guide
PDF documentation
The in-product Help is also available as an Adobe PDF that is optimized for printing. Other documents, such as
installation guides and white papers, may also be provided as PDFs.
All PDF documentation is available through the Adobe Help Resource Center, at www.adobe.com/go/documen-
tation. To see the PDF documentation included with your software, look in the Documents folder on the installation
or content DVD.
Printed documentation
Printed editions of the in-product Help may be available for purchase in the Adobe Store, at
www.adobe.com/go/store. You can also find books published by Adobe publishing partners in the Adobe Store.
A printed workflow guide is included with all Adobe Creative Suite® 3 products, and stand-alone Adobe products
may include a printed getting started guide.
Note: Printed documentation is not available in all languages.
Using Help in the product
In-product Help isavailablethrough theHelpmenu.AfteryoustarttheAdobeHelpViewer,youcanaccessHelp for
additional Adobe products installed on your computer. Topics may contain links to additional content on the web.
3
If you search for a phrase, such as “shape tool,” enclose it in quotation marks to see only those topics that include all
the words in the phrase (applies to roman language versions of the software).
Accessibility features
Adobe Help content is accessible to people with disabilities—such as mobility impairments, blindness, and low
vision. In-product Help supports these standard accessibility features:
• The user can change text size with standard context menu commands (Microsoft® Windows®) and standard menu
commands (Apple Mac OS).
• Links are underlined for easy recognition.
• If link text doesn’t match the title of the destination, the title is referenced in the Title attribute of the Anchor tag.
For example, the Previous and Next links include the titles of the previous and next topics.
• Content supports high-contrast mode.
• Images without captions include alternate text.
• Each frame has a title to indicate its purpose.
• Standard HTML tags define content structure for screen reading or text-to-speech tools.
• Style sheets control formatting, so there are no embedded fonts.
Keyboard shortcuts for Help toolbar controls (Windows)
Back button Alt+Left Arrow
Forward button Alt+Right Arrow
Print Ctrl+P
About button Ctrl+I
Help For menu Alt+Down Arrow or Alt+Up Arrow to view Help for another application
Page 10

ADOBE ACROBAT 8 STANDARD
User Guide
Keyboard shortcuts for Help navigation (Windows)
• To move between panes, press Ctrl+Tab (forward) and Shift+Ctrl+Tab (backward).
• To move through and outline links in a pane, press Tab (forward) or Shift+Tab (backward).
• To activate an outlined link, press Enter.
• To change text size, press Ctrl/Command+plus sign (+) or Ctrl/Command+minus sign (-).
Resources
Adobe Video Workshop
Adobe Creative Suite 3 Video Workshop offers over 200 training videos covering a wide range of subjects for print,
web, and video professionals.
You can use Adobe Video Workshop to learn about any Creative Suite 3 product. Many videos show you how to use
Adobe applications together.
Note: Adobe Video Workshop is not available in all languages.
4
Page 11

ADOBE ACROBAT 8 STANDARD
User Guide
When you start Adobe Video Workshop, you choose the products you want to learn and the subjects you want to
view. You can see details about each video to focus and direct your learning.
5
Community of presenters
With this release, Adobe Systems invited the community of its users to share their expertise and insights. Adobe and
lynda.com present tutorials, tips, and tricks from leading designers and developers such as Joseph Lowery, Katrin
Eismann, and Chris Georgenes. You can see and hear Adobe experts such as Lynn Grillo, Greg Rewis, and Russell
Brown. In all, over 30 product experts share their knowledge.
Tutorials and source files
Adobe Video Workshop includes training for novices and experienced users. You’ll also find videos on new features
and key techniques. Each video covers a single subject and typically runs about 3-5 minutes. Most videos come with
an illustrated tutorial and source files, so you can print detailed steps and try the tutorial on your own.
Using Adobe Video Workshop
Youcan access AdobeVideoWorkshop usingtheDVDincludedwithyourCreativeSuite 3product.It’salsoavailable
online at www.adobe.com/go/learn_videotutorials. Adobe will regularly add new videos to the online Video
Workshop, so check in to see what’s new.
Acrobat videos
Adobe Video Workshop covers a wide range of subjects for Adobe Acrobat®, including these:
• Setting up the workspace and taskbars
• Combining files into a PDF
• Converting PDFs
• Modifying PDFs
Page 12

ADOBE ACROBAT 8 STANDARD
User Guide
• Adding comments to PDFs
• Working with shared reviews
• Reviewing and summarizing comments
• Adding security to forms
• Collaborating in real time with Adobe Acrobat Connect™
• Preflighting files
• Printing documents
To access Adobe Creative Suite 3 video tutorials, visit Adobe Video Workshop at
www.adobe.com/go/learn_videotutorials.
Note: Adobe Video Workshop is not available in all languages.
Extras
You have access to a wide variety of resources that will help you make the most of your Adobe software. Some of
these resources are installed on your computer during the setup process; additional content is included on the installation or content disc, if applicable. Unique extras are also offered online by the Adobe Exchange community, at
www.adobe.com/go/exchange.
6
Installed resources
During software installation, a number of resources are placed in your application folder. To view those files, navigate
to the application folder on your computer.
Disc content
The disc included with your product may contain additional resources for use with the software, such as presets,
plug-ins, a PDF version of the Help, technical information, and other documents.
Adobe Exchange
For more free content, visit www.adobe.com/go/exchange, an online community where users download and share
thousands of free actions, extensions, plug-ins, and other content for use with Adobe products.
Page 13
ADOBE ACROBAT 8 STANDARD
User Guide
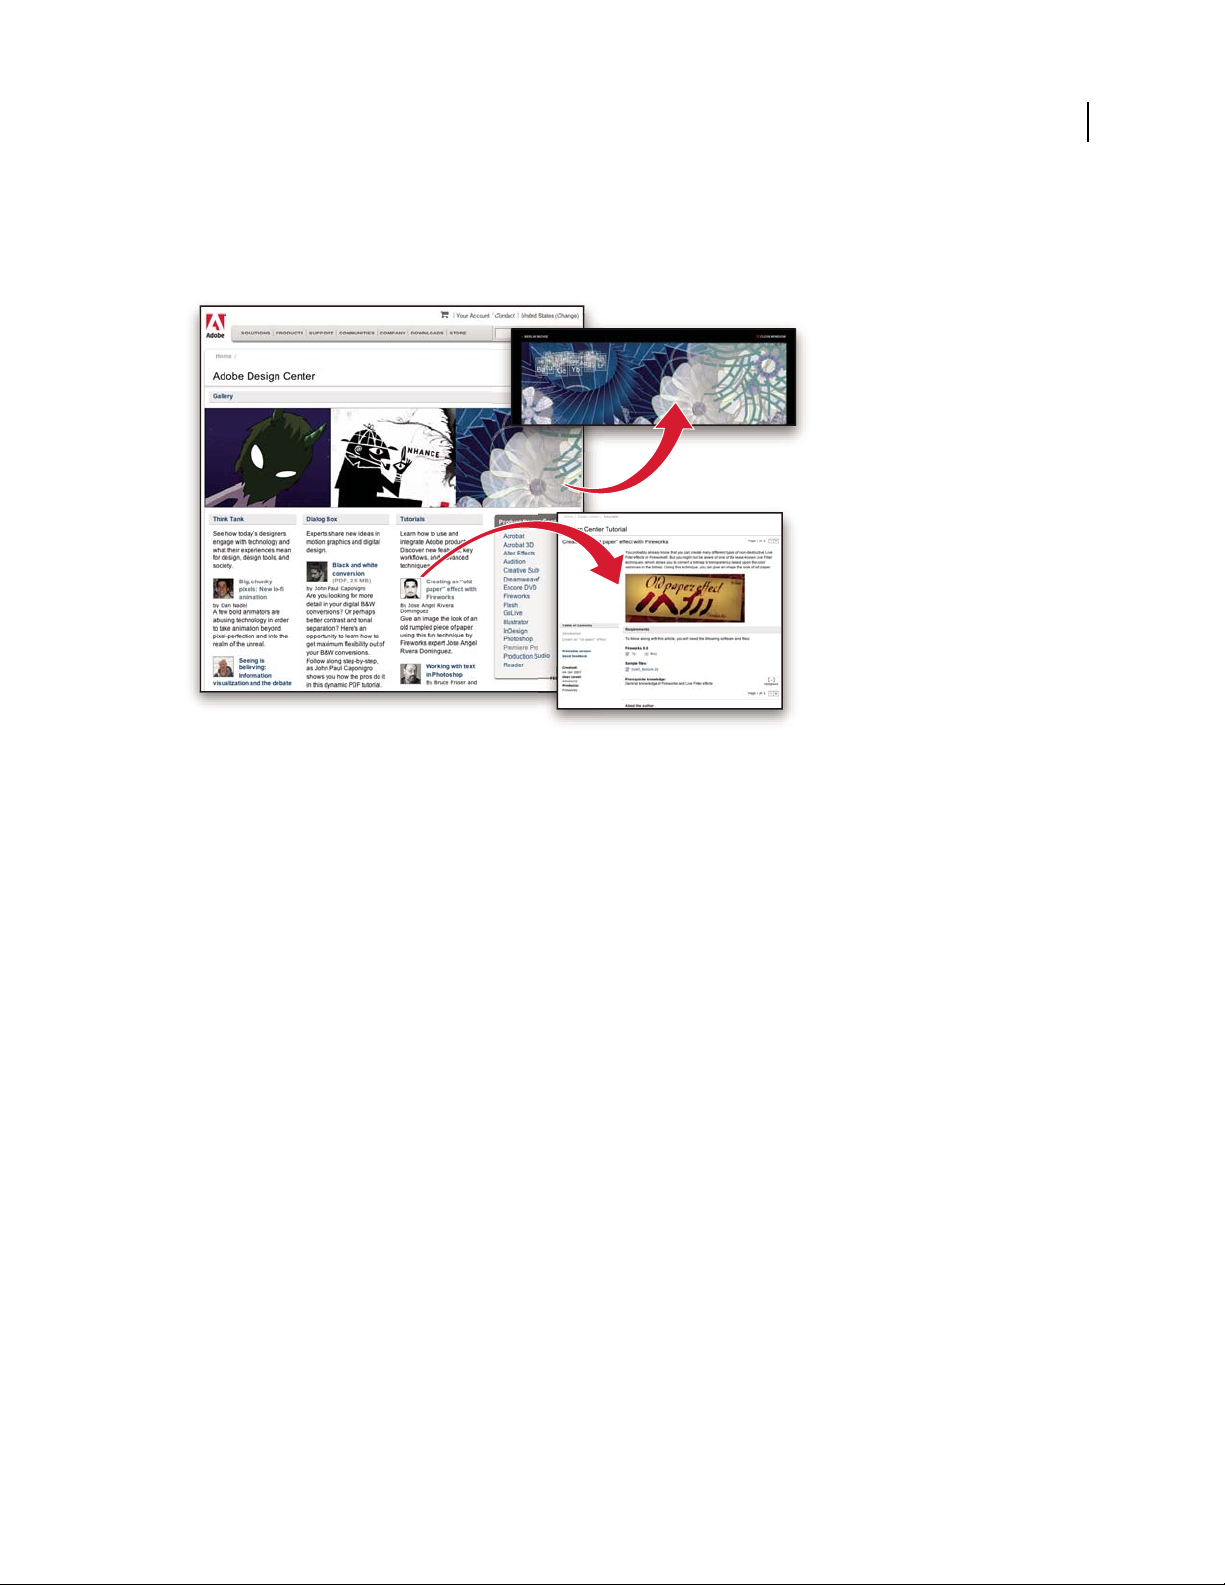
Adobe Design Center
Adobe Design Center offers articles, inspiration, and instruction from industry experts, top designers, and Adobe
publishing partners. New content is added monthly.
7
You can find hundreds of tutorials for design products and learn tips and techniques through videos, HTML
tutorials, and sample book chapters.
New ideas are the heart of Think Tank, Dialog Box, and Gallery:
• ThinkTankarticlesconsiderhowtoday’sdesignersengagewithtechnology andwhattheirexperiencesmeanfor
design, design tools, and society.
• In Dialog Box, experts share new ideas in motion graphics and digital design.
• The Gallery showcases how artists communicate design in motion.
Visit Adobe Design Center at www.adobe.com/designcenter.
Page 14

ADOBE ACROBAT 8 STANDARD
User Guide
Adobe Developer Center
Adobe Developer Center provides samples, tutorials, articles, and community resources for developers who build
rich Internet applications, websites, mobile content, and other projects using Adobe products. The Developer Center
also contains resources for developers who develop plug-ins for Adobe products.
8
In addition to sample code and tutorials, you'll find RSS feeds, online seminars, SDKs, scripting guides, and other
technical resources.
Visit Adobe Developer Center at www.adobe.com/go/developer.
Customer support
VisittheAdobeSupportwebsite,at www.adobe.com/support, to find troubleshooting information for your product
and to learn about free and paid technical support options. Follow the Training link for access to Adobe Press books,
a variety of training resources, Adobe software certification programs, and more.
Downloads
Visit www.adobe.com/go/downloads to find free updates, tryouts, and other useful software. In addition, the Adobe
Store (at www.adobe.com/go/store) provides access to thousands of plug-ins from third-party developers, helping
you to automate tasks, customize workflows, create specialized professional effects, and more.
Adobe Labs
Adobe Labs gives you the opportunity to experience and evaluate new and emerging technologies and products from
Adobe.
At Adobe Labs, you have access to resources such as these:
• Prerelease software and technologies
• Code samples and best practices to accelerate your learning
• Early versions of product and technical documentation
Page 15

ADOBE ACROBAT 8 STANDARD
User Guide
• Forums, wiki-based content, and other collaborative resources to help you interact with like-minded developers
Adobe Labs fosters a collaborative software development process. In this environment, customers quickly become
productive with new products and technologies. Adobe Labs is also a forum for early feedback, which the Adobe
development teams use to create software that meets the needs and expectations of the community.
Visit Adobe Labs at www.adobe.com/go/labs.
User communities
User communities feature forums, blogs, and other avenues for users to share technologies, tools, and information.
Users can ask questions and find out how others are getting the most out of their software. User-to-user forums are
available in English, French, German, and Japanese; blogs are posted in a wide range of languages.
To participate in forums or blogs, visit www.adobe.com/communities.
What’s new
Viewing, navigating, and searching
Getting Started window At a glance, see the main features of Adobe® Acrobat® 8 Standard and click links to start
tasks or learn more about features. See “Start in the Getting Started window” on page 18.
9
Maximized work area View PDFs in a new visual design for the work area, navigation pane, and toolbars. User
interface elements have been removed to maximize space. See “View the work area” on page 14.
Customizable toolbars Easily hide or show individual tools by right-clicking/Control-clicking a toolbar, or use the
More Tools dialog box to customize toolbars. See “Display and arrange toolbars” on page 19.
Search enhancements Find words or use advanced search tools, all from the same integrated toolbar. View search
results in a floating, resizable panel. Search documents in a PDF package. See “Search features overview” on
page 281.
Embedded PDF search index Embed a search index for a specific file directly within the PDF to speed up searching.
See “Create and manage an index in a PDF” on page 287.
PDF creation, assembly, and editing
PDF from a blank page Create a blank PDF page and type text onto the page. Format text using formatting controls.
Lock the document so that it can’t be edited. See “Create a PDF from a blank page” on page 60.
PDF packages Assemble PDF files (including PDF forms) and non-PDF files into a single package. Files aren’t
modified when packaged, so signatures and security options stay intact. Documents within a package are viewed in
the same window. Easily add, delete, or extract documents from the package. Search and print the current or selected
document, or all documents within the package. See “About PDF packages” on page 112.
Combined files user interface Combine files into a single PDF with concatenated pages, or assemble files into a PDF
package. Choose simple options to control the size of the resulting PDF. See “Combining different types of files” on
page 112.
Mail merge to PDF within Microsoft® Word Convert Word mail merge documents to PDF and send them out by
email. See “Create PDFs from Word mail merges” on page 77.
Microsoft Excel worksheet enhancements (Windows) Select and order worksheets for conversion. Convert all links
and bookmarks. Create PDF/A-compliant files. See “Application-specific PDFMaker settings” on page 79.
Page 16

ADOBE ACROBAT 8 STANDARD
User Guide
Microsoft PowerPoint presentation enhancements (Windows) Convert overlapping shapes and images, action
buttons, action settings, and speaker notes. Convert backgrounds to a separate, nonprinting layer. Create PDF/Acompliant files. See “Application-specific PDFMaker settings” on page 79.
Email conversion enhancements Convert an email message or a complete mail folder to PDF from Lotus Notes.
Create PDF packages of email from both Microsoft Outlook and Lotus Notes. In Outlook on Windows, convert
email archives to PDF packages and automatically archive email on a schedule. See “Convert email messages to PDFs
(Windows)” on page 74, “Migrate old Outlook PDF archives to PDF packages (Windows)” on page 76, and “Set up
automatic email archiving (Windows)” on page 77.
Scanning enhancements Scan to PDF or PDF/A from a broader range of scanners. Add metadata while scanning.
Optimize a scanned PDF. See “Scan a paper document to PDF” on page 61.
PDF/A-compliant files Create PDF/A-compliant files when scanning paper documents and when creating PDFs
from Word, Microsoft Excel, Microsoft PowerPoint, Adobe Acrobat Distiller, and the Acrobat Preflight tool.
Document examination Inspect PDFs for metadata, annotations, attachments, hidden data, form fields, hidden
layers, or bookmarks. Remove some or all of the information. See “Examine a PDF for hidden content” on page 197.
Headers, footers, watermarks, and backgrounds Save header, footer, watermark, and background options as named
settings for reuse. Remove or update existing headers, footers, watermarks, and backgrounds. Shrink content to
accommodate headers and footers. Preview changes in real time. Set underline text. See “Add and edit headers and
footers” on page 118.
10
Review and commenting
Acrobat Connect meetings Access the real-time, web-based collaboration capabilities of Acrobat Connect (sold
separately). Click the Start Meeting button to escalate from a document review to real-time communication with
others over the Internet. Acrobat Connect uses Adobe Flash® CS3 Professional and a personal meeting room for
screen sharing, audio and video conferencing, whiteboarding, and more. When you first click the Start Meeting
button, you can create a free trial account. Each subsequent time, you go directly to your Acrobat Connect personal
meeting room. (Acrobat Connect is not available in all languages.) See “Meetings” on page 150.
Shared reviews Initiate a review where comments are stored on a central server, allowing all participants to see
comments in real time. No extra server software is needed. Shared reviews work with a folder on a network server,
a Windows SharePoint workspace, or a web folder on a web server. Comments are automatically retrieved, even if
Reader isn’trunningandcouldbeaddedevenwhenyou aredisconnectedfromthenetwork.Notificationsalertusers
that there are new comments. Comments from reviewers outside the firewall can be merged into the shared review,
and you can enable Reader users to participate in reviews. See “Start a shared review” on page 146.
Review Tracker Provides details about all active reviews. For shared reviews, details include the number of
comments from a reviewer, the review deadline, server status, unread reviews, and a summary of updated shared
reviews. See “Tracking PDF reviews” on page 155.
Commenting and markup enhancements View and accurately place callout and cloud markups as you apply them.
The callout leader automatically moves as you position the callout. Selected comments are highlighted for easier
visibility when zoomed out. Rotate stamps and select all tools from a single, integrated toolbar. See “Commenting”
on page 158.
Digital signatures
Roaming IDs Enroll in a signing service where the server holds your private key. Authenticate to the server from
Acrobat and allow the document to be signed with your credentials stored on the server. See “Set up a roaming ID
account” on page 200.
Page 17

ADOBE ACROBAT 8 STANDARD
User Guide
Signature preview mode and conformance checker Before signing, view the document content as it will appear after
eliminating transparency, scripts, fonts, and other dynamic content that can alter a document’s appearance. Acrobat
automatically runs the Document Integrity Checker, which now includes checking for Qualified Signatures
conformance before entering signature preview mode. See “Sign in Preview Document mode” on page 225.
Certificate enhancements Predetermine the signing certificate. Configure the chain model for certificate validation.
See “Sharing and managing certificates” on page 203.
Seed values Specify which choices a user can make when signing a document. See “Customizing signature
properties using seed values” on page 222.
Additional new features
FIPS mode Version 8.1 of Acrobat provides a FIPS mode to restrict data protection to Federal Information
Processing Standard (FIPS) 140-2 approved algorithms using the RSABSAFE Crypto-C 2.0 encryption module with
FIPS 140-2 validation certificate 608. See “Securing PDFs in FIPS mode (Windows)” on page 209.
Microsoft Windows Vista™ support Version 8.1 of Acrobat supports Windows Vista.
Installing Acrobat on 64-bit versions of Windows Version 8.1 of Acrobat supports the 64-bit versions of Microsoft
Windows XP and Windows Vista.
Version Cue 2.0 Manage files and versions as a single user or in a small workgroup. Integrate with Adobe Bridge to
manage files for your Creative Suite projects. See “Adobe Version Cue” on page 336.
11
Digital Editions Read and organize eBooks and other publications with Adobe® Digital Editions (a separate
product). When you first click the Digital Editions menu item, you can download and install the Adobe Digital
Editions software. After installation, choose Digital Editions to go directly to your Adobe Digital Editions bookshelf.
See “Adobe Digital Editions” on page 51.
Booklet printing Print pages as a simple booklet, for example, 2-up, saddle-stitched. See “Print a booklet” on
page 329.
Printing over the Internet Print documents to a FedEx Kinkos office in the United States. See “Print over the
Internet” on page 325.
Forms Tracker Track the forms you fill out. See “About Forms Tracker” on page 192.
2D Measurement tool enhancements Measurement is recalculated if start or end points move. Measurements snap
to lines, intersections, or corners. See “Measure the height, width, or area of objects” on page 41.
Page 18

Chapter 2: Workspace
As you get acquainted with Adobe® Acrobat® 8 Standard, make setting up your Acrobat work environment a priority.
The more you learn about its potential, the better you can take advantage of its features, tools, and options.
There’s much more to the application than you see at first glance. Acrobat has hidden tools, preferences, and options
that can enhance your experience and give you greater control over how your work area is arranged and displayed.
Quickstart
Customize the work area
You can change the work area to suit your needs.
• To change the toolbars that appear, choose View > Toolbars, and select the desired toolbars.
• To change the navigation pane view, click one of the buttons to the left of the navigation pane.
• To customize the display colors for page background and document text, choose Edit > Preferences > Accessi-
bility.
• To set the default zoom level and page layout, choose Edit > Preferences > Page Display.
12
See also
“Customizing the work area” on page 18
Move a toolbar
Sometoolbars,suchasthe Taskstoolbar,appearinthe toolbararea.Others,suchastheComment&Markup toolbar,
open as floating toolbars.
❖ To move a toolbar, drag the grabber bar at the left edge of the toolbar:
• Drag a toolbar to a new location in the toolbar area.
• Drag a toolbar out of the toolbar area to create a floating toolbar.
• Drag a floating toolbar into the toolbar area.
See also
“Display and arrange toolbars” on page 19
Add tools and toolbars
You can customize Acrobat to display the tools and toolbars you use most often.
❖ Right-click/Control-click a toolbar and do any of the following:
• Select the buttons you want to display.
• Choose Hide Toolbars and select the toolbars you want to hide.
Page 19

ADOBE ACROBAT 8 STANDARD
User Guide
• Choose More Tools, and select the toolbars and buttons you want to display.
See also
“Show and hide toolbar elements” on page 21
Change the look of a tool or object
You can easily change the properties for many tools and objects, including comments, form fields, and bookmarks.
1 Right-click/Control-click the tool or object you want to change.
2 Choose Properties or Tool Default Properties.
3 Set the desired properties.
To apply an object’s settings to all subsequent objects of the same type, right-click/Control-click the object and
choose Make Current Properties Default or Use Current Properties As New Defaults.
See also
“Review properties for tools and objects” on page 21
13
Change viewing mode
To give you more space for reading a document, you can change the viewing mode.
❖ Choose View > Reading Mode or Full Screen Mode.
In Reading mode, toolbars and the navigation pane are hidden but the menu bar is present. In Full Screen mode,
everything but the document is hidden. To exit from Full Screen mode, press Esc.
See also
“View PDFs in Full Screen mode” on page 29
View PDFs in a package
An Adobe PDF package opens with a list of the PDFs it contains and a PDF package navigation bar.
❖ Open the package and do any of the following:
• To view a PDF, select it from the PDF list or click Open Next or Open Previous .
• To change the position of the PDF list, click one of the list position icons.
• To access package-related commands, click Options and choose the desired command.
See also
“View, sort, and search components in a PDF package” on page 26
View attachments
A PDF may have other PDFs attached to it, either as single files or a PDF package. When you open a PDF containing
attachments, the Attachment panel opens automatically.
❖ Double-click the desired PDF. The attachment opens in a new window.
Page 20

ADOBE ACROBAT 8 STANDARD
User Guide
If the attachment is a PDF package, the first PDF in the package opens along with a list of all PDFs in the package.
Click a PDF to view it.
See also
“PDFs with file attachments” on page 29
Reduce PDF file size
Reducing the size of PDFs improves their performance—particularly when they’re being accessed on the web.
1 Choose Document > Reduce File Size.
2 Select the version compatibility you need, and click OK.
3 Specify a filename and location, and click Save.
If you’re certain that all your users use Acrobat 8 or Adobe Reader 8, limiting compatibility to the latest version can
further reduce file size.
See also
“Reduce file size by saving” on page 45
14
Locate PDFs in the Organizer
TheOrganizer helpsyou quicklylocatePDFsyou’vepreviouslyopenedandPDFsyou’veorganizedintocollections
or favorites.
1 Choose File > Organizer > Open Organizer.
2 Click in the categories pane on the left to locate PDFs.
All PDFs found are listed in the files pane. After you locate a PDF, you can use the buttons at the top of the Organizer
to work with the file.
See also
“Organizer window overview” on page 45
Work area basics
View the work area
Acrobat opens in two different ways: as a stand-alone application, and in a web browser. The associated work areas
differ in small but important ways.
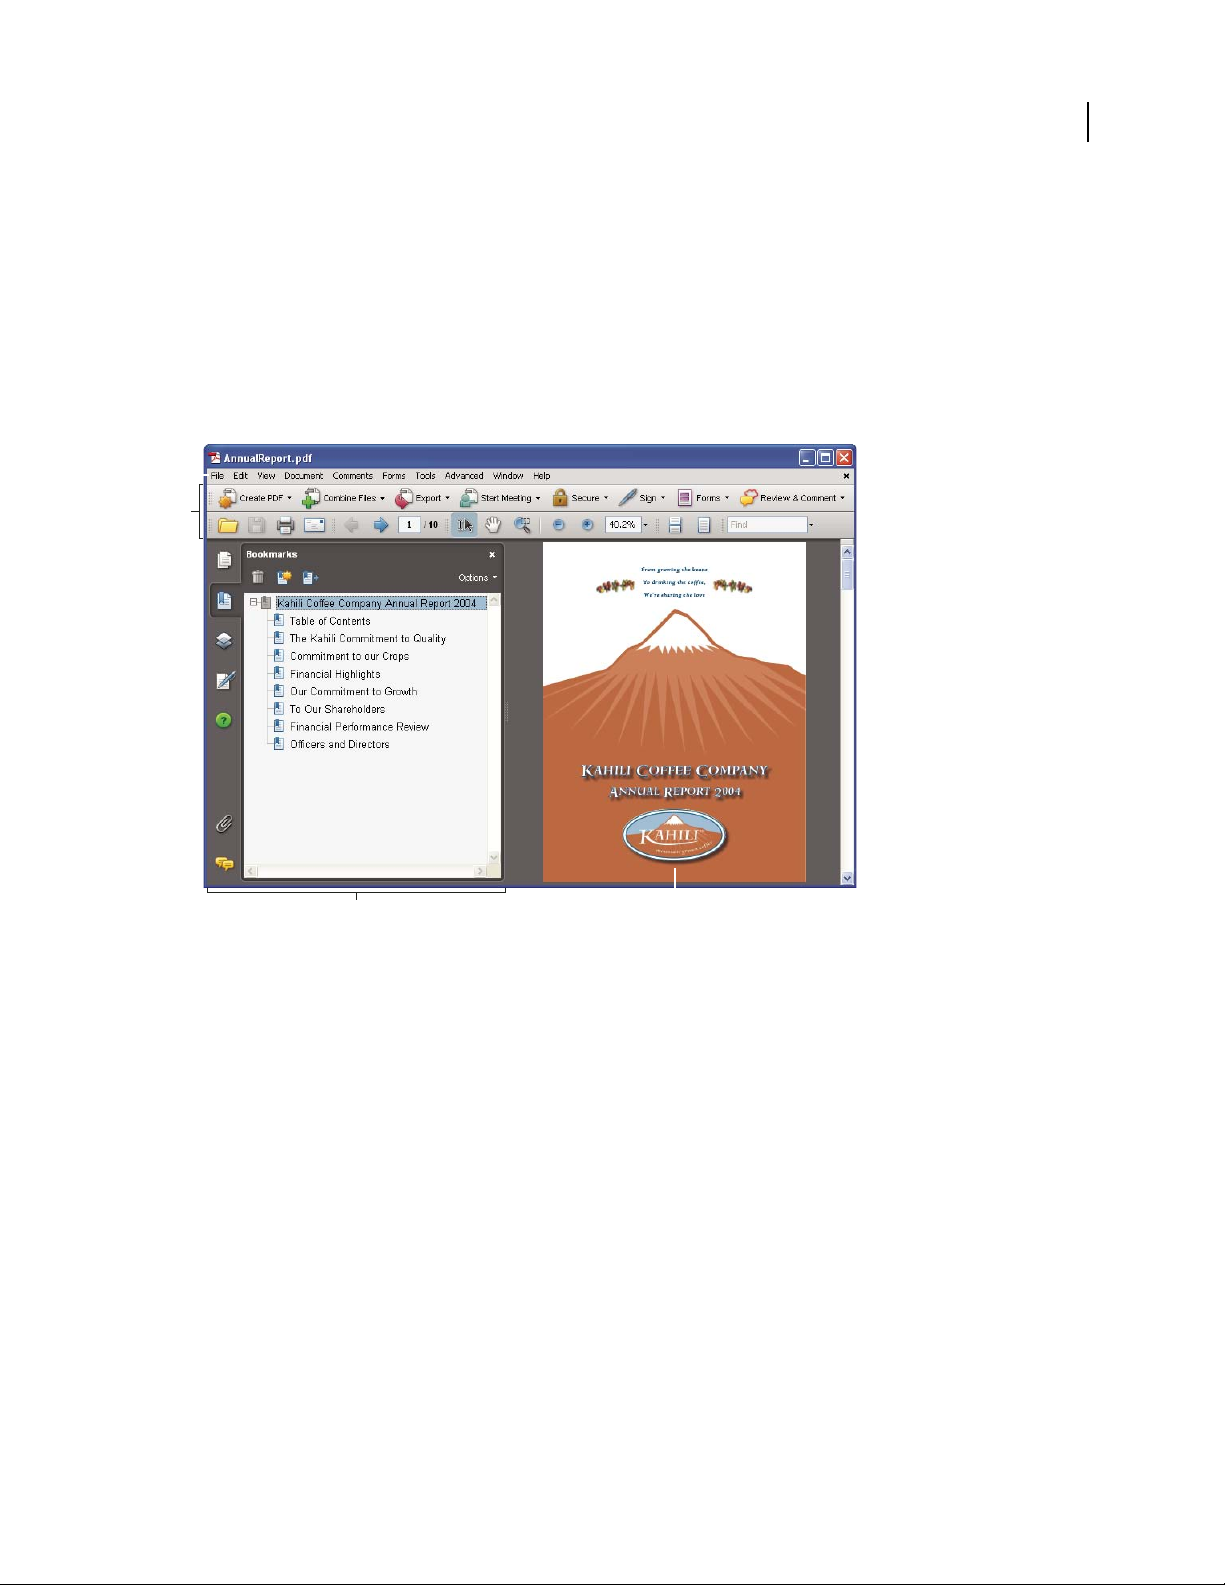
The Acrobat work area includes a document pane that displays PDFs and a navigation pane ontheleftsidethathelps
you browse through the current PDF. Toolbars near the top of the window provide other controls that you can use
to work with PDFs.
Note: Openingcertaintypesof PDFscauses specializedpartsoftheworkareatoappear: thedocumentmessagebarand
PDF package navigation features. For other types of PDFs, these areas are not seen and not available.
Page 21
ADOBE ACROBAT 8 STANDARD
See also
“Document message bar” on page 17
“Navigation areas for PDF packages” on page 17
View the work area for PDFs open in the application
1
Click the Acrobat icon on the desktop, or use the Start menu (Windows) or Finder (Mac OS) to start the Acrobat
application.
2 Choose File > Open, navigate to and select any PDF on your computer, and click Open.
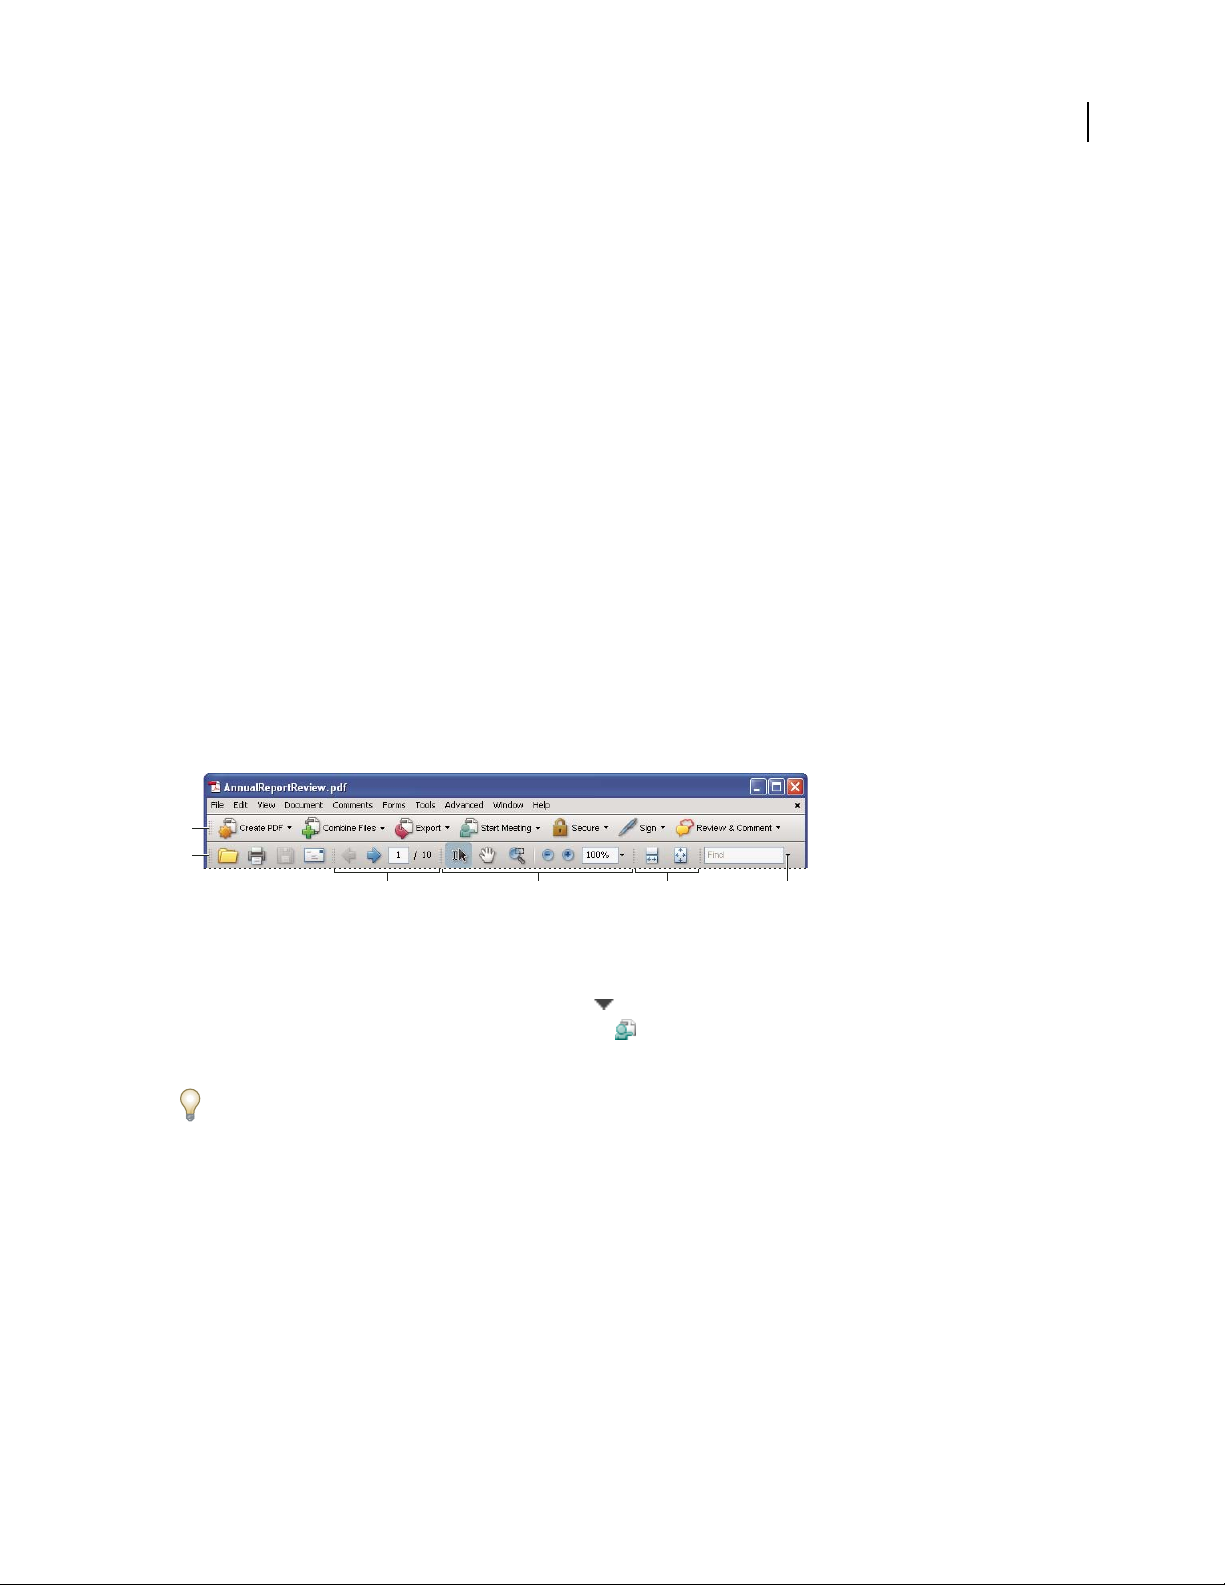
A
B
User Guide
15
C
Acrobat window
A. Menu bar B. Toolbars C. Navigation pane (Bookmarks panel displayed) D. Document pane
D
View the work area for PDFs open in a web browser
1
Open a web browser application.
2 Do one of the following:
• Select a PDF anywhere on the Internet and open it.
• Choose File > Open (or Open File). If necessary, choose PDF or All Files in the pop-up menu for the type of file.
Then navigate to and select any PDF on your computer or local network, and click Open.
3 Identify items in the work area.
Page 22

ADOBE ACROBAT 8 STANDARD
User Guide
A
B
16
C
PDF open within a web browser
A. Web browser application menu bar and buttons B. Acrobat toolbars C. Navigation pane (Bookmarks panel displayed) D. Document
pane
D
Opening PDFs
You can open a PDF in many ways: from within the Acrobat application, from your email application, from your file
system, or on a network from within a web browser. The initial view of the PDF depends on how its creator set the
document properties. For example, a document may open at a particular page or magnification.
Some PDFs are restricted and open only after you enter a password provided to you by the PDF owner. If a document
is encrypted, you may need the permission of its creator to open it. In the case of some restricted or certified
documents, you may be prevented from printing a file or copying information to another application. If you have
trouble opening a PDF or can’t use certain features, contact its author or owner.
If adocumentissettoopeninFullScreenmode,the toolbar,commandbar,menubar,andwindowcontrolsarenot
visible. You can quit Full Screen mode by pressing the Esc key if your preferences are set this way, or by pressing
Ctrl+L/Command+L.
See also
“Defining initial view as Full Screen mode” on page 271
“Navigation areas for PDF packages” on page 17
“Open secured PDFs” on page 195
Select another tool
By default, the Select tool is active when Acrobat opens, because it is the most versatile tool.
Specialized tools, such as those for zooming in or adding review comments, are available in toolbars and in the Tools
menus.
Page 23
ADOBE ACROBAT 8 STANDARD
User Guide
Select a tool
❖ Do one of the following:
• Select a tool in a toolbar.
• Choose Tools > [toolbar name] > [tool].
Switch temporarily to the Zoom In or Hand tool
You can use these tools temporarily, without deselecting the current tool.
• To select the Hand tool temporarily, hold down the spacebar.
• To select the Zoom In tool temporarily, hold down Ctrl+spacebar/Command+spacebar.
When you release the keys, Acrobat reverts to the previously active tool.
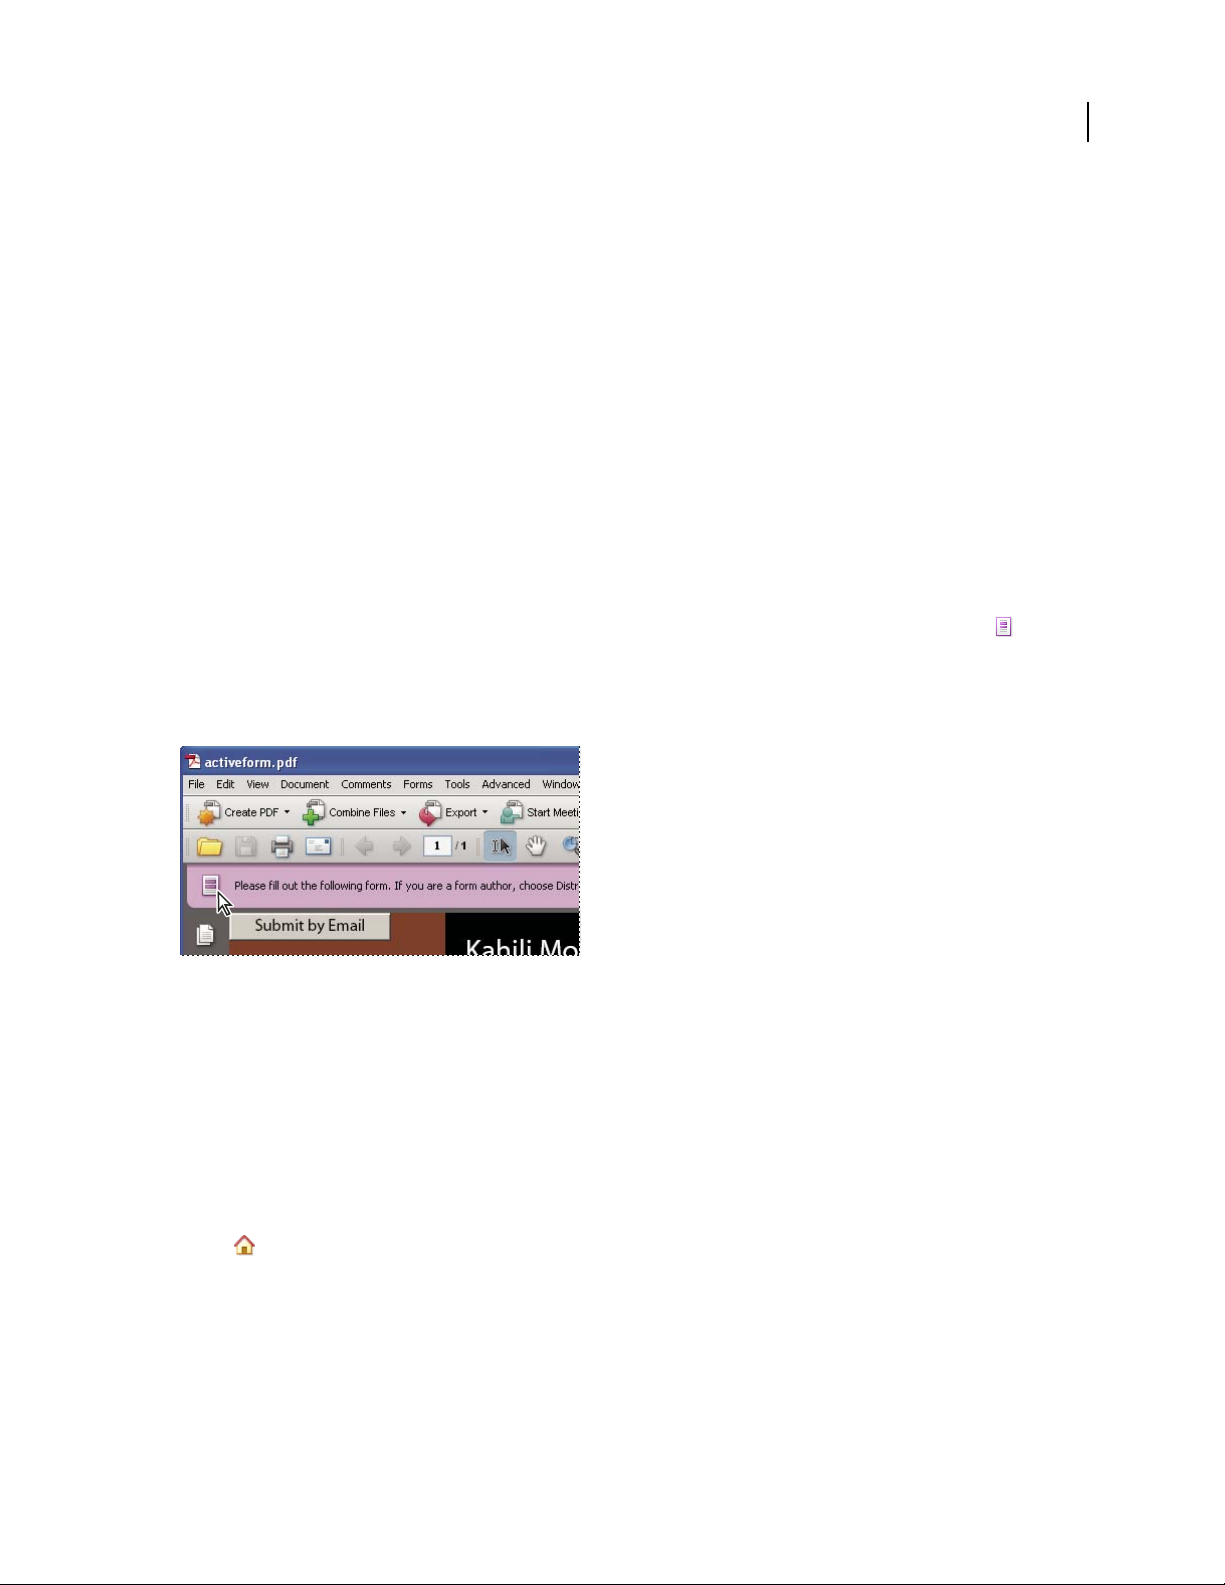
Document message bar
The document message bar appears only in certain types of PDFs. Typically, you see this area when you open a PDF
form, a PDF that has been sent to you for review, or a PDF with special rights or security restrictions. The document
message bar appears immediately below the toolbar area, and can be hidden or shown by clicking its button on
the left side of the work area.
Look on the document message bar for instructions on how to proceed and for any special buttons associated with
the task. The bar is color coded: purple for forms, yellow for reviews, and blue for certified or secure PDFs.
17
Document message bar for a form
See also
“Filling in PDF forms” on page 186
“Commenting” on page 158
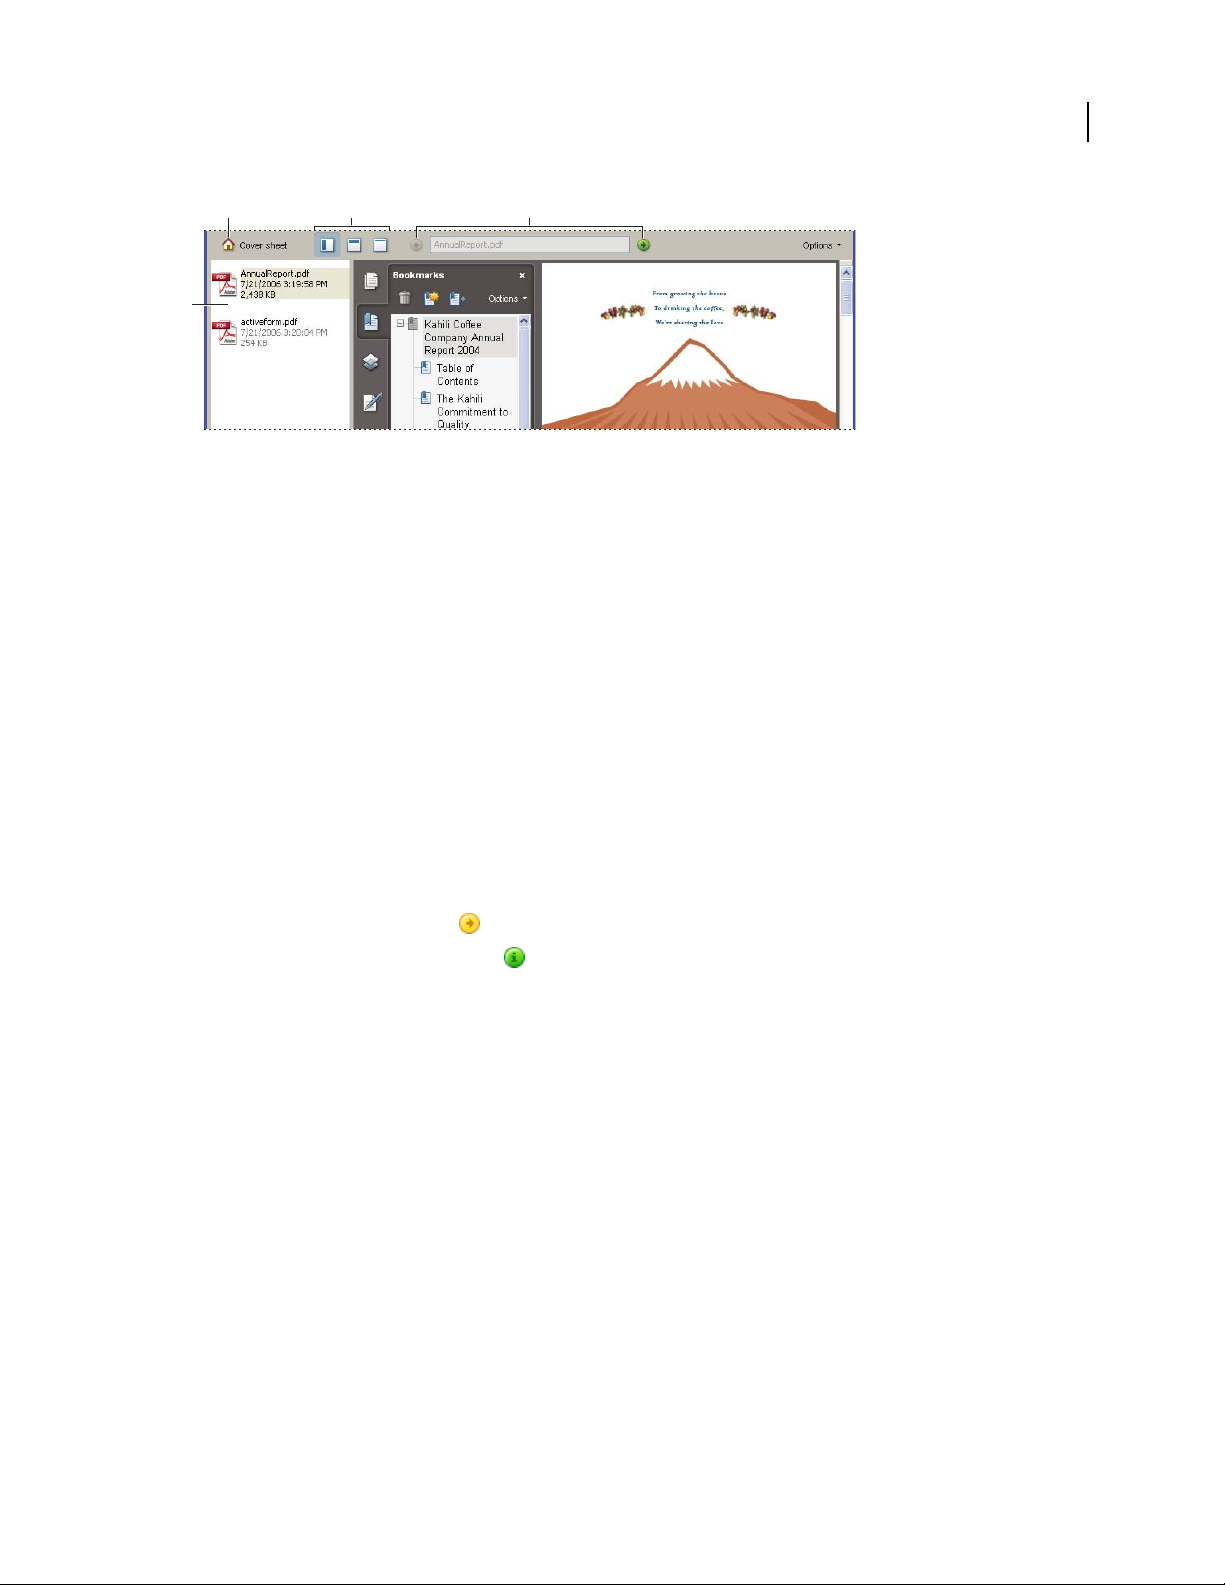
Navigation areas for PDF packages
When you open a PDF package, two unique areas appear:
PDF package navigation bar Located immediately below the toolbars area. Look here for the Cover Sheet
button , buttons that hide or set the orientation of the list of component documents, buttons for moving to the
next or previous component document, and an Options menu with commands for viewing, editing, and using the
PDF package.
List of component documents Bydefault, locatedbetweenthePDF packagenavigationbarandthedocumentpane,
but can be hidden or displayed vertically, to the left of the navigation pane. Selecting a component file in the list
opens it in the document pane.
Page 24
ADOBE ACROBAT 8 STANDARD
User Guide
18
A
D
E
Navigation areas for PDF packages
A. Cover Sheet button B. PDF list display options C. Open Previous button, currently displayed PDF filename, Open Next button D. PDF
package navigation bar E. List of component PDFs (shown vertically)
cB
See also
“About PDF packages” on page 112
“View, sort, and search components in a PDF package” on page 26
Start in the Getting Started window
The Getting Started window opens by default when you start Acrobat. The home page in this window contains links
that open additional pages. All Getting Started pages include buttons and links that start specific tasks or display
topics in the full Acrobat Help system (which you are reading now).
You can open or close the Getting Started window, or simply let it remain open behind or beside the Acrobat work area.
Start a task from the Getting Started window
1
On the Getting Started home page, select a task group, such as Create PDF or Review & Comment.
2 Start a task or view a Help topic:
• Click an action text link or button to initiate a task.
• Click an information text link or button to open full Acrobat Help to the related Help topic.
Ifyoudecidetotryadifferenttaskgroup,clickHomeintheupper-left cornertoreturn totheGetting Startedhomepage.
Reopen and reset the Getting Started window
1
Choose Help > Getting Started With Adobe Acrobat®.
2 Deselect the Do Not Show At Startup option in the upper-right corner.
Customizing the work area
Displaying menus
Ordinarily, it’s a good idea to keep the Acrobat menus visible so that they are available as you work. It is possible to
hide them,usingtheView>MenuBarcommand.However,theonlywaytodisplayandusethem againisbypressing
F9/Shift+Command+M.
Page 25
ADOBE ACROBAT 8 STANDARD
User Guide
Acrobat also has numerous context-sensitive menus. These menus appear when you right-click/Control-click an
element in the work area or PDF that has such a menu associated with it. A context menu displays commands that
relate to the item or area that you clicked. For example, when you right-click/Control-click the toolbar area, that
context menu displays the same commands as the View > Toolbars menu.
Note: The Acrobat menu bar appears only if Acrobat is open as a stand-alone application. If Acrobat is open within the
browser, only the browser application menu appears at the top of the window. However, context menus are available in
both cases.
About toolbars
Toolbars reduce clutter in the work area by arranging tools in task-related groups. For example, the Page Display
toolbarincludesbuttonsforchanginghowmanypagesyoucansee at atimeinthe documentwindow.TheComment
& Markup toolbar contains tools for reviewing and annotating a PDF.
Any toolbar can float or be docked. Docked toolbars appear in the toolbar area. Floating toolbars appear as
independent panels that you can move anywhere in the work area.
Each toolbar has a grabber bar, which is a vertical gray stripe at the left end of the toolbar.
• When you position the pointer over a grabber bar, a tool tip displays the name of the associated toolbar.
• When you drag a grabber bar, the toolbar moves. You can drag toolbars off the toolbar area (so that they float),
dock them in the toolbar area, or rearrange them in the toolbar area.
19
Some toolbars appear by default and some are hidden.
A
B
C D E F
Toolbars open by default
A. Tasks toolbar B. File toolbar C. Page Navigation toolbar D. Select & Zoom toolbar E. Page Display toolbar F. Find toolbar
Buttons in the Tasks toolbar behave somewhat differently from other toolbar buttons. Each of these buttons is
associated with a menu of commands. Click the arrow to the right of the button name to open the menu. For
example, click the arrow next to the Start Meeting button to display a menu of commands related to Adobe
Acrobat Connect meetings.
Position the pointer over a tool to see a description of the tool. Position the pointer over the grabber bar on the left
edge of a toolbar to see its name. All tools are identified by name in the More Tools dialog box (Tools > Customize
Toolbars).
See also
“Customizing the work area” on page 18
“Displaying menus” on page 18
Display and arrange toolbars
When your work does not involve using the tools in a toolbar, you can close the toolbar to tidy up the work area. For
example,ifyouarenotaddingreviewcommentstoaPDF,there’snoneedtohavetheComment&Markuptoolbaropen.
Page 26

ADOBE ACROBAT 8 STANDARD
User Guide
Whenyouneedeasyaccesstoatoolbar thatishiddenbydefault,youcanopenit.This toolbarappearsas afloating
panel, which you can move or dock in the toolbar area.
Note: If several PDFs are open, you can customize the toolbars for each PDF independently. The different customized
states persist as you switch between PDFs.
Show or hide toolbars
• To o p en a t o o lb a r, c h o o se V i ew > To o l b ar s > [ toolbar name]. A check mark next to the toolbar name indicates that
the toolbar is displayed.
• To hide all toolbars, choose View > Toolbars > Hide Toolbars.
• To change a toolbar that is either shown or hidden, right-click/Control-click the toolbar area, and choose the
toolbar you want to show or hide.
• To change the visibility of several toolbars, choose Tools > Customize Toolbars or View > Toolbars > More Tools.
Then, select and deselect toolbars. (Check marks by the toolbar names indicate which ones are currently visible.)
Note: Whether a new toolbar opens as a floating toolbar or docked in the toolbar area depends on its default position or
where it appeared in your previous configuration of the work area, if any.
Move toolbars
• To rearrange the docked toolbars, use the toolbar grabber bars to drag them from one position to another.
• To move a floating toolbar, drag it by its title bar or grabber bar to another location in the work area.
• To float a docked toolbar, drag it by its grabber bar from the toolbar area.
20
Use the title bar to move a section of tools from the toolbar area.
• To dock a floating toolbar, drag it by its title bar or grabber bar to the toolbar area.
• To move all floating toolbars to the toolbar area, choose View > Toolbars > Dock Toolbars.
Rows may be added to or removed from the toolbar area as you move the toolbars in and out.
Return toolbars to their default configuration
❖ Choose View > Toolbars > Reset Toolbars.
Page 27

ADOBE ACROBAT 8 STANDARD
User Guide
Lock or unlock the toolbar area
Locking the toolbars prevents any rearrangement of the toolbar area, so all grabber bars disappear when the toolbar
area is locked. Locking does not affect the positions of any floating toolbars.
❖ Choose View > Toolbars > Lock Toolbars.
Select the command a second time to unlock the toolbar area.
Note: When the toolbar area is locked, you can still move floating toolbars by dragging them by their title bars. However,
you can’t dock them unless you unlock the toolbar area.
About the Properties toolbar
The Properties toolbar looks like any other toolbar and can be moved, docked, or floated in the same way. It also
contains buttons and can be hidden or displayed by choosing it by name from the View > Toolbars menu.
The buttons in the Properties toolbar display properties of the currently selected tool or object. Unlike buttons in
most toolbars, the buttons in the Properties toolbar can’t be hidden. Also, many of the buttons merely display information, so you cannot use them to make changes to the PDF.
Show and hide toolbar elements
You can alter the display within an individual toolbar to keep just the tools you need available with a minimum of
wasted space. You can also show and hide tool labels.
21
Show or hide individual tools
Acrobat includes more tools and more toolbars than the set that appears by default. You can customize the toolbars
so that the tools you use most often appear in the toolbar area.
❖ Do any of the following:
• Right-click/Control-click the toolbar, and select a tool that you want to display or deselect a tool that is already
displayed if you want to hide it.
• Right-click/Control-click any toolbar and choose More Tools. Then select individual tools and toolbars that you
want to display, and deselect those that you want to hide.
Note: A selected tool appears in the toolbar area only if its toolbar is also selected in the More Tools dialog box.
Show or hide tool labels
Thedefaultviewshowslabelsforsometoolbarbuttons.Youcanshowlabelsforallbuttonstohelpyouasyoulearn
to use Acrobat, or you can hide all tool labels to save space in the toolbar area.
❖ Choose View > Toolbars > Button Labels > [option].
Note: Tool labels are turned off selectively when space in the toolbar area becomes limited.
Review properties for tools and objects
The Properties toolbar provides easy access to the properties for many tools and objects such as links, comments,
form fields, media clips, and bookmarks. For example, if you select the Note tool, the Properties toolbar displays the
current default properties for that tool. If you select a note in the document, the Properties toolbar displays
properties for that note.
YoucanusetheProperties toolbartochangemanyofthesettingsthatappearthere.Afewitemsonlyprovideinformation and cannot be edited.
Page 28

ADOBE ACROBAT 8 STANDARD
User Guide
Likealltoolbars, thePropertiestoolbarcanfloator bedockedin thetoolbararea.ThePropertiestoolbarisdifferent
in that it doesn’t contain tools and can’t be customized to hide options.
1 Do one of the following:
• Choose View > Toolbars > Properties Bar.
• Right-click/Control-click the toolbar area, and choose Properties Bar from the context menu.
2 Select the object or tool that you want to review.
3 Change properties for the selected item, as desired.
If you want to change object properties other than those listed in the Properties toolbar, right-click/Control-click the
object, and choose Properties.
Show or hide the navigation pane
The navigation pane is an area of the work space that can display different navigation panels. Typically, these panels
act like a table of contents, with items you can click to jump to a specific place in the document. For example, the
Pages panel contains thumbnail images of each page; clicking a thumbnail opens that page in the document.
When you open a PDF, the navigation pane is closed by default, but buttons along the left side of the work area
provideeasyaccesstovariouspanels,suchasthePagespanelbutton andtheBookmarkspanelbutton .When
Acrobat is open but empty (no PDF is open), the navigation pane is unavailable.
22
1 To open the navigation pane, do one of the following:
• Click any panel button on the left side of the work area to open that panel.
• Choose View > Navigation Panels > Show Navigation Pane.
2 To close the navigation pane, do one of the following:
• Click the button for the currently open panel in the navigation pane.
• Choose View > Navigation Panels > Hide Navigation Pane.
Note: The creator of the PDF can control the contents of some navigation panels and may make them empty.
Adjust navigation panels
Like toolbars, navigation panels can be docked in the navigation pane, or they can float anywhere in the work area. You
canhideorclosepanelsyoudon’tneed andopenthe ones youdo.Youcan alsoadjustthewidth ofthenavigationpane.
Change the display area for navigation panels
• To change the width of the navigation pane, drag its right border.
• To collapse a floating panel without closing it, click the tab name at the top of the window. Click the tab name again
to restore the panel to its full size.
Change the orientation of a docked navigation panel
By default, some panels, such as Bookmarks, appear in a column on the left side of the work area. Others, such as the
Comments panel, appear horizontally across the bottom of the document pane. You can change the orientation of
anypanel toeithervertical orhorizontalby dragging thebuttonforthatpanel,whichappearsontheleftsideofthe
work area.
• To orient the panel vertically, drag its button to the upper part of the navigation pane, near the buttons of other
vertically oriented panels.
Page 29

ADOBE ACROBAT 8 STANDARD
User Guide
• To orient the panel horizontally, drag its button to the lower part of the navigation pane, near the buttons of other
horizontally oriented panels.
In either case, a gray frame highlights the entire panel buttons area. If you release the mouse button before the area
is highlighted, the panel will float above the work area. If that happens, try again by dragging the panel tab into the
upper or lower part of the button area.
View a different panel in the navigation pane
By default,only aselectedsetofpanelbuttonsappearsontheleftside of theworkarea.Otherpanelsareincludedin
theViewmenuandmayopenasfloatingpanelsratherthaninthe navigation pane.However,youcandockthe panel
in the navigation pane later.
❖ Do one of the following:
• On the left side of the navigation pane, select the button for the panel.
• Choose View > Navigation Panels > [panel name].
Dock or float navigation panels
• To float a panel that is docked in the navigation pane, drag the panel button into the document pane.
• To dock a floating panel, drag the tab to the navigation pane.
• To group two floating panels, drag the tab of one panel into the other floating panel.
23
Options in a navigation panel
All navigation panels have an Options menu in the upper-right corner. The commands available in these menu vary.
Some panels also contain other buttons that affect the items in the panel. Again, these vary among the different
panels, and some panels have none.
Click Options to open the menu.
Page 30

ADOBE ACROBAT 8 STANDARD
User Guide
Viewing PDF pages
Open a PDF
You can open a PDF from within the Acrobat application, from the desktop, or from within certain other applications.
Open a PDF in the application
❖ Start Acrobat and do one of the following:
• Choose File > Open, or click the Open button in the toolbar. In the Open dialog box, select one or more
filenames, and click Open. PDF documents usually have the extension .pdf.
• (Windows) Choose File > [a previously opened PDF].
• (Mac OS) Choose File > Open Recent File > [a previously opened PDF].
• FromeithertheFile>Organizersubmenu or theOrganizerbuttonmenuontheFiletoolbar,chooseCollections
> [collection name] > [PDF filename].
• From the File menu or the Organizer button menu on the File toolbar, choose History > [time period] > [PDF
filename].
24
If more than one document is open, you can switch between documents by choosing the document name from the
Window menu. In Windows, the application places a button for each open document on the Windows taskbar. You
can click this button to move between open documents.
Open a PDF from the desktop or within another application
❖ Do one of the following:
• To open a PDF attached to an email message, open the message, either by double-clicking the PDF icon or right-
clicking/Control-clicking and choosing Open.
• To open a PDF linked to an open web page, click the PDF file link. The PDF usually opens in the web browser.
• Double-click the PDF File icon in your file system.
Note: In Mac OS, you may not be able to open a PDF created in Windows by double-clicking the icon. Instead, choose
File > Open With > Acrobat.
Opening pages in a PDF
Depending on the PDF you open, you may need to move forward through multiple pages, see different parts of the
page, or change the magnification. There are many ways to navigate, but the following items are commonly used:
Note: If you do not see these items, choose View > Toolbars > Reset Toolbars.
Next and Previous The Next Page and Previous Page buttons appear on the Page Navigation toolbar. The text
box next to them is also interactive, so you can type a page number and press Enter to go directly to that page.
Scroll bars Vertical and horizontal scroll bars appear to the right and bottom of the document pane whenever the
view does not show the entire document. Click the arrows or drag to view other pages or different areas of the page.
Select & Zoom toolbar This toolbar contains buttons and controls for changing the page magnification.
Pages panel The Pages button on the left side of the work area opens the navigation pane to the Pages panel,
which displays thumbnail images of each page. Click a page thumbnail to open that page in the document pane.
Page 31

ADOBE ACROBAT 8 STANDARD
User Guide
See also
“Retrace your viewing path” on page 28
“Adjust page magnification” on page 36
Page through a document
There are many ways to turn pages in a PDF. Many people use the buttons on the Page Navigation toolbar, but you
can also use arrow keys, scroll bars, and other features to move forward and backward through a multipage PDF.
ThePageNavigationtoolbar opensbydefault.The defaulttoolbar containsfrequentlyusedtools: theNextPage ,
PreviousPage ,andPage Number.Likealltoolbars,the Page Navigationtoolbarcanbehidden andreopenedby
choosing it on the Toolbars menu under the View menu. You can display additional tools on the Page Navigation
toolbar by right-clicking/Control-clicking the toolbar and choosing an individual tool, Show All Tools, or More
Tools and then selecting and deselecting tools in the dialog box.
See also
“About bookmarks” on page 251
“About page thumbnails” on page 249
25
“Set the page layout and orientation” on page 39
Move through a PDF
❖ Do one of the following:
• Click the Previous Page or Next Page button on the toolbar.
• Choose View > Go To > [location].
• Choose View > Go To > Page, and then type the page number in the Go To Page dialog box.
• Press the Page Up and Page Down keys.
Jump to a specific page
❖ Do one of the following:
• Drag the vertical scroll bar until the page appears in the small pop-up display.
• Type the page number to replace the one currently displayed in the Page Navigation toolbar, and press Enter or
Return.
Note: If thedocumentpagenumbersaredifferentfrom theactualpagepositioninthe PDFfile,thepage’spositionwithin
thefileappearsinparenthesesafter theassignedpagenumberinthePageNavigationtoolbar.Forexample,ifyouassign
numbering for a file that is an 18-page chapter to begin with page 223, the number shown when the first page is active
is 223 (1 of 18). You can turn off logical page numbers in the Page Display preferences. See “Renumber pages” on
page 130 and “Preferences for viewing PDFs” on page 32.
Jump to bookmarked pages
Bookmarks provide a table of contents and usually represent the chapters and sections in a document. Bookmarks
appear in the navigation pane.
Page 32

ADOBE ACROBAT 8 STANDARD
User Guide
C
A
B
Bookmarks panel
A. Bookmarks button B. Expanded bookmark C. Click to display bookmark Options menu.
1 Click the Bookmarks button, or choose View > Navigation Panels > Bookmarks.
2 To jump to a topic, click the bookmark. Click the plus (+) or minus (-) sign to expand or collapse the bookmark
contents.
26
Note: Depending on how the bookmark was defined, clicking it may not take you to that location but perform some other
action instead.
If the list of bookmarks disappears when you click a bookmark, click the Bookmarks button to display the list again.
If you want to hide the Bookmarks button after you click a bookmark, select Hide After Use on the Options menu.
Use page thumbnails to jump to specific pages
Page thumbnails provide miniature previews of document pages. You can use thumbnails in the Pages panel to
change the display of pages and to go to other pages. The red page-view box in the page thumbnail indicates which
area of the page appears. You can resize this box to change the zoom percentage.
1 Click the Pages button or choose View > Navigation Panels > Pages to display the Pages panel.
2 To jump to another page, click its thumbnail.
View, sort, and search components in a PDF package
Both Adobe Reader users and Acrobat users can view, sort, and search component files in a PDF package.
Note: You can dramatically increase the speed of searches by creating an embedded index when you create a PDF
package.
See also
“Searching PDFs” on page 281
Page 33

ADOBE ACROBAT 8 STANDARD
User Guide
View component PDFs in a PDF package
ThePDF packagenavigationbarcontainsbuttonsthatcontrolthevisibilityand placementofthelistofcomponent
files. If the list is hidden, the View Top button or View Left button will make the list visible either horizontally or
vertically adjacent to the document pane.
1 Open the PDF package in Acrobat.
2 In the PDF package navigation bar, select the View Left or View Top button , as needed, so that you can
see the list of component PDFs.
3 Select the PDF you want to read. Or, use the Open Next and Open Previous buttons to review the
component PDFs one by one.
Sort the components of a PDF package
Because the data categories are shown in columns in View Top mode, use that view to complete this procedure.
1 In the PDF package navigation bar, select the View Top button , if necessary, so that you can see the list of
component PDFs and the categories bar across the top of the list.
2 Do any of the following:
• Click a category name. Click it a second time to reverse the order between Ascending and Descending.
• In the PDF package navigation bar, choose Options > Sort By > [category name].
• Right-click/Control-click a PDF in the list or anywhere in the categories bar and choose Sort By > [category name].
• Right-click/Control-click a PDF in the list or anywhere in the categories bar and choose Package Properties. Then
choose options in the Sort By and Sort Order menus. (This sets the default sorting for the PDF package.)
27
Note: Unless you change the default sorting for the PDF package, the sorting remains in place for only the current session
or until you change the sorting again. The next time you open the PDF package, it will appear in the default sorting order.
Search component PDFs in a PDF package
1
Choose Edit > Search, or choose Open Full Acrobat Search on the Find toolbar pop-up menu.
2 Select which PDFs to search. You can search only the currently open document, several documents that you select,
or all the PDFs in the package.
3 Enter the search text and select other options for searching, as usual.
Automatically scroll through a document
Automatic scrolling advances your view of the PDF at a steady rate, moving vertically down the document. If you
interrupt the process by using the scroll bars to move back or forward to another page or position, automatic
scrolling continues from that point forward. At the end of the PDF, automatic scrolling stops and does not begin
again until you choose automatic scrolling again.
1 Choose View > Automatically Scroll.
2 Press Esc to stop scrolling.
Page 34

ADOBE ACROBAT 8 STANDARD
User Guide
Retrace your viewing path
You can find PDF pages that you viewed earlier by retracing your viewing path. It’s helpful to understand the
difference between previous and next pages and previous and next views. In the case of pages, previous and next refer
to the two adjacent pages, before and after the currently active page. In the case of views, previous and next refer to
your viewing history. For example, if you jump forward and backward in a document, your viewing history retraces
those steps, showing you the pages you viewed in the reverse order that you viewed them.
Retrace your path in a PDF
1
Choose View > Go To > Previous View.
2 To continue seeing another part of your path, do either of the following:
• Repeat step 1.
• Choose View > Go To > Next View.
Note: You can make the Previous View button and Go To Next View button available in the toolbar area by
right-clicking/Control-clicking the Page Navigation toolbar and choosing them on the context menu, or choosing Show
All Tools.
Retrace your path through multiple PDFs
❖ Choose View > Go To > Previous Document or Next Document. These commands open the other PDF
documents if the documents are closed.
28
Note: If Acrobatisopeninawebbrowser,youcanusethewebbrowser’sBackandForwardoptions as usualtoretrace
your steps.
Change the PDF/A viewing mode
PDF/A is an ISO standard for PDFs. Documents you scan to PDF are PDF/A-compliant. You can specify when and
whether you want to view documents in this viewing mode.
1 Choose Edit > Preferences (Windows) or Acrobat> Preferences (Mac OS).
2 Select Documents under Categories.
3 Choose an option for View Documents In PDF/A: Never, Always, or Only For PDF/A Documents.
You can switch in or out of PDF/A viewing mode by changing this preference setting again.
Navigate with links
Links can take you to another location in the current document, to other PDF documents, or to websites. Clicking
a link can also open file attachments and play 3D content, movies, and sound clips. To play these media clips, you
must have the appropriate hardware and software installed.
The person who created the PDF document determines what links look like in the PDF.
Note: Unless a link was created in Acrobat using the Link tool, you must have the Automatically Detect URLs From Text
option selected in the General preferences for a link to work correctly.
1 Choose the Select tool
2 Position the pointer over the linked area on the page until the pointer changes to the hand with a pointing finger.
A plus sign (+) or a w appears within the hand if the link points to the web. Then click the link.
.
Page 35

ADOBE ACROBAT 8 STANDARD
User Guide
See also
“Links and attachments” on page 255
“Multimedia preferences” on page 288
PDFs with file attachments
IfyouopenaPDFthathas oneormoreattachedfiles,the Attachmentspanelautomaticallyopens,listing theattached
files. You can open these files for viewing, edit the attachments, and save your changes, as permitted by the document
authors.
If you move the PDF to a new location, the attachments automatically move with it.
See also
“Open, save, or delete an attachment” on page 259
Open or close reading mode
The reading mode view hides everything in the work area except the document and the menu bar.
❖ Choose View > Reading Mode.
29
Choosing Reading Mode again restores the work area to its previous view, with the same navigation buttons and
toolbar displays.
View PDFs in Full Screen mode
In Full Screen mode, PDF pages fill the entire screen; the menu bar, toolbars, and window controls are hidden. A
PDF creator can set a PDF to open in Full Screen mode, or you can set the view yourself. Full Screen mode is often
used for presentations, sometimes with automatic page advancement and transitions.
The pointer remains active in Full Screen mode so that you can click links and open notes. There are two ways to
advance through a PDF in Full Screen mode: You can use keyboard shortcuts for navigational and magnification
commands, and you can set a Full Screen preference to display Full Screen navigation buttons that you click to
change pages or exit Full Screen mode.
See also
“Preferences for viewing PDFs” on page 32
“Setting up a presentation” on page 271
Set the Full Screen navigation bar preference
1
Choose Edit > Preferences.
2 Under Categories, select Full Screen.
3 Select Show Navigation Bar.
4 Select View > Full Screen Mode.
The Full Screen navigation bar contains Previous Page , and Close Full Screen View buttons,
, Next Page
which appear in the lower left corner of the work area.
Page 36

ADOBE ACROBAT 8 STANDARD
User Guide
Read a document in Full Screen mode
If the Full Screen navigation bar is not shown, you can use keyboard shortcuts to navigate through a PDF.
Note: If you have two monitors installed, the Full Screen mode of a page may appear on only one of the monitors. To
page through the document, click the screen displaying the page in Full Screen mode.
1 Choose View > Full Screen Mode.
2 Do any of the following:
• To go to the next page, press the Enter, Page Down, or Right Arrow key.
• To go to the previous page, press Shift+Enter, Page Up, or the Left Arrow key.
• To change the magnification, press Ctrl+0/Command+0 for Fit Page view, Ctrl+1/Command+1 for actual size,
Ctrl+2/Command+2 for Fit Width view, or Ctrl+3/Command+3 for Fit Visible view.
You can show a Full Screen tool on the Page Display toolbar by right-clicking/Control-clicking the Page Display
toolbar and choosing Full Screen Mode. Then, you can click the Full Screen tool to switch to Full Screen mode.
Close Full Screen mode
❖ Do one of the following:
• Press Ctrl+L/Command+L.
• Press Esc. (Escape Key Exits must be selected in the Full Screen preferences. This is the default setting.)
30
Viewing PDFs in a web browser
You can view PDFs in a supported web browser, or you can set your Acrobat Internet preferences to open linked or
downloaded PDF files in a separate Acrobat window. If you open PDFs in Acrobat outside the browser, you cannot
use Fast Web Viewing, form submittal in a browser, or search highlighting on the web.
Because keyboard commands may be mapped to the web browser, some Acrobat shortcuts may not be available.
Similarly, you may need to use the tools and commands in the Acrobat toolbar rather than the browser toolbar or
menu bar. For example, to print a PDF document, use the Print button in the Acrobat toolbar rather than the Print
command in the browser. (In Microsoft Internet Explorer, you can choose File > Print, Edit > Copy, and Edit > Find
on the Internet Explorer toolbar.)
Important: (Mac OS) If you have Adobe Reader installed on your system and subsequently install Acrobat, Safari
continues to use Adobe Reader to open PDFs in your browser. To reconfigure Safari to use Acrobat, you must quit Safari
and all versions of Acrobat or Adobe Reader, start Acrobat, and then start Safari while Acrobat is running.
Internet preferences
To open the Internet preferences, choose Edit > Preferences (Windows) or Acrobat > Preferences (Mac OS), and
select Internet under Categories.
Display PDF In Browser Displays any PDF opened from the web in the browser window. If this option is not selected,
PDFs open in a separate Acrobat window. On Mac OS, if you have installed versions of Adobe Reader and Acrobat,
you can select which application and which version to use.
Allow Fast Web View Downloads PDFs for viewing on the web one page at a time. If this option is not selected, the
entire PDF downloads before it is displayed. If you want the entire PDF to continue downloading in the background
while you view the first page of requested information, also select Allow Speculative Downloading In The
Background.
Page 37

ADOBE ACROBAT 8 STANDARD
User Guide
Allow Speculative Downloading In The Background Allows a PDF to continue downloading from the web, even
after the first requested page appears. Downloading in the background stops when any other task, such as paging
through the document, is initiated in Acrobat.
Connection Speed Choose a connection speed from the menu. This setting is also used by the multimedia plug-in.
Internet Settings [or Network Settings] Click to open the Internet or network connection dialog box or panel for
your computer. For more information, consult your operating system Help, your Internet service provider, or your
local network administrator.
Read articles
In PDFs, articles are optional electronic threads that the PDF author may define within that PDF. Articles lead
readers through the PDF content, jumping over pages or areas of the page that are not included in the article, in the
same way that you might skim through a traditional newspaper or magazine, following one specific story and
ignoring the rest. When you read an article, the page view may zoom in or out so that the current part of the article
fills the screen.
See also
“Articles” on page 264
31
Open and navigate an article thread
1
Choose Tools > Select & Zoom > Hand Tool, or click the Hand Tool on the Select & Zoom toolbar.
2 Choose View > Navigation Panels > Articles to open the Articles panel.
Note: You cannot open the Articles panel if you are viewing the PDF inside a browser. You must open the PDF in Acrobat.
3 Double-click the article icon to go to the beginning of that article. The icon changes to the follow-article
pointer
.
Note: If the Articles panel is blank, then the author has not defined any article threads for this PDF.
4 With the article thread open, do any of the following:
• To scroll through the article one pane at a time, press Enter/Return or click in the article.
• To scroll backward through the article one pane at a time, Shift-click in the article, or press Shift+Return.
• To go to the beginning of the article, Ctrl-click/Option-click within the article.
5 At the end of the article, click in the article again.
The previous page view is restored, and the pointer changes to the end-article pointer
Exit a thread before the end of the article
1
Make sure that the Hand tool is selected.
2 Shift+Ctrl-click/Shift+Option-click the page or press Enter/Return.
.
The previous page view is restored.
Page 38

ADOBE ACROBAT 8 STANDARD
User Guide
Preferences for viewing PDFs
The Preferences dialog box defines a default page layout and customizes your application in many other ways. To
modify preferences, choose Edit > Preferences (Windows) or Acrobat > Preferences (Mac OS), and select the panel
you want under Categories. For viewing PDFs, examine the preferences options for Documents, General, Multimedia, and Page Display.
The preferences settings control how the application behaves whenever you use it; they are not associated with any
particular PDF document.
Note: If you install any third-party plug-ins, set these preferences using the Third-Party Preferences menu item.
See also
“3D preferences” on page 301
“Multimedia preferences” on page 288
“Setting accessibility preferences” on page 235
Documents preferences
Open Settings
Show Each Document In Its Own Window Creates multiple Acrobat windows rather than opening multiple PDFs in
one instance of Acrobat.
32
Restore Last View Settings When Reopening Documents Determines whether documents open automatically to the
last viewed page within a work session.
Open Cross-document Links In Same Window Closes the current document and opens the document being linked
to in the same window, minimizing the number of windows open. If the document being linked to is already open
in another window, the current document is not closed when you click a link to the open document. If you do not
select this option, a new window opens each time you click a link to a different document.
Allow Layer State To Be Set By User Information Allows the author of a layered PDF document to specify layer
visibility based on user information.
Allow Documents To Hide The Menu Bar, Toolbars, And Window Controls AllowsthePDFtodeterminewhetherthe
menu bar, toolbar, and window controls are hidden when the PDF is opened.
Documents In Recently Used List Sets the maximum number of documents listed in the File menu (Windows) or
when you choose File > Open Recent File (Mac OS). The default is five for Windows and nine for Mac OS.
Remember Files In Organizer History For Specifies how long PDF files remain in the History list.
Save Settings
Automatically Save Document Changes To Temporary File Every _ Minutes Determines how often Acrobat automat-
ically saves changes to an open document.
Save As Optimizes For Fast Web View Restructures a PDF document for page-at-a-time downloading from web
servers.
PDF/A View Mode
View Documents In PDF/A Mode Specifies when to use this viewing mode: Always, Never, or Only For PDF/A
Documents.
Page 39

ADOBE ACROBAT 8 STANDARD
User Guide
Examine Document
Examine Document Examines the PDF for items that may not be apparent, such as metadata, file attachments,
comments, and hidden text and layers. The examination results appear in a dialog box, and you can remove any type
of item that appears there.
• Examine Document When Closing Document (Not selected by default.)
• Examine Document When Sending Document By Email (Not selected by default.)
Adobe Version Cue CS3
Enable Version Cue File-Version Manager Turns on Adobe Version Cue® CS3 (a feature of Adobe Creative Suite 3)
and adds the Save A Version command and the Versions command to the File menu.
Note: To use Version Cue in Acrobat, you must be able to access a Version Cue Workspace in Creative Suite.
Full Screen preferences
Full Screen Setup
Current Document Only Specifies whether or not the display is limited to a single PDF.
Fill Screen With One Page At A Time Sets the page view to the maximum screen coverage by a single page.
33
Alert When Document Requests Full Screen Displays a message before going into Full Screen mode. Selecting this
option overrides a previous selection of Do Not Show This Message Again in that message.
Which Monitor To Use Specifies the monitor on which full-screen display appears (for users with multiple-monitor
configurations).
Full Screen Navigation
Escape Key Exits Lets you exit Full Screen mode by pressing the Esc key. If this option is not selected, you can exit
by pressing Ctrl+L/Command+L.
Show Navigation Bar Shows a minimal navigation toolbar regardless of the document settings.
Left Click To Go Forward One Page; Right Click To Go Back One Page Lets you page through an Adobe PDF
document by clicking the mouse. You can also page through a document by pressing Return, Shift-Return (to go
backward), or the arrow keys.
Loop After Last Page Lets you page through a PDF document continuously, returning to the first page after the last.
This option is typically used for setting up kiosk displays.
Advance Every _ Seconds Specifies whether to advance automatically from page to page every set number of
seconds. You can page through a document using mouse or keyboard commands even if automatic paging is
selected.
Full Screen Appearance
Background Color Specifies the window’s background color in Full Screen mode. You can select a color from the
color palettet to customize the background color.
Mouse Cursor Specifies whether to show or hide the pointer when Full Screen mode is in operation.
Full Screen Transitions
Ignore All Transitions Removes transition effects from presentations that you view in Full Screen mode.
Page 40

ADOBE ACROBAT 8 STANDARD
User Guide
Default Transition Specifies the transition effect to display when you switch pages in Full Screen mode and no
transition effect has been set for the document.
Direction Determines the flow of the selected default transition on the screen, such as Down, Left, Horizontally, and
so forth. The available options vary according to the transition. If no directional options affect the selected default
transition, this option is not available.
Navigation Controls Direction Mimics the user’s progress through the presentation, such as transitioning from top
tobottom whentheuserproceedstothenext pageandfrombottomtotop whentheuserbacktrackstothe previous
page. Available only for transitions with directional options.
General preferences
Basic Tools
Use Single Key Accelerators To Access Tools Enables you to select tools with a single keystroke. This is off by default.
Create Links From URLs Specifies whether links that weren’t created with Acrobat are automatically identified in the
PDF document and become clickable links.
Make The Hand Tool Select Text Enables the Hand tool to function as the Select tool when it hovers over text in an
Adobe PDF.
Make The Hand Tool Read Articles Changes the appearance of the Hand tool pointer when over an article thread.
Uponthefirstclick,thearticlezoomstofillthedocumentpanehorizontally;subsequentclicksfollowthethreadof
the article.
34
Make The Hand Tool Use Mouse-wheel Zooming Changes the action of the mouse wheel from scrolling to zooming.
Make The Select Tool Select Images Before Text Changes the order in which the Select tool selects.
Use Fixed Resolution For Snapshot Tool Images Sets the resolution used to copy an image captured with the
Snapshot tool.
Warnings
Do Not Show Edit Warnings Disables warning boxes that would normally appear when you delete items such as
links, pages, page thumbnails, and bookmarks.
Reset All Warnings Restores default settings for warnings.
Print
Show Page Thumbnails In Print Dialog Controls the print preview display in the Print dialog box. Deselecting this
option speeds up the preview.
Emit Passthrough PostScript When Printing EnablesAdobePostScript®XObjectsinthePDFfiletobeemitted when
that PDF file is printed to a PostScript printer.
Application Startup
Show Splash Screen Determines whether the application splash screen appears each time the application starts.
Use Only Certified Plug-Ins Ensures that only Adobe-certified third-party plug-ins are loaded.
Page 41

ADOBE ACROBAT 8 STANDARD
User Guide
Page Display preferences
Default Layout And Zoom
Resolution
Use System Setting Uses the system settings for monitor resolution.
Custom Resolution Sets the monitor resolution.
Rendering
Smooth Text Specifies the kind of text-smoothing to apply: None, For Monitor, or For Laptop/LCD.
Smooth Line Art Applies smoothing to remove abrupt angles in lines.
Smooth Images Applies smoothing to minimize abrupt changes in images.
Use Local Fonts Specifies whether the application uses or ignores local fonts installed on your system. When
deselected, substitute fonts are used for any font not embedded in the PDF. If a font cannot be substituted, the text
appears as bullets and an error message appears.
Use 2D GPU Acceleration (Appears only if your computer hardware supports 2D GPU acceleration.) Speeds up
zooming, scrolling, and redrawing of page content, and speeds the rendering and manipulation of 2D PDF content.
This option is deselected by default.
35
Note: If the 2D GPU Acceleration option appears on the Page Display preferences but is not available, you may need to
updateyourGPUcarddrivertoenablethis hardware feature. Contactyourcardvendororcomputermanufacturerfor
an updated driver.
Use Page Cache Places the next page in a buffer before the current page is viewed to reduce the time required to page
through a document.
Page Content And Information
Show Large Images Displays large images. If your system is slow to display image-intensive pages, you can deselect
this option.
Overprint Preview Turns overprint preview on or off. The Overprint Preview mode lets you see (on-screen) the
effects of ink aliasing in the printed output. A printer or service provider may create an ink alias if a document
contains two similar spot colors and only one is required, for example.
Show Art, Trim, & Bleed Boxes Displays any art, trim, or bleed boxes defined for a document.
Show Transparency Grid Displays the grid behind transparent objects.
Use Logical Page Numbers Enables the Number Pages command for matching the position of the page in the PDF
to the number printed on the page. A page number, followed by the page position in parentheses, appears in the Page
Navigation toolbar and in the Go To Page and Print dialog boxes—for example, i (1 of 1) if the printed number of
the first page is i. If this option is not selected, pages are numbered with arabic numbers starting at 1. Selecting this
option helps prevent unexpected behavior when clicking Back or Go Back in your web browser.
Always Show Document Page Size Displays the page measurements beside the horizontal scroll bar.
Use Smooth Zooming When deselected, turns off animation effects, which improves performance.
Use Smooth Scrolling When deselected, turns off animation effects, which improves performance.
Page 42

ADOBE ACROBAT 8 STANDARD
User Guide
Adjusting PDF views
Adjust page magnification
Tools on the Select & Zoom toolbar can change the magnification of PDF documents. Only some of these tools
appear on the default view of the toolbar. You can see all the tools by right-clicking/Control-clicking the Select &
Zoom toolbar and choosing either individual tools, Show All Tools, or More Tools and then selecting individual
tools.
A B C D E F G H I J
All zoom tools
A. Marquee Zoom tool B. DynamicZoomtool C. Zoom Out button D. Zoom In button E. Zoom Value menu button F. Actual Size button
G. Fit Width button H. Fit Page button I. Pan & Zoom Window tool J. Loupe tool
• The Marquee Zoom tool works in a few different ways. You can use it to drag a rectangle around a portion of the
page that you want to fill the viewing area. Or, simply clicking the Marquee Zoom tool increases the magnification
by one preset level, centering on the point where you clicked. To decrease the magnification by one preset level,
Ctrl-click/Option-click the Marquee Zoom tool.
• The Dynamic Zoom tool zooms in when you drag it up the page and it zooms out when you drag down. If you
use a mouse wheel, this tool zooms in when you roll forward and zooms out when you roll backward.
• Zoom In and Zoom Out buttons change the document magnification by preset levels.
•
The Zoom Value option changes the page view according to a percentage you type in or select from a pop-up menu.
• Actual Size displays the page at 100% magnification.
• Fit Width adjusts the magnification so that the PDF fills the document pane horizontally.
• Fit Page adjusts the magnification so that one page fills the document pane vertically.
• The Pan & Zoom Window tool adjusts the magnification and position of the view area to match the area in an
adjustable rectangle in the Pan & Zoom window’s thumbnail view of the page.
• TheLoupe Toolwindow displaysamagnified portionofthe PDFthatmatchestheareainanadjustablerectangle
on the document pane.
36
Resize a page to fit the window
• To resize the page to fit entirely in the document pane, choose View > Zoom > Fit Page.
• To resize the page to fit the width of the window, choose View > Zoom > Fit Width. Part of the page may be out
of view.
• Toresizethepagetofittheheightofthewindow,chooseView > Zoom >Fit Height.Partofthepage maybeout
of view.
• Toresize thepagesothatits textandimagesfitthewidthofthewindow,chooseView > Zoom>FitVisible.Part
of the page may be out of view.
To see keyboard shortcuts for resizing the document, open the View menu.
Page 43

ADOBE ACROBAT 8 STANDARD
Show a page at actual size
❖ Choose View > Zoom > Actual Size.
User Guide
The actual size for a PDF page is typically 100%, but the document may have been set to another magnification level
when it was created.
Change the magnification with zoom tools
❖ Do one of the following:
• Click the Zoom In button or the Zoom Out button in the toolbar.
• Enter a magnification percentage in the Select & Zoom toolbar, either by typing or choosing from the pop-up
menu.
• Drag the Marquee Zoom tool to define the area of the page that you want to fill the document pane.
• Drag the Dynamic Zoom tool up to increase the magnification and down to decrease magnification.
When the Marquee Zoom tool is selected, you can Ctrl-click/Option-click or Ctrl-drag/Option-drag to zoom out.
Holding down Shift switches temporarily from the Marquee Zoom tool to the Dynamic Zoom tool.
Change the magnification with the Pan & Zoom Window tool
1
Choose Tools > Select & Zoom > Pan & Zoom Window, or select the Pan & Zoom Window tool on the Select
& Zoom toolbar.
2 Do any of the following:
• Drag the handles of the box in the Pan & Zoom window to change the document magnification.
• Drag the center of the box to pan across the area you want to see.
• Click the navigation buttons to move to a different page.
• Enter a value in the zoom text box, or click the plus or minus buttons to increase or decrease the magnifi-
cation by preset levels.
37
Change the magnification with the Loupe tool
1
ChooseTools>Select&Zoom>Loupe,orselecttheLoupetool ontheSelect&Zoomtoolbar,ifitisdisplayed.
2
Click the area of the document you want to view in closer detail. A rectangle appears in the document, corresponding
to the area shown in the Loupe Tool window. You can drag or resize the rectangle to change the Loupe tool view.
3 To change the magnification of the Loupe tool, do any of the following:
• Drag the slider.
• Click the plus or minus buttons.
• Enter a value in the zoom text box.
Page 44

ADOBE ACROBAT 8 STANDARD
Use the Loupe tool to view a magnified area of the document.
User Guide
Note: You can change the color of the Loupe tool rectangle, click the Line Color pop-up menu in the lower right corner
of the Loupe Tool window, and select a new color.
Change the magnification by using a page thumbnail
1
Click the Pages button on the left side of the window to view the page thumbnails.
2 Locatethethumbnailforthecurrentpage,andthenpositionthepointeroverthe lowerrightcornerofthepage-
view box until the pointer changes into a double-headed arrow.
3 Drag the corner of the box to reduce or expand the view of the page.
4 As needed, move the pointer over the zoom box frame within the thumbnail until it changes to a Hand icon, and
then drag the frame to see a different area of the page in the document pane.
38
A page-view box in a page thumbnail indicates the area of the page currently showing in the document pane.
Change the default magnification
1
Choose Edit > Preferences.
2 Under Categories, select Page Display.
3 Open the Zoom pop-up menu and choose a default magnification level.
Page 45

ADOBE ACROBAT 8 STANDARD
User Guide
Set the page layout and orientation
Changing thepagelayoutisespeciallyusefulwhenyou wanttozoomouttoget anoverviewofthedocumentlayout.
You can use the following page layouts when viewing PDF documents:
Single Page Displays one page at a time, with no portion on other pages visible.
Single Page Continuous Displays pages in a continuous vertical column that is one page wide.
Two-Up Displays each two-page spread with no portion of other pages visible.
Two-Up Continuous Displays facing pages side by side in a continuous vertical column.
Note: If a document has more than two pages, the Two-Up and Two-Up Continuous views display the first page alone
on the right side of the document pane, to ensure proper display of two-page spreads.
Single Page, Single Page Continuous, Two-Up, Two-Up Continuous page layouts
39
Set page layout
• To see only one page at a time, choose View > Page Display > Single Page.
• To see two pages at a time, side by side, choose View > Page Display > Two-Up.
• To scroll down continuously through one page after another, choose View > Page Display > Single Page
Continuous.
• To scroll down continuously through two pages at a time, choose View > Page Display > Two-Up Continuous.
You can also display buttons for each of these options in the Display Pages toolbar by choosing Tools > Toolbars >
More Tools, and selecting them in the More Tools dialog box.
Note: In Single Page layout, choosing Edit > Select All selects all text on the current page. In other layouts, Select All
selects all text in the PDF.
Rotate the page view
You can change the view of a page in 90˚ increments. This changes the view of the page, not its actual orientation.
You can’t save this change.
❖ Choose View > Rotate View > Clockwise or Counterclockwise, or click the Rotate Clockwise button or the
Rotate Counterclockwise button in the toolbar.
Note: If you want the rotation to be saved with the document, choose Document > Rotate Pages.
Change the default page layout
1
Choose Edit > Preferences.
2 Under Categories, select Page Display.
3 Open the Page Layout menu and choose Automatic, Continuous, Single Page, Two-Up, or Two-Up Continuous.
Page 46

ADOBE ACROBAT 8 STANDARD
User Guide
Use split-window view
You can view a PDF with the document pane divided into two panes (Split command) or four panes (Spreadsheet
Split command).
WithSplitview,youcanscroll,changethemagnification level, orturntoadifferent pageintheactivepanewithout
affecting the other pane.
The Spreadsheet Split view is useful if you want to keep column headings and row labels visible while scrolling
through a large spreadsheet or table. In this mode, changing the magnification in one pane changes the magnification in all panes. Also, scrolling is coordinated between the panes: scrolling a pane horizontally also scrolls the
pane above or below it; scrolling vertically also scrolls the pane to the left or right of that pane.
1 Start creating the type of split view you want:
• To split the view into two panes, choose Window > Split, or drag the gray box above the vertical scroll bar.
• To split the view into four panes with synchronized scrolling and zoom levels, choose Window > Spreadsheet Split.
2 Drag the splitter bars up, down, left, or right to resize the panes, as needed.
3 Adjust the zoom level, as needed:
• In Split view, click a pane to make it active, and change the zoom level for that pane only.
• In Spreadsheet Split view, adjust the zoom level to change the displays in all four panes.
4 Scroll, as needed:
• In Split view, click a pane to make it active, and scroll to change that pane only.
• In Spreadsheet Split view, click a pane, and scroll vertically to change the views in the active pane and the pane
beside it. Scroll horizontally to change the views in the active pane and the pane above or below it.
5 To restore single-pane view, choose Window > Remove Split.
40
View a document in multiple windows
You can create multiple windows for the same document using the New Window command. New windows have the
same size, magnification, and layout as the original window and open at the same page and on top of the original
window. When you open a new window, Acrobat adds the suffix 1 to the original filename and assigns the suffix 2
tothenew window.Youcanopenmultiplewindowswiththesuffixincrementingwitheachnewwindow.Closing a
window causes the remaining open windows to be renumbered sequentially; that is, if you have five windows open
and you close the third window that you opened, the windows are renumbered with the suffixes 1 to 4.
Note: This feature is not available when PDFs are viewed in a browser.
Open a new window
❖ Select Window > New Window.
Close a window
❖ Click the close box in the window. You are prompted to save any changes. Closing a window does not close a
document if more than one window is open.
Close all windows for a document
❖ Choose File > Close. You are prompted to save any changes before each window is closed.
Page 47

ADOBE ACROBAT 8 STANDARD
User Guide
Display off-screen areas of a magnified page
When you zoom in to a high magnification, you may be able to see only part of a page. You can shift the view to show
other areas of the page without changing the magnification level.
❖ Do either of the following:
• Use the vertical scroll bars to move up and down the pages or the horizontal scroll bars to move across the page.
• Select the Hand tool in the Select & Zoom toolbar, or choose Tools > Select & Zoom > Hand Tool, and drag to
move the page, as if moving a piece of paper on a table.
See also
“About PDF layers” on page 277
Display PDFs in Line Weights view
The Line Weights view applies a constant stroke width (1 pixel) to lines, regardless of zoom. When you print the
document, the stroke will print at the true width. Line Weights view is off by default.
❖ Choose View > Line Weights. To turn off Line Weights view, choose View > Line Weights again.
Note: Line Weights view is not available for viewing PDFs within a web browser.
41
Grids, guides, and measurements
Measure the height, width, or area of objects
The Measuring toolbar contains tools you can use to measure distances and areas of objects in PDF documents. The
measuring tools are especially useful when you need to know the distances or areas associated with objects in a form
or computer-aided design (CAD) drawing, or when you want to measure certain areas of a document before sending
it to a professional printer. The measuring tools are available to Reader users only if the PDF creator enables
measuring functionality.
When you use a measuring tool, the tool dialog box displays the measurements of the line segments you draw.
Page 48

ADOBE ACROBAT 8 STANDARD
User Guide
A
B
C
42
Measuring tools
A. Measuring toolbar B. Object being measured C. Too l d i s p l ay
1 Choose Tools > Measuring, and select a measuring tool. Or, right-click/Control-click the toolbar area, and then
choose Measuring.
2 To measure areas of your PDF document, do any of the following:
• SelecttheDistancetool tomeasure thedistancebetweentwopoints.Clickthefirstpoint,movethepointer
to the second point, and then click again. The measurements appear in the tool dialog box.
• Select the Perimeter tool to measure a set of distances between multiple points. Click each point you want to
measure. Then, double-click the last point, or hold the pointer over the last point and click.
• SelecttheAreatool tomeasuretheareawithinthelinesegmentsthatyou draw. Clickeachpointyouwantto
measure. After you have clicked at least two points, click the first point to complete the area measurement.
Note: You can also finish a measurement by right-clicking/Control-clicking and choosing Complete Measurement from
the context menu.
3 While measuring objects, do any of the following:
• To change the scaling ratio (such as 3:2) on the drawing areas, specify the appropriate numbers in the tool dialog
box. If desired, change the unit of measurement next to this ratio.
• Select Measurement Markup in the tool dialog box if you want the lines you draw to appear as a comment. You
canthenusetheHandtooltodouble-clickthecommentandviewthemeasurementforthelinesegmentsthatyou
draw.UnlessAnnotateisselected,theobjectyoudrawwilldisappearwhenyoumeasureanotherobjectorselect
another tool.
Page 49

ADOBE ACROBAT 8 STANDARD
User Guide
View the Info panel
The Info panel lets you see the coordinate position of the pointer within the document pane. The position
numbering begins at the upper left corner of the document. The Info panel also shows the width and height of a
selected object as you resize it.
View x and y coordinates
1
Choose View > Navigation Panels > Info.
2 Move the mouse pointer to view x and y coordinates.
Change the panel’s measurement units
❖ In the Options menu in the Info panel, choose a different unit of measurement. The currently selected option has
a check mark next to its name.
Saving PDFs
About saving PDFs
You can save a copy of a PDF with any comments, entries in form fields, or digital signatures that you have added to
the PDF. If the PDF restricts your usage rights, the document message bar under the toolbar area describes these
restrictions when you open the document.
43
You can also save the contents of a PDF in text format. This allows you to easily reuse the text from a PDF and to use
the content with a screen reader, screen magnifier, or other assistive technology.
Save a copy of a PDF
1 Choose File > Save As (or Save A Copy, if Save As is not shown).
2 In the Save As dialog box, enter the filename and location, and click Save.
Save comments, form field entries, and digital signatures
❖ Do one of the following:
• Choose File > Save to save changes to the current file.
• Choose File > Save As to save changes to a new file.
If you are viewing a PDF in a web browser, the Acrobat File menu is not available. However, you can use the Save A
Copy button in the Acrobat toolbar to save the PDF.
See also
“Filling in PDF forms” on page 186
“Participating in a PDF review” on page 151
Page 50

ADOBE ACROBAT 8 STANDARD
User Guide
Save document changes
If you modify a PDF—such as by adding new pages from another file or deleting pages—you can save your changes
by saving the PDF or by saving a copy of the PDF. You can also save changes to your work incrementally and then
recover those changes if a problem occurs.
Note: Saving a digitally signed PDF invalidates the signature.
Save changes
• To save the changes to the current document, choose File > Save.
• To save the modified document to a new file, choose File > Save As. For Save As Type (Windows) or Format (Mac
OS), choose Adobe PDF Files (*.pdf). Type a name and location, and click Save.
Recover the last saved version
❖ Choose File > Revert, and then click Revert.
About the Autosave feature
The Autosave feature guards against losing your work in case of a power failure by incrementally, and at regular
intervals, saving file changes to a specified location. The original file is not modified. Instead, Acrobat creates an
autosave file of changes, which includes all the changes you made to the open file since the last automatic save. The
amount of new information that the autosave file contains depends on how frequently Acrobat saves the autosave
file. If you set the autosave interval to 15 minutes, you could lose the last 14 minutes of your work if a problem occurs.
Frequent automatic saving prevents loss of data, and is especially useful if you make extensive changes to a
document, such as by adding comments.
44
You can apply autosave changes to the original files when you restart Acrobat. When you close, save manually, or
revert to the last-saved version of a file, the autosave file is deleted.
Note: If you use assistive technology, such as a screen reader, you may want to disable the Autosave feature so that you
don’t lose your place when the file is reloaded.
The Autosave feature won’t work in the following cases:
• A document that has its security changed. You must save the document to re-enable automatic saving of document
changes.
• A document created using the WebCapture feature or extracted from a larger PDF (Document > Extract Pages).
You must save the document to enable automatic saving of changes.
• A document displayed in a web browser or incorporated into a container document that supports Object Linking
and Embedding (OLE). This document appears outside the default file system and cannot support automatic
saving.
Recover lost changes
To prevent lost changes after an unexpected interruption, the Autosave feature must be enabled, which is the default
setting.
Set up automatic saving
1
Choose Edit > Preferences (Windows) or Acrobat > Preferences (Mac OS).
2 Select Documents in the Categories list.
Page 51

ADOBE ACROBAT 8 STANDARD
3 If Automatically Save Document Changes To Temporary File Every xx Minutes (1-99) is not selected, select it now.
4 In the Minutes box, specify how often you want Acrobat to save files.
Recover lost changes after an unexpected shutdown
1
Start Acrobat or open the file you were working on last.
2 When prompted, click Yes to open the autosave file or files. If multiple files were open, Acrobat opens all of the
files for you.
3 Save the file or files with the same names as the files you were originally working on.
User Guide
Reduce file size by saving
You can sometimes reduce the file size of a PDF simply by using the Save As command. Reducing the size of PDFs
improves their performance—particularly when they’re being accessed on the web—without altering their
appearance.
The Reduce File Size command resamples and recompresses images, removes embedded fonts, compresses
document structure, and cleans up elements such as invalid bookmarks. If the file size is already as small as possible,
this command has no effect.
Note: Reducing the file size of a digitally signed document removes the signature.
45
1 Choose Document > Reduce File Size.
2 Select the version compatibility that you need, and click OK.
If you’re certain that all your users use Acrobat 8 or Adobe Reader 8, limiting compatibility to the latest version can
further reduce file size.
Note: If you select Acrobat 4.0 And Later, and the document contains transparency, the conversion will fail.
See also
“Balancing PDF file size and quality” on page 58
Organizer
Organizer window overview
Organizer helps you find PDFs that you’ve previously opened and PDFs that you’ve organized into collections and
favorites. With Organizer, you can see thumbnail images of PDF pages to quickly identify files. You can also use
Organizer to organize related PDFs without changing their location in your file structure, and quickly browse, find,
and sort PDFs that you recently viewed.
You access the Organizer and Organizer-related commands in the File menu. After you select one or more files
within the Organizer, you can start one of several different tasks using the buttons above the file list.
Page 52

A B C
ADOBE ACROBAT 8 STANDARD
User Guide
46
Organizer window in Windows
A. Categories pane B. Files pane C. Pages pane
Categories pane
The categories pane of the Organizer window is divided vertically into sections that contain categories. These items
can help you locate and organize PDFs that reside on your computer, on a network, and on the web.
History Contains subcategories that list all the PDFs that you’ve opened during a specified period of time. You can’t
change the subcategory names or manually add PDFs to the History, which is automatically updated each time you
open a PDF and as time passes, but you can clear the entire history by using the Clear History button in the files pane.
You can also control the maximum length of the file history or turn it off with the Remember Files In Organizer
History For option in Edit > Preferences > Documents.
My Computer (Windows) or [disk name] (Mac OS) Lists the hard drives and folders in their current hierarchy. This
category is especially useful if you know where a particular PDF resides.
Favorite Places Lists any folders, network locations, and web directories that you’ve specified as favorite destina-
tions. This category functions like bookmarks or favorite destinations that you create for quick access in a web
browser, except that the destinations are folders or disk drives that contain PDFs. You can add or remove destinations
from the Favorite Places list, but you can’t edit the destination names.
Collections Contains collection folders that list all PDFs that you’ve associated with each particular collection folder.
Each collection folder can point to multiple PDFs no matter where each PDF is located; for example, a single
collection folder can list PDFs that are actually located in different folders on your computer, on a network, and also
on the web. You can change each collection folder’s name, add new collection folders, and add PDFs to each
collection folder.
Note: Collections and PDF packages both involve multiple PDFs, but in very different ways. A PDF package is itself a
PDF file that can be composed of multiple PDFs and that exists in a folder on your computer. For example, you can
attach a PDF package to an email message. Collections are more like reminders that help you find related files that may
be stored in different locations on your computer.
Page 53

ADOBE ACROBAT 8 STANDARD
User Guide
Files pane
The files pane in the Organizer window lists the PDFs that are within the subcategory or folder selected in the
categories pane; each PDF listing shows the filename, modification date, page number, file size, location, and a
thumbnail image of the first page. You can sort the list by filename, metadata information, number of pages, file size,
modification date, and date last opened.
Use the buttons at the top of the Organizer window to open, print, email, or combine one or more selected PDFs; in
addition, you can send a selected PDF for review or approval, or upload it for a browser-based review.
Pages pane
The pages pane of the Organizer window displays thumbnails for every page of all PDF files that are selected in the
files pane. The Zoom slider and buttons at the bottom of the pages pane let you adjust the size of the page thumbnails.
47
Selecting a PDF (left) reveals a thumbnail for each page in the pages pane (right).
Adjust the Organizer window
You can make changes to your view of the Organizer.
See also
“Combining files into PDFs” on page 112
“Starting and managing a review” on page 146
Display the Organizer window
❖ Choose File > Organizer > Open Organizer.
It isn’t necessary to open the Organizer window if you want to open a PDF in a collection, create a new collection,
add an open PDF to a collection, or open a PDF from your history of opened PDFs. Choose File > Organizer or File >
History to access commands that let you do all of these things.
Resize the Organizer and its panes
• To resize a pane relative to the other panes, drag the vertical bar that separates two panes.
• To resize the Organizer window, drag the left, right, or bottom edge of the window.
Page 54

ADOBE ACROBAT 8 STANDARD
Sort the files pane list
1
If necessary, select a subcategory or folder in the categories pane to display PDFs in the files pane.
2 In the files pane, do any of the following:
User Guide
• To sort the list of PDF files according to a particular property, choose a property from the Sort By menu.
• To change the sorting direction, click the Ascending Sort Order button or the Descending Sort Order button
to the right of the Sort By menu.
• To view the location of the selected PDFs, right-click/Control-click, and choose Show In Windows Explorer
(Windows) or Show In Finder (Mac OS).
Organize PDF collections
You can manage PDF collections in the Organizer window.
Add a PDF to a collection
❖ Do any of the following:
• Right-click/Control-click the collection, choose Add Files, select one or more PDFs, and click Add.
• Right-click/Control-click the PDF in the files pane, and choose Add To A Collection > [collection name].
• Drag a PDF from Windows Explorer or Mac OS Finder to the collection in the categories pane.
• After selecting a subcategory in the History, My Computer, or Favorite Places category, drag a PDF from the files
pane to the desired collection.
• In Acrobat, open the PDF and choose File > Organizer > Add To A Collection. Then either select the collection
to which you want to add the PDF or click New Collection, type a name, and click Create.
48
intheOrganizerwindoworbychoosingthe Youcan openanyPDFfromacollectionbyusingtheOpenbutton
PDFfilenamefromasubmenudirectlyinAcrobat.ToopenaPDFfromacollectioninAcrobat,chooseCollections
> [collection name] > [PDF filename] from either the File > Organizer submenu or the Organizer menu in the File
toolbar.
Edit the collection folders
• To rename a collection, right-click/Control-click the collection name, choose Rename Collection, and then type
the new name.
• To delete a collection, right-click/Control-click the collection name, choose Delete Collection, and then click Yes
in the confirmation dialog box. The PDF files within the collection aren’t deleted from their original locations.
• To create a new collection, click the Create A New Collection button in the Organizer window. Or, in Acrobat,
choose File > Organizer > Create A New Collection. Type a name for the collection.
Move a PDF to a different collection
❖ To move a PDF from one collection to another, select the collection that contains the PDF, right-click/Control-
click the PDF file in the files pane, and choose Move To Collection > [collection name].
Remove a PDF from a collection
❖ To remove a PDF from a collection, select the collection, right-click/Control-click the PDF in the files pane, and
choose Remove From [collection name].
Page 55

ADOBE ACROBAT 8 STANDARD
User Guide
Organize PDFs with the Favorite Places category
1 To add an existing folder or hard drive to the category, do one of the following:
• Click the Add A Favorite Place button , select a folder or hard drive, and click OK.
• Right-click/Control-click the folder in the My Computer (Windows) or [disk name] (Mac OS) category, and
choose Add [folder name] To Favorite Places.
• Right-click/Control-click the subfolder in the Favorite Places category, and choose Add [favorite place name] To
Favorite Places.
2 To remove a folder or hard drive from the list of Favorite Places, right-click/Control-click the item, and choose
Remove [folder name] From Favorite Places.
Expand views in the Categories pane
Items in the Categories pane can be expanded and collapsed by clicking the plus sign [+] (Windows) or arrow
(Mac OS) so that you can see more of the structure. When you select a date category, folder, or collection, all PDFs
in that item are listed in the pages pane.
Expand an Organizer category
1
Toexpand or collapseacategoryorfolderinthe categories pane,click theicontothe leftofthecategoryiconor
folder icon.
2 Select a subcategory or folder under a main category. The pages pane lists all PDFs associated with that subcat-
egory or folder.
49
Expand the file structure
❖ Select a folder in the My Computer (Windows) or [disk name] (Mac OS) category. All PDFs in that folder are listed
in the files pane.
Start a task from the Organizer files pane
1 Select a subcategory or folder under a main category in the categories pane to display PDFs in the files pane.
2 Select the file or files you want to work with:
• To select a listed PDF file, click it.
• To select all the PDF files listed, click Select All.
• To add noncontiguous PDF files to or remove them from the selection, Ctrl-click/Command-click them.
• To add contiguous PDF files to the selection, Shift-click them.
3 To perform an action on the selected PDF files, click one of the task buttons at the top of the Organizer window:
• To open, print, or email the PDF files, use the buttons above the files pane.
• To start combining PDF files into a single PDF file, click the Combine Files button and follow the instructions in
the wizard.
• To start a review, select the PDF and choose Send For Review > Send For Shared Review or Send For Review >
Attach For Email Review.
Page 56

ADOBE ACROBAT 8 STANDARD
User Guide
See also
“Combining files into PDFs” on page 112
“Starting and managing a review” on page 146
Erase the history of opened PDFs
1 Select a History subcategory in the categories pane.
2 Click Clear History in the files pane.
Maintaining the software
About the updating process
Acrobat application files and components can be updated in a variety of ways. Some updates are available when you
open a PDF that triggers the updating process automatically. For example, if you open a form that uses Asianlanguage fonts, Acrobat asks whether you want to download the fonts. Other updates are available only from the
Help menu, and you must install them manually. Some updates are available both automatically and manually.
50
Depending on your preferences settings, Acrobat downloads updates in the background.
Update the software
❖ Choose Help > Check For Updates, and follow any on-screen instructions.
Change updating preferences
1 Choose Help > Check For Updates.
2 In the Adobe Updater dialog box, click Preferences.
3 Select Automatically Check For Adobe Updates, and specify whether you want automatic checking on a weekly
or monthly basis and whether or not you want to be asked before updates are downloaded.
4 Makesurethattheapplicationyouarerunning(AdobeReaderorAdobeAcrobat)is selectedasthesoftwarethat
will be updated.
5 If appropriate, click Browse to navigate to the location in which you want the downloads to be placed.
About Speed Launcher (Windows)
When you install Acrobat, the Speed Launcher program is installed into your computer’s Common Startup group.
The Speed Launcher shortens the time needed to start Acrobat.
Although this is not recommended, you can disable Speed Launcher by dragging its icon out of the Startup folder.
Note: If you have both Acrobat and Reader installed on the same system, two Speed Launcher icons appear in the Startup
folder. If you want to disable Speed Launcher, remove both Speed Launcher icons from the Startup folder.
For more information about this topic, see the Adobe support website.
Page 57

ADOBE ACROBAT 8 STANDARD
User Guide
Manage plug-ins
Plug-ins add more functionality, but they also increase the memory needed. To minimize memory requirements,
you may want to install only the plug-ins that you use. To load a plug-in correctly, you must place it in the plug-ins
folder. You can temporarily disable plug-ins when starting your software.
Disable a plug-in
1
Do one of the following:
• (Windows) Open the plug_ins folder (Program Files/Adobe/ Acrobat 8.0/ Acrobat/plug_ins).
• (Mac OS) Control-click the application icon, and choose Show Package Contents. Then double-click the Contents
folder and open the Plug-ins folder.
2 Select the plug-ins you do not want to load, and move them out of the folder. Some of the plug-ins may be in
folders nested inside the plug-ins folder.
Disable all plug-ins temporarily
❖ Press the Shift key immediately after starting Acrobat.
Adobe Digital Editions
Acrobat 8 changes the way you open and manage eBooks. Now, you use the free Adobe® Digital Editions software to
read and organize eBooks and other publications. Digital Editions is a separate web-based Rich Internet Application
(RIA) that replaces the eBooks features in previous versions of Acrobat.
51
When you install Digital Editions, your existing bookshelf items are automatically imported and available within the
new Digital Editions bookshelf experience. You can also manually import individual PDFs into your Digital Editions
bookshelf.
Note: When you double-click the icon for an eBook, Acrobat automatically opens the Digital Editions download website,
where you can start installing the software.
To learn more about how to make the transition to this new solution for eBooks and for a link to the secure download
website, go to the Adobe website.
Non-English languages
Asian language PDFs
You can use Acrobat to view, search, and print PDF documents that contain Asian text (Traditional and Simplified
Chinese, Japanese, and Korean). You can also use these languages when you fill in forms, add comments, and apply
digital signatures.
Almost allofthe Acrobatfeaturesare supportedforTraditionaland SimplifiedChinese,Japanese, andKoreantext.
In Windows, you must install the Asian language support files by using the custom installation and selecting the
Asian Language Support options under Create Adobe PDF and View Adobe PDF.
PDFMaker and the Adobe PDF printer automatically embed most Asian fonts in your file when creating PDF files.
You can control whether Asian fonts are embedded.
Page 58

ADOBE ACROBAT 8 STANDARD
User Guide
In Windows, you may be able to view and print files that contain Asian languages without having the necessary Asian
language support installed on your system. If you try to open a PDF file for which language support is required, you
are automatically prompted to install the required fonts.
Cyrillic, Central European, and Eastern European language PDFs
You can work with Adobe PDF files that contain Cyrillic text (including Bulgarian and Russian), Central European
text, and Eastern European text (including Czech, Hungarian, and Polish) if the fonts are embedded in the PDF files.
If the fonts are embedded, you can view and print the files on any system. Fonts do not need to be embedded to use
the Search feature.
Note: If you open a PDF file in which form fields or text boxes contain these languages but the fonts are not embedded
and are not installed on your system, choosing Help > Check For Updates Now automatically prompts you to download
and install the necessary fonts.
Hebrew, Arabic, Thai, and Vietnamese language PDFs
Acrobat supports the entry and display of Thai and Vietnamese text. In Windows only, Acrobat also supports Arabic
and Hebrew. By default, Right-To-Left Language Options is enabled under Arabic and Hebrew regional settings (in
Windows).
52
Enable right-to-left languages
Enabling right-to-left language options displays the user interface elements for controlling paragraph direction, digit
style, and ligature. When this option is selected, you can specify the writing direction (left-to-right or right-to-left)
and type of digits (Western or Arabic-Indic) used for creating and filling out certain form fields, adding digital signatures, and creating text box markups.
Enable Right-To-Left Language Options is enabled by default under Arabic and Hebrew regional settings.
1 Choose Edit > Preferences (Windows) or Acrobat > Preferences (Mac OS).
2 Under Categories, select International.
3 Select Enable Right-To-Left Language Options.
Page 59

Chapter 3: Creating PDFs
Adobe PDF is the solution of choice for capturing robust information from any application on any computer system.
You can create PDFs from blank pages, document files, scanned paper documents, and clipboard images.
Quickstart
Following are quick steps for some common PDF creation tasks.
Create from a file
To create a PDF from within Acrobat, the application that created the original file must be installed on the system in
most cases.
1 Click the Create PDF button and choose From File.
2 Select the file you want to convert, and click Open.
53
The authoring application opens automatically or a progress dialog box appears. If the file is in an unsupported
format, a message appears, telling you that the file cannot be converted to a PDF.
See also
“Convert a file to PDF” on page 58
Create from a paper document
You can create a PDF directly from a paper document using Acrobat and your scanner.
1 Click the Create PDF button and choose From Scanner.
2 Select the input, output, and document options in the Acrobat Scan dialog box, and then click Scan.
3 If creating a new PDF, specify a filename and location, and click Save.
4 Select Scan More Pages or Scanning Complete.
See also
“Scan a paper document to PDF” on page 61
Create from a web page
You can download and convert web pages from the top level, or any number of subordinate levels, of a URL.
1 Click the Create PDF button and choose From Web Page.
2 Type the URL into the text box. (Click Browse to convert a web page you have already downloaded.)
3 Specify the number of levels to download and where to download files from, and then click Create.
Page 60

ADOBE ACROBAT 8 STANDARD
User Guide
See also
“Convert web pages to PDF in Acrobat” on page 85
Create from scratch
You can create small PDFs that can be edited in Acrobat.
1 Choose File > Create PDF > From Blank Page.
2 Click in the document and begin typing. Use options on the New Document toolbar to change text attributes.
3 Save the document.
4 To continue editing, choose Document > Resume Editing.
To convert the PDF so that it cannot be re-edited, choose Document > Prevent Further Edits.
See also
“Create a PDF from a blank page” on page 60
Create from Word
After you install Acrobat, an Acrobat PDFMaker toolbar is added to Microsoft® Word. In Word 2007 for Windows,
you access the PDFMaker options from the Acrobat ribbon instead of the toolbar.
54
1 In Word, open the file you want to convert.
2 Do one of the following:
• (Word 2007 for Windows) Click Acrobat and then click the Create PDF button
• (Other versions of Word) Click the Convert To Adobe PDF button
3 Specify a filename and location, and click Save.
4 (Mac OS only) Click View File or Done.
You can also convert a file to PDF and then email it for review by clicking Create And Send For Review (Office
2007) or Send For Review (other versions of Office).
.
.
See also
“Creating PDFs with PDFMaker” on page 70
Create from Outlook (Windows)
After you install Acrobat, an Acrobat PDFMaker toolbar is added to Outlook.
1 Select the desired email messages and click Create Adobe PDF From Selected Messages
2 Specify a filename and location, and click Save.
The selected messages are converted to a PDF package or a merged PDF, depending upon conversion settings. To
convert email folders, select the desired folders and click Create Adobe PDF From Folders . You can also automat-
ically archive email messages and folders.
.
See also
“Convert email messages to PDFs (Windows)” on page 74
Page 61

ADOBE ACROBAT 8 STANDARD
User Guide
Automatically archive email (Windows)
You can automatically archive your Outlook email messages as PDFs.
1 In Outlook, choose Adobe PDF > Setup Automatic Archival.
2 Click the Automatic Archival tab, and select Enable Automatic Archival.
3 Specify frequency and run time. If desired, set up a log file and embedded index.
4 Click Add, select the desired folders, and specify a filename and location for the archive.
To create an archive immediately, click Run Archival Now.
See also
“Set up automatic email archiving (Windows)” on page 77
Create from Lotus Notes (Windows)
After you install Acrobat, an Acrobat PDFMaker toolbar is added to IBM Lotus Notes and commands are added to
the Actions menu.
1 Select the desired email messages and click Convert Selected Messages To Adobe PDF .
2 Specify a filename and location, and click Save.
55
The messages are converted to a merged PDF or a PDF package, depending upon conversion settings. You can
convert an entire folder to PDF by clicking Convert Selected Folder To Adobe PDF .
See also
“Convert email messages to PDFs (Windows)” on page 74
Create from Internet Explorer (Windows)
You can convert an entire web page or a selected portion of it to PDF.
1 In Microsoft Internet Explorer, open the web page you want to convert.
2 (Optional) Drag to select the text and images you want to convert.
3 Click Convert Web Page To PDF
4 Specify a filename and location, and click Save.
.
You can also convert one or more web pages, and even entire websites, from within Acrobat.
See also
“Convert web pages to PDF in Internet Explorer (Windows)” on page 82
Create using Adobe PDF printer
In many applications, you can use the Print command with the Adobe PDF printer to convert a file to PDF.
1 Open the file you want to convert, and choose File > Print.
2 Choose Adobe PDF from the list of printers, and print the file.
3 If prompted, specify a filename and location, and click Save.
Page 62

ADOBE ACROBAT 8 STANDARD
User Guide
You can also choose a different default Adobe PDF printer setting or create a customized setting.
See also
“Create PDFs by printing to file” on page 67
Overview of creating PDFs
What’s the best way to create a PDF?
There are many correct answers to this question. You create a PDF by converting other documents and resources to
Portable Document Format.
Adobe Acrobat is a powerful tool with many uses, but it is not an authoring application—that is, not an application
in which you design page layouts, write text, or create and place images on a blank page. Instead, it works in harmony
with other applications and built-in operating system features to produce PDFs that you can then use for a variety of
purposes.
The best method for creating a PDF depends on several things:
56
• What is the source document?
You can create PDFs from documents printed on paper, Word documents, InDesign files, images taken by a digital
camera, and spreadsheets, to name just a few examples. Different types of sources have different tools available for
PDF conversion.
• What is already running on your computer?
You can save time by using the most readily available Acrobat conversion feature. If the document you want to
convert is already open in its authoring application (for example, a spreadsheet that is open in Excel), there are
severalwaystoconvert thefiletoPDFwithoutopening Acrobat.Similarly,ifAcrobatisalreadyopen,you don’thave
to open the authoring application to convert a file to PDF.
• How will you use the PDF?
Every PDF strikes a balance between efficiency (small file size) and quality (such as resolution and color). When that
balance is critical to your task, you’ll want to use a method that includes access to various conversion options as a
part of the process.
For example, you can drag and drop files on the Acrobat icon on the desktop to create PDFs, but Acrobat simply
applies the most recently used conversion settings without offering you access to those settings. If you want more
control over the process, another method might be a better choice.
Note: In Acrobat 8, you can also create a new PDF from a blank page.
See also
“Create a PDF from a blank page” on page 60
PDF creation methods by file type
Refer to the following lists to determine the methods available for the different types of files.
Page 63

ADOBE ACROBAT 8 STANDARD
User Guide
Most files
These methods can be used for documents and images in almost all file formats.
Create PDF menu Within Acrobat, by choosing From File.
Adobe PDF printer Within most applications, in the Print dialog box.
Drag and drop On the desktop, in Windows Explorer or in Mac OS Finder.
Context menu On the desktop, in Windows Explorer or in Mac OS Finder (by right-clicking/Control-clicking).
Paper documents
Requires a scanner and a hard copy of the document.
Create PDF menu Within Acrobat, by choosing From Scanner. Or, for previously scanned paper documents, by
choosing From File.
Document menu Within Acrobat, by choosing Scan To PDF.
Microsoft Office documents
PDFMaker Within the authoring application, in the PDF toolbar and on the Adobe PDF menu. For Office 2007
applications, in the Acrobat Ribbon and on the Microsoft Office Button menu.
Adobe PDF printer Within the authoring application, in the Print dialog box.
57
Drag and drop On the desktop, in Windows Explorer or in Mac OS Finder.
Context menu On the desktop, in Windows Explorer or in Mac OS Finder (by right-clicking/Control-clicking).
Email messages
PDFMaker (Windows only) Within Microsoft Outlook or Lotus Notes, by clicking Acrobat PDFMaker toolbar
buttons or choosing commands in the Adobe PDF menu (Outlook) or the Actions menu (Lotus Notes).
Adobe PDF printer Within the email application, in the Print dialog box. Creates a PDF (not a PDF package).
Web pages
Create PDF menu Within Acrobat, by choosing From Web Page.
PDFMaker Within Internet Explorer or when editing in a web-authoring application that supports PDFMaker, such
as Word; in the Acrobat PDFMaker toolbar and on the Adobe PDF menu.
Adobe PDF printer Within Internet Explorer or when editing in a web-authoring application that supports
PDFMaker, such as Word; in the Print dialog box.
Drag and drop On the desktop, in Windows Explorer or in Mac OS Finder, dragging the HTML file.
Context menu (HTML files) On the desktop, in Windows Explorer or in Mac OS Finder (by right-clicking/Control-
clicking the HTML file).
Images copied on the clipboard
Create PDF menu Within Acrobat, by choosing From Clipboard Image.
Adobe Creative Suite files
Adobe PDF printer Within the authoring application, in the Print dialog box.
Export Within InDesign or Adobe GoLive®, on the File menu. (In InDesign, using the file type menu in the Export
dialog box; in GoLive, using the HTML As Adobe PDF command on the Export submenu.)
Page 64

ADOBE ACROBAT 8 STANDARD
User Guide
Save As Within Adobe Photoshop® or Adobe Illustrator, on the File menu and using the file type menu in the Save
As dialog box.
Drag and drop On the desktop, in Windows Explorer or in Mac OS Finder.
Context menu On the desktop, in Windows Explorer or in Mac OS Finder (by right-clicking/Control-clicking).
PostScript and EPS files
Drag and drop On the desktop, in Windows Explorer or in Mac OS Finder, by dragging to the Acrobat Distiller icon
or into the Acrobat Distiller window.
Double-clicking (PostScript files only) On the desktop, in Windows Explorer or Mac OS Finder.
Open command Within Acrobat Distiller, on the File menu.
Create PDF menu Within Acrobat, by choosing From File.
Adobe PDF printer Within the authoring application, in the Print dialog box.
Context menu On the desktop, in Windows Explorer or in Mac OS Finder (by right-clicking/Control-clicking).
Balancing PDF file size and quality
Thereareimportantsettingsthatyou canselectsothatyourPDFhasthebestbalancebetweenfilesize,resolution,
conformity to specific standards, and other factors. Which settings you select depends on your goals for the PDF that
you are creating. For example, a PDF intended for high-quality commercial printing requires different settings than
a PDF intended only for on-screen viewing and quick downloading over the Internet.
58
Once selected, these settings apply across PDFMaker, Acrobat, and Acrobat Distiller. However, there are some
settings that are limited to specific contexts or file types. For example, PDFMaker options can vary among the
different types of Microsoft Office applications.
For convenience, you can select one of the conversion presets available in Acrobat. You can also create, define, save,
and reuse custom presets that are uniquely suited to your purposes.
See also
“Adobe PDF conversion settings” on page 92
Creating simple PDFs with Acrobat
Convert a file to PDF
1 In Acrobat, do one of the following:
• Choose File > Create PDF > From File.
• On the toolbar, click the Create PDF button and choose From File.
2 IntheOpendialogbox,selectthefileyouwanttoconverttoPDF.Youcanbrowseallfiletypesorselectaspecific
type in the Files Of Type menu.
3 (Optional) Click Settings to change the conversion options. The options available vary depending on the file type.
Note: TheSettingsbuttonisunavailableifyouchooseAllFilesasthefiletypeorifnoconversionsettingsareavailable
for the selected file type.
Page 65

ADOBE ACROBAT 8 STANDARD
User Guide
4 Click Open to convert the file to a PDF.
Depending on the type of file being converted, the authoring application opens automatically or a progress dialog
box appears. If the file is in an unsupported format, a message appears, telling you that the file cannot be converted
to PDF.
5 When the new PDF opens, choose File > Save or File > Save As; then select a name and location for the PDF.
When naming a PDF that’s intended for electronic distribution, limit the filename to eight characters (with no
spaces) and include the .pdf extension. This ensures that email programs or network servers don’t truncate the
filename and that the PDF opens as expected.
See also
“View PDFMaker conversion settings” on page 73
“Combining PDF content” on page 109
Drag and drop to create PDFs
This method is usually best reserved for small, simple files, such as small image files or plain text files, when the
balance between file size and output quality is not important. You can use this technique with many other types of
files, but you won’t have the opportunity to adjust any conversion settings during the process.
59
1 Using Explorer (Windows) or the Finder (Mac OS), select the file icons of one or more files that you want to
convert to PDF.
2 Drag the file icons onto the Acrobat application icon. Or, (Windows only) drag the files into the open Acrobat
window.
If a message appears saying that the file could not be opened in Acrobat, then that file type cannot be converted to
PDF by the drag-and-drop method. Use one of the other conversion methods for that file.
Note: You can also convert PostScript and EPS files to PDF by dragging them onto the Acrobat Distiller window or the
Distiller application icon.
3 Save the PDF.
(Windows only) You can also right-click a file in Windows Explorer and choose Create PDF.
Convert clipboard images to PDF
You can create PDFs from screen captures and other images you copy from an image-editing application.
❖ Use the method described for the operating system running on your computer:
• (Windows) Capture a displayed image to the Clipboard, either by using the Copy command in an image-editing
application, such as Adobe Photoshop, or by pressing the PrintScreen key. Then in Acrobat, choose File > Create
PDF > From Clipboard Image, or choose From Clipboard Image in the Create PDF toolbar menu.
• (Mac OS) Choose Acrobat > Services > Grab > [Screen, Selection, or Timed Screen]. (Grab is the Mac OS X
screen-capture utility.) Your screen capture automatically converts to a PDF and opens.
Note: The From Clipboard Image command appears only when there is an image copied to the clipboard. If the clipboard
is empty or if you have copied text to the clipboard, the command does not appear.
Page 66

ADOBE ACROBAT 8 STANDARD
User Guide
Create a PDF from a blank page
Adobe® Acrobat® 8 Standard introduces the PDF Editor feature. With it, you can create a PDF from a blank page
rather than beginning with a file, a clipboard image, or scanning.
Thisprocesscan beuseful forcreatingrelativelysmallPDFs of uptoaboutadozenpages.For longer,morecomplex,
or heavily formatted new documents, it’s usually better to create the source document in an authoring application
that offers more layout and formatting options, such as Adobe InDesign or various business software products.
Note: The PDF Editor can make changes in text only with PDFs created from blank pages. To add a blank page to a PDF
created by another method, create a blank document in another application and convert that file to PDF and import it
into the existing PDF.
Create and add text to a new, blank PDF
1
Choose File > Create PDF > From Blank Page.
2 Begin typing the text you want to add to the blank page.
3 Add any formatting to the text by selecting it and selecting options on the New Document toolbar.
4 As needed, select other tools and options that you want to apply to the PDF.
5 Choose File > Save, and select a name and location for the PDF file.
Note: When the page is filled with text, the PDF Editor automatically adds a new blank page to the document.
60
Edit text in a PDF created from a blank page
1
Choose File > Open, and locate and select a PDF created with PDF Editor (that is, one created from a blank page).
2 Choose Document > Resume Editing.
3 Add text and formatting as needed.
Prevent changes in PDF Editor
You can freeze the text you have added to PDFs created from a blank page. This prevents anyone from adding or
changing the text. There is no Undo for this process.
1 Choose Document > Prevent Further Edits.
2 In the message that appears, click Prevent Further Edits to confirm your choice. Or, click Keep Text Editable if you
want to continue adding or editing text with the PDF Editor.
3 In the Save As dialog box, select a new name and location for the file, or leave the original name and location
selected to replace the original file with the uneditable version.
Preferences for the PDF Editor
You can access the PDF Editor preferences options by choosing Edit > Preferences (Windows) or Acrobat > Preferences (Mac OS) and then selecting New Document in the list under Categories.
Font Specifies the font family that will be used by default for typing on a new, blank page.
Size Specifies the font size of the default font.
Default Margins Specifies the measurements of the insets from the edges of the page: Left, Right, Top, and Bottom.
Size (under Default Page) Specifies the standard paper size, such as Letter, Tabloid, A4, and so on.
Orientation Specifies whether the longer side of the page runs horizontally (Landscape) or vertically (Portrait).
Page 67

ADOBE ACROBAT 8 STANDARD
Scan a paper document to PDF
You can create a PDF file directly from a paper document, starting within Acrobat and using your scanner. In
Windows XP, Acrobat supports TWAIN scanner drivers and Windows Image Acquisition (WIA) drivers.
If you need to convert large numbers of paper documents to PDF archives, consider purchasing Adobe Acrobat
Capture®.
Scan a paper document directly to PDF
1
In Acrobat, do one of the following:
• Choose File > Create PDF > From Scanner.
• Choose Document > Scan To PDF.
• Choose From Scanner from the Create PDF menu on the toolbar.
2 In the Acrobat Scan dialog box, select basic scanning options.
User Guide
61
Note: The Options button under Text Recognition And Metadata is not available unless Make Searchable (Run OCR)
is selected.
3 As needed, click Scanner Options and the two Options buttons to access advanced settings for your selected
scanner, Optimization Options, and Recognize Text settings.
Note: If you specify that you want to use your scanner’s native interface instead of the Acrobat interface, other windows
or dialog boxes appear. Consult the scanner manufacturer’s documentation for more information on available options.
In Mac OS, the scanner’s interface is always shown.
4 Click Scan.
5 Click the Scan More Pages (Put Sheet N+1) option if you are scanning multiple pages (where N is the number of
pages already scanned); click Scanning Complete and OK if you are finished scanning.
Optimize a scanned PDF
1
Open a PDF created from a scanned document.
2 Choose Document > Optimize Scanned PDF.
3 Select options in the dialog box, and click OK.
Page 68

ADOBE ACROBAT 8 STANDARD
User Guide
The options available in the Optimized Scanned PDF dialog box also appear in the Optimization Options dialog box,
which are described in detail under that heading in this topic.
Basic scanning options
Scanner Select an installed scanner. You must have the manufacturer’s scanning software installed on your
computer.
Scanner Options (Windows only) Click to open the Scanner Options dialog box. (Available only after you select a
scanner.)
Sides Specify single or double-sided scanning. If you select Both Sides and the scanner’s own settings are for only
one side, the scanner setting overrides the Acrobat settings.
Note: You can scan both sides of pages even on scanners that do not themselves support two-sided scanning. When Both
Sidesisselected, adialogboxappearsafterthefirstsidesare scanned. You can then reverse the original paper documents
inthetray,select theScanReverse Side (Put ReverseOfSheets) option in that dialog box, and click OK to scan the back
sides of the paper pages. This produces a PDF with all pages in the proper sequence.
Color Mode (Windows only) Select a basic color mode (Color, Black and White, or Grayscale) supported by your
scanner. This option is enabled if your Scanner Options are set to use the Acrobat scanning dialog box instead of the
scanner application.
Resolution (Windows only) Select a resolution supported by your scanner. This option is enabled if your Scanner
Options are set to use the Acrobat scanning dialog box instead of the scanner application.
62
Note: If you select a Color Mode or Resolution option not supported by your scanner, a message appears and your
scanner’s application window opens, where you can select different options.
New PDF Document Select this to create a new PDF; deselect it if you want to append the scanned pages to an
existing PDF.
Append Select this if you want to add the converted scan to an existing PDF. Use the pop-up menu to select an open
PDF or click Browse to find and select another PDF.
Make PDF/A Compliant Select this option to make the PDF conform to ISO standards for PDF/A-1b. When selected,
only Searchable Image (Exact) is available in the Recognize Text - Settings dialog box for the PDF Output Style
option.
Optimization Drag the slider to set the balance point between file size and quality. Click the Options button if you
want to customize optimization with specific settings for file compression and filtering.
Make Searchable (Run OCR) Select this option to make text and images in the PDF searchable and selectable. This
option applies OCR and font and page recognition to the text images and converts them to normal text. Click the
Options button to select specific settings in the Recognize Text - Settings dialog box. See “Recognize text in scanned
documents” on page 64.
Make Accessible Select this option to add tags to the document, which improve accessibility for disabled users.
(Available only when Make Searchable (Run OCR) is selected.)
Add Metadata Select this if you want to add information about the scanned document to the PDF file. When this
option is selected, the Document Properties dialog box appears after scanning, where you can type in the metadata
you want to add.
Scanner Options dialog box
Data Transfer Method Native Mode transfers in the default mode for your scanner. Memory Mode is automatically
selected for scanning in resolutions over 600 dots per inch (dpi).
Page 69

ADOBE ACROBAT 8 STANDARD
User Guide
User Interface The Hide Scanner’s Native Interface option bypasses the windows and dialog boxes provided by the
scanner manufacturer. Instead, scanning from Acrobat opens the Acrobat Scan dialog box.
Paper Size The menu lists available standard page sizes.
Invert Black And White This option creates positive images from black-and-white negatives, for example.
Optimization Options dialog box
The Optimization Options dialog box for image settings controls how scanned images are filtered and compressed
for the PDF. Default settings are suitable for a wide range of document pages, but you may want to customize settings
for higher-quality images, smaller file sizes, or scanning issues.
Automatic Applies default settings to balance file size and quality at a moderate level.
• Aggressive Applies settings that minimize file size. In some cases, selecting this option may visibly affect the
quality of the scanned PDF.
Custom Settings Makes additional settings available under Compression and Filtering and disables the Aggressive
setting under Automatic. If you select Custom Settings, the Color/Grayscale or Monochrome settings are available,
depending on the option you selected in the Acrobat Scan dialog box.
Color/Grayscale settings When scanning color or grayscale pages, select one of the following:
• Lossless Does not apply compression or filters—such as Deskew, Background Removal, and so forth—to scanned
pages.
63
• Adaptive Divides each page into black-and-white, grayscale, and color regions and chooses a representation that
preserves appearance while highly compressing each kind of content. Recommended scanning resolutions are 300
pixels per inch (ppi) for grayscale and RGB input, or 600 ppi for black-and-white input.
• JPEG Applies JPEG compression to the entire grayscale or RGB input page.
Note: The scanner uses either the selected Color/Grayscale option or the selected Monochrome option. Which one is used
depends on the settings you select in the Acrobat Scan dialog box or in the scanner’s TWAIN interface, which may open
after you click Scan in the Acrobat Scan dialog box. (By default, the scanner application dialog box does not open.)
Monochrome When scanning black-and-white or monotone images, select one of the following:
• JBIG2 Applies the JBIG2 compression method to black-and-white input pages. Settings of 0.95 or higher use the
lossless method; at lower settings, text is highly compressed. Text pages typically are 60% smaller than CCITT Group
4 compressed pages, but processing is slow. Compatible with Acrobat 5.0 (PDF 1.4) and later.
Note: For compatibility with Acrobat 4.0, use a compression method other than JBIG2.
• Adaptive (As described above, under Color/Grayscale settings.)
• CCITT Group 4 Applies CCITT Group 4 compression to black-and-white input page images. This fast, lossless
compression method is compatible with Acrobat 3.0 (PDF 1.2) and later.
Deskew Rotatesanypagethatis notsquarewiththe sidesofthescannerbed,tomakethePDFpagealignvertically.
Choose Automatic or Off.
Background Removal Whitens nearly white areas of grayscale and color input (not black-and-white input).
For best results, calibrate your scanner’s contrast and brightness settings so that a scan of a normal black-and-white
page has dark gray or black text and a white background. Then, Off or Low should produce good results. If scanning
off-white paper or newsprint, use Medium or High to clean up the page.
Page 70

ADOBE ACROBAT 8 STANDARD
User Guide
Edge Shadow Removal Removes dark streaks that occur at the edges of scanned pages, where the scanner light is
shadowed by the paper edge. Choose Off, Cautious, or Aggressive.
Despeckle Removes isolated black marks in black-and-white page content. Low uses a basic peephole filter. Medium
and High use both a peephole filter and a large area filter that removes larger spots farther from nearby features.
Descreen Removes halftone dot structure, which can reduce JPEG compression, cause moire patterns, and make
text difficult to recognize. Suitable for 200–400 ppi grayscale or RGB input or, for Adaptive compression, 400–600
ppi black-and-white input. The Automatic setting (recommended) applies the filter for 300 ppi or higher grayscale
and RGB input. Select Off when scanning a page with no pictures or filled areas, or when scanning at a resolution
higher than the effective range.
Halo Removal When On (recommended), removes excess color at high-contrast edges, which may have been intro-
duced during either printing or scanning. This filter is used only on color input pages.
Scanning tips
• Acrobat scanning accepts images between 10 and 3000 ppi. If you select Searchable Image or Formatted Text &
Graphics for PDF Output Style, input resolution of 72 ppi or higher is required, and input resolution higher than
600 ppi is downsampled to 600 ppi or lower.
• On the Color/Grayscale menu in the Optimization Options dialog box, apply lossless compression to a scanned
image by choosing CCITT for black-and-white images or Lossless for color or grayscale images. If this image is
appendedtoaPDFdocument,andthefileissavedbySave,the scannedimageremainsuncompressed.IfthePDF
document is saved using Save As, the scanned image may be compressed.
• For most pages, black-and-white scanning at 300 ppi produces text best suited for conversion. At 150 ppi, OCR
accuracy is slightly lower, and more font-recognition errors occur; at 400 ppi and higher resolution, processing
slows and compressed pages are bigger. If a page has many unrecognized words or very small text (9 points or
smaller), try scanning at higher resolution. Scan in black and white whenever possible.
• When Recognize Text Using OCR is disabled, full 10-to-3000 ppi resolution range may be used, but the recom-
mended resolution is 72 and higher ppi. For Adaptive compression, 300 ppi is recommended for grayscale or RGB
input, or 600 ppi for black-and-white input.
• Pages scanned in 24-bit color, 300 ppi, at 8-1/2–by-11 inches (21.59-by-27.94 cm) result in large images (25 MB)
prior to compression. Your system may require 50 MB of virtual memory or more to scan the image. At 600 ppi,
both scanning and processing typically are about four times slower than at 300 ppi.
• Avoid dithering or halftone scanner settings. These can improve the appearance of photographs, but they make it
difficult to recognize text.
• For text printed on colored paper, try increasing the brightness and contrast by about 10%. If your scanner has
color-filtering capability, consider using a filter or lamp that drops out the background color. Or if the text isn’t
crisp or drops out, try adjusting scanner contrast and brightness to clarify the scan.
• If yourscannerhasamanualbrightnesscontrol,adjustitsothatcharactersare cleanandwellformed.Ifcharacters
are touching, use a higher (brighter) setting. If characters are separated, use a lower (darker) setting.
64
Recognize text in scanned documents
You can use Acrobat to recognize text in previously scanned documents that have already been converted to PDF.
OCR runs with header/footer/Bates number on image PDF files.
1 Open the scanned PDF.
Page 71

ADOBE ACROBAT 8 STANDARD
User Guide
2 Choose Document > OCR Text Recognition > Recognize Text Using OCR.
3 In the Recognize Text dialog box, select an option under Pages.
4 (Optional) Click Edit to open the Recognize Text - Settings dialog box, and select the options you want to use.
Recognize Text - Settings
Optical Character Recognition (OCR) software enables you to search, correct, and copy the text in a scanned PDF.
If you do not apply OCR when you create a PDF by scanning a paper document, you can apply OCR to the PDF later
if you have set the scanner resolution at 72 ppi and higher.
OCR runs with header/footer/Bates number on image PDF files.
Primary OCR Language Specifies the language for the OCR engine to use to identify the characters.
PDF Output Style Determines the type of PDF to be produced. All options require an input resolution of 72 ppi or
higher (recommended). All formats apply OCR and font and page recognition to the text images and convert them
to normal text.
• Searchable Image Ensuresthattextissearchableandselectable.Thisoptionkeepstheoriginalimage,deskewsit
as needed, and places an invisible text layer over it. The selection for Downsample Images in this same dialog box
determines whether or not the image will be downsampled and to what extent.
• Searchable Image (Exact) Ensuresthattextissearchableandselectable.Thisoptionkeepstheoriginalimage and
places an invisible text layer over it. Recommended for cases requiring maximum fidelity to the original image.
65
• Formatted Text & Graphics Reconstructs the original page using recognized text, fonts, and graphic elements. The
accuracy of the results depends on the scanning resolution and other factors. You may need to review and correct
the OCR text in the new PDF page after scanning.
Note: The Formatted Text & Graphics option is available for only some languages.
Black-and-white scanning at 300 ppi produces the best text for conversion. At 150 ppi, OCR accuracy is slightly lower,
and more font-recognition errors occur. For text printed on colored paper, try increasing the brightness and contrast
by about 10%. If your scanner has color-filtering capability, consider using a filter or lamp that drops out the background
color.
Downsample Images Decreases the number of pixels in color, grayscale, and monochrome images after OCR is
complete. Choose the degree of downsampling that you want to apply. Higher-numbered options do less downsampling, producing higher-resolution PDFs.
Correct OCR text in PDFs
When you scan to Formatted Text & Graphics output, Acrobat analyzes bitmaps of text and substitutes words and
characters for those bitmap areas. If the ideal substitution is uncertain, Acrobat marks the word as suspect. Suspects
appear in thePDFastheoriginalbitmapoftheword,but thetextisincludedonaninvisiblelayerbehindthebitmap
of the word. This makes the word searchable even though it is displayed as a bitmap. You can accept these suspects
as they are, or you can use the TouchUp Text tool to correct them.
Note: If you try to select text in a scanned PDF that does not have OCR applied, or try to perform a Read Out Loud
operationonanimage file,Acrobatasksif youwanttorun OCR.IfyouclickOK,theRecognizeText dialogboxopens
and you can select options, which are described in detail under the previous topic.
1 Do one of the following:
• Choose Document > OCR Text Recognition > Find All OCR Suspects. All suspect words on the page are enclosed
in boxes. Click any suspect word to show the suspect text in the Find Element dialog box.
Page 72

ADOBE ACROBAT 8 STANDARD
User Guide
• Choose Document > OCR Text Recognition > Find First OCR Suspect.
Note: If you close the Find Element window before correcting all suspect words, you can return to the process by choosing
Document > OCR Text Recognition > Find First OCR Suspect, or by clicking any suspect word with the TouchUp Text tool.
2 In the Find option, choose OCR Suspects.
3 Compare the word in the Suspect text box with the actual word in the scanned document, and accept, correct, or
ignore the word. If the suspect was incorrectly identified as text, click the Not Text button.
4 Review and correct the remaining suspect words, and then close the Find Element dialog box.
Enable Fast Web View in a PDF
Fast Web View restructures a PDF document for page-at-a-time downloading (byte-serving) from web servers. With
Fast Web View, the web server sends only the requested page, rather than the entire PDF. This is especially important
with large documents that can take a long time to download from a server.
Check with your webmaster to make sure that the web server software you use supports page-at-a-time
downloading. To ensure that the PDF documents on your website appear in older browsers, you may also want to
create HTML links (versus ASP scripts or the POST method) to the PDF documents and use relatively short path
names (256 characters or fewer).
66
Verify that an existing PDF is enabled for Fast Web View
❖ Do one of the following:
• Open the PDF in Acrobat, and choose File > Properties. Look in the lower right area of the Description panel of
the dialog box for the Fast Web View setting (Yes or No).
• (Windows only) In Windows Explorer, right-click the PDF file icon and choose Properties. Click the PDF tab and
look near the bottom of the panel for the Fast Web View setting (Yes or No).
Verify the Fast Web View Preferences setting
Follow this procedure to make sure that you have Acrobat set up to enable Fast Web View during the PDF creation
process.
1 Choose Edit > Preferences (Windows) or Acrobat > Preferences (Mac OS).
2 Under Categories, select Documents.
3 Ontherightsideof thedialogbox,underSaveSettings,makesurethatSaveAsOptimizesForFastWeb Viewis
selected, or select it now, and click OK.
Enable Fast Web View for an existing PDF
Usethisprocedureafteryouhaveverifiedyour FastWebViewPreferencessettingandcheckedthePDFproperties
to be sure that the file is not already enabled for Fast Web View.
1 Open the PDF that you want to have Fast Web View.
2 Choose File > Save As. Select the same filename and location.
3 When a message appears asking if you want to overwrite the existing file, click OK.
Page 73

ADOBE ACROBAT 8 STANDARD
User Guide
Using the Adobe PDF printer
Create PDFs by printing to file
Inmany authoringapplications,youcanusethePrintcommandwiththeAdobePDFprinter toconvertyourfileto
PDF. Your source document is converted to PostScript and fed directly to Distiller for conversion to PDF, without
manually starting Distiller. The current Distiller preference settings and Adobe PDF settings are used to convert the
file. If you’re working with nonstandard page sizes, create a custom page size.
Note: The Adobe PDF printer creates untagged PDFs. A tagged structure is required for reflowing content to a handheld
device and is preferable for producing reliable results with a screen reader.
See also
“Creating accessible PDFs” on page 241
Create a PDF using the Print command (Windows)
1
Open the file that you want to convert to a PDF in its authoring application, and choose File > Print.
2 Choose Adobe PDF from the printers menu.
3 Click the Properties (or Preferences) button to customize the Adobe PDF printer setting. (In some applications,
you may need to click Setup in the Print dialog box to access the list of printers, and then click Properties or Preferences.)
4 In the Print dialog box, click OK.
67
Note: By default, your PDF is saved in the folder specified in the printer port. The default location is My Documents.
Thefilenameand destinationare controlledbythePromptFor AdobePDFFilenamesettingintheAdobePDFPrinting
Preferences dialog box.
Create a PDF using the Print command (Mac OS)
1
Open the file that you want to convert to a PDF in its authoring application, and choose File > Print.
2 Choose Adobe PDF 8.0 from the printers menu.
3 Choose PDF Options from the pop-up menu that is beneath the Presets menu (it may show Copies & Pages by
default).
4 For Adobe PDF Settings, choose one of the default settings, or customize the settings using Distiller. Any custom
settings that you have defined are listed.
For most users, the default Adobe PDF conversion settings are adequate.
5 For After PDF Creation, specify whether or not to open the PDF.
6 Click Print.
7 Select a name and location for your PDF, and click Save.
Note: By default, your PDF is saved with the same filename and a .pdf extension.
Adobe PDF printing preferences (Windows)
Printing preferences apply to all applications that use the Adobe PDF printer, unless you change the settings in an
authoring application by using the Page Setup, Document Setup, or Print menu.
Page 74

ADOBE ACROBAT 8 STANDARD
User Guide
Note: The dialog box for setting printing preferences is named Adobe PDF Printing Preferences, Adobe PDF Printing
Defaults, or Adobe PDF Document Properties, depending on how you access it.
To access printing preferences:
• Click the Start button and choose Settings > Printers And Faxes. Right-click the Adobe PDF printer, and choose
Printing Preferences.
• In an authoring application such as Adobe InDesign, choose File > Print. Select Adobe PDF as the printer, and
click the Properties (or Preferences) button. (In some applications, you may need to click Setup in the Print dialog
box to access the list of printers, and then click Properties or Preferences to customize the Adobe PDF settings.)
PDF-specific options appear in the Adobe PDF Settings tab. The Paper Quality tab and Layout tab contain other
familiar options for the paper source, printer ink, page orientation, and number of pages per sheet.
Note: Printing Preferences are different from printer Properties. The Preferences include Adobe PDF-specific options for
the conversion process; the Properties dialog box contains tabs of options that are available for any type of printer.
Adobe PDF Conversion Settings Select a predefined set of options from the Default Settings menu or click Edit to
view or change the settings in the Adobe PDF Settings dialog box.
Adobe PDF Security To add security to the PDF, choose one of the following options, or click Edit to view or change
the security settings:
68
• Reconfirm Security For Each Job Opens the Adobe PDF - Security dialog box each time you create a PDF using
the Adobe PDF printer. Specify settings in the dialog box.
• Use The Last Known Security Settings Uses the same security settings that were used the last time a PDF was
created using the Adobe PDF printer on your computer.
Adobe PDF Output Folder Choose an output folder for the converted PDF, or click Browse to add or change the
output folder. Choose Prompt For Adobe PDF Filename to specify a location and filename at conversion time.
Adobe PDF Page Size menu Select a custom page size that you have defined.
View Adobe PDF Results Automatically starts Acrobat and displays the converted document immediately.
Add Document Information Includes information such as the filename and date and time of creation.
Rely On System Fonts Only; Do Not Use Document Fonts Deselect this option to download fonts when creating the
PDF. All your fonts will be available in the PDF, but it will take longer to create it. Leave this option selected if you
are working with Asian-language documents.
Delete Log Files For Successful Jobs Automatically deletes the log files unless the job fails.
Ask To Replace Existing PDF File Warns you when you are about to overwrite an existing PDF with a file of the same
name.
See also
“Create and use a custom page size” on page 70
Set Adobe PDF printer properties (Windows)
In Windows, you can usually leave the Adobe PDF printer’s properties unchanged, unless you have configured
printer sharing or set security.
Note: Printing Properties are different from printer Preferences. The Properties dialog box contains tabs of options that
apply to any type of printer; the Preferences include conversion options specifically for the Adobe PDF printer.
Page 75

ADOBE ACROBAT 8 STANDARD
Set Adobe PDF printer properties
1
Open the Printers window from the Start menu, and right-click the Adobe PDF printer.
2 Choose Properties.
3 Click the tabs, and select options as needed.
Reassign the port that the Adobe PDF printer uses
1
Quit Distiller if it is running, and allow all queued jobs to the Adobe PDF printer to complete.
2 Open the Printers window from the Start menu.
3 Right-click the Adobe PDF printer, and choose Properties.
4 Click the Ports tab, and then click Add Port.
5 Select Adobe PDF Port from the list of available port types, and click New Port.
6 Select a local folder for PDF output files, and click OK. Then click Close to quit the Printer Ports dialog box.
7 In the Adobe PDF Properties dialog box, click Apply, and then click OK.
For best results, select a folder on the same system where Distiller is installed. Although remote or network folders
are supported, they have limited user access and security issues.
User Guide
69
Delete a folder and reassign the Adobe PDF printer to the default port
1
Quit Distiller if it is running, and allow a few minutes for all queued jobs to Adobe PDF to complete.
2 Open the Printers window from the Start menu.
3 Right-click the Adobe PDF printer, and choose Properties.
4 Click the Ports tab.
5 Select the default port, My Documents, and click Apply.
6 Select the port to delete, click Delete Port, and then click Yes to confirm the deletion.
7 Select the My Documents port again and click Close.
Configure the Adobe PDF printer (Mac OS)
In Mac OS, you must configure the Adobe PDF printer in three places: Distiller, your authoring application’s Page
Setup menu, and your authoring application’s Print dialog box.
1 In Distiller, specify the Adobe PDF settings, font locations, and security.
2 In an authoring application such as Adobe InDesign, choose File > Page Setup.
3 Select Adobe PDF 8.0 from the Format For menu.
4 Specify the paper size, orientation, and scale as necessary.
5 In your authoring application, choose File > Print, and select Adobe PDF 8.0 from the Printer menu.
6 In the pop-up menu below the Presets menu, choose PDF Options, and set any of the following options:
• Select a set of predefined conversion settings from the Adobe PDF Settings menu if you want to override default
settings. Default settings are the settings currently defined in Distiller.
• Specify whether to open the converted files in Acrobat in the After PDF Creation menu.
7 Specify print settings as desired in the other menus available in the pop-up menu below the Presets menu.
Page 76

ADOBE ACROBAT 8 STANDARD
User Guide
Create and use a custom page size
It’s important to distinguish between page size (as defined in the source application’s Document Setup dialog box for
your document) and paper size (the sheet of paper, piece of film, or area of the printing plate you’ll print on). Your
page size might be U.S. Letter (8-1/2-by-11 inches or 21.59-by-27.94 cm), but you might need to print on a larger
piece of paper or film to accommodate any printer’s marks or the bleed area. To ensure that your document prints
as expected, set up your page size in both the source application and the printer.
The list of paper sizes available to Acrobat comes from the PPD file (PostScript printers) or from the printer driver
(non-PostScript printers). If the printer and PPD file you’ve chosen for PostScript printing support custom paper
sizes, you see a Custom option in the Paper Size menu. For printers capable of producing very large print areas,
Acrobat supports pages as large as 15,000,000 inches (38,100,000 cm) by 15,000,000 inches (38,100,000 cm).
Create a custom page size (Windows)
1
Do one of the following:
• Open the Printers or Printer And Faxes window from the Start menu. Right-click the Adobe PDF printer, and
choose Printing Preferences.
• In an authoring application such as Adobe InDesign, choose File > Print. Select Adobe PDF as the printer, and
click the Properties button. (In some applications, you may need to click Setup in the Print dialog box to access
the list of printers, and then click Properties or Preferences to customize the Adobe PDF settings.)
2 In the Adobe PDF Settings tab, click the Add button next to the Adobe PDF Page Size menu.
3 Specify the name, width, height, and unit of measurement. Click Add/Modify to add the custom page size name
to the Adobe PDF Page Size menu.
70
Create a custom page size (Mac OS)
1
In an authoring application such as Adobe InDesign, choose File > Page Setup.
2 In the Settings pop-up menu, select Custom Paper Size.
3 Click the New button.
4 Specify the name, height, width, and margins. The unit of measurement depends on the system language.
5 Click Save, and then click OK.
Use the custom page size
1
Choose File > Print Setup.
2 Select the new custom page size from the Paper Size menu, and click OK.
Creating PDFs with PDFMaker
About Acrobat PDFMaker
PDFMaker is an Acrobat feature that operates within many business applications, such as Microsoft Office applicationsandLotusNotes.WhenyouinstallAcrobat,PDFMakercontrolsappearintheworkarea oftheauthoringapplication.
Page 77

ADOBE ACROBAT 8 STANDARD
User Guide
Using PDFMaker within an authoring application is a simple, one-click procedure. It involves clicking an Acrobat
PDFMaker toolbar button or (Windows only) choosing acommand on theAdobePDFmenu.Itis notnecessaryto
open Acrobat.
Use PDFMaker to convert a file to PDF (Windows)
In Windows, Acrobat installs both an Acrobat PDFMaker toolbar and an Adobe PDF menu in many popular
authoring applications. You can use either the toolbar buttons or the Adobe PDF menu (the Action menu in Lotus
Notes) to create PDFs, but the menu also provides access to conversion settings. Although many of the conversion
options are common to all authoring applications, a few are application-specific.
For Microsoft Office 2007 applications such as Word, Excel, and PowerPoint, the options for creating PDFs are
available from the Acrobat Ribbon.
Note: If you don’t see the PDF toolbar buttons in an application, choose View > Toolbars > Acrobat PDFMaker 8.0. Or,
in Lotus Notes only, choose File > Preferences > Toolbar Preferences, click Toolbars, and select the Visible check box for
Acrobat PDFMaker 8.0.
See also
“Customize Adobe PDF settings” on page 94
71
“Create PDFs from Word mail merges” on page 77
Convert a file to PDF
1
Open the file in the application used to create it.
2 Click the Convert To Adobe PDF button on the Acrobat PDFMaker toolbar, or (if available) choose Adobe
PDF > Convert To Adobe PDF. (In Lotus Notes only, PDF conversion commands appear on the Actions menu.)
For Microsoft Office 2007 applications such as Word, Excel, PowerPoint, and Access, click the Create PDF button
on the Acrobat Ribbon.
3 In the Save Adobe PDF File As dialog box, enter a filename and location for the PDF, and click Save.
Create a PDF as an email attachment
1
Open the file in the application used to create it.
2 Choose Adobe PDF > Convert To Adobe PDF And Email.
For Microsoft Office 2007 applications such as Word, Excel, PowerPoint, and Access, click the Create And Attach To
Email button on the Acrobat Ribbon.
When the conversion is finished, a blank message with the new PDF included as an attachment automatically opens
in your default email application. You can then address and complete the message and either send it or save it as a
draft.
Attach a file as PDF (Outlook)
1
In the Outlook email Message window, click the Attach As PDF button
.
Note: If the Attach As PDF button isn’t visible, in Outlook, choose Adobe PDF > Change Conversion Settings, and then
select Show Attach As Adobe PDF Buttons. The Attach As PDF button is not available for Outlook 2007.
2 Select a file to attach, and click Open.
Page 78

Convert files to a secured PDF and attach it to an email message (Outlook)
1
In the Outlook email Message window, click the Attach As Secured Adobe PDF button
ADOBE ACROBAT 8 STANDARD
.
User Guide
Note: The Attach As Secured Adobe PDF button appears only after you’ve configured an Adobe LiveCycle Policy Server
using the Advanced > Security Settings menu.
2 Click Browse, select a file to convert, and click Open.
3 Specify the users that can open the PDF, and then click OK:
• To specify only users that receive the PDF, select Restrict Access Only To People In This Message’s To:, Cc:, And
Bcc: List. In this case, the PDF isn’t secured until you send the email message.
• To specify only users that are specified by a security policy, select Restrict Access By Applying The Following
SecurityPolicy,andthenselectasecuritypolicyinthelist.Inthiscase,thePDFissecuredbeforeitisattachedto
the email message.
4 If prompted, enter your user name and password to log in to the Adobe Policy Server.
Create a PDF and send it for review
1
Open the file in the application used to create it.
2 Click the Convert To Adobe PDF And Send For Review button on the Acrobat PDFMaker toolbar, or (if
available) choose Adobe PDF > Convert To Adobe PDF And Send For Review.
72
For Microsoft Office 2007 applications such as Word, Excel, PowerPoint, and Access, click the Create And Send For
Review button on the Acrobat Ribbon.
3 When the Identity Setup dialog box appears, enter the appropriate information about yourself, and click
Complete.
4 Follow the directions in the wizard that appears, as described in “Start an email-based review” on page 147.
Use PDFMaker to convert a file to PDF (Mac OS)
The default Acrobat installation adds Convert To Adobe PDF buttons to Office application toolbars. You can use
these buttons to create Adobe PDF files quickly and easily from Microsoft Word, Excel, and PowerPoint files without
opening Acrobat.
The PDF creation process applies the currently selected conversion settings. If you want to change those settings, you
must open Acrobat Distiller and select options there. In most cases, the default settings produce good results.
Note: Password-protected Excel files can’t be converted to PDF on Mac OS. Also, many PowerPoint features aren’t
converted when you produce a PDF from a PowerPoint file on Mac OS. For example, animations and transitions aren’t
converted.
1 Open the file in the Office application.
2 On the Adobe Acrobat PDFMaker 8 toolbar, select one of the following:
• Convert To Adobe PDF.
• Convert To Adobe PDF And EMail.
3 In the Save dialog box, type a filename, select a folder in which to save the PDF, and click Save.
4 When the conversion is complete, choose View File if you want to open the new PDF in Acrobat, or Done if you
want to close the Acrobat PDFMaker status dialog box without opening the PDF.
Page 79

ADOBE ACROBAT 8 STANDARD
User Guide
IfyouselectedConvert ToAdobePDF AndEmail,thenewlycreatedPDFisattachedtoablankemailthatopensin
your default email application. You can either address, complete, and send the message immediately or save it as a
draft to send later.
See also
“Customize Adobe PDF settings” on page 94
View PDFMaker conversion settings
PDFMaker conversion settings vary according to file types. For example, the options available for PowerPoint files
aren’tthesameasthoseavailableforOutlookfiles.Onceyou’veselectedconversionsettings, thosechoicesapplyto
all subsequent PDFs you create from that file type. It’s a good idea to review the settings occasionally.
1 Open a PDFMaker-enabled application (such as Word or Excel).
2 Do one of the following:
• (Lotus Notes) Choose Actions > Change Adobe PDF Conversion Settings.
• (Office 2007 applications) Choose Acrobat > Preferences.
• (All other applications) Choose Adobe PDF > Change Conversion Settings.
3 (Optional) To revert to the original default settings, click Restore Defaults on the Settings tab.
73
Note: PDFMaker isn’t available for email applications on Mac OS.
See also
“Application-specific features of PDFMaker” on page 74
“Adobe PDF conversion settings” on page 92
Settings tab of the Conversion Settings
The settings available for PDFMaker depend on the application in which you’re using PDFMaker.
Conversion Settings Specifies the standard by which the PDF will be optimized. When you choose an item in the
menu, a description of that preset appears immediately below it.
View Adobe PDF Result Opens the converted document directly into Acrobat. (Exception: when you choose
Convert To Adobe PDF And Email.)
Prompt For Adobe PDF File Name Lets you enter a custom filename for the resulting PDF. Deselect this option to
save the file in the same folder as the source file, using the same name but with a .pdf extension.
Convert Document Information Adds document information from the Properties dialog box of the source file. This
setting overrides the printer preferences and settings in the Advanced panel of the Adobe PDF Settings dialog box.
Note: The Advanced Settings button opens the Adobe PDF Settings dialog box, which contains many additional
conversion options. These conversion settings apply to all Acrobat features that create PDFs, such as Acrobat Distiller,
PDFMaker, and the Acrobat application itself.
Create PDF/A Compliant PDF File Creates the PDF so that it conforms to this ISO standard for long-term preser-
vation of electronic documents. (In the Microsoft Publisher application alone, PDFMaker does not support the
PDF/A standard.)
Page 80

ADOBE ACROBAT 8 STANDARD
User Guide
Note: When Conversion Settings are opened from within Word, Excel, or PowerPoint, this option specifies PDF/A 1-
a:2005. When opened from within Access or Publisher, it specifies PDF/A 1-b:2005.
Security tab of the Conversion Settings
The settings available for PDFMaker depend on the application in which you’re using PDFMaker.
Require A Password To Open The Document Whenselected,makestheDocumentOpenPasswordoptionavailable,
where you type to set a password that users must use in order to open the document.
Restrict Editing And Printing Of The Document When selected, makes the other Permissions options available.
Change Permissions Password Specifies a password you set that users must use in order to do any allowable printing
or editing.
Printing Allowed Specifies whether users who use the Permissions Password can print the document and at what
resolution.
Changes Allowed Specifies what kind of changes users who use the Permissions Password can make.
Enable Copying Of Text, Images, And Other Contents Prevents or allows users from copying from the PDF.
Enable Text Access For Screen Reader Devices For The Visually Impaired Prevents or allows screen reader devices to
access text. (Selected by default.)
74
Enable Plaintext Metadata Specifies whether or not the search engine can access the document metadata. Available
only when the PDF-compatibility is set to Acrobat 6.0 (PDF 1.5) or later.
Application-specific features of PDFMaker
Convert email messages to PDFs (Windows)
You can use PDFMaker to convert one or more Microsoft Outlook or Lotus Notes email messages or entire folders
of messagestoamergedPDFor PDFpackage.Withinapackage, eachemailmessageappearsasaseparatePDFfile.
The Acrobat PDFMaker Conversion Settings dialog box contains the option that determines whether email messages
are merged into one continuous PDF or assembled into a PDF package.
The controls that activate an email conversion to PDF appear in two places within the email application: on the
Acrobat PDFMaker toolbar and on a menu. In Outlook, the menu is called Adobe PDF and appears to the right of
the Outlook Help menu. In Lotus Notes, PDF commands appear under the Actions menu.
You can convert one currently open email message to PDF (not to a PDF package) by choosing File > Print, and
selecting Adobe PDF as the printer in the Print dialog box. The PDFMaker conversion settings do not affect this
process.
See also
“Application-specific PDFMaker settings” on page 79
Specify whether email messages become merged PDFs or PDF packages
1
Do one of the following:
• (Outlook) Choose Adobe PDF > Change Conversion Settings.
• (Lotus Notes) Choose Actions > Change Adobe PDF Conversion Settings.
Page 81

ADOBE ACROBAT 8 STANDARD
2 Do one of the following:
User Guide
• To convert and merge email messages into a PDF as sequential pages of one document, deselect Output Adobe
PDF Package When Creating A New PDF File.
• To assemble converted email messages as components of a PDF package, select Output Adobe PDF Package When
Creating A New PDF File.
Convert an open email message to PDF (Outlook)
❖ Choose Adobe PDF > Convert To Adobe PDF.
You can also convert a different file to PDF from within an open Outlook email message if the Attach As Adobe PDF
toolbar is shown. Clicking this button opens a series of dialog boxes for selecting and saving the new PDF and also
starts Acrobat, if it is not already running. The resulting PDF is attached to the open email message.
Convert email messages to a new PDF
1
In Outlook or Lotus Notes, select the individual email messages that you want to archive.
2 Do one of the following:
• (Outlook) Click the Convert Messages button in the Acrobat PDFMaker toolbar, or choose Adobe PDF >
Convert To Adobe PDF > Selected Messages.
• (Lotus Notes) Click the Convert Selected Messages To Adobe PDF button in the Acrobat PDFMaker toolbar,
or choose Actions > Convert Selected Messages To Adobe PDF.
3 In the Save Adobe PDF As dialog box, select a location, type a filename, and click Save.
75
Note: For security reasons, the default settings in Outlook 2003 block automatic downloading of pictures in HTML email
messages from unknown senders and sites. If you want to download such images and include them in the conversion to
PDF,youcanchange thatsettinginOutlook by choosingTools> Options, clicking the Security tab, and then clicking the
Change Automatic Download Settings, where specific options are available. For more information, see the Outlook Help
system.
Add email messages to an existing PDF
1
In Outlook or Lotus Notes, select the individual email messages that you want to convert and add to a PDF.
2 Do one of the following:
• (Outlook) Choose Adobe PDF > Convert And Append To Existing Adobe PDF > Selected Messages.
• (Lotus Notes) Choose Actions > Append Selected Messages To Existing Adobe PDF.
3 Locate and select the PDF or PDF package to which you want to add the converted emails, and click Open.
Important: Do not type a new name for the PDF. If you do, a warning message appears telling you that the PDF was not
found. Click OK, and select a PDF without changing its name.
4 (Outlook only) If a message appears, alerting you that the existing PDF was creating using an earlier version of
PDFMaker, do one of the following:
• To create a PDF package from the original PDF archive, click Yes, and select a name and location for the new
archive. (The default name adds _Packaged to the original PDF filename.) When the conversion is complete and
the Creating Adobe PDF dialog box closes, the new archive opens in Acrobat.
• To not create a PDF package from the original PDF archive, click No and cancel the process.
Page 82

ADOBE ACROBAT 8 STANDARD
User Guide
Note: In earlier versions of Acrobat and for email merged into a single PDF, messages might be duplicated when running
the append process. For PDF packages of email converted or migrated in Acrobat 8, only new messages—that is, messages
that are not already part of the PDF package—are appended.
(Lotus Notes) Convert an email folder to a new PDF
1
In Lotus Notes, select the folder that you want to convert to PDF.
2 ClicktheConvertSelectedFolderToAdobePDFbutton ontheAcrobatPDFMakertoolbar,orchooseActions
> Convert Selected Folder To Adobe PDF.
3 In the Save Adobe PDF File As, specify a location and name for the PDF package, and click Save.
To convert other Lotus Notes folders to PDF, repeat this procedure for each folder.
(Outlook) Convert email folders to a new PDF
In Outlook, PDFMaker can convert multiple folders to PDF in one procedure. It is not necessary to select those
folders at the beginning of the process because you can make these selection in a dialog box that appears automatically.
1 In Outlook, choose Adobe PDF > Convert To Adobe PDF > Selected Folders.
2 In the Convert Folder(s) To PDF dialog box, select the folders you want to convert, and then select or deselect the
Convert This Folder And All Sub Folders option.
3 In the Save Adobe PDF File As, select a location and name for the PDF package.
76
TheCreatingAdobePDFstatusdialogbox showstheprogress oftheconversion.When theconversioniscomplete,
the new PDF opens in Acrobat.
Migrating old Outlook PDF archives to PDF packages (Windows)
There are two good reasons for migrating old PDF email archives to PDF packages: to facilitate sorting and other
functions, and to make it possible to add new email messages to those archives.
InPDFpackages, eachemailmessage isconvertedasacomponentPDF.Youcanthensortthe messagesbymessage
folder, sender, subject line, date, size, or attachments. Also, you can create custom categories and sort by those.
You can open email archives you created with earlier version of Acrobat in Acrobat 8.0, but you cannot add email
messages to that archive in the same way. If you try, messages will appear that will guide you through the process of
creating a new archive from the old one and appending the selected messages to the new PDF package archive.
Migrate old Outlook PDF archives to PDF packages (Windows)
1 Open Outlook.
2 Choose Adobe PDF > Migrate Old PDF Archives To PDF Packages.
3 If a message appears, click Yes to continue the migration process.
4 Locate and select the old PDF archive, and click Open.
5 Selectalocationand name forthe migratedPDFpackage,and clickSave. (Thedefaultnamingadds _Packaged to
the existing filename, such as renaming an archive called Inbox.pdf as Inbox_Packaged.pdf.)
When the conversion process is complete and the Creating Adobe PDF dialog box closes, the new archive opens in
Acrobat.
Page 83

ADOBE ACROBAT 8 STANDARD
User Guide
Set up automatic email archiving (Windows)
In Microsoft Outlook, you can set up PDFMaker to automatically archive your email messages.
1 In Outlook, choose Adobe PDF > Setup Automatic Archival.
2 OntheAutomaticArchival taboftheAcrobatPDFMakerdialogbox,selectEnableAutomaticArchival,andthen
select options for Frequency and the time of day at which automatic archiving occurs.
3 Select other options, according to your needs:
Maintain Log Of Archival Creates a record of each archiving session.
Choose File Specifies the name and location of the archiving log.
Embed Index For Faster Search Creates an index that you can search to find specific words or characters instead of
having to search each individual document.
4 ClickAdd,and selecttheemailfoldersandsubfoldersthat youwantPDFMakertoarchive.Thenselectordeselect
the Convert This Folder And All Sub Folders option, as preferred, and click OK.
5 IntheSavePDFArchiveFileAsdialogbox,selectanameandlocationforthearchivedemailPDF.ThenclickOpen.
6 Review the settings and the archive folder names listed in the Acrobat PDFMaker dialog box, and do any of the
following:
• To add other email folders to the list, click Add and select the folder.
• To remove folders from the list, select the ones you want to remove and click Delete.
• To make changes to an archive file, select any folder name on the list, click Change Archive File, and specify the
name and location.
• To start archiving email immediately, click Run Archival Now.
77
Create PDFs from Word mail merges
Mail merges from Word generate documents like form letters—for one common example—which are personalized
with information like the names and addresses of the individuals to whom they will be sent. With Acrobat
PDFMaker, you can save steps by using a Word mail merge document and corresponding data file to output mail
merges directly to PDF. You can even set up PDFMaker to attach those PDFs to email messages that are generated
during the PDF-creation process.
Note: For more information on setting up files for the Word Mail Merge feature, see Microsoft Office Word Help.
1 InMicrosoftWord,openthetemplatethatyouhavecreatedasthebasisofyourmailmerge,orcreatethefileusing
the Word Mail Merge toolbar and Mail Merge wizard, as needed.
Important: Do not complete the mail merge in Word. Instead, set up and preview the mail merge as usual, so that you
can verify that the merge will work correctly.
2 Do one of the following:
• Choose Adobe PDF > Mail Merge To Adobe PDF.
• Click the Mail Merge To Adobe PDF button on the Mail Merge toolbar (View > Toolbars > Mail Merge).
• (Word 2007) Choose Acrobat > Mail Merge.
3 In the Acrobat PDFMaker - Mail Merge dialog box, select the options you want:
• To specify which records in the data file will be imported into the merged files, select All or Current, or enter a
range of pages by typing in the From and To boxes.
Page 84

ADOBE ACROBAT 8 STANDARD
User Guide
• To name the PDF that will be created, type in the Specify PDF File Name box.
Note: The PDF will be named using this text plus a series of numbers. For example, if you type JulyLetter in the Specify
PDF File Name box, the mail-merged PDFs might appear as JulyLetter_0000123, JulyLetter_0000124, July
Letter_0000125, and so forth.
4 For Automatically Send Adobe PDF Files By Email, do one of the following:
• To create and save merged PDFs for printing or sending later in email, leave the option deselected, and click OK.
• To createmergedPDFsandattacheachoneto anemailmessageto theappropriaterecipient,selectthischeckbox,
and fill in the other Email options.
5 When the Browse For Folder dialog box appears, navigate to the location you want to use and click OK.
Status indicators appear as PDFMaker generates the individual PDFs, which takes an amount of time that is proportional to the complexity of the merge and the number of PDFs you create.
6 If you selected Automatically Send Adobe PDF Files By Email, a dialog box appears asking for your email profile.
Enter the appropriate information and click OK.
When the job is finished, a message appears, telling you that the process was successful.
Email options for PDF mail merges
To Use the pop-up menu to select the field or column in the associated data file that contains the email addresses in
each individual’s record.
78
Subject Line Type the text that you want to appear in the subject line of each message.
Message Type to add or edit text that you want to appear in the body of the email messages.
PDFs from Microsoft Project, Publisher, and Access (Windows)
There are specific differences to be aware of when you create PDFs from files authored in these applications:
Microsoft Project You can create PDFs of only the currently selected view. Views designated as nonprintable in
Project cannot be converted to PDF.
Note: Converting Project files requires Acrobat Professional or Acrobat 3D.
Microsoft Publisher PDFs converted from Microsoft Publisher support crop marks, links, bookmarks, spot colors,
transparency, bleed marks, printing bleed marks, and CMYK color conversion.
Microsoft Access When creating PDFs from Access files, the process can involve two additional steps:
• You must select the object in the Access file to be created as a PDF before using the PDFMaker button or
command.
• You can choose Adobe PDF > Convert Multiple Reports To Single Adobe PDF. For Access 2007, click Acrobat and
then click Convert Multiple Report. You can select individual reports that you want to include, and click Add
Report(s). When all of the reports that you want to convert appear in the Reports In PDF list, click Convert to start
creating the PDF.
Note: When you convert an Access 2003 or Access 2002 file to PDF, Access reports, tables, queries, and forms are
converted. When you convert an Access 2000 file to PDF, only reports are converted.
Page 85

ADOBE ACROBAT 8 STANDARD
User Guide
Application-specific PDFMaker settings
PDFMaker is a flexible feature of Acrobat that adapts according to its environment. The conversion settings available
in one PDFMaker-enabled application may be different than those you would encounter within a different application.
Some PDFMaker settings are common to several or most applications. Some options are unique to a specific application.
See also
“Adobe PDF conversion settings” on page 92
“Convert web pages to PDF in Internet Explorer (Windows)” on page 82
“Settings for a single conversion for Office 2007 applications” on page 81
Settings tab options available from within most applications
The following settings appear on the Settings tab accessed from within most PDFMaker-enabled applications.
Attach Source File To Adobe PDF Includes the document being converted as an attachment to the PDF.
Add Bookmarks To Adobe PDF Converts certain elements in original Office documents to PDF bookmarks: Word
headings, Excel worksheet names, or PowerPoint titles. Selecting this option overrides any settings in the Bookmarks
tab of the Conversion Settings dialog box.
79
Note: In Microsoft Publisher 2003 documents, PDFMaker includes Publisher headings as bookmarks in the PDF.
PDFMaker does not support the conversion of Publisher 2002 bookmarks, links, transparency, or crop marks and bleed
marks.
Add Links To Adobe PDF Includes active links and hypertext in the PDF.
Enable Accessibility And Reflow With Tagged Adobe PDF Embeds tags in the PDF.
Excel-specific options on the Settings tab
Convert Comments To Notes Converts user-created Excel comments to notes and lists them in the Acrobat
Comments panel.
Fit Worksheet To A Single Page Adjusts the size of each worksheet so that all the entries on that worksheet appear on
the same page of the PDF.
Prompt For Selecting Excel Sheets Opens a dialog box at the beginning of the file conversion process, in which you
can specify which worksheets are included in the PDF and the order in which the sheets appear in the PDF.
PowerPoint-specific options on the Settings tab
Convert Multimedia To PDF Multimedia Adds any linked audio-video files to the PDF.
Save Animations In Adobe PDF Converts any animation effects in the PowerPoint file to equivalent animations in
the PDF.
Save Slide Transitions In Adobe PDF Converts PowerPoint slide transition effects to PDF transition effects.
Convert Hidden Slides To PDF Pages Converts any PowerPoint slides that are not seen in the usual playing of the
presentation to PDF pages.
Convert Speaker Notes To Text Notes In Adobe PDF Converts any speaker notes for the PowerPoint presentation
into Text notes in the PDF.
Page 86

ADOBE ACROBAT 8 STANDARD
User Guide
PDF Layout Based On PowerPoint Printer Settings Uses the same printer settings in the PDF as in the original file.
Email-specific options on the Settings tab
Thefollowingoptionsappearwhenyou openthePDFMakersettingsfromwithinMicrosoftOutlookorLotusNotes.
Attachments Indicates whether or not all files attached to email messages will be included in the new PDF.
Output Adobe PDF Package When Creating A New PDF File When selected, always converts individual messages as
component files of a PDF package. When deselected, merges individual messages as separate pages of a PDF.
Embed Index For Faster Search Creates an embedded index, which speeds up searches, especially when you convert
large numbers of email messages or message folders.
Show “Attach As Adobe PDF” Buttons If selected, the Attach As Adobe PDF button appears in the Outlook email
message window.
Page Layout options Specify page properties, similar to those found in the Print dialog box: page dimensions, orien-
tation, and margins.
Visio-specific options on the Settings tab
The following options appear when you open the PDFMaker settings from within Microsoft Visio.
Include Visio Custom Properties As Object Data In The Adobe PDF Indicates whether or not custom properties of
the Visio image will be included as object data in the new PDF.
80
Exclude Visio Objects With No Custom Properties Indicates if the new PDF should exclude Visio objects without
custom properties.
Convert Comments To Adobe PDF Indicates if the comments in the Visio file should be converted to PDF comments
in the new PDF.
Always Flatten Layers In Adobe PDF Specifies if the layers should be flattened. If you flatten layers, the PDF will look
like the original drawing, but won’t contain any layer information. All shapes in the Visio drawing are converted,
regardless of their protection or behavior, and shape custom properties can be converted to PDF object data.
Word 2007-specific options on the Settings tab
The following options appear when you open the PDFMaker settings from within Microsoft Word 2007.
Fully Functional PDF creates a fully functional, high-quality, and compact PDF file.
Quick And Simple PDF CreatesabasicPDFfileforviewing.TheBookmarkandWordtabsettingsarenotavailable
for quick and simple PDFs.
Word tab settings (Microsoft Word)
Convert Displayed Comments To Notes In The Adobe PDF Changes any Word comment entries to PDF comments. If
the currently open Word document contains comments, more options appear in the Comments list on this tab:
• Reviewer Lists the names of reviewers who have entered comments in the current Word document.
• Include When deselected, does not include that reviewer’s comments in the PDF.
• Notes Open Specifies whether the PDF comment windows automatically open or are closed for that reviewer’s
comments.
• Color Shows the color for that reviewer’s comment icons. Clicking the color icon repeatedly cycles through a
limited set of available colors.
Page 87

ADOBE ACROBAT 8 STANDARD
User Guide
Convert Cross-References And Table Of Contents To Links Enables one-click navigation of these elements in the new
PDF.
Convert Footnote And Endnote Links Integrates these into the PDF.
Enable Advanced Tagging Integrates this into the PDF.
Bookmarks tab settings (Microsoft Word)
The options you specify on this tab determine which items are converted into PDF bookmarks in the PDF.
Important: The Add Bookmarks To Adobe PDF option on the Settings tab must be selected in order to include any
bookmarks in the conversion process. If you deselect that option, it overrides any options you select on this tab and no
bookmarks will be created.
Convert Word Headings To Bookmarks Selects all the headings in the Elements list for conversion to PDF
bookmarks.
Convert Word Styles To Bookmarks Selects all the text styles in the Elements list for conversion to PDF bookmarks.
(Deselected by default.)
Convert Word Bookmarks Converts any user-created Word bookmarks to PDF bookmarks.
Element list Specifies which Word headings and styles will be converted as PDF bookmarks.
81
• Element Lists the names of all available Word headings and styles. The icons for Headings and Styles
indicate the element types.
• Type Also indicates whether the element is a heading or style in the Word document.
• Bookmark Displays X’s, indicating whether or not individual elements will be converted to PDF bookmarks.
Clicking an individual Bookmark check box changes the selection status for that element.
• Level Specifies where the element will fit in the hierarchy structure of the PDF Bookmarks panel. Clicking an
individual Level number opens a menu that you can use to change the value.
Note: When some but not all of the available Word headings and styles are selected for conversion to PDF bookmarks,
themarkerinthe corresponding checkboxesatthetopofthetabchange.Ifallelementsofthetypeare selected,acheck
mark appears. If only some of the elements of that type are selected, a colored square appears. Otherwise, the check box
is empty.
Settings for a single conversion for Office 2007 applications
For Word 2007, Excel 2007, and PowerPoint 2007 applications, if you want the settings to be used only for the
selected conversion and not for future conversions, you can define the settings by accessing the conversion options
from the Save Adobe PDF File As dialog box.
View and modify options for a single conversion
1
Click the Office button and choose Save As > Adobe PDF.
2 Select the View Result check box if you want to view the PDF file after the conversion is complete.
3 (Word 2007) Specify if you want the PDF to be complete and fully functional or if you just need a quick and simple
PDF. The quick and simple PDF option does not allow you to create bookmarks from Word styles.
4 Click Adobe PDF Conversion Options to define the options to be used for the current conversion.
The initial settings in the Conversion Options dialog box are based on the options that you set using the Preferences
button on the Acrobat Ribbon.
Page 88

ADOBE ACROBAT 8 STANDARD
User Guide
Converting web pages to PDF
Web pages and PDFs
The core of a web page is a file written in Hypertext Markup Language (HTML). Typically, the HTML file includes
associations with other files that either appear on the web page or govern how it looks or works.
When you convert a web page to PDF, the HTML file and all associated files—such as JPEG images, Adobe Flash
files, cascading style sheets, text files, image maps, and forms—are included in the conversion process.
The resulting PDF behaves much like the original web page. For example, the images, links, image maps, and most
media files appear and function normally within the PDF. (Animated GIF files appear as still images, showing the
last frame of the animation.)
Also, the PDF functions like any other PDF. For example, you can navigate through the file by scrolling or using
bookmarks; users can add comments to it; you can add security, form fields, and other features that enhance it.
In preparing to convert web pages to PDF, there are decisions to consider that affect how you approach the
conversion process:
• How much do you want to convert?
If you want to convert only a selected area of the currently open web page, use PDFMaker from within Internet
Explorer. If you want to convert several levels or all of a multipage web site to PDF, work within Acrobat.
82
• Do you want to create a new PDF from the web pages or to append the converted pages to an existing PDF?
YoucandothisineitherAcrobatorInternetExplorerPDFMaker,butyouchoosedifferentbuttonsorcommandsto
accomplish these things.
• Do you need to apply advanced conversion settings to the process?
The conversion settings available from within Internet Explorer are limited. Use Acrobat for the conversion process
if you need to select additional settings. When you finish your selections and have converted at least one web page to
PDF from within Acrobat, those settings will apply when you convert web pages from within Internet Explorer, too.
Note: To convert Chinese, Japanese, and Korean (CJK) language web pages to PDF on a Roman (Western) system in
Windows,youmusthaveinstalledtheCJK languagesupportfiles whileinstalling Acrobat. Also,itispreferabletoselect
an appropriate encoding from the HTML conversion settings.
Convert web pages to PDF in Internet Explorer (Windows)
When you install Acrobat, Internet Explorer (version 6.0 and later) gains an Adobe PDF toolbar. Using the
commands on this toolbar, you can convert the currently displayed web page to PDF in various ways: You can
convertthe entirewebpageorjustaselected partofit;you cancreateanewPDF orappend theconverted webpage
to an existing PDF. The Adobe PDF toolbar menu also contains commands that initiate further actions after
conversion, such as attaching the new PDF to a new email message or printing it.
Page 89

A menu on the PDF toolbar provides easy conversion and print capabilities.
Convert a web page to PDF
1
Start Internet Explorer and go to the web page that you want to convert to PDF.
2 Using the Adobe PDF toolbar menu, do one of the following:
ADOBE ACROBAT 8 STANDARD
User Guide
Note: If you don’t see the Adobe PDF toolbar in Internet Explorer, choose View > Toolbars > Adobe PDF.
• TocreateanewPDFfromthecurrentlyopenwebpage,chooseConvert WebPageToPDF.Thenselectalocation,
type a filename, and click Save.
• ToaddaPDFofthecurrentlyopenweb pageto anotherPDF,chooseAddWebPageToExistingPDF.Thenlocate
and select the PDF to which the converted file will be added, and click Save.
• To create and print a new PDF from the currently open web page, choose Print Web Page. When the conversion
is complete and the Print dialog box opens, select options and click OK.
• To create a new PDF from the currently open web page and attach it to a blank email message, choose Convert
Web Page And Email. Then select a location for the PDF, type a filename, and click Save. Type the appropriate
information in the email message that opens after the conversion is complete.
83
Convert part of a web page to PDF
You can convert text or images on a web page. This is useful if you want to save content without saving navigation
frames or advertising.
1 Drag the pointer to select text and images on a web page.
2 On the Adobe PDF toolbar menu, choose one of the following:
• To create a new PDF, choose Convert Web Page To PDF. Then select a name and location for the PDF.
• ToappendtheselectedcontenttoanotherPDF,chooseAddWebPageToExistingPDF.Thenlocateand selectthe
PDF to which the selection will be added.
3 Make sure that Only Convert Selection is selected, and click Save.
Convert a linked web page to PDF
❖ In the open web page, right-click the linked text and choose one of the following:
• To convert the linked web page to a new PDF, choose Convert Link Target To Adobe PDF.
• To add the linked web page to an existing PDF, choose Convert Link Target To Existing PDF. Then locate and
select the existing PDF, and click Save.
Page 90

ADOBE ACROBAT 8 STANDARD
User Guide
Set PDF conversion preferences for Internet Explorer (Windows)
The Internet Explorer PDF preferences determine only whether converted files open in Acrobat automatically, and
whether you are prompted to confirm the deletion of files or addition of pages to an existing PDF.
1 In Internet Explorer, choose Preferences from the Adobe PDF toolbar menu.
2 Select and deselect options in the Adobe PDF Preferences, as needed:
• To continue working in Internet Explorer after the conversion without opening the new PDF in Acrobat, deselect
Open PDF Files In Acrobat After Conversion.
• To delete PDF files without further notice, deselect Ask For Confirmation Before Deleting PDF Files.
• To append PDF files without further notice, deselect Ask For Confirmation Before Adding Pages To PDF Files.
• To skip alerts reminding you that the PDF file you are appending to has been changed, deselect Warn Before
Adding Pages If The PDF File Has Been Modified.
Manage PDFs in Internet Explorer (Windows)
You can open the Adobe PDF Explorer Bar within Internet Explorer to see PDF files and folders on your computer
in a familiar navigation-tree pane and format. All other types of files do not appear, which makes it easier to find the
PDFs on your computer. You can move PDFs and folders, rename them, or delete them, just like in Windows
Explorer.
84
The Adobe PDF Explorer Bar also contains buttons for converting the current web page to PDF or creating new
folders on your computer.
Note: When you right-click a web page, the context-sensitive menu includes some commands for converting PDFs. Which
commands are available depends on the element you right-click on the web page. For example, the commands that appear
when you right-click a text link differ from those that appear when you right-click ordinary text on the web page.
1 Open the Adobe PDF pane in Internet Explorer, using one of the following methods:
• Choose Adobe PDF Explorer Bar from the Adobe PDF toolbar menu.
• Choose View > Explorer Bar > Adobe PDF.
2 In the Adobe PDF pane, manage folders by doing any of the following:
• To add a new folder, select the location for the folder in the tree structure and click New Folder, or right-click the
location icon and choose New Folder.
• To rename a folder, right-click the folder, choose Rename, and type a new name.
• To delete a folder, right-click the folder and choose Delete.
Note: Only PDF files appear in the navigation structure in the Adobe PDF pane, but other files may be present in folders.
If you attempt to delete a folder that contains files that aren’t visible, a confirmation message appears. If you’re not sure
that you want to delete those files, click No.
3 In the Adobe PDF pane, manage PDFs by right-clicking a PDF and choosing one of the following:
Open In Internet Explorer Opens the selected PDF within the document pane of Internet Explorer.
Open In Acrobat Opens the selected PDF in a standalone instance of Acrobat.
Open Containing Folder Opens the folder in which the PDF is located, as a new instance of Windows Explorer.
Add Web Page To This File
ConvertsthecurrentlyopenwebpagetoPDFandaddsitasanewpagetotheselectedPDF.
Page 91

ADOBE ACROBAT 8 STANDARD
Add Selection To This File Converts your selection within the currently open web page to PDF and adds it as a new
User Guide
page to the selected PDF.
Note: You can also rename or delete the selected PDF from the right-click menu.
Convert web pages to PDF in Acrobat
Although you can convert an open web page to PDF from Internet Explorer, you get additional options when you
run the conversion from the Acrobat application. For example, you can include an entire website in the PDF or just
some levels of a website. Also, you can select Web Page Conversion options that apply when you create PDFs from
web pages.
See also
“Asian language PDFs” on page 51
“Web Page Conversion options in Acrobat” on page 87
Convert a web page to PDF
1
In Acrobat, choose File > Create PDF > From Web Page, or click the Create PDF From Web Page button on
the toolbar to open the dialog box.
2 In URL, enter the complete path to the web page, or click Browse and locate the HTML page that you want to
convert.
3 UnderSettings, enterthenumberoflevelsyouwanttoinclude,orselectGetEntireSitetoincludeall levelsfrom
the website.
85
Note: Some websites may have hundreds or even thousands of pages. This can take a long time to download, may make
your system slow and unresponsive, and can even use up all available hard disk space and memory, causing a system
crash. You may want to begin by downloading only one level of pages and then go through them to find particular links
to download.
4 Select one or both of the following options:
Stay On Same Path Downloads only web pages subordinate to the specified URL.
Stay On Same Server Downloads only web pages stored on the same server.
5 ClickSettings,andreviewtheselectedoptionsintheWebPageConversionSettingsdialogbox.Makeanychanges
you want on the General and Page Layout tabs, and click OK.
6 Click Create.
Note: You can view PDF pages while they are downloading; however, you cannot modify a page until the download
process is complete.
If you closed the Download Status dialog box, Choose Advanced > Web Capture > Bring Status Dialogs To
Foreground to see the dialog box again.
Add an unlinked web page to an existing PDF
UsethisproceduretoappendpagestoawritablePDF.If theoriginalPDFisread-only,theresultwillbeanewPDF
rather than new pages in the existing PDF.
1 Open the existing PDF in Acrobat (the PDF to which you want to append a web page).
2 Choose Advanced > Web Capture > Create PDF From/Append Web Page.
Page 92

ADOBE ACROBAT 8 STANDARD
3 Enter the URL to the web page you want to append and select options, as described for converting web pages to
User Guide
PDF, and then click Create.
Add a linked web page to an existing PDF
1
Open the previously converted PDF in Acrobat. If necessary, scroll to the page containing links to the pages you
want to add.
2 Do one of the following:
• Click a web link in your PDF.
• Right-click/Control-click the web link, and choose Append To Document.
• Choose Advanced > Web Capture > View Web Links. The dialog box lists all the links on the current page or on
the tagged bookmark’s pages. Using the Shift key or Ctrl key as needed, click to select the linked pages you want
to add, or click Select All. Click Properties to set the download options, as needed, and then click Download.
• Choose Advanced > Web Capture > Append All Links On Page.
Note: After pages have been converted, links to these pages change to internal links, and clicking a link takes you to the
PDF page, rather than to the original HTML page on the web.
Convert a linked web page to a new PDF
1
Open the previously converted PDF in Acrobat. If necessary, scroll to the page containing a web link you want to
convert.
2 Do one of the following:
• Right-click/Control-click the web link, and choose Open Weblink As New Document.
• Ctrl-click/Control-click the web link.
86
Note: In Windows, you can also convert a linked page from a web page displayed in Internet Explorer, using a similar
right-click command.
Copy the URL of a web link
Use this procedure to copy the path for a web link to the clipboard, to use it for other purposes.
1 Open the previously converted PDF in Acrobat. If necessary, scroll to the page containing links to the pages you
want to copy.
2 Right-click/Control-click the web link and choose Copy Link Location.
Change Acrobat web page conversion options
The settings for converting web pages to PDF apply to the conversion process. Any changes you make to these
settings apply to PDFs you create from web pages after changing the settings. The settings changes do not affect
existing PDFs.
Edit the web page conversion options
1
Choose File > Create PDF > From Web Page.
2 Click the Settings button.
3 On the General tab, select new options under File Type Settings and PDF Settings, as needed. If you select a text
file type, you can click the Settings button to see additional options for that file type.
4 On the Page Layout tab, select options for page size, orientation, and scaling, as needed, and then click OK.
Page 93

ADOBE ACROBAT 8 STANDARD
Reset web page conversion options to default settings
1
Choose Edit > Preferences.
2 Under Categories, select Web Capture, and then click Reset Conversion Settings To Defaults.
User Guide
Web Page Conversion options in Acrobat
The Web Page Conversion Settings dialog box is available only from within Acrobat. The Settings button in the
Create PDF From Web Page dialog box opens the Web Page Conversion Settings.
Note: Theoptions availableinthe WebPageConversionSettingsare differentfromthoseavailableintheWebCapture
Preferences. Together, these settings apply to both the web conversion and web capture processes.
General tab
File Type Settings Specifies the file type to be downloaded. If you select HTML or Plain Text as the file type, click
Settings to select the font properties and other display characteristics.
Create Bookmarks Creates a tagged bookmark for each converted web page using the page’s title (HTML Title
element) as the bookmark name. If the page has no title, the URL is used as the bookmark name.
Create PDF Tags Stores a structure in the PDF that corresponds to the HTML structure of the web pages and lets
you create tagged bookmarks for paragraphs, list elements, and other items that use HTML elements.
87
Place Headers & Footers On New Pages Places a header and footer on every page. Headers show the web page’s title;
footers show the page’s URL, the page number in the downloaded set, and the date and time of the download.
Save Refresh Commands Saves a list of all URLs and remembers how they were downloaded in the PDF for
refreshing (updating) purposes. Must be selected before you can update a PDF-converted website.
Page Layout tab
The upper portion of this tab shows options similar to those on a Page Setup or Print dialog box, specifying a
selection of page sizes and options for width, height, margin measurements, and page orientation. The right side of
the tab area shows a Sample Page that adjusts when you change the measurements or orientation options.
The Scaling portion of the tab area shows these options:
Scale Wide Contents To Fit Page (Windows)/Scale Contents To Fit Page (Mac OS) Rescales a page’s contents, if
necessary, to fit the width of the page. If this option is not selected, the paper size adjusts to fit the page’s contents if
necessary.
Switch To Landscape If Scaled Smaller Than Changes the page orientation to landscape if the new version of a page
is less than 70% of the original size. Available only if you selected portrait orientation.
HTML Conversion Settings
This dialog box opens when you select HTML on the General tab of the Web Page Conversion Settings dialog box,
and then click the Settings button.
General tab Lets you specify the following options:
• Default Colors Sets the default colors for text, page backgrounds, web links, and text that replace unavailable
images. Click the color button to open a palette, and select the color. To use these colors on all pages, select Force
These Settings For All Pages.
Page 94

ADOBE ACROBAT 8 STANDARD
User Guide
• Background Options Specifies whether to display colors and tiled images in page backgrounds and colors in table
cells. If options are deselected, converted web pages may look different than they do in a web browser, but may be
easier to read when printed.
• Line Wrap Wraps preformatted (HTML) lines of text. When selected, this option changes the line breaks so that
the text fits on the PDF pages. Select this setting if an HTML file has unreasonably long lines of preformatted text.
• Multimedia Determines whether to reference multimedia (such as SWF files) by URL, disable multimedia
capture, or embed multimedia files when possible.
• Convert Images Includes images in the conversion to PDF. If you do not select this option, an image is indicated
by a colored border (and possibly text, if specified by the page’s design).
• Underline Links Underlines textual web links on the pages.
Fonts And Encoding tab Lets you specify the following options:
• Default Under Input Encoding, sets the input encoding of a file’s text from a menu of operating systems and
alphabets.
• Always Ignores any encoding that is specified in the HTML source file and uses the selection shown in the
Default option.
• When Page Doesn’t Specify Encoding Uses the selection shown in the Default option only if the HTML source file
does not specify a type of encoding.
88
• Language Specific Font Settings Use these settings to change the fonts used to display body text, headings, and
preformatted text. Click Change, select new fonts from the menus, and click OK.
• Font Size Sets the font sizes used for body text, headings, and preformatted text.
• Embed Platform Fonts When Possible Stores the fonts used on the pages in the PDF so that the text always
appears in the original fonts. Note that embedding fonts increases the size of the file.
Plain Text Conversion Settings
General tab Lets you specify the following options:
• Color swatches Swatches indicate the colors selected for text and background. Colors can be changed by clicking
the swatch and selecting a new color in the color picker that opens.
• Wrap Lines At Margin Inserts a soft return when the text reaches the edge of the text area on the page.
• Reflow Text (Available only when Wrap Lines At Margin is selected.) Makes text more accessible for users with
special needs.
• Limit Lines Per Page Sets the maximum number of lines that can appear on a single page, based on the entry in
Max Lines.
Fonts And Encoding tab Lets you specify the following options:
• Default Under Input Encoding, sets the input encoding of a file’s text.
• Language Specific Font Settings Use these settings to change the fonts used to display body text, headings, and
preformatted text. Click Change, select new fonts from the menus, and click OK.
• Font Size Sets the font sizes used for body text, headings, and preformatted text.
• Embed Platform Fonts When Possible Stores the fonts used on the pages in the PDF so that the text always
appears in the original fonts. Note that embedding fonts increases the size of the file.
Page 95

ADOBE ACROBAT 8 STANDARD
User Guide
Web Capture preferences in Acrobat
You can set several preferences for opening PDFs created from web pages and for customizing the process of
converting web pages to PDFs. To open the Web Capture Preferences, choose Edit > Preferences (Windows) or
Acrobat > Preferences (Mac OS) and select Web Capture under Categories.
Note: The options available in the Web Capture Preferences are different from those available in the Web Page
Conversion Settings. Together, these settings apply to both the web conversion and web capture processes.
Verify Stored Images Specifies how often to check whether images on the website have changed.
Show Bookmarks Panel When New PDF File (Created From Web Page) Is Opened When selected, automatically
opens the navigation pane and displays tagged bookmarks when you open a new file. (When deselected, the
navigation pane is closed when you open converted web pages, but the tagged bookmarks are still created. Click the
Bookmarks button to see the tagged bookmarks in the navigation pane.)
Skip Downloading Secured Pages Select Always to skip secured pages when downloading multiple levels of a
website. If you select After, a password dialog box appears that times out and skips the secured pages after the
specified number of seconds.
Reset Conversion Settings To Defaults ChangestheoptionsintheWebPageConversionSettingsdialogbox backto
the original settings.
Note: If you select this option, the settings revert immediately and irreversibly. If you want to restore your custom
conversion options, you must enter each of those settings again.
89
Creating PDFs with Acrobat Distiller
Acrobat Distiller overview
In Acrobat Distiller, you can select settings used to convert documents to PDFs, security options, and font information. You also use the Acrobat Distiller window to monitor the jobs you’ve lined up for PDF conversion.
Page 96

ADOBE ACROBAT 8 STANDARD
User Guide
A
B
C
D
E
F
90
Acrobat Distiller main window (Windows)
A. Menus B. Adobe PDF settings files C. Files in job queue D. Failed job E. Context menu F. Status window
Note: In Mac OS, there is no context menu. Instead, a Clear List button clears all distilled jobs from the list.
Start Acrobat Distiller
❖ Do one of the following:
• In Acrobat, choose Advanced > Print Production > Acrobat Distiller.
• (Windows) Choose Start > Programs > Acrobat Distiller 8.0.
• (Mac OS) Use the Finder to locate Acrobat Distiller 8.0, and double-click it to open the Distiller application.
Manage the conversion queue
Distiller lets you queue PostScript files that you create in authoring applications and then monitor them throughout
the PDF conversion process.
Queue a PostScript file
1
In Distiller, select an Adobe PDF settings file from the Default Settings pop-up menu.
2 (Optional) Choose Settings > Security and select an encryption level.
3 Open the PostScript file and start the conversion process, using either method:
• Choose File > Open, select a PostScript file, and click Open.
• Drag one or more PostScript files from the desktop to the Acrobat Distiller window.
Click Pause before doing step 3 if you want to review the queue before Distiller starts converting the files.
Page 97

ADOBE ACROBAT 8 STANDARD
User Guide
Change the queue during processing
Do any of the following:
• To temporarily stop processing the current job, click Pause. Or (Windows only), right-click the job queue and
choose Pause.
• To resume processing the current job, click Resume. Or (Windows only), right-click the job queue and choose
Resume.
• To delete files from the queue, click Cancel Job. Cancel Jobs deletes all files from the queue that are not yet success-
fully completed. Or (Windows only), select and right-click individual files in the job queue and choose Cancel
Job(s) to delete only those files.
• (Windows only) To open the folder where the selected files are, right-click the job queue and choose Explore.
• (Windows only) To open the selected PDF in Acrobat, a browser, or Reader, right-click the job queue and choose
View. Or, double-click the PDF to open it in Acrobat.
Save a history of the job queue (Windows)
❖ Right-click the job queue, and choose Save List.
Distiller saves and opens the history as a PDF.
91
Clear the queue
Remove all paused and successfully converted files from the list:
• (Windows) Right-click the job queue, and choose Clear History.
• (Mac OS) Click the Clear List button above the queue.
Distiller preferences
The Distiller preferences control global Distiller settings. You set Distiller preferences by choosing File > Preferences
(Windows) or Distiller > Preferences (Mac OS).
(Windows) Notify When Windows TEMP Folder Is Nearly Full Warnsyouifavailableharddiskspaceislessthan1MB.
Required hard disk space is often double the size of the PostScript file being processed.
Ask For PDF File Destination Lets you specify the name and location for files when using drag-and-drop or the Print
command.
Ask To Replace Existing PDF File Warns you if you are about to overwrite an existing PDF.
View PDF When Using Distiller Automatically opens the converted PDF.
Delete Log Files For Successful Jobs Creates a log file (named messages.log) only if there are messages from inter-
preting the PostScript file or if a PostScript error occurs. (Log files for failed jobs are always created.)
Guidelines for creating PostScript files
If you want to fine-tune the creation of the PDF with Distiller parameters or pdfmark operators, first create a
PostScript file and then convert that file to PDF. For details, download the Adobe Acrobat 8 SDK or specific parts of
it,suchasthe pdfmark Reference Manual, from various tabs on the Acrobat SDK documentation page (English only)
on the Adobe website.
Page 98

ADOBE ACROBAT 8 STANDARD
User Guide
In authoring applications such as Adobe InDesign, use the Print command with the Adobe PDF printer to convert
a file to PostScript. The Print dialog boxes can vary from application to application. For instructions on creating a
PostScript file from your specific application, see the application’s documentation.
Keep the following guidelines in mind when creating PostScript files:
• UsePostScriptLanguageLevel3wheneverpossibletotakeadvantageof themostadvancedfeaturesofPostScript.
• Use the Adobe PDF printer as your PostScript printer.
• (Windows) Send the fonts used in the document.
• Give a PostScript file the same name as the original document, but with the extension .ps. (Some applications use
a .prn extension instead.)
• Use color and custom page sizes that are available with the Acrobat Distiller 8.0 PPD file. Other PPD files may
cause inappropriate colors, fonts, or page sizes in the PDF.
• Send PostScript files as 8-bit binary data when using FTP to transfer the files between computers, especially if the
platforms are different, to avoid converting line feeds to carriage returns or vice versa.
Adobe PDF conversion settings
92
Choose an Adobe PDF preset for converting files
1 Do one of the following:
• Start Acrobat Distiller 8.0.
• In an Adobe Creative Suite application, choose File > Print, select Adobe PDF as the target printer, and click
Properties.
• (Windows) In Office 2007 applications, choose Acrobat > Preferences.
• (Windows) In another authoring application or utility, choose Adobe PDF > Change Conversion Settings.
2 Choose a preset from the Default Settings (or Conversion Settings) menu.
Note: All settings create PDFs that can be opened in Acrobat 5.0 and later, and Acrobat Reader 5.0 and later, unless
otherwise described.
Adobe PDF presets
A PDF preset is a group of settings that affect the process of creating a PDF. These settings are designed to balance
file size with quality, depending on how the PDF will be used. Most predefined presets are shared across Adobe
Creative Suite applications, including InDesign, Illustrator, Photoshop, and Acrobat. You can also create and share
custom presets for your unique output requirements.
A few of the presets listed below are not available until you move them—as needed—from the Extras folder (where
they installed by default) to the Settings folder for custom settings.
Typically, the Extras and Settings folders for default settings are found in (Windows) Documents and Settings/All
Users/Application Data/Adobe/Adobe PDF, (Vista) ProgramData/Adobe/Adobe PDF, or (Mac OS) Library/Application Support/Adobe PDF. The default settings files installed with Distiller are Read Only and Hidden.
Page 99

ADOBE ACROBAT 8 STANDARD
User Guide
The custom settings are found in (Windows) Documents and Settings/[username]/Application Data/Adobe/Adobe
PDF/Settings, (Vista) Users/[username]/AppData/Roaming/Adobe/Adobe PDF/Settings, or (Mac OS)
Use rs/[username]/Library/Application Support/Adobe/Adobe PDF/Settings.
Some presets are not available in some Creative Suite applications.
Review your PDF settings periodically. The settings do not automatically revert to the default settings. Applications
and utilities that create PDFs use the last set of PDF settings defined or selected.
High Quality Print Creates PDFs for quality printing on desktop printers and proofing devices. This preset uses PDF
1.4, downsamples color and grayscale images to 300 ppi and monochrome images to 1200 ppi, embeds subsets of all
fonts, leaves color unchanged, and does not flatten transparency (for file types capable of transparency). These PDFs
can be opened in Acrobat 5.0 and Acrobat Reader 5.0 and later. In InDesign, this preset also creates tagged PDFs.
Illustrator Default (Illustrator only) Creates a PDF in which all Illustrator data is preserved. PDFs created with this
preset can be reopened in Illustrator without any loss of data.
Oversized Pages (Acrobat only) Creates PDFs suitable for viewing and printing of engineering drawings larger than
200 x 200 inches (508 x 508 cm). These PDFs can be opened in Acrobat and Reader 7.0 and later.
PDF/A-1b: 2005 (CMYK and RGB) (Acrobat only) Used for long-term preservation (archival) of electronic
documents. PDF/A-1b uses PDF 1.4 and converts all colors to either CMYK or RGB, depending on which standard
you choose. These PDFs can be opened in Acrobat and Reader versions 5.0 and later.
93
PDF/X-1a (2001 and 2003) PDF/X-1a requires all fonts to be embedded, the appropriate PDF bounding boxes to be
specified, and color to appear as CMYK, spot colors, or both. Compliant files must contain information describing
the printing condition for which they are prepared. PDF files created with PDF/X-1a compliance can be opened in
Acrobat 4.0 and Acrobat Reader 4.0 and later.
PDF/X-1a uses PDF 1.3, downsamples color and grayscale images to 300 ppi and monochrome images to 1200 ppi,
embeds subsets of all fonts, creates untagged PDFs, and flattens transparency using the High Resolution setting.
Note: The PDF/X1-a:2003 and PDF/X-3 (2003) presets are placed on your computer during installation but aren’t
available until you move them from the Extras folder to the Settings folder.
PDF/X-4 (2007) In Acrobat 8, this preset is called PDF/X-4 DRAFT to reflect the draft state of the ISO specification
at Acrobat ship time. This preset is based on PDF 1.4, which includes support for live transparency. PDF/X-4 has the
same color-management and International Color Consortium (ICC) color specifications as PDF/X-3. You can create
PDF/X-4-compliant files directly with Creative Suite 3 applications (Illustrator, InDesign, and Photoshop). In
Acrobat 8, use the Preflight feature to convert PDFs to PDF/X-4 DRAFT.
PDF files created with PDF/X-4 compliance can be opened in Acrobat 7.0 and Reader 7.0 and later.
Press Quality Creates PDF files for high-quality print production (for example, for digital printing or for separations
to an imagesetter or platesetter), but does not create files that are PDF/X-compliant. In this case, the quality of the
content is the highest consideration. The objective is to maintain all the information in a PDF file that a commercial
printer or print service provider needs in order to print the document correctly. This set of options uses PDF 1.4,
converts colors to CMYK, downsamples color and grayscale images to 300 ppi and monochrome images to 1200 ppi,
embeds subsets of all fonts, and preserves transparency (for file types capable of transparency).
These PDF files can be opened in Acrobat 5.0 and Acrobat Reader 5.0 and later.
Note: Before creating an Adobe PDF file to send to a commercial printer or print service provider, find out what the
output resolution and other settings should be, or ask for a .joboptions file with the recommended settings. You might
need to customize the Adobe PDF settings for a particular provider and then provide a .joboptions file of your own.
Page 100

ADOBE ACROBAT 8 STANDARD
User Guide
Rich Content PDF Creates accessible PDF files that include tags, hyperlinks, bookmarks, interactive elements, and
layers. This set of options uses PDF 1.5 and embeds subsets of all fonts. It also optimizes files for byte serving. These
PDF files can be opened in Acrobat 6.0 and Adobe Reader 6.0 and later. (The Rich Content PDF preset is in the
Extras folder.)
Note: This preset was called eBook in earlier versions of some applications.
Smallest File Size Creates PDF files for displaying on the web or an intranet, or for distribution through an email
system. This set of options uses compression, downsampling, and a relatively low image resolution. It converts all
colors to sRGB, and (for Adobe Acrobat Distiller-based conversions) does not embed fonts. It also optimizes files for
byte serving.
These PDF files can be opened in Acrobat 5.0 and Acrobat Reader 5.0 and later.
Standard (Acrobat only) Creates PDF files to be printed to desktop printers or digital copiers, published on a CD, or
sent to a client as a publishing proof. This set of options uses compression and downsampling to keep the file size
down, but also embeds subsets of all (allowed) fonts used in the file, converts all colors to sRGB, and prints to a
medium resolution. Note that Windows font subsets are not embedded by default. PDF files created with this settings
file can be opened in Acrobat 5.0 and Acrobat Reader 5.0 and later.
For more information about shared PDF settings for Adobe Creative Suite applications, see the PDF Integration
Guide on the Creative Suite CD.
94
Customize Adobe PDF settings
You may want to create custom conversion settings for certain jobs or output devices. The selections you make
determine such things as whether the document fonts are embedded and subsetted at 100%, how vector objects and
images are compressed and/or sampled, and whether the resulting PDF includes high-end printing information such
as OPI (Open Prepress Interface) comments. Default settings files cannot be modified, but can be duplicated to help
create new settings files.
Note: If the PDF is intended for high-end printing, ask your service provider for their custom .joboptions file with the
recommended output resolution and other settings. This way, the PDF you give them will have characteristics optimized
for your print workflow.
Create a custom Adobe PDF settings file
1
Do one of the following:
• In Acrobat Distiller, select one of the predefined sets of options from the Default Settings menu to use as a starting
point, and then choose Settings > Edit Adobe PDF Settings.
• In authoring applications or utilities, select Adobe PDF as the target printer—typically in the Page Setup or Print
dialog boxes—and click Properties.
• (Windows) In the Acrobat PDFMaker dialog box, click Advanced Settings in the Settings tab.
Note: InWindows,youcanswitchto adifferentpresetfromwithintheAdobePDFSettingsdialogbox.Todothis,select
Show All Settings at the bottom left and then select a preset from the list on the left.
 Loading...