

Page 1
Page 2

Copyright
© 2007 Adobe Systems Incorporated. All rights reserved.
Adobe® Acrobat® 3D Version 8 for Windows®
If this guide is distributed with software that includes an end user agreement, this guide, as well as the software described in it, is furnished under license
and may be used or copied only in accordance with the terms of such license. Except as permitted by any such license, no part of this guide may be
reproduced, stored in a retrieva l system, or transmitte d, in any form or by any means, ele ctronic, mechanical, re cording, or otherwise, without the prior
written per mission of Adobe Systems Inc orporated. Please note that the content in this guide is protected under copyright law even if it is not distributed
with software that includes an end user license agreement.
The content of this guide is furnished for informational use only, is subject to change without notice, and should not be construed as a commitment by
Adobe Systems Incorporated. Adobe Systems Incorporated assumes no responsibility or liability for any errors or inaccuracies that may appear in the
informational content contained in this guide.
Ple ase r ememb er th at exi stin g art work o r imag es th at you m ay wan t to i nclud e in yo ur pro ject may be prote cted unde r copy right law. The unauthorize d
incorporation of such material into your new work could be a violation of the rights of the copyright owner. Please be sure to obtain any permission
required from the copyright owner.
Any references to company names in sample templates or images are for demonstration purposes only and are not intended to refer to any actual
organization.
Adobe , the Adob e logo, Ac robat, Acr obat Capt ure, Acrob at Conne ct, Bree ze, Cre ative Sui te, Dist iller, Fla sh, Fram eMaker, Free Hand, GoLive, Illustrator,
InCopy, InDesign, LiveCycle, Photoshop, PostScript, PostScript 3, Reader, and Version Cue are either registered trademarks or trademarks of Adobe
Systems Incorporated in the United States and/or other countries.
Apple, Mac and Macintosh are trademarks of Apple Inc., registered in the United States an d other countries . Microsoft, MS- DOS, OpenType, Vista, and
Windows are either registered trademarks or trademarks of Microsoft Corporation in the United States and/or other countries. UNIX is a registered
trademark op The Open Group in the US and other countries. Helvetica and Times are trademarks of Heidelberger Druckmaschinen AG exclusively
licensed through Linotype Library GmbH, and may be registered in certain jurisdictions. All other trademarks are the property of their respective
owners.
The Spelling portion of this product is based on Proximity Linguistic Technology. © Copyright 1989, 2004 All Rights Reserved Proximity Technology
A Division of Franklin Electronic Publishers, Inc. Burlington, New Jersey USA. © Copyright 1990 Merriam-Webster Inc. © Copyright 1990 All Rights
Reserved Proximity Technology A Division of Franklin Electronic Publishers, Inc. Burlington, New Jersey USA. © Copyright 2003, 2004 Franklin
Electronic Publishers, Inc. © Copyright 2003, 2004 All Rights Reserved Proximity Technology A Division of Franklin Electronic Publishers, Inc.
Burlington, New Jersey USA. © Copyright 1991 Dr. Lluis de Yzaguirre I Maura. © Copyright 1991 All Rights Reserved Proximity Technology A Division
of Franklin Electronic Publishers, Inc. Burlington, New Jersey USA. © Copyright 1990 Munksgaard International Publishers Ltd. © Copyright 1990 All
Rights Reserved Proximity Technology A Division of Franklin Electronic Publishers, Inc. Burlington, New Jersey USA. © Copyright 1990, 1995 Van
Dale Lexicografie bv © Copyright 1990, 1996 All Rights Reserved Proximity Technology A Division of Franklin Electronic Publishers, Inc. Burlington,
New Jersey USA. © Copyright 1990, 2004 IDE a.s. © Copyright 1990, 2004 All Rights Reserved Proximity Technology A Division of Franklin Electronic
Publishers, Inc. Burlington, New Jersey USA. © Copyright 1992 Hachette / Franklin Electronic Publishers, Inc. © Copyright 2004 All Rights Reserved
Proximity Technology A Division of Franklin Electronic Publishers, Inc. Burlington, New Jersey USA. © Copyright 1991 Text & Satz Datentechnik ©
Copyright 1991 All Rights Reserved Proximity Technology A Division of Franklin Electronic Publishers, Inc. Burlington, New Jersey USA. © Copyright
2004 Bertelsmann Lexikon Verlag © Copyright 2004 All Rights Reserved Proximity Technology A Division of Franklin Electronic Publishers, Inc.
Burlington, New Jersey USA. © Copyright 2004 MorphoLogic Inc. © Copyright 2004 All Rights Reserved Proximity Technology A Division of Franklin
Electronic Publishers, Inc. Burlington, New Jersey USA. © Copyright 1990 William Collins Sons & Co. Ltd. © Copyright 1990 All Rights Reserved
Proximity Technology A Division of Franklin Electronic Publishers, Inc. Burlington, New Jersey USA. © Copyright 1993, 1994, 1995 Russicon
Company Ltd. © Copyright 1995 All Rights Reserved Proximity Technology A Division of Franklin Electronic Publishers, Inc. Burli
ngton, New Jersey
USA.
Portions of Adobe Acrobat include technology used under license from Autonomy and are copyrighted.
This product contains either BISAFE and/or TIPEM software by RSA Data Security, Inc.
e_Db is a licensed product from Simple Software Solutions, Inc.
Adobe Systems Incorporated, 345 Park Avenue, San Jose, California 95110, USA.
Notice to U.S. Government End Users. The Software and Documentation are “Commercial Items,” as that term is defined at 48 C.F.R. §2.101, consisting
of “Commercial Computer Software” and “Commercial Computer Software Documentation,” as such terms are used in 48 C.F.R. §12.212 or 48 C.F.R.
§227.7202, as applicable. Consistent with 48 C.F.R. §12.212 or 48 C.F.R. §§227.7202-1 through 227.7202-4, as applicable, the Commercial Computer
Software and Commercial Computer Software Documentation are being licensed to U.S. Government end users (a) only as Commercial Items and (b)
with only those rights as are granted to all other end users pursuant to the terms and conditions herein. Unpublished-rights reserved under the
copyright laws of the United States. Adobe agrees to comply with all applicable equal opportunity laws including, if appropriate, the provisions of
Executive Order 11246, as amended, Section 402 of the Vietnam Era Veterans Readjustment Assistance Act of 1974 (38 USC 4212), and Section 503 of
the Rehabilitation Act of 1973, as amended, and the regulations at 41 CFR Parts 60-1 through 60-60, 60-250, and 60-741. The affirmative action clause
and regulations contained in the preceding sentence shall be incorporated by reference.
Part Number: 90069961 (04/07)
Page 3

© 2007 Adobe Systems Incorporated. Tous droits réservés.
Adobe® Acrobat® 3D Version 8 pour Windows®
Lorsque le présent guide est distribué avec un logiciel assujetti à un contrat de licence, le guide et le logiciel qu'il décrit sont régis par la licence et ne
peuvent être utilisés ou copiés qu'en conformité avec les conditions de ladite licence. A moins d'une autorisation expresse accordée par cette licence,
aucune partie de ce guide ne peut être reproduite, stockée dans un système d'interrogation ou transmise, sous quelque forme ou par qu elque moyen que
ce soit (électronique, mécanique, par enregistrement ou autre) sans l'autorisation écrite préalable d'Adobe Systems Incorporated. Veuillez noter que le
contenu du présent guide est protégé par la loi sur les droits d'auteur, même s'il n'est pas distribué avec un logiciel régi par un contrat de licence
utilisateur.
Les informations contenues dans ce guide sont fournies à titre purement informatif ; elles sont susceptibles d'être modifiées sans préavis et ne doivent
pas être interprétées comme étant un engagement de la part d'Adobe Systems Incorporated. Adobe Systems Incorporated n'accepte aucune
responsabilité quant aux erreurs ou inexactitudes pouvant être contenues dans le présent guide.
Veuillez noter que les illustrations et images existantes que vous souhaiterez éventuellement inclure dans votre projet sont susceptibles d'être protégées
par les lois sur les droits d'auteur. L'inclusion non autorisée de tels éléments dans vos nouveaux travaux peut constituer une violation des droits du
propriétaire. Veuillez vous assurer de détenir toute autorisation nécessaire auprès du détenteur des droits.
Toute référence à des noms de sociétés dans les modèles ou images types n'est utilisée qu'à titre d'exemple et ne fait référence à aucune société réelle.
Adobe , le logo Adobe , Acrobat, Acroba t Capture, Acrobat Connec t, Breez e, Creativ e Suite, Disti ller, Flash , FrameMa ker, FreeHand , GoLive, Illustrator,
InCopy, InDesign, LiveCycle, Photoshop, PostScript, PostScript 3, Reader et Version Cue sont des marques ou des marques déposées d'Adobe Systems
Incorporated aux Etats-Unis et/ou dans d'autres pays.
Apple, Mac et Macintosh sont des marques d'Apple, Inc., déposées aux Etats-Unis et dans d'autres pays. Microsoft, MS-DOS, OpenType, Vista et
Windows s ont des marques ou des marques déposées de Microsoft Corporation aux Etats-Unis et/ou dans d'autres pays. UNIX est une marque déposée
de The Open Group aux Etats-Unis et dans d'autres pays. Helvetica and Times sont des marques déposées de Heidelberger Druckmaschinen AG,
exclusivement cédées sous licence par le biais de Linotype Library GmbH, et peuvent être déposées dans certaines juridictions. Toutes les autres marques
citées sont la propriété de leurs détenteurs respectifs.
La partie Orthographe de ce produit est basée sur Proximity Linguistic Te chnology. © Copyright 1989, 2004. Tous droits réservés. Proximity Technology
A Division of Franklin Elect ronic Publishers, Inc. Burlington, New Jersey, Etats-Unis. © Copyright 1990. Mer riam-Webster Inc. © Copyright 1990. Tous
droits réservés. Proximity Technology A Division of Franklin Electronic Publishers, Inc. Burlington, New Jersey, Etats-Unis. © Copyright 2003, 2004.
Franklin Electronic Publishers, Inc. © Copyright 2003, 2004. Tous droits réservés. Proximity Technology A Division of Franklin Electronic Publishers,
Inc. Burlington, New Jersey, Etats-Unis. © Copyright 1991 Dr. Lluis de Yzaguirre I Maura. © Copyright 1991, 2004. Tous droits réservés. Proximity
Technology A Division of Franklin Electronic Publishers, Inc. Burlington, New Jersey, Etats-Unis. © Copyright 1990. Munksgaard Inter national
Publishers Ltd. © Copyright 1990. Tous droits réservés. Proximity Technology A Division of Franklin Electronic Publishers, Inc. Burlington, New Jersey,
Etats-Unis. © Copyright 1990, 1995. Van Dale Lexicografie bv © Copyright 1990, 1996. Tous droits réservés. Proximity Technology A Division of
Franklin Electronic Publishers, Inc. Burlington, New Jersey, Etats-Unis. © Copyright 1990, 2004. IDE a.s. © Copyright 1990, 2004. Tous droits réservés.
Proximity Technology A Division of Franklin Electronic Publishers, Inc. Burlington, New Jersey, Etats-Unis. © Copyright 1992. Hachette / Franklin
Electronic Publishers, Inc. © Copyright 2004. Tous droits réservés. Proximity Technology A Division of Franklin Electronic Publishers, Inc. Burlington,
New Jersey, Etats-Unis. © Copyright 1991. Text & Satz Datentechnik © Copyright 1991. Tous droits réservés. Proximity Technology A Division of
Franklin Electronic Publishers, Inc. Burlington, New Jersey, Etats-Unis. © Copyright 2004. Bertelsmann Lexikon Verlag © Copyright 2004. Tous droits
réservé s. Proximity Technology A Divi sion of Franklin Ele ctronic Publishers, Inc. Burlington, Ne w Jersey, Etats-Unis. © Copyrig
Inc. © Copyright 2004. Tous droits réservés. Proximity Technology A Division of Franklin Electronic Publishers, Inc. Burlington, New Jersey, EtatsUnis. © Copyright 1990. William Collins Sons & Co. Ltd. © Copyright 1990. Tous droits réservés. Proximity Technology A Division of Franklin
Electronic Publishers, Inc. Burlington, New Jersey, Etats-Unis. © Copyright 1993, 1994, 1995. Russicon Company Ltd. © Copyright 1995. Tous droits
réservés. Proximity Technology A Division of Franklin Electronic Publishers, Inc. Burlington, New Jersey, Etats-Unis.
Certains composants d’Adobe Acrobat, protégés par des droits d’auteur, incluent une technologie utilisée sous la licence d’Autonomy, Inc.
Ce produit contient les logiciels BISAFE et/ou TIPEM de RSA Data Security, Inc.
e_Db est un produit de Simple Software Solutions, Inc., cédé sous licence.
Adobe Systems Incorporated, 345 Park Avenue, San Jose, California 95110, USA.
Avis aux utilisateurs du gouvernement des Etats-Unis. Ce logiciel et la docume ntation attenante font partie des « commerci al items », visés à l'article 48
C.F.R., alinéa 2.101, qui se composent des « commercial computer software » et « commercial computer software documentation », visés à l'article 48
C.F.R., alinéa 12.212 ou 48 C.F.R., alinéa 227.7202, selon le cas. Conformément à l'article 48 C.F.R., alinéa 12.212 ou 48 C.F.R., alinéas 227.7202-1 à
227.7202-4, selon le cas, la licence des « commercial computer software » et « commercial computer software documentation » est accordée aux
utilisateurs finaux faisant partie du gouvernement des Et ats-Unis (a) en tant que « commercial items » et (b) uniquement selon les droits accordés à tous
les autres utilisateurs selon les conditions mentionnées dans les présentes. Droits non publiés réservés dans le cadre des lois sur les droits d'auteur en
vigueur aux Etats-Unis. Adob e s'engage à respecter la législation relative à l'égalité des chances y compris, le cas échéant, les dispositions du décret 11246,
tel qu'amendé, à la section 402 de la loi sur l'assistance aux vétérans du Vietnam (Vietnam Era Veterans Readjustment Assistance Act) de 1974
(38 USC 4212), et à la section 503 de la loi sur la réadaptation (Rehabilitation Act) de 1973, telle qu'amendée, et la réglementation des articles 41 CFR,
alinéas 60-1 à 60-60, 60-250 et 60-741. La clause d'action positive et la réglementation décrites dans la phrase précédente sont incluses par référence.
Référence : 90069961 (04/07)
ht 2004. MorphoLogic
Page 4

© 2007 Adobe Systems Incorporated. Alle Rechte vorbehalten.
Adobe® Acrobat® 3D Version 8 für Windows®
Wenn dieses Handbuch mit Software vertrieben wird, zu der eine Endbenutzervereinbarung gehört, unterliegen dieses Handbuch und die darin
beschriebene Software einem Lizenzvertrag und dürfen nur in Übereinstimmung mit den Vertragsbestimmungen verwendet oder vervielfältigt
werden. Kein Teil dieses Handbuchs darf, sofern nicht per Lizenzvertrag ausdrücklich erlaubt, ohne die vorherige schriftliche Genehmigung von Adobe
Systems Incorporated reproduziert, in Datenbanken gespeichert oder in irgendeiner Form – elektronisch, fotomechanisch, auf Tonträgern oder auf
irgendeine andere Weise – übertragen werden. Beachten Sie, dass der Inhalt dieses Handbuchs urheberrechtlich geschützt ist, auch wenn es nicht mit
der Software geliefert wird, die eine Endbenutzerlizenzvereinbarung enthält.
Der Inhalt dieses Handbuchs dient ausschließlich Informationszwecken, kann ohne Vorankündigung verändert werden und ist nicht als Verpflichtung
von Adobe Systems Incorporated anzusehen. Adobe Systems Incorporated übernimmt keine Haftung für Fehler oder Ungenauigkeiten, die in den in
diesem Handbuch enthaltenen Informationen auftauchen können.
Beachten Sie, dass die Grafiken oder Abbildungen, die Sie eventuell in Ihrem Projekt verwenden möchten, urheberrechtlich geschützt sein können. Das
Einfügen solchen Materials in Ihre neue Arbeit kann eine Verletzung der Rechte des Inhabers der Urheberrechte darstellen. Holen Sie vorher die
Erlaubnis vom Inhaber der Urheberrechte ein.
Firmennamen in Beispielvorlagen oder Bildern dienen ausschließlich Demonstrationszwecken und verweisen nicht auf tatsächlich bestehende
Organisationen.
Adobe, das Adobe-Logo, Acrobat, Acrobat Capture, Acrobat Connect, Breeze, Creative Suite, Distiller, Flash, FrameMaker, FreeHand, GoLive,
Illustrator, InCopy, InDesign, LiveCycle, Photoshop, PostScript, PostScript 3, Reader und Version Cue sind Marken oder eingetragene Marken von
Adobe Systems Incorporated in den USA und/oder anderen Ländern.
Apple, Mac und Macintosh sind Marken von Apple Inc., die in den USA und anderen Ländern eingetragen sind. Microsoft, MS-DOS, OpenType, Vista
und Windows sind Marken oder eingetragene Marken der Microsoft Corporation in den USA und/oder anderen Ländern. UNIX ist eine eingetragene
Marke von The Open Group in den USA und anderen Ländern. Helvetica und Times sind Marken (in einigen Ländern bzw. Regionen eingetragene
Marken) der Heidelberger Druckmaschinen AG, exklusiv lizenziert durch die Linotype Library GmbH. Alle anderen Marken sind Eigentum ihrer
jeweiligen Inhaber.
Die Rechtschreibprüfung dieses Produkts basiert auf der Proximit y Linguistic Technology. © Copyright 1989, 2004 Alle Rechte vorbehalten. Proximity
Technology, eine Division von Franklin Electronic Publishers, Inc. Burlington, New Jersey USA. © Copyright 1990 Merriam-Webster Inc. © Copyright
1990 Alle Rechte vorbehalten. Proximity Technology, eine Division von Franklin Electronic Publishers, Inc. Burlington, New Jersey USA. © Copyright
2003, 2004 Franklin Electronic Publishers, Inc. © Copyright 2003, 2004 Alle Rechte vorbehalten. Proximity Technology, eine Division von Franklin
Electronic Publishers, Inc. Burlington, New Jersey USA. © Copyright 1991 Dr. Lluis de Yzaguirre I Maura. © Copyright 1991 Alle Rechte vorbehalten.
Proximity Technology, eine Division von Franklin Electronic Publishers, Inc. Burlington, New Jersey USA. © Copyright 1990 Munksgaard
International Publishers Ltd. © Copyright 1990 Alle Rechte vorbehalten. Proximity Technology, eine Division von Franklin Electronic Publishers, Inc.
Burlington, New Jersey USA. © Copyright 1990, 1995 Van Dale Lexicografie bv © Copyright 1990, 1996 Alle Rechte vorbehalten. Proximity Technology,
eine Division von Franklin Electronic Publishers, Inc. Burlington, New Jersey USA. © Copyright 1990, 2004 IDE a.s. © Copyright 1990, 2004 Alle
Rechte vorbehalten. Proximity Technology, eine Division von Franklin Electronic Publishers, Inc. Burlington, New Jersey USA. © Copyright 1992
Hachette / Franklin Electronic Publishers, Inc. © Copyright 2004 Alle Rechte vorbehalten. Proximity Technology, eine Division von Franklin Electronic
Publishers, Inc. Burlington, New Jersey USA. © Copyright 1991 Text & Satz Datentechnik © Copyright 1991 Alle Rechte vorbehalten. Proximity
Technology, eine Division von Franklin Electronic Publishers, Inc. Burlington, New Jersey USA. © Copyright 2004 Bertelsmann Lexikon Verlag ©
Copyright 2004 Alle Rechte vorbehalten. Proximity Technology, eine Division von Franklin Elec tronic Publishers, Inc. Burlington, New Jersey USA. ©
Copyright 2004 MorphoLogic Inc. © Copyright 2004 Alle Rechte vorbehalten. Proximity Technology, eine Division von Franklin Electronic Publishers,
Inc. Burlington, New Jersey USA. © Copyright 1990 William Collins Sons & Co. Ltd. © Copyright 1990 Alle Rechte vorbehalten. Proximity Technology,
eine Division von Franklin Electronic Publishers, Inc. Burlington, New Jersey USA. © Copyright 1993, 1994, 1995 Russicon Company Ltd. © Copyright
1995 Alle Rechte vorbehalten. Proximity Technology, eine Division von Franklin Electronic Publishers, Inc. Burlington, New Jersey USA.
Teile von Adobe Acrobat beinhalten Technologien, die unter Lizenz von Autonomy verwendet werden und urheberrechtlich geschützt sind.
Dieses Produkt enthält BSAFE- und/oder TIPEM-Software von RSA Data Security, Inc.
e_Db ist ein lizenziertes Produkt von Simple Software Solutions, Inc.
Adobe Systems Incorporated, 345 Park Avenue, San Jose, California 95110, USA.
Hinweis für Endbenutzer in US-Behörden. Die vorliegende Software und die zugehörige Dokumentation sind „Commercial Items“ (Kommerzielle
Güter), wie in 48 C.F.R. §2.101 definiert, und umfassen die Bestandteile „Commercial Computer Software“ (Kommerzielle Computersoftware) und
„Commercial Computer Software Documentation“ (Kommerzielle Computersoftwaredokumentation), wie in 48 C.F.R. §12.212 bzw. 48 C.F.R.
§227.7202 als solche bezeichnet, falls anwendbar. In Übereinstimmung mit 48 C.F.R. §12.212 oder 48 C.F.R. §§227.7202-1 bis 227.7202-4 werden
„Commercial Computer Software“ und „Commercial Computer Software Documentation“ für Benutzer in US-Regierungsbehörden (a) lediglich als
„Commercial Items“ und (b) nur mit den Rechten lizenziert, die allen anderen Benutzern gemäß den dokumentierten Geschäftsbedingungen
eingeräumt werden. Nicht veröffentlichte Rechte sind unter den Urheberrechtsgesetzen der USA vorbehalten. Adobe erklärt hiermit, alle anwendbaren
Gesetze zur Chancengleichheit zu beachten, darunter, soweit zutreffend, die Bestimmungen der Executive Order 11246 (geänderte Fassung),
Paragraph 402 des Vietnam Era Veterans Readjustment Assistance Act von 1974 (38 USC 4212), Paragraph 503 des Rehabilitation Act von 1973
(geänderte Fassung) sowie die Bestimmungen in 41 CFR Abschnitt 60-1 bis 60-60, 60-250 und 60-741. Die Schutzmaßnahmen und die Festsetzungen
im vorangegangenen Satz werden per Verweis integriert.
Teilenummer: 90069961 (04/07)
Page 5

Contents
Chapter 1: Getting started
Installation . . . . . . . . . . . . . . . . . . . . . . . . . . . . . . . . . . . . . . . . . . . . . . . . . . . . . . . . . . . . . . . . . . . . . . . . . . . . . . . . A-1
Using Adobe Help . . . . . . . . . . . . . . . . . . . . . . . . . . . . . . . . . . . . . . . . . . . . . . . . . . . . . . . . . . . . . . . . . . . . . . . . . A-2
Resources . . . . . . . . . . . . . . . . . . . . . . . . . . . . . . . . . . . . . . . . . . . . . . . . . . . . . . . . . . . . . . . . . . . . . . . . . . . . . . . . . A-4
Workflows. . . . . . . . . . . . . . . . . . . . . . . . . . . . . . . . . . . . . . . . . . . . . . . . . . . . . . . . . . . . . . . . . . . . . . . . . . . . . . . . . A-8
What’s new. . . . . . . . . . . . . . . . . . . . . . . . . . . . . . . . . . . . . . . . . . . . . . . . . . . . . . . . . . . . . . . . . . . . . . . . . . . . . . .A-25
v
Page 6

vi
Sommaire
Chapitre 1 : Prise en main
Installation . . . . . . . . . . . . . . . . . . . . . . . . . . . . . . . . . . . . . . . . . . . . . . . . . . . . . . . . . . . . . . . . . . . . . . . . . . . . . . . . B-1
Utilisation de l’aide Adobe . . . . . . . . . . . . . . . . . . . . . . . . . . . . . . . . . . . . . . . . . . . . . . . . . . . . . . . . . . . . . . . . . B-2
Ressources . . . . . . . . . . . . . . . . . . . . . . . . . . . . . . . . . . . . . . . . . . . . . . . . . . . . . . . . . . . . . . . . . . . . . . . . . . . . . . . . B-4
Flux de production . . . . . . . . . . . . . . . . . . . . . . . . . . . . . . . . . . . . . . . . . . . . . . . . . . . . . . . . . . . . . . . . . . . . . . . . B-9
Nouveautés . . . . . . . . . . . . . . . . . . . . . . . . . . . . . . . . . . . . . . . . . . . . . . . . . . . . . . . . . . . . . . . . . . . . . . . . . . . . . . B-29
Page 7

Inhalt
Kapitel 1: Erste Schritte
Installation . . . . . . . . . . . . . . . . . . . . . . . . . . . . . . . . . . . . . . . . . . . . . . . . . . . . . . . . . . . . . . . . . . . . . . . . . . . . . . . . C-1
Adobe-Hilfe verwenden . . . . . . . . . . . . . . . . . . . . . . . . . . . . . . . . . . . . . . . . . . . . . . . . . . . . . . . . . . . . . . . . . . . C-2
Ressourcen. . . . . . . . . . . . . . . . . . . . . . . . . . . . . . . . . . . . . . . . . . . . . . . . . . . . . . . . . . . . . . . . . . . . . . . . . . . . . . . . C-4
Arbeitsabläufe . . . . . . . . . . . . . . . . . . . . . . . . . . . . . . . . . . . . . . . . . . . . . . . . . . . . . . . . . . . . . . . . . . . . . . . . . . . . C-9
Neuheiten . . . . . . . . . . . . . . . . . . . . . . . . . . . . . . . . . . . . . . . . . . . . . . . . . . . . . . . . . . . . . . . . . . . . . . . . . . . . . . . C-29
vii
Page 8

Page 9

Chapter 1: Getting started
A-1
Installation
Requirements
To review complete system requirements and
recommendations for your Adobe® software, see the
Read Me file included with your software.
Install the software
1 Close any other Adobe applications open on your
computer.
2 Insert the installation disc into the disc drive, and
follow the on-screen instructions.
Note: For more information, see the Read Me file
included with your software.
Activate the software
Adobe software may include license management
technology to ensure compliance with the product
license agreement. When present, this technology
prompts you to verify the license of your product
within 30 days after you first use it. Verification is
mandatory.
You may be prompted to activate the software. The
verification process doesn’t collect, transmit, or use
any information about the identity of users. For more
in for mation on t his top ic, see the R ead Me file on y our
installation disc, or visit the Adobe website at
www.adobe.com/go/activation.
2 Follow the on-screen instructions.
Note: If you want to install the software on a different
computer, you must first deactivate the software on your
computer: Choose Help > Activation > Deactivate.
Register
Register your product to receive complimentary
installation support, notifications of updates, and
other services.
❖ To register, follow the on-screen instructions in the
Registration dialog box, which appears after you
install and activate the software.
If you postpone registration, you can register at any
time by choosing Help > Registration.
Read Me
The in st al la ti on disc con ta in s t he R ead Me fi le fo r you r
software. (This file is also copied to the application
folder during product installation.) Open the file to
read important information about the following
topics:
• System requirements
• Installation
• Registration
• Electronic licensing
• Legal notices
1 If the Activation dialog box isn’t already open,
choose Help > Activation > Activate.
Page 10
CHAPTER 1
A-2
Getting started
Using Adobe Help
Adobe Help resources
Documentation for your Adobe software is available
in a variety of formats.
In-product and LiveDocs Help
In-product Help provides access to all documentation
and instructional content available at the time the
software ships. It is available through the Help menu
in your Adobe software.
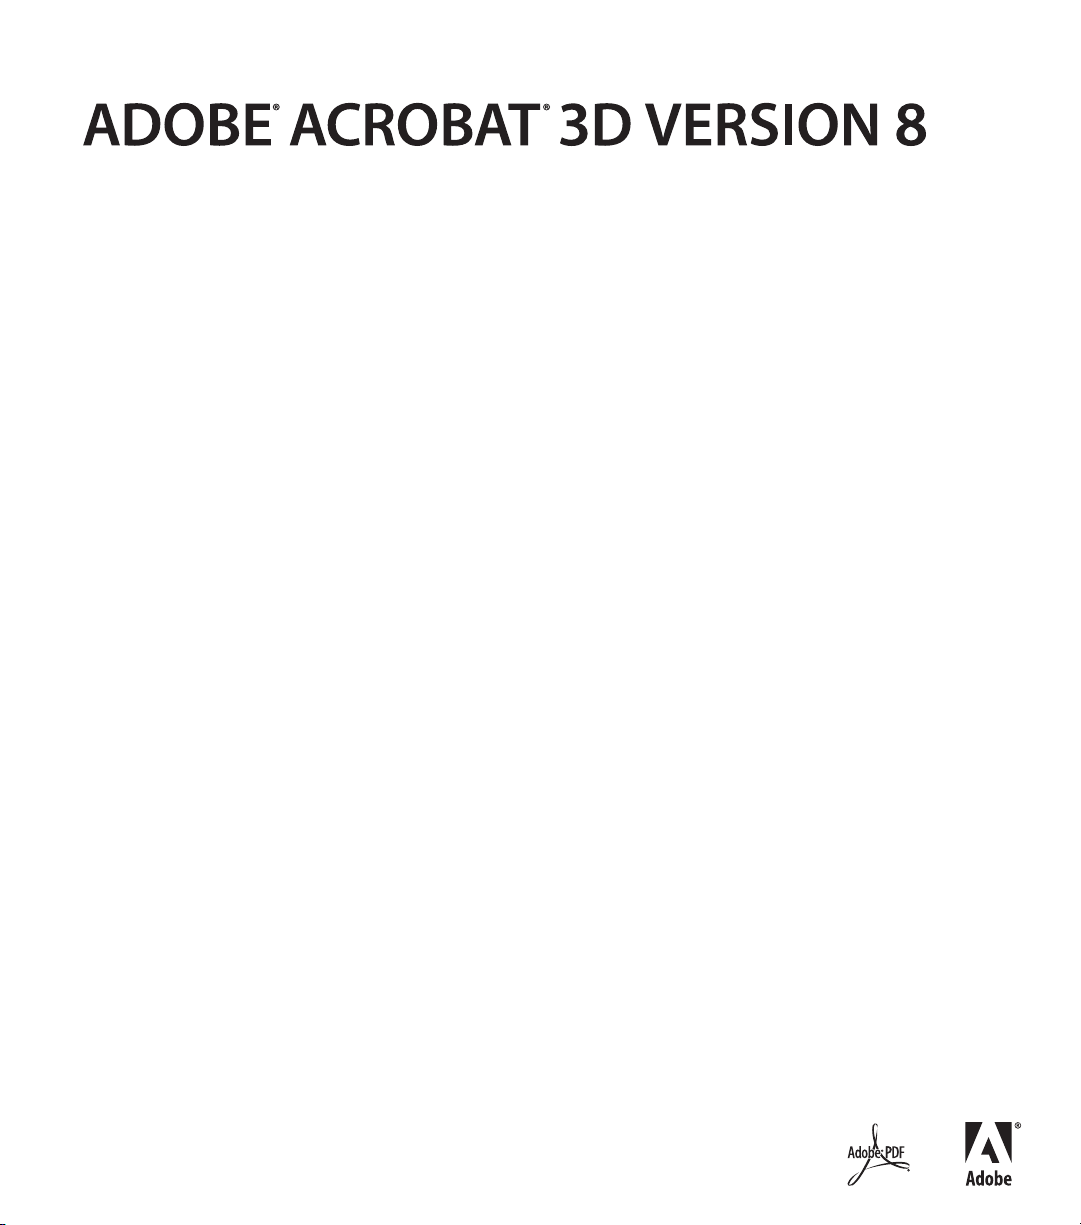
LiveDocs Help includes all the content from
in-product Help, plus updates and links to additional
instructional content available on the web. For some
products, you can also add comments to the topics in
LiveDocs Help. Find LiveDocs Help for your product
in the Adobe Help Resource Center, at
www.adobe.com/go/documentation.
Most versions of in-product and LiveDocs Help let
you search across the Help systems of multiple
products. Topics may also contain links to relevant
content on the web or to topics in the Help of another
product.
Think of Help, both in the product and on the web, as
a hub for accessing additional content and
communities of users. The most complete and
up-to-date version of Help is always on the web.
How To topics
The How To topics provide a brief overview of the
most common tasks. If you need more information,
click the link at the bottom of the How To topic to view
the related Help topic.
Page 11

ADOBE ACROBAT 3D VERSION 8
Getting Started Guide
A-3
PDF documentation
Th e in -produ ct He lp i s al so av ail abl e as an Adob e PDF
that is optimized for printing. Other documents, such
as installation guides and white papers, may also be
provided as PDFs.
All PDF documentation is available through the
Adobe Help Resource Center, at
www.adobe.com/go/documentation. To see the PDF
do c um ent at io n i nc lu de d w it h yo ur so ft wa re , l oo k i n t he
Documents folder on the installation or content DVD.
Printed documentation
Printed editions of the in-product Help may be
available for purchase in the Adobe Store, at
www.adobe.com/go/store. You can also find books
published by Adobe publishing partners in the Adobe
Store.
A printed workflow guide is included with all Adobe
Creative Suite® 3 products, and stand-alone Adobe
products may include a printed getting started guide.
Using Help in the product
In-product Help is available through the Help menu.
After you start the Adobe Help Viewer, you can access
Help for additional Adobe products installed on your
computer. Topics may contain links to additional
content on the web.
If you search for a phrase, such as “shape tool,”
enclose it in quotation marks to see only those topics
that include all the words in the phrase.
Accessibility features
Adobe Help content is accessible to people with
disabilities—such as mobility impairments, blindness,
and low vision. In-product Help supports these
standard accessibility features:
• The user can change text size with standard context
menu commands (Microsoft® Windows®) and
standard menu commands (Apple Mac OS).
• Links are underlined for easy recognition.
• If link text doesn’t match the title of the destination,
the title is referenced in the Title attribute of the
Anchor tag. For example, the Previous and Next
links include the titles of the previous and next
topics.
• Content supports high-contrast mode.
• Images without captions include alternate text.
• Each frame has a title to indicate its purpose.
• Standard HTML tags define content structure for
screen reading or text-to-speech tools.
• Style sheets control formatting, so there are no
embedded fonts.
Keyboard shortcuts for Help toolbar controls
(Windows)
Back button Alt+Left Arrow
Forward button Alt+Right Arrow
Print Ctrl+P
About button Ctrl+I
Help For menu Alt+Down Arrow or Alt+Up Arrow to
view Help for another application
Page 12
CHAPTER 1
A-4
Getting started
Keyboard shortcuts for Help navigation (Windows)
• To move between panes, press Ctrl+Tab (forward)
and Shift+Ctrl+Tab (backward).
• To move through and outline links in a pane, press
Tab (forward) or Shift+Tab (backward).
• To activate an outlined link, press Enter.
• To change text size, press Ctrl/Command+plus sign
(+) or Ctrl/Command+minus sign (-).
Resources
Adobe Video Workshop
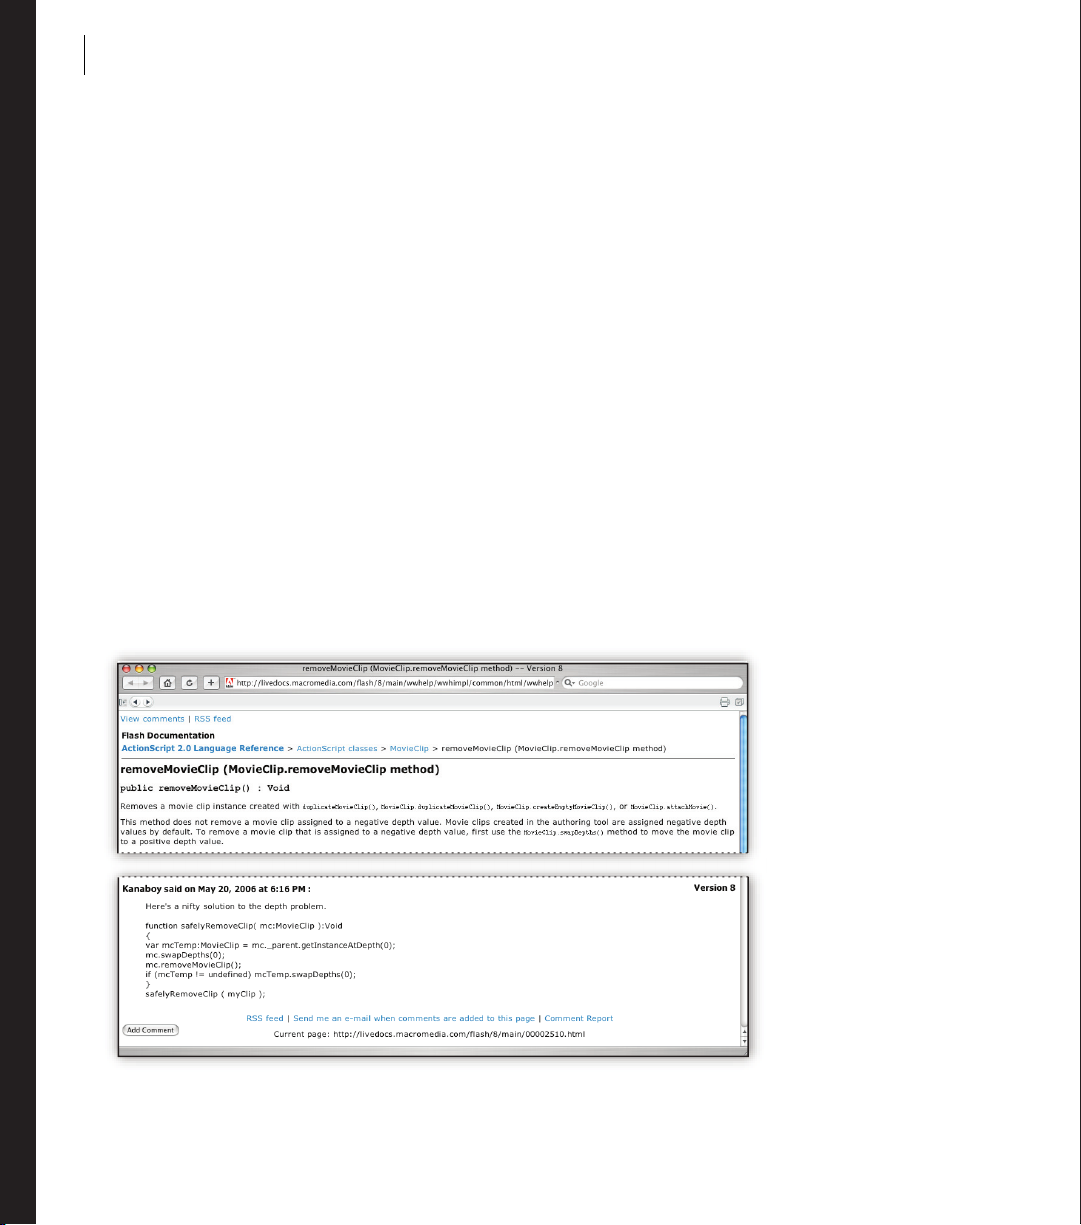
The Adobe Creative Suite 3 Video Workshop offers
over 200 training videos covering a wide range of
subjects for print, web, and video professionals.
You can use the Adobe Video Workshop to learn about
any Creative Suite 3 product. Many videos show you
how to use Adobe applications together.
When you start the Adobe Video Workshop, you
choose the products you want to learn and the subjects
you want to view. You can see details about each video
to focus and direct your learning.
Community of presenters
With this release, Adobe Systems invited the
community of its users to share their expertise and
insights. Adobe and lynda.com present tutorials, tips,
and tricks from leading designers and developers such
as Joseph Lowery, Katrin Eismann, and Chris
Georgenes. You can see and hear Adobe experts such
as Lynn Grillo, Greg Rewis, and Russell Brown. In all,
over 30 product experts share their knowledge.
Page 13
ADOBE ACROBAT 3D VERSION 8
Getting Started Guide
A-5
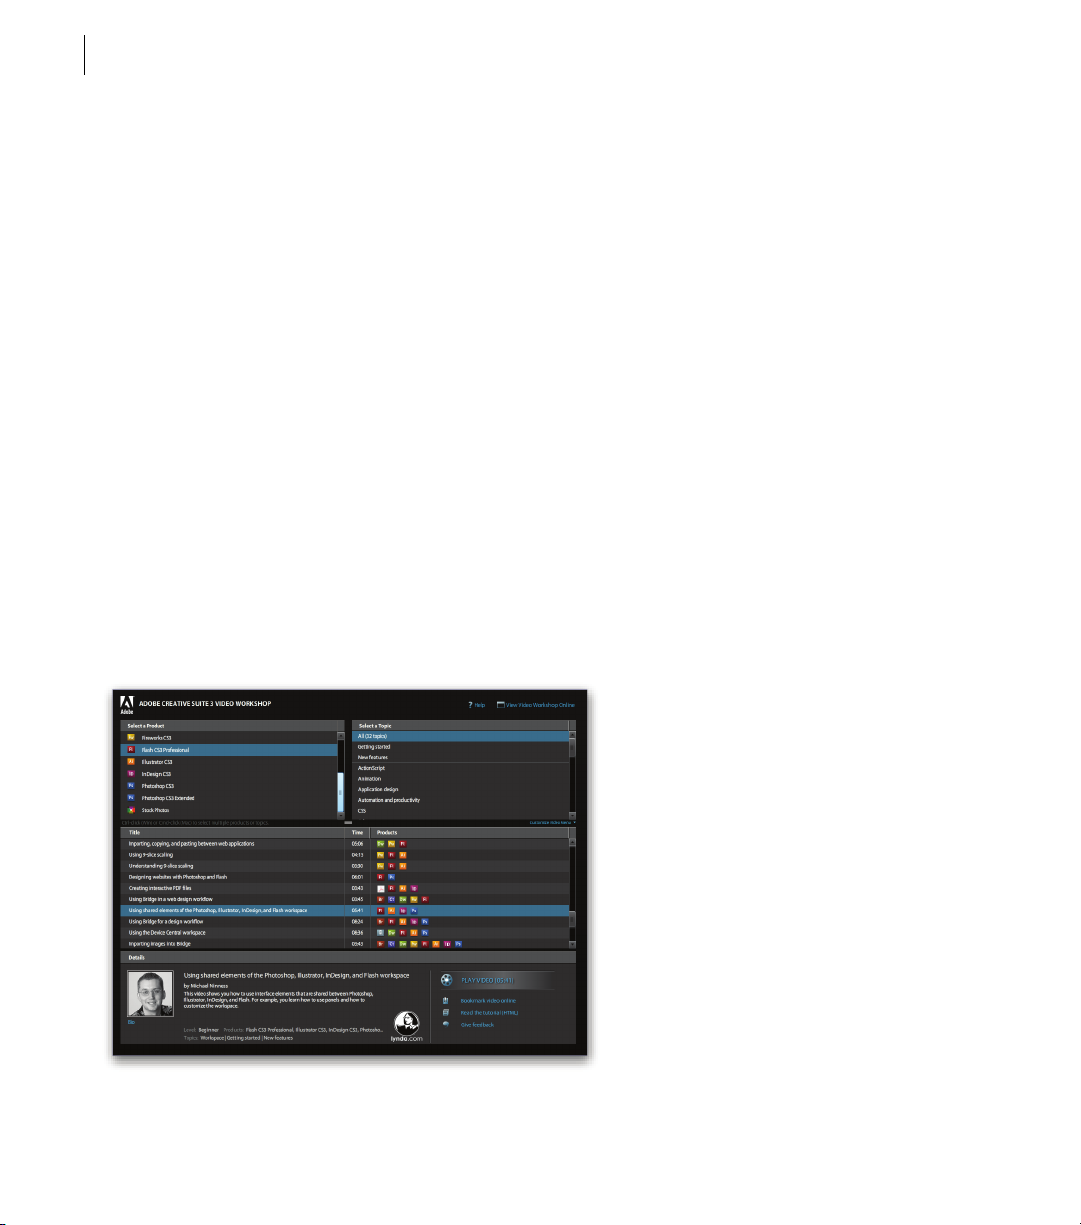
Tutorials and source files
The Adobe Video Workshop includes training for
novices and experienced users. You’ll also find videos
on new features and key techniques. Each video covers
a single subject and typically runs about 3-5 minutes.
Most videos come with an illustrated tutorial and
source files, so you can print detailed steps and try the
tutorial on your own.
Using Adobe Video Workshop
You can access Adobe Video Workshop using the
DVD included with your Creative Suite 3 product.
It’s also available online at
www.adobe.com/go/learn_videotutorials. Adobe will
regularly add new videos to the online Video
Workshop, so check in to see what’s new.
Acrobat videos
Adobe Video Workshop covers a wide range of
subjects for Adobe Acrobat®, including these:
• Setting up the workspace and taskbars
• Combining files into a PDF
• Converting PDFs
• Modifying PDFs
• Adding comments to PDFs
• Wor king wit h shar e d re v ie w s
• Reviewing and summarizing comments
• Adding security to forms
• Collaborating in real time with Adobe Acrobat
Connect™
• Preflighting files
• Printing documents
Page 14
CHAPTER 1
A-6
Getting started
To access Adobe Creative Suite 3 video
tutorials, visit Adobe Video Workshop at
www.adobe.com/go/learn_videotutorials.
Extras
You have access to a wide variety of resources that will
help you make the most of your Adobe software. Some
of these resources are installed on your computer
during the setup process; additional content is included
on the installation or content disc, if applicable. Unique
extras are also offered online by the Adobe Exchange
community, at www.adobe.com/go/exchange.
Installed resources
During software installation, a number of resources
are placed in your application folder. To view those
files, navigate to the application folder on your
computer.
Disc content
The disc included with your product may contain
additional resources for use with the software, such as
presets, plug-ins, a PDF version of the Help, technical
information, and other documents.
Adobe Exchange
For more free content, visit
www.adobe.com/go/exchange, an online community
where users download and share thousands of free
actions, extensions, plug-ins, and other content for use
with Adobe products.
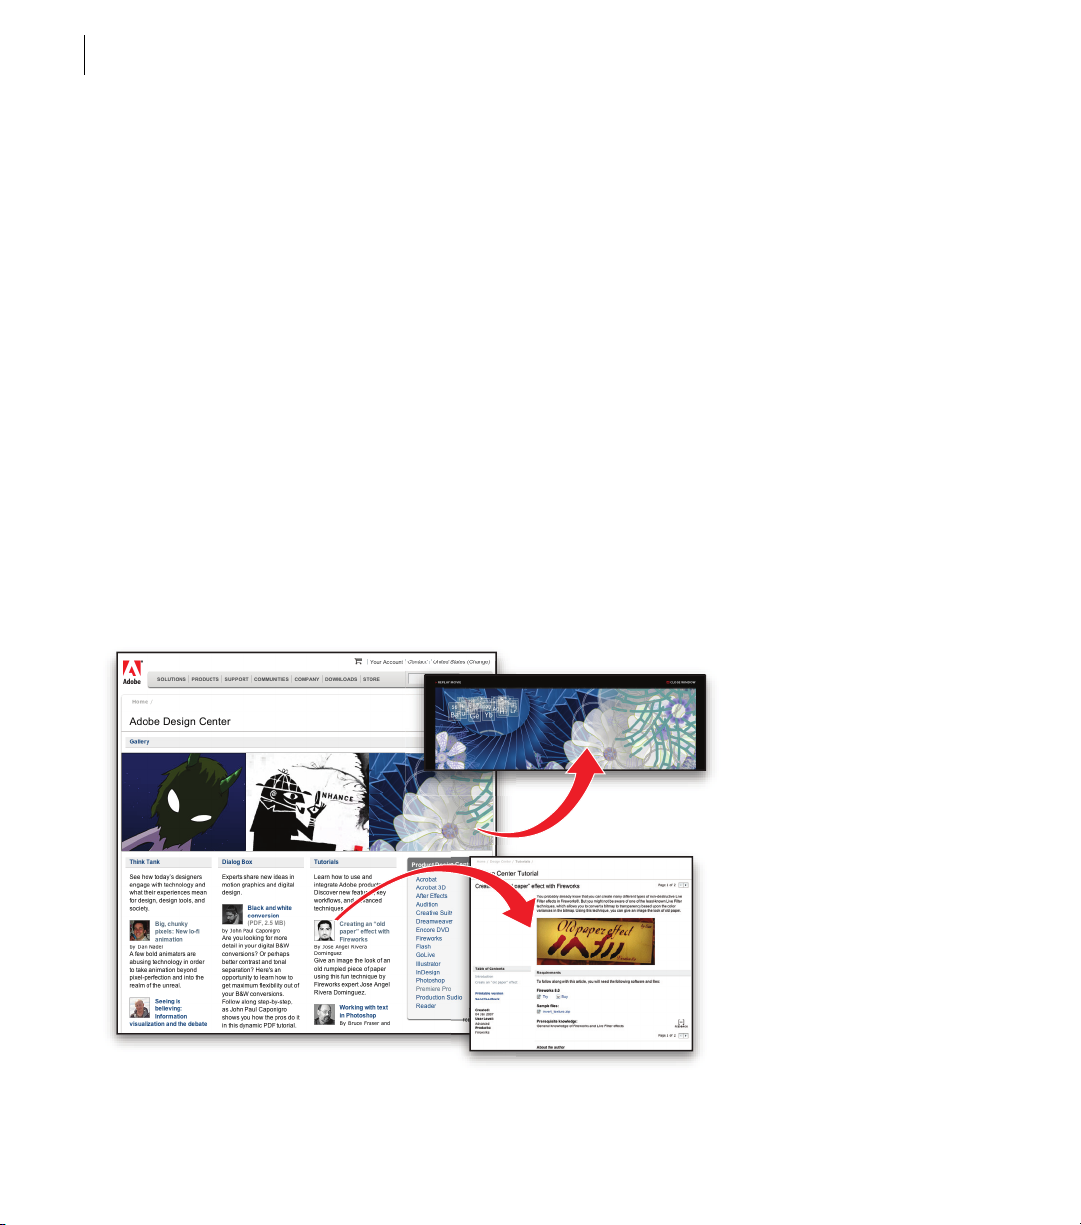
Adobe Design Center
Adobe Design Center offers articles, inspiration, and
instruction from industry experts, top designers, and
Adobe publishing partners. New content is added
monthly.
Page 15
ADOBE ACROBAT 3D VERSION 8
Getting Started Guide
A-7
You can find hundreds of tutorials for design products
and learn tips and techniques through videos, HTML
tutorials, and sample book chapters.
New ideas are the heart of Think Tank, Dialog Box,
and Gallery:
• Think Tank articles consider how today’s designers
engage with technology and what their experiences
mean for design, design tools, and society.
• In Dialog Box, experts share new ideas in motion
graphics and digital design.
• The Gallery showcases how artists communicate
design in motion.
Visit Adobe Design Center at
www.adobe.com/designcenter.
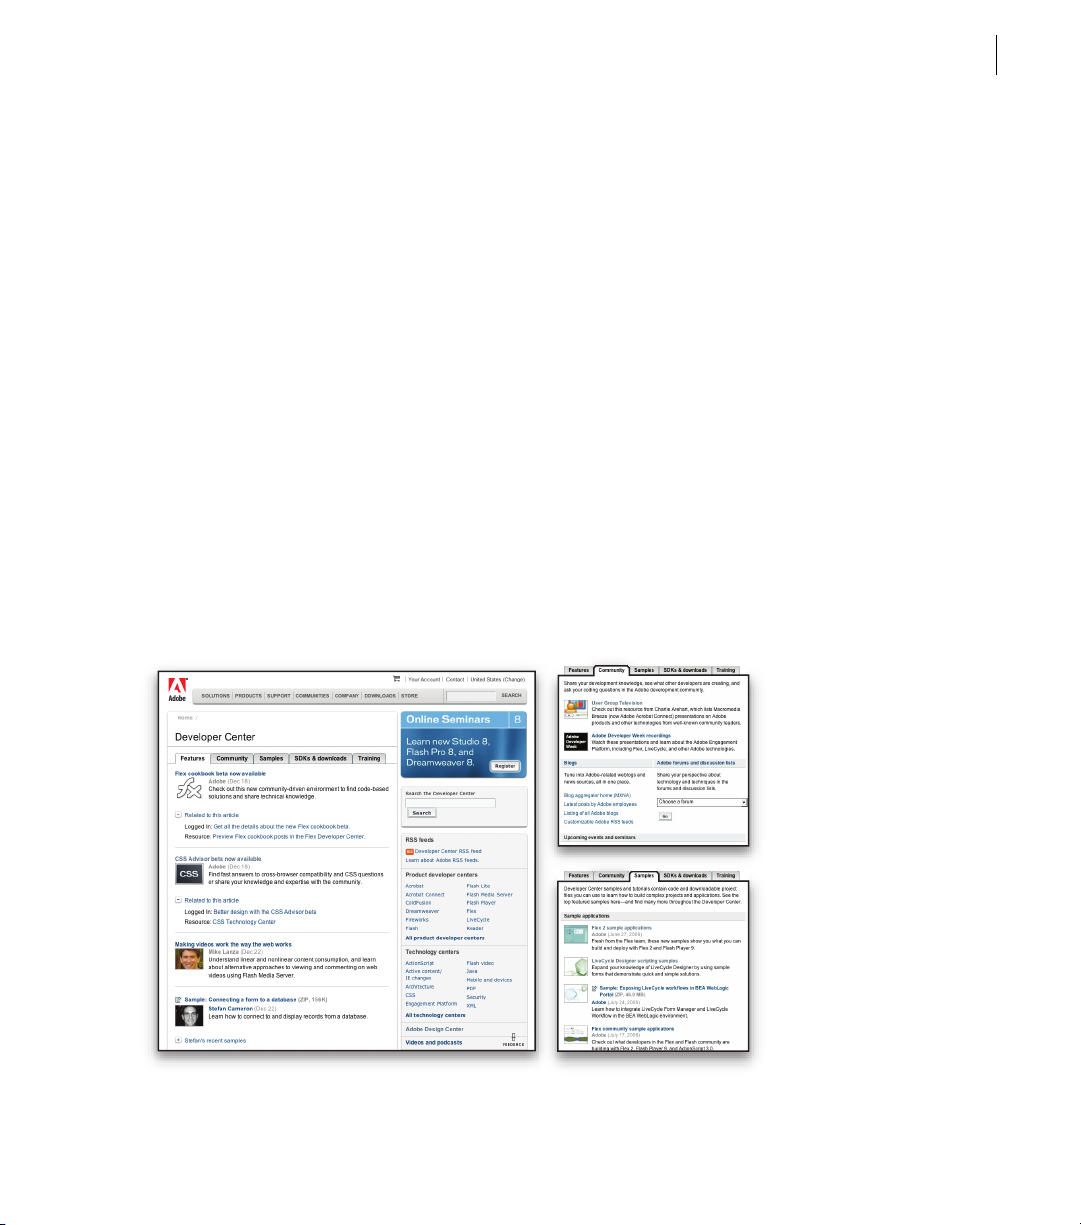
Adobe Developer Center
Adobe Developer Center provides samples, tutorials,
articles, and community resources for developers who
build rich Internet applications, websites, mobile
content, and other projects using Adobe products.
The Developer Center also contains resources for
developers who develop plug-ins for Adobe products.
In addition to sample code and tutorials, you'll find
RSS feeds, online seminars, SDKs, scripting guides,
and other technical resources.
Visit Adobe Developer Center at
www.adobe.com/go/developer.
Page 16

CHAPTER 1
A-8
Getting started
Customer support
Visit the Adobe Support website, at
www.adobe.com/support, to find troubleshooting
information for your product and to learn about free
and paid technical support options. Follow the Training
link for access to Adobe Press books, a variety of
training resources, Adobe software certification
programs, and more.
Downloads
Visit www.adobe.com/go/downloads to find free
updates, tryouts, and other useful software. In addition,
the Adobe Store (at www.adobe.com/go/store) provides
access to thousands of plug-ins from third-party
developers, helping you to automate tasks, customize
workflows, create specialized professional effects, and
more.
Adobe Labs
Adobe Labs gives you the opportunity to experience
and evaluate new and emerging technologies and
products from Adobe.
At Adobe Labs, you have access to resources such as
these:
• Prerelease software and technologies
• Code samples and best practices to accelerate your
learning
• Early versions of product and technical
documentation
• Forums, wiki-based content, and other
collaborative resources to help you interact with
like-minded developers
Adobe Labs fosters a collaborative software
development process. In this environment, customers
quickly become productive with new products and
technologies. Adobe Labs is also a forum for early
feedback, which the Adobe development teams use to
create software that meets the needs and expectations
of the community.
Visit Adobe Labs at www.adobe.com/go/labs.
User communities
User communities feature forums, blogs, and other
avenues for users to share technologies, tools, and
information. Users can ask questions and find out how
others are getting the most out of their software.
User-to-user forums are available in English, French,
German, and Japanese; blogs are posted in a wide
range of languages.
To participate in forums or blogs, visit
www.adobe.com/communities.
Workflows
Adobe® Acrobat® 3D Version 8 software offers robust
tools to support many aspects of your document
processes.
• Create Adobe PDFs from many different
applications.
• Assemble files from multiple sources into a PDF
package.
• Convert PDFs to other formats, such as Word,
HTML, or JPG.
Page 17

• Restrict access to your PDFs using various security
features.
• Approve a PDF by digitally signing and certifying it.
• Conduct reviews using numerous commenting and
review tools.
• Create fillable forms, distribute them securely, and
collect the form data.
Browse through the following Quickstart topics to get
an overview of Acrobat 3D capabilities. For more
information on a topic, see Help.
Create PDFs
PDFs retain the appearance of your original
documents, so you don’t need to worry about losing
document quality. And because PDFs can be viewed
on Windows, Mac OS, or UNIX by using free Adobe
Reader® software, anyone can view and print PDFs
without having the source applications. You can create
PDFs from within Acrobat 3D, or from various source
applications.
ADOBE ACROBAT 3D VERSION 8
Getting Started Guide
Convert your original document (left) to Adobe PDF (center), and
then add bookmarks, comments, and so on in Acrobat (right).
A-9
For example, you can convert an Outlook email
message discussing project issues to a PDF and then
attach it to a PDF containing the project specification
and schedule. Or you may have personnel documents
that are currently only on paper. You can easily create
PDFs from each of these paper documents as part of
the process of creating an online human resources
package.
Create from a file
To create a PDF from within Acrobat, the application
that created the original file must be installed on the
system in most cases.
1 Click the Create PDF button and choose From
File.
2 Select the file you want to convert, and click Open.
The authoring application opens automatically or a
progress dialog box appears. If the file is in an
unsupported format, a message appears, telling you
that the file cannot be converted to a PDF.
Page 18
A-10
CHAPTER 1
Getting started
Create from a paper document
You can create a PDF directly from a paper document
using Acrobat 3D and your scanner.
1 Click the Create PDF button and choose From
Scanner.
2 Select the input, output, and document options in
the Acrobat Scan dialog box, and then click Scan.
3 If creating a new PDF, specify a filename and
location, and click Save.
4 Select Scan More Pages or Scanning Complete.
Create from a web page
You can download and convert web pages from the top
level, or any number of subordinate levels, of a URL.
1 Click the Create PDF button and choose From
Web Pa ge.
2 Type the URL into the text box. (Click Browse to
convert a web page you have already downloaded.)
3 Specify the number of levels to download and
where to download files from, and then click Create.
To convert the PDF so that it cannot be re-edited,
choose Document > Prevent Further Edits.
Create from Word
After you install Acrobat 3D, an Acrobat PDFMaker
toolbar is added to Word. In Word 2007 for Windows
instead of the toolbar, you need to access the
PDFMaker options from the Acrobat Ribbon.
1 In Word, open the file you want to convert.
2 Do one of the following:
• (Word 2007 for Windows) Click Acrobat and then
click the Create PDF button .
• (Other versions of Word) Click the Convert To
Adobe PDF button .
3 Specify a filename and location, and click Save.
4 (Mac OS only) Click View File or Done.
You can also convert a file to PDF and then email it for
review by clicking Create and Send For Review
(Office 2007) or Send For Review (Other versions
of Office).
Create from scratch
You can create small PDFs that can be edited in
Acrobat 3D.
1 Choose File > Create PDF > From Blank Page.
2 Click in the document and begin typing. Use
options on the New Document toolbar to change text
attributes.
3 Save the document.
4 To continue editing, choose Document > Resume
Editing.
Create from Outlook (Windows)
After you install Acrobat 3D, an Acrobat PDFMaker
toolbar is added to Outlook.
1 Select the desired email messages and click Create
Adobe PDF From Selected Messages .
2 Specify a filename and location, and click Save.
The selected messages are converted to a PDF package
or a merged PDF, depending upon conversion
settings. To convert email folders, select the desired
folders and click Create Adobe PDF From Folders .
You can also automatically archive email messages and
folders.
Page 19

ADOBE ACROBAT 3D VERSION 8
Getting Started Guide
A-11
Create from Lotus Notes (Windows)
After you install Acrobat 3D, an Acrobat PDFMaker
toolbar is added to Lotus Notes and commands are
added to the Actions menu.
1 Select the desired email messages and click Convert
Selected Messages To Adobe PDF .
2 Specify a filename and location, and click Save.
The messages are converted to a merged PDF or a PDF
package, depending upon conversion settings. You can
convert an entire folder to PDF by clicking Convert
Selected Folder to Adobe PDF .
Create from Internet Explorer (Windows)
You can convert an entire web page or a selected
portion of it to PDF.
1 In Internet Explorer, open the web page you want to
convert.
2 (Optional) Drag to select the text and images you
want to convert.
3 Click Convert Web Page To PDF .
4 Specify a filename and location, and click Save.
You can also convert one or more web pages, and even
entire websites, from within Acrobat 3D.
Create using Adobe PDF printer
In many applications, you can use the Print command
with the Adobe PDF printer to convert a file to PDF.
1 Open the file you want to convert, and choose File
> Print.
2 Choose Adobe PDF from the list of printers, and
print the file.
3 If prompted, specify a filename and location, and
click Save.
You can also choose a different default Adobe PDF
printer setting or create a customized setting.
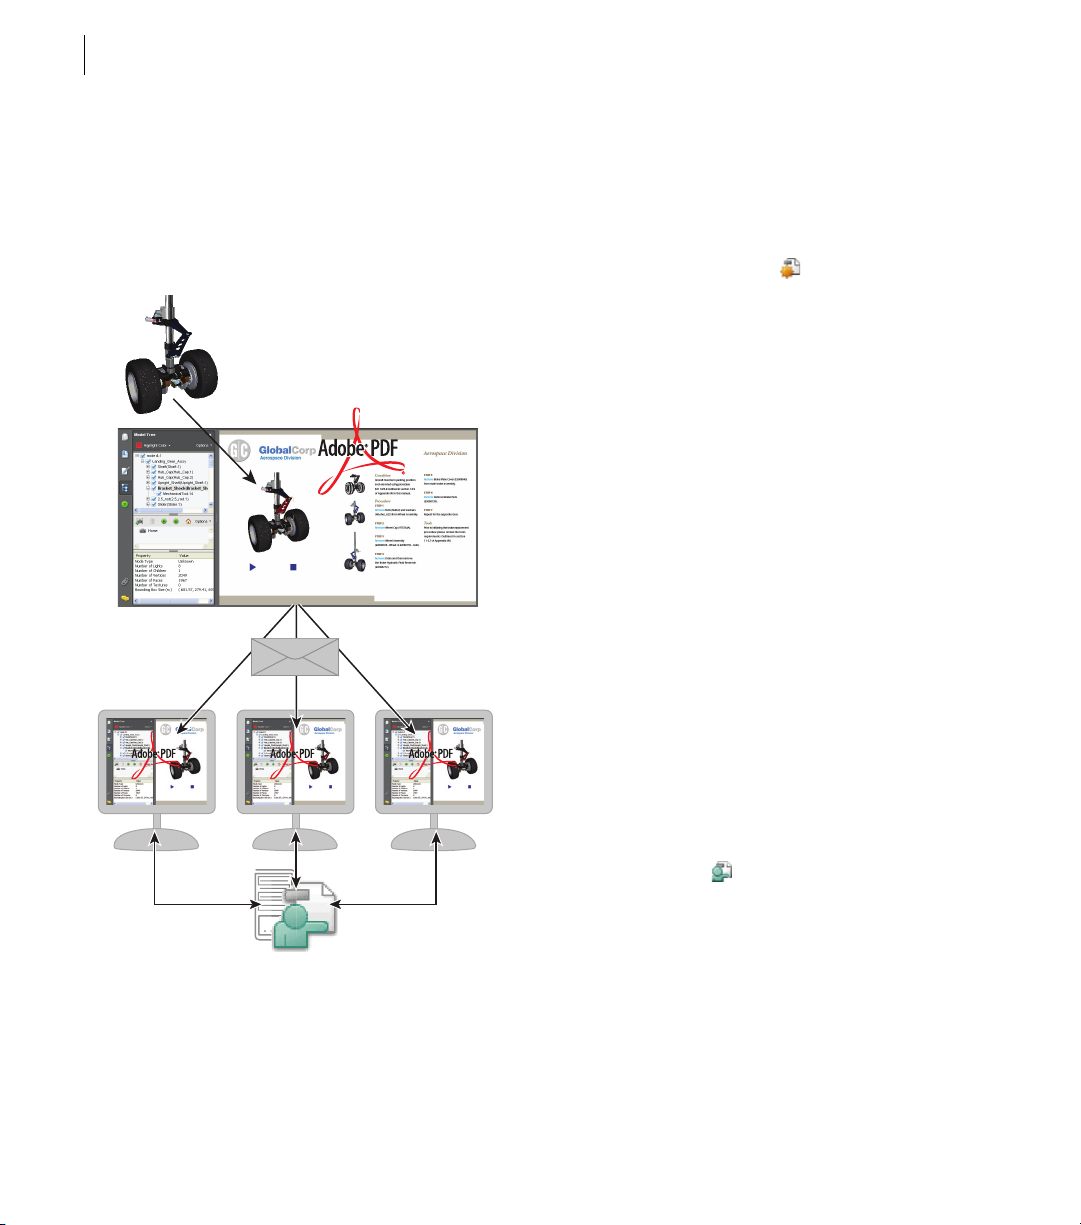
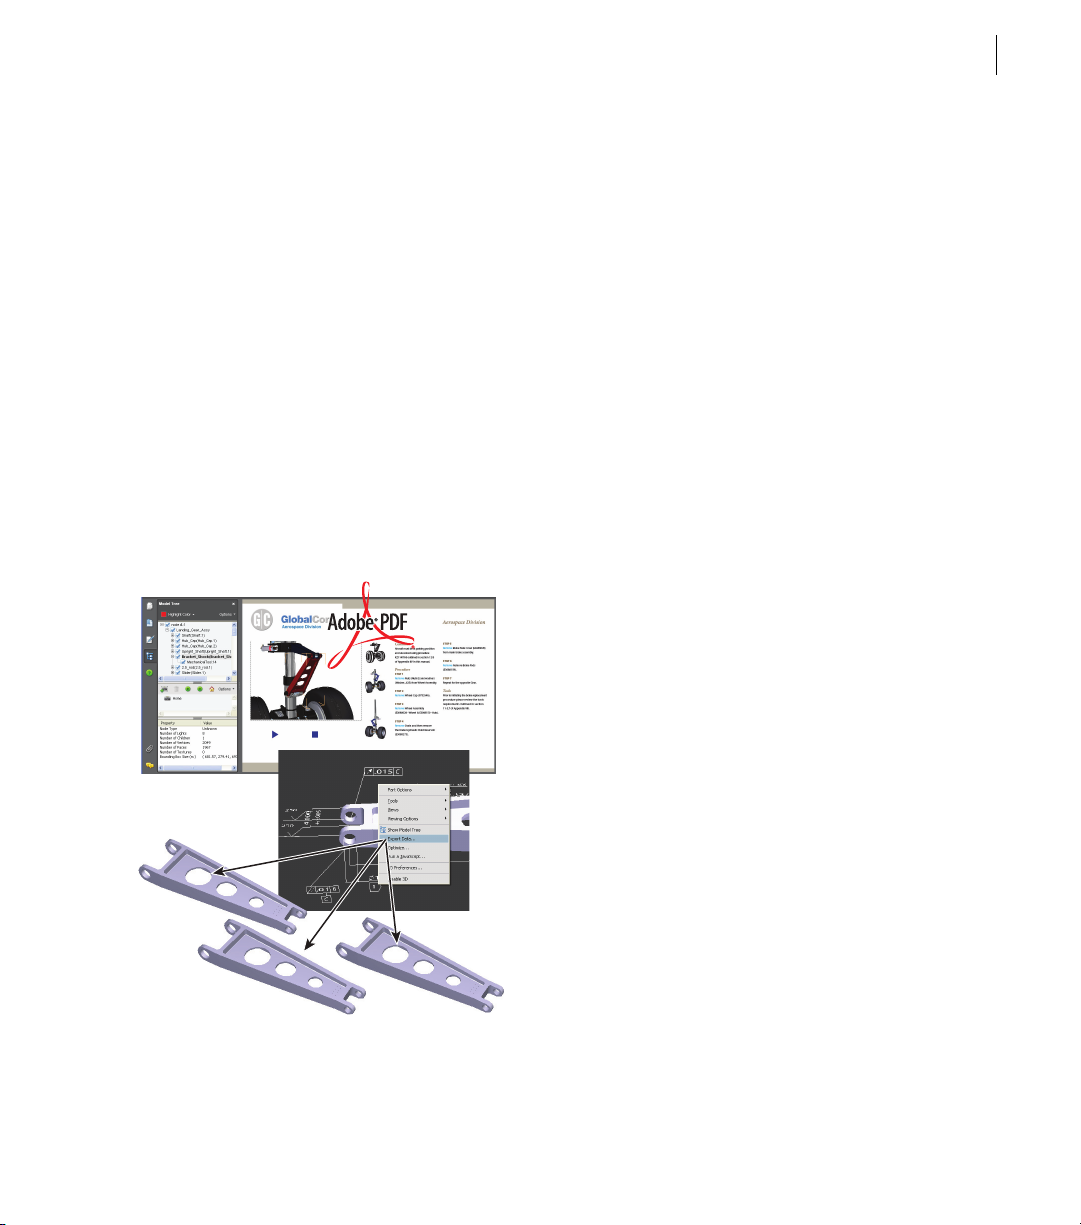
Collaborate on 3D designs
Share and collaborate on your 3D design ideas by
converting them to secure PDF files that others can
comment on in free Adobe Reader. Start an email-based
review to solicit feedback from your collaborators. The
email-based review wizard enables commenting for
Reader users by default. Or, you can start an Acrobat
Connect meeting that lets you demonstrate and discuss
3D designs on your desktop in real time.
Note: If you want to secure your 3D PDF, do so before
you start a review. You can’t change security properties
in a Reader-enabled PDF.
Page 20
A-12
CHAPTER 1
Getting started
Collaborators can explore all aspects of the 3D model,
from hidden internal structures to exploded
animations. They can rotate, cross-section, and
measure parts while adding their comments in notes,
drawings, and other markups.
Convert a 3D file to PDF
Convert any supported 3D file to PDF. (For a list of
supported formats, choose Edit > Preferences, and
select Convert To PDF on the left.)
1 Click the Create PDF button on the Tasks
toolbar, and choose From File.
2 Browse to select the 3D CAD file you want to
convert.
3 Select the desired preset or individual settings.
Add comments to a 3D model
By adding comments, you create a new view that’s
associated with those comments.
1 Select a tool from the Comment & Markup toolbar.
2 Click in the 3D model to add a comment and create
a new view in the Model Tree.
You can add comments to an existing comment view
by selecting that view in the Model Tree before you
click in the model.
Start a meeting
If you have an Adobe Acrobat Connect account, you
can start a meeting to review PDFs in a web browser.
You can also create a trial account to start a meeting.
Note: Acrobat Connect is not available in all languages.
1 Click Start Meeting in the Tasks toolbar.
2 Click Log In, and then type your Meeting URL,
login, and password. (Or click Create Trial Account
and follow the on-screen instructions.)
3 Click Send An E-mail Invitation or Share My
Screen.
Page 21
ADOBE ACROBAT 3D VERSION 8
Getting Started Guide
A-13
CAD, CAM, CAE interoperability
From drawing board to manufacturing plant, PDF
can ease the flow of Computer Aided Design,
Manufacturing, and Engineering (CAD, CAM, CAE)
information. For example, you can quickly convert an
entire assembly to a PDF that’s a fraction of the original
file size while retaining geometric dimensioning and
tolerancing and other product specifications.
By using Acrobat 3D, manufacturers and suppliers can
open virtually any 3D CAD file without installing the
original CAD application or a CAD translator. Import
and view Product Manufacturing Information (PMI)
from CATIA V5, I-DEAS, JT, NX, and Pro/ENGINEER
files. Once the design is finalized, export geometry to a
standard file format that can be reused in CAM
applications to cut, build, and assemble the parts.
View product information for a 3D model
You can view Product Manufacturing Information
(PMI) in the Model Tree and in the 3D model, if you
imported it during PDF conversion.
1 Click the 3D model, and click the Model Tree icon
in the 3D toolbar.
2 In the Model Tree, click each view to see the PMI
associated with that view.
Export geometry from a 3D model
If geometry was retained during conversion, you can
export it as IGES, STEP, VRML, or ParaSolid file
formats, which most CAE and CAM applications can
read.
1 Right-click the 3D model and choose Export Data
from the menu.
2 Choose a file type and click Settings to specify
options for that file type.
Combine files
Combine files from various sources into a single,
merged PDF or an assembled PDF package of related
files. For example, you might collect brochures,
presentations, spreadsheets, and contracts into a
cohesive sales proposal.
If you merge files into a single PDF, you can then add
unifying elements to help tie the document together.
For example, you can add a header or footer to the new
file. Or renumber pages so that the page numbers that
appear in the Page Navigation toolbar are consecutive
across the merged files. You can also rotate, delete, and
replace pages as necessary to create a cohesive look
and keep the PDF up-to-date.
Page 22
A-14
CHAPTER 1
Getting started
Assemble PDFs in a package
A PDF package lets you assemble related information
into a single PDF while maintaining individual PDFs
within it.
1 Click Combine Files , and then click Add Files.
2 Select the files you want to combine, and click Add
Files.
3 Adjust the order of files as desired, and then choose
a file size and conversion setting.
4 Click Next, select Assemble Files Into A PDF
Package, and click Create.
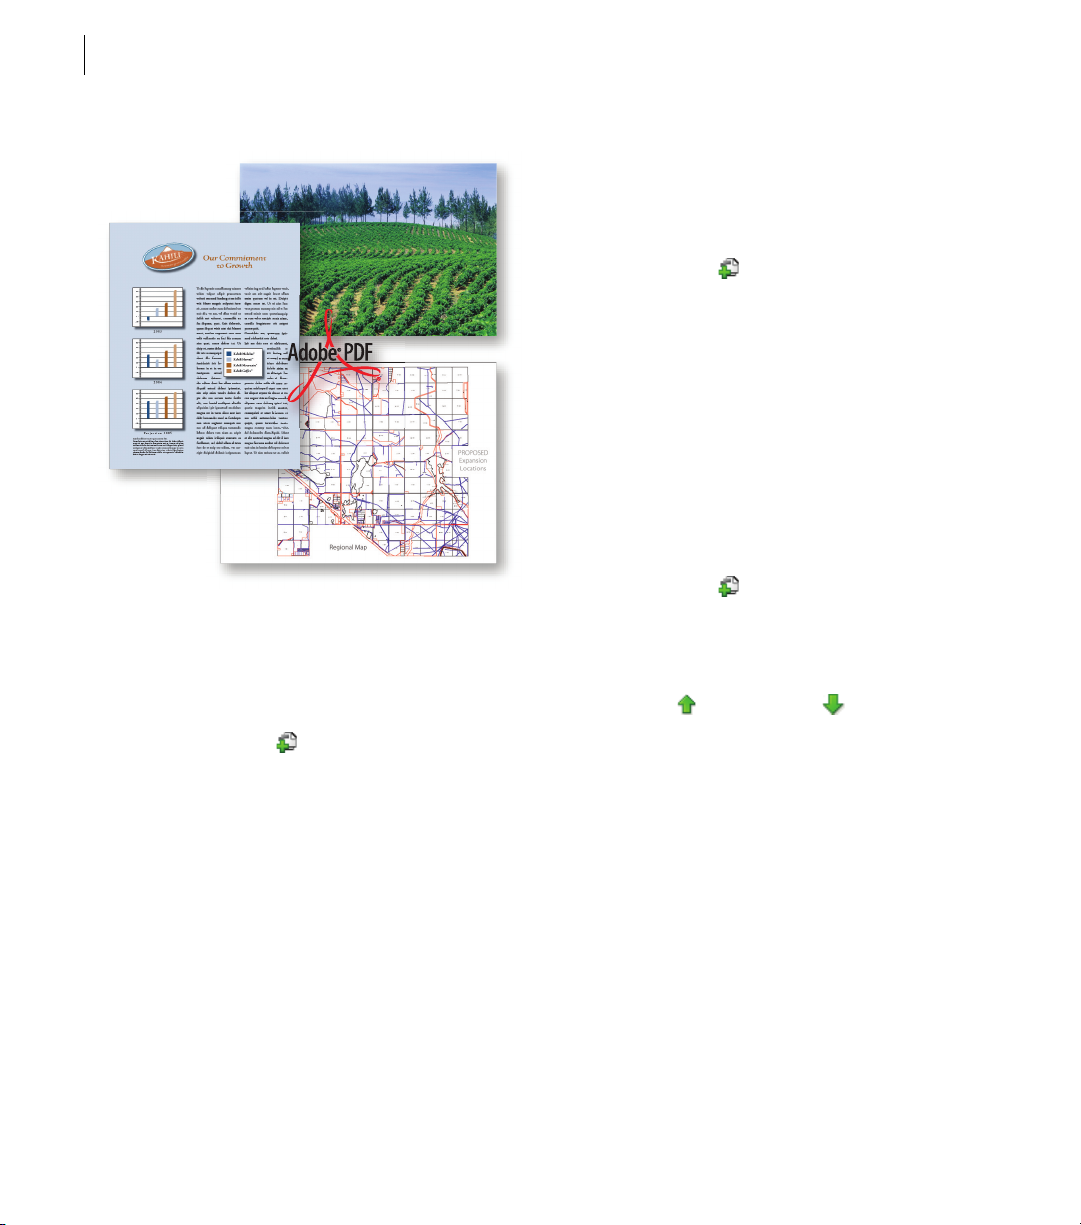
Modify a list of files to combine
When combining files, you have several options for
adjusting the set of files.
Merge documents from different applications into one Adobe PDF.
Create a PDF from multiple files
You can easily merge files of different types into a
single PDF.
1 Click Combine Files , and then click Add Files.
2 Select the files you want to combine, and click Add
Files.
3 Adjust the order of files as desired, and then choose
a file size and conversion setting.
4 Click Next, select Merge Files Into A Single PDF,
and click Create.
Rather than merging files, you can also create a PDF
package of files.
1 Click Combine Files , click Add Files, and add
the desired files.
2 To modify the list of files or remove a file from the
list, select a file, and then do any of the following:
• Click Move Up or Move Down or drag the
file to a new location.
• Click Choose Pages to include a subset of pages.
(Button name might change based on file type.)
• Click Remove or press Delete.
Add headers and footers
You can add a single header and footer throughout a
PDF or apply different headers and footers selectively
to various pages.
1 Choose Document > Header & Footer > Add. If a
message appears, click Add New.
2 Specify font and margin settings.
Page 23

ADOBE ACROBAT 3D VERSION 8
Getting Started Guide
A-15
3 In the header and footer text boxes, type the desired
text. Click the buttons below the boxes to insert a page
number or date.
You can save header and footer settings for easy reuse.
Renumber pages
When you renumber pages, only the numbers that
appear in the Pages panel and the toolbar are affected.
To change the numbers that appear on the document
pages, add a header or footer.
1 Click the Pages button , and choose Number
Pages from the Options menu.
2
Specify which pages the numbering will be applied to.
3 Specify the numbering style, prefix (if any), and
starting number.
You can also continue the numbering style of the
previous section.
Rotate pages
You can rotate all or selected pages in a PDF.
1 Choose Document > Rotate Pages.
2 Specify the direction of the rotation and the page
range.
3 Choose the desired options from the Rotate menus.
Delete pages
After combining files, you can delete unwanted or
blank pages.
1 (Optional) Click the Pages button in the
navigation pane and select the pages you want to
delete.
2 Choose Document > Delete Pages.
3 Click Selected to delete selected pages or click From
and specify a range.
If you want to retain a copy of the original PDF, make
sure that you save the new document using Save As
rather than Save.
Replace pages
To quickly update a PDF, you can replace individual
pages.
1 Choose Document > Replace Pages.
2 Select the document that contains the replacement
pages, and click Select.
3 Under Original, specify the pages you want to
replace. Under Replacement, specify the beginning
replacement page.
Interactive elements, such as links and bookmarks,
associated with the original pages aren’t deleted.
To temporarily rotate a page, choose View > Rotate
View > Clo c kwise o r Counter c l ockwi s e.
Export
If you don’t have access to the original source file for a
PDF, you can convert the PDF to an editable format.
You can also copy selected text and images to reuse in
other documents. Or extract pages and save them as a
new PDF.
Page 24

A-16
CHAPTER 1
Getting started
For example, you might save a brochure in HTML
format for use on your company’s website. Or extract
a few relevant pages from a large in-house document
to share with clients. You could easily repurpose
images and text from a design specification by copying
them into a Word, Photoshop, or InDesign document.
Export as Word
If you don’t have the original file from which a PDF
was created, you can save the PDF as a Word
document that you can then edit in Word.
1 Click Export on the Tasks toolbar, and then
choose Word Document.
2 Click Settings to set conversion options.
Note: When you save a PDF to Word format, the
resulting file isn’t equivalent to a file created in Word;
some coding information may be lost.
Export as HTML or XML
To easily use the content of a PDF on the web, simply
convert the PDF to HTML or XML format.
1 Click Export on the Tasks toolbar, and then
choose HTML Web Page or XML 1.0.
2 Click Settings to set conversion options.
You can save a PDF in HTML 3.2 format by clicking
Export, and choosing More Formats > HTML 3.2.
2 If saving to RTF or plain text, click Settings to adjust
the conversion settings.
Select and copy text
You can copy words, lines, or columns of text from a PDF.
1 Using the Select tool , do any of the following:
• Drag across text.
• Double-click or triple-click to select a word or a line
of text.
2
Move the pointer over the icon that appears next to the
selected text, and then choose an option from the menu.
If you cannot select text, it may be part of an image or
from a scanned document.
Select and copy an image
You can copy an image from a PDF to the clipboard or
to another application, or you can save it to a file.
1 Using the Select tool , click an image or drag to
select a portion of it after the pointer changes to a
crosshairs icon.
2 Do any of the following:
• Drag the image into an open document in another
application.
• Right-click/Control-click the image and choose
Copy Image or Save Image As.
Export as text
You can save a PDF in Rich Text Format (RTF), as
accessible text, or as plain text. RTF preserves the most
formatting. Accessible text preserves such items as
comments, form fields, and alternate text.
1 Click Export on the Tasks toolbar, choose More
Formats, and then choose the desired text format.
Take a snapshot of a page
Use the Snapshot tool to copy all selected content. Text
and images are both copied as an image.
1 Choose Tools > Select & Zoom > Snapshot tool.
2 Drag on the page to select content, or click to copy
the entire page.
Page 25

ADOBE ACROBAT 3D VERSION 8
Getting Started Guide
A-17
The selected content is copied to the clipboard when
you release the mouse button.
Extract pages
When you extract pages, they are saved in a new PDF.
1 Choose Document > Extract Pages.
2 Specify the range of pages to extract.
3 Choose whether you want to delete the pages after
extracting them.
4 To save the extracted pages as individual files,
rather than a single PDF, select Extract Pages As
Separate Files.
All links, comments, and form fields on the extracted
pages are also extracted, but bookmarks and articles
are not.
Secure
You can use password or certificate encryption, as well
as server-based policies, to help control access to your
PDFs. These security features allow you to restrict
what others can do and see in the PDFs you create.
For example, you can create read-only files for web
distribution. Or limit access in files that you send out
for review so that only commenting is allowed. You
can redact sensitive content in a legal brief or examine
a PDF for personal information before making it
available to the public.
Examine a PDF for hidden content
Before making a PDF available to others, you may
wish to remove content that reveals the document
history or that contains your personal information,
such as metadata that lists your name as the author.
1 Choose Document > Examine Document.
2 Select the items you want removed from the PDF,
and click Remove All Checked Items.
3 Save the document with a new name.
You can also examine a PDF at the end of a redaction
process.
Redact sensitive content
Use redaction to remove sensitive content from a PDF.
Important: Save a copy of the PDF before applying
redaction markups.
1 Choose View > Toolbars > Redaction.
2 Click Mark For Redaction , and do any of the
following:
• Double-click a word or an image.
• Drag across text.
• Ctrl/Control-drag over an area of the page.
3 Click Apply Redactions . Search for and remove
hidden content, if desired.
Use Search And Redact to remove all instances of a
search string.
Add a document password
One way to restrict access to a PDF is to add a
Document Open password.
Page 26

A-18
CHAPTER 1
Getting started
Important: There is no way to open the PDF if you
forget the password.
1 Click Secure on the toolbar, and choose
Password Encryption.
2 Select Require A Password To Open The
Document, and type a case-sensitive password in the
text box.
If the PDF already has security applied, you may need
to supply the Permissions password that lets you
change security settings.
Prevent changes to a PDF
Add security restrictions to help prevent others from
changing your PDF.
1 Click Secure on the Tasks toolbar, and choose
Password Encryption.
2 Select Restrict Editing And Printing Of The
Document, and type a Permissions password.
3
Choose an option from the Changes Allowed menu.
For information on using other security methods to
restrict access, see Help.
Recipients can extract and save the encrypted
documents. Once saved, the documents are no longer
encrypted.
Secure PDFs using policies
You can quickly apply security options by using either
a user policy that you create or an organizational policy
created by an Adobe LiveCycle Policy Server
administrator and shared by a group of users. Two
user policies come with Acrobat 3D.
1 Click Secure on the toolbar, and choose one of
the policies listed at the top of the menu.
2 Click Yes, and then change the security settings as
desired.
Create a user security policy
Security policies provide an easy way for you to apply
the same security settings to multiple PDFs. Security
policies include encryption, permission settings, and
information about who can open the PDFs or change
security settings.
1 Cl ick Secu re on the too lba r, and ch oos e Ma nage
Security Policies.
Create secure attachments
You can add security to both PDF and non-PDF
documents by embedding them in an encrypted
envelope, called a security envelope, and sending the
envelope as an email attachment.
1 Click Secure , and choose Create Security
Envelope.
2 Click Add File To Send, and select the desired
documents.
3 Click Next, and follow the on-screen instructions to
create the security envelope.
2 Click New, and select the type of security you want.
3 Click Next, and follow the on-screen instructions to
set up the policy and choose the desired security
settings.
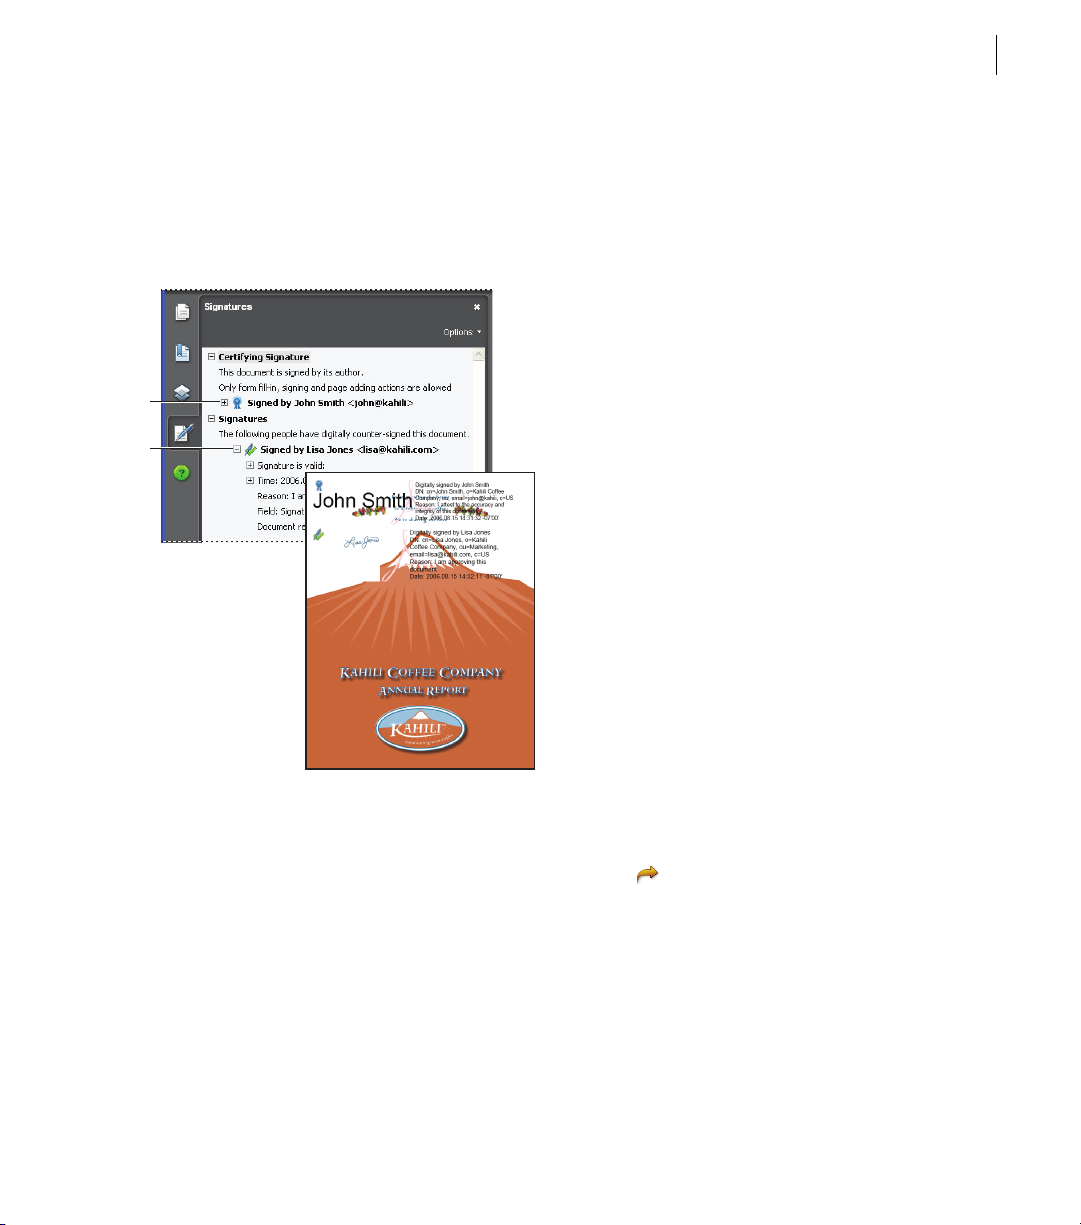
Sign
Digitally signing a PDF is much like signing a paper
document. For example, you can use a digital
signature to indicate that you approve of the contents,
that you have reviewed the contents, or that you agree
to the terms outlined in the document.
Page 27
ADOBE ACROBAT 3D VERSION 8
Getting Started Guide
A-19
Adding a digital signature also allows you to track any
changes made to the PDF. For added security, you can
certify a PDF so that recipients can be assured that the
PDF has not been altered. Finally, you can check
digital signatures to ensure that they are valid.
A
B
3 Select Create A Self-Signed Digital ID For Use With
Acrobat.
4 Follow the on-screen instructions to set up the self-
signed digital ID.
Register a digital ID
You must register a digital ID in Acrobat 3D before
you can use it.
1 Choose Advanced > Security Settings.
2 Select Digital IDs, and click Add ID.
3 Select Browse For An Existing Digital ID File.
4 Follow the on-screen instructions to select the
digital ID file, type your password, and register the
digital ID.
You can create self-signed digital IDs in Acrobat 3D.
Or, see the Adobe website for information on
acquiring a digital ID from Adobe security partners.
Share your certificate
Your digital ID includes a certificate that others
require to validate your signature and encrypt
documents for you.
Sign a PDF to indicate you’ve read it or to certify its contents.
A. Certifying signature B. Digital signature
Create a self-signed digital ID
A digital ID is required to sign documents and apply
certificate security. Self-signed digital IDs created
from Acrobat 3D may be adequate for many
situations. See the Adobe website for information on
acquiring a digital ID from Adobe security partners.
1 Choose Advanced > Security Settings.
2 Select Digital IDs, and click Add ID.
1 Choose Advanced > Security Settings.
2 Select Digital IDs on the left.
3 Select the ID you want to share, and click
Export .
4 Follow the on-screen instructions to email the
certificate or save it to a file.
If you use a third-party security method, you usually
don’t need to share your certificate with others.
Page 28

A-20
CHAPTER 1
Getting started
Create a signature appearance
You can modify your digital signature appearance. For
example, you can include your scanned signature.
1 (Optional) Save the desired image on a page by
itself, and convert the page to PDF.
2 Choose Edit > Preferences (Windows) or
Acrobat 3D (Mac OS) > Preferences, and select
Security.
3 Click New, and type a title.
4 (Optional) Select Imported Graphic, click File, and
select the desired file.
5 Specify options as desired.
Sign a PDF
Use a digital signature to indicate your approval. For
best results, change your security preferences to
always sign in Preview Document mode, so that you
can view and sign the PDF in a secure state.
1 Click the signature field. Or, click Sign , and
choose Sign Document.
2 Follow the on-screen instructions to apply your
digital signature.
If the document does not contain an unsigned
signature field, click Sign and choose Place Signature
to sign the PDF.
Certify a PDF
Certifying a PDF indicates that you approve of its
content and allows you to specify the types of changes
that are permitted for the PDF to remain certified.
1 Click Sign on the Tasks toolbar, choose Certify
With Visi b le Sign atu re or Cer t ify Wit hout Visibl e
Signature, and click OK.
2 If certifying with a visible signature, draw a
signature field.
3 Follow the on-screen instructions to apply the
certifying signature.
4 Save the PDF using a different filename.
Validate signatures
When you open a document, a status icon appears
next to the signature, indicating if the signature is
valid.
1 Click Signatures in the navigation pane, and
select the signature.
2 Right-click/Control-click and choose Show
Signature Properties.
3 Use the various tabs and options in the Signature
Properties dialog box to resolve any signature issues.
For example, if the identity is unknown or unverified,
click the Signer tab, and click Show Certificate to
determine if the certificate is trusted.
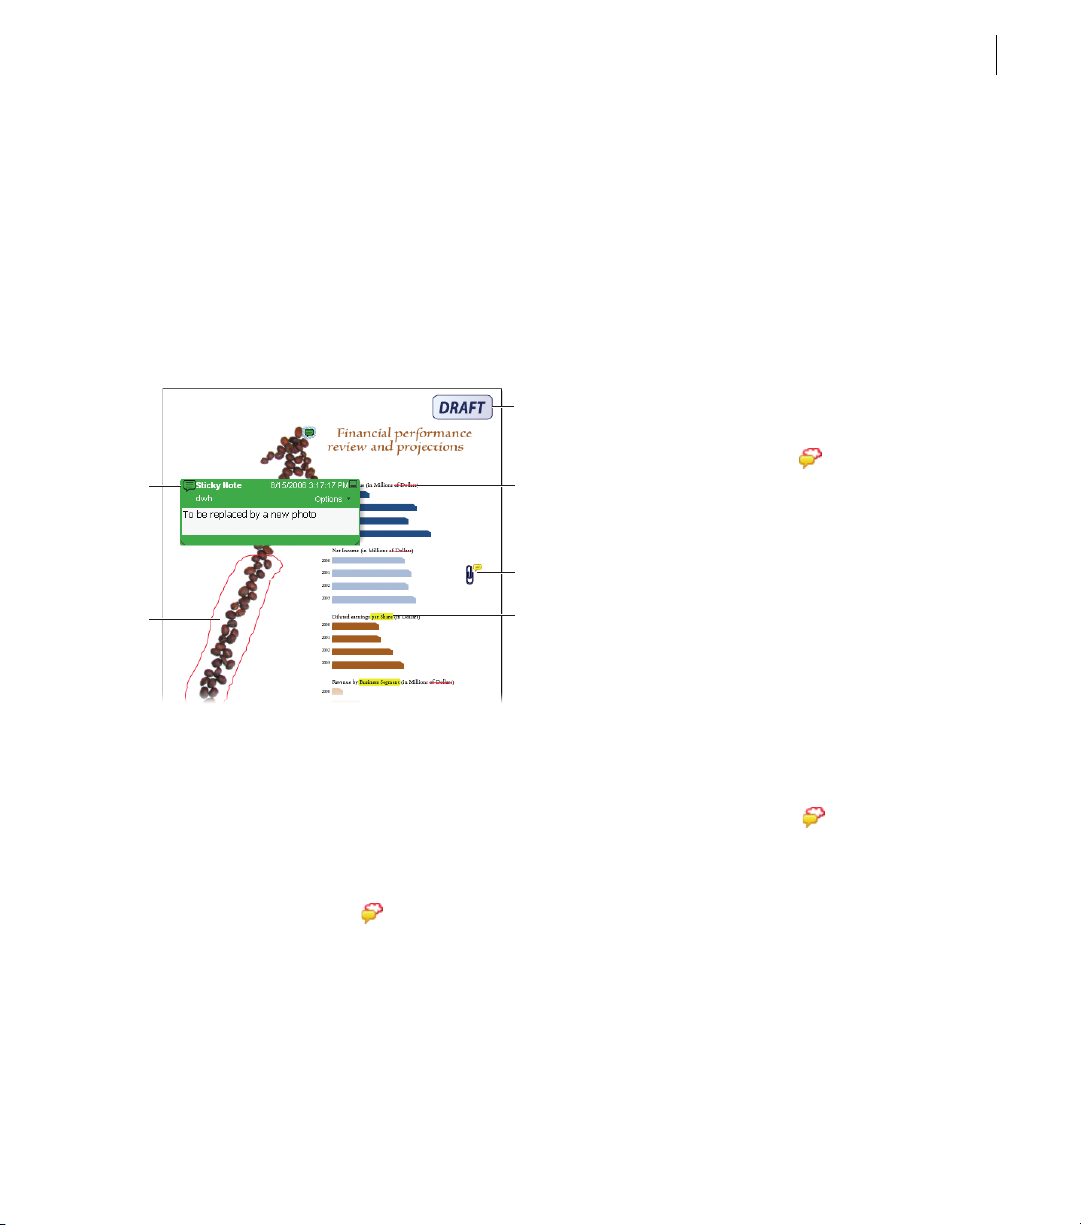
Review & Comment
Start an automated email or shared review to simplify
the reviewing process. When you review a PDF using
Acrobat 3D, all users can comment on a single,
unchanging document using a wide variety of
commenting tools, from sticky notes and stamps to
text edits, highlights, and drawing markups. If you set
up a shared review, reviewers can see and respond to
others reviewer’s comments. Using the Review
Tracker, you can invite additional reviewers, rejoin a
review, and track the progress of shared reviews.
Page 29
ADOBE ACROBAT 3D VERSION 8
Getting Started Guide
A-21
For example, suppose you have a specification that
needs to be reviewed by your project team, which
includes people in several locations. Set up a shared
review to send the PDF to all the review participants.
When the participants (including Adobe Reader 8.0
users if you have enabled commenting for Adobe
Reader) open the email attachment, Acrobat opens the
Commenting toolbar and instructions on how to
complete the review.
C
A
B
Add different kinds of comments to your PDF. They also appear in
the Comments list.
A. Note B. Drawing markup C. Stamp D. Replaced Text
E. File attachment F. Highlighted text
D
E
F
If your email application doesn’t send email
automatically, you may need to answer alert messages
and switch to your email application to finish sending
the message.
Start a shared review
A shared review allows reviewers, including those
using Adobe Reader, to see and respond to others’
comments during the review.
Important: To conduct a shared review, you and your
reviewers need write access to a shared comment server.
1 Click Review & Comment and choose Send For
Shared Review.
2 If prompted, enter your identity information to
create a reviewer profile.
3 Follow the on-screen instructions to select (or add)
a server, select the PDF, invite reviewers, and send the
email invitation.
Track and manage reviews
The Review Tracker provides information for all
documents that you’ve sent and received for review.
Use the Review Tracker to rejoin a review, send a
reminder, or invite additional reviewers.
Start an email review
An email-based review lets you track review status and
merge received comments into the PDF.
1 Click Review & Comment and choose Attach
For Email Review.
2 If prompted, enter your identity information to
create a reviewer profile.
3 Follow the on-screen instructions to select the PDF,
invite reviewers, and send the email invitation.
1 Click Review & Comment , and choose Review
Tr ac ke r.
2 Select the desired PDF on the left.
3 Do any of the following:
• To rejoin a review, double-click the PDF.
• To send a message, click Email All Reviewers or
Email Initiator.
• To invite additional reviewers, click Add Reviewers.
Page 30

A-22
CHAPTER 1
Getting started
Invite additional reviewers
If you initiated a review, you can invite more
reviewers. If you are a reviewer, ask the initiator to add
reviewers so the initiator can track all reviewers and
receive notification when comments are received.
1 Click Review & Comment , and choose Review
Tr ac ke r.
2 Select the desired PDF under Reviews I’ve Sent, and
click Add Reviewers on the right.
3 Follow the on-screen instructions to add email
addresses, change the message as needed, and send the
invitation.
Participate in an email review
When you open the PDF attachment in an email
review, a tracked copy of the PDF opens with a
document message bar, a Send Comments button, and
a Comment & Markup toolbar.
Important: If you’re prompted to connect to a server
when you open the PDF, you’ve been invited to a shared
review.
3 Type your name, email address, and job title to
create a reviewer profile, if prompted.
4 Add comments.
5 When you want to share your comments, click
Publish Comments.
In a shared review, you can see all reviewers’
comments that have been published.
Create drawing markups
You can add lines, arrows, and shapes to a PDF by
using the drawing markup tools.
1 Choose Tools > Comment & Markup, and choose
the desired tool.
2 Draw in the PDF. For example, click and drag to
form a line, arrow, or rectangle.
3 (Optional) Using the Select tool, double-click the
markup, and then type a comment in the pop-up note.
To change properties, such as line color and width,
right-click/Control-click the markup and choose
Properties.
1 Open the PDF attachment from your email
application.
2 Use commenting tools to add comments.
3 Save the PDF, and then click Send Comments.
Participate in a shared review
When you open the shared PDF, commenting tools and
a document message bar with instructions also open.
1 Open the PDF attachment or link.
2 Click Connect, and type your login name and
password, if prompted.
Forms
You can create a PDF form with interactive form fields
from many different sources—an existing electronic
document such as a Word document or a spreadsheet,
a scanned paper document, or a template. You can
then distribute the form through email or a shared
server and track the forms that have been returned to
you. Finally, you can easily collect and review form
data and export it to other applications.
Page 31

ADOBE ACROBAT 3D VERSION 8
Getting Started Guide
A-23
For example, you could convert all of your human
resources forms to PDF and post them for easy access
on a shared server. You could then track a specific
form, such as a yearly benefits enrollment form, and
know who has filled out and returned the form. After
you have collected the returned data, you could then
export it to a spreadsheet or a personnel database.
A
B
C
D
Create a form
The Create New Form wizard guides you through
creating a PDF form from a template (Windows only),
an electronic document, spreadsheet data, or a
scanned paper document.
1 Click Forms on the toolbar, and choose Create
New Form.
2 Select the source for the PDF form, and click
Continue.
3 Follow the on-screen instructions.
Forms created with the wizard are LiveCycle Designer
forms. To create an Acrobat form instead, choose
Forms > Run Form Field Recognition.
Edit a form
Depending upon how a PDF form was created, you
can edit it in either Acrobat 3D or Adobe LiveCycle
Designer (Windows only).
Note:
(Windows) PDF forms created in Acrobat 3D can be
edited in LiveCycle Designer, but those created or edited in
LiveCycle Designer cannot be edited in Acrobat 3D.
Interactive form fields make it easy to collect data.
A. Check box B. Radio button C. Combo box D. Text box
E. Button
1 Open a PDF form.
E
2 Choose Forms > Edit Form In Designer or Edit
Form In Acrobat.
3 Add or modify form fields and field properties as
desired.
Distribute a form
After you create a PDF form, you can distribute it by
using the Distribute Form wizard.
Page 32

A-24
CHAPTER 1
Getting started
Note: To use the wizard, the form must contain a submit
button.
1 Open the desired form.
2 Click the Forms button on the Tasks toolbar,
and choose Distribute Form.
3 Follow the on-screen instructions to prepare the
form for distribution.
4 Specify if you want to email the form or save and
send it later.
5 Follow the on-screen instructions to distribute the
form.
Track and manage forms
The Forms Tracker helps you manage forms you’ve
distributed.
1 Click the Forms button on the Tasks toolbar,
and choose Track Forms.
2 Select an icon on the left to see forms in that
category:
• To D o d i spla y s for ms yo u ’v e rec eive d .
• History displays forms you’ve distributed.
• Search Results allows you to search for specific
forms.
• Forms Library displays forms you’ve saved in the
library for future distribution.
Compile data received by email
As users return their form data, you can compile it into
a data set.
1 Open the email attachment containing the returned
form.
2 In the dialog box that appears, select an existing
data set or create a new set for the form data.
The new data is added and the data set opens, allowing
you to review all responses. You can also compile data
by clicking Forms on the Tasks toolbar, and
choosing Compile Returned Forms.
Review form responses
After you’ve compiled returned form data into a data
set, the PDF automatically opens for you to review the
responses.
❖ With the desired data set PDF open, do any of the
following:
• To revie w an ind ivi dua l respo nse , se lec t a l ine in t he
response list.
• To sort the response list, click the desired column
heading.
• To add data, click Import Data .
• To delete data, select a record and press Delete.
Export form data to a spreadsheet
Once you’ve collected PDF form data in FDF or XML
format, you can organize the form data into a commadelimited spreadsheet (CSV) file.
1 Choose Forms > Manage Form Data > Merge Data
Files Into Spreadsheet.
2 Click Add Files, and then select the desired data
files.
3 Click Export, choose a location for the CSV file,
and click Save.
Page 33

ADOBE ACROBAT 3D VERSION 8
Getting Started Guide
A-25
What’s new
Viewing, navigating, searching
Getting Started window At a glance, see the main
features of Adobe® Acrobat® 3D Version 8 and click
links to start tasks or learn more about features. See
“Start in the Getting Started window” in Acrobat Help.
Maximized work area View PDFs in a new visual
design for the work area, navigation pane, and
toolbars. User interface elements have been removed
to maximize space. See “View the work area” in
Acrobat 3D Help.
Customizable toolbars
tools by right-clicking/Control-clicking a toolbar, or
use the More Tools dialog box to customize toolbars.
See “Display and arrange toolbars” in Acrobat 3D Help.
Search enhancements Find words or use advanced
search tools, all from the same integrated toolbar.
View search results in a floating, resizable window.
Search documents in a PDF package. See “Search
features overview” in Acrobat 3D Help.
Embedded PDF search index Embed a search index
for a specific file directly within the PDF to speed up
searching. See “Create and manage an index in a PDF”
in Acrobat Help.
PDF creation, assembly, and editing
PDF from a blank page Create a blank PDF page and
type text onto the page. Format text using formatting
controls. Lock the document so that it can’t be edited.
See “Create a PDF from a blank page” in Acrobat Help.
Easily hide or show individual
PDF packages Assemble PDF files (including PDF
forms) and non-PDF files into a single package. Files
aren’t modified when packaged, so signatures and
security options stay intact. Documents within a
package are viewed in the same window. Easily add,
delete, or extract documents from the package. Search
and print the current or selected document, or all
documents within the package. See “About PDF
packages” in Acrobat Help.
Combined files user interface Combine files into a
single PDF with concatenated pages, or assemble files
into a PDF package. Choose simple options to control
the size of the resulting PDF. See “Combining different
types of files” in Acrobat Help.
Mail merge to PDF within Word Convert Word mail
merge documents to PDF and send them out by email.
See “Create PDFs from Word mail merges” in Acrobat
Help.
Excel worksheet enhancements (Windows) Select
and order worksheets for conversion. Convert all links
and bookmarks. Create PDF/A-compliant files. See
“Application-specific PDFMaker settings” in Acrobat
Help.
PowerPoint presentation enhancements (Windows)
Convert overlapping shapes and graphics, action
buttons, action settings, and speaker notes. Convert
backgrounds to a separate, nonprinting layer. Create
PDF/A-compliant files. See “Application-specific
PDFMaker settings” in Acrobat Help.
Page 34

A-26
CHAPTER 1
Getting started
Email conversion enhancements Convert an email
message or a complete mail folder to PDF from Lotus
Notes. Create PDF packages of email from both
Outlook and Lotus Notes. In Outlook on Windows,
convert email archives to PDF packages, and
automatically archive email on a schedule. See
“Convert email messages to PDFs (Windows)”,
“Migrate Outlook PDF archives to PDF packages
(Windows)” and “Set up automatic email archiving
(Windows)” in Acrobat Help.
Scanning enhancements Scan to PDF or PDF/A from
a broader range of scanners. Add metadata while
scanning. Optimize a scanned PDF. See “Scan a paper
document to PDF” in Acrobat Help.
PDF/A-compliant files Create PDF/A-compliant files
when scanning paper documents and when creating
PDFs from Word, Excel, PowerPoint, Acrobat
Distiller, and the Acrobat Preflight tool.
Bates numbering Apply identifying labels to a batch
of related documents—typically legal documents
associated with a court case. Bates numbering appears
as a header or footer on each page of each PDF in the
batch. See “Add a Bates numbering header or footer”
in Acrobat Help.
Document examination Inspect PDFs for metadata,
annotations, attachments, hidden data, form fields,
hidden layers, or bookmarks. Remove some or all of
the information. See “Examine a PDF for hidden
content” in Acrobat Help.
Headers, footers, watermarks, and backgrounds Save
header, footer, watermark, and background options as
named settings for reuse. Remove or update existing
headers, footers, watermarks, and backgrounds.
Shrink content to accommodate headers and footers.
Preview changes in real time. Set underline text. See
“Add and edit headers and footers” in Acrobat Help.
Review and commenting
Acrobat Connect meetings Access the real-time, web-
based collaboration capabilities of Acrobat Connect
(sold separately). Click the Start Meeting button to
escalate from a document review to real-time
communication with others over the Internet. Acrobat
Connect uses Flash and a personal meeting room for
screen sharing, audio and video conferencing,
whiteboarding, and more. When you first click the
Start Meeting button, you can create a free trial
account. Each subsequent time, you go directly to your
Acrobat Connect personal meeting room. (Acrobat
Connect is not available in all languages.) See
“Meetings” in Acrobat 3D Help.
Shared reviews Initiate a review where comments are
stored on a central server, allowing all participants to
see comments in real time. No extra server software is
needed. Shared reviews work with a folder on a
network server, a Windows SharePoint workspace, or
a web folder on a web server. Comments are
automatically retrieved, even if Reader isn’t running
and could be added even when you are disconnected
from the network. Notifications alert users that there
are new comments. Comments from reviewers
outside the firewall can be merged into the shared
review. Enable Reader users to participate. See “Start a
shared review” in Acrobat Help.
Review Tracker Provides details about all active
reviews. For shared reviews, details include the
number of comments from a reviewer, the review
deadline, server status, unread reviews, and a
summary of updated shared reviews. See “Tracking
PDF reviews” in Acrobat 3D Help.
Page 35

ADOBE ACROBAT 3D VERSION 8
Getting Started Guide
A-27
Commenting and markup enhancements View and
accurately place callout and cloud markups as you apply
them. The callout leader automatically moves as you
position the callout. Selected comments are highlighted
for easier visibility when zoomed out. Rotate stamps,
and select all tools from a single, integrated toolbar. See
“Commenting” in Acrobat 3D Help.
Forms
Simple forms creation (Windows) Use a wizard to
create PDF forms from templates, existing electronic
documents, paper forms, or spreadsheet data.
Customize forms with contact information and logos.
Edit in Adobe LiveCycle Designer. See “Creating and
editing forms” in Acrobat Help.
PDF background artwork Import a PDF as
background artwork on a form in LiveCycle Designer.
Add form fields on top of the background. See
LiveCycle Designer Help.
Forms Tracker Track the forms you initiate or fill out.
See “About Forms Tracker” in Acrobat Help.
Export and compile form data Aggregate returned
forms into a PDF package. Export the form data to a
spreadsheet. See “Submitting forms” and “Export
records from a PDF data set” in Acrobat Help.
Form field recognition
Automatically recognize form
fields on non-interactive PDF documents and convert
them to interactive fields that can be filled electronically.
See “Creating new forms” in Acrobat Help.
Reader-enabled rights Enable Reader 7.0 and 8.0
users to fill in, digitally sign, and locally save forms
and other PDFs. See “Enable Reader users to save form
data” in Acrobat Help.
Digital signatures
Roaming IDs Enroll in a signing service where the
server holds your private key. Authenticate to the
server from Acrobat and allow the document to be
signed with your credentials stored on the server. See
“Set up a roaming ID” in Acrobat 3D Help.
Signature preview mode and conformance checker
Before signing, view the document content as it will
appear after eliminating transparency, scripts, fonts,
and other dynamic content that can alter a document’s
appearance. Acrobat 3Dautomatically runs the
Document Integrity Checker, which now includes
checking for Qualified Signatures conformance before
entering signature preview mode. See “Sign in Preview
Document mode” in Acrobat 3D Help.
Certificate enhancements Predetermine the signing
certificate. Configure the chain model for certificate
validation. See “Sharing and managing certificates” in
Acrobat 3D Help.
Seed values Specify which choices a user can make
when signing a document. See “Customizing signature
properties using seed values” in Acrobat Help.
Signatures in Reader Allow Reader users to draw a
signature field. See “Before you certify a PDF” in
Acrobat Help.
Architecture, Engineering, and Construction
Batch conversion/Direct conversion From AutoCAD,
convert multiple AutoCAD files to multiple PDFs.
Convert AutoCAD files to PDF with improved speed.
See “Convert AutoCAD files to PDF (Windows)” in
Acrobat Help.
DWG/DWF support Convert AutoCAD DWF and
DWG format files without installing AutoCAD.
Page 36

A-28
CHAPTER 1
Getting started
2D Measurement tool enhancements Measurement is
recalculated if start or end points move. Measurements
snap to lines, intersections, or corners. See “Measure the
height, width, or area of objects” in Acrobat Help.
3D Computer Aided Design (CAD)
Produce compact PDFs A dj us t 3 D c onv er si on se tt in gs
to create highly compressed, universally-accessible
PDF files that are a fraction of the size of the original
CAD file or assembly. See “About PRC and U3D
conversion formats” in Acrobat Help.
Import PMI Import and view geometric dimensioning
and tolerancing specifications in the 3D model as
Product Manufacturing Information (PMI) instead of
sending a separate 2D drawing. Supported file formats
include CATIA V5, I-DEAS, JT, NX, Pro/ENGINEER.
See “View Product Manufacturing Information
(PMI)” in Acrobat Help.
Export geometry Export geometry to standard
formats (IGES, STEP, ParaSolid, and VRML) for
interoperability with Computer Aided Manufacturing
(CAM) applications. See “Exporting geometry from
3D models” in Acrobat Help.
Support for latest CAD applications Open the latest
versions of most CAD file formats without installing
the CAD application. See “About supported 3D file
formats” in Acrobat Help.
Legal
Redaction tools
Mark text, images, and sensitive areas
for redaction. Permanently apply redaction. Modify the
appearance of redaction marks, including color and
codes. See “Redact sensitive content” in Acrobat Help.
Search and redact From within the Search feature,
mark some or all search results for redaction. See
“Search and redact words” in Acrobat Help.
Bates numbering Apply identifying labels to a batch
of related documents—typically legal documents
associated with a court case. Bates numbering appears
as a header or footer on each page of each PDF in the
batch. See “Add a Bates numbering header or footer”
in Acrobat Help.
Creative professional
Color management improvements
In Adobe Creative
Suite, synchronize settings for on-screen color across the
applications with a single click. See “Synchronize color
settings across Adobe applications” in Acrobat Help.
Shared transparency flattener presets Define
flattener presets in one Adobe application, such as
Acrobat, and then easily share those swatches with
other applications, such as Illustrator and InDesign.
See “Create a flattener preset” in Acrobat Help.
Preflight Locate, modify, or remove PDF elements
using customizable fixup profiles. Create an inventory
of PDF content, including XMP metadata. Perform
advanced inspections on Cos objects and fonts.
Convert to and validate PDF/X-4 and PDF/A files.
Edit droplet settings for automated preflight
inspections. See “Correcting problem areas” and
“Advanced inspections” in Acrobat Help.
Booklet printing Print pages as a simple booklet, for
example, 2-up, saddle-stitched. See “Print a booklet”
in Acrobat Help.
Metadata in documents and objects Maintain and
access document and object-level metadata. See
“Document properties and metadata” in Acrobat 3D
Help.
Page 37

ADOBE ACROBAT 3D VERSION 8
Getting Started Guide
A-29
TouchUp Object tool enhancement
See and change
the color space of a selected object. Scale, rotate, or clip
an object. See “Move or edit an object” in Acrobat Help.
Additional new features
FIPS mode Version 8.1 of Acrobat 3D provides a FIPS
mode to restrict data protection to Federal
Information Processing Standard (FIPS) 140-2
approved algorithms using the RSABSAFE Crypto-C
2.0 encryption module with FIPS 140-2 validation
certificate 608. See “Securing PDFs in FIPS mode” in
Acrobat Help.
Microsoft Windows Vista support Version 8.1 of
Acrobat 3D supports Microsoft Windows Vista.
Installing Acrobat on 64-bit versions of Microsoft
Windows
Version 8.1 of Acrobat 3D supports the 64bit versions of Microsoft Windows XP and Microsoft
Windows Vis t a.
Version Cue 2.0 Manage files and versions as a single
user or in a small workgroup. Integrate with Adobe
Bridge to manage files for your Creative Suite projects.
See “Adobe Version Cue” in Acrobat Help.
2D Measurement tool enhancements Measu remen t is
recalculated if start or end points move.
Measurements snap to lines, intersections, or corners.
See “Measure the height, width, or area of objects” in
Acrobat 3D Help.
Digital Editions Read and organize eBooks and other
publications with Adobe Digital Editions (a separate
product). When you first click the Digital Editions
menu item, you can download and install the Adobe
Digital Editions software. After installation, choose
Digital Editions to go directly to your Adobe Digital
Editions bookshelf. See “Adobe Digital Editions” in
Acrobat 3D Help.
Printing over the Internet Print documents to a
FedEx Kinko’s office in the United States. See “Print
over the Internet” in Acrobat 3D Help.
Page 38

Page 39

Chapitre 1 : Prise en main
B-1
Installation
Configuration requise
Pour connaître toutes les conditions système requises
et les recommandations relatives à votre logiciel
Adobe®, reportez-vous au fichier Lisez-moi fourni
avec le logiciel.
Installation du logiciel
1 Fermez toute autre application Adobe en cours
d’exécution sur votre ordinateur.
2 Introduisez le disque d’installation dans le lecteur,
puis suivez les instructions qui s’affichent à l’écran.
Remarque : Pour plus de détails, reportez-vous au
fichier Lisez-moi accompagnant le logiciel.
Activation du logiciel
Les logiciels Adobe peuvent exploiter la technologie
de gestion des licences afin de garantir le respect des
conditions du contrat de licence. Le cas échéant, cette
fonction vous invite à vérifier la licence de votre
produit dans les 30 jours suivants sa première
utilisation. Cette vérification est obligatoire.
Lisez-moi de votre DVD d’installation ou
visitez le site Web d’Adobe à l’adresse
www.adobe.com/go/activation_fr.
1 Si la boîte de dialogue d’activation n’est pas ouverte,
choisissez Aide > Activation > Activer.
2 Suivez les instructions à l’écran.
Remarque : Si vous souhaitez installer le logiciel sur un
ordinateur différent, vous devez au préalable désactiver
le logiciel sur votre ordinateur : choisissez pour ce faire
Aide > Activation > Désactiver.
Enregistrement
Enregistrez votre produit afin de bénéficier,
gratuitement, d’une aide à l’installation, de
notifications de mises à jour, ainsi que d’autres
services.
Pour vous enregistrer, suivez les instructions
affichées dans la boîte de dialogue d’enregistrement
qui apparaît après l’installation et l’activation du
logiciel.
Si vous reportez l’enregistrement, vous pourrez
effectuer cette procédure ultérieurement en
sélectionnant Aide > Enregistrement.
Vous serez peut-être invité à activer le logiciel. Le
processus de vérification n’induit en aucun cas le
recueil, la transmission ou l’utilisation d’informations
relatives à l’identité des utilisateurs. Pour plus
d’informations sur ce sujet, reportez-vous au fichier
Page 40

CHAPITRE 1
B-2
Prise en main
Lisez-moi
Le DVD d’installation contient le fichier Lisez-moi
pour le logiciel. Ce fichier est aussi copié dans le
dossier de l’application pendant l’installation du
produit. Ouvrez le fichier pour prendre connaissance
d’informations très importantes sur les sujets
suivants :
• Configuration système
• Installation
• Repérage
• Licence électronique
• Informations juridiques
Utilisation de l’aide
Adobe
Ressources d’assistance d’Adobe
La documentation de vos logiciels Adobe est
disponible dans plusieurs formats.
Aide en ligne et LiveDocs
L’aide en ligne vous donne accès à l’ensemble de la
documentation et du matériel didactique disponible
au moment de la distribution du logiciel. Elle est
disponible à partir du menu d’aide du logiciel Adobe.
L’aide LiveDocs contient l’intégralité de l’aide en ligne,
plus des mises à jour et des liens vers du matériel
didactique supplémentaire disponible sur le Web.
Pour certains produits, vous pouvez également ajouter
des commentaires aux rubriques dans l’aide LiveDocs.
L’aide au format LiveDocs est disponible dans le
Centre de ressources d’aide d’Adobe à l’adresse
www.adobe.com/go/documentation_fr.
La plupart des versions de l’aide en ligne et LiveDocs
vous permettent d’effectuer une recherche dans les
systèmes d’aide de plusieurs produits. Certaines
rubriques peuvent également proposer des liens vers
du contenu connexe sur le Web ou vers des rubriques
d’aide d’un autre produit.
Vous devez considérer le module d’aide comme une
plate-forme d’accès vers du contenu supplémentaire et
des communautés d’utilisateurs. La version la plus
récente et la plus complète de l’aide est toujours
disponible sur le Web.
Rubriques Procédures
Les rubriques Procédures offrent un aperçu des tâches
les plus courantes. Pour obtenir plus de détails, cliquez
sur le lien situé au bas de la rubrique Procédures afin
d’afficher la rubrique d’aide correspondante.
Documentation au format PDF
L’aide intégrée au produit est également disponible au
format Adobe PDF, qui convient parfaitement à
l’impression. D’autres documents, tels que des guides
d’installation et des livres blancs, peuvent également
être fournis au format PDF.
Tous les documents au format PDF sont disponibles
par le biais du Centre de ressources d’aide d’Adobe à
l’adresse www.adobe.com/go/documentation_fr. Pour
consulter la documentation PDF incluse avec le
logiciel, accédez au dossier Documents sur le DVD
d’installation ou de contenu.
Page 41

ADOBE ACROBAT 3D VERSION 8
Guide de prise en main
B-3
Documentation papier
Des versions papier de l’aide intégrée au produit sont
disponibles à l’achat sur Adobe Store, à l’adresse
www.adobe.com/go/store_fr. Vous y trouverez
également des ouvrages édités par des partenaires
d’Adobe.
Un guide de l’utilisateur imprimé est livré avec tous les
produits Adobe Creative Suite® 3, les produits Adobe
autonomes étant quant à eux fournis avec un guide de
prise en main imprimé.
Utilisation du module d’aide du produit
L’aide en ligne est accessible par le biais du menu Aide.
Après avoir ouvert Adobe Help Viewer, vous pouvez
accéder à l’aide des autres produits Adobe installés sur
votre ordinateur. Les rubriques peuvent contenir des
liens vers un contenu supplémentaire sur le Web.
Si vous recherchez une expression, telle que « outil
forme », placez-la entre guillemets afin de n’afficher
que les rubriques contenant tous les mots de l’expression
en question.
Fonctions d’accessibilité
L’aide d’Adobe est accessible aux personnes souffrant
d’un handicap (mobilité réduite, cécité ou déficience
vi suel le ). L’aide i nté grée a u pr odu it pr end en cha rge les
fonctions d’accessibilité standard suivantes :
• L’utilisateur peut modifier la taille du texte avec les
commandes de menu contextuel standard
(Microsoft® Windows®) et les commandes de menu
standard (Apple Mac OS).
• Les liens sont soulignés pour une identification
aisée.
Page 42

CHAPITRE 1
B-4
Prise en main
• Si le texte d’un lien ne correspond pas au titre cible,
ce dernier est indiqué dans l’attribut Titre de la
balise d’ancrage. Par exemple, les liens Précédent et
Suivant incluent le titre des rubriques précédente et
suivante.
• Le contenu prend en charge le mode à forts
contrastes.
• Les images sans légende présentent un texte de
remplacement.
• Chaque cadre est doté d’un titre indiquant son
utilité.
• Les balises HTML standard définissent la structure
du contenu pour les outils de lecture d’écran ou de
synthèse de la parole à partir du texte.
• Le s f eu il les de st yl e c ont rô le nt l a m is e e n f orme , d ’o ù
une absence totale de polices incorporées.
Raccourcis clavier pour les commandes de barre
d’outils de l’aide (Windows)
Bouton Précédent Alt + Flèche Gauche
Bouton Page suivante Alt + Flèche Droite
Imprimer Ctrl+P
Bouton A propos de Ctrl+I
Menu Aide de Alt+touche Bas ou Alt+touche Haut
pour consulter l’aide d’une autre application
Raccourcis clavier de navigation dans l’aide
(Windows)
•
Pour passer d’un panneau à un autre, appuyez sur
Ctrl+Tab (vers l’avant) ou Maj+Ctrl+Tab (vers
l’arrière).
• Pour parcourir les liens soulignés dans un panneau,
appuyez sur Tab (vers l’avant) ou Maj+Tab (vers
l’arrière).
• Pour activer un lien souligné, appuyez sur Entrée.
• Pour modifier la taille du texte, appuyez sur
Ctrl/Command + signe plus (+) ou
Ctrl/Command + signe moins (-).
Ressources
Atelier vidéo Adobe
L’atelier vidéo Adobe Creative Suite 3 propose plus de
200 vidéos de formation pour Adobe Creative Suite 3.
Ces ateliers couvrent un large éventail de sujets à
l’intention des professionnels de l’impression, du Web
et de la vidéo.
Vous pouvez utiliser l’atelier vidéo Adobe pour en
apprendre davantage sur le produit Creative Suite 3.
De nombreuses vidéos vous expliquent comment
utiliser les applications Adobe de manière combinée.
Lorsque vous lancez l’atelier vidéo Adobe, vous
choisissez les produits que vous voulez apprendre et
les sujets que vous voulez voir. Des informations
détaillées sont disponibles pour chaque vidéo afin de
vous aider et diriger votre apprentissage.
Page 43

ADOBE ACROBAT 3D VERSION 8
Guide de prise en main
B-5
Communauté de présentateurs
Avec cette nouvelle version, Adobe Systems invite les
membres de la communauté Adobe à partager leurs
compétences et leurs connaissances. Adobe et
Lynda.com mettent à votre disposition des
didacticiels, trucs et astuces proposés par des
concepteurs et développeurs de renom parmi lesquels
Joseph Lowery, Katrin Eismann et Chris Georgenes.
Des experts Adobe, tels que Lynn Grillo, Greg Rewis
et Russell Brown, vous prodigueront également de
précieux conseils. Au total, pas moins de 30 experts
partageront leurs connaissances avec vous !
Page 44

CHAPITRE 1
B-6
Prise en main
Didacticiels et fichiers source
L’Atelier vidéo Adobe propose des formations pour
les utilisateurs débutants et expérimentés. Vous y
trouverez également des vidéos concernant les
nouvelles fonctions et les techniques essentielles.
Chaque vidéo porte sur un seul sujet et dure
généralement entre 3 et 5 minutes. La plupart des
vidéos s’accompagnent d’un didacticiel illustré et de
fichiers source. Vous pourrez ainsi imprimer les
procédures détaillées et exécuter seul le didacticiel.
Utilisation de l’atelier vidéo Adobe
Pour accéder à l’Atelier vidéo Adobe, utilisez le DVD
inclus dans votre produit Creative Suite 3. Il est
également disponible en ligne à l’adresse
www.adobe.com/go/learn_videotutorials_fr. Adobe
s’engage à ajouter régulièrement de nouvelles vidéos à
son atelier vidéo en ligne. Nous vous invitons donc à
vous enregistrer pour découvrir toutes les nouveautés.
Vidéos Acrobat
L’atelier vidéo Adobe couvre un large éventail de sujets
concernant Adobe Acrobat®. En voici un aperçu :
• Contrôle en amont des fichiers
• Impression de documents
Pour accéder aux dictaticiels vidéo d’Adobe Creative
Suite 3, visitez l’atelier vidéo Adobe à l’adresse suivante :
www.adobe.com/go/learn_videotutorials_fr.
Extras
Vous avez accès à de très nombreuses ressources afin de
vous aider à tirer le meilleur parti possible de votre
logiciel Adobe. Certaines des ressources sont installées
sur votre ordinateur pendant l’installation ; le cas
échéant, le contenu supplémentaire est inclus sur le
DVD d’installation ou de contenu. Des suppléments
particulièrement intéressants sont également proposés
en ligne par la communauté Adobe Exchange, à
l’adresse www.adobe.com/go/exchange_fr.
Ressources installées
Lors de l’installation du logiciel, plusieurs ressources
sont placées dans votre dossier d’application.
Pour visualiser ces fichiers, accédez au dossier
correspondant sur votre ordinateur.
• Définition de l’espace de travail et des barres de
tâches
• Combinaison de fichiers en documents PDF
• Conversion de fichiers PDF
• Modification de fichiers PDF
• Insertion de commentaires dans les fichiers PDF
• Travail dans le cadre de révisions partagées
• Révision et résumé de commentaires
• Ajout de protection aux formulaires
• Collaboration en temps réel avec Acrobat Connect™
Contenu du disque
Le DVD fourni avec le produit peut contenir des
ressources supplémentaires à utiliser avec le logiciel,
par exemple des paramètres prédéfinis, des modules
externes, une version PDF de l’aide, des informations
techniques et d’autres documents.
Page 45

ADOBE ACROBAT 3D VERSION 8
Guide de prise en main
B-7
Adobe Exchange
Vous en voulez plus ? Dans ce cas, rendez-vous sur
www.adobe.com/go/exchange_fr, une communauté en
ligne où les utilisateurs téléchargent et échangent, à titre
gracieux, des milliers d’actions, extensions, plug-ins et
autres éléments utilisables avec les produits Adobe.
Adobe Design Center
Adobe Design Center met à votre disposition des
articles, modèles et instructions proposés par des
experts de l’industrie, des concepteurs de renom et des
partenaires d’édition d’Adobe. Du nouveau contenu est
ajouté tous les mois.
Outre des centaines de didacticiels axés sur les
logiciels de conception, vous y trouverez des conseils
et techniques sous la forme de vidéos, de didacticiels
HTML et d’extraits de chapitres de livre.
Les idées nouvelles sont au cœur même de Think
Tank, Dialog Box et Gallery :
• Les articles Think Tank analysent la façon dont les
concepteurs contemporains embrassent la
technologie et ce que leurs expériences signifient
pour la création, les outils de création et la société
en général.
• Dans Dialog Box, des experts partagent leurs idées
nouvelles en termes d’animations et de création
numérique.
• Dans Gallery, vous découvrirez ce que les artistes
entendent par conception en mouvement.
Rendez-vous sur Adobe Design Center à l’adresse
www.adobe.com/fr/designcenter.
Page 46

CHAPITRE 1
B-8
Prise en main
Centre des développeurs Adobe
Le Centre des développeurs Adobe propose des
échantillons, des didacticiels, des articles et diverses
ressources à l’usage des développeurs qui utilisent des
produits Adobe pour élaborer, entre autres projets, du
contenu mobile, des applications Internet et des sites
Web sophistiqués. Ce centre contient également des
ressources à l’intention des développeurs de plug-ins
pour produits Adobe.
Outre des échantillons de code et des didacticiels, vous
y trouverez des flux RSS, des séminaires en ligne, des
kits SDK, des guides de création de scripts, ainsi que
bien d’autres ressources techniques.
Rendez-vous sur le Centre des développeurs Adobe à
l’adresse www.adobe.com/go/developer_fr.
Support technique
Consultez le site Web d’assistance technique d’Adobe
(www.adobe.com/fr/support) pour obtenir des
informations de dépannage pour votre produit et en
savoir plus sur les options d’assistance technique
gratuites et payantes. Suivez le lien Formation pour
accéder à des manuels Adobe Press, à un éventail de
ressources de formation, à des programmes de
certification de logiciels d’Adobe, etc.
Té lé c ha r ge m en ts
Rendez-vous à l’adresse
www.adobe.com/go/downloads_fr pour obtenir
gratuitement des mises à jour, des versions
d’essai et d’autres logiciels utiles. Adobe Store
(www.adobe.com/go/store_fr) vous donne également
accès à des milliers de plug-ins de d évelo ppeur s tiers, c e
Page 47

ADOBE ACROBAT 3D VERSION 8
Guide de prise en main
B-9
qui vous aide à automatiser des tâches, personnaliser
des flux de production, créer des effets spéciaux de
qualité professionnelle et bien d’autres choses encore.
Adobe Labs
Adobe Labs vous permet d’utiliser et d’évaluer des
technologies nouvelles et émergentes, ainsi que des
produits Adobe.
Adobe Labs vous donne accès à un éventail de
ressources :
• Préversions de logiciels et technologies à venir
• Echantillons de code et méthodes conseillées pour
accélérer votre apprentissage
• Préversions de la documentation technique et
produit
• Forums, contenu Wikipédia et autres ressources de
collaboration pour vous aider à interagir avec des
développeurs qui partagent vos opinions
Adobe Labs favorise la mise en place d’un processus de
développement de logiciels axé sur la collaboration.
Dans cet environnement, les clients utilisant de
nouveaux produits et technologies deviennent
rapidement productifs. Adobe Labs est également un
forum de commentaires, que l’équipe de développement Adobe utilise pour créer des logiciels correspondant aux besoins et aux attentes de la communauté.
Visitez Adobe Labs à l’adresse
www.adobe.com/go/labs_fr.
Communautés d’utilisateurs
Les communautés d’utilisateurs comprennent des
forums, des blogs et d’autres moyens leur permettant
de partager des technologies, des outils et des
informations. Les utilisateurs peuvent poser des
questions afin de savoir comment les autres
utilisateurs exploitent au mieux leur logiciel. Les
forums utilisateur sont disponibles en anglais,
français, allemand et japonais ; les blogs sont rédigés
dans un large éventail de langues.
Pour participer à des forums ou à des blogs, rendezvous à l’adresse www.adobe.com/fr/communities.
Flux de production
Le logiciel Adobe® Acrobat® 3D Version 8 propose de
puissants outils capables de prendre en charge de
nombreux aspects de vos processus de
documentation.
• Créez des fichiers Adobe PDF à partir de différentes
applications.
• Assemblez des fichiers provenant de diverses
sources en un lot PDF.
• Convertissez des fichiers PDF en d’autres formats,
tels que Word, HTML ou JPG.
• Restreignez l’accès à vos documents PDF à l’aide de
diverses fonctions de protection.
• Approuvez un document PDF en lui apposant une
signature numérique ou un certificat.
• Organisez des révisions à l’aide des nombreux outils
de révision et de commentaire.
• Créez des formulaires à remplir, diffusez-les en
toute sécurité et recueillez les données indiquées
dans les champs.
Page 48

CHAPITRE 1
B-10
Prise en main
Les rubriques Mise en route suivantes vous offriront
une vue d’ensemble des possibilités qu’offre
Acrobat 3D. Pour plus de détails sur une rubrique,
consultez l’Aide.
Création de fichiers PDF
Les documents PDF conservent l’aspect des
originaux ; leur qualité n’est pas altérée au cours de la
conversion. En outre, étant donné que les documents
PDF peuvent être visualisés sous Windows, Mac OS
ou UNIX à l’aide du logiciel gratuit Adobe Reader®, il
est inutile de disposer de l’application source pour
afficher et imprimer ces documents. Vous pouvez
créer un document PDF au sein d’Acrobat 3D ou à
partir de diverses applications de création.
Par exemple, convertissez au format PDF un message
électronique Outlook traitant des contraintes d’un
projet, puis joignez-le à un document PDF présentant
les caractéristiques et le planning de ce projet. Il se
peut également que vos documents personnels soient
uniquement disponibles sur papier. Vous pouvez
facilement créer un fichier PDF à partir de chacun de
ces documents imprimés en vue de créer un système
de ressources humaines en ligne.
Convertissez votre document original (à gauche) au format
Adobe PDF ( au centre), puis ajoutez des signets, des commentaires
ou autres dans Acrobat (à droite).
Création à partir d’un fichier
Dans la plupart des cas, pour créer un fichier PDF
dans Acrobat, l’application qui a servi à créer le fichier
d’origine doit être installée sur le système.
1 Cliquez sur le bouton Créer un fichier PDF ,
puis choisissez A partir d’un fichier.
2 Sélectionnez le fichier à convertir, puis cliquez
sur Ouvrir.
Page 49

ADOBE ACROBAT 3D VERSION 8
Guide de prise en main
B-11
L’application de création s’ouvre automatiquement ou
une boîte de dialogue de progression s’affiche. Si le
format du fichier n’est pas pris en charge, un message
s’affiche pour vous indiquer que la conversion au
format PDF est impossible.
Création à partir d’un document papier
A l’aide d’Acrobat 3D et d’un scanner, vous pouvez
créer un fichier PDF directement à partir d’un
document papier.
1 Cliquez sur le bouton Créer un fichier PDF ,
puis choisissez A partir d’un scanner.
2 Sélectionnez l’entrée et la sortie, et les options de
document dans la boîte de dialogue Acrobat Scan, puis
cliquez sur Numériser.
3 Si vous créez un nouveau fichier PDF, précisez son
nom et son emplacement, puis cliquez sur Enregistrer.
4 Sélectionnez Numériser davantage de pages ou
Numérisation terminée.
Création à partir d’une page Web
Vous pouvez télécharger et convertir des pages Web à
partir du premier niveau spécifié par un URL, ou du
nombre de niveaux inférieurs de votre choix.
1 Cliquez sur le bouton Créer un fichier PDF ,
puis choisissez A partir d’une page Web.
2 Saisissez l’URL dans la zone de texte. (Cliquez sur
Parcourir pour convertir une page Web que vous avez
déjà téléchargée.)
3 Spécifiez le nombre de niveaux à télécharger et
l’emplacement source, puis cliquez sur Créer.
Création de A à Z
Vous avez la possibilité de créer de petits fichiers PDF
modifiables dans Acrobat 3D.
1 Choisissez Fichier > Créer un fichier PDF >
A partir d’une page vierge.
2 Cliquez dans le document et commencez la saisie.
Modifiez les attributs de texte à l’aide des options de la
barre d’outils Nouveau document.
3 Enregistrez le document.
4 Pour poursuivre la modification, choisissez
Document > Reprendre la modification.
Pour convertir le fichier PDF de manière à empêcher
toute modification ultérieure, choisissez Document >
Empêcher les modifications ultérieures.
Création à partir de Word
Une fois que vous avez installé Acrobat 3D, la barre
d’outils Acrobat PDFMaker est ajoutée à Word. Dans
Word 2007 pour Windows, accédez aux options
PDFMaker via le ruban Acrobat.
1 Dans Word, ouvrez le fichier à convertir.
2 Utilisez l’une des méthodes suivantes :
• (Word 2007 pour Windows) Cliquez sur Acrobat,
puis cliquez sur le bouton Créer un fichier PDF .
• (Autres versions de Word) Cliquez sur Convertir au
format Adobe PDF .
3 Précisez un nom de fichier et un emplacement, puis
cliquez sur Enregistrer.
4 (Mac OS uniquement) Cliquez sur Afficher le
fichier ou Terminer.
Page 50

B-12
CHAPITRE 1
Prise en main
Vous pouvez également convertir un fichier au format
PDF, puis l’envoyer par messagerie en cliquant sur le
bouton Créer et envoyer en révision (Office 2007)
ou Envoyer en révision (autres versions d’Office).
Création à partir d’Outlook (Windows)
Une fois que vous avez installé Acrobat 3D, la barre
d’outils Acrobat PDFMaker est ajoutée à Outlook.
1 Sélectionnez les messages électroniques voulus et
cliquez sur Créer un fichier PDF à partir des messages
sélectionnés .
2 Précisez un nom de fichier et un emplacement, puis
cliquez sur Enregistrer.
Les messages sélectionnés sont convertis en un lot
PDF ou un fichier PDF fusionné, selon les paramètres
de conversion choisis. Pour convertir des dossiers de
messages électroniques, sélectionnez les dossiers en
question et cliquez sur Créer un fichier Adobe PDF à
partir des dossiers . Vous pouvez également
archiver automatiquement les messages et dossiers de
messagerie.
Création à partir de Lotus Notes (Windows)
Une fois que vous avez installé Acrobat 3D, la barre
d’outils Acrobat PDFMaker est ajoutée à Lotus Notes
et de nou vel les co mman des appar ais sent dans le men u
Actions.
1 Sélectionnez les messages électroniques voulus et
cliquez sur Convertir les messages sélectionnés au
format Adobe PDF .
2 Précisez un nom de fichier et un emplacement, puis
cliquez sur Enregistrer.
Les messages sont convertis en un lot PDF ou un
fichier PDF fusionné, selon les paramètres de
conversion choisis. Vous pouvez convertir un dossier
entier en un lot PDF en cliquant sur Convertir le
dossier sélectionné en Adobe PDF .
Création à partir d’Internet Explorer (Windows)
Vous p ouve z conv e rt ir au f ormat PDF une p age We b
entière ou une sélection effectuée sur la page.
1 Dans Internet Explorer, ouvrez la page Web à
convertir.
2 (Facultatif) Cliquez et faites glisser le pointeur pour
sélectionner le texte et les images à convertir.
3
Cliquez sur Convertir la page Web au format PDF .
4 Précisez un nom de fichier et un emplacement, puis
cliquez sur Enregistrer.
Vous pouvez également convertir une ou plusieurs
pages Web, voire des sites Web entiers, à partir
d’Acrobat 3D.
Création à l’aide de l’imprimante Adobe PDF
Dans de nombreuses applications, vous pouvez
utiliser la commande d’impression et l’imprimante
Adobe PDF pour convertir un fichier au format PDF.
1 Ouvrez le fichier à convertir, puis choisissez
Fichier > Imprimer.
2 Choisissez Adobe PDF dans la liste des
imprimantes, puis imprimez le fichier.
3 Si vous y êtes invité, indiquez un nom de fichier et
un emplacement, puis cliquez sur Enregistrer.
Vous pouvez également modifier le paramétrage par
défaut de l’imprimante Adobe PDF ou créer des
paramètres personnalisés.
Page 51

ADOBE ACROBAT 3D VERSION 8
Guide de prise en main
B-13
Collaboration sur des conceptions 3D
Partagez vos idées de conception 3D en les
convertissant en fichiers PDF sécurisés pouvant être
commentés par d’autres utilisateurs dans la version
gratuite d’Adobe Reader. Lancez une révision par
courrier électronique pour obtenir des commentaires
de vos collaborateurs. L’assistant de révision par
messagerie électronique permet aux utilisateurs de
Reader d’effectuer des commentaires par défaut.
Vous pouvez également lancer une réunion
Acrobat Connect qui vous permet d’effectuer des
démonstrations de conceptions 3D et de les
commenter sur votre bureau en temps réel.
Remarque : Si vous souhaitez protéger votre fichier
PDF 3D, effectuez cette opération avant de commencer
la révision. Vous ne pouvez pas modifier les propriétés
de sécurité dans un fichier PDF Reader.
Les collaborateurs peuvent explorer tous les aspects du
modèle 3D, des structures internes masquées aux
animations décomposées. Ils peuvent faire tourner,
couper et mesurer les pièces tout en ajoutant leurs
commentaires dans des notes, des dessins et d’autres
annotations.
Page 52

B-14
CHAPITRE 1
Prise en main
Conversion d’un fichier 3D au format PDF
Convertissez tout fichier 3D pris en charge au format
PDF. (Pour obtenir une liste des formats pris en
charge, sélectionnez Edition > Préférences, puis
sélectionnez Conversion au format PDF à gauche dans
la colonne Catégories.)
1 Cliquez sur le bouton Créer un fichier PDF de
la barre d’outils Tâches, puis choisissez A partir d’un
fichier.
2 Sélectionnez le fichier de CAO 3D que vous
souhaitez convertir.
3 Sélectionnez les paramètres prédéfinis ou spécifiez
les paramètres de votre choix.
Ajout de commentaires à un modèle 3D
En ajoutant des commentaires, vous créez une
nouvelle vue associée à ces commentaires.
1 Sélectionnez un outil sur la barre d’outils
Commentaires et annotations.
2 Cliquez sur le modèle 3D pour ajouter un
commentaire et créer une nouvelle vue dans
l’arborescence du modèle.
Pour ajouter des commentaires à une vue de
commentaire, sélectionnez cette vue dans
l’arborescence du modèle, puis cliquez sur le modèle.
Démarrage d’une réunion
Si vous avez un compte Adobe Acrobat Connect,
vous pouvez démarrer une réunion pour réviser des
documents PDF dans un navigateur Web. Vous
pouvez également créer un compte d’évaluation dans
ce but.
Remarque : Acrobat Connect n’est pas disponible dans
toutes les langues.
1 Cliquez sur Démarrer la réunion sur la barre
d’outils Tâches.
2 Cliquez sur Connexion, puis saisissez l’URL, votre
identifiant et votre mot de passe pour la réunion.
(Vous pouvez également cliquer sur Créer un compte
d’évaluation et suivre les instructions affichées.)
3 Cliquez sur Envoyer une invitation par messagerie
électronique ou sur Partager mon écran.
Intéropérabilité CAO, FAO et IAO
De la planche à dessin à l’usine de fabrication, le
document PDF peut simplifier la gestion du flux des
informations de conception CAO, la fabrication et
l’ingéniérie (CAO, FAO et IAO). Par exemple, vous
pouvez rapidement convertir tout un assemblage en
fichier PDF à une fraction de la taille du fichier
d’origine tout en conservant la tolérance et le
dimensionnement géométrique ainsi que les autre
spécifications relatives au produit.
En utilisant Acrobat 3D, les fabricants et les fournisseurs peuvent ouvrir virtuellement tout fichier de CAO
3D sans installer l’application CAO d’origine ou un
convertisseur CAO. Vous pouvez importer et visualiser
les informations PMI (Import and view Product
Manufacturing Information) à partir des fichiers
CATIA V5, I-DEAS, JT, NX et Pro/ENGINEER.
Lorsque la conception est finalisée, exportez la
Page 53

ADOBE ACROBAT 3D VERSION 8
Guide de prise en main
B-15
géométrie dans un format de fichier standard qui peut
être réutilisé dans des applications FAO pour couper,
contruire et assembler les pièces.
Affichage des informations de produit pour un
modèle 3D
Vous pouvez afficher les informations PMI (Product
Manufacturing Information) dans l’arborescence du
modèle et dans le modèle 3D si vous l’avez importé au
cours de la conversion au format PDF.
1 Cliquez sur le modèle 3D, puis cliquez sur l’icône
d’arborescence du modèle dans la barre d’outils 3D.
2 Dans l’arborescence du modèle, cliquez sur chacune
des vues pour visualiser les informations PMI
associées à une vue en particulier.
Exportation de la géométrie à partir d’un modèle 3D
Si la géométrie a été retenue au cours de la conversion,
vous pouvez l’exporter aux formats IGES, STEP,
VRML ou ParaSolid, pouvant être lus par la plupart
des applications CAE et CAM.
1 Cliquez avec le bouton droit de la souris sur le
modèle 3D et sélectionnez Exporter les données.
2 Sélectionnez un type de fichier et cliquez sur
Paramètres pour spécifier les options concernant ce
type de fichier.
Combinaison de fichiers
Combinez des fichiers issus de sources diverses en
un seul document PDF fusionné ou en un lot PDF
assemblé de fichiers apparentés. Vous pouvez par
exemple réunir des brochures, des présentations,
des feuilles de calcul et des contrats en une seule
proposition commerciale cohérente.
Si vous fusionnez des fichiers en un seul fichier
PDF, vous pouvez ensuite y insérer des éléments
unificateurs visant à homogénéiser le document
résultant. Ajoutez par exemple un en-tête ou un pied
de page au fichier créé. Renumérotez les pages de
manière que la numérotation indiquée sur la barre de
navigation soit logique sur l’ensemble des fichiers
fusionnés. Autre possibilité, vous pouvez faire pivoter,
supprimer et remplacer des pages selon vos besoins
afin de donner un aspect homogène au document et
de tenir celui-ci à jour.
Page 54

CHAPITRE 1
B-16
Prise en main
Fusionnez des documents issus de diverses applications en un seul
document Adobe PDF.
Création d’un fichier PDF à partir de plusieurs
fichiers
Vous pouvez facilement fusionner différents types de
fichiers en un seul document PDF.
1 Cliquez sur Combiner des fichiers , puis sur
Ajouter les fichiers.
2 Sélectionnez les fichiers à combiner, puis cliquez
sur Ajouter des fichiers.
3 Organisez les fichiers dans l’ordre souhaité, puis
choisissez une option de taille de fichier et paramètre
de conversion.
4 Cliquez sur Suivant, sélectionnez Fusionner les
fichiers en un seul fichier PDF, puis cliquez sur Créer.
Au lieu de fusionner des fichiers, vous pouvez créer un
lot PDF à partir de fichiers.
Assemblage de fichiers PDF dans un lot
Un lot PDF permet d’assembler des informations
connexes dans un seul document PDF tout en
conservant l’intégralité de chacun des fichiers PDF
qui le composent.
1 Cliquez sur Combiner des fichiers , puis sur
Ajouter les fichiers.
2 Sélectionnez les fichiers à combiner, puis cliquez
sur Ajouter des fichiers.
3 Organisez les fichiers dans l’ordre souhaité, puis
choisissez une option de taille de fichier et paramètre
de conversion.
4 Cliquez sur Suivant, sélectionnez Assembler les
fichiers dans un lot PDF, puis cliquez sur Créer.
Modification de la liste des fichiers à combiner
Lorsque vous combinez des fichiers, vous pouvez
organiser le jeu de fichiers de différentes manières.
1 Cliquez sur Combiner des fichiers puis sur
Ajouter des fichiers, et ajoutez les fichiers voulus.
2 Pour modifier la liste des fichiers ou supprimer un
fichier de cette liste, sélectionnez un fichier et
effectuez l’une des opérations suivantes :
• Cliquez sur Monter ou sur Descendre ou
faites glisser le fichier vers une autre position dans
la liste.
• Cliquez sur Sélectionner les pages pour inclure un
sous-groupe de pages. (Le nom du bouton varie
selon le type de fichier.)
• Cliquez sur Supprimer ou appuyez sur la touche
Suppr.
Page 55

ADOBE ACROBAT 3D VERSION 8
Guide de prise en main
B-17
Ajout d’en-têtes et de pieds de page
Il est possible d’ajouter un même en-tête et un même
pied de page à toutes les pages d’un document PDF ou
d’appliquer des en-têtes et pieds de page différents à
certaines pages.
1 Choisissez Document > En-tête et pied de page >
Ajouter. Si un message s’affiche, cliquez sur Ajouter.
2 Définissez les paramètres de police et de marge.
3 Dans les zones de texte de l’en-tête et du pied de
page, saisissez le texte souhaité. Cliquez sur les
boutons situés sous ces zones pour insérer un numéro
de page ou une date.
Vous pouvez enregistrer les paramètres d’en-tête et de
pied de page pour les réutiliser ultérieurement.
Renumérotation des pages
Lorsque vous renumérotez les pages, seuls les numéros
qui apparaissent sur le panneau Pages et sur la barre
d’outils sont pris en compte. Pour modifier les
numéros de page qui apparaissent sur le document,
ajoutez un en-tête ou un pied de page.
1 Cliquez sur le bouton Pages , puis choisissez
Numéroter des pages dans le menu Options.
2 Spécifiez les pages auxquelles la numérotation doit
s’appliquer.
3 Spécifiez le style de numérotation, le préfixe, s’il y a
lieu, et le numéro de début.
Vous pouvez également reprendre le type de
numérotation de la section précédente.
Rotation des pages
Vous avez la possibilité de faire pivoter la totalité ou
une partie des pages d’un document PDF.
1 Choisissez Document > Pivoter des pages.
2 Précisez le sens de rotation et l’étendue des pages.
3 Choisissez les options souhaitées dans les menus de
rotation.
Pour appliquer une rotation temporaire à une page,
choisissez Affichage > Rotation > Horaire ou
Antihoraire.
Suppression de pages
Après avoir combiné des fichiers, vous pouvez
supprimer les pages non souhaitées ou vierges.
1 (Facultatif) Cliquez sur le bouton Pages du
navigateur et sélectionnez les pages à supprimer.
2 Choisissez Document > Supprimer des pages.
3 Cliquez sur Sélectionnées pour supprimer les pages
sélectionnées, ou sur De et précisez une étendue.
Pour conserver une copie du document PDF d’origine,
veillez à enregistrer le nouveau document à l’aide de
l’option Enregistrer sous plutôt qu’avec l’option
Enregistrer.
Remplacement de pages
Pour mettre rapidement à jour un document PDF, il
est possible de remplacer des pages précises.
1 Choisissez Document > Remplacer des pages.
2 Sélectionnez le document qui contient les pages de
remplacement, puis cliquez sur Sélectionner.
Page 56

B-18
CHAPITRE 1
Prise en main
3 Sous Pages d’origine, indiquez les pages à
remplacer. Sous Pages de remplacement, indiquez la
première page de remplacement.
Les éléments interactifs, tels que les liens et les signets,
associés aux pages d’origine sont conservés.
Exportation
Si vous n’avez pas accès au fichier qui a servi à créer un
document PDF, vous pouvez convertir ce dernier en
un format autorisant les modifications. Vous pouvez
également sélectionner du texte et des images pour les
réutiliser dans d’autres documents. Vous avez aussi la
possibilité d’extraire des pages et de les enregistrer
dans un nouveau document PDF.
Par exemple, enregistrez une brochure au format
HTML pour la mettre à disposition sur le site Web
de votre société. A partir d’un document interne
volumineux, extrayez les quelques pages que vous
souhaitez remettre à des clients. Il est très facile
de recycler des images et du texte issus tirés de
spécifications de conception en les copiant
simplement dans un document Word, Photoshop
ou InDesign.
Exportation vers Word
Si vous n’avez pas le fichier à partir duquel un
document PDF a été créé, vous pouvez enregistrer ce
dernier en tant que document Word, puis le modifier
dans cette application.
1 Cliquez sur le bouton Exporter sur la barre
d’outils Tâches, puis choisissez Document Word.
Remarque : L’e nr eg is tr e m e nt d’u n f ic hi er PD F a u
format Word ne produit pas un fichier équivalent à un
document créé dans Word, certaines informations de
codage risquent en effet d’être perdues.
Exportation au format HTML ou XML
Pour faciliter l’utilisation d’un fichier PDF sur le Web,
il vous suffit de convertir le fichier au format HTML
ou XML.
1 Cliquez sur Exporter sur la barre d’outils Tâches,
puis choisissez Page Web HTML ou XML 1.0.
2 Cliquez sur le bouton Paramètres pour définir les
options de conversion.
Pour enregistrer un fichier PDF au format HTML 3.2,
cliquez sur Exporter et choisissez Autres formats >
HTML 3.2.
Exportation au format texte
Vous pouvez enregistrer un fichier PDF en texte
enrichi (RTF), accessible ou brut. Le format RTF
permet de conserver la plus grande partie du
formatage. Le texte accessible préserve les éléments
tels que les commentaires, les champs de formulaire
ou le texte de remplacement.
1 Cliquez sur Exporter sur la barre d’outils Tâches,
choisissez Autres formats, puis choisissez le format
texte voulu
2 Si vous enregistrez en RTF ou texte brut, cliquez sur
Paramètres pour régler les paramètres de conversion.
2 Cliquez sur le bouton Paramètres pour définir les
options de conversion.
Page 57

ADOBE ACROBAT 3D VERSION 8
Guide de prise en main
B-19
Sélection et copie de texte
Il est possible de copier des mots, des lignes ou des
colonnes de texte à partir d’un fichier PDF.
1 A l’aide de l’outil Sélection , effectuez l’une des
opérations suivantes :
• Cliquez et faites glisser le pointeur sur le texte à
sélectionner.
• Cliquez deux fois pour sélectionner un mot, trois
fois pour sélectionner une ligne de texte.
2 Placez le pointeur sur l’icône qui s’affiche en regard
du te xte s él ec ti onn é, puis ch oisi ss ez une op ti on dan s l e
menu contextuel.
Si la sélection de texte est impossible, il s’agit sans
doute d’une image ou d’un document numérisé.
Sélection et copie d’une image
Vous pouvez copier une image dans le Presse-papiers
ou dans une autre application à partir d’un
fichier PDF, ou enregistrer cette image dans un fichier.
1 A l’aide de l’outil Sélection , cliquez sur une
image, ou faites glisser une partie de l’image une fois
que le pointeur s’est transformé en une icône de viseur.
2 Effectuez l’une des opérations suivantes :
• Faites glisser l’image dans un document ouvert dans
l’application cible.
•
Cliquez avec le bouton droit de la souris ou en
maintenant la touche Contrôle enfoncée, puis
choisissez Copier l’image ou Enregistrer l’image sous.
Instantané d’une page
L’outil Instantané permet de copier l’ensemble du
contenu sélectionné. Le texte et les images sont tous
deux copiés sous la forme d’une image.
1 Choisissez Outils > Sélection et zoom > Instantané.
2 Faites glisser sur la page afin de sélectionner le
contenu ou cliquez pour copier toute la page.
Celui-ci est copié dans le Presse-papiers lorsque vous
relâchez le bouton de la souris.
Extraction d’une page
Les pages extraites sont enregistrées dans un nouveau
fichier PDF.
1 Choisissez Document > Extraire des pages.
2 Spécifiez l’intervalle de pages à extraire.
3 Indiquez si vous souhaitez supprimer les pages
après leur extraction.
4 Pour enregistrer les pages extraites dans des fichiers
distincts plutôt qu’au sein d’un même fichier PDF,
choisissez Extraire les pages sous forme de fichiers
distincts.
Tous les liens, commentaires et champs de formulaires
des pages extraites le sont également, mais pas les
signets ni les articles.
Protection
Vous pouvez utiliser le chiffrement par mot de passe
ou par certificat, de même que des stratégies serveur,
pour renforcer le contrôle d’accès à vos documents
PDF. Ces fonctions de protection vous permettent de
restreindre les actions que des tiers peuvent exécuter
et visualiser dans les fichiers PDF dont vous êtes
l’auteur.
Page 58

B-20
CHAPITRE 1
Prise en main
Créez par exemple des fichiers en lecture seule, pour
une diffusion sur le Web. Limitez l’accès aux fichiers
que vous envoyez en révision de manière que seul
l’ajout de commentaires soit permis. Vous avez la
possibilité de biffer du contenu confidentiel dans un
condensé juridique ou de supprimer des informations
personnelles d’un document PDF avant de le mettre à
la disposition du public.
Recherche d’informations masquées dans un
fichier PDF
Avant de mettre un fichier PDF à disposition d’autres
utilisateurs, il peut être utile de supprimer des
informations relatives à l’historique du document ou
des éléments personnels, tels que les métadonnées qui
vous identifient comme l’auteur.
1 Choisissez Document > Examiner le document.
2 Sélectionnez les éléments à supprimer du
fichier PDF, puis cliquez sur Supprimer tous les
éléments sélectionnés.
3 Enregistrez le document sous un nouveau nom.
Vous pouvez également effectuer cette recherche
d’informations à la fin du processus de biffure.
Biffure du contenu confidentiel
L’outil Biffure permet de supprimer le contenu
confidentiel d’un fichier PDF.
Important : Enregistrez une copie du fichier PDF avant
d’appliquer les biffures.
1 Choisissez Affichage > Barres d’outils > Biffure.
2 Cliquez sur Repérer les biffures , puis effectuez
l’une des opérations suivantes :
• Cliquez deux fois sur un mot ou une image.
• Cliquez et faites glisser le pointeur sur le texte à
sélectionner.
• Cliquez puis sélectionnez une zone de la page en
maintenant la touche Ctrl/Contrôle enfoncée.
3 Cliquez sur Appliquer les biffures . Si vous le
souhaitez, vous pouvez rechercher des informations
masquées et les supprimer.
L’option Rechercher et biffer permet de supprimer
toutes les instances d’une chaîne recherchée.
Ajout d’un mot de passe à un document
Il est possible de restreindre l’accès à un document PDF
en lui ajoutant un mot de passe d’ouverture.
Important : Il est impossible d’ouvrir le fichier PDF si
vous oubliez le mot de passe.
1 Cliquez sur Protection sur la barre d’outils, puis
choisissez Chiffrement par mot de passe.
2 Sélectionnez Exiger un mot de passe pour
l’ouverture du document, puis saisissez le mot de passe
(en tenant compte des minuscules et majuscules) dans
la zone de texte.
Si le fic hi er P DF est dé jà p rot égé, i l p eut ê tre néce ss air e
de fournir le mot de passe d’accès aux droits afin de
modifier les paramètres de protection.
Prévention de la modification d’un fichier PDF
Les restrictions de protection vous permettent
d’empêcher d’autres utilisateurs de modifier le
fichier PDF.
1 Cliquez sur Protection sur la barre d’outils
Tâches, puis choisissez Chiffrement par mot de passe.
Page 59

ADOBE ACROBAT 3D VERSION 8
Guide de prise en main
B-21
2 Sélectionnez Restreindre la modification et
l’impression du document, puis saisissez le mot de
passe d’accès aux droits.
3 Choisissez une option dans le menu Modifications
autorisées.
Pour en savoir plus sur l’utilisation d’autres méthodes
de protection pour restreindre l’accès au fichier,
reportez-vous à l’aide.
Création de pièces jointes protégées
Pour ajouter une protection à un fichier PDF, vous
pouvez l’incorporer dans une enveloppe chiffrée, ou
enveloppe sécurisée, et l’envoyer en pièce jointe à un
message électronique.
1 Cliquez sur Protection et choisissez Créer une
enveloppe sécurisée.
2 Cliquez sur Ajouter le fichier à envoyer et
sélectionnez les documents voulus.
3 Cliquez sur Suivant et suivez les instructions à
l’écran pour créer l’enveloppe sécurisée.
Les destinataires peuvent extraire les documents
chiffrés puis les enregistrer. Une fois enregistrés, les
documents ne sont plus chiffrés.
Protection d’un fichier PDF à l’aide d’une stratégie
Pour appliquer rapidement les options de sécurité,
utilisez soit une stratégie utilisateur que vous créez, soit
une stratégie d’entreprise créée par un administrateur
d’Adobe LiveCycle Policy Server partagée et par un
groupe d’utilisateurs. Deux stratégies sont proposées
dans Acrobat 3D.
2 Cliquez sur Oui et modifiez les paramètres de
protection selon vos besoins.
Création d’une stratégie de protection utilisateur
Les stratégies de protection facilitent l’application
d’options de protection identiques à plusieurs
documents PDF. Les stratégies de protection
concernent le chiffrement, les paramètres de
protection et des informations relatives aux
utilisateurs autorisés à ouvrir les fichiers PDF ou à
modifier les paramètres de protection.
1 Cliquez sur le bouton Protection de la barre
d’outils, puis choisissez Gérer les stratégies de
protection.
2 Cliquez sur Créer, puis sélectionnez le type de
protection souhaité.
3 Cliquez sur Suivant, puis suivez les instructions à
l’écran pour configurer la stratégie, et choisissez les
options de protection appropriées.
Signer
L’apposition d’une signature numérique sur un
document PDF est très semblable à la signature d’un
document papier. Une signature numérique vous
permet par exemple d’indiquer que vous approuvez le
contenu d’un document, que vous avez révisé le
document ou que vous êtes en accord avec les points
qu’il présente.
1 Cliquez sur le bouton Protection de la barre
d’outils Tâches et choisissez l’une des stratégies
répertoriées en haut du menu.
Page 60

B-22
CHAPITRE 1
Prise en main
En outre, l’apposition d’une signature numérique rend
possible le suivi des modifications apportées au
document PDF. Pour renforcer la protection d’un
document PDF, vous pouvez certifier ce fichier ; les
destinataires sont alors assurés que le document n’a
pas été modifié. Enfin, il est possible de vérifier la
validité des signatures numériques.
A
B
Apposez une signature au document PDF pour indiquer que vous
l’avez lu ou pour en certifier le contenu.
A. Signature de certification B. Signature numérique
Création d’une identification numérique
autosignée
Une identification numérique est indispensable si
vous souhaitez signer des documents et mettre en
place une protection par certificat. Les identifications
numériques autosignées créées dans Acrobat 3D
peuvent s’avérer intéressantes dans de nombreuses
situations. Pour plus de détails sur l’acquisition d’une
identification numérique auprès des partenaires en
sécurité d’Adobe, visitez le site Web d’Adobe.
1 Choisissez Options avancées > Options de
protection.
2 Sélectionnez Identifications numériques et cliquez
sur Ajouter une identification numérique.
3 Sélectionnez Créer une ID numérique autosignée à
utiliser avec Acrobat.
4 Suivez les instructions à l’écran pour configurer
votre identification numérique autosignée.
Enregistrement d’une identification numérique
Vous devez enregistrer votre identification numérique
dans Acrobat 3D avant de pouvoir l’utiliser.
1 Choisissez Options avancées > Options de
protection.
2 Sélectionnez Identifications numériques et cliquez
sur Ajouter une identification numérique.
3 Sélectionnez Rechercher un fichier d’ID numérique
existant.
4 Suivez les instructions à l’écran pour sélectionner le
fichier d’identification numérique, saisir votre mot de
passe et enregistrer l’identification.
Vous pouvez créer des identifications numériques
autosignées dans Acrobat 3D. Ou, pour plus de détails
sur l’acquisition d’une identification numérique
auprès des partenaires en sécurité d’Adobe, visitez le
site Web d’Adobe.
Page 61

ADOBE ACROBAT 3D VERSION 8
Guide de prise en main
B-23
Partage d’un certificat
L’identification numérique comprend un certificat qui
permet aux autres utilisateurs de valider votre
signature et de chiffrer des documents pour vous.
1 Choisissez Options avancées > Options de
protection.
2 Sélectionnez Identifications numériques dans le
panneau gauche.
3 Sélectionnez l’identification à partager, puis cliquez
sur Exporter .
4 Suivez les instructions à l’écran pour envoyer le
certificat par messagerie électronique ou l’enregistrer
dans un fichier.
Si vous faites appel à une méthode de protection tierce,
il n’est généralement pas nécessaire de partager votre
certificat avec d’autres utilisateurs.
Création d’un aspect de signature
Vous pouvez modifier l’apparence de votre signature
numérique. Il est notamment possible d’y inclure votre
signature manuscrite numérisée.
1 (Facultatif) Enregistrez l’image souhaitée sur une
page indépendante, puis convertissez cette page au
format PDF.
2 Choisissez Edition > Préférences (Windows) ou
Acrobat 3D (Mac OS) > Préférences, puis sélectionnez
Protection.
3 Cliquez sur Créer et entrez un titre.
4 (Facultatif) Sélectionnez Image importée, cliquez
sur Fichier et choisissez le fichier désiré.
Signature d’un fichier PDF
Indiquez votre approbation au moyen d’une signature
numérique. Pour obtenir les meilleurs résultats,
modifiez vos préférences de sécurité de manière à
toujours apposer une signature en mode d’aperçu.
Vous pourrez ainsi consulter et signer le fichier PDF
en toute sécurité.
1 Cliquez dans le champ de signature. Vous pouvez
aussi cliquer sur Signature et choisir Signer le
document.
2 Pour apposer une signature numérique, suivez les
instructions à l’écran.
Si le document ne contient aucun champ de signature
vide, cliquez sur Signature et choisissez Apposer une
signature pour signer le fichier PDF.
Certification d’un fichier PDF
Certifier un document PDF revient à approuver son
contenu. Cela vous permet également d’indiquer les
types de modifications autorisées pour que ce
document reste certifié.
1 Cliquez sur le bouton Signature de la barre
d’outils Tâches, choisissez Certifier par une signature
visible ou Certifier par une signature invisible, puis
cliquez sur OK.
2 Si vous certifiez le document par une signature
visible, délimitez un champ de signature.
3 Pour apposer une signature de certification, suivez
les instructions à l’écran.
4 Enregistrez le fichier PDF sous un nom différent.
5 Spécifiez les options voulues.
Page 62

B-24
CHAPITRE 1
Prise en main
Validation de signatures
Lorsque vous ouvrez un document, une icône d’état
s’affiche à côté de la signature, pour indiquer sa
validité.
1 Cliquez sur le bouton Signatures du navigateur,
puis sélectionnez la signature.
2 Cliquez avec le bouton droit de la souris ou en
maintenant la touche Contrôle enfoncée, puis
choisissez Afficher les propriétés de la signature.
3 Utilisez les différents onglets et options de la boîte
de dialogue des propriétés afin de résoudre tout
problème de signature. Par exemple, si l’identité est
indéterminée ou non vérifiée, cliquez sur l’onglet
Signataire, puis sur Certificat pour savoir si le
certificat est approuvé ou non.
Révisions et commentaires
Pour simplifier le processus de révision, optez pour
une révision automatisée par messagerie électronique
ou une révision partagée. La révision d’un document
PDF à l’aide d’Acrobat 3D permet à tous les utilisateurs
de commenter une version unique du document,
sans la modifier, grâce à un large éventail d’outils de
commentaire : notes, tampons, modifications de
texte, surlignement et annotations de dessin. Si vous
configurez une révision partagée, les réviseurs
peuvent visualiser les commentaires des uns et des
autres et y répondre. Grâce à la fonction de suivi
des révisions, vous pouvez inviter des réviseurs
supplémentaires, rejoindre une révision et suivre
l’évolution des révisions partagées.
Par exemple, si vous souhaitez faire réviser une
spécification de projet par une équipe composée de
collaborateurs dispersés géographiquement, configurez
une révision partagée pour faire parvenir le document
PDF à tous les participants. Lorsque les participants (y
compris les utilisateurs d’Adobe Reader 8.0 si vous avez
activé la fonction de commentaire pour les utilisateurs
de cette application) ouvrent la pièce jointe au message
électronique, Acrobat affiche la barre d’outils
Commentaires, ainsi que des instructions sur la
procédure de révision.
C
A
B
Ajoutez différents types de commentaires à votre document PDF.
Ces commentaires sont également répertoriés dans une liste.
A. Note B. Annotation de dessin C. Tampon D. Te xte re mpla c é
E. Pièce jointe F. Te xte surlig n é
D
E
F
Initiation d’une révision par messagerie
électronique
La révision par messagerie électronique permet de
suivre l’état de la révision et de fusionner les
commentaires reçus dans le fichier PDF d’origine.
1 Cliquez sur Révisions et commentaires , puis
choisissez Joindre pour une révision par messagerie.
2 Le cas échéant, indiquez votre identité afin de créer
un profil de réviseur.
Page 63

ADOBE ACROBAT 3D VERSION 8
Guide de prise en main
B-25
3 Suivez les instructions à l’écran pour sélectionner le
fichier PDF, inviter des réviseurs et envoyer une
invitation électronique.
Si votre application de messagerie n’envoie pas
automatiquement les messages, vous devrez peut-être
répondre aux messages d’alerte et ouvrir l’application
pour achever l’envoi du message.
Initiation d’une révision partagée
La révision partagée permet aux réviseurs, y
compris aux utilisateurs d’Adobe Reader, de voir les
commentaires des autres réviseurs et d’y répondre
pendant le processus de révision.
Important : Pour mener une révision partagée, les
réviseurs et vous-même devez disposer d’un accès en
écriture à un serveur de commentaires partagé.
1 Cliquez sur Révisions et commentaires puis
choisissez Envoyer en révision partagée.
2 Le cas échéant, indiquez votre identité afin de créer
un profil de réviseur.
3 Suivez les instructions à l’écran pour sélectionner le
serveur (ou en ajouter un), sélectionner le fichier PDF,
inviter des réviseurs et envoyer une invitation
électronique.
Suivi et gestion d’une révision
Le Suivi des révisions fournit toutes les informations
relatives aux documents que vous avez envoyés en
révision ou reçus. Utilisez-le pour reprendre une
révision, envoyer un rappel ou inviter d’autres
réviseurs.
1 Cliquez sur Révisions et commentaires et
choisissez Suivi des révisions.
2 Sélectionnez le document PDF souhaité dans le
panneau de gauche.
3 Effectuez l’une des opérations suivantes :
• Pour reprendre une révision, cliquez deux fois sur le
fichier PDF.
• Pour envoyer un message, cliquez sur Envoyer un
message aux réviseurs ou Envoyer un message à
l’initiateur.
• Pour inviter d’autres réviseurs, cliquez sur Ajouter
des réviseurs.
Invitation de réviseurs supplémentaires
Si vous avez initié une révision, vous pouvez inviter
d’autres réviseurs à y participer. Si vous êtes un réviseur,
demandez à l’initiateur de convier d’autres réviseurs. Il
pourra ainsi effectuer le suivi de tous les réviseurs et être
averti de la réception des commentaires.
1 Cliquez sur Révisions et commentaires et
choisissez Suivi des révisions.
2 Sélectionnez le fichier PDF voulu dans la zone
Révisions que j’ai envoyées, puis cliquez sur Ajouter
des réviseurs dans la partie droite.
3 Suivez les instructions à l’écran pour ajouter les
adresses électroniques, modifier le message si
nécessaire et envoyer l’invitation électronique.
Participer à une révision par messagerie
électronique
Lorsque vous ouvrez une pièce jointe PDF reçue dans
le cadre d’une révision par messagerie, une version
suivie du fichier PDF s’ouvre, assortie de la barre de
message du document, du bouton Envoyer les
commentaires et de la barre d’outils Commentaires et
annotations.
Page 64

B-26
CHAPITRE 1
Prise en main
Important : Si vous êtes invité à vous connecter à un
serveur à l’ouverture du fichier PDF, il s’agit alors d’une
révision partagée.
1 Ouvrez la pièce jointe PDF à partir de votre
application de messagerie.
2 Ajoutez des commentaires à l’aide des outils de
commentaire.
3 Enregistrez le fichier PDF, puis cliquez sur Envoyer
les commentaires.
Participation à une révision partagée
Lorsque vous ouvrez un fichier PDF partagé, des outils
de commentaires s’affichent ainsi que des instructions
sur la barre de message du document.
1 Ouvrez la pièce jointe PDF ou cliquez sur le lien.
2 Cliquez sur Se connecter et saisissez votre
identifiant et votre mot de passe, le cas échéant.
3 Entrez vos nom, adresse électronique et fonction
afin de créer un profil de réviseur, le cas échéant.
4 Ajoutez des commentaires.
5 Lorsque vous êtes prêt à partager vos
commentaires, cliquez sur Publier les commentaires.
Dans une révision partagée, vous pouvez voir les
commentaires que tous les réviseurs ont publiés.
Création d’une annotation de dessin
Grâce aux outils d’annotation de dessin, vous pouvez
ajouter des lignes, des flèches et d’autres formes à un
fichier PDF.
1 Choisissez Outils > Commentaires et annotations,
puis choisissez l’outil voulu.
2 Dessinez sur le fichier PDF. Par exemple, cliquez et
faites glisser la souris de manière à tracer une ligne,
une flèche ou un rectangle.
3 (Facultatif) A l’aide de l’outil Sélection, cliquez deux
fois sur l’annotation, puis entrez un commentaire dans
la note contextuelle.
Pour modifier les propriétés telles que la couleur et
l’épaisseur de trait, cliquez sur l’annotation avec le
bouton droit de la souris ou en maintenant la touche
Contrôle enfoncée, puis choisissez Propriétés.
Formulaires
Vous pouvez créer un formulaire au format PDF
contenant des champs interactifs provenant de
diverses sources : un fichier électronique existant tel
qu’un document Word, une feuille de calcul, un
document papier numérisé ou un modèle. Vous
pouvez ensuite diffuser le formulaire par messagerie
électronique ou via un serveur partagé, et effectuer le
suivi des formulaires qui vous sont renvoyés. Pour
finir, recueillez et examinez les données des
formulaires, et exportez-les vers d’autres applications
en toute simplicité.
Vous pourriez par exemple convertir tous vos
formulaires de ressources humaines au format PDF et
les publier sur un serveur partagé, pour en faciliter
l’accès. Vous pourriez ensuite effectuer le suivi d’un
formulaire donné, par exemple un formulaire
d’adhésion à un programme annuel d’avantages
sociaux, afin de savoir qui a rempli et renvoyé le
formulaire. Une fois les données renvoyées recueillies,
vous pouvez alors les exporter vers une feuille de
calcul ou une base de données du personnel.
Page 65

ADOBE ACROBAT 3D VERSION 8
Guide de prise en main
Les formulaire créés à l’aide de l’assistant constituent
des formulaires LiveCycle Designer. Pour créer plutôt
un formulaire Acrobat, choisissez Formulaires >
Exécuter la reconnaissance des champs de formulaire.
B-27
A
B
C
D
E
Les champs de formulaire interactifs facilitent la collecte des
données.
A. Case à cocher B. Bouton radio C. Combo box D. Text box
E. Button
Création d’un formulaire
L’assistant Créer un formulaire vous aide à créer un
formulaire PDF à partir d’un modèle (sous Windows
seulement), d’un document électronique, d’une feuille
de calcul ou d’un document papier numérisé.
1 Cliquez sur Formulaires sur la barre d’outils
Tâches, puis choisissez Créer un formulaire.
2 Sélectionnez le fichier source du formulaire PDF,
puis cliquez sur Continuer.
3 Suivez les instructions qui s’affichent à l’écran.
Modification d’un formulaire
Selon la méthode de création du formulaire PDF,
vous pouvez le modifier dans Acrobat 3D ou dans
Adobe LiveCycle Designer (sous Windows seulement).
Remarque : (Windows) Les formulaires PDF créés
dans Acrobat 3D peuvent être modifiés dans
LiveCycle Designer. Cependant, les formulaires créés
dans LiveCycle Designer ne peuvent pas être modifiés
dans Acrobat 3D.
1 Ouvrez le formulaire PDF.
2 Choisissez Formulaires > Modifier le formulaire
dans Designer ou Modifier le formulaire dans
Acrobat.
3 Ajoutez ou modifiez les propriétés de champ et de
champ de formulaire selon vos besoins.
Diffusion d’un formulaire
Après l’avoir créé, vous pouvez diffuser un
formulaire PDF à l’aide de l’assistant Diffuser le
formulaire.
Remarque : Pour que vous puissiez utiliser l’assistant,
le formulaire doit contenir un bouton d’envoi.
1 Ouvrez le formulaire souhaité.
2 Cliquez sur le bouton Formulaires de la barre
d’outils Tâches, puis choisissez Diffuser le formulaire.
3 Suivez les instructions affichées pour préparer le
formulaire à la diffusion.
Page 66

B-28
CHAPITRE 1
Prise en main
4 Indiquez si vous souhaitez envoyer le formulaire
par messagerie électronique, ou l’enregistrer et
l’envoyer ultérieurement.
5 Suivez les instructions à l’écran pour diffuser le
formulaire.
Suivi et gestion des formulaires
Le dispositif de suivi des formulaires vous aide à gérer
les formulaires que vous avez diffusés.
1 Cliquez sur le bouton Formulaires de la barre
d’outils Tâches, puis choisissez Suivi des formulaires.
2 Sélectionnez une icône de catégorie dans le
panneau de gauche pour afficher les formulaires
correspondants :
• Tâches à effectuer affiche les formulaires que vous
avez reçus.
• Historique affiche les formulaires que vous avez
diffusés.
• Résultats de la recherche vous permet de rechercher
des formulaires spécifiques.
• Bibliothèque de formulaires affiche les formulaires
que vous avez enregistrés en vue d’une diffusion
ultérieure.
Compilation des données reçues par messagerie
Vous pouvez compiler les données de formulaire des
utilisateurs en un jeu de données au fur et à mesure
qu’ils les renvoient.
1 Ouvrez la pièce jointe qui contient le formulaire
renvoyé.
2 Dans la boîte de dialogue qui s’affiche, sélectionnez
un jeu de données ou créez-en un pour les données de
formulaire.
Les nouvelles données sont ajoutées et le jeu de données
s’ouvre. Vous pouvez alors réviser toutes les réponses.
Pour compiler les données, vous pouvez également
cliquer sur Formulaires sur la barre d’outils Tâches,
puis sélectionner Compiler les formulaires renvoyés.
Consultation des réponses de formulaire
Une fois que vous avez compilé les données de
formulaire renvoyées en un jeu de données, le
fichier PDF s’ouvre automatiquement pour que vous
puissiez réviser les réponses.
Le jeu de données PDF souhaité étant ouvert,
effectuez l’une des opérations suivantes :
• Pour réviser une réponse précise, sélectionnez la
ligne correspondante dans la liste des réponses.
• Pour trier la liste des réponses, cliquez sur l’en-tête
de colonne souhaité.
• Pour ajouter des données, cliquez sur Importer les
données .
• Pour supprimer des données, sélectionnez un
enregistrement puis appuyez sur la touche Suppr.
Exportation des données de formulaire vers une
feuille de calcul
Une fois que vous avez recueilli des données de
formulaire PDF au format FDF ou XML, vous pouvez
organiser ces données dans un fichier de feuille de
calcul délimité par des virgules (CSV).
1 Choisissez Formulaires > Gérer les données de
formulaire > Fusionner les fichiers de données dans
une feuille de calcul.
2 Cliquez sur Ajouter des fichiers, puis sélectionnez
les fichiers de données souhaités.
3 Cliquez sur Exporter, choisissez l’emplacement du
fichier CSV, puis cliquez sur Enregistrer.
Page 67

ADOBE ACROBAT 3D VERSION 8
Guide de prise en main
B-29
Nouveautés
Affichage, navigation, recherche
Fenêtre Mise en route Découvrez, d’un simple coup
d’œil, les principales fonctions d’Adobe® Acrobat® 3D
Version 8 et cliquez sur les liens pour lancer des tâches
ou en savoir plus sur ces fonctions. Reportez-vous à la
section « Démarrage à partir de la fenêtre Mise en
route » dans l’aide d’Acrobat.
Zone de travail maximisée Les documents PDF
s’affichent dans une nouvelle présentation visuelle de la
zone de travail, du navigateur et des barres d’outils.
Les éléments de l’interface utilisateur ont été supprimés
pour maximiser l’espace. Reportez-vous à la section
« Affichage de la zone de travail » dans l’aide
d’Acrobat 3D.
Barres d’outils personnalisables Vo us p o uvez
facilement masquer ou afficher les outils individuels
en cliquant avec le bouton droit de la souris sur une
barre d’outils ou en utilisant la boîte de dialogue Plus
d’outils pour personnaliser les barres d’outils.
Reportez-vous à la section « Affichage et organisation
des barres d’outils » dans l’aide d’Acrobat 3D.
Améliorations de la fonction de recherche
Recherchez des mots ou profitez des outils de
recherche avancée à partir d’une seule et même barre
d’outils intégrée. Consultez les résultats de la recherche
dans une fenêtre flottante redimensionnable.
Recherchez des documents dans un lot PDF.
Reportez-vous à la section « Présentation des
fonctions de recherche » dans l’aide d’Acrobat 3D.
Index de recherche incorporé PDF Incorporez un
index de recherche pour un fichier spécifique dans le
document PDF pour une recherche optimisée.
Reportez-vous à la section « Création et gestion d’un
index dans un document PDF » dans l’aide d’Acrobat.
Création, assemblage et modification d’un
fichier PDF
Document PDF à partir d’une page blanche Créez
une page blanche au format PDF et saisissez-y du
texte. Mettez le texte en forme à l’aide des commandes
de formatage. Verrouillez le document pour empêcher
toute modification. Reportez-vous à la section
« Création d’un fichier PDF à partir d’une page
vierge » dans l’aide d’Acrobat.
Lots PDF Assemblez des fichiers PDF ou autre (y
compris des formulaires PDF) dans un lot unique. Les
fichiers ne sont pas modifiés lors de leur mise en lot,
les signatures et options de protection restent donc
inchangées. Les documents dans un lot s’affichent
dans la même fenêtre. Ajoutez, supprimez ou extrayez
aisément des documents. Effectuez des recherches
da ns le do cum ent actif ou séle ct ion né, ou dan s to us le s
documents du lot. Imprimez le document actif ou
sélectionné, ou tous les documents du lot. Reportezvous à la section « Présentation des lots PDF » dans
l’aide d’Acrobat.
Interface utilisateur pour les fichiers combinés
Combinez des fichiers en un seul document PDF avec
des pages concaténées ou assemblez des fichiers en un
lot PDF. De simples options permettent le contrôle de
la taille du fichier PDF résultant. Reportez-vous à la
section « Combinaison de différents types de fichiers »
dans l’aide d’Acrobat.
Fusion et publipostage au format PDF à partir de
Convertissez au format PDF des documents
Word
Word par fusion et publipostage, puis envoyez-les par
messagerie électronique. Reportez-vous à la section
« Création d’un fichier PDF à partir de fichiers de
fusion et publipostage Word » dans l’aide d’Acrobat.
Page 68

B-30
CHAPITRE 1
Prise en main
Améliorations de la manipulation des feuilles de calcul
(Windows) Sélectionnez et triez les feuilles de
Excel
calcul à convertir. Convertissez tous les liens et signets.
Créez des fichiers conformes à la norme PDF/A.
Reportez-vous à la section « Paramètres PDFMaker
spécifiques aux applications » dans l’aide d’Acrobat.
Améliorations de la manipulation des présentations
PowerPoint
(Windows) Convertissez les formes se
chevauchant, les graphiques, boutons d’action,
paramètres des actions et commentaires du
présentateur. Convertissez les arrière-plans en un
calque distinct, non imprimable. Créez des fichiers
conformes à la norme PDF/A. Reportez-vous à la
section « Paramètres PDFMaker spécifiques aux
applications » dans l’aide d’Acrobat.
Améliorations de la conversion de messages
électroniques
Convertissez un message électronique
ou l’intégralité d’un dossier de messages au format
PDF dans Lotus Notes. Créez des lots PDF de
messages électroniques, dans Outlook et Lotus Notes.
Dans Outlook sous Windows, convertissez des
archives de messages électroniques en lots PDF et
configurez l’archivage automatique et planifié des
messages. Reportez-vous à la section « Conversion de
messages électroniques en fichiers PDF (Windows) »,
« Migration d’archives PDF Outlook PDF en lots PDF
(Windows) » et « Configuration de l’archivage
automatique du courrier électronique (Windows) »
dans l’aide d’Acrobat.
Améliorations de la fonction de numérisation
Numérisez au format PDF ou PDF/A à partir d’un
éventail de scanners. Ajoutez des métadonnées
pendant la numérisation. Optimisez un document
PDF numérisé. Reportez-vous à la section
« Numérisation d’un document papier au format
PDF » dans l’aide d’Acrobat.
Fichiers conformes à la norme PDF/A Créez des
fichiers conformes à la norme PDF/A lors de la
numérisation de documents papier et lors de la
création de fichiers PDF à partir de Word, Excel,
PowerPoint, Acrobat Distiller et de l’utilisation de
l’outil Contrôle en amont d’Acrobat.
Numérotation Bates Appliquez des libellés
d’identification à un lot de documents rattachés, par
exemple des documents juridiques concernant le
même procès. Un numéro Bates s’affiche sous la forme
d’un en-tête ou d’un pied de page sur toutes les pages
d’un document PDF compris dans le lot. Reportezvous à la section « Ajout d’un en-tête ou d’un pied de
page Bates » dans l’aide d’Acrobat.
Examen de document Vérifiez la présence dans le
fichier PDF de métadonnées, d’annotations, de pièces
jointes, de données masquées, de champs de
formulaire ou de signets. Supprimez l’ensemble ou une
partie de ces informations. Reportez-vous à la section
« Recherche d’informations masquées dans un fichier
PDF » dans l’aide d’Acrobat.
En-têtes, pieds de page, filigrane et arrière-plan
Enregistrez les options d’en-tête, de pied de page, de
filigrane et d’arrière-plan sous forme de paramètres
réutilisables. Supprimez ou mettez à jour des en-têtes,
pieds de page, filigranes et arrière-plans existants.
Ajustez le contenu pour inclure les en-têtes et pieds de
page. Visualisez les modifications en temps réel.
Définissez le texte souligné. Reportez-vous à la section
« Ajout et modification d’un en-tête et d’un pied de
page » dans l’aide d’Acrobat.
Page 69

ADOBE ACROBAT 3D VERSION 8
Guide de prise en main
B-31
Révisions et commentaires
Réunions Acrobat Connect Bénéficiez des capacités de
collaboration Web en temps réel d’Acrobat Connect
(vendu séparément). Cliquez sur le bouton Démarrer la
réunion pour passer d’une révision de document à une
communication en temps réel sur Internet avec d’autres
utilisateurs. Acrobat Connect utilise Flash et une salle
de réunion personnelle permettant de partager
votre l’écran, d’organiser des audioconférences et
visioconférences, d’utiliser un tableau blanc, etc.
Lorsque vous cliquez sur le bouton Démarrer la réunion
pour la première fois, vous pouvez créer un compte
d’évaluation gratuit. Lors des connexions suivantes,
vous accéderez directement à votre salle de réunion
personnelle d’Acrobat Connect. (Acrobat Connect n’est
pas disponible dans toutes les langues.) Reportez-vous à
la section « Réunions » dans l’aide d’Acrobat 3D.
Révision partagée Initiez une révision dans laquelle
les commentaires sont stockés sur un serveur central,
permettant à tous les participants d’afficher les
commentaires en temps réel. Aucun logiciel de
serveur supplémentaire n’est requis. Les révisions
partagées fonctionnent avec un dossier sur un
serveur réseau, un espace de travail SharePoint
Windows ou un dossier Web sur un serveur Web.
Les commentaires sont automatiquement récupérés,
même si Reader n’est pas en cours d’exécution, et sont
ajoutés même lorsque vous êtes déconnecté du réseau.
Des notifications indiquent aux utilisateurs s’il existe
de nouveaux commentaires. Les commentaires des
réviseurs hors du pare-feu peuvent être fusionnés dans
la révision partagée. Permettez aux utilisateurs Reader
de participer à la révision. Reportez-vous à la section
« Initiation d’une révision partagée » dans l’aide
d’Acrobat.
Suivi des révisions Propose des détails sur toutes les
révisions actives. Pour des révisions partagées, cela
inclut le nombre de commentaires d’un réviseur, la
date limite de révision, l’état du serveur, les révisions
non lues et un résumé des révisions partagées mises à
jour. Reportez-vous à la section « Suivi des fichiers
PDF révisés » dans l’aide d’Acrobat 3D.
Améliorations des fonctions de commentaires et
annotations
Affichez et positionnez précisément les
annotations de légende et de nuage pendant leur
application. Les points de conduite de la légende se
déplacent automatiquement au fur et à mesure que
vous positionnez la légende. Les commentaires
sélectionnés sont mis en surbrillance pour une
meilleure visibilité lors d’un zoom arrière. Faites
pivoter des tampons et sélectionnez tous les outils
dans une seule barre d’outils intégrée. Reportez-vous à
la section « Commentaires » dans l’aide d’Acrobat 3D.
Formulaires
Simple création de formulaires (Windows) Ut ili sez un
assistant pour créer des formulaires PDF à partir de
modèles, de documents électroniques existants, de
formulaires papier ou de données de feuille de calcul.
Personnalisez des formulaires avec vos coordonnées et
logos. Modifiez les formulaires dans Adobe LiveCycle
Designer. Reportez-vous à la section « Création et
modification de formulaires » dans l’aide d’Acrobat.
Fichier PDF en illustration d’arrière-plan Imp ortez un
fichier PDF comme illustration d’arrière-plan dans un
formulaire dans LiveCycle Designer. Ajoutez des
champs de formulaires par-dessus cet arrière-plan.
Consultez l’aide de LiveCycle Designer.
Page 70

B-32
CHAPITRE 1
Prise en main
Suivi des formulaires Effectuez un suivi des
formulaires que vous créez ou remplissez. Reportezvous à la section « A propos du suivi des formulaires »
dans l’aide d’Acrobat.
Exportation et compilation des données de
formulaire
Réunissez les formulaires renvoyés dans
un lot PDF. Exportez les données de formulaire vers
une feuille de calcul. Reportez-vous à la section
«Soumission de formulaires» et «Exportation
d’enregistrements depuis un jeu de données PDF »
dans l’aide d’Acrobat.
Reconnaissance des champs de formulaire
Reconnaissez automatiquement les champs de
formulaire dans des documents PDF non interactifs et
convertissez-les en champs interactifs pouvant être
remplis automatiquement. Reportez-vous à la section
« Création de formulaires » dans l’aide d’Acrobat.
Droits activés dans Reader Autorisez les utilisateurs
de Reader 7.0 et 8.0 à remplir des formulaires, à
apposer des signatures numériques et à enregistrer des
formulaires ou d’autres documents PDF. Reportezvous à la section « Autorisation d’enregistrer les
données de formulaire pour les utilisateurs de
Reader » dans l’aide d’Acrobat
Signatures numériques
ID d’itinérance Inscrivez-vous à un service de
signature qui permet de conserver votre clé privé sur
un serveur. Identifiez-vous sur le serveur à partir
d’Acrobat et autorisez la signature du document avec
vos informations d’identité stockées sur le serveur.
Reportez-vous à la section « Configuration d’une
identification d’itinérance » dans l’aide d’Acrobat 3D.
Mode d’aperçu avant signature et vérification de la
conformité
Avant d’apposer votre signature,
visualisez le contenu du document tel qu’il s’affiche
après la suppression de la transparence, des scripts, des
polices et de tout contenu dynamique pouvant
modifier l’aspect du document. Acrobat 3D procède
automatiquement à la vérification de l’intégrité du
document, qui permet désormais de vérifier la
conformité des signatures avant de lancer le mode
d’aperçu. Reportez-vous à la section « Signature en
mode Aperçu du document » dans l’aide d’Acrobat 3D.
Améliorations de la manipulation des certificats
Prédéterminez le certificat pour la signature.
Configurez le modèle de chaîne pour la validation du
certificat. Reportez-vous à la section « Partage et
gestion des certificats » dans l’aide d’Acrobat 3D.
Valeurs de base Spécifiez les choix proposés à
l’utilisateur lors de la signature d’un document.
Reportez-vous à la section « Personnalisation des
propriétés de signature à l’aide de valeurs de base »
dans l’aide d’Acrobat.
Signatures dans Reader Permettre aux utilisateurs de
Reader de placer un champ de signature. Reportezvous à la section « Avant de certifier un fichier PDF »
dans l’aide d’Acrobat.
Architecture, ingénierie et construction
Conversion par lots/Conversion directe A partir
d’AutoCAD, convertissez plusieurs fichiers AutoCAD
en plusieurs fichiers PDF. Convertissez les fichiers
AutoCAD au format PDF à vitesse accélérée.
Reportez-vous à la section « Conversion d’un fichier
AutoCAD au format PDF (Windows) » dans l’aide
d’Acrobat.
Page 71

ADOBE ACROBAT 3D VERSION 8
Guide de prise en main
B-33
Prise en charge des formats DWG/DWF Vo u s p o uvez
convertir les fichiers au format DWF et DWG
d’AutoCAD sans installer AutoCAD.
Améliorations des outils de mesures 2D Les mesures
sont recalculées si le point de départ ou de fin est
déplacé. Mesures accrochées aux lignes, intersections
ou coins. Reportez-vous à la section « Mesure de la
hauteur, de la largeur ou de l’aire d’un objet » dans
l’aide d’Acrobat.
Conception 3D assistée par ordinateur (CAO)
Conception de documents PDF compacts Réglez les
paramètres de conversion 3D pour créer des fichiers
PDF accessibles de manière universelle et très
compressés qui sont seulement une fraction de la taille
de l’assemblage ou du fichier CAD d’origine. Reportezvous à la section « A propos des formats de conversion
PRC et U3D » dans l’aide d’Acrobat.
Importer les informations PMI Vous po uve z i mp or ter
et afficher les spécifications de tolérance et de
dimensionnement géométriques dans le modèle 3D
en tant qu’informations PMI (Product Manufacturing
Information) au lieu d’envoyer un dessin en 2D. Les
formats de fichiers pris en charge sont les suivants :
CATIA V5, I-DEAS, JT, NX et Pro/ENGINEER.
Reportez-vous à la section « Affichage des
informations PMI (Product Manufacturing
Information) » dans l’aide d’Acrobat.
Exportation de la géométrie Exportez la géométrie
aux formats standard (IGES, STEP, ParaSolid, and
VRML) pour permettre l’interopérabilité avec les
applications de FAO. Reportez-vous à la section
« Exportation de la géométrie à partir des
modèles 3D » dans l’aide d’Acrobat.
Prise en charge des dernières applications de CAO
Ouvrez la plupart des derniers types de formats de
fichiers de CAO sans avoir à installer une application de
CAO. Reportez-vous à la section « A propos des
formats de fichiers 3D pris en charge » dans l’aide
d’Acrobat.
Copyright
Outils de biffure Id en ti fi ez le te xt e, le s i ma ges et zones
sensibles à biffer. Appliquez les biffures de façon
irréversible. Modifiez l’aspect des marques de biffures,
notamment la couleur et les codes. Reportez-vous à la
section « Biffure du contenu confidentiel » dans l’aide
d’Acrobat.
Recherche et biffure Dans le panneau de recherche,
sélectionnez certains ou tous les résultats à biffer.
Reportez-vous à la section « Recherche et biffure de
mots » dans l’aide d’Acrobat.
Numérotation Bates Appliquez des libellés
d’identification à un lot de documents rattachés, par
exemple des documents juridiques concernant le
même procès. Un numéro Bates s’affiche sous la forme
d’un en-tête ou d’un pied de page sur toutes les pages
d’un document PDF compris dans le lot. Reportezvous à la section « Ajout d’un en-tête ou d’un pied de
page Bates » dans l’aide d’Acrobat.
Professionnel de la création
Amélioration de la gestion des couleurs Dans la suite
AdobeCreativeSuite, synchronisez en un seul clic les
paramètres d’affichage des couleurs à l’écran dans les
différentes applications Reportez-vous à la section
« Synchroniser les paramètres de couleur entre les
applications Adobe » dans l’aide d’Acrobat.
Page 72

B-34
CHAPITRE 1
Prise en main
Paramètres d’aplatissement des transparences
prédéfinis partagés
Définissez des paramètres
prédéfinis d’aplatissement des transparences dans une
application Adobe (par exemple dans Acrobat), puis
partagez-les facilement avec d’autres applications
telles qu’Illustrator ou InDesign. Reportez-vous à la
section « Création d’un nouveau paramètre
d’aplatissement prédéfini » dans l’aide d’Acrobat.
Contrôle en amont Localisez, modifiez ou supprimez
des éléments PDF à l’aide de profils de correction
personnalisables. Créez un inventaire du contenu
PDF, y compris les métadonnées XMP. Effectuez des
contrôles avancés des objets Cos et des polices.
Convertissez au format PDF/X-4 et PDF/A et validez
les fichiers qui sont déjà dans ces formats. Modifiez les
paramètres de droplet pour les contrôles en amont
automatisés. Reportez-vous à la section « Correction
des zones problématiques » et « Contrôles avancés »
dans l’aide d’Acrobat.
Impression en livret Imprimez des pages juxtaposées
pour constituer un livret relié. Reportez-vous à la
section « Impression en livret » dans l’aide d’Acrobat.
Inclusion de métadonnées dans les documents et
Maintenez les métadonnées de document et
objets
d’objet et accédez-y. Reportez-vous à la section
« Propriétés et métadonnées de document » dans
l’aide d’Acrobat 3D.
Améliorations de l’outil Retouche d’objet Affichez et
modifiez l’espace colorimétrique d’un objet sélectionné.
Mettez à l’échelle, faites pivoter ou découpez un objet.
Reportez-vous à la section « Déplacement ou
modification d’un objet » dans l’aide d’Acrobat.
Nouvelles fonctions supplémentaires
Mode FIPS La version 8.1 fournit un mode FIPS
permettant de restreindre la protection des données
aux algorithmes approuvés 140-2 FIPS (Federal
Information Processing Standard) à l’aide d’un
module de chiffrement RSABSAFE Crypto-C 2.0 avec
une validation FIPS 140-2, certificatAcrobat 3D 608.
Reportez-vous à la section « Protection des
documents PDF en mode FIPS » dans l’aide d’Acrobat.
Prise en charge de Microsoft Windows Vista
La version 8.1 d’Acrobat 3D prend en charge
Microsoft Windows Vista.
Installation d’Acrobat sur des versions à 64 bits de
Microsoft Windows
La version 8.1 d’Acrobat 3D
prend en charge les versions à 64 bits de Microsoft
Windows XP et M i crosof t Windows Vi s ta.
Version Cue 2.0 Gérez les fichiers et les versions en
tant qu’utilisateur unique ou dans un petit groupe de
travail. Intégrez Adobe Bridge pour gérer les fichiers
de vos projets Creative Suite. Reportez-vous à la
section « Adobe Version Cue » dans l’aide d’Acrobat.
Publications numériques
Lisez et organisez des livres
électroniques ou autres publications dans Adobe Digital
Editions (produit distinct). Lorsque vous cliquez sur
l’élément de menu Digital Editions pour la première fois,
vous pouvez télécharger et installer le logiciel Adobe
Digital Editions. Une fois l’installation effectuée,
sélectionnez les publications numériques pour passer
directement à votre bibliorom des publications
numériques d’Adobe. Reportez-vous à la section
« Adobe Digital Editions » dans l’aide d’Acrobat 3D.
Page 73

Impression via Internet Imprimez des documents
vers un bureau FedEx Kinko aux Etats-Unis.
Reportez-vous à la section « Impression sur Internet »
dans l’aide d’Acrobat 3D.
Améliorations des outils de mesures 2D Les mesures
sont recalculées si le point de départ ou de fin est
déplacé. Mesures accrochées aux lignes, intersections
ou coins. Reportez-vous à la section « Mesure de la
hauteur, de la largeur ou de l’aire d’un objet » dans
l’aide d’Acrobat 3D.
ADOBE ACROBAT 3D VERSION 8
Guide de prise en main
B-35
Page 74

Page 75

Kapitel 1: Erste Schritte
C-1
Installation
Anforderungen
Die vollständigen Systemanforderungen und
Konfigurationsempfehlungen zu Ihrer
Adobe®-Software sind in der Datei „Bitte lesen“
aufgeführt, die mit der Software geliefert wird.
Software installieren
1 Schließen Sie alle Adobe-Anwendungen, die auf
dem Computer ausgeführt werden.
2 Legen Sie den Installationsdatenträger in das
Laufwerk ein und befolgen Sie die angezeigten
Anweisungen.
Hinweis: Weitere Informationen finden Sie in der Datei
„Bitte lesen“, die mit der Software geliefert wird.
Software aktivieren
Adobe-Software kann Technologie zur Lizenzverwaltung enthalten, mit der die Einhaltung des
Lizenzvertrags für das Produkt gesichert wird. Wenn
diese Technologie vorhanden ist, werden Sie aufgefordert, die Lizenz für Ihr Produkt innerhalb von
30 Tagen nach der ersten Verwendung des Produkts
zu verifizieren. Die Verifizierung ist obligatorisch.
Unter Umständen werden Sie aufgefordert, die
Software zu aktivieren. Beim Verifizierungsverfahren
werden keinerlei Informationen zur Identität der
Benutzer erfasst, übermittelt oder verwendet.
Weitere Informationen zur Produktaktivierung
finden Sie in der „Bitte lesen“-Datei auf der
Installations-DVD oder auf der Adobe-Website
www.adobe.com/go/activation_de.
1 Wenn das Aktivierungsfenster nicht geöffnet ist,
wählen Sie „Hilfe“> „Aktivierung“> „Aktivieren“.
2 Befolgen Sie die Anweisungen auf dem Bildschirm.
Hinweis: Wenn Sie die Software auf einem anderen
Computer installieren möchten, müssen Sie sie zunächst
auf Ihrem Computer deaktivieren: Wählen Sie „Hilfe“ >
„Aktivierung“ > „Deaktivieren“.
Registrieren
Registrieren Sie das Produkt, damit Sie
Installationssupport und andere Dienste nutzen
können sowie über Updates benachrichtigt werden.
Befolgen Sie zum Registrieren die Anweisungen im
Fenster „Registrierung“, das nach dem Installieren
und Aktivieren der Software angezeigt wird.
Wenn Sie die Registrierung verschieben, können Sie
sie später jederzeit mit „Hilfe“ > „Registrierung“
durchführen.
Page 76

KAPITEL 1
C-2
Erste Schritte
Bitte lesen
Die Installations-DVD enthält die „Bitte lesen“-Datei
für Ihre Software. (Die Datei wird bei der Produktinstallation auch in den Anwendungsordner kopiert.)
In der Datei sind wichtige Informationen zu den
folgenden Themen zusammengefasst:
• Systemanforderungen
• Installation
• Passermarken
• Elektronische Lizenzierung
• Rechtliche Hinweise
Adobe-Hilfe verwenden
Adobe-Hilfequellen
Die Dokumentation zur Adobe-Software ist in
verschiedenen Formaten verfügbar.
Integrierte und LiveDocs-Hilfe
Die integrierte Hilfe bietet Zugriff auf alle
Dokumentationen und Schulungsmaterialien, die
zum Zeitpunkt der Auslieferung der Software
verfügbar waren. Sie können über das Menü „Hilfe“
in Ihrer Adobe-Software darauf zugreifen.
Die LiveDocs-Hilfe umfasst die gesamte integrierte
Hilfe des Produkts und zusätzlich Updates sowie
Verknüpfungen zu Schulungsmaterialien, die im Web
verfügbar sind. Bei einigen Produkten können Sie
Kommentare zu den Themen der LiveDocs-Hilfe
einfügen. Die LiveDocs-Hilfe für Ihr Produkt
finden Sie im Adobe-Hilfe Resource Center unter
www.adobe.com/go/documentation_de.
Die meisten Versionen der integrierten und der
LiveDocs-Hilfe unterstützen das Durchsuchen der
Hilfesysteme mehrerer Produkte. Themen können
Verknüpfungen zu relevanten Inhalten im Web oder
Hilfethemen anderer Produkte enthalten.
Insgesamt repräsentiert die im Produkt und im Web
verfügbare Hilfe einen Ausgangspunkt für den Zugriff
auf weiterführende Informationen sowie Informationen von Benutzercommunitys. Die aktuelle und
umfassendste Version der Hilfe ist immer im Web
verfügbar.
Verfahren-Themen
Die Verfahren-Themen bieten einen Überblick über
häufig ausgeführte Aufgaben. Wenn Sie zusätzliche
Informationen benötigen, klicken Sie einfach auf die
Verknüpfung unter dem Verfahren-Thema, um das
zugehörige Thema in der Hilfe anzuzeigen.
PDF-Dokumentation
Die integrierte Hilfe ist zusätzlich als für die
Druckausgabe optimiertes Adobe PDF-Dokument
verfügbar. Andere Dokumente – Installationshandbücher, White Paper usw. – werden ggf. auch
als PDF-Dateien bereitgestellt.
Alle PDF-Dokumentationen sind im
Adobe Help Resource Center unter
www.adobe.com/go/documentation_de verfügbar.
Die mit der Software gelieferte PDF-Dokumentation
finden Sie im Ordner „Documents“ auf der
Installations- bzw. Inhalts-DVD.
Page 77

ADOBE ACROBAT 3D VERSION 8
Erste Schritte
C-3
Gedruckte Dokumentation
Gedruckte Ausgaben der im Produkt enthaltenen
Hilfe können im Adobe Store erworben werden
(www.adobe.com/go/store_de). Im Adobe Store
finden Sie zudem Bücher, die von Partnerverlagen
von Adobe veröffentlicht wurden.
In allen Adobe Creative Suite® 3-Produkten ist ein
gedrucktes Workflow-Handbuch enthalten. Eigenständige Adobe-Produkte enthalten unter Umständen
auch ein gedrucktes Handbuch „Erste Schritte“.
Hilfe im Produkt verwenden
Die integrierte Hilfe wird mit dem Menü „Hilfe“
aufgerufen. Nach dem Öffnen des AdobeHilfefensters können Sie die Hilfe zu weiteren auf
Ihrem Computer installierten Adobe-Produkte
anzeigen. Die Hilfethemen enthalten möglicherweise
Links zu ergänzenden Inhalten im Internet.
Geben Sie gesuchte Wortfolgen wie „ursprüngliche
Form“ in Anführungszeichen an, damit nur die
Themen angezeigt werden, die alle Wörter in der
Wortfolge enthalten.
Eingabehilfen
Die Adobe-Hilfe ist so konzipiert, dass sie auch von
Menschen mit Behinderungen wie eingeschränktem
Seh- oder Bewegungsvermögen genutzt werden kann.
In der Produkt-Hilfe werden die folgenden
standardmäßigen Ausgabehilfen unterstützt:
• Benutzer können die Textgröße mit gängigen
Kontextmenübefehlen (Microsoft® Windows®) bzw.
Menübefehlen (Apple Mac OS) ändern.
• Ver knüp f ung e n we r den z ur He r vo r hebu ng
unterstrichen.
Page 78

KAPITEL 1
C-4
Erste Schritte
• Wenn Verknüpfungstext nicht dem Titel des
Zielinhalts entspricht, wird der Titel im TitleAttribut des Anker-Tags referenziert. Beispielsweise
wird bei den Links „Zurück“ und „Weiter“ der Titel
des vorherigen bzw. nächsten Themas einbezogen.
• Die Inhalte unterstützen den High-Contrast-
Modus (Anzeige mit hohem Kontrastverhältnis).
•
Bilder ohne Beschriftung enthalten alternativen Text.
• Jeder Frame hat einen Titel zur Kennzeichnung des
Einsatzzwecks.
• Mit Standard-HTML-Tags wird die Inhaltsstruktur
für das Lesen am Bildschirm und für Text-zuSprache-Umwandlungen definiert.
• Formatvorlagen steuern die Formatierung, es gibt
also keine eingebetteten Schriften.
Tastaturbefehle für Steuerelemente in der
Symbolleiste der Hilfe (Windows)
Schaltfläche „Zurück“ Alt + Nach-links-Taste
Schaltfläche „Weiter“ Alt + Nach-rechts-Taste
Drucken Strg+P
Schaltfläche „Info“ Strg+I
Menü „Produkthilfe für“ Alt+Nach-unten-Taste oder
Alt+Nach-oben-Taste, um die Hilfe für eine andere
Anwendung anzuzeigen
• Mit Tab (vorwärts) und Umschalt + Tab
(rückwärts) navigieren Sie zu den verschiedenen
Verknüpfungen in einem Fensterbereich.
• Drücken Sie die Eingabetaste, um eine
hervorgehobene Verknüpfung aufzurufen.
• Drücken Sie zum Ändern der Textgröße bei
gedrückter Strg- bzw. Befehlstaste die PlusTaste (+) oder Minus-Taste (-).
Ressourcen
Adobe Video Workshop
Adobe Creative Suite 3 Video Workshop umfasst über
200 Schulungsvideos zu verschiedenen Themenbereichen für Druck-, Web- und Videoprofis.
Mit Adobe Video Workshop können Sie die
Benutzung jedes Creative Suite 3-Produkts erlernen.
In zahlreichen Videos wird die parallele Verwendung
mehrerer Adobe-Anwendungen demonstriert.
Wenn Sie Adobe Video Workshop starten, können Sie
auswählen, an welchen Produkten und Themen Sie
interessiert sind. Dank der Details zu den einzelnen
Videos können Sie Ihr Schulungsprogramm nach
Bedarf zusammenstellen.
Tastaturbefehle für die Navigation in der Hilfe
(Windows)
•
Mit Strg+Tab (vorwärts) und Umschalt+Strg+Tab
(rückwärts) navigieren Sie zu den verschiedenen
Fensterbereichen.
Page 79

ADOBE ACROBAT 3D VERSION 8
Erste Schritte
C-5
Moderatoren-Community
Bei dieser Produktversion hat Adobe Systems die
Benutzercommunity dazu aufgefordert, in einem
Forum eigene Erfahrungen und Erkenntnisse mit
anderen auszutauschen. Adobe und lynda.com
präsentieren Tutorials, Tipps und Tricks von führenden
Designern und Entwicklern wie Joseph Lowery, Katrin
Eismann und Chris Georgenes. Sehen und hören Sie
Adobe-Experten wie Lynn Grillo, Greg Rewis und
Russell Brown. Mehr als 30 Produktexperten teilen ihr
Fachwissen.
Page 80

KAPITEL 1
C-6
Erste Schritte
Tutorials und Quelldateien
Adobe Video Workshop enthält Schulungen für
Anfänger und erfahrene Benutzer. Es gibt außerdem
Videos zu neuen Funktionen und Techniken. Jedes
Video befasst sich mit einem einzelnen Gegenstand
und besitzt eine Laufzeit von 3–5 Minuten. Zu den
meisten Videos gehört ein illustriertes Tutorial sowie
Quelldateien, so dass Sie die einzelnen Arbeitsschritte
ausdrucken und selbstständig nachvollziehen können.
Adobe Video Workshop verwenden
Über die in Ihrem Creative Suite 3-Produkt enthaltene
DVD können Sie auf Adobe Video Workshop
zugreifen. Adobe Video Workshop ist auch online
unter www.adobe.com/go/learn_videotutorials_de
verfügbar. Adobe wird regelmäßig neue Videos online
in Video Workshop bereitstellen, achten Sie also auf
Neuigkeiten.
Acrobat-Videos
Adobe Video Workshop deckt eine breite Palette von
Themen zu Adobe Acrobat® ab:
• Einrichten von Arbeitsbereich und Taskleisten
• Zusammenführen von Dateien in ein PDF-
Dokument
• Konvertieren von PDF-Dateien
• Ändern von PDF-Dateien
• Einfügen von Kommentaren in PDF-Dokumente
• Durchführen von gemeinsamen Überprüfungen
• Überprüfen und Zusammenfassen von
Kommentaren
• Echtzeit-Zusammenarbeit unter Verwendung von
Adobe Acrobat Connect™
• Preflight-Überprüfung von Dateien
• Drucken von Dokumenten
Zugriff auf die Adobe Creative Suite 3-Videotutorials
erhalten Sie über den Adobe Video Workshop unter
www.adobe.com/go/learn_videotutorials_de.
Extras
Es stehen zahlreiche Ressourcen zur Verfügung, die Sie
bei der Arbeit mit Ihrer Adobe-Software unterstützten.
Einige dieser Ressourcen werden im Verlauf des Setupvorgangs auf Ihrem Computer installiert; zusätzliche
Inhalte sind ggf. auf der Installations- bzw. Informationsdisk enthalten. Die Adobe Exchange-Community
bietet besondere Extras online unter folgender Adresse
an: www.adobe.com/go/exchange_de.
Installierte Ressourcen
Während der Installation werden verschiedene
Ressourcen in den Anwendungsordner kopiert.
Um diese Dateien anzuzeigen, navigieren Sie auf dem
Computer zum Anwendungsordner.
Datenträgerinhalt
Die mit Ihrem Produkt gelieferte Disk enthält u. U.
weitere Ressourcen zum Einsatz mit der Software,
beispielsweise Vorgaben, Zusatzmodule, eine PDFVersion der Hilfe, technische Informationen und
andere Dokumente.
• Schützen von Formularen
Page 81

ADOBE ACROBAT 3D VERSION 8
Erste Schritte
C-7
Adobe Exchange
Weitere kostenlose Inhalte finden Sie unter
www.adobe.com/go/exchange_de. Diese Website stellt
eine Onlinecommunity dar, in der Benutzer tausende
kostenloser Aktionen, Erweiterungen, Zusatzmodule
us w. f ü r Adobe-Produkte b ereitstellen bzw.
herunterladen können.
Adobe Design Center
Adobe Design Center bietet Artikel, Inspiration und
Instruktionen von Branchenexperten, Topdesignern
und Adobe-Partnerverlagen. Monatlich werden neue
Inhalte hinzugefügt.
Hier gibt es hunderte Tutorials zum Entwerfen von
Produkten sowie Tipps und Techniken in Videos, dazu
HTML-Tutorials und Beispielkapitel.
Neue Ideen bilden das Herz der Kategorien
„Denkfabrik“, „Dialogfeld“ und „Galerie“:
• Die Artikel in der Kategorie „Denkfabrik“ erläutern
den Einsatz moderner Techniken auf Seiten der
Designer und untersuchen, was ihre Erfahrungen
für Design, Designwerkzeuge und die Gesellschaft
insgesamt bedeuten.
• In der Kategorie „Dialogfeld“ veröffentlichen
Experten neue Ideen in den Bereichen animierte
Grafik und digitales Design.
• Die „Galerie“ demonstriert, wie Künstler animierte
Grafik umsetzen.
Adobe Design Center ist auch online unter
www.adobe.com/de/designcenter verfügbar.
Page 82

KAPITEL 1
C-8
Erste Schritte
Adobe Developer Center
Adobe Developer Center stellt Beispiele, Tutorials,
Artikel und Community-Ressourcen für Entwickler
bereit, die komplexe Internetanwendungen, Websites,
Inhalte für Mobilfunkgeräte und andere Projekte mit
Adobe-Produkten umsetzen. Das Developer Center
enthält außerdem Ressourcen für Entwickler, die
Zusatzmodule für Adobe-Produkte programmieren.
Außer Beispielcode und Tutorials gibt es RSS-Feeds,
Onlineseminare, SDKs, Handbücher zur
Skripterstellung und weitere technische Ressourcen.
Adobe Developer Center ist online unter
www.adobe.com/go/developer_de verfügbar.
Kundendienst
Besuchen Sie die Adobe Support-Website unter
www.adobe.com/de/support, wenn Sie produktspezifische Informationen zur Fehlerbehebung bzw.
Informationen zu kostenlosen und kostenpflichtigen
Supportoptionen suchen. Über den Link „Schulung“
haben Sie Zugriff auf Bücher von Adobe Press,
verschiedene Schulungsressourcen, Adobe-SoftwareZertifizierungsprogramme und vieles mehr.
Downloads
Besuchen Sie www.adobe.com/go/downloads_de,
wenn Sie kostenlose Updates, Probeversionen und
andere nützliche Software suchen. Zudem erhalten Sie
im Adobe Store (unter www.adobe.com/go/store_de)
Zugriff auf tausende von Zusatzmodulen von
Drittanbietern, mit denen Sie typische Arbeiten
automatisieren, Workflows konfigurieren, spezielle
Effekte in Profiqualität erstellen können usw.
Page 83

ADOBE ACROBAT 3D VERSION 8
Erste Schritte
C-9
Adobe Labs
Adobe Labs bietet Ihnen die Möglichkeit, neue und in
der Entwicklung befindliche Technologien und
Produkte von Adobe auszuprobieren und zu bewerten.
In Adobe Labs sind z. B. die folgenden Ressourcen
verfügbar:
• Prerelease-Software und -Technologien
• Codebeispiele und bewährte Verfahren, die die
Einarbeitung beschleunigen
• Frühe Versionen von Produkt- und technischen
Dokumentationen
• Foren, Inhalte auf Wiki-Basis und andere
Ressourcen unterstützen die Interaktion mit
gleichgesinnten Entwicklern
Adobe Labs begünstigt eine kollaborative SoftwareEntwicklung. Durch diese Unterstützung sind
Kunden schnell in der Lage, neue Produkte und
Technologie produktiv einzusetzen. Adobe Labs ist
außerdem ein Forum für frühzeitige Rückmeldungen.
Sie helfen den Adobe-Teams, Software zu entwickeln,
die den Bedürfnissen und Erwartungen der Nutzer
gerecht wird.
Besuchen Sie Adobe Labs unter
www.adobe.com/go/labs_de.
Benutzercommunitys
Den Benutzern stehen Foren, Blogs und andere
Möglichkeiten zum Austauschen von Technologien,
Tools und Informationen zur Verfügung. Benutzer
können Fragen stellen und erfahren, wie andere ihre
Software bestmöglich einsetzen. Benutzerforen stehen
in deutscher, englischer, französischer und
japanischer Sprache zur Verfügung; Blogs werden
in zahlreichen Sprachen verfasst.
Besuchen Sie www.adobe.com/de/communities, um
an Foren oder Blogs teilzunehmen.
Arbeitsabläufe
Adobe® Acrobat® 3D Version 8 bietet zuverlässige
Werkzeuge, die viele Aspekte Ihrer Dokumentenabläufe unterstützen.
• Erstellen Sie Adobe PDFs in vielen verschiedenen
Anwendungen.
• Führen Sie Dateien aus mehreren Quellen in einem
PDF-Paket zusammen.
• Konvertieren Sie PDFs in andere Formate, wie
Word, HTML oder JPG.
• Beschränken Sie den Zugriff auf Ihre PDFs anhand
verschiedener Sicherheitsfunktionen.
• Genehmigen Sie Dokumente durch digitale
Unterschriften und Zertifikate.
• Führen Sie Überprüfungen mit Hilfe verschiedener
Kommentierungs- und Überprüfungswerkzeuge
durch.
• Erstellen Sie ausfüllbare Formulare, verteilen Sie
diese und erfassen Sie die Formulardaten.
Die folgenden Themen zum Schnelleinstieg geben
einen Überblick über die Funktionen von Acrobat 3D.
Weitere Informationen zu einem Thema finden Sie in
der Hilfe.
Page 84

KAPITEL 1
C-10
Erste Schritte
PDF-Dokumente erstellen
PDF-Dokumente behalten das Erscheinungsbild des
Ausgangsdokuments bei, so dass Sie sich nicht um
eine Beeinträchtigung der Dokumentqualität
sorgen müssen. Und da PDFs auf den Plattformen
Windows, Mac OS und UNIX mit der kostenlosen
Adobe Reader®-Software angezeigt werden können,
sind alle Personen in der Lage, PDF-Dokumente auch
ohne die Ausgangsanwendung anzuzeigen oder zu
drucken. Sie können PDFs in Acrobat 3D oder in
verschiedenen anderen Quellanwendungen erstellen.
Sie haben Sie z. B. die Möglichkeit, eine E-MailNachricht mit Projektthemen in Outlook oder Lotus
Notes in PDF zu konvertieren und diese Datei
dann an ein PDF-Dokument anzuhängen, das die
Projektdetails und den Zeitplan enthält. Oder Ihnen
liegen beispielsweise Personalbögen nur auf Papier
vor. Dann können Sie diese Papierdokumente
problemlos in PDF-Dokumente umwandeln und so
ein Online-Personalpaket erstellen.
Konvertieren Sie Ihr Originaldokument (links) in Adobe PDF
(Mitte) und fügen Sie anschließend Lesezeichen, Kommentare
usw. in Acrobat ein (rechts).
Aus Datei erstellen
Zum Erstellen von PDF-Dokumenten in Acrobat ist es
in der Regel erforderlich, dass die
Ausgangsanwendung, mit der die Originaldatei
erstellt wurde, auf dem System installiert ist.
1 Klicken Sie auf die Schaltfläche „PDF erstellen“
und wählen Sie „Aus Datei“.
2 Wählen Sie die zu konvertierende Datei aus und
klicken Sie auf „Öffnen“.
Page 85

ADOBE ACROBAT 3D VERSION 8
Erste Schritte
C-11
Die Ausgangsanwendung wird automatisch geöffnet
oder ein Statusdialogfeld wird angezeigt. Wenn die
Datei ein nicht unterstütztes Format aufweist, wird
eine Meldung angezeigt, dass die Datei nicht in PDF
konvertiert werden kann.
Aus Papierdokument erstellen
Mit Acrobat 3D und einem Scanner können Sie eine
PDF-Datei direkt aus einem Papierdokument
erstellen.
1 Klicken Sie auf die Schaltfläche „PDF erstellen“
und wählen Sie „Über den Scanner“.
2 Wählen Sie im Dialogfeld „Acrobat Scan“ die
Eingabe-, Ausgabe- und Dokumentoptionen aus und
klicken Sie dann auf „Scannen“.
3 Wenn Sie eine neue PDF-Datei erstellen, geben Sie
Dateinamen und Speicherort an und klicken Sie auf
„Speichern“.
4 Wählen Sie „Weitere Seiten scannen“ oder
„Scanvorgang abgeschlossen“ aus.
Aus einer Webseite erstellen
Sie können Webseiten von der obersten Ebene oder
einer beliebigen Unterebene einer URL-Adresse
herunterladen und konvertieren.
1 Klicken Sie auf die Schaltfläche „PDF erstellen“
und wählen Sie „Aus Webseite“.
2 Geben Sie die URL in das Feld „URL“ ein.
(Klicken Sie auf „Durchsuchen“, um eine bereits
heruntergeladene Webseite zu konvertieren.)
3 Geben Sie die Anzahl der Ebenen für den Download
sowie den Speicherort der herunterzuladenden Dateien
an und klicken Sie dann auf „Erstellen“.
Nach eigenen Vorstellungen erstellen
Sie können kleine PDF-Dokumente erstellen, die in
Acrobat 3D bearbeitet werden können.
1 Wählen Sie „Datei“ > „PDF erstellen“ >
„Aus leerer Seite“.
2 Klicken Sie auf das Dokument und geben Sie Text
ein. Mit Hilfe der Optionen auf der Werkzeugleiste
„Neues Dokument“ können Sie Textattribute ändern.
3 Speichern Sie das Dokument.
4 Um die Bearbeitung fortzusetzen wählen Sie
„Dokument“ > „Bearbeitung fortsetzen“.
Um das PDF-Dokument zu konvertieren, so dass es
nicht erneut bearbeitet werden kann, wählen Sie
„Dokument“ > „Keine weitere Bearbeitung“.
Aus Word erstellen
Nach der Installation von Acrobat 3D wird Word eine
Acrobat PDFMaker-Werkzeugleiste hinzugefügt. In
Word 2007 für Windows erfolgt der Zugriff auf
PDFMaker-Optionen nicht über die Werkzeugleiste,
sondern über die Acrobat-Multifunktionsleiste.
1 Öffnen Sie die zu konvertierende Datei in Word.
2 Führen Sie einen der folgenden Schritte aus:
• (Word 2007 für Windows:) Klicken Sie auf
„Acrobat“ und anschließend auf die Schaltfläche
„PDF erstellen“ .
• (Andere Versionen von Word:) Klicken Sie auf die
Schaltfläche „In Adobe PDF konvertieren“ .
3 Geben Sie einen Dateinamen und einen
Speicherort an und klicken Sie auf „Speichern“.
4 (Nur Mac OS) Klicken Sie auf „Datei anzeigen“
oder auf „Fertig“.
Page 86

C-12
KAPITEL 1
Erste Schritte
Sie können eine Datei auch in das PDF-Format
konvertieren und anschließend per E-Mail zur
Überprüfung senden, indem Sie auf „Erstellen und
zur Überprüfung senden“ (Office 2007) bzw. auf
„Zur Überprüfung senden“ (andere OfficeVersionen) klicken.
Aus Outlook erstellen (Windows)
Nach der Installation von Acrobat 3D wird Outlook
eine Acrobat PDFMaker-Werkzeugleiste hinzugefügt.
1 Wählen Sie die gewünschten E-Mail-Nachrichten
aus und klicken Sie auf „Adobe PDF aus ausgewählten
Meldungen erstellen“ .
2 Geben Sie einen Dateinamen und einen
Speicherort an und klicken Sie auf „Speichern“.
Je nach Konvertierungseinstellungen werden die
ausgewählten Nachrichten in ein PDF-Paket gepackt
oder in einem PDF-Dokument zusammengeführt.
Zum Konvertieren von E-Mail-Ordnern wählen Sie die
gewünschten Ordner aus und klicken auf „Adobe PDF
aus Ordnern erstellen“ . Außerdem können Sie
automatisches Archivieren von E-Mail-Nachrichten
und -Ordnern möglich.
Aus Lotus Notes erstellen (Windows)
Nach der Installation von Acrobat 3D werden Lotus
Notes eine Acrobat PDFMaker-Werkzeugleiste und
dem Menü „Aktionen“ Befehle hinzugefügt.
1 Wählen Sie die gewünschten E-Mail-Nachrichten
aus und klicken Sie auf „Ausgewählte Nachrichten in
Adobe PDF konvertieren“ .
2 Geben Sie einen Dateinamen und einen
Speicherort an und klicken Sie auf „Speichern“.
Je nach Konvertierungseinstellungen werden die
ausgewählten Nachrichten in ein PDF-Paket gepackt
oder in einem PDF-Dokument zusammengeführt. Sie
können einen ganzen Ordner in PDF konvertieren,
indem Sie auf „Ausgewählten Ordner in Adobe PDF
konvertieren“ klicken.
Aus Internet Explorer erstellen (Windows)
Sie können eine gesamte Webseite oder einen
bestimmten Teil in das PDF-Format konvertieren.
1 Öffnen Sie in Internet Explorer die zu
konvertierende Webseite.
2 (Optional) Ziehen Sie mit der Maus, um den Text
und die Bilder auszuwählen, die Sie konvertieren
möchten.
3 Klicken Sie auf „Webseite in PDF konvertieren“ .
4 Geben Sie einen Dateinamen und einen
Speicherort an und klicken Sie auf „Speichern“.
Außerdem können Sie eine oder mehrere Webseiten
und sogar ganze Websites aus Acrobat 3D konvertieren.
Über Adobe PDF-Drucker erstellen
In vielen Anwendungen können Sie den Befehl
„Drucken“ mit dem Adobe PDF-Drucker verwenden,
um eine Datei in das PDF-Format zu konvertieren.
1 Öffnen Sie die zu konvertierende Datei und wählen
Sie „Datei“ > „Drucken“.
2 Wählen Sie den Adobe PDF-Drucker in der
Druckerliste aus und drucken Sie dann die Datei.
3 Geben Sie bei Anzeige einer entsprechenden
Meldung einen Dateinamen und einen Speicherort an
und klicken Sie auf „Speichern“.
Page 87

ADOBE ACROBAT 3D VERSION 8
Erste Schritte
C-13
Sie können auch eine andere standardmäßige
Adobe PDF-Druckereinstellung wählen oder eine
benutzerdefinierte Einstellung erstellen.
Gemeinsam an 3D-Entwürfen arbeiten
Tauschen Sie Ihre 3D-Konstruktionsideen aus und
arbeiten Sie an ihnen mit anderen zusammen, indem
Sie sie in sichere PDF-Dateien konvertieren, denen
andere im kostenlosen Adobe Reader Kommentare
hinzufügen können. Starten Sie eine E-Mail-basierte
Überprüfung, um ein Feedback von Ihren Mitarbeitern
zu erhalten. Der E-Mail-basierte Assistent aktiviert
standardmäßig das Kommentieren für ReaderBenutzer. Oder starten Sie ein Acrobat ConnectMeeting, in dem Sie 3D-Entwürfe auf Ihrem Desktop in
Echtzeit anzeigen und diese besprechen können.
Hinweis: Schützen Sie Ihre 3D PDF-Datei, bevor
Sie mit der Überprüfung beginnen. Sie können die
Sicherheitseigenschaften in einem Reader-aktiviertem
PDF nicht ändern.
Mitarbeiter können sich alle Aspekte des 3D-Modells
ansehen, von ausgeblendeten internen Strukturen bis
hin zu Explosionsansichten. Sie können Teile drehen,
messen und Querschnitte erstellen und dabei ihre
Kommentare in Notizen, Zeichnungen oder mit Hilfe
anderer Markierungen hinzufügen.
Page 88

C-14
KAPITEL 1
Erste Schritte
3D-Dateien in PDF konvertieren
Sie können jedes unterstützte 3D-Dateiformat in PDF
konvertieren. (Eine Liste unterstützter Dateiformate
erhalten Sie unter „Bearbeiten“ >
„Grundeinstellungen“ durch Auswahl der Option „In
PDF konvertieren“ im linken Abschnitt.)
1 Klicken Sie auf der Aufgaben-Werkzeugleiste auf
die Schaltfläche „PDF erstellen“ und wählen Sie
„Aus Datei“.
2 Suchen Sie nach der zu konvertierenden 3D-CAD-
Datei.
3 Wählen Sie die gewünschte Vorgabe oder
individuelle Einstellungen.
Kommentare zu einem 3D-Modell hinzufügen
Durch Hinzufügen von Kommentaren erstellen Sie
eine neue, diesen Kommentaren zugeordnete Ansicht.
1 Wählen Sie ein Werkzeug aus der Werkzeugleiste
„Kommentieren und markieren“ aus.
2 Klicken Sie auf das 3D-Modell, um einen
Kommentar hinzuzufügen und in der
Modellhierarchie eine neue Ansicht zu erstellen.
Sie können einer vorhandenen Kommentaransicht
Kommentare hinzufügen, indem Sie vor dem Klicken
auf das Modell in der Modellhierarchie die
entsprechende Ansicht auswählen.
Meeting eröffnen
Wenn Sie über ein Adobe Acrobat Connect-Konto
verfügen, können Sie ein Meeting beginnen, um PDFDokumente in einem Webbrowser zu überprüfen.
Zum Starten eines Meetings können Sie auch ein
Testkonto erstellen.
Hinweis: Acrobat Connect steht nicht in allen Sprachen
zur Verfügung.
1 Klicken Sie auf der Aufgaben-Werkzeugleiste auf
„Meeting eröffnen“ .
2 Klicken Sie auf „Anmelden“ und geben Sie Ihre
Meeting-URL, Ihren Benutzernamen und Ihr
Kennwort ein. (Oder klicken Sie auf „Testkonto
anlegen“ und befolgen Sie die Anweisungen auf dem
Bildschirm.)
3 Klicken Sie auf „E-Mail-Einladungen senden“ oder
„Meinen Bildschirm freigeben“.
Interoperabilität von CAD, CAM und CAE
Vom Zeichenbrett bis zur Produktionsanlage kann
PDF den Übertragung von CAD-, CAM- und CAEInformationen erleichtern. So können Sie schnell eine
gesamte Baugruppe in eine PDF-Datei konvertieren,
die erheblich kleiner als die Originaldatei ist, wobei
geometrischen Abmessungen und Toleranzen sowie
weitere Produktspezifikationen beibehalten werden.
Page 89

ADOBE ACROBAT 3D VERSION 8
Erste Schritte
C-15
Mit Acrobat 3D können Hersteller und Lieferanten jede
3D CAD-Datei virtuell öffnen, ohne die originale
CAD-Anwendung oder einen CAD-Translator zu
installieren. Importieren Sie PMI aus CATIA V5-,
I-DEAS-, JT-, NX- und Pro/ENGINEER-Dateien
und zeigen Sie diese an. Bei Fertigstellung der
Konstruktion exportieren Sie Geometrie in ein
Standarddateiformat, das in CAM-Anwendungen
wieder verwendet werden kann, um Teile auszuschneiden, zu generieren und zusammenzusetzen.
2 Klicken Sie in der Modellhierarchie auf die
einzelnen Ansichten, um festzustellen, welche die
PMI-Daten enthält.
Geometrie aus einem 3D-Modell exportieren
Wenn die Geometrie bei der Konvertierung
beibehalten wurde, können Sie Exporte im IGES-,
STEP-, VRML- oder ParaSolid-Dateiformat erstellen.
Diese Formate können von den meisten CAE und
CAM-Anwendungen gelesen werden.
1 Klicken Sie mit der rechten Maustaste auf das 3D-
Modell und wählen Sie aus dem Kontextmenü die
Option „Daten exportieren“ aus.
2 Wählen Sie einen Dateityp aus und legen Sie
über die Schaltfläche „Einstellungen“ entsprechende
Option dafür fest.
Dateien zusammenführen
Führen Sie verwandte Dateien aus verschiedenen
Quellen in einem PDF-Dokument oder in einem
PDF-Paket zusammen. Sie können z. B. Broschüren,
Präsentationen, Tabellenkalkulationen und Verträge
zu einem Angebot zusammenfassen.
Produktinformationen für ein 3D-Modell anzeigen
Wurden PMI-Daten bei der PDF-Konvertierung
importiert, können diese sowohl in der Modellhierarchie als auch im 3D-Modell angezeigt werden.
1 Klicken Sie auf das 3D-Modell und anschließend
auf das Symbol für die Modellhierarchie in der
3D-Werkzeugleiste.
Wenn Sie Dateien in einem PDF-Dokument
zusammenführen, können Sie anschließend Elemente
hinzufügen, die das Dokument logisch verknüpfen.
Sie können dazu in die neue Datei z. B. eine Kopf- oder
Fußzeile einfügen. Oder Sie nummerieren die Seiten
neu, so dass in der Werkzeugleiste „Seitennavigation“
fortlaufende Seitenzahlen für die zusammengeführten
Dateien angezeigt werden. Sie können Seiten ggf. auch
drehen, löschen oder ersetzen, um dem Dokument ein
zusammenhängendes Aussehen zu geben und den
Inhalt auf dem neuesten Stand zu halten.
Page 90

C-16
KAPITEL 1
Erste Schritte
Statt Dateien zusammenzuführen, können Sie auch
ein PDF-Paket aus Dateien erstellen.
PDF-Dokumente in einem Paket zusammenfassen
Mit Hilfe von PDF-Paketen können Sie zusammengehörige Informationen in einer PDF-Datei bündeln.
Die einzelnen PDFs bleiben dabei als eigenständige
Dateien erhalten.
1 Klicken Sie auf „Dateien zusammenführen“
und anschließend auf „Hinzufügen“.
2 Wählen Sie die gewünschten Dateien für die
Zusammenführung aus und klicken Sie auf
„Hinzufügen“.
3 Passen Sie die Reihenfolge der Dateien wie
gewünscht an und wählen Sie eine Dateigröße sowie
eine Konvertierungseinstellung.
Führen Sie Dokumente aus verschiedenen Anwendungen in einem
Adobe PDF-Dokument zusammen.
PDF-Dokument aus mehreren Dateien erstellen
Verschiedene Dateitypen lassen sich problemlos zu
einer PDF-Datei zusammenführen.
1 Klicken Sie auf „Dateien zusammenführen“
und anschließend auf „Hinzufügen“.
2 Wählen Sie die gewünschten Dateien für die
Zusammenführung aus und klicken Sie auf
„Hinzufügen“.
3 Passen Sie die Reihenfolge der Dateien wie
gewünscht an und wählen Sie eine Dateigröße sowie
eine Konvertierungseinstellung.
4 Klicken Sie auf „Weiter“, wählen Sie „Dateien in
einem einzigen PDF-Dokument zusammenführen“
und klicken Sie auf „Erstellen“.
4 Klicken Sie auf „Weiter“, wählen Sie „Dateien in ein
PDF-Paket packen“ und klicken Sie auf „Erstellen“.
Liste zusammenzuführender Dateien bearbeiten
Beim Zusammenführen von Dateien stehen Ihnen
verschiedene Optionen zum Anpassen des
Dateiensatzes zur Verfügung.
1 Klicken Sie auf „Dateien zusammenführen“ ,
klicken Sie auf „Hinzufügen“ und fügen Sie die
gewünschten Dateien hinzu.
2 Wenn Sie die Dateiliste ändern bzw. eine Datei aus
der Liste entfernen möchten, wählen Sie eine Datei aus
und führen Sie einen der folgenden Schritte aus:
• Klicken Sie auf „Nach oben“ bzw. „Nach
unten“ oder ziehen Sie die Datei an eine neue
Position.
Page 91

ADOBE ACROBAT 3D VERSION 8
Erste Schritte
C-17
• Klicken Sie auf „Seiten wählen“, um eine
Untergruppe von Seiten einzuschließen. (Der
Name der Schaltfläche kann je nach Dateityp
unterschiedlich sein.)
• Klicken Sie auf die Schaltfläche „Entfernen“ oder
drücken Sie die Entf-Taste.
Kopf- und Fußzeilen hinzufügen
Sie können eine einzige Kopf- und Fußzeile für das
gesamte PDF-Dokument einfügen oder verschiedene
Kopf- und Fußzeilen auf bestimmte Seiten anwenden.
1 Wählen Sie „Dokument“ > „Kopf- und Fußzeile“ >
„Hi n zuf üge n“. Wenn ein e Mel d ung a nge z eig t wi rd,
klicken Sie auf „Neue hinzufügen“.
2
Legen Sie die Schrift und die Randeinstellungen fest.
3 Geben Sie in die Textfelder für die Kopf- und
Fußzeile den gewünschten Text ein. Klicken Sie auf die
Schaltflächen unter den Feldern, um eine Seitenzahl
oder ein Datum einzufügen.
Sie können die Einstellungen für die Kopf- und
Fußzeilen zur Wiederverwendung speichern.
3 Wählen Sie den Nummerierungsstil, geben Sie bei
Bedarf ein Präfix ein und legen Sie die Seitenzahl der
Startseite fest.
Sie können auch den Nummerierungsstil des
vorherigen Abschnitts übernehmen.
Seiten drehen
Sie können alle oder einige ausgewählte Seiten in
einem PDF-Dokument drehen.
1 Wählen Sie „Dokument“ > „Seiten drehen“.
2 Legen Sie die Richtung der Drehung und den
Seitenbereich fest.
3 Wählen Sie die gewünschten Optionen in den
Drehen-Menüs.
Zum vorübergehenden Drehen einer Seite wählen Sie
„Anzeige“ > „Ansicht drehen“ > „Im UZS“ oder
„Gegen U Z S “.
Seiten löschen
Nach dem Zusammenführen von Dateien können Sie
unerwünschte oder leere Seiten löschen.
Seiten neu nummerieren
Eine Neunummerierung von Seiten betrifft nur die
Seitenzahlen, die im Fenster „Seiten“ und in der
Werkzeugleiste angezeigt werden. Zum Ändern der
Seitenzahlen, die auf den Dokumentseiten angezeigt
werden, fügen Sie eine Kopf- oder Fußzeileein.
1 Klicken Sie auf die Seiten-Schaltfläche und
wählen Sie im Menü „Optionen“ den Befehl „Seiten
nummerieren“.
2 Legen Sie die Seiten fest, auf die Sie die
Nummerierung anwenden möchten.
1 (Optional) Klicken Sie im Navigationsfenster auf
die Schaltfläche „Seiten“ und wählen Sie die zu
löschenden Seiten aus.
2 Wählen Sie „Dokument“ > „Seiten löschen“.
3 Klicken Sie auf „Ausgewählte“, um die
ausgewählten Seiten zu löschen, oder klicken Sie auf
„Von“ und geben Sie einen Seitenbereich an.
Wenn Sie eine Kopie des Original-PDF-Dokuments
bewahren möchten, sollten Sie das neue Dokument
mit dem Befehl „Speichern unter“ (nicht „Speichern“)
speichern.
Page 92

C-18
KAPITEL 1
Erste Schritte
Seiten ersetzen
Um ein PDF-Dokument schnell zu aktualisieren,
können Sie einzelne Seiten ersetzen.
1 Wählen Sie „Dokument“ > „Seiten ersetzen“.
2 Wählen Sie die Datei aus, die die neuen Seiten
enthält, und klicken Sie auf „Auswählen“.
3 Geben Sie unter „Original“ die zu ersetzenden
Seiten an. Geben Sie unter „Ersetzen“ die erste zu
ersetzende Seite ein.
Zu den Originalseiten gehörende interaktive Elemente
wie Verknüpfungen und Lesezeichen werden nicht
gelöscht.
Exportieren
Wenn Sie keinen Zugriff auf die ursprüngliche
Quelldatei eines PDF-Dokuments haben, können Sie
das PDF in ein bearbeitbares Format konvertieren.
Darüber hinaus können Sie ausgewählten Text und
Bilder kopieren und in anderen Dokumenten
wiederverwenden. Oder extrahieren Sie Seiten und
speichern Sie sie als neues PDF-Dokument.
Sie können z. B. eine Broschüre im HTML-Format
speichern, um sie auf Ihrer Firmen-Website zu
verwenden. Sie können auch einige relevante Seiten
aus einem umfangreichen internen Dokument
extrahieren und an Kunden weiterleiten. Bilder
und Text aus Konstruktionsspezifikationen können
problemlos wiederverwendet werden. Kopieren Sie
diese dazu einfach in ein Word-, Photoshop- oder
InDesign-Dokument.
Als Word-Dokument exportieren
Wenn Sie nicht über die ursprüngliche Datei verfügen,
aus der das PDF-Dokument erstellt wurde, können Sie
die PDF-Datei als in Word bearbeitbares WordDokument speichern.
1 Klicken Sie auf der Aufgaben-Werkzeugleiste auf
„Exportieren“ und wählen Sie „Word-Dokument“.
2 Klicken Sie auf „Einstellungen“, um
Konvertierungseinstellungen festzulegen.
Hinwe is: Wenn Si e eine PD F-Date i im Wo r d -For m at
speichern, entspricht die so entstandene Datei nicht einer
tatsächlich in Word erstellten Datei. Kodierungsinformationen können verloren gehen.
Als HTML oder XML exportieren
Wenn Sie den Inhalt eines PDF-Dokuments im
Internet verwenden möchten, können Sie die PDFDatei einfach in das HTML- oder XML-Format
umwandeln.
1 Klicken Sie auf der Aufgaben-Werkzeugleiste auf
„Exportieren“ und wählen Sie „HTML-Webseite“
oder „XML 1.0“.
2 Klicken Sie auf „Einstellungen“, um
Konvertierungseinstellungen festzulegen.
Sie können PDF-Dokumente im Format „HTML 3.2“
speichern, indem Sie auf „Exportieren“ klicken und
dann „Weitere Formate“ > „HTML 3.2“ wählen.
Als Text exportieren
Sie können PDFs als RTF-Dateien (Rich Text Format),
als verfügbare und als normale Textdateien speichern.
Im RTF-Format bleiben die meisten
Page 93

ADOBE ACROBAT 3D VERSION 8
Erste Schritte
C-19
Formatierungseinstellungen erhalten. Bei
verfügbarem Text werden Elemente wie Kommentare,
Formularfelder und alternativer Text übernommen.
1 Klicken Sie auf der Aufgaben-Werkzeugleiste auf
„Exportieren“ , wählen Sie „Weitere Formate“ und
dann das gewünschte Textformat.
2 Wenn Sie eine Datei als RTF oder normale
Textdatei speichern, können Sie über die Schaltfläche
„Einstellungen“ die Konvertierungseinstellungen
anpassen.
Text auswählen und kopieren
Sie können in PDF-Dokumenten Wörter, Zeilen und
Spalten mit Text kopieren.
1 Führen Sie mit dem Auswahl-Werkzeug einen
der folgenden Schritte aus:
• Ziehen Sie die Maus über den gewünschten Text.
• Doppel- oder Dreifachklicken Sie, um ein Wort
bzw. eine Textzeile auszuwählen.
2 Zeigen Sie mit der Maus auf das Symbol, das neben
dem ausgewählten Text zu sehen ist, und wählen Sie
eine Option im Menü aus.
Falls Sie bestimmten Text nicht auswählen können, ist
er unter Umständen Teil eines Bildes oder gescannten
Dokuments.
Bilder auswählen und kopieren
Sie können ein Bild aus einer PDF-Datei in die
Zwischenablage bzw. in eine andere Anwendung
kopieren oder in einer Datei speichern.
1 Klicken Sie mit dem Auswahl-Werkzeug auf ein
Bild oder ziehen Sie - nachdem sich der Mauszeiger in
ein Fadenkreuz verwandelt hat - mit der Maus, um
einen Teil des Bildes auszuwählen.
2 Führen Sie einen der folgenden Schritte aus:
• Ziehen Sie das Bild in ein geöffnetes Dokument
einer anderen Anwendung.
• Klicken Sie mit der rechten Maustaste bzw. bei
gedrückter Ctrl-Taste auf das Bild und wählen Sie
„Bild kopieren“ bzw. „Bild speichern unter“.
Schnappschüsse erstellen
Mit dem Schnappschuss-Werkzeug können Sie den
gesamten ausgewählten Inhalt kopieren. Sowohl Text
als auch Grafiken werden dabei als Bild kopiert.
1 Wählen Sie „Werkzeuge“ > „Auswählen und
zoomen“ > „Schnappschuss-Werkzeug“.
2 Wählen Sie durch Ziehen mit der Maus Inhalt auf
der Seite aus bzw. klicken Sie, um die gesamte Seite zu
kopieren.
Beim Loslassen der Maustaste wird der ausgewählte
Inhalt in die Zwischenablage kopiert.
Seiten entnehmen
Entnommene Seiten werden in einer neuen PDFDatei gespeichert.
1 Wählen Sie „Dokument“> „Seiten entnehmen“.
2 Geben Sie den Bereich der zu entnehmenden Seiten
an.
3 Legen Sie fest, ob die Seiten nach der Entnahme
gelöscht werden sollen.
4 Um entnommene Seiten nicht zusammen in
einem Dokument, sondern in separaten Dateien zu
speichern, aktivieren Sie das Kontrollkästchen „Seiten
als einzelne Dateien entnehmen“.
Page 94

C-20
KAPITEL 1
Erste Schritte
Es werden alle Verknüpfungen, Kommentare und
Formularfelder, nicht jedoch Lesezeichen und Artikel
entnommen.
Sicher
Den Zugriff auf Ihre PDF-Dokumente können Sie mit
Hilfe von Kennwörtern, Zertifikaten und serverbasierten Richtlinien steuern. Anhand dieser Sicherheitsfunktionen können Sie bestimmten, was andere
Personen mit Ihren PDFs tun und welche Inhalte sie
anzeigen können.
Erstellen Sie z. B. schreibgeschützte Dateien für die
Verteilung im Internet. Oder schränken Sie den
Zugriff auf Dateien ein, die Sie zur Überprüfung
senden, so dass nur das Kommentieren erlaubt ist. Sie
können vertrauliche Informationen in einem
juristischen Dokument schwärzen oder persönlichen
Daten in einer PDF suchen und entfernen, bevor Sie
das Dokument der Öffentlichkeit zugänglich machen.
PDF-Datei auf ausgeblendeten Inhalt überprüfen
Bevor Sie ein PDF-Dokument an andere Personen
weitergeben, möchten Sie vielleicht Informationen zur
Geschichte des Dokuments oder persönliche Details
wie Metadaten mit Ihrem Namen als Verfasser
entfernen.
1 Wählen Sie „Dokument“ > „Dokument
untersuchen“.
2 Wählen Sie die Elemente aus, die aus dem PDF-
Dokument entfernt werden sollen, und klicken Sie auf
„Alle ausgewählten Elemente entfernen“.
3 Speichern Sie das Dokument unter einem neuen
Namen.
Sie können ein PDF-Dokument auch im Anschluss an
die Schwärzung.
Vertraulichen Inhalt schwärzen
Mit der Funktion zum Schwärzen von Text können Sie
vertrauliche Inhalte aus einem PDF-Dokument
entfernen.
Wichtig: Speichern Sie eine Kopie der PDF-Datei, bevor
Sie Text schwärzen.
1 Wählen Sie „Anzeige“ > „Werkzeugleisten“ >
„Schwärzung“.
2 Klicken Sie auf „Zum Schwärzen markieren“
und führen Sie einen der folgenden Schritte aus:
• Doppelklicken Sie auf ein Wort oder Bild.
• Ziehen Sie die Maus über den gewünschten Text.
• Ziehen Sie die Maus bei gedrückter Strg- bzw. Ctrl-
Taste über einen Seitenbereich.
3 Klicken Sie auf „Schwärzungen anwenden“ .
Suchen Sie ggf. nach ausgeblendetem Inhalt und
entfernen Sie diesen.
Entfernen Sie mit „Suchen und schwärzen“ alle
Exemplare einer Suchzeichenfolge.
Dokumente mit einem Kennwort versehen
Eine Möglichkeit, den Zugriff auf ein PDF-Dokument
einzuschränken ist, ein Kennwort zum Öffnen der
Datei festzulegen.
Wichtig: Falls Sie das Kennwort vergessen, kann die
PDF-Datei nicht mehr geöffnet werden.
1 Klicken Sie auf der Aufgaben-Werkzeugleiste auf
„Schützen“ und wählen Sie „Verschlüsselung mit
Kennwort“.
Page 95

ADOBE ACROBAT 3D VERSION 8
Erste Schritte
C-21
2 Aktivieren Sie die Option „Kennwort zum Öffnen
des Dokuments erforderlich“ und geben Sie das
Kennwort in das Textfeld ein. Bei diesem Kennwort
wird die Groß-/Kleinschreibung beachtet.
Sollte die PDF-Datei bereits geschützt sein, müssen Sie
möglicherweise das Berechtigungskennwort eingeben,
um die Sicherheitseinstellungen ändern zu können.
PDFs vor Änderungen schützen
Sie können Sicherheitsbeschränkungen festlegen, um
andere Personen daran zu hindern, Ihr PDFDokument zu ändern.
1 Klicken Sie auf der Aufgaben-Werkzeugleiste auf
„Schützen“ und wählen Sie „Verschlüsselung mit
Kennwort“.
2 Aktivieren Sie die Option „Einschränkung für
Bearbeitung und Drucken des Dokuments“ und geben
Sie das Berechtigungskennwort ein.
3 Wählen Sie eine Option im Menü „Zulässige
Änderungen“ aus.
Weitere Informationen zu den übrigen Schutzoptionen
im Dropdown-Menü „Sicherheitssystem“ finden Sie in
der Hilfe.
Geschützte Anlagen erstellen
Sie können PDF-Dateien und Dateien anderen Formats
schützen, indem Sie sie in einen verschlüsselten
Sicherheitsumschlag einbetten und als E-Mail-Anlage
versenden.
1 Klicken Sie auf „Schützen“ und wählen Sie
„Sicherheitsumschlag erstellen“.
2 Klicken Sie auf „Zu sendende Datei hinzufügen“
und wählen Sie die gewünschten Dokumente aus.
3 Klicken Sie auf „Weiter“ und folgen Sie den
Anweisungen auf dem Bildschirm, um den
Sicherheitsumschlag zu erstellen.
Die Empfänger können die verschlüsselten
Dokumente entnehmen und speichern. Durch das
Speichern wird die Verschlüsselung aufgehoben.
PDFs mit Richtlinien schützen
Durch Verwenden einer von Ihnen erstellten Benutzerrichtlinie oder einer von einem Adobe Policy Server-
Verwalter eingerichteten und für ganze Benutzergruppen geltenden Firmenrichtlinie können Sie einfach
und schnell Sicherheitseinstellungen anwenden.
Acrobat 3D wird mit zwei Benutzerrichtlinien geliefert.
1 Klicken Sie in der Aufgaben-Werkzeugleiste auf
„Schützen“ und wählen Sie oben im Menü eine der
Richtlinien aus.
2 Klicken Sie auf „Ja“ und passen Sie die
Sicherheitseinstellungen wie gewünscht an.
Benutzersicherheitsrichtlinien erstellen
Sicherheit Richtlinien sind eine einfache Methode,
mehreren PDF-Dokumenten dieselben Sicherheitseinstellungen zuzuweisen. Sicherheitsrichtlinien
beinhalten eine Verschlüsselung, Berechtigungseinstellungen sowie Informationen über Anwender,
die die PDFs öffnen oder Sicherheitseinstellungen
ändern dürfen.
1 Klicken Sie auf der Aufgaben-Werkzeugleiste auf
„Schützen“ und wählen Sie „Sicherheitsrichtlinien
verwalten“.
2 Klicken Sie auf „Neu“ und wählen Sie die
gewünschte Schutzmethode.
Page 96

KAPITEL 1
C-22
Erste Schritte
3 Klicken Sie auf „Weiter“ und folgen Sie den
Anweisungen auf dem Bildschirm, um die Richtlinie
zu definieren und die gewünschten Sicherheitseinstellungen festzulegen.
A
Unterschreiben
Das digitale Unterschreiben eines PDF-Dokuments
entspricht im Grunde dem Unterschreiben eines
Papierdokuments. Sie können mit einer digitalen
Unterschrift z. B. Inhalt genehmigen oder angeben,
dass Sie den Inhalt überprüft haben oder den im
Dokument dargelegten Bedingungen zustimmen.
Durch Hinzufügen einer digitalen Unterschrift
können Sie außerdem am PDF-Dokument
vorgenommene Änderungen zurückverfolgen.
Zur zusätzlichen Sicherheit können Sie ein PDFDokument zertifizieren, damit die Empfänger sicher
sein können, dass das Dokument nicht verändert
wurde. Und zuletzt können Sie digitale Unterschriften
überprüfen, um sicherzustellen, dass sie gültig sind.
B
Bestätigen Sie durch Ihre Unterschrift, dass Sie ein Dokument
gelesen haben und mit dem Inhalt einverstanden sind.
A. Zertifizierungsunterschrift B. Digitale Unterschrift
Selbst signierte digitale ID erstellen
Zum Unterzeichnen von Dokumenten und zum
Einsatz von Zertifikaten ist eine digitale ID
erforderlich. Hierfür sind in vielen Fällen selbst
signierte digitale IDs, die in Acrobat 3D erstellt
wurden, geeignet. Informationen zum Erwerb einer
digitalen ID über einen Adobe-Sicherheitspartner
finden Sie auf der Adobe-Website.
1 Wählen Sie „Erweitert“ > „Sicherheitseinstellungen“.
2 Wählen Sie „Digitale IDs“ aus und klicken Sie auf
„ID hinzufügen“.
Page 97

ADOBE ACROBAT 3D VERSION 8
Erste Schritte
C-23
3 Aktivieren Sie die Option „Selbst signierte digitale
ID zur Verwendung mit Acrobat erstellen“.
4 Folgen Sie den Anweisungen auf dem Bildschirm,
um eine selbst signierte digitale ID anzulegen.
Digitale IDs registrieren
Sie müssen digitale IDs in Acrobat 3D registrieren,
bevor Sie sie verwenden können.
1 Wählen Sie „Erweitert“ > „Sicherheitseinstellungen“.
2 Wählen Sie „Digitale IDs“ aus und klicken Sie auf
„ID hinzufügen“.
3 Aktivieren Sie die Option „Vorhandene digitale
ID-Datei suchen“.
4 Folgen Sie den Anweisungen auf dem Bildschirm,
wählen Sie die digitale ID-Datei aus, geben Sie Ihr
Kennwort ein und registrieren Sie die digitale ID.
Sie haben die Möglichkeit, selbst signierte digitale IDs
in Acrobat 3D zu erstellen. Informationen zum
Erwerb einer digitalen ID über einen AdobeSicherheitspartner finden Sie auf der Adobe-Website.
Zertifikate freigeben
Zu Ihrer digitalen ID gehört ein Zertifikat, mit dem
Dritte Ihre Unterschrift prüfen und Dokumente für
Sie verschlüsseln können.
1 Wählen Sie „Erweitert“ > „Sicherheitseinstellungen“.
2 Wählen Sie links „Digitale IDs“.
3 Wählen Sie die freizugebende ID aus und klicken
Sie auf „Exportieren“ .
4 Folgen Sie den Anweisungen auf dem Bildschirm,
um das Zertifikat per E-Mail zu versenden oder als
Datei zu speichern.
Wenn Sie ein Sicherheitssystem eines Drittanbieters
verwenden, müssen Sie Ihr Zertifikat normalerweise
nicht an andere übermitteln.
Erscheinungsbild für Unterschrift erstellen
Sie können das Erscheinungsbild der digitalen
Unterschrift ändern. Sie können z. B. Ihre gescannte
Unterschrift einschließen.
1
(Optional) Speichern Sie das gewünschte Bild auf
einer eigenen Seite und konvertieren Sie die Seite in PDF.
2 Wählen Sie „Bearbeiten“ > „Grundeinstellungen“
(Windows) bzw. „Acrobat 3D“ > „Grundeinstellungen“
(Mac OS), und wählen Sie „Sicherheit“.
3 Klicken Sie auf „Neu“ und geben Sie einen Titel ein.
4 (Optional) Wählen Sie „Importierte Grafik“,
klicken Sie auf „Datei“ und wählen Sie die gewünschte
Datei aus.
5 Wählen Sie die gewünschten Optionen aus.
PDF-Dateien unterschreiben
Mit einer digitalen Unterschrift genehmigen Sie eine
PDF-Datei. Das beste Ergebnis erzielen Sie, wenn Sie
Ihre Sicherheitseinstellungen so ändern, dass Sie beim
Unterschreiben immer der DokumentvorschauModus aktiviert ist. Auf deise Weise können Sie das
PDF-Dokument in einem sicheren Status anzeigen
und unterschreiben.
1 Klicken Sie auf das Unterschriftsfeld. Oder klicken
Sie auf „Unterschreiben“ und wählen Sie
„Dokument unterschreiben“.
2 Befolgen Sie die Anweisungen auf dem Bildschirm
zum Anwenden Ihrer digitalen Unterschrift.
Page 98

C-24
KAPITEL 1
Erste Schritte
Enthält das Dokument kein nicht unterschriebenes
Unterschriftsfeld, kicken Sie auf „Unterschreiben“ und
wählen Sie „Unterschrift platzieren“, um das PDF zu
unterschreiben.
PDF-Dateien zertifizieren
Durch die Zertifizierung eines PDF-Dokuments
genehmigen Sie seinen Inhalt. Außerdem können
Sie festlegen, welche Arten von Änderungen
vorgenommen werden dürfen, damit die
Zertifizierung des PDF-Dokuments gültig bleibt.
1 Klicken Sie in der Werkzeugleiste auf
„Unterschreiben“ , wählen Sie „Mit sichtbarer
Unterschrift zertifizieren“ oder „Ohne sichtbare
Unterschrift zertifizieren“ und klicken Sie auf „OK“.
2 Wenn Sie die Zertifizierung mit sichtbarer
Unterschrift gewählt haben, zeichnen Sie ein
Unters chriftsfeld.
3 Befolgen Sie die Anweisungen auf dem Bildschirm
zum Anwenden Ihrer Zertifizierungsunterschrift.
4 Speichern Sie das PDF-Dokument unter einem
anderen Dateinamen.
Unterschriften prüfen
Wenn Sie ein Dokument öffnen, wird neben der
Unterschrift ein Statussymbol angezeigt, das angibt,
ob die Unterschrift gültig ist.
1 Klicken Sie im Navigationsfenster auf die
Schaltfläche „Unterschriften“ und wählen Sie die
Unterschrift aus.
2 Klicken Sie mit der rechten Maustaste bzw.
bei gedrückter Ctrl-Taste und wählen Sie
„Unterschriftseigenschaften einblenden“.
3 Lösen Sie mit Hilfe der verschiedenen
Registerkarten und Optionen des Dialogfeld
„Unterschriftseigenschaften“ mögliche Probleme mit
der Unterschrift. Wenn z. B. die Identität unbekannt
ist oder nicht bestätigt wurde, klicken Sie auf die
Registerkarte „Unterzeichner“ und dann auf
„Zertifikat anzeigen“, um festzustellen, ob das
Zertifikat vertrauenswürdig ist.
Überarbeiten und kommentieren
Starten Sie eine automatische E-Mail-basierte
oder gemeinsame Überprüfung, um den
Überprüfungsprozess zu vereinfachen. Wenn Sie ein
PDF-Dokument mit Acrobat 3D überprüfen, können
alle Benutzer mit Hilfe vieler verschiedener
Kommentierungswerkzeuge Kommentare wie
Notizen und Stempel, Textänderungen,
Hervorhebungen und Grafikmarkierungen in ein
einziges, unveränderliches Dokument einfügen.
Bei einer gemeinsamen Überprüfung können die
Überprüfer die Kommentare der anderen Überprüfer
sehen und darauf antworten. Anhand des
Überprüfungsprotokolls können Sie weitere
Überprüfer einladen, erneut an einer Überprüfung
teilnehmen und den Fortschritt gemeinsamer
Überprüfungen verfolgen.
Ihr Projektteam soll z. B. ein Datenblatt überprüfen,
allerdings befinden sich die Beteiligten an
verschiedenen Orten. Sie richten eine gemeinsame
Überprüfung ein, um die PDF an alle Teilnehmer zu
schicken. Öffnen die Teilnehmer (einschließlich
Benutzer von Adobe Reader 8.0, wenn Sie zusätzliche
Verwendungsrechte hinzugefügt haben) die E-MailAnlage, zeigt Acrobat die Werkzeugleiste zum
Kommentieren sowie Überprüfungsanweisungen an.
Page 99

ADOBE ACROBAT 3D VERSION 8
Gemeinsame Überprüfung starten
C
Bei einer gemeinsamen Überprüfung können
Erste Schritte
C-25
Überprüfer (auch jene, die Adobe Reader verwenden)
die Kommentare anderer Personen während der
A
D
Überprüfung anzeigen und beantworten.
Wichtig: Für die Durchführung einer gemeinsamen
Überprüfung benötigen Sie und Ihre Überprüfer Schreib-
E
zugriff auf einen gemeinsamen Kommentarserver.
F
B
1 Klicken Sie auf „Überprüfen und
kommentieren“ und wählen Sie „Zur
gemeinsamen Überprüfung senden“.
Fügen Sie Ihrer PDF verschiedene Arten von Kommentaren hinzu.
Diese werden auch in der Kommentarliste angezeigt.
A. Hinwe is B. Grafikmarkierungen C. Stempel D. Ersetzter Text
E. Dateianlage F. Markierter Text
E-Mail-basierte Überprüfung starten
Bei einer E-Mail-basierten Überprüfung können Sie
den Überprüfungsstatus protokollieren und erhaltene
Kommentare in die PDF-Datei einfügen.
1 Klicken Sie auf „Überprüfen und
kommentieren“ und wählen Sie „Zur E-MailÜberprüfung anhängen“.
2 Geben Sie bei entsprechender Aufforderung
Ihre persönlichen Informationen ein, um ein
Überprüferprofil zu erstellen.
3 Befolgen Sie die Anweisungen auf dem Bildschirm,
um die PDF-Datei auszuwählen, Überprüfer
einzuladen und die E-Mail-Einladung zu senden.
Wenn Ihre E-Mail-Anwendung die E-Mails nicht
automatisch sendet, müssen Sie vor dem Senden
der Nachricht möglicherweise Warnmeldungen
beantworten und zur E-Mail-Anwendung wechseln.
2 Geben Sie bei entsprechender Aufforderung
Ihre persönlichen Informationen ein, um ein
Überprüferprofil zu erstellen.
3 Befolgen Sie die Anweisungen auf dem Bildschirm,
einen Server auszuwählen (oder hinzuzufügen), das
PDF-Dokument auszuwählen, Überprüfer einzuladen
und die E-Mail-Einladung zu senden.
Überprüfungen protokollieren und verwalten
Das Überprüfungsprotokoll enthält Informationen
für alle Dokumente, die Sie zur Überprüfung gesendet
und erhalten haben. Mit dem Überprüfungsprotokoll
können Sie erneut an einer Überprüfung teilnehmen,
eine Erinnerung senden oder weitere Überprüfer
einladen.
1 Klicken Sie auf „Kommentieren und markieren“
und wählen Sie „Überprüfungsprotokoll“.
2 Wählen Sie das gewünschte PDF links aus.
3 Führen Sie einen der folgenden Schritte aus:
• Um erneut an einer Überprüfung teilzunehmen,
doppelklicken Sie auf die entsprechende PDFDatei.
Page 100

C-26
KAPITEL 1
Erste Schritte
• Um eine Nachricht zu senden, klicken Sie auf
„E-Mail an alle Überprüfer“ oder auf „E-MailInitiator“.
• Um weitere Überprüfer einzuladen, klicken Sie auf
„Überprüfer hinzufügen“.
Weitere Korrektoren einladen
Wenn Sie eine Überprüfung initiiert haben, können
Sie zusätzliche Korrektoren zur Teilnahme einladen.
Wenn Sie ein Überprüfer sind, können Sie den
Initiator bitten, weitere Überprüfer hinzuzufügen, so
dass der Initiator alle Überprüfer überwachen kann
und benachrichtigt wird, wenn Kommentare gesendet
werden.
1 Klicken Sie auf „Kommentieren und markieren“
und wählen Sie „Überprüfungsprotokoll“.
2 Wählen Sie d a s ge wünschte PDF-Dokument unter
„Von mir gesendete Überprüfungen“ aus und klicken
Sie rechts auf „Überprüfer hinzufügen“.
3 Befolgen Sie die Anweisungen auf dem Bildschirm,
um E-Mail-Adressen hinzuzufügen, die Nachricht je
nach Bedarf zu ändern und die Einladung zu senden.
An E-Mail-Überprüfung teilnehmen
Wenn Sie die PDF-Anlage in einer E-MailÜberprüfung öffnen, wird eine protokollierte Kopie
der PDF-Datei mit einer Dokumentmeldungsleiste,
der Schaltfläche „Kommentare senden“ und der
Werkzeugleiste „Kommentieren und markieren“
geöffnet.
Wichtig: Wenn Sie beim Öffnen der PDF-Datei dazu
aufgefordert werden, eine Verbindung zu einem Server
herzustellen, haben Sie eine Einladung zu einer
gemeinsamen Überprüfung erhalten.
1 Öffnen Sie die PDF-Anlage in der E-Mail-
Anwendung.
2 Fügen Sie mit Hilfe von
Kommentierungswerkzeugen Kommentare hinzu.
3 Speichern Sie die PDF-Datei und klicken Sie
anschließend auf „Kommentare senden“.
An einer gemeinsamen Überprüfung teilnehmen
Wenn Sie das freigegebene PDF-Dokument öffnen,
werden Kommentierungswerkzeuge und eine
Dokumentmeldungsleiste mit Anweisungen
angezeigt.
1 Öffnen Sie die PDF-Anlage oder die Verknüpfung.
2 Klicken Sie auf „Verbinden“ und geben Sie bei
entsprechender Aufforderung Ihren Anmeldenamen
und Ihr Kennwort ein.
3 Geben Sie bei Aufforderung Ihren Namen, Ihre
E-Mail-Adresse und Ihre Berufsbezeichnung ein, um
ein Überprüferprofil zu erstellen.
4 Fügen Sie Kommentare hinzu.
5 Wenn Sie Ihre Kommentare freigeben möchten,
klicken Sie auf „Kommentare veröffentlichen“.
Bei einer gemeinsamen Überprüfung können Sie die
veröffentlichten Kommentare aller Überprüfer
anzeigen.
 Loading...