

Xylem SH-BLOX-ST30 Series, BLOX BRIDGE BR-BLOX-12 Series, BLOX V-BLOX-SH-20 series, BLOX BRIDGE BR-BLOX-20 Series, SH-BLOX-ST24 Series Installation Instructions Manual
...Page 1

TM
THANK YOU FOR CHOOSING XYLEM
Please take a few minutes to review this manual before you start installation. If you
encounter any installation problems, please don’t hesitate to contact us.
Before you begin, please observe all local building codes. Unpack the new product and
inspect for damage. The appearance of your vanity may differ from the illustrations in this
guide. This instructions still apply.
Please ensure the finished wall is straight and plumb and the floor is flat and perpendicular
to the finished wall.
SUGGESTED TOOLS AND MATERIALS
INSTALLATION INSTRUCTIONS
TM
BLOX
VANITY
V-BLOX-SH-20xx
10'
Philips Screwdriver Level Drill Tape Measure Safety Glasses
ROUGH-IN DIMENSIONS
20” (508mm)
SUGGESTED HEIGHT:
Application
Undermount
Vessel
20” (508mm) 21-1/2” (546mm)
Y (inch)
14”
11”
3-7/8” (100mm)
FINISHED
WALL
Y (inch)
FLOOR
Page 2
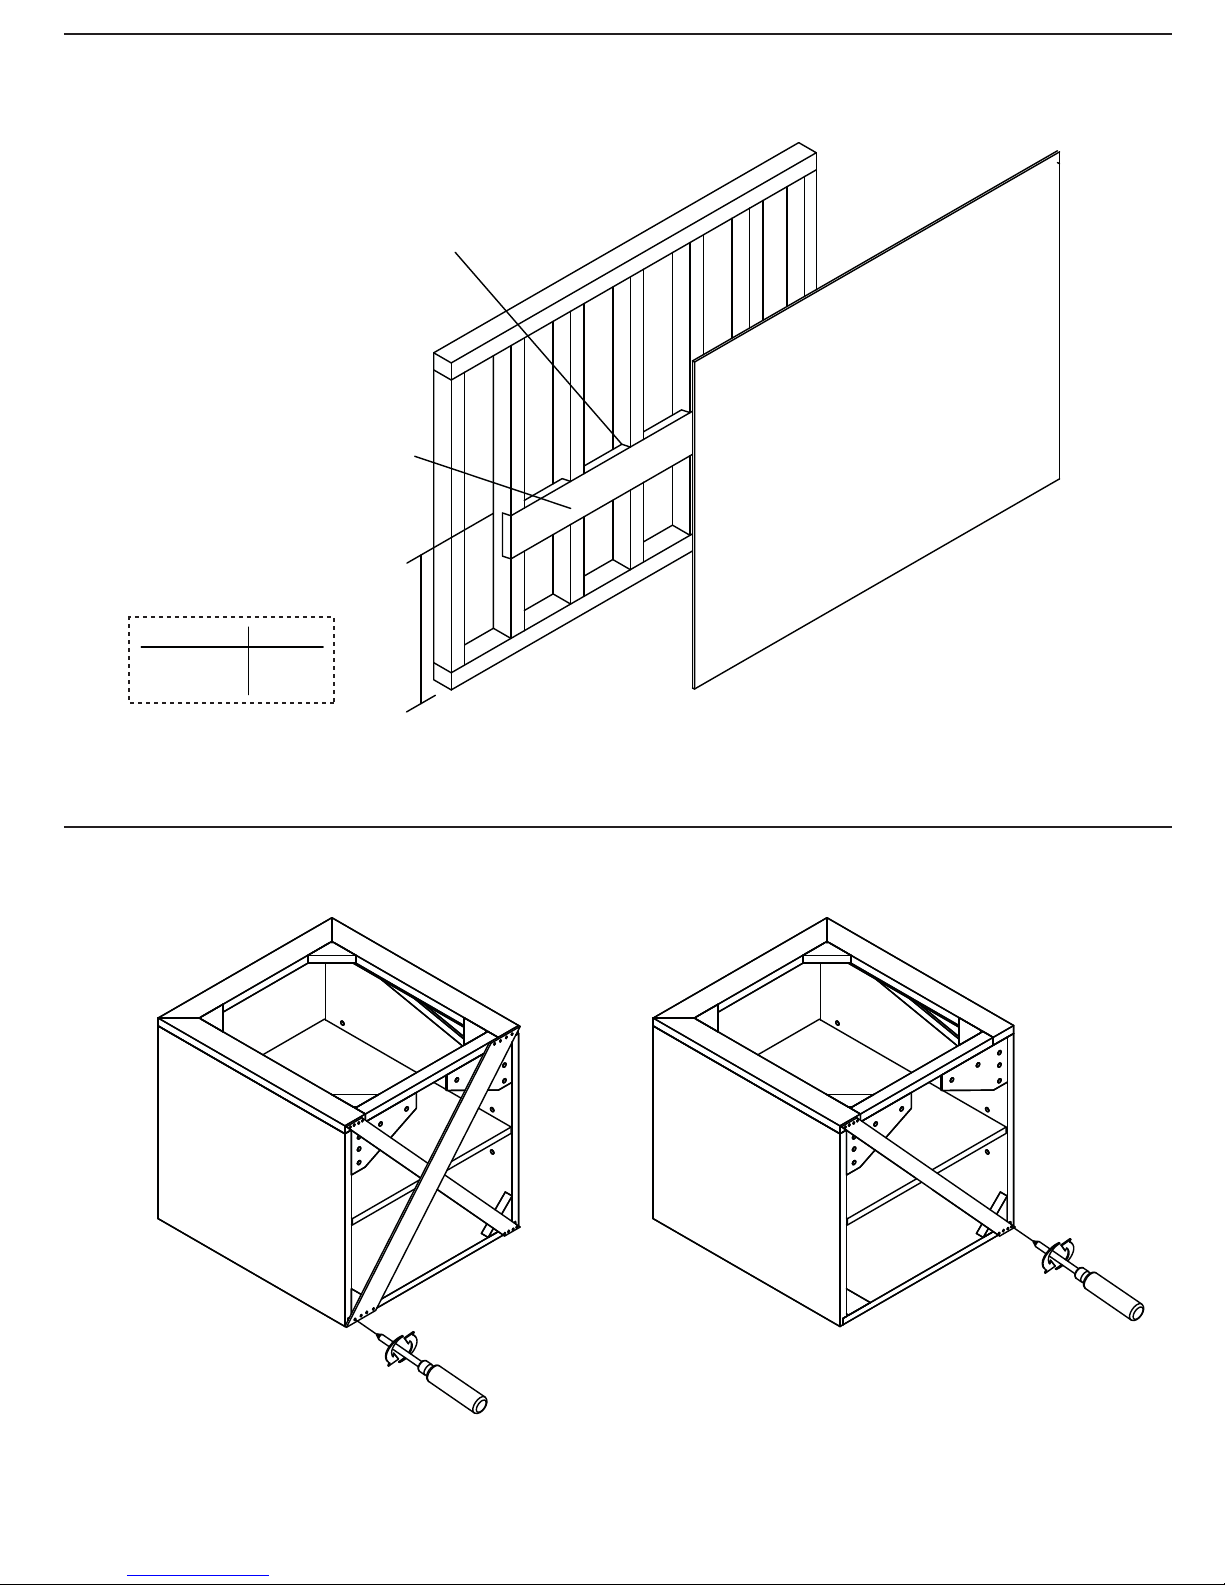
WALL PREPARATION
Notch studs 1-1/2" (38mm) to
provide support for header.
Extend the header beyond the
countertop to the nearest stud.
SUGGESTED HEIGHT:
Application Z (inch)
Undermount
Vessel
35”
32”
2” x 12”
Header
Z
Finished Wall
INSTALLATION INSTRUCTIONS
1. 2.
Remove wood supports from the back of vanity.
Page 3

INSTALLATION INSTRUCTIONS
HARDWARE INCLUDED
3.
BLS01
x 8
Level the vanity with a leveler and attach the brackets to the 2 x 12 header using screws provided.
CARE AND CLEANING
• To maintain the beauty of the finish, avoid placing the furniture in direct sunlight, as sunlight causes fading. Also avoid extreme
changes in temperature by arranging furniture away from radiators, heat and air vents, and air conditioning units. Avoid placing furniture
directly under windows.
• Dust the vanity frequently with a clean, soft, dry or lint-free cloth. Clean the surface by rubbing in the direction of the grain using damp
lint-free cloth. Avoid using silicone cleaners and waxes.
• Clean up excess water and spills immediately. Use blotting rather than a wiping action. Water left over a long period of time will cause
white spots in the finish. Please note that some chemicals may damage the finish.
Page 4

ADJUSTMENT
SIDE
2
CAM HEIGHT
1
1
2
TILT
Rev 2/10
For customer support please visit www.xylem.biz or call 866 395 8112 weekdays 8:00 to 5:00 EST or fax 866 395 8113 any time
 Loading...