

Page 1

System Software Version 80.20.84
Book Version 3.1
November 2015
®
Xerox
Versant
User Guide
®
80 Press
Page 2

©2015 Xerox Corporation. All rights reserved. Xerox®, Xerox and Design®, FreeFlow®,
SquareFold®, CentreWare®and Versant®are trademarks of Xerox Corporation in the
United States and/or other countries.
Adobe PDF is a registered trademarks of Adobe Systems, Inc. PostScript is an Adobe
registered trademark used with the Adobe PostScript Interpreter, the Adobe page
description language, and other Adobe products.
Fiery®and EFI™are trademarks or registered trademarks of Electronics For Imaging, Inc.
GBC®and AdvancedPunch™are trademarks or registered trademarks of General Binding
Corporation.
Microsoft, Windows, Windows XP, Windows Vista, Internet Explorer, and Word are
registered trademarks of Microsoft Corporation in the United States and/or other
countries.
3-IN-ONE®and WD-40®are a registered trademarks of the WD-40 Company.
BR4005
Page 3

Table of Contents
1 Product Overview.......................................................................................1-1
Introduction...........................................................................................................................1-1
Base Configuration.............................................................................................................1-1
Print Server Overview..........................................................................................................1-2
Press Components...............................................................................................................1-2
Press Components..................................................................................................1-2
Locating the Press Serial Number....................................................................1-3
User Interface (UI).................................................................................................1-4
Features...................................................................................................................................1-5
Logon...........................................................................................................................1-5
Language...................................................................................................................1-6
Language Feature.....................................................................................1-6
Changing the Language.........................................................................1-6
Energy (Power) Saver Mode...............................................................................1-6
Energy (Power) Saver Mode Overview..............................................1-6
Low Power Mode.......................................................................................1-7
Sleep Mode..................................................................................................1-7
Exiting Energy (Power) Saver Mode...................................................1-7
Power On/Off.........................................................................................................................1-7
The Power Switches...............................................................................................1-7
Power On/Off the Press........................................................................................1-8
Power On the Press...................................................................................1-8
Power Off the Press...................................................................................1-8
Feeding and Finishing Devices.......................................................................................1-8
Feeding Devices.......................................................................................................1-9
Finishing Devices..................................................................................................1-10
Optional Performance Package...................................................................................1-14
2 Where to Find Help...................................................................................2-1
Help on the Xerox Web Site.............................................................................................2-1
Print Server Customer Documentation.......................................................................2-1
3 Paper and Media.......................................................................................3-1
Overview..................................................................................................................................3-1
Loading Media in Trays 1, 2, and 3...............................................................................3-1
Information About Loading Media in Trays 1, 2, and 3..........................3-1
Loading Paper in Trays 1, 2, and 3...................................................................3-2
User Guide
iXerox®Versant®80 Press
Page 4

Table of Contents
Loading Media in the Bypass (Tray 5).........................................................................3-5
Loading Paper in the 1-Tray High Capacity Feeder (HCF / Tray 6)..................3-8
Loading Media in the 1- or 2-Tray Oversized High Capacity Feeder (OHCF
Loading Media in the OHCF (Trays 8 and 9)..........................................................3-15
Loading Post-Process Media in Optional Finishing Devices.............................3-21
Loading Tab Stock in Trays 1, 2, and 3...........................................................3-2
Loading Transparencies in Trays 1, 2, and 3................................................3-3
Loading Pre-drilled Stock in Trays 1, 2, and 3..............................................3-4
Loading Paper in the Bypass (Tray 5).............................................................3-5
Loading Tab Stock in the Bypass (Tray 5).....................................................3-6
Loading Transparencies in the Bypass (Tray 5)..........................................3-6
Loading Pre-drilled Stock in the Bypass (Tray 5)........................................3-7
Loading Envelopes in the Bypass (Tray 5)....................................................3-7
/ Trays 6 and / or 7)...................................................................................................3-9
Postcard Bracket......................................................................................................3-9
Using the Postcard Bracket.................................................................3-10
Skew Adjustment Levers (Trays 6 and 7)....................................................3-11
Loading Paper in the Oversized High Capacity Feeder (OHCF / Trays
6 and 7).........................................................................................................3-12
Loading Tabs in the Oversized High Capacity Feeder (OHCF / Trays
6 and 7).........................................................................................................3-12
Loading Transparencies in the Oversized High Capacity Feeder
(OHCF / Trays 6 and 7)............................................................................3-13
Loading Pre-Drilled Stock into the Oversized High Capacity Feeder
(OHCF / Trays 6 and 7)............................................................................3-14
Postcard Bracket...................................................................................................3-15
Using the Postcard Bracket.................................................................3-15
Skew Adjustment Levers (Trays 8 and 9)....................................................3-17
Loading Paper in the OHCF (Trays 8 and 9)..............................................3-18
Loading Tabs in the OHCF (Trays 8 and 9)................................................3-18
Loading Transparencies in the OHCF (Trays 8 and 9)...........................3-19
Loading Pre-drilled Stock into the OHCF (Trays 8 and 9)....................3-20
4 Copy................................................................................................................4-1
Document Feeder and Glass...........................................................................................4-1
Document Feeder Tips..........................................................................................4-1
Document Glass......................................................................................................4-1
Basic Copying Steps............................................................................................................4-2
Basic Copying with the Document Feeder (DADF)...................................4-2
Basic Copying with the Document Glass......................................................4-2
Selecting Copy Options for a Third-Party Finishing Device...................4-3
Copy Feature..........................................................................................................................4-4
Xerox®Versant®80 Pressii
User Guide
Page 5

Table of Contents
Copy Feature Overview.........................................................................................4-4
Reduce/Enlarge.......................................................................................................4-4
Reduce / Enlarge (R/E).............................................................................4-4
More Reduce/Enlarge (R/E) Options..................................................4-5
Paper Supply.............................................................................................................4-5
Output Color.............................................................................................................4-6
Copy Output.............................................................................................................4-6
2 Sided Copying......................................................................................................4-7
Original Type............................................................................................................4-8
Darken/Lighten........................................................................................................4-8
Image Quality Feature.......................................................................................................4-9
Image Quality Feature Overview.....................................................................4-9
Selecting Image Quality Options.....................................................................4-9
Original Type..........................................................................................................4-10
Image Options......................................................................................................4-10
Image Enhancement.........................................................................................4-11
Color Effects...........................................................................................................4-11
Color Balance.........................................................................................................4-11
Color Shift...............................................................................................................4-12
Layout Adjustment Feature..........................................................................................4-12
Layout Adjustment Feature Overview.........................................................4-12
Selecting Layout Adjustment Options........................................................4-12
Book Copying........................................................................................................4-13
2 Sided Book Copying........................................................................................4-14
Original Size...........................................................................................................4-14
Edge Erase..............................................................................................................4-14
Image Shift............................................................................................................4-15
Image Rotation....................................................................................................4-15
Invert Image..........................................................................................................4-16
Original Orientation............................................................................................4-16
Output Format Feature...................................................................................................4-16
Output Format Feature Overview..................................................................4-16
Selecting Output Format Options.................................................................4-17
Booklet Creation...................................................................................................4-17
Covers.......................................................................................................................4-19
Page Layout...........................................................................................................4-19
Poster........................................................................................................................4-20
Annotations...........................................................................................................4-20
Watermark..............................................................................................................4-21
Tab Margin Shift...................................................................................................4-21
User Guide
iiiXerox®Versant®80 Press
Page 6

Table of Contents
Face Up/Down Output.......................................................................................4-22
ID Card Copy.........................................................................................................4-22
Transparency Options........................................................................................4-23
Folding (optional)................................................................................................4-23
Job Assembly Feature......................................................................................................4-24
Job Assembly Feature Overview.....................................................................4-24
Build Job..................................................................................................................4-24
Sample Job.............................................................................................................4-25
Combine Original Sets.......................................................................................4-26
Delete Outside/Delete Inside..........................................................................4-26
5 Scan................................................................................................................5-1
Scan Overview.......................................................................................................................5-1
Basic Scanning......................................................................................................................5-1
Basic Scanning Procedure...................................................................................5-1
Previewing Scanned Images..............................................................................5-2
Changing Scan Settings/Options.....................................................................5-3
Canceling a Scan Job............................................................................................5-3
Stopping a Scan Job..............................................................................................5-3
Scan Options..........................................................................................................................5-4
Scan Options Overview.........................................................................................5-4
Basic Scan Options.................................................................................................5-4
Advanced Settings.................................................................................................5-5
Layout Adjustment................................................................................................5-7
E-mail Options.........................................................................................................5-8
Filing Options........................................................................................................5-10
Resolving a File Name Conflict.......................................................................5-12
E-mail.....................................................................................................................................5-13
E-mail Overview....................................................................................................5-13
E-mail Components.............................................................................................5-13
Scanning to an E-mail Address.......................................................................5-14
Network Scanning.............................................................................................................5-15
Network Scanning Overview............................................................................5-15
Network Scanning Components....................................................................5-15
Network Scanning Procedure..........................................................................5-16
Scan to PC............................................................................................................................5-16
Scan to PC Overview...........................................................................................5-16
Scan to PC Components....................................................................................5-16
How to Use the Scan to PC Feature.............................................................5-17
Using the Scan to PC Feature............................................................5-17
Xerox®Versant®80 Pressiv
User Guide
Page 7

Table of Contents
Using the Address Book to Specify a Scan to PC
Destination.....................................................................................5-17
Browsing the Network for a Scan to PC Destination................5-18
Specifying a Scan to PC Destination Using the UI
Keyboard..........................................................................................5-18
Store to Folder....................................................................................................................5-19
Store to Folder Overview...................................................................................5-19
Store to Folder Components............................................................................5-19
Using the Store to Folder Feature.................................................................5-19
Store to USB........................................................................................................................5-20
Store to USB Overview.......................................................................................5-20
Using the Store to USB Feature.....................................................................5-20
Store and Send Link Feature (Send to Folder).......................................................5-21
Store and Send Link (Send to Folder) Overview.......................................5-21
Storing and Sending a Link (Sending to Folder)......................................5-22
Store to Web Services for Devices (WSD)................................................................5-23
Store to WSD Overview.....................................................................................5-23
How to Use the Store to Web Services for Devices (WSD)
Feature...........................................................................................................5-23
Using the Store to WSD Feature......................................................5-23
Starting a Scan Job from a Network Computer.........................5-24
Starting a Scan Job from This Device.............................................5-24
6 Send from Folder (Folder / File Management)..............................6-1
Send from Folder (Folder / File Management) Overview.....................................6-1
File Options............................................................................................................................6-1
Managing Folders and Scanned Files..........................................................................6-3
How to Configure/Start a Job Flow..............................................................................6-4
Configuring/Starting a Job Flow......................................................................6-4
Using Send from Folder to Link a Job Flow Sheet to a Folder..............6-5
7 Job Flow........................................................................................................7-1
Job Flow Overview...............................................................................................................7-1
Job Flow Settings and Options.......................................................................................7-2
Overview of Job Flow Options...........................................................................7-2
Additional Job Flow Options..............................................................................7-2
Sheet Filtering Options.........................................................................................7-3
Send as E-mail Options........................................................................................7-3
Transfer via FTP (1) / Transfer via FTP (2) Options...................................7-4
Transfer via SMB (1) / Transfer via SMB (2) Options................................7-4
Print Options.............................................................................................................7-4
E-mail Notification Options................................................................................7-5
User Guide
vXerox®Versant®80 Press
Page 8

Table of Contents
Job Flow Procedures...........................................................................................................7-5
Creating a Job Flow Sheet..................................................................................7-5
Linking a Job Flow Sheet with a Folder..........................................................7-5
Starting a Job Flow Manually............................................................................7-6
Confirming/Changing a Job Flow....................................................................7-7
8 Stored Programming................................................................................8-1
Stored Programming Overview.......................................................................................8-1
Stored Programming Options.........................................................................................8-1
Stored Programming Notes and Restrictions...........................................................8-2
Stored Programming Procedures...................................................................................8-3
Creating and Saving a Job as a Stored Program.......................................8-3
Creating and Saving a Stored Program to Use with Build Job.............8-4
Deleting a Stored Program.................................................................................8-5
Naming / Renaming a Stored Program.........................................................8-5
Assigning or Changing Icons for a Stored Program..................................8-6
Running a Stored Program.................................................................................8-6
Using a Stored Program while Build Job is Running.................................8-6
9 Web Applications.......................................................................................9-1
Web Applications Overview.............................................................................................9-1
Accessing Web Applications............................................................................................9-1
10 Job Status................................................................................................10-1
Job Status Overview.........................................................................................................10-1
Job Status Area..................................................................................................................10-1
Active Jobs Tab...................................................................................................................10-1
Completed Jobs Tab.........................................................................................................10-2
11 Machine Status.....................................................................................11-1
Machine Status Overview..............................................................................................11-1
Device Information Tab..................................................................................................11-1
Faults Tab.............................................................................................................................11-2
Supplies Tab.........................................................................................................................11-3
Billing Information Tab...................................................................................................11-3
Accessing Billing Information.........................................................................11-3
Billing Impressions Information....................................................................11-3
Usage Counters....................................................................................................11-4
Tools Tab...............................................................................................................................11-5
Changing the Paper Tray Attributes..........................................................................11-6
12 How to Submit a Print Job................................................................12-1
Setup and Submit the Print Job..................................................................................12-1
Xerox®Versant®80 Pressvi
User Guide
Page 9

Table of Contents
How to Submit a Print Job.............................................................................................12-1
Printing from a Computer or Print Server................................................................12-2
Printing from a Computer.................................................................................12-2
Printing from the FreeFlow Print Server......................................................12-2
Printing from the EX Print Server...................................................................12-3
Printing on Tabs from a Print Server..........................................................................12-3
Basic Procedure for Printing on Tabs from a Print Server.....................12-3
Tips for Printing on Tabs from the EX Print Server..................................12-4
13 Press Maintenance..............................................................................13-1
Procedures for Cleaning the Press..............................................................................13-1
Cleaning the Press Overview...........................................................................13-1
Cleaning the Exterior..........................................................................................13-1
Cleaning the Document Cover and Glass..................................................13-1
Cleaning the Document Feeder Rollers.......................................................13-3
Cleaning the Drum Drawer Area....................................................................13-4
Cleaning the ROS Windows.............................................................................13-4
Cleaning the Fuser Assembly..........................................................................13-5
Procedures for Replacing Consumables...................................................................13-6
Replacing Consumable Supplies....................................................................13-6
Ordering Supplies.................................................................................................13-6
Checking the Status of Consumables..........................................................13-7
Replacing a Dry Ink/Toner Cartridge............................................................13-8
Replacing the Dry Ink/Toner Waste Bottle................................................13-9
Replacing a Drum Cartridge.........................................................................13-10
Replacing the Suction Filter..........................................................................13-12
14 Press Problem Solving.........................................................................14-1
Locating the Press Serial Number...............................................................................14-1
Calling for Service..............................................................................................................14-1
Press Troubleshooting.....................................................................................................14-2
Basic Troubleshooting Information..............................................................14-2
General Problems.................................................................................................14-2
Image Quality Problems...................................................................................14-7
Fault Codes........................................................................................................................14-10
Press Fault Codes...............................................................................................14-10
Fault Codes - High Capacity Feeder (Tray 6) .........................................14-19
Fault Codes - Oversized High Capacity Feeder (Trays 6 and / or
7)...................................................................................................................14-20
Fault Codes - Oversized High Capacity Feeder (Trays 8 and
9)...................................................................................................................14-22
User Guide
viiXerox®Versant®80 Press
Page 10

Table of Contents
Paper Jams........................................................................................................................14-35
Fuser Hints and Tips......................................................................................................14-45
Fault Codes - Business Ready (BR) Finisher and Optional Booklet
Maker...........................................................................................................14-25
Fault Codes - Interface Module / Interface Cooling Module...........14-26
Fault Codes - GBC AdvancedPunch............................................................14-27
Fault Codes - GBC AdvancedPunch Pro....................................................14-28
Fault Codes - High Capacity Stacker (HCS).............................................14-28
Fault Codes - Standard Finisher / Booklet Maker Finisher................14-29
Fault Codes - SquareFold Trimmer Module.............................................14-31
Fault Codes - Standard Finisher Plus.........................................................14-33
Paper Jams Overview.......................................................................................14-35
Information about Paper Jams...................................................................14-35
Jam Recovery Offset Feature.......................................................................14-35
Setting Up the Jam Recovery Offset Feature...........................14-36
Paper Jams in the Document Feeder........................................................14-37
Document Feeder Jams.....................................................................14-37
Document Jams Under the Document Feeder Belt...............14-39
Press Paper Jams...............................................................................................14-40
Paper Jams Inside the Press............................................................14-40
Paper Jams in Trays 1-3.....................................................................14-41
Paper Jams in the Bypass (Tray 5)..............................................................14-42
Paper Jams in the Standalone Bypass (Tray 5)........................14-42
Paper Jams When the Bypass is Installed on Trays 6 and
7........................................................................................................14-42
Paper Jams When the Bypass is Installed on Trays 8 and
9........................................................................................................14-43
Extending Fuser Life.........................................................................................14-45
Preventing Fuser Damage..............................................................................14-45
Fuser Paper Width Information...................................................................14-46
15 Press Technical Data...........................................................................15-1
Press Specifications..........................................................................................................15-1
General Press Specifications............................................................................15-1
First Print-Out Time.............................................................................................15-2
Press Warm-up Time...........................................................................................15-2
Document Feeder Specifications...................................................................15-2
Paper Tray Information.....................................................................................15-3
Throughput / Productivity Information .....................................................15-3
Copy Specifications.............................................................................................15-5
Scan Specifications.............................................................................................15-7
Xerox®Versant®80 Pressviii
User Guide
Page 11

Table of Contents
Paper Specifications.........................................................................................................15-8
Environmental Specifications....................................................................................15-10
16 1-Tray High Capacity Feeder (HCF / Tray 6), Letter-Size / A4
Only..........................................................................................................16-1
High Capacity Feeder (HCF) Overview......................................................................16-1
Loading Paper in the 1-Tray High Capacity Feeder (HCF / Tray 6)...............16-1
HCF Problem Solving........................................................................................................16-2
Fault Codes - High Capacity Feeder (Tray 6) ...........................................16-2
Clearing Paper Jams in the HCF (Tray 6)....................................................16-4
Clearing HCF Paper Jams in the Lower Left Cover..................................16-4
HCF Specifications............................................................................................................16-5
17 1- or 2-Tray Oversized High Capacity Feeder (OHCF / Trays
6 and 7)..................................................................................................17-1
Overview of the Oversized High Capacity Feeder (Trays 6 and 7) ...............17-1
Loading Media in the OHCF (Trays 6 and 7)..........................................................17-2
OHCF Maintenance (Trays 6 and 7)..........................................................................17-2
Consumable Supplies for the OHCF (Trays 6 and 7)..............................17-2
Replacing the OHCF Bypass Tray Feed Rolls (Trays 6 and 7)..............17-2
Replacing the OHCF Feed Rolls (Trays 6 and 7).......................................17-3
OHCF Problem Solving (Trays 6 and 7)....................................................................17-6
Fault Codes - Oversized High Capacity Feeder (Trays 6 and / or
7)......................................................................................................................17-6
OHCF Jam Clearance (Trays 6 and 7)..........................................................17-8
Clearing OHCF Jams (Trays 6 and 7)..............................................17-8
Paper Jams When the Bypass is Installed on Trays 6 and
7..........................................................................................................17-8
Paper Jams Inside the OHCF Trays (6 and 7).............................17-9
OHCF Paper Jams at Lever 1a and Knob 1c (Trays 6 and
7)......................................................................................................17-10
OHCF Paper Jams at Lever 1b and Knob 1c (Trays 6 and
7)......................................................................................................17-11
OHCF Paper Jams at Lever 1d and Knob 1c (Trays 6 and
7)......................................................................................................17-11
OHCF Specifications (Trays 6 and 7)......................................................................17-13
18 Chained (Second) Oversized High Capacity Feeder (OHCF
/ Trays 8 and 9)...................................................................................18-1
OHCF (Trays 8 and 9) Overview...................................................................................18-1
OHCF (Trays 8 and 9) Specifications...........................................................18-2
Loading Media in the Chained OHCF (Trays 8 and 9).......................................18-2
OHCF (Trays 8 and 9) Maintenance..........................................................................18-3
User Guide
ixXerox®Versant®80 Press
Page 12

Table of Contents
OHCF (Trays 8 and 9) Problem Solving....................................................................18-8
Replacing the Bypass Tray Feed Rolls for the OHCF (Trays 8 and
9)......................................................................................................................18-3
Replacing the OHCF Feed Rolls for the OHCF (Trays 8 and
9)......................................................................................................................18-4
Fault Codes - Oversized High Capacity Feeder (Trays 8 and
9)......................................................................................................................18-8
OHCF (Trays 8 and 9) Jam Clearance.......................................................18-10
Clearing OHCF (Trays 8 / 9) Jams.................................................18-10
Paper Jams When the Bypass is Installed on Trays 8 and
9........................................................................................................18-10
Paper Jams Inside the OHCF (Trays 8 and 9)...........................18-12
OHCF (Trays 8 and 9) Paper Jams at Lever 1a and Knob
1c......................................................................................................18-12
OHCF (Trays 8 and 9) Paper Jams at Lever 1b and Knob
1c......................................................................................................18-13
OHCF (Trays 8 and 9) Paper Jams at Lever 1d and Knob
1c......................................................................................................18-14
19 Business Ready (BR) Finisher and Optional Booklet
Maker......................................................................................................19-1
Business Ready (BR) Finisher Overview....................................................................19-1
Identifying the BR Finisher Components................................................................19-2
BR Finisher Maintenance...............................................................................................19-2
Consumable Supplies for the BR Finisher...................................................19-2
Replacing Staples in the Main Stapler Unit...............................................19-3
Replacing Staples in the Booklet Maker.....................................................19-3
Emptying the Hole Punch Waste Container..............................................19-4
Problem Solving for the BR Finisher...........................................................................19-5
Fault Codes - Business Ready (BR) Finisher and Optional Booklet
Maker..............................................................................................................19-5
Clearing Jams in the BR Finisher at Position 3a......................................19-6
Clearing Jams in the BR Finisher at Position 3c.......................................19-7
Clearing Jams in the BR Finisher at Position 3d......................................19-8
Clearing Jams in the BR Finisher at Position 4.........................................19-8
Clearing Jams in the Booklet Tray.................................................................19-9
BR Finisher Specifications...........................................................................................19-10
20 Interface Module / Interface Cooling Module.........................20-1
Overview of the Interface Module / Interface Cooling Module......................20-1
Module Overview...............................................................................................................20-2
Module Control Panel.........................................................................................20-2
Paper Path through the Module....................................................................20-3
Paper Curl Settings on the Module...............................................................20-3
Xerox®Versant®80 Pressx
User Guide
Page 13

Table of Contents
Auto Decurl Presettings........................................................................20-3
Manual Decurl Buttons........................................................................20-3
Internal Spectrophotometer (Interface Cooling Module)...................20-4
Problem Solving for the Interface Module / Interface Cooling
Module........................................................................................................................20-5
Fault Codes - Interface Module / Interface Cooling Module..............20-5
Jam Clearance on the Interface Module / Interface Cooling
Module...........................................................................................................20-6
Clearing Module Jams..........................................................................20-6
Paper Jams at Lever 1a........................................................................20-6
Paper Jams at Lever 2a........................................................................20-7
Paper Jams at Lever 2b........................................................................20-8
21 GBC AdvancedPunch..........................................................................21-1
GBC AdvancedPunch Overview...................................................................................21-1
GBC AdvancedPunch Specifications............................................................21-1
GBC AdvancedPunch Components............................................................................21-2
GBC AdvancedPunch Operation Controls..................................................21-2
Status Indicators on the GBC AdvancedPunch.......................................21-2
Punch Dies..............................................................................................................21-3
GBC AdvancedPunch Procedures................................................................................21-4
Changing the Punch Die...................................................................................21-4
Pre-Punch Job Checkpoints..............................................................................21-5
Loading Tab Stock with the GBC AdvancedPunch.................................21-6
GBC AdvancedPunch Maintenance...........................................................................21-6
Emptying the Punch Container......................................................................21-6
GBC AdvancedPunch Problem Solving.....................................................................21-7
Fault Codes - GBC AdvancedPunch..............................................................21-7
GBC AdvancedPunch General Problems.....................................................21-7
GBC AdvancedPunch Jam Clearance...........................................................21-8
Clearing Jams in the AdvancedPunch............................................21-8
22 GBC AdvancedPunch Pro..................................................................22-1
AdvancedPunch Pro Overview......................................................................................22-1
AdvancedPunch Pro Specifications...............................................................22-2
AdvancedPunch Pro Components..............................................................................22-3
Operation Controls..............................................................................................22-3
Punch Chip Container.........................................................................................22-3
Punch Modes.........................................................................................................22-3
AdvancedPunch Pro User Display Panel...................................................................22-4
Layout of the User Display Panel..................................................................22-4
User Display Panel Overview...........................................................................22-4
User Guide
xiXerox®Versant®80 Press
Page 14

Table of Contents
Die Sets.................................................................................................................................22-7
AdvancedPunch Pro Procedures...............................................................................22-13
AdvancedPunch Pro Maintenance...........................................................................22-20
AdvancedPunch Pro Problem Solving.....................................................................22-23
Messages on the User Display Panel...........................................................22-5
Settings on the User Display Panel...............................................................22-5
Information on User Display Panel..............................................................22-6
Die Set Configuration.........................................................................................22-7
Pin Numbering.........................................................................................22-7
Pin Removal Table for US Paper Sizes............................................22-7
Pin Removal Table for ISO Paper Sizes...........................................22-9
Die Stop Position...............................................................................................22-10
Die Stop Position Guide for US Paper Sizes...............................22-10
Die Stop Position Guide for ISO Paper Sizes.............................22-11
Available Die Sets for the AdvancedPunch Pro.....................................22-11
Pre-Punch Job Checkpoints...........................................................................22-14
Changing Settings on the AdvancedPunch Pro....................................22-14
Changing Die Sets in the AdvancedPunch Pro (Removing /
Installing)...................................................................................................22-15
Die Set Procedures............................................................................................22-17
Removing Pins from a Die Set........................................................22-17
Adding Pins to a Die Set...................................................................22-18
Changing the Die Stop Position.....................................................22-19
Ordering Supplies for the AdvancedPunch Pro......................................22-20
Cleaning the Exterior of the AdvancedPunch Pro................................22-21
Emptying the Punch Container....................................................................22-21
Die Set Maintenance.......................................................................................22-22
Lubricating Die Set Pins (without a Felt Pad)...........................22-22
Lubricating Die Set Pins (with a Felt Pad)..................................22-22
Fault Codes - GBC AdvancedPunch Pro....................................................22-23
AdvancedPunch Pro General Problems.....................................................22-24
Die Set End of Life............................................................................................22-24
Clearing Paper Jams in the AdvancedPunch Pro..................................22-25
23 High Capacity Stacker (HCS)...........................................................23-1
High Capacity Stacker (HCS) Overview....................................................................23-1
High Capacity Stacker (HCS) Components.............................................................23-2
Identifying the Main HCS Components.....................................................23-2
HCS Control Panel................................................................................................23-2
HCS Top Tray..........................................................................................................23-3
Unloading the HCS Stacker Tray / Cart.......................................................23-3
Xerox®Versant®80 Pressxii
User Guide
Page 15

Table of Contents
HCS Problem Solving........................................................................................................23-4
Fault Codes - High Capacity Stacker (HCS)...............................................23-4
HCS General Problems.......................................................................................23-5
HCS Jam Clearance.............................................................................................23-5
HCS Jam Clearance Overview............................................................23-5
HCS Entrance Jams (E1, E2, and E3)...............................................23-6
HCS Transport Jams (E4, E5, and E6).............................................23-6
HCS Top Tray Jam (E7).........................................................................23-7
HCS Exit Jam (E8)...................................................................................23-8
Information about Paper Curl and the HCS..............................................23-8
HCS Specifications............................................................................................................23-9
24 Standard Finisher / Booklet Maker Finisher...............................24-1
Standard Finisher / Booklet Maker Finisher Overview........................................24-1
Manual Decurling Feature on the Finisher..............................................................24-3
Folding Feature on the Finisher...................................................................................24-4
Folding Overview..................................................................................................24-4
Fold Types...............................................................................................................24-4
Loading Paper / Tabs in the Post-Process Inserter (Tray T1)............................24-5
Finisher Maintenance......................................................................................................24-6
Finisher Consumable Supplies........................................................................24-6
Replacing the Basic Staple Cartridge...........................................................24-6
Replacing the Booklet Staple Cartridge......................................................24-7
Replacing the Staple Waste Container........................................................24-8
Emptying the Punch Waste Container......................................................24-10
Finisher Problem Solving.............................................................................................24-11
Problem Solving Information.......................................................................24-11
Fault Codes - Standard Finisher / Booklet Maker Finisher................24-11
Jam Clearance in the Finisher......................................................................24-13
Paper Jams in the Post-Process Inserter (Tray T1)..................24-13
Paper Jams at Finisher Top Tray....................................................24-14
Paper Jams at Finisher Stacker Tray.............................................24-14
Paper Jams at the Booklet Maker Tray.......................................24-15
Paper Jams at Lever 1a and Knob 1c...........................................24-15
Paper Jams at Lever 1d.....................................................................24-16
Paper Jams at Lever 1b.....................................................................24-17
Paper Jams at Lever 3b and 3d......................................................24-18
Paper Jams at Lever 3e and Knob 3c...........................................24-19
Paper Jams at Lever 3g and Knob 3f...........................................24-19
Paper Jams at Lever 4b and Knob 3a..........................................24-20
Paper Jams at the Optional C / Z Folder.....................................24-21
User Guide
xiiiXerox®Versant®80 Press
Page 16

Table of Contents
Stapler Faults......................................................................................................24-25
Stapler Faults Overview.....................................................................24-25
Staple Jams in the Basic Staple Cartridge.................................24-26
Staple Jams in the Booklet Maker Cartridge............................24-27
Reinserting the Basic Staple Cartridge.....................................................24-28
Specifications for the Standard Finisher / Booklet Maker Finisher.............24-30
Standard / Booklet Maker Finisher Specifications...............................24-30
C / Z Folder Specifications.............................................................................24-33
25 SquareFold Trimmer Module...........................................................25-1
SquareFold Trimmer Module Overview....................................................................25-1
SquareFold Trimmer Module Specifications.............................................25-2
Identifying the Module Components.......................................................................25-2
Main Components...............................................................................................25-2
Module Paper Path..............................................................................................25-3
Module Control Panel.........................................................................................25-4
Square Fold Feature.........................................................................................................25-4
Square Fold Options............................................................................................25-5
Trimmer Feature................................................................................................................25-5
Trimmer Options..................................................................................................25-6
Trim Guidelines.....................................................................................................25-6
Square Fold / Trimming Procedures...........................................................................25-8
Selecting the Square Fold / Trimming Options for Network Print
Jobs.................................................................................................................25-8
Selecting the Square Fold / Trimming Options for Copy
Jobs.................................................................................................................25-8
Hints and Tips.....................................................................................................................25-9
Printing Full-Page Images on Booklets........................................................25-9
Follow These Tips..............................................................................................25-10
Problem Solving...............................................................................................................25-10
Fault Codes - SquareFold Trimmer Module.............................................25-10
SquareFold Trimmer Module Jam Clearance.........................................25-12
Jam Clearance Overview...................................................................25-12
Clearing Jams........................................................................................25-12
Clearing E1 / E2 Jams.........................................................................25-13
Clearing E3 Jams..................................................................................25-14
26 Standard Finisher Plus........................................................................26-1
Standard Finisher Plus Introduction..........................................................................26-1
Standard Finisher Plus Components..........................................................................26-1
Standard Finisher Plus Main Components.................................................26-1
Finisher Module....................................................................................................26-2
Xerox®Versant®80 Pressxiv
User Guide
Page 17

Table of Contents
Finisher Module Main Components................................................26-2
Folding Feature and Types..................................................................26-3
Post-Process Inserter (Tray T1)..........................................................26-3
Finishing Transport..............................................................................................26-3
Finishing Transport Main Components.........................................26-3
Finishing Transport Status Indicators............................................26-4
Standard Finisher Plus Maintenance.........................................................................26-4
Consumable Supplies for the Standard Finisher Plus............................26-4
Finisher Module Maintenance Procedures................................................26-5
Standard Finisher Plus Problem Solving...................................................................26-5
Fault Codes - Standard Finisher Plus............................................................26-5
Paper Jam Procedures for the Finisher Module.......................................26-7
Paper Jams in the Finisher Module.................................................26-7
Paper Jams in Areas 4b and 4c.........................................................26-8
Paper Jams in the Finishing Transport........................................................26-8
Paper Jams in Area 1.............................................................................26-8
Paper Jams in Area 2.............................................................................26-9
Paper Jams in Area 3..........................................................................26-10
Paper Jams in Area 4..........................................................................26-11
Standard Finisher Plus Specifications....................................................................26-12
Finisher Module Specifications....................................................................26-12
C / Z Folder Specifications.............................................................................26-15
Finishing Transport Specifications.............................................................26-15
User Guide
xvXerox®Versant®80 Press
Page 18

Table of Contents
Xerox®Versant®80 Pressxvi
User Guide
Page 19

1
Product Overview
Introduction
The Xerox®Versant®80 Press is a full color/black and white, auto-duplex copier/printer
that operates at a speed of 80 prints per minute (when printing on 8.5 x 11 inch/A4
paper).
Base Configuration
The system base system configuration consists of the following components:
1. Bypass Tray
Other optional feeding devices are available.
2. Color Press
3. Offset Catch Tray
Other optional finishing devices are available.
4. Print Server (not shown)
Choice of one of three print servers is available.
User Guide
1-1Xerox®Versant®80 Press
Page 20

Product Overview
Print Server Overview
The print server networked with your press accepts, processes, and manages document
files for job submission to the press.
One of the following print servers may be used with your press:
• Xerox®FreeFlow®Print Server
• Xerox®EX 80 Print Server, Powered by Fiery
• Xerox®EX-P 80 Print Server, Powered by Fiery
Note
For detailed information on your specific print server, refer to the customer
documentation that was delivered with it. Documentation may also be downloaded
from www.xerox.com by searching for the press and selecting the Support link.
®
®
Press Components
Press Components
1 Bypass Tray
The Bypass Tray is also called Tray 5 or Multisheet Inserter; the tray accommodates
all types of stock in various sizes and weight ranges.
Note
The mounting location for the Bypass tray varies when optional feeding devices are
added to the machine configuration.
2 User Interface (UI)
The User Interface (UI) consists of the touch screen and control panel with the buttons
and keypad.
3 Duplex Automatic Document Feeder (DADF)
Automatically feeds 1- and 2-sided original documents. A maximum of 250 two-sided
documents can be scanned at one time.
Xerox®Versant®80 Press1-2
User Guide
Page 21

Product Overview
4 Offset Catch Tray (OCT)
This tray receives the completed print job. Output print sheets can be offset for easy
separation. The maximum capacity of the OCT is determined by the tray sensor as well
as stock weight, but is approximately 500 sheets of 24 lb. (90 gsm) paper.
Note
Offsetting per set in the stack continues up to the point when the tray reaches the
maximum height or weight allowed.
5 Dry Ink/Toner Waste Bottle Door
Open this door to access the waste bottle when replacement of the bottle is required.
6 Trays 1-3
Trays 1, 2, and 3 accommodate a variety of paper sizes and weights; refer to the
Technical Specifications chapter for detailed information.
7 Front Door
Open this door to clear paper jams and to replace various Customer Replaceable Units
(CRUs).
8 Dry Ink/Toner Cover
Open this cover to access and replace the dry ink/toner cartridges.
Locating the Press Serial Number
The press serial number can be accessed from either the press User Interface or from
the serial number plate which is located on the inside frame of Tray 1.
1. Press the Machine Status button on the User Interface.
2. From the Machine Status screen, ensure that the Device Information tab is displayed.
The press serial number is displayed under Device Serial Information near the bottom
of the screen.
3. If there is a loss of power and it is not possible to access the Machine Status screen,
the press serial number can also be found on the inside frame of the press near the
Paper Tray 1 drawer:
a) At the press, fully open Tray 1.
b) At the left of the tray, on the press frame, locate the plate with the serial number
(SER#).
User Guide
1-3Xerox®Versant®80 Press
Page 22

Product Overview
User Interface (UI)
1 Touch Screen
Directly touch the screen to select and set features. Displays instructional and
informational messages, fault clearance procedures and general press information.
2 Home button
Press this button to display the main window. Provides access to features such as Copy,
E-Mail, and Network Scanning, just to name a few features. Other features may be
available depending on your marketplace.
3 Services
This button lights when the main power is on.
4 Job Status button
Use to check the progress of active jobs and detailed information about completed
jobs or pending jobs. This area also allows you to delete a job (cancel printing or copying)
and pause jobs.
5 Machine Status button
Use to access the Tools feature, check the press configuration, the software version,
the press billing meters and counter information, and to access and print job history
or error reports.
6 Log In/Out button
Use to log in and out of Administrator mode or Authentication mode with user ID and
password.
7 Energy / Power Saver button
Use this button if the press has been inactive and the touch screen is dark (system is
in Energy Saver mode). This button manually exits the system from Energy Saver mode;
it does not place the press in Energy Save mode.
8 Clear All button
Use this button to return all selections to the same state as when the press was powered
on. Press once to clear a current entry. Press twice to return to default settings.
9 Stop button
Press to stop and pause the print or copy job in progress.
Xerox®Versant®80 Press1-4
User Guide
Page 23
Product Overview
10 Start button
Use this button to perform certain functions, such as scanning/copying a document or
printing a selected report from the print engine. This button is also used by the Customer
Service Engineer (CSE) during diagnostic routine procedures.
11 Interrupt button
Use this button to suspend a copy or print job in progress and have the machine stop
to process another job. During the Interrupt mode, the Interrupt button lights. Pressing
the Interrupt button again exits the Interrupt mode and resumes the suspended job.
12 Numeric Keypad
Use to enter alphanumeric characters. The C (Cancel) Entry cancels the previous entry
made on the numeric keypad.
13 Language button
Use to select a different language for the touch screen options.
14 Help button
Displays the Help System; this feature may not be available in all marketplaces.
Features
Logon
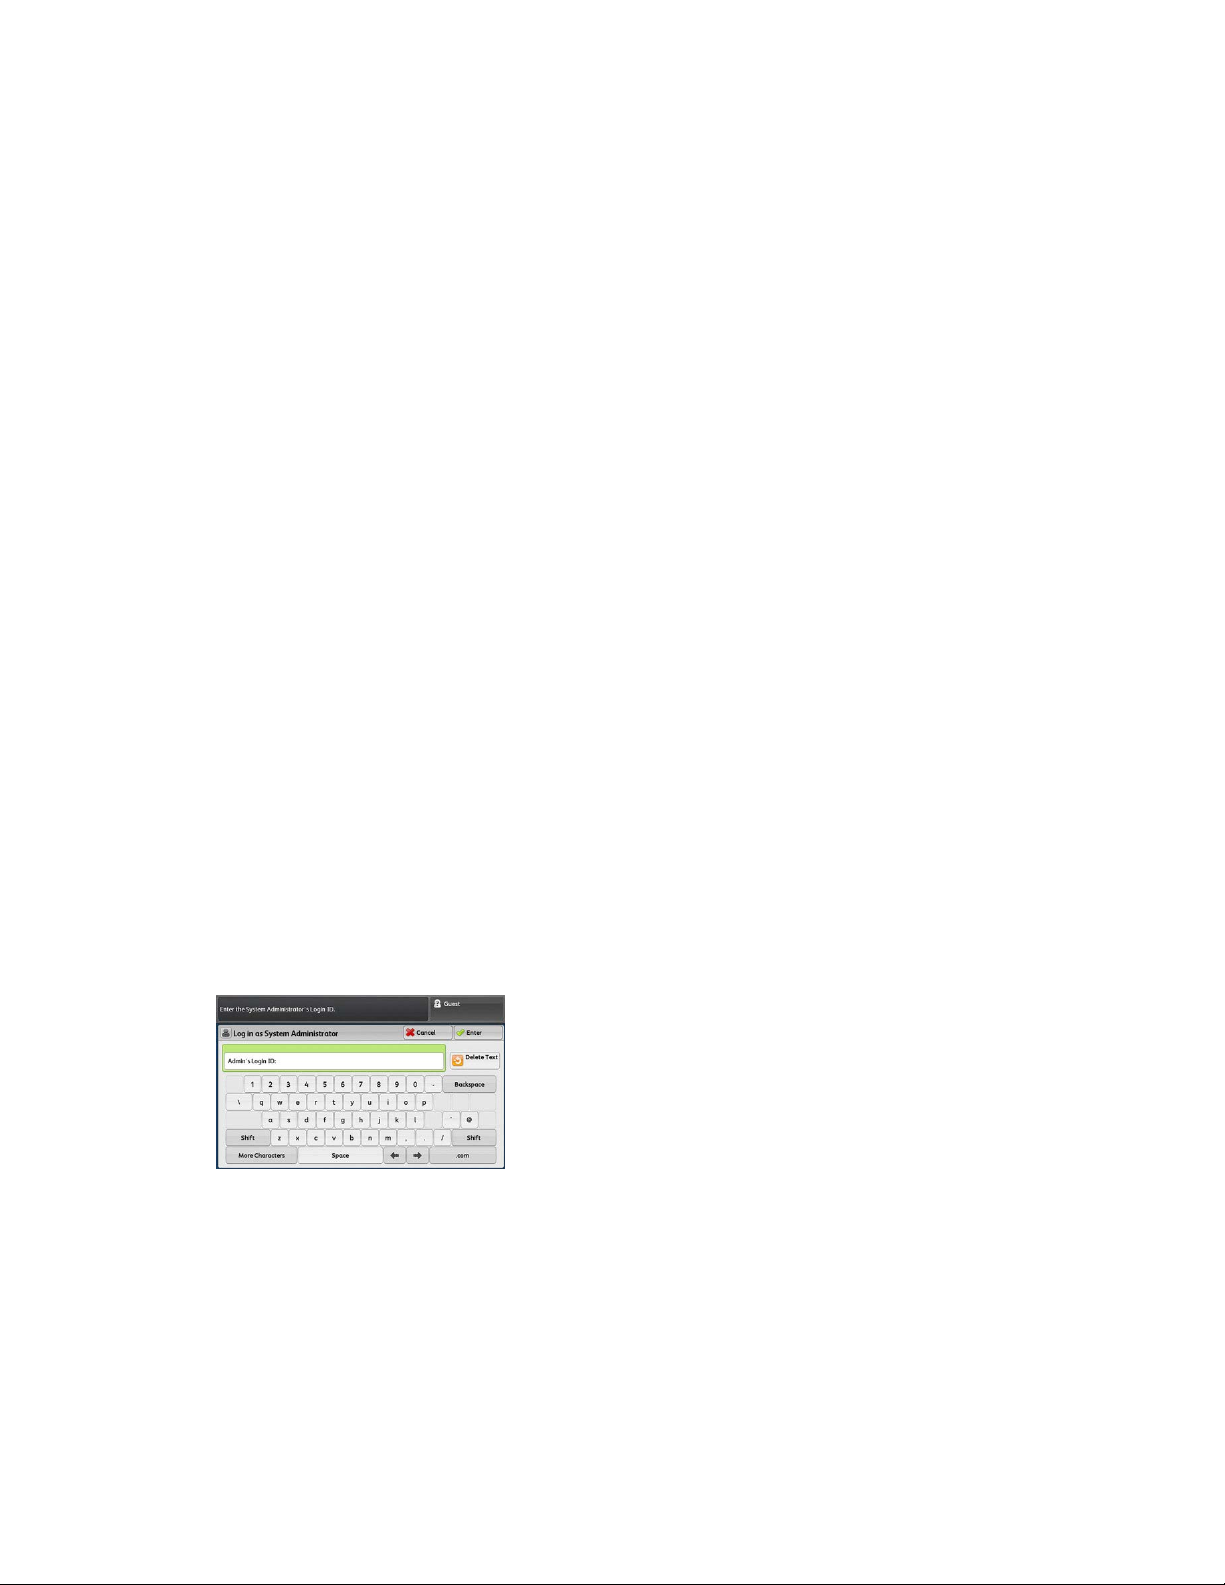
There are two logon levels:
• Guest/Operator: This is the default logon user. You are automatically logged on as
Guest.
• Administrator: This logon level is required to customize the system and network
defaults for your press and to customize particular print jobs by setting, or changing
parameters for certain features. Press the Guest button (or the Log in button on the
Control Panel) to access the Login screen.
Note
Refer to the System Administration Guide for more information on the Administrator
features.
User Guide
1-5Xerox®Versant®80 Press
Page 24

Product Overview
Language
Language Feature
Note
The number of languages available on your system depends on what was installed during
the initial installation process.
Selecting a particular Language button immediately changes the language. No
confirmation is required.
Changing the Language
1. Press the Language button on the press User Interface
The Language window displays on the touch screen.
2. Choose one of the following:
• Select the desired language from the list, and select Save. The language on the
screen changes to the new language and closes the Language window.
• Select the Cancel button to return to the main screen.
Energy (Power) Saver Mode
Energy (Power) Saver Mode Overview
The Energy (Power) Saver feature allows the press to enter a reduced power consumption
mode when all print jobs have completed and there are no jobs currently processing.
There are two energy saving modes: Low Power and Sleep.
By default, the press automatically enters the Low Power mode after 1 minute of
inactivity. After 1 minute of inactivity, the press then enters Sleep mode. These time
intervals for both modes can be changed by the system administrator.
Here are two examples:
• If Low Power Mode is set to 15 minutes and Sleep Mode is set to 60 minutes, Sleep
Mode activates after 60 minutes of total inactivity, not 60 minutes after Low Power
Mode begins. In other words, Sleep Mode activates 45 minutes after the Low Power
Mode begins.
• If Low Power Mode is set to 15 minutes and Sleep Mode is set to 20 minutes, Sleep
Mode activates 5 minutes after Low Power Mode begins.
Xerox®Versant®80 Press1-6
User Guide
Page 25

Product Overview
Low Power Mode
In this mode, the power to the User Interface (UI) and fuser unit is lowered to save
power. The display goes out and the Energy Saver button on the UI lights. To use the
press, press the Energy Saver button. The Energy Saver button is no longer lit, indicating
that the Energy Saver feature is canceled.
Sleep Mode
In this mode, the power is lowered more than in the Low Power mode. The display goes
out and the Energy Saver button on the UI lights. To use the press, press the Energy
Saver button. The Energy Saver button is no longer lit, indicating that the Energy Saver
feature is canceled.
Exiting Energy (Power) Saver Mode
The press exits Energy (Power) Saver mode by doing one of the following:
• Pressing the Power / Energy Saver button on the press UI,
• Receiving print data for an incoming job to be printed, or
• Programming and performing a copy or scan job.
Power On/Off
The Power Switches
There are three power switches involved with the press:
• The Breaker switch located at the rear of the press. Initially check to make sure this
switch is set to On when the press is shipped.
• The Main Power switch located inside the Front Door. This switch is used mainly by
the Xerox Service Representative when servicing the press. In rare problem solving
cases, you may be directed to power off the press with this switch.
User Guide
1-7Xerox®Versant®80 Press
Page 26

Product Overview
• The Power On/Off button located on the top of the press near the Document Feeder.
This button is the primary way for you to switch on or off the press. It is used by the
operator as workflow requires.
Use the Power On/Off button to power ON or power OFF the press.
Important
Always use the Power On/Off button first, and then power off the Main Power Switch.
Power On/Off the Press
Power On the Press
1. Check that the Main Power switch behind the Front Door is On.
2. Press the Power On/Off button on top of the press to the ON position.
The Ready Indicator light displays green.
A screen message advises of a short wait while the fuser warms up and the press runs
a system check. You can set features for a job during this time and the printing process
will start automatically when the press is ready.
Power Off the Press
Important
Always power off the Power Switch first and then power off the Main Power Switch.
1. Press the Power On/Off button on the top of the press to Off.
Wait until the lights on UI stop blinking, as this allows the fuser to begin cooling.
2. Switch Off the Main Power switch behind the Front Door.
Note
Allow the press to remain off for a minimum of 10 seconds before switching on the
power again.
Feeding and Finishing Devices
Available with your press is a variety of optional feeding and finishing devices. These
devices are briefly introduced on the following pages. Refer to the sections at the end
of this guide for specific information on each feeder or finisher.
Xerox®Versant®80 Press1-8
User Guide
Page 27
Product Overview
Feeding Devices
Bypass (Tray 5)
The Bypass Tray, also called Tray 5, is part of the base system configuration. The
mounting location for the Bypass tray varies when optional feeding devices are added
to the machine configuration:
• If the system configuration includes either the 1-Tray HCF (Letter-size / A4) or the
1-Tray OHCF (Tray 6), then the Bypass (Tray 5) is installed above the feeding device.
• If the system configuration includes one 2-Tray OHCF (Trays 6 and 7), then the
Bypass Tray is installed on top of it.
• If the system configuration includes a second, chained OHCF (Trays 8 and 9), then
the Bypass Tray is installed on top of the second OHCF (Trays 8 and 9).
The Bypass Tray accommodates a weight range of 52 to 300 gsm and media size of
3.86 x 5.75 inches (98 x 146 mm) to 13 x 19.2 inches (330.2 x 488 mm). The Bypass
Tray holds a maximum of 280 sheets of 20 lb. / 75 gsm plain paper. The Bypass Tray
accepts envelopes, postcards and transparencies.
High Capacity Feeder (HCF), 1 Tray
The 1-tray High Capacity Feeder (HCF), also known as Tray 6, provides a 2,000-sheet,
letter-size (8.5 x 11 in. / A4) paper source.
Note
Only letter-size (8.5 x 11 in.) / A4 paper, Long Edge Feed (LEF) can be used in this tray.
1- or 2-Tray Oversized High Capacity Feeder (OHCF / Trays 6 and 7)
The Oversized High Capacity Feeder (OHCF) is available in a 1-tray or 2-tray option.
The OHCF feeds a variety of stock sizes, including standard and oversized stock up to
13 x 19.2 in./330.2 x 488 mm and weighing between 52 gsm and 350 gsm. Each tray
holds 2,000 sheets.
• 1-tray OHCF (with storage cabinet above the tray; shown with Bypass Tray installed)
• 2-tray OHCF (shown with Bypass Tray installed)
User Guide
1-9Xerox®Versant®80 Press
Page 28
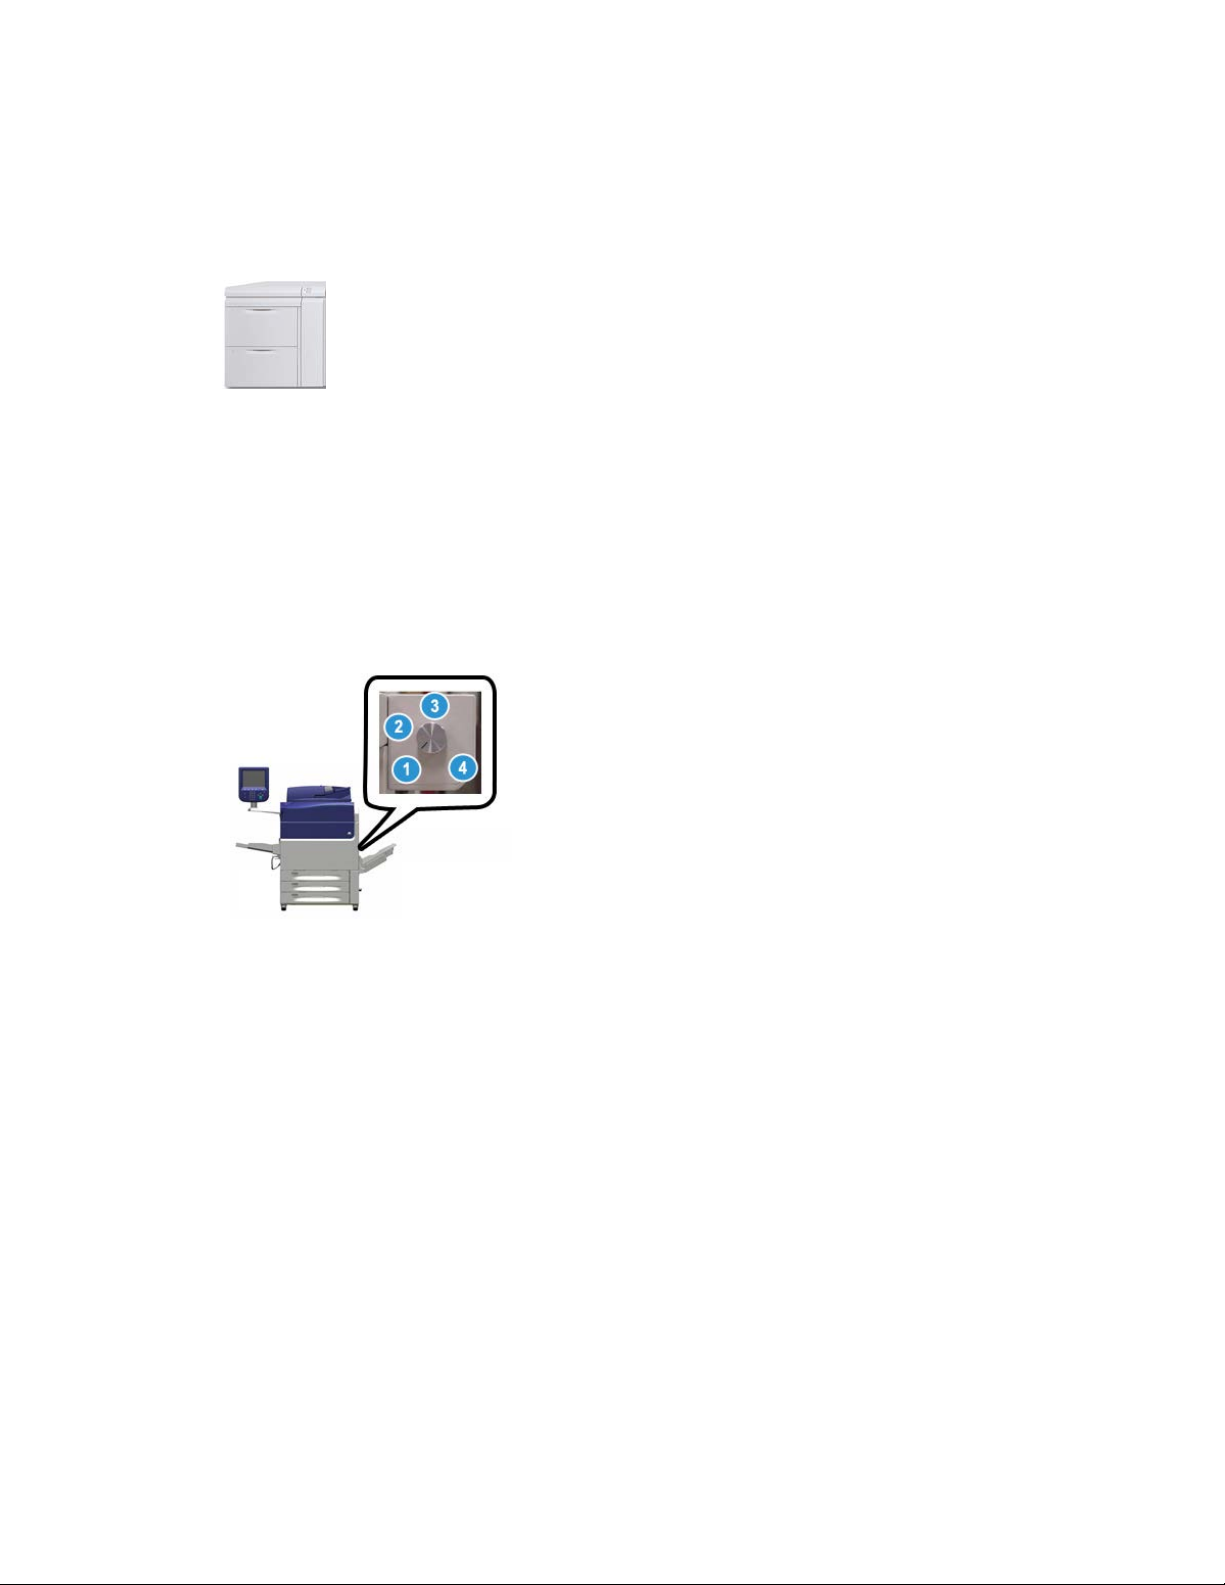
Product Overview
Chained Oversized High Capacity Feeder (OHCF / Trays 8 and 9)
A second, chained Oversized High Capacity Feeder(OHCF) may be added to the system
to extend the paper capacities by providing two additional trays. This second, chained
OHCF is referred to as Trays 8 and 9, and it feeds a variety of stock sizes, including
standard, heavyweight, and oversized stocks up to 13 x 19.2 in. / 330 x 488 mm in size
and weighing between 52 gsm and 350 gsm. Each tray holds 2,000 sheets of coated
and uncoated stock.
Important
The second, chained OHCF (Trays 8 and 9) can be added only to a system which includes
a 2-Tray OHCF (Trays 6 and 7).
Finishing Devices
Optional Cooling Fan Kit for the Offset Catch Tray (OCT)
When attached to the OCT, the Cooling Fan prevents blocking (sticking together) of
the printed/copied output.
The OCT Cooling Fan can be adjusted for the following paper weights:
1.
OFF for all paper types weighing 60-105 gsm.
2.
One-quarter turn for Coated paper weighing 106-135 gsm.
3.
Mid/halfway position turn for Coated paper weighing 136-186 gsm.
4.
ON 100% for Coated paper weighing 221-300 gsm.
Xerox®Versant®80 Press1-10
User Guide
Page 29

Product Overview
Interface Module
The Interface Module provides communication, an aligned paper path between the
print engine and the attached finishing device, and the decurling of the paper as it
exits the print engine.
Important
The Interface Module is required with many of the finishing devices; this depends on
the system configuration and which finishing devices are attached.
Interface Cooling Module
The Interface Cooling Module provides the same functions as the Interface Module.
In additional to these functions, the Interface Cooling Module also provides the added
feature of cooling the printed media as it passes through the paper path by using
additional fans and associated duct work. The module is also equipped with an internal
spectrophotometer.
Important
The Interface Cooling Module is required with many of the finishing devices; this
depends on the system configuration and which finishing devices are attached.
The following finishing devices require either the Interface Module or the Interface
Cooling Module:
• GBC®AdvancedPunch
™
• GBC®AdvancedPunch™Pro
• High Capacity Stacker (HCS)
• Standard Finisher
• Booklet Maker Finisher
• Standard Finisher Plus
User Guide
1-11Xerox®Versant®80 Press
Page 30

Product Overview
Business Ready (BR) Finisher (with or without Booklet Maker)
The Business Ready (BR) Finisher adds several professional-level finishing options to
the press while requiring minimal additional space for the finisher. The finisher is
available with or without an optional booklet maker.
• BR Finisher without Booklet Maker
• BR Finisher with the optional Booklet Maker
Tip
The BR Finisher (with or without Booklet Maker) attaches directly to the press and does
not require the Interface Module / Interface Cooling Module.
GBC®AdvancedPunch
™
The GBC AdvancedPunch may be attached to a variety of optional finishing accessories.
It provides another level of finishing by allowing you to punch holes in 8.5 x 11 in./A4
documents that support a variety of binding styles. Punch types include 19-hole to a
maximum of 32-hole for 8.5 x 11 in. media. A4 media supports punch types 21-hole
to a maximum of 47-hole.
Information on this device can be found later in this guide. Information can also be
found on the customer documentation CD that came with the accessory, or it can be
downloaded from www.xerox.com.
Xerox®Versant®80 Press1-12
User Guide
Page 31

Product Overview
GBC®AdvancedPunch™Pro
The GBC AdvancedPunch Pro may be attached to a variety of optional finishing
accessories and provides all the same capabilities as the GBC AdvancedPunch.
The AdvancedPunch Pro also provides additional capabilities such as the following:
• A bigger range of media sizes and types
• LEF and SEF punching
• 2-up punching (double punch) on large sheets
• Quick-change die sets that can be interchanged without any tools
• All die sets include an Identification Label providing the user with the hole pattern
and name
Information on this device can be found later in this guide. Information can also be
found on the customer documentation CD that came with the accessory, or it can be
downloaded from www.xerox.com.
High Capacity Stacker (HCS)
The High Capacity Stacker (HCS) is an optional finishing device that provides production
stacking and offsetting capabilities of up to 5,000 sheets to a cart in the Stacker
Tray/Cart. Shorter runs of up to 500 sheets can be sent to the stacker Top Tray.
Standard Finisher (with or without optional C/Z Folder)
This finisher provides a wide range of finishing / folding options. It includes a basic
inline punch, stapler, built-in decurler, and a post-process inserter/interposer (Tray T1).
An optional C/Z Folder also is available.
1-13Xerox®Versant®80 Press
User Guide
Page 32

Product Overview
Booklet Maker Finisher (with or without optional C/Z Folder)
This finisher provides the same finishing / folding capabilities as the Standard Finisher.
Additionally, this finisher includes a booklet unit with saddle-stitching and bi-fold
finishing capabilities. An optional C/Z Folder also is available.
Standard Finisher Plus (with or without optional C/Z Folder)
The Standard Finisher Plus includes the same features and functions as the Standard
Finisher but also serves as an interface to transfer paper between the print engine and
any third-party, Document Finishing Architecture (DFA) device attached to the press.
An optional C/Z Folder also is available.
Third-party Finishing Devices
Additional third-party, Document Finishing Architecture (DFA) devices are also available
for your press. Information on these DFA devices can be obtained by contacting your
Xerox sales representative.
Optional Performance Package
Important
The Performance Package must be ordered prior to initial installation of the system. It
is not possible to upgrade an existing press with the Performance Package after the
system has been ordered and installed.
The optional Performance Package is a suite of technologies and tools that enhances
the capabilities of the base press in three areas: operational speed, color management
automation, and print shop productivity.
The Performance Package is comprised of the following technologies and tools:
• All Stocks Rated Speed (ASRS) software
• Automated Color Quality System (ACQS) software
• Inline Spectrophotometer (ILS) - which is included with the Interface Cooling Module
• Xerox EX 80 Print Server
Xerox®Versant®80 Press1-14
User Guide
Page 33

Product Overview
All Stocks Rated Speed (ASRS)
The All Stocks Rated Speed (ASRS) feature eliminates the slower speeds created by
heavier weight stocks. With ASRS, the speed of the press is governed by the size of the
stock only and not by its weight. This means that all stock weights up to 350 gsm for a
given sheet size will run at the rated speed (the top speed) for that stock size.
Automated Color Quality System (ACQS)
The Automated Color Quality System (ACQS) is an advanced color management
technology that transfers the complex decisions about color maintenance from operators
to an automated system. ACQS automates the printing and measuring of calibration
charts and then calculates and makes precise adjustments to color tables based on the
results.
Note
The ACQS suite is available only with the external Xerox EX 80 Print Server Powered by
Fiery; it is not available with the Xerox EX-i 80 Print Server Powered by Fiery.
ACQS takes the variability out of the color equation by incorporating standardized color
measurements using the Inline Spectrophotometer (on the Interface Cooling Module)
to calibrate color on the press as well as generating accurate destination profiles for
different stocks.
Procedures are automated in that they eliminate the need for an operator to manually
scan target sheets using an external spectrophotometer. The operator must initiate the
procedure at the print server, but all target sheets are then generated and scanned
automatically, and all measurements, calculations, and corrections are performed
automatically.
Inline Spectrophotometer (ILS)
The Inline Spectrophotometer (ILS) is housed in the Interface Cooling Module. The ILS
enables the Automated Color Quality Suite, which automates the process of ensuring
stable and accurate color from job to job, by eliminating the need for operators to use
a hand-held spectrophotometer during print server calibration. It also facilitates the
creation of custom destination profiles for each stock on which the press prints.
With the ILS is strategically placed within the paper path, automated processes like
measurements for calibration and destination profiling are quick to perform and require
less down-time for the press. Working together, the ACQS software and the ILS hardware
gives accurate color faster, and provides more stable color over time.
Besides the Inline Spectrophotometer (ILS), the Interface Cooling Module contains
additional cooling to support the higher speeds of the press when running at higher
speeds, and a Decurler to ensure flat sheets for finishing.
User Guide
1-15Xerox®Versant®80 Press
Page 34

Product Overview
Configuration Information Regarding the Performance Package
1. The Performance Package must be ordered when the press is ordered. Once the
press has been configured without the Performance Package option, it cannot be
upgraded at a later time to include the package.
2. The Performance Package is not available with the Xerox EX-i 80 Print Server.
Customers must order the external Xerox EX 80 Print Server.
3. If customers configure the press with the Business Ready (BR) Finisher, the Business
Ready Finisher with Booklet Maker, or the Offset Catch Tray, then the Performance
Package option is not available for the configuration.
4. When the Performance Package is ordered, the Interface Cooling Module must be
used. The package cannot be used with the Interface Module.
5. Finishing options enabled by the Interface Cooling Module include these finishers
and their options:
• High Capacity Stacker (HCS)
• Standard Finisher
• Booklet Maker Finisher
• Standard Finisher Plus
• SquareFold Trimmer Module (which requires the Booklet Maker Finisher)
• Plockmatic Pro 35 and Plockmatic Pro 50 (which requires the Standard Finisher
Plus)
Xerox®Versant®80 Press1-16
User Guide
Page 35

2
Where to Find Help
Help on the Xerox Web Site
For technical product support, Xerox supplies, customer documentation, and answers to
frequently-asked questions, go to www.xerox.com. You will find the latest documentation
and the knowledge base under Support & Drivers. Use the Contact link for specific
contact information/telephone numbers in your area.
Note
Be sure to periodically check this website for the latest information on your product.
It may be helpful to know your press serial number before calling for support. The press
serial number is shown on the Device Information tab: Machine Status > Device
Information.
Print Server Customer Documentation
• The FreeFlow Print Server features are documented in the Online Help system from
the Help menu shown on the main print server window. Additional FreeFlow Print
Server user documentation can be found at www.xerox.com.
• The EFI Print Server Help menu on the Command WorkStation window is designed
to provide information on specific work flows when using the Command WorkStation.
Additional user documentation supplied by EFI is available to you from www.xerox.com
under the Support and Drivers link.
2-1Xerox®Versant®80 Press
User Guide
Page 36

Where to Find Help
Xerox®Versant®80 Press2-2
User Guide
Page 37

3
Paper and Media
Overview
Before loading paper, consider the following:
• The press supports the ability to pull different stock sizes and paper types from various
trays and assemble them as part of a single job. To select multiple paper trays and
insert different papers within one job, program this custom job at the print server
using features such as special pages.
• The press supports Automatic Tray Switching, which allows a job to switch
automatically from an empty tray to a full tray containing the same size paper,
orientation and stock type. Refer to the System Administrator Guide for how to enable
this feature and prioritize the order of trays to search on and use.
Loading Media in Trays 1, 2, and 3
Information About Loading Media in Trays 1, 2, and 3
Trays 1, 2, and 3 are identical. Each tray has a capacity of 550 sheets of 20 lb./75 gsm
paper. Stock can be Long Edge Feed (LEF) or Short Edge Feed (SEF), landscape or portrait.
Note
Each feeder tray has a stock loading label. When loading media into the tray, refer to
the labels on the inside panel of the feeder tray for the correct orientation of that stock
type.
3-1Xerox®Versant®80 Press
User Guide
Page 38

Paper and Media
Loading Paper in Trays 1, 2, and 3
Note
A paper jam may occur if a tray is opened while it is being used to feed stock.
1. Select the appropriate paper stock for your print or copy job.
2. Pull out the tray slowly until it stops.
3. Open the ream of paper with the seam side facing up.
4. Fan the sheets before loading them into the tray.
5. Load and align the edge of the paper against the left edge of the tray.
Paper can be loaded either in the LEF/portrait or SEF/landscape direction.
6. Adjust the paper guides by pressing in the guide release and carefully moving the
Edge Guide until it lightly touches the edge of the material in the tray.
Do not load materials above the MAX line located on the rear Edge Guide.
7. Gently push in the tray until it comes to a stop.
If enabled by your System Administrator, the Paper Tray settings/Tray Properties
window may be displayed on the UI. You can view and set stock attributes and verify
trays are assigned with the correct stock.
8. From the Paper Tray settings/Tray Properties window, choose one of the following:
• No changes were made to the paper tray; select Confirm to close the window.
• Changes were made to the paper tray; go to the next step.
9. Select the Change Settings button.
a) Make the desired selections for Paper Type/Paper Weight, Paper Size, and
Paper Color.
b) If necessary, make the desired changes to paper curl and alignment adjustment.
c) Select Save until you are returned to the Paper Tray settings/Tray Properties
window.
d) Select Confirm or OK to save the information and close the Paper Tray
settings/Tray Properties window.
Loading Tab Stock in Trays 1, 2, and 3
Refer to the following tips before loading tab stock in the tray:
• You can load either single straight collated or single reverse collated tab stock.
• For network print jobs, refer to your print server customer documentation for
instructions on loading tab stock into a tray.
Xerox®Versant®80 Press3-2
User Guide
Page 39

Paper and Media
• If a jam occurs while running tabbed sets, cancel the job and start again.
1. Pull out the tray slowly until it stops.
2. Fan the tab stock before loading into the tray.
3. Load the tab stock LEF (portrait) and align the straight edge of the tab stock against
the left edge of the tray (tabs to the right or trailing edge). For single straight collated
tabs, the first blank tab cutout in the stack will be toward the rear of the tray. For
single reverse collated tabs, the first blank tab cutout in the stack will be toward the
front of the tray.
Note
Tab stock is loaded so the straight edge of the stock is in the feed direction. Also, you
can only load the tab stock LEF.
4. Adjust the paper guides by pressing in the guide release and carefully moving the
Edge Guide until it lightly touches the edge of the stock in the tray.
Do not load materials above the MAX line located on the rear Edge Guide.
5. Gently push in the tray until it comes to a stop.
6. If the Paper Tray settings/Tray Properties window displays on the UI, confirm the
correct tray to which it is printing and other information, including size, type (precut
tab), and, if necessary, paper curl and/or alignment option.
7. Select Confirm or OK to save the information and close the Paper Tray settings/Tray
Properties window.
Loading Transparencies in Trays 1, 2, and 3
Read these tips before using transparencies:
• Do not use transparencies with the white side strip (either permanent or removable).
• Do not mix paper and transparencies in a tray. Jams may occur.
• Do not load more than 100 transparencies in a paper tray at one time.
• Load 8.5 x 11 in (A4) transparencies long edge feed only (landscape).
1. Select the appropriate paper stock for your print job.
2. Pull out the tray slowly until it stops.
3. Fan the transparencies to stop them from sticking together before loading into the
tray.
4. Load a small stack of paper into the tray first. The paper must be the same size as
the transparencies.
User Guide
3-3Xerox®Versant®80 Press
Page 40

Paper and Media
5. Load the transparencies LEF on top of this paper stack. Align the edge of the
transparencies against the left edge of the tray, with the side to be printed on facing
down.
6. Adjust the paper guides by pressing in the guide release and carefully moving the
Edge Guide until it lightly touches the edge of the material in the tray.
Do not load materials above the MAX line located on the rear Edge Guide.
7. Gently push in the tray until it comes to a stop.
If enabled by your System Administrator, the Paper Tray settings/Tray Properties
window displays on the UI.
8. From the Paper Tray settings/Tray Properties window, enter the correct paper
information, including size, type, weight and, if necessary, paper curl and/or alignment
option.
9. Select Confirm or OK to save the information and close the Paper Tray settings/Tray
Properties window.
Loading Pre-drilled Stock in Trays 1, 2, and 3
Pre-drilled paper is defined as having two or more holes along one edge for use in ring
binders and notebooks. To prevent jams or damage, make sure that any plugs (pieces
cut out of the paper to create the holes) do not remain in the stack.
1. Select the appropriate paper stock for your print job.
2. Pull out the tray slowly until it stops.
3. Open the ream of paper with the seam side facing up.
4. Fan the sheets before loading them into the tray.
5. Load and align the edge of the pre-drilled paper with the holes against the left edge
of the tray.
Paper can be loaded either in the LEF/portrait or SEF/landscape direction.
6. Adjust the paper guides by pressing in the guide release and carefully moving the
Edge Guide until it lightly touches the edge of the material in the tray.
Do not load materials above the MAX line located on the rear Edge Guide.
7. Gently push in the tray until it comes to a stop.
If enabled by your System Administrator, the Paper Tray settings/Tray Properties
window displays on the UI.
Xerox®Versant®80 Press3-4
User Guide
Page 41

Paper and Media
8. From the Paper Tray settings/Tray Properties window, enter the correct paper
information, including size, type, weight and, if necessary, paper curl and/or alignment
option.
9. Select Confirm or OK to save the information and close the Paper Tray settings/Tray
Properties window.
Loading Media in the Bypass (Tray 5)
Note
If any optional feeding devices are attached, the Bypass (Tray 5) is installed above or
on top of that feeding device.
This tray is used primarily when using a small quantity and special media (such as
envelopes). Review the following tips when using the Bypass (Tray 5):
• Verify the stock loaded in the tray with the Paper Tray settings/Tray Properties window
on the UI
• Load a maximum of 280 sheets of 20 lb. / 75 gsm paper
• Do not load mixed-size paper into the Bypass Tray
• Do not load materials above the MAX line as indicated on the tray
Loading Paper in the Bypass (Tray 5)
Note
The following prodecure shows the Bypass (Tray 5) located on top of the 2-Tray OHCF.
1. Gently extend the Bypass tray (Tray 5) as necessary to accommodate the paper.
2. Hold the center of the paper guides and slide them to the desired paper size.
3. Select the appropriate paper stock for your print/copy job.
4. Open the ream of paper with the seam side facing up.
User Guide
3-5Xerox®Versant®80 Press
Page 42

Paper and Media
5. Fan the sheets before loading them into the tray.
6. Insert the paper or media into the tray until it stops.
7. Adjust the paper guides so that they touch the edges of the stack.
If enabled by your System Administrator, the Paper Tray settings/Tray Properties
window may be displayed on the UI.
8. If the Paper Tray settings/Tray Properties window displays on the UI, confirm the
correct tray to which it is printing and other information, including size, type (precut
tab), and, if necessary, paper curl and/or alignment option.
9. Select Confirm or OK to save the information and close the Paper Tray settings/Tray
Properties window.
Loading Tab Stock in the Bypass (Tray 5)
Refer to the following tips before loading tab stock in the tray:
• You can load either single straight collated or single reverse collated tab stock.
• For network print jobs, refer to your print server customer documentation for
instructions on loading tab stock into a tray.
• If a jam occurs while running tabbed sets, cancel the job and start again.
1. Gently extend the Bypass tray (Tray 5) as necessary to accommodate the tab stock.
2. Hold the center of the paper guides and slide them to the desired stock size.
3. Fan the tab paper before inserting into the tray.
4. Insert the tab stock into the tray so the straight edge of the stock is in the feed
direction (lead edge) and the tabs are to the left (trail edge).
5. Continue to insert the tab stock into the tray until it stops.
6. Adjust the paper guides so that they touch the edges of the stack.
7. If the Paper Tray settings/Tray Properties window displays on the UI, confirm the
correct tray to which it is printing and other information, including size, type (precut
tab), and, if necessary, paper curl and/or alignment option.
8. Select Confirm or OK to save the information and close the Paper Tray settings/Tray
Properties window.
Loading Transparencies in the Bypass (Tray 5)
Note
Do not use transparencies with a white side strip (either permanent or removable).
1. Gently extend the Bypass tray (Tray 5) as necessary to accommodate the paper.
2. Hold the center of the paper guides and slide them to the desired paper size.
3. Select the appropriate paper stock for your print/copy job.
4. Fan the transparencies to stop them from sticking together before loading into the
tray.
5. Insert the transparencies LEF into the tray with the side to be printed on face up and
with the removable stripe to the right.
6. Continue to insert the paper or media into the tray until it stops.
7. Adjust the paper guides so that they touch the edges of the stack.
Xerox®Versant®80 Press3-6
User Guide
Page 43

Paper and Media
8. From the Paper Tray settings/Tray Properties window, enter the correct paper
information, including size, type, weight and, if necessary, paper curl and/or alignment
option.
9. Select Confirm or OK to save the information and close the Paper Tray settings/Tray
Properties window.
Loading Pre-drilled Stock in the Bypass (Tray 5)
1. Gently extend the Bypass tray (Tray 5) as necessary to accommodate the paper.
2. Hold the center of the paper guides and slide them to the desired paper size.
3. Select the appropriate paper stock for your print/copy job.
4. Fan the sheets before loading them into the tray.
5. Insert the pre-drilled stock into the tray in the LEF direction with the holes to the
right.
6. Continue to insert the paper or media into the tray until it stops.
7. Adjust the paper guides so that they touch the edges of the stack.
8. From the Paper Tray settings/Tray Properties window, enter the correct paper
information, including size, type, weight and, if necessary, paper curl and/or alignment
option.
9. Select Confirm or OK to save the information and close the Paper Tray settings/Tray
Properties window.
Loading Envelopes in the Bypass (Tray 5)
Note
It is recommended that you print envelopes from the Bypass/Tray 5 only. Optional Trays
6 and 7 (OHCF) can be used if the Postcard Bracket is mounted and the stack height is
limited to no more than 200 envelopes.
When setting up your print job, follow the steps below to define the custom paper settings
at the Paper Tray settings/Tray Properties window and assign this stock to Tray 5. With
the flap closed, measure the height and width of the envelope.
The following envelope sizes are supported. Other sizes can be used but performance is
not guaranteed.
• C4 (229 x 324 mm) Short Edge Feed or Long Edge Feed
• C5 (162 x 229 mm) Short Edge Feed or Long Edge Feed
• #10 (4.125 x 9.5 inches) Short Edge Feed
1. Always load envelopes with the flaps closed.
Do not use padded envelopes.
2. When loading in the SEF direction, place the flaps facing the back of the press. When
loading in the LEF direction, place the flaps facing the lead edge.
3. When submitting your network print file, select Custom Paper as the Paper Type.
Enter the dimensions of the envelope.
User Guide
3-7Xerox®Versant®80 Press
Page 44

Paper and Media
The width is measured from the lead edge to the trail edge of the envelope. For
example, if you are loading SEF, enter the long dimension of the envelope as the
width. If you are loading the envelope LEF, enter the short dimension of the envelope
as the width.
4. Enter a heavy paper weight value, such as 220 gsm, in the Paper Weight field.
5. Select the Bypass Tray as the Paper Source.
6. Store unused envelopes in their original packaging to avoid the excess moisture or
dryness that can affect print quality and cause wrinkling. Excessive moisture can
cause the envelopes to seal before or during printing.
Some wrinkling or embossing may occur when printing on envelopes. Successful envelope
printing depends on the quality and construction of the envelopes. Try another envelope
brand if problems occur.
Loading Paper in the 1-Tray High Capacity Feeder (HCF / Tray 6)
Tips about the 1-tray HCF (Tray 6):
• This tray accommodates only 8.5 x 11 in./A4 Long Edge Feed (LEF) stock
• Stock weights between 18 lb./64gsm bond to 80 lb./220 gsm cover may be used in
this tray
• It holds a maximum of 2000 sheets of 20lb./75 gsm paper
• Stock must be loaded only in LEF direction
• Do not load materials above the MAX line
1. Select the appropriate paper stock for your job.
2. Pull out the tray slowly until it stops.
3. Open the ream of paper with the seam side facing up.
4. Fan the sheets before loading them into the tray.
5. Load the paper in the tray.
a) Align the edge of the paper against the RIGHT edge of the tray.
b) Move the paper guides to just touch the edges of the paper stack.
Do not load materials above the MAX line.
Xerox®Versant®80 Press3-8
User Guide
Page 45

Paper and Media
6. Gently push in the tray until it comes to a stop.
If enabled by your System Administrator, the Paper Tray settings screen may be
displayed on the UI.
7. If changes have been made to the paper tray, select the Change Settings button;
otherwise, proceed to the next step.
a) Make the desired selections for Paper Type/Paper Weight, Paper Size, and
Paper Color.
b) If necessary, make the desired changes to paper curl and alignment adjustment.
Note
Refer to the System Administration Guide for detailed information on the paper
curl and alignment adjustment options.
c) Select Save until you are returned to the tray settings window.
8. Select Confirm to close the window.
Loading Media in the 1- or 2-Tray Oversized High Capacity Feeder (OHCF / Trays 6 and / or 7)
Note
Each feeder tray has a stock loading label. When loading media into the tray, refer to
the labels on the inside panel of the feeder tray for the correct orientation of that stock
type.
Note
It is recommended that you use the Bypass Tray (Tray 5) to feed envelopes. However,
if you use Trays 6 and / or 7, C5 and #10 envelopes must be fed SEF with the Postcard
Bracket installed. Stack height is limited to 200 envelopes.
Postcard Bracket
The Postcard bracket is delivered with the OHCF from manufacturing. The Postcard
bracket allows you to print on smaller size media without requiring post-processing
cutting or sorting. The Postcard bracket specifically accommodates 4 x 6 in. (101.6 x
152.4 mm) SEF media.
User Guide
3-9Xerox®Versant®80 Press
Page 46

Paper and Media
Using the Postcard Bracket
Use the following procedure for installing and using the Postcard bracket when printing
on smaller media (4 x 6 in./101.6 x 152.4 mm).
With the Postcard Bracket installed, you could print envelopes from Trays 6 and 7. The
stack height is up to 200 envelopes.
1. Slowly open one of the paper trays until it stops and remove the paper.
2. Move the paper guides out to their largest position.
3. Open the front cover of the OHCF.
4. Remove the Postcard bracket from inside the OHCF front cover.
5. Install the Postcard bracket so that it sits on the locating pins on the upper frame
and in the grooves on the bottom of the tray.
6. Tighten the thumb screw so it locks the Postcard bracket in place.
Xerox®Versant®80 Press3-10
User Guide
Page 47

Paper and Media
7. Load the postcard stock and adjust the paper guides against the stock.
8. Close the paper tray and confirm the new settings at the print server.
9. Run your print job.
10. Upon completion of your print job, remove the postcard stock and the Postcard
bracket from the tray.
11. Store the Postcard bracket inside the OHCF front cover area.
Skew Adjustment Levers (Trays 6 and 7)
The skew adjustment levers are found in all paper trays. These levers are used to improve
paper feed accuracy and to reduce paper skew problems.
1. Rear Skew Adjustment Lever
2. Right Side Skew Adjustment Lever
Note
These levers should remain in their default position. The position of these levers should
be changed only if there is a skew problem when running a specific print job and/or
media type. Changing the levers may cause more skew problems when running certain
media types such as coated, label, transparency and film.
Use the following procedure to set the skew adjustment levers:
1. Pull out the tray slowly until it stops.
The Tray Properties / Settings automatically display at the press User Interface (UI).
2. From the Tray Properties window, verify that the correct paper information is being
used including size, type, weight and paper curl or alignment option for the tray.
Select OK and close the Tray Properties window.
3. At the tray, slide the rear skew adjustment lever to the right.
4. Gently push in the tray until it comes to a stop.
5. Run your print job.
• The paper is fed accurately without skew and the printed output is satisfactory;
your task is complete.
• The paper is skewed and the printed output is unsatisfactory; proceed to the next
step.
6. Pull out the tray slowly until it stops.
User Guide
3-11Xerox®Versant®80 Press
Page 48

Paper and Media
7. Verify the tray and paper settings at the print server.
8. Return the rear skew adjustment lever to its left, default position.
9. Slide the right-side skew adjustment lever toward the front of the paper tray.
10. Gently push in the tray until it comes to a stop.
11. Run your print job.
• The paper is fed accurately without skew and the printed output is satisfactory;
your task is complete.
• The paper is skewed and the printed output is unsatisfactory; proceed to the next
step.
12. Pull out the tray slowly until it stops.
13. Return the right-side skew adjustment lever toward the rear of the paper tray; this is
its default position.
14. Gently push in the tray until it comes to a stop.
Loading Paper in the Oversized High Capacity Feeder (OHCF / Trays 6 and 7)
1. Select the appropriate paper stock for your print/copy job.
2. Pull out the tray slowly until it stops.
3. Open the ream of paper with the seam side facing up.
4. Fan the sheets before loading them into the tray.
5. Load paper into the tray.
6. Adjust the paper guides by pressing in the guide release and carefully moving the
Edge Guide until it lightly touches the edge of the material in the tray.
Do not load materials above the MAX line located on the rear Edge Guide.
7. Gently push in the tray until it comes to a stop.
The Paper Tray settings/Tray Properties window displays on the UI. You can view
and set stock attributes and verify trays are assigned with the correct stock.
8. From the Paper Tray settings/Tray Properties window, enter or verify the correct paper
information, including size, type, weight and, if necessary, paper curl and/or alignment
option. Select the stock and assign the stock to the tray to be used.
9. Select Confirm or OK to save the information and close the Paper Tray settings/Tray
Properties window.
Loading Tabs in the Oversized High Capacity Feeder (OHCF / Trays 6 and 7)
Refer to the following tips before loading tab stock in the tray:
• You can load either single straight collated or single reverse collated tab stock.
• For network print jobs, refer to your print server customer documentation for
instructions on loading tab stock into a tray.
Xerox®Versant®80 Press3-12
User Guide
Page 49

Paper and Media
• If a jam occurs while running tabbed sets, cancel the job and start again.
1. After programming your tab job at the print server, select the appropriate and
matching tab stock for your print job.
2. Pull out the tray slowly until it stops.
3. Fan the tab paper before loading into the tray.
4. Load the tab stock LEF (portrait) and align the straight edge of the tab stock against
the right edge of the tray (tabs to the left or trailing edge). For single straight collated
tabs, the first blank tab cutout in the stack will be toward the front of the tray. For
single reverse collated tabs, the first blank tab cutout in the stack will be toward the
rear of the tray.
Tab stock is loaded so the straight edge of the stock is in the feed direction. Also, you
can only load the tab stock LEF.
5. Adjust the paper guides by pressing in the guide release and carefully moving the
Edge Guide until it lightly touches the edge of the stock in the tray.
Do not load materials above the MAX line located on the rear Edge Guide.
6. Gently push in the tray until it comes to a stop.
The Paper Tray settings/Tray Properties window displays on the UG.
7. From the Paper Tray settings/Tray Properties window, confirm the correct tray to
which it is printing and other information, including size (9 x 11 inches), type (precut
tab), and, if necessary, paper curl and/or alignment option.
8. Select Confirm or OK to save the information and close the Paper Tray settings/Tray
Properties window.
Loading Transparencies in the Oversized High Capacity Feeder (OHCF / Trays 6 and 7)
Read these tips before using transparencies:
• Do not use transparencies with the white side strip (either permanent or removable).
• Do not mix paper and transparencies in a tray. Jams may occur.
• Do not load more than 100 transparencies in a paper tray at one time.
• Load 8.5 x 11 in (A4) transparencies long edge feed only (landscape).
1. Select the appropriate paper stock for your print job.
2. Pull out the tray slowly until it stops.
3. Fan the transparencies to stop them from sticking together before loading into the
tray.
4. Load transparencies LEF on top of a small stack of same-size paper and align the
strip edge of the transparency against the right edge of the paper tray, with the side
to be printed on facing down.
User Guide
3-13Xerox®Versant®80 Press
Page 50

Paper and Media
5. Adjust the paper guides by pressing in the guide release and carefully moving the
Edge Guide until it lightly touches the edge of the material in the tray.
Do not load materials above the MAX line located on the rear Edge Guide.
6. Gently push in the tray until it comes to a stop.
If enabled by your System Administrator, the Paper Tray settings/Tray Properties
window displays on the UI.
7. From the Paper Tray settings/Tray Properties window, enter the correct paper
information, including size, type, weight and, if necessary, paper curl and/or alignment
option.
8. Select Confirm or OK to save the information and close the Paper Tray settings/Tray
Properties window.
Loading Pre-Drilled Stock into the Oversized High Capacity Feeder (OHCF / Trays 6 and 7)
1. Select the appropriate paper stock for your print job.
2. Pull out the tray slowly until it stops.
3. Open the ream of paper with the seam side facing up.
4. Fan the sheets before loading them into the tray.
5. Load and register the paper against the right side of the tray for LEF direction.
6. Load and register the paper against the right side of the tray as depicted below for
SEF direction.
7. Adjust the paper guides by pressing in the guide release and carefully moving the
Edge Guide until it lightly touches the edge of the stock in the tray.
Do not load materials above the MAX line located on the rear Edge Guide.
8. Gently push in the tray until it comes to a stop.
If enabled by your System Administrator, the Paper Tray settings/Tray Properties
window displays on the UI.
9. From the Paper Tray settings/Tray Properties window, enter the correct paper
information, including size, type, weight and, if necessary, paper curl and/or alignment
option.
10. Select Confirm or OK to save the information and close the Paper Tray settings/Tray
Properties window.
Xerox®Versant®80 Press3-14
User Guide
Page 51

Paper and Media
Loading Media in the OHCF (Trays 8 and
9)
Note
Each feeder tray has a stock loading label. When loading media into the tray, refer to
the labels on the inside panel of the feeder tray for the correct orientation of that stock
type.
Note
It is recommended that you use the Bypass (Tray 5) to feed envelopes. However, if you
use Trays 8 or 9, C5 and #10 envelopes must be fed SEF with the Postcard Bracket
installed. Stack height is limited to 200 envelopes.
Postcard Bracket
The Postcard bracket is delivered with the OHCF from manufacturing. The Postcard
bracket allows you to print on smaller size media without requiring post-processing
cutting or sorting. The Postcard bracket specifically accommodates 4 x 6 in. (101.6 x
152.4 mm) SEF media.
Using the Postcard Bracket
Use the following procedure for installing and using the Postcard Bracket when printing
on smaller media (4 x 6 in. / 101.6 x 152.4 mm).
With the Postcard Bracket installed, you could print envelopes from Trays 8 and 9. The
stack height is up to 200 envelopes.
1. Slowly open one of the paper trays until it stops and remove the paper.
2. Move the paper guides out to their largest position.
User Guide
3-15Xerox®Versant®80 Press
Page 52

Paper and Media
3. Open the front cover of the OHCF.
4. Remove the Postcard Bracket from inside the OHCF front cover.
5. Install the Postcard Bracket so that it sits on the locating pins on the upper frame
and in the grooves on the bottom of the tray.
6. Tighten the thumb screw so it locks the Postcard Bracket in place.
7. Load the postcard stock and adjust the paper guides against the stock.
8. Close the paper tray and confirm the new settings at the print server.
9. Run your print job.
10. Upon completion of your print job, remove the postcard stock and the Postcard
Bracket from the tray.
11. Store the Postcard Bracket inside the OHCF front cover area.
Xerox®Versant®80 Press3-16
User Guide
Page 53

Paper and Media
Skew Adjustment Levers (Trays 8 and 9)
The skew adjustment levers are found in all paper trays. These levers are used to improve
paper feed accuracy and to reduce paper skew problems.
1 Rear Skew Adjustment Lever
2 Right Side Skew Adjustment Lever
Note
These levers should remain in their default position. The position of these levers should
be changed only if there is a skew problem when running a specific print job and / or
media type. Changing the levers may cause more skew problems when running certain
media types such as coated, label, transparency and film.
Use the following procedure to set the skew adjustment levers:
1. Pull out the tray slowly until it stops.
The Stock Library Manager and Tray settings automatically display at the print server.
2. From the Tray Properties window at the print server, verify that the correct paper
information is being used including size, type, weight and paper curl or alignment
option for the tray. Select OK and close the Tray Properties window.
3. At the tray, slide the rear skew adjustment lever to the right.
4. Gently push in the tray until it comes to a stop.
5. Run your print job.
• The paper is fed accurately without skew and the printed output is satisfactory;
your task is complete.
• The paper is skewed and the printed output is unsatisfactory; proceed to the next
step.
6. Pull out the tray slowly until it stops.
7. Verify the tray and paper settings at the print server.
8. Return the rear skew adjustment lever to its left, default position.
9. Slide the right-side skew adjustment lever toward the front of the paper tray.
10. Gently push in the tray until it comes to a stop.
11. Run your print job.
• The paper is fed accurately without skew and the printed output is satisfactory;
your task is complete.
User Guide
3-17Xerox®Versant®80 Press
Page 54

Paper and Media
• The paper is skewed and the printed output is unsatisfactory; proceed to the next
step.
12. Pull out the tray slowly until it stops.
13. Return the right-side skew adjustment lever toward the rear of the paper tray; this is
its default position.
14. Gently push in the tray until it comes to a stop.
15. If you are still having skew adjustment problems, refer to the Advanced Stock Setup
information.
Loading Paper in the OHCF (Trays 8 and 9)
1. Select the appropriate paper stock for your print job.
2. Pull out the tray slowly until it stops.
3. Open the ream of paper with the seam side facing up.
4. Fan the sheets before loading them into the tray.
5. Load paper into the tray.
6. Adjust the paper guides by pressing in the guide release and carefully moving the
Edge Guide until it lightly touches the edge of the material in the tray.
Do not load materials above the MAX line located on the rear Edge Guide.
7. Gently push in the tray until it comes to a stop.
The Tray Properties window displays on the print server. You can view and set stock
attributes and verify trays are assigned with the correct stock. The Stock Library
Manager is available from the print server only and not at the press.
8. From the Tray Properties window, enter or verify the correct paper information,
including size, type, weight and, if necessary, paper curl and / or alignment option.
Select the stock and assign the stock to the tray to be used.
9. Select OK to save the information and close the Tray Properties window.
Loading Tabs in the OHCF (Trays 8 and 9)
You can load either single straight collated or single reverse collated tab stock.
Before loading tab stock in the OHCF, program your tab job at the Stock Library Manager
application on the print server. Create a new tab stock name and select these tab-specific
property settings for the tab print job:
• Type - Precut Tabs or Tab Stock
• Modules - the number of tabs in the set
• Size - Auto Select or custom size of 9 x 11 inches
• Weight - select the correct tab stock weight in the range 106 to 176 gsm
• Tray / Source - Tray 6 or 7
• Print Output Order / Tab Sequence - 1 to N
• Output Delivery - Face Down
Xerox®Versant®80 Press3-18
User Guide
Page 55

Paper and Media
Note
Refer to the print server documentation for more detailed information on how to set up
a tab job at your print server.
Note
If a jam occurs while running tabbed sets, cancel the job and start again.
1. After programming your tab job at the print server, select the appropriate and
matching tab stock for your print job.
2. Pull out the tray slowly until it stops.
3. Fan the tab paper before loading into the tray.
4. Load the tab stock LEF (portrait) and align the straight edge of the tab stock against
the right edge of the tray (tabs to the left or trailing edge). For single straight collated
tabs, the first blank tab cutout in the stack will be toward the front of the tray. For
single reverse collated tabs, the first blank tab cutout in the stack will be toward the
rear of the tray.
Tab stock is loaded so the straight edge of the stock is in the feed direction. Also, you
can only load the tab stock LEF.
5. Adjust the paper guides by pressing in the guide release and carefully moving the
Edge Guide until it lightly touches the edge of the stock in the tray.
Do not load materials above the MAX line located on the rear Edge Guide.
6. Gently push in the tray until it comes to a stop.
The Paper Tray Properties window displays from the Stock Library Manager on the
print server. The Stock Library Manager is available from the print server only and
not at the press.
7. From the Tray Properties window, confirm the correct tray to which it is printing and
other information, including size (9 x 11 inches), type (precut tab), and, if necessary,
paper curl and / or alignment option.
8. Select OK to save the information and close the Tray Properties window.
Loading Transparencies in the OHCF (Trays 8 and 9)
Note
Do not use transparencies with a white side strip (either permanent or removable).
At the Stock Library Manager, make sure to select Transparency as the Paper or Media
Type and select the tray containing the transparencies as the Paper Source.
1. Select the appropriate paper stock for your print job.
2. Pull out the tray slowly until it stops.
3. Fan the transparencies to stop them from sticking together before loading into the
tray.
User Guide
3-19Xerox®Versant®80 Press
Page 56

Paper and Media
4. Load transparencies LEF on top of a small stack of same-size paper and align the
strip edge of the transparency against the right edge of the paper tray, with the side
to be printed on facing down.
5. Adjust the paper guides by pressing in the guide release and carefully moving the
Edge Guide until it lightly touches the edge of the material in the tray.
Do not load materials above the MAX line located on the rear Edge Guide.
6. Gently push in the tray until it comes to a stop.
The Paper Tray Properties window displays from the Stock Library Manager on the
print server. The Stock Library Manager is available from the print server only and
not at the press.
7. From the Tray Properties window, confirm that the correct stock information for
transparencies, such as size, type, weight, are selected.
8. Select OK to save the information and close the Tray Properties window.
Loading Pre-drilled Stock into the OHCF (Trays 8 and 9)
1. Select the appropriate paper stock for your print job.
2. Pull out the tray slowly until it stops.
3. Open the ream of paper with the seam side facing up.
4. Fan the sheets before loading them into the tray.
5. Load and register the paper against the right side of the tray for LEF direction.
6. Load and register the paper against the right side of the tray as depicted below for
SEF direction.
7. Adjust the paper guides by pressing in the guide release and carefully moving the
Edge Guide until it lightly touches the edge of the stock in the tray.
Do not load materials above the MAX line located on the rear Edge Guide.
8. Gently push in the tray until it comes to a stop.
Xerox®Versant®80 Press3-20
User Guide
Page 57

Paper and Media
The Paper Tray Properties window displays from the Stock Library Manager on the
print server. The Stock Library Manager is available from the print server only and
not at the press.
9. From the Tray Properties window, confirm the correct tray to which it is printing and
other information such as the paper type, paper weight and paper size.
10. Select OK to save the information and close the Tray Properties window.
Loading Post-Process Media in Optional Finishing Devices
Refer to the specific chapter for information on loading post-process media in the optional
finishing devices.
• For loading tabs into the GBC AdvancedPunch, refer to Loading Tab Stock with the
GBC AdvancedPunch
• For loading paper or tabs into the Post-Processor Inserter (Tray T1) for the Standard
Finisher, Booklet Maker Finisher, or the Standard Finisher Plus, refer to Loading Paper
/ Tabs in the Post-Process Inserter (Tray T1).
User Guide
3-21Xerox®Versant®80 Press
Page 58

Paper and Media
Xerox®Versant®80 Press3-22
User Guide
Page 59

4
Copy
Document Feeder and Glass
Document Feeder Tips
Tips for using the Duplex Automatic Document Feeder (DADF):
• For best output, ensure that the documents are in good condition.
• A maximum of 250 documents can be scanned at one time by using the document
feeder.
• Mixed-size original documents can be used; however, the top left corners of the
original documents must be aligned in the document handler.
• Remove any staples and paper clips from the documents before loading them in the
document feeder.
Document Glass
Use the Document Glass for scanning and copying various types documents, such as
bound originals (books), odd size documents or poor quality originals. Documents should
be placed face down on the glass and aligned with the tip of the registration arrow in
the top left corner.
The document glass accommodates document sizes up to a maximum of 11 x 17 in./A3.
4-1Xerox®Versant®80 Press
User Guide
Page 60

Copy
Basic Copying Steps
Basic Copying with the Document Feeder (DADF)
1. Adjust the movable document guides to their widest position.
2. Load the documents face up with the first page on top and with the headings toward
the back or left of the machine.
The confirmation indicator lights to show that the documents are loaded correctly.
3. Press the Home button on the press UI.
4. Select Copy on the Home window.
5. Select the desired Copy features/options:
• Paper Supply
• Reduce/Enlarge
• Output Color
• 2-Sided Copying
• Original Type
• Lighten/Darken
The features displayed on the main Copy window vary depending on how it is
configured by the administrator.
6. Enter the quantity.
7. Press Start.
Basic Copying with the Document Glass
1. Open the document feeder.
Xerox®Versant®80 Press4-2
User Guide
Page 61

2. Place the document face down by aligning it as shown in the illustration.
3. Press the Home button on the press UI.
4. Select Copy on the Home window.
5. Select the desired Copy features/options:
• Paper Supply
• Reduce/Enlarge
• Output Color
• 2-Sided Copying
• Original Type
• Lighten/Darken
The features displayed on the main Copy window vary depending on how it is
configured by the administrator.
Copy
6. Enter the quantity.
7. Press Start.
Selecting Copy Options for a Third-Party Finishing Device
Read the following list before performing the procedure:
• If your machine has an optional, third-party, Document Finishing Architecture (DFA)
device attached, then this profile feature is available, and specific copy options may
be selected for a job.
• Prior to physically attaching the DFA device to the machine, device profiles are created.
The profiles represent the characteristics of your finishing device.
• Refer to the third-party customer documentation for information on setting the
profile values for the specific DFA device attached to the machine.
• A profile for the job can be selected from either the print server, the print driver on
your computer, or the press User Interface. Depending on the DFA device, a maximum
of twelve profiles are available.
1. Place your original documents either in the document feeder or on the document
glass.
2. Press the Home button on the press UI.
3. Select Copy on the Home window.
4. Select the Output Format tab.
a) Select the DFA Finisher.
The DFA Finisher Profile screen displays.
b) From the displayed list, select the profile for the job.
If the device is an e-binder, select the binding position.
User Guide
4-3Xerox®Versant®80 Press
Page 62

Copy
c) Select Save.
d) Select the desired Face Up/Down Output option.
5. Select the desired Copy features/options.
The features displayed on the main Copy window vary depending on how it is
configured by the administrator.
6. Enter the quantity.
7. Press Start.
If prompted on the UI, follow the instructions provided to correct any job submission
errors. If there is a DFA problem, refer to your DFA documentation.
Copy Feature
Copy Feature Overview
Tip
Depending on how the Copy tab is configured by the administrator, this tab may contain
different features than the ones listed here.
The Copy feature includes the following options:
• Reduce/Enlarge (R/E)
• Paper Supply (Auto Select)
• Output Color
• Copy Output
• 2 Sided Copying
• Original Type
• Darken/Lighten
Reduce/Enlarge
Reduce / Enlarge (R/E)
The reduce / enlarge (R/E) feature provides a variety of reduction and enlargement
options to adjust the size of the output image. Originals can be enlarged or reduced
from 25-400%. Various automatic and preset selections are available to help you choose
the most common reductions or enlargements, while a custom setting enables you to
select the ratio that suits your requirements. Basic reduction/enlargement options include:
100% or R/E entry box
The default setting in the R/E entry box is 100%. This selection produces an image on
your copy exactly the same size as the image on your original document.
You can also set the R/E ratio by using the plus or minus buttons. In this case, the ratio
is displayed in the R/E entry box.
Xerox®Versant®80 Press4-4
User Guide
Page 63

Copy
Auto%
This selection proportionally reduces or enlarges the image so that it will fit onto your
chosen paper. If this option is selected, you must also select a specific paper tray.
Preset R/E buttons
Depending on what the System Administrator has selected, you see several percentage
options for reduction or enlargement. These buttons can be customized by the
Administrator to display the reduction/enlargement ratios that you frequently use.
More
When the Reduce/Enlarge (R/E) More button is selected, a new window opens and
displays additional R/E options.
More Reduce/Enlarge (R/E) Options
The Reduce/Enlarge (R/E) More options include:
Proportional %
All of the options will reduce or enlarge the image by the same ratio in both directions
so that the image gets bigger or smaller, but the proportion remain the same.
Auto %
Proportionally reduces or enlarges the image so that it will fit onto your chosen paper.
If this option is selected, you must also select a specific paper tray.
Independent X-Y%
This option allows you to specify different height and width ratios to scale the height
and width independently.
Auto X-Y% ensures copies are made with the height and width ratios set automatically
to match the paper size.
Auto Center
This option allows you to specify individually the height and width values.
Preset percentage buttons
The percentage buttons are preset for specific magnification levels by the administrator
to reflect the percentages used most frequently.
Paper Supply
Select the desired tray to be used for your job; options include:
Auto Select
This option automatically detects the size of the original document and selects the
proper tray for output.
Tray buttons
Allows you to select a specific tray containing the desired media for your job.
More button
Displays the Paper Supply screen showing all available trays for the machine and their
media content.
User Guide
4-5Xerox®Versant®80 Press
Page 64

Copy
Output Color
Select the desired Output Color option which best applies to the job. The options include:
Auto Detect
This option allows the machine to automatically detect if the original document is in
color or black and white.
Color
This option generates copies with full color output, using all four printing colors - cyan,
magenta, yellow, and black.
Black and White
This option copies in black and white only. Colors in the original are converted to shades
of gray.
Dual Color
This option allows you to separate the colors of the original into two groups of colors
for copying. The source color is extracted from the original and replaced by the target
area color. The rest of the colors are replaced by the non-target area color that you
select.
Single Color
This option allows you to copy in one of the preset or custom colors.
More
This options allow you to customize the color for the copied output.
Copy Output
Important
Copy Output options vary depending on the finishing devices attached to your machine.
Note
Copy Output may be accessed either from the Copy tab or from the Output Format tab.
Use the Copy Output feature to select the desired options for your output; options
include:
• Auto
• Collated
• Uncollated
• Uncollated with Separators
• Original Orientation
• Optional finishing features, including:
- Output Destination/Offset
- Stapling
- Hole Punching
- C/Z Folding
Xerox®Versant®80 Press4-6
User Guide
Page 65

Copy
2 Sided Copying
Note
The 2 Sided Copying option may be accessed either from the main Copy screen or from
the Output Format tab.
Make one or two-sided copies from one or two-sided originals using either the document
feeder or the document glass. The two-sided option enables you to select your output
in book or calendar orientation. Options include:
1-1 Sided
Use this option if your originals are printed on one side and you want single-sided
copies.
1-2 Sided
Use this option if your originals are printed on one side and you want two-sided copies.
2-2 Sided
Use this option if you want to make two sided copies from two-sided originals.
2-1 Sided
This option will make one-sided copies from two-sided originals.
Originals/Copies
Select the orientation of both your original documents and the output copies. Options
include Head to Head and Head to Toe.
Head to Head
This option is sometimes called Top-to-Top. For your original documents, select this
option when all the pages of your original documents have the same orientation. For
copy output, select this option to copy/print the reverse side of a page so that the
finished document opens like a book.
Head to Toe
This option is sometimes called Top-to-Bottom. For your original documents, select this
option when the pages of your original documents have the opposite orientation such
as on a calendar. For copy output, select this option to copy/print the reverse side of a
page so that the finished document opens like a calendar.
Original Orientation
Upright Images
Select this option when placing the top edge of the document against the top side
of the document glass or document feeder.
Sideways Images
Select this option when placing the top edge of the document against the left side
of the document glass or document feeder.
User Guide
4-7Xerox®Versant®80 Press
Page 66

Copy
Original Type
Note
The Original Type option may be accessed either from the main Copy screen or from
the Image Quality tab.
The Original Type feature provides a convenient way to enhance the quality of your
output based on the type of original images you are copying. Select the Original Type
button on the Image Quality tab, and select the desired option.
Auto
This option sets the output color according to the document type preset in the System
Administration mode.
Photo and Text
Use this option if your original is from a magazine or other source that contains high
quality photographs with text. This setting produces better pictures, but slightly reduces
sharpness for text and line art.
Text
Use this option if your original contains only text or line art. The result is sharper edges
for the text and line art.
Photo
This option is specifically designed to copy photographs or magazine pictures without
any text or line drawings. This option prevents faint reproduction of colors.
Map
Use this option for making copies of documents that have text on colored backgrounds
such as maps.
Darken/Lighten
Note
The Darken/Lighten option may be accessed either from the main Copy screen or from
the Image Quality tab and then by selecting Image Options.
The Darken/Lighten option provides manual control to adjust the lightness or darkness
of the scanned images.
• Select the Left scroll button to darken the scanned image from light originals such
as pencil images.
• Select the Right scroll button to lighten the scanned image from dark originals such
as half tones or originals with colored backgrounds.
Xerox®Versant®80 Press4-8
User Guide
Page 67

Image Quality Feature
Image Quality Feature Overview
The Image Quality feature includes the following options:
• Original Type
• Image Options
• Image Enhancement
• Color Effects
• Color Balance
• Color Shift
Selecting Image Quality Options
1. Load the document or documents either onto the Document Glass or into the
Document Feeder.
2. Press the Home button on the press UI.
3. Select Copy on the Home window.
4. Select the Image Quality tab.
5. From the Image Quality window, select the desire options:
Copy
• Original Type
• Image Options
• Image Enhancement
• Color Effects
• Color Balance
• Color Shift
6. Select the Copy tab.
7. Select the desired Copy options including:
• Paper Supply
• Reduce/Enlarge
• 2-Sided Copying
8. Select any other desired Copy features/options (such as Layout Adjustment, Output
Format).
9. Enter the quantity.
10. Press Start on the UI.
User Guide
4-9Xerox®Versant®80 Press
Page 68

Copy
Original Type
Note
The Original Type option may be accessed either from the main Copy screen or from
the Image Quality tab.
The Original Type feature provides a convenient way to enhance the quality of your
output based on the type of original images you are copying. Select the Original Type
button on the Image Quality tab, and select the desired option.
Auto
This option sets the output color according to the document type preset in the System
Administration mode.
Photo and Text
Use this option if your original is from a magazine or other source that contains high
quality photographs with text. This setting produces better pictures, but slightly reduces
sharpness for text and line art.
Text
Use this option if your original contains only text or line art. The result is sharper edges
for the text and line art.
Photo
This option is specifically designed to copy photographs or magazine pictures without
any text or line drawings. This option prevents faint reproduction of colors.
Map
Use this option for making copies of documents that have text on colored backgrounds
such as maps.
Image Options
Use the Image Options feature to make adjustments to the following options:
Lighten/Darken
This option provides manual control to adjust the lightness or darkness of the scanned
images.
• Select the Down scroll button to darken the scanned image from light originals such
as pencil images.
• Select the Up scroll button to lighten the scanned image from dark originals such as
half tones or originals with colored backgrounds.
Sharpness
This option controls the balance between sharp text and moiré (patterns within the
image). Move the slider control down (Soften) to produce an image with a smooth,
uniform appearance ideally suited for photographic scanned images. Move the slider
control up (Sharpen) to produce an image with better quality text or line art.
Saturation
This option allows colors to become more or less vivid. To make the colors on your
output more vivid, move the slide bar up. To create a less vivid output, or a pastel effect,
move the slide bar down. To keep the output normal, do not adjust the saturation.
Xerox®Versant®80 Press4-10
User Guide
Page 69

Copy
Image Enhancement
Use the Image Enhancement settings when your scanned image requires more than
the basic image quality. There are two features associated with Image Enhancement:
Suppress Background
This option prevents reproduction of unwanted shading from originals where the
opposite side printing shows through.
Off
Auto Suppression: This option automatically reduces or eliminates any background
on the copies caused by colored paper or newspaper originals.
Contrast
Selections are either Auto Contrast or Manual Constrast. The Constrast featurecontrols
the difference between the image densities within the scanned image. Lower contrast
settings reproduce more detail in light and dark areas of the original. Higher contrast
settings produce vivid blacks and whites for sharper text and lines, but produce less
detail in pictures. Auto Correction automatically chooses the best settings for your job.
Color Effects
This feature produces balanced image tones on your output. Options include:
Lively
This option uses the highest color saturation to produce rich, vivid output colors. The
option increases the color saturation of the most vivid setting in order to produce
fresher images.
Bright
This option produces images that have a brighter appearance and enhanced contrast.
Warm
This option produces a soft image on the output and adding a warm, reddish tint to
low density colors. Use this setting to apply a light pink tone to skin colors and to give
a soft tone to dark, warm colors.
Cool
This option produces a strong, clear blue tone on the output. This setting makes blue
color stronger and makes dark, cold colors clearer.
Shadow Suppression
This option reduces or eliminates any background shadow caused by colored paper or
newspaper originals.
Color Balance
This feature allows you to adjust the balance between colors and the overall amount of
color on the output copies. You can adjust the levels of all four process colors (Yellow,
Magenta, Cyan, and Black) for their low, medium, and high density ranges.
• The default option is Normal.
4-11Xerox®Versant®80 Press
User Guide
Page 70

Copy
• Basic Color adjusts the density.
• Advanced Color adjusts the Highlights, Midtones, and Shadows.
Color Shift
This feature allows you to shift all hues in an image simultaneously in order to make the
overall character of the output image warmer or cooler. For example, if you select one
of the:
Normal
This is the default option.
Plus buttons
The red colors shift toward the yellow hue, the green colors shift toward the cyan hue,
and the blue colors shift toward the magenta hue. All colors between these original
colors also shift in the same direction.
Minus buttons
The red colors shift toward the magenta hue, the blue colors shift toward the cyan hue,
and the green colors shift toward the yellow hue. Again, all colors between these original
colors also shift in the same direction.
Layout Adjustment Feature
Layout Adjustment Feature Overview
The Layout Adjustment feature includes the following options:
• Book Copying
• 2 Sided Book Copying
• Original Size
• Edge Erase
• Image Shift
• Image Rotation
• Invert Image
• Original Orientation
Selecting Layout Adjustment Options
1. Load the document or documents either onto the Document Glass or into the
Document Feeder.
2. Press the Home button on the press UI.
3. Select Copy on the Home window.
4. Select the Layout Adjustment tab.
5. From the Layout Adjustment window, select the desire options:
Xerox®Versant®80 Press4-12
User Guide
Page 71

• Book Copying
• 2 Sided Book Copying
• Original Size
• Edge Erase
• Image Shift
• Image Rotation
• Invert Image
• Original Orientation
6. Select the Copy tab.
7. Select the desired Copy options including:
• Paper Supply
• Reduce/Enlarge
• Darken/Lighten
8. Select any other desired Copy features/options (such as Image Quality, Output
Format).
9. Enter the quantity.
10. Press Start on the UI.
Copy
Book Copying
Bound originals (such as books) can be placed on the document glass to make 1-sided
or 2-sided copies. The bound original should be placed face down and registered to the
rear left corner of the document glass. Align the top of the bound original against the
rear edge of the document glass.
Book Copying options include:
Both Pages
Copies both pages in page order.
Left Page Only
Copies the left page only.
Right Page Only
Copies the right page only.
Binding Edge Erase
This option erases or deletes the shadow from your copies that is caused by the center
binding of the bound original.
User Guide
4-13Xerox®Versant®80 Press
Page 72

Copy
2 Sided Book Copying
You can make 2-sided copies from two pages of a bound original. This feature allows
you to assign pages when making copies of a bound original so that the copied pages
face each other in the same way as the bound original. 2 Sided Book Copying options
include:
• Select a starting and ending page
• Select Starting Page (Left Page or Right Page), and
• Selecting Ending Page (Left Page or Right Page).
Original Size
The machine can detect the size of the document if it is a standard size. If the document
is not a standard size, the machine does not know what size it is. This does not matter
if you select a specific reduction/enlargement option and also select a specific paper
tray. However, you can tell the machine the size of the document if you want to use the
Auto features. Original Size options include:
Auto Detect
This option automatically detects the size of the scanned pages. The document sizes
that can be detected automatically include all standard sizes.
Manual Size Input
This option allows you to select a standard paper size from the options shown or to
input a non-standard (custom) size. When you have selected the size of your document,
you can use the auto reduce/enlarge or the auto paper supply features.
Mixed Size Originals
With this option the machine automatically detects the size of each document.
Edge Erase
This option allows you to erase images around the border of a document. Edge Erase
also deletes center streaks caused by a gap between the spine of a bound document
and the document glass. Options include:
All Edges
This option causes a preset amount to be erased from the top/bottom and left/right
edges and from the center of the output image.
Print to Edge
This option does not perform any edge deletions.
Individual Edges
This option allows you to independently set the amount to be erased for each of the
four edges and the center of your output. The default is 0.1 in. (2.54 mm) and each
edge can be adjusted in 0.1 in. (2.54 mm) increments up to 2.0 in (50.8 mm).
Xerox®Versant®80 Press4-14
User Guide
Page 73

Copy
Presets
With this option you choose pre-programmed erase amounts that were previously
created and saved by the system administrator.
Image Shift
Image Shift allows you to move the position of the image on the output page. Options
include:
Off
This is the default setting. The image on the copy will be in the same place as the image
on the original.
Auto Center
This option automatically centers the scanned image on the output paper. To work
effectively, the original should be smaller than the selected output stock or the image
should be reduced.
Corner Shift
This option enables you to move the image to each of the four corners of the paper or
to the center of each of the four sides of the paper (eight positions total).
Margin Shift
This option creates a margin for binding one edge of a document by shifting the image
away from that edge. The Margin Shift option enables you to center a document image,
shift the image to one edge slightly, or move the image to a specified edge (0-2.0
in./0-50.8 mm Left/Right or Top/Bottom) of the output.
Presets
With this option you choose pre-programmed shift amounts that were previously
created and saved by the system administrator.
Image Rotation
If the orientation of the paper loaded in the selected paper tray differs from that of the
document that is scanned, the Image Rotation option automatically rotates the
document image to match the orientation of the paper loaded in the paper tray. You
can also select which edge of the original document to use as a reference for image
rotation if documents are of mixed orientations. Options include:
Off
This option causes copies to be made as they are loaded, even if they are oriented
differently from the paper in the selected paper tray.
Always On
This option causes copies to be made with the document image automatically rotated
so that the orientation of the document matches that of the paper in the selected
paper tray.
On during Auto
This option provides automatic rotation of the image on your original to fit correctly
on your selected copy paper when Auto Select or Auto% is selected.
User Guide
4-15Xerox®Versant®80 Press
Page 74

Copy
Invert Image
The Invert Image feature allows you to make copies with the left and right sides of the
document image reversed or the colors reversed. Options include:
Mirror Image
This option reverses the original image creating a mirror of the original. This feature
can be used when you want to change the apparent direction of an image or where
the original is inked on the reverse of the paper (for example engineering drawings).
Negative Image
This option converts the black image areas in the original to white, the white image
areas to black, and any dark gray image areas to light gray. This feature is useful for
documents that have a substantial amount of dark background and/or light text and
images, saving on toner usage.
Original Orientation
This feature is used to inform the system of orientation of your original document when
it is placed in the document feeder or on the document glass. The orientation must be
specified in order to identify the top of the document set. This information is used by
the system to make a decision about how to accurately place images on paper when
using features such as Image Shift, Edge Erase, Multiple-Up, Repeat Image, Annotation,
and Booklet Creation. Original Orientation options include:
• Upright Images: Select this option when placing the top edge of the document
against the top side of the document glass or document feeder.
• Sideways Images: Select this option when placing the top edge of the document
against the left side of the document glass or document feeder.
Output Format Feature
Output Format Feature Overview
The Output Format feature includes the following options:
• Booklet Creation
• Covers
• Transparency Options
• Page Layout
• Poster
• Annotations
• Watermark
• Tab Margin Shift
• Face Up/Down Output
Xerox®Versant®80 Press4-16
User Guide
Page 75

• ID Card Copying
• Transparency Options
• Folding (optional)
Selecting Output Format Options
1. Load the document or documents either onto the Document Glass or into the
Document Feeder.
2. Press the Home button on the press UI.
3. Select Copy on the Home window.
4. Select the Output Format tab.
5. From the Output Format window, select the desire options:
• Booklet Creation
• Covers
• Transparency Options
• Page Layout
• Poster
• Annotations
• Watermark
• Tab Margin Shift
• Face Up/Down Output
• ID Card Copying
• Transparency Options
• Folding (optional)
Copy
6. Select the Copy tab.
7. Select the desired Copy options including:
• Paper Supply
• Reduce/Enlarge
• Darken/Lighten
8. Select any other desired Copy features/options (such as Image Quality, Layout
Adjustment, Output Format).
9. Enter the quantity.
10. Press Start on the UI.
Booklet Creation
Booklet Creation allows you to create multi-page booklets from an ordered set of 1-Sided
or 2-Sided originals.
Refer to the following tips when using the Booklet Creation feature:
• When Auto% is selected, the press reduces or enlarges the image as required.
User Guide
4-17Xerox®Versant®80 Press
Page 76

Copy
• Any other Reduce/Enlarge selection could result in image loss.
• When Booklet Creation is selected, the output is automatically set to 1-2 Sided.
• Ensure that the Original Orientation setting reflects the same orientation as that
of the original documents.
Booklet Creation Options
When On is selected, the following Booklet Creation options are available:
Original Input
• 1 Sided Originals
• 2 Sided Originals
• 2 Sided Rotated Originals
Binding Shift
Use this option to set the booklet binding-shift value within the range from 0 to 1.9 in.
(0 to 50 mm) in 0.1 in. or 1 mm increments.
Covers
This option allows you to attach covers to the booklet. The front and back covers can
be output before the first page and after the last page of the document and on a
different type of paper.
Divide Output
Use this option when you have a large number of original documents. The original
documents are divided to create subsets in order to reduce the thickness of each booklet.
The machine folds copies in half, and piles them up to form a booklet. The Light
Production C Finisher with Booklet Maker allows you to specify the number of sheets
within the range of 1-50 sheets in one-sheet increments.
Output/Offset
This option is available only when specific optional finishers are attached, such as the
Standard Finisher or Booklet Maker Finisher.
Auto Image Positioning
This option adjusts the image position so that the printing position from the edge of
each page remains consistent between the inner and outer pages of the booklet. Auto
Image Positioning is available for selection if you have already selected Create Left/Top
Bound Booklet or Create Right Bound Booklet.
Fold and Staple (optional)
Folding and/or stapling are optional features. These features are available only with
finishing devices that provide these capabilities.
When available, select the desired Fold and Staple option:
• No Fold and Staple: This option produces booklets without folding or stapling.
• Fold Only: This option produces booklets that are folded in half.
• Fold and Staple: This option produces booklets that are folded in half and stapled
in the center.
Xerox®Versant®80 Press4-18
User Guide
Page 77

Copy
Booklet Trimming/Pressing (optional)
Booklet trimming and pressing are available only if the optional SquareFold Trimmer
Module is attached to the Booklet Maker Finisher.
Booklet Trimming/Pressing options include the following:
• Booklet Trimming: This option trims (cuts) away the face (edge) of the booklet,
resulting in a neat finished edge.
• Book Pressing: Book Pressing, also known as square folding, flattens the booklet
spine, thereby reducing the booklet thickness and giving it the appearance of a
perfect bound book.
Covers
This feature allows you to automatically add covers to your copied sets using stock from
a different tray. For example you can add colored stock, card or transparencies to your
copied sets to add a professional finish to your copy job.
The Covers feature includes the following options:
Front Cover/Back Cover
Select an option for a front cover only, back cover only, or select options for both front
and back covers:
•
Off
•
Blank Cover: Uses blank sheets of paper as the cover.
•
Print on Side 1
•
Print on Side 2
•
Print on Both
Paper Supply
Select the tray or trays from which front and/or back cover media is supplied. If Blank
Covers is selected, enter the number of blank sheets that will be used for the covers.
Note
If Blank Cover is used for both the front and back covers, verify that the correct quantity
is selected for both the covers.
Page Layout
The Page Layout options are ideal for handouts, storyboards, or for archival purposes.
Pages per Side
The Pages per Side feature is ideal for handouts, storyboards or for archival purposes.
It allows the scanning of up to eight independent images to fit onto one sheet of paper.
Your press reduces or enlarges the images as needed in order to display them either
in portrait (upright) or landscape (sideways) orientation on one page; this is based on
the paper supply selected.
User Guide
4-19Xerox®Versant®80 Press
Page 78

Copy
Repeat Image
This option allows you to copy a single image up to eight times onto one page.
Variable Repeat: This option specifies the number of times to repeatedly copy the
image along each of the long and short sides of the paper. You can specify from 1 to
23 repeats along the short side (Y) and from 1 to 33 repeats along the long side (X).
The examples shown are a typical output that can be produced when using the Repeat
Image feature.
Poster
This feature allows you to create a large poster by pasting together copies spread over
multiple sheets. Copies are provided with a paste margin so that they can be pasted
together. Options include:
Output Size
This option allows you to choose from a list of preset output poster sizes.
Enlargement %
This option allows you to enter specific height and width percentage values (from
100% to 400%) for your final poster size.
Annotations
This option allows you to add a stamp to your copied output. Options include:
Comment
This option allows you to add comment stamps that are stored on the machine to the
output copies. Select one of eight existing stamped messages to be printed on the first
page or all pages of your copied sets. Stored comments include Confidential, Urgent,
and Draft. You can also create new or edit existing comments. These can also be stored
to the machine memory. You can also change the position and appearance of the
comment using the Position and Font Size buttons.
Date
This option allows you to place the current date in the margins of your output. The
date can be printed on only the first page of the output, or it can be printed on all
pages. You can also change the position and appearance of the date using the Position
buttons.
Page Numbers
This option allows you to add an independent page number to one or many copied
pages. You can also change the position and appearance of the page numbers using
the Position and Font Size buttons.
Bates Stamp
This option allows you to place an alphanumeric prefix, followed by a sequential page
number in the margins of the output. You can specify an existing Bates Stamp, or you
can create a new or edit an existing Bates Stamp. You can also change the position
and appearance of the stamp using the Position and Font Size buttons.
Xerox®Versant®80 Press4-20
User Guide
Page 79

Copy
Watermark
This option to add a lightly printed sequential control-number, stored watermark, date
and time, or serial number on the background of each copy set. This feature can be used
to help track confidential documents. For example, you can use sequential numbering
to associate distribution copies with specific recipients. Options include:
Control Number
This option allows you to input a start number that will be printed on each document
set. For example, if you select 1 for the start number, the number 1 will be printed on
the first set of documents, the number 2 will be printed on the second set, and so on.
Stored Watermarks
This option allows you to select an existing watermark to be printed on one page or
many pages. Existing watermarks include Copy Prohibited, Copy, and Duplicate.
Date and Time
This option prints the current date and time on the output (each page).
Serial Number
This option allows you to make copies with the machine's serial number printed on
each page. This feature is useful if you want to track the copies coming from a certain
machine.
Watermark Effect
This option allows you choose an embossed or outline style for the watermark text you
print.
Tab Margin Shift
The Tab Margin Shift option allows you to copy images from a document onto tabbed
stock. You have the option to copy the entire original document onto the tabbed stock,
or you can choose to copy only the edge of the original document onto the tabbed stock.
Options include:
Shift to Tab
This option prints the edge of the original document image onto the tab of the tabbed
stock. You can change the amount of shift required by using the Shift Value buttons
on the touch screen.
Shift All
This option copies the whole image of the document onto tab stock. Use the Shift
Value button when you want to adjust the position of the image on the tab area.
Shift Value buttons
These buttons allow you to specify a shift value in the range of 0-15 mm (0-0.59 in.)
in 1 mm (0.039 in.) increments.
Add Tab Stock
Use this option to select a specific number of tab stock sheets to use.
Paper Supply
Use this option to select the tray containing the tab stock.
User Guide
4-21Xerox®Versant®80 Press
Page 80

Copy
Face Up/Down Output
The Face Up/Down Output option allows you to select whether copies are output facing
up or facing down. Options include:
Auto
Selecting the Auto button automatically determines whether the copies should be
output face up or face down.
Face Up
Selecting the Face Up button causes all output to be delivered face up, with the first
page on top of the output stack.
Face Down
Selecting the Face Down button causes all output to be delivered face down, with the
first page on the bottom of the output stack.
Face Up (Reverse Order)
Selecting the Face Up (Reverse Order) button causes all output to be delivered face
up, with the last page on the top of the output stack. This setting may not be available,
depending on how your system administrator configures the machine.
ID Card Copy
Whether needing to copy insurance cards, a driver’s license, or any other form of
identification, the ID Card Copying feature offers a simple and efficient way to save
time. Information on both sides of an ID card can be copied onto one side of a sheet
of paper into the paper or bypass tray.
1. Open the document feeder and place the ID card on the top, left corner of the
document glass.
2. Close the document feeder.
3. Press the Home button on the press UI.
4. Select Copy on the Home window.
5. Select Output Format > ID Card Copying.
6. Select On.
7. Select Save.
8. Enter the quantity.
9. Press Start to begin scanning side 1.
10. Open the document feeder and turn the ID card over to copy side 2.
11. Close the document feeder.
12. Press Start to begin scanning side 2.
Printing begins and copies are delivered to the output area.
Xerox®Versant®80 Press4-22
User Guide
Page 81

Copy
Transparency Options
When making a set of transparencies you can insert a divider between each transparency
in order to make it easier to manage your presentation slides. You can also produce
paper copies of the transparencies in order to distribute them to people. Transparency
options include:
Blank Transparency Separators
This option delivers your transparencies to the output destination with a blank sheet
of paper separating each transparency.
Blank Separators and Handouts
This option inserts a blank sheet of paper between each printed transparency. In
addition, a distribution set of copies is also printed on the stock you specify using the
Paper Supply Settings button. Handouts can be 1- or 2-sided and stapled (if available).
Transparency Set and Handouts
This option delivers the transparencies without separators. However, a distribution set
of copies will be printed on the stock you specify using the Paper Supply button.
Handouts can be 1- or 2-sided and stapled (if available).
Transparency Tray
Select the tray containing the transparencies.
Separator Tray / Separator and Handout Tray / Handout Tray
This option varies depending on the selected transparency option. Select the desired
tray that contains the separator and/or handout stock.
Folding (optional)
Note
This feature is available only if the appropriate, optional finishing device is attached to
your press.
Review the following information before using the Folding option.
• If your press is equipped with an optional Folder, you can make copies or prints using
the Folding feature.
• Depending on the finishing device, the Folding option can fold your output in half
(single or bi-fold) or in thirds (C-fold or Z-fold types).
• The Folding option can be selected for both your copy and network print jobs.
• Depending on the copy/print job, the Folding option can be selected from either the
press UI or from the print driver on your workstation.
• The Folding option can also be selected at the print server for the selected job.
• In order to use the folding option, the orientation of documents must be short-edge
feed (SEF). You must select a paper tray that contains SEF stock.
Folding options include:
• Single Fold (Bi-Fold): Select this option to fold the output copies in half.
User Guide
4-23Xerox®Versant®80 Press
Page 82

Copy
• C-Fold: Select this option to fold the output copies in thirds.
• Z-Fold: Select this option to fold the output copies with two folds that are folded in
opposite directions, resulting in a type of fan fold.
• Z-Fold Half Sheet: This option has two folds that are folded in opposite directions,
with two unequal folds. The two unequal folds allow one edge of the sheet to have
a longer edge which allows for stapling or hole punching.
• Image Inside Fold: Folds copies so that the image is printed on the inside.
• Images Outside Fold: Folds copies so that the image is printed on the outside.
Job Assembly Feature
Job Assembly Feature Overview
Job Assembly includes the following features:
• Build Job
• Sample Job
• Combine Original Sets
• Delete Outside / Delete Inside
Build Job
This feature allows you to change and save settings individually for each document
page or stack. You can then make copies of documents with different settings as one
job.
1. Split the hard-copy document into sections for individual programming.
2. On the Home window, select Copy.
3. Select the Job Assembly tab.
4. Select Build Job.
5. Select Build Job On.
6. Select Save.
7. Program the job requirements for the first segment of the job by selecting and saving
the applicable features from the features shown at the bottom of the Build Job
window.
• Copy Output
• Booklet Creation
• Covers
• Annotations
• Segment Separators
• Watermark
• Face Up/Down Orientation
Xerox®Versant®80 Press4-24
User Guide
Page 83

Copy
8. Load only the first segment into the document feeder or place the segment on the
document glass one page at a time.
9. Press Start.
When the first segment has finished scanning, the Copy Status screen will appear.
10. Remove the originals from the document feeder or document glass.
11. Select Change Settings.
12. Program the job requirements for the second segment.
13. Load the second segment into the document feeder or on the document glass.
14. Press Start.
15. Repeat the previous steps until all segments of your job have been programmed and
scanned.
16. After the last segment has been scanned, select Last Original.
The machine will complete the quantity selected.
17. Retrieve the copies from the output area.
Sample Job
When making multiple copies, you can continue making copies after making and
examining a sample set. Youcan choose to continue or cancel the job after confirmation.
To print a sample of the job, perform the following:
1. Press the Home button on the press UI.
2. Select Copy on the Home window.
3. Select Job Assembly > Sample Job.
4. Select Sample Job On.
5. Select Save.
6. Load the documents in either the document feeder or on the document glass.
7. Program the job with the Copy desired features/options.
8. Enter the quantity.
9. Press Start.
One copy set of the job (the sample set) is printed and the remainder of the job is
placed on hold, and the machine is paused.
10. If desired, change any applicable setting and copy quantity.
11. Select either Start to finish the job or Cancel to stop the job.
Selecting Start continues the copy process and the programmed number of sets will
be printed. Retrieve the copies from the output area.
12. Upon completion, press the Clear All button on the control panel to return the settings
to their default state.
4-25Xerox®Versant®80 Press
User Guide
Page 84

Copy
Combine Original Sets
This feature allows you to copy sets of documents that cannot be loaded into the
document feeder. This is useful when copying documents that may be damaged, ripped
or torn, or too wrinkled to go through the document feeder. Combine Original Sets allows
you to copy each original by placing it on the document glass and creating one copy
job for the entire set.
1. Press the Home button on the press UI.
2. Select Copy on the Home window.
3. Select the Job Assembly tab.
4. From the Job Assembly tab, select Combine Original Sets.
5. Select either On or Off.
• On: Select this option to have the Next Original option highlighted on the copy
screen when scanning is in process.
• Off: Select this option to have the Last Original option highlighted on the copy
screen the scanning process is in process.
6. Select Save to save your choice.
This feature is available only when Collated is selected in the Copy Output window.
7. Load your documents into the document feeder or individually place them on the
document glass.
8. Program the job with the desired Copy features/options.
9.
10. Enter the quantity.
11. Press Start.
12. When you are finished scanning all the documents, select Last Original to complete
the job.
13. Retrieve the copies from the output area.
Delete Outside/Delete Inside
This feature allows you to specify the area for omission or deletion and then to copy
that area. Keep the following in mind when using this feature:
• When specifying multiple areas to delete, it is also possible to overlap and specify an
area.
• When selecting Reduce/Enlarge, the areas are reduced or enlarged by interlocking
magnification.
1. Press the Home button on the press UI.
2. Select Copy on the Home window.
3. Select the Job Assembly tab.
4. Select Delete Outside/Delete Inside.
The Delete Outside/Delete Inside screen is displayed. By default, Off is selected.
5. Select either Delete Outside or Delete Inside.
Xerox®Versant®80 Press4-26
User Guide
Page 85

Copy
6. If the originals are 2-sided, select the applicable option:
• Both Sides
• Side 1 Only
• Side 2 Only
7. Select the Area 1 button.
The Delete Outside/Delete Inside Area 1 screen is displayed; use this screen to define
the first area for deletion (omission) from the copy output.
8. To define a specific area, enter the two X/Y coordinates within a range 0.0-17.0 inches
(0.0-431.8 mm). Navigate from coordinate to coordinate by selecting each X/Y button:
a) Select the Y1 box and use the numeric keypad on the control panel to enter the
value for Y1.
b) Select the Y2 box and use the numeric keypad on the control panel to enter the
value for Y2.
c) Select the X1 box and use the numeric keypad on the control panel to enter the
value for X1.
d) Select the X2 box and use the numeric keypad on the control panel to enter the
value for X2.
Clear a deletion area by selecting the Clear Area X (1, 2, or 3) button.
9. Select Save.
10. Select Save again.
11. Select any other desired copy features/options.
12. Enter the quantity.
13. Press Start.
14. Retrieve the copies from the output area.
User Guide
4-27Xerox®Versant®80 Press
Page 86

Copy
Xerox®Versant®80 Press4-28
User Guide
Page 87

5
Scan
Scan Overview
The Scan feature supports several methods for scanning and storing an original
document. This machine supports the following scan capabilities:
• Email: Scans a document and sends the scanned data as an e-mail attachment after
converting the data to TIFF, JPEG, PDF, DocuWorks®, or XPS (XML Paper Specification).
• Network Scanning: Scans a document using a job template that was created using
CentreWare®Internet Services (CWIS). When Scan to Home is enabled and the
Remote Access feature is available, the scanned data can be transferred to a different
destination according to an authenticated user.
• Scan to PC: Scans a document and sends the scanned data to a network computer
via the FTP or SMB protocol.
• Store to Folder: Scans a document and saves the scanned data in a folder on the
machine.
• Store to USB: Scans a document and saves the scanned data to a USB memory
device. (This is an optional feature.)
• Store & Send Link (Send to Folder): Scans a document and sends an e-mail notifying
the user of two URLs: one is for the location where the scanned data can be retrieved,
and second is for the location from which the data can be deleted.
• Store to WSD (Web Services on Device): Scan a job either at the press or by sending
a command from a network computer to the press. The scanned data is then sent to
a specified network computer.
Basic Scanning
Basic Scanning Procedure
1. From the press UI, press the Clear All button.
User Guide
5-1Xerox®Versant®80 Press
Page 88

Scan
2. Press the Home button.
3. Select the desired scan method.
• E-mail
• Network Scanning
• Scan to PC
• Store to Folder
• Send from Folder
• Store to USB
• Store & Send Link (Send to Folder)
• Store to WSD
4. Load your original documents either in the document feeder or on the document
glass.
5. Select the desired scan options.
• Color Scanning
• 2 Sided Scanning
• Original Type
• Scan Presets
• Advanced Settings
• Layout Adjustments
• E-mail Options or Filing Options
6. Press Start.
If using the document glass and multiple documents or multiple pages of a bound
original/book need to be scanned, the perform the following substeps:
a) Select Next Original, place the original to be scanned and select the Start button.
b) Continue until you are scanning the last original, select Last Original then select
the Start button.
7. Select Job Status on the UI to view the status of the scanned job.
8. Retrieve the original documents either from the Document Feeder or Document Glass.
Previewing Scanned Images
1. Scan the images and select job features.
2. While scanning, select Preview to preview the last page that was scanned.
3. From the drop-down menu, specify the view size by selecting Whole Page or Enlarge
View, and set Current Page.
4. After the confirmation, select Close to close the preview screen.
Xerox®Versant®80 Press5-2
User Guide
Page 89

Scan
Changing Scan Settings/Options
While your job is scanning, you can change settings to that job by performing the
following steps.
1. Select Next Original.
2. Select Change Settings.
3. Select the appropriate section and make select features. The following features can
be adjusted:
• Color Scanning
• 2 Sided Scanning
• Original Type
• Image Options (Lighten/Darken)
• Image Enhancement
• Resolution
• Quality/File Size
• Shadow Suppression
• Original Orientation
• Original Size
• Edge Erase
• Book Scanning
• Reduce/Enlarge
4. After your changes are complete, select Start.
Canceling a Scan Job
1. Either select Stop on the UI touch screen or press the Stop button on the UI control
panel.
2. On the UI control panel, press Cancel to end scanning or Start to restart the scan.
3. Press the Job Status button on the UI.
4. Select the job to cancel, and then press Stop.
Note
When a scan is canceled, scan data already stored to the mailbox is deleted.
Stopping a Scan Job
1. While a scan job is in process, Press either the Stop button on the UI control panel
or select Delete on the UI touch screen.
2. Select Delete.
3. If Delete does not appear on the screen, press the Job Status button on the UI control
panel.
4. Select the job to cancel and select Delete.
User Guide
5-3Xerox®Versant®80 Press
Page 90

Scan
Scan Options
Scan Options Overview
The following settings can be set for scan jobs.
• Basic Scan Options (shown on the first tab of the selected scan method window)
• Advanced Settings
• Layout Adjustment
• Email Options or Filing Options (depends upon the selected scan method)
Basic Scan Options
The basic scan options are shown on the first tab of the selected scan method. These
options include the following:
Color Scanning
Color Scanning options include:
•
Auto Detect: The color of the document is determined automatically; the machine
scans in full color when the document is colored, otherwise, scans in monochrome.
•
Color: Select this option to scan a color document.
•
Black & White: Scans a document in monochrome two tones. You can select the
document type in Original Type.
•
Grayscale: Scans a document in grayscale. Adds shades to monochrome, creating
intermediate tones that change gradually. Suited to documents containing gradations
that cannot be reproduced with monochrome (2-color tone).
2 Sided Scanning
2 Sided Scanning options include:
•
1 Sided: Select this option to scan only one side of the document.
•
2 Sided: Select this option when both sides of the 2-sided document are in the same
orientation.
•
2 Sided, Rotate Side 2: Select this option when both sides of the 2-sided document
are in opposite orientations.
Original Type
Original Type options include:
•
Photo & Text: Select this option when scanning a document that contains both text
and photos. The machine automatically identifies the text and photo areas and
scans each area with optimum quality.
•
Text: Select this option when scanning text clearly.
•
Photo: Select this option when scanning photos.
Xerox®Versant®80 Press5-4
User Guide
Page 91

Scan Presets
Scan Presets options include:
•
Sharing and Printing: This setting is best used for sharing files to be viewed on
screen and for printing most of the standard business documents. This setting results
in small file sizes and higher image quality.
•
Archival Record: This setting is best used for standard business documents that are
stored for record keeping purposes. This setting results in the smallest file size and
normal image quality.
•
Optical Character Recognition: This setting is best used for documents that are
processed by OCR software. This setting results in large file sizes and the highest
image quality.
•
High Quality Printing: This setting is best used for documents that contain detailed
graphics and photos. This setting results in large file sizes and the maximum image
quality.
•
Simple Scan: This setting is best used for faster processing but may result in
excessively large file sizes. Use this setting to apply the minimal amount of image
processing and compression.
Advanced Settings
Scan
The options for Advanced Settings are shown on the second tab of the selected scan
method; these options include the following:
Image Options
The Image Options include:
• Lighten/Darken: This option provides manual control to adjust the lightness or
darkness of the scanned images. Scroll down to darken the scanned image of light
originals such as pencil images. Scroll up to lighten the scanned image of dark
originals such as half tones or originals with colored backgrounds.
• Sharpness: This option controls the balance between sharp text and moiré (patterns
within the image). Move the slider control down (Soften) to produce an image with
a smooth, uniform appearance (ideally suited for photographic scanned images).
Move the slider control up (Sharpen) to produce an image with better quality text
or line art.
User Guide
5-5Xerox®Versant®80 Press
Page 92

Scan
Image Enhancement
The Image Enhancement options include:
• Background Suppression: This option prevents reproduction of unwanted shading
from originals where the opposite side printing shows through (translucent).
Off: This is the default setting. With background suppression off, originals are scanned
without filtering the document backgrounds.
Auto Suppression: This option automatically reduces or eliminates any background
on the output which may be caused by colored paper or newspaper originals. For
example, when Color Scanning is set to Black & White, the background of a
document printed on colored paper, such as newspaper, is suppressed. When Color
Scanning is set to Color, the background of a document printed on white-color paper
is suppressed.
• Contrast: This option controls the difference between the image densities within the
scanned image. Lower contrast settings reproduce more detail in light and dark areas
of the original. Higher contrast settings produce vivid blacks and whites for sharper
text and lines, but produce less detail in pictures.
Resolution
Choose one of four resolution settings:
•
200 dpi (dots per inch): This setting produces normal output quality and a small file
size. Use this setting for office documents and photos.
•
300 dpi: This setting produces a higher output quality and larger file size. Use this
setting for sharper scanning of office documents and photos.
•
400 dpi: This setting produces medium output quality and the largest file size. Use
this setting for high quality printing; this setting is suitable for fine lines and small
fonts than have been enlarged, and for documents with low image definition.
•
600 dpi: This setting produces maximum output quality and the largest file size. Use
this setting for high quality printing; this setting is suitable for fine lines and small
fonts than have been enlarged, and for documents with low image definition.
Quality/File Size
This feature allows you to select the ratio of data compression for color and grayscale
scanned images. Use the slider to choose from good image quality with small file size,
higher image quality with larger file size, or highest image quality with largest file size.
Note
This feature is unavailable whenever Black and White (Color Scanning) is selected.
Photographs
This feature enhances the image for files that are scanned using photographic originals.
Select either Off (default setting) or Enhance Photographs.
Note
In order to use this feature, Color Scanning must be set for Color. Furthermore, when
Enhance Photographs is selected, Shadow Suppression and Background Suppression
are not available.
Xerox®Versant®80 Press5-6
User Guide
Page 93

Scan
Shadow Suppression
Select Auto Suppression to hide background color and image bleed through for color
scanning. This feature is not available when Black and White is selected for Color
Scanning.
Layout Adjustment
The options for Layout Adjustment are shown on the third tab of the selected scan
method; these options include the following:
Original Orientation
Select the direction that your original lays either in the document feeder or on the
document glass. Select either Upright Images or Sideways Images.
Original Size
Select one of three options that indicate the size of your originals.
•
Auto Detect: This option automatically detects the size of the scanned pages. All
standard sizes are automatically detected.
•
Manual Size Input: This option allows you to select a standard paper size from the
options shown or to input a non-standard (custom) size.
•
Mixed Size Originals: With this option the machine automatically detects the size
of each document.
Edge Erase
This option erases images around the border (margins) of a document.
•
All Edges: This option erases a preset, equal amount from the top, bottom, left and
right margins.
•
Print to Edge: This option does not erase any of the margins of the document.
•
Individual Edges: This option independently erases each of the four margins in
differing amounts.
•
Presets: This option erases preprogrammed amounts as set up by the System
Administrator. This includes preset options for Header/Footer Erase and Hole Punch
Erase.
User Guide
5-7Xerox®Versant®80 Press
Page 94

Scan
Book Scanning
Use this option to scan pages from bound originals. Options include:
•
Left Page then Right: Scans the left page first and the right page of the bound
original’s facing pages.
•
Right Page then Left: Scans the right page first and the left page of the bound
original’s facing pages.
•
Top Page then Bottom: Scans the top page first and then the bottom page of the
bound original’s facing pages.
The following sub-options are also available:
•
Both Pages: Scans both pages in page order.
•
Left Page Only: Scans the left page only.
•
Right Page Only: Scans the right page only.
•
Top Page Only: Scans the top page only.
•
Bottom Page Only: Scan the bottom page only.
•
Binding Edge Erase: This option erases or deletes the shadow that is caused by the
center binding of the bound original.
Reduce/Enlarge
Use this option to select a reduction or enlargement value for the scanned document.
E-mail Options
E-mail Options is the fourth tab of the E-mail scan method, and options include the
following:
File Name
Use this option to enter a file name. If no name is entered, the system automatically
generates a file name.
Reply To
Use this option to enter a reply recipient email address.
Read Receipts
This option requests an email with the delivery status from the recipient to the sender.
Xerox®Versant®80 Press5-8
User Guide
Page 95

File Format
Select the desired file format for scanned data; options include:
•
PDF: Saves scanned data in PDF format.
•
PDF/A: Saves scanned data in the PDF/A format. PDF/A is used primarily for archiving
and long-term preservation.
•
TIFF: Saves scanned data in TIFF format.
•
JPEG: Saves scanned data in JPEG format. This option is selectable when either Color
or Grayscale is selected for Color Scanning.
•
TIFF/JPEG Auto Select: Automatically selects JPEG or TIFF. The file format is
determined for each page: JPEG for full-color and grayscale pages, and TIFF for
monochrome pages.
•
XPS (XML Paper Specification): Saves multiple pages into a single file.
Note
Options may vary and some options may not be available for your machine.
Additional File Format options
Depending on the selected file format, the following sub-options also are available:
•
Compression Method: Allows you to select a compression method for the scanned
data.
•
MRC High Compression: Allows you to save PDF and XPS files with high compression.
•
Searchable Text: Allows you to select whether to perform character recognition in
PDF files.
•
PDF Security: Allows you to configure security for the PDF output in order to prevent
unauthorized access.
•
Optimize For Quick Web View: Optimizes the PDF file so that it is displayed faster
on a web browser.
•
Add Thumbnail: Allows you to attach thumbnails to XPS files when XPS is selected.
A thumbnail is a reduced, small file size image that helps you check the file contents.
•
Single File for Each Page: Saves each page as a single file in the specified format.
Scan
User Guide
5-9Xerox®Versant®80 Press
Page 96

Scan
Compression Method options
When Manual Select is chosen for the Compression Method, some or all of the
following options are available.
For black and white images/pages only, select one of the following options:
•
Modified Modified Read (MMR): This setting is automatically selected when either
Photo and Text or Text is chosen for Original Type.
•
Modified Huffman (MH): This setting is automatically selected when Photo is chosen
for Original Type.
•
JBIG2 Arithmetic Encoded: This process has better compression performance than
the Huffman encoded process. However, the compression rate is slower than Huffman
encoded and it uses more memory but yields better compression results.
Note
JBIG stands for Joint Bi-level Image experts Group. JBIG compresses only black and
white images.
•
JBIG2 Huffman Encoded: Huffman coding takes less page memory and has faster
compression and decompression than the arithmetic coding. Use this option if
high-quality compression results do not matter and you want to use less page
memory.
For grayscale or color images/pages, select one of the following options:
•
JPEG: This is the default setting for grayscale/color pages.
•
Flate: This option saves the image data at a higher compression rate than JPEG.
Flate is lossless and does not remove data during the compression process.
PDF Security options
The following PDF Security options are available when selecting E-mail Options > File
Format > PDF > PDF Security > Password:
• Encryption Algorithm: Choose one of three encryption methods:
-
128-bit RC4: Encrypts the file by using the 128-bit RC4 method. Files encrypted
with this method can be opened with Adobe®Acrobat®5.0 or later.
-
128-bit AES: Encrypts the file by using the 128-bit AES method. Files encrypted
with this method can be opened with Adobe®Acrobat®7.0 or later.
-
256-bit AES: Encrypts the file by using the 256-bit AES method. Files encrypted
with this method can be opened with Adobe®Acrobat®9.0 or later.
•
File Open Password: This option sets a password for opening the PDF. The recipient
of the PDF file must know the password before it can be opened.
•
Permissions: This option adds restrictions to the PDF file which prevents unauthorized
printing or editing of the file. The recipient of the PDF must know the permissions
password in order to remove these restrictions.
Filing Options
Note
Filing Options is not available with the E-mail scan method.
Xerox®Versant®80 Press5-10
User Guide
Page 97

Scan
Filing Options is the fourth tab of the selected scan method, and options include the
following:
File Name
Use this option to enter a file name. If no name is entered, the system automatically
generates a file name.
File Name Conflict
Use this option to resolve file name conflicts. Choices include:
•
Do Not Save: Cancels the scan operation so that you can enter another file name.
•
Rename New File: Attaches a 4-digit number (0000-9999) to the end of the duplicate
file name and saves the file in the same directory.
•
Overwrite Existing File: Deletes the existing file with the duplicate file name and
saves the new file with the specified file name in the same directory.
•
Add to Existing Folder: Adds the scanned file to the existing folder and overwrites
any other file that has the same file name.
•
Add Date Stamp to File Name: Adds the current date to the name of the new file.
File Format
Select the desired file format for scanned data; options include:
•
PDF: Saves scanned data in PDF format.
•
PDF/A: Saves scanned data in the PDF/A format. PDF/A is used primarily for archiving
and long-term preservation.
•
TIFF: Saves scanned data in TIFF format.
•
JPEG: Saves scanned data in JPEG format. This option is selectable when either Color
or Grayscale is selected for Color Scanning.
•
TIFF/JPEG Auto Select: Automatically selects JPEG or TIFF. The file format is
determined for each page: JPEG for full-color and grayscale pages, and TIFF for
monochrome pages.
•
XPS (XML Paper Specification): Saves multiple pages into a single file.
Note
Options may vary and some options may not be available for your machine.
Additional File Format options
Depending on the selected file format, the following sub-options also are available:
•
Compression Method: Allows you to select a compression method for the scanned
data.
•
MRC High Compression: Allows you to save PDF and XPS files with high compression.
•
Searchable Text: Allows you to select whether to perform character recognition in
PDF files.
•
Optimize For Quick Web View: Optimizes the PDF file so that it is displayed faster
on a web browser.
•
Add Thumbnail: Allows you to attach thumbnails to XPS files when XPS is selected.
A thumbnail is a reduced, small file size image that helps you check the file contents.
•
Single File for Each Page: Saves each page as a single file in the specified format.
User Guide
5-11Xerox®Versant®80 Press
Page 98

Scan
Compression Method options
When Manual Select is chosen for the Compression Method, some or all of the
following options are available.
For black and white images/pages only, select one of the following options:
•
Modified Modified Read (MMR): This setting is automatically selected when either
Photo and Text or Text is chosen for Original Type.
•
Modified Huffman (MH): This setting is automatically selected when Photo is chosen
for Original Type.
•
JBIG2 Arithmetic Encoded: This process has better compression performance than
the Huffman encoded process. However, the compression rate is slower than Huffman
encoded and it uses more memory but yields better compression results.
Note
JBIG stands for Joint Bi-level Image experts Group. JBIG compresses only black and
white images.
•
JBIG2 Huffman Encoded: Huffman coding takes less page memory and has faster
compression and decompression than the arithmetic coding. Use this option if
high-quality compression results do not matter and you want to use less page
memory.
For grayscale or color images/pages, select one of the following options:
•
JPEG: This is the default setting for grayscale/color pages.
•
Flate: This option saves the image data at a higher compression rate than JPEG.
Flate is lossless and does not remove data during the compression process.
Resolving a File Name Conflict
Note
This option is not available with some of the scan methods.
1. Select the Filing Options tab.
2. Select the File Name Conflict option.
3. Select the appropriate option:
• Do Not Save: Cancels the scan operation so that you may enter another file
name.
• Rename New File: Attaches a 4-digit number (0000-9999) to the end of the
duplicate file name and saves the file in the same directory.
• Overwrite Existing File: Deletes the existing file with the duplicate file name
and saves the new file with the specified file name in the same directory.
4. Select Save.
Xerox®Versant®80 Press5-12
User Guide
Page 99

Scan
E-mail Overview
The E-mail feature scans a document and sends the scanned data as an e-mail
attachment to one or more recipients.
E-mail Components
New Recipient
If the recipient of the e-mail cannot be found in the address book, select New Recipient
option to add the address in the To, Cc, or Bcc field of the e-mail. A maximum of 128
characters may be entered for a single e-mail address.
Address Book
Use the address book to find and add recipients in the To, Cc, or Bcc fields of the e-mail.
• List all public entries: This option displays the local address list which resides on the
machine.
• Retrieve entries using index: This option displays a keyboard allowing you to enter
characters and narrow the search to specific recipients.
• Search Public: This option searches for entries in the local address list.
Note
The address book displays only entries that were previously added by the system
administrator. A maximum of 2,000 addresses may be stored in the address book.
Add Me and From fields
By default, these fields are not available for use. The system administrator must change
the settings for these fields before they can be used.
When these fields are available for use, enter the sender’s e-mail address in the From
field and send a copy of the e-mail to the sender by selecting Add Me. A maximum of
128 characters may be entered for the sender’s address in the From field.
Recipient(s) field
From this field, an e-mail address can be edited or removed by selecting a specific
recipient.
Subject
Use this field to enter the subject of the e-mail. A maximum of 128 characters may be
entered for the subject line.
Message
Use this field to enter a message to the recipient. A maximum of 512 characters may
be entered for the e-mail body text.
User Guide
5-13Xerox®Versant®80 Press
Page 100

Scan
Preview
Select this check box in order to preview the scanned images/data.
Note
Scanned images/data cannot be previewed with E-mail Options > File Format > MRC
High Compression > On.
Scanning to an E-mail Address
1. From the UI, press the Clear All button.
This clears all previous settings from the machine.
2. Press the Home button.
3. Select E-mail.
4. Specify one or more recipients by choosing one of the following options:
• Select New Recipient.
1. Use the keyboard to enter the entire address.
2. Select Add.
3. If sending to multiple recipients, repeat the previous sub-steps until finished.
4. Select Close.
• Select Address Book.
1. Select Address Book.
2. Select one of the choices from the pull-down menu (such as List all public
entries).
3. Select the desired recipient.
4. Select one of the fields To, Cc, or Bcc.
5. If sending to multiple recipients, repeat the previous sub-steps until finished.
6. Select Close.
5. If applicable, perform the following:
• Select From and add the sender e-mail address.
• To send a copy of the email to the sender, select Add Me.
• Edit or remove recipients from the Recipient(s) field.
• Select Subject to enter and save an e-mail subject.
• Select Message to enter and save the e-mail message.
6. Load your original documents either in the document feeder or on the document
glass.
7. Select the desired scan options.
8. Press Start to begin scanning.
9. Retrieve the original documents from either the Document Feeder or the Document
Glass.
Xerox®Versant®80 Press5-14
User Guide
 Loading...