

Page 1
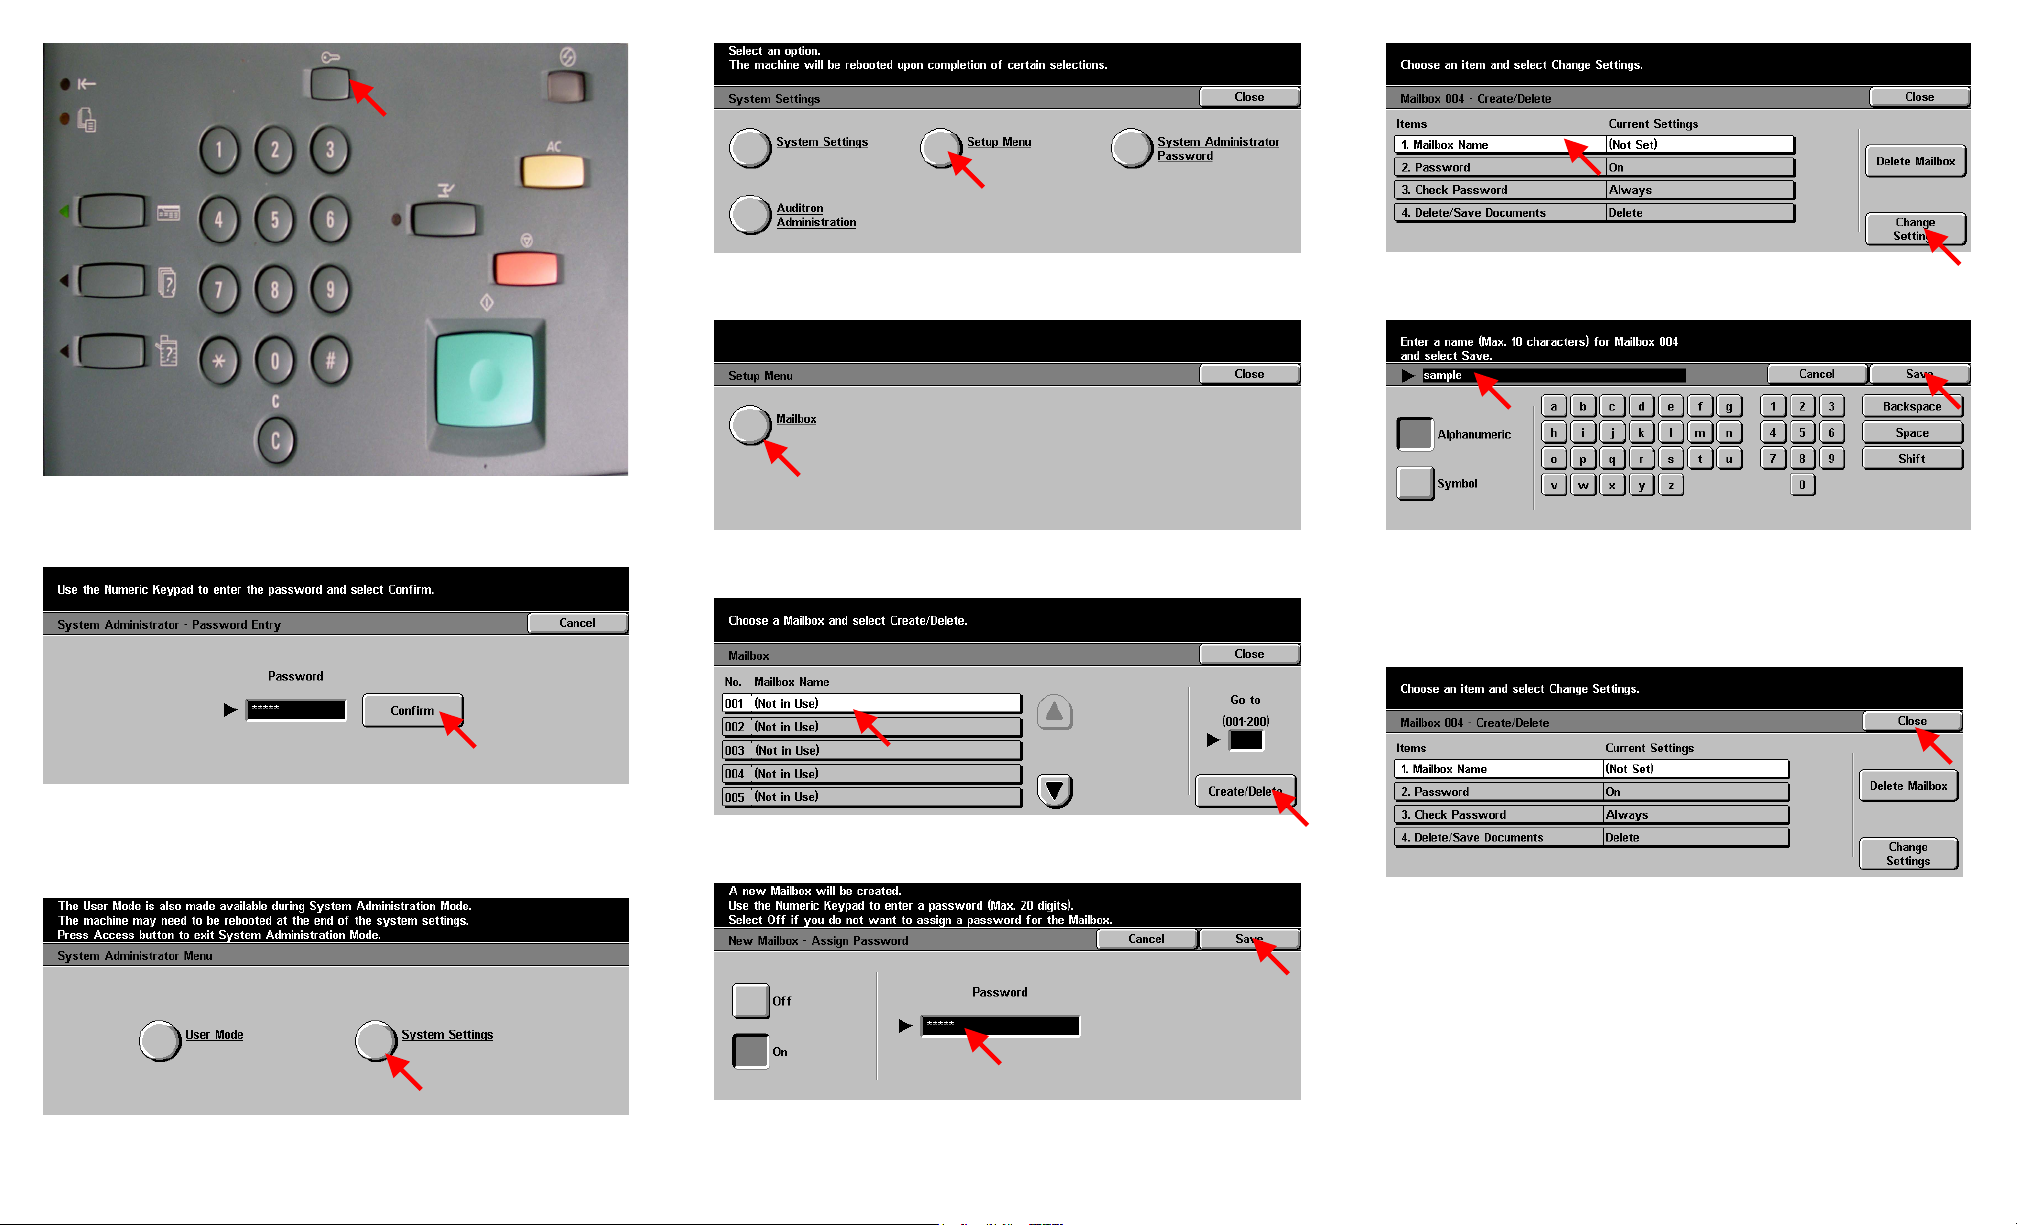
Fig. 4
Press Setup Menu.
Fig. 8
Select 1. Mailbox Name then press Change Settings.
Fig. 1
Press Access.
Fig. 2
Enter the System Administrator Password from the Numeric Keypad and
then press Confirm. (See Machine Administration User Guide for
default password)
Fig. 5
Press Mailbox.
Fig. 9
Enter the name for the Mailbox using the keyboard displayed. The
mailbox name may be up to 10 characters. Press Save after entering the
name.
Fig. 6
Select the Mailbox to be created. Then press Create/Delete.
Fig. 10
Select Close.
Note: Password, Check Password, Delete/Save Documents may be set
at this time.
Fig. 3
Press System Settings.
Fig. 7
Use the Numeric Keypad to enter the password. (ie. 12345) Then press
Save.
Creating Mailbox - 1 of 2
Page 2
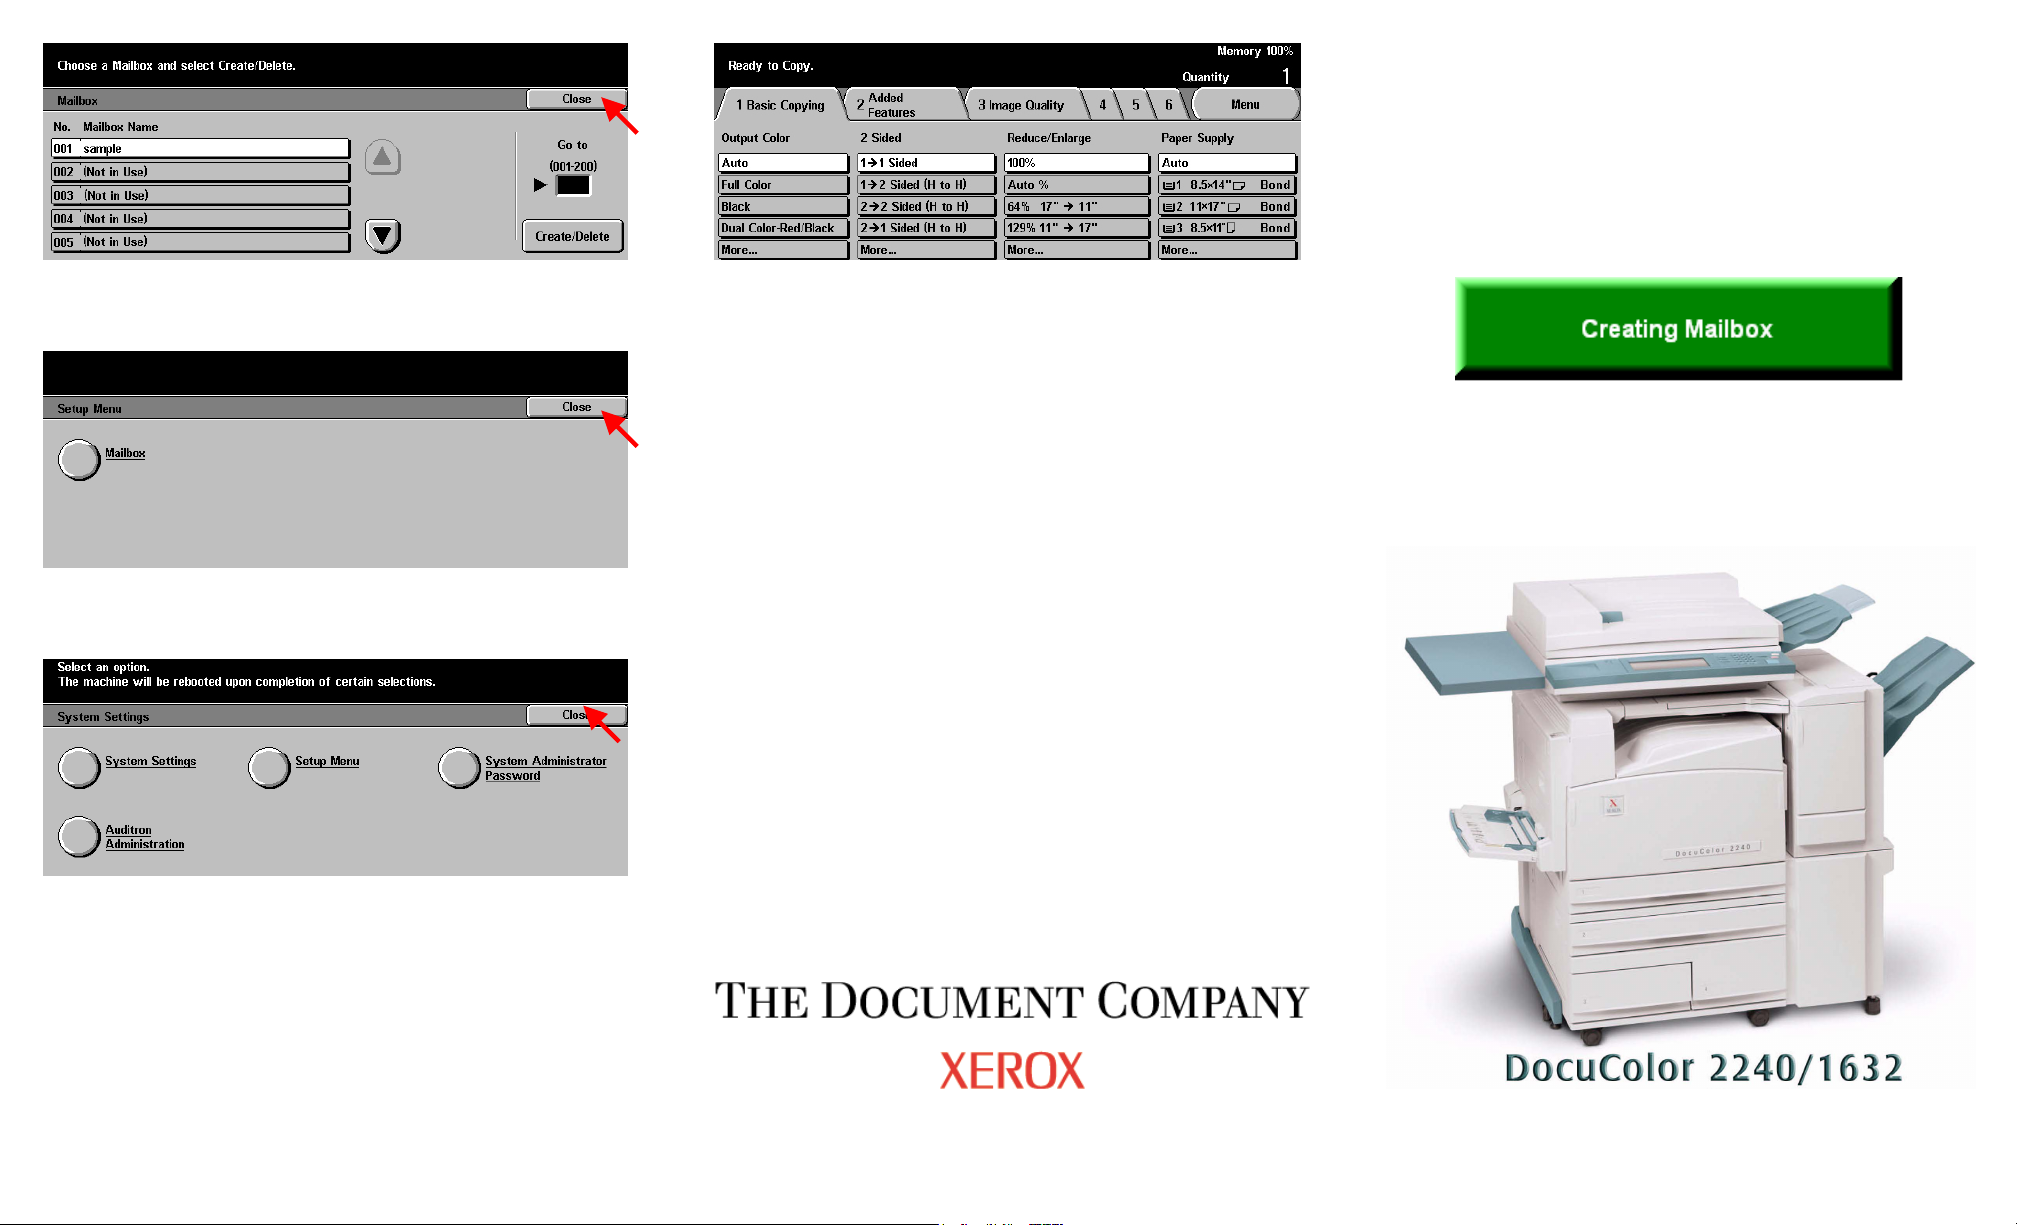
Fig. 11
Press Close.
Fig. 12
Press Close.
Fig. 13
Press Close.
Quick Start Guide
Fig. 14
The Menu Screen is displayed and the Mailbox creation is complete.
NOTE: Please remember or write down your Mailbox Number and
Password. This information will be used to scan and retrieve documents
in the mailbox.
Mailbox Number: ________________________________
Mailbox Password: _______________________________
Creating Mailbox - 2 of 2
 Loading...