

Whirlpool 4378005 Instruction Sheet
INSTALLATION INSTRUCTIONS
21 cu. ft.
Bottom Mount
Refrigerator
Trim Kit
Model 4378005
(All Rights Reserved)
Instruction Sheet 4378364 Rev. B 2/00© Whirlpool Corporation, 2000
1
Before you start...
Proper installation is your responsibility. Make sure you
have all tools and parts necessary for correct installation.
Take special care when removing parts from packaging to
avoid scratches.
INSTALLATION REQUIRES THAT YOU REMOVE THE
DOORS FROM THE REFRIGERATOR AND LAY THEM
ON A FLAT PADDED SURFACE. CARE SHOULD BE
TAKEN NOT TO BREAK THE INNER DOOR SHELVES
AND TRIM.
Work on one door at a time.
Read each step carefully before trying. You will need help
during certain steps to assure proper trim piece
attachment. Some pieces removed need to be saved
and certain trim pieces, once applied, cannot be
changed.
Trim kit can be installed with the handle on either the
right or left side. After the kit is installed, the handle
cannot be reversed.
4378364-B
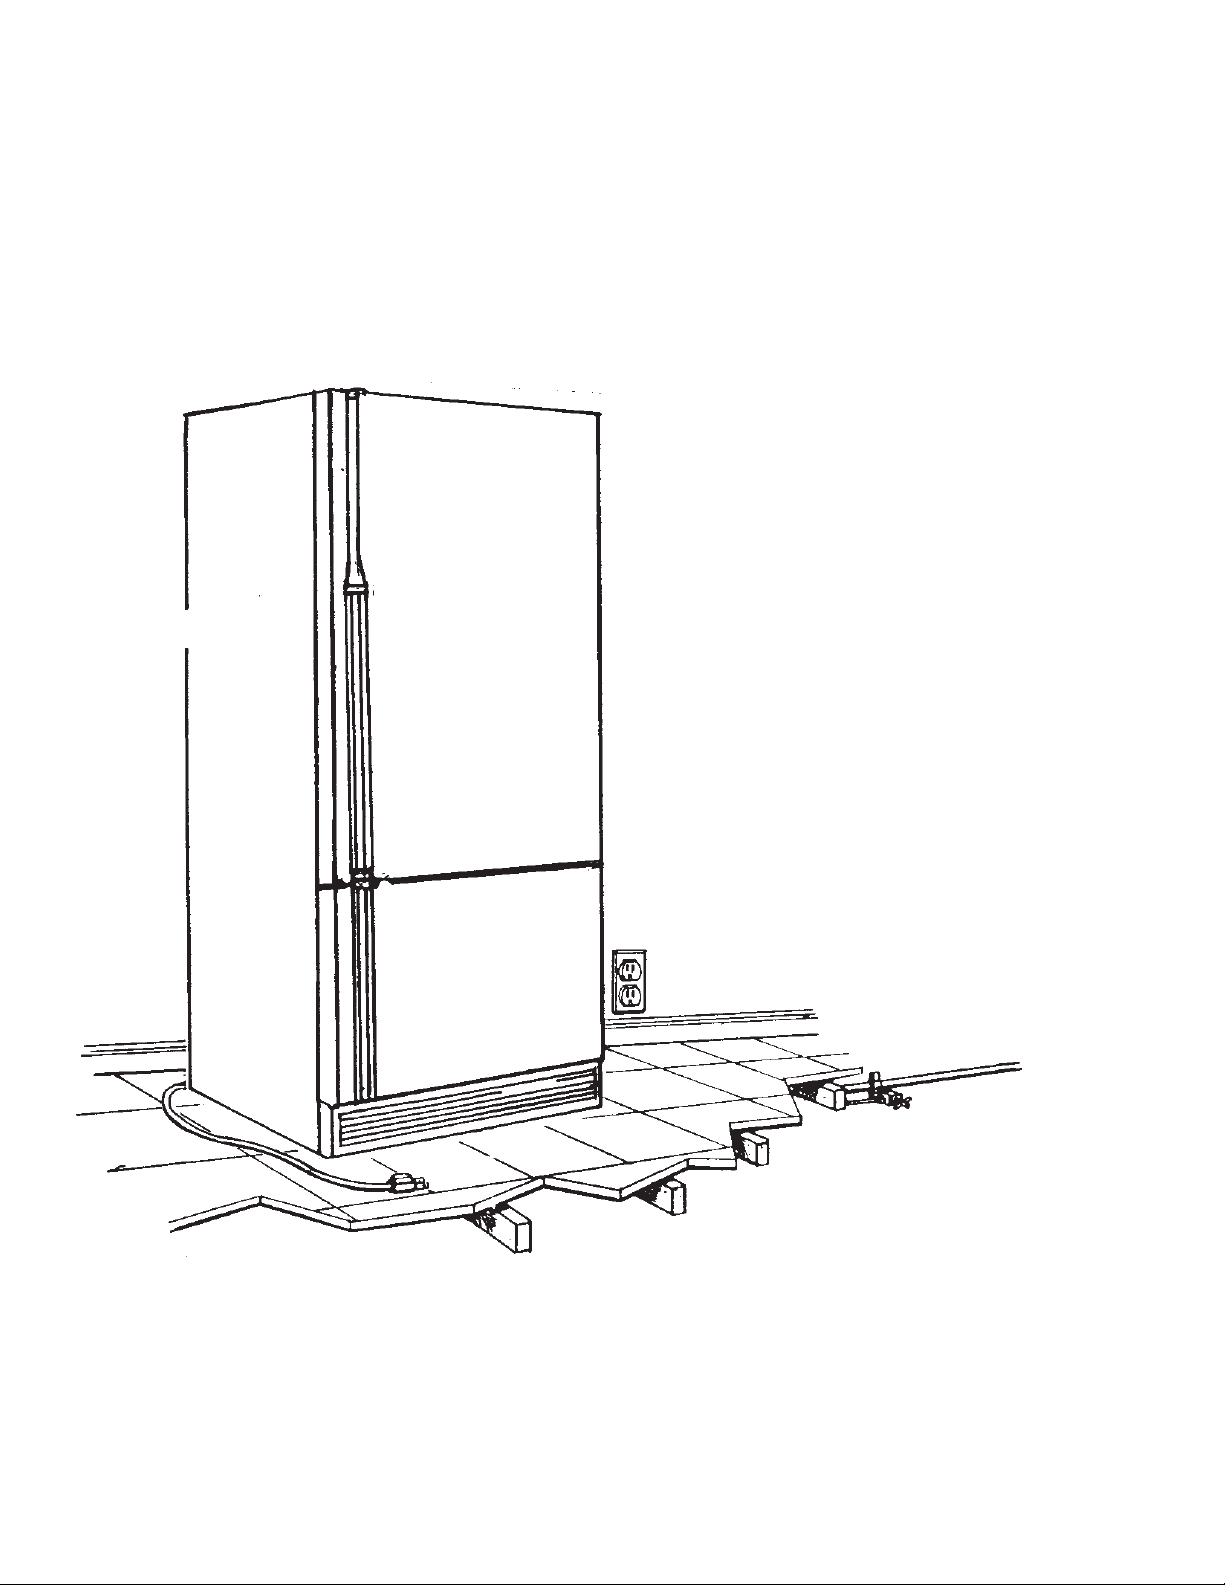
Shut-off
valve
(continued)
2
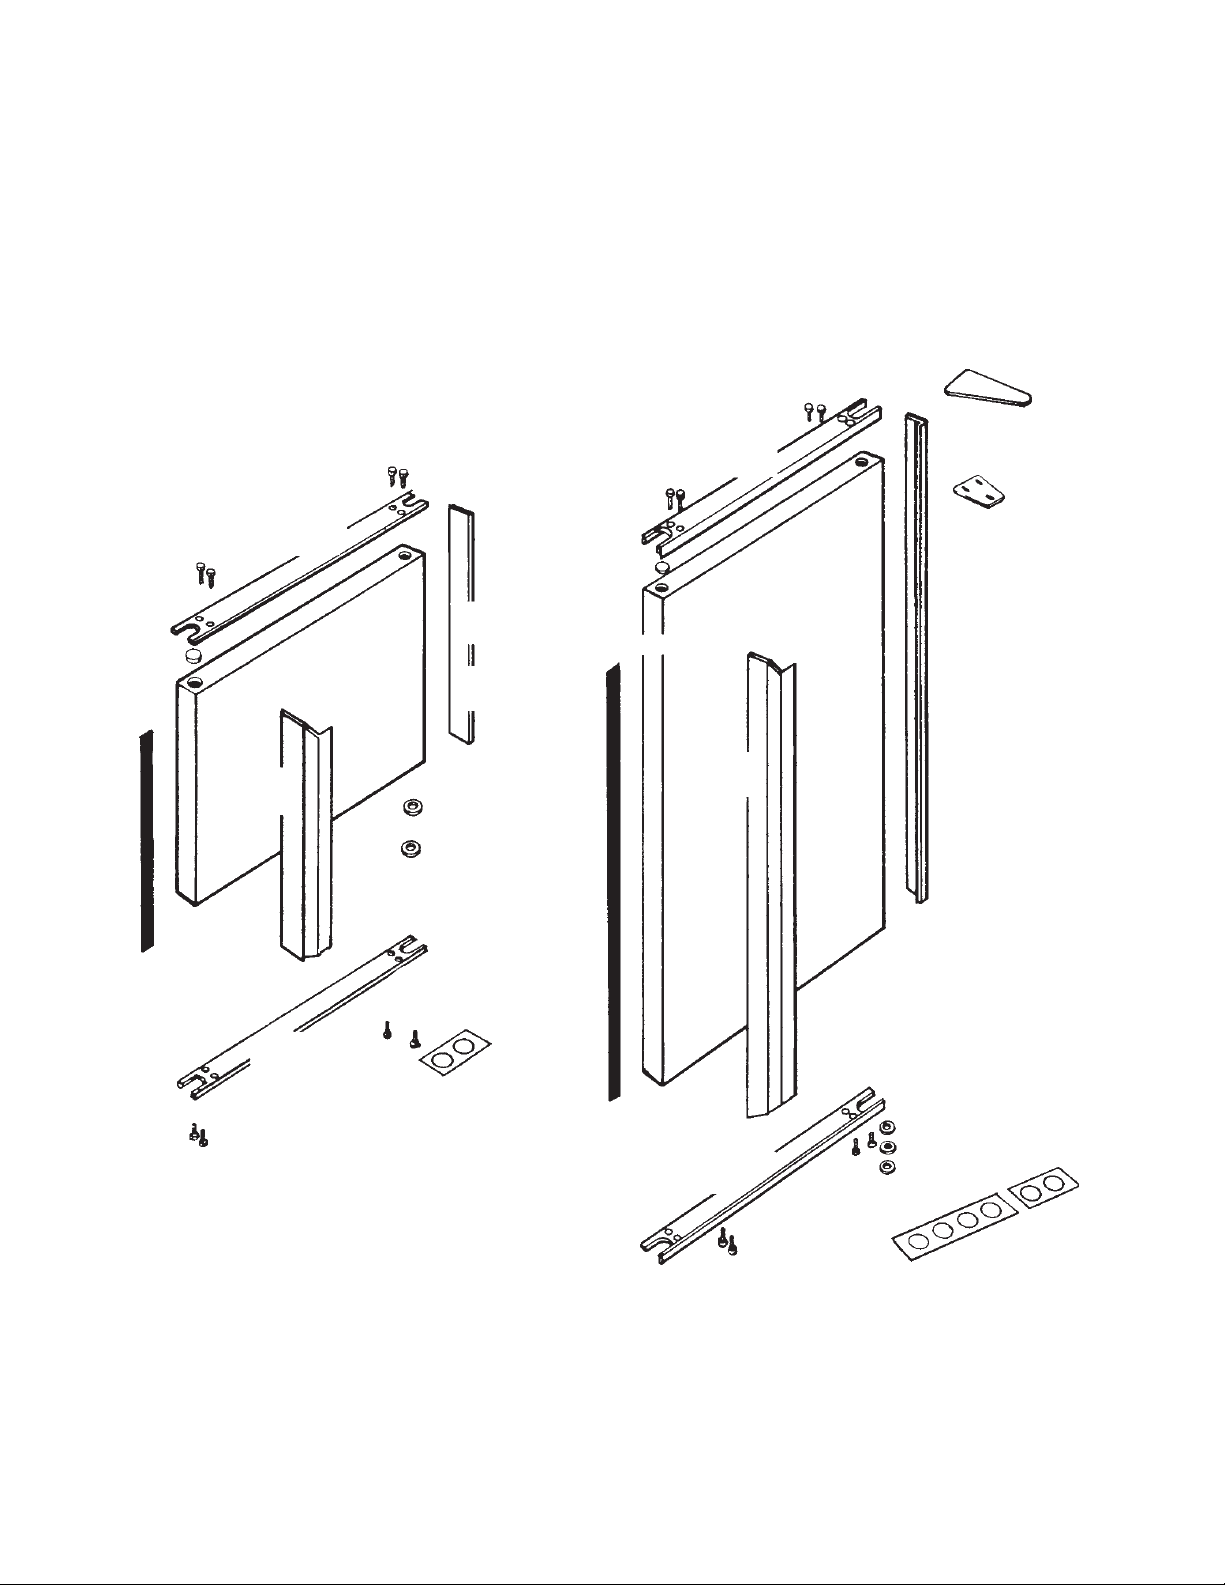
Trim kit parts
Remove parts from packages. Check that you have all the
parts.
Refrigerator Door
8 screws
(489028)
1 hole plug
(1100189)
Freezer Door
1 top trim
(4378321)
1 handle
(4378306)
Black vinyl
door handle
insert
Freezer door
Black vinyl
door handle insert
1 side trim
(4378361)
1 washer
(487576)
1 washer 11⁄64"
(488296)
1
⁄16"
1 hole plug
(1100189)
1 top trim
(4378319)
Refrigerator door
1 handle
(4378307)
1 hinge cover
(1117296)
1 hinge shim
(941047)
1 side trim
(4378315)
1 bottom trim
(4378320)
hole-seals
(941765)
1 bottom trim
(4378320)
3
8 screws
(489028)
2 washers
(487576)
1 washers
(488296)
hole-seals
(941765)
1
11
⁄16"
⁄64"
(continued)
4378364-B

Tools needed for installation
Rubbing
alcohol
5
⁄16" Socket wrench
Now start...
wWARNING
Electrical Shock Hazard
Disconnect power before
servicing.
Replace all panels before
operating.
Failure to do so can result in
death or electrical shock.
Flat-head
screwdriver
Putty knife
Phillips
screwdriver
Dime
Masking tape
4. To remove the freezer door handle, remove the two
screws on the top of the door handle and the two
screws on the bottom of the door handle.
1. Remove all food from the refrigerator and freezer.
2. If you have an icemaker, shut off the water supply to
the refrigerator by turning the valve of your water line
clockwise.
3. Use putty knife to pry off Whirlpool name plate from
refrigerator door. Be careful not to scratch paint.
Remove excess adhesive using thumbnail, lighter
fluid or WD-40.
To remove the refrigerator door handle, remove the two
screws on the bottom of door handle, pry out handle insert,
remove the one e xposed screw in the center of the door .
Then remove the two screws on the top of the door handle.
Cover e xposed hole with hole seals (941765) pro vided.
Discard the screws and handle insert.
Use putty knife to pry off the round plastic plug on the
right-hand side of the door. Cover exposed holes with
hole-seals (941765) provided.
4378364-B
4
(continued)
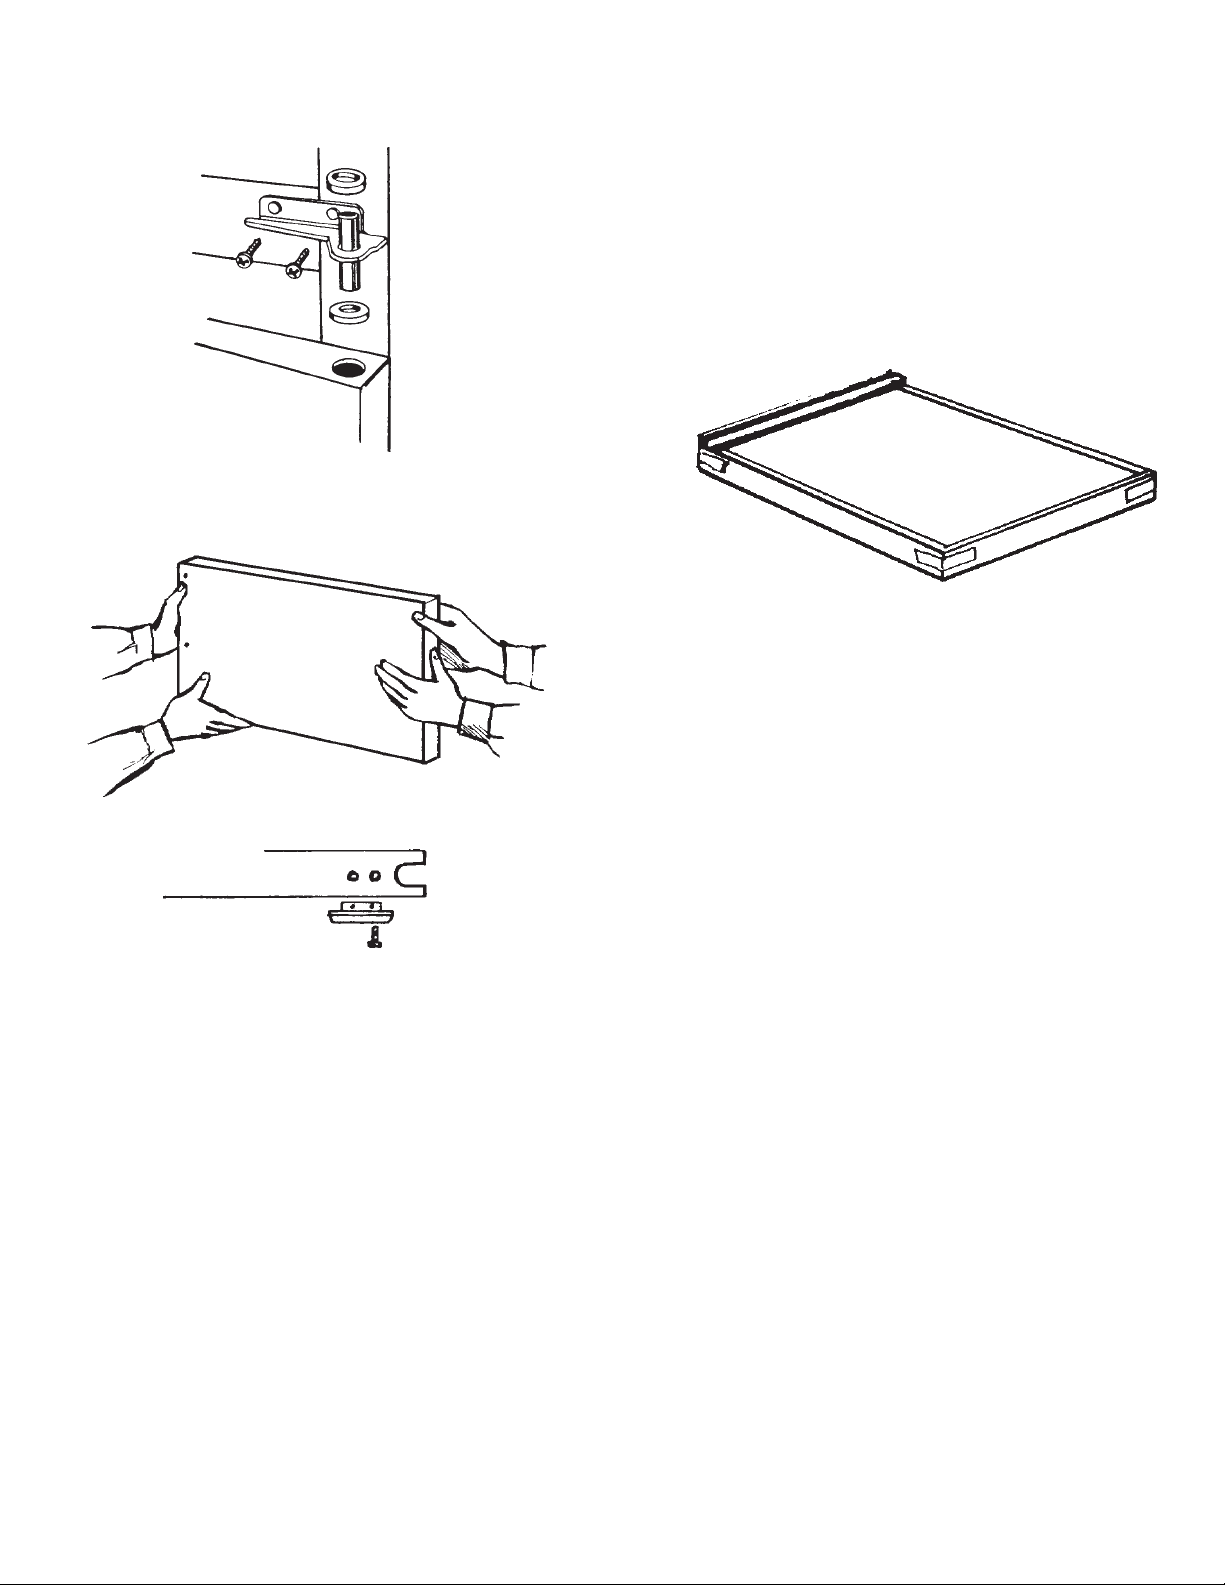
Remove the refrigerator door
5. Remove the refrigerator door top hinge cover by
tapping the underside of the hinge near the gasket
area. Remove screws that hold the hinge and shim
(if any) in place. Save screws and hinge. Discard shim
and hinge cover.
6. With help to support refrigerator door, carefully lift
refrigerator door up and off the center hinge. Place
the door, shelf side down, on a flat, padded surface.
Practice lining up trim pieces before removing
adhesive backing. Keep adhesive side of trim
pieces away from door until ready to press in
place. The adhesive forms a permanent bond
upon contact.
8. Attach the top (4378319) and bottom (4378320) trim
pieces to the refrigerator door using the new screws
provided (489028).
Do not tighten screws now. Both trim pieces will be
used to judge the fit of the other trim pieces.
Top
Bottom
9. Attach side trim piece (4378315) and handle
(4378307) to the door with masking tape. Check that
corners of the top trim are flush with the side trim and
handle.
10. Remove handle trim piece. Remove adhesive backing
from refrigerator door handle trim piece. With
assistance to align corners, carefully press handle in
place, making sure top corner is flush with top trim.
The lower lip of the trim channel must fit snugly to the
door.
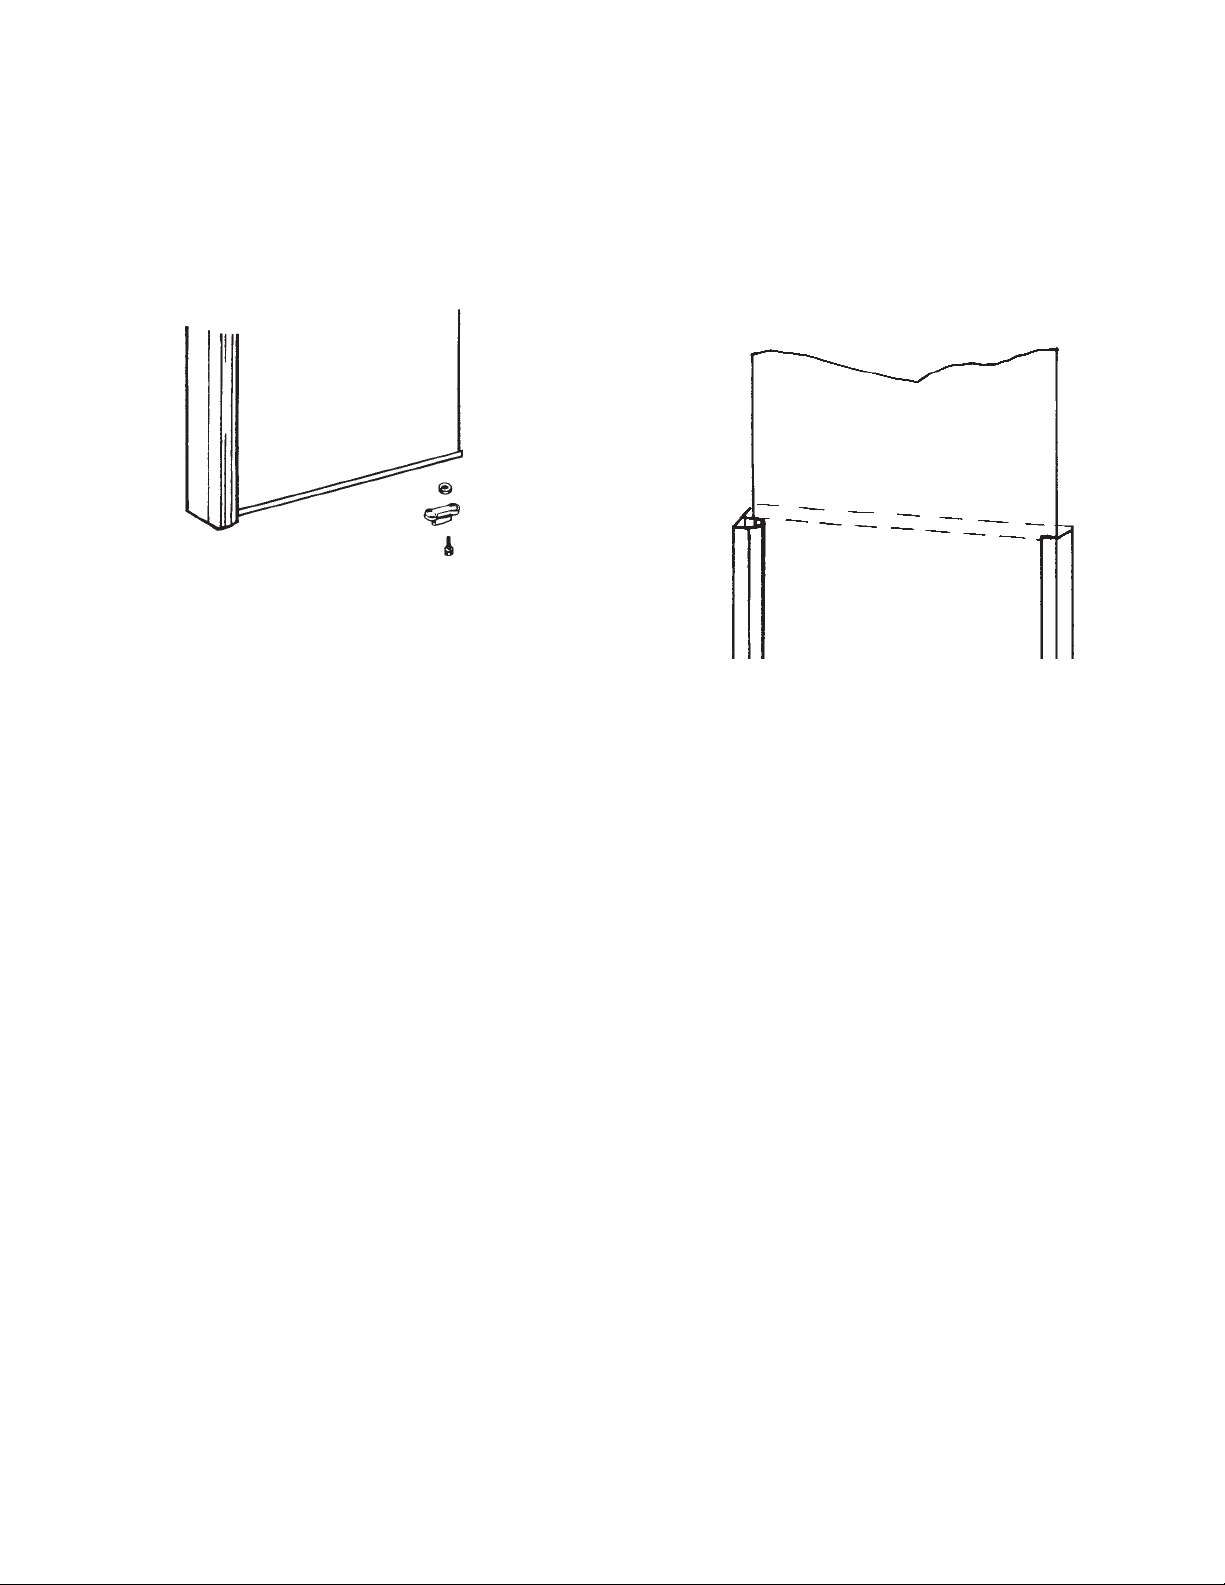
7. Remove the door stop from the bottom of the
refrigerator door. Save screws and door stop. On the
bottom of the refrigerator door there are two plastic
plugs covering two holes. You must remove these
plugs using a putty knife or screwdriver. Discard the
plugs and cover the two holes with hole-seals (941765)
provided. Remove the plastic plug from the top of the
refrigerator door but do not cover the hole. Remove the
two filler screws from the top of the door and one from
the bottom of the door. Use r ubbing alcohol to clean all
edges of door where trim pieces will be applied. Allow
alcohol to dry before continuing.
(continued)
5
4378364-B
11. Remove side trim. Remove adhesive backing from
refrigerator door side trim piece. Use inside edge of
trim channel as a guide for alignment. With assistance,
check to make sure the corners are flush with top and
bottom trim pieces before pressing the trim piece in
place. After aligning corners, you and your assistant
must press the side trim piece in place at the same
time. Tighten screw on hinge side of bottom trim so it
is flush with side trim. A slight gap at one end of the
bottom trim is acceptable and will not be noticeable
when door is reinstalled.
12. Remove screw from hinge side of bottom trim piece.
Slide screw through door stop and 1⁄16" washer
(487576). Insert door stop screw into door stop hole in
bottom trim and tighten. Make sure the flange side is
toward the front edge of the door.
THE FOLLOWING INSTRUCTIONS ARE FOR
INSTALLING WHIRLPOOL PROVlDED DECORATOR
PANELS. IF YOU HAVE CUSTOM DESIGNED PANELS,
PLEASE REFER TO THE CUSTOMIZED PANEL
SECTION TO ENSURE PROPER FIT. IF YOU DO NOT
PLAN ON INSTALLING YOUR PANELS NOW, PLEASE
SAVE THESE INSTRUCTIONS FOR FUTURE
REFERENCE.
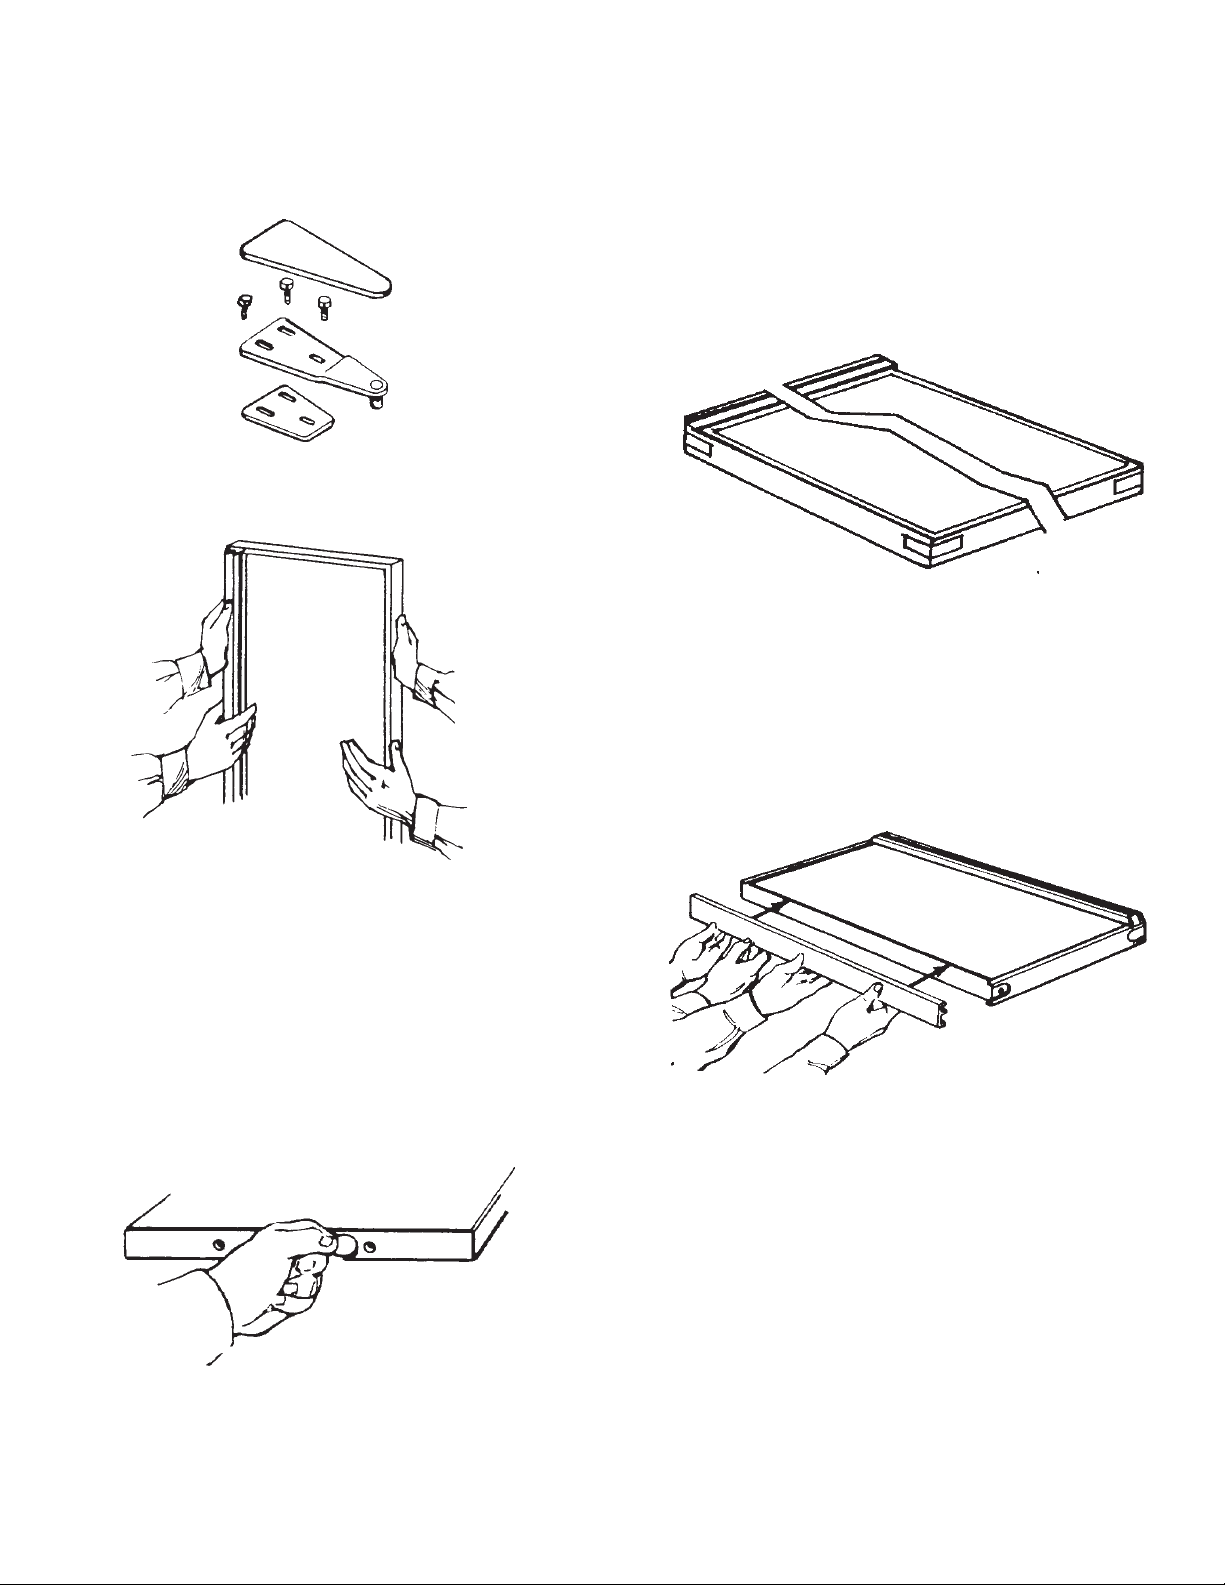
13. Remove the four screws holding top trim piece in
place. Slide the filler board into the “U”-shaped track
of the trim pieces.
14. Remove the protective paper covering from the good
side of the decorator panel before sliding the panel into
place. When installing Almond decorator panels, both
sides are good and protective paper covering must be
removed from both sides before installing. Handle the
panels carefully to avoid scratching the surface. Install
decorator panels, with the good side out, on top of the
filler boards using the trim as a guide. Reattach the top
trim. Tighten screws in top and bottom trim. Insert new
hole plug (1100189) into top of door.
4378364-B
(continued)
6
Remove the freezer door
15. Remove the two screws, center hinge, and washers.
Save screws, hinge and washers.
16. With assistance, carefully lift freezer door up and off
the bottom hinge. Place door, shelf side down, on a
flat, padded surface.
19. Remove the plastic plug from the top left corner of
the door. Do Not cover remaining holes.
Practice lining up trim pieces before removing
adhesive backing. Keep adhesive side of trim pieces
away from door until ready to press in place. The
adhesive forms a permanent bond upon contact.
20. Attach the top (4378321) and bottom (4378320)
trim pieces to the freezer door using the new screws
provided (489028). Do not tighten screws now. Both
trim pieces will be used to judge the fit of the other trim
pieces.
Top
Bottom
21.
Attach side trim piece (4378316) and handle (4378306)
to the door with masking tape. Check that corners of
the top trim are flush with the side trim and handle.
22. Remove handle trim piece. Remove adhesive backing
from freezer door handle trim piece. Carefully press
handle in place, making sure top corner is flush with
top trim. The lower lip of the trim channel must fit
snugly to the door.
17. Remove the door stop. Save screw and door stop.
18. Remove and discard screws and 2 center plastic plugs
from the bottom of the door. Use rubbing alcohol to
clean all edges of door where trim pieces will be
applied. Allow alcohol to dry. Cover two (2) center plug
holes and door handle screw hole with hole-seals
(941765) provided.
(continued)
7
4378364-B
 Loading...