

Uniflame GR1700W-U Owner's Manual
OWNER’S MANUAL
UNIFLAME ROTISSERIE KIT
Model No. GR1700W-U (ASDA Spec Code: 505478106510.2019 )
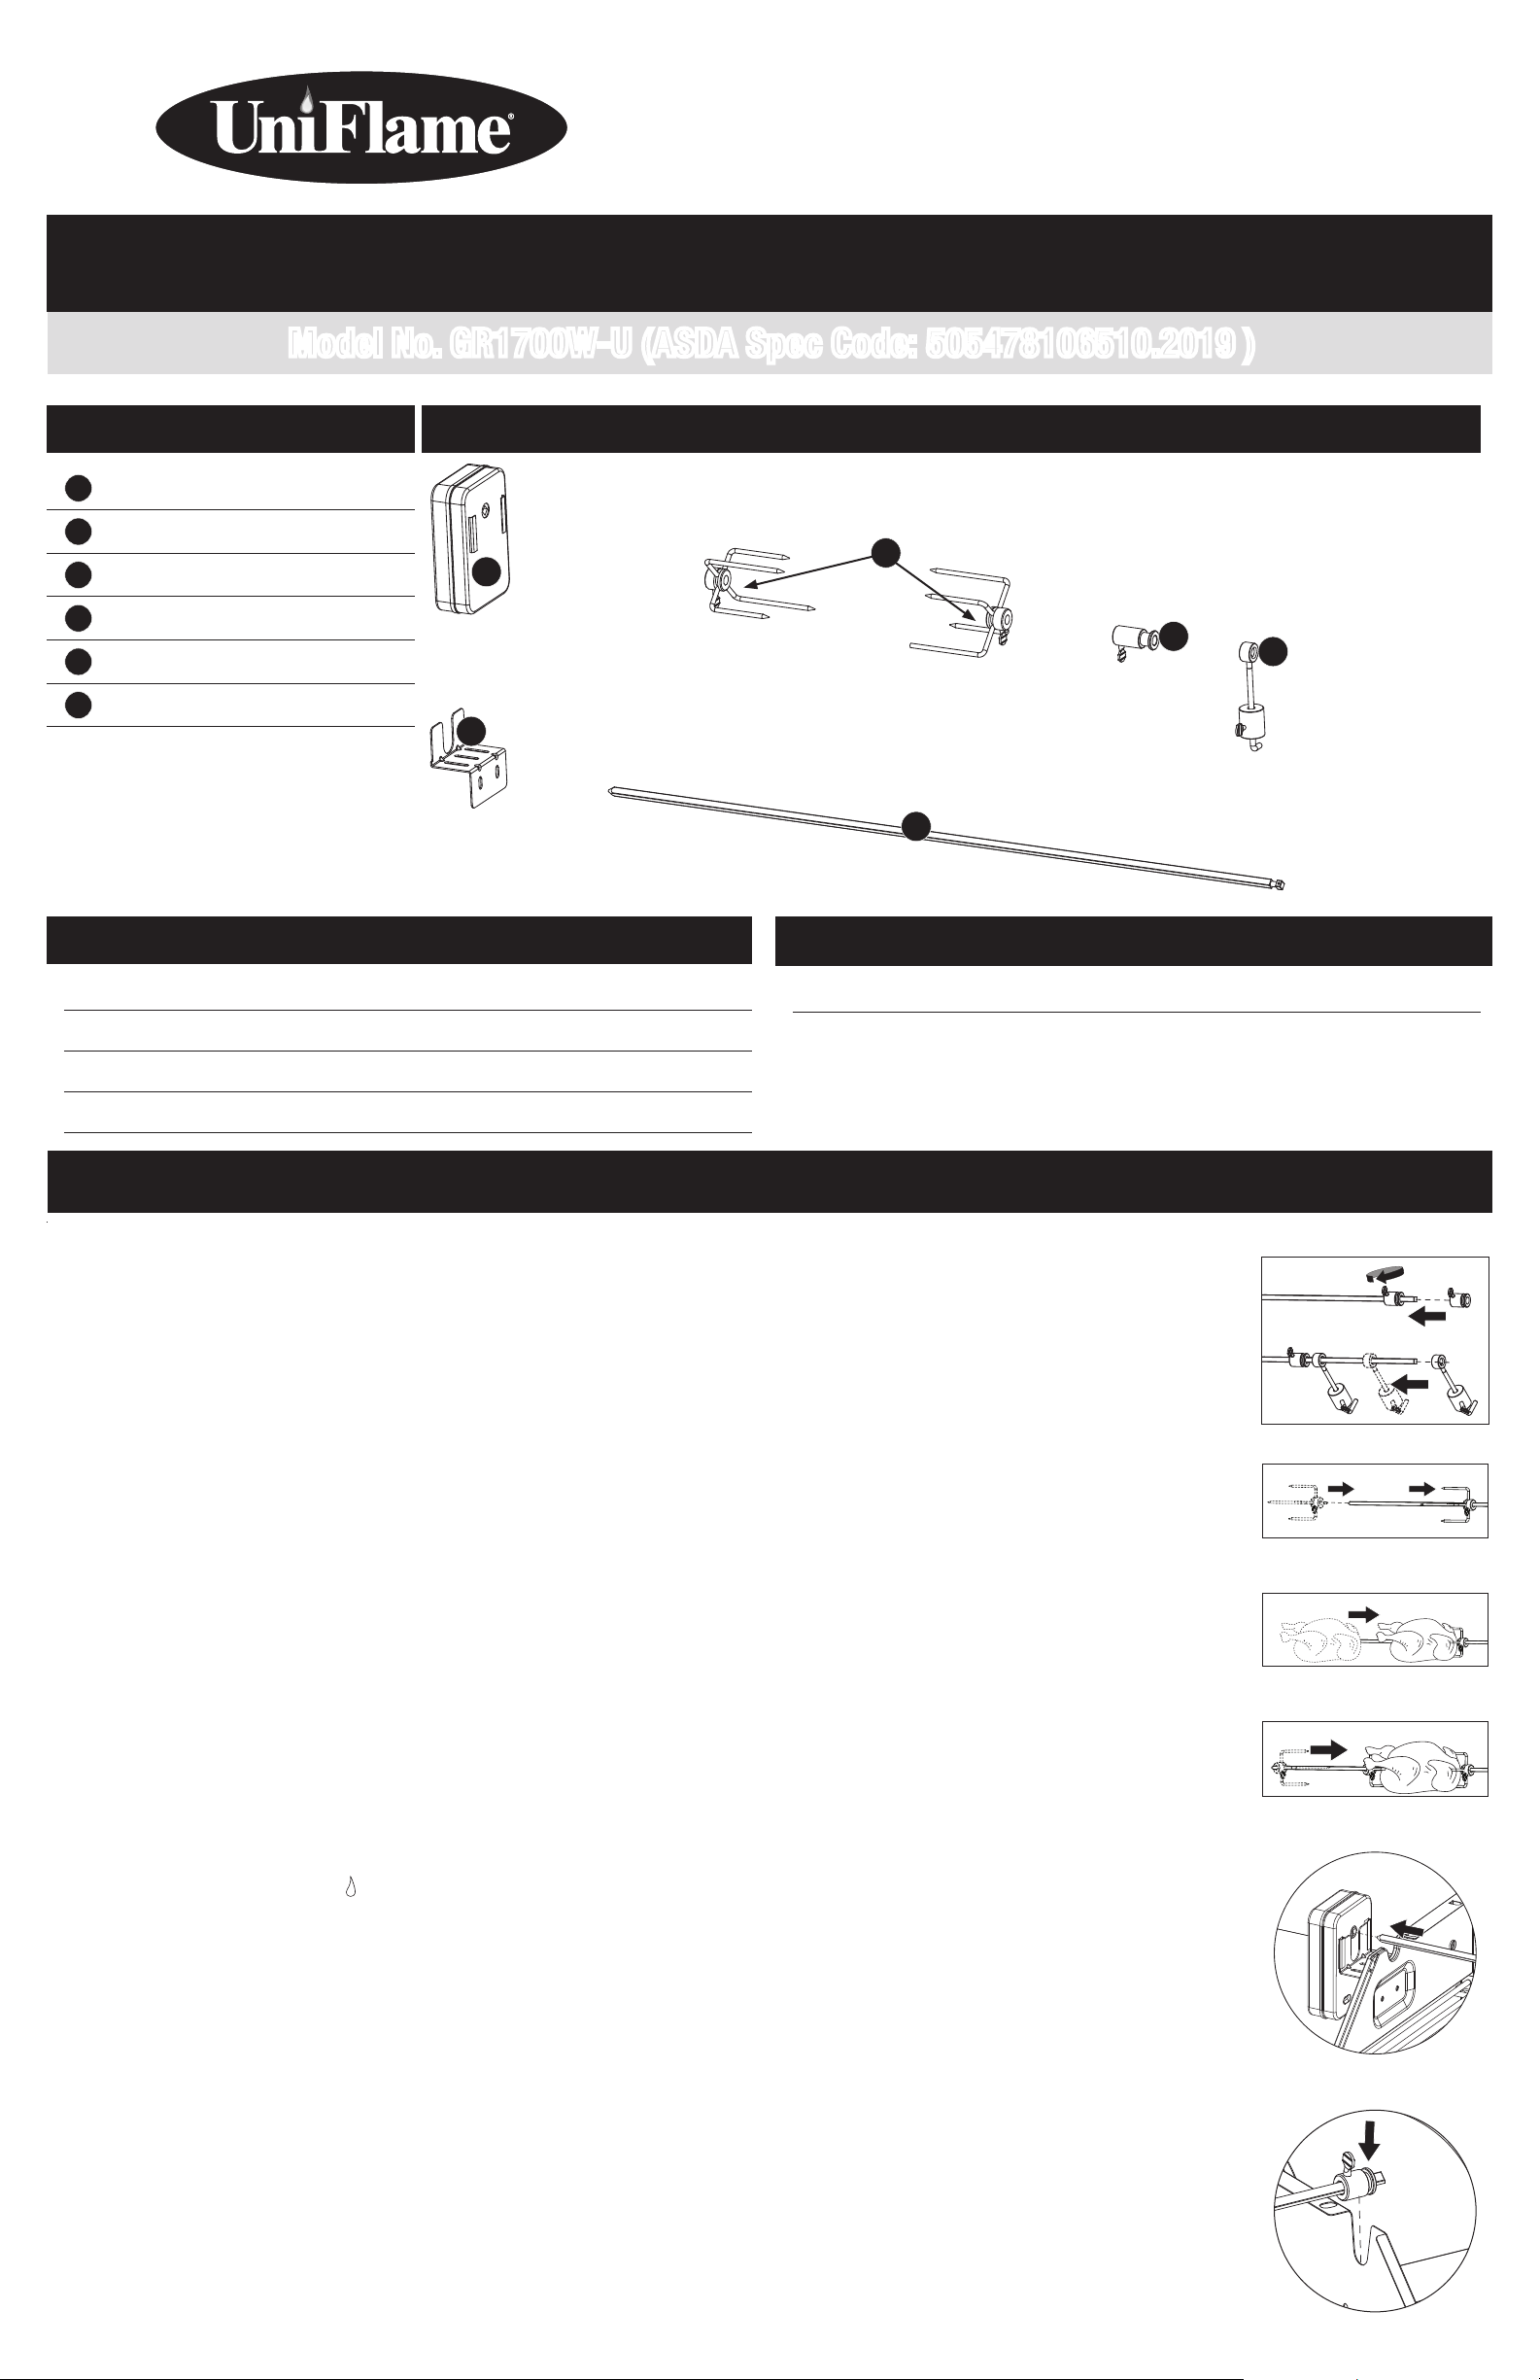
Parts List
1
Rotisserie Motor
2
Rotisserie Fork (2)
3
Rotisserie Handle
4
Rotisserie Counterweight
5
Rotisserie Motor Support
6
Rotisserie Rod
Hardware
A
Screw
Expanded View
1
5
M6x16 Nickel Plated Phillips Truss Head
2 pcs
2
6
Hardware (Not Included)
D Batteries 2 pcs
3
4
B
C
D
Nut
Washer
Lock Washer
M6 Nickel Plated
ø6.2 Nickel Plated
ø6.5 Nickel Plated
Operating Instructions
Operating Rotisserie
W WARNING: Basic safety precautions should always be
used, including the following:
1. Most grill surfaces and accessories are hot during and after
cooking. Use caution around grill. Wear a flame retardant BBQ
mitt.
2. Do NOT use accessory attachments on the rotisserie that were
not supplied by the manufacturer. This may cause injuries. Do
NOT use this appliance for other than intended use.
3. Never cover bottom of your grill bowl with aluminum foil, sand
or any grease absorbent substances.
4. Should a grease fire occur, turn burners to • (OFF) position
and turn the regulator valve clockwise into the the “OFF”
position. Close lid until fire is out.
5. Do NOT let children operate grill or rotisserie. Do NOT let
children play nearby.
6. Allow to cool before adding or removing parts.
7. When rotisserie is cooking, place a drip pan under the food to
be cooked. This will capture the drippings and keep grill clean
of excess grease, which could cause a fire. Use caution when
moving a drip pan containing hot oils.
8. This rotisserie is for outdoor use only and with this grill only.
W CAUTION: If burner flame goes out during operation,
immediately turn the gas “
gas clear for about 5 minutes before re-lighting.
W WARNING: Install batteries correctly observing the +/-
polarity signs.
W WARNING: Remove exhausted batteries and batteries not
used for extended periods.
W WARNING: Store unused batteries in their pack, away
from metal objects that may cause a short circuit.
W WARNING: Only recharge rechargeable batteries. Do not
open or dispose of batteries in fire as they may explode.
W WARNING: Batteries should only be replaced by a
responsible adult.
W WARNING: Do not mix old and new batteries
W WARNING: Do not mix alkaline, standard (carbon-zinc),
or rechargeable (ni-cad, ni-mh, etc.) batteries
W WARNING: When rotisserie motor is not in use, remove
OFF” and open lid to let the
2 pcs
2 pcs
2 pcs
and store in a dry indoor area.
W WARNING: OUTDOOR USE ONLY. DO NOT EXPOSE TO RAIN.
Attaching Meat
1. Attach rotisserie motor per “Assembly Instructions –
Rotisserie” section.
2. Attach rotisserie counterweight and handle to rotisserie rod
(Figure 1).
3. Slide one rotisserie fork onto rod (Figure 2).
4. Push rotisserie rod through the middle of the meat and
evenly attach to the prongs of the rotisserie fork (Figure 3).
5. Attach second rotisserie fork onto rod and insert prongs into
meat. Tighten rotisserie forks
(Figure 4).
6. Insert rotisserie rod into motor and place other end of rod
into grooves on bottom bowl (Figures 5 and 6).
7. Turn rotisserie motor “ON” to test meat placement.
Note: Heavy side of meat should rotate down towards the
bottom bowl. Adjust counterweight if needed for a proper
balance. If meat still does not rotate properly, remove meat
and remount for a proper balance.
8. Light grill per “Operating Infrared Back Burner” lighting
instructions.
Note: Cooking grid can be removed if necessary.
9. Keep lid closed during cooking.
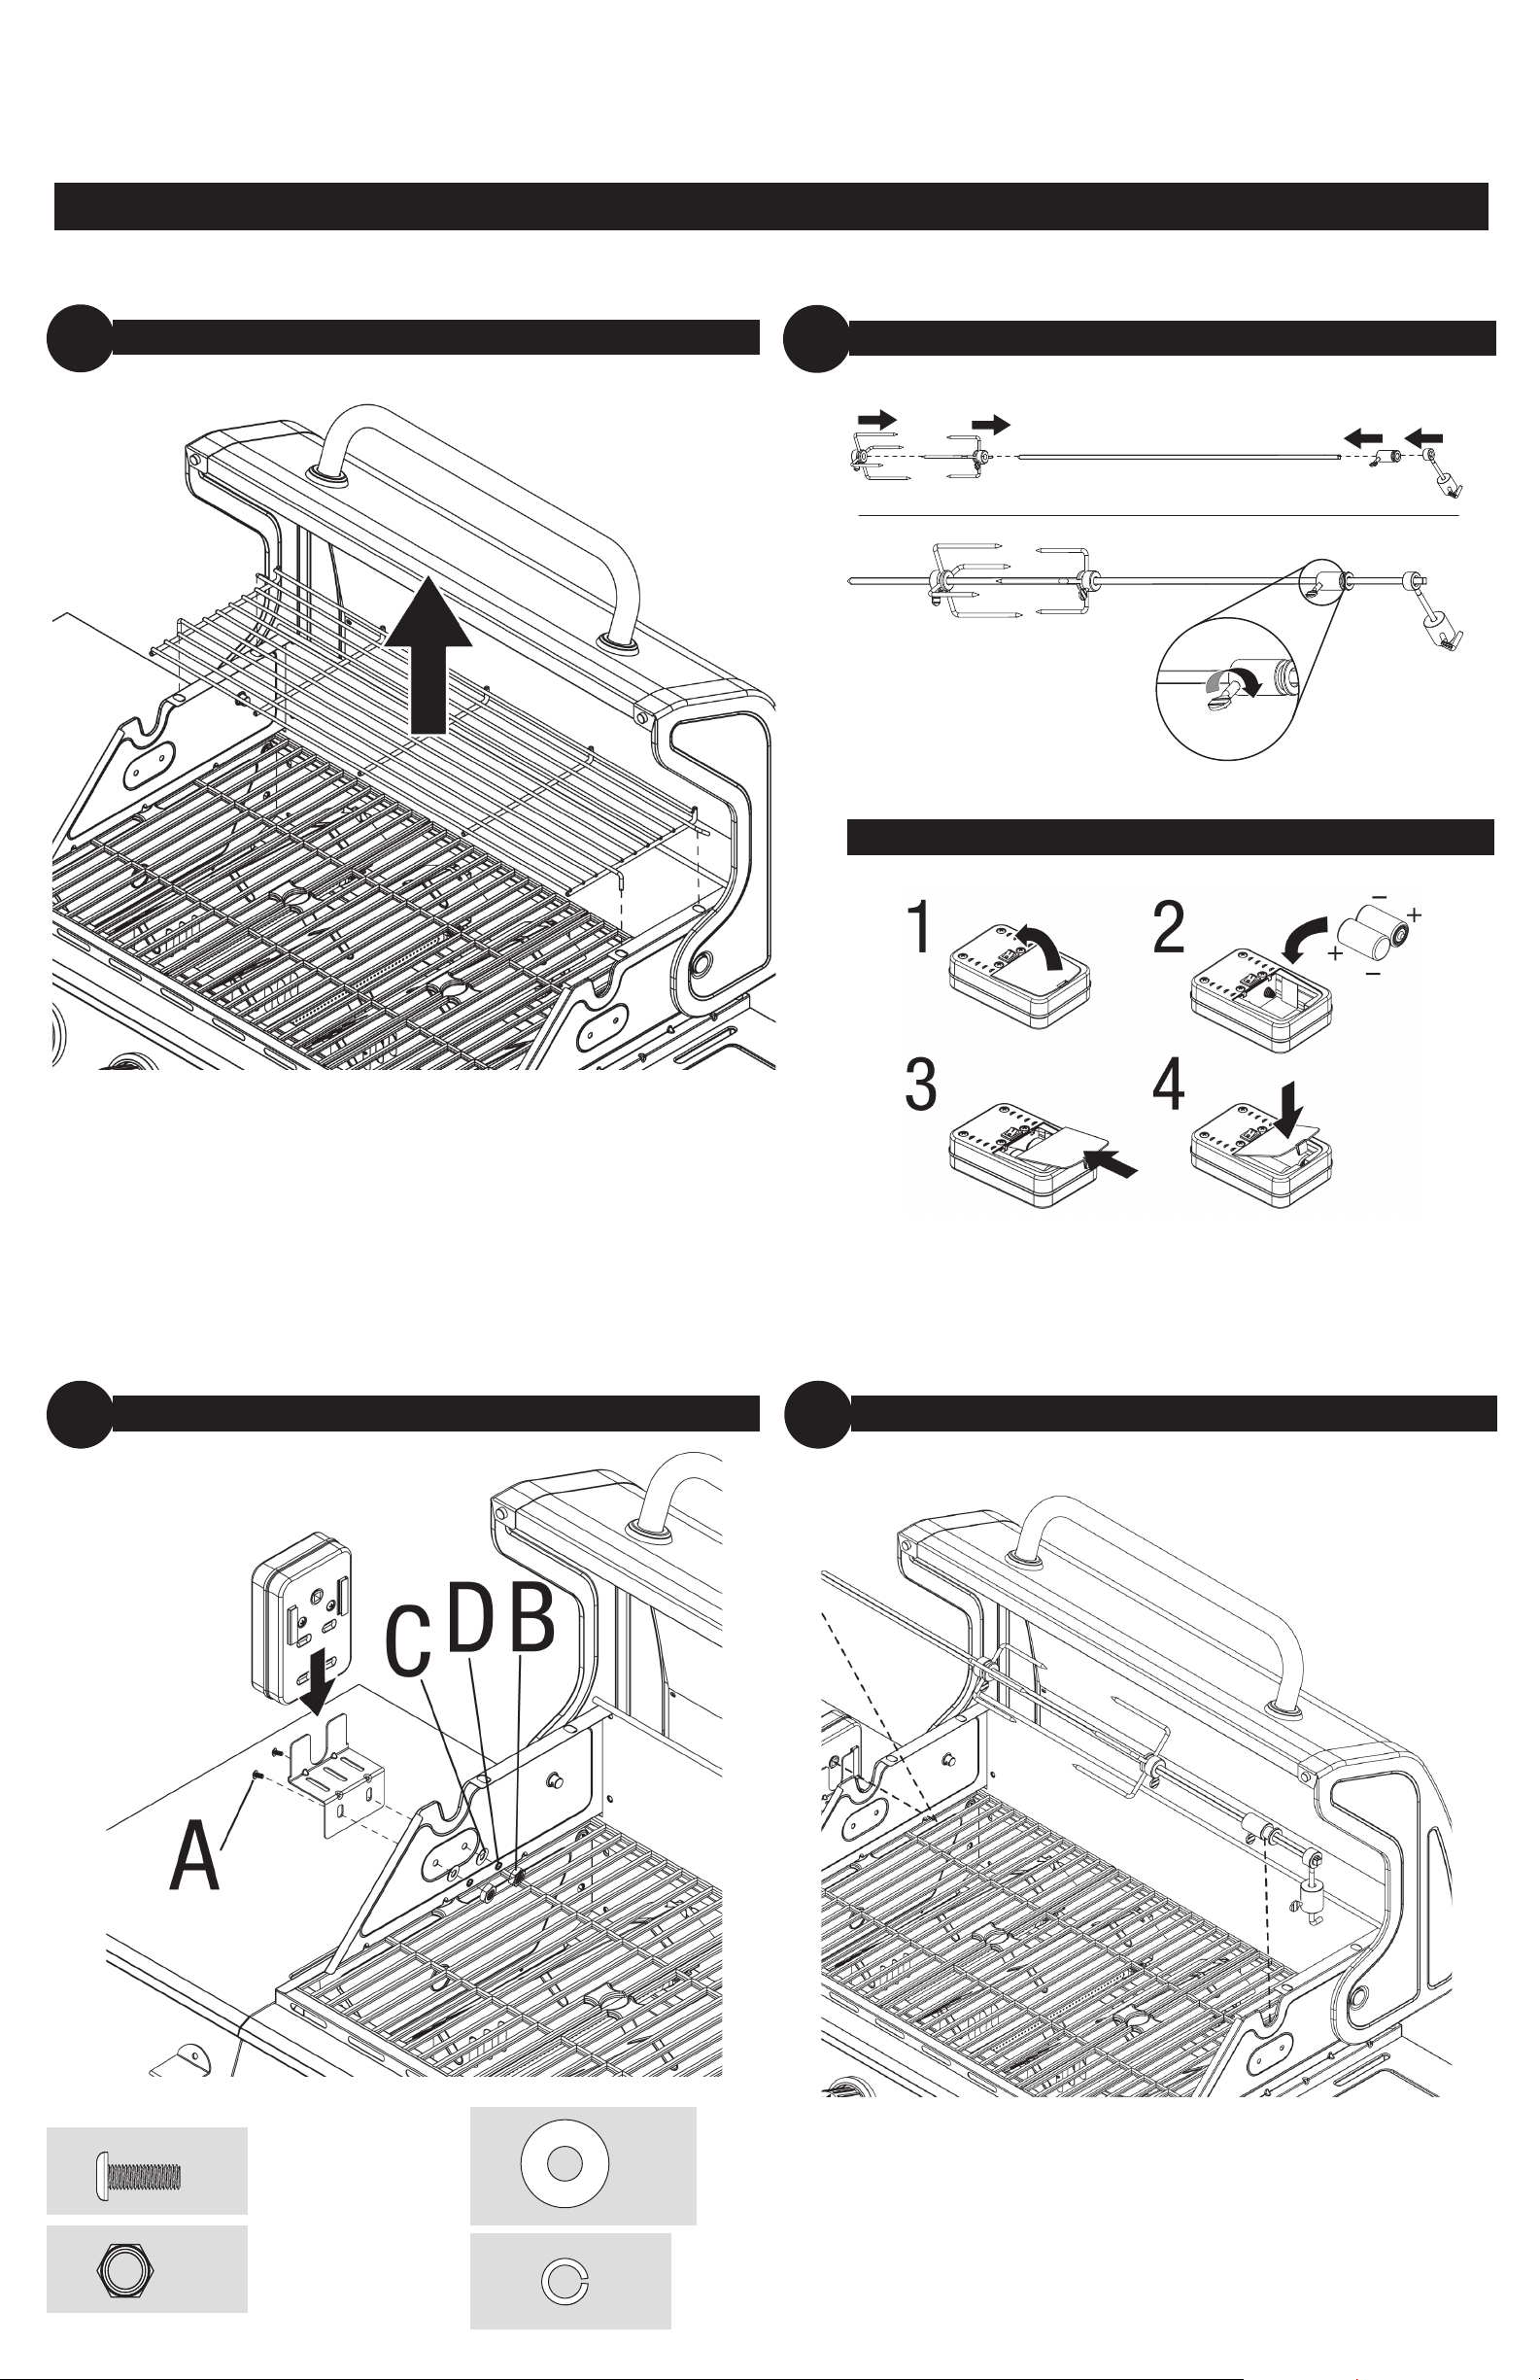
Replacing the batteries (See “Assembly Instructions Step 2)
1. Remove rotisserie box back cover.
2. Replace D batteries (2).
3. Replace rotisserie box back cover.
Manufactured in China for: RevoAce Inc. Limited
Hong Kong, China
Figure 1
Figure 2
Figure 3
Figure 4
Figure 5
Figure 6
2
Assembly Instructions
Remove Warming Rack
1
Assemble Rotisserie Rod
2
Insert D Batteries (Not Included)
Attach Rotisserie Motor Support and Rotisserie Motor
3
Insert Rotisserie Rod
4
A
B
x 2
x 2
C
D
x 2
x 2
 Loading...