

Page 1
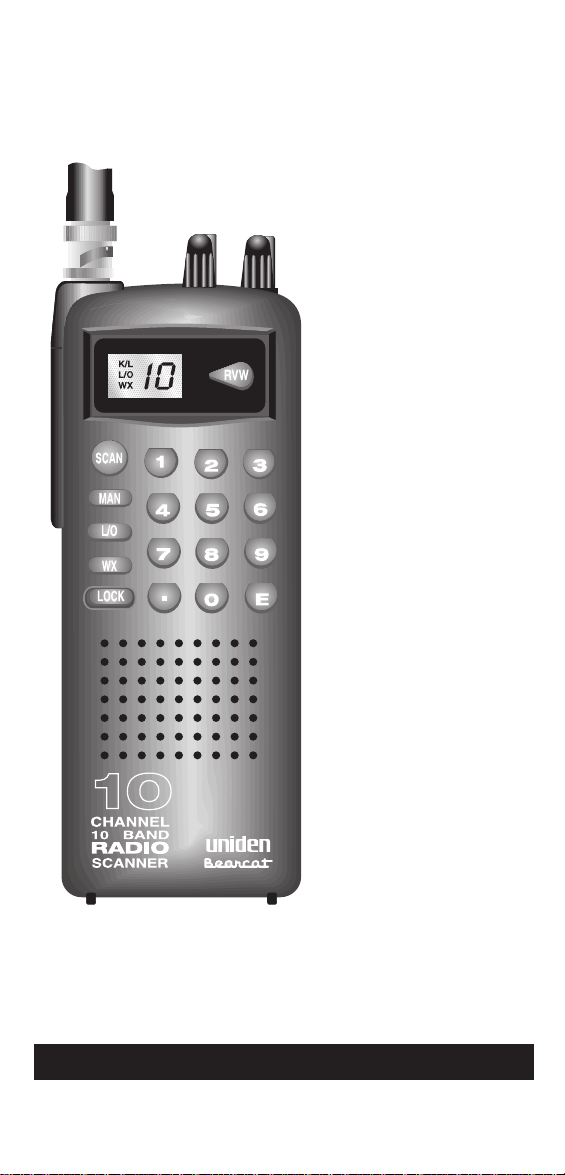
BC60XLT
Programmable
Hand-Held
Scanner
OPERATING GUIDE
Page 2

PRECAUTIONS
Before you use this scanner, please read and observe the
following:
WARNING!
n
Uniden DOES NOT represent this unit to be waterproof.
To reduce the risk of fire or electrical shock, DO NOT
expose this unit to rain or moisture.
EARPHONE WARNING:
n
Be sure to use only the recommended optional
•
earphone or a stereo headset of the proper
impedance (32Ω). Use of an incorrect earphone
or stereo headset may be potentially hazardous to
your hearing. The output of the Phone jack is
monaural, but you will hear it in both headphones
of a stereo headset.
Set the Volume to a comfortable audio level
•
coming from the speaker before plugging in an
earphone or a stereo headset of the proper
impedance (32Ω). Otherwise you might
experience some discomfort or possible hearing
damage if the Volume suddenly becomes too loud
because of the Volume Control or Squelch Control
setting. This may be particularly true of the type of
earphone that is placed in the ear canal.
n
GENERAL BATTERY WARNING
•
Do not short circuit any Battery.
•
Do not discard Batteries in a fire; they may
explode.
n
NICKEL-CADMIUM BATTERY WARNING
When using Nickel-Cadmium Batteries with this product,
take note of the following warnings:
•
Cadmium is a chemical known to the State of
California to cause cancer.
•
Do not charge Nickel-Cadmium Batteries with any
charger other than the one supplied with this
product. Using another charger may damage the
Batteries, or cause them to explode.
•
Nickel-Cadmium Batteries must be disposed of
properly. Read the Nickel-Cadmium Battery
Disposal package insert for important information.
n
ALKALINE BATTERY WARNING
•
Do not recharge Alkaline Batteries in this product.
Doing so may cause serious damage to the
product and will void the warranty.
•
Uniden does not recommend using rechargeable
Alkaline Batteries in this product.
Page 3
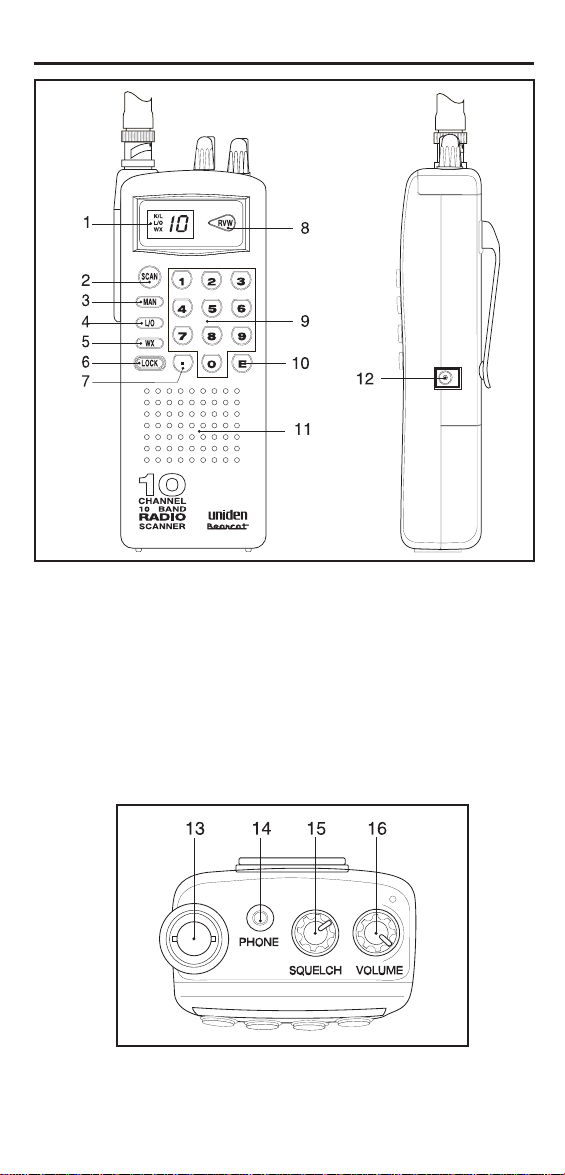
Controls
1. LCD Display 7. Decimal Key
2. Scan Key 8. Review Key
3. Manual Key 9. Numeric Key Pad
4. Lockout Key 10. Enter Key
5. Weather Scan Key 11. Speaker
6. Keylock Key 12. 12V DC Power Jack
13. Antenna Connector 15. Squelch Control
14. Phone Jack 16. On/Off Volume Control
Page 4

Table of Contents
About Your New BC60XLT.........................2
Feature Highlights ..............................2
What is Scanning? ..............................2
Types of Communication .........................3
Included with the BC60XLT ........................4
Where to Obtain More Information..................5
Setup ..........................................6
Power........................................6
Installing Batteries ............................6
AC/DC Adapter/Charger .......................7
Mounting the Flexible Antenna.....................7
Installing the Belt Clip............................7
Operation.......................................8
Keylock.......................................8
Programming Channels ..........................9
How Squelch Works............................12
Setting the Squelch ............................13
Scanning Programmed Channels .................13
Channel Lockout ..............................16
Scanning Weather Channels .....................18
Care and Maintenance ...........................20
Low Battery Warning ...........................20
Replacing the Batteries .........................20
Location .....................................20
Cleaning.....................................20
Repairs......................................20
Proper Care of Your Scanner.....................20
Optional Accessories and
Replacement Parts ..............................21
Operating Tips .................................22
Technical Specifications .........................24
Controls........................Back Cover Foldout
Uniden® andBearcat® are registered trademarks of Uniden America Corporation.
1
Page 5

About Your New BC60XLT
The BC60XLT is a brand new state-of-the-art information radio
with automatic scanning capabilities. It can store frequencies
such as police, fire/emergency, marine, amateur, and other
communications into 10 channels.
Feature Highlights
10 Channels Program one frequency in each channel. You
must have at least one channel programmed to use this
scanner.
10 Bands, 29 MHz - 512 MHz Scan these frequency ranges
with your scanner. (Note: The frequency coverage is not
totally continuous from 29.0 MHz to 512 MHz.)
Weather Channels Use your scanner as a weather
information radio.
Memory Backup Frequencies programmed in the channels
are retained in memory for at least 1 day, and typically 3 days,
when batteries are removed from the scanner.
What is Scanning?
Unlike standard AM or FM radio stations, most two-way
communications (listed below) do not transmit continuously.
The BC60XLT scans programmed channels at the rate of
nearly 10 channels per second until it finds an active
frequency.
Scanning stops on an active frequency, and remains on that
channel as long as the transmission continues. When the
transmission ends, the scanner stays on the channel for 2
more seconds after the transmission stops, waiting for another
transmission. The scanning cycle then resumes until another
transmission is received.
While the BC60XLT is scanning channels, it is in “SCAN
Mode”. When you stop the scanning with
“MANUAL Mode”.
2
M,itisin
Page 6

Types of Communication
You will be able to monitor communication such as:
Police and fire department (including rescue and
n
paramedics)
NOAA weather broadcasts (7 preprogrammed channels)
n
Business/industrial radio
n
Motion picture and press relay
n
Utility
n
Land transportation frequencies, such as trucking firms,
n
buses, taxis, tow trucks, and railroads
Marine and amateur (ham radio) bands
n
And many more in the following 10 Bands:
Frequency Range Transmission
29.0-29.7 MHz 10 Meter Amateur Band
29.7-50.0 MHz VHF Low band
50.0-54.0 MHz 6 Meter Amateur Band
137-144 MHz Military Land mobile
144-148 MHz 2 Meter Amateur Band
148-174 MHz VHF High Band
406-420 MHz Federal Govt. Land Mobile
420-450 MHz 70 cm Amateur Band
450-470 MHz UHF Standard Band
470-512 MHz UHF “T” Band
The installation, possession, or use of this scanning
NOTE:
radio in a motor vehicle may be prohibited,
regulated, or require a permit in certain states, cities,
and/or local jurisdiction. Your local law enforcement
officials should be able to provide you with
information regarding the laws in your community.
3
Page 7
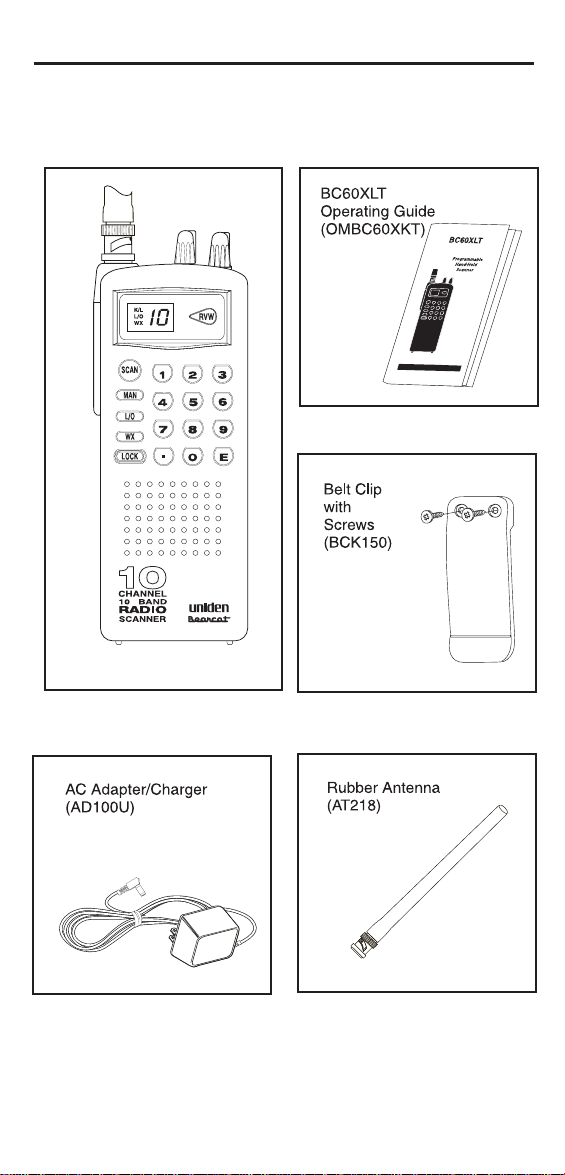
Included with the BC60XLT
4
Page 8
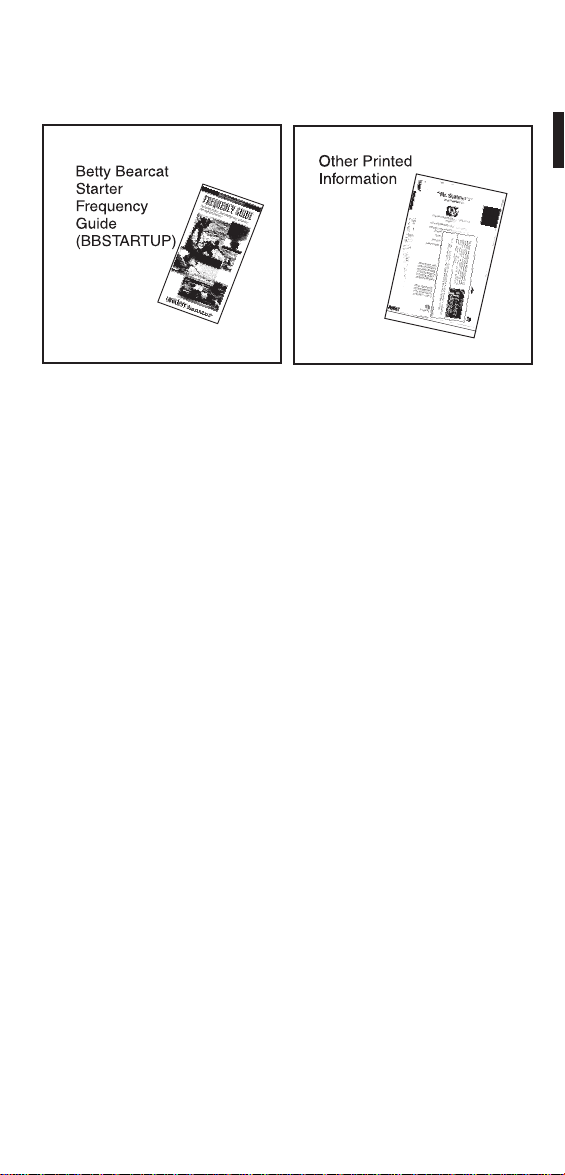
Before you can scan,you must program a frequency into each
channel you want touse. The Betty Bearcat Starter Frequency
Guide lists typical frequenciesused around the U.S. that you may
useto program the BC60XLT.
If the frequencies listed do not work in your area, call the 800
number on the yellow sheet enclosed with the guide. A
Uniden representative should be able to provide you with a
few sample frequencies. Or, use the enclosed order form to
purchase a local frequency list.
Where to Obtain More Information
The Bearcat Radio Club and other similar hobby clubs have
publications, information on computer bulletin boards, and
even contests for the radio enthusiast. Additional information
is also available through your local library.
Please remove the Registration Card from the middle of this
guide, complete, and mail it immediately.
Read this Operating Guide before using your BC60XLT for the
first time.
5
Page 9
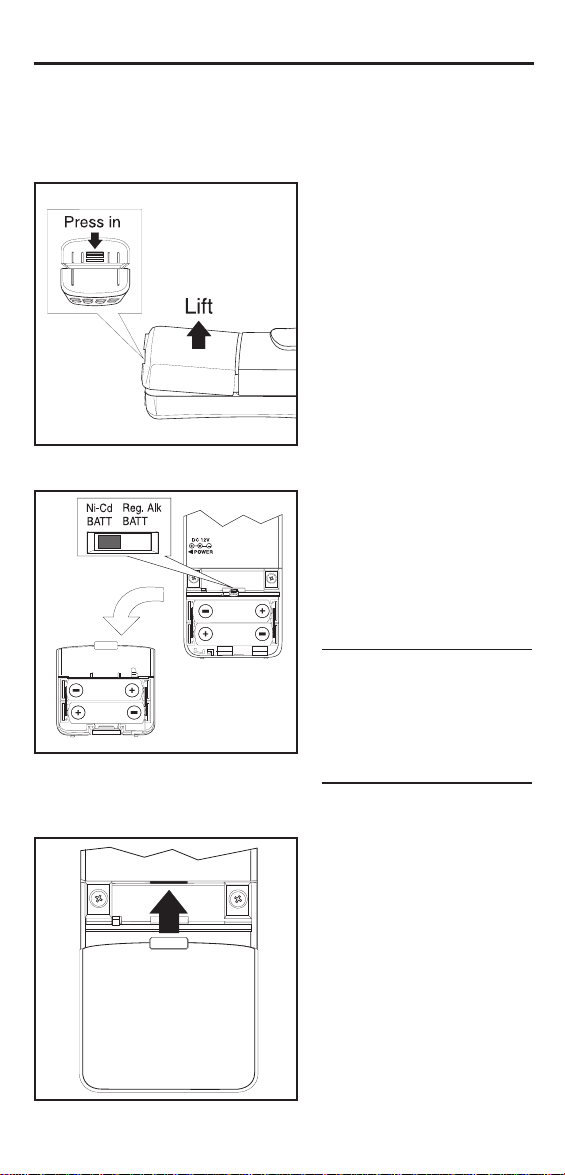
Power
Installing Batteries
1. Open cover.
2. Insert batteries
Setup
IMPORTANT
If you are installing Alkaline
Batteries, set theswitch to
“Reg. Alk BATT.” If
installing Nickel-Cadmium
Batteries, set theswitch to
“Ni-Cd BATT.”
WARNING! Do not mix
Alkaline Batteries with
Nickel-Cadmium
Batteries. Be sure to
install four Batteries of the
same type.
3. Replace cover.
6
Page 10

AC Adapter/Charger
Use the included AC
Adapter/Charger to power
the BC60XLT from an AC
source.
The AC Adapter/
Charger also recharges
Nickel-Cadmium Batteries
while they are installed in
the scanner.
WARNING! Do not charge Alkaline Batteries in this
scanner. Doing so maycause serious damage to the product
and void the warranty. Before attempting to recharge
Batteries, make sure youhave installed four rechargeable
Nickel-Cadmium Batteries and theselector switch is set to
“Ni-Cd” .
Mounting the Flexible Antenna
Installing the Belt Clip
CAUTION: Do not tighten
the screws too tight. You
could damage the case or
clip.
7
Page 11

Operation
Keylock
Keylock prevents accidental key entries.
To lock:
Only theS, M, and
K
keys will function.
To unlock:
If keys do not work, press
to unlock keys.
K
The K/L indicator
disappears from the
display.
8
Page 12

Programming Channels
1. Select frequency.
2. Select channel using Manual mode.
Note: For channel 10,
press
1,0
9
.
Page 13

— OR—
3. Enter frequency.
Each digit displays as you
enter it.
The decimal displays as a
dash.
If you make a mistake,
press
over.
twice and start
.
3a. If frequency outside range.
10
Programmed frequencies
must be within the bands
shown on the back of the
scanner, and on page
three of this guide.
Page 14

4. Recheck frequency.
The frequency appears
one digit at a time in
sequence.
Repeat these steps to program each channel.
You can program the same frequency into two or more
channels, if desired.
Channels with no frequency programmed are skipped during
scanning.
After programming your scanner, record the frequencies in the
table below (or another convenient place) so you can easily
reprogram the scanner in case the memory is accidentally
erased. Use pencil so you can change your entries at a later
date.
Channel Frequency Notes
1
2
3
4
5
6
7
8
9
10
11
Page 15

How Squelch Works
Think of “SQUELCH” as a
gate.
If the gate is set too low
(SQUELCH too low),
everything (all noise as
well as signals) gets
through.
If the gate is set too high
(SQUELCH too high),
nothing gets through.
If the gate is set just right
(SQUELCH set properly),
just the desired signals
get through.
12
Page 16

Setting the Squelch
1. Turn until hiss heard.
2. Turn just until hiss stops.
This action lowers the
“squelch gate,” allowing
all signals and noise to
get through.
No signal should be
present when adjusting
squelch.
Scanner doesn’t scan
with squelch open.
This action raises the
“squelch gate,” allowing
only strong signals to get
through.
Scanner should begin
scanning after two
seconds.
Note: You must have at
least one channel
programmed before the
BC60XLT will scan.
Scanning Programmed Channels
Turn the scanner on.
Channel numbers
advance rapidly.
Note: When you turn the
scanner on, it will always
be in Scan mode.
13
Page 17

When transmission received:
The scanner skips any
unprogrammed channels,
and locked out channels.
Scanner stops on that
channel.
When the transmission
ends, scanning resumes
after a two second delay.
To hold on that channel:
14
Page 18

To resume scanning:
Scanner immediately
resumes scanning.
To listen to or program a specific channel:
Note: For channel 10,
press
1,0
Press
S
scanning.
15
.
to resume
Page 19
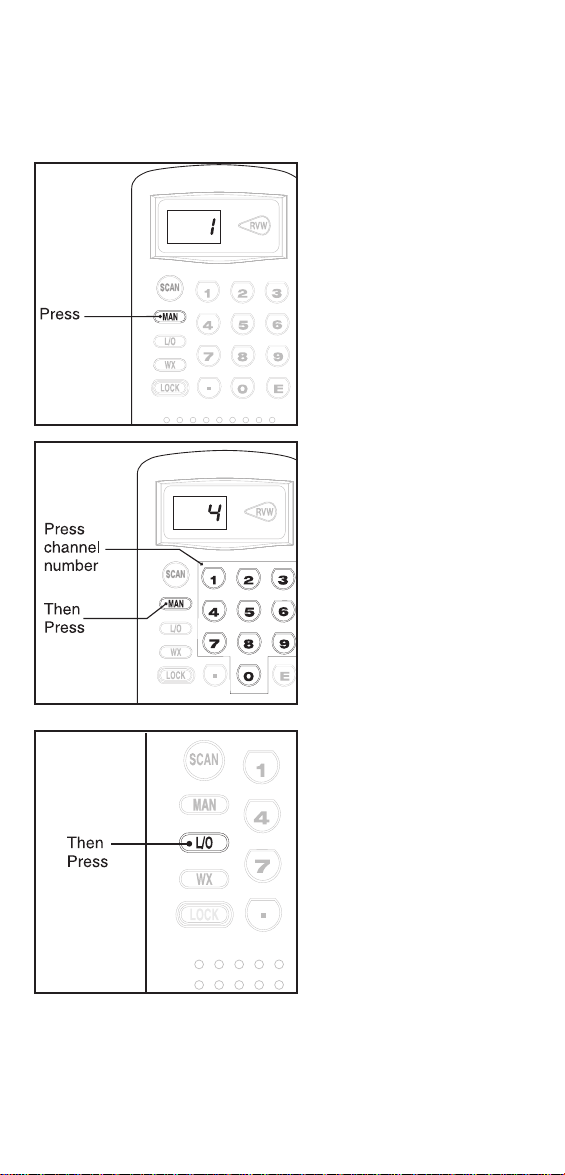
Channel Lockout
Channel Lockout lets you skip channels during scanning.
There are two ways to lock out a channel:
Manual Mode
Use Manual mode to
select the channel you
want to lock out.
Note: For channel 10,
1,0
.
press
16
Page 20
Scanning Mode
To unlock a channel:
When the scanner stops
on a channel during
scanning, you can lock
out that channel by
pressing
Because the locked out
channel is no longer
scanned, scanning
resumes immediately
after pressing
Use Manual mode to
select the desired
channel.
O
.
O
.
17
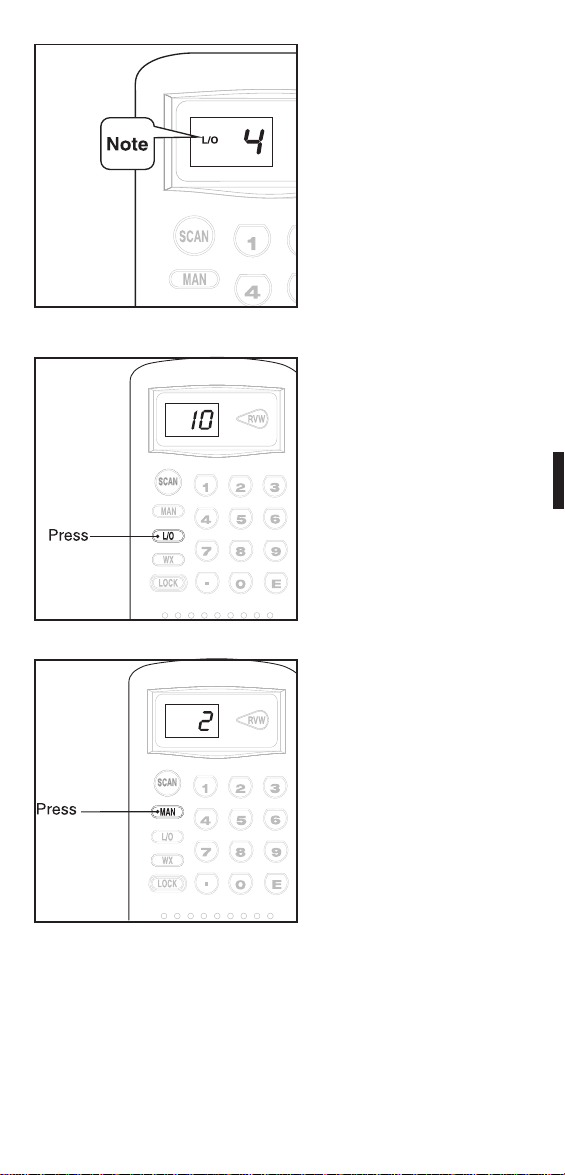
Page 21

Note: For channel 10,
press
The L/O indicator
disappears from the
display after pressing
O
Scanning Weather Channels
1,0
.
.
To scan weather channels:
18
Page 22

To review the weather frequency:
The BC60XLT finds the
active weather channel in
your area from seven
preprogrammed NOAA
frequencies.
Note: The channel
number does not indicate
the NOAA weather
frequency you hear.
The frequency displays
one digit at a time, in
sequence.
To resume normal scanning:
19
Page 23

Care and Maintenance
Low Battery Warning
When the Batteries become weak, you will hear an audible
warning. Be sure to replace Alkaline Batteries as soon as
possible, or you can recharge Nickel-Cadmium Batteries while
they are installed in the scanner.
Replacing the Batteries
See page six.
Location
If strong interference or electrical noise is received,
n
relocate the scanner or its antenna away from the
source of the noise. A higher elevation, if possible, may
provide better reception.
Do not use the scanner in high-moisture environments
n
such as the kitchen or bathroom.
Avoid placing the unit in direct sunlight or near heating
n
elements or vents.
Cleaning
Disconnect the power to the unit before cleaning.
n
n
Clean the outside of the scanner with a mild detergent.
n
To prevent scratches, do not use abrasive cleaners or
solvents. Be careful not to rub the LCD window.
n
Do not use excessive amounts of water.
Repairs
Do not attempt any repair. The scanner contains no user
serviceable parts. Contact the Uniden Customer Service
Center or take it to a qualified repair technician.
Proper Care of Your Scanner
n
Use only the AC Adapter/Charger that came with your
scanner.
n
Avoid placing the scanner in direct sunlight or near
heating elements or vents.
n
Do not subject the scanner to extremes in temperature.
If the scanner is exposed to temperatures below 14°F or
above 140°F, the liquid crystal display may temporarily
cease to function properly, or can become permanently
damaged.
20
Page 24

Optional Accessories and
Replacement Parts
The following optional accessories and replacement parts for
your BC60XLT are available from your local Uniden Dealer or
through the Uniden Customer Service Center by calling:
(800) 297-1023, 8:00 a.m. to 5:00 p.m. Central, Monday
through Friday.
Ω
21
Page 25

Operating Tips
If yourBC60XLT is notperforming properly,trythe stepslisted below.
CONDITION SUGGESTION
Scanner doesn’t turn
on.
Poor reception. Check the antenna connection.
Scanner doesn’t receive
weather channels.
Rotate the Volume control to the
right.
Check the Batteries for correct
installation.
Check the power level of the
Batteries. Replace or recharge
Batteries as necessary.
Check the AC Adapter/Charger or
the (optional) Cigarette Lighter
Adapter for a good electrical
contact at the scanner.
Make sure there is power at the
AC outlet (or the vehicle’s
cigarette lighter).
Check the in-line fuse on the
(optional) Cigarette Lighter
Adapter cord. If blown, replace it
with the same type of fuse.
Make sure the antenna is in a
vertical position.
If you’re inside a building, move
the scanner to a window, an
outside wall, or outdoors.
Check for sources of interference
such as computers, microwave
ovens, or other electrical devices.
Move the scanner as necessary.
You may be too far away from the
stations using the frequencies
you have programmed. Try
another location, or program
frequencies for stations closer to
your area.
Adjust the Squelch setting. It
may be too high.
In some parts of the country, you
may not be able to monitor
weather broadcasts, such as in
low lying areas. Move the
scanner to a higher location.
Reception may be poor. See
above for suggestions.
22
Page 26

CONDITION SUGGESTION
Scan doesn’t stop. Adjust the Squelch setting. It
Scan doesn’t start. Make sure there are some
Keypad won’t work. Check the Keylock. Make sure
may be too high.
Check the antenna connection.
Make sure the antenna is in a
vertical position.
Reception may be poor. See
above for suggestions.
It is possible that none of the
programmed frequencies are
active at the time.
programmed channels.
The scanner may be in Manual
mode. Press
scanning.
The scanner may be stopped on
a weather frequency. Press
to begin scanning.
Adjust the Squelch setting. It
may be too low.
All the channels may be locked
out. Turn off Lockout for the
channels you want to scan.
Keylock is off before
programming or locking out
channels.
S
to begin
S
If you still cannot get satisfactory results and want additional
information, or to return the unit for service, please call or write
the Uniden Parts and Service Division. The address and
phone number are listed in the Warranty (at the end of this
manual).
23
Page 27

Technical Specifications
Channels:
WX:
Frequency
Coverage:
Scan Rate:
Scan Delay:
Audio Output:
Antenna:
Operating
Temperature:
Size:
10
7 Programmed Channels (All NOAA
Weather Service)
29.00 to 29.70 MHz
29.70 to 50.00 MHz
50.00 to 54.00 MHz
137.00 to 144.00 MHz
144.00 to 148.00 MHz
148.00 to 174.00 MHz
406.00 to 420.00 MHz
420.00 to 450.00 MHz
450.00 to 470.00 MHz
470.00 to 512.00 MHz
10 channels per sec. Max.
2 seconds
250 mW nominal into 8Ω internal speaker
Rubber antenna included
- 10°C (14°F) to + 60°C (+ 140°F)
2-1/2" (W) x 1-3/4" (D) x 12-3/4" (H)
(with antenna attached)
Weight:
Power
Requirements:
12.6 oz
6.0V DC — provided by 4 AA Alkaline
Batteries
4.8V DC — provided by 4 AA rechargeable
Nickel-Cadmium Batteries, or
External
12V DC — provided by the included AC
Adapter/Charger, or an
optional Cigarette Lighter
Adapter
Certified in accordance with FCC Rules and Regulations Part
15 Subpart C as of date of manufacture.
Features, specifications, and availability of optional
accessories are all subject to change without notice.
24
Page 28

One Year Limited Warranty
WARRANTOR: UNIDEN AMERICA CORPORATION (“Uniden”)
ELEMENTS OF WARRANTY: Uniden warrants, for one year,
to the original retail owner, this Uniden Product to be free from
defects in materials and craftsmanship with only the limitations
or exclusions set out below.
WARRANTY DURATION: This warranty to the original user
shall terminate and be of no further effect 12 months after the
date of original retail sale. The warranty is invalid if the Product
is (A) damaged or not maintained as reasonable or necessary,
(B) modified, altered, or used as part of any conversion kits,
sub- assemblies, or any configurations not sold by Uniden,(C)
improperly installed, (D) serviced or repaired by someone
other than an authorized Uniden service center for a defect or
malfunction covered by this warranty, (E) used in any
conjunction with equipment or parts or as part of any system
not manufactured by Uniden, or (F) installed or programmed
by anyone other than as detailed by the Operating Guide for
this product.
STATEMENT OF REMEDY: In the event that the product
does not conform to this warranty at any time while this
warranty is in effect, warrantor will repair the defect and return
it to you without charge for parts, service, or any other cost
(except shipping and handling) incurred by warrantor or its
representatives in connection with the performance of this
warranty. THE LIMITED WARRANTY SET FORTH ABOVE IS
THE SOLE AND ENTIRE WARRANTY PERTAINING TO THE
PRODUCT AND IS IN LIEU OF AND EXCLUDES ALL
OTHER WARRANTIES OF ANY NATURE WHATSOEVER,
WHETHER EXPRESS, IMPLIED OR ARISING BY
OPERATION OF LAW, INCLUDING, BUT NOT LIMITED TO
ANY IMPLIED WARRANTIES OF MERCHANT ABILITY OR
FITNESS FOR A PARTICULAR PURPOSE. THIS
WARRANTY DOES NOT COVER OR PROVIDE FOR THE
REIMBURSEMENT OR PAYMENT OF INCIDENTAL OR
CONSEQUENTIAL DAMAGES. Some states do not allow this
exclusion or limitation of incidental or consequential damages
so the above limitation or exclusion may not apply to you.
LEGAL REMEDIES: This warranty gives you specific legal
rights, and you may also have other rights which vary from
state to state. This warranty is void outside the United States
of America.
PROCEDURE FOR OBTAINING PERFORMANCE OF
WARRANTY: If, after following the instructions in this
Operating Guide you are certain that the Product is defective,
pack the Product carefully (preferably in its original
packaging). Include evidence of original purchase and a note
describing the defect that has caused you to return it. The
Product should be shipped freight prepaid by traceable means,
or delivered, to warrantor at:
Uniden America Corporation
Parts and Service Division
4700 Amon Carter Blvd.
Ft. Worth, TX 76155
(800) 297-1023, 8 a.m.to 5 p.m. Central, Monday through Friday
Page 29

COVERED UNDER ONE OR MORE OF THE
FOLLOWING U.S. PATENTS
RE 31,523 4,027,251 4,057,760 4,092,594 4,100,497
4,114,103 4,123,715 4,156,193 4,157,505 4,179,662
4,219,821 4,270,217 4,398,304 4,409,688 4,455,679
4,461,036 4,521,915 4,627,100 4,888,815 4,932,074
4,947,456 5,014,348 5199,109
©1994, Uniden AmericaCorporation. All rights reserved.
UBUD01226ZZ Printed in thePhillippines
 Loading...