

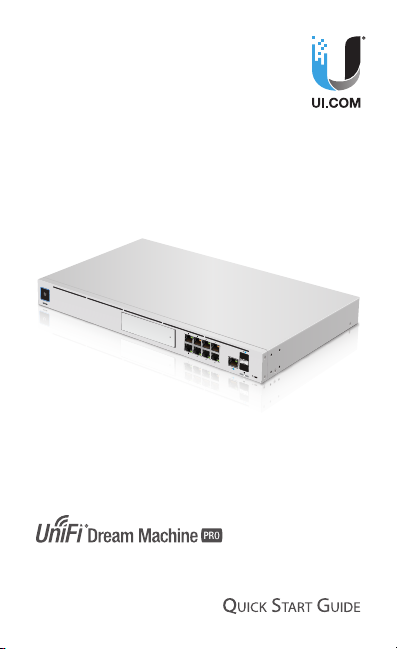
Enterprise Security Gateway
and Network Appliance with
10G SFP+
Model: UDM-Pro
Introduction
Thank you for purchasing the Ubiquiti® UniFi® Dream
MachinePro. This Quick Start Guide is designed to guide you
through installation and also includes warrantyterms.
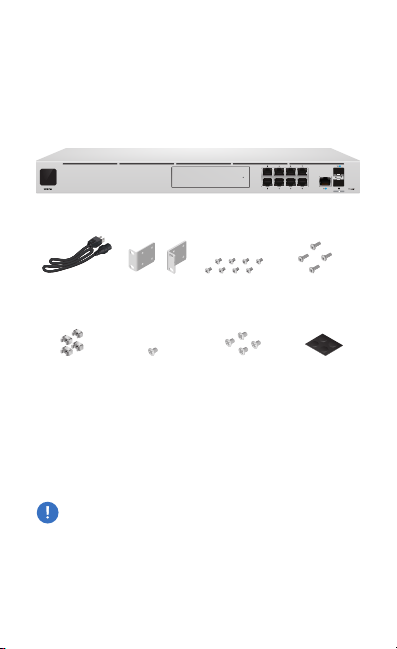
Package Contents
UniFi Dream Machine Pro
Power Cord Rack-Mount
Cage Nuts
(Qty. 4)
Brackets (Qty. 2)
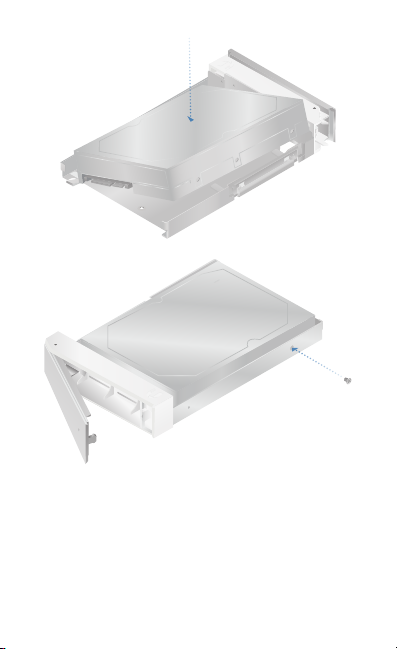
Security Screw 2.5" HDD Screws
Bracket Screws
(Qty. 8)
(Qty. 4)
Mounting Screws
(Qty. 4)
Rubber Feet
(Qty. 4)
System Requirement
Either of the following is required:
• iOS or Android™ Mobile Device with UniFi App Installed
• Web Browser: Google Chrome (Other browsers may have
limited functionality)
IMPORTANT: We strongly recommend using UPS backup
and power regulation to prevent equipment damage due
to stability issues with local AC power.
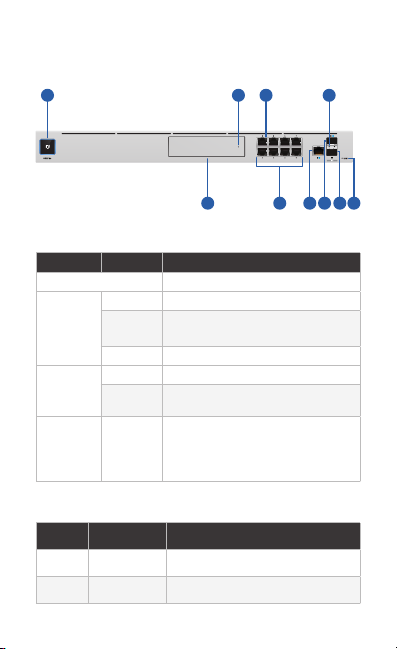
Hardware Overview
1 2 3
4
LEDs
5 6 7 8 9 10
System LED
Color State Status
Bootup Animation Initializing
White Solid Device is ready to be configured
Blue Solid Device is configured and ready
Off/White/
Blue
HDD LED
Flashing Device is booting up
Device is initializing/deinitializing
Heartbeat Firmware update in process
Slow
Flashing
Client connected to device via
Bluetooth (BLE)
Flashing Device is in recovery mode.
The LED will cycle through a pattern
at one-second intervals, between
off, white, and blue.
Color State Status
White Flashing Indicates Read/Write Activity
Amber Steady Indicates HDD Error
RJ-45 Speed/
Link/Activity
LED (Ports
1 - 9)
SFP+ Speed/
Link/Activity
LED (Ports
10 - 11)
State Status
Off No Link
Amber
Green
Off No Link
Green
White
Link Established at 10/100Mbps
Flashing Indicates Activity
Link Established at 1Gbps
Flashing Indicates Activity
Link Established at 1Gbps
Flashing Indicates Activity
Link Established at 10Gbps
Flashing Indicates Activity
Item Description
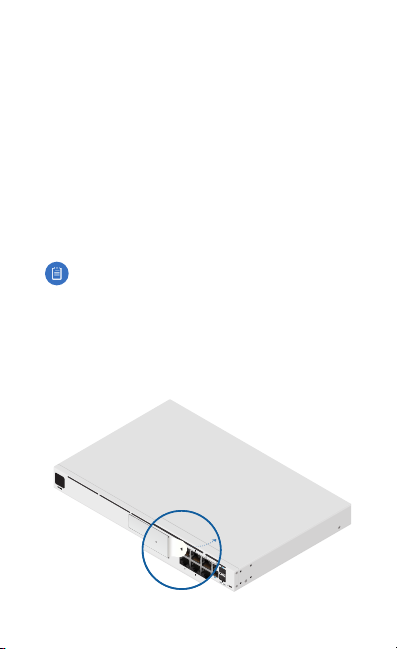
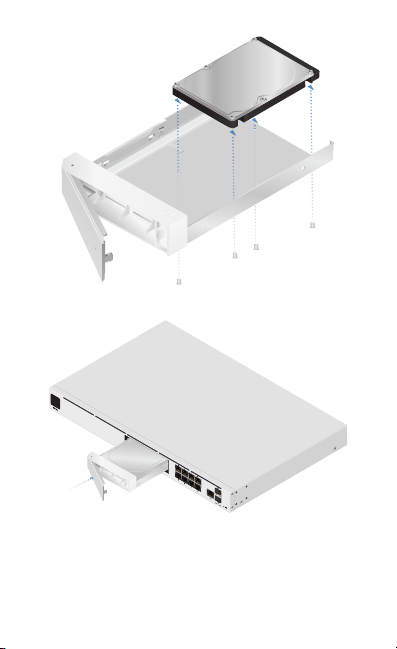
HDD Bay
RJ45 LAN
(Ports 1 - 8)
RJ45 Internet
(Port 9)
SFP+ Internet
(Port 10)
SFP+ LAN
(Port 11)
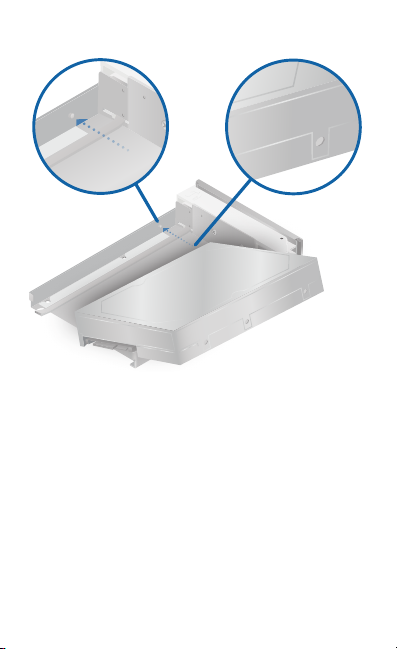
Install a 3.5" or 2.5" HDD (not included) to
use the device as an NVR for UniFi Protect.
The RJ45 ports support 10/100/1000
Ethernet connections. By default, they are set
to DHCP Server with the fallback IP address,
192.168.1.1/24.
The RJ45 port supports a 10/100/1000
Ethernet connection. Set to DHCP Client by
default.
The SFP+ port supports a 1/10G Ethernet
connection. Set to DHCP Client by default.
The SFP+ port supports a 1/10G Ethernet
connection. By default, it is set to DHCP
Server with the fallback IP address,
192.168.1.1/24.

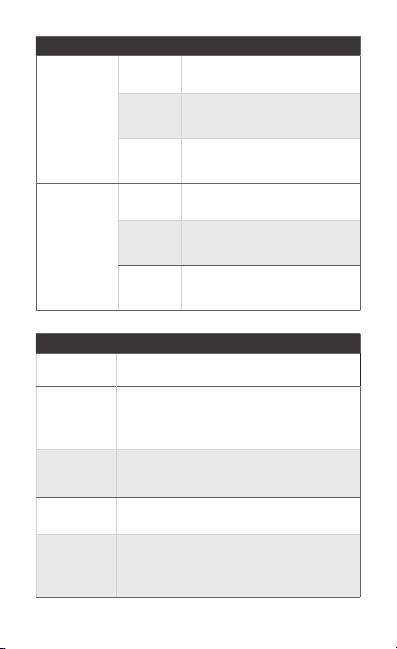
Item Description
11
Resets to factory defaults. The device
should be running after bootup is complete.
Reset Button
Press and hold the Reset button for about
10seconds until the LED starts flashing and
then becomes solidly lit. After a few seconds,
the LED will turn off, and the device will
automatically reboot.
12 13
Item Description
USP RPS LED Reserved for future use.
USP RPS Input Reserved for future use.
Power Connect the included Power Cord to the
Power port.
Installation Requirements
• Phillips screwdriver
• Standard-sized, 19" wide rack with a minimum of 1U height
available
• For indoor applications, use Category 5 (or above) UTP
cabling approved for indoor use.
• For outdoor applications, shielded Category 5 (or above)
cabling should be used for all wired Ethernet connections
and should be grounded through the AC ground of the
power supply.
We recommend that you protect your networks from
harmful outdoor environments and destructive ESD events
with industrial-grade, shielded Ethernet cable from Ubiquiti.
For more details, visit: ui.com/toughcable
Note: Although the cabling can be located outdoors,
the UDM-Pro itself should be housed inside a
protective enclosure.
Before You Begin
Ensure the device is powered off before you install the 3.5" or
2.5" HDD (not included).
1.
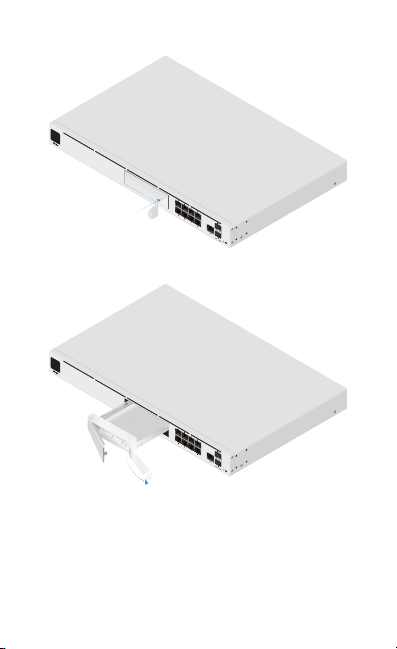
2.
3.
4.
OR
5.
 Loading...