


Thermal Arc 186 AC/DC
Setup Guide
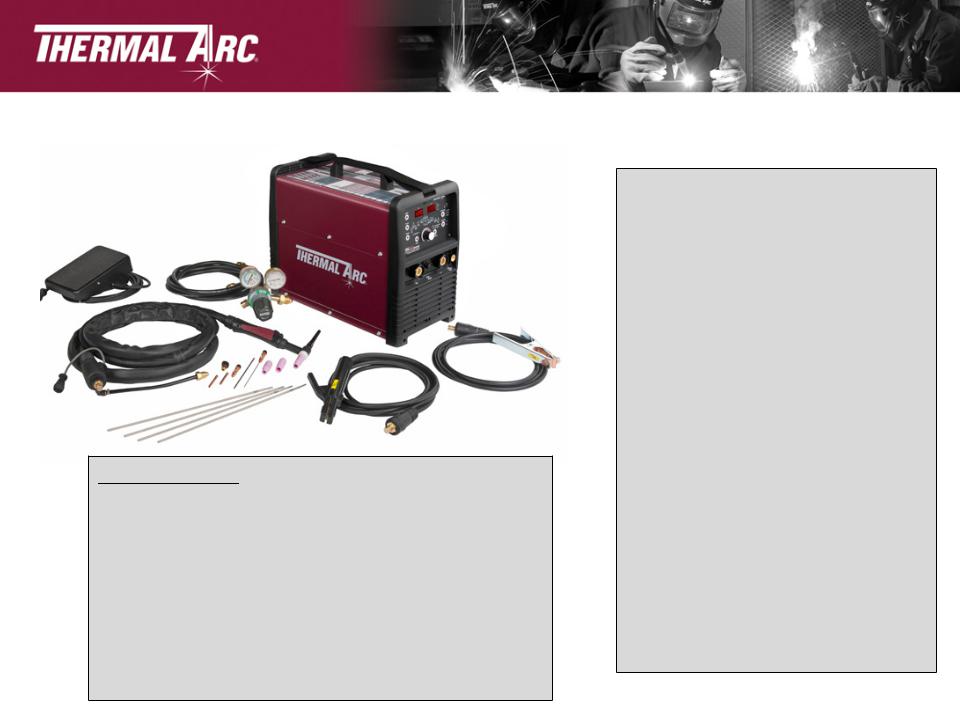
Thermal Arc 186 AC/DC Complete
QUICK SPECIFICATIONS
PROCESSES :
HF TIG (GTAW) LiF TIG (GTAW)
STICK (SMAW)
RATED OUTPUT
200A / 18V @ 20% Duty Cycle
180A / 17.2V @ 25% Duty Cycle
150A / 16V @ 35% Duty cycle
MAX. OPEN CIRCUIT VOLTAGE
70.3V DC / 50 VAC
AMPERAGE RANGE
10-200 A
WEIGHT
48.4 lbs (22 kg)
•

Digital
Displays both actual
voltage of Also used to in
Trigger
Control
Button
Programming Parameter
Indicator Lights

TIG |
Modules Overview |
|
TIG Torch Contents: |
|
• 26 TIG Torch with Long Back Cap |
|
• 12.5 ft lead length |
|
• 10. 5 in gas hose length |
|
• 9.5 in control lead with 8 pin plug and Rigid Head. |
Dfsdfsdf
Sdfsdf
Additional switches/controls are interchangeable with the sdfsdf
installed control in the TIG torch.
Control module |
Control module with |
Control module |
|
with roller |
|
||
with push button |
push button on/off |
|
|
potentiometer and |
|
||
on/off switch only. |
switch with roller |
|
|
integrated on/off |
|
||
|
potentiometer. |
|
|
|
switch. |
Slide 4 |
|
|
|
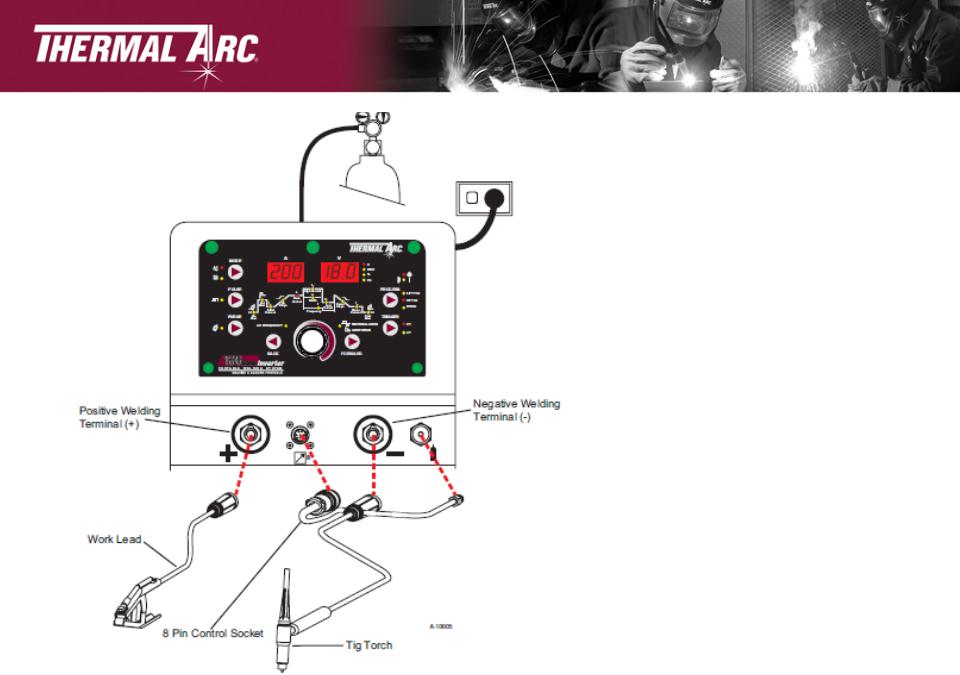
TIG Setup
1. Connect the TIG Torch to the negative welding terminal (-). Welding current flows from the power source is
heavy duty bayonet type terminals. It is essential, however, that the male plug is inserted and turned securely
to achieve a sound electrical connection.
2. Connect the work lead to the positive welding terminal (+). Welding current flows from the Power Source is
heavy duty bayonet type terminals. It is essential, however, that the male plug is inserted and turned securely
to achieve a sound electrical connection.
3. Fit the welding grade shielding gas regulator/flowmeter to the shielding gas cylinder, then connect the shielding gas hose from the regulator/flow meter outlet gas INLET on the rear of the 186 AC/DC Power Source. Connect the gas hose from the TIG torch to the gas OUTLET on the front of the
186 AC/DC Power Source.
Slide 5
 Loading...