

Page 1
Thank you for purchasing OC200, the Omada Hardware
Controller. This Installation Guide is designed to guide you
through installation.
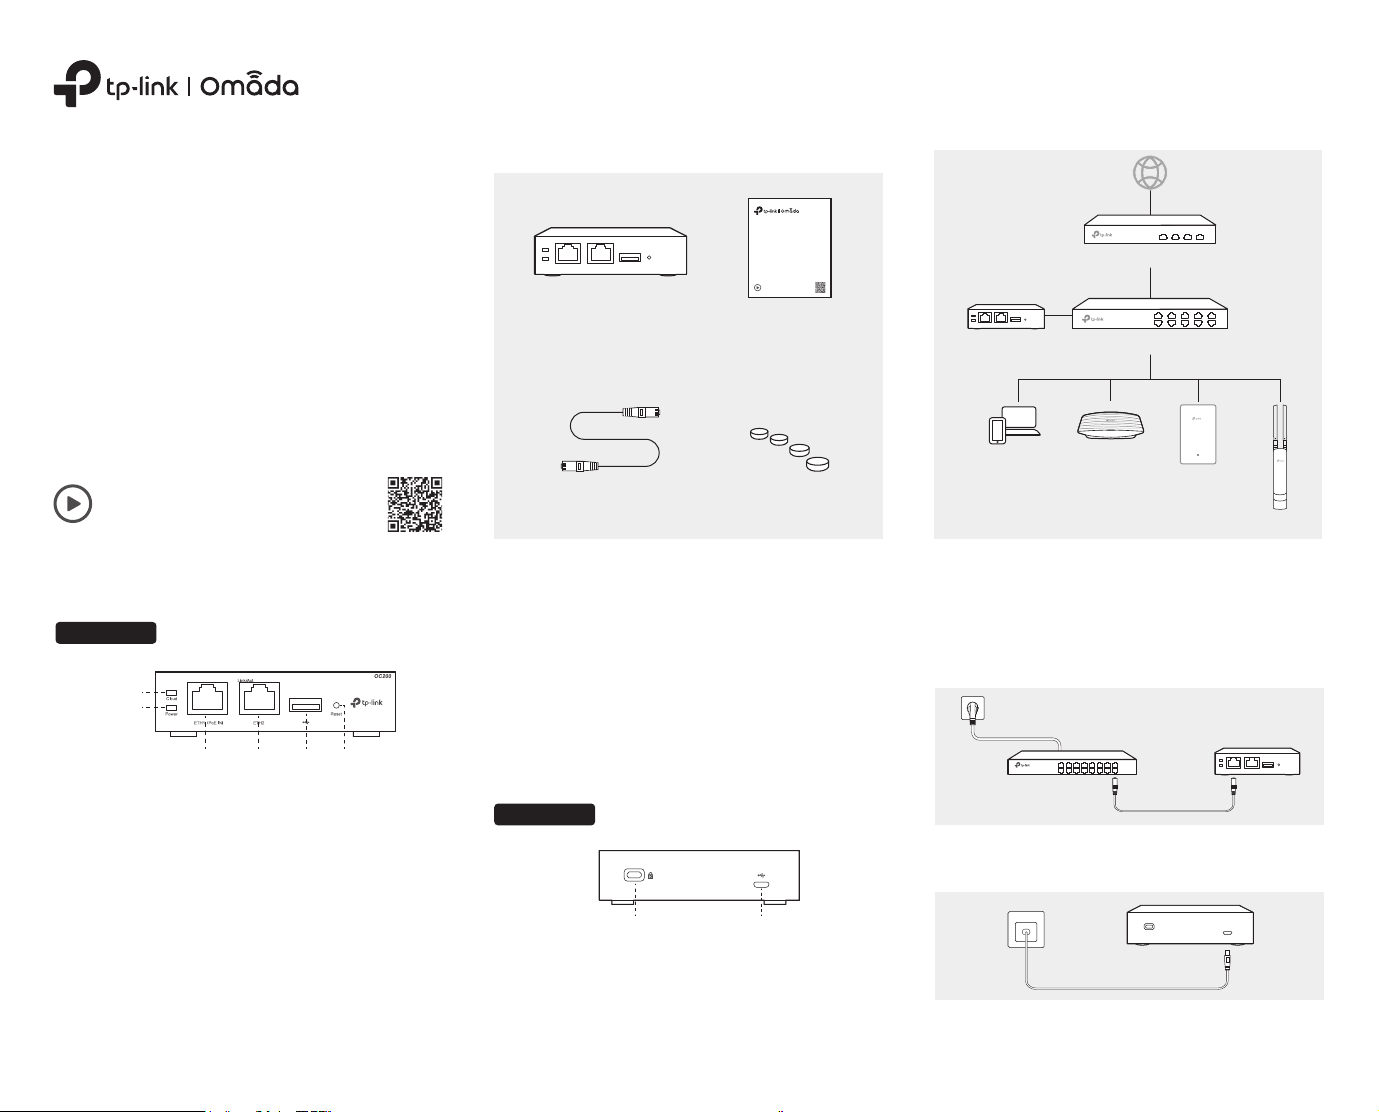
Package Contents
Typical Network Topology
A DHCP server (typically a router) with DHCP function enabled is
required to assign IP addresses to the EAPs and OC200 in your
local network.
Installation Guide
Omada Hardware Controller
Setup with videos
Scan QR code or visit
https://www.tp-link.com/support/setup-video/
Hardware Overview
Front Panel
Cloud LED
Power LED
Cloud LED
On: The device is bound to a TP-Link ID.
Slow Flashing: The device is connected to cloud but not
bound to a TP-Link ID.
Quick Flashing: The device is being reset to its factory default
settings.
O: The device is disconnected from cloud.
Omada Hardware Controller
ETH1 (PoE IN) ETH2 USB 2.0 Port Reset
Installation Guide
Omada Hardware Controller
Setup with videos
Scan QR code or visit
https://www.tp-link.com/support/setup-video/
OC200
Ethernet Cable
Installation Guide
Feet
ETH2 Port
Connected to a device to transmit data.
USB 2.0 Port
Connected to a storage device to automatically back up the
conguration le and database. This function is only available
when OC200 is powered by a PoE device.
Reset Button
After the device is initialized, press and hold the button for 5
seconds to reset the device to its factory default settings.
Rear Panel
Router
SwitchOC200
Celling Mount APManagement Device
Wall Plate AP
Outdoor AP
Power On
Via Standard PoE Device
Connect an Ethernet cable from the ETH1 (PoE IN) port of
OC200 to a standard 802.3af or 802.3at PoE device, such as
TP-Link PoE switch.
Via USB Power Source
Connect a USB cable (not provided) from the micro USB port
of OC200 to the USB Power Source (5V DC, minimum 1A).
Power LED
On: Working normally.
O: Working abnormally.
ETH1 (PoE IN) Port
Connected to a standard 802.3af or 802.3at PoE device, such
as a TP-Link PoE switch, to transmit data and gain power
supply simultaneously.
© 2020 TP-Link 7106508627 REV1.1.0
Kensington Security Slot
Micro USB
Kensington Security Slot
Secure the lock (not provided) into the security slot to prevent
the device from being stolen.
Micro USB
Connected to a USB Power Source (5V DC, minimum 1A) to
gain power supply if PoE is not available.
The Cloud LED ashes three times when initialization is
completed.
Page 2
Software Congurations
OC200 supports two management options:
To configure and manage OC200 without requiring internet access, please refer to Local Management.
To configure and manage OC200 via cloud access, please refer to Remote Management.
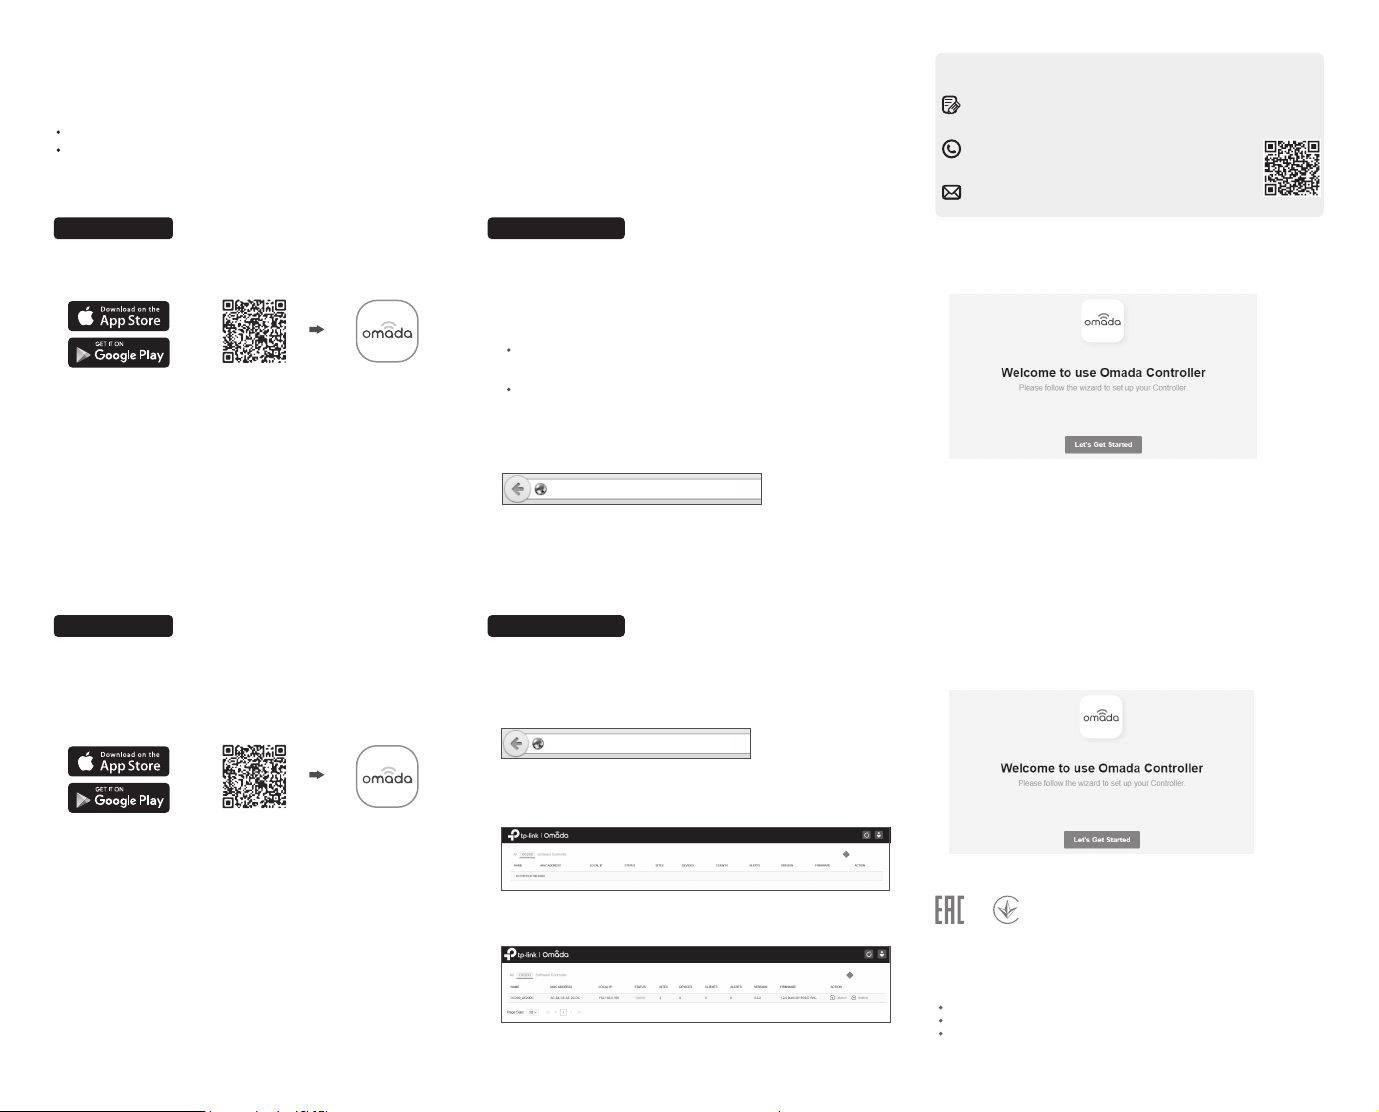
Local Management
Via Omada App
Via a Web Browser
For detailed configurations, please visit https://www.tp-link.com/support
to download the User Guide of EAP in the download center.
To ask questions, find answers, and communicate with TP-Link users
or engineers, please visit https://community.tp-link.com to join
TP-Link Community.
For technical support, the user guide and other information,
please visit https://www.tp-link.com/support, or simply
scan the QR code.
If you have any suggestions or needs on the product
guides, welcome to email techwriter@tp-link.com.cn.
1. Download the Omada app on your mobile device. It can be
downloaded from Apple Store or Google Play:
or
Scan for Omada App Download Omada App
2. Make sure that your mobile device and OC200 are on the
same subnet.
3. Launch the app and go to Local Access. Then tap the +
button on the upper-right corner to add OC200.
4. Follow the step-by-step instructions to complete the
conguration wizard.
Remote Management
Via Omada App
1. Make sure that your mobile device and OC200 can access
the internet.
2. Download the Omada app on your mobile device. It can be
downloaded from Apple Store or Google Play:
or
Scan for Omada App Download Omada App
3. Launch the app and go to Cloud Access. Then log in with
your TP-Link ID.
4. Tap the + button on the upper-right corner and follow the
instructions in the app to add OC200.
5. Follow the step-by-step instructions to complete the
conguration wizard.
1. Make sure that your management device and OC200 are on
the same subnet.
2. Check the DHCP server (typically a router) for OC200’s IP
Address. The default fallback IP address is 192.168.0.253.
If you have downloaded the Omada app, you can also
check the app for OC200’s IP address.
The fallback IP address is used when OC200 fails to get
dynamic IP address from the DHCP server.
3. Launch a web browser and type OC200’s IP address in the
address bar, then press Enter (Windows) or Return (Mac).
https://<IP_address>
Via a Web Browser
1. Make sure that your management device and OC200 can
access the internet.
2. Launch a web browser and type https://omada.tplinkcloud.com
in the address bar, then press Enter (Windows) or Return (Mac).
https://omada.tplinkcloud.com
3. Enter your TP-Link ID and password to log in. Then click Add
Hardware Controller and follow the instructions to add your
OC200.
Add Hardware Controller
4. Click Launch in the Action column to visit the web
management interface of OC200.
Add Hardware Controller
4. Click Let’s Get Started and follow the step-by-step
instructions to complete the conguration wizard.
For detailed congurations, please visit
https://www.tp-link.com/support to download the User
Guide of OC200 in the download center.
5. Click Let’s Get Started and follow the step-by-step
instructions to complete the conguration wizard.
TP-Link hereby declares that the device is in compliance with the essential requirements
and other relevant provisions of directives 2014/53/EU, 2009/125/EC, 2011/65/EU and
(EU)2015/863.
The original EU declaration of conformity may be found at https//www.tp-link.com/en/ce.
Safety Information
Keep the device away from water, re, humidity or hot environments.
Do not attempt to disassemble, repair, or modify the device.
Do not use the device where wireless devices are not allowed.
 Loading...