

Toyota SP200 Series, XXX15C, XXX15D, SuperJ15 Instruction Manual
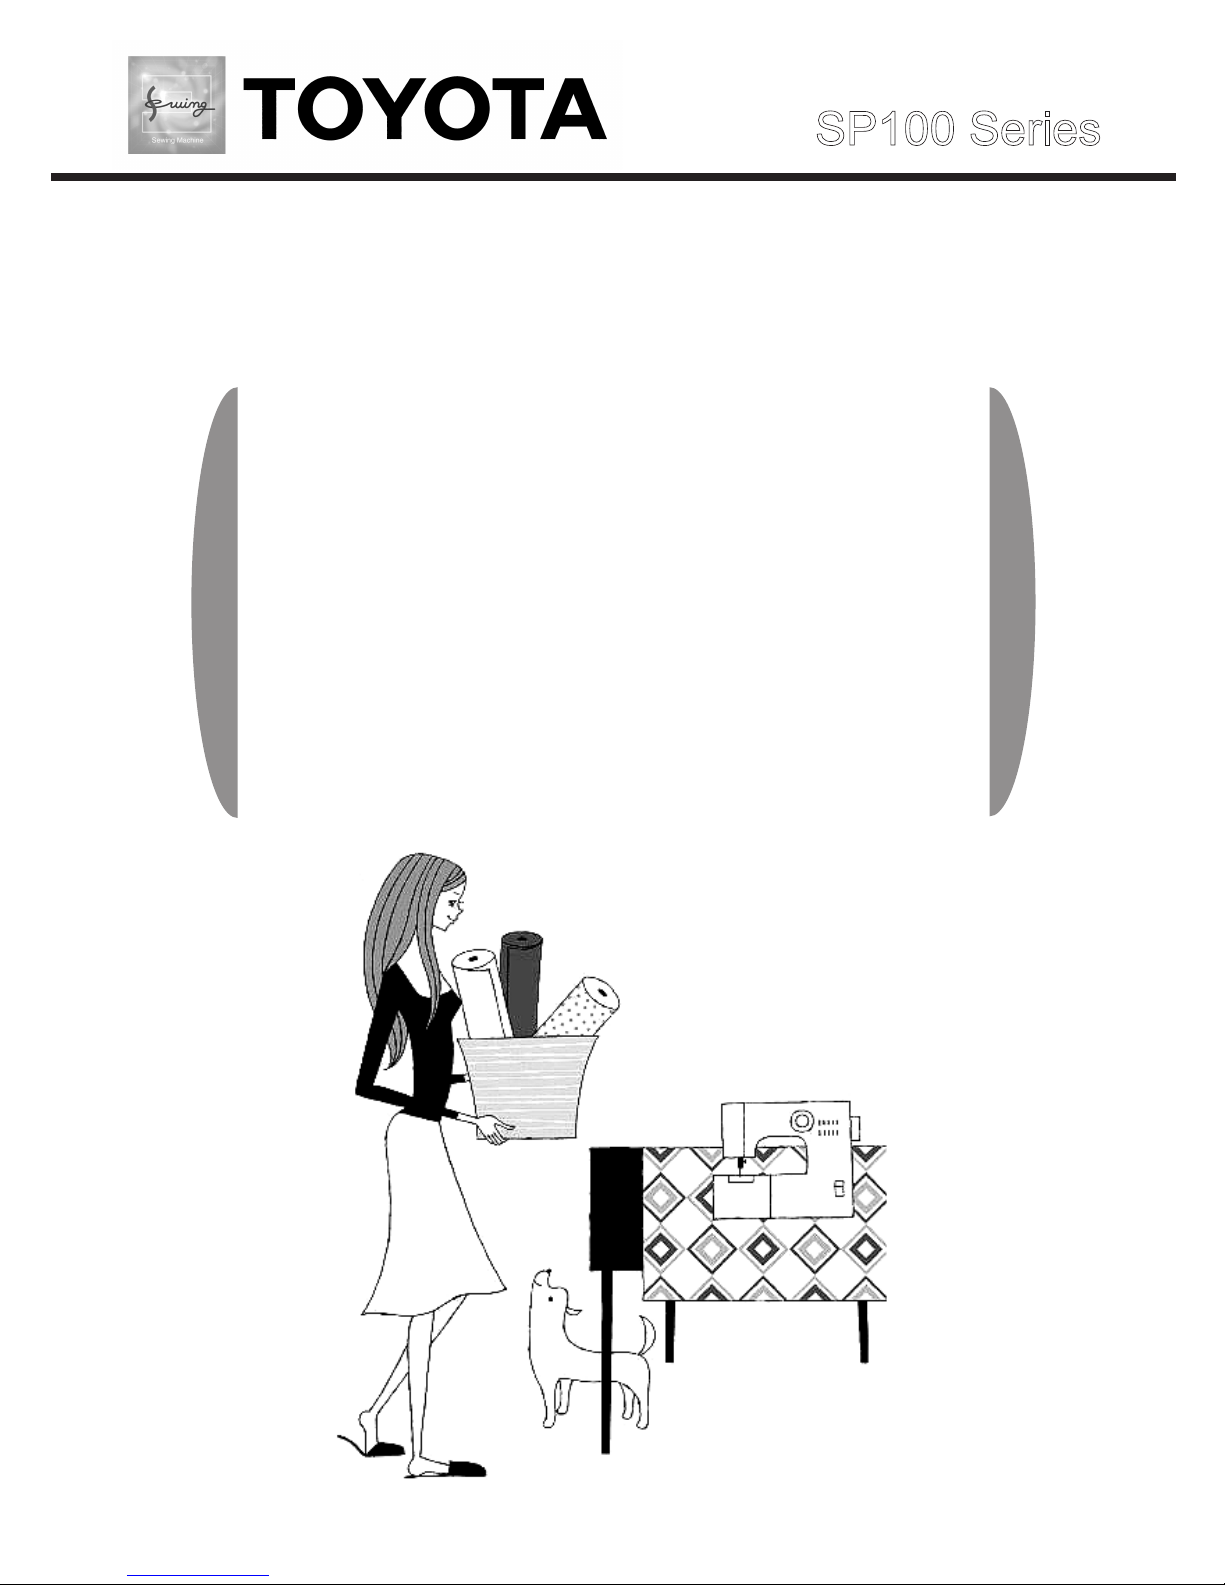
SP100 Series
Read this manual carefully before use and always follow the •
instructions.
Keep the manual in a convenient place for easy reference.•
If you give the sewing machine to someone else, also give •
them this instruction manual.
HOME-USE SEWING MACHINE
INSTRUCTION
MANUAL

1
2
3
4
5
2
Contents
Before use (Be sure to read this section before use)
Important safety instructions
•
............................................. 3
How to change the power plug
•
......................................... 5
Part names
•
....................................................................... 6
Part names and their functions
•
......................................... 8
Quick adviser
•
.................................................................. 10
How to operate foot controller
•
......................................... 11
Sewing preparations
Connecting the power
•
..................................................... 12
Winding the lower thread
•
................................................ 14
Threading the lower thread
•
............................................. 16
Threading the upper thread
•
............................................ 18
Using the needle threader
•
.............................................. 20
Pulling up the lower thread
•
............................................. 22
Application of each stitch pattern
•
.................................... 23
Changing the presser foot
•
..............................................24
Changing the needle
•
....................................................... 26
Relationship between the needle, thread and fabric, and
•
adjusting the thread tension............................................ 27
Sewing
Straight stitching and reverse sewing
•
............................. 28
Zigzag sewing
•
................................................................. 32
Adjusting thread tension
•
................................................. 33
Buttonhole sewing
•
.......................................................... 34
Overcasting
•
..................................................................... 37
Zipper insertion
•
............................................................... 38
Blind hem stitching
•
.......................................................... 40
Maintenance
Feed dog and hook maintenance
•
................................... 42
Changing light bulb
•
......................................................... 46
Servicing double-insulated products (230V-240V)
•
.......... 47
Notice about the incandescent lamp
•
............................... 47
Troubleshooting
•
.............................................................. 47
Others
Recycling
•
........................................................................ 50
Specications
•
.................................................................. 51
1
1
3
Before use (Be sure to read this section before use)
Before use
(Be sure to read this section before use)
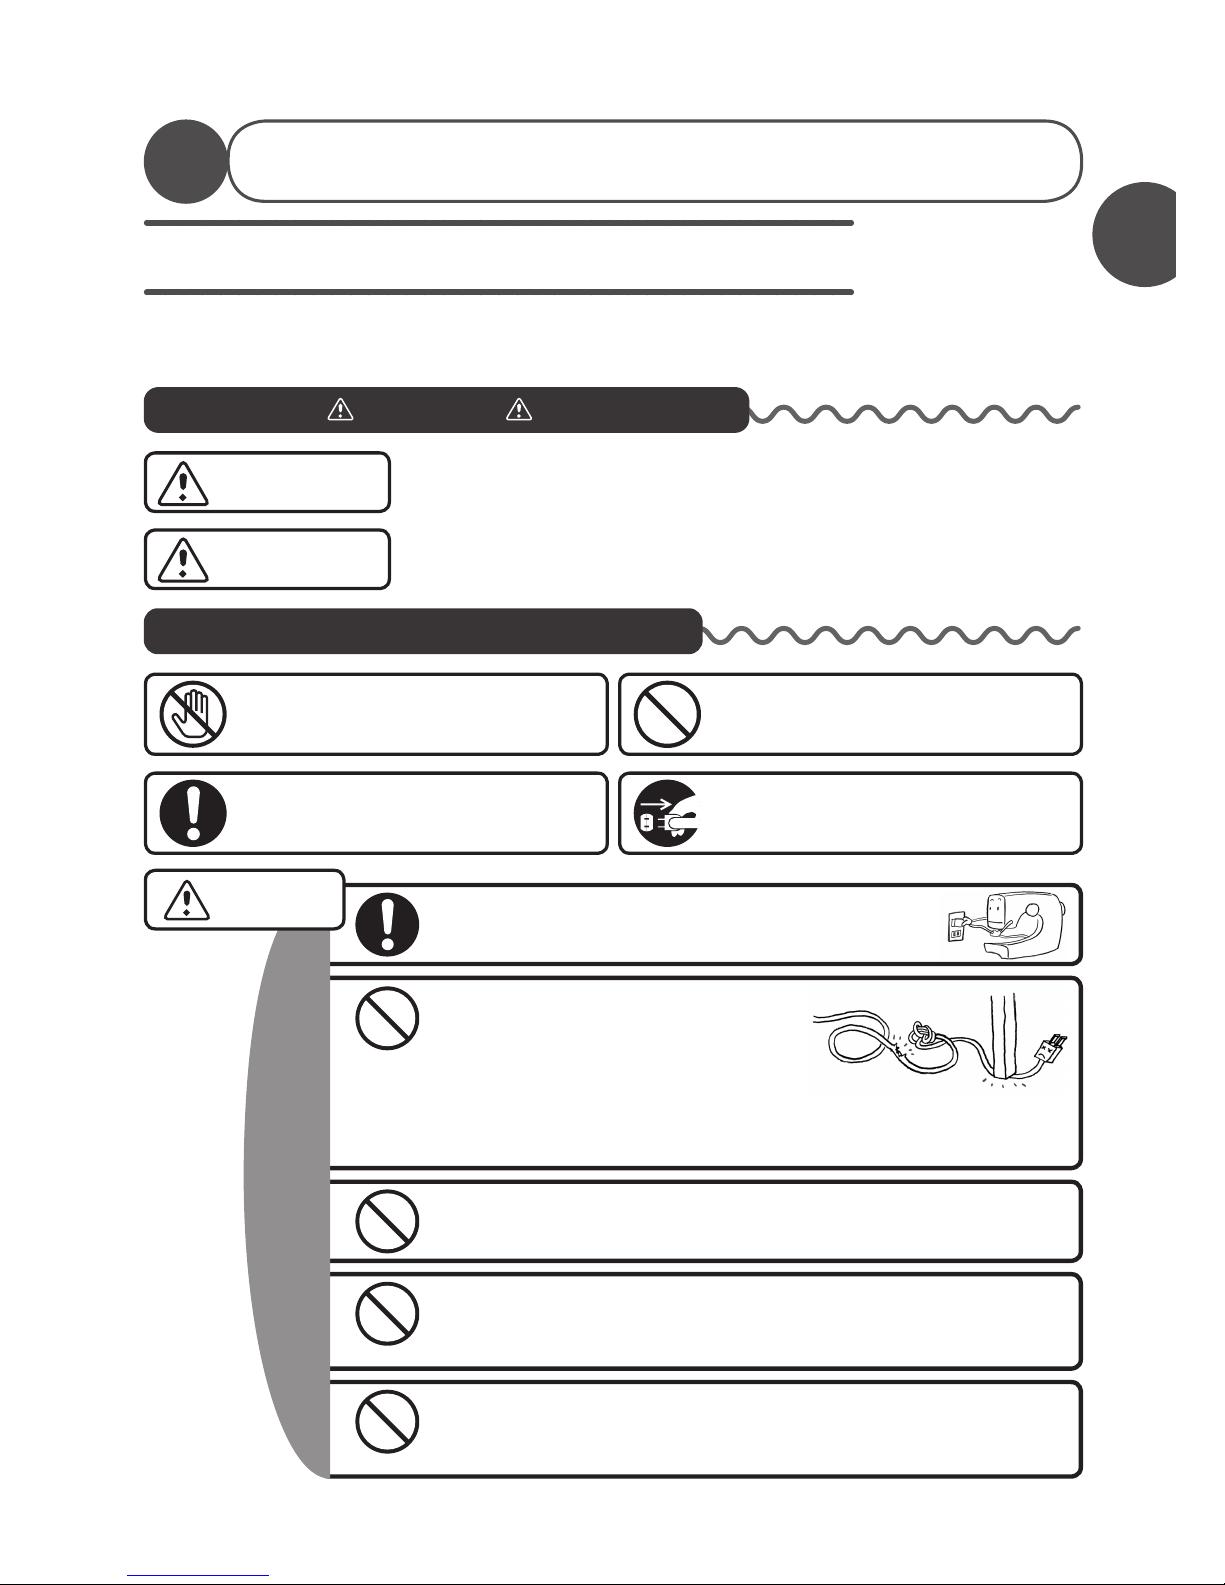
Important safety instructions
These safety instructions are designed to prevent danger or damage arising from the
incorrect operation of the machine. Read carefully and always follow the instructions.
Explanation of “ Warning” and “ Caution”
Warning
An incorrect operation could result in death or serious injury.
An incorrect operation could result in an injury or damage to
the machine.
Symbol explanation
Use an AC 220 to 240 V power source.
Not doing so could cause an electric shock or a re.
If the power cord is damaged, it must be replaced by a special cord or
assembly available from the manufacturer or its service agent.
Do not use outdoors.
Doing so could cause an electric shock or a re.
Do not damage the power cord,
modify it, bend it excessively, jerk it
or twist it.
Doing so could cause an electric shock
or a re.
Do not operate where aerosol (spray) products are being
used or where oxygen is being administered.
Doing so could cause a re.
Do not repair, disassemble or modify except what is
mentioned in the instruction manual.
Doing so could cause an electric shock, a re or an injury.
Do not touch.
Required actions
Prohibited actions
Remove the power plug from
the outlet.
Caution
Warning
4
Before using the sewing machine make sure that the presser
foot holder clamp screw, needle clamp screw and needle
plate screw are rmly tightened, and that the presser foot is
properly set in the presser foot holder.
Not doing so could cause an injury.
When the machine is not in use it should be stored safely, not
on the oor as protruding parts could cause injury if a person
fell on the machine.
Not doing so could cause an injury.
Do not look away from the needle while
operating the sewing machine.
If the needle breaks it could cause an injury.
Do not touch moving parts such as the needle,
take-up lever or handwheel.
Doing so could cause an injury.
Do not place your hand or ngers under the
needle.
Doing so could cause an injury.
Do not use when young children are near the
machine.
They could touch the needle and be injured.
When leaving the sewing machine after using it,
use the main power switch to turn off the sewing
machine, and then remove the power plug from
the outlet.
Not doing so could cause an injury.
Before changing the needle or threading the lower
thread or upper thread, use the main power switch
to turn off the sewing machine.
Not doing so could cause an injury.
On Off
Children should only use the machine under the
supervision of a parent or guardian.
Otherwise they could injure themselves.
Caution
Be sure to close the bobbin case cover before operating the
sewing machine.
Not doing so could cause an injury.
1
5
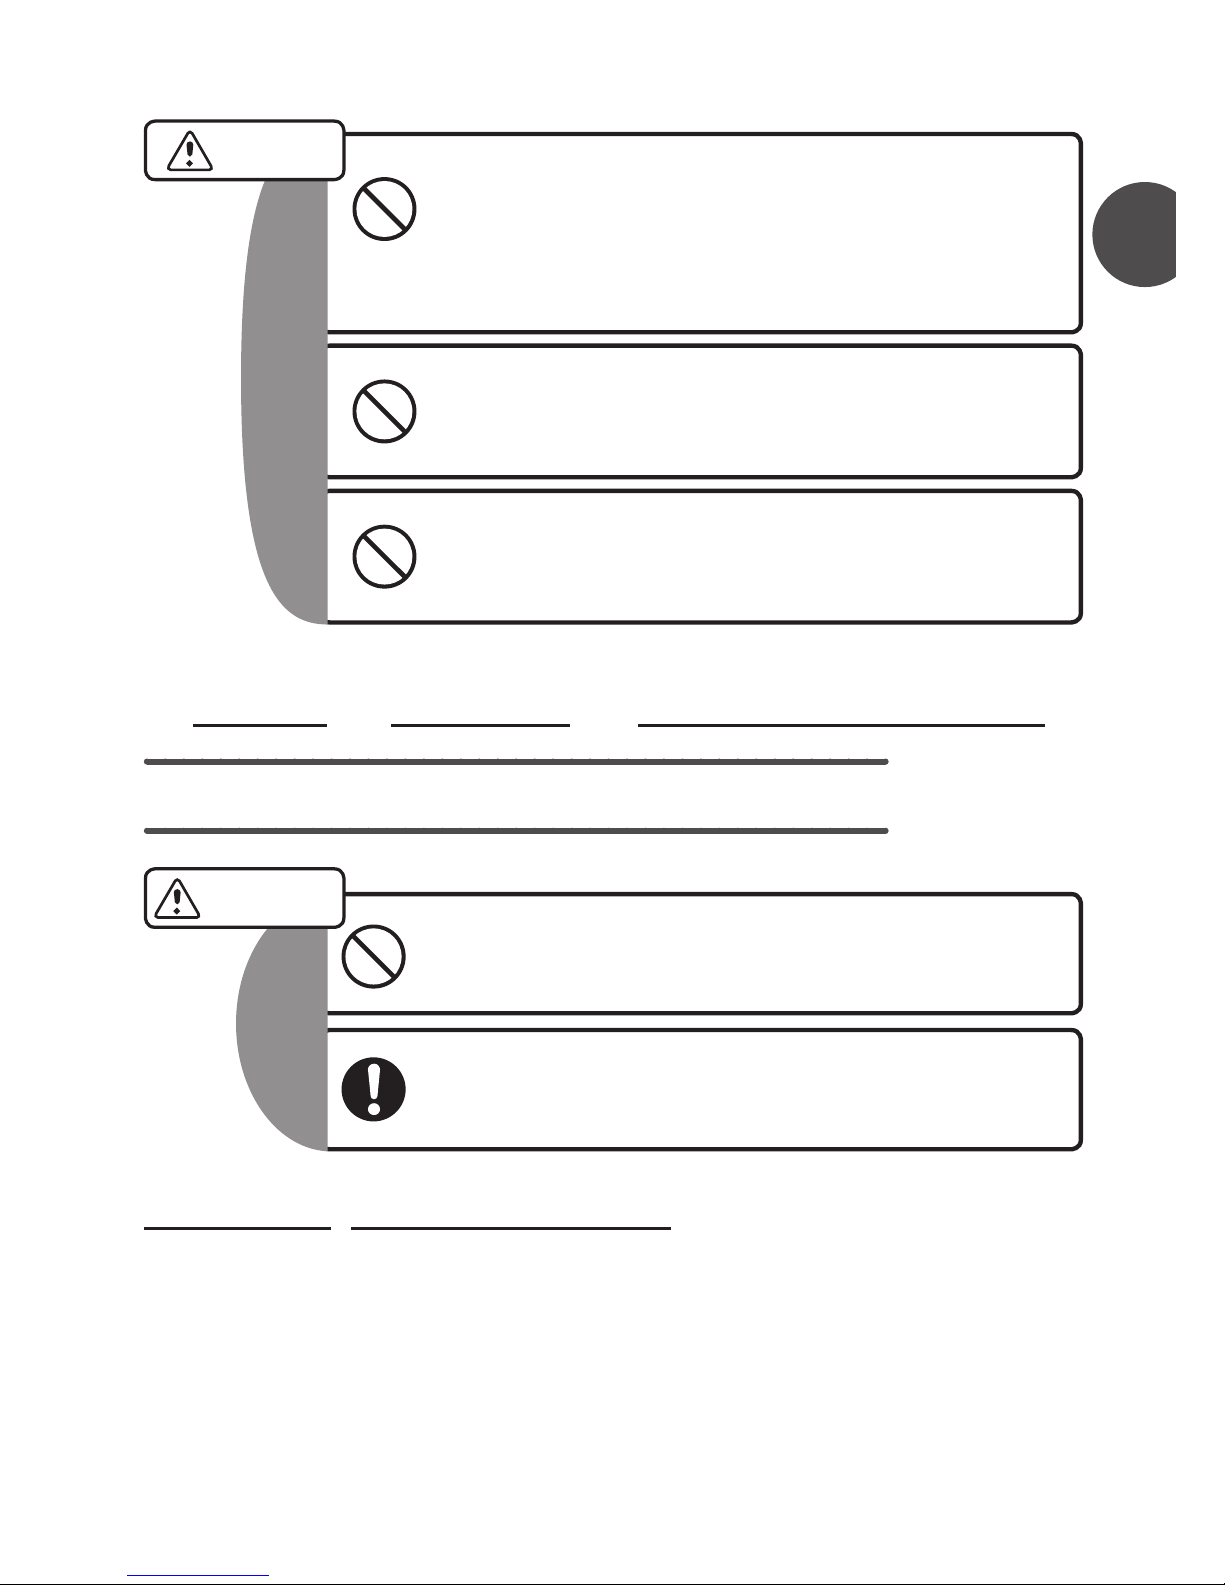
Before use (Be sure to read this section before use)
Do not drop or insert any foreign objects into any openings
such as opening space when you remove the face cover and /
or the outer casing space of bobbin case.
Doing so could cause an injury or damages to the machine.
Do not operate on an unstable surface such as a sofa or a
bed.
If the sewing machine falls down, it could cause an injury or
damages to the machine.
Do not perform the following actions.
Doing so could cause an injury.
Sewing without lowering the presser foot.
•
Sewing while the needle is incorrectly installed.
•
Using a bent needle.
•
Sewing while jerking the fabric.
•
Moving the pattern selection dial while sewing.
•
When you change the power plug or cord, do not repair,
disassemble or modify except at the authorised dealer or
service centre.
Doing so could cause an electric shock or a re
If for any reason the power plug for this product is removed it
should be immediately disposed of safety and not stored
anywhere where it could be inadvertently used again.
Doing so could cause an electric shock or a re
Warning
The wires in this mains lead are coloured in accordance with the following code:
BLUE-NEUTRAL BROWN-LIVE ( OR ACTIVE )
As the colours of the mains lead of this appliance may not correspond with the coloured
markings identifying the terminals in your plug - PROCEED AS FOLLOWS:
The earth plug pin is unnecessary. As the machine is designed under double insulation
structure, the earth wire is removed from the machine. The wire coloured BROWN must
be connected to the terminal marked L or A or coloured RED. The wire coloured BLUE
must be connected to the terminal marked N or coloured BLACK. Neither core is to be
connected to the earth terminal of a three-pin plug.
UK ONLY IMPORTANT PLEASE READ CAREFULLY
How to change the power plug
Caution
6
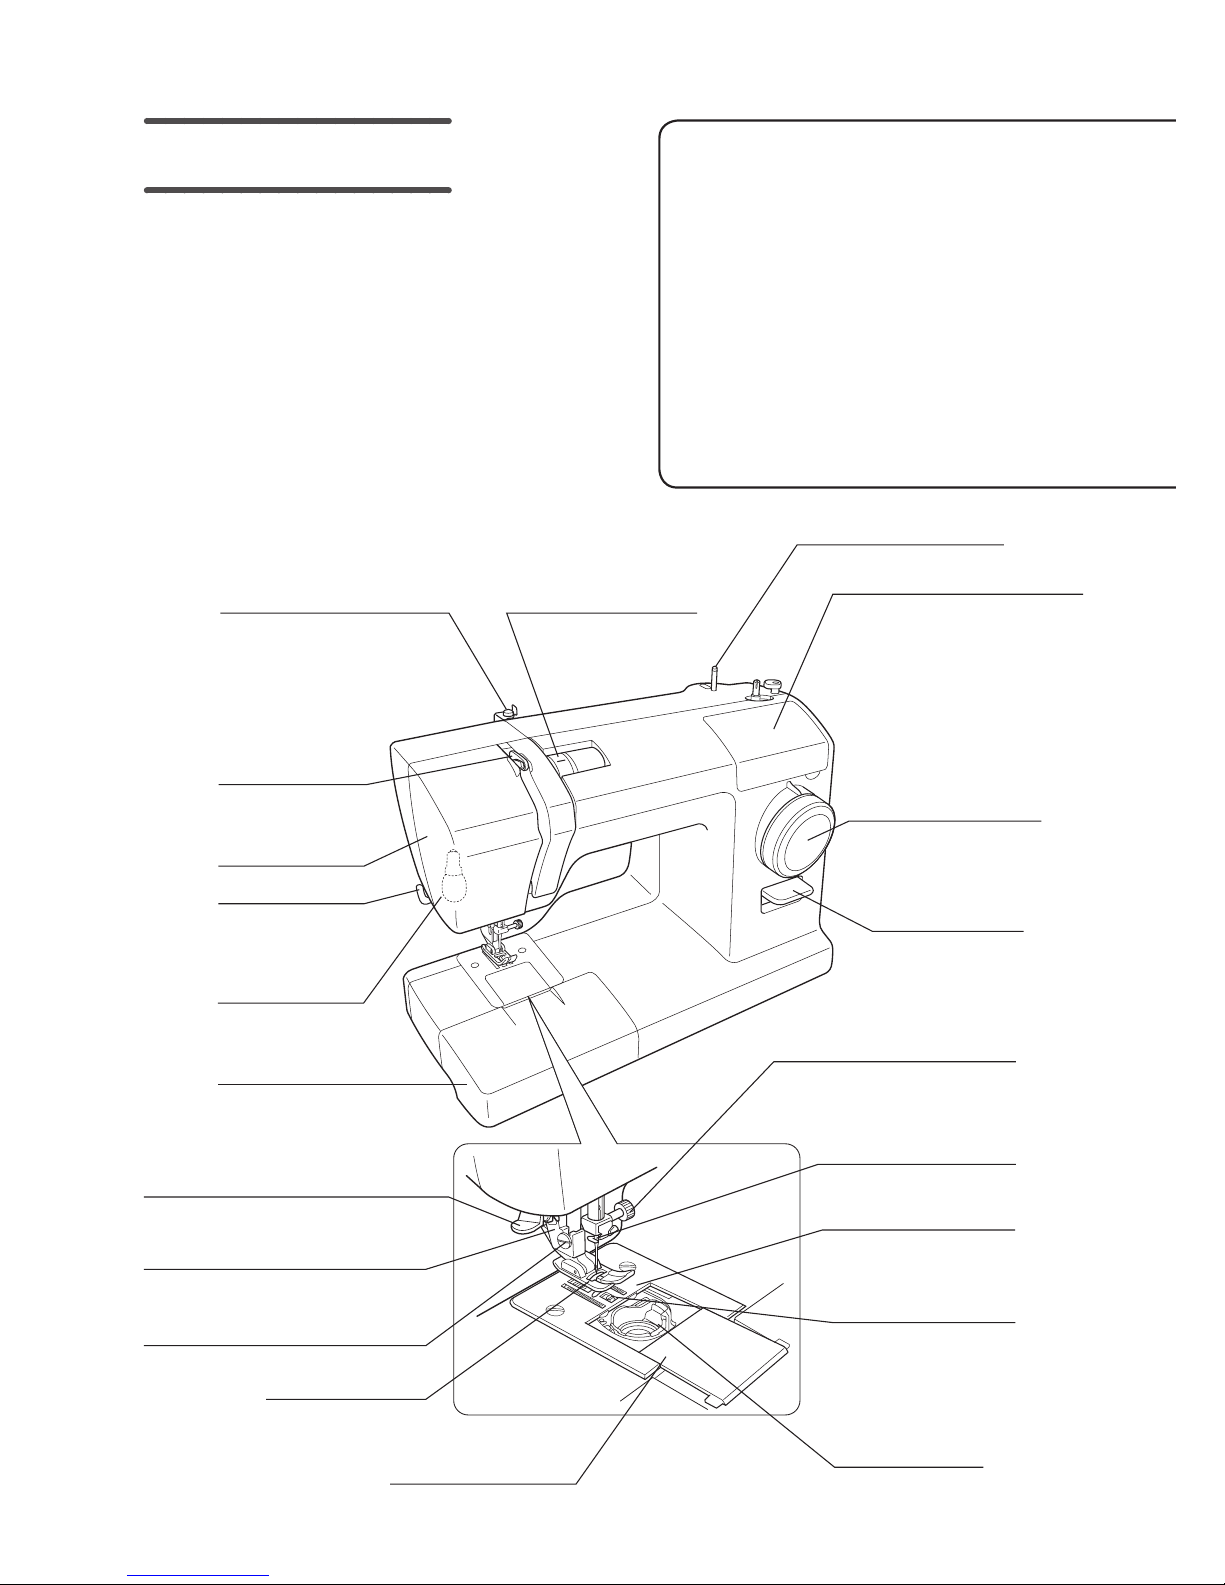
Part names
Thread guide
Take-up lever
Face cover
Thread cutter
Light bulb
Extension table
(Accessory Box)
Bobbin case
cover
Bobbin case
Feed dog
Needle plate
Needle thread
guide
Needle clamp screw
Reverse
sewing lever
Pattern
selection dial
Upper thread
tension dial
Quick adviser
Needle threader
Presser foot holder
Presser foot holder
clamp screw
This manual provides descriptions on
operating procedures for two sewing
machine models.
Normally, descriptions will apply to
both models; however, descriptions
that apply to only one of the models
will be indicated with “XXX15C” or
“XXX15D/SuperJ15”.
Presser foot
Spool pin
Equipped only with model SuperJ15 *
Equipped only *
with model
SuperJ15
1
7
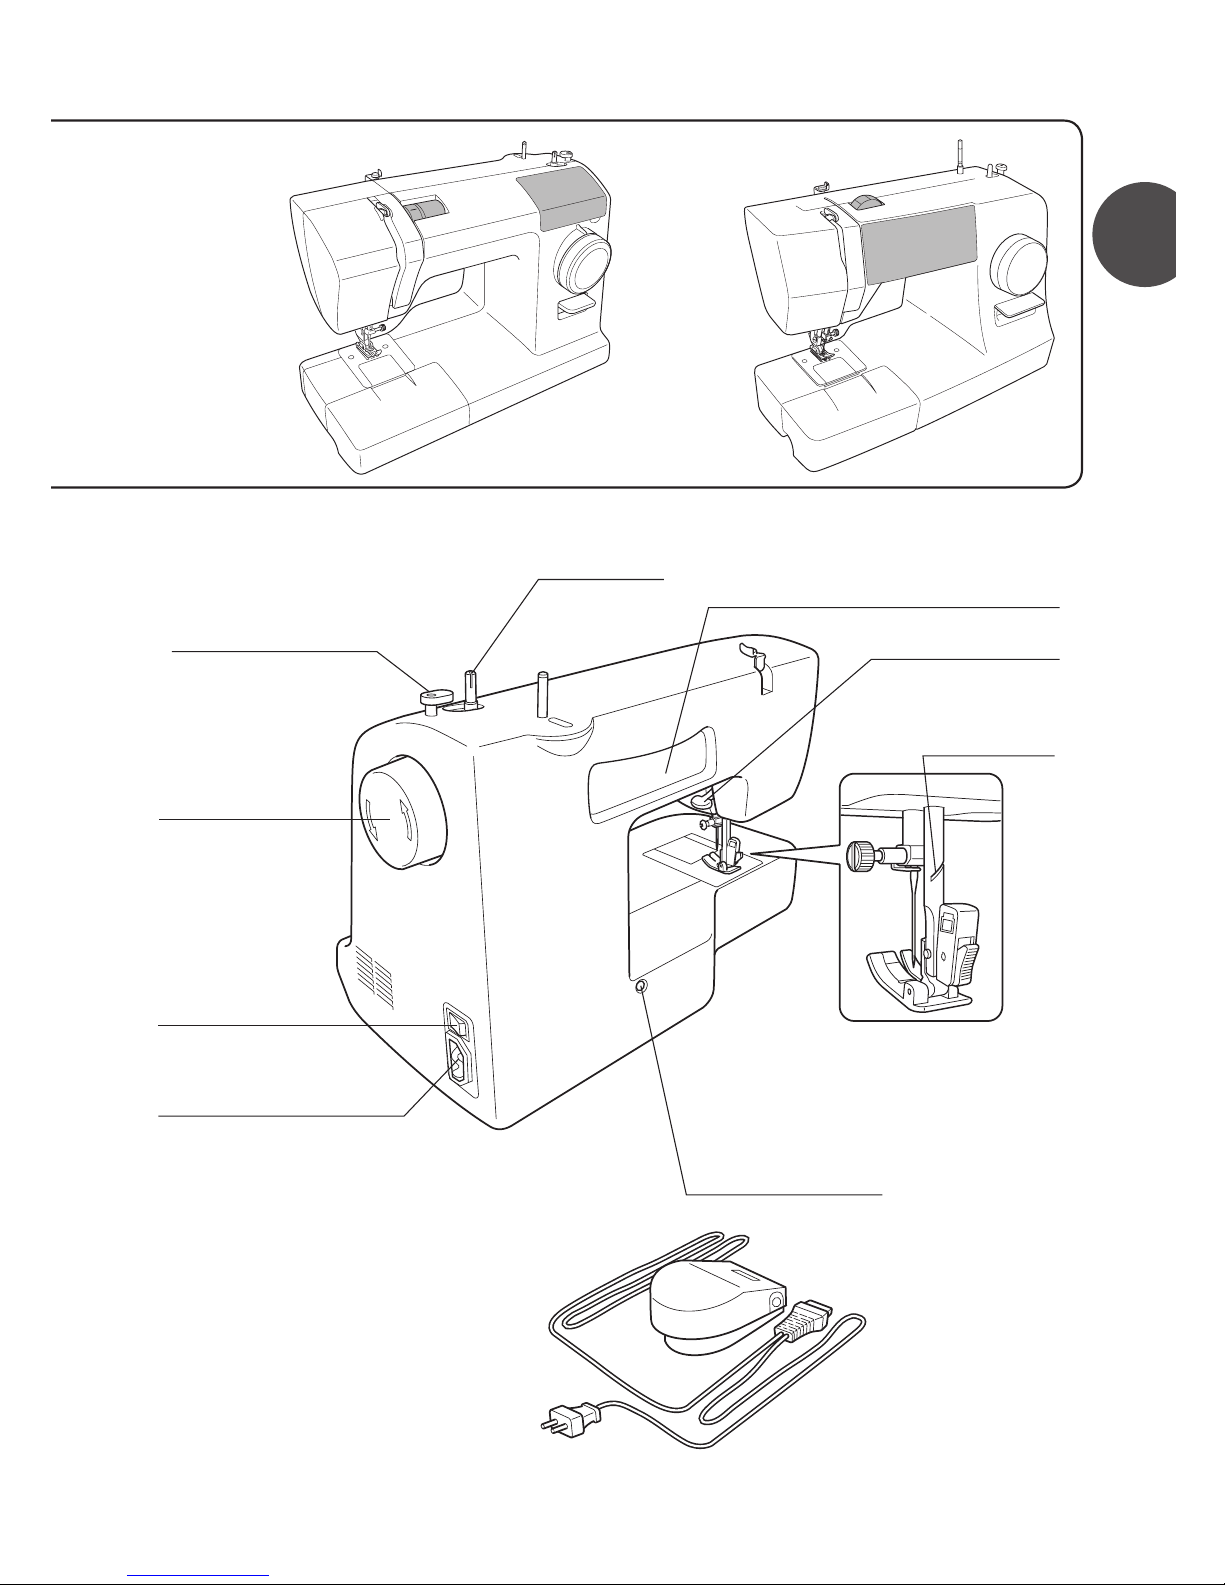
Before use (Be sure to read this section before use)
Thread winder
guide
Handwheel
Main power
switch
Terminal box
Thread cutter
Buttonhole
adjustment screw
Presser foot lever
Hollow for carrying
(Insert your hand into the hollow
when carrying sewing machine)
Thread winding
spindle
Foot controller
Model XXX15C Model XXX15D/SuperJ15
8
Part names and their functions
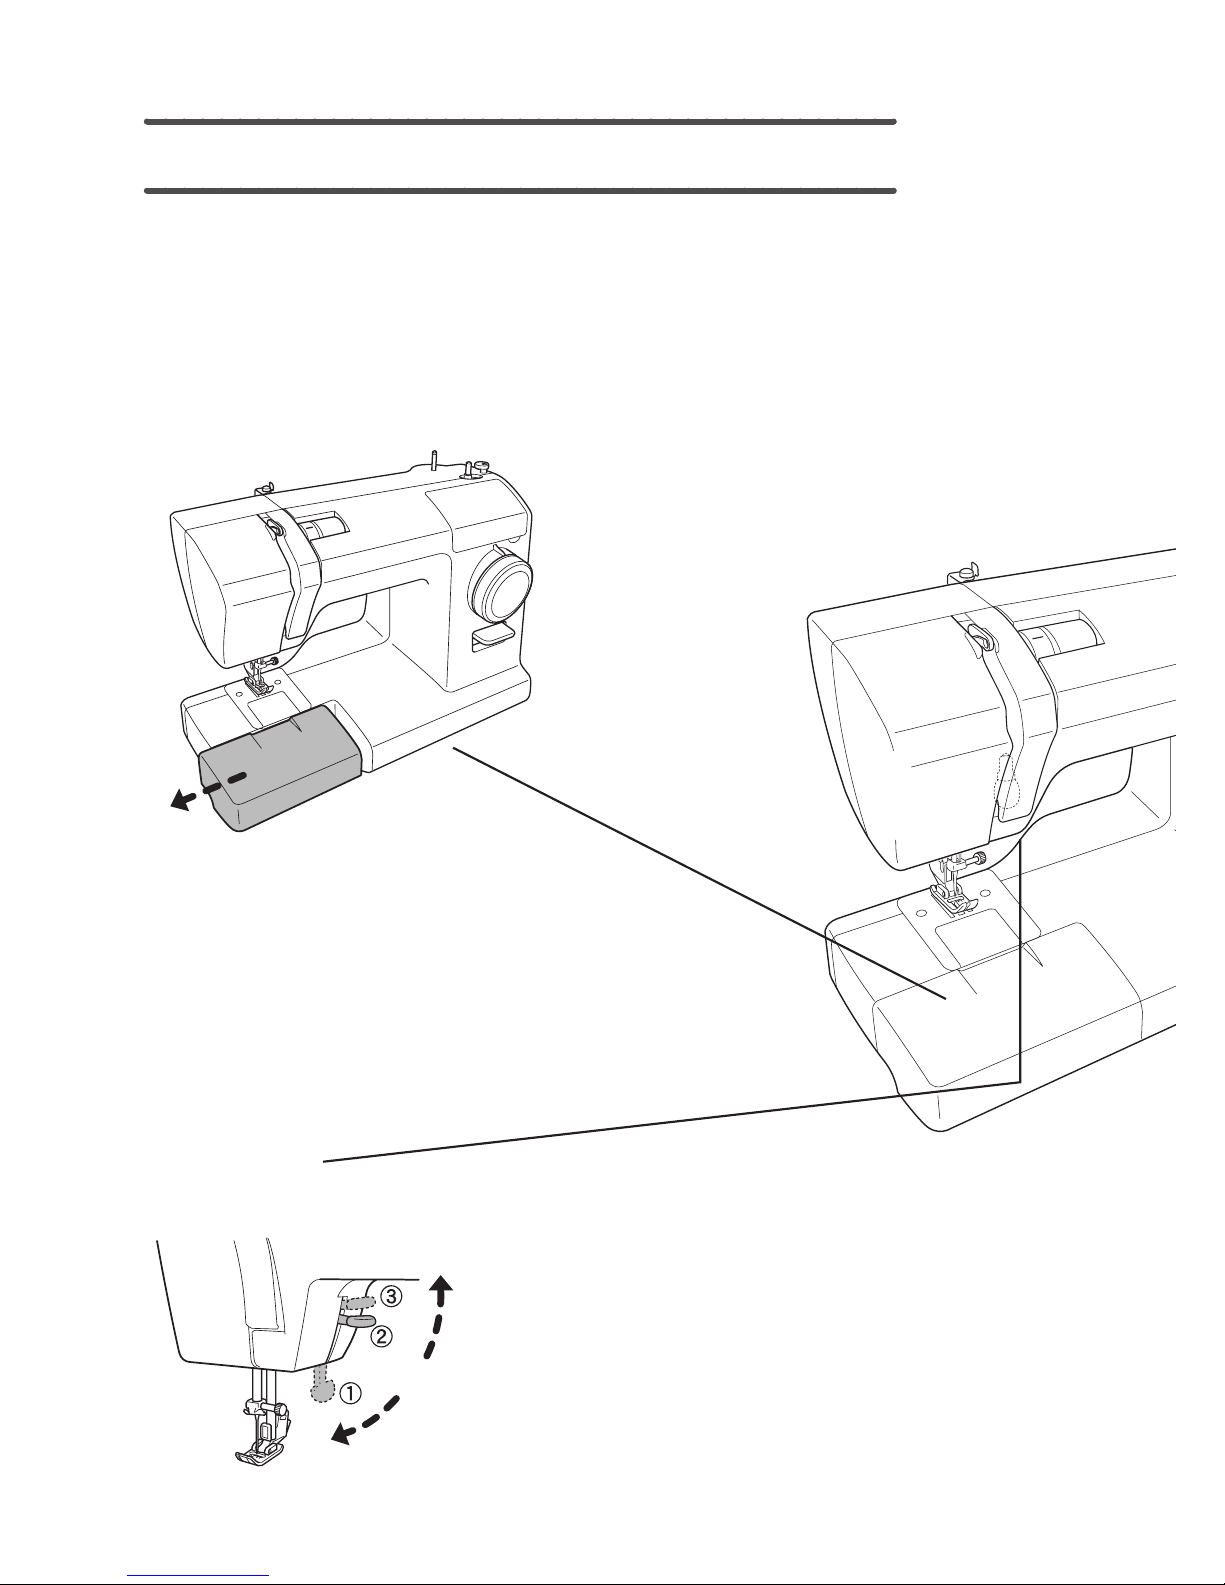
The various parts of the sewing machine have the functions described below.
Extension table
(Accessory Box)
Presser foot lever
When sewing, lower the presser foot lever to lower
•
the presser foot. (Position 1)
When inserting fabric, lift up the presser foot lever to
•
raise the presser foot. (Position 2)
The presser foot can be raised even higher by raising
•
the presser foot lever to position 3. Since the
presser foot lever does not remain in this position,
hold it in place when inserting the fabric. This position
is useful when sewing thick fabric.
Pull out the extension
•
table (accessory box)
in the direction of the
arrow.
1
9
Before use (Be sure to read this section before use)
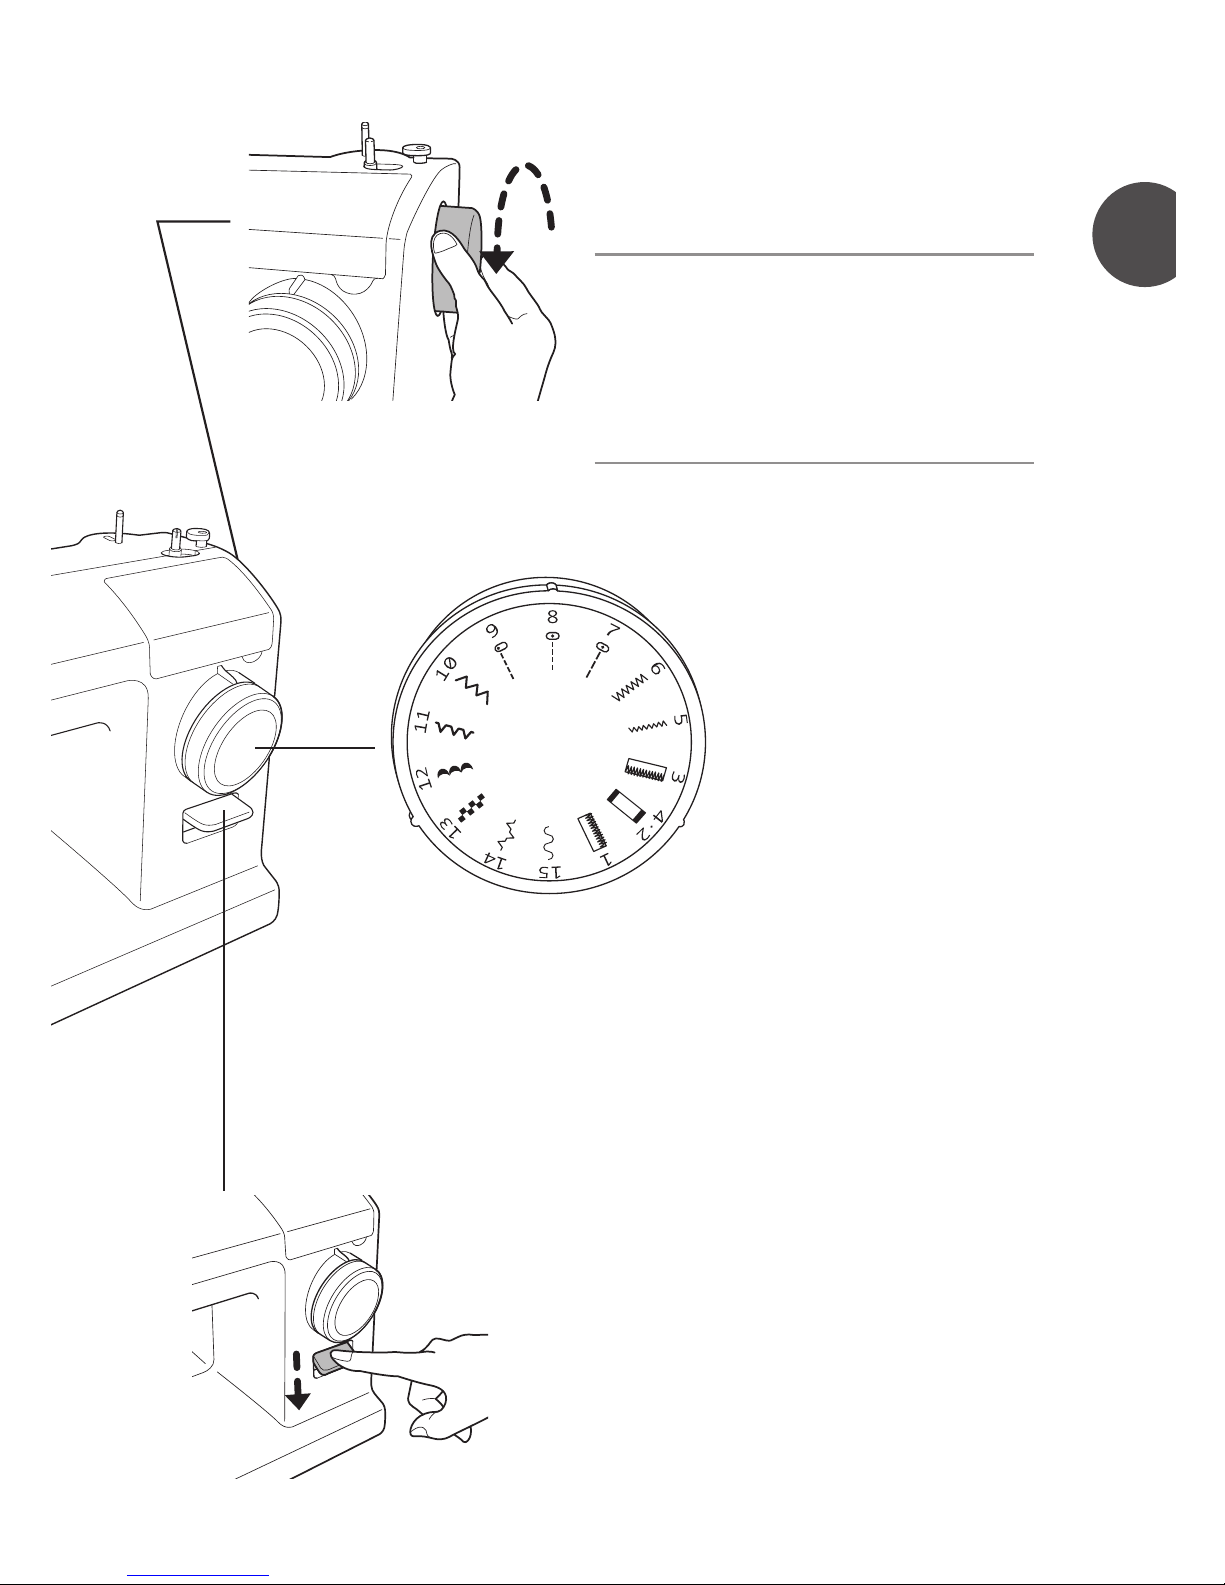
Reverse sewing lever
Handwheel
Use the handwheel to manually raise and
•
lower the needle.
Note:
Always turn the handwheel towards
yourself (in the direction of the
arrow).
If the handwheel is turned in the
opposite direction, the thread may
become tangled.
Pattern selection dial
Select the pattern to be
•
used.
Turn the pattern selection
dial until the desired pattern
aligns with the mark above
the dial.
Press down the reverse lever, when sewing in
•
reverse.
Remove your nger from the reverse sewing
•
lever to return to forward direction sewing.

10
Quick adviser
The quick adviser (under the lid on the sewing machine) provides various descriptions
such as basic machine operations.
Accessing the quick adviser
z
Quick adviser
(Stored inside)
For model XXX15C
For model XXX15D/SuperJ15
Pull the top of the lid towards yourself to open it.
Quick adviser
(Stored inside)
Note:
Do not pull down the top of the lid with extreme force. The lid may break.•
If the lid has been removed from the •
machine, fit the lid into the corresponding
area of the machine, and then push it
straight in until it snaps into place.
Flip up the lid to open it.
2
11
Before use (Be sure to read this section before use)
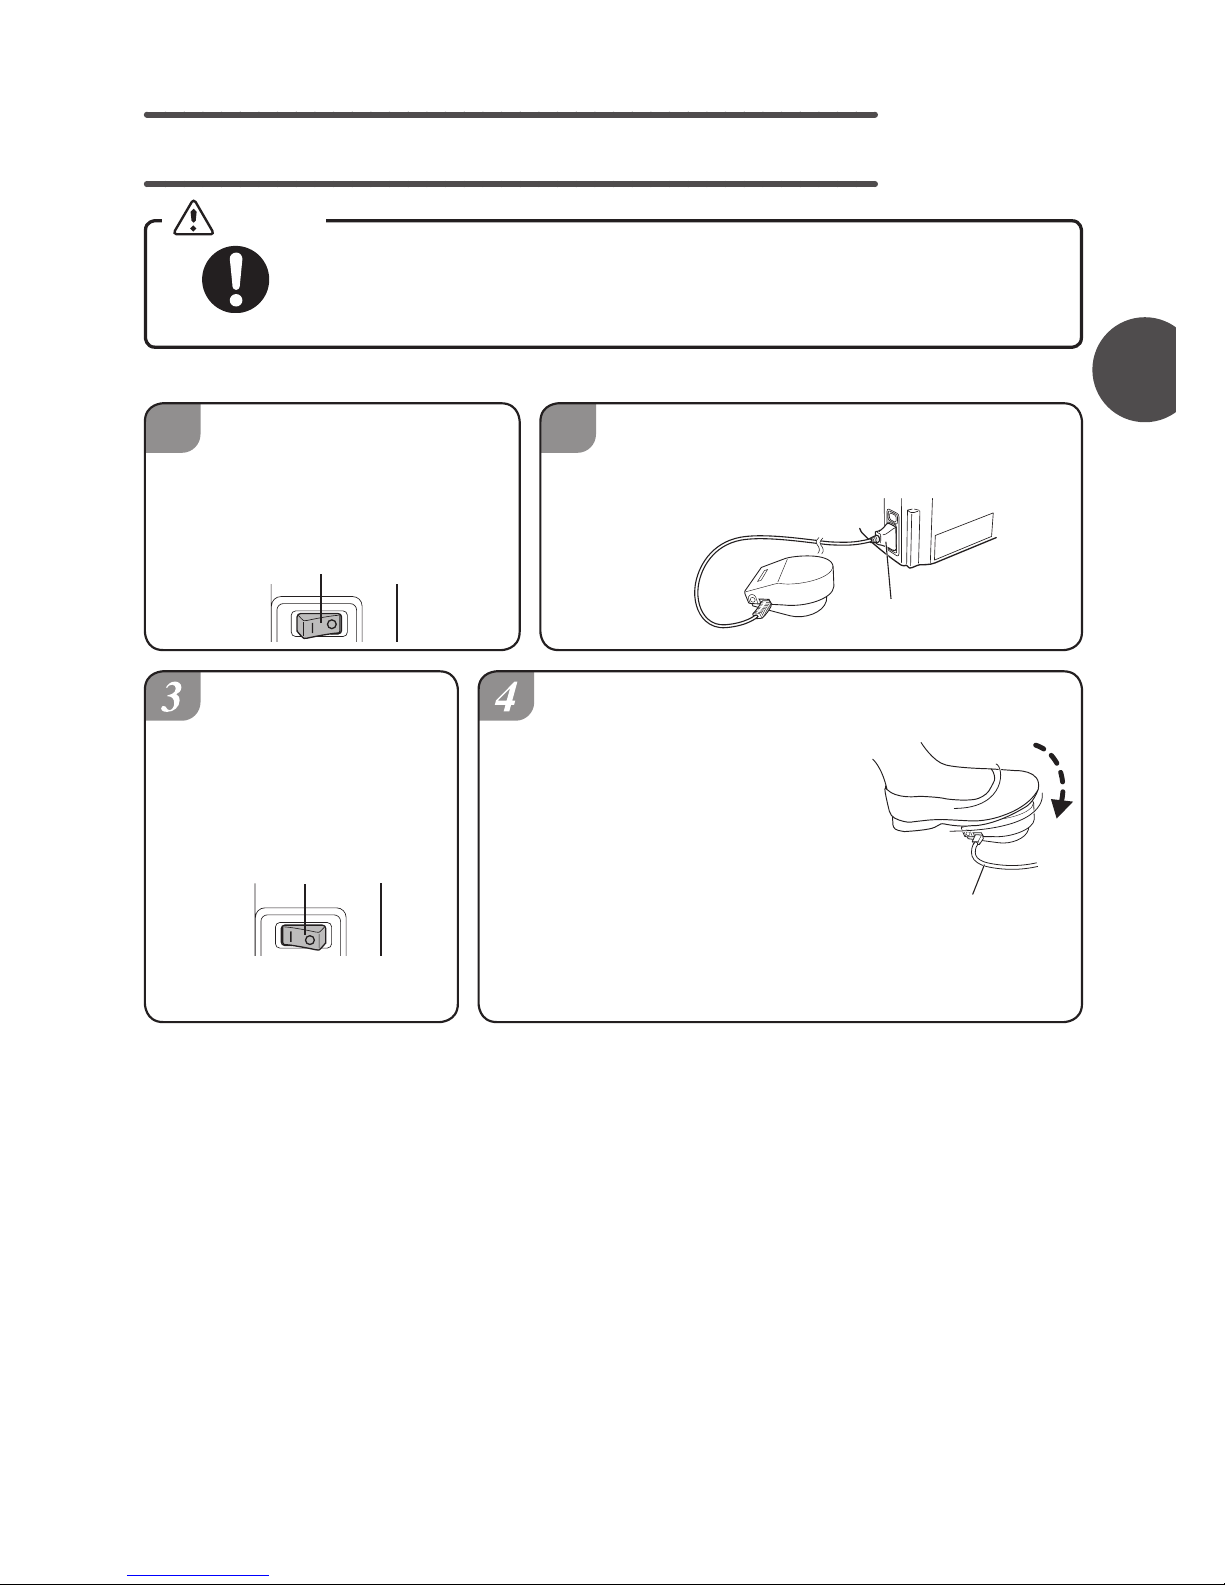
How to operate foot controller
Operation
Be sure to use the main power switch to turn off the sewing machine
before connecting the foot controller.
Not doing so could cause an injury.
1
2
Press the “” side of
the main power switch
to turn off the sewing
machine.
Press the “|” side
of the main power
switch to turn on
the sewing machine.
Step on the foot controller
to operate the sewing
machine.
The more you press the
foot controller, the faster
the machine runs.
Release the foot controller
to stop the machine.
Insert the power cord connector into
the terminal box on the machine.
Main power switch
Main power switch
Connector
Foot
controller
Caution
2
12
1
Sewing preparations
Connecting the power
Do not touch the power plug with wet hands.
Doing so could cause an electric shock.
Hold the power plug, to remove or insert into the power outlet.
Not doing so could damage the cord and cause an electric shock, fire or
injury.
Prepare the foot controller.
Insert the power cord connector
into the terminal box.
Insert the power plug into the outlet.
Press the “|” side (power on) of the
main power switch.
The power is turned on.
Power plug
Terminal box
Connector
Foot controller
2
Before plugging in the power cord, use the main power switch to
turn off the sewing machine.
Not doing so could cause an injury.
Main power switch
ON
OFF
Warning
Caution

13
Memo
14
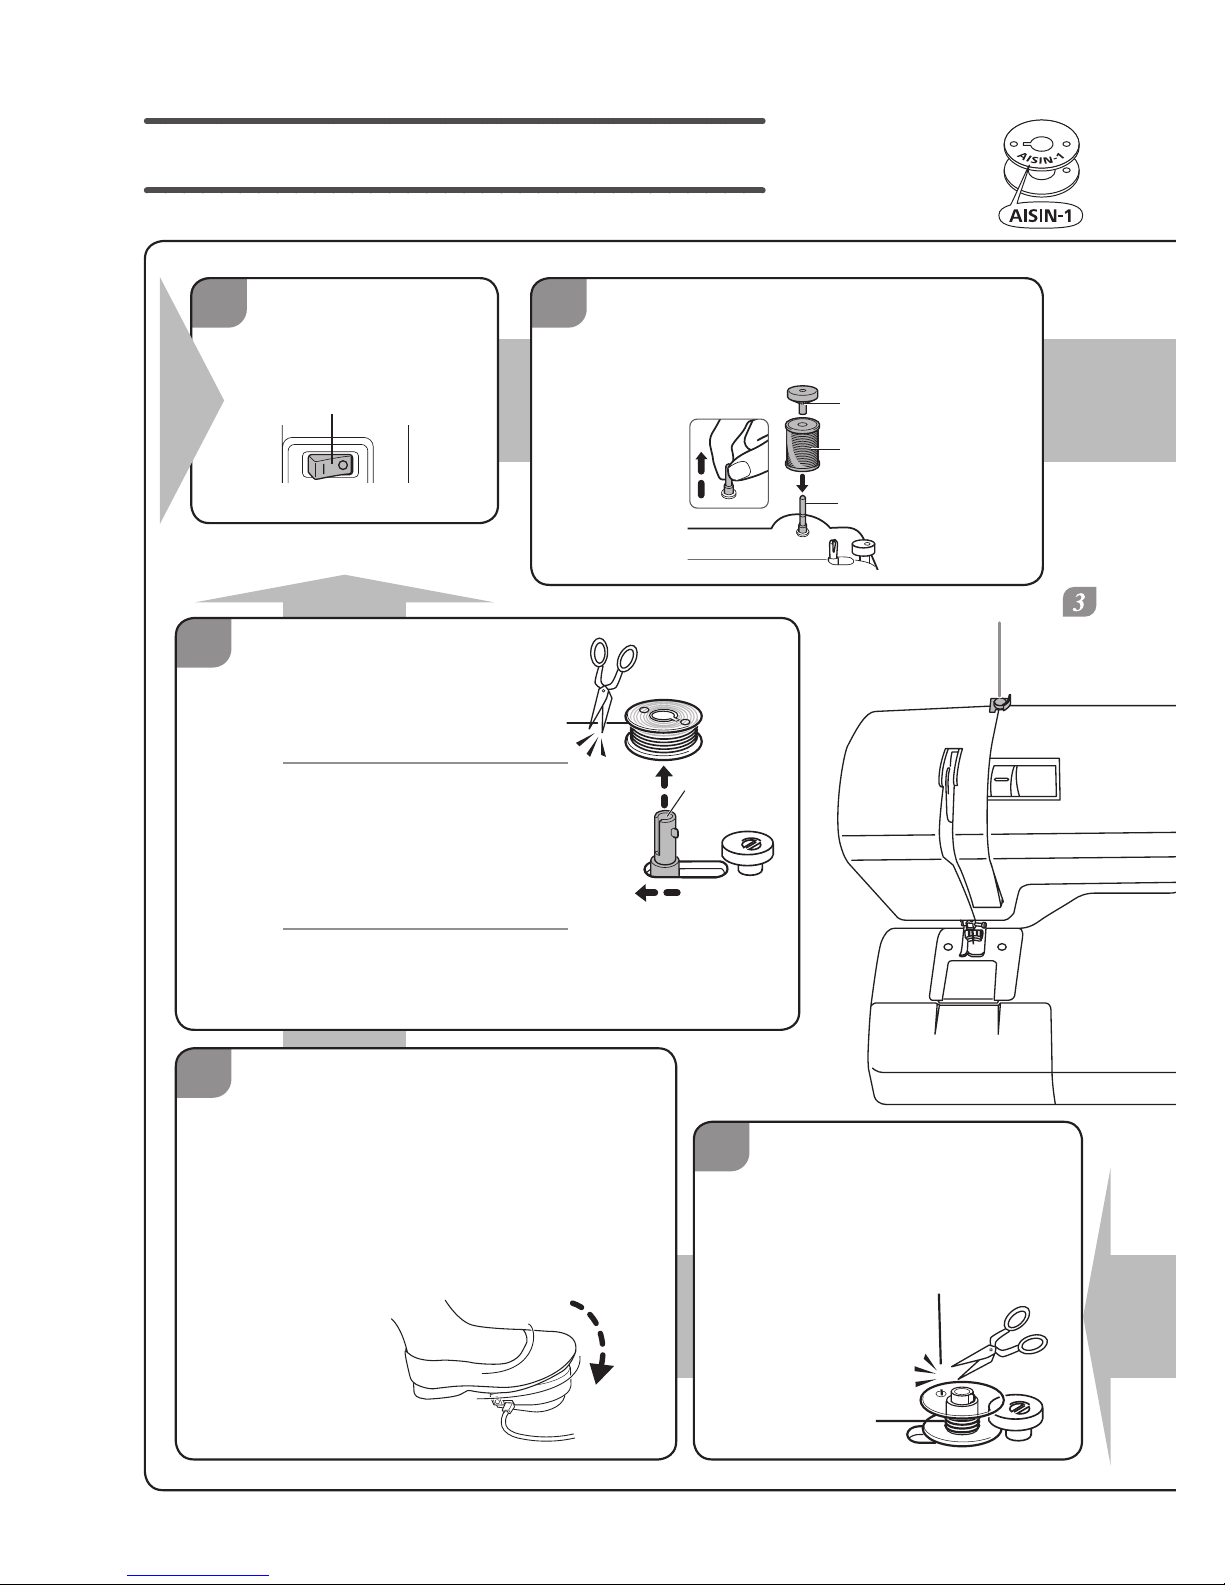
Winding the lower thread
1
1
2
Turn off the
sewing machine.
9
10
Return the thread
1
winding spindle by
sliding it in the direction
of the arrow.
Note
If the thread winding
spindle is not returned,
the needle does not
move and sewing is
not possible.
Start
Complete
8
Cut the excess thread
above the bobbin hole.
Cut the thread so that no *
excess extends from the
bobbin hole.
Thread guide ( )
Main power switch
Press on the foot controller with
1
your foot to continue winding the
bobbin.
When the bobbin winding
2
becomes slow, release the foot
controller to stop winding the
bobbin.
2
1
Thread
winding
spindle
Foot controller
Note:
Prepare a
specially
designed bobbin.
Remove the bobbin from the thread winding
2
spindle, and cut the thread.
Pull up the spool pin.
Position the spool of thread and the
spool cap on to the spool pin.
Spool of thread
Spool cap
spool pin
2
15
Sewing preparations
Pull the thread from the thread
spool, and then hold it with
one hand while passing it
around the thread guide with
the other hand, as shown.
Pass the thread end through
the hole in the bobbin as
shown.
Place the bobbin on the
thread winding spindle so the
groove aligns with the shaft
projection.
7
While holding the thread end,
1
begin pressing on the foot
controller with your foot.
After the thread has been
2
wound around the bobbin
about 10 times, release
the foot controller to stop
winding.
Spool pin (2)
Thread winding spindle
(
7 8 10)
Foot controller
(
7 9
)
Main power switch
(
1
6)
Thread guide
Thread
Hole
Thread
winding
spindle
Groove
Bobbin
Shaft
projection
Slide the
thread winding
spindle in the
direction of
the arrow until
it snaps into
place.
6
Turn on the machine.
Main power switch
Foot controller
Hold in place
with your finger.
While the bobbin is being wound, do not touch the thread winding
spindle or the handwheel.
Doing so could cause an injury.
Caution
16
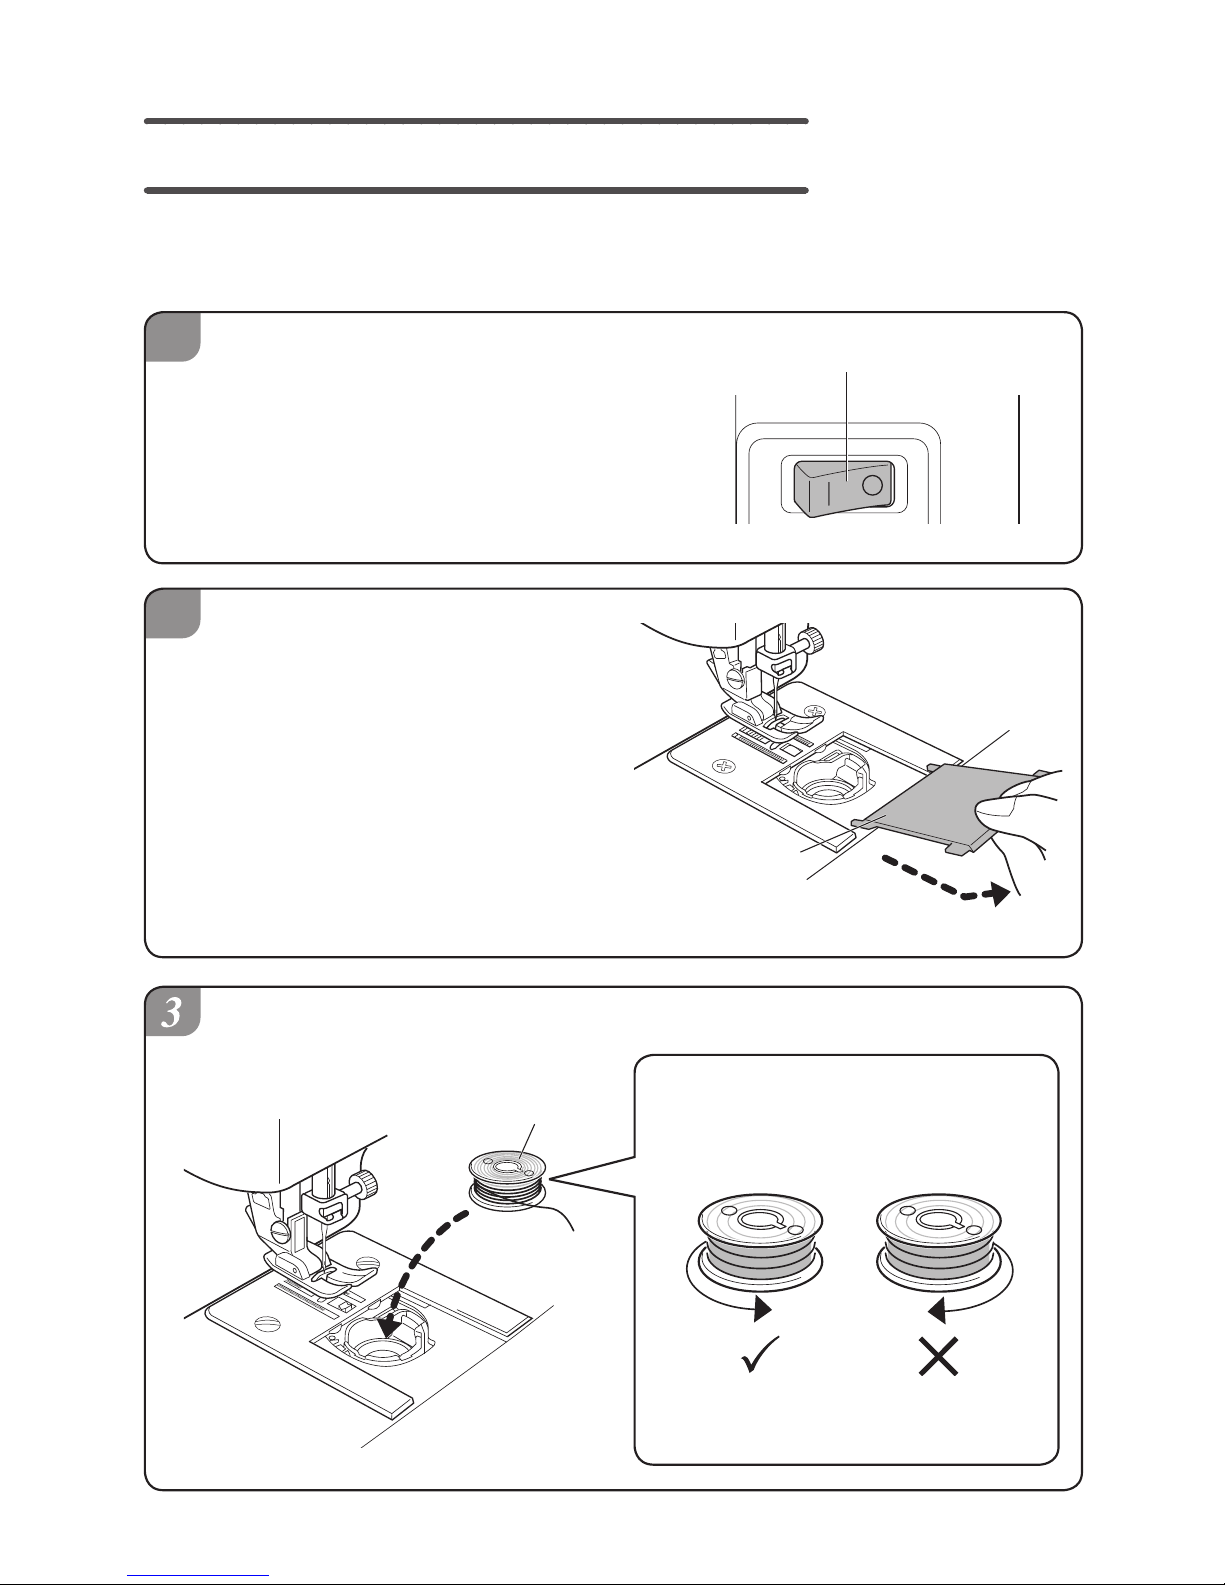
2
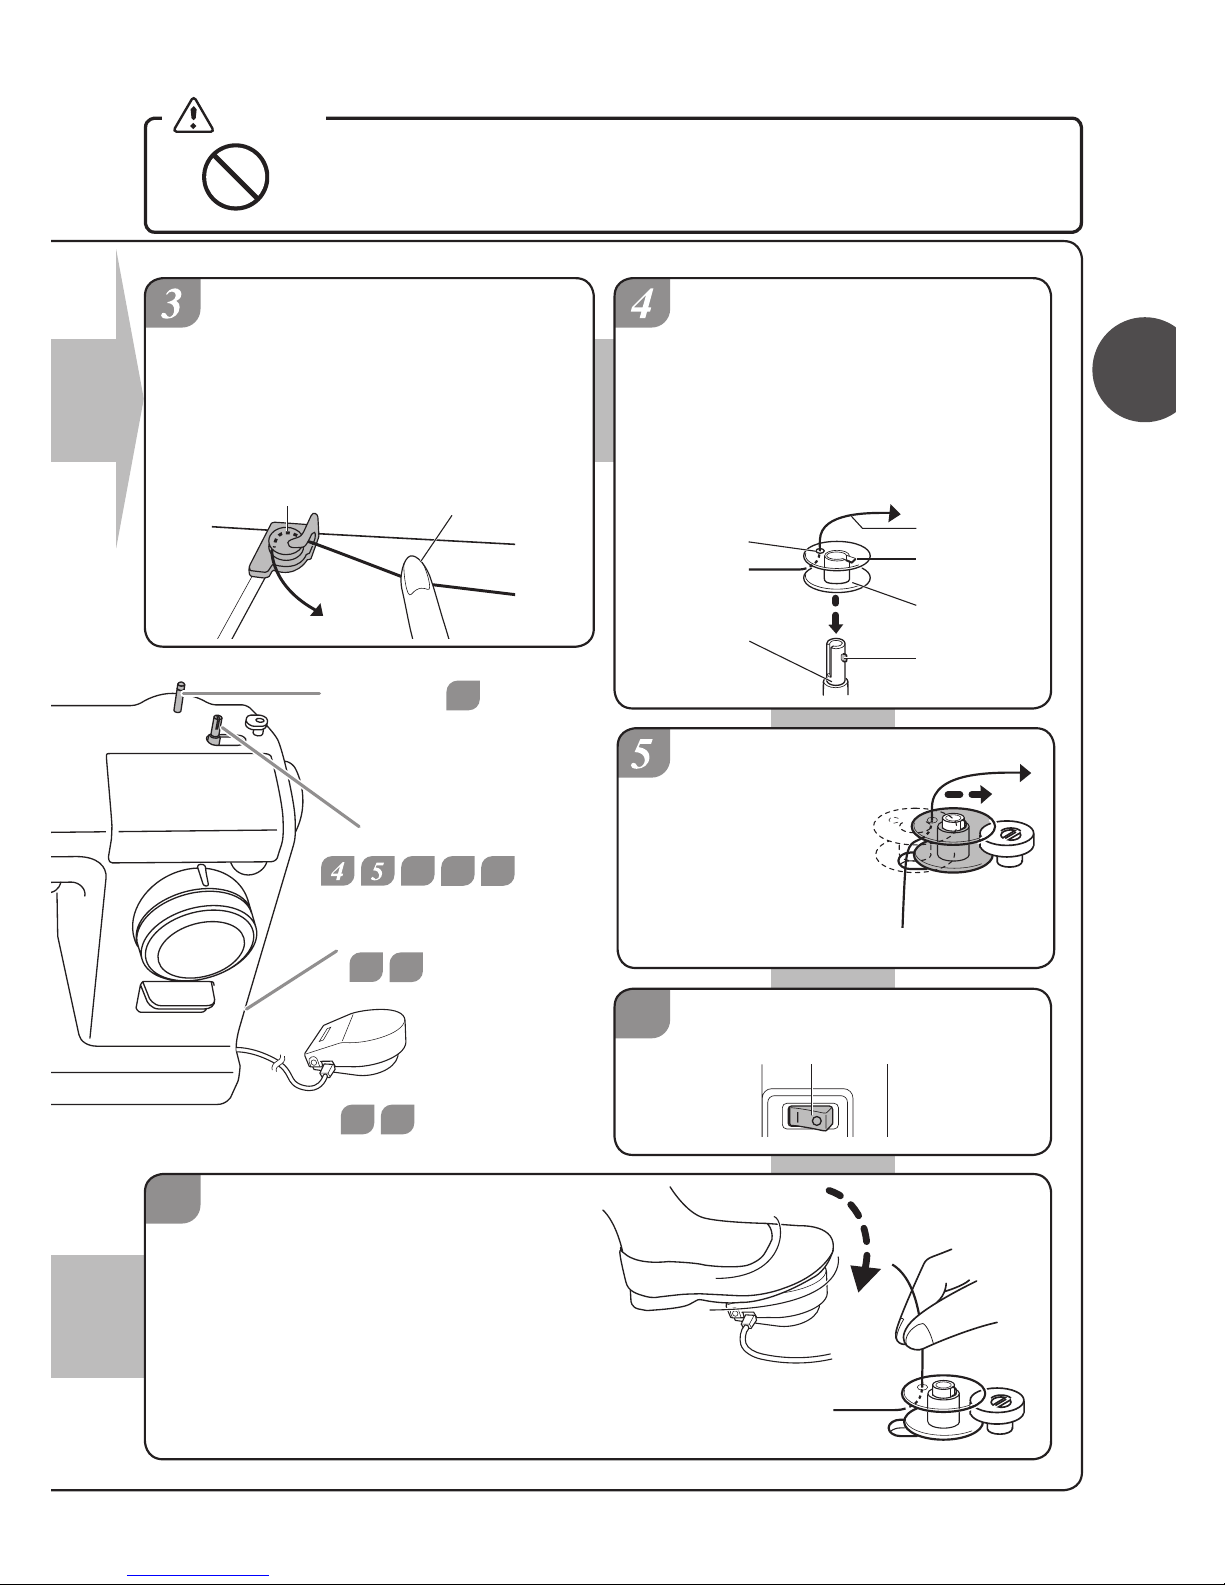
Threading the lower thread
Open the bobbin case cover, and insert the bobbin into the bobbin case.
If the bobbin is incorrectly inserted into the bobbin case, the stitching will not be sewn
correctly.
1
Turn off the sewing machine.
Pull the bobbin case cover
towards yourself.
Insert the bobbin so that it rotates
counterclockwise.
Thread unwinding direction
Check the orientation of the bobbin.
Counterclockwise Clockwise
Main power switch
Bobbin case
cover
Bobbin
Bobbin case
 Loading...