

Page 1

TASCAM GigaStudio 3.0 User’s Manual
1
Page 2

3
Copyright 2004 TEAC America, Inc. All rights reserved. No part of this manual may be
reproduced or transmitted in any form or by any means for any purpose other than the
licensee’s personal use without the express written permission of TEAC America, Inc.
All information in this manual is subject to change without notice and does not
represent a commitment on the part of TEAC America, Inc. The software described in
this manual is provided under the terms of a Software License Agreement. The Software
License Agreement species the terms and conditions of use.
TASCAM, NemeSys, GigaStudio™, GigaStudio Instrument Editor™, GigaSampler™, and
GigaSampler Instrument Editor™ are trademarks of TEAC America, Inc.
All other trademarks are trademarks or registered trademarks of their trademark
holders.
2
Page 3

Table of Contents
System Requirements 9
GigaStudio Orchestra 3.0 9
GigaStudio Ensemble 3.0 10
GigaStudio Solo 3.0 11
Preparing Your Windows System to Install GigaStudio 3.0 13
GigaStudio 3.0 Software with Windows XP 13
Settings & Requirement 13
Additional Notes 13
Dual Boot Systems 14
DMA Mode Enabled Instructions — Windows XP 14
Removing a Previous GigaStudio Installation – Windows Method 15
Installing GigaStudio 3.0 17
Recommendations 18
Registering GigaStudio 3.0 20
Step-by-Step Review 25
Getting Help 25
Automated Systems 26
Contact TASCAM Registration Support 26
Contact TASCAM Technical Support 26
TASCAM Direct Contact Information 26
User Interface Essentials 27
Selecting Components 27
Resizing Components 28
Floating Components 29
Fader, Knob, & Slider Adjustments 30
GigaStudio 3.0 Conguration Manager 33
First Time Startup Procedure 33
Bounce To Disk 36
Synthesizer Engine Settings 37
Mixer/Disk Engine 38
Hardware 38
ReWire/Plugins 39
Convolution/Modeling 40
Trouble Shoot 40
GigaStudio 3.0 Settings 41
Starting GigaStudio 41
The GigaStudio Settings Manager 41
3
Page 4

5
General Settings 41
Performance/Instrument Loading 43
QuickSound 44
Search Mode 44
Search Properties 44
Results Properties 44
Result Window’s Reset Conguration 44
QuickSound Database Properties 45
Akai Convertor 45
Tutorial 1 - Introducing QuickSound 49
Finding, Loading, & Playing Instruments 49
Finding Instruments 51
Auditioning Instrument 55
Loading Instruments 55
Playing Instruments 58
Tutorial 2 - Working With Performances 61
Custom Default Performance 61
Performance Load/Reset Options 63
Stacking Instruments 65
Linking Ports 67
Step-by-Step Review 67
Tutorial 3 - Routing Audio in the DSP Station 69
Inputs & Groups 69
Aux Busses 74
Groups 78
Step-by-Step Review 78
Tutorial 4 - ReWiring GigaStudio 81
Conguring GigaStudio for ReWire 81
Conguring Multiple Rewire Output Channels 83
Rendering ReWire Tracks to Audio Files 84
How to ReWire GigaStudio 3.0 with Live 2 or Live 3 85
How to ReWire GigaStudio 3.0 with Acid 4.0 85
How To ReWire GigaStudio with Cubase SX 86
How To ReWire GigaStudio 3.0 with Nuendo 87
How To ReWire GigaStudio 3.0 with Pro Tools 88
How To ReWire GigaStudio 3.0 with Sonar 90
Tutorial 5 - QuickEdit 93
Making QuickEdits 98
Step-by-Step Review 100
4
Page 5

Tutorial 6 - MIDI Control 101
About MIDI Control 101
MIDI Mixer: Both Control & Controller 101
DSP Station 102
Step-by-Step Review 107
Tutorial 7 - Intelligent MIDI 109
Adding, Initializing and Editing iMIDI Rules 110
iMIDI Rule Usage 111
Transpose Keyboard 111
Filter MIDI 111
Legato Mode Rule 114
Examples 114
Legato Mode Control Panel 116
Saving the Settings 117
Mapping & Creating a Legato Mode Instrument 118
Pattern Alternator 121
Playing & Editing the Patterns 121
Opening the Pattern Alternator window 121
Controller Trigger 128
Release Trigger with Tracking 131
The Rule Builder 132
Design a Custom Filter 133
Add New Filter 134
Modify Existing Filter 134
Filter List 135
MIDI Activity Window 135
Tutorial 8 - Audio Capture Tool 137
Simple Capture Example 139
Step-By-Step Review 140
Tutorial 9 - Distributed Wave 141
Creating a Distributed Wave Instrument 143
Multi-Track Capture and Distributed Wave 145
Step-by-Step Review 146
Menus 147
File Menu 147
View Menu 149
Capture Menu 150
Help Menu 151
Tool Bars 153
Quick Launch 153
5
Page 6

7
Capture 154
Audio Engine 154
Status Bar 157
MIDI Mixer 161
MIDI Port Navigation 161
Loader Channel Menu 162
Stacked Instruments 163
Control Sliders 164
QuickEdit 167
Articulation 168
Envelope Parameters 168
Envelopes 1 (amplitude) & 2 (lter) 169
Envelope 3 170
Attack (sec) 170
EG1 & 2 Modulators 171
Filter 171
LFO (Low Frequency Oscillator) 176
Dimensions 177
Dimensions Overview 177
Stereo Split 177
Velocity Splits 177
Sustain Pedal 177
MIDI Controllers 177
Layers 178
Key-Switch 178
Round Robin & Random 178
Smart MIDI 178
Wave Audio View 178
Keyboard View 179
QuickSound 183
Search Field 183
Tool Bar 184
Drive and Folder Tree View 185
Instrument List View 186
Loaded Instrument View 186
Virtual Keyboard 187
Display Options 187
Application Options 187
Distributed Wave 189
Distributed Wave Instrument 189
6
Page 7

Audition Panel 189
Keyboard Display 191
Recent Wave Captures 191
Activation Buttons 193
DSP Station Input Channels 193
Narrow/Wide Views 193
Source Input Selection 193
Mute/Solo Function 194
Pan Mode Select 194
Fader Mode (Link Status) 194
Insert Assign Slots 195
Pre Fader Mode 196
Aux Sends 196
Link Status 196
Dynamics 197
Equalizer 198
DSP Station Group Channels 203
Narrow/Wide Views 203
Activation Buttons 203
Source Input Selection 203
Mute/Solo Function 204
Pan Mode Select 204
Fader Mode (Link Status) 204
Insert Assign Slots 205
Pre Fader Mode 206
Aux Sends 206
Link Status 206
On (bypass) 206
Dynamics 207
Equalizer 208
DSP Station Aux Busses 213
Narrow/Wide Views 213
Source Input Selection 213
Insert Activation Button 213
Fader Mode (Link Status) 214
Insert Assign Slots 214
DSP Station Output Masters 217
Narrow/Wide Views 217
Source Input Selection 217
7
Page 8

9
Record Arm Button 217
Fader Mode (Link Status) 218
Channel Output Selection 218
Channel Output Menu (ReWire mode) 218
NFX-1 Reverb 219
NFX-2 Chorus 229
NFX-3 Delay 239
NFX-4 EQ Contour 249
GigaPulse Pro 257
Appendix A - GigaPiano II 277
GPII Design Notes 279
Appendix B - QuickSound 283
Tips and Examples 283
Keyword searching and Tips. 283
Search Criteria 283
Word context 285
Numbers and single characters 285
Playing 286
File Types 286
AutoComplete Mode 287
How Keywords Work 287
Parentheses 288
Case Insensitive 288
Keyword Tips 288
Excluded Terms 289
Ignored Common Words 289
Control Words Ignored as Keywords 289
Rules 291
Appendix C - ReWire 293
Launching and setting up 293
MIDI via ReWire with GigaStudio 293
Recording the Audio via ReWire Channels in the Mixer Application 294
Capture to Wave not Possible in GigaStudio 3.0 ReWire Mode 294
ReWire and VST Instruments (VSTi) 294
Appendix D - Keystrokes 295
Index 297
8
Page 9

System Requirements
GigaStudio Orchestra 3.0
Minimum required for GigaStudio to run:
Windows XP SP1
Pentium IV 1.7 GHz Processor or
AMD 2100 XP
512 MB RAM
Monitor Resolution 1024 x 768
Application Hard Drive Space 100MB
MIDI Interface
Either:
GSIF compatible sound card or
ReWire compatible host application
*SSE compatible processors required for GigaPulse
Recommended
Windows XP SP1
Pentium IV 2.8GHz Processor or
AMD 3200 XP Processor
1GB RAM
Monitor Resolution 1024 x 768
Application Hard Drive Space: 1GB
Dedicated Sample Drive with many free GIGS of sample storage space: 7200RPM,
8MB Cache, 8.9 ms Seek time
MIDI Interface
Either:
GSIF compatible sound card or
ReWire compatible host application
*SSE compatible processors required for GigaPulse
9
Page 10

11
System Requirements
GigaStudio Ensemble 3.0
Minimum required for GigaStudio to run:
Windows XP SP1
Pentium III 1 GB Processor or
AMD 1500 XP
512 MB RAM
Monitor Resolution 1024 x 768
Application Hard Drive Space 100MB
MIDI Interface
Either:
GSIF compatible sound card or
ReWire compatible host application
*SSE compatible processors required for GigaPulse
Recommended
Windows XP SP1
Pentium IV 2.8GHz Processor or
AMD 3200 XP Processor
1GB RAM
Monitor Resolution 1024 x 768
Application Hard Drive Space: 1GB
Dedicated Sample Drive with many free GIGS of sample storage space: 7200RPM,
8MB Cache, 8.9 ms Seek time
MIDI Interface
Either:
GSIF compatible sound card or
ReWire compatible host application
*SSE compatible processors required for GigaPulse
10
Page 11

System Requirements
GigaStudio Solo 3.0
Minimum required for GigaStudio to run:
Windows XP SP1
Pentium III 1 GB Processor or
AMD 1500 XP
512 MB RAM
Monitor Resolution 1024 x 768
Application Hard Drive Space 100MB
MIDI Interface
Either:
GSIF compatible sound card or
ReWire compatible host application
*SSE compatible processors required for GigaPulse
Recommended
Windows XP SP1
Pentium IV 1.7 GB Processor or
AMD 2100 XP
1GB RAM
Monitor Resolution 1024 x 768
Application Hard Drive Space: 1GB
Dedicated Sample Drive with many free GIGS of sample storage space: 7200RPM,
8MB Cache, 8.9 ms Seek time
MIDI Interface
Either:
GSIF compatible sound card or
ReWire compatible host application
*SSE compatible processors required for GigaPulse
11
Page 12

12
13
Page 13

Preparing Your Windows System to Install GigaStudio 3.0
GigaStudio 3.0 Software with Windows XP
GigaStudio 3.0 Orchestra with Windows XP Professional or Home Edition
GigaStudio 3.0 Ensemble with Windows XP Professional or Home Edition
GigaStudio 3.0 Solo with Windows XP Professional or Home Edition
Note: See the ReadMe.txt le for the most up to date information about system com-
patibility.
Settings & Requirements
• Each IDE drive must have DMA enabled in the “System > Control Panel”. This can be
changed in the Device Manager. There are detailed instructions later in this section.
• Pentium 4 systems with HyperThreading technology must have “Intel HyperThreading” in the system BIOS disabled.
• Although not a requirement, removing or disabling startup applications, system
utilities (i.e. Norton Utilities) internal and external hardware deices (i.e. tape
drives, scanners, TV tuners, non-essential sound or MIDI drivers) may increase the
performance of GigaStudio. Remember to keep in mind that the more you demand of GigaStudio, the more GigaStudio will demand of the system.
Additional Notes
• Windows XP Service Pack 1 (SP1) is required. To nd out if you have Windows XP
Service Pack 1, right-click on the “My Computer” icon in the Start Menu and select
“Properties”. In the General section, it will read “Service Pack 1” below the listed operating system if you indeed have SP1 installed.
• To ensure compatibility, check with the manufacturer of the various system devices
you plan to use, to ensure that you are using the latest software or drivers for Windows XP.
• GigaStudio 3.0 Orchestra, Ensemble, or Solo is NOT recommend for installation on
systems running Windows 2000, Server 2000, 98, ME, NT, 95, or 3.1.
• Windows XP Media Center Edition has NOT been tested with GigaStudio 3.0.
• While GigaStudio 3.0 may run on Windows 2000, only Windows XP with SP1 has
been fully tested and approved by Tascam.
13
Page 14

15
Dual Boot Systems
If you have a PC with an operating system other than Windows XP on it, you may
choose to install a compatible operating system on a separate partition or hard drive in
order to use GigaStudio 3.0. If you want to use more than one operating system on the
same computer hardware, you can use a program such as PartitionMagic to help create
a “dual-boot” system.
DMA Mode Enabled Instructions — Windows XP
DMA mode must be enabled for all IDE drives in your system. To do this in Windows
XP:
1. Right-click My Computer, located on the Desktop or in the start menu, and choose
Properties
2. Select the Hardware tab
3. Click the Device Manager button
4. Locate and double-click the device for your IDE/ATA controller
5. In the IDE/ATA Controller Properties dialog, click the Advanced Settings tab
6. Under Transfer mode, select DMA Transfer mode, if available, and click OK
7. Repeat for any additional IDE/ATA drives
8. Click OK to close the Device Manager dialog
9. Close the System Control Panel
Once you have restarted follow steps 1-5 above once again to make sure “DMA” is in
fact still set to enabled. If your computer is unable to keep this setting or your computer
doesn’t allow the option for enabling DMA, and you are having problems running GigaStudio, you (or one of your technically-minded friends) may need to change a setting
in your system BIOS (Basic Input Output System).
To access your computer’s BIOS you must restart your computer. During the initial startup your computer will tell you which key to press in order to enter the setup
program. Typically repeatedly pressing either the [Delete] or [F2] key during the initial
stages of the boot process will access the BIOS on “most” motherboards. Refer to your
MB manual for manufacturer specic BIOS commands.Press the corresponding key during startup. You should see an “Entering Setup” message. If present, make this change
to your computer’s BIOS:
Allow PCI Bus Masters = Enabled
In addition to checking the BIOS if DMA is not available, you can also check in device
manager under “Hard disk controllers” and make sure that you have the IDE controller
and NOT the ATA controller. If you have the ATA controller you will need to Update the
hard disk controller driver to the “standard dual IDE controller”.
14
Page 15
Removing a Previous GigaStudio Installation – Windows Method
Before installing your new GigaStudio 3.0 you will need to remove any previous version of GigaStudio from your computer. Be sure that you back up any performance les
(.Gsp), articulation les (.Art), and instruments (.Gig) before proceeding. You will still be
able to use any of these with GigaStudio 3.0.
Begin by placing the GigaStudio 3.0 Installation CD in your drive and allowing it to
spin up and be recognized. If the GS3 autorun does not come up on its own, browse the
contents of the CD and click on the Setup.exe le.
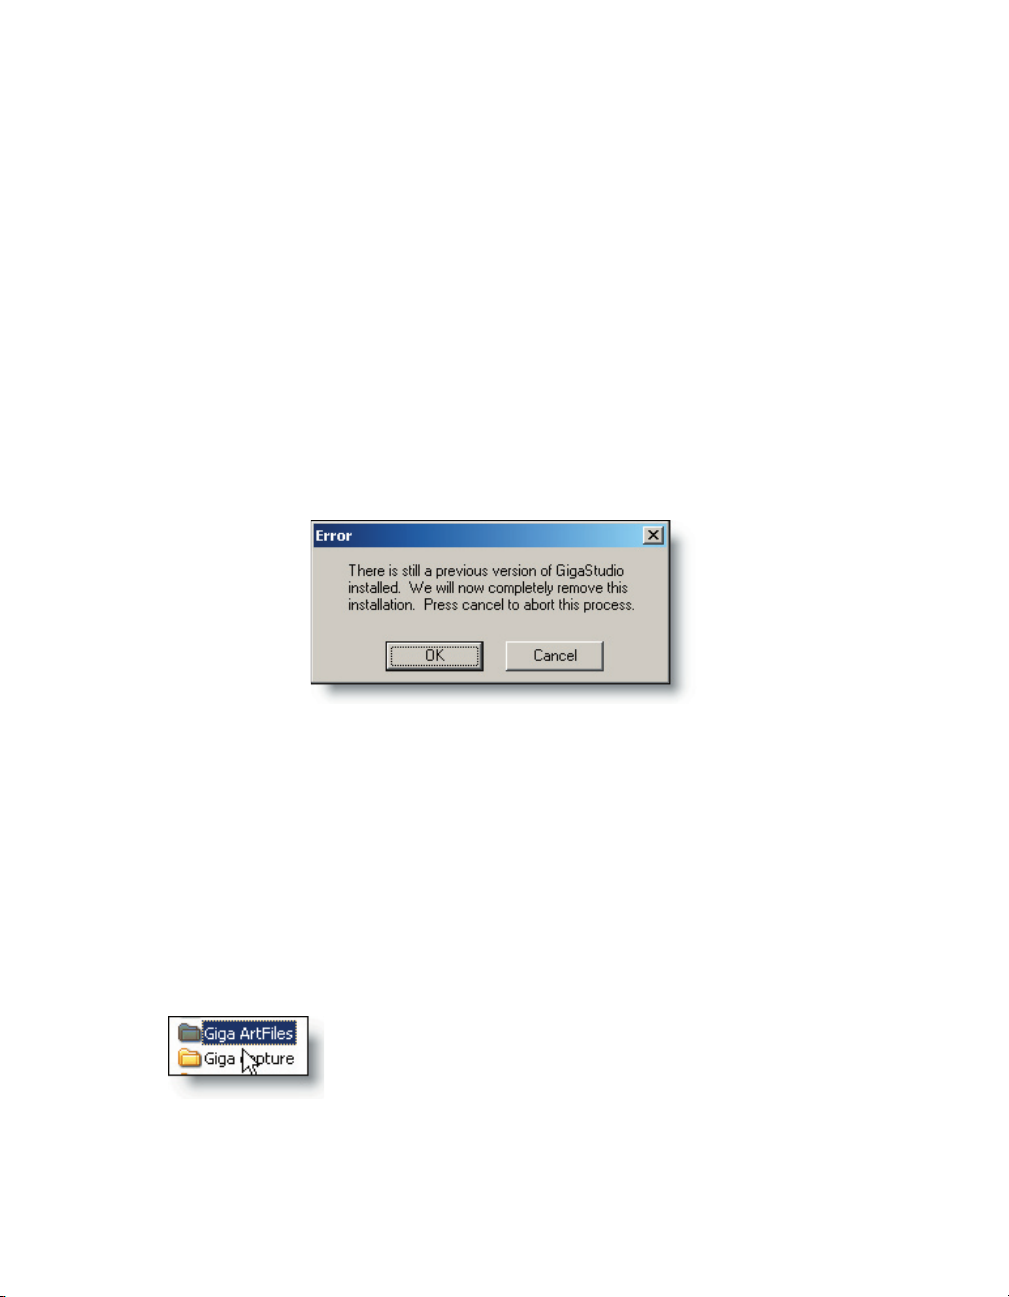
If you have not removed your previously installed version of GigaStudio, you will be
prompted to do so. It is not possible to proceed any further until you have successfully
removed your existing version of GigaStudio.
Consider that you may have performance (.GSP), articulation (.ART), and instrument
(.GIG) les saved in the same directory as you GigaStudio installation. Although storing
your les in one place is just as good as any, bear in mind that when you uninstall your
existing version of GigaStudio, you will lose ALL of the data that is in that folder.
For example, you may have made some special edits to your favorite instruments
and saved those as articulation les. If you have ever done this, then you know that you
were prompted each time to specify a name and location for those les.
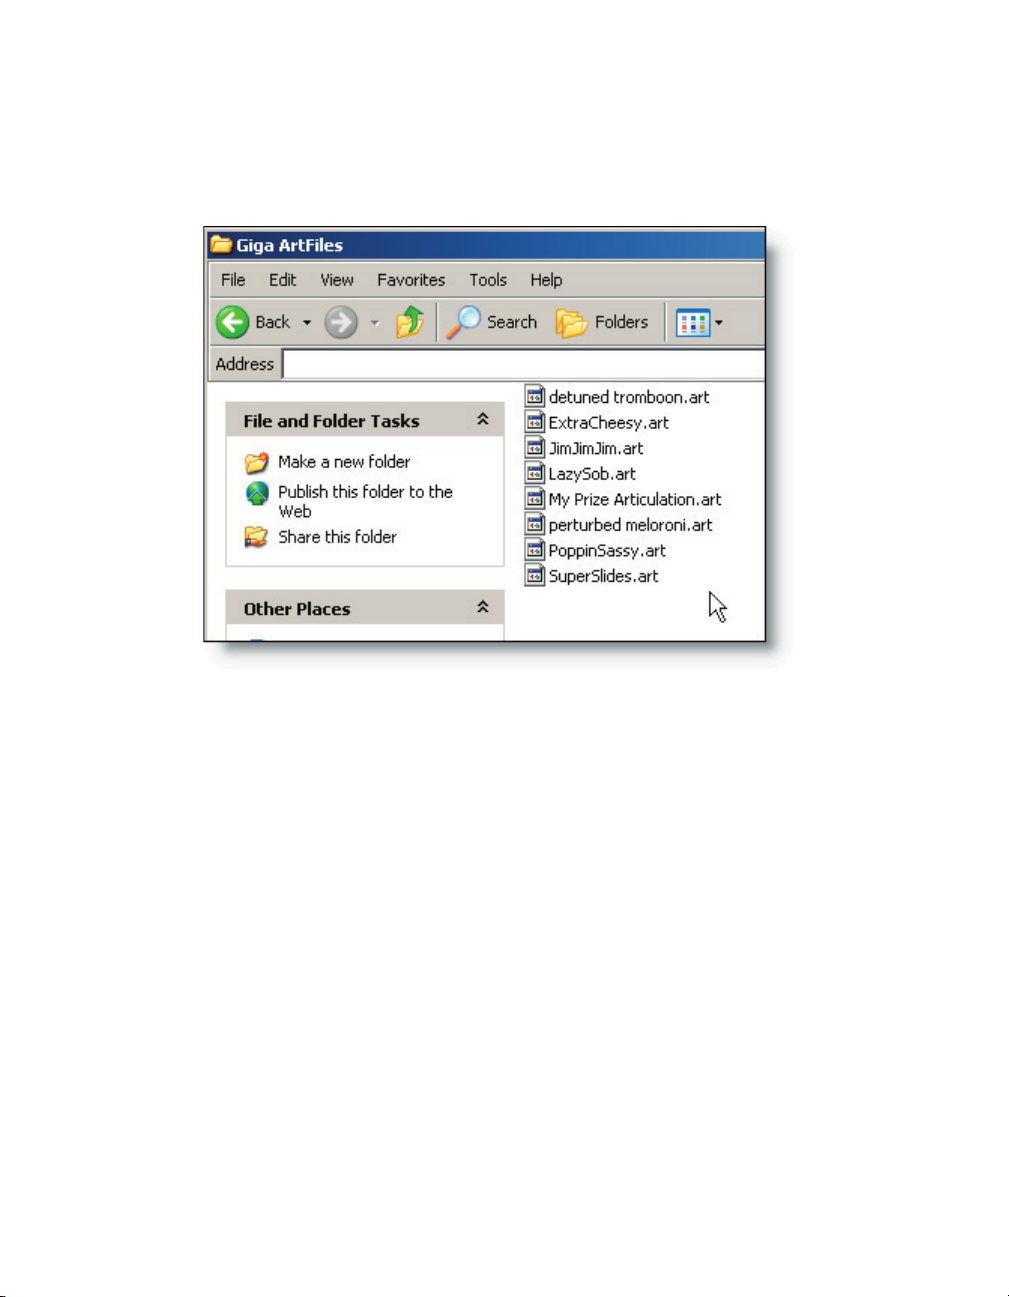
So be sure to check for any les of the types .GSP, .ART, and
.GIG by checking visually with the Windows le explorer or
using the Windows search tool.
Any .gsp, .art, or .gig les that show up under either of the directories C:\Program
Files\Nemesys or C:\Program Files\Tascam will be removed during the un-install process.
15
Page 16
17
Save the folder to a backup location, or select the les within that folder and save
them to a backup location. You can then access the les at any time after you installed
your new copy of GigaStudio 3.0. Do the same with each of your performances and instruments as well.
1. To uninstall your previous GigaStudio installation, begin by clicking the Windows
Start button.
2. Go to the Control Panel item on your Start Menu. Double-click the Add or Remove
Programs option in the list.
3. In the installed programs list, select the Tascam GigaStudio item so that it is expanded to show its details.
4. Click the Change/Remove button to remove the previous version of GigaStudio.
Windows will ask you to verify that you want to continue with the removal of the
previous version of GigaStudio. When the removal process is complete, you will be
prompted to restart the computer. At this point you may want to save any open les
and close other any open programs. If you just want to keep working and install GigaStudio 3.0 later you can choose not to restart at this time.
Once the computer has restarted, you have successfully un-installed your previous
version of GigaStudio as well as backed up your Giga-related project les. If after this
process, Giga still detects a previous version installed, browse your installation disc to
the “/Utilities/GigaClean.exe” le. Run this utility, restart your computer, and then install GigaStudio 3.0.
16
Page 17
Installing GigaStudio 3.0
Begin by placing the GigaStudio 3.0 Installation CD in your drive and allowing it to
spin up and be recognized. Browse the contents of the CD and click on the Setup.exe
le. You may be prompted to remove a previous version of GigaStudio. Please see the
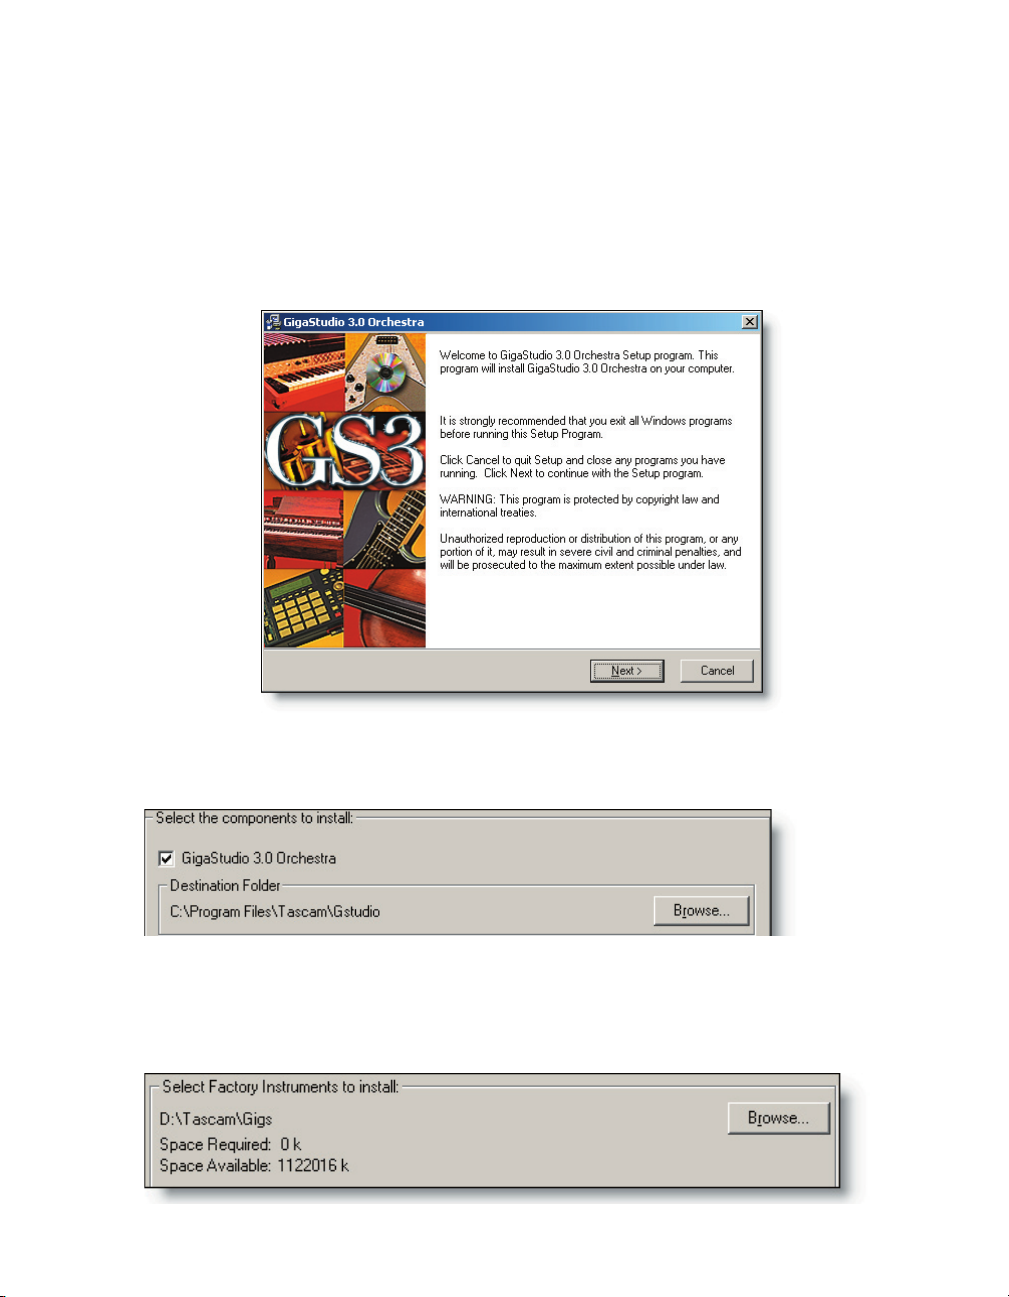
preceding section on Removing a Previous Version of GigaStudio. GigaStudio 3.0 Installation welcome screen. After reading the welcome, click “next” to continue.
Select the options for GigaStudio content you would like to install at this time. Use
the default drive and folder for installation, or optionally browse and select a different
location. Click “next” to continue.
The content provided with Gigastudio 3.0 can be installed at this time, or you can
wait to install it at another time. To install all or part of the content now, select these
options and then assign the drive and folder location for the content to be installed.
Folder destination option for factory instruments:
17
Page 18
19
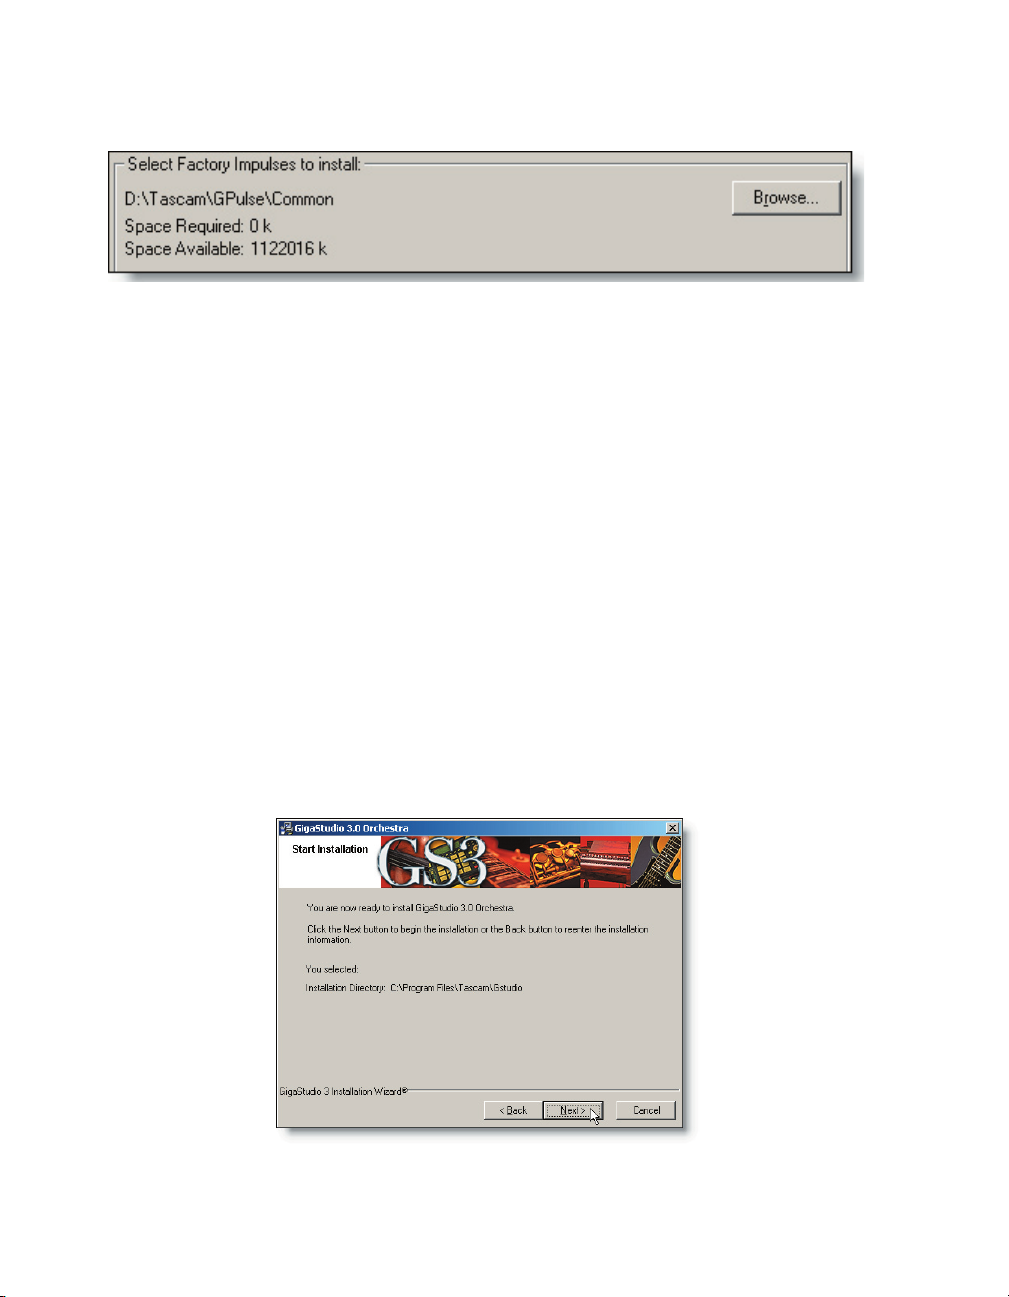
Folder destination option for factory impulses:
Recommendations
Probably the single most important thing you can do for your system to increase performance and polyphony is to dedicate a separate physical hard drive to your sample
content. It is simply not enough to create a separate audio partition on the same drive
as your OS and programs. In fact, this is actually a bad idea- this makes the drive’s stylus
or head work even harder, since it is simultaneously seeking application data in one
partition and streaming audio data from another. A dedicated drive for your content
frees up both drives to separately access the program data and the audio data.
If your motherboard has only two IDE or SATA connectors, you would normally connect the system drive to the primary connector (IDE 1 or SATA 1) and the audio drive to
the secondary connector (IDE2 or SATA 2). Set each hard drive’s jumper to master. Congure your CD or DVD drive as the slave device on IDE1 or SATA1, and make sure that it
is sharing the system drive connection ribbon cable and not the audio drive connection
ribbon cable that your dedicated audio drive is connected to. This will insure uninterupted data ow to and from the more critical audio drive. If your motherboard has
a separate IDE or SATA controller(s), your setup will be more exible as well as allowing
for more physical drives.
The impulse content should ideally be placed on yet another separate drive from the
.gig content, or on the system drive with the OS and programs.
18
Start Installation Screen
Page 19
Your selections will be displayed here for you to verify that they are correct. If you
happen to have made a mistake or just want to change your mind about one or both of
the locations you specied, click the “Back” button. Otherwise, click the “Next” button to
begin the automated installation process.
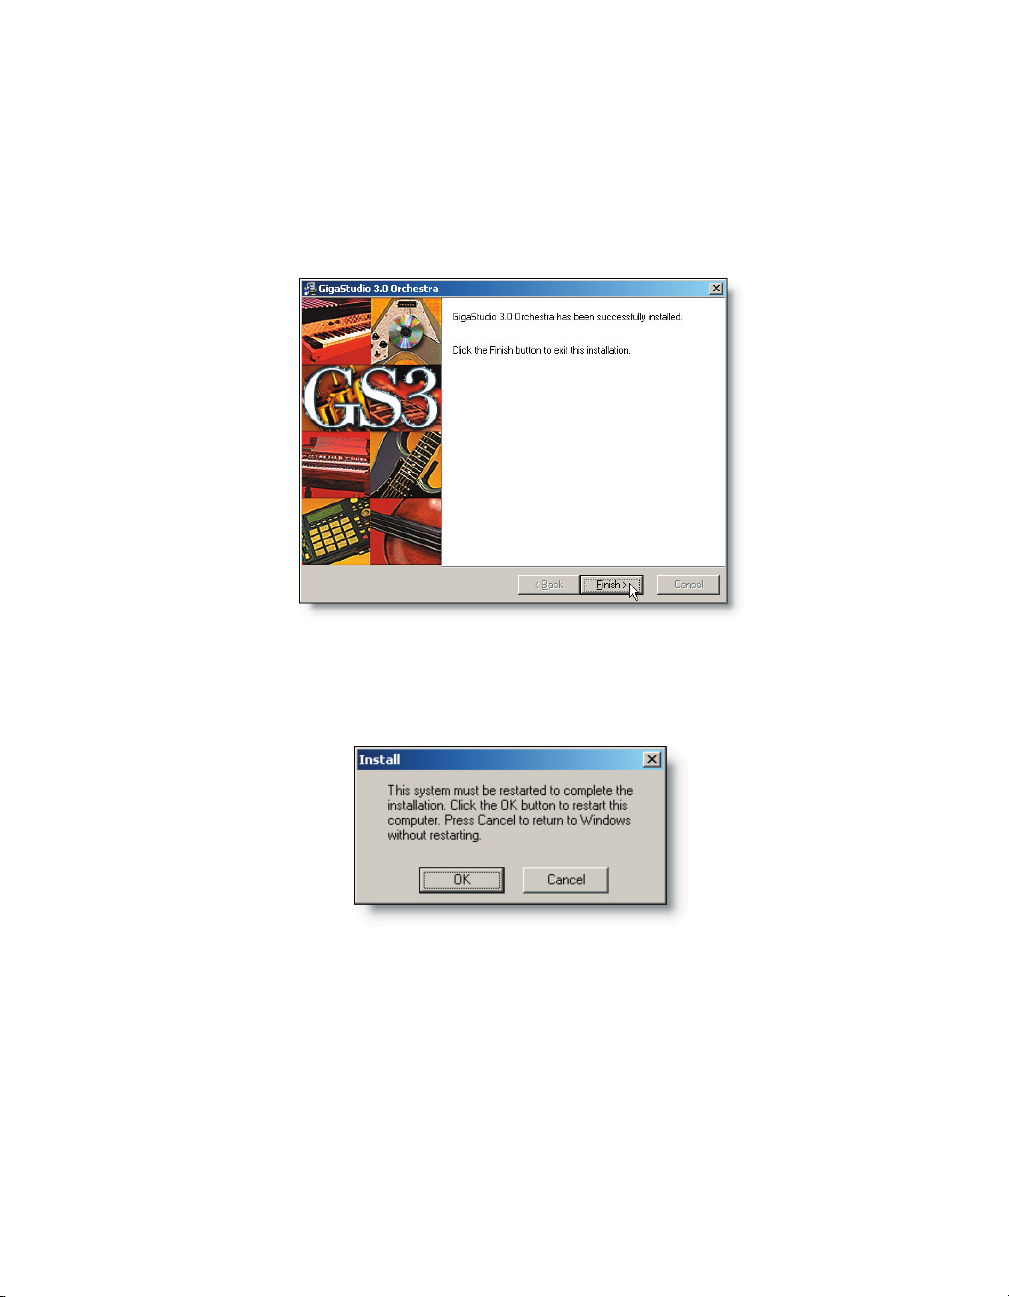
When the installer nishes, you will be prompted to restart the computer. At this
point you may want to save any open les and close other any open programs.
If you just want to keep working and run GigaStudio 3.0 later you can choose not to
restart at this time. You must restart the computer in order for GigaStudio 3.0 to run
properly.
Once the computer has restarted you will have successfully installed GigaStudio 3.0
along with any optional content. When you run GigaStudio for the rst time, you will
need to make some settings and specify some user information, as well as register the
product. See Registering GigaStudio 3.0 instructions on getting through the process as
painlessly as possible. See the GigaStudio Conguration Manager section for details on
setting up your GigaStudio information with your sound and MIDI hardware installed
on your system.
19
Page 20
21
Registering GigaStudio 3.0
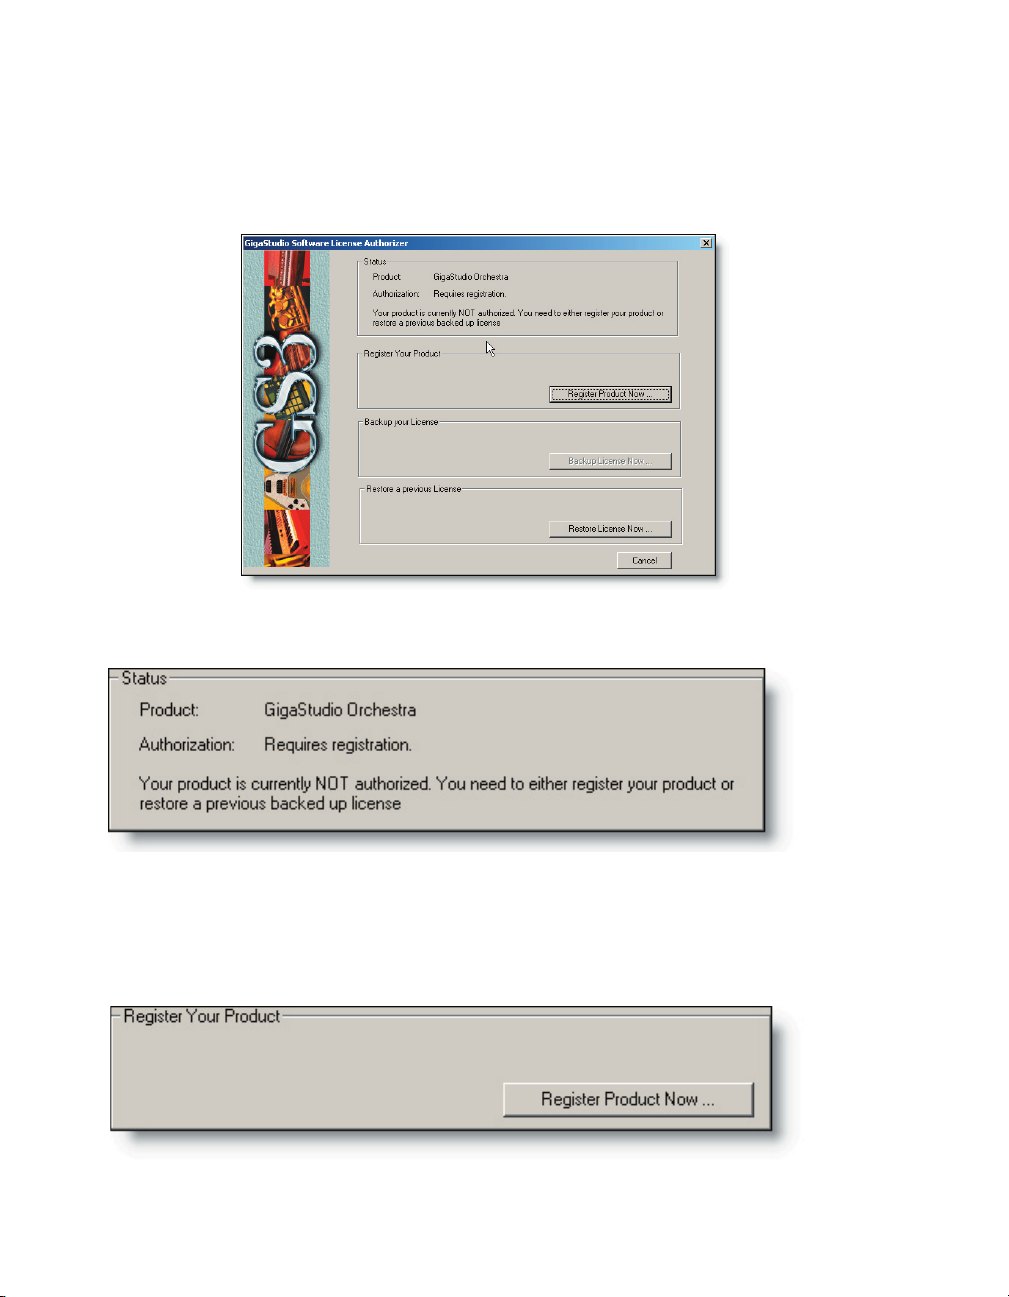
Before running GigaStudio, run the GigaStudio License Authorizer utility from the
Start Menu. It is located in the Tascam Program Files group.
Until you have registered your GigaStudio, the status area of the License Authorizer
will state that you need to do so.
Select the Register Product Now ... option. Once you have successfully registered your
copy of GigaStudio 3.0, you will have the option of saving a backup of your license. In
the future, should it be necessary, you can easily restore your GigaStudio license from
the backup location.
20
Page 21

Fill out your personal identication information carefully. This how the Tascam product registration folks will identify you when you register and receive upgrades, additional licenses, and technical support. Your CD Key should be located in the GigaStudio
3.0 packaging. The information in the top section is required, and must complete in
order for you to register. The information in the lower section is optional, but could be
helpful to TASCAM in any future correspondence with our tech support and customer
service departments.
Online Registration
Click “next” to continue. There are two methods by which you may register. Select either the Register at the Tascam Website option, or choose to Register Ofine. It is recom-
mended that you use the Register Online option. This will require that your GigaStudio
machine is connected to the internet and can receive a conrmation e-mail message.
21
Page 22
23
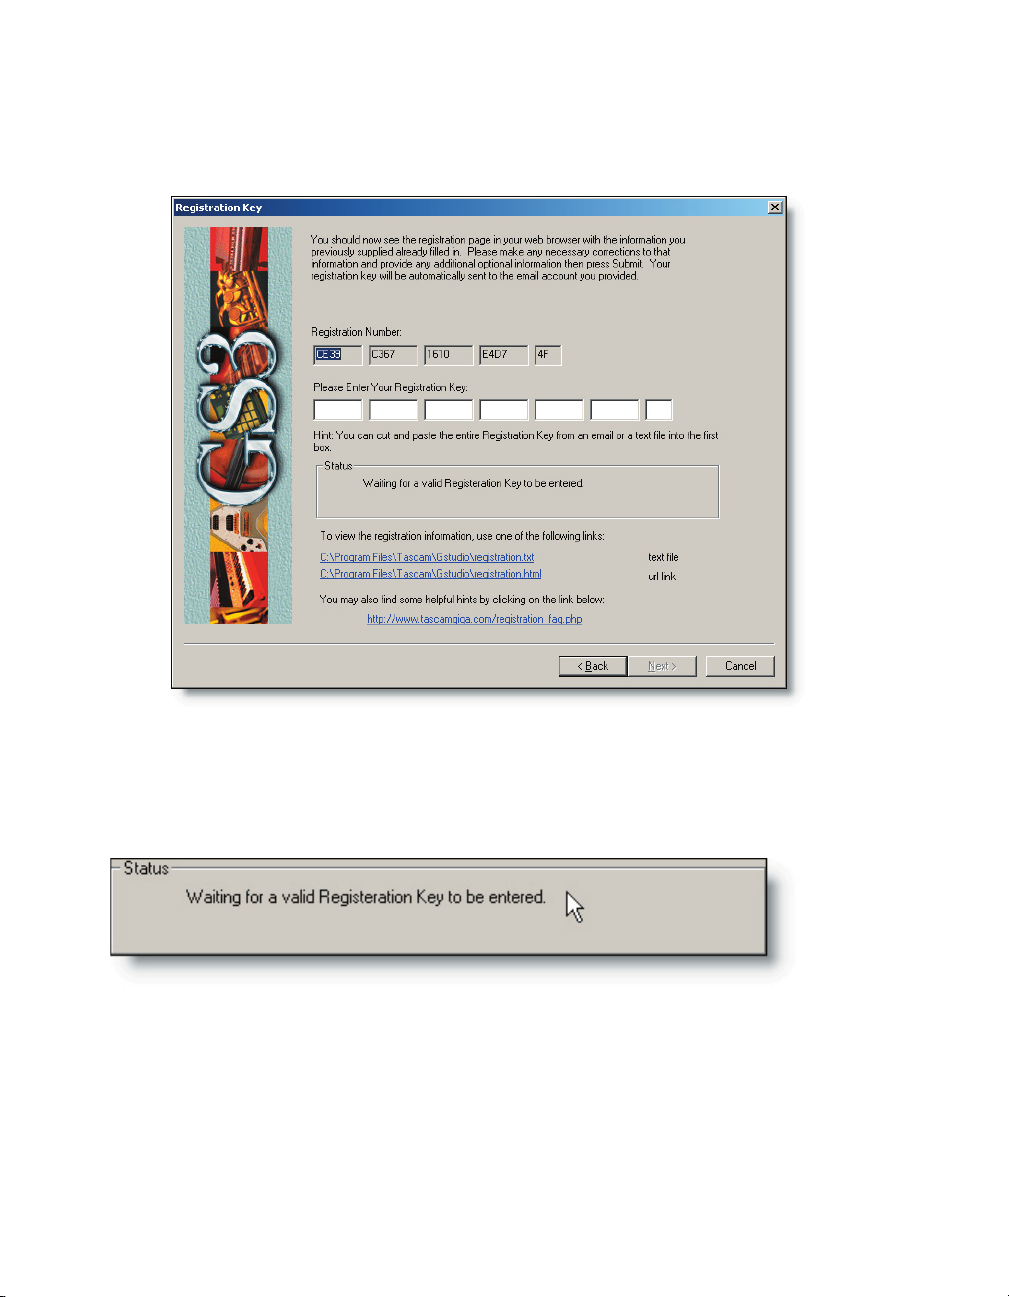
After selecting Register Online, you will then be presented with the following screen
with a set of elds in which you will place your registration key when you receive it in a
conrmation e-mail message.
You should also see a web page on your screen as well. This contains a form where
your information has been automatically lled into the form. Please double-check to
makesure that all the required elds are lled in with the correct information. Click the
Submit button at the bottom of this web page.
The status area of the registration window will show that it is waiting on you to
enter your registration key. You will receive the key in an e-mail message. You can copy
the entire alpha-numeric key and then paste it into the rst eld. It will automatically
spread across the appropriate elds for you.
22
Page 23
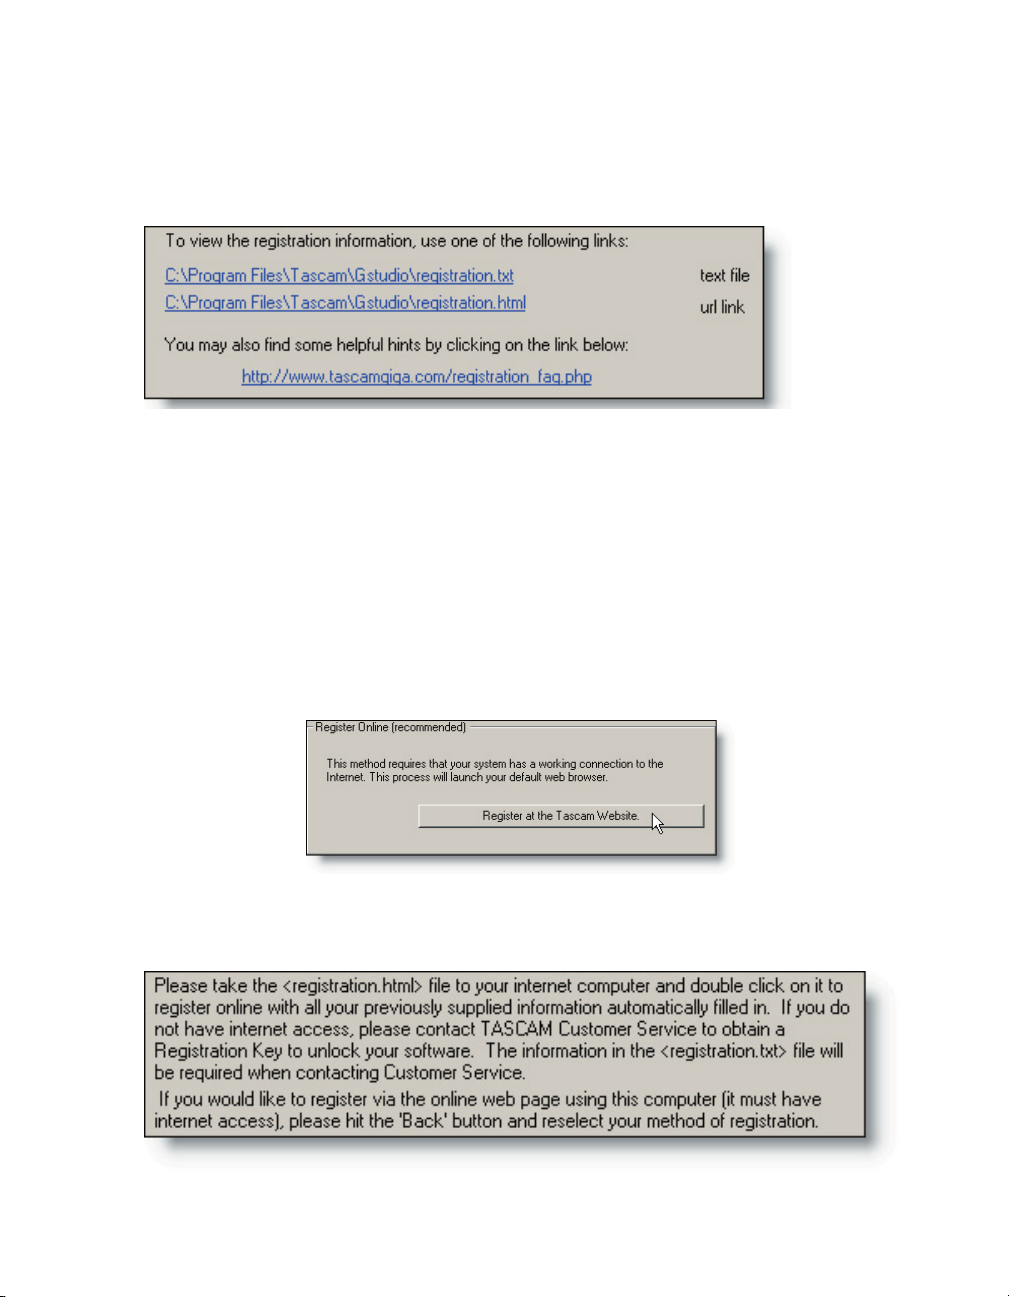
You may want to save your registration information electronically as well as a printed copy. Perhaps your GigaStudio machine is not connected to receive e-mail messages,
but you have an ofce machine that is. You can click on the links in the lower portion of
the registration screen to open these les:
There are two links here that will launch the le automatically for you. You can than
save these to an alternate location, or print them out. Notice that they are located in
your GigaStudio installation directory.
Ofine Registration
If your GigaStudio machine is not connected to the internet, or you would prefer to
register from a different location where you have internet access, it is possible to register by using the Register Ofine method. When you use this process, you will have the
option of saving two les, “registration.txt” and “registration.html” to a oppy disk or
another removable and portable storage medium.
There are explicit intructions on this page to help you register ofine. Should you decide to register online, click the Back button and select the Register Online option.
23
Page 24
25
Successful Registration
Upon entering your valid registration key, you will see a conrmation message. If not,
you will prompted to re-enter your key, making sure to enter it correctly.
The product status area of the GigaStudio License Authorizer will display the current
status of your license.
24
Page 25

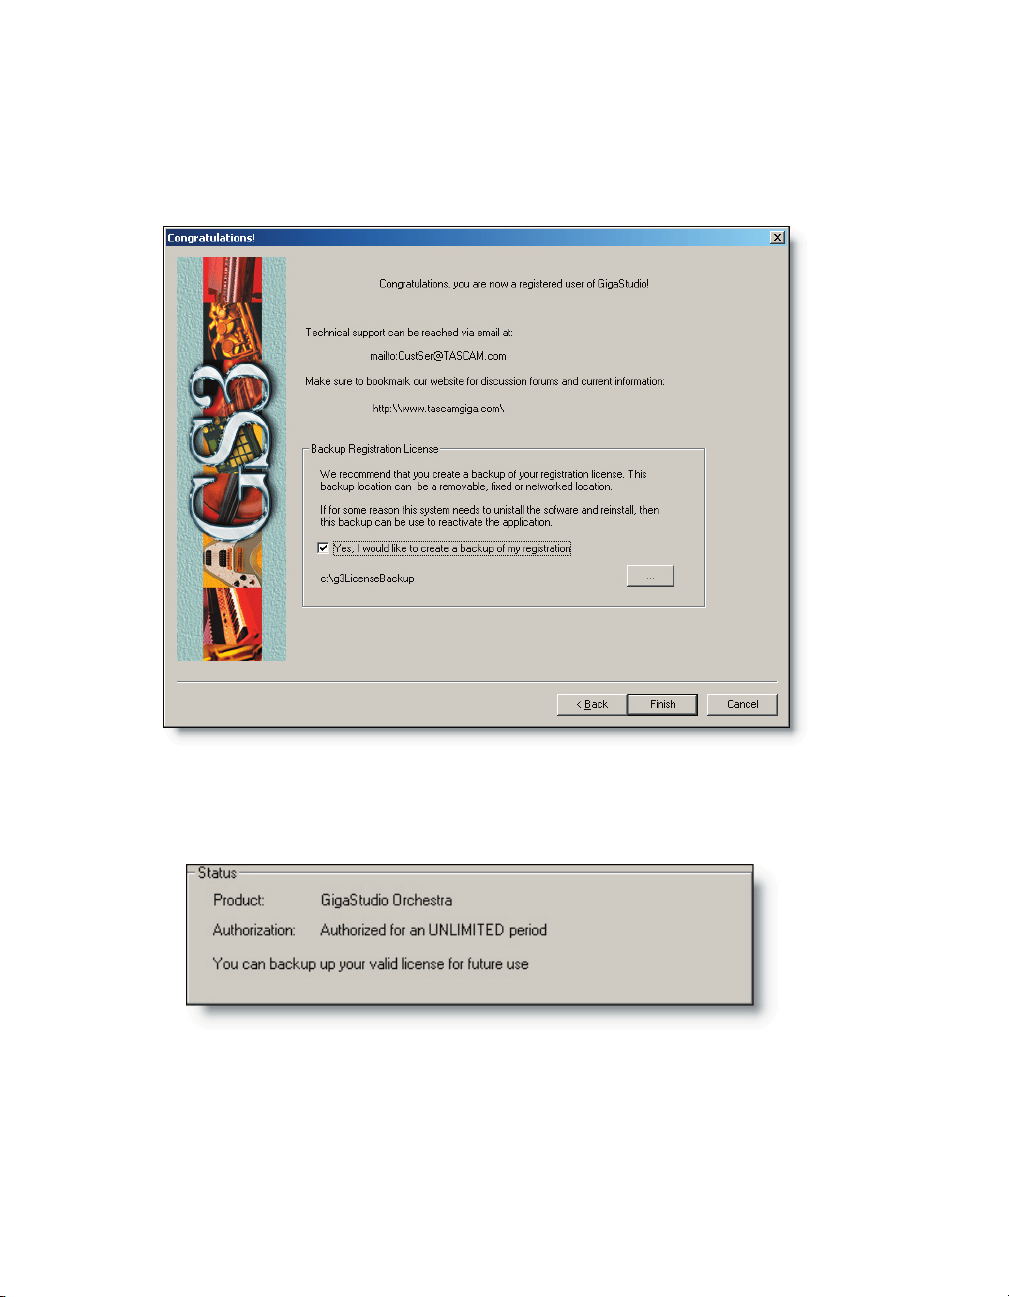
Backup License
As soon as you have successfully registered GigaStudio, you will then have the opor-
tunity to back up your license to a location you specify. The default location is a directory created by the licensing manager at c:\g3LicenseBackup.
If you do not wish to back up your license (not recommended) you can de-select the
check box in the back up options section of the conrmation screen.
When you have chosen a location, by clicking the browse button, or using the default
location, you will see a message that you have backed up your GigaStudio 3 license with
the location shown as a le path.
Step-by-Step Review
Removing a Previous Installation
1. Be sure that you back up any performance les (.Gsp), articulation les (.Art), and
instruments (.Gig) before proceeding.
2. Use the Windows Control Panel Add/Remove Programs to completely remove the
previous GigaStudio installation from your computer.
3. Restart the computer. You are now ready to begin installation of GigaStudio 3.0.
Installing GigaStudio 3.0
1. Place the GigaStudio 3.0 CD in your drive. If the installation wizard does not start
automatically, browse the CD contents and select the “Setup” le to begin the installation.
25
Page 26

2. Select the drive and folder location for GigaStudio. The default location will be your
system drive. This should be ne for most users.
3. Select the drive and folder location for your .gig content. This should be a separate
drive from the system drive containing your OS and programs.
4. Select the drive and folder for your impulse content. This should be on a separate
drive from your .gig content. Use your system drive if you do not have a third drive
available for impulse data.
Registering GigaStudio 3.0
1. There are two methods by in which you may register. Select either the automatic
method at the Tascam website, or choose to register ofine.
2. Fill out your personal identication information carefully. This how the Tascam
product registration folks will identify you should you need to contact them for
support by phone, fax, or e-mail.
4. If you are connected to the internet and elected to register automatically, you will
get a conrmation screen with a links to a text and HTML le containing all your
registration data. Save this le to the location you specify for future reference.
5. If registering ofine, your information will be in the text le you saved to your registration backup location. You can print this page for faxing and keep a copy on le
with your GigaStudio purchase and license records.
Getting Help
Always have your CD Key available in order to identify yourself as a registered Gigatudio 3.0 user. Have your printed or electronic copy of your registration information
handy as well. This will be greatly appreciated by the ne registration folks at TASCAM
and will help them register your GigaStudio 3.0 more efciently.
Automated Systems, Registration, Technical Support
http://www.tascamgiga.com
TASCAM International Direct Contact Information
http://www.tascamgiga.com [check for your local tech support ofce location]
You will nd contact information for all departments as well as phone numbers, fax
numbers, e-mail addresses, and mailing addresses for your local TASCAM customer service representatives.
26
Page 27
User Interface Essentials
The user interface has many user-denable features enabling you to customize the
look and feel of GigaStudio. This design has been optimized for maximum user exibility and workow. While it would be impossible to create a one-size-ts-all interface
design, research and end-user requests have greatly inuenced the way the program
can be individually customized.
It will be well worth your while to become familiar with the user-denable aspects of
the program. As it is with any set of tools, you will nd ways to do the same thing differently, new ways of doing the same thing, and better ways to do things. As your experience increases and your expertise evolves you will be able to rene the look and feel of
GigaStudio as you see t.
GigaStudio is made up of many components that can be resized, selected, hidden,
and further congured and manipulated in a number of ways.
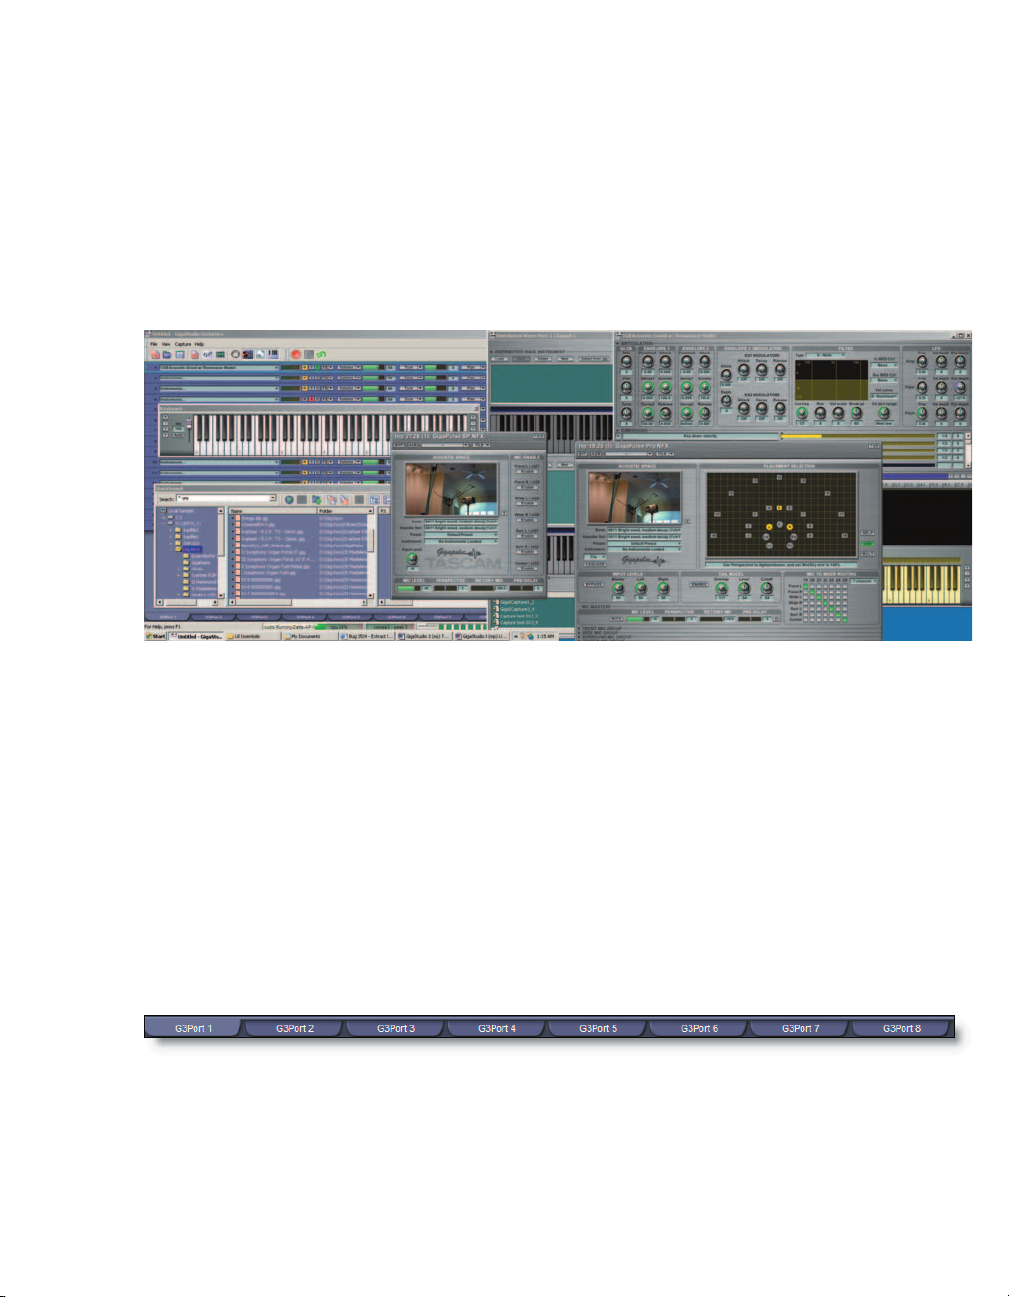
Selecting Components
At the bottom of the MIDI Mixer Port window are tabs for each of the available Ports.
Click on the tab to view the 16 MIDI channels of the selected MIDI Port.
You may also use the keystroke Alt + n where n is the number of the MIDI Port you
wish to select. For example Alt + 3 would select the Port 3 view and bring its 16 channel
display to the front. For a comprehensive list of keystrokes see the Keystroke Appendix.
27
Page 28
29
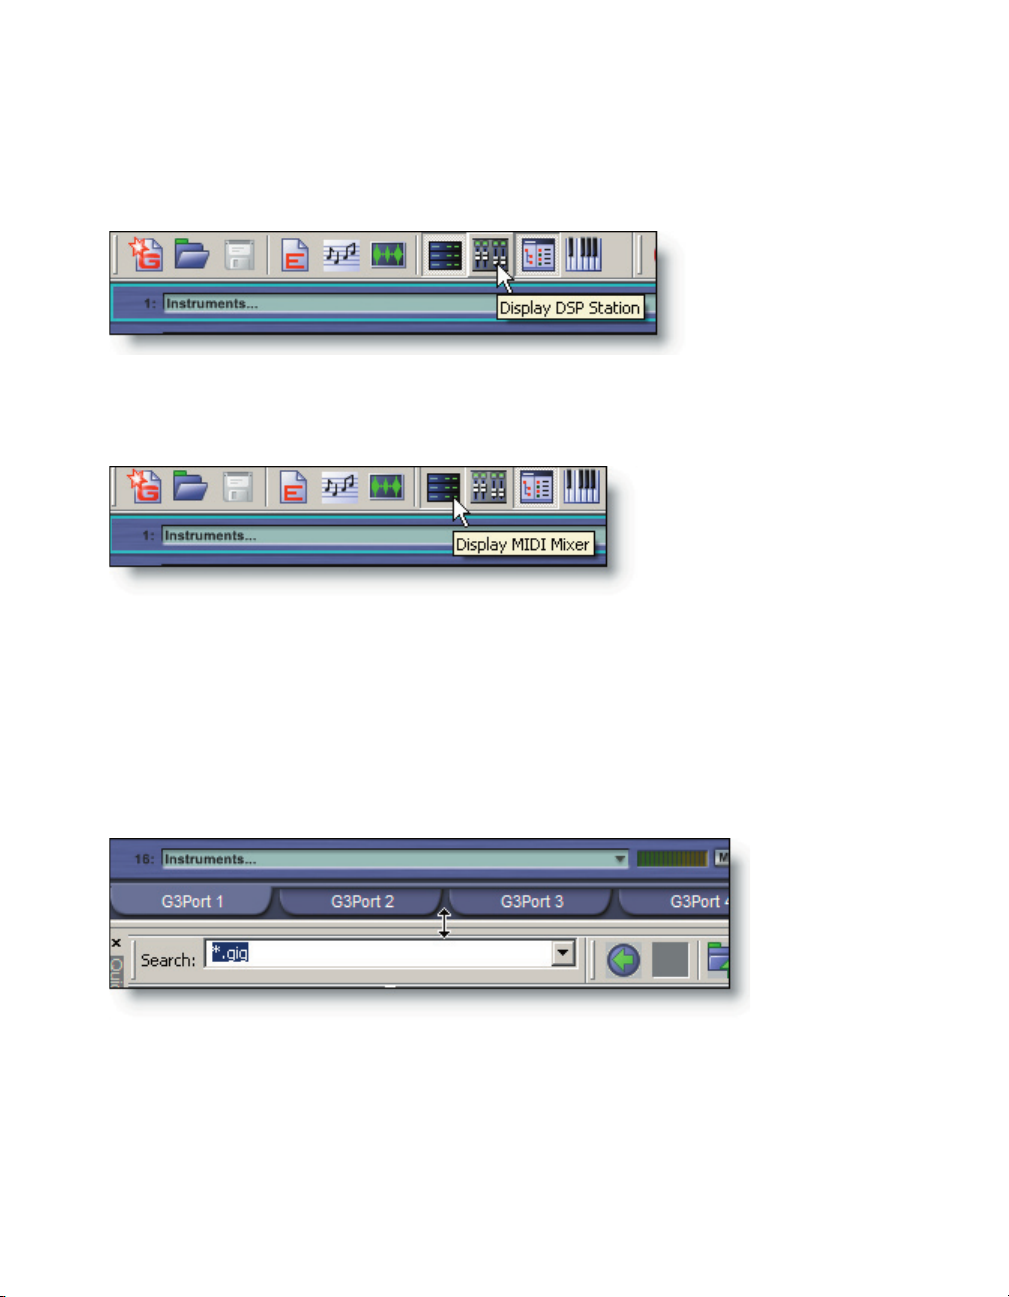
The tool bar can be used to select components as well. To switch to the DSP Station
view select the button on the tool bar and the DSP Station will be displayed in place of
the MIDI Mixer. Note that the tooltip text tells you what the icon button does, when
you hold your mouse cursor over the button.
To bring back the MIDI Mixer, click the MIDI Mixer tool bar icon and the last state of
the MIDI Mixer Port 3 view will be displayed in place of the DSP Station.
Using these tool bar buttons it is possible to toggle between the two component
views very quickly.
Resizing Components
Place the mouse cursor over the border between the MIDI Mixer Ports and the QuickSound Loader and it will change to up/down arrows. Click and drag to move the dividing line so that one view increases in size while the other diminishes.
The overall size of a component can be adjusted by placing the cursor over any of
its corners. When the cursor becomes a diagonal two-headed arrow, click and drag the
component to increase or decrease its size.
28
Page 29
Floating Components
It is now possible to “oat” components such as the QuickSound Loader, Virtual Keyboard, DSP Station, and MIDI Mixer. Simply grab a component along its left-hand edge
and drag it away from where it is docked and the component will now oat above the
rest of the user interface. To oat the DSP Station, select the View Menu option “DSP
Station in separate pane”.
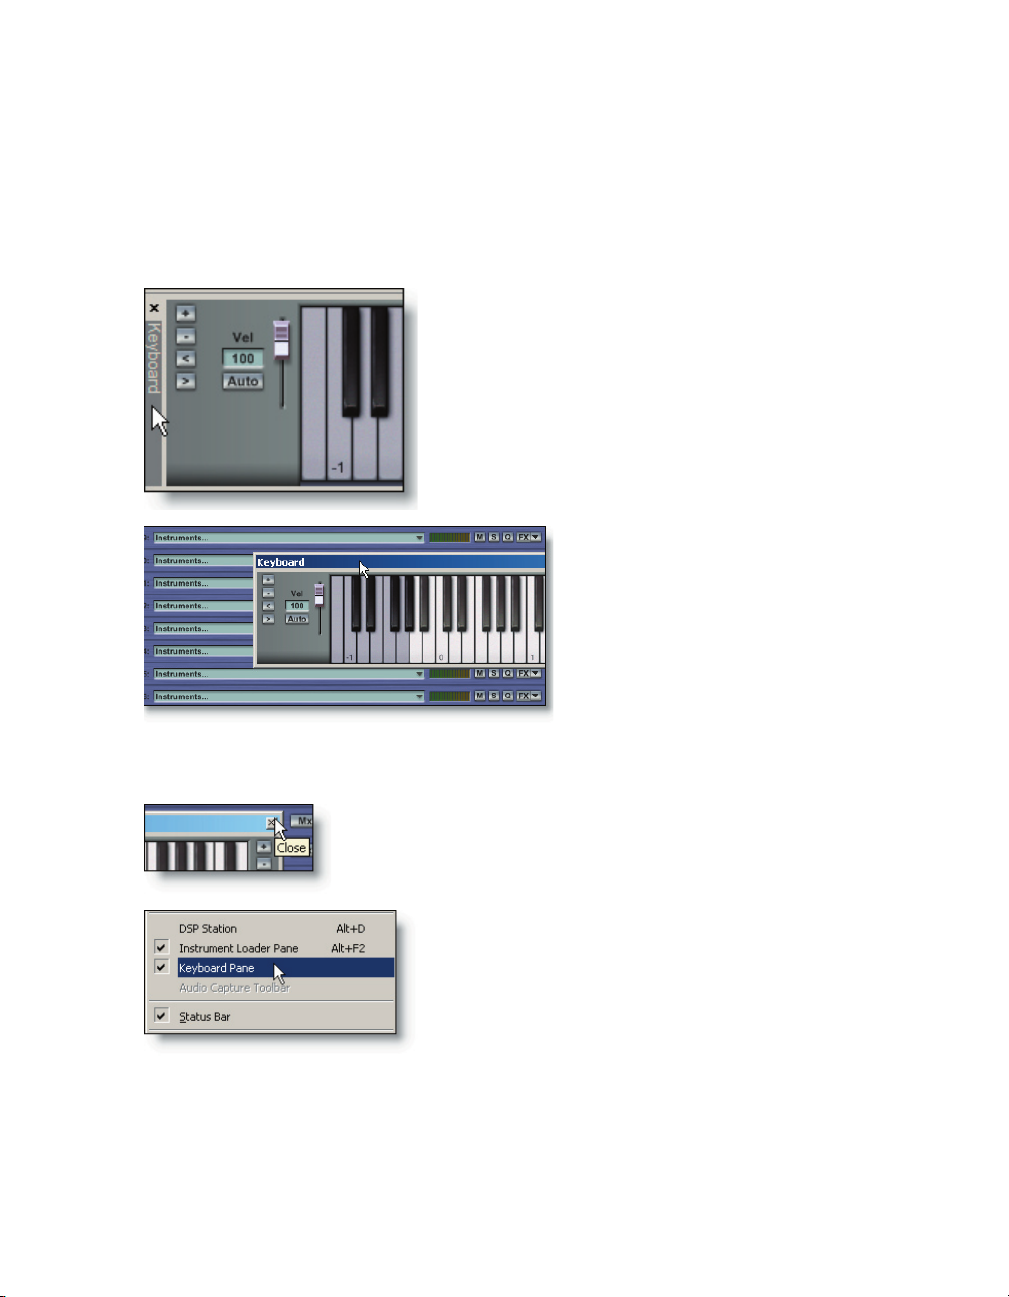
For an example, grab the left-hand edge of the
Virtual Keyboard display at the bottom of the interface window and drag it away toward the center of the screen.
The Virtual Keyboard component itself can now
be resized and placed where it is most useful.
To move a oating object around
the screen, grab its title bar and drag it
with the mouse. When you nd a suitable place for the component, release
the mouse and the object will stick in
place until it is moved again or hidden
from view.
Perhaps, at times, it would be most useful out of the way. There are several ways of
doing this:
Simply click on the X (standard Windows close function) in
the upper right-hand corner of the Virtual Keyboard component to dismiss the component.
Alternatively, you can select the “Keyboard Pane” op-
tion in the View Menu. To recall the Virtual Keyboard,
simply click on the tool bar icon OR select the “Keyboard Pane” option again in the View Menu and it will
be restored to its last location.
The same can be done for the QuickSound loader pane. Toggling this window into
view only as long as you need it will free up work space. When you are done with a component, simply dismiss it to make more of your screen available for other tasks. It is only
a click away whenever you need to use it again.
29
Page 30
31
When using multiple monitors, it can be advantageous to oat several of the interface components and place them onto a different monitor. This can be useful for toggling the QuickSound loader on and to quickly load instruments while watching the
MIDI Mixer Port view, tweaking EQ and FX on DSP Mixer inputs, ne tuning GigaPulse
parameters, and toggling the Virtual Keyboard on and off to use the mouse to play or
simply monitor the incoming MIDI data as the notes are triggered from your sequencer.
All the aspects of the user-dened interface components can be saved in the “Save
As…” options of a saved performance. See the tutorial on working with performances
and the related reference sections for more details.
If you click the Reset tool
bar button in its default state,
it will revert the entire GigaStudio user interface back
to its power-up default state.
When you have the Reset->User Interface option
selected, all the user interface
components will be retained
after a Reset is selected.
See about more details on the reset options in the related reference section. For more
details on the individual components and their particular user interface attributes see
the reference section for each component.
Fader, Knob, & Slider Adjustments
When adjusting the various control widgets in GigaStudio 3.0.
click directly on the control and drag to move the cursor.
As soon as you drag to move it, the cursor will disappear enabling you to see the widget movement as well as its displayed
value. To disable this behavior, simply go the GigaStudio Settings
General page. Under the Visual Preference section, un-select the
“Auto Hide Cursor” option.
30
Page 31

The direction in which you drag the cursor will determine the behavior of the widget
movement:
For Knobs, click and drag the cursor:
Move cursor up to adjust knob clockwise.
Move cursor down to adjust knob counter-clockwise.
Move cursor right to adjust knob clockwise.
Move cursor left to adjust knob counter-clockwise.
Move cursor diagonally for ne adjustment.
For Faders (vertical), drag the cursor:
Up to adjust the fader upward.
Down to adjust the fader downward.
Diagonally left to right to make ne adjustments upward.
Diagonally right to left to make ne adjustments downward.
For Sliders (horizontal), drag the cursor:
Right to adjust the slider right-ward.
Left to adjust the slider left-ward.
Diagonally left to right to make ne adjustments right-ward.
Diagonally right to left to make ne adjustments left-ward.
Hold the [Alt] key while dragging for ne adjustment both ways.
In review, you will notice that the default behavior of the cursor is to automatically
hide while you are making adjustments to a knob, fader, or slider (widget). To disable
this behavior, simply go the GigaStudio Settings General page. Under the Visual Preference section, un-select the “Auto Hide Cursor” option.
31
Page 32

32
33
Page 33

GigaStudio 3.0 Conguration Manager
Before running GigaStudio 3.0 for the rst
time, it is highly recommended you open the
GigaStudio Conguration Manager directly
from the Windows Start Menu.
This will enable you to congure MIDI and
audio hardware and software settings and
will help to minimize any potential conicts
with other demands already placed upon
your system resources.
First Time Startup Procedure
Upon launching the Giga Conguration Manager, you will be presented with a set of
comprehensive dialogs for making adjustments for making the most of your particular
needs. As you become more accustomed to working in the Giga environment, you may
wish to revisit this dialog and revise these settings as you continue to work with your
sampled instruments.
You should rst select the Hardware tab and assign the Hardware Adapter (sound card) and MIDI Port Conguration for your
Giga system.
Select Audio Hardware
Select the drop-down menu for the
hardware adapter and choose the audio
interface you wish to use with GigaStudio.
In this example, we have only one option to choose from. It is possible that multiple
cards are installed on a given system. It will be necessary to dedicate at least one pair of
audio outputs to be used by GigaStudio.
Keep in mind that you must have a GSIF supported driver for your audio hardware
adapter to work with GigaStudio. Most professional sound card manufacturers have
GSIF driver support for their products. If you do not have a GSIF supported sound card,
you can still run GigaStudio in ReWire mode. You can only use it as an integrated sampler in your ReWire host DAW application if you are running in ReWire mode.
33
Page 34

35
Sample rate and bit depth can be congured as well. It is very important that these
settings remain consistent throughout all of your integrated audio programs (sequencers, audio editors, multi-track audio DAWs) and sound card settings so that resampling
is not required at any step along the way to the nished master (unless desired, of
course). This will also keep any sync, tuning, and timing consistent with other aspects of
your project, such as video and other time-specic cues.
Select MIDI Hardware
Next, select the MIDI Port conguration. It
is not necessary to enable all eight MIDI ports,
but you must have at least one port enabled
for external MIDI input. In this example, we
have selected a virtual MIDI cable from a networked computer running a sequencer over a
LAN connection.
In this dialog, we can choose from a number of software and hardware MIDI In devices. Each of the eight MIDI In Ports can be congured with a discrete “cable” for up to
128 MIDI channels. Advanced methods for utilizing MIDI resources such as port linking
and stacked instruments will be covered in more detail in their respective sections. For
now, simply assigning one MIDI Port will be sufcient.
Congure the Synthesizer
Next, select the Synthesizer tab. Here are settings for polyphony,
capture as well as other settings in GigaStudio 3.0.
The Polyphony Settings
Looking at the polyphony slider, we see that it is set at 160, but this is not anywhere
near the maximum setting. In fact, maximum polyphony is ultimately determined by
the performance and hardware capabilities of each individual system. Above the polyphony slider and slightly to the right is a setting for maximum polyphony.
34
Page 35

The Maximum Polyphony eld can be changed to
any number from 1 to well over a thousand voices.
Depending on the system performance, this setting
will need to be ne tuned for the optimum setting. Click on the up and down buttons
to increment by one, or click in the center handle and drag the mouse cursor up or
down to rapidly increment this setting. Keep in mind, that you will need to click the Apply button for any actual changes to take place.
As more polyphony is requested, more system resources must be allocated for handling the voice streams. Some of the system memory will be allocated to these polyphonic streams and will no longer be available for loading instruments. In order to
help you to gauge this allotment of memory, there is a graphic display just below the
polyphony slider that dynamically tracks these memory requirements based on the
amount of memory installed in the system.
The System Memory Status Display
In this example, we start with a maximum setting of up to 256 voices. On the slider
we have a conservative setting of 160 out of a possible maximum of 256 simultaneous
voices or streams.
The system we are working with has 512MB of memory is installed. Here we can see
that our polyphony setting of 160 will require 5% (shown in green) of the installed RAM
for streaming the samples. The remaining amount of RAM (shown in blue) remains
available for loading instruments.
To understand this further, let’s move the polyphony slider up all the way to the dened 256 maximum.
35
Page 36

37
Notice that the graphic readout has increased slightly to accommodate the demands
of additional polyphony.
The remaining memory has decreased accordingly leaving slightly less RAM available
for loading instruments. A more extreme example shows how these demands make a
dramatic effect on the overall system resources.
The graphic readout has increased to show that 33% of the available memory is now
required to accommodate as many as 1000 simultaneous voice streams.
This readout also shows that the available memory for loading instruments has decreased accordingly.
It is not possible to allocate more than 50% of installed memory for polyphonic
streaming. Therefore the theoretical limitation placed on polyphony is derived, at least
in part, from the amount of physical RAM installed in the system.
Bounce To Disk
Capture bit depth is, by default, set to “Track Hardware Bit Depth”. This option will
set the capture bit depth to the same as that of the audio hardware bit depth setting in
the System Settings->Hardware tab discussed earlier.
This is essentially an enhanced “capture to wave” function allowing for muti-track
recording of the master channel outputs of the GigaStudio 3.0 DSP Station. Here are
settings for ne tuning that function.
You can select any bit depth that your audio hardware driver is
capable of supporting. In this case, we can select from 16, 24, or 32
bits per sample. You should consider the proper setting to match
36
Page 37

the other audio les in your project, as well as that of your target delivery format.
Audio capture is buffered by the system to record as many as 64 audio tracks simultaneously. Some systems may benet from additional buffering than the default 0.5
MB. This is dependant on your audio card’s total audio output stream capability.
An 8 channel audio card will be capable of 8 channel capture to
wave. The buffer size setting can be increased to compensate for
drop outs in the audio les captured, if you nd it is necessary.
Synthesizer Engine Settings
Adjust master attenuation and dither (if necessary).
Master Attenuation sets an attenuation on the overall output of
the output master channels of the GigaStudio 3.0 DSP Station. With
extreme amounts of polyphony, the levels of a mix can become saturated at the outputs. Therefore it may be necessary to apply a judicious
amount of attenuation to the master outputs. You should monitor
your sound card hardware mixer utility to see if you are overloading at
the outputs.
Dither should only be enabled if you reducing the bit rate output to
16. Most modern professional sound cards are 24-bit and will require
no dithering. If you do have dither enabled on a 24-bit sound card, the
sound quality can be degraded by the unnecessary dither.
Stacked Instruments
Stacked instruments are managed by MIDI bank select. With this setting, banks can
be dened as long as they are assigned a number that is greater than 127. The rst 128
(0-127) banks are reserved for normal instrument assignments.
Apply or Cancel
Click Apply or OK to accept any changes you have made, or click Cancel to dismiss or
undo anything you are not sure of and you can begin again. Once you are done with the
Hardware and Synthesizer tabs, you are ready to run GigaStudio for the rst time.
The other tabs of the GigaStudio Conguration Manager are covered in the remainder of this section. Please refer to them for more details as needed.
37
Page 38

39
Mixer/Disk Engine
Dene the number of mixer input and group
channels. You can have 32-128 mixer input channels
(up to 64 stereo pairs) and 2-32 group channels (up
to 16 stereo groups).
Sequencer programs that are running on the
same machine as Gigastudio must share system
resources. The priority setting helps to balance the
computational load demands by this user denable
setting. It is best to experiment to nd the optimum setting for your particular system.
A higher setting will give up some of the processing threads for the sequencer. A lower
setting will give GigaStudio more processing priority. The default seting is 1 which will
give GigaStudio the higher priority over your sequencer as long as the two are both
running on the same machine.
Hardware
Your GSIF sound card and driver information are displayed here. Select one of the available sound cards installed in your computer.
38
Select any available sample rate for the GigaStudio audio
output master channels.
Select any available bit depth for the GigaStudio audio
output master channels.
Select as many output channels as you require
from your GSIF sound hardware. A check mark will
indicate any active channels in use by GigaStudio.
Click to enable or disable outputs.
Select any available input channels as your GSIF
2 sound hardware has available. With a GSIF 2 supported audio card, you can have a live input from a
microphone, guitar, or use it as an effects unit from
an external mixing console.
Page 39

ReWire/Plugins
Congure the number of channels, up to 64, you would
like to make available to your ReWire host application.
Dene the search path(s) for your saved
effects presets. You can click on a displayed
path to enable or disable it.
Dene the search path for your installed VST plugins. You can click on a displayed path to enable or disable it.
Congure your plug-ins for use with GigaStudio 3.0. This will
open a list of all installed NFX and VST plug-ins.
The Congure Plug-ins dialog is helpful for troubleshooting as well as scanning for
new plug-ins and viewing their types and capabilities. Click a plug-in to highlight it in
the list. Then you can view its capabilities, add it to the blocked plug-ins list, or remove a
blocked plug-in. One button enables you to unblock all blocked plug-ins.
39
Page 40

A plug-in’s Name and associated image le loca-
tion are displayed.
Type indicates Giga or VST. Pins indicates input
and output conguration. This is a stereo in and
7-channel surround output plug-in.
Capabilities include “Multi-Channel” and “Requires SSE” so to take full advantage of this plug-in
you should have the appropriate hardware to do so.
Convolution/Modeling
IIS conguration settings. See the electronic release notes for the latest information.
Trouble Shoot
If you should have trouble with getting GigaStudio 3.0 to run properly, there are a
number of helpful options for isolating the source of the problem. See the Reference
section for more details on this tab.
Startup Options
Options are available for disabling GigaStudio’s awareness of the selected options. A
thorough test with each of the options enabled or diabled and in varying combinations
can help to isolate the source of a given difculty. This is also helpful information for
anyone who is helping you to solve a technical issue.
QuickSound Database Options
Create a log le in case you have trouble with the database updating. This feature
can help you track down a corrupt or missing le.
Warning Messages
These are all enabled by default. Un-select an option to disable any warning messages. If you have no Giga compatible (GSIF) sound card installed, you may still run in
ReWire mode, but you will always get a warning that you have no Giga compatible
cards installed ay time you launch GigaStudio. So in this case, it would be a good idea to
un-select the “No Giga Compatible Cards” warning message.
Diagnostics
It is possible to run a diagnostic utility with several levels of options and e-mail the
report to Tascam tech support. The Debug mode is a sophisticated extension of the diagnostics utility recommended for advanced users only.
40
Page 41
GigaStudio 3.0 Settings
It will be necessary to take care of some settings specic to your GigaStudio 3.0 installation. See the preceding GigaStudio Conguration Manager if you have not already
done so.
Starting GigaStudio
Once you have your system settings congured, GigaStudio 3.0 can be started just as
you would most any other Windows program. Go to the Start Menu, select the Tascam
group, then select the GigaStudio Workstation option. Optionally, double-click the desktop shortcut icon.
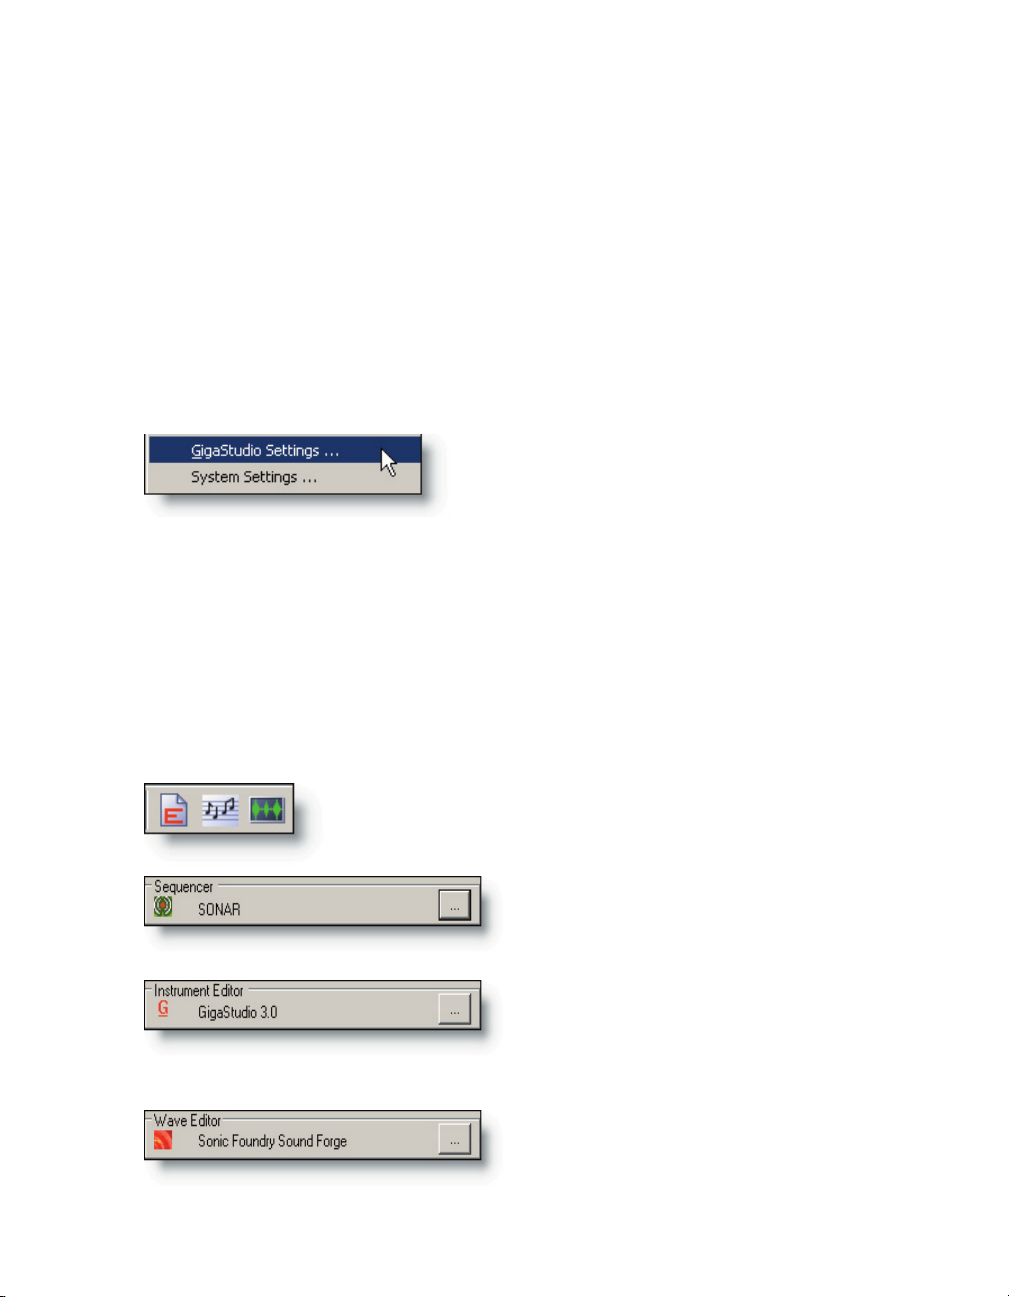
The GigaStudio Settings Manager
Open the GigaStudio Settings manager from
the File menu. There are several tabs devoted to
different aspects of the program. Click on each tab
to bring its view to the front.
General Settings
External Editor/Sequencers
There are quick launch buttons available at all times in the GigaStudio interface. If
you plan to use a sequencer or wave editor on the same computer as you are running
GigaStudio, dene the applications you wish to use here. Each of these will open a standard le browser window so that you can select the application’s executable le. Once
you have assigned the applications, they can be launched with the click of the mouse.
The quick launch tool bar buttons provide quick and easy
access to the Instrument Editor, Sequencer, and Wave Editor as
dened in the general settings.
Browse to the program le location of your
preferred sequencer application. It must be
located on the same computer as GigaStudio.
This is set by default to launch the GigaStudio 3.0 Instrument Editor. Other third
party tools may become available.
Browse to the program le location of your
preferred wave editor application. It must be
located on the same computer as GigaStudio.
41
Page 42

43
Startup and Recovery
“Load last performance on startup” will automatically load the GigaStudio environ-
ment to the last saved state it was left in whenever Gigastudio is started.
“Load default performance on startup” will automatically load the dened default
performance whenever GigaStudio is started. Here you can assign a saved performance
le through a standard le browser window to be your preferred default performance.
“Load the last Window sizes and position at startup” retains the size and position of
the interface elements of the last saved session.
“Always start audio engine during startup” enables the audio engine automatically
whenever GigaStudio is started. This is recommended unless you are having difculties
with your audio hardware when starting GigaStudio. You can then use this option as a
means of troubleshooting your system at startup.
When GigaStudio is already running, you can start and stop the audio engine by
clicking the tool bar icon to enable/disable it.
When the audio engine button is disabled, the state will be
displayed as “stopped” with a red square in its corner. When it is
again “started” (default state) the button will show a green point-
Off On
er in its corner. Stopping the audio engine temporaily can help
resolve a program conict or audio driver problem.
Visual Preference
“Auto Hide Cursor” is the default state of the cursor. Whenever you adjust a widget
control (knob, slider, or fader) the cursor will disappear allowing you to see the position
of the widget and readout of the controller value. If you nd that you would rather not
hide the cursor when making these adjustments, then disable this option.
“Lower User Interface Refresh Rate (High Polyphony mode)” reduces the resources
given to the visual display so that more resources are available for processing and
streaming voices by the audio engine.
The QuickSound Loader interface text and background colors can be dened with a
standard color pallette selection dialog. Click the color swatch elds to assign preset or
custom colors.
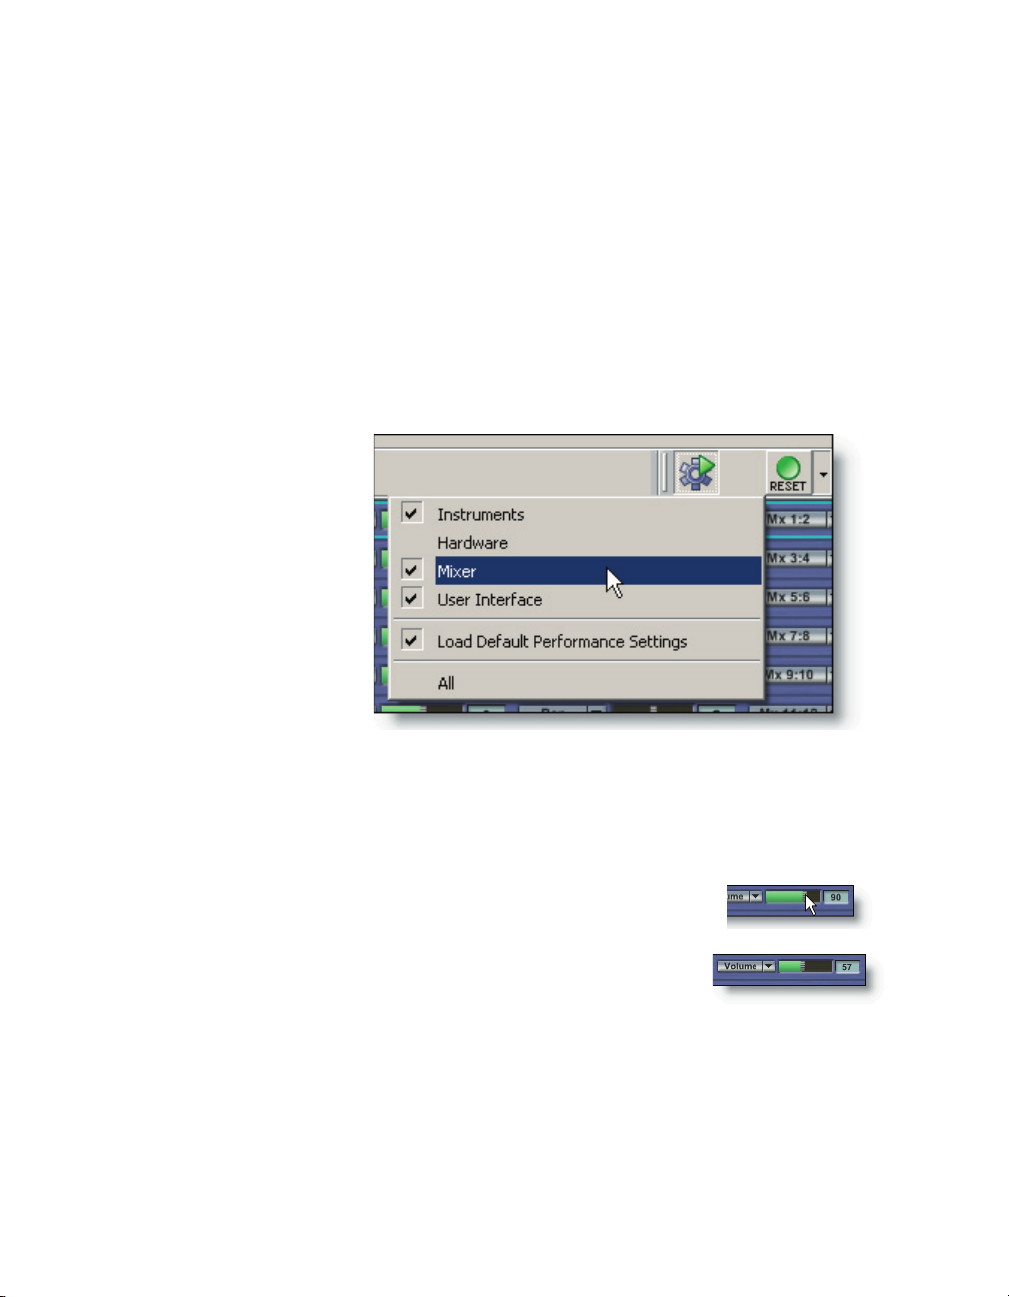
Reset Options
These options dene the behavior of the reset button on the main tool bar. These
same options are available in the drop-down menu along side the tool bar reset button.
“Reset Instruments” will clear any instruments currently loaded into the MIDI Mixer
port channel slots as well as any loaded in memory.
“Reset Mixer” will return all mixer settings to their default state.
“Reset Hardware” will clear any audio driver buffers and streams that are currently
active.
“Reset User Interace (Window sizes and positions)” is like the startup option. The
42
Page 43

main difference is that this setting is used speciaclly for a “Reset” operation while the
startup is intended to be used as a “startup state”. You may wish for both to do exactly
the same thing. If you would prefer not to retain the window sizes and positions on a
“Reset” then you should leave this option disabled.
“Load Default performance after reset”. Use this option to load a preferred default
performance upon “Reset” whether or not you have dened this as a “startup state”.
Use combinations of reset options depending on the project and its specic needs.
Here are some examples:
• Reset only the loaded instruments while retaining all the mixer settings and win-
dow positions and sizes.
•Reset only the hardware in the case of overly stressed hardware/drivers.
•Reset the preferred default performance such as an orchestral template with a pal-
ette of instruments, mixer settings, effects, and all the window sizes and positions.
Performance/Instrument Loading
Performance
“Remember recent performance les” will dene a number from 0-16 recent perfor-
mance les in the File menu list.
“Remember recent .gig les” will dene a number from 0-16 recent instrument les
in the File menu list.
Loading from the QuickSound Window
Set the default state of a load performed form the QuickSound window with a drag-
and-drop operation.
“Load on current channel, replacing previous instrument” is the default state for a
load operation. Hold down the [Ctrl] key while loading to assert stacked instrumenmode for the selected channel. As soon as the instrument is stacked to a channel the
mode will revert to normal (not stacked) until the [Ctrl] key is used again during a dragand-drop load operation.
“Stack on current channel” can be set as the default state for all drag-and-drop load
operations by selecting this option. While you are working in this state, hold down the
[Ctrl] key to revert to a normal (non-stacked) load operation.
General MIDI Support
Dene a folder where your General MIDI library is located. This helps GigaStudio to
make instrument assignments by program change numbers whenever a standard GM
le is dragged to the MIDI Mixer interface. A standard le browser window is provided
for this preference.
“Launch Sequencer on downloading MIDI le” will open your sequencer automati-
43
Page 44

45
cally whenver a standard GM le is dragged to the MIDI Mixer interface. This feature
particularly pertains to certain GM libraries for GigaStudio such as the Conexant
GM500 General MIDI sample library available from TASCAM®.
QuickSound
Search Mode
Any time you perform a search in QuickSound, two things need to happen which the
user must control. First is to select and highlight the local sampler, a drive, or a folder.
The second thing you must do is to type in a search keyword or choose a default le
extension from the drop-down list of the QuickSound search eld. The manner in which
the resulting search is performed and displayed depends on these user dened settings.
In the Search Mode settings, you can choose between Recursive or Local modes for
any searches performed in the QuickSound search eld. Recursive mode will include all
tree-level drives, folders and le names that are within the top branch selected in the
QuickSound window.
Search Properties
Select Auto Complete Existing Criteria for searches that involve .gig, *.gig, etc. This fa-
cilitates searches for known le types quickly.
Select the Restore to Last Search on StartUp option to display the last search you per-
formed during your last session with GigaStudio the next time you start the program.
Results Properties
To view all the instruments within the .gig les without having to manually expand
each view select the Automatically Expand Gigs to show Instruments option.
Select the Show Keyword Hit Report option to display the result of the number of
keyword results in a search. An example for searching with the keyword “piano” might
have “<PIANO> 7 les under selected directory” displayed above the search eld.
Result Window’s Reset Conguration
Set the preferred view of the columns displayed in the QuickSound Instrument List.
Select or de-select each of the columns you wish to have available. The default columns
are “Name, “ Folder”, “Size”, “Type”, “Modied”, and “Usage”.
Name displays the .gig le name expandable to show all instruments contained
within the .gig le.
Folder displays a folder and le path location of the instrument.
Size displays the instrument le size in kilobytes.
Type displays brief details regarding the le type such as “16 bit wave le”, “Gig le
3.o”, and “Performance”.
44
Page 45

Modied displays the date and time the le was last edited or changed in some way.
MemFootPrint displays the amount of memory required in kilobytes to load the in-
strument.
Chans is for wave les and displays “stereo” or “mono” accordingly.
SampleRate is for wave les and displays its sample rate such as “44.1kHz”.
Group Flag displays a dened group for the instrument.
Usage displays a percentage, a bar display, as well as the number of times an instru-
ment, wave le, or performance has been loaded.
QuickSound Database Properties
Select the Monitor File Activity (default) to constantly monitor any changes made to
the system. This allows the QuickSound File Monitor to actively track all changes and
update the database instantly. To disable the File Monitor, de-select this option. This
may be necessary if you nd that the File Monitor is causing problems with your system
while running programs other than GigStudio. You can always rebuild or update the
database manually at any time. It is recommended that you do this quite often if you
choose to disable the File Monitor.
Advanced Settings allows you to dene which le types, drives and folders to include
or exclude in the database rebuilding process.
As a troubleshooting option, you can select the Display File Statistics as Database is
being built in order to monitor any possible corrupt les that are causing a problem
with the database building process.
To quickly restore defaults to all the le type, drive, and folder settings, click the Re-
store Defaults button.
To save a special set of dened le types, drive, and folder settings, click the Save Set-
tings button.
To rebuild the database, click the Rebuild Entire QuickSound Database Now button.
Akai Convertor
The SConv tab allows customization of GigaStudio’s Akai conversion utility, SCon-
verter. All of the conguration options on this panel are accessable from the SConverter
Context Menus.
Conversion Options
Akai format les are often dual mono. When SConverter converts Akai Programs, it
can detect if mono samples are intended to be used together as a stereo pair. To create
a merged stereo le select the Merge L/R Samples option.
The Akai convertor will attempt to emulate the lter settings of the imported le
when the Use Akai Filter Info option is selected.
45
Page 46

47
Temporary Disk Usage
You can specify a drive and folder to be used for Akai conversions. Use the “Browse”
button to bring up a folder browser dialog. When you drag/drop Akai objects to MIDI
channels or the VirtualPiano, SConverter converts the S1000/S3000 CD/Partitions/
Volumes/Programs on the y into .gig or .wav les. These les are considered transient
and are placed in a temporary directory. You may use the Browse button to change this
directory.
NOTE: SConverter will automatically append a ‘Temp’ directory onto the end of the
path shown. This ‘Temp’ directory is subject to deletion.
As the above mentioned les accumulate, you may wish to delete them. This can be
done manually at any time, by selecting Clean Temp Dir from any SConverter context
menu You can choose between two options for managing the temp folder:
To automatically empty the temp directory after a conversion operation, select the
Empty Temp Directory When Disk is Ejected or Program Exits option.
To keep the contents of the temp directory for as long as you decide, choose the Emp-
ty Temp Directory Manually (using SConvertor Context Menu) option. You can empty the
directory by right-clicking the converted les and selecting the context menu option.
NOTE: You can prevent removal of les in this directory by setting their properties to
‘Read Only’. This would allow you to specify les you wish to keep while deleting all the
other les from the ‘Temp’ directory.
Short cut operations
You can dene the SConvertor double-click operation to one of a list of pre-dened
operations for a short cut. The default setting is for a double-click to act just as if you
had performaed a single click.
An example of a time saving short cut for an operation would be “Comb2Gig-> GSEdit”. In this example the double-click performed on a multi-selection would combine
the selected instruments to a .gig le and automatically open them in the GigaStudio
Instrument Editor for further design and custom adjustment of parameters.
Scope of Operation
Select one option from a list of pre-dened conversion operations. You may set the
above mentioned double click operations to independently for Partitions and Volumes
(NonPrograms), Programs, and Items in the Batch List…or you may set them all to the
same operation.
All will enable all non programs, programs, and batch conversion items to be converted in the same operation.
The NonPrograms option will convert partitions or volumes of the Akai disk to the
.gig format.
The Programs option will convert only the program data of the Akai le to the .gig
format.
46
Page 47

The Batch Items option will convert only the listed instruments and programs in the
batch list.
47
Page 48

48
49
Page 49

QuickSound Tutorial 1
Finding, Loading, & Playing Instruments
Once you have completed installation, the rst thing you will want to do is to load
some instruments and make some noise- or, music! Perhaps you only have a few GigaStudio instruments. You may have many. Regardless of the quantity of instruments
and sample libraries you already have, we recommend you become familiar with the
basics of using the QuickSound database engine and the integrated instrument loader
window. Utilizing this powerful set of tools, you can quickly nd, audition, and load instruments located on any storage medium connected to your GigaStudio workstation
computer.
Here is a quick overview of the procedure for nding. loading, and playing an instrument:
1. Launch GigaStudio 3.0. You will see the MIDI Mixer view for Port 1 channels 1-16.
Each of these channel slots corresponds to the incoming MIDI data from your controller keyboard or sequencer program.
2. Verify MIDI activity at the MIDI status indicator. Play some notes on your keyboard
or from your sequencer. You should see the incoming MIDI activity at the status
bar along the bottom of the GigaStudio window.
3. Choose Local Sampler in the QuickSound browser. The drive and directory tree view
shows all the hard drives and folders in the familiar branching view. Local Sampler
is the top level branch of the entire view.
4. Type in GigaPiano in the search eld. You must have something in the search eld
any time you wish to search, audition, and load instruments. The GigaPiano will
appear in the instrument list view.
5. Double click on the GigaPiano gig le. This action is the most direct method of
loading instruments to the MIDI Mixer. Note that the instrument will be loaded
to the aselected MIDI channel. A selected channel will have its border highlighted.
Click any port channel to select it.
6. Play your keyboard. As long as your keyboard is transmitting its MIDI data on the
same channel as GigaStudio is set to receive, you should hear the GigaPiano. If you
are not hearing the GigaPiano, check MIDI and audio hardware settings on your
keyboard, the sound card driver properties, and the GigaStudio System Settings.
49
Page 50

51
With the default view of the GigaStudio interface on startup, in the upper part of the
screen you will see the Port 1, 16 MIDI channel display of the MIDI Mixer. There are multiple ports available depending on the version of GigaStudio you have. With GigaStudio
Orchestra you get 8 ports each having 16 MIDI channels equaling 128 MIDI channels. For
now we will concern ourselves only with the 16 MIDI channels of Port 1 (default performance view).
Let’s get familiar with the QuickSound loader window and learn to use some of the
search functions. First, nd the loader window itself. In the default startup view, the
loader can be found just below the MIDI Mixer Port view.
If the loader is not visible, it may be hidden. To enable
(or “unhide”) the loader view, click on the toolbar button.
Refer to the User Interface Basics section to better understand how to manipulate
the look and feel of GigaStudio to your best advantage.
50
Page 51

Finding Instruments
First of all, it is necessary to type in a search key word in the QuickSound Search eld.
You must type at least two characters to activate a search of any kind. There are some
basic pre-dened searches available in the drop-down menu for the search eld. To follow this tutorial, select the “*.gig” option from the menu options. If you don’t have anything typed in the QuickSearch eld, you won’t be able to load an instrument.
The search eld provides access to powerful ltering of a comprehensive database
of all your instruments and any other audio data les. For now, we are asking to see all
the .Gig type les available. Note that the search is always conned to the drive or folder
you have highlighted in the folder tree view. You should select the “Local Sampler” for
now. This will list every available .Gig le on the GigaStudio computer in the Instrument
list.
In addition to the Instrument List, in the QuickSound loader window there are two
other subsections. On the far left is the folder tree view.
This view shows the hierarchy of all drives and folders connected to the GigaStudio computer. This pane
will only reveal directories. Files will not be visible in this
pane.This view can be toggled on/off with the Drive Tree
tool bar button.
Click on a drive or folder to select it and narrow your
search to that selection. To expand a drive or folder, click
the plus sign (+) to select any of its sub folders.
51
Page 52

53
In the middle is the instrument list view. File search results show up up
in this pane. Folders cannot be seen in this view.This view shows a list of all
the instruments we asked to see from the search eld criteria. This view is
scrollable to show more lines and columns of information about the listed
.Gig instruments. Click the Instrument List tool bar button to toggle this
view on/off.
On the far right is the loaded instruments view. This view shows a list of
all instruments that are presently loaded in the sampler memory. This view
is scrollable to show more lines and columns of information about the listed .Gig instruments. This view can be toggled on/off with the tool bar icon.
Each of the three views can be toggled on/off with the tool
bar icons as long as at least one view is active. Take a moment to familiarize yourself with the different view congurations available by toggling the three views on and off in
different combinations. Hiding all but one of the views creates a lot of visual space for
more columns of information. Hide the drive tree view and the loaded instrument list.
This leaves all the available space in the window for the instrument list.
52
Page 53

Notice that there are several additional columns of information types now visible
along the top of this view. These headers can be used to sort the instruments by clicking
on them. For example, click on the “Name” header and all the instruments are listed in
reverse alphanumeric order, by instrument name.
Click again to revert to forward alphanumeric order. Each of the other columns behaves in similar fashion. You can also select an arrangement of the view by right-clicking on any instrument in the list and selecting the View->Arrange Icons options from
the pop-up menu.
53
Page 54

55
The QuickSound loader views can also be congured to your liking by
opening the QuickSound conguration dialog. Click the tool bar icon to
quickly access the settings dialog. For more details see Reference->GigaStudio Settings->QuickSound.
Now try some different search eld entries. For instance, type “piano” into the search
eld to view all les containing “piano” in the le name and/or a keyword named “piano” in its QuickSound le properties.
How did QuickSound know which les to display? First, it checks all le names for the
keyword “piano” and then it checks the keywords in the le properties of each audio le
on the system. Actually it’s already done that since building the QuickSound database.
Now when you type in keywords, the database is cross referenced and the search results
are displayed for you instantly.
To view a le’s keyword properties, right click on an
instrument and select the “Properties” option.
This will open a dialog with many elds for entering
your own keywords. Many sample library developers
provide keywords already in place. You are always free
to add to and change these yourself.
In this window you can add, change, or remove keywords from the instrument properties. These changes
are automatically updated when you close the properties dialog.
The real power in this option is selecting groups of instruments with a multi-selection. Right click on any instrument within the group, add a keyword, and it will be added to every instrument (perhaps hundreds or thousands of them) in the selected group.
At any time in the future when you wish to nd an instrument and you know you have
54
Page 55

added a keyword that is easy to remember and relevant to the type of sound you are
looking for you will be able to recall it instantly.
Auditioning Instruments
Before loading any instrument it is possible to get a quick listen by using
the “Play Audition Sample” tool bar button.
It is possible to assign any sample within the .Gig le to an instrument’s
audition sample. Developer’s may provide a single sustained note, a short
phrase, an entire ensemble demo, or a spoken guide with examples of how to use the
instrument in a composition. By default, if no specic sample has been assigned, the
audition button will play the rst alphanumeric named sample within the instrument.
To customize your own sample libraries, you may wish to compose your own short
phrases, perhaps with or without spoken notes, to remind yourself of how you would
intend to use a particular instrument. In this manner, you can create your own genrespecic examples or even journal entries tied directly to the instrument les for future
reference.
Loading Instruments
While the audition sample button is helpful, to actually play a sample you must rst
load it onto a MIDI port channel. To do this we will use the “Audition Mode” button.
The “Audition Mode” button has an active and inactive state. Click the
button to place it in the active state.
You rst need to select a port and channel to load an instrument. Click on
a port channel to make it the active channel. By default, Channel 1 on Port 1
is selected and any instrument that is double-clicked in the QuickSound loader will be
loaded to this location.
55
Page 56

57
While the “Audition Mode” button is active, any instrument that is double-clicked
will be loaded to the selected port and channel. The previous instrument will be detached, but remain loaded in memory until it is unloaded. In this way, it is easy to cycle
through a series of instruments at the keyboard until the you nd the one you want.
By watching the Loaded
Instruments List you can revert back to previously played
instruments for quick A-B comparisons as long as the instruments are still loaded.
The list can become quite
large very soon, so it is a good
idea to monitor this list along
with the Status Bar Memory
indicator at the bottom of the
screen.
Once you have decided on
an instrument you can unload
the ones you are not using in
order to free up memory for
loading other instruments. To
do this, right-click on any instrument in the Loaded Instruments List and select “Unload
Unmapped” to remove all instruments except for the ones
that are mapped to a port and
channel.
See Reference section for the QuickSound Loader for more details on loading/
unloading instruments.
56
Page 57

Alternatively, you can use the MIDI Mixer port channel drop-down list to detach an
instrument.
Use the same menu to browse the local computer, removable drive, or network to
load an instrument.
Select another channel and continue to audition and load instruments. Once you
nd you have lled all 16 channels, you can switch to another port and continue auditioning and loading. You are no where near out of room for instruments. With up to
eight ports available you can have up to 128 channels of instruments loaded. The only
other limiting factor is the availabity of system resources. Remember to periodically unload unmapped instruments to free up your memory. By monitoring the status bar at
the bottom of the screen, you can see how many resources are still available at a glance.
Toggle off the Audition Mode button to load instruments on other channels. When Audition Mode is off, each subsequent double-click will load an
instrument to the next available port channel.
It is also possible to drag-and-drop an instrument directly to a port channel from either the Instrument List or the Loaded Instrument List. Simply drag the instrument and
drop it on the port channel loader pane.
Each of these methods is effective and some
situations will call for different methods to
be used. Your experience and work habits will
ultimately dictate how you choose to load instruments.
57
Page 58
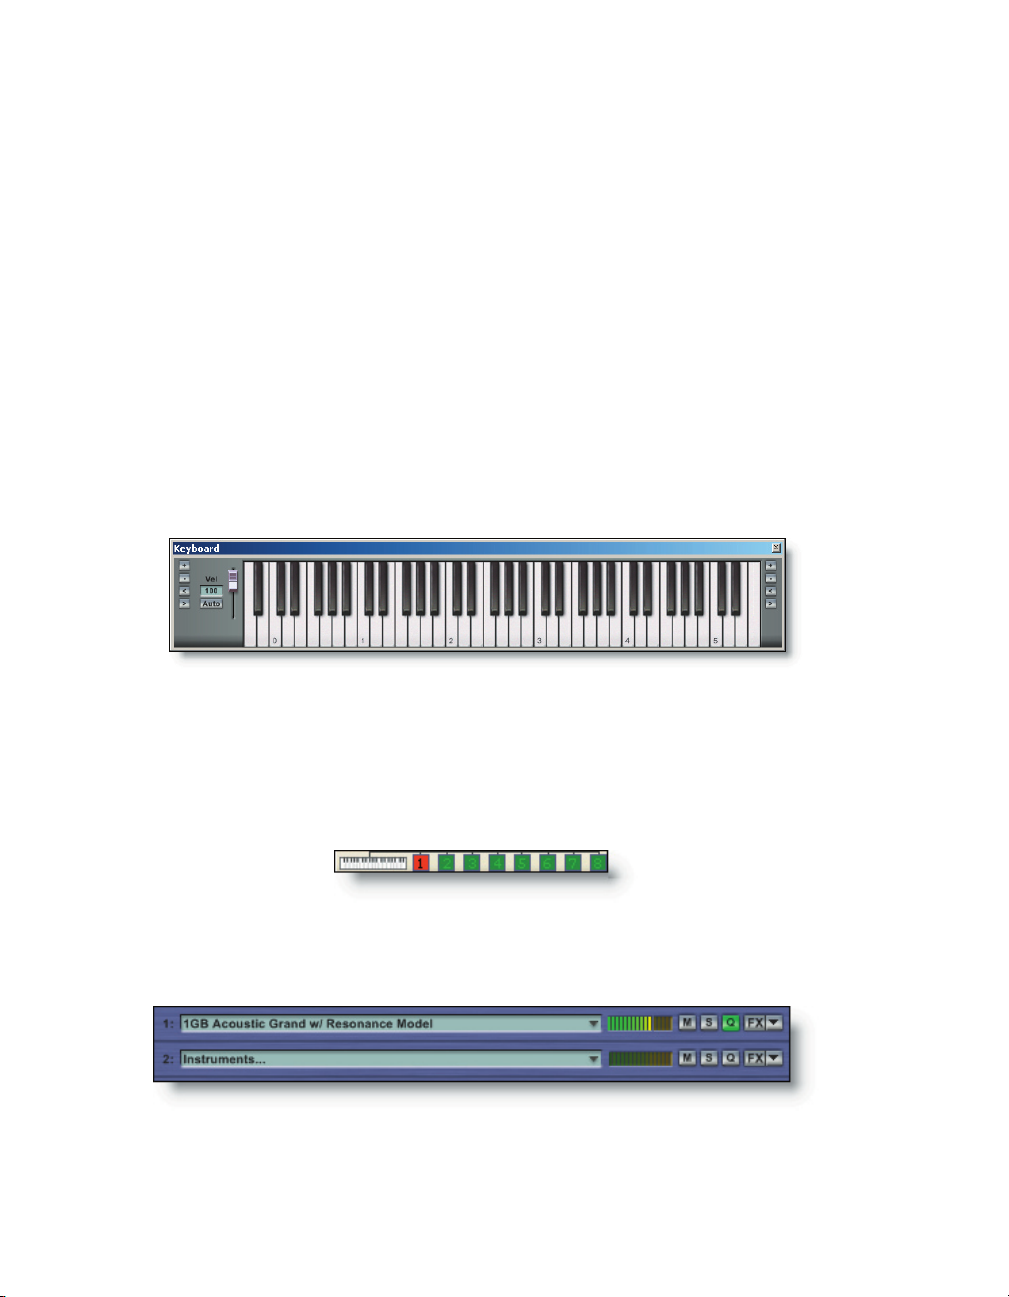
59
Playing Instruments
There are three ways to play a loaded instrument.
1. Set your MIDI controller keyboard to channel 1 and connect a keyboard/sequencer
to the GigaStudio computer via the MIDI interface congured for MIDI port 1.
2. Your keyboard/sequencer may be set to use a port other than 1 and a MIDI channel other than 1. In this case you should select the corresponding port and channel
in GigaStudio so that this selection will have the focus of the QuickSound Loader. For
example, enable audition mode, select port 6 channel 3, and each subsequent load by
double-click will be placed at port 6 – channel 3. To audition and load on another channel simply click on another port channel.
3. Use the GigaStudio Virtual Keyboard display. First select a port and channel with
the instrument loaded and play the Virtual Keyboard with your mouse.
See more about the behavior and control of this keyboard at Reference->Virtual Key-
board.
While you are playing a controller keyboard or sequencer, there are three visual indi-
cators to monitor the incoming MIDI.
On the status bar, the MIDI port activity monitor changes from green to red upon
receiving MIDI messages.
The MIDI Mixer port channel velocity meter lights up to reect the velocity of the
incoming note-on messages. The level indicator will remain active until a note-off message is received.
58
Page 59

The corresponding keys on the Virtual Keyboard change color for the duration of a
note-on and revert to normal after a note-off is received.
Now that you have become an expert at nding, loading, and playing instruments,
you will want to save the various combinations, or palettes, of instruments as a GigaStudio Performance le (.GSP). Learn all about performances in Tutorial 2 – “Creating
& Working With Performances”.
59
Page 60

60
61
Page 61

Tutorial 2
Creating & Working With Performances
A performance (.GSP) le contains no audio data, no MIDI data, and no pictures of
your signicant other. What good is it then? Basically, it contains a map of every instrument loaded, every knob, fader, and slider setting, every audio effect (NFX & VST), and
GigaPulse plug-in setting, as well as the size and arrangement of the various graphical
components as they are displayed on your monitor(s). All this can be instantly recalled
with a single tiny little performance (.GSP) le.
There are two main ways to create a new performance le:
Start with a blank new performance. New performances have a default
state with all the factory default performance settings.
All the instrument loader slots are empty and the faders are all at nominal settings,
with no FX loaded. Essentially you have a blank slate. Using the skills you learned in the
QuickSound tutorial you gradually build up a number of instruments, tweak the various settings, and add some plug-in processing. The sum total of all the particular settings you have made are then saved with the performance.
An alternative method of creating a performance is to open an existing
performance le, change it to suit a special need. Then do a “Save As..” to
create an additional performance with a new and unique name.
In this manner you can have several performances derived from the same basic template of loaded instruments, mixer settings, tweaks, and plug-ins, but each tailored to a
specic application. Using this approach it is possible to have a skeletal rhythm section
saved as BasicRhythm.GSP or My Drums.GSP and tailor each performance derived from
this to have different additional rhythm and lead instruments.
Be aware that performance les are tiny, like MIDI les, in that they contain only
pointer data for the various parameters and a map of the loaded instrument locations,
not the instruments themselves. Therefore making a multitude of variations of a huge
performance is going to take very little hard drive space.
Custom Default Performance
Any performance environment can be made to be the “Default Performance”. There
is probably a way you would like to dene your own version of a clean slate as being
somewhat different from the way the factory default .GSP is congured. After working
with GigaStudio performances for a while you may nd yourself always loading up a
particular performance when staring a new project. This would be a good reason to set
it up as your default performance. There are two very simple ways to do this:
61
Page 62

63
One way is to use the le menu option to
“Save settings as default performance”. As you
build and experiment with your settings you
can update your default state by selecting this
option from time to time.
When you are presented with the le
browser dialog check the “Save as default performance” box in the “Customize the performance Save” area of the dialog.
The other method is to use the le menu
option to “Save As..” to open the dialog for
more available options.
You can congure the “Reset” tool bar button to load the default performance upon reset. Take note that you can further customize the default
performance settings by selecting the “Use customize performance” option
on the “Save As..” dialog. There are many options available such as how to
handle instruments, mixer, port and channel assignments, as well as the look and feel
of the graphical components of the interface.
In this tutorial, we will only cover a few of these options in order to explain the over-
all concept of loading multiple performances together. See the Reference->Save As.. sec-
tion for more details on every possible option available here.
62
Page 63

Performance Load/Reset Options
A very powerful new feature with regard to performances is the ability to load more
than one performance at a time. This new feature for GigaStudio 3.0 is called an Instrument Performance (.GSI) le. This is different from a normal session performance (.GSP)
which includes all the settings for the entire GigaStudio environment including the
mixer, window sizes and positions, effects routing , as well as any included instruments.
The Instrument Performance le (.GSI) enables you to save the applicable environment
for the instrument(s) saved in a .GSI. For example, you can create a drums only performance with multiple channels of individual drum and percussion instruments along
with mixer, EQ, dynamics, and plug-in settings and save it as one performance (My
Drums.gsi).
The drums .GSI includes a
stacked instrument. We will get
to details about this powerful
new feature later. For now, we
have already created a stacked
drum set made up of individual
instruments and saved it as a
.GSI.
When creating a Instrument Performance you will need to specify that it have certain properties upon saving if you want to be able to load it with another performance.
The default behavior for all GigaStudio Performances (.GSP) is that the sampler is reset upon loading a new session performance (.GSP). This would mean that all loaded
instruments and all the associated settings would be unloaded and replaced by the
instruments in the newly loaded performance (.GSP). Fortunately, now there is a way to
override this default behavior. The way to do it is to use the “Save As…” dialog and select
the Instrument Performance (.GSI) option.
Select the Instrument Performance (*.gsi)
option from the Files of Type drop-down
menu.
For example, if a performance is built on port 3 channels 7-10, the .GSI can be
mounted to port 6 channels 2-5 (or any other port channel, provided there are enough
contiguous channel slots available). In the example that follows, we will create separate
.GSIs which will be automatically saved with the “Reset sampler…” and “Preserve the
Port and Channel..” options turned off to demonstrate the construction of a complete
performance session (.GSP).
63
Page 64

65
You can separately create a rhythm section performance containing bass, guitar, or-
gan, and piano (My Rhythm.gsi).
Then create another .GSI with a horn section including trumpets, saxes, and trom-
bones (My Horns.gsi).
When properly congured, these .GSP les can be mixed and matched by dragging
them to any port channel in the MIDI Mixer to create a compound performance le.
This can then be saved as a new performance if you nd it useful it and would like to
keep it around. You can then load a single .GSP le to load all these instruments and settings.
To see how this works, we can combine two performances that we built and saved
with custom options. Here is what the MIDI Mixer port window looks like when we rst
load the My Drums.gsi to channel 1 and then load the My Horns.gsi to channel 5.
64
Page 65

This example is shown using only one MIDI port and its channels. You can mix and
match instruments and performance les on up to 8 ports of 16 channels each for a
total of 128 MIDI channels. Utilizing stacking and linking, even more load congurations
are possible.
Stacking Instruments
In the previous example we used a stacked instrument, composed of
multiple drum instrument les. This is easily done in the MIDI Mixer using
the QuickSound Stack Mode tool bar button.
While Stack Mode is active in the QuickSound window, any instrument that is double-clicked or any of the other load methods will be placed onto the selected MIDI port
channel. The rst instrument loaded to the channel will appear as a normally loaded
instrument.
Any subsequent instrument that is loaded, while in Stack Mode, will cause the channel slot to expand into a series of sub-channels which appear as gray colored slots,
while the original channel slot becomes designated the channel Master. The channel
Master remains the normal purplish-blue color.
There is no limit to how many instruments you can stack on a single MIDI
channel, excepting the limit of available system resources. Keep an eye on
the status bar at the bottom of the screen to monitor available resources at
a glance. At the top of the next page is an example of six drum instruments
stacked onto channel 1.
65
Page 66

67
There are several benets to stacking instruments. In the example stacked drum set,
we can mute or solo the entire drum set by toggling the channel 1 “Stacked Instrument
– 0”. This acts as a master channel. We can mute or solo individual instruments by toggling the individual sub-channel of the stack. Each of the volume sliders can be set for a
submix and the overall level controlled by the channel master volume slider.
Each sub-channel can be muted, soloed, and opened in QuickEdit. If the instrument
has an embedded NFX, the edit screen can be opened with the FX button. Like any normal port channel, its volume, among other controllers, can be sub-mixed with the slider
controls. In addition each sub-channel can be routed to its own DSP Station (audio
mixer) channels for discrete FX processing.
To free up more space on the screen,
hide the stacked instrument sub-channels by clicking the channel master slot
on the arrow at the far left. Click it again
to expand out the view.
66
Page 67

Linking Ports
Another method of quickly combining instruments is to use the port linking mode.
When one port is linked to one or more additional ports the incoming MIDI data is duplicated on each linked port. It has the equivalent function of a traditional hardware
MIDI thru box.
The MIDI Port Status bar can be found along the
bottom of the GigaStudio interface. The dim green
color of the ports indicates they are unlinked.
Click on the port boxes to toggle the link status of the individual ports. They will turn
a bright green color when linked.
Additional ports must be linked to Port 1. Keep this in mind when you are planning
on using linked ports in a project. You should compose on a port other than port 1 to
avoid having to link its channels by default. Any other combination of linked ports is
possible. With the Port Link Mode active, all 16 MIDI channels of the incoming MIDI at
port 1 is duplicated (MIDI thru) at each of the linked ports. For example, a sequencer
track can be playing a melody at Port 1 channel 3 on a ute. You can layer this ute melody with a viola on port 3 channel 3 and a Spanish guitar on port 4 channel 3. Any MIDI
received on port 1 will be sent to the corresponding channels of each of the linked ports.
If no instruments are loaded, MIDI messages will be ignored.
Any un-linked ports will receive incoming MIDI in normal mode. In the above example with 5 ports linked, the remaining ports 2, 6, and 8 will not receive the MIDI thru
from any of the other port channels. So any composing you do with instruments loaded
on these port channels will not be linked to the port 1 channels, nor any of the other
linked ports. With up to eight MIDI ports, this makes for a very exible setup in which to
use a combination of channel stacking and port linking in very creative ways.
Step-by-Step Review
1. Create a new performance by clicking the toolbar shortcut button.
2. Load instruments and make mix adjustments.
3. “Save As...” and select Instrument Performance (*.gsi) and give the le a name.
67
Page 68

4. Create another new performance by clicking the toolbar shortcut button. If you
have not saved the currently loaded performance, you will be prompted to do so.
5. Load some different instruments and make mix adjustments for them.
6. “Save As...” and select Instrument Performance (*.gsi) and give the le a name.
You now have two distinct instrument performance les which can be loaded with
other instrument performance les.
7. Load the rst .GSI you created to any port channel you choose. Select the port and
channel by clicking on it to highlight it. You can search in the QuickSound browser for
les with .GSI extension or by a keyword in the le name. Drag the le from the QuickSound instrument list to its destination port and channel.
8. Load the second .GSI you created to any available port channel. Once the two instrument performances are loaded, you can make further adjustments and add additional instruments and effects to your GigaStudio Performance session (.GSP).
9. “Save As...” the entire environment as a .GSP by saving the le with the default GigaStudio Performance (*.GSP) as the selected le type.
You now have three separate elements available for future sessions with GigaStudio.
Working in this way, you can create many useful building blocks for putting together
performances quickly. Best of all, since you designed them, these elements have all
been customized for the way you like to work.
68
Page 69

Tutorial 3 - Routing Audio in the DSP Station
The GigaStudio DSP Station provides extensive mixing, routing, and processing for
audio output of all your Giga content. With GSIF 2, any external audio routed to the
sound card inputs can be processed in the same way. To switch to the DSP Station view
click the DSP Station tool bar button:
The keystroke for toggling the DSP Station view is [Alt]+[D]. For a complete list of all
keystrokes see the Appendix – Keystrokes.
The basic look and feel of the DSP Station has been designed and modeled to work
like a traditional studio mixing console. There are many enhancements as well, including channel strip dynamics and EQ, along with MIDI control and user-dened behavior
of each channel strip.
The DSP Station has four main signal routing sections separated by different views.
The Inputs, Groups, Aux Returns, and Output Masters are tab-selectable at the bottom
of the DSP Station window.
Inputs & Groups
The number of DSP Station
inputs is also user denable
from 2-128, where the default
is 32 inputs. You can dene the
number of inputs in the System
Settings->Mixer/Disk Engine
tab found in the File Menu or in
the Start Menu by opening the
Giga Conguration Manager.
The DSP Station mixer inputs section is
where all the audio sources are placed. By default, the 16 MIDI Mixer channels of each port
are routed to the rst 32 DSP Station inputs.
This routing is user denable on each MIDI
Mixer channel pane.
69
Page 70

71
Load an instrument on MIDI port 1 channel 1 and switch to the DSP Station Inputs
view. By default, this instrument’s audio is routed to the DSP Station Input channel pair
1, 2 as indicated at far right end of the MIDI Mixer port channel slot.
Switch to the DSP Station view of the mixer input channel strips are in their minimized state, or Narrow view.
Each of the channel strips is functionally identical for Inputs and Groups. Once you
understand the functions of one channel strip, you will understand the majority of the
functions of the DSP Station mixing and routing.
The two main points for routing are at the top and the bottom of each DSP Station
channel strip. At the top are the displayed channel number pairs. These are xed and
cannot be changed.
The MIDI Mixer port channel slots are
where this channel number pair is assigned
as a source input. By default, the inputs are
routed from the sampler engine (MIDI Mixer).
This will be the default input assignment. If
you have GSIF 2 driver supported sound card,
you can select from the available audio inputs on your sound hardware.
70
Page 71

At the bottom of each channel strip is the user-denable output routing for the
channel strip pair.
Here, it is possible to route the
audio directly to any of the available Output Master channel pairs
(default 1,2) or to one of the available Group inputs. The number of
Output Master channels is dependent on how many audio outputs
your hardware can support as well
as which of those outputs have
been designated for use by the GigaStudio Conguration Manager->
System Settings->Hardware tab.
The number of available groups is dened on the same Mixer/Disk Engine tab where
you dene the number of Mixer Input pairs.
The Groups serve the same functions as the Input channels, except that multiple
channel pair outputs can be routed to the same Group channel pair. This provides a
dedicated channel pair for control, or a sub-mix, of multiple instruments routed to a
Group channel pair.
Each of the Group channel pair outputs are then routed directly to the
selected Output Masters. Here are four
input channel pairs routed to Group1,2
(G1:2) which are then routed to Output
Masters 1,2 (H1:2)
To maximize a channel strip to Wide view, click on the top where the
channel strip numbers are, for example 1,2 on the rst channel strip.
71
Page 72

73
This reveals the Wide Channel view for the selected strip.
More than one strip can be in Wide Channel view at one time, but it is best to keep
most of them in Narrow view to maximize screen space for the task at hand. The Wide
view is about as wide as eight Narrow view channel strips.
While in Wide view, you
can assign Inserts by clicking on an Insert slot. Select
and effect to patch directly
to the input channel pair.
72
Utilize any of the eight available Aux busses by assigning an
effect to an Aux Buss and then control the level of signal pre or
post-fader.
Each send can be turned on/off using the ON button for each
Aux Send. ON shows as bright green, OFF shows as grey.
The level of effected signal returned to the Output Masters is
controlled by the Aux Return channel pairs.
Page 73

You can also tweak Dynamics and EQ settings. There is dynamic compression and
limiting as well as up to four instances of six types of EQ on every Input and Group
channel.
At the bottom of the channel strip just above the
channel output assignment is the name eld for the
channel strip.
To enter text, click on this eld and type a name of
your choosing, and hit the “Enter” key.
The input channel name will then be saved with the
performance (.GSP) environment.
Go ahead and assign an Insert effect. Notice there are
two columns of four slots for different effects. A stereo effect
should only be inserted on a left insert since it will require
both left and right channels. The default state of each slot
is blank, indicating no insert assignment is active. Click on
the top left insert slot to call up the insert assignment dropdown menu.
To assign a Native Plug-in
(NFX), select that sub-menu
and choose an available plugin from the list.
When you select an NFX, this will launch the plug-in interface for you to make adjustments to.
73
Page 74

75
Use the “Bypass” and A-B buttons at the top of the
NFX plug-in window to listen to comparative edits as
well as the unaffected signal.
You can dismiss the NFX interface by clicking the X in the
upper right of its window. It will remain loaded but hidden
from view.
To recall and edit the NFX interface, click on the slot where
the insert is loaded and select the Edit button on the Inserts
section of the channel strip.
You can bypass all the inserted effect(s) by clicking on the
INS button at the top of the channel strip. Notice that the button changes from a bright green (loaded and active) to a dim
green (loaded but inactive). This button is always available with
the channel strip in Narrow or Wide view.
To bypass an individual effect inserted on a channel strip,
click the BYP button for the desired effect. The channel INS button will override the state of individual effects. If the loaded
effects are not bypassed, but the INS button is inactive (dim
green), then the inserted effects will not be heard.
To add more inserts to the same channel, repeat the above procedure. Up to four ste-
reo inserts can be used on a single channel strip..
To remove an insert, click on the loaded slot and select the “Remove…” option from
the drop-down menu.
Aux Busses
Assigning a plug-in to an insert on a specic channel strip is often necessary to
achieve a desired result. It is not very efcient if you are using a similar or even the
same plug-in on several channels as inserts. To get the maximum benet from your
plug-ins it would be best to use channel inserts only in special circumstances, such as a
anger on a bass harmonica sample.
Use an Aux bus to handle a shared effect plug-in, such as a reverb, delay, or GigaPulse
convolution model that you can apply to any number of channels routed to it through
the channel strip Aux Sends.
There are eight Aux sends that each can be congured to be pre- or post-fader, depending on what the mix calls for.
74
Page 75

Select the Aux Returns tab to view the eight Aux Buss channel strip pairs.
These have a much simpler control interface. There are four insert slots for each of
the Aux Busses. Load a plug-in to an insert slot and control the level returned to the mix
at its selected Output Master channel pair.
In the same way as the Input channel strips, the inserted plug-in(s) can be toggled on
and off with the “INS” button at the top of the Aux Buss channel strip. The INS button
has three states.
Grey = Off. No Insert effect has been assigned
Bright Green = Active. Inserted effect is sent to the Output Master.
Dim Green = Inactive. Inserted effect is not sent to the Output Master.
To control the amount of the individual level sent to the shared
plug-in effect, go back to the Inputs tab and open a strip to Wide Channel view. Go to the Aux Sends section of the Wide Channel view. Every
Input and Group channel has up to eight Aux Sends available. More
than one, in fact many, mixer Input and/or Group channels can be
handled by each of the eight Aux Busses.
We have activated Aux Sends 1-5 for routing send levels from this
channel to ve different Aux Busses each having a different effect.
Here any of the eight Aux Busses can be accessed by each of the available mixer input channels. For example, we could have a reverb on Aux Buss 1, a chorus on Aux Buss
2, a stereo multi-tap delay on Aux Buss 3, a ThunderChicken FlapperWapperator VST on
Aux Buss 4, and a GigaPulse modeled resonance of a railroad boxcar on Aux Buss 5. We
75
Page 76

77
still have 3 Aux Busses left over to use for something else we’re sure to think of later.
For one instrument, we can apply a little reverb by turning up
the Send 1 knob, and add some delay by turning up the Send 3
knob.
The level of the effected signal returned to the Output Masters
is controlled by the Aux Return channel pairs.
For another instrument loaded on a different channel, we can
use some of the same plug-ins, yet specify different amounts by
setting the Send knobs to their own levels.
For our sampled 55 gallon oil drum, a fair amount of the FlapperWapperator can be added by turning the Send 4 knob way up,
and a judicious use of just enough of the modeled boxcar resonance on Send 5 should set very nicely in the mix.
Again, the level of effected signal sent to the Aux Busses is returned at the level set by the Aux Return channel pair faders.
For an eerie show-biz effect, turn Send 1 about half way up on
the oil drum and click the PRE button and turn the Input channel
fader all the way down. What you will hear is none of the dry signal and only the Aux Return level sent to the Output Master channel pair from any send that is designated by the PRE button.
76
Creative use of Aux Buss routing and PRE fader assignment
gives you a lot of control over every aspect of the mix.
Each of the sends can be toggled on and off for comparative
monitoring of the mix elements.
See the Reference->DSP Station->Aux Sends for more details.
Page 77

Click on the top where the channel strip numbers are displayed to toggle the chan-
nel strip back to Narrow Channel view.
Although the Narrow view hides all the Insert slots, Dynamics and EQ
controls, it is still powerful enough to do all of the following.
Select the channel input source from a loaded instrument in
the sampler or an allocated GSIF 2 audio hardware input.
Toggle the audio signal of all Insert assignments routed to the
output masters as a group. Off is muted and on is active.
Channel Insert status monitor shows how many inserts are
placed on the channel strip.
Bypass or enable the Dynamics effect for the channel.
Bypass or enable all applied bands of EQ for the channel.
Mute and un-mute an individual channel.
Toggle the Solo mode of a channel strip.
Dene the panning mode for the channel. See
the Reference->DSP Station for more details.
Unlink and Link the fader mode. See the Reference->DSP Station
for more details.
In addition, the name eld can be edited and the output of the channel
strips can be selectively routed to a Group channel pair or to an Output
Master pair.
77
Page 78

79
Groups
Group channel pairs are identical to the Input channel pairs, except that their output routing goes directly to the selected Output Masters section. Simply select from the
available outputs.
One method of utilizing a Group fader is to load individual drums to Input channels,
use the Aux sends for processing the individual drum plug-ins, and route all the drum
tracks to the same Group channel pair. The level of the entire group can be controlled at
a single Group channel fader, while the individual drums in the mix can be adjusted at
the Input channel faders.
The name eld for a Group channel can be edited in the same way that an Input
channel can.
Groups can utilize their own Inserts, Dynamics, EQ, and Aux Sends as well as fader
level and pan position controls. They have all the functions and features of the Input
channel pair strips with the one exception that the output must be routed directly to
an Output Master channel pair.
Step-by-Step Review
1. Load an instrument into a MIDI port channel (port 1 ,channel 1) in the GigaStudio
MIDI Mixer.
2. Assign the instrument to a mixer input channel pair in the DSP Station. You may
choose to use the default assignment (Port 1, channel 1 defaults to DSP station in-
put channel strip 1,2).
3. Switch to the DSP Station view [Ctrl] + [D] and locate the mixer input channels
your instrument is assigned to. While playing the instrument, adjust the level of
the faders. You can unlink them and adjust either left or right fader individually.
4. Expand the channel strip to wide view by clicking in the top of the channel strip.
Here you can assign insert effects, EQ, compression, and route signal to aux busses.
5. By clicking the INS, DYN, EQ buttons, you can monitor and bypass any of the active
DSP processes on each of the mixer channels. Remember an active processor that
is bypassed will have its button displayed as a dim green color. Click the M and S
buttons to mute or solo a channel strip.
6. Utilize the aux busses for shared effects to conserve computational resources. Remember that each instance of a plug-in will increase the demand on your system.
Aux buss routing is a good way to make efcient use of your system resources.
78
Page 79

7. Use the Group assignments for managing a large number of instruments in a
complex mixing environment. Group channels are identical in design to the Input
channels and can be used as sub-masters with their own DSP assignments.
79
Page 80

80
81
Page 81

Tutorial 4 - ReWiring GigaStudio
GigaStudio works as a ReWire synth application (slave mode) with any ReWire 2.0
host DAW such as Cubase SX, Acid, Live, Nuendo, Sonar, or Pro Tools. Currently, both applications must be run on the same computer. First of all, here is a general discussion of
conguring GigaStudio and how to set up a ReWire mixer application. Following this
discussion are sections devoted to specic software applications. See the Appendix on
ReWire for more information about the ReWire specication and how it pertains to
GigaStudio.
Conguring GigaStudio for ReWire
GigaStudio can run in either of two modes, standalone or ReWire. In standalone
mode, the MIDI messages originate from an external source such as a sequencer or
MIDI controller keyboard. The MIDI source is connected directly to the GigaStudio MIDI
In ports. In ReWire mode, the MIDI input comes from a software connection from the
ReWire host or DAW application. Think of it as a virtual MIDI connection.
In the same way, the audio outputs of the GigaStudio are routed to the ReWire inputs of the host DAW. The number of audio channels available depends on how many
are congured in both the mixer application (ReWire master) and GigaStudio (ReWire
slave). Up to 64 audio channels are available in GigaStudio.
There are two ways to access the ReWire set-
tings for GigaStudio:
1. While GigaStudio is running open, choose
File/System Settings, then choose the Rewire/
Plugins Tab.
2. Before running GigaStuido, openthe Start/Programs/TASCAM/Conguration Man-
ager and choose the Rewire/Plugins Tab.
After setting the number of audio ReWire channels, be sure to click “Apply” or “OK”
and close the Giga Conguration Manager and close GigaStudio if it is running. It is
very important that you set up GigaStudio for ReWire rst before opening the host
application and starting a ReWire session. Now the host application will be aware of
GigaStudio as a ReWire slave program and will see that we have set the number of ReWire channels to 64.
Open the host application (audio sequencer) and verify that the audio and MIDI connections are properly congured and everything works. Make sure your MIDI is coming
in from whatever input source you are using (MIDI controller keyboard) and you are
getting audio out (recorded track monitoring).
Insert at least one ReWire track in the sequencer/mixing application. The exact
method on how to do this will vary among host applications. In most cases, a menu will
list all available ReWire channels, allowing you to designate these to a sequencer track
81
Page 82

83
or effect send/return. GigaStudio will be listed as “Giga3” in any ReWire device menu.
With GigaStudio you can have up to 64 ReWire channels (32 stereo) arriving at your
host’s application audio mixer..
When you insert a ReWire device, some applications have an option of launching
the ReWire slave application (GigaStudio). If this is not the case, then you must launch
GigaStudio manually. When GigaStudio opens this time you will notice that the status
bar along the bottom of the screen shows that you are running it in ReWire mode.
GigaStudio in ReWire Mode
One very important thing has happened. GigaStudio has detected that ReWire is activated instead of using its standard audio hardware settings and the number of audio
channels specied will instead be routed to the host DAW application.
Each of the channels activated in the DAW application correspond to the instruments you have routed to the output masters in the GigaStudio DSP Station. You must
do all the instrument loading and signal routing in GigaStudio. For starters, load an instrument onto port 1 channel 1 and leave the routing as is. The default output channels
will be ReWire 1,2 in the DSP Station.
In ReWire mode, the DSP Station Output Master channel strips are where the instruments in a GigaStudio performance are routed. These outputs are designated as ReWire outputs instead of sound hardware outputs.
In the DSP Station Inputs view, select the ReWire channels from
the output selection menu for each channel strip you wish to
route to the ReWire host DAW application.
It is also possible to route an input (or several inputs) to a group
and then assign that group to the corresponding ReWire channels
in the host DAW application.
Go back to your host app and nd the track with the “Giga3 Mix ReWire 1/ReWire 2”
designation and try starting playback of the track. You should automatically hear the
instrument you have loaded in GigaStudio.
Well, you just set up a basic ReWire connection. This setup will enable you to play
and record MIDI tracks in your sequencer and have them play along with your audio
tracks and apply mixing and processing all in the host DAW application environment.
Be sure to save both your sequencer project and your GigaStudio performance (.GSP).
The ReWire connection is only a method of connectiong the two programs. A good rule
to follow when saving project les is to give them the same name, date, version, or any
other identiable characteristic that will help you keep your projects organized, one for
82
Page 83

the host application (sequencer) and one for GigaStudio (performance le .GSP). Two
les, exact same names, different le extensions.
Conguring Multiple Rewire Output Channels
In our example, we set up a simple stereo rewire connection between our host
(sequencer) application and GigaStudio. It is possible to send additional instruments
to individual rewire channels, that arrive on their own mixer channels in the host
application..You can apply the plug-ins you are familiar with in your mixing app to the
GigaStudio ReWire channels or use the GigaStudio NFX and VST plugins in the DSP
Station’s mixer environment.
In GigaStudio, load three instruments on
channels 1, 2, and 3 in MIDI Mixer Port 1.
Route each of the instruments to their own
mixer inputs. In our example, we have selected
pairs 1:2, 3:4, and 5:6. These are the DSP Station
Input channel assignments.
Switch to the DSP Station Inputs view and you will see that the output routing on
each channel pair is set to R1:2 (default).
Click on the channel output slot to dene a new routing.
Leave the rst DSP channel pair set to ReWire 1:2, but change
the next two channel routings (channel strips 3:4 and 5:6) to
ReWire 3:4 and ReWire 5:6. We will not congure any additional
routings for the purposes of this example, but as you can see, it is
possible to congure as many ReWire channels as you have available. Up to 64 if you have designated this many in the Giga Conguration Manager / System Settings on the Rewire/Plugins tab.
83
Page 84

85
Note: Only activate in your host DAW application as many ReWire audio channels
as you will need for your project. this will keep the CPU demands lower, therby leaving
more computational power for effects such as the GigaPulse convolution engine.
Click on the Output Masters tab to gain access to the faders for the ReWire outputs.
Adjust the levels here if you need to avaoid clipping at the inputs of the host application.
In your host application (sequencer) activate a number of MIDI tracks, route the
MIDI outputs to “Giga3” channels 1, 2, and 3 where you have instruments loaded in
GigaStudio Port 1. The audio will be routed to “Giga3 ReWire 1/ReWire 2”, “Giga3 ReWire
3/ReWire 4”, and “Giga3 ReWire 5/ReWire 6”. You have just successfully routed 3 midi
tracks from your host application (sequencer) to GigaStudio and returned the audio
result from GigaStudio back to the host application’s (sequencer) audio mixer.
Rendering ReWire Tracks to Audio Files
With ReWire it is not necessary to record the output from GigaStudio to audio wave
les. The host application you are using can render the GigaStudio ReWire tracks along
with the rest of your projects “real world” recorded audio tracks.
By routing GigaStudio tracks individually, you can render or “bounce to disk” one
instrument at a time. It may be necessary to do this so that you can temporarily shut
down GigaStudio to maximize all your processing power for a complex or dense mix in
your sequencer.
To do this, solo each of your returning GigaStudio rewire audio tracks with the
render or “bounce to disk” option enabled and record your GigaStudio ReWire tracks.
Eventually you will replace all your ReWire tracks with audio tracks. At this point, you
can close GigaStudio, de-activate the ReWire channels and proceed with the mixing and
processing your project within your host DAW application.
84
Page 85

How to ReWire GigaStudio 3.0 with Live 2 or Live 3
This procedure is based on Live version 2 or 3 for Windows XP.
1. If you have not used Live yet, please be sure to run it at least once before proceeding. This is so that Live can install its ReWire engine in your system.
2. Go to Live’s In/Out View and select Giga3 as the “In Type”.
3. Enable Live’s monitoring switch.
4. Launch GigaStudio 3.0
5. Select the desired ReWire Channels in Live´s In Channel menu if you have devices
in GigStudio routed to specic channels other than the DSP Station Output Master
channels 1:2.
Gigastudio 3.0 is now ready to run in ReWire Slave mode, while Live is the ReWire
Master. You can record the GigaStudio ReWire input in Live as you would with any
other input in Live. (For more application specic information see the recording
section of the Live manual).
To successfully disconnect the ReWire connection from Live you must always quit
Gigastudio rst.
How to ReWire GigaStudio 3.0 with Acid 4.0
This procedure is based on ACID Pro version 4.0 for Windows XP. No other versions of
Acid have support for ReWire.
1. If you have not used Acid yet, please be sure to run it at least once before proceeding. This is so that Acid can install its ReWire engine in your system.
2. Go to Acid’s Insert menu and select Soft Synth. Go to the ReWire tab and select an
available Giga3 ReWire device.
3. Scroll the Acid mixer window to nd the new stereo buss for the Giga3 ReWire device.
4. Launch GigaStudio 3.0.
5. Select the desired ReWire MIDI channels in Acid’s Soft Synth Properties window if
you have devices in GigaStudio routed to specic channels other than the DSP Station Output Master channels 1:2.
6. Add more stereo busses in Acid’s Project Audio Properties for additional outputs
routed from the GigaStudio DSP Station.
Gigastudio 3.0 is now in ReWire Slave mode, while Acid is the ReWire Master. You can
render the GigaStudio ReWire input in Acid as you would with any other track in
85
Page 86

87
Acid. (For more application specic information see the ReWire section of the Acid
4.0 manual).
To successfully disconnect the ReWire connection from Acid you must always quit
Gigastudio rst.
How To ReWire GigaStudio with Cubase SX
This procedure is based on Cubase SX version 2.0 for Windows XP.
1. If you have not used Cubase SX yet, please be sure to run it at least once before proceeding. This is so that Cubase SX can install its ReWire engine in your system.
2. Go to the Cubase SX Devices menu and select Giga3.
3. Activate the ReWire channels in the Cubase SX ReWire menu (Devices/Giga3). You
may need to have GigaStudio running in order to do this. The ReWire channels will
become available as channel strips in the Mixer. These channel strips can have the
following properties:
• ReWire channels show up on the right hand side of the audio and MIDI chan
nel strips.
• ReWire channels will function just like any other audio channel in the Mixer.
4. Launch GigaStudio 3.0.
5. To take full advantage of the mixing features in Cubase SX you will need to route
the different GigaStudio instruments directly to the DSP Station ReWire output
master channels. For example, if your GigaStudio performance contains eight different instruments and you connect these to separate output masters in the DSP
Station, they will appear on separate ReWire channels in the Cubase SX Mixer. You
can then use the mixer in Cubase SX to adjust volume and pan, add effects and EQ
- individually for each GigaStudio instrument.
6. If you simply connect all your Giga instruments through the DSP Station mixer to
the stereo output pair on the Output Masters 1:2, all sounds will appear mixed on
a single ReWire stereo channel pair. This a perfectly acceptable option as there are
extensive mixing and processing capabilities in the GigaStudio, allowing you the
option of a pre-processed stereo mix. Note the manual assignment as the DSP station always defaults to ReWire outputs 1.2.
Gigastudio 3.0 is now in ReWire Slave mode, Cubase SX is the ReWire Master. You can
render the GigaStudio ReWire input in Cubase SX as you would with other tracks, using
the “Import to Pool” and “Import to Track” options in a Cubase SX project. (For more application specic information see the recording section of the Cubase manual).
86
Page 87

To successfully disconnect the ReWire connection from Cubase SX you must always
quit Gigastudio rst.
How To ReWire GigaStudio 3.0 with Nuendo
This procedure is based on Nuendo version 1.5.2 or later for Windows XP.
1. If you have not used Nuendo yet, please be sure to run it at least once before proceeding. This is so that Nuendo can install its ReWire engine in your system.
2. Go to the Nuendo Devices menu and select Giga3.
3. Launch GigaStudio 3.0.
4. Activate the ReWire channels in the Nuendo ReWire menu. The ReWire channels
will become available as channel strips in the Nuendo VST Mixer. These channel
strips can have the following properties:
• ReWire channels show up on the far right hand side of the audio and MIDI channel
strips.
• ReWire channels can be any combination of mono and stereo.
• ReWire channels will function just like any other audio channel in the VST Mixer,
with the exception that ReWire channels have no ‘Input” buttons.
5. To take full advantage of the mixing features in Nuendo you will need to route the
different GigaStudio instruments directly to the DSP Station ReWire output master channels. For example, if your GigaStudio performance contains eight different
instruments and you connect these to separate output masters in the DSP Station,
they will appear on separate ReWire channels in the Nuendo VST Mixer. You can
then use the mixer in Nuendo to adjust volume and pan, add effects and EQ - individually for each GigaStudio instrument.
6. If you simply connect all your Giga instruments through the DSP Station mixer to
the stereo output pair on the Output Masters 1:2, all sounds will appear mixed on
a single ReWire stereo channel pair. This a perfectly acceptable option as there are
extensive mixing and processing capabilities in the GigaStudio, allowing you the
option of a pre-processed stereo mix. Note the manual assignment as the DSP station always defaults to rewire outputs 1.2.
Gigastudio 3.0 is now in ReWire Slave mode, while Nuendo is the ReWire Master. You
can render the GigaStudio ReWire input in Nuendo as you would with other tracks, using the “Import to Pool” and “Import to Audio Track” options in a Nuendo project. (For
more application specic information see the recording section of the Nuendo manual).
To successfully disconnect the ReWire connection from Nuendo you must always
quit Gigastudio rst.
87
Page 88

89
How To ReWire GigaStudio 3.0 with Pro Tools
This procedure is based on Pro Tools version 6.1 or later for Windows XP.
1. If you have not used Pro Tools yet, please be sure to run it at least once before proceeding. This is so that Pro Tools can install its ReWire engine in your system.
2. Set up Giga3 as a ReWire client. Select ‘Giga Conguration Manager’ from ‘Start
menu > Tascam’. On the ‘ReWire/Plugins’ tab, select the number of desired output
channels.
3. In Pro Tools, add a track. For stereo, add a stereo audio track, instantiate Giga3 via
‘multi-channel RTAS plugin’ insert on audio track, which launches Giga3 automatically.
Note: RTAS on audio tracks is required for TDM systems only. On LE systems you
should use an Aux track.
For multi-channel, quad, or surround, add the necessary number of mono audio
tracks. Instantiate Giga3 using the ‘RTAS plug-in’ insert on each individual audio/aux
track.
Note: Multi-channel support can also be achieved by adding a multi-channel track
(TDM systems only), and then using a “multi-mono” instance of the Giga3 ReWire plugin. Make sure to unlink (plug-in header switch) before setting individual input channels.
4. On the ReWire dialog, choose the Giga3 outputs to be used on the audio track. For
multiple mono, choose each output (on the ReWire dialog) for each mono track
individually. Set the pans as needed for each mono track.
5. Add a MIDI track, select the MIDI input device, select GigaOut:Port (1-8) and channel (1-16) for the MIDI output device. All 128 Giga3 MIDI ports/channels are supported in Pro Tools. MIDI routed to any midi channel on any of Giga’s 8 midi ports
(8 x 16 MIDI channels).
6.‘Record enable’ the midi track to send the midi data to Giga3.
7. In GigaStudio, load instruments, performances, FX and convolution as you normally would do. Save any new performances or changes to performances.
You should always create your ReWire inputs from GigaStudio on an Aux Input track
in Pro Tools LE. On TDM systems, you will only be able to instantiate it on an Audio Track.
On the output tab for that track, select an output to an open buss, then create an Audio
Track and, on its input tab, select the same buss. Here is a walkthrough:
88
Page 89

a. Create a Stereo Aux Input track in Pro Tools. (File Menu > New Track).
b. Insert the Giga3 ReWire plug-in on the insert of that track.
c. In the Rewire plug-in window, select the output from Giga3 that you want to
record (for example, Mix L - Mix R).
d. On the output tab on that track select an open Bus (for example, Bus 1 - 2
Stereo).
e. Create a new Stereo Audio Track and set its input to the same Bus indicated
in Step 4 (in this case Bus 1 - 2 Stereo).
f. Record enable the track and you’re all set. When you now press ‘Record’ and
‘Play’ in the Transport, the outputs from your ReWire application will be re
corded on that Stereo Audio Track.
8. If you simply connect all your Giga instruments through the DSP Station mixer to
the stereo output pair on the Output Masters 1:2, all sounds will appear mixed on
a single ReWire stereo channel pair. This a perfectly acceptable option as there are
extensive mixing and processing capabilities in the GigaStudio, allowing you the
option of a pre-processed stereo mix. The choice is entirely up to you as to which
mixing environment you prefer to use for the Giga3 audio streams.
To disconnect Giga3 select ‘no insert’ to remove the ReWire device from the track. Be
aware that this does not unload Giga3. To do that you must close the GigaStudio application itself, or it will be unloaded when quitting Pro Tools.
System performance optimization tips:
• IMPORTANT: Place .gig content on separate Hard Drive than Pro Tools audio les.
Ideal conguration for Giga and ProTools on the same system would have at least 3
hard drives.
1. For your OS and applications.
2. For recorded ProTools tracks.
3. For streaming samples for GigaStudio.
• In Pro Tools, ‘Setups/Playback Engine’, set the ‘CPU Usage Limit’ to 65% or higher. Be
aware that the ‘DAE Playback Buffer’ may need to be increased before raising the ‘CPU
Usage Limit’ to above 65%. On some Pro Tools LE systems, it may be necessary to raise
the ‘CPU Usage Limit’ to 80% or higher.
89
Page 90

91
• For Pro Tools LE systems, in addition to the normal Pro Tools LE hardware system
requirements, a 3GHz or faster computer with at least 1GB of memory is recommended
for use with GigaStudio 3.0. There may also be a reduction in the overall number of concurrent RTAS plug-ins possible while running concurrently with GigaStudio 3.0.
• If you are using an Mbox USB / Pro Tools LE system, lowering the default 1024 ‘H/
W Buffer Size’ buffer size may help improve latency performance, but the amount of
achievable polyphony will also be reduced. Due to the high latency system timing of the
USB interface, an MBox USB system may not be suitable for some live MIDI input, such
as keyboard playing, needs with GigaStudio 3.0.
• Run the Windows XP ‘Defragmentation’ tool on all hard drives containing .gig les.
How To ReWire GigaStudio 3.0 with Sonar
This description is based on Sonar version 2.0 or later for Windows XP.
1. If you have not used Sonar yet, please be sure to run it at least once before proceed-
ing. This is so that Sonar can install its ReWire engine in your system.
2. Go to the Sonar Insert menu and select Giga3 from the ReWire Device sub-menu.
You can set the following options in the DXi Synth Options dialog:
• Create MIDI Source Track - If selected, this option will create a new MIDI track
named “Giga3”.
• First Synth Output - If selected, this option will create a new audio track that uses
the rst output of Giga3 as the input. This would select Giga3’s DSP Station Output
Master channels for the new track.
• All Synth Outputs - This option automatically creates audio tracks for each ReWire
channel available in Giga3, and sets the input for each track to the corresponding
channel.
• You also have the option of opening Giga3 from within Sonar by checking the
“Synth Property Page” box in the dialog. By doing so, GigaStudio will launch when
you click OK in the dialog.
3. If you did not select the “Synth Property Page” option, launch GigaStudio 3.0 man-
ually.
4. Now open the “In” pop-up for a Sonar audio track and the Giga3 ReWire applica-
tion will now be available on the menu, with GigaStudio’s ReWire channels listed
on the sub-menu. Selecting a channel will direct the output from GigaStudio to
the selected track. Repeat this step for all the ReWire channels you wish to use in
Sonar.
90
Page 91

5. To take full advantage of the mixing features in Sonar you will need to route the
different GigaStudio instruments directly to the DSP Station ReWire output master channels. For example, if your GigaStudio performance contains eight different
instruments and you connect these to separate output masters in the DSP Station,
they will appear on separate ReWire channels in the Sonar Console. You can then
use the Console in Sonar to adjust volume and pan, add effects and EQ - individually for each GigaStudio instrument.
6. If you simply connect all your Giga instruments through the DSP Station mixer to
the stereo output pair on the Output Masters 1:2, all sounds will appear mixed on
a single ReWire stereo channel pair. This a perfectly acceptable option as there are
extensive mixing and processing capabilities in the GigaStudio, allowing you the
option of a pre-processed stereo mix.
Gigastudio 3.0 is now in ReWire Slave mode, Sonar is the ReWire Master. You can
render the GigaStudio ReWire input in Sonar as you would with other tracks, using the
“Bounce to Track(s)” option in the Sonar Edit-Export sub-menu. (For more application
specic information see the recording section of the Sonar manual).
To successfully disconnect the Giga3 ReWire connection from Sonar you must always
quit Gigastudio rst.
For more information about the Rewire spec as it pertains to GigaStudio 3.0 see the
ReWire Appendix.
91
Page 92

92
93
Page 93

Tutorial 5 - QuickEdit
QuickEdit is a powerful utility that enables you to quickly perform quick parameter
changes. QuickEdit functions include:
• Articulation – synth parameters like attenuation, pan, tuning, envelopes, lters,
and LFOs
• Dimensions – navigate through specic dimensions, like velocity cross-switches, for
quick & precise edits
• Wave View – drag envelope, lter and LFO curves directly on the graphic waveform
• Keyboard – additional special purpose version of the virtual keyboard
Any edits made in the QuickEdit are non-destructive to the .Gig itself. Rather, the edits are saved with the performance (.GSP). When you load a performance containing instruments you specically made QuickEdit adjustments to, the settings will be instantly
recalled and applied on a performance by performance basis. To make permanent edits
to the .Gig instrument, see the related sections of the GigaStudio 3.0 Instrument Editor.
To perform edits to any instrument loaded in the GigaStudio MIDI Mixer port channel view or QuickSound loaded instrument list, launch the readily available QuickEdit
utility. The instrument must be loaded rst, then there are two ways to open QuickEdit:
The rst method is to simply click the green ‘Q’ button on the MIDI Mixer channel
slot.
The other method is to right-click
on any instrument in the QuickSound
Loaded Instrument list and select the
‘QuickEdit…’ option.
Either method will launch the QuickSound utility interface.
For the purposes of this tutorial, we will be using the VSL 14 Violins Enemble basic all
instrument which has velocity, keyswitch, and stereo dimensions. We will demonstrate
the function of each of the editable parameters available in the QuickEdit utility.
93
Page 94

95
Here is the VSL Violin Ensemble keyswitched instrument loaded in QuickSound.
Before explaining how QuickEdit works, you need some background on the components of a GigaStudio Instrument. There are several properties of the overall design and
construction of the instrument that will help you to perform any number of precise as
well as general overall adjustments.
Note region selection and split selection must be understood in order to make edits
on a global (entire instrument with every split and region) or individual (a single or several selected splits and regions) basis. Before proceeding with any edits, double-check
that you are going to edit the correct instrument. Since it is possible to have a QuickEdit
window open for every loaded instrument, you want to be sure you are editing the
right one.
Each QuickEdit Window has a name eld in its title bar. You
can also grab this bar to drag the window around the desktop.
Once you have veried that this is the instrument you wish to edit, the rst place to
look is in the QuickEdit Keyboard view located at the bottom of its window.
94
Page 95

In the Keyboard view, we can observe several of the loaded instrument properties:
• The range of the instrument is laid out in the white keys. The lowest note region is
selected and is yellow. The octave numbers label each C note. We can see that the violin
section has a range from G2-D6.
• There are special green keyswitch dimension keys at the left in of the keyboard,
with the lowest dimension key selected. A black dot on the key indicates the selection.
We can see that the violin section has a keyswitch range of C0-G0.
• Above the keys are region selection indicators. For each note selected, a corresponding region indicator will turn yellow. Any edits performed in QuickEdit will only affect
selected regions and splits (sub-regions).
• Keyboard Select is set to ‘individual regions’ (default).
• Dimension Select is set to ‘individual splits’ (default).
• The default velocity for mouse-triggered notes is 100 (default).
Any or all of the properties can be changed as well as manipulating the view of the
keyboard itself.
Some basic controls in this view are zoom (+ / -) buttons and scroll
(< / >) buttons at both ends of the keyboard window allowing you to
resize the keys and adjust the range of the notes displayed within it.
The MIDI Select button, when activated (green), places the keyboard
in Midi Select mode which allows you to select note regions as well as
individual splits within those regions from a MIDI source such as your
controller keyboard or sequencer.
We will explore the functions of the keyboard further when we begin to make some
basic edits. For now, we need to be able to interpret what the rest of the QuickEdit parameters mean, how we can adjust them, and which note regions and splits will be affected by those edits.
With regard to an instrument’s articulation (the manner in which the sampler plays
a sample), there are parameters organized into sections in the Articulation view located
at the top of the QuickSound window. Each section has its own set of parameters and
the default settings reect the state of the loaded instrument. If you have edited an
instrument in QuickEdit and loaded its performance le (.GSP), then the settings of the
parameters will reect those of the last saved state of that performance.
95
Page 96

97
Here is a break down of the Articulation view’s control sections.
In the Global parameters section:
• Attenuation reduces the output level (range 0-96 dB)
• Pan denes the placement in the stereosound stage (-64-63, from left to
right)
• Tune varies the pitch by a dened offset (-49-50 cents)
Envelopes 1 (amplitude) and 2 (lter) have exactly the same controls.
Each can be set independently of the other, yet some parameters will
have a direct effect on the other. For instance, a lter envelope (when a
lter is activated) with its sustain setting at zero would render a region/
split inaudible. Each of the control functions are as follows:
•Pre-Attack (%) sets the minimum level for attack
•Attack (sec) sets the speed of the attack
•Decay1 (sec) sets the speed of the pre-sustain decay
•Sustain (%) sets the level of the sustaining sample
•Decay2 (sec) sets the speed of the sustain decay
•Release (sec) sets the speed of the release
As you can see, some control settings are a function of volume (preattack, sustain) and others are a function of time (attack, decay1 & 2,
release). For a more thorough discussion of the function of these parameters see the related section in the QuickEdit Reference section.
There are two controls for Envelope 3. They are used to con-
trol the pitch envelope:
•Attack (sec) sets the attack speed for pitch
•Depth (cents) sets the amount of de-tuning
The remaining controls are for setting MIDI control source
modulators to the EG1 (amplitude) and EG2 (lter) envelopes.
The default status for many instruments will be OFF, although many Giga developers
are including these controls built into their instruments as an added performance feature. Learn more in the Editor section.
96
Page 97

The lter on our violin section is not active. To
apply a lter, we can simply select a lter type and
dene its parameters, and assign MIDI control
sources for lter cutoff and resonance.
The velocity curve can be dened for the applied
lter.
Cutoff frequency, resonance, velocity scaling,
keyboard break point, and the velocity dynamic
range can be set as well.
The LFO (low frequency oscillator) has frequency, internal
and external depth controls for each of the envelope generators.
The frequency is adjusted in cycles (Hz) while the depths
are adjusted in cents.
Some practical applications of LFO include simulated
tremolo and vibrato as well as rotating speaker behavior can
be programmed into an instrument using these controls.
Your imagination may come up with a new and creative use
for LFO controls.
The Dimension view displays all the available pre-programmed dimension controllers contained in the loaded instrument. In our violin section example instrument we
have the following dimensions:
The rst dimension controller listed is Key Down Velocity. We can see that thee are
two splits dened for the velocity of the selected region by the yellow (active) and dull
green (inactive) bars.
The next dimension controller is the Stereo dimension. All note regions that hold stereo samples are automatically assigned a Stereo dimension controller. The active split is
yellow.
The last dimension controller listed is a keyswitch with eight dimension keys assigned. The active dimension split is yellow.
97
Page 98

99
While it is not possible to add more dimensions in QuickEdit, it provides a way to
select the dimension splits and to modify its parameters. More extensive work with
dimensions is best left to the GigaStudio 3.0 Instrument Editor. See the related sections
on dimensions for more details.
The Wave view provides valuable visual feedback when adjusting various param-
eters or to monitor split points between samples.
In the Wave view are scroll (< / >) and zoom (+ / -) buttons for navigation as well as a
traditional waveform display for mono or stereo samples with a timeline along the top
edge.
Making QuickEdits
Now that you have a better concept of region and split selection (focus of an edit)
and the various controls available (edit parameters), you can condently begin experimenting with QuickEdits. Remember any edits you make, no matter how drastic, will
have no effect on the original .Gig le instruement. You can always revert to a known
good starting point by opning the instrument in a new performance.
First, we will do a QuickEdit to a single split sample whose pitch sounds a little at.
To nd the exact sample, rst play around the general area until you nd the note. It is
important to discern if the entire region is affected by the pitch or if it is only one sample split. It may appear that the louder velocity, at MIDI note E5, in the C0 dimension is
the problem.
Before proceeding, we need to decide on
the type of selection we are going to make.
For dimension splits, use the Dimension Se-
lect menu to choose the type of selection. Since we are going to concentrate on only
one sample split, choose the individual splits option. To manually select the dimension
where our sample is located, click the green dimension control key (keyswitch).
98
Page 99

The selection is then marked with a black dot on the key. This selection will remain
active until a different dimension key is selected. Next, we select the note region. In the
slot just above the keys along the range of the keyboard are the note region selectors.
A selected note region will be yellow. To manually select a note region where our out of
tune same is, click on E5 in the region selection slot.
When we selected the note region, the selection for the upper velocity split is the one
we want. The reason for this is that the behavior of the click for note-on velocity is dened as 100 (default).
If you wanted a different velocity split, simply adjust the velocity fader
control to dene the velocity value of a mouse-click for note-ons.
Selecting the Auto option enables you to click at different places on the
individual keys to get low to high velocity values.
Now we can edit the precise dimension, note region, and split at the sample level.
Simply adjust the Articulation control for Tune to correct the sample’s pitch. When you
save the performance, the edit will be saved with it.
Now that you understand the concept of a manual selection, use the MIDI Select to
do a multiple selection of several note regions. First, enable MIDI Select.
With MIDI Select active, any note played on either the GigaStudio host Virtual Keyboard (keystroke Alt+K) or an attached MIDI control source (controller keyboard) will
select each subsequent note triggered.
Any edits made will affect only the selected note regions. Be sure to select any dimension, velocity, and stereo splits and then make the edits. To reset the selection click,
with the mouse, any key in the instrument note range on the QuickEdit keyboard.
There are many powerful selection options to know about that are beyond the scope
99
Page 100

of this tutorial. For more details see the related reference section on QuickEdit. As you
can see, from the concepts already covered, a lot can be done with an instrument without ever leaving the GigaStudio environment.
Step-by-Step Review
1. To use QuickEdit on a loaded instrument, click the Q button on the MIDI Mixer load-
er channel pane. You can QuickEdit any instrument, including those within a stacked
instrument, but you cannot QuickEdit a stacked channel master.
2. By default, an instrument loaded in QuickEdit has all its regions and splits selected.
To make an edit to any parameter at this point will affect the entire instrument.
3. To make a partial or individual split edit, rst make the selection(s). Use the mouse
or enable MIDI Select to make selections from your keyboard.
4. Edit any of the articualtion parameters. All edits are updated in real time so you
can listen as you make adjustments.
5. Save the changes you have made with a performance. Remember, there are two
types of performances, so you can save the entire GigaStudio session environment
(.GSP) or a specic instrument level performance (.GSI) for loading into other performance sessions. (.GSPs).
The edits you make with QuickEdit are non-destructive edits. The parameter changes
are saved as offsets within their respective performance (.GSI or .GSP) le. The original
.gig les are not affected. To make a permanent edit to a .gig le, it will be necessary to
load the instrument into the GigaStudio 3.0 Instrument Editor, make the edits, and then
save the changes over the old le, or Save As.. to a new instrument le.
100
 Loading...