

77-20SR45I00020
Z
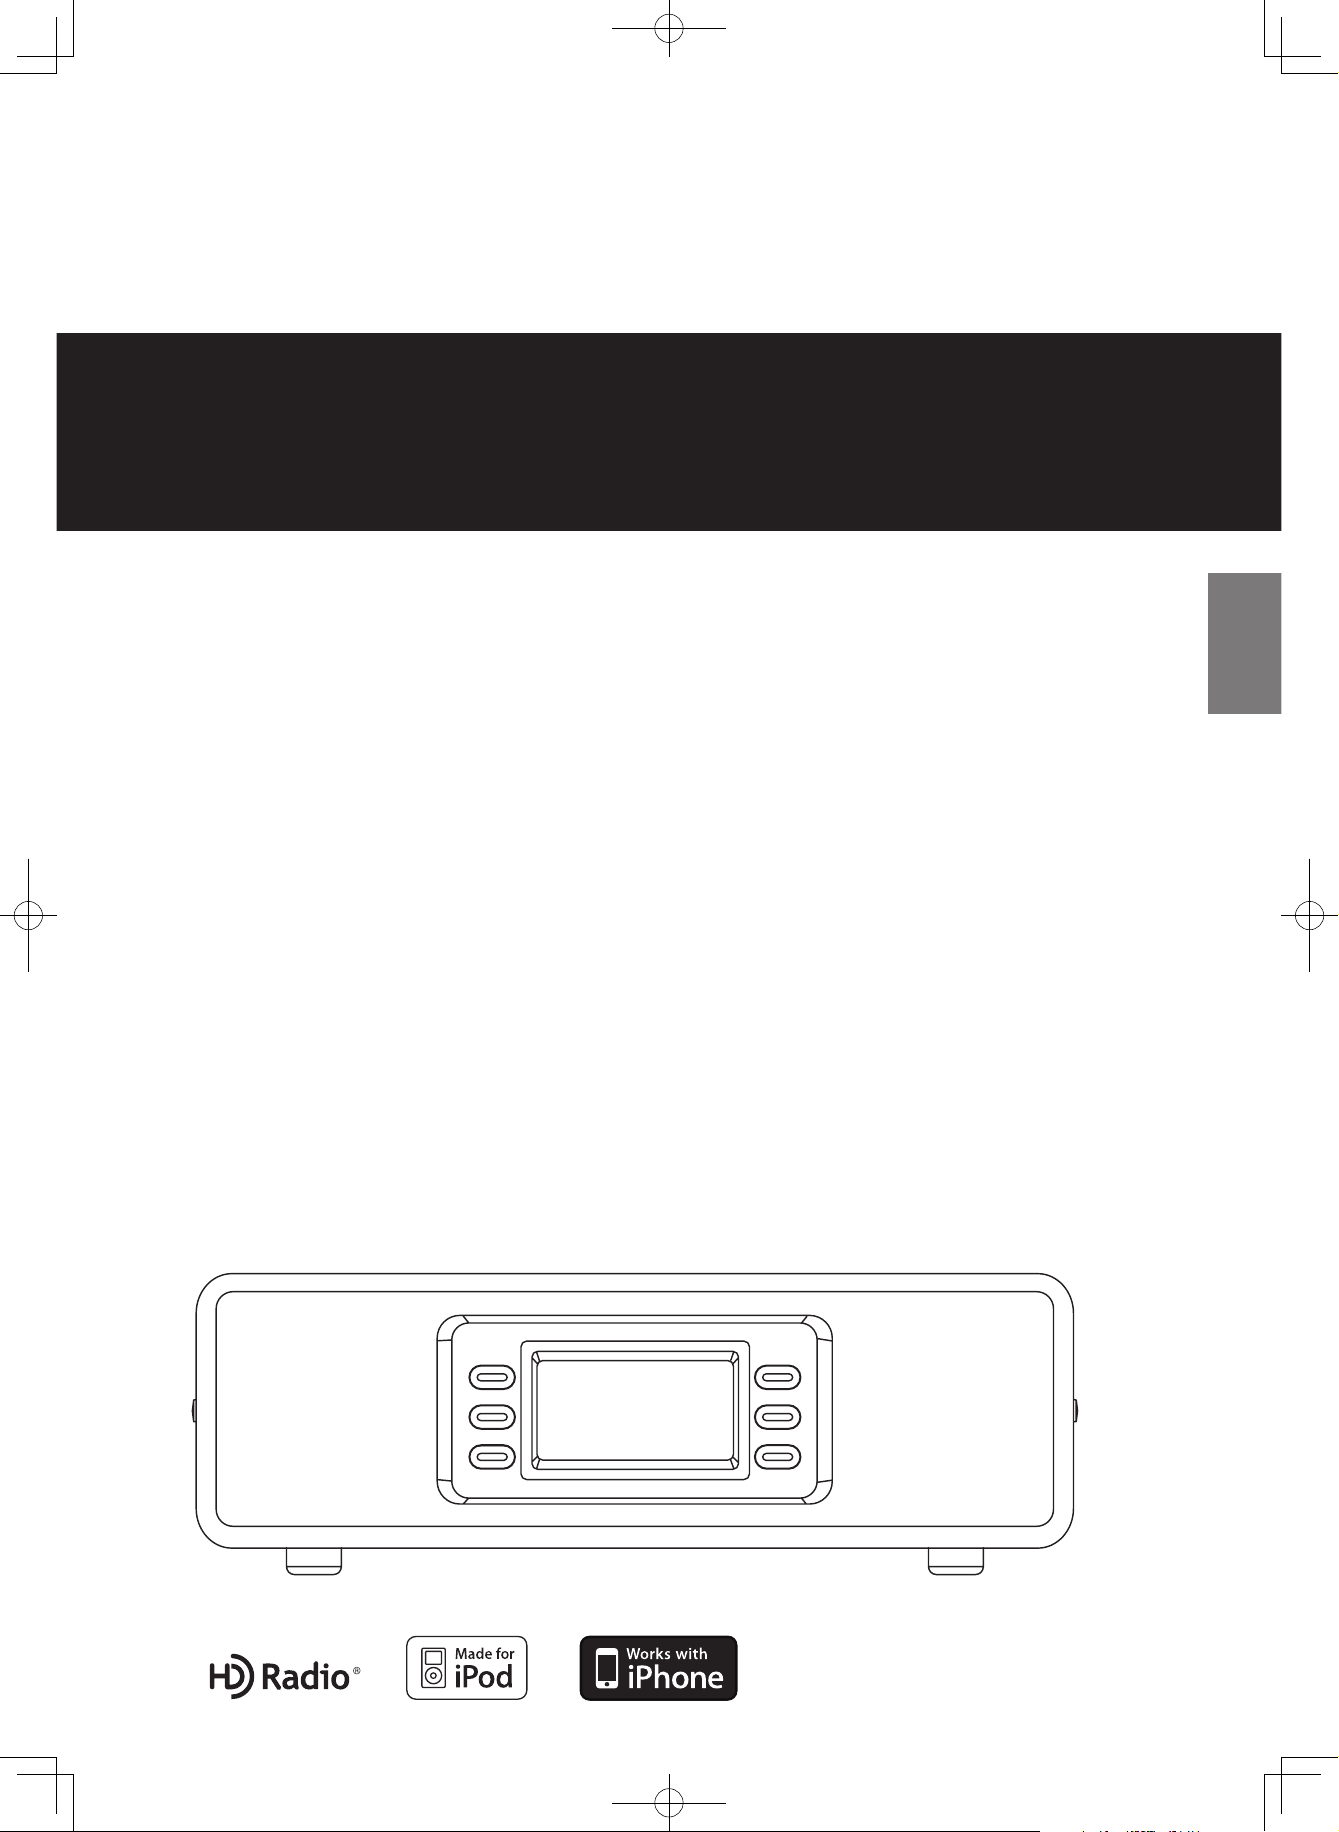
HD RadioTM Receiver
OWNER’S MANUAL
HD-1
ENGLISH
SLEEP
PRESET
MUTING
ALARM 1
HD Radio Receiver HD-1
ALARM 2
EQ
HD-1.indd 21 2008.12.17 9:21:44 AM
2
IMPORTANT SAFETY INSTRUCTIONS
1) Read these instructions.
2) Keep these instructions.
3) Heed all warnings.
4) Follow all instructions.
5) Do not use this apparatus near water.
6) Clean only with dry cloth.
7) Do not block any ventilation openings. Install in accordance
with the manufacturer’s instructions.
8) Do not install near any heat sources such as radiators, heat
registers, stoves, or other apparatus (including amplifiers) that
produce heat.
9) Do no t defea t the saf ety pur pose of t he pola rize d or
grounding-type plug. A polarized plug has two blades with
one wider than the other. A grounding type plug has two
blades and a third grounding prong. The wide blade or the
third prong are provided for your safety. If the provided
plug does not fit into your outlet, consult an electrician for
replacement of the obsolete outlet.
10) Protect the power cord from being walked on or pinched
particularly at plugs, convenience receptacles, and the point
where they exit from the apparatus.
11) Onl y u s e at t a c hmen t s / a cces s o r i e s speci f i e d by th e
manufacturer.
12) Us e only w ith th e cart, stand, tr ipod ,
b r a c k et , o r ta b l e spe c i f i e d by th e
manufacturer, or sold with the apparatus.
When a cart is used, use caution when
moving the cart/apparatus combination to
avoid injury from tip-over.
13) Unplug this apparatus during lig htning storms or when
unused for long periods of time.
14) Refer all servicing to qualified service personnel. Servicing is
required when the apparatus has been damaged in any way,
such as power-supply cord or plug is damaged, liquid has
been spilled or objects have fallen into the apparatus, the
apparatus has been exposed to rain or moisture, does not
operate normally, or has been dropped.
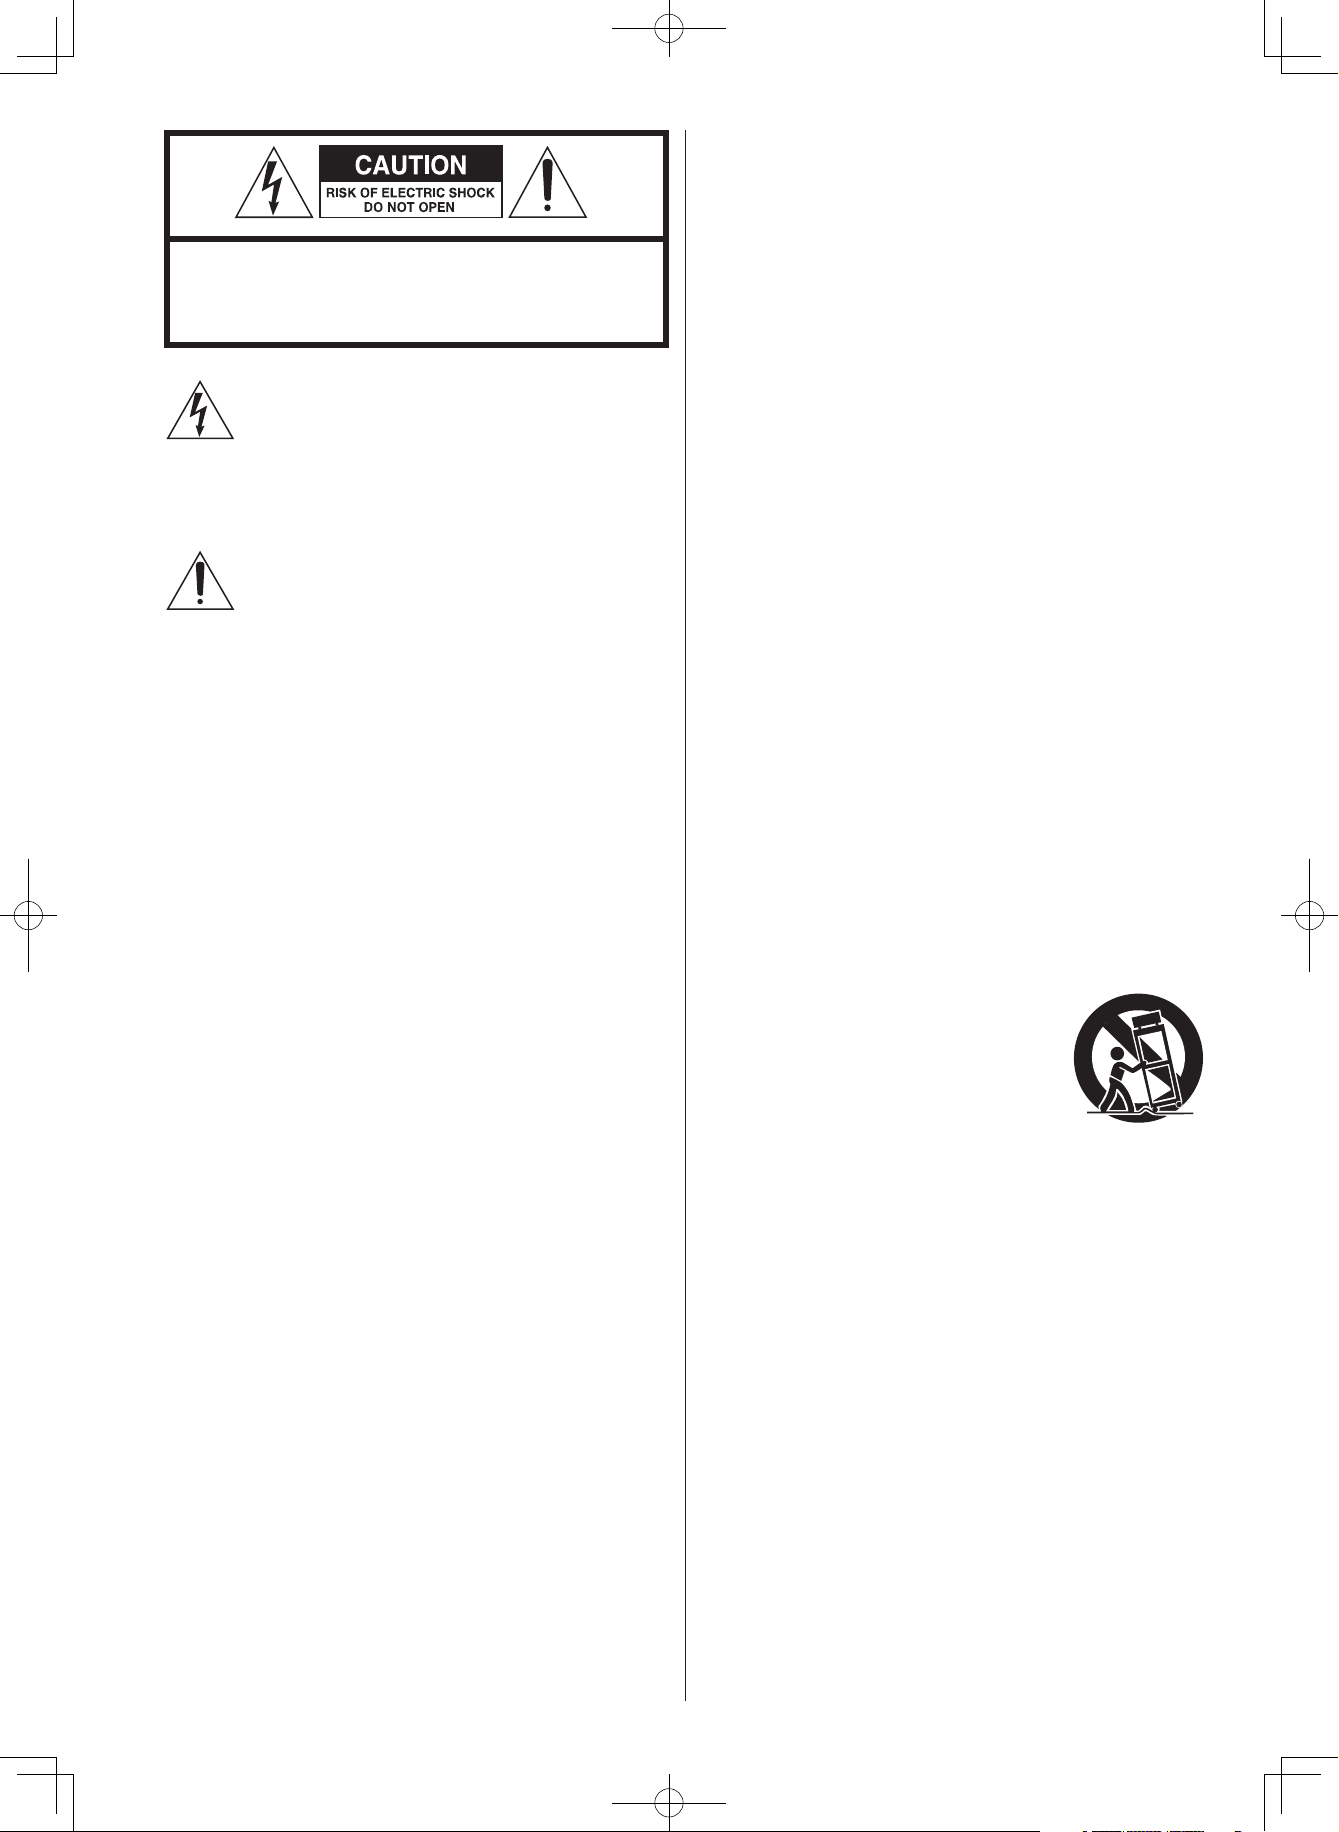
CAUTION: TO REDUCE THE RISK OF ELECTRIC SHOCK,
DO NO T RE M O V E CO V E R (OR BA CK). NO US E R SE R VICE ABLE PAR TS INSI DE. REF ER SERV ICIN G T O
QUALIFIED SERVICE PERSONNEL.
The lightning flash with arrowhead symbol, within
an equilateral triangle, is intended to alert the user
to the presence of uninsulated “dangerous voltage”
within the product’s enclosure that may be of sufficient
magnitude to constitute a risk of electric shock to
persons.
The exclamation point within an equilateral triangle is
intended to alert the user to the presence of important
operating and maintenance (servicing) instructions in
the literature accompanying the appliance.
HD-1.indd 2 2008.12.17 9:19:15 AM
3
ENGLISH
CAUTION
< DO NOT REMOVE THE EXTERNAL CASES OR CABINETS TO
EXPOSE THE ELECTRONICS. NO USER SERVICEABLE PARTS
ARE WITHIN!
< IF YOU ARE EXPERIENCING PROBLEMS WITH THIS PRODUCT,
CONTACT TEAC FOR A SERVICE REFERRAL. DO NOT USE THE
PRODUCT UNTIL IT HAS BEEN REPAIRED.
< USE OF CONTROLS OR ADJUSTMENTS OR PERFORMANCE OF
PROCEDURES OTHER THAN THOSE SPECIFIED HEREIN MAY
RESULT IN HAZARDOUS RADIATION EXPOSURE.
WAR N ING: TO PRE VENT FIRE O R SHOCK
HAZARD, DO NOT EXPOSE THIS APPLIANCE
TO RAIN OR MOISTURE.
< Do not expose this apparatus to drips or splashes.
< Do not place any objects filled with liquids, such as vases, on
the apparatus.
< Do not install this apparatus in a confined space such as a
book case or similar unit.
< The apparatus draws nominal non-operating power from the
AC outlet with its POWER switch in the off position.
< The apparatus should be located close enough to the AC
outlet so that you can easily grasp the power cord plug at any
time.
< An apparatus with Class ! construction shall be connected to
an AC outlet with a protective grounding connection.
< Batteries (battery pack or batteries installed) shall not be
exposed to excessive heat such as sunshine, fire or the like.
< Excessive sound pressure from earphones and headphones
can cause hearing loss.
Contents
Thank you for choosing TEAC. Read this manual carefully
to get the best performance from this unit.
Important Safety Instructions . . . . . . . . . . . . . . . . . . . . . . . . . 2
Before Using the Unit . . . . . . . . . . . . . . . . . . . . . . . . . . . . . . . 4
Connection . . . . . . . . . . . . . . . . . . . . . . . . . . . . . . . . . . . . . . 5
Unit Functions . . . . . . . . . . . . . . . . . . . . . . . . . . . . . . . . . . . . 7
Display . . . . . . . . . . . . . . . . . . . . . . . . . . . . . . . . . . . . . . . . . . 9
Remote Control Unit . . . . . . . . . . . . . . . . . . . . . . . . . . . . . . . . 9
Getting started
Getting started . . . . . . . . . . . . . . . . . . . . . . . . . . . . . . . . . . . 10
Operational Instructions
Basic Operation . . . . . . . . . . . . . . . . . . . . . . . . . . . . . . . . . . 11
Listening to the Radio . . . . . . . . . . . . . . . . . . . . . . . . . . . . . . 12
Storing Preset Stations . . . . . . . . . . . . . . . . . . . . . . . . . . . . . 12
HD Radio stations . . . . . . . . . . . . . . . . . . . . . . . . . . . . . . . . . 13
HD TAG . . . . . . . . . . . . . . . . . . . . . . . . . . . . . . . . . . . . . . . . 13
Listening to your iPod or iPhone . . . . . . . . . . . . . . . . . . . . . . 14
iPod video output . . . . . . . . . . . . . . . . . . . . . . . . . . . . . . . . . 14
Listening to a non-docking iPod or
other portable audio devices . . . . . . . . . . . . . . . . . . . . . . . . 15
LINE Out Operation . . . . . . . . . . . . . . . . . . . . . . . . . . . . . . . 15
Setting the Clock Time and Calendar . . . . . . . . . . . . . . . . . . 16
Setting the Alarm Time . . . . . . . . . . . . . . . . . . . . . . . . . . . . . 16
Using the Alarm . . . . . . . . . . . . . . . . . . . . . . . . . . . . . . . . . . 17
Snooze/Dimmer Operation . . . . . . . . . . . . . . . . . . . . . . . . . . 17
Sleep Operation . . . . . . . . . . . . . . . . . . . . . . . . . . . . . . . . . . 18
Specifications . . . . . . . . . . . . . . . . . . . . . . . . . . . . . . . . . . . . 18
Troubleshooting . . . . . . . . . . . . . . . . . . . . . . . . . . . . . . . . . . 19
For U.S.A.
This equipment has been tested and found to comply with
the limits for a Class B digital device, pursuant to Part 15
of the FCC R ules. T hes e limit s are designed to provide
reasonable protection against harmful interference in a
residential installation. This equipment generates, uses, and
can radiate radio frequency energy and, if not installed and
used in accordance with the instructions, may cause harmful
interference to radio communications. However, there is
no guarantee that interference will not occur in a particular
installation. If this equipment does cause harmful interference
to radio or television reception, which can be determined by
turning the equipment off and on, the user is encouraged to
try to correct the interference by one or more of the following
measures:
• Reorient or relocate the equipment and/or the receiving
antenna.
• Increase the separation between the equipment and
receiver.
• Connect the equipment into an ou tlet on a circuit
different from that to which the receiver is connected.
• Consult the dealer or an experienced radio/TV
technician for help.
CAUTION
Changes or modifications to this equipments not expressly
approved by TEAC CORPORATION for compliance will void the
user’s warranty.
HD-1.indd 3 2008.12.17 9:19:16 AM

4
Before Using the Unit
Read this before operation
< As the unit may become warm during operation, always leave
sufficient space around the unit for ventilation.
< The voltage supplied to the unit should match the voltage as
printed on the rear panel. If you are in any doubt regarding
this matter, consult an electrician.
< Choose the installation location of your unit carefully. Avoid
placing it in direct sunlight or close to a source of heat. Avoid
locations subject to vibrations and excessive dust, heat, cold
or moisture.
< Do not place the unit on any other electronic components.
< Do not open the cabinet as this might result in damage to the
circuitry or electrical shock. If a foreign object should fall into
the unit, contact your dealer or service company as soon as
possible.
< When removing the power plug from a wall outlet, always
pull directly on the plug. Do not pull on the line cord.
< Do not attempt to clean the unit with chemical solvents as
this might damage the finish. Use a clean, dry, lint-free cloth.
< Keep this manual in a safe place for future reference.
Maintenance
• Place the unit on a level surface away from sources of direct
sunlight or excessive heat.
• Protect your furniture when placing your unit on a natural
wood a nd lacquered finish . A cloth or ot her protecti ve
material should be placed between it and the furniture.
• Clean your unit with a soft cloth moistened only with mild
soap and water. Stronger cleaning agents, such as Benzine,
thinner or similar materials can damage the surface of the
unit.
Beware of condensation
When the unit is moved from a cold to a warm place, or
used after a sudden temperature change, there is a danger of
condensation; vapor in the air could condense on the internal
mechanism, making correct operation impossible. To prevent
this, or if this occurs, leave the unit for one or two hours with
the power turned on. The unit will stabilize at the temperature
of its surroundings.
HD-1.indd 4 2008.12.17 9:19:17 AM
Connection
CAUTION
< Switch off (standby) the power before making connections.
< Read the instructions of each component you intend to use with this unit.
< Be sure to insert each plug securely. To prevent hum and noise, do not bundle the connection cords .
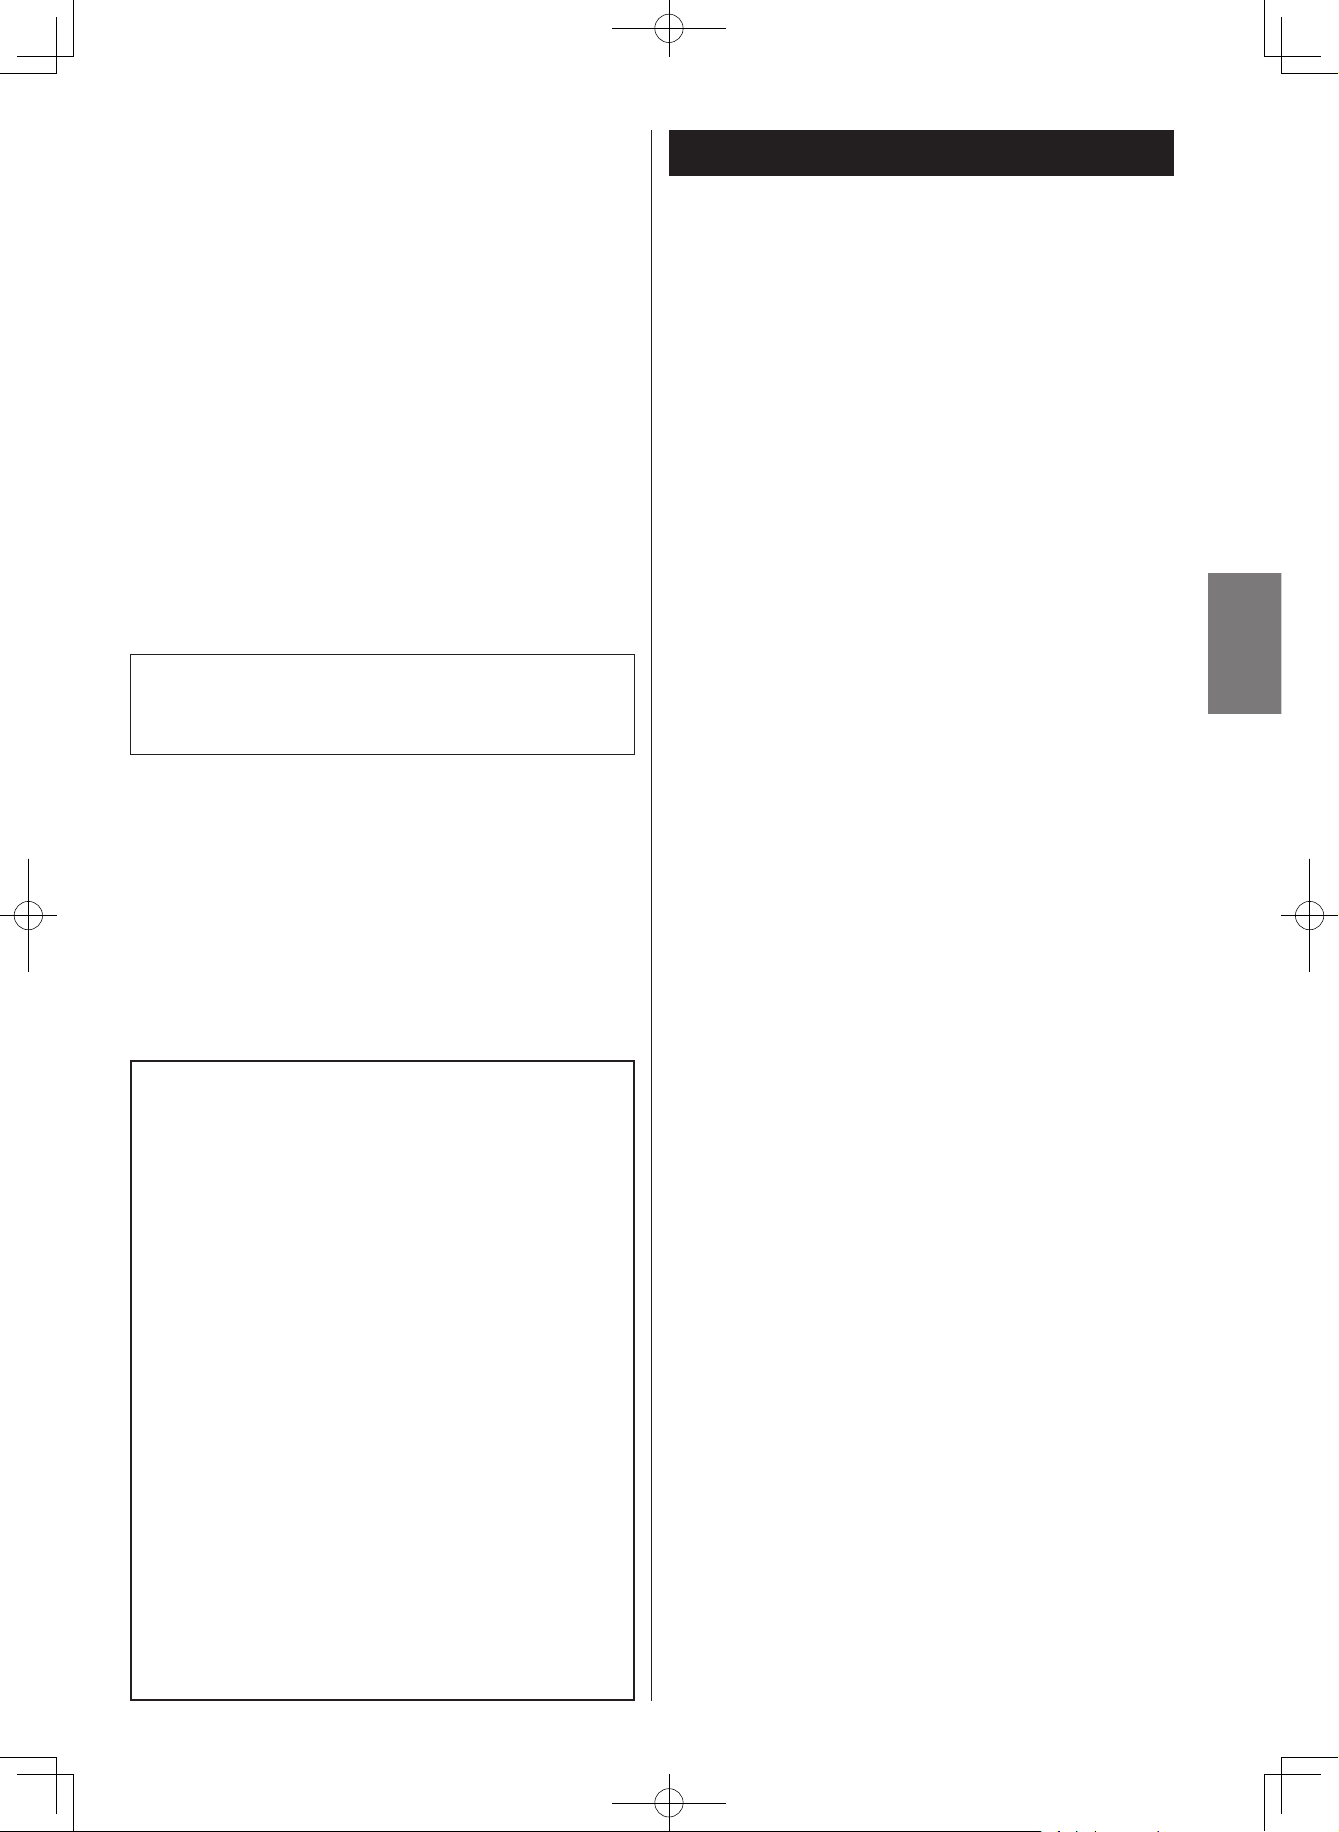
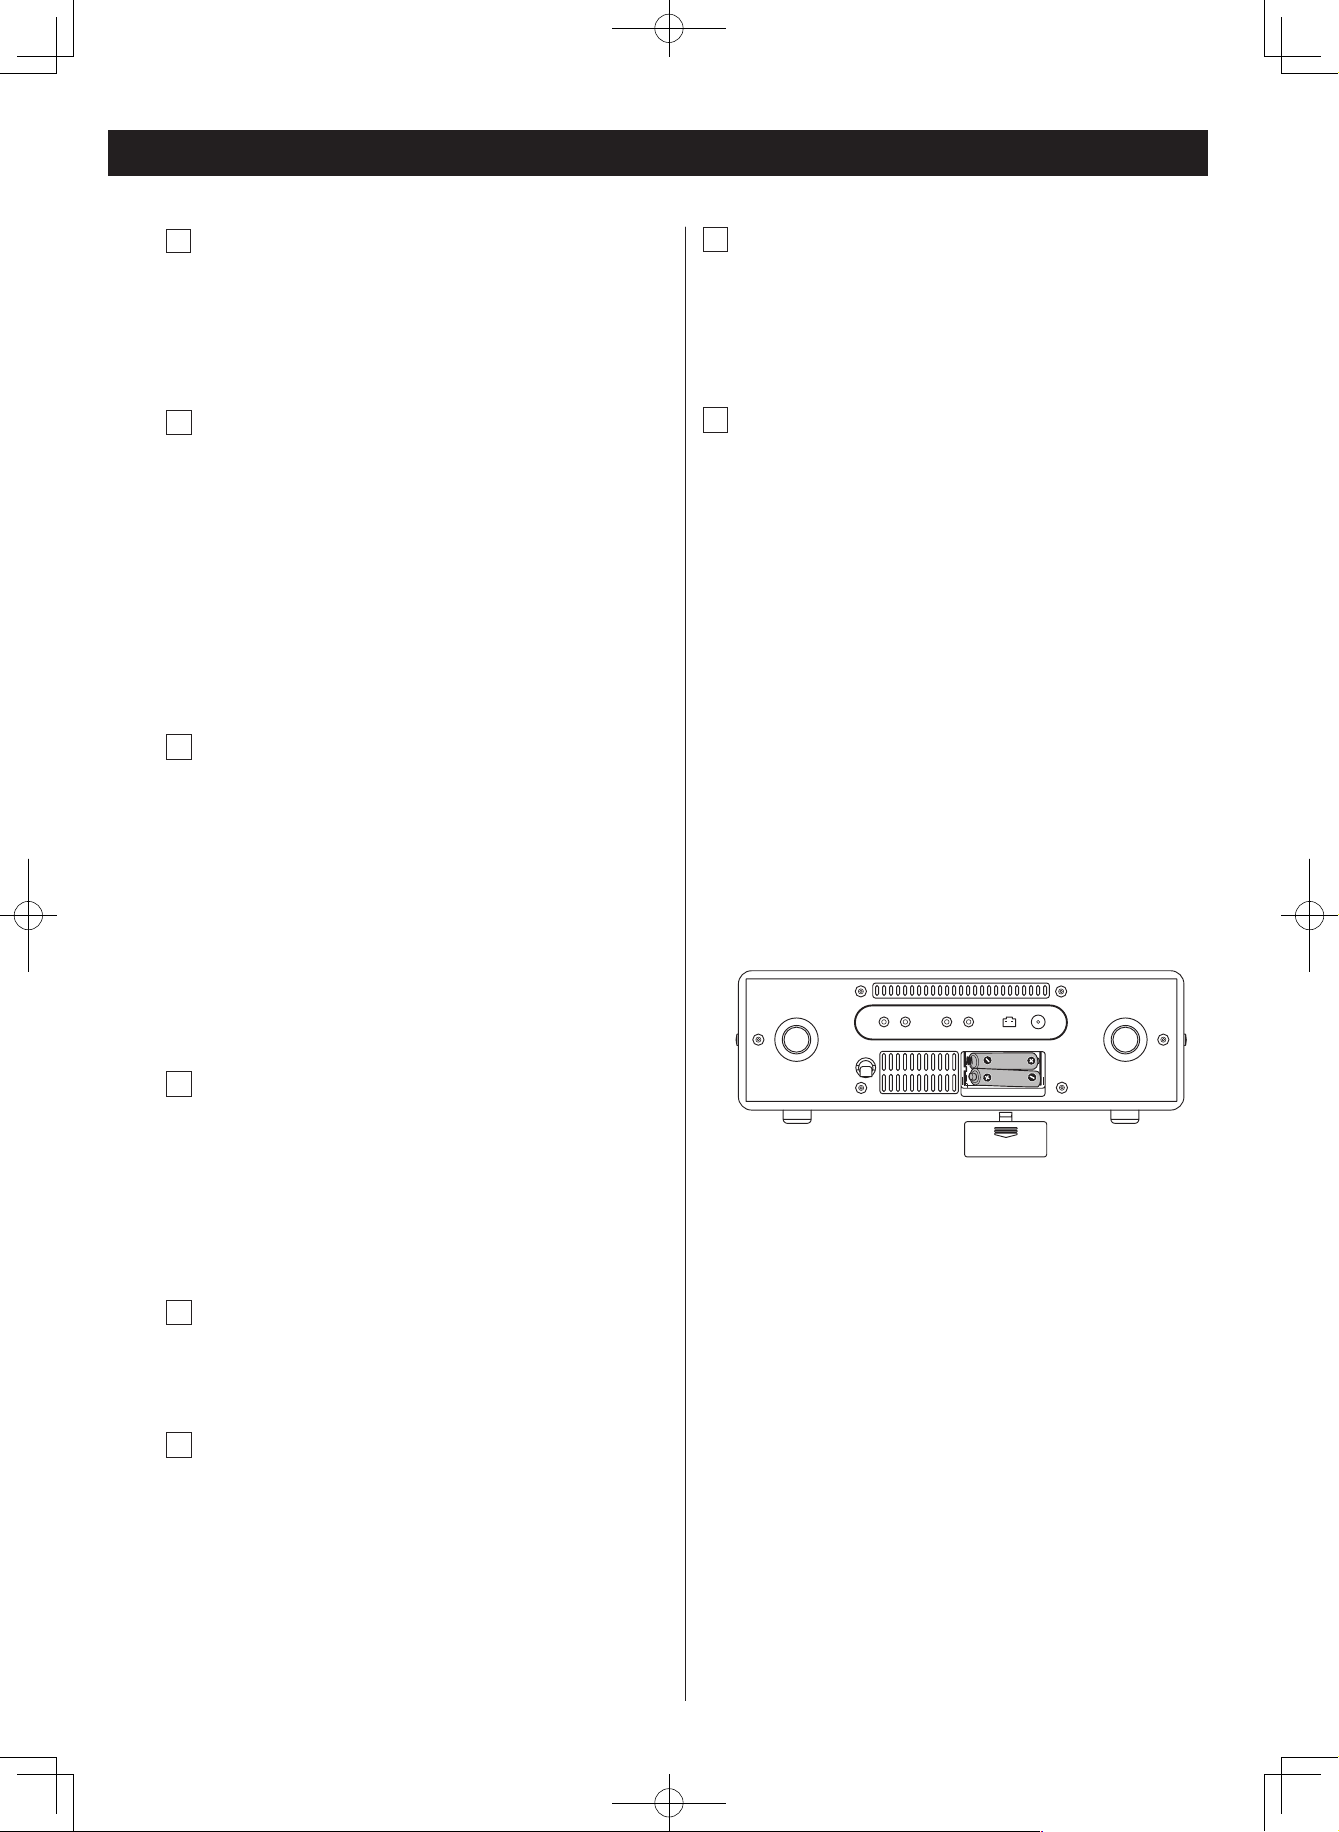
A
AC power cord
B
Phones jack
C
Line out jack
D
AUX IN jack
E
Video out jack
F
AM loop antenna connector
G
FM antenna jack
H
Battery compartment
PHONES
LINE OUT
AUX IN VIDEO OUT
AM-ANTENNA-FM 75Ω
B
HA
GFEDC
5
HD-1.indd 5 2008.12.17 9:19:18 AM
6
Connection
A
AC Power Cord
Be sure to connect the power cord to an AC outlet which
supplies the correct voltage.
Hold the power plug when plugging or unplugging the
power cord. Never pull or yank on the power cord.
B
Phones jack
Fo r pri vat e lis ten ing , first reduc e the volume level to
minimum. Then insert the plug from your headphones into
the PHONES jack, and adjust the volume using the VOLUME
knob. The sound from the speakers is cut off while the
headphone jack is inserted.
CAUTION
Always lower the volume level prior to plugging in your
headphones. TO AVOID DAMAGING YOUR HEARING - Do
not place your headphones on your head until after you
have plugged them in.
C
Line out jack
You can connect this unit to an external amplifier, Connect
the pin cords. Make sure to connect to MINI PLUG JACK.
NOTE :
< This output jack is a “line level” output. Do NOT connect
to the “PHONO” jack on your amplifier or distortion may
occur.
< The volume level of line output cannot be adjusted by the
VOLUME control knob of this unit. Use the volume control
of your amplifier to adjust the volume.
D
AUX IN jack
You can connect a portable audio player to this jack.
Connect the LINE OUT or PHONES jack (audio output jack)
of the player using the supplied stereo mini plug cable.
When using the PHONES jack of your mini player, you must
adjust the volume of the mini-player or you may hear no
sound from your HD-1.
E
VIDEO OUT jack
This terminal outputs video signal from iPod.
Use an RCA (pin) video cable to connect the Dock to the
composite video connector of a television or monitor.
F
AM loop antenna connector
Connect the supplied AM loop antenna to the
AM ANTENNA connector.
Place the antenna in the direction which gives the
best reception.
G
FM antenna jack
While in FM mode, tune in an FM station and
extend the lead to find the best position for the
reception. This antenna may need to be
repositioned if you move your unit to a new
location.
H
Battery compartment
The battery supplies a backup power to the builtin clock and
preset, when the unit is momentarily disconnected from the
AC outlet.
1. Remove the lid.
2.Insert two AAA batteries.
3. Replace the lid.
Battery replacement
If the clock comes to indicate the wrong time,
replace the battery with a new one.
Precautions concerning AAA/UM-3 battery
< Be sure to insert the battery with correct positive
“+” and negative “_” polarities. >
< Do not heat or disassemble battery and never
dispose of old battery by throwing them in a fire. >
PHONES
LINE OUT AUX IN
VIDEO OUT
AM-ANTENNA-FM 75Ω
NOTE :
< The battery should be removed when not using it in a long
term.
< The battery must use an alkaline battery on the market.
HD-1.indd 6 2008.12.17 9:19:20 AM

ENGLISH
7
Unit Functions
NOTE :
To simplify explanations, instructions in this manual refer to
the names of the buttons and controls on the front panel
only. Associated controls on the remote control will also
operate similarly.
V
O
L
U
M
E
S
TA
N
D
B
Y
/
ON
ME
M
O
RY
C
LO
CK
A
D
J
SL
EE
P
PR
E
SE
T
M
U
T
IN
G
A
LA
R
M
2
E
Q
A
LA
R
M
1
T
U
N
IN
G
/S
E
LE
C
T
F
U
N
C
T
I
O
N
(W
A
KE
T
O
)
A
F
B
I
L
P
K
N E Q
D C M J
H G O A
B
K
I
Q
M
E
O
N
C
D
G
F
L
SNOOZE
HD TAG
EQ
HD
RADI
O
R
E
C
EIVER HD
1
RC-1219
A
Stereo Speakers
B
PLAY/PAUSE (
y/J
)
C
FUNCTION/WAKE TO
D
STANDBY/ON
E
PRESET
F
HD TAG
G
EQ
H
LCD DISPLAY
I
VOLUME
J
iPhone / iPod Dock
K
TUNING /SELECT
L
SNOOZE / DIMMER
M
MEMORY
N
SLEEP
O
ALARM 1
ALARM 2
P
CLOCK ADJ
Q
MUTING
HD-1.indd 7 2008.12.17 11:25:19 AM

8
Unit Functions
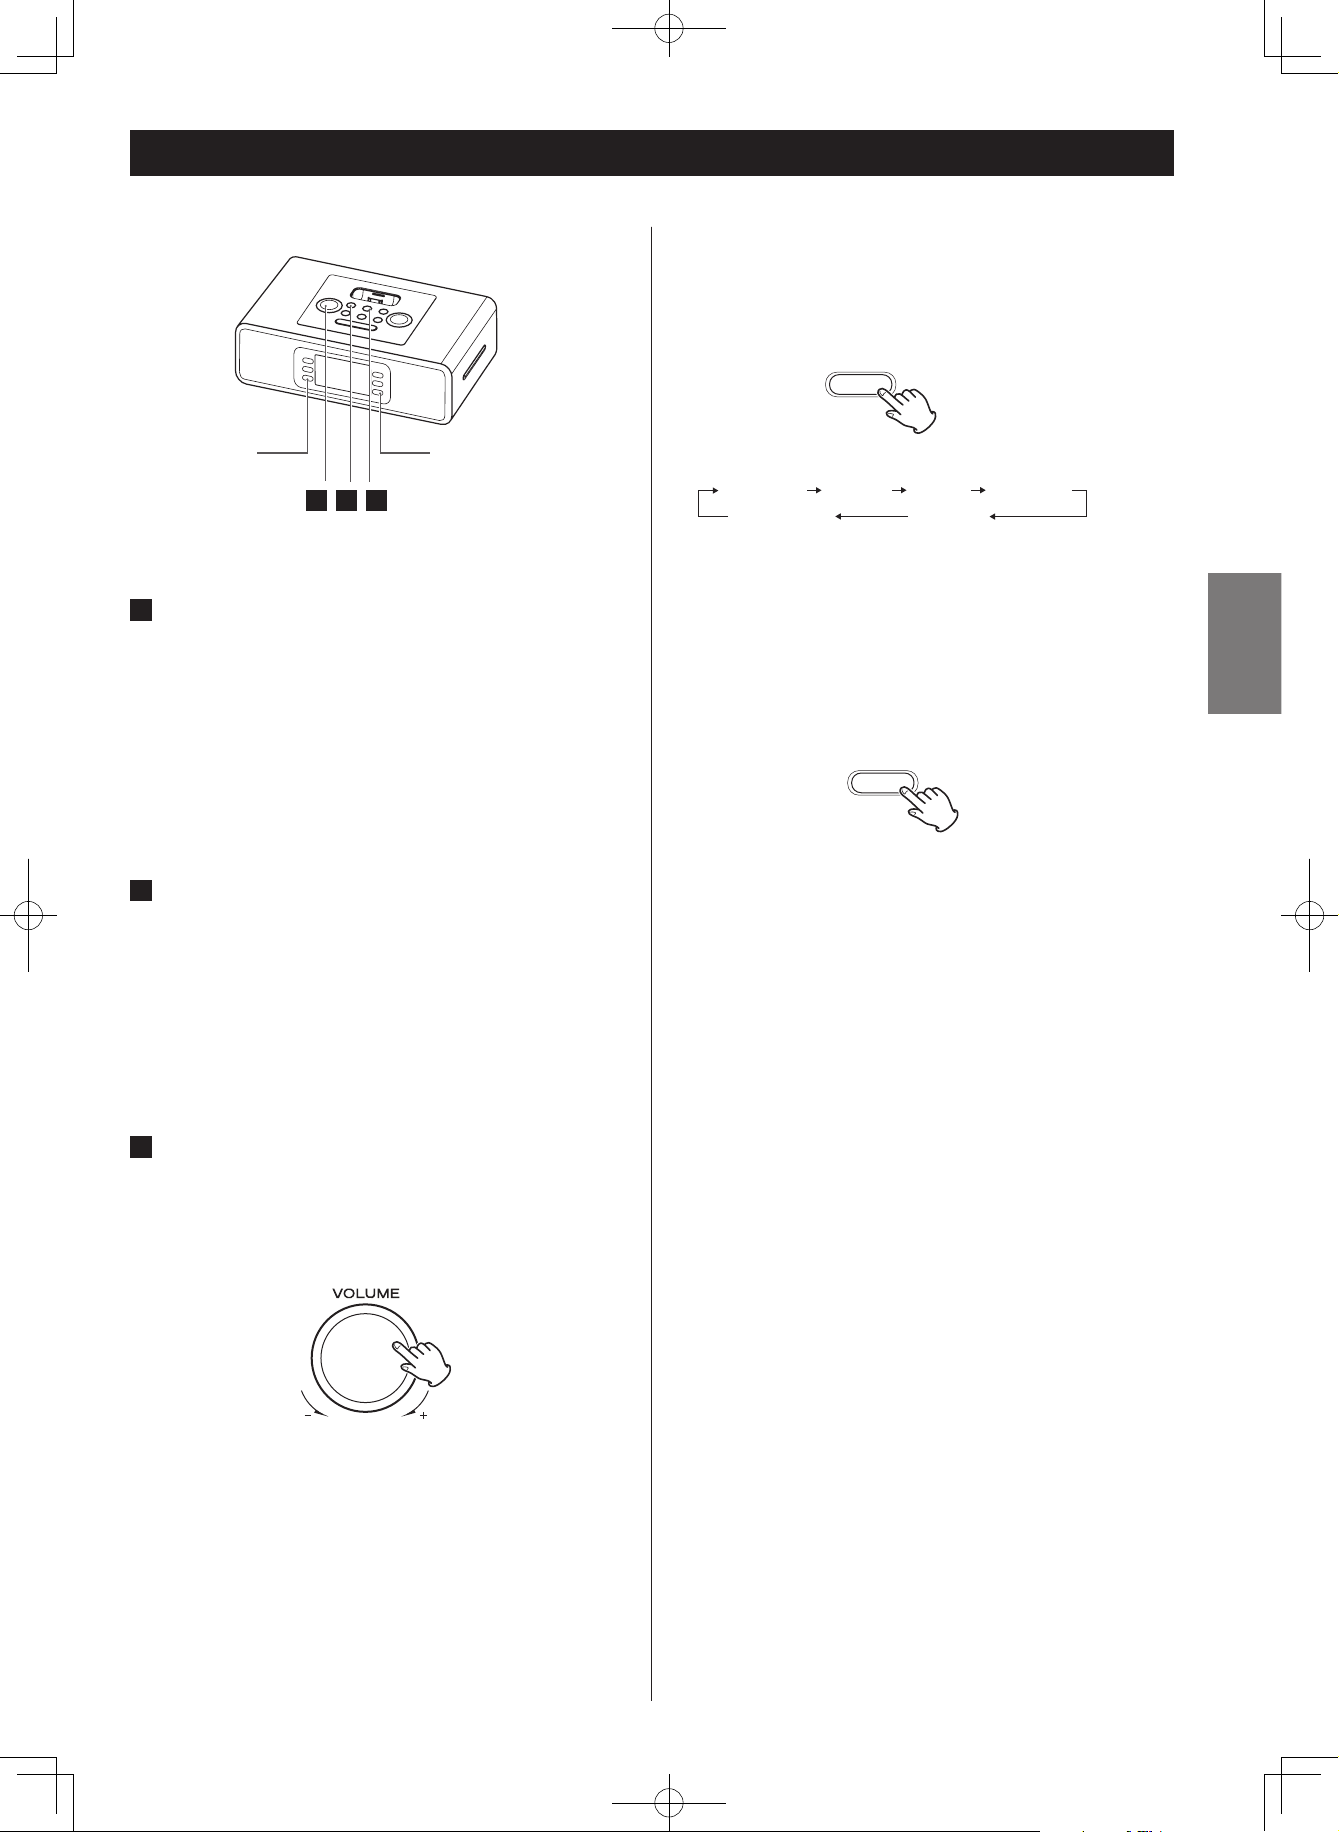
A
Speakers (Stereo)
B
PLAY/PAUSE (y/J)
In iPod mode, use this button to start or pause playback.
C
FUNCTION
Use these buttons to select the source you want to
listen to.
D
STANDBY/ON ( )
Use this button to turn the unit on or standby.
E
PRESET
In TUNER mode, use these buttons to select a preset station.
F
HD TAG
One touch “iTunes Tagging" ; tag a currently playing song
from HD Radio receiver and download it to your iPod.
G
EQ
Use this EQ button to select ROCK, POP, CLASSIC, JAZZ, BASS
or NORMAL for the desired sound effect.
H
Display
I
VOLUME
Turn the knob to adjust the volume level.
J
iPhone / iPod Dock
Before use, insert an appropriate Dock adapter in the Dock.
Insert an iPod or iPhone mobile digital device into this dock.
K
TUNING/SELECT (.//, / )
In TUNER mode, use these buttons to tune in a station.
iPod mode, use these buttons to skip tracks. Hold down this
button to search for a part of a track.
L
SNOOZE/DIMMER
After the TIMER ON time is reached, use this button
to turn the unit off for 6 minutes. This button is also used for
display dimming.
M
MEMORY
In TUNER mode, use this button to store preset channels into
memory.
N SLEEP
Use this button to set sleep timer.
O ALARM 1, ALARM 2
Hold down these buttons for more than 2 seconds to enter
the alarm setting mode.
These buttons are also used to turn on or off the ALARM
function.
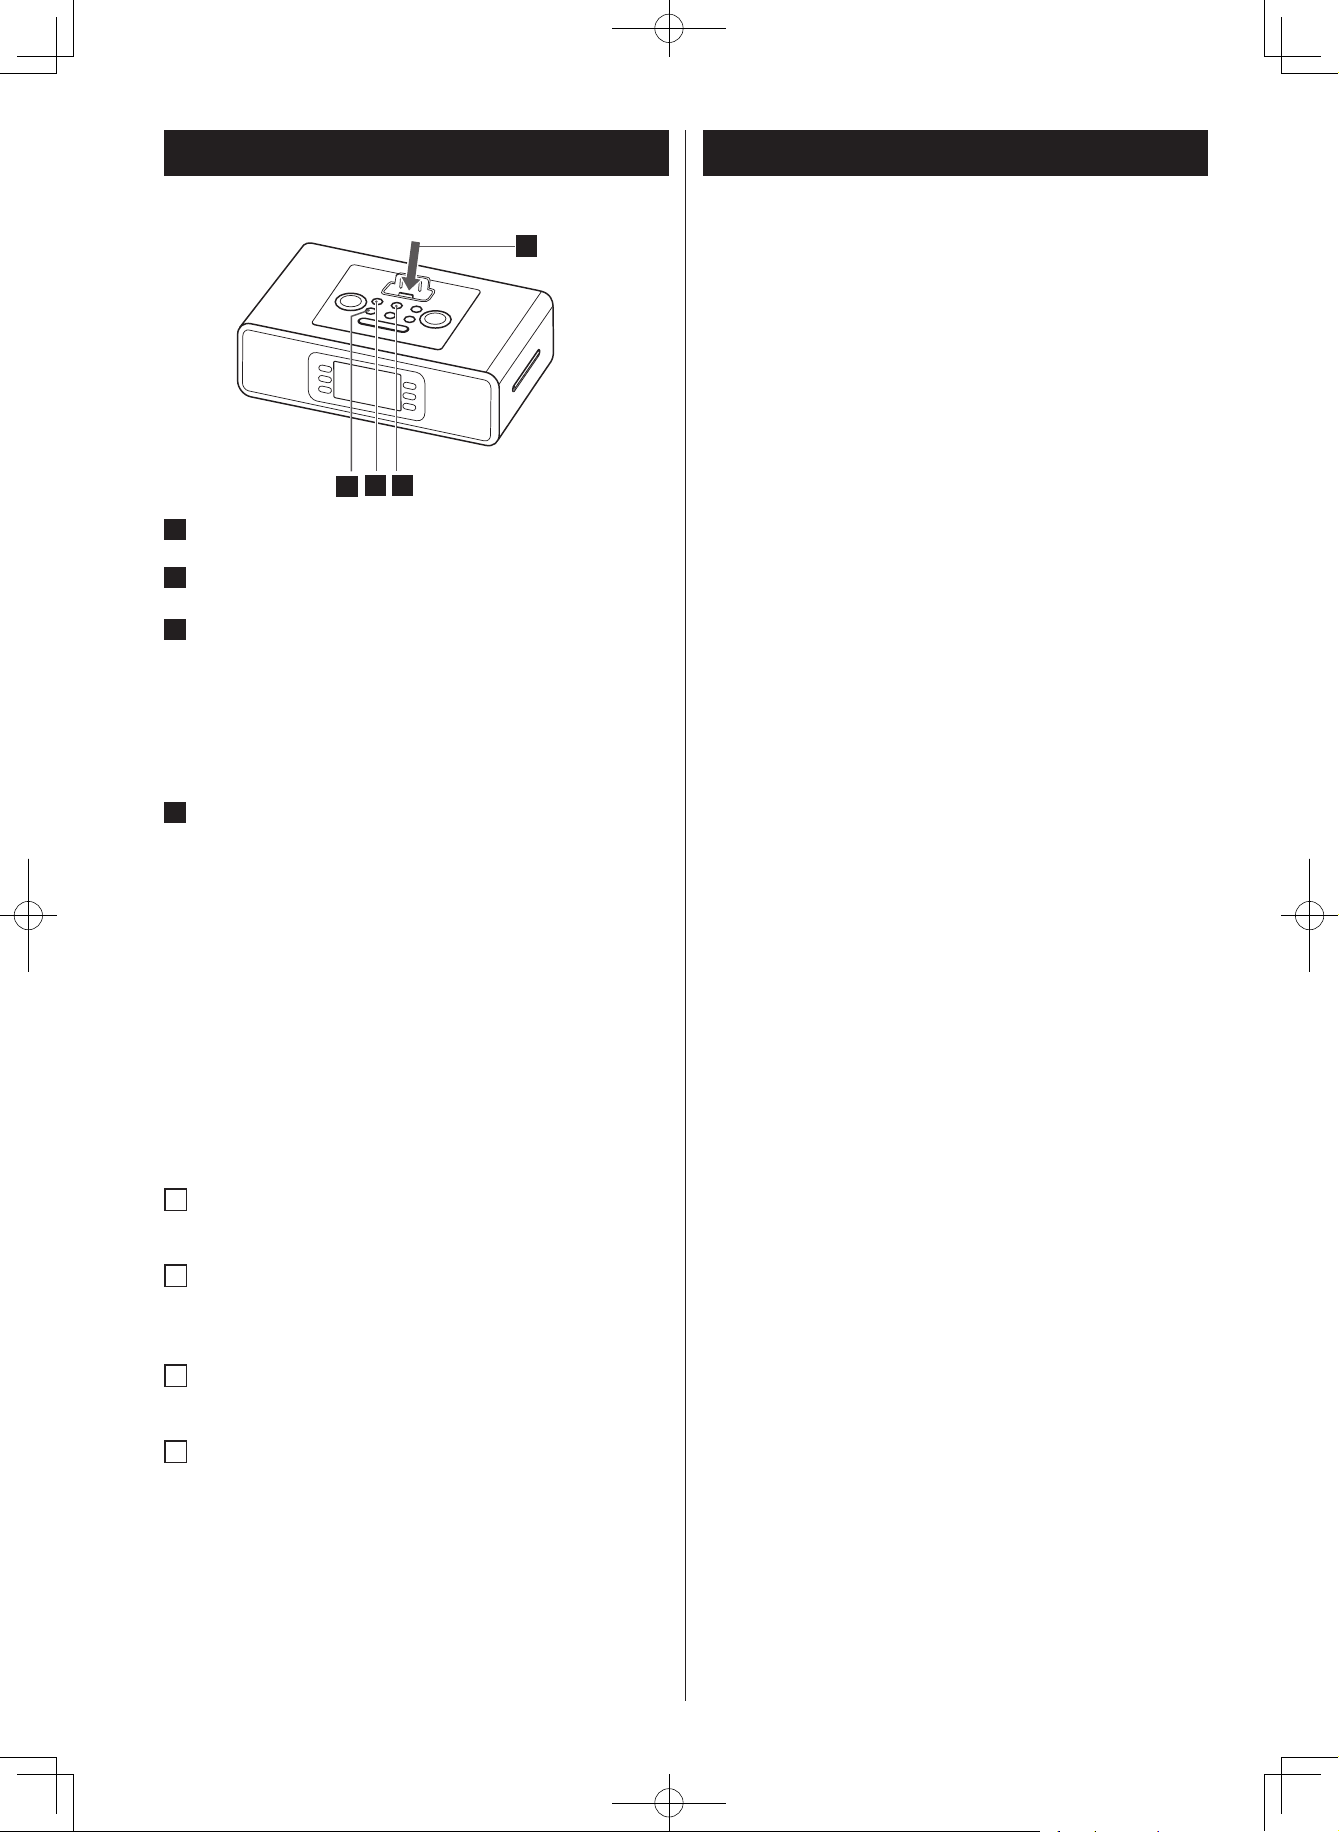
P
Clock ADJ
This button is used for clock adjustment and to set the time
and Calender.
Q
MUTING
Use this button to mute the sound.
HD-1.indd 8 2008.12.17 9:19:23 AM

ENGLISH
9
Display
A
iPod or iPhone indicator
B
HD Radio indicator
C
FM STEREO indicator
D
Band FM/AM, clock, AM/PM indicator
E
Time/Frequency Readout
F
SLEEP indicator
G
ALARM 1 indicator
H
ALARM 2 indicator
I
RBDS Messages/FUNCTION indicator
B
E
G
F
H
I
D
A
C
The provided Remote Control Unit allows the unit to be operated
from a distance.
When operating the remote control unit, point it towards the
remote sensor on the front panel of the unit.
< Even if the remote control unit is operated within the effective
range (5m), remote control operation may be impossible if
there are any obstacles between the unit and the remote
control.
< If the remote control unit is operated near other products
which generate infrared rays, or if other remote control
devices using infrared rays are used near the unit, it may
operate incorrectly. Conversely, the other products may also
operate incorrectly.
1
2
3
Remote Control Unit
HD-1.indd 9 2008.12.17 9:19:25 AM

10
The HD-1comes mounted with an adapter for iPod with “iPod
classic(160G)+iPhone 2G/3G”. To play your iPod through the
HD-1, you have first to check if the factory mounted adapter fits
your model of iPod. If it does not, you have to replace it with a
correct one, as explained below.
1
Remove the adapter from the Dock of the HD-1.
Hold the left and right sides of the adapter and gently pull it
up.
2
This unit includes dock adapters as follows:
“nano” for iPod nano 1st and 2nd generations.
“60GB (color) + Photo 40GB/60GB” for iPod with
Click Wheel (40 GB), iPod with color display.
“20GB + U2” for iPod with Click Wheel
(20 GB, U2 Special Edition).
iPod classic (160G) + iPhone 2G/3G ( Premounted )
< Use a commercially available adapter or a supplied one
with your iPod to play other iPods.
3
Insert the adapter into the Dock of the HD-1.
Fit the front edge of the adapter into the Dock, and then
press the back edge of the adapter onto the Dock until
a slight “click” is heard indicating the adapter is inserted
correctly.
Compatible iPod Software
In case your iPod will not work with the HD-1or with the remote
control unit, software update may solve the problem.
Visit the Apple website and download the latest iPod Software.
http://www.apple.com/uk/ipod/download/
“Made for iPod” means that an electronic accessory has been
designed to connect specifically to iPod and has been certified by
the developer to meet Apple performance standards.
“Works with iPhone” means that an electronic accessory has
been designed to connect specifically to iPhone and has been
certified by the developer to meet Apple performance standards.
Apple is not responsible for the operation of this device or its
compliance with safety and regulatory standards.
Getting started
1
2
Power Source
• This HD Radio Receiver operates from AC120V/60Hz line
power supply.
• The Remote Control operates on 1 Lithium battery, CR2032
(Included).
Insert the AC plug into a standard 120V AC outlet . The Radio
will automatically go into standby mode.
NOTE :
The system has an AC plug and will only fit into matching
AC outlets. This is a safety feature to reduce the possibility
of electric shock. If the plug will not fit in your AC outlets,
you should have the outlet changed by a qualified, licensed
electrician. Do not use an adapter to make the plug fit into
your outlet. This defeats the safety feature and could expose
you to electric shock.
Protect your Furniture
This model is equipped with non-skid rubber 'feet' to prevent
the product from moving when you operate the controls.
These 'feet' are made from non-migrating rubber material
specially formulated to avoid leaving any marks or stains on
your furniture. However certain types of oil based furniture
polishes, wood preservatives, or cleaning sprays may cause the
rubber 'feet' to soften, and leave marks or a rubber residue
on the furniture. To prevent any damage to your furniture we
strongly recommend that you purchase small self-adhesive felt
pads, available at hardware stores and home improvement
centers everywhere, and apply these pads to the bottom of
the rubber 'feet' before you place the product on fine wooden
furniture.
HD-1.indd 10 2008.12.17 9:19:27 AM
ENGLISH
11
EQ FUNCTION
Press the EQ button to select ROCK, POP, CLASSIC, JAZZ,
BASS or NORMAL for the desired sound effect.
MUTING FUNCTION
To mute the sound temporarily, press the MUTING button.
Press the MUTING button again to restore the sound.
< The "MUTE" indicator lights on the display to indicate that
the muting is engaged.
< If you change the volume or source during the muting, the
muting will be cancelled.
MUTING
Basic Operation
3 1 2
1
POWER ON
Press the STANDBY/ON button to turn the unit on.
< The unit turns on with the source that was last selected. If the
iPod that is in playback mode is inserted into the Dock, the
HD-1 will automatically turn on and start playback of the
iPod.
2
SELECT SOURCE
Press the FUNCTION/WAKE TO button to select a source.
< To listen to an external source connected to the AUX IN jack,
select AUX.
< If you select “iPod” when no iPod i s docked, the iPod
indicator "No iPod" on the display.
3
VOLUME ADJUSTMENT
Turn the VOLUME UP or DOWN knob on the HD-1 (or press
Volume+ or Volume- button on the remote control) to
adjust the system volume.
The volume is adjustable from MIN (0) to MAX (32). Hold
down the VOLUME – or + button to turn down or up the
volume continuously.
EQ
NORMAL ROCK POP CLASSIC
BASS JAZZ
MUTING EQ
HD-1.indd 11 2008.12.17 9:19:31 AM

12
Listening to the Radio
Extend the FM wire antenna fully for best reception (do not strip,
alter or attach to other antennas). The AM loop antenna should
be placed up to 12" away from the unit for best reception.
Rotate the AM loop antenna as required for best reception.
1
Press the STANDBY/ON button to turn on the unit.
2
Press the FUNCTION/WAKE TO button on the HD-1 to
select AM or FM band to listen to the radio. The radio
frequency appears at the center of the display.
3
Turn the TUNING/SELECT knob on the HD-1 (or press
.or / on the remote control) to tune in the desired
station. Press and hold the . or/ on t he remote
control for 2 seconds to Auto scan to the next clear station.
3
1
Storing Preset Stations
This unit allows you to program 20 stations on FM band and
10 stations on the AM band.
1
Turn the TUNING/SELECT knob on the HD-1 (or press .
or/ on the remote control) to tune to the station you
wish to store.
2
Press the MEMORY button once to store the station.
3
While preset number indicator flashing on the display, press
PRESET button repeatedly to select preset station.
4
Press MEMORY button again to confirm after your preset
number selected.
To store more stations, repeat steps
1
to 3 .
How to select a preset station
1
To select FM or AM, press th e FU NCTION/WAKE TO
button.
2
Press the PRESET button on the unit repeatedly until the
desired preset station is found.
NOTE :
•
If the preset memory mode is open and no button is pressed
for 10 seconds, the preset memory mode will quit unless
the MEMORY button is pressed before then to confirm and
close the preset memory mode. No frequency will be stored
after the 10 seconds runs out.
2
HD-1.indd 12 2008.12.17 9:19:34 AM

ENGLISH
13
To select FM or AM, press the FUNCTION/WAKE TO button.
You can listen to your favorite radio stations on this unit by
turning the TUNING/SELECT knob (or pressing . or/
on the remote control).
When an HD Radio signal is received, the HD icon lights on the
display.
NOTE :
• When an anal og signal is received, the HD icon is not
displayed.
• When a digital HD Radio signal is received, the HD icon lights
on upon the display.
HD TAG
TUNING/SELECT
HD TAG
HD Radio stations
1
While listening to broadcast music on an HD Radio Receiver,
the user can hear a song and tag it for feature review or
purchase from Apple iTunes store by pressing the HD TAG
button.
2
The radio equipped with an HD TAG button store data for
the currently playing song . Th e user can tag the song
without needing to know anything about it or its originating
station. The song information is stored on the radio until
your iPod is connected to it.
3
When your iPod is connected to it, the unit will transfer the
tagged song information to your iPod. Then your iPod stores
the data until it is synched with iTunes.
4
When your iPod is connected to your computer, iTunes will
imports the tag data, analyze it, and present it to the user in
the form of a tagged play list. iTunes then displays the song
title, artist, album and other information for each tagged
song.
5
With iTunes, you can save, review or delete any item in the
tagged play list and easily purchase any of the listed titles
through iTunes.
NOTE :
• HD tagging function can store 50 songs.
HD
TAG
Support iTunes Tagging function
• iPod with video(5G iPod)
• iPod classic
• 3G nano/4G nano
• iPhone 2G/3G
• 2G iPod Touch/2G iPod Touch
(software must use the latest version:<2008.Dec.>)
• iTunes tagging does not work on some older Apple products
not originally equipped with this feature. Please contact
Apple Inc. for compatibility.
HD-1.indd 13 2008.12.17 9:19:40 AM
14
Listening to your iPod or iPhone
1
Insert the iPod or iPhone into the Dock
2
Press the STANDBY/ON button to turn on the unit.
3
To select iPod mode
Press the FUNCTION/WAKE TO button (or press FUNCTION
button on the remote control) to select iPod mode. You
will hear the music playing from your iPod or iPhone, and
an iPod or iPhone icon will appear on the LCD display to
indicate iPod or iPhone Playing mode.
4
Press the PLAY/PAUSE button (y/J) again to pause play;
press again to resume play.
•
press the STANDBY/ON button to turn it off. Your iPod or
iPhone will continue charging while in the dock.
•
Make sure to use an appropriate Dock adapter (see “Getting
Started” on page 10).
•
When headphones are plugged into the iPod, sound comes
from both the speakers of the HD-1 and the headphones.
Using your iPhone
1
When your iPhone is successfully detected in the dock, the “
iPod” is shown on the display.
2
During playback, hold . or/ on the remote control to
start high speed search. When the desired passage is found ,
release the key. Normal playback will resume.
3
You can watch your favorite movies on your iPhone screen
or TV.
4
If there is an incoming call during playback of music or
movies, the word “Decline” or “Answer” will appear on
the iPhone screen * if your iP hone is unlocked (or has
warning notice “side to unlock”). Normal playback will
resume at the end of the call.
NOTE :
*
: if your iPhone is unlocked, the iPhone will be return the
movies Menu, can not auto play.
1
4
2 3
Docking an iPod to this system
You can connect iPod video on TV through the VIDEO OUT in
yellow jack at the back of the unit.
• Make the following settings on your iPod's menu to output
video to a TV via this system's dock.
In the [Video] menu, select [Video Settings]. Set [TV OUT] to
[On] or [Ask].
If you have set [TV OUT] to [Ask], your iPod prompts you each
time you play a video to specify whether to output it to a TV.
NOTE :
If you output video to a TV from your iPod, the video is not
displayed on the iPod's screen.
*iPod touch does not contain this menu. You will have to
specify whether to a output video to a TV each time you play
it.
*
: Old version software.
Using the alarm on your iPod touch or iPhone
• If you specify [Slide to power off] on your iPod touch, you
cannot use the alarm even if the iPod touch is docked to this
system.
To use the alarm on your iPod touch, do not select [Slide
to power off]. (The screen can be turned off without any
problem.)
• If Video is displayed on your iPod touch's screen, you cannot
use the alarm even if the iPod touch is docked to this system.
To use the alarm on your iPod touch, select any item other
than Video.
• If video is displayed on your iPhone. You can not use the alarm
by video. the alarm of iphone will be music automatically.
iPod video output
HD-1.indd 14 2008.12.17 11:24:31 AM

ENGLISH
15
3
Turn on and play your device.
4
Turn the VOLUME knob on the unit (or press Volume+/-
buttons on the remote control) to adjust the system volume.
You may need to adjust your device volume, too.
When using the PHONES jack of your mini player, you must
adjust the volume of the mini player or you may hear no
sound from your HD-1.
• Turning the volume of the mini player up too high may cause
the sound from your HD-1 to be distorted. In this case, reduce
the volume of the mini player until the distortion stops and
then adjust the volume level of the HD-1 to a comfortable
listening level.
LINE Out Operation
You can connect the HD-1 to another line-level device such as
an amplifier or recording device through the LINE OUT Jack
located at the back of the unit.
The volume setting on the HD-1 does not affect the line level.
Adjust volume level using the volume control on the device
you connect to.
If you are using your iPod without a docking port, other MP3
player or other portable audio device, it can still be played on
the HD-1.
1
Connect the PHONES jack (audio output jack) of a portable
audio player to the AUX IN jack of the HD-1 using the
supplied stereo mini plug cable.
2
Select "AUX" using the FUNCTION/WAKE TO button.
Listening to a non-docking iPod or other portable audio devices
FUNCTION
(WAKE TO)
2
4
DEVICE
HD-1.indd 15 2008.12.17 9:19:46 AM
16
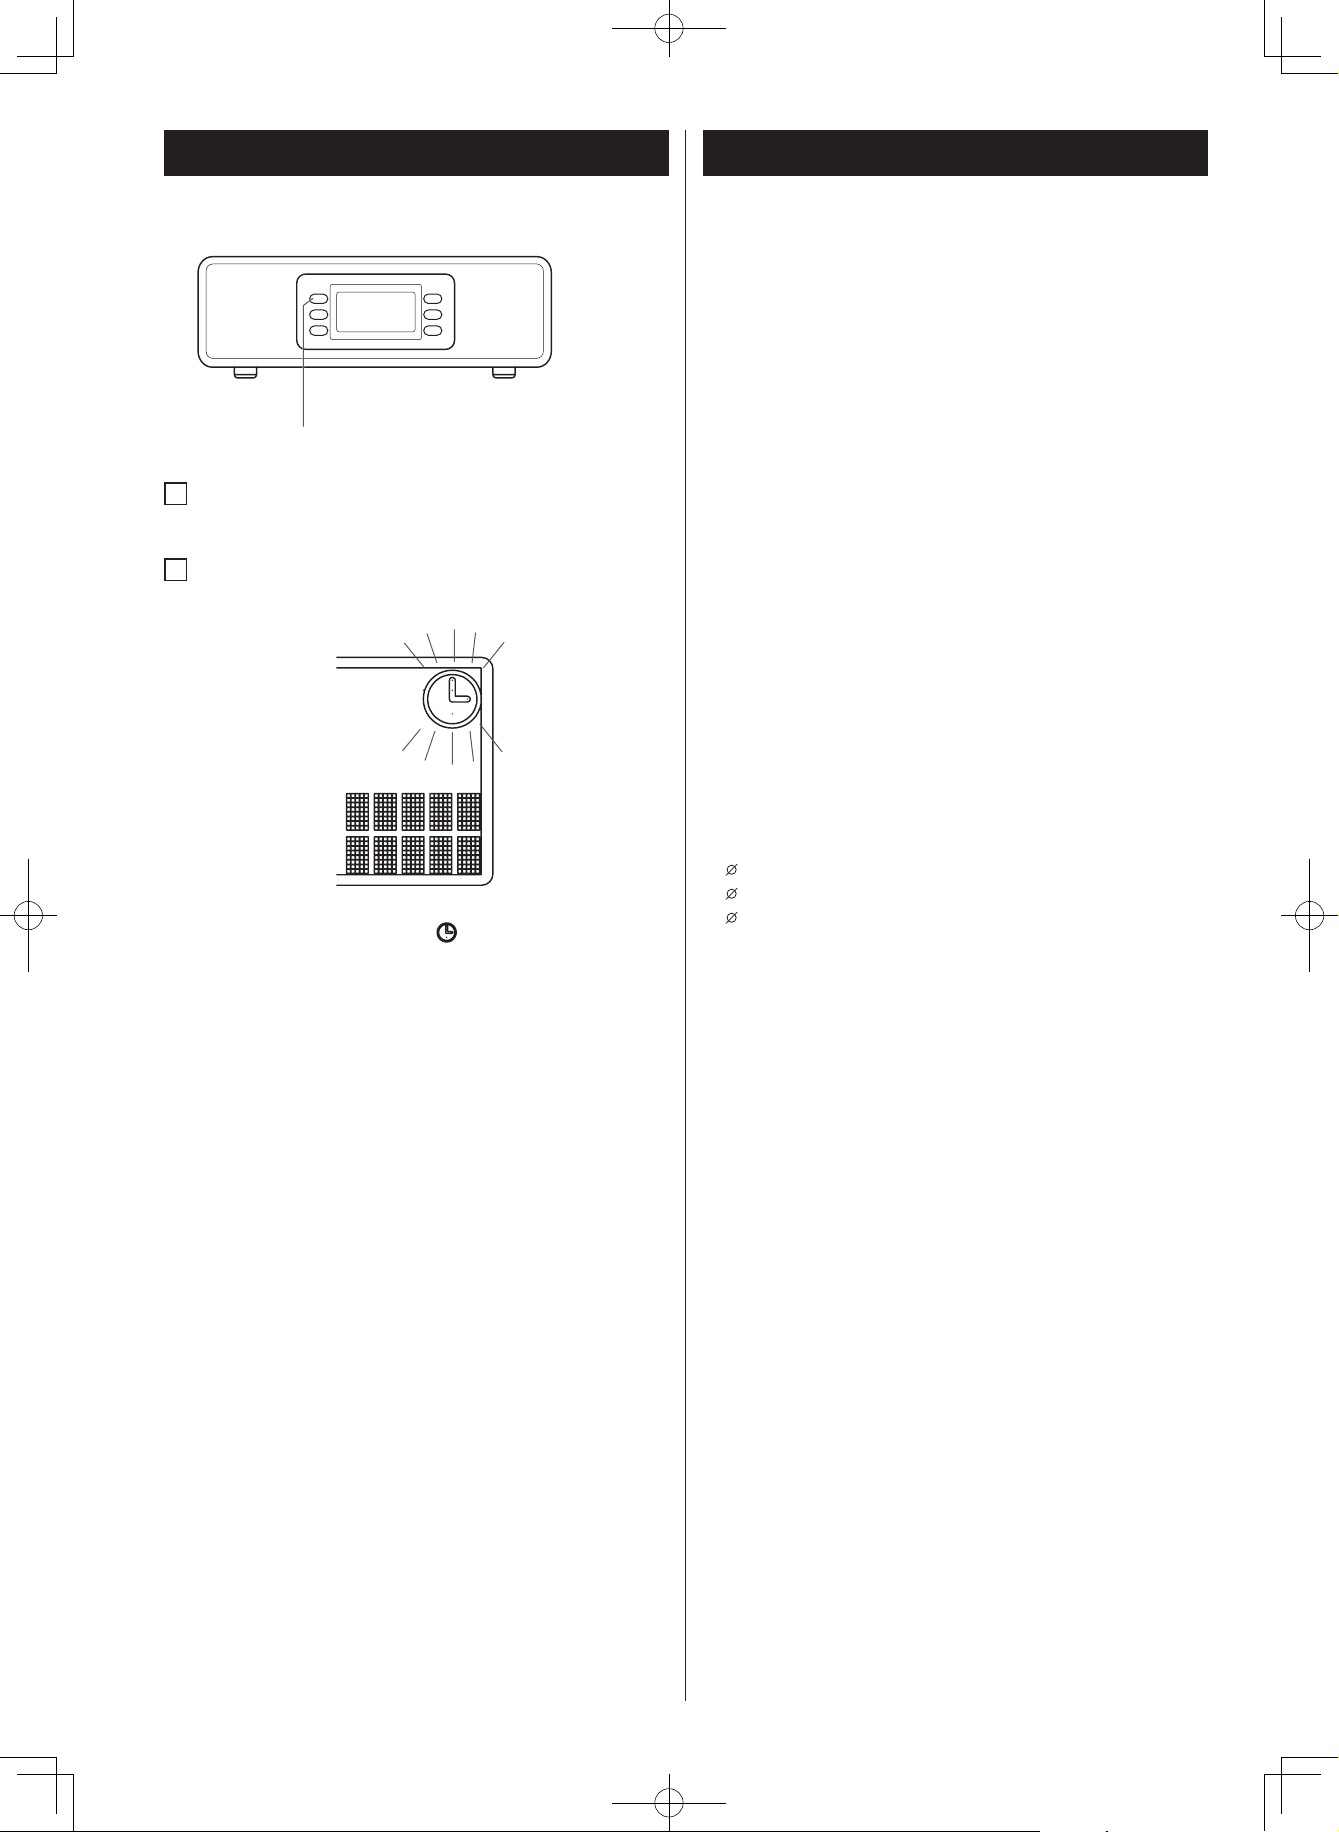
Setting the Clock Time and Calendar
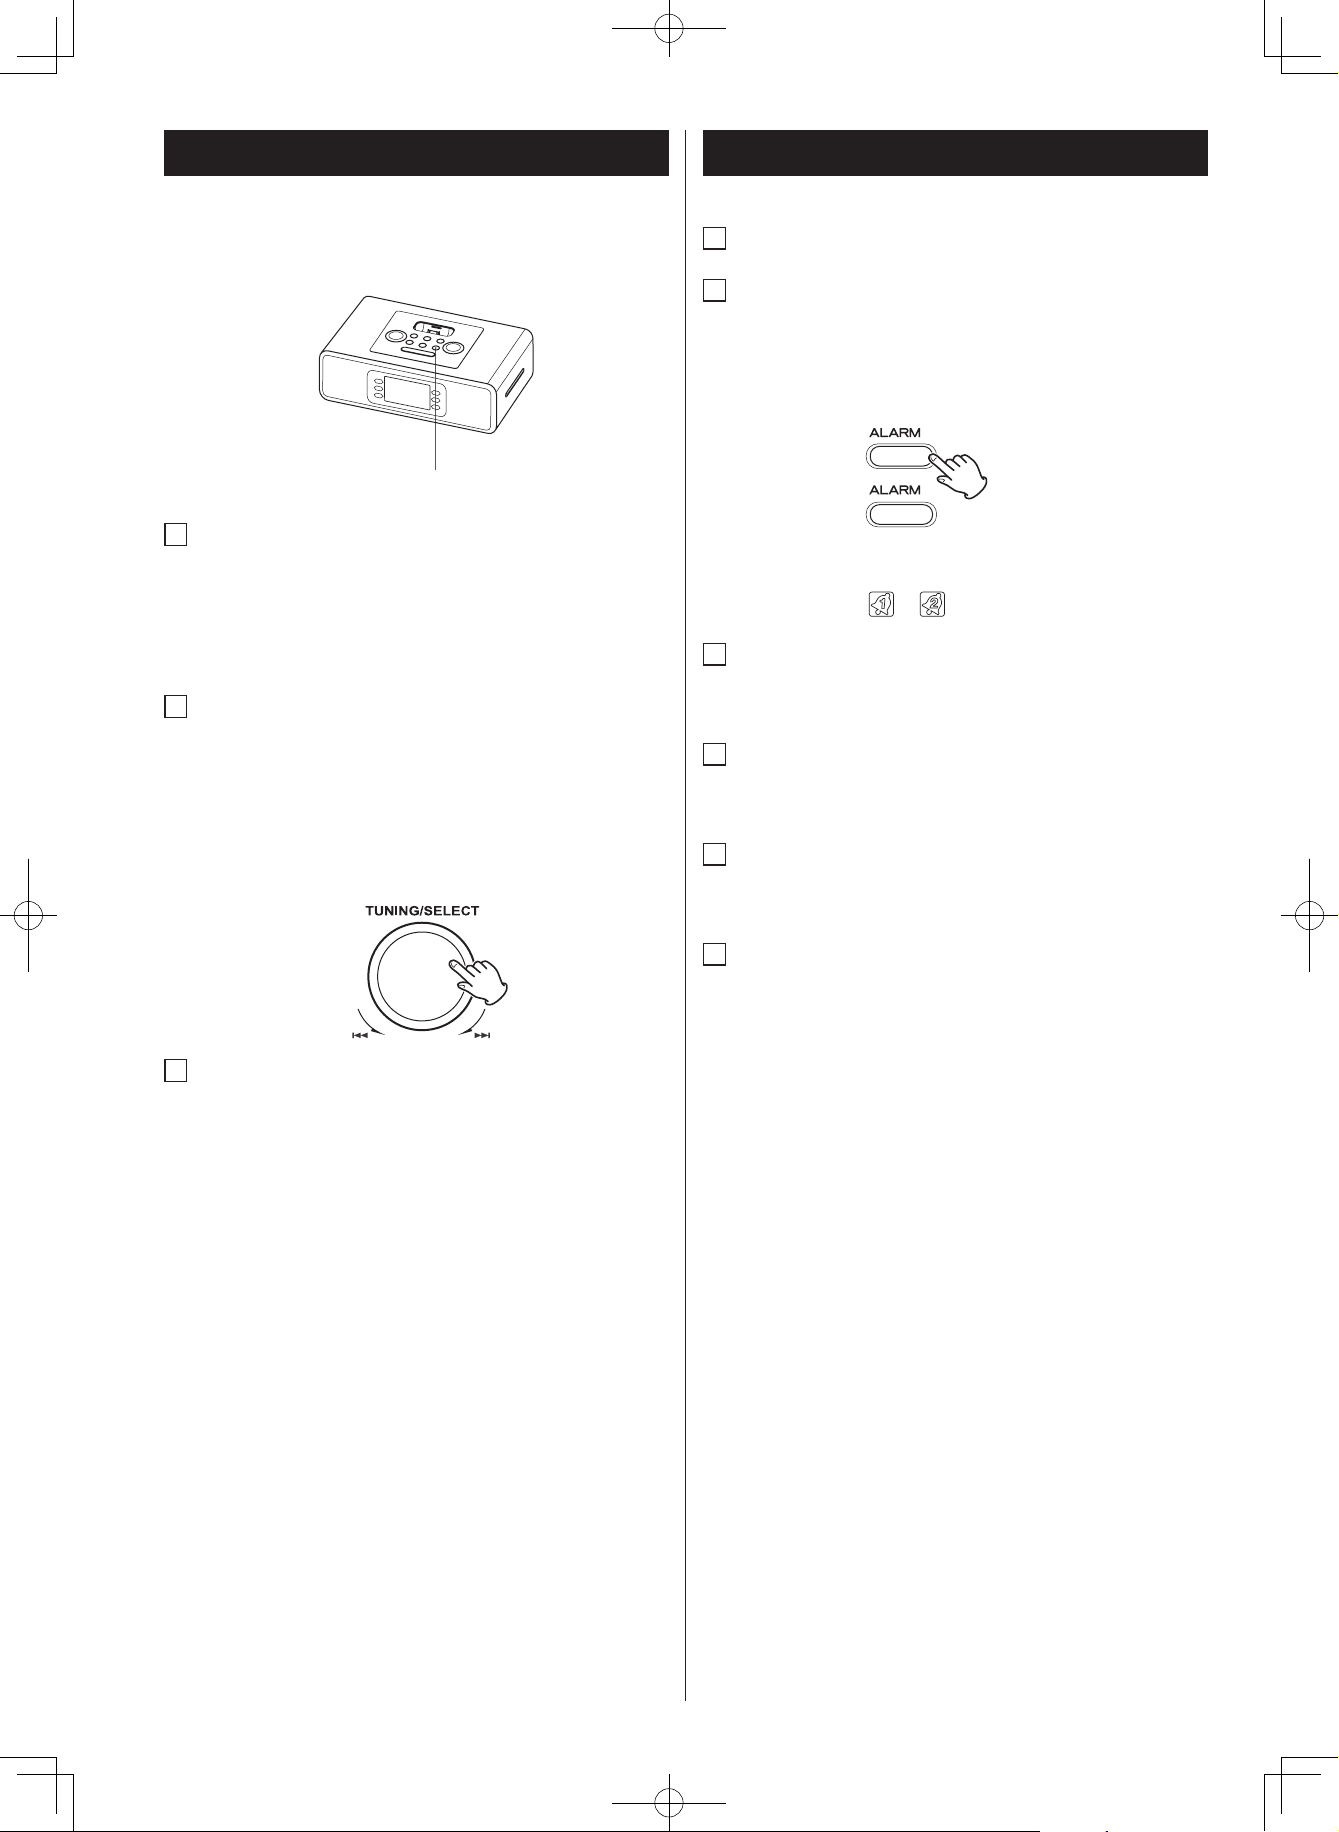
1
Press and hold the Clock ADJ Button located on the top of
the unit until 12H or 24H appeared. Select your desired clock
display either 12 hour or 24 hour by turning TUNING /
SELECT Knob (or press . or/ on the remote control).
Then press the Clock ADJ Button again to confirm 12H or
24H mode setting.
2
The hour display at the center will blink. Turn the TUNING /
SELECT Knob (or press . or/ on the remote control)
to set the current time, then press the Clock ADJ Button
again to confirm clock setting. (Note: if the system is set to
12-hour mode, the AM or PM indicator will be lighted on.)
The min u t e di splay will now bli n k . Fo llow the same
procedure to set the minute.
3
The month, date and year display at the lower will blink
successively. or turn TUNING /SELECT Knob (or press .
or/ on the remote control) until current month, date,
year is displayed. Press the Clock ADJ Button to confirm
month, date or year setting.
Clock ADJ
1
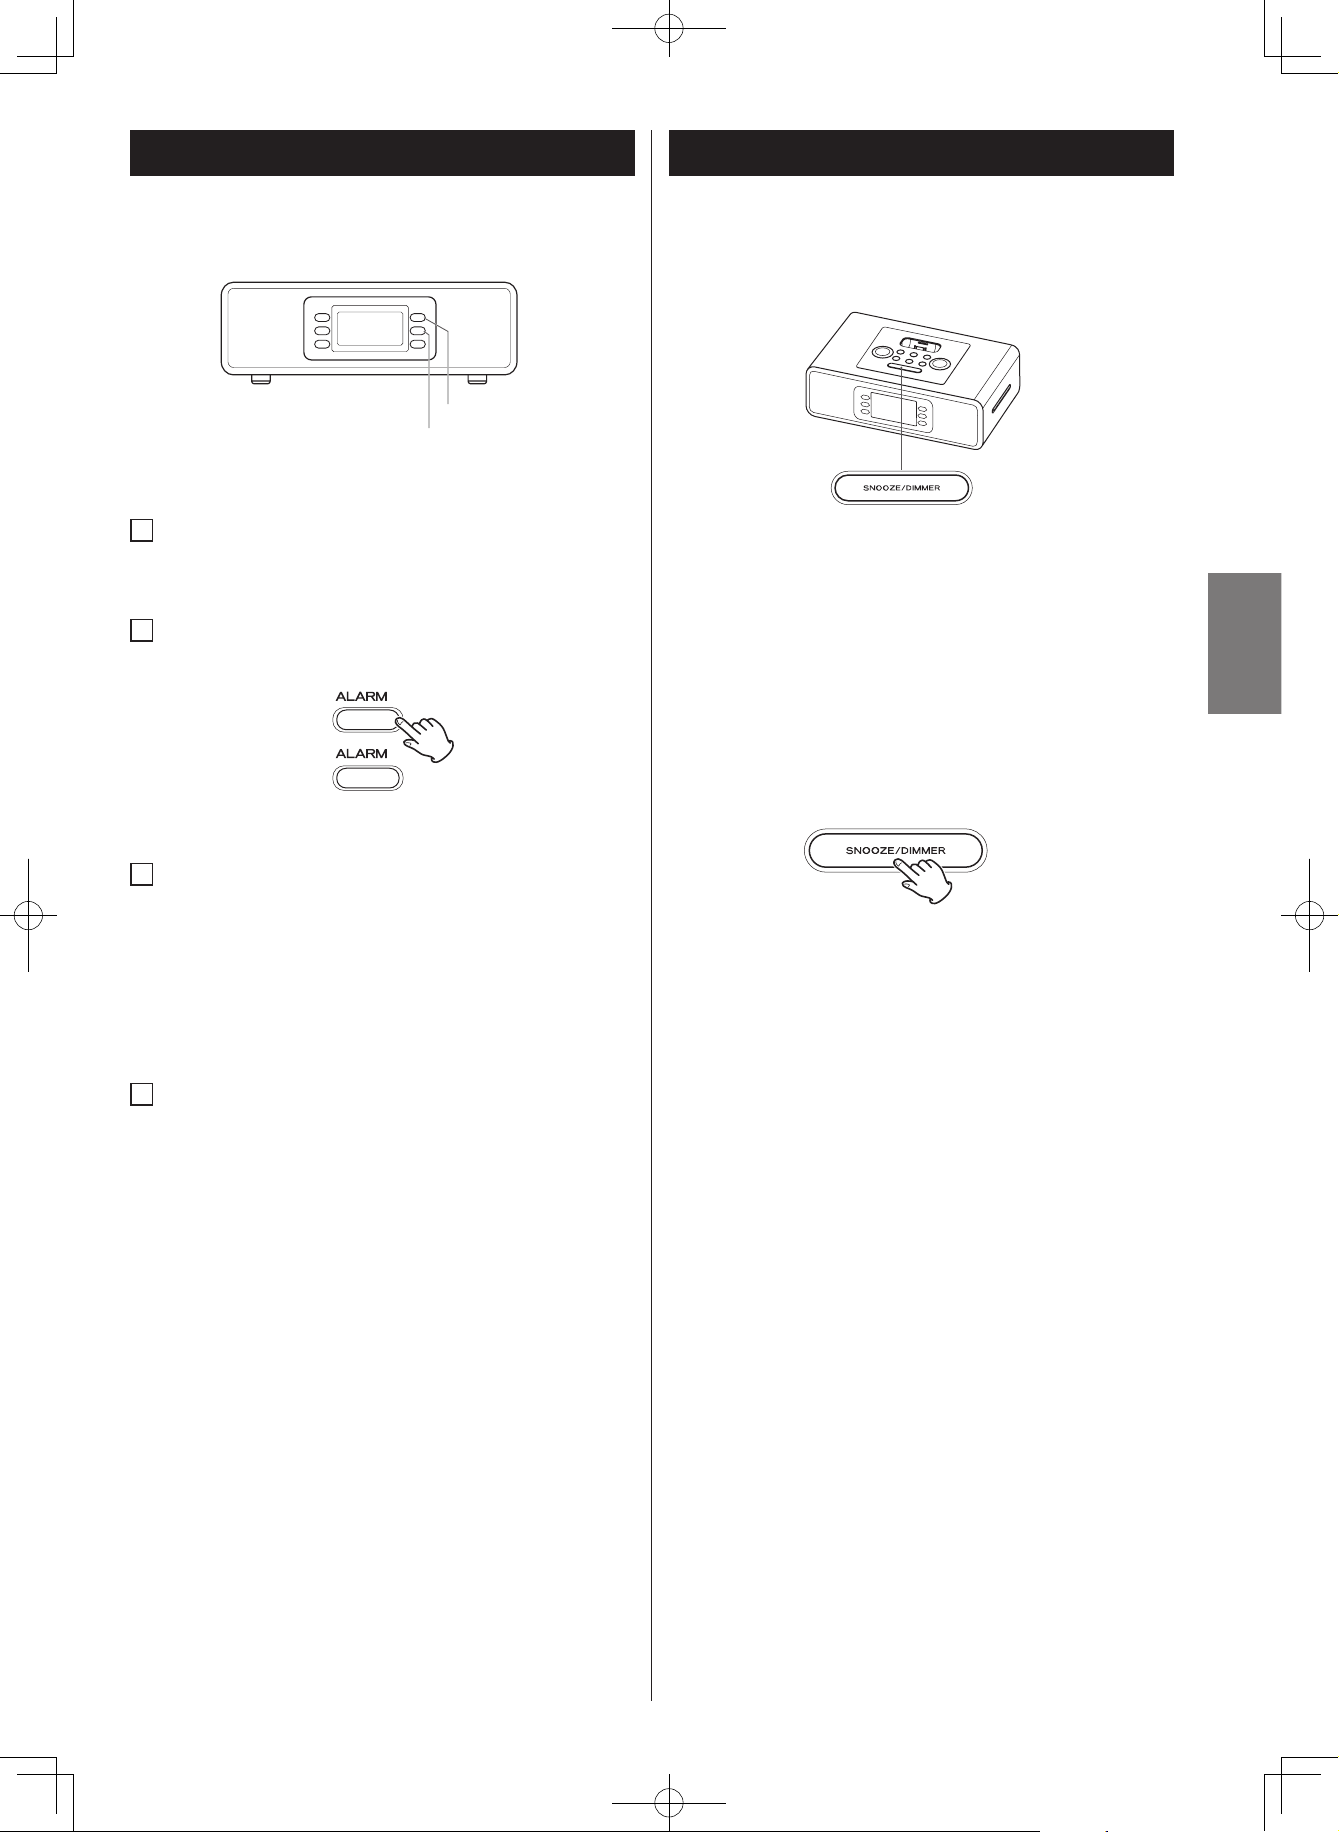
The unit can set two Alarm Times.
2
Press and hold the ALARM 1 or ALARM 2 Button until the
display blinks. Press the FUNCTION/WAKE TO Button to
select mode of HD RADIO FM, HD RADIO AM, IPOD or
BUZZER to wake to, then press ALARM 1 or ALARM 2
Button to confirm.
Alam indicator ( or ) appears on the display
3
The Hour display will blink, turn TUNING /SELECT Knob (or
press or Button on the remote control) to select, press
ALARM 1 or ALARM 2 Button to confirm.
4
The Minute display will blink, turn TUNING /SELECT Knob
(or press or Button on the remote control) to select, press
ALARM 1 or ALARM 2 Button to confirm.
5
The Volume level display will blink, turn VOLUME DOWN or
VOLUME UP Knob to select, press ALARM 1 or ALARM 2
Button to confirm.
6
The Alarm 1 or Alarm 2 icon will light up on display.
• If the source is set to "iPod", but when iPod is not setting,
the unit will turn on into buzzer mode.
• When the source is set to "TUNER"and the unit turns on, it
will tune in to the station you selected last time.
NOTE :
• Once you set the alarm time, the alarm will be automatically
armed. The Alarm icon will appear to indicate the alarm is
armed. Make sure to adjust volume level for comfortable
wake up volume.
1
2
Setting the Alarm Time
HD-1.indd 16 2008.12.17 9:19:48 AM
ENGLISH
17
DIMMER function
You can change the front panel’s display brightness. Use the
DIMMER button to change the brightness among 4 levels.
You can change display brightness by using DIMMEN botton.
How to use the snooze function
After the ON time is reached, press the SNOOZE button and
the unit will turn off for 6 minutes then turn on again.
You can use this function repeatedly during 1 hour alarm
cycle.
Snooze/Dimmer Operation
1
Set the alarm time per Setting Alarm time. To preview the
alarm time, just press the ALARM 1 button or ALARM 2
button to turn on the Alarm function.
2
Press the ALARM 1 button or ALARM 2 button again to
arm or disarm the alarm.
3
When the alarm is sounding, press the *STANDBY/ON
button to turn the Alarm OFF. The alarm will come on again
the next day at the same time.
*: SLEEP
*: iPod/iPhone connecting
*
: Press the ALARM 1 button
*
: Press the ALARM 2 button
4
To stop the alarm from coming on the following day, press
the ALARM 1 button or ALARM 2 button to turn it OFF. The
Alarm Icon will disappear to indicate the alarm is disarmed.
• If the alarm is not turned off after it sounds it will play for
approximately 1 hour then turn off automatically. This cycle
will repeat every 24 hours unless the controls are changed.
NOTE :
• When setting the unit to “Wake to iPod,” Your iPod must be
properly docked and turned off or the alarm will not sound.
• When you select “Wake To iPod,” be sure your iPod has
enough songs to play for 1 hour, otherwise set the iPod
repeat mode to ON. If there is no iPod is present or there
is no music on y our iPod at ala rm t ime, the HD -1 w ill
automatically switch to buzzer alarm.
• Alarm function is still working at the Standby ON mode.
• Playback vol ume wi ll gradually i ncrease up to y our set
volume when the unit is turned on by Alarm.
ALARM 1
ALARM 2
1
2
Using the Alarm
HD-1.indd 17 2008.12.17 9:19:51 AM
18
1
When the HD-1 is OFF or while listening to your iPod or the
radio, press the SLEEP button to enter sleep mode.
2
You can adjust the sleep timer from 120, 90, 75, 60, 45, 30,
15 minutes by pressing the SLEEP button again.
•
By the "SLEEP" mode, t he" " icon is blinking on the
display.
•
Pressing the SLEEP button to “00” will turn off the unit.
•
When the display changes back to show the real time,
pressing the SLEEP button once will show the sleep time
remaining. Pressing it again will change sleep time to the
next lowest increment.
•
HD-1 has independent volume setting for sleep mode so
you can adjust the sleeping volume without affecting the
alarm volume. Turn the VOLUME knob (or press Volume+
and Volume- Button on the remote control) to adjust sleep
volume. The sleep volume will remain at that level the next
time you enter sleep mode until controls are changed.
•
To stop SLEEP mode at any time, press the STANDBY/ON
button.
•
The unit will automatically turn off after the selected time.
Sleep mode has a Gentle Sleep feature which gradually
lowers the volume.
Specifications
TUNER Section
Frequency Range . . . . FM: 87.5 MHz to 107.9 MHz
( 200 kHz step )
AM: 520 kHz to 1710 kHz
( 10 kHz step )
GENERAL
Total Output Power . . . . . . . . . . . . . . . . . . . 6 W (L+R)
Power Requirement . . . . . . . . . . . . . . . AC 120 V, 60 Hz
Dimension (W x H x D) . . . . . . . . (375 x 172 x 244 ) mm
Weight (Net) . . . . . . . . . . . . . . . . . . . . . . . . . . . 3.7 kg
Standard Accessories
Remote control (RC-1219) x 1
Battery for Remote control Unit (CR2032) x 1
Dock adapter x 4
(adapter “iPod classic (160G) + iPhone 2G/3G” premounted)
Video cable
Stereo mini plug cable
AM loop antenna
FM antenna
Owner's Manual
Warranty Card
Connectivity
30-pin male connector for iPod / iPhone
3.5mm stereo headphone jack
3.5mm aux. in jack
3.5mm Video out jack
FM antenna jack ( F-Type connector )
AM antenna connector ( 2-Pin type )
• Design and specifications are subject to change without
notice.
• Weight and dimensions are approximate.
• Illustrations may differ slightly from production models.
Sleep Operation
SLEEP
HD-1.indd 18 2008.12.17 9:19:53 AM

ENGLISH
19
If you have problems with your system, look through this chart
and see if you can solve the problem yourself before calling your
dealer or TEAC service center.
General
The unit does not turn on.
The AC plug may not be connected properly. Check the
connection.
The wall outlet may not function. Try another outlet.
When playing music, the sound gets distorted.
The volume level on the connected device or the HD-1 is
set too high. Decrease the volume until the distortion has
disappeared.
The source sound is distorted. If the original sound source
(MP3) on your iPod is poor quality, the distortion and noises
are easily noticed with high-power speakers.
The remote control does not operate properly.
The installed battery is weak. Replace with a new battery.
It is not aimed to the HD-1 or too far away from it. Move
within 20 feet of the unit and point the remote control
toward the HD-1.
Remote functions like play/pause skip up, skip down does
not work
Depending on the device these functions might be disabled
due to differences in software.
Please refer to owner’s manual of the device you are using.
iPod or iPhone Player
Your iPod or iPhone does not fit into the built-in universal
dock.
The installed dock adapter is not the correct one. Check
whether a correct dock adapter is installed.
There m ight be some obstruc tions on the dock. Check
whether there are any obstructions on the connector and on
the dock. If everything is secured, place your iPod back into
the dock.
It does not recognize your iPod or Phone when docked.
Your iPod or iPhone may not be properly docked. Take your
iPod or iPhone out of the dock, and remove any obstructions
on the connector from the dock and on your iPod or iPhone.
Place your iPod or iPhone back into the dock.
Your iPod or iPhone is frozen or locked up. Check whether
your iPod or iPhone operates correctly before placing it back
into the dock. Please refer to the owner’s instruction manual
of your iPod or iPhone.
The software of your iPod or iPhone is outdated. Upgrade
the software on your iPod or iPhone. For the details on how
to upgrade the software on your iPod or iPhone, please visit
Apple’s website: http://www.apple.com.
Your iPod or iPhone is not charged even though it is in the
dock.
Your iPod or iPhone might not be properly docked. Take your
iPod or iPhone out of the dock, and remove any obstructions
on the connector from the dock and on your iPod or iPhone.
Place your iPod or iPhone back into the dock.
Your iPod or iPhone is frozen or locked up. Check whether
your iPod or iPhone operates correctly before placing it back
into the dock. Please refer to the owner’s instruction manual
of your iPod or iPhone.
Your iPod or iPhone will not be charged in Radio mode to
avoid major radio interference.
Tuner
AM band is too noisy.
The reception at the set location is poor. Rotate the AM loop
antenna position for best reception.
Move the antenna away from the unit to avoid interference.
FM band is too noisy.
The reception at the set location is poor. Check that the FM
antenna is properly connected to the jack in the rear of the
unit.
Stretch the antenna to a “T” shape and move slightly closer
to a window.
Troubleshooting
HD-1.indd 19 2008.12.17 9:19:54 AM

Z
This appliance has a serial number located on the rear panel. Please record
the model number and serial number and retain them for your records.
Model number Serial number
SKTE -T0811002
PREPARED IN CHINA
NOV 2008
TEAC CORPORATION
1-47, Ochiai, Tama-shi, Tokyo 206-8530, Japan Phone: (042) 356-9155
TEAC AMERICA, INC. 7733 Telegraph Road, Montebello, California 90640 Phone: (323) 726-0303
TEAC CANADA LTD. 5939 Wallace Street, Mississauga, Ontario L4Z 1Z8, Canada Phone: (905) 890-8008
TEAC MEXICO, S.A. De C.V
TEAC UK LIMITED Unit 19 & 20, The Courtyards, Hatters Lane, Watford, Hertfordshire, WD18 8TE, U.K. Phone: (0845) 130-2511
TEAC EUROPE GmbH Bahnstrasse 12, 65205 Wiesbaden-Erbenheim, Germany Phone: 0611-71580
Río Churubusco 364, Colonia Del Carmen, Delegación Coyoacán, CP 04100, México DF, México Phone:(5255)5010-6000
iPod is a trademark of Apple Inc., registered in the U.S. and other countries. iPhone is a trademark of
Apple Inc. iTunes is a trademark of Apple Inc., registered in the U.S. and other countries. All logos and
brands are property of their respective owners. HD Radio ™ Technology manufactured under license
from iBiquity Digital Corp. U.S. and foreign patents. HD Radio™ and the HD Radio logos are proprietary
trademarks of iBiquity Digital Corp. iPod or iPhone are not included in this package. Features and
specifications are subject to change without prior notification.
HD-1.indd 20 2008.12.17 9:25:30 AM
 Loading...