


432555-01
Magazine
Quick Start Guide
SuperLoader
™
For more information about Tandberg Data’s
quality products, visit www.tandberg.com
Tandberg Data publications can be requested from a Tandberg Data Sales Representative or ordered directly from
Tandberg Data.
For the latest information about Super DLTtape™ and DLTtape™ products and accessories, visit the Tandberg Data
web site at www.tandberg.com or the Technical Support site at www.dlttape.com.
Tandberg Data reserves the right to make changes and improvements to its products, without incurring
any obligation to incorporate such changes or improvements in units previously sold or shipped.
Publication Number: 432555-01
© 2002 Tandberg Data. All rights reserved. Tandberg Data and the Tandberg Data logo are trademarks of Tandberg
Data ASA. The DLTtape logo and the Super DLTtape logo are trademarks of Quantum Corporation, registered
in the U.S.A. and other countries. DLTtape, Super DLTtape, SuperLoader, and the SuperLoader logo are
trademarks of Quantum Corporation. Products mentioned herein are for identification purposes only and may be
trademarks or registered trademarks of their respective companies. All other trademarks are the property of their
respective owners.
On the Eject submenu, scroll to Right
Magazine or Left Magazine,
depending on which magazine you
want to eject and press Enter.
The magazine pops forward so that the
front of the magazine is no longer flush
with the front panel.
With one hand, grasp the magazine by
the handle and slide it forward to
remove. Place your other hand under
the magazine to support it and prevent
it from falling.
Note: If you need to remove the
magazine when the autoloader is
powered off, remove it manually.
On the front panel, scroll to
Commands and press Enter.
On the Commands submenu, scroll
to Eject and press Enter.
d
1
Unpack the
magazine
This guide contains
a sequence of steps
recommended for
unpacking and
installing a magazine.
Place the carton on an ESD-safe work surface.
Use a utility knife or scissors to cut the
packing tape along the length and ends
of the carton.
Fold open the box flaps.
Reach into the carton and lift out the
magazine and foam.
Remove the foam caps from each end of
the magazine.
Place the magazine on a flat surface and
rotate the assembly using the manual
indexing wheel.
When the carrier assemblies rotate freely,
the magazine is ready for use.
a
b
e
2
3
f
g
c
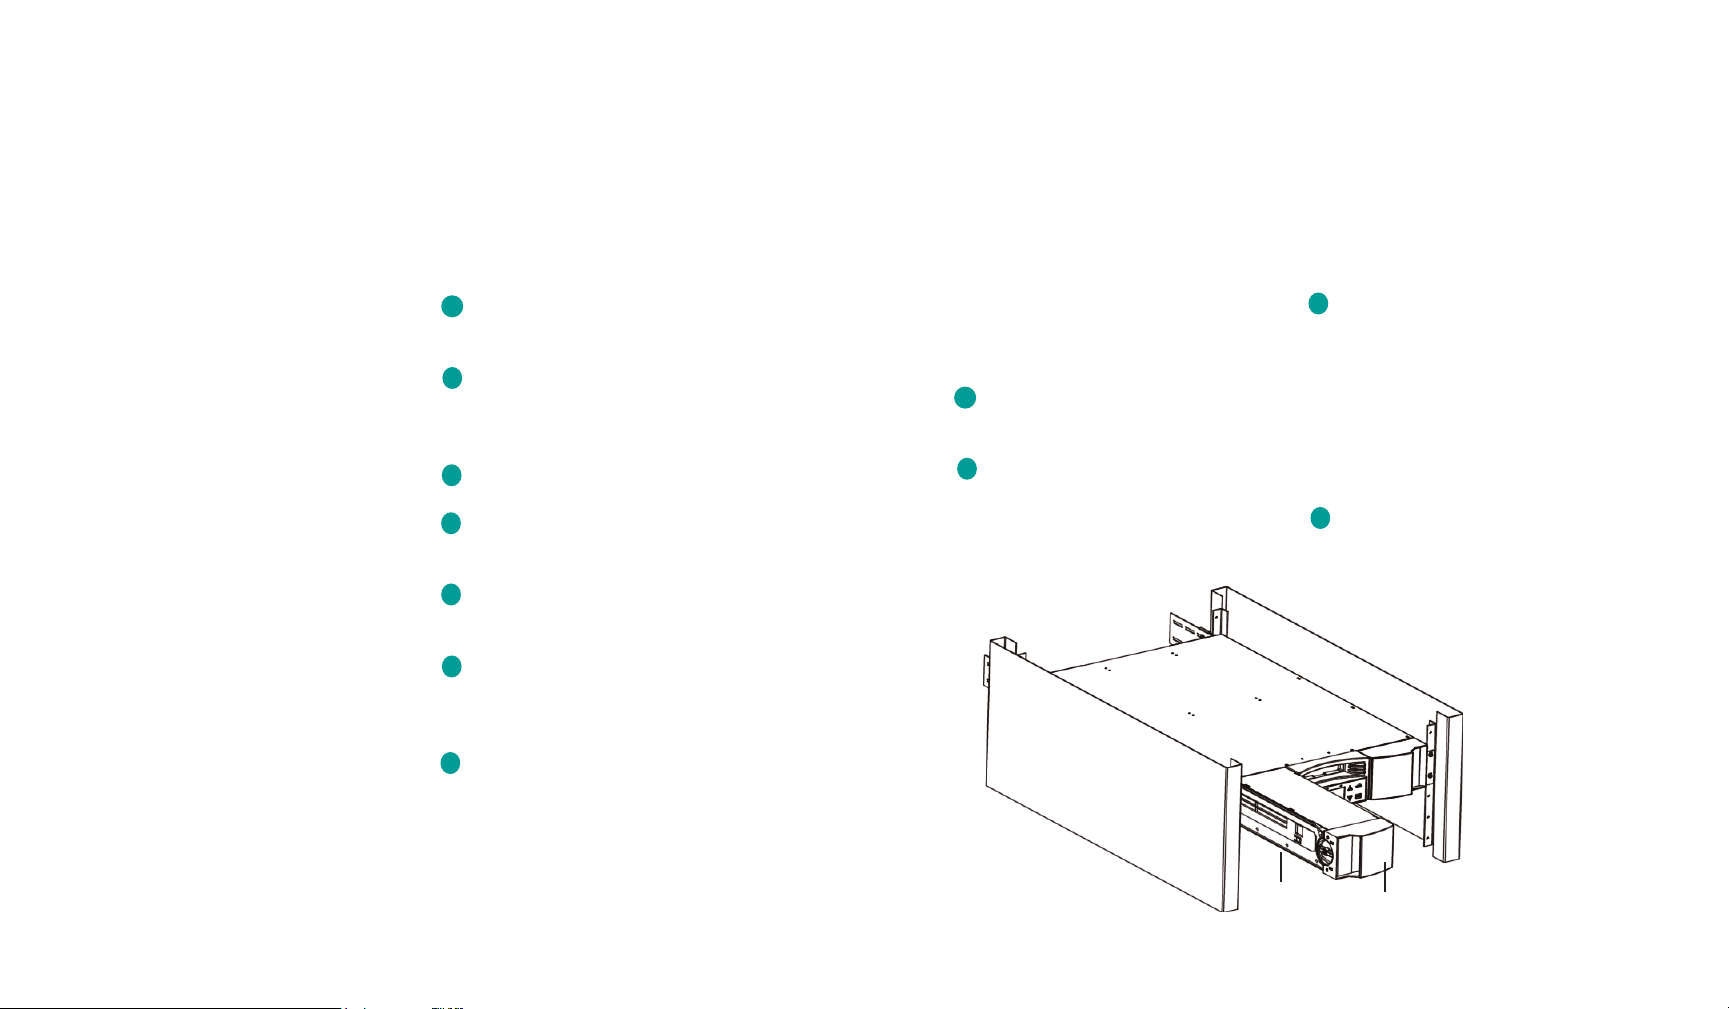
Remove a
magazine
2
a
b
c
d
Support here.
Grasp here.
For additional information:
Refer to the enclosed CD-ROM,
or visit www.tandberg.com

Grasp the magazine by the handle with
one hand and support it underneath with
the other hand.
Slide the magazine into the magazine bay.
Make sure that you position the magazine
correctly; it should slide smoothly.
Caution
Insert the magazine slowly to avoid damaging internal components or autoloader.
The magazine is correctly installed when
you feel it click into place and the front is
flush with the front panel.
Reinstall a
magazine
3
Section 3 explains
how to reinstall a
magazine.
4
5
To remove a magazine blank, pull
the magazine straight out.
To resinstall a magazine blank,
grasp the magazine blank by the
handle with one hand.
Slide the magazine blank into the
magazine bay until it stops.
Remove/reinstall
a magazine blank
a
b
!
4
Slide into magazine bay.
a
b
c

Change the
orientation
Unsnap the handle carefully, ensuring
you do not break the hinge.
Any magazine or magazine blank can be
configured to fit in the right or left
magazine bay.
6 7
5
Change the orientation of a
cartridge magazine
Remove the two screws that attach the
handle to the front of the magazine
blank.
2-cartridge opening on top
Rotate the handle 180 degrees so that
what was the top of the handle is now
the bottom. (Procedure continues.)
Right magazine handle
Left magazine handle
Pull out
Slide
a
b
c

Change the
orientation,
continued
Change the orientation of a
magazine blank
Remove the two screws that attach the
handle to the front of the magazine
blank.
8
9
Rotate the magazine 180 degrees so that
what was the front of the magazine is
now the back.
Snap the handle back on the front of the
magazine.
e
f
d
Install the two screws to attach the
handle securely to the magazine.
a
Unsnap the handle carefully, ensuring
that you do not break the hinge.
(Procedure continues.)
b
2 screws
Right magazine with handle and top side up
Left magazine with handle and top side up

Change the
orientation,
continued
Rotate the handle 180 degrees so that
what was the top of the handle is now
the bottom.
10 11
Snap the handle back on the front of the
magazine blank.
Install the two screws to attach the
handle securely to the magazine blank.
c
d
e
Left magazine handle
Right magazine handle
 Loading...