

Page 1

Getting Started
Page 2

Original Manual: Synkron
Revision and Quality Control: C. Bachmann, H. Bischoff, S. Pfeifer, C. Schomburg
The information in this document is subject to change without notice and does not represent a commitment on the part of Steinberg Media Technologies GmbH. The software described by this document is subject to a License Agreement and may not be
copied to other media except as specifically allowed in the License Agreement. No part
of this publication may be copied, reproduced or otherwise transmitted or recorded, for
any purpose, without prior written permission by Steinberg Media Technologies GmbH.
All product and company names are ™ or ® trademarks of their respective owners.
Windows XP is a trademark of Microsoft Corporation. The Mac logo is a trademark used
under license. Macintosh and Power Macintosh are registered trademarks.
© Steinberg Media Technologies GmbH, 2005.
All rights reserved.
Page 3

Table of Contents
Page 4

7 Introduction
61 Basic Methods
8 Welcome
9 About the manuals and the
Help
12 How you can reach us
13 Installation and
Requirements
for Windows
14 About this chapter
14 Requirements
18 Hardware installation
21 Installing Cubase SE
25 Installation and
Requirements
for Mac OS X
26 About this chapter
26 Requirements
29 Hardware installation
31 Installing Cubase SE
35 Setting up your
system
36 Setting up audio
45 Setting up MIDI
49 Connecting a synchronizer
50 Setting up video
51 Optimizing audio
performance
55 Basic Cubase SE
concepts
56 About this chapter
56 The project
58 Audio terminology
60 MIDI terminology
60 Video terminology
62 About this chapter
62 Using menus
64 Using tools
66 Changing values
70 Selecting objects
71 Zoom and view techniques
73 Window handling
76 Undo
79 Guided Tour
80 The main windows in
Cubase SE
89 Tutorial 1: Recording
and playing back
audio
90 About this tutorial
91 Creating a new project
93 Preparing to record
99 Recording
99 Playing back what you just
recorded
100 Recording more events
101 Playing back in a cycle
103 Tutorial 2: Recording
and playing back
MIDI
104 About this tutorial
105 Setting up for recording
MIDI
108 Recording MIDI
108 Playing back what you just
recorded
109 Playing back in a cycle
110 Transposing the MIDI track
CUBASE SE
4 Table of Contents
Page 5

113 Tutorial 3: Mixing
114 About this tutorial
114 Preparations
116 Setting levels
117 Setting pan
118 Using Mute and Solo
119 Adding EQ to an audio
channel
123 Audio effects
129 Automation
131 Tutorial 4: Editing in
the Project window
132 About this tutorial
132 Preparations
133 Overview
134 Moving and copying events
136 Muting and erasing events
137 Splitting and resizing events
139 Adding a fade
141 Tutorial 5: Using
VST Instruments
142 About this tutorial
142 Preparations
143 Activating a VST Instrument
145 Routing
146 Playing back
147 Adding another instrument
149 Playing a VST Instrument in
real time
151 Recording
159 Tutorial 7: Editing
MIDI
160 About this tutorial
160 Opening the Key Editor
161 Drawing events in the Key
Editor
162 Selecting and moving
events
163 About quantize
165 Editing velocity in the
controller display
167 Tutorial 8:
Customizing
168 About this tutorial
169 Setting preferences
171 Setting up key commands
174 Changing the look of the
toolbar
176 Changing the appearance
of the program
177 Applying track colors
180 Creating a template
183 Setting up Zoom presets
185 Shortcuts &
key commands
186 About this chapter
186 The default key commands
193 Index
153 Tutorial 6: Editing
audio
154 About this tutorial
154 The Sample Editor
157 Processing audio
CUBASE SE
Table of Contents 5
Page 6

CUBASE SE
6 Table of Contents
Page 7

1
Introduction
Page 8

Welcome
Congratulations and thank you for purchasing Cubase SE, Steinberg’s
Cubase Start Edition. This version of Cubase sets a new standard for
entry-level music production software. It combines the experience of
more than 20 years in designing music software applications with the
latest advances in digital audio technology. Perfection runs in the family.
Cubase SX and Cubase SL have proven to be some of the most powerful tools for audio and MIDI production available today. Cubase SE
provides you with these same tools.
Whether you are a beginner and new to the world of computer-based
music production, or a more experienced musician/producer switching
to Cubase from some other software: Cubase SE will help you realize
your musical ideas and turn out productions which sound like they
were created on a system costing ten times more. But best of all: once
you have made yourself familiar with Cubase SE’s interface and tools,
you will be able to handle any other version of Cubase just as easily.
Cubase SE has a lot to offer, given that it is a special version of our
more advanced software solutions. Chances are, you will dive deep
into the creative process without ever reaching the limits of this program. It offers professional audio quality of 24 bit, full VST effects and
VST instrument support, pitch-shifting and time-stretching, and even
our advanced VST System Link protocol to link multiple computers
and share processing power between them.
Multiple audio import and output formats allow you to share your work
with others, while our CD audio grabbing feature gives you easy access to loops and effects from external sources. Cubase SE supports
the latest audio hardware, and even remote control devices like our
own Houston controller. For editing your audio or MIDI tracks, you will
find power tools and functions, like the popular Key, List, Drum and
Score editors. And to master your work, the powerful mixer gives you
professional mixing, effects and automation.
Our goal is to provide you with the best quality music software possible. In order to achieve this, we need your input! Please visit the Steinberg website if you have any ideas or suggestions on how to make
Cubase even more powerful. We look forward to hearing from you!
The Steinberg Cubase Team
CUBASE SE
1 – 8 Introduction
Page 9

About the manuals and the Help
The Cubase SE documentation is divided into several sections, as
listed below. Most of the documents are in Adobe Acrobat format (extension “.pdf”) - these can be accessed in the following ways:
• You can open the pdf documents from the Help menu in the program.
• Under Windows you can also open these documents from the Cubase SE
Documentation subfolder on the Windows Start menu.
• Under Mac OS X the pdf documents are located in the folder “/Library/Documentation/Steinberg/Cubase SE 3” or in the Cubase SE program folder under
“/Contents/Documentation/”.
• To read the pdf documents you need to have the Acrobat Reader application installed on your computer.
An Acrobat installer is provided on the program DVD.
The Getting Started book
This is the book you are reading now. The Getting Started book covers
the following areas:
• Computer requirements.
• Installation issues.
• Setting up your system for audio, MIDI and/or video work.
• A guided tour of the main Cubase SE windows.
• Tutorials describing the most common procedures for recording, playing
back, mixing and editing in Cubase SE.
• Basic concepts and terminology.
• A description of the general methods used when working in Cubase SE.
In other words, this book does not go into detail on any Cubase SE
windows, functions or procedures. The Getting Started book comes
as a printed book but is also available as a pdf document.
The Operation Manual
The Operation Manual is the main Cubase SE reference documentation, with detailed descriptions of Cubase SE operations, parameters,
functions and techniques. You should be familiar with the concepts
and methods described in the Getting Started book before moving on
to the Operation Manual.
CUBASE SE
Introduction 1 – 9
Page 10

MIDI Devices and Features
Contains descriptions of the included MIDI effect plug-ins; how to manage MIDI Devices; how to work with MIDI System Exclusive messages;
how to use the Input Transformer and how to apply Logical Presets.
Audio Effects and VST Instruments
Describes the features and parameters of the included VST plug-ins
(real-time audio effects and VST instruments).
The Help System
Cubase SE comes with a detailed help system, making it easy to look
up procedures and descriptions from within the program. The contents of the help basically mirror the complete Operation Manual text.
The help systems are slightly different depending on which operating
system you use, Windows or Mac OS X:
HTML Help (Windows)
You use the HTML Help in the following way:
• To open the HTML Help for browsing, select “HTML Help” from the Help
menu in the program.
This brings up the HTML Help browser in which you can browse the help table of contents, search the index or perform a free text search.
• To get information about the active window or a dialog, press [F1] on the
computer keyboard or click the Help button in the actual dialog.
Within a topic, related topics are sometimes directly accessible via clickable links.
Apple Help (Mac OS X)
You use the Apple Help in the following way:
• To open the Apple Help for browsing, select “Cubase SE Help” from the Help
menu in the program.
This brings up the Apple Help Viewer window. There, you can either browse the help
table of contents, use the index or type any words into the Search field at the top of the
window.
• To get information about the active window or a dialog, press [F1] on the
computer keyboard or click the Help button in the actual dialog.
Within a topic, related topics are sometimes directly accessible via clickable links.
CUBASE SE
1 – 10 Introduction
Page 11

Please note that when you have started the program once, you can
open the Cubase SE Help even when the program isn’t running:
1.
Select “Mac Help” from the Help menu in the Finder.
2.
From the Library menu, select “Cubase SE Help”.
About the program versions
Some features and settings are specific to one of the platforms,
Windows or Mac OS X. This is clearly stated.
The screenshots are taken from the Windows version of Cubase SE.
Key command conventions
Many of the default key commands in Cubase SE use modifier keys,
some of which are different depending on the operating system. For example, the default key command for Undo is [Ctrl]-[Z] under Windows
and [Command]-[Z] under Mac OS X.
When key commands with modifier keys are described in this manual,
they are shown with the Windows modifier key first, in the following
way:
[Win modifier key]/[Mac modifier key]-[key]
For example, [Ctrl]/[Command]-[Z] means “press [Ctrl] under Windows
or [Command] under Mac OS X, then press [Z]”.
Similarly, [Alt]/[Option]-[X] means “press [Alt] under Windows or
[Option] under Mac OS X, then press [X]”.
CUBASE SE
Introduction 1 – 11
Page 12
How you can reach us
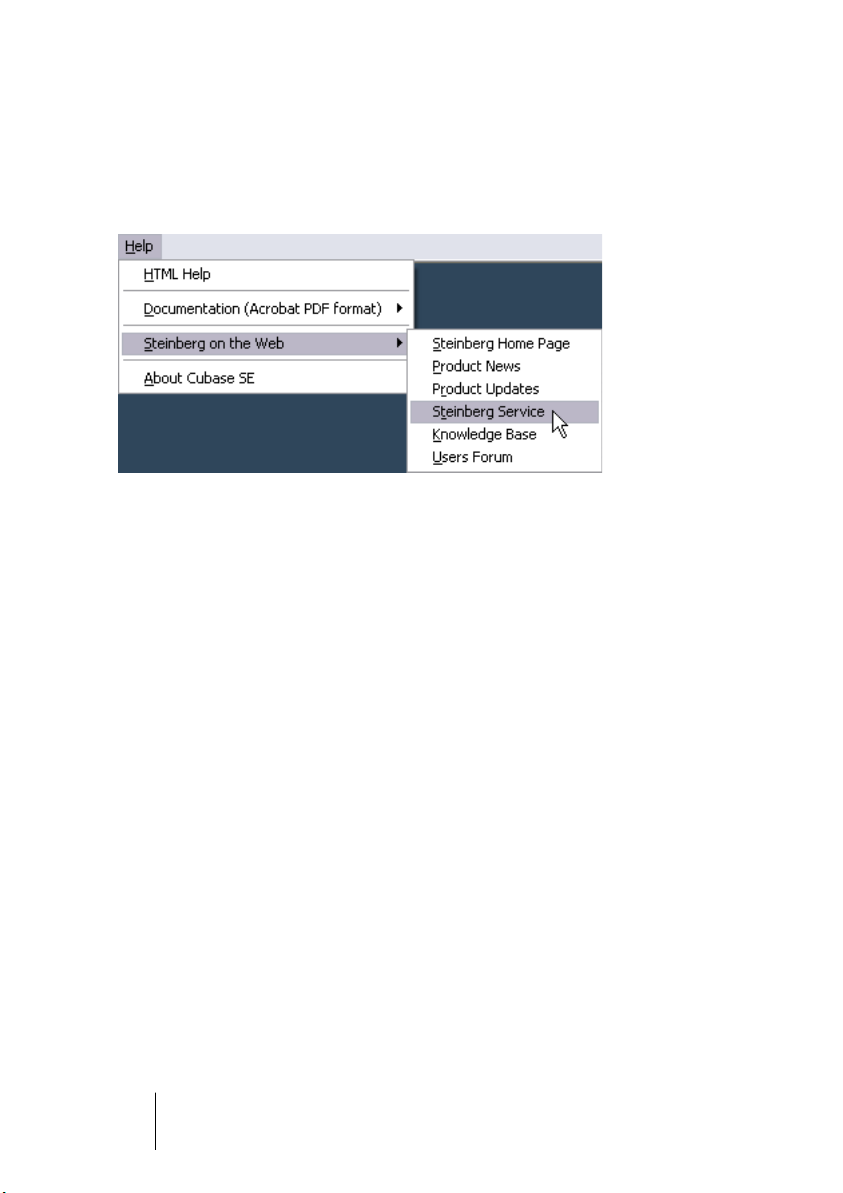
On the Help menu in Cubase SE, you will find items for getting additional information and help:
•
On the “Steinberg on the Web” submenu you can find links to various
Steinberg websites. Selecting one will automatically launch your
browser application and open the page.
You can find support and compatibility information, answers to frequently asked questions, links for downloading new drivers, etc. This requires that you have a web
browser application installed on your computer, and a working Internet connection.
CUBASE SE
1 – 12 Introduction
Page 13

2
Installation and Requirements
for Windows
Page 14

About this chapter
This chapter describes the system requirements and installation procedures for Cubase SE for Windows. Installing Cubase SE for Mac OS X
is described on page 26.
Requirements
To use Cubase SE, you need the following:
•
A PC with Windows XP installed.
A USB Port is also required.
For more details about the computer requirements, see below.
•
Compatible audio hardware.
By audio hardware we mean a card capable of recording and playing back digital audio
using your hard disk as a storage medium. It must also have an appropriate ASIO driver
(see page 16) or be Windows Multimedia compatible. Also, to take full advantage of
Cubase’s channel i/o bus architecture, audio hardware with multiple inputs and outputs is required.
For MIDI
•
At least one MIDI interface.
•
At least one MIDI instrument.
•
Any audio equipment necessary to listen to the sound from your MIDI
devices.
CUBASE SE
2 – 14 Installation and Requirements for Windows
Page 15

Computer requirements
Hardware – PC
The minimum requirements for running Cubase SE on a PC are:
• A 800MHz Pentium processor or Athlon processor and Windows XP.
• 384MB of RAM.
• Monitor and graphics card supporting 1024 x 768 resolution.
• A free USB port for the copy protection key.
• A DVD ROM drive.
For optimum performance we recommend the following:
• Pentium or Athlon processor at 2.8GHz or faster.
• 512MB of RAM.
• A monitor setup with 1152 x 864 screen resolution or higher.
RAM
Audio work requires a lot of RAM! In fact, there is a direct relation between the amount of available RAM and the number of audio channels
that you can have running. As specified earlier, 384 MB is the minimum
requirement, but as a general rule “the more the better” applies.
Hard disk size
•
The size of the hard disk determines how many minutes of audio you
will be able to record.
Recording one minute of stereo CD quality audio, requires 10 MB of hard disk space.
That is, eight stereo tracks in Cubase SE use up at least 80 MB of disk space per recording minute.
Hard disk speed
The speed of the hard drive also determines the number of audio tracks
you can run. That is the quantity of information that the disk can read,
usually expressed as “sustained transfer rate”. Again, “the more the
better” applies.
Wheel mouse
Although a regular mouse will work fine with Cubase SE, we recommend that you use a wheel mouse, as this will speed up value editing
and scrolling considerably. See page 66 and page 71.
CUBASE SE
Installation and Requirements for Windows 2 – 15
Page 16

Audio hardware
Cubase SE will run with audio hardware that meets the following basic specifications:
• Stereo.
• 16 bit.
• Support of at least the 44.1kHz sampling rate.
• Is supplied with a special ASIO driver, or a DirectX or Windows Multimedia
compatible driver as described below.
About drivers
A driver is a piece of software that allows a program to communicate
with a certain piece of hardware. In this case, the driver allows Cubase
SE to use the audio hardware. For audio hardware, there are three different cases, each requiring different driver configurations:
If the audio hardware has a specific ASIO driver
Professional audio cards often come with an ASIO driver written especially for the card. This allows for communication directly between Cubase SE and the audio card. As a result, audio cards with specific ASIO
drivers can provide lower latency (input-output delay), which is crucial
when monitoring audio via Cubase SE or using VST Instruments. The
ASIO driver may also provide special support for multiple inputs and
outputs, routing, synchronization, etc.
Audio card-specific ASIO drivers are provided by the card manufacturers. Make sure to check the manufacturer’s web site for the latest
driver versions.
If your audio hardware comes with a specific ASIO driver we strongly
recommend that you use this.
CUBASE SE
2 – 16 Installation and Requirements for Windows
Page 17

If the audio card communicates via DirectX
DirectX is a Microsoft “package” for handling various types of Multimedia under Windows. Cubase SE supports DirectX, or to be more precise, DirectSound, which is a part of DirectX used for playing back and
recording audio. This requires two types of drivers:
• A DirectX driver for the audio card, allowing it to communicate with DirectX. If
the audio card supports DirectX, this driver should be supplied by the audio
card manufacturer. If it isn’t installed with the audio card, please check the
manufacturer’s web site for more information.
• The ASIO DirectX Full Duplex driver, allowing Cubase SE to communicate
with DirectX. This driver is included with Cubase SE, and does not require any
special installation.
If the audio card communicates via Windows Multimedia system
If the card is Windows compatible, it can be used in Cubase SE. The
card then communicates with Windows Multimedia system, which in
turn communicates with Cubase SE. This requires two types of drivers:
• A Windows Multimedia driver for the audio card, allowing it to communicate
with the Windows Multimedia system. This driver should be supplied by the audio card manufacturer, and is normally installed when you install the audio card.
• The ASIO Multimedia driver, allowing Cubase SE to communicate with the
Windows Multimedia system. This driver is included with Cubase SE, and
does not require any special installation.
CUBASE SE
Installation and Requirements for Windows 2 – 17
Page 18
Hardware installation
About the copy protection key
Please read the following section before installing the program software.
New users
Included with the Cubase SE package, you will find a hardware key
(sometimes referred to as a “dongle”) that is part of the Cubase SE
copy protection scheme. Cubase SE will not run if this key isn’t installed
properly.
•
You should first install the program (and any necessary hardware, see
below), then insert the protection key and finally launch the program.
This is because the necessary drivers for the key are installed when you install the
program.
If you’re upgrading from a previous version of Cubase SE/LE
•
If you already own a copy protection key, you need to activate that key
for use with your new Cubase SE version. This is done by means of
the activation code included in the upgrade package, after installing
the program, see page 22.
•
If your previous version of Cubase SE/LE was not hardware-protected
by a Steinberg Key, you now need to purchase this key separately.
The key then needs to be activated. This is done by means of the activation code included in the upgrade package, after installing the program, see page 22.
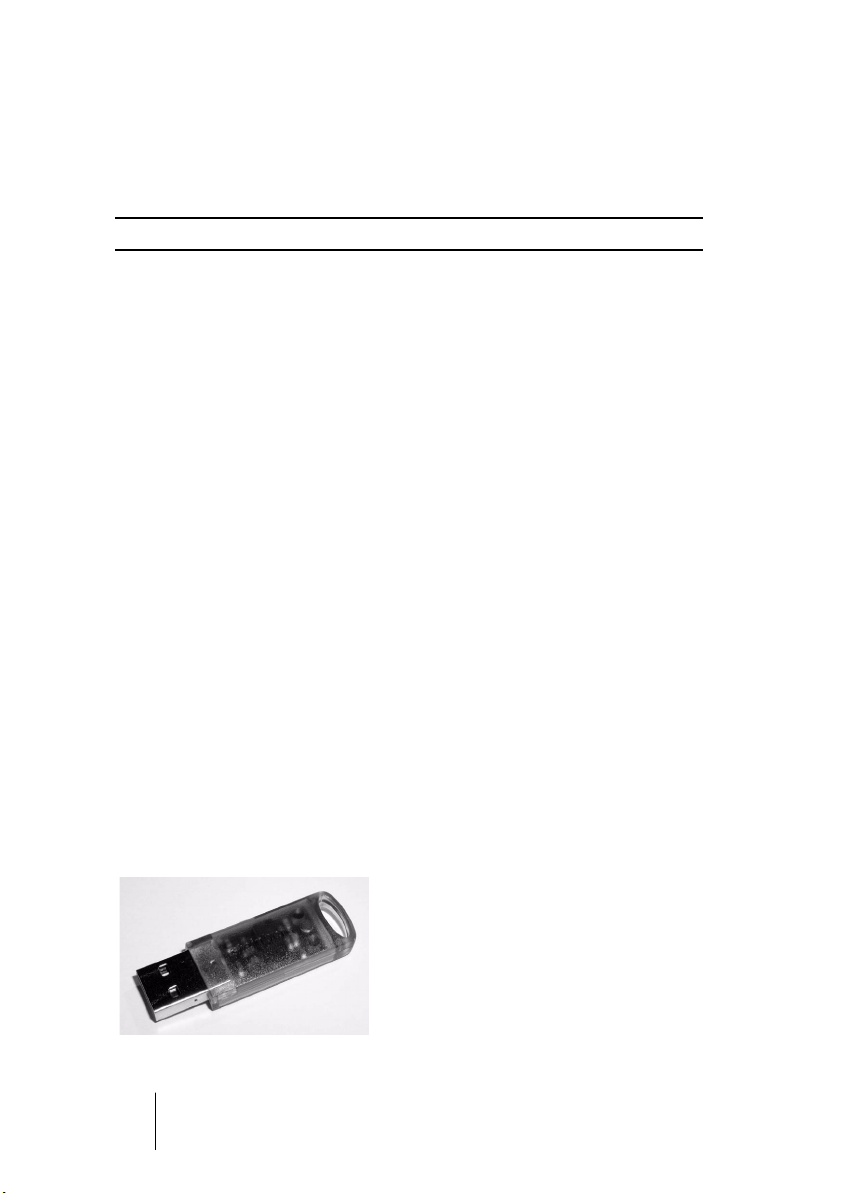
The Steinberg Key
CUBASE SE
2 – 18 Installation and Requirements for Windows
Page 19

The Steinberg Key is, in fact, a little computer on which your Steinberg
software licenses are stored. All hardware-protected Steinberg products use the same type of key, and you can store more than one license
on one key. Also, licenses can (within certain limits) be transferred between keys – which is helpful, e.g. if you want to sell a piece of software.
•
The installation routine will initiate a restart of Windows after installation of the key drivers and the program software. After the restart, you
can plug the key into the USB port to proceed with the key activation.
The Steinberg Key must not be plugged in before or during the installation of Cubase SE if this is the first time you use such a key. Otherwise
the operating system of your computer will register it as new USB hardware and try to find drivers that won’t be present before the installation
of Cubase SE.
Installing the audio hardware and its driver
1.
Install the audio card and related equipment in the computer, as described in the card’s documentation.
2. Install the driver for the card.
There are three types of drivers that could apply: card-specific ASIO drivers, DirectX
drivers and Windows Multimedia drivers:
Specific ASIO driver
If your audio card has a specific ASIO driver it may be included with
the audio card, but you should always make sure to check the audio
card manufacturer’s web site for the most recent drivers. For details
on how to install the driver, refer to the manufacturer’s instructions.
DirectX driver
If your audio card is DirectX compatible, its DirectX drivers will most
likely be installed when you install the card (as with the Windows Multimedia driver). If you have downloaded special DirectX drivers for the audio card, you should follow the manufacturer’s installation instructions.
CUBASE SE
Installation and Requirements for Windows 2 – 19
Page 20

Windows Multimedia driver
These drivers are normally included with all types of regular PC audio
cards. Some are even included with Windows itself. Depending on
whether the audio card is “Plug’n’Play compatible” or not, the installation of the card is done differently:
• If the card is “Plug’n’Play compatible”, Windows will detect the
card once it is plugged in, and ask for the necessary driver disks.
• If not, you need to use the “Add New Hardware” feature in the Control
Panel to install the card and its drivers.
Refer to the documentation that comes with the card.
Should you have an audio card but no driver, please check the manufacturer’s web site, or ask your music or computer dealer for help.
Testing the card
To make sure the audio card will work as expected, perform the following two tests:
• Use any software included with the audio card to make sure you can
record and play back audio without problems.
• If the card is accessed via a standard Windows driver, use the Media
Player application (included with Windows) to play back audio.
Installing a MIDI interface/synthesizer card
Installation instructions for a MIDI interface should be included with
the product. However, here’s an outline of the necessary steps:
1. Install the interface (or MIDI synthesizer card) inside your computer or
connect it to a “port” (connector) on the computer.
Which is right for you depends on which type of interface you have.
2. If the interface has a power supply and/or a power switch, turn it on.
3. Install the driver for the interface, as described in the documentation
that comes with the interface.
It is likely that you will need a CD ROM or floppy disk supplied by the manufacturer of
the MIDI interface. You should also make sure to check the manufacturer’s web site for
the latest driver updates.
CUBASE SE
2 – 20 Installation and Requirements for Windows
Page 21

Installing Cubase SE
Defragment the hard disk
If you plan to record audio on a hard disk where you have already
stored other files, now is the time to defragment it. Defragmentation
reorganizes the physical allocation of space on the hard disk in order
to optimize its performance. It is done with a special defragmentation
program. In Windows XP, for example, you might look for the “Disk
Defragmenter” utility.
It is crucial to the audio recording performance that your hard disk is optimized (defragmented). You should make sure to defragment regularly.
Installing the files from the DVD-ROM
The installation procedure puts all files in the right places, automatically.
1. Insert the Cubase SE DVD-ROM.
2. In the window that appears, double-click the Setup.exe.
This starts the installation procedure for the Syncrosoft License Control Center.
3. Remove all copy protection keys (if plugged) and click the “Next”
button to continue.
4. You will be asked to read and confirm the license agreement (shown
on screen).
This is required for the installation to proceed.
5. Install the drivers for the copy protection key and click the “Next” button to continue.
6. Click the “Finish” button to finish the installation of the License Control Center.
Now the installation of Cubase SE will begin automatically:
7. You will be asked to read and confirm the license agreement (shown
on screen).
This is required for the installation to proceed.
CUBASE SE
Installation and Requirements for Windows 2 – 21
Page 22

8. At one point you will be asked whether Cubase SE should be available to all users of the computer or just to you.
Choose the option that suits you best.
9. Finally, a dialog box informs you that the installation was successful
and recommends that you restart your computer.
Remove the DVD-ROM and store it in a safe place.
Setting up the protection key
If you are a new Cubase SE user
1. After restarting the computer, plug in the hardware protection key into
the USB port.
If you are unsure which port this is, consult the computer’s documentation.
2. The first time the copy protection device is plugged in, it will be registered as a new hardware device, and a dialog will appear asking you
whether you would like to find drivers for the device manually or automatically.
3. Choose to find drivers automatically.
The dialog closes.
4. You are now ready to launch Cubase SE!
If you are upgrading from a previous version of Cubase SE/LE
• For the activation of the copy protection key, you need a working internet
connection, as this is performed online. In case you have no connection
to the internet on the computer on which you wish to use Cubase SE,
you can always use a different computer for activation.
Simply install the License Control Center separately on the internet computer, without
installing the complete product. To do this, the product installation DVD contains a
dedicated installer called “SyncrosoftLicenseControlSetup”. You can also find up-todate versions of this installer for Mac and PC at www.syncrosoft.com/downloads/index.html.
Whether you bought a new Steinberg key or whether you are using an existing Steinberg key: this key does not yet contain the necessary license.
You must download this license before you can launch the program.
CUBASE SE
2 – 22 Installation and Requirements for Windows
Page 23

To activate the protection key for use with your new Cubase SE
version, proceed as follows:
1. After restarting the computer, plug in your protection key into the USB
port.
2. Make sure that your computer has a working internet connection.
3. Locate the activation code in the upgrade package and keep it at hand.
4. Launch the “License Control Center” application (found under “Syncro-
soft” on the Start menu).
This application allows you to view your USB protection keys and activate them for
new applications by downloading licenses.
5. Use the License Control Center “Wizard” function to download a
license for your new program version to your protection key.
This requires that you enter your activation code – just follow the instructions on screen.
If you are uncertain about how to proceed, consult the help for LCC.
6. When the activation is complete, you are ready to launch Cubase SE!
For information about product updates, you should check the Steinberg
website regularly. Open the “Steinberg on the Web” submenu on the Help
menu and select “Product Updates”. The website that opens contains a
list with the recent updates.
Register your software!
Registering your software will make sure you are entitled to technical
support and kept aware of updates and other news regarding Cubase
SE. For full support services, you need to register by sending in your
registration card.
Installation and Requirements for Windows 2 – 23
CUBASE SE
Page 24

The items on the start menu
If you open the Windows Start menu, you will find a Cubase SE group
on the “Programs” submenu. This contains the following items:
• Documentation.
On this submenu you can access the various Cubase SE documentation files in the
Acrobat pdf format. These documents are also available on the Help menu from within
the program.
• ASIO Multimedia Setup.
This opens a dialog with settings for the ASIO (Audio Stream Input Output) system,
which handles audio recording and playback in Cubase SE, if you are using the ASIO
MME driver. This dialog can also be opened from within Cubase SE. See the chapter
“Setting up your system” in this book.
• Cubase SE.
This launches the actual program.
• Cubase SE 3 application data folder.
This opens the application data folder, where your Cubase SE settings are stored.
On the “Programs” submenu you will also find an item called Syncrosoft
(License Control Center). This item shows all Syncrosoft protection devices and valid licenses currently installed and allows you to download
new licenses to your protection key.
There may also be additional items (such as Readme files) available on
the Start menu. Please read all such files before launching Cubase SE,
since they may contain late information not included in the manuals.
CUBASE SE
2 – 24 Installation and Requirements for Windows
Page 25

3
Installation and Requirements
for Mac OS X
Page 26

About this chapter
This chapter describes the system requirements and installation procedures for Cubase SE for Mac OS X. Installing Cubase SE for Windows is described on page 14.
Requirements
To use Cubase SE, you need the following:
• A Macintosh computer running Mac OS X 10.3 or 10.4.
A USB Port is also required.
For more details about the computer requirements, see below.
• Mac OS X compatible audio hardware.
While the built-in audio hardware of the Macintosh may be adequate for basic audio
playback, we strongly recommend audio hardware that is specifically designed for audio
recording and music applications. Also, to take full advantage of Cubase’s multi-channel i/o bus architecture, audio hardware with multiple inputs and outputs is required.
For MIDI
• At least one MIDI interface.
• At least one MIDI instrument.
• Any audio equipment necessary to listen to the sound from your MIDI
devices.
CUBASE SE
3 – 26 Installation and Requirements for Mac OS X
Page 27

Computer requirements
Hardware – Mac
The absolute minimum requirements for running Cubase SE on a
Macintosh are as follows:
• A G4 with 867MHz and OS X 10.3 or 10.4.
• 384MB RAM.
• Monitor and graphics card supporting 1024 x 768 resolution.
• A free USB port for the copy protection key.
• A DVD ROM drive.
For optimum performance we recommend the following:
• A G5 dual processor with 1.8GHz or faster.
• 512MB RAM.
• A monitor setup with 1152 x 864 screen resolution or higher.
RAM
Audio work requires a lot of RAM! In fact, there is a direct relation between the amount of available RAM and the number of audio channels
that you can have running. As specified earlier, 384MB is the minimum
requirement, but as a general rule “the more the better” applies.
Hard disk size
• The size of the hard disk determines how many minutes of audio you
will be able to record.
Recording one minute of stereo CD quality audio, requires 10MB of hard disk space.
That is, eight stereo tracks in Cubase SE use up at least 80MB of disk space per recording minute.
Hard disk speed
The speed of the hard drive also determines the number of audio
tracks you can run. That is the quantity of information that the disk can
read, usually expressed as “sustained transfer rate”. Again, “the more
the better” applies.
CUBASE SE
Installation and Requirements for Mac OS X 3 – 27
Page 28

Mouse
Although a regular mouse will work fine with Cubase SE, we recommend that you use a wheel mouse with two mouse buttons.
• Having a wheel mouse will speed up value editing and scrolling considerably.
• If your mouse has two mouse buttons you should program the right mouse
button to generate a [Ctrl]-click (this is typically the default behavior of the
right mouse button).
This will allow you to bring up context menus by right clicking (see page 63).
Audio hardware
Cubase SE will run with audio hardware that meets the following basic
specifications:
• Stereo.
• 16 bit.
• Support of at least the 44.1kHz sampling rate.
• Is supplied with proper Mac OS X (Core Audio) drivers.
A basic rule of thumb is: if the hardware works under Mac OS X, you
can use it in Cubase SE.
• Cubase SE also supports audio hardware with Mac OS X compliant
ASIO drivers.
ASIO drivers may provide special support for routing, monitoring, synchronization, etc.
Note that the ASIO drivers must be written specifically for Mac OS X – Mac OS 9.X
ASIO drivers cannot be used.
Using the built-in audio hardware of the Macintosh
Although Cubase SE is designed with multi-channel input and output
in mind, it’s of course possible to use the program with “basic” stereo
inputs and outputs. As of this writing, all current Macintosh models
have built-in 16 bit stereo audio hardware. Depending on your preferences and requirements, this may be sufficient for use with Cubase SE.
The built-in audio hardware is always available for selection in Cubase
SE – you don’t need to install any additional drivers.
Some Macintosh models have audio outputs but no inputs. This means
that you can only play back audio – recording is not possible without additional audio hardware.
CUBASE SE
3 – 28 Installation and Requirements for Mac OS X
Page 29
Hardware installation
About the copy protection key
Please read the following section before installing the program software.
New users
Included with the Cubase SE package, you will find a hardware key
(sometimes referred to as a “dongle”) that is part of the Cubase SE
copy protection scheme. Cubase SE will not run if this key isn’t installed
properly.
• You should first install the program (and any necessary hardware, see
below), then insert the protection key and finally launch the program.
This is because the necessary drivers for the key are installed when you install the
program.
If you’re upgrading from a previous version of Cubase SE/LE
• If you already own a copy protection key, you need to activate that key
for use with your new Cubase SE version. This is done by means of
the activation code included in the upgrade package, after installing
the program, see page 31.
• If your previous version of Cubase SE/LE was not hardware-protected
by a Steinberg Key, you now need to purchase this key separately. The
key then needs to be activated. This is done by means of the activation
code included in the upgrade package, after installing the program,
see page 31.
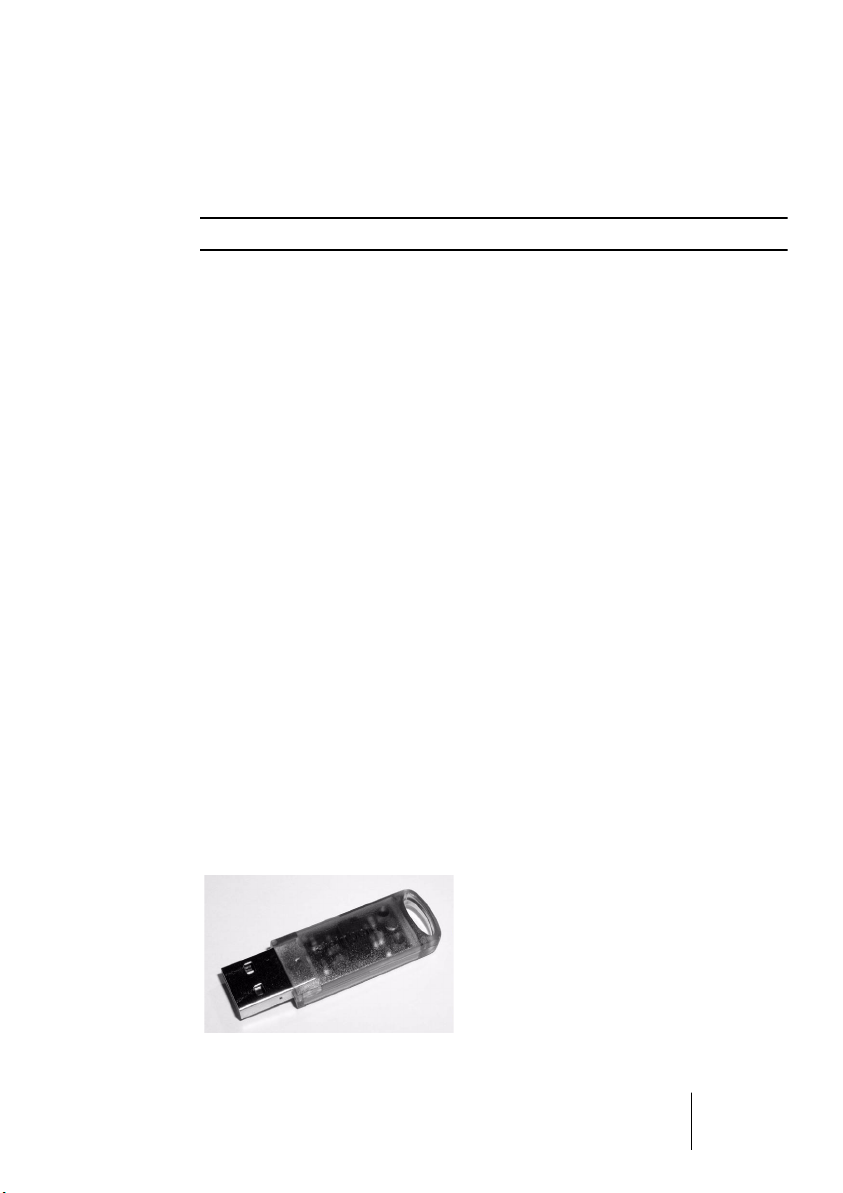
The Steinberg Key
CUBASE SE
Installation and Requirements for Mac OS X 3 – 29
Page 30

The Steinberg Key is, in fact, a little computer on which your Steinberg
software licenses are stored. All hardware-protected Steinberg products use the same type of key, and you can store more than one license
on one key. Also, licenses can (within certain limits) be transferred between keys – which is helpful, e.g. if you want to sell a piece of software.
• During the installation routine, be sure to read the information regarding the Steinberg Key that is displayed during the installation process.
The Steinberg Key must not be plugged in before or during the installation of Cubase SE if this is the first time you use such a key. Otherwise
the operating system of your computer will register it as new USB hardware and try to find drivers that won’t be present before the installation
of Cubase SE.
Installing the audio hardware and its driver
1. Make sure you have the latest Mac OS X drivers for the audio hardware!
Please check the manufacturer’s web site for the latest versions.
2. Install the driver(s) for the audio hardware.
This is usually done by running an installer application.
3. Install or connect the audio interface, as described in the card’s
documentation.
Installing a MIDI interface
1. Make sure you have the latest Mac OS X drivers for the MIDI interface!
Please check the manufacturer’s web site for the latest versions.
2. Install the driver(s) for the interface.
This is usually done by running an installer application.
3. Connect the MIDI interface to the computer, as described in the interface documentation.
CUBASE SE
3 – 30 Installation and Requirements for Mac OS X
Page 31

Installing Cubase SE
Defragment the hard disk
If you plan to record audio on a hard disk where you have already
stored other files, now is the time to defragment it. Defragmentation
reorganizes the physical allocation of space on the hard disk in order
to optimize its performance. It is done with a special defragmentation
program.
It is crucial to the audio recording performance that your hard disk is optimized (defragmented). You should make sure to defragment regularly.
Installing the files from the DVD-ROM
The installation procedure puts all files in the right places, automatically.
1. Insert the Cubase SE DVD-ROM.
2. Locate the Cubase SE installer and run it.
The installation procedure starts. This will create a Cubase SE folder in your Applications folder and add various required files to your system.
3. You will be asked to read and confirm the license agreement (shown
on screen).
This is required for the installation to proceed.
Finally, a dialog box informs you that the installation was successful.
Setting up the protection key
If you are a new Cubase SE user
1. After restarting the computer, plug in the hardware protection key into
the USB port.
If you are unsure which port this is, consult the computer’s documentation.
2. You are now ready to launch Cubase SE!
CUBASE SE
Installation and Requirements for Mac OS X 3 – 31
Page 32

If you are upgrading from a previous version of Cubase SE/LE
• For the activation of the copy protection key, you need a working
internet connection, as this is performed online. In case you have no
connection to the internet on the computer on which you wish to use
Cubase SE, you can always use a different computer for activation.
Simply install the License Control Center separately on the internet computer, without installing the complete product. To do this, the product installation DVD contains a dedicated installer called “SyncrosoftLicenseControl.mpkg”. You can also find up-to-date
versions of this installer for Mac and PC at www.syncrosoft.com/downloads/index.html.
Whether you bought a new Steinberg key or whether you are using an existing Steinberg key: this key does not yet contain the necessary license.
You must download this license before you can launch the program.
To activate the protection key for use with your new Cubase SE
version, proceed as follows:
1. After restarting the computer, plug in your protection key into the USB
port.
2. Make sure that your computer has a working internet connection.
3. Locate the activation code in the upgrade package and keep it at hand.
4. Launch the “License Control Center” application (found in the Appli-
cations folder).
This application allows you to view your USB protection keys and activate them for
new applications by downloading licenses.
5. Use the License Control Center “Wizard” functions to download a
license for your new program version to your protection key.
This requires that you enter your activation code – just follow the instructions on screen.
If you are uncertain about how to proceed, consult the help for LCC.
6. When the activation is complete, you are ready to launch Cubase SE!
For information about product updates, you should check the Steinberg
website regularly. Open the “Steinberg on the Web” submenu on the Help
menu and select “Product Updates”. The website that opens contains a
list with the recent updates.
CUBASE SE
3 – 32 Installation and Requirements for Mac OS X
Page 33

Register your software!
Registering your software will make sure you are entitled to technical
support and kept aware of updates and other news regarding Cubase
SE. For full support services, you need to register by sending in your
registration card.
CUBASE SE
Installation and Requirements for Mac OS X 3 – 33
Page 34

CUBASE SE
3 – 34 Installation and Requirements for Mac OS X
Page 35

4
Setting up your system
Page 36

Setting up audio
Always make all connections with all equipment turned off!
Connecting audio
Exactly how to set up your system is a very personal matter – the following connection diagrams should be taken as examples.
The audio connections below may be digital or analog, it doesn’t matter.
Stereo input and output – the simplest connection
If you only use a stereo input and output from Cubase SE, you can
connect your audio hardware directly to the input source, a mixer for
example, and the outputs to a power amplifier and speaker.
Audio card outputs
LR
Audio card inputs
LR
A simple stereo audio setup.
CUBASE SE
4 – 36 Setting up your system
Source to be recorded
Amplifier and speakers
Page 37

Multi-channel input and output
Most likely however, you will have other audio equipment that you
want to integrate with Cubase SE. This will require a mixer, preferably
one with a group or bus system that can be used for feeding inputs on
the audio hardware.
In the example below, four buses are used for feeding signals to the
audio hardware’s inputs. The four outputs are connected back to the
mixer for monitoring and playback. Remaining mixer inputs can be used
for connecting audio sources like microphones, instruments, etc.
Audio card outputs
Audio card inputs
Inputs
1 to 4
A multi-channel audio setup.
Bus
1 to 4
LR
Amplifier and speakersMixer
• When connecting an input source (like a mixer) to the audio hardware,
you should use output buses, sends or similar that are separate from
the mixer’s master output to avoid recording what you are playing back.
Recording from a CD player
Most computers come with a CD-ROM drive that can also be used as
a regular CD player. In some cases the CD player is internally connected to the audio hardware so that you can record the output of the
CD player directly into Cubase SE (consult the audio hardware documentation if you are uncertain).
• All routing and level adjustments for recording from a CD (if available) are
done in the audio hardware setup application (see page 38).
• You can also grab audio tracks directly from a CD in Cubase SE (see the Operation Manual).
CUBASE SE
Setting up your system 4 – 37
Page 38

About recording levels and inputs
When you connect your equipment, you should make sure that the impedance and levels of the audio sources and inputs are matched.
Typically, different inputs may be designed for use with microphones,
consumer line level (-10 dBV) or professional line level (+4 dBV), or
you may be able to adjust input characteristics on the audio interface
or in its control panel. Please check the audio hardware documentation for details.
Using the correct types of input is important to avoid distortion or
noisy recordings. For more information about checking input levels,
see page 95.
Cubase SE does not provide any input level adjustments for the signals
coming in to your audio hardware, since these are handled differently for
each card. Adjusting input levels is either done in a special application included with the hardware or from its control panel (see below).
Making settings for the audio hardware
Most audio cards come with one or more small applications that allow
you to configure the inputs of the hardware to your liking.
This includes:
• Selecting which inputs/outputs are active.
• Turning monitoring via the hardware on/off (see page 44).
• Setting levels for each input. This is very important!
• Setting levels for the outputs, so that they match the equipment you use for
monitoring.
• Selecting digital input and output formats.
• Making settings for the audio buffers.
In many cases all available settings for the audio hardware are gathered in a control panel, which can be opened from within Cubase SE
as described below (or opened separately, when Cubase SE isn’t running). In some cases there may be several different applications and
panels – please refer to the audio hardware documentation for details.
CUBASE SE
4 – 38 Setting up your system
Page 39

Selecting a driver and making audio settings in Cubase SE
The first thing you need to do is select the correct driver in Cubase SE
to make sure that the program can communicate with the audio hardware:
1. Launch Cubase SE, select Device Setup from the Devices menu and
click on VST Audiobay in the list.
The VST Audiobay page in the Device Setup dialog.
2. Select your audio hardware driver from the Master ASIO Driver menu.
There may be several options here that all refer to the same audio hardware. When you
have selected a driver, it is added to the Devices list.
Under Windows, we strongly recommend that you access your hardware
via an ASIO driver written specifically for the hardware, if available. If no
ASIO driver is installed we recommend that you check with your audio
hardware manufacturer if they have an ASIO driver available, for example for download via the Internet.
3. Select the driver in the Devices list to open the Driver settings for your
audio hardware.
4. Bring up the control panel for the audio hardware and adjust the settings as recommended by the audio hardware manufacturer.
CUBASE SE
Setting up your system 4 – 39
Page 40

• Under Windows, you can open the control panel by clicking the Control Panel button.
The control panel that appears when you click this button is provided by the audio
hardware manufacturer and not Cubase SE (unless you use DirectX or MME, see below). Hence it will be different for each audio card brand and model.
The Control panels for the ASIO Multimedia and ASIO DirectX drivers are an exception, as they are provided by Steinberg. They are described in the HTML Help, opened
by clicking the Help button in the respective dialog. See also the notes below.
• Under Mac OS X, you will find the control panel for your audio hardware in the System Preferences (“Other” section), opened from the
Apple menu or from the Dock.
If you are using the built-in audio hardware of the Macintosh, you use the “Sound” control panel in the System Preferences to set levels, balance, etc.
If you are using ASIO audio hardware, you can click the Control Panel button to bring
up its panel.
5. If you plan to use several audio applications simultaneously, you may
want to activate the option “Release ASIO Driver in Background” on
the VST Audiobay page. This will allow another application to play
back via your audio hardware even though Cubase SE is running.
The application that is currently active (i.e. the “top window” on the desktop), will get
access to the audio hardware. Make sure that any other audio application accessing
the audio hardware is also set to release the ASIO (or Mac OS X) driver so Cubase SE
can use it when it becomes the active application again.
6. If your audio hardware and its driver support ASIO Direct Monitoring,
you may want to activate the Direct Monitoring checkbox.
Read more about monitoring later in this chapter and in the Recording chapter in the
Operation Manual.
7. Click Apply and then OK to close the dialog.
CUBASE SE
4 – 40 Setting up your system
Page 41

If you are using audio hardware with a DirectX driver (Windows only)
If your Windows audio hardware doesn’t have a specific ASIO driver, a
DirectX driver is the next best option.
Cubase SE comes with a driver called ASIO DirectX Full Duplex,
available for selection on the Master ASIO Driver pop-up menu (VST
Audiobay page).
• To be able to take full advantage of DirectX Full Duplex, the audio hardware must support WDM (Windows Driver Model) in combination with
DirectX version 8.1 or higher.
In all other cases, the audio inputs will be emulated by DirectX (see the HTML Help for
the ASIO DirectX Full Duplex Setup dialog for details about how this is reported).
Since using emulated inputs will result in higher latency, you may want to use the ASIO
Multimedia driver instead, as this gives you more possibilities to fine-tune the settings.
• During the installation of Cubase SE, the latest DirectX will be installed
on your computer.
When the ASIO DirectX Full Duplex driver is selected in the Device
Setup dialog, you can open the ASIO Control Panel and adjust the
following settings (for more details, click the Help button in the control
panel):
• Direct Sound Output and Input Ports
In the list to the left in the window, all available Direct Sound Output and Input Ports
are listed. In many cases, there will only be one Port in each list. To activate or deactivate a Port in the list, click the checkbox in the left column. If the checkbox is ticked,
the port is activated.
• You can edit the Buffer Size and Offset settings in this list if necessary, by
double clicking on the value and typing in a new value.
In most cases the default settings will work fine. Audio buffers are used when audio
data is transferred between Cubase SE and the audio card. While larger buffers ensure
that playback will occur without glitches, the latency (the time between the moment
Cubase SE sends out the data and when it actually reaches the output) will be higher.
• Offset
If a constant offset is audible during playback of Audio and MIDI recordings, you can
adjust the output or input latency time using this value.
CUBASE SE
Setting up your system 4 – 41
Page 42

If you are using audio hardware with a Windows Multimedia (MME) driver
When you select the ASIO Multimedia Driver for the first time, the system will ask you whether you want to test the configuration. We strongly
recommend that you perform this test. If it fails, or if you for other reasons need to make adjustments to your ASIO Multimedia configuration,
click the Control Panel button to open the ASIO Multimedia Setup control panel included with Cubase SE. This control panel comes with an
HTML Help describing the features and procedures.
Setting up the input and output ports
Once you have selected the driver and made the settings as described
above, you need to specify which inputs and outputs should be used
and name these:
1. In the Device Setup dialog, select VST Outputs in the list to the left.
All output ports on the audio hardware are listed.
CUBASE SE
4 – 42 Setting up your system
Page 43

2. To hide an output port, click in the “Visible” column for the port (so
that it says “No”).
Ports that aren’t visible cannot be selected in the VST Connections window where you
set up your input and output busses – see page 93.
If you attempt to hide a port that is already used by a bus you will be
asked whether this is really what you want – note that this will disable
the output port!
3. To rename a port, click on its name in the list and type in a new name.
• It is a good idea to give your ports generic names that are related to the
channel configuration (rather than to the actual hardware model)!
This makes it easier to transfer your projects between different computers.
4. Select VST Inputs in the list to the left and set up the input ports in the
same way.
5. Click OK to close the Device Setup dialog and apply your changes.
CUBASE SE
Setting up your system 4 – 43
Page 44

About monitoring
In Cubase SE, monitoring means listening to the input signal while preparing to record or while recording. There are basically three ways to
monitor:
External monitoring
External monitoring (listening to the input signal before it goes into
Cubase SE) requires an external mixer for mixing the audio playback
with the input signal. This mixer could be a stand-alone physical mixer
or a mixer application for your audio hardware, if this has a mode in
which the input audio is sent back out again (usually called “Thru”,
“Direct Thru” or similar).
Via Cubase SE
In this case, the audio passes from the input into Cubase SE, possibly
through Cubase SE effects and EQ and then back to the output. You
then control monitoring via settings in Cubase SE.
This allows you to control the monitoring level from Cubase SE and
add effects to the monitored signal only.
ASIO Direct Monitoring
If your audio hardware is ASIO 2.0 compatible, it may support ASIO
Direct Monitoring (this feature may also be available for audio hardware
with Mac OS X drivers). In this mode, the actual monitoring is done in
the audio hardware, by sending the input signal back out again. However, monitoring is controlled from Cubase SE. This means that the audio hardware’s direct monitoring feature can be turned on or off
automatically by Cubase SE.
Monitoring is described in detail in the Recording chapter in the Operation Manual. However, when setting up, there’s one thing to note:
• If you want to use the external monitoring via your audio hardware,
make sure the corresponding functions are activated in the card’s
mixer application.
CUBASE SE
4 – 44 Setting up your system
Page 45

Setting up MIDI
Always make all connections with all equipment turned off!
This section describes how to connect and set up MIDI equipment. If
you have no MIDI equipment you can skip this section.
Connecting the MIDI equipment
Below follows a description of a typical but small setup example. You
might need or want to hook things up differently!
In this example we assume that you have a MIDI keyboard and an external MIDI sound module. The keyboard is used both for feeding the
computer with MIDI messages for recording and for playing back MIDI
tracks. The sound module is used for playback only. Using Cubase
SE’s MIDI Thru feature (described later) you will be able to hear the
correct sound from the sound module while playing the keyboard or
recording.
MIDI
Interface
MIDI
MIDI
A typical MIDI Setup.
Out
OutIn
In
Thru
MIDI In
MIDI Sound Module
MIDI Keyboard
CUBASE SE
Setting up your system 4 – 45
Page 46

You might want to use even more instruments for playback. If you do,
simply connect MIDI Thru on the sound module to MIDI In on the next
instrument, and so on. In this hook-up, you will always play the first
keyboard when recording. But you can still use all your devices for
providing sounds on playback.
If you plan to use more than three sound sources we recommend that
you either use an interface with more than one output, or a separate
MIDI Thru box instead of the Thru jacks on each unit.
Setting MIDI Thru and Local On/Off
In the “MIDI” section in the Preferences dialog (located on the File menu
under Windows and on the Cubase SE menu under Mac OS X), you will
find a setting called “MIDI Thru Active” which can be enabled or not. This
is related to a setting in your instrument called “Local On/Off” or “Local
Control On/Off”.
• If you use a MIDI keyboard instrument, as described earlier in this chapter, MIDI
Thru should be activated and that instrument should be set to Local Off (sometimes called Local Control Off – see the instrument’s operation manual for details). This will let the MIDI signal from the keyboard get recorded into Cubase
SE and at the same time re-routed back to the instrument so that you hear
what you are playing, without the keyboard “triggering” its own sounds.
CUBASE SE
4 – 46 Setting up your system
Page 47

MIDI
MIDI
Interface
OutIn
When “MIDI Thru” is active in Cubase SE,
MIDI data received is immediately “echoed” back out.
MIDI data coming in to the instrument
is played by the “Synth” inside it.
MIDI In
MIDI
When you press a key, it is sent
out via MIDI to Cubase SE.
Out
In
Thru
MIDI Sound Module
“Synth”
MIDI Keyboard
When Local Control is turned on in the instrument, the keys you press will be played by the
“Synth” inside the Instrument.
When Local Control is turned off, this connection
is cut off.
• If you use a separate MIDI keyboard – one that does not produce any sounds
itself – MIDI Thru in Cubase SE should also be activated, but you don’t need
to look for any Local On/Off setting in your instruments.
• The only case where MIDI Thru should be deactivated is if you use Cubase SE
with only one keyboard instrument and that instrument cannot be set to Local
Off mode.
• Note that MIDI Thru will only be active for MIDI tracks that are record enabled
and/or have the monitor button activated. See the Recording chapter in the
Operation Manual for more information.
CUBASE SE
Setting up your system 4 – 47
Page 48

Setting up MIDI ports in Cubase SE
The Device Setup dialog lets you set up your MIDI system in the following ways:
• Note: After changing a setting in the Device Setup dialog, you should
click Apply and then click OK to close the dialog.
Showing or hiding MIDI Ports
Under Windows, the MIDI ports are listed in the Device Setup dialog
on the DirectMusic page and/or the Windows MIDI page (depending
on your system). By clicking in the “Show” column for a MIDI input or
output, you can specify whether or not it should be listed on the MIDI
pop-up menus in the program.
Under Mac OS X, you can hide or show MIDI ports on the MIDI System page in the Device Setup dialog.
• Hiding a MIDI port from view does not turn it off if it’s already selected
for a track or a MIDI device.
Setting up the “All MIDI Inputs” option
When you record MIDI in Cubase SE, you can specify which MIDI input each recording MIDI track should use. However, you can also select the “All MIDI Inputs” option, which causes any MIDI data from any
MIDI input to be recorded.
The All MIDI Inputs page in the Device Setup dialog allows you to specify which inputs should be included when you select All MIDI Inputs for
a MIDI track. This can be especially useful if your system provides several instances of the same physical MIDI input – by deactivating the duplicates you make sure only the desired MIDI data is recorded.
• If you have a MIDI remote control unit connected you should also make
sure to deactivate that MIDI input on the All MIDI Inputs page.
This is to avoid accidentally recording the data from the remote control when the “All
MIDI Inputs” option is selected as input for a MIDI track.
CUBASE SE
4 – 48 Setting up your system
Page 49

Setting up a default MIDI input and output
The Default MIDI Ports page in the Device Setup dialog allows you to
select which MIDI ports should be selected by default when you create
a new MIDI track. In other words, newly created tracks will always use
the input and output specified on this page. However, you can later
change this setting for each individual track in the Project window.
Connecting a synchronizer
Always make all connections with all equipment turned off!
When using Cubase SE with external tape transports you will most
likely need to add a synchronizer to your system. All connections and
setup procedures for synchronization are described in the Synchronization chapter in the Operation Manual.
CUBASE SE
Setting up your system 4 – 49
Page 50

Setting up video
Always make all connections with all equipment turned off!
Cubase SE plays back video films in AVI, Quicktime or MPEG formats.
Under Windows, video playback can be done using one of the following playback engines: Video for Windows, DirectShow or Quicktime.
This ensures compatibility with as wide a range of video files as possible. Under Mac OS X, Quicktime is always used as playback engine.
Generally there are two ways to play back video:
• Without any special hardware at all.
While this will be fine in many situations it does put a limit on the size of the video window as well as the quality of the image.
• Using video hardware that for example connects to an external monitor.
Mac OS X: Using a FireWire port, you can play back video on an external monitor using
a DV-to-analog converter or a DV camera (see also the Video chapter in the Operation
Manual).
This is valid for DV video and QuickTime is used for playback.
Windows: Multi-head graphics cards which support overlay functionality can be used to
display the video picture on an external monitor. As of this writing, the following manufacturers have working solutions available: nVIDIA and Matrox.
If you plan to use special video hardware, install it and set it up as
recommended by the manufacturer.
Before you use the video hardware with Cubase SE, we recommend
that you test the hardware installation with the utility applications that
came with the hardware and/or the Windows Media Player or Quicktime Player (Mac OS X) applications.
CUBASE SE
4 – 50 Setting up your system
Page 51

Optimizing audio performance
This section gives you some hints and tips on how to get the most out
of your Cubase SE system, performance-wise. Some of this text refers
to hardware properties and can be used as a guide when upgrading
your system. This text is very brief. Look for details and current information on the Steinberg web site (see page 12)!
Two aspects of performance
There are two distinct aspects of performance in respect to Cubase SE:
Tracks and effects
Simply put: the faster your computer, the more tracks, effects and EQ
you will be able to play. Exactly what constitutes a “fast computer” is
almost a science in itself, but some hints are given below.
Short response times (latency)
Another aspect of performance is response times. Latency is a phenomenon based on the fact that in a computer, audio has to be “buffered”
(stored) in small chunks during various steps of the recording and playback process. The more and larger those chunks, the higher the latency.
High latency is most troublesome when playing VST Instruments and
when monitoring through the computer, that is when listening to a live
audio source via the Cubase SE mixer and effects. However, very long
latency times (several hundred milliseconds) can hamper other processes like mixing, since e.g. a fader movement will affect the audio
noticeably late.
While Direct Monitoring and other techniques reduce the problems
associated with very long latency times, a system that responds fast
will always be more convenient to work with.
• Depending on your audio hardware, it may be possible to “trim” your
latency times, usually by lowering the size and number of buffers.
For details, refer to the audio hardware documentation, or, if you are using a DirectX or
MME driver under Windows, the HTML Help.
CUBASE SE
Setting up your system 4 – 51
Page 52

System factors that affect performance
CPU and processor cache
It goes without saying that the faster the computer processor, the better. But there are a number of factors that affect the apparent speed of
a computer: the bus speed and type (PCI is strongly recommended),
the processor cache size and of course, the processor type and brand.
Cubase SE relies heavily on floating point calculations. When shopping
for a processor, please make sure you get one that is powerful in calculating floating point arithmetics.
Note also that Cubase SE features full support for multi-processor
systems. So if you own a computer system with more than one processor, Cubase SE can take advantage of the total capacity and
evenly distribute the processing load to all available processors. See
page 53.
Hard disk and controller
The number of hard disk tracks you can record and play back at the
same time also depends on the speed of your hard disk and hard disk
controller. If you use E-IDE disks and controllers, make sure that the
transfer mode is DMA Busmaster. Under Windows, you can check
the current mode by launching the Windows Device Manager and
looking for properties of the IDE ATA/ATAPI Controller’s primary and
secondary channel. DMA transfer mode is enabled by default, but may
be turned off by the system should hardware problems occur.
Audio hardware and driver
The hardware and its driver can have some effect on regular performance. A badly written driver can reduce the performance of your
computer. But where the hardware driver design makes the most difference is with latency.
Again, we strongly recommend that you use audio hardware for which
there is a specific ASIO driver!
This is especially true when using Cubase SE for Windows:
• Under Windows, ASIO drivers written specifically for the hardware are more
efficient than MME or DirectX drivers and produce shorter latency times.
CUBASE SE
4 – 52 Setting up your system
Page 53

• Under Mac OS X, audio hardware with properly written Mac OS X (Core
Audio) drivers can be very efficient and produce very low latency times.
However, there are additional features currently only available with ASIO drivers, such
as the ASIO Positioning Protocol.
Making settings that affect performance
Choosing a driver for your audio hardware
As described on page 39, it is recommended to install and use a standard ASIO driver if available for your specific hardware. Check the
manufacturers web site for the latest drivers etc.
Making audio buffer settings
Audio buffers affect how audio is sent to and from the audio hardware.
The size of the audio buffers affects both the latency and the audio
performance. Generally, the smaller the buffer size, the lower the latency. On the other hand, working with small buffers can be demanding for the computer. If the audio buffers are too small, you may get
clicks, pops or other audio playback problems.
• Under Mac OS X, you can adjust the size of the buffers on the VST Audiobay
page in the Device Setup dialog.
You may also find buffer settings in the control panel for the audio hardware.
• Under Windows, you adjust the buffer size settings in the control panel for the
audio hardware (opened by clicking the Control Panel button on the driver
page in the Device Setup dialog).
The Expert settings
On the VST Audiobay page you will find a button called “Expert…”.
This opens a dialog with advanced settings for the VST Engine, including a Multi Processing switch. When this is activated (default setting if
you have a hyper-threading or multiple-CPU system – in a single-CPU
system, this option is greyed out) and there is more than one CPU in
your system, the processing load is distributed evenly to all available
CPUs, allowing Cubase SE to make full use of the combined power of
the multiple processors. See the Online Help for details.
Activating the “Lower Latency” option will basically disable the CPU
overload protection, but allow for lower latencies. See the Online Help
for details.
CUBASE SE
Setting up your system 4 – 53
Page 54

Optimizing processor scheduling (Windows only)
To get the lowest possible latencies when using ASIO under Windows
XP (on a single CPU system), the “system performance” has to be optimized for background tasks:
1. Open the Control Panel from the Start menu and select System.
2. Select the Advanced tab and click the Settings button in the Perfor-
mance section.
The Performance Options dialog appears.
3. Select the Advanced tab.
4. In the Processor Scheduling section, select “Adjust for best perfor-
mance of: Background services”
5. Click OK to close the dialogs.
CUBASE SE
4 – 54 Setting up your system
Page 55

5
Basic Cubase SE concepts
Page 56

About this chapter
This chapter describes the basic “building blocks” and terminology in
Cubase SE. Please take your time to read this chapter thoroughly before moving on!
The project
The native document format of Cubase SE is called a project. Before
you can start recording, playing back or editing you always have to create a new project, or open a saved project file from disk. There can be
several projects open at the same time, but one is always the active
project.
Two Project windows in Cubase SE. Here, the project “on top” is the active project,
as indicated by the lit blue indicator in the upper left corner of the window.
CUBASE SE
5 – 56 Basic Cubase SE concepts
Page 57

About the file and folder structure
A project file (file extension “.cpr” under Windows) is always associated
with a project folder on your hard disk. Several projects can share the
same project folder (which is practical if you have several versions of
your project, for example).
• The Audio folder contains audio files referenced by the project.
It is also possible for the project to refer to audio files elsewhere on your disk(s) – you
can even specify different folders for different audio tracks when recording. However,
having all audio files in the project’s Audio folder makes the project easy to move and
archive, and is a good safety measure.
• The Edits folder contains audio files created automatically by editing
and processing operations in Cubase SE.
As a rule, you shouldn’t touch the files in this folder. To remove unused edit files, it is
better to use the Cleanup function, as described in the Operation Manual.
• The Images folder contains waveform images for the audio files in the
project.
• The project file itself contains all references to audio and video files,
along with playback information, MIDI data and settings for the project
(such as sample rate, frame rate, etc.).
• Video files are never automatically copied to the project folder.
This is because video files are often very large, and it doesn’t make sense to copy them
into different project folders. However, nothing stops you from creating a Video folder
inside the project folder and storing your video files there.
• You may also find additional files in the project folder.
For example, Cubase SE’s Auto Save feature stores backup copies of the project file
in its project folder.
CUBASE SE
Basic Cubase SE concepts 5 – 57
Page 58

Audio terminology
When you record audio in Cubase SE, this is what happens:
• An audio file is created on the hard disk.
• In Cubase SE, an audio clip is created. The audio clip refers to the audio file
on disk.
• An audio event is also created in Cubase SE. This plays back the audio clip.
There are good reasons for this long chain of references:
• The audio event is the object that you place on a time position in Cubase SE.
If you make copies of an audio event and move them to different positions in
the project, they will still all refer to the same audio clip.
Furthermore, each audio event has an Offset value and a Length value. These
determine at which positions in the clip the event will start and end, i.e. which
section of the audio clip will be played back by the audio event. For example,
if you resize the audio event, you will just change its start and/or end position
in the audio clip – the clip itself will not be affected.
• The audio clip does not necessarily refer to just one original recorded file!
For example, if you apply some processing to a section of an audio clip, this will
actually create a new audio file that contains only the section in question. The
processing will then be applied to the new audio file only, leaving the original
audio file unchanged. Finally, the audio clip is automatically adjusted, so that it
refers both to the original file and to the new, processed file. During playback,
the program will switch between the original file and the processed file at the
correct positions. You will hear this as a single recording, with processing applied to one section only.
This feature makes it possible to undo processing at a later stage, and to apply
different processing to different audio clips that refer to the same original file.
CUBASE SE
5 – 58 Basic Cubase SE concepts
Page 59

Audio tracks, parts and channels
For an audio event to be played back in Cubase SE, it has to be placed
on an
audio track
. This is similar to a track on a multi-track tape recorder,
and allows you to view the event and move it along the timeline. You
can place any number of audio events on an audio track, but only one at
a time can be played back. You can have a virtually unlimited number of
audio tracks, although the number of tracks you can play back at the
same time depends on your computer performance.
Even though audio events can be placed directly on audio tracks, sometimes it is convenient to gather several audio events into an
audio part
This is simply a “container”, allowing you to move and duplicate several
audio events as one.
An event and a part.
Each audio track has a corresponding
audio channel
in the mixer. This
is much like a channel on a hardware mixer, allowing you to set levels
and panning, add EQ and effects, etc.
.
CUBASE SE
Basic Cubase SE concepts 5 – 59
Page 60

MIDI terminology
When you are recording MIDI (or entering MIDI data manually in an
editor),
separate MIDI event, and if you record the movement of a modulation
wheel or other controller, a large number of densely spaced events
are created.
MIDI events
are created. For example, each note you record is a
MIDI events are always placed in
lowing you to move or copy a number of MIDI events (e.g. a recorded
MIDI melody line) as one item.
MIDI parts are placed on MIDI tracks. For each MIDI track you can
specify on which MIDI output and MIDI channel its MIDI events should
be played back. This allows you to have different tracks play back different sounds, in the same or different MIDI instruments.
A MIDI part on a MIDI track. The black lines in the part indicate MIDI events.
MIDI parts
. These are “containers”, al-
Video terminology
• When you import a video file from disk into a Cubase SE project, a video clip
is created that refers to the file.
• A video event is then created, referring to the video clip. Video events can be
moved, copied and resized without affecting their video clips.
• For a video event to be played back, it has to be placed on the video track.
There can only be one video track in a Cubase SE project.
The video support in Cubase SE is described in its own chapter in the
Operation Manual.
CUBASE SE
5 – 60 Basic Cubase SE concepts
Page 61

6
Basic Methods
Page 62

About this chapter
This chapter contains descriptions of the general methods and procedures used in Cubase SE. As this information applies to all parts of the
program and all ways of working, please take time to read this chapter
before continuing with the Operation Manual.
Using menus
Main menus
The menus in the main Cubase SE menu bar are available regardless
of which window is active. You select items from the main menus following the standard procedure for the operating system. Menu items
that are not relevant in the current window may be greyed out.
Pop-up menus
Pop-up menus can be found throughout the program and are often
used for selecting options or values. A pop-up menu is indicated by a
small arrow in a field showing the currently selected option/value.
• To bring up the pop-up menu, click the arrow.
Selecting is done as with regular menus.
Selecting from the Snap pop-up menu.
CUBASE SE
6 – 62 Basic Methods
Page 63

The Quick menu
In Cubase SE, clicking the right mouse button will bring up a contextual
pop-up menu (under Mac OS X you need to press [Ctrl] and click, or
preferably use a two-button mouse set up so that the right mouse button generates a [Ctrl]-click).
Some areas have special context menus with functions or settings that
only apply to the corresponding area (for example, right-clicking in a
ruler brings up a pop-up menu with display format options).
However, right-clicking in the main area of a window brings up the
Quick menu. As a rule, the Quick menu contains:
• The tools (provided that the window has tools), see page 64.
• The most relevant menu items from the main Cubase SE menus.
• Settings that are specific for the window.
For example, in the Sample Editor the Quick menu contains settings determining which
elements should be shown in the waveform display.
The Quick menu in the Sample Editor.
• If the option “Popup toolbox on right click” is activated in the Preferences
dialog (Editing page), right-clicking (or [Ctrl]-clicking under Mac OS X)
will instead bring up a dedicated toolbox, containing the tools only.
In that case you can bring up the Quick menu by pressing a modifier key (e.g. [Shift])
and right-clicking/[Ctrl]-clicking.
CUBASE SE
Basic Methods 6 – 63
Page 64

Using tools
Editing in Cubase SE is largely done with the various tools. Typical examples are selecting and moving events with the Arrow (Object Selection) tool, drawing with the Pencil tool, deleting with the Eraser tool,
etc. There are different tools for different windows.
Tools can be selected in four ways:
• By clicking the corresponding tool icon on the toolbar.
When you click a tool icon, the pointer takes on the shape of the corresponding tool.
• By using the Quick menu.
As described on page 63, right-clicking (Win) or [Ctrl]-clicking (Mac) in the main area
of a window brings up the Quick menu. The tools will be listed (along with their corresponding icons) at the top of the menu – to select a tool, simply select it from the menu.
CUBASE SE
6 – 64 Basic Methods
Page 65

• By using the dedicated toolbox.
If the option “Popup toolbox on right click” is activated in the Preferences dialog (Editing page), right-clicking (or [Ctrl]-clicking under Mac OS X) will bring up the toolbox
instead. This shows the tools only and you select tools as if from a menu.
Note that you can still bring up the Quick menu in this mode by pressing a modifier key
(e.g. [Shift]) and right-clicking/[Ctrl]-clicking. Similarly, if the option isn’t activated in
the Preferences dialog, you can bring up the toolbox in that way.
• By using key commands.
By default, the keys [1] - [9] on the alphanumeric part of the keyboard are used, so that
pressing [1] selects the leftmost tool and so on. You can also use key commands to
step between the tools on the toolbar. By default, pressing [F9] selects the previous
tool and pressing [F10] selects the next tool.
The uses and purposes of the tools in the different windows are described in the corresponding chapters of the Operation Manual.
About tool tips
If you position the pointer over a tool icon (or any other icon or button
in Cubase SE), a label will appear after a moment, informing you of the
function of the icon or button.
• This feature can be turned off by deactivating the option “Show Tips”
on the General page in the Preferences dialog (found on the File menu
under Windows and on the Cubase SE menu under Mac OS X).
CUBASE SE
Basic Methods 6 – 65
Page 66

Changing values
Throughout the program you will encounter various value fields that
can be edited. These can be divided into three categories: position
values, regular numeric values and names.
Editing position values
Depending on the selected display format (see the Operation Manual),
position values in Cubase SE are usually divided into several “segments” (the exception being the “Samples” display format, in which
values are edited as regular numeric values). Two examples:
If the “Seconds” display format is selected, positions are shown as
“hours:minutes:seconds.milliseconds”.
If the “Bars+Beats” display format is selected, positions are shown as
“bars.beats.sixteenth notes.ticks” (with 120 ticks per sixteenth note, by default).
Each value segment can be edited separately, in one of the following
ways:
• Point at the upper or lower edge of the segment and click.
Clicking at the upper edge will raise the value of the segment one step, clicking at the
lower edge will lower the value.
• Click directly on the value segment, type in a new value and press
[Return].
• If you are using a wheel mouse, point at the value segment and use
the wheel to raise or lower its value.
Generally, we recommend that you use a wheel mouse, as this speeds up editing in
many areas in Cubase SE.
CUBASE SE
6 – 66 Basic Methods
Page 67

You can also edit the whole value (all segments) by double clicking
and typing in a new value. Note:
• To separate the value segments, you can use spaces, dots, colons or
any other character that isn’t a number.
• If the “Bars+Beats” display format is selected, and you enter a value
with less than four segments, the largest position value segments will
be affected and the program will set the lesser segments to their lowest values.
For example, if you enter “5.3”, the position will be set to “5.3.1.0”.
• If one of the frame based display formats is selected and you enter a
value with less than four segments, the smallest position value segments will be affected and the program will set the larger segments to
their lowest values.
For example, if you enter “2:5”, the position will be set to “0:0:2:5”.
• If the “Seconds” display format is selected, value editing works as
with the frame based formats, with one addition: The smallest value
segment (milliseconds) is considered to be the decimal part of the
seconds segment.
This means that if you enter “2:50”, the position will be set to “0:0:2:500”, rather than
“0:0:2:050”.
Editing regular numeric values
Numeric values other than positions are edited by clicking the value
and editing numerically from the computer keyboard.
In the Preferences dialog (Editing–Controls page) you can specify
what should happen when you click on a value field. The “Value Box/
Time Control Mode” item contains the following options:
Option Description
Text Input on Left-Click In this mode, clicking a value box will open it for editing by
typing.
Increment/Decrement on
Left/Right-Click
Increment/Decrement on
Left-Click and Drag
In this mode you can click with the left or right mouse button to decrease or increase the value, respectively. To edit
values by typing in this mode, please double-click.
In this mode, you can click and drag up or down to adjust
the value (much like dragging a vertical fader). To edit values by typing in this mode, please double-click.
CUBASE SE
Basic Methods 6 – 67
Page 68

• In the Inspector and elsewhere in the program you can find value sliders
that may be blue or green – click and drag to adjust the value.
• For some values, you can hold down [Alt]/[Option], click on the value
and keep the mouse button pressed to display a value slider.
This allows you to scroll the value by dragging up or down with the mouse button
pressed. When you release the mouse button, the value slider is hidden again.
Adjusting the event volume setting on the info line.
• Most values can also be edited using a wheel mouse: point at the
value and use the wheel to raise or lower it.
Editing names
To edit a name, click on it, type a new name and press [Return] (or click
outside the name field).
CUBASE SE
6 – 68 Basic Methods
Page 69

Using knobs and sliders
In the VST audio windows, most parameters are shown as knobs, sliders and buttons, emulating hardware interfaces. For knobs and sliders,
you can select the desired way of making adjustments in the Preferences dialog (Editing–Controls page):
Knobs
The Knob Mode pop-up menu contains the following options:
Option Description
Circular To move a knob, you click on it and drag in a circular motion, much like
turning a “real” knob. When you click anywhere along the knob’s edge,
the setting is immediately changed.
Relative
Circular
Linear To move a knob, you click on it and drag up or down with the mouse but-
Works like the “Circular” option, but clicking does not automatically change
the setting. This means you can make adjustments to the current setting by
clicking anywhere on a knob and dragging, without having to click on the
exact current position.
ton pressed – as if the knob were a vertical slider.
Sliders
The Slider Mode pop-up menu contains the following options:
Option Description
Jump In this mode, clicking anywhere on a slider will make the slider handle
instantly move to that position.
Touch In this mode, you have to click on the actual slider handle to adjust the
parameter. This reduces the risk of accidentally moving sliders.
Ramp In this mode, clicking anywhere on a slider (but not on the handle) and
keeping the mouse button pressed, will cause the handle to move smoothly
to the new position.
Basic Methods 6 – 69
CUBASE SE
Page 70

Option Description
Relative In this mode, clicking anywhere on a slider does not automatically change
the setting, but you can make adjustments to the current setting by clicking anywhere on a slider and dragging, without having to click on the exact
current position.
Selecting objects
Selecting Cubase SE objects such as audio and MIDI events is generally done with the Arrow tool, according to standard selection procedures.
• Clicking on an object selects it (and deselects any previously selected
objects).
• Holding down [Shift] and clicking on an object selects it without deselecting any other objects.
• You can also create a selection rectangle by clicking in an empty area
and dragging with the mouse button pressed.
All objects partially or totally enclosed by the rectangle will be selected.
• If an object is already selected, you can use the left and right arrow
key on the computer keyboard to select the previous or next object,
respectively.
Holding down [Shift] and using the arrow keys allows you to select the previous/next
object without deselecting the current object.
There are several additional ways to make selections in the different
Cubase SE windows. These are described in the corresponding
Operation Manual chapters.
CUBASE SE
6 – 70 Basic Methods
Page 71

Zoom and view techniques
Scrolling the view
If the active window isn’t large enough to show all its contents, you can
scroll the view by using the standard window scroll bars. However, if
you are using a wheel mouse, there are two additional ways to scroll:
• Rolling the wheel will scroll the view vertically.
If you hold down [Shift] and use the wheel, the view will be scrolled horizontally. Just
make sure not to point at a value field, as this will edit the value instead.
• If you aim in the main area of a window, click the wheel and keep it
pressed, the pointer takes on the shape of a hand. You can now scroll
the view freely by dragging the mouse horizontally and/or vertically.
Zooming
All windows that contain graphical displays can be zoomed horizontally and vertically. While some windows have special zoom functions
(see the respective chapters in the Operation Manual), a few methods
are commonly available:
Using the zoom sliders
In the lower right corner of all zoomable displays, you will find two
zoom sliders.
• To zoom in horizontally, drag the horizontal zoom slider handle to the
right.
• To zoom in vertically, drag the vertical zoom slider upwards.
There is one exception to this: in the Project window, dragging the vertical zoom slider
upwards will decrease the height of Tracks (in effect, zooming out). See the chapter
“The Project Window” in the Operation Manual.
CUBASE SE
Basic Methods 6 – 71
Page 72

• Clicking on a zoom slider will move the handle to the click position,
instantly changing the magnification.
If the project cursor is visible when you zoom in or out horizontally, the
magnification will be “centered on the cursor”. In other words: if possible, the project cursor will remain in the same position on screen.
Using the Magnifying Glass tool
You can use the Magnifying Glass tool to zoom in and out horizontally,
using the following methods:
• Click once to zoom in one step.
Zooming will be centered on the click position.
• Double click (or press [Alt]/[Option] and click) to zoom out one step.
• Draw a zoom rectangle by pressing the mouse button, dragging the
pointer and releasing the mouse button.
The view will zoom in horizontally, so that only the area enclosed in the zoom rectangle
is visible.
Using the Zoom submenu
At the bottom of the Edit menu, you will find a Zoom submenu with
various zoom functions. Exactly which items on the submenu are available depends on the currently active window.
• The Zoom submenu is also available as a separate menu item on the
Quick menu.
• As with any menu item, you can specify key commands for the functions
on the Zoom submenu, for quick access.
Key commands are set up in the Key Commands dialog on the File menu. This is
described in a separate chapter in the Operation Manual.
CUBASE SE
6 – 72 Basic Methods
Page 73

Zooming in the ruler
If the option “Zoom while Locating in Time Scale” is activated in the
Preferences dialog (Transport page), you can use the rulers for zooming. This allows you to quickly zoom in or out on a certain position,
without having to select a special tool:
1. Click in the ruler and keep the mouse button pressed.
The project cursor is automatically moved to the click position. If you don’t want to
move the cursor, press [Shift] and click in the ruler instead.
2. Drag down to zoom in (horizontally) or drag up to zoom out.
Zooming will be centered on the project cursor.
Window handling
Generally, Cubase SE windows are handled according to the standard
procedures. However, the Window menu contains some functions that
make work quicker and easier:
Menu item Description
Close Closes the currently active window. If this is a Project win-
dow, you will close the current project.
Close All Closes all windows, including all open projects.
Minimize All Minimizes all windows.
Restore All Restores all minimized Cubase SE windows.
CUBASE SE
Basic Methods 6 – 73
Page 74

Menu item Description
Tile Horizontally/Vertically
(Windows version only)
Cascade
(Windows version only)
Windows… See below.
The open windows list Selecting a window from the list at the bottom of the menu
Arranges the open windows next to each other on screen.
Arranges the open windows in a partially overlapping pattern.
brings it to front.
The Windows dialog
By selecting “Windows…” from the Window menu, you open the
Windows dialog. This allows you to manage the open windows in
various ways.
The display to the left lists all open windows, hierarchically arranged
(so that editors and other windows that belong to a certain project are
listed under the corresponding Project window). To the right are various window functions. To use one of the functions, proceed as follows:
1. Click in the field below the OK button to select one of the selection
modes:
Mode Description
Selected Only the windows selected in the list will be affected.
Cascaded The selected windows will be affected, along with all their “sub-win-
dows”. Typically, if a Project window is selected in the list, all open
windows belonging to that project will be affected.
All All windows will be affected, regardless of the selection.
CUBASE SE
6 – 74 Basic Methods
Page 75

2. If you chose the “Selected” or “Cascaded” modes, select the desired
windows by clicking in the list.
As usual, you can select multiple items by holding [Shift] or [Ctrl]/[Command] and
clicking.
3. Use the buttons to the right to activate (bring to front), minimize, restore
or close the specified window(s).
Closing a window will also remove it from the list.
4. When you are done, click OK to close the dialog.
The Devices panel
If you like, you can manage devices from a central Devices panel:
1. Pull down the Devices menu and select “Show Panel”.
The Devices Panel appears.
2. To display a closed or hidden window, click on its button in the Devices
panel.
3. Clicking the button again will close the window.
CUBASE SE
Basic Methods 6 – 75
Page 76

Undo
You can undo operations in Cubase SE by using the Undo command
on the Edit menu.
• The Undo function can be applied to virtually all actions you perform,
in multiple levels.
It is accessed by using the “Undo”, “Redo” and “History” items on the Edit menu, as
described below.
The Undo and Redo commands
Cubase SE offers wide-ranging, multiple Undo, allowing you to undo
virtually any action you perform.
• To undo the last performed action, select Undo from the Edit menu or use the
corresponding key command (by default [Ctrl]/[Command]-[Z]).
If you select Undo again, the previously performed action will be undone, and so on.
• To redo the last undone action, select Redo from the Edit menu or use the
corresponding key command (by default [Ctrl]/[Command]-[Shift]-[Z]).
Undone actions will be available for Redo until you perform another action (at which
point the “Redo stack” is cleared – see below).
CUBASE SE
6 – 76 Basic Methods
Page 77

The Edit History window
Selecting “History…” from the Edit menu opens the Edit History window. This contains a graphic representation of the “Undo stack” (the
performed actions, with the most recent action at the top of the stack)
and the “Redo stack” (the undone actions, with the most recently undone action at the bottom of the stack). The two stacks are separated
by a divider line.
The most recently undone action.
The most recently performed action.
The Redo stack.
The Undo stack.
CUBASE SE
Basic Methods 6 – 77
Page 78

The Edit History dialog allows you to undo or redo several actions in
one go, by moving the divider between the Undo stack and the Redo
stack (in essence, moving actions from the Undo stack to the Redo
stack, or vice versa):
1. Click on the divider line and drag it up or down.
Drag up to redo actions, drag down to undo them.
In this case, three more actions will be undone (and moved to the Redo stack).
• You can also click directly between two items in the list, instantly moving the divider line.
• When you move the divider line by dragging or clicking, the actions
are immediately undone or redone.
The changes are reflected in all open Cubase SE windows.
2. When you’re finished, click OK to close the dialog.
The Undo and Redo stacks are cleared when you close a project.
CUBASE SE
6 – 78 Basic Methods
Page 79

7
Guided Tour
Page 80

The main windows in Cubase SE
The Project window
The Project window is the main window in Cubase SE. This provides
you with a graphic overview of the project, allowing you to navigate and
perform large scale editing. The Project window is divided vertically into
tracks and has a time line going from left to right. Each project has one
Project window.
The project cursor.
The area with various
track settings to the left
is called the Inspector.
CUBASE SE
7 – 80 Guided Tour
The Track list with
various track types.
The area to the right in the Project window is called the event display. This is
where you view and edit audio and
MIDI events, automation curves, etc.
Page 81

The Transport panel
The Transport panel features transport controls, much like those found
on a conventional tape recorder. It can also be used for locating Marker
positions, setting tempo and time signature, etc.
MIDI/Audio Input/
output activity meters
Marker
section
CPU/Disk meter
Recording
modes and
auto quantize
Position displays
The left and right locators define where to start
and end recording and
what section to cycle.
Tempo display and
metronome settings
Transport
controls
Sync display Level Control
• Note that you can customize the appearance of the Transport panel!
You can remove controls that you don’t need to use or even change the positions of
the different sections on the panel. This is described in the Customizing chapter in the
Operation Manual.
CUBASE SE
Guided Tour 7 – 81
Page 82

The Pool
All files, audio or video, that belong to a project are listed in the Pool.
There is a separate Pool for every project. In the Pool you can organize,
convert and audition clips, amongst many other things.
Audio folder
Trash folder Video folder
Audio clips
Waveform image
CUBASE SE
7 – 82 Guided Tour
Page 83

The Sample Editor
In the Sample Editor you can view and manipulate audio, by cutting
and pasting, removing or drawing audio data.
Thumbnail overview
Waveform view
A selected range
CUBASE SE
Guided Tour 7 – 83
Page 84

The MIDI editors
Editing MIDI data is done using the MIDI editors. The following editors
are available:
Key Editor
The Key Editor shows the contents of one or several MIDI parts. The
MIDI notes are represented by “boxes”, whose vertical position corresponds to their pitch.
This box represents a MIDI note.
This section is called the controller display. It shows “continuous” MIDI
events (such as controllers) or as in this figure, the velocity values of notes.
CUBASE SE
7 – 84 Guided Tour
Page 85

Score Editor
The Score Editor shows MIDI notes as a musical score. The Score
Editor is described in the Operation Manual.
List Editor
The List Editor shows MIDI events as a list, allowing you to view and
edit their properties numerically.
CUBASE SE
Guided Tour 7 – 85
Page 86

Drum Editor
The Drum Editor is similar to the Key Editor, but takes advantage of
the fact that with drum parts, each key corresponds to a separate
drum sound.
CUBASE SE
7 – 86 Guided Tour
Page 87

Tempo Track Editor
Tracks follow a tempo which can either be fixed through the whole
project or follow the tempo track. In the Tempo Track Editor you can
draw curves that determine how the tempo will change over time or
record tempo changes in real time.
Time signature events
The tempo curve
The Mixer
The Mixer is where you mix your audio and MIDI channels, that is, adjust
the levels (volume), panning, effect sends, EQ, etc. You will also find
channel strips for the output busses here.
CUBASE SE
Guided Tour 7 – 87
Page 88

Channel Settings
The Channel Settings window is used for adding effects and EQ to
individual channels. Each mixer channel has its own Channel Settings
window.
Inserts section Equalizer section Sends section
VST Connections
This is where you set up input and output busses – the audio connections between Cubase SE and the inputs and outputs on your audio
hardware.
CUBASE SE
7 – 88 Guided Tour
Page 89

8
Tutorial 1: Recording and
playing back audio
Page 90

About this tutorial
This chapter contains a step-by-step description of how to make a
simple audio recording and play it back. The purpose is for you to try
out some of the most common recording and playback features. However, you should make sure to read the Recording chapter in the Operation Manual before doing any “serious” recording, as there are a lot
of settings, options and methods that are not mentioned here.
Before you start
This chapter assumes that:
• You have installed and set up your audio hardware.
• Your audio source (a mixer or tape recorder, for example) is properly
connected to the inputs of the audio hardware.
• The outputs of the audio hardware are connected to some sort of listening equipment, allowing you to listen to the recorded audio during
playback.
• You are monitoring your audio source through Cubase SE.
This means that when you are recording, the audio source is sent into Cubase SE and
then back out again to your monitoring equipment. This way of monitoring allows you to
adjust monitoring levels from within the program, add effects to the monitor signal, etc.
However, it also requires audio hardware with low latency – otherwise the monitored
signal will be noticeably delayed.
Even if you find that the latency is too high for monitoring through Cubase SE – please
bear with us through this tutorial! In the Operation Manual you will find other methods
for monitoring that may suit you better.
• You have launched Cubase SE.
CUBASE SE
8 – 90 Tutorial 1: Recording and playing back audio
Page 91

Creating a new project
Before you can start recording, you need a working environment – a
project:
1. Pull down the File menu and select “New Project”.
A dialog appears, listing a number of project templates for various purposes.
2. Make sure the “Empty” item in the list is selected and click OK.
A file dialog appears, allowing you to specify a location for the project folder. This will
contain all files related to the project.
3. Navigate to the desired location of the project folder, and select it by
clicking OK, or click “Create” to create and name a new folder.
The project folder is created on disk, and an empty Project window appears.
At this point, you can make various settings for the project, such as
sample rate, resolution, etc. However, to keep things simple we will
use the default settings for now.
CUBASE SE
Tutorial 1: Recording and playing back audio 8 – 91
Page 92

The next step is to create an audio track to record on:
4. Pull down the Project menu and select “Add Track”.
A submenu appears, listing the various types of tracks available in Cubase SE.
5. Select “Audio”.
In the dialog that appears you can select whether the track should be mono or stereo.
6. In this example, set the track to stereo by selecting Stereo from the
pop-up menu and clicking “OK”.
An empty audio track appears in the Project window.
CUBASE SE
8 – 92 Tutorial 1: Recording and playing back audio
Page 93

Preparing to record
Before you can start recording, there are some preparations to make:
Setting up input and output busses
When you record in Cubase SE, the signal passes from the inputs on
your audio hardware to an input bus in the program. This is where you
check levels and adjust the sound to be recorded. From the input bus
the signal is written to an audio file on your hard disk, and sent to the
track’s channel in the mixer for monitoring etc.
Sound to be
recorded
Audio Hardware
Input bus in Cubase SE Mixer channel for
the audio track
Audio file on hard disk
You can have as many input busses as you like, but for this example
we only need a stereo input bus:
1. Pull down the Devices menu and select “VST Connections”.
The VST Connections window appears. This is where you view, add and set up input
and output busses.
CUBASE SE
Tutorial 1: Recording and playing back audio 8 – 93
Page 94

2. Select the “Inputs” tab by clicking on it.
By default, there is a stereo bus present – if there wasn’t you could easily add one by
clicking the Add Bus button.
3. Click the “+” button to the left so that the individual inputs in the bus
are shown.
The Device Port column shows the physical inputs on your audio hardware that are
used by the bus.
4. Click in the Device Port column for the “Left” channel.
A pop-up menu appears, listing all inputs on your audio hardware.
5. Select the input you want to use for the left channel in the stereo bus.
6. Select the input for the right channel in the same way.
7. Click the “Outputs” tab and set up a stereo output bus in the same way.
This is strictly not required for recording – but you need it for monitoring and for playing back the recording afterwards.
8. Close the VST Connections window and open the Mixer from the
Devices menu.
This is Cubase SE’s Mixer window, used for setting levels, etc. The mixer contains
channel strips for all tracks in the project and all the output busses (input busses are
not shown in Cubase SE).
CUBASE SE
8 – 94 Tutorial 1: Recording and playing back audio
Page 95

• Right now the mixer should contain one stereo audio channel and one
output bus – just like the picture above.
If not, check the Hide buttons to the left. If any of these is lit (orange), click on it so that
it goes grey.
When this button is lit, the output busses are hidden.
Leave the Mixer window open for now.
Checking the input level
When you record digitally, it’s important to set the input level correctly.
Above all, you don’t want the signal to be too loud, as this will cause
clipping, digital distortion.
Clipping typically occurs in the audio hardware, when a too loud analog signal is converted to digital in the hardware’s A/D converters.
Check the level at the channel strip for the track on which you are
recording:
1. Locate the channel strip for the track you’re about to record on.
2. Activate monitoring for the channel by clicking the speaker button next
to the fader.
When monitoring is activated, the meter shows the level of the incoming audio signal.
CUBASE SE
Tutorial 1: Recording and playing back audio 8 – 95
Page 96

3. Play the audio source that you want to record and check the level
meter for the channel.
4. Adjust the output level of your audio source so that the meters go reasonably high without reaching 0.0 dB.
Check the numerical peak level indicator below the meter in the bus channel strip. To
reset the peak level indicator, click on it.
• You must adjust the output level of the audio source – you cannot use
the faders in Cubase SE to adjust the input level!
• An alternative way of checking the input levels would be to use the control
panel for your audio hardware (if it’s equipped with input level meters).
See the documentation of the audio hardware for details.
Making the track ready for recording
1. If the “Record Enable” button next to the fader on the mixer channel
strip isn’t already red, click on it so that it lights up.
2. Make sure the Transport panel is visible.
If not, pull down the Transport menu and select the “Transport Panel” item at the top.
CUBASE SE
8 – 96 Tutorial 1: Recording and playing back audio
Page 97

3. The Transport panel contains a lot of options that affect how recording is done – in this example we want most of them to be turned off.
Check that the following buttons are off (grey or unlit):
Click and Precount deactivated.
Punch In and Punch Out deactivated. Cycle deactivated.
Sync deactivated.
4. Click in the ruler (the time scale area above the track in the Project
window), at the position where you want to start recording.
When you click, the project cursor (the black vertical line) is automatically moved to
the click position. In our example, recording will start from the project cursor position.
Setting the project cursor position in the ruler.
5. To set recording to start at the cursor position, pull down the Transport menu and make sure the item “Start Record at Left Locator” is
deactivated (unticked).
CUBASE SE
Tutorial 1: Recording and playing back audio 8 – 97
Page 98

Setting up monitoring
When you are monitoring through Cubase SE, you can choose to activate monitoring manually or automatically, in several different ways. In
this example we choose the “Tapemachine Style” monitoring, in which
the input signal is automatically monitored in Stop mode and during
recording – but not during playback. This is convenient since it allows
you to play back and listen to your recording without having to turn off
monitoring first.
1. Pull down the File menu (Win) or Cubase SE menu (Mac) and select
“Preferences…”.
2. In the Preferences dialog, click the VST item to the left.
3. Pull down the Auto Monitoring pop-up menu and make sure “Tape-
machine Style” is selected.
4. Click OK to close the Preferences dialog.
5. Bring up the Mixer and locate the channel strip for the audio track.
Since the track is record enabled (the red button is lit) and Cubase SE is in Stop
mode, monitoring should now be activated.
6. Check the monitoring by playing back your audio source and listening
to your monitoring equipment.
You should see the meters move in the channel strip for the audio track and in the output bus to the right.
7. If you like you can adjust the monitoring level with the fader for the
audio track.
This will not affect the level in the recorded audio file.
You are ready to record!
CUBASE SE
8 – 98 Tutorial 1: Recording and playing back audio
Page 99

Recording
1. Start recording by clicking the Record button on the Transport panel.
The project cursor will start moving.
2. Play your instrument, etc.
During recording, a rectangle with an audio waveform will appear, covering the recorded
area. This is the recorded audio event.
3. When you are done, click the Stop button on the Transport panel.
Recording stops and you can see the resulting audio event on the track.
4. If you are done recording, click the Record Enable button in the area
to the left of the track, so that it goes dark.
Playing back what you just recorded
1. Move the project cursor to the beginning of the recorded audio event.
This could either be done by clicking in the ruler, or by using the Rewind button on the
Transport panel.
2. Click the Play button on the Transport panel.
Your recording will be played back.
3. When you are done, stop playback by clicking the Stop button on the
Transport panel.
CUBASE SE
Tutorial 1: Recording and playing back audio 8 – 99
Page 100

Recording more events
At this point, you may want to continue recording audio, on the same
track or on a new track.
Recording more on the same track
To record more audio on the same track, move the project cursor to a
new start position and proceed as when you recorded the first time.
It is possible to record audio events that overlap each other, but only the
visible events (the events at the top) will be heard when you play back.
Recording a new audio track
This example shows how to record a new audio track, while listening
to the first recording.
1. Create a new audio track by using the “Add Track” submenu on the
Project menu.
2. Decide whether you want the new track to be stereo or mono in the
dialog that appears.
3. Use the Input pop-up menu in the Inspector to make sure that the
same stereo input bus is selected for the new track.
If the audio source is another than the one you first recorded, you need to check the
input level again – see page 95.
4. Record enable the new track by clicking the red Record Enable button
in its mixer channel strip.
Make sure that the Record Enable button for the first track is disabled – otherwise you
will be recording on both tracks at the same time.
5. Move the project cursor to the desired start position.
6. Activate recording by clicking the Record button on the Transport panel.
While you are recording, the first audio track is played back.
7. When you are done, click the Stop button on the Transport panel.
CUBASE SE
8 – 100 Tutorial 1: Recording and playing back audio
 Loading...