

Sony MDS-SP55 User Manual
4-230-236-12(1)
MiniDisc Deck
Operating Instructions
MDS-SP55
©2000 Sony Corporation
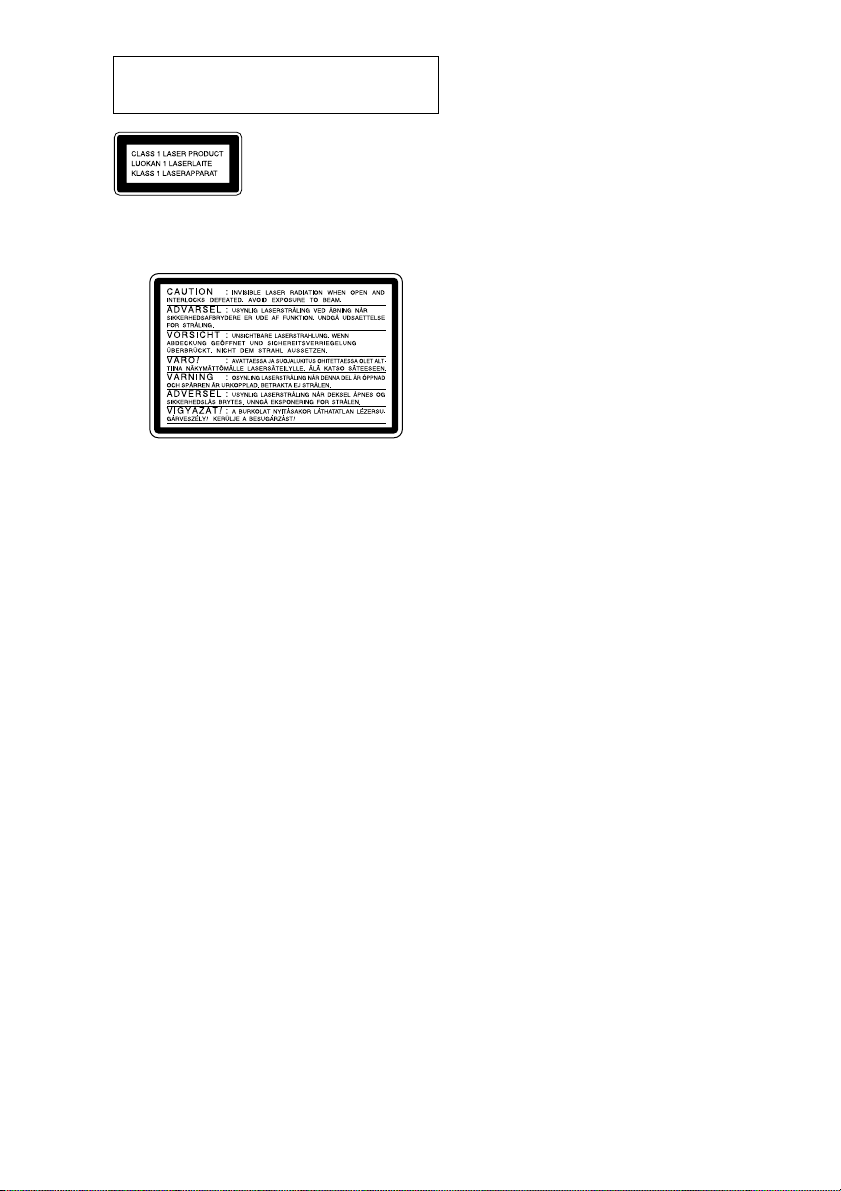
Do not install the appliance in a confined space,
such as a bookcase or built-in cabinet.
This appliance is classified as
a CLASS 1 LASER product.
The CLASS 1 LASER
PRODUCT MARKING is
located on the rear exterior.
The following caution label is located inside of the
unit.
US and foreign patents licensed from Dolby
Laboratories.
The MDS-SP55 MD deck is
designed only for the
CMT-SP55TC Micro Hi-Fi
component system
Here are some of the features you can use with
this MD deck when connected with the
CMT-SP55TC Micro Hi-Fi component system
(see page 4).
Auto Power On/Off
The MD deck power is tied with the
CMT-SP55TC Micro Hi-Fi component system.
Synchro Recording
You can easily record a CD onto an MD (see
pages 12 and 15).
Automatic Source Selection
You can switch from another source to the MD
deck and start playing an MD just by pressing H
on the MD deck (see page 6).
Timer
You can wake up to music or record a radio
programme at a preset time. For details, refer to
“Falling asleep to music” and “Waking up to
music” in the CMT-SP55TC Operating
Instructions, and “Timer recording radio
programmes” on page 20.
Remote Control
You can operate the MD deck using the remote
supplied with CMT-SP55TC.
2

Table of Contents
Getting Started
Hooking up the system.............................. 4
Playback
Playing an MD .......................................... 6
Playing MD tracks in random order
— Shuffle Play ................................... 7
Programming MD tracks
— Programme Play ............................ 8
Playing MD tracks repeatedly
— Repeat Play .................................... 9
Using the MD display ............................. 10
Editing
Before you start editing ........................... 28
Labelling an MD — Name Function ...... 29
Erasing recordings — Erase Function .... 31
Moving recorded tracks
— Move Function ............................ 34
Dividing recorded tracks
— Divide Function ........................... 35
Combining recorded tracks
— Combine Function ....................... 37
Undoing the last edit
— Undo Function ............................. 38
Optional Components
Connecting a digital component ............. 39
Recording
Before you start recording....................... 11
Recording a CD on an MD
— CD-MD Synchro Recording........ 12
Recording a tape on an MD .................... 13
Recording your favourite CD tracks
on an MD
— CD-MD Synchro Recording........ 15
Recording your favourite portions
on an MD
— Manual Recording ....................... 16
Recording an MD on a tape .................... 17
Recording from the radio
— Manual Recording ....................... 19
Timer recording radio programmes ........ 20
Making a space between tracks 3 seconds
long — Smart Space ......................... 22
Starting recording with 6 seconds of
prestored audio data
— Time Machine Recording ............ 23
Marking track numbers ........................... 24
Adjusting the recording level .................. 26
Monaural recording ................................. 27
Additional Information
Precautions .............................................. 41
System limitations of MDs ..................... 42
Troubleshooting ...................................... 43
Self-diagnosis Display ............................ 44
Messages ................................................. 45
Specifications .......................................... 46
Index.......................................... Back cover
3
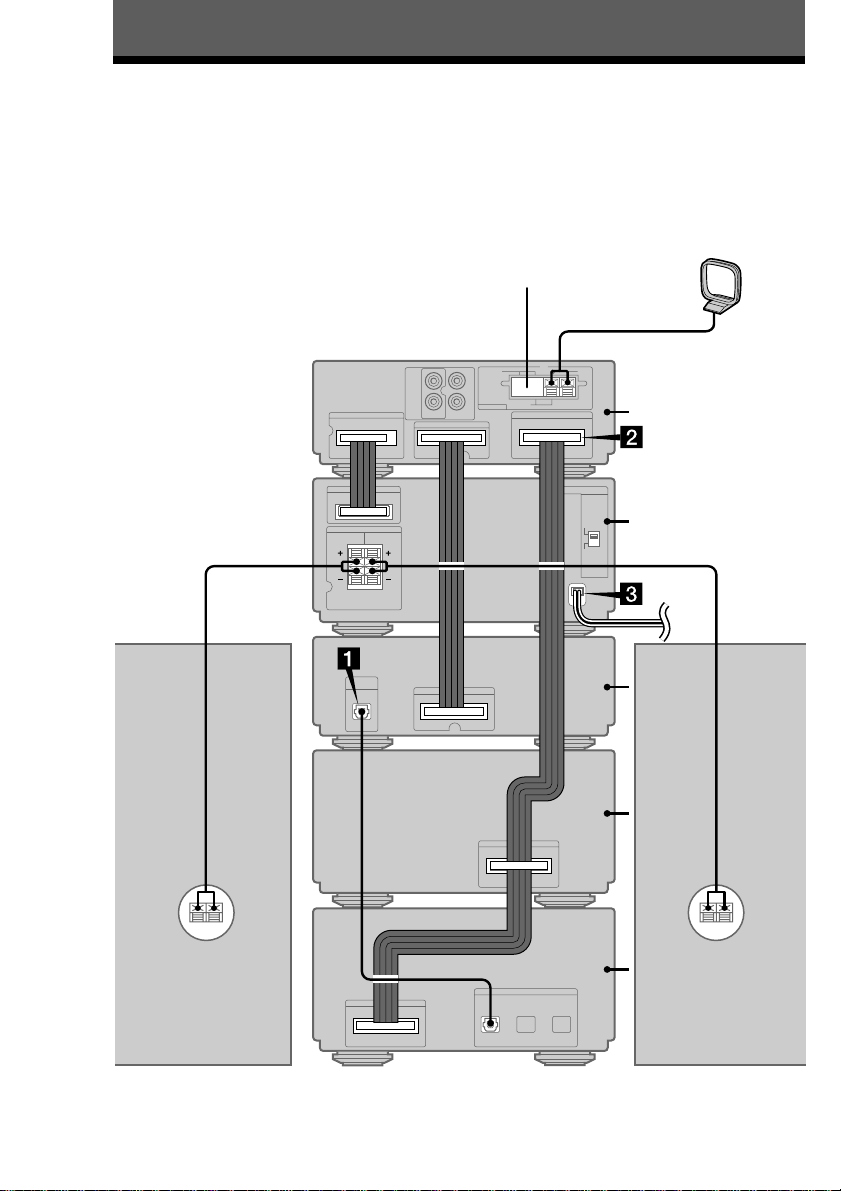
Getting Started
Hooking up the system
Perform the following procedure 1 to 3 to hook up MDS-SP55 using the supplied cords.
Note
Be sure to hook up the system with the mains lead unplugged from the mains. Hooking up the system with the
mains lead plugged in may cause the system to malfunction.
AM loop aerial
FM aerial
Rear panel
Tuner
Amplifier
Right
speaker
CD player
Tape deck
MD deck
Left
speaker
4
Preparations
S
Y
S
T
E
M
C
O
N
T
R
O
L
3
S
Y
S
T
E
M
C
O
N
T
R
O
L
3
1 Stack the components vertically in the order of
tuner, amplifier, CD player, tape deck and MD
deck.
2 Disconnect the system cable supplied with
CMT-SP55TC from the SYSTEM CONTROL
3 connectors on the tuner and tape deck.
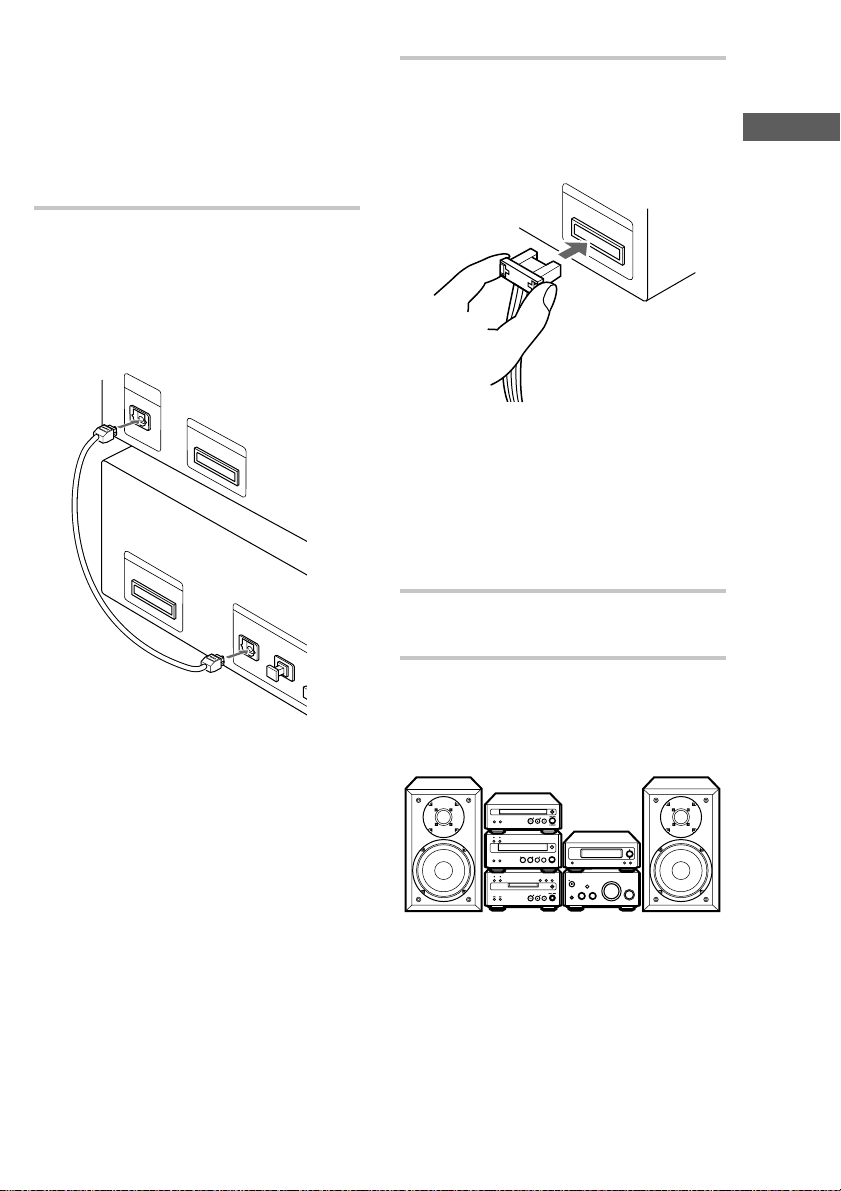
1 Connect the supplied digital cable to
DIGITAL OPTICAL OUT on the CD
player and DIGITAL OPTICAL CD
IN 1 on the MD deck.
Take the caps off the connectors, then insert
the plugs until they click into place.
D
I
G
I
T
A
O
L
P
T
I
C
A
L
S
Y
S
T
O
U
T
S
Y
S
T
E
E
M
C
O
N
T
R
O
L
2
M
C
O
N
T
R
O
L
3
2 Connect the SYSTEM CONTROL 3
connectors in the order of the tuner, tape
deck and MD deck using the system
cable supplied with MDS-SP55.
Notes
• The system cable is used to send signals and
electricity between the components for
interlinked operation.
Be sure to insert the connector horizontally
until it clicks into place. Otherwise the system
will not operate correctly.
• Keep the system cable away from the aerials
to prevent noise or malfunction.
Getting Started
C
D
D
I
G
I
T
A
L
O
P
T
I
C
A
L
A
U
X
IN
1
IN
2
3 Connect the mains lead to the mains
after you complete all the connections.
Arranging the components side
by side
Once you have finished the connections, you can
rearrange the components as desired.
Tip
All information for the MDS-SP55 MD deck appears
in the display on the tuner of CMT-SP55TC.
5
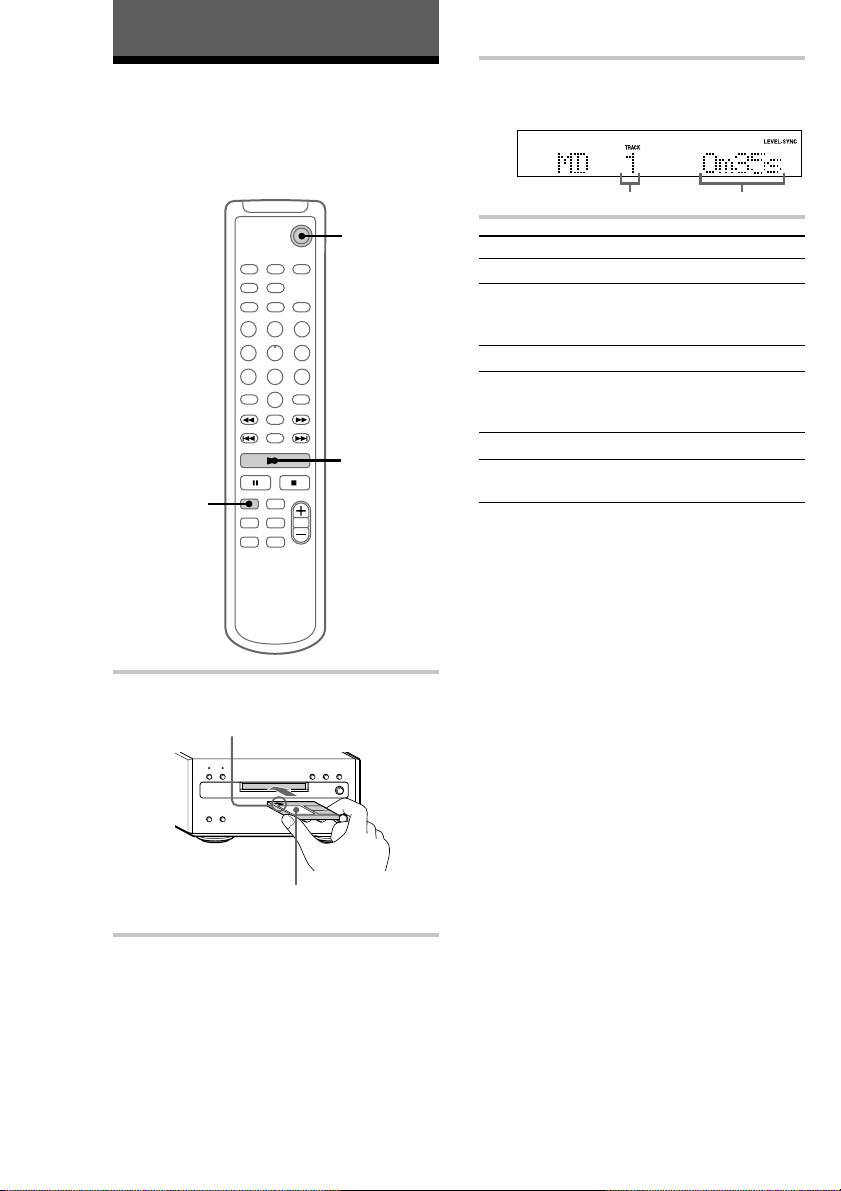
Playback
Playing an MD
You can play an MD just like a CD.
To turn on the system, press ?/1 (power). The
MD deck turns on automatically.
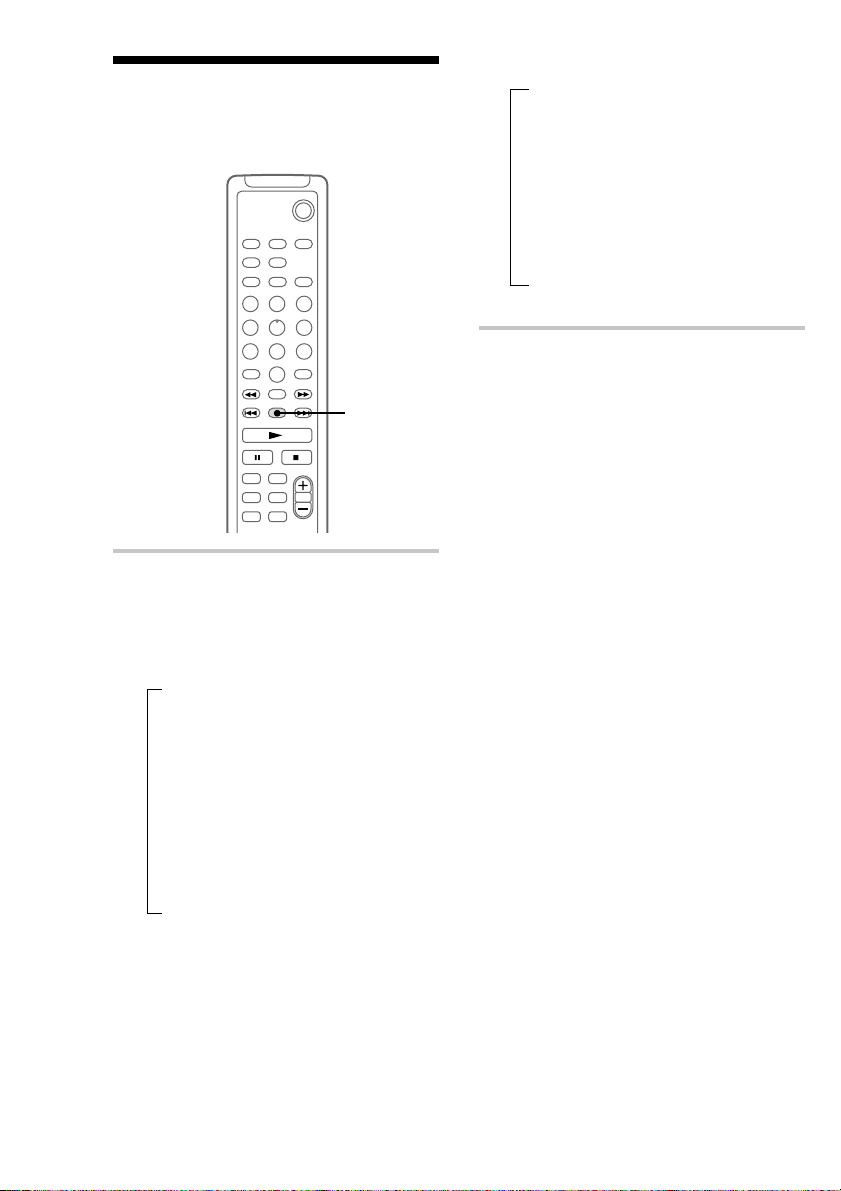
`/1
?/1 (power)
3
2
1 Insert an MD.
With the arrow pointing toward the deck.
With the label side up, and the shutter on
the righthand side.
2 Press MD to switch the function to MD.
3 Press N.
Play starts.
Track number Playing time
To Do this
Stop play Press x.
Pause Press X.
Select a track Press . or >.
Find a point in
a track
Remove the MD Press A on the MD deck.
Adjust the
volume
Tips
• You can start playing from the desired track in
step 3.
1 Press the track number of the track you want to
listen to.
To select track number 11 and higher
Press >10 once and then the number buttons of
the track number.
For example, to select track 32, press >10, 3, and
2.
To select track number 100 and higher
Press >10 twice and then the number buttons of
the track number.
2 Press N.
• You can switch from another source to the MD
deck and start playing an MD just by pressing H
on the MD deck (Automatic Source Selection).
Note
Do not use an MD on which the label sticks out from
the edge or on which the label is not positioned
correctly. Such labels can cause the MD deck to
malfunction.
Press X again or N to resume
play.
Keep pressing m or M during
play and release it at the desired
point.
Press VOLUME + or –.
6
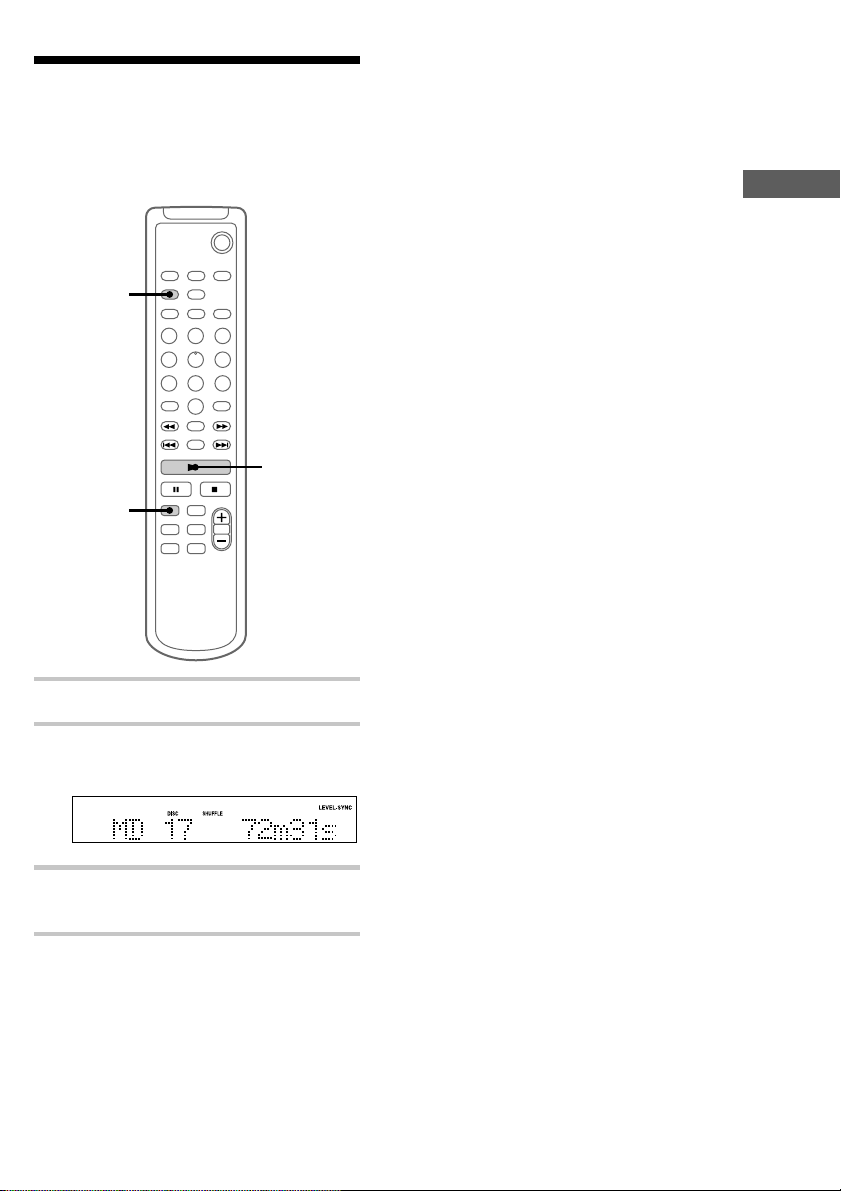
Playing MD tracks in
random order
You can play all the tracks on an MD in random
order.
— Shuffle Play
`/1
2
3
1
To cancel Shuffle Play
Press x to stop Shuffle Play, then press PLAY
MODE repeatedly until “SHUFFLE” and
“PROGRAM” disappear.
Tip
To skip a track, press >. Press . to go back to
the beginning of the current track. However, you
cannot go back to the previous track.
Playback
1 Press MD to switch the function to MD.
2 Press PLAY MODE repeatedly until
“SHUFFLE” appears in stop mode.
3 Press N.
Shuffle Play starts.
7
Programming MD tracks
— Programme Play
You can make a programme of up to 25 tracks in
the order you want them to be played.
`/1
2
3
3 Press the track number of the track you
want to listen to.
To select track number 11
and higher
Press >10 once and then the number buttons
of the track number.
For example, to select track 32, press >10, 3,
and 2.
To select track number 100
and higher
Press >10 twice and then the number buttons
of the track number.
5
1
1 Press MD to switch the function to MD.
2 Press PLAY MODE repeatedly until
“PROGRAM” appears in stop mode.
Selected track
number
Total playing time
4 To programme additional tracks, repeat
step 3.
Each time you programme, the total time of
the programme is displayed. You can make a
programme of up to 25 tracks.
Last programmed
track number
Total playing
time
5 Press N.
All the tracks play in the order you selected.
8
To Do this
Cancel
Programme
Play
Add a track to
the programme
(in stop mode)
Erase the entire
programme
Press x, then press PLAY MODE
repeatedly until “PROGRAM” and
“SHUFFLE” disappear.
Do step 3.
Do steps 1 and 2, then press and
hold CLEAR.
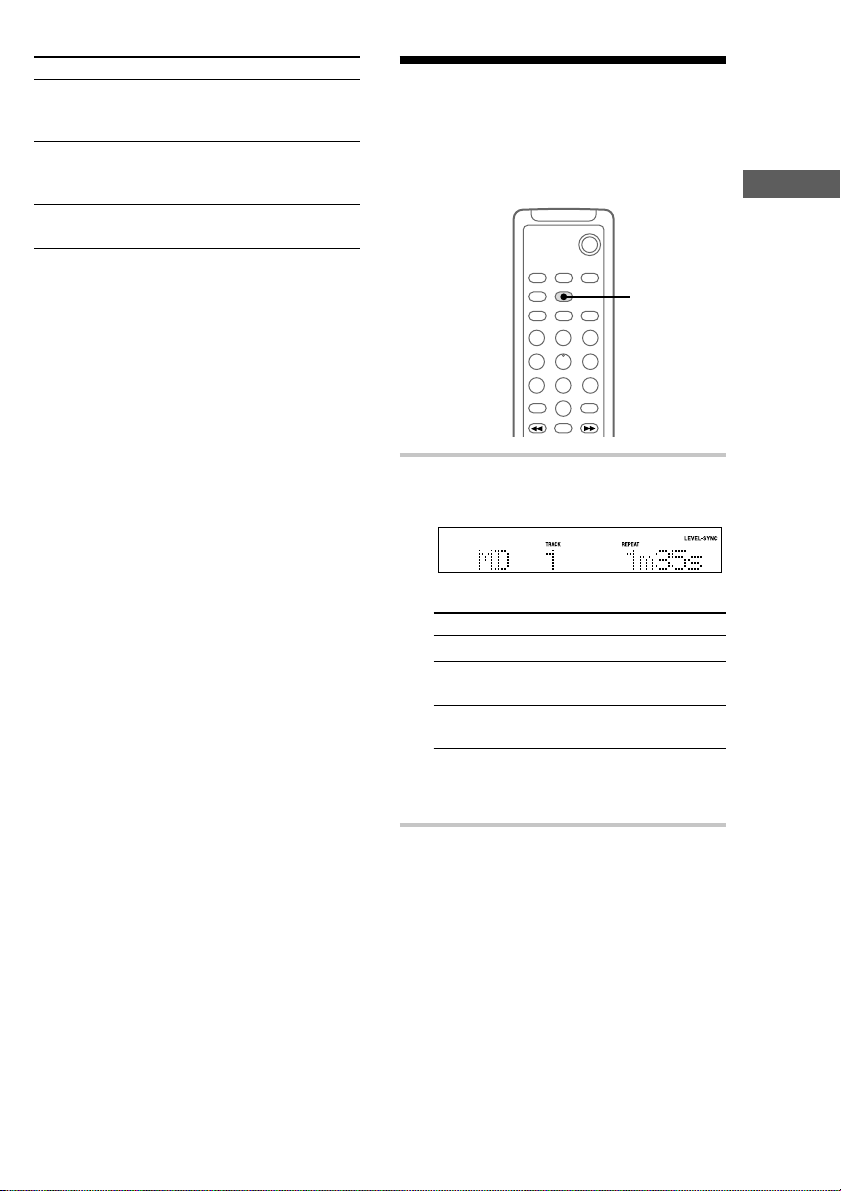
Playing MD tracks
repeatedly
You can repeat an MD in normal play, Shuffle
Play and Programme Play.
— Repeat Play
`/1
Playback
Tips
• You can select the desired track using . or >
in step 3.
Press . or > repeatedly until the desired track
number appears, then press ENTER/YES.
• The programme you made remains after
Programme Play finishes. To play the same
programme again, press N.
• “Program Full!!” appears when you try to
programme 26 or more tracks.
• “---m--s” appears when the total MD programme
time exceeds 199 minutes.
REPEAT
, Press REPEAT during play until
“REPEAT” or “REPEAT 1” appears.
REPEAT: For all the tracks on the MD.
Play mode Repeat
Normal All the tracks in order
Shuffle Play
(page 7)
Programme Play
(page 8)
REPEAT 1*: For a single track only.
* You cannot repeat a single track during
Shuffle Play or Programme Play.
All the tracks in random
order
All the programmed
tracks in order
To cancel Repeat Play
Press REPEAT until “REPEAT” or “REPEAT 1”
disappears.
9
Using the MD display
You can check the total number of tracks, the total
playing time and the remaining time on the MD.
`/1
DISPLAY
, Press DISPLAY.
Each time you press the button during
normal play or in stop mode, the display
changes as follows:
During normal play
t Elapsed playing time and the track
number on the current track
r
Remaining time and the track number on
the current track
r
Remaining time on the MD*
r
Track title of the current track*
r
Clock display
*1The remaining time of the programme appears
during Programme Play.
*2“No Name” appears if no track title is labelled.
1
2
In stop mode
t Total number of tracks and total playing
time
r
Remaining recordable time (Only for a
recordable MD)
Disc title appears for a pre-mastered MD.
r
Disc title*
Clock display
*3“No Name” appears if no disc title is labelled.
Tips
• You can check a track title during play. If you press
SCROLL, a track title appears scrolling in the
display. Press SCROLL at any point during the
scroll display to stop the scrolling. Press SCROLL
again to restart the scrolling.
• To label a disc title or a track title, see “Labelling
an MD” on page 29.
• “---m--s” appears when the total playing time
exceeds 199 minutes.
3
r
10
Recording
Before you start recording
MDs (MiniDisc) let you digitally record and play
music with high quality sound. Another feature of
MDs is track marking. The track marking feature
lets you quickly locate a specific point or easily
edit the recorded tracks. However, depending on
the source you record, the recording method and
the way the track numbers are recorded differ.
When the source you record from is:
• This system’s CD player (CMTSP55TC)
– The MD deck performs digital recording.*
– Track numbers are automatically marked as on
the original CD.
• Other digital components
connected to the DIGITAL
OPTICAL AUX IN jack of MDSSP55 (e.g., a DVD player)
– The MD deck performs digital recording.*1*2*
– Track numbers are marked differently
depending on the source you record.
• This system’s tuner or tape deck,
or other analogue components
connected to the AUX IN jacks of
CMT-SP55TC (e.g., a VCR)
– The MD deck performs analogue recording.
– A track number is marked at the beginning of a
recording, but when you turn on the Level
Synchro Recording function (see page 24),
track numbers are automatically marked in sync
with the level of the input signal.
*1For details on the limitations of digital recording,
see page 42.
*2The sound produced from the speakers during
recording is the AUX IN jacks audio. When
making a digital connection, be sure to also make
an analogue connection.
*3If a digital component is not connected to the
DIGITAL OPTICAL AUX IN jack using an optical
cable, the MD deck performs analogue recording.
1
Note on MD track numbers
On an MD, the track numbers (track sequence), track
start and end point information, etc., are recorded in
the TOC*4 area independent of the sound information.
You can edit recorded tracks quickly by modifying
the TOC information.
*4TOC: Table Of Contents
After recording
, Press A on the MD deck to remove the
MD or press ?/1 (power) to turn off
the system.
“TOC” lights up or starts flashing. The TOC
is updated and recording is completed.
Before pulling out the mains lead
MD recording is completed when the MD Table
of Contents (TOC) is updated. The TOC is
updated when you eject the MD or press ?/1 to
turn off the system. Do not pull out the mains lead
before updating the TOC (while “TOC” is lit) or
3
while updating the TOC (while “TOC” is flashing)
to ensure a complete recording.
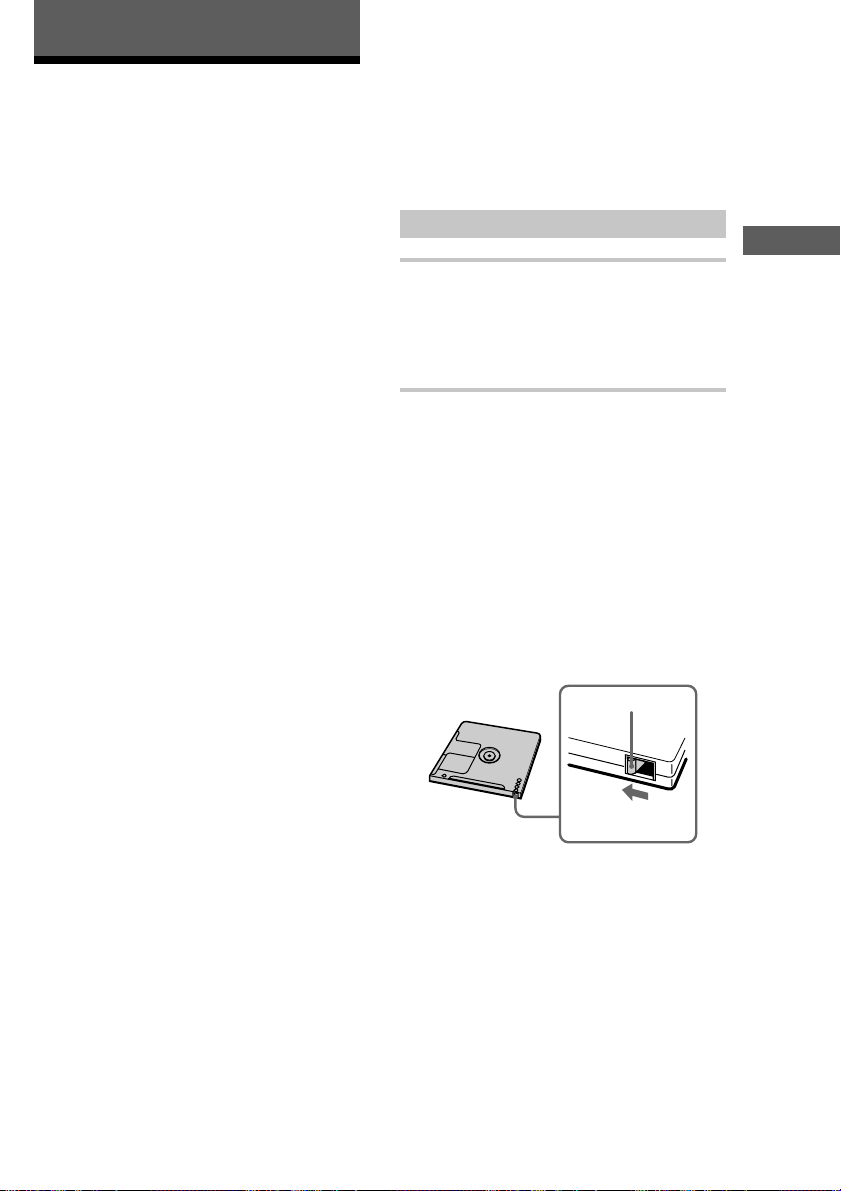
Protecting a recorded MD
• To protect a recorded MD, slide the tab on the side
of the MD to open the slot. In this position, the MD
cannot be recorded. To record on the MD, slide the
tab to close the slot.
Slide the tab
• If the MD is record protected, “C11” and
“Protected” appear alternately and the MD cannot
be recorded. Remove the MD, then slide the record
protection tab to the closed position.
Playback/Recording
Tab
11
Recording a CD on an
— CD-MD Synchro Recording
MD
You can make a digital recording of a CD on an
MD, marking track numbers in the same sequence
as the original CD.
You can also record a programme of favourite
tracks (see page 15).
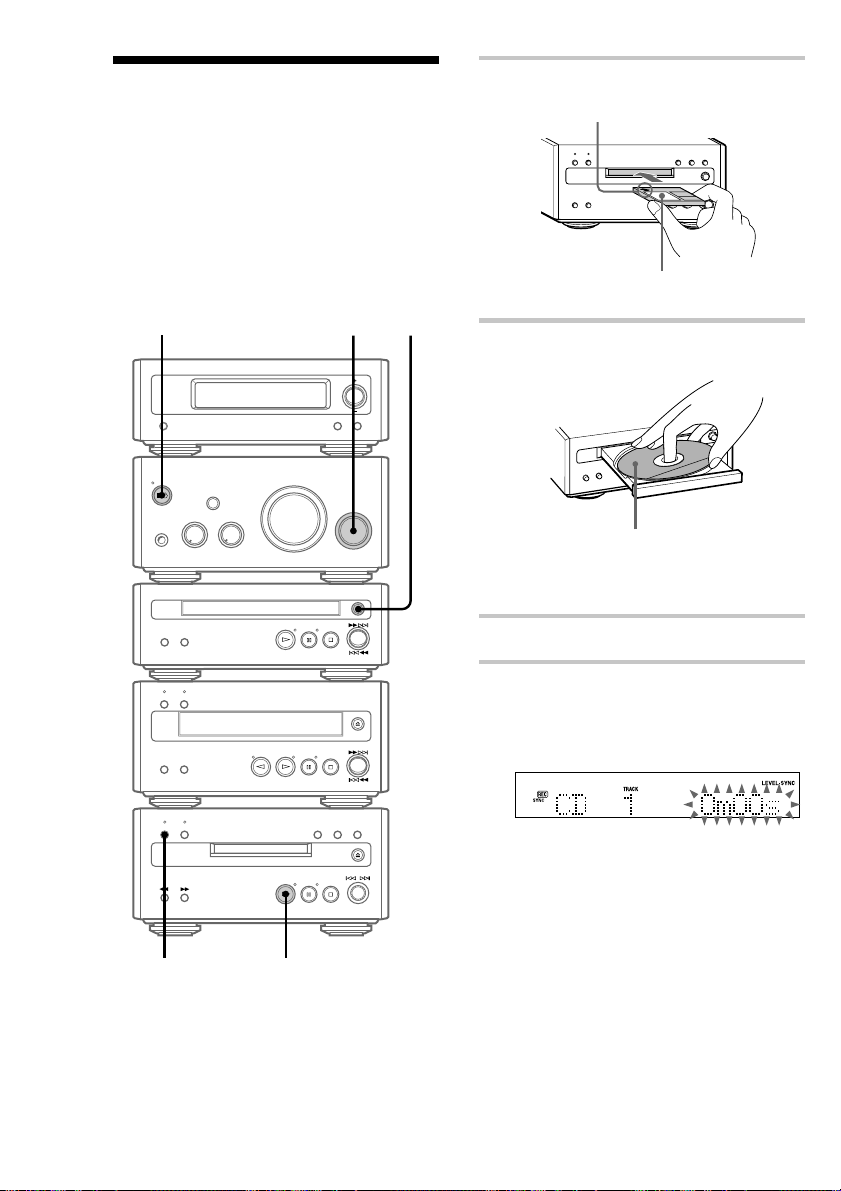
To turn on the system, press ?/1 (power). The
MD deck turns on automatically.
?/1 (power)
3
2
1 Insert a recordable MD.
With the arrow pointing toward the deck.
With the label side up, and the shutter on
the righthand side.
2 Press A on the CD player and place a
CD on the disc tray.
With the label side up.
When you play a CD single (8 cm CD),
place it on the inner circle of the tray.
Press A again to close the disc tray.
3 Turn FUNCTION until “CD” appears.
12
4
4 Press CD SYNC REC on the MD deck.
The CD SYNC REC indicator lights up. The
MD deck stands by for recording and the CD
player pauses for play.
5
5 Press H on the MD deck.
Recording starts.
When the recording is completed, the CD
player and the MD deck stop automatically.
To Do this
Stop recording Press s on the MD deck or CD
Remove the
MD and CD
Tips
• If you use a partially recorded MD, recording starts
after the recorded tracks. To erase the recorded
contents, see “Erasing recordings” on page 31.
• Depending on the disc, CD TEXT information may
also be recorded. If “CD-TEXT” flashes during
recording, press NAME EDIT on the remote, and
then press ENTER/YES to record the title of the
current track. (If “CD-TEXT” is lit, it is
automatically recorded.)
Note
If the MD is record protected, “C11” and “Protected”
appear alternately and the MD cannot be recorded.
Remove the MD, then slide the record protection tab
to the closed position (see page 11).
player.
Press A on the MD deck and CD
player in stop mode.
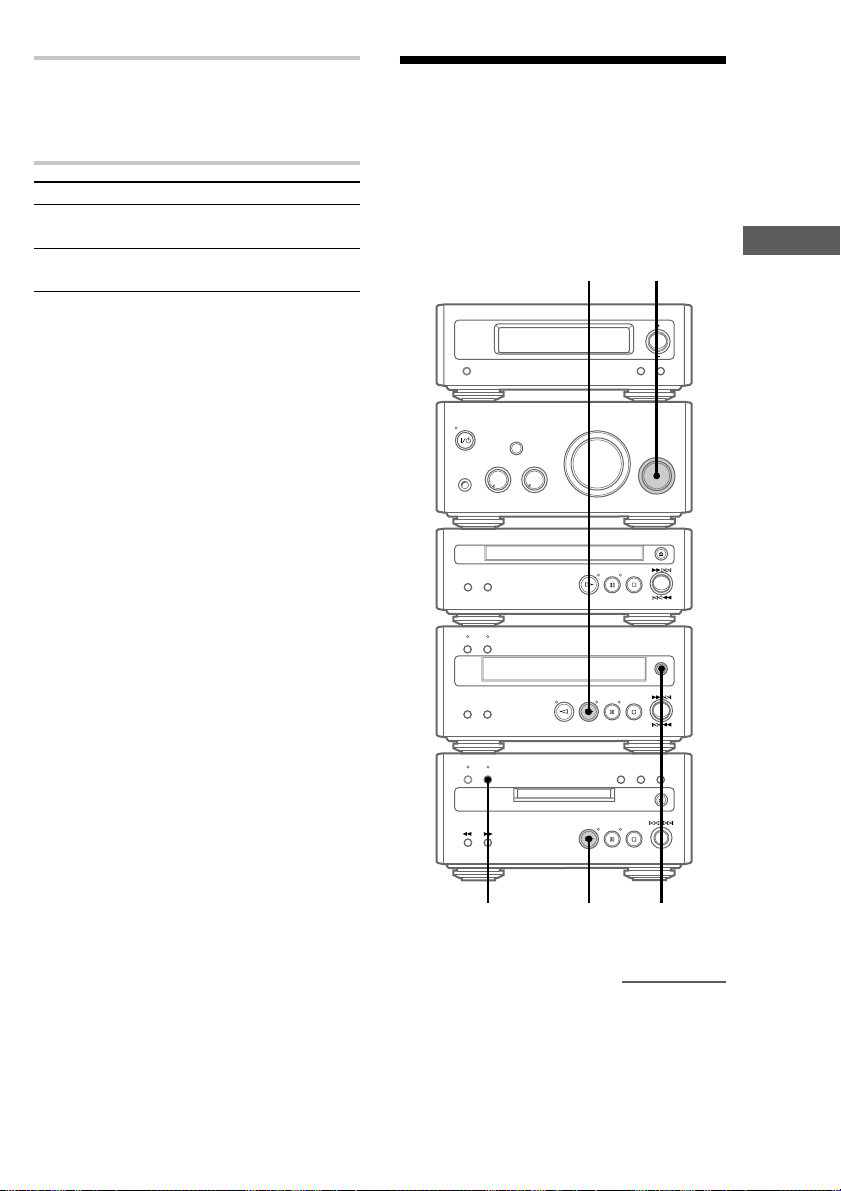
Recording a tape on an MD
You can make an analogue recording of a tape on
an MD. You can use TYPE I (normal), TYPE II
(CrO2) tape. The recording level is automatically
adjusted.
36
Recording
4
52
continued
13
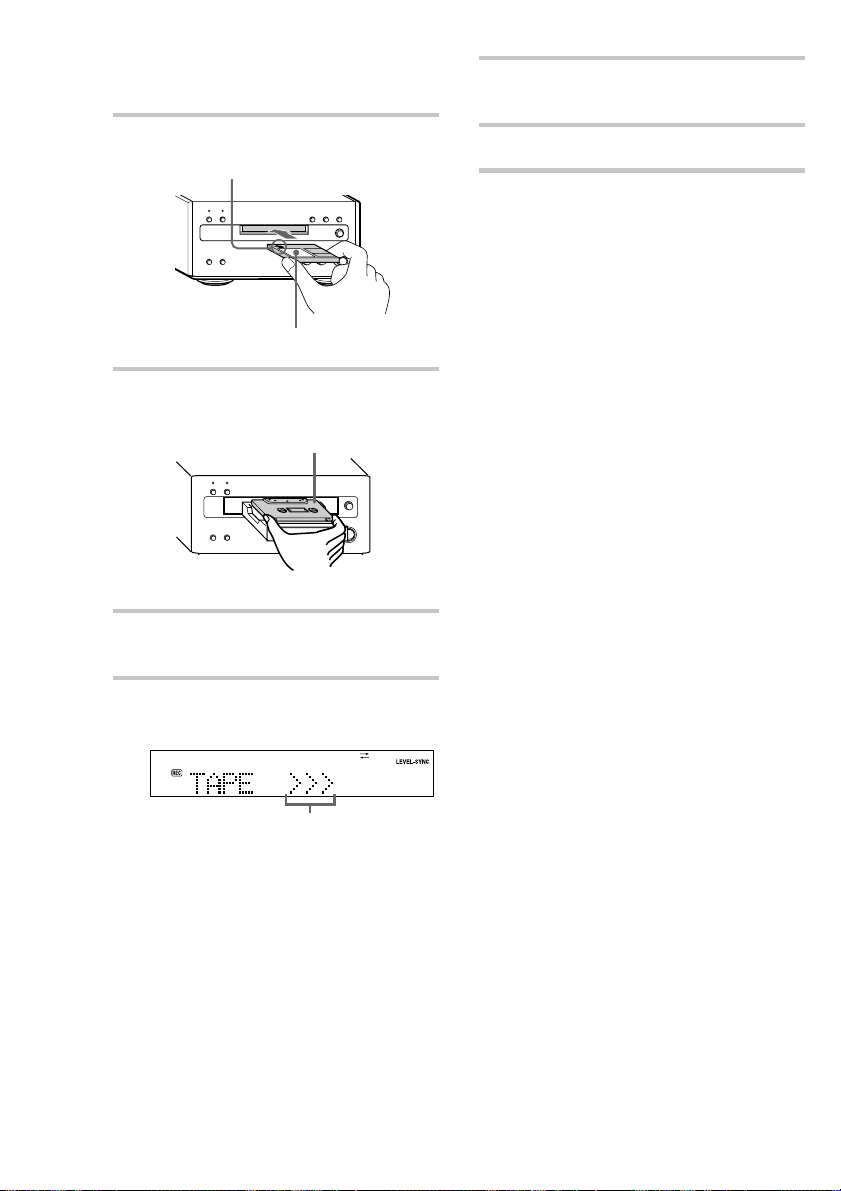
Recording a tape on an MD
(continued)
1 Insert a recordable MD.
With the arrow pointing toward the deck.
With the label side up, and the shutter on
the righthand side.
2 Press A on the tape deck to open the
cassette tray and insert a tape.
With the side you want to play facing up
Press A again to close the cassette tray.
3 Turn FUNCTION until “TAPE”
appears.
5 Press H on the MD deck.
Recording starts.
6 Press H on the tape deck.
To stop recording
Press s on the MD deck.
Tips
• If you use a partially recorded MD, recording starts
after the recorded tracks. To erase the recorded
contents, see “Erasing recordings” on page 31.
• If the Smart Space function is on and there is no
sound input for about 3 seconds or more (but less
than 30 seconds) while recording, the MD deck
replaces this silence with a blank of about 3 seconds
and continues recording. However, this function
may not activate if there is noise.
Note
If the MD is record protected, “C11” and “Protected”
appear alternately and the MD cannot be recorded.
Remove the MD, then slide the record protection tab
to the closed position (see page 11).
4 Press z REC on the MD deck.
The MD deck stands by for recording.
Tape playback side
>>> appears for the front side, and <<< for
the reverse side. To play the side not
indicated, press s on the tape deck and
remove the tape to reverse the tape side, then
do steps 3 and 4 again.
14

Recording your favourite
Selecting the tracks
CD tracks on an MD
— CD-MD Synchro Recording
You can select your favourite CD tracks with the
Programme Play feature, then record the
programme on an MD using the Synchro
Recording feature. If you use a partially recorded
MD, recording starts after the recorded tracks.
6
7
`/1
2
1 Press CD on the remote to switch the
function to CD.
Place a CD.
2 Press PLAY MODE on the remote
repeatedly until “PROGRAM” appears.
Recording
3 Press the track number of the track you
want to record.
To select track number 11
and higher
Press >10 once and then the number buttons
of the track number.
For example, to select track 32, press >10, 3,
and 2.
4 To programme additional tracks, repeat
step 3.
Each time you programme, the total time of
the programme is displayed. You can make a
programme of up to 25 tracks.
Recording on an MD
5 Insert a recordable MD.
1
3
6 Press CD SYNC REC on the MD deck.
The MD deck stands by for recording and the
CD player pauses for play.
7 Press H on the MD deck.
CD play and MD recording start.
When the recording is completed, the CD
player and the MD deck stop automatically.
continued
15
 Loading...