

Page 1
M-crew
4-240-070-11 (1)
Operating Instructions
Mode d’emploi
Bedienungsanleitung
Manual de instrucciones
Gebruiksaanwijzing
Bruksanvisning
Istruzioni per l’uso
Manual de instruções
GB
FR
DE
ES
NL
SE
IT
PT
CT
2002 Sony Corporation
Page 2

• Duplication of any or all of the contents of
this software and instruction manual or
lending of this software to third parties
without the express permission of the
copyright holder is strictly prohibited by
copyright law.
• Sony cannot be held liable in any way for
monetary losses, lost profits or claims from
third parties arising from the use of this
software.
• Should any manufacturing defects occur,
Sony’s responsibility shall be limited solely
to replacing said defective merchandise.
• This software is approved for use only with
the specified equipment.
• Sony reserves the right to change software
specifications without prior notice. Other
related software and services provided are
also subject to change without prior notice.
Program 1997-2001 Sony Corporation
Documentation 2001 Sony
Corporation
2001 Sony Corporation All rights
reserved.
• M-crew, LabelMaker and are the
registered trademarks of Sony Corporation.
• Microsoft, MS-DOS and Windows are the
registered trademarks of Microsoft
Corporation.
• IBM and PC/AT are the registered
trademarks of International Business
Machines Corporation.
• Macintosh is the registrated trademark of
Apple Computer Inc.
• Gracenote CDDB or Gracenote CDDB
Music Recognition Service
• Powered by Gracenote CDDB
SM
• Other companies and product names are
the trademarks or the registered
trademarks of each company.
GB
2
Page 3

Table of contents
Table of contents
Getting started
Overview .............................................. 4
System requirements ........................... 6
Preparation
1: Installing M-crew ............................. 7
2: Connections .................................... 11
3: Setup procedure for your
computer system ....................... 11
Setting up for Windows 98/
98SE ..................................... 12
Setting up for Windows 2000/
Windows Me/
Windows XP ...................... 14
When no sound comes out of
the computer ...................... 17
Installing LabelMaker 5.1 ................. 18
Uninstalling the software ................. 19
Basic Operations
Starting up M-crew............................ 20
Using M-crew ..................................... 21
Main bar ...................................... 21
Tool bar ....................................... 23
Operation windows .................. 24
Easy Mode window .................. 24
Quitting the software ........................ 25
About this manual
This manual shows how to install the M-crew
software and how to use the Help.
For the latest information, refer to the
“Readme.txt” file in the Start menu.
The “Readme.txt” file is in the folder which
the M-crew software is installed in.
GB
Additional Information
Using Help .......................................... 26
Troubleshooting ................................. 27
GB
3
Page 4

Getting started
Overview
M-crew (ver. 2.0E) allows you to control Sony system stereo
components. Through M-crew, you can perform the functions listed
below.
Playback
• Use the computer to operate the playback function on CD, MD and
DVD decks.
• Enjoy audio files stored on the computer.
• Tune in radio stations using the computer.
Recording/editing
• Input disc and track names from the computer keyboard.
• Edit MDs on the computer screen.
• Record from a CD to an MD through easy drag-and-drop operations.
• Record easily from a radio to an MD.
• Organize tracks on an MD into groups of your choice.
• Access CDDB2 from your computer to label albums and tracks
automatically (only for the components supporting this feature).
Other operations
• Create virtual media for the management of audio files.
• Keep track of played and recorded tracks through a Disc Library.
• Access related websites while enjoying tracks.
• Register images to attach them to a track and view them while
listening to the track (CLIP function).
• Access related websites while enjoying radio programs.
• Set playback and recording timers.
• Use the Easy Mode window to access easily to the basic functions of
M-crew.
• Print out MD labels.
GB
4
Page 5

Notes
• In this manual, the term “system stereo component” refers specifically to
component stereo systems (incorporating CD and MD decks) and discrete CD,
MD, and DVD decks.
• The M-crew functions that operate on your computer will depend on the
system stereo component connected to your computer.
• You can use this software to operate only system stereo components
connected directly to the computer.
Music recognition technology and related data are provided by Gracenote and
the Gracenote CDDB Music Recognition ServiceSM. Gracenote is the industry
standard in music recognition technology and related content delivery. For
more information go to www.gracenote.com.
Gracenote is CDDB, Inc. d/b/a “Gracenote.” CD and music related data from
Gracenote CDDB Music Recognition ServiceSM 2000, 2001 Gracenote.
Gracenote CDDB Client Software 2000, 2001 Gracenote. U.S. Patents Numbers
#5,987,525; #6,061,680; #6,154,773, and other patents issued or pending.
CDDB is a registered trademark of Gracenote. CDDB-Enabled, the Gracenote
logo, the CDDB Logo, and the “Powered by Gracenote CDDB” logo are
trademarks of Gracenote. Music Recognition Service and MRS are service marks
of Gracenote.
GB
5
Page 6

System requirements
The following hardware and software are necessary to use the M-crew
(ver. 2.0E) software.
s IBM PC/AT or compatible (This software does not run on the Apple
Macintosh.)
s CPU*
s Video board and display driver:
s Hard disk space: 30 MB*
s USB port: 1 or more
s OS: Windows 98/Windows 98SE/Windows 2000*
s Media player: Windows Media Player 6.4 or higher is required
s Video monitor: SVGA (800 × 600 pixels), 65,536 colors or more.
*1The operation of M-crew is not guaranteed on some computers with Pentium-
*2Another 20 MB of hard disk space is required to install LabelMaker 5.1.
*3Be sure to log on through the administrator’s account to install the software
1
: Intel Pentium II 266 MHz/Celeron 333 MHz or
higher
SVGA (800 × 600 pixels), 65,536 colors or more.
2
or more
Windows Me/Windows XP*
not run on Microsoft Windows 3.1, Windows 95
or Windows NT.)
in order to play music files on the computer.
compatible CPU chips, such as the AMD K6 (e.g., sound skipping may occur
during playing of an audio file).
and setup devices on a computer running Windows 2000 or Windows XP.
3
3
(This software does
/
Notes
• The proper operation of M-crew is not guaranteed on some computers even if
they meet the requirements above.
• The proper operation of M-crew is not guaranteed on computers that you
constructed yourself or on computers with an operating system that you
upgraded yourself.
• Do not use a USB hub. If multiple USB devices are connected to the hub,
M-crew may not operate the system stereo component connected to the
computer properly.
• This software can be used only with an English-language operating system. If
used in a different language environment, it may not function properly or text
may not be correctly displayed.
GB
6
Page 7

Preparation
1: Installing M-crew
Use this procedure to install the M-crew software onto your computer’s
hard disk. Be sure to start up Windows in advance.
Notes
• Be sure to install this software before connecting the system stereo
component to your computer. If not, this software may not function
properly.
• Be sure to log on through the administrator’s account to install this software
(for Windows2000/Windows XP).
1 Load the supplied M-crew CD-ROM into the CD-ROM drive of
your computer.
The window will open with the
Note
If the window does not open, use Windows Explorer to open the window
by double-clicking the M-crew CD-ROM icon.
2 Double-click the (InstallDlg.exe) icon.
The setup window appears.
• If you are using the PCLK-MN10/MN10A and you have already
installed PCLK USB driver onto your computer, go to step 4.
• If you are installing M-crew onto the computer with the CMT-C7NT
connected, proceed the procedure from step 3 even if you are using the
PCLK-MN10/MN10A. Be sure not to skip step 3.
(InstallDlg.exe) icon displayed.
3 Click “1. Setting up PCLK-USB Driver” in the setup window.
The installation of the driver starts. When the dialog box indicating
the completion of the installation appears, click “Finish.”
4 Click “2. Setting up M-crew” in the setup window.
The setup program starts up.
(continued)
GB
7
Page 8
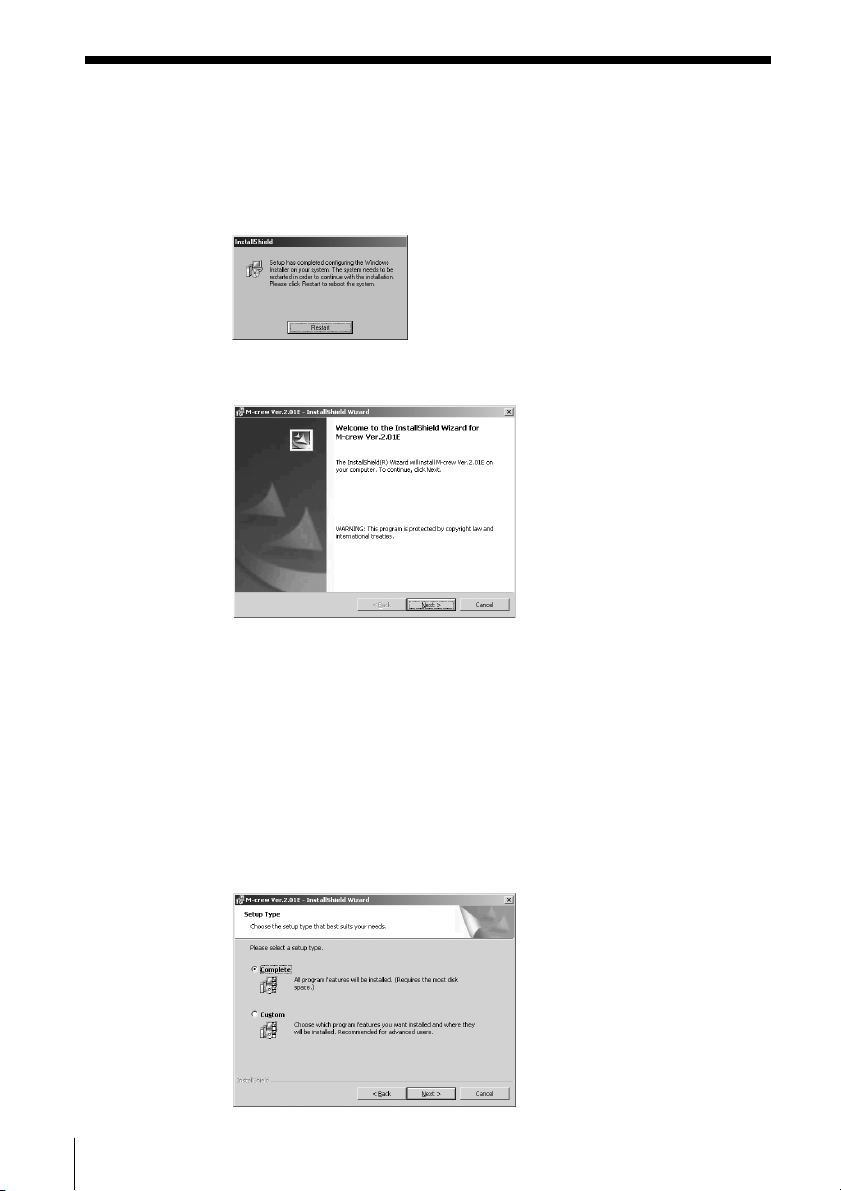
Note
The Windows Installer is necessary to install M-crew. If the Windows
Installer is not installed on your computer, the following window appears.
If this happens, click “Restart” to restart your computer. When you restart
your computer, do not remove the CD-ROM.
5 Click “Next.”
6 Select one of the setup type options, and then click “Next.”
Complete: All the M-crew files on the CD-ROM will be installed.
This option does not allow you to specify the folder to
which the M-crew files are installed. (Normally the
files are installed in “C:\Program Files\M_crew”
folder.)
Custom: You can specify the folder to which the M-crew files
are installed.
GB
8
Page 9
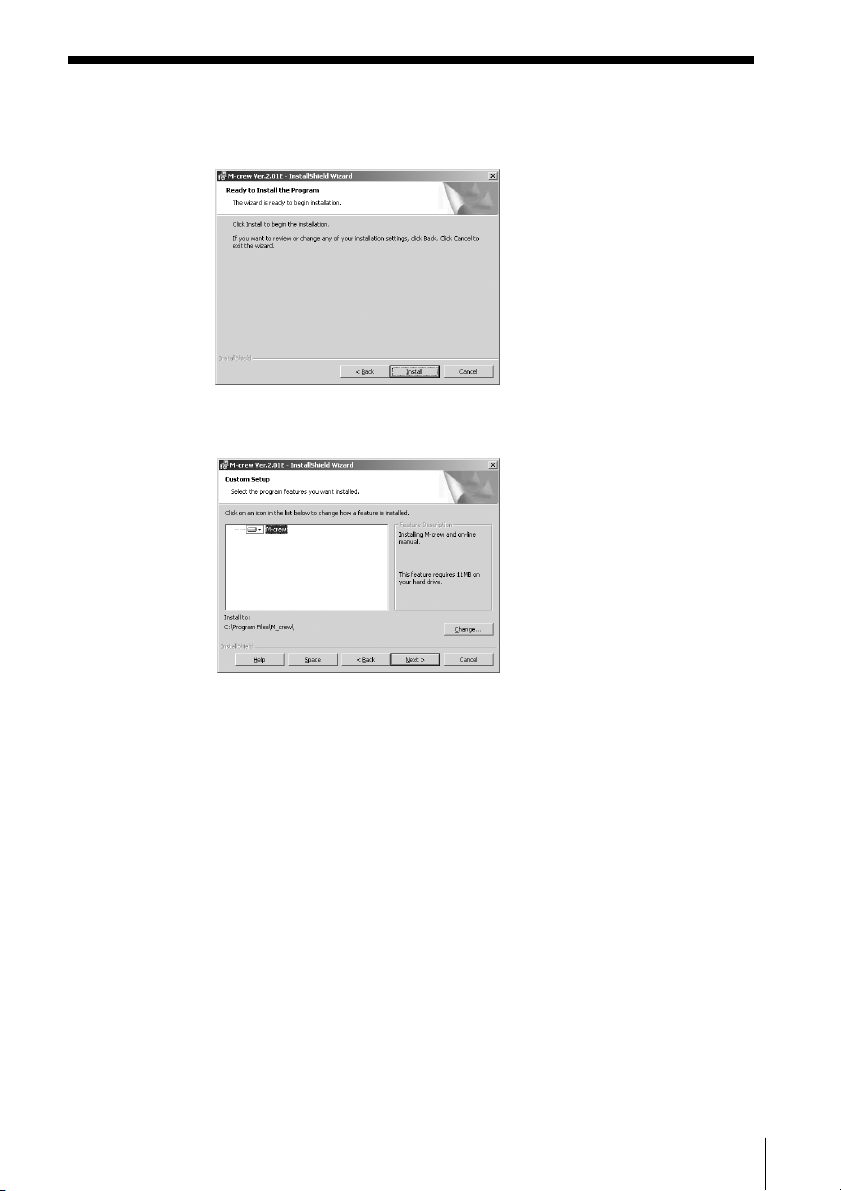
7 If you selected “Complete” in step 6, click “Install.”
The installation starts.
If you selected “Custom” in step 6, click “Next.”
To change the folder to which to install M-crew, click “Change” to
open the dialog box, click “Next” after specifying the folder, and
then click “Install.”
(continued)
GB
9
Page 10
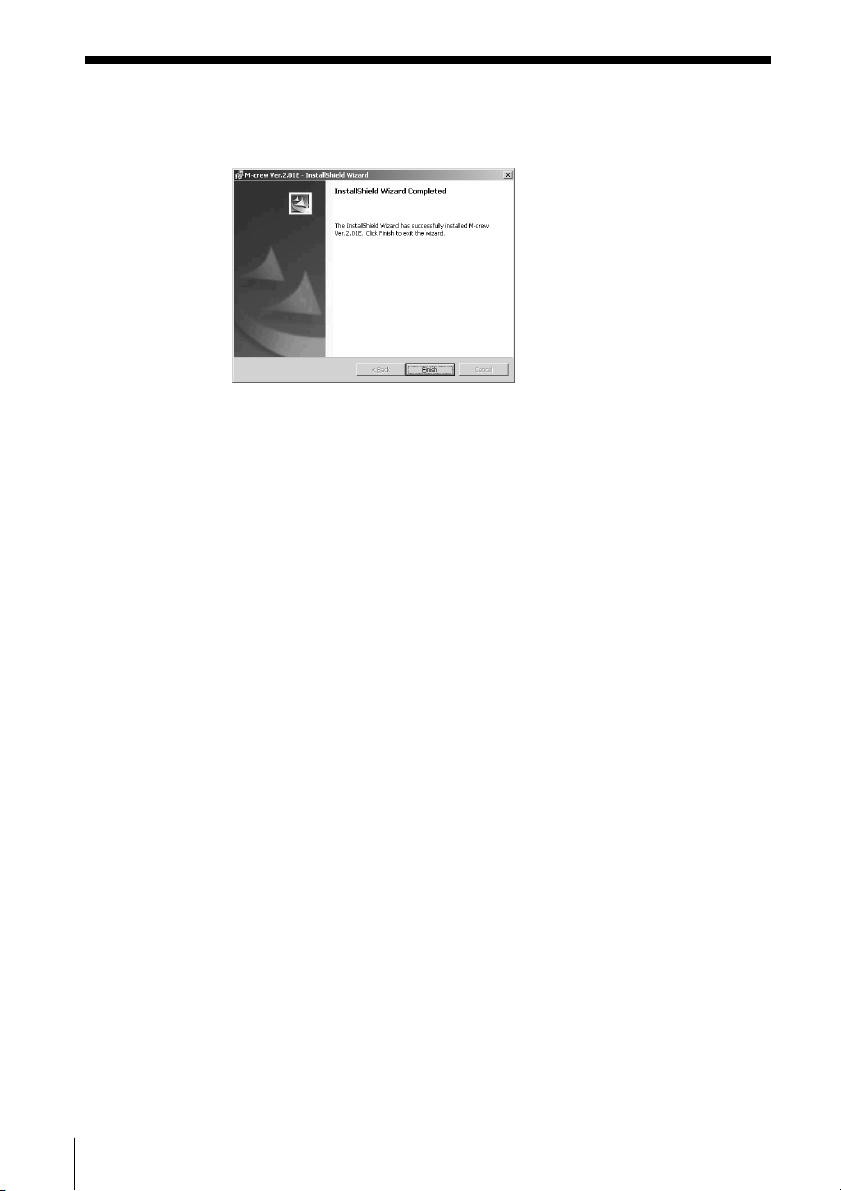
8 When the dialog box indicating the completion of the installation
appears, click “Finish.”
This completes the setup process.
Be sure to restart the computer. If not, the software will not
function properly.
Be sure to close the dialog box activated by executing InstallDlg.exe
before connecting the system stereo component to the computer.
Now, you can proceed to the next preparation steps: connecting the
system stereo component to the computer, installing the USB
drivers, and then verifying the status of the installed devices
according to the procedures described on the following pages.
Before starting M-crew
Open the “Readme” file and read it.
To open the “Readme” file, go to the Start menu and select “Programs”
and “M-crew,” and then click “Readme.”
10
Notes
• A folder is created as a result of the installation. This folder is used by the
software. Do not erase, move, or change its contents.
• If the required driver and other items have already been installed, a dialog
box for your confirmation will appear during the installation.
GB
Page 11

2: Connections
For information on connecting the system stereo component to the
computer, refer to the operating instructions for the system stereo
component or the PCLK-MN20 PC connecting adaptor.
3: Setup procedure for your computer
system
Be sure to check the status of the installed devices before you start up
M-crew.
The following procedure is for Windows98/98SE. Some parts of the
procedure may differ depending on which operating system you have
installed the software in. See page 14 for Windows 2000/Windows
Me/Windows XP.
Note
Some illustrations included in the following procedures may differ partly
depending on which operating system your computer is running.
11
GB
Page 12

Setting up for Windows 98/98SE
Installing the USB driver
1 Connect the system stereo component to the computer directly or
via the PC connecting adaptor, and then start up the computer.
“Add New Hardware Wizard” appears.
Quit any applications that are active.
2 Click “Next.”
3 Select “Search for the best driver for your device.
(Recommended).” (For the computer system with the CMT-C7NT
connected to it, refer to the operating instructions for that system
stereo component.)
Load the Windows 98/98SE CD-ROM into the CD-ROM drive of
the computer if the wizard requests it, and then install the drivers.
Installation procedure will be repeated for each of the following
devices.
• USB audio device
• USB composite device
• Generic USB hub
12
GB
Page 13
Verifying the status of the installed devices
Be sure to check the status of the installed devices after you have
installed thier drivers.
1 Open the Control Panel.
In the Start menu, point to “Settings” and click “Control Panel”.
2 Double-click the System icon.
The “System Properties” dialog box appears.
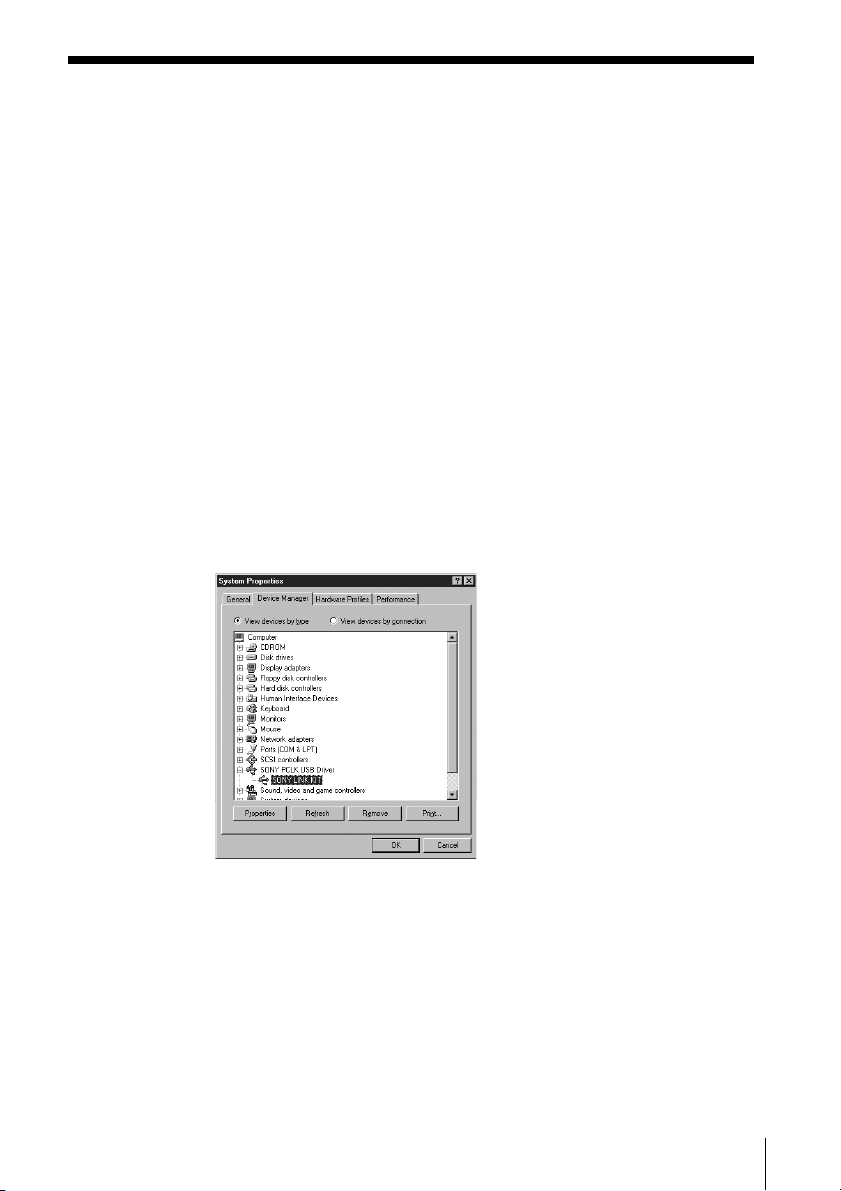
3 Click the “Device Manager” tab. (For the computer system with the
CMT-C7NT connected to it, refer to the operating instructions for
that system stereo component.)
Make sure that the following items are listed in the “Device
Manager” dialog box.
• “SONY PCLK USB Driver”
• “USB Audio Device” under “Sound, video and game controllers”
• “USB Composite Device” and “Generic USB Hub” under “Universal
Serial Bus controllers”
4 Click “OK” to close the “System Properties” dialog box.
13
GB
Page 14

Setting up for Windows 2000/Windows Me/Windows XP
Installing the USB driver (Windows 2000)
1 Connect the system stereo component to the computer directly or
via the PC connecting adaptor, and then start up the computer.
“Found New Hardware Wizard” appears.
Quit any applications that are active.
2 Click “Next.”
3 Select “Search for a suitable driver for my device (recommended).”
(For the computer system with the CMT-C7NT connected to it,
refer to the operating instructions for that system stereo
component.)
Load the Windows 2000 CD-ROM into the CD-ROM drive of the
computer if the wizard requests it, and then install the drivers.
Installation procedure will be repeated for each of the following
devices.
• USB audio device
• USB composite device
• Generic USB hub
Installing the USB driver (Windows Me)
14
1 Connect the system stereo component to the computer directly or
via the PC connecting adaptor, and then start up the computer.
“Add New Hardware Wizard” appears.
Quit any applications that are active.
GB
Page 15

2 Select “Search for the best driver for your device.
(Recommended).” (For the computer system with the CMT-C7NT
connected to it, refer to the operating instructions for that system
stereo component.)
Load the Windows Me CD-ROM into the CD-ROM drive of the
computer if the wizard requests it, and then install the drivers.
Installation procedure will be repeated for each of the following
devices.
• USB audio device
• USB composite device
• Generic USB hub
Installing the USB drivers (Windows XP)
1 Quit any applications that are active.
2 Connect the system stereo component to the computer directly or
via the PC connecting adaptor, and then start up the computer.
Installation of the drivers starts automatically, and will be
terminated after completing installation.
If “Found New Hardware Wizard” should appear, go to step 3.
3 Select “Install the software automatically [Recommended]” after
confirming that the name of the device for which the drivers are to
be installed is “SONY LINK KIT.”
Verifying the status of the installed devices (Windows 2000/
Windows Me/Windows XP)
Be sure to check the status of the installed devices after you have
installed thier drivers.
1 Open the Control Panel.
In the Start menu, point to “Settings” and click “Control Panel”.
(For Windows XP) In the Start menu, click “Control Panel,” and
then click “Switch to Classic View” on the left pane of the window.
(continued)
15
GB
Page 16
2 Double-click the “System” icon.
The “System Properties” dialog box appears.
Note
If you cannot find the “System” icon, click “View all Control Panel options”
(in the case of Windows Me).
3 (For Windows 2000/Windows XP only) Click the “Hardware” tab.
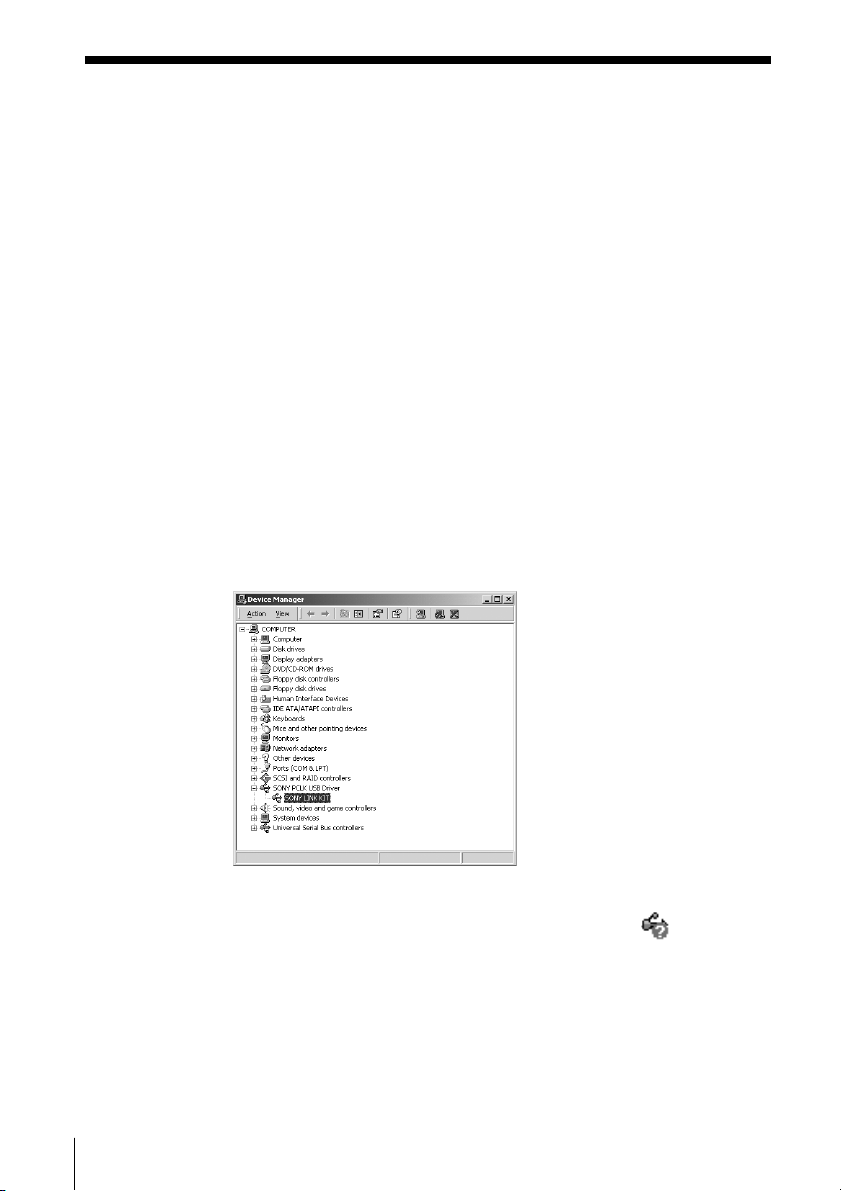
4 Click the “Device Manager” tab. (For Windows 2000/Windows XP,
click the “Device Manager” button, instead) (For the computer
system with the CMT-C7NT connected to it, refer to the operating
instructions for that system stereo component.)
Make sure that the following items are listed in the “Device
Manager” dialog box.
• “SONY PCLK USB Driver” (This item may be found under “Universal
Serial Bus controllers.”)
• “USB Audio Device” under “Sound, video and game controllers”
• “USB Composite Device” and “Generic USB Hub”under “Universal
Serial Bus controllers”
16
Example: Window for
Windows 2000
Note (for Windows Me only)
Depending on the configuration of your computer, may
appear before the listed device. This, however, does not affect the
operation of the system (the computer and system stereo
component).
5 Click “OK” to close the “System Properties” dialog box.
GB
Page 17

When no sound comes out of the computer
M-crew uses the USB audio device for sound playback and recording.
When you start up the computer with a system stereo component
connected, the USB audio device will be enabled in place of the
standard audio device. As a result, no sound will come out of the builtin or external speakers of the computer, because all sounds will be
output to the USB audio device via the USB cable. To allow sounds to
come out of the computer, remove the USB cable from the computer.
To enable the speakers of the computer with a system stereo
component connected to it, do the following procedure.
1 Open the Control Panel.
In the Start menu, point to “Setting” and click “Control Panel.”
(For Windows XP) In the start menu, click “Control Panel,” and
then click “Switch to Classic View” on the left pain of the window.
2 Double-click the “Sounds and Multimedia” (or “Multimedia” for
Windows 98/98SE or “Sounds and Audio Devices” for Windows
XP) icon to open the “Sounds and Multimedia Properties” (or
“Multimedia Properties” for Windows 98/98SE or “Sounds and
Audio Devices Properties” for Windows XP) dialog box.
3 Click the “Audio” tab, and then select the standard audio device
for each “Preferred device:” (or “Default Device:” for Windows XP)
of the “Sound Playback” (or “Playback” for Windows 98/98SE)
and “Sound Recording” (or “Recording” for Windows 98/98SE)
group boxes.
4 Click the “Use only preferred devices” (or “Use only default
devices” for Windows XP) option to enable it.
5 Click “OK.”
Note
Be sure to select “USB Audio Device” for each “Preferred device:” (or “Default
Device:” for Windows XP) in step 3 above before you start recording to an MD.
17
GB
Page 18

Installing LabelMaker 5.1
Please note that if you install LabelMaker 5.1 onto the Windows XP
preinstalled VAIO computer, LabelMaker 5.0 installed on it may be
overwritten by the new version.
Installing LabelMaker 5.1 will not overwrite any version of LabelMaker
older than 5.0 such as included in PictureGear 4.x.
1 Click “Setting up LabelMaker 5.1” in the setup window (see step 2
on page 7).
2 Follow the instructions that appear to install the application.
18
GB
Page 19

Uninstalling the software
When you no longer require M-crew or LabelMaker 5.1, uninstall the
programs as follows:
1 Open the Control Panel.
In the Start menu, point to “Settings” and click “Control Panel”.
2 Double-click the “Add/Remove Programs” icon.
The “Add/Remove Programs Properties” window appears.
3 Select and click “M-crew” or “LabelMaker 5.1” in the program list.
4 Click “Add/Remove.”
Uninstaller is activated and the software selected in step 3 is
deleted automatically.
Notes
• After uninstalling M-crew, the “Database” and “Jacket” folders created under
the M-crew folder (usually C:\Program Files\M_crew) and their files still
remain on the hard disk. Delete them manually, if there is no more need for
them.
• If you select LabelMaker 5.1 in step 3 above and uninstall it, not only
LabelMaker 5.1 installed through M-crew but also any other copy of
LabelMaker 5.1 that you may have installed separately from M-crew will be
removed.
• Similarly, if you uninstall LabelMaker 5.1 that has been installed separately
from M-crew, the label printing function will be no longer available also in
M-crew.
19
GB
Page 20

Basic Operations
Starting up M-crew
, In the Start menu, point to “Programs” and “M-crew”, and
then click “M-crew.”
The software starts up and the M-crew Main bar appears.
The bar below is displayed immediately after M-crew is started up.
The following description assumes that M-crew is running on the
computer to which the CMT-C7NT is connected as a system stereo
component.
Notes
• During MD recording, a dialog box appears to prompt you to stop
recording or to start up M-crew.
• M-crew (ver. 2.0E) and Net MD-enabled OpenMG Jukebox cannot be
active simultaneously.
20
GB
Page 21
Using M-crew
This section provides a short description of basic functionality and
usage of bars and windows available in M-crew.
For more information on using M-crew, refer to the Help (page 26).
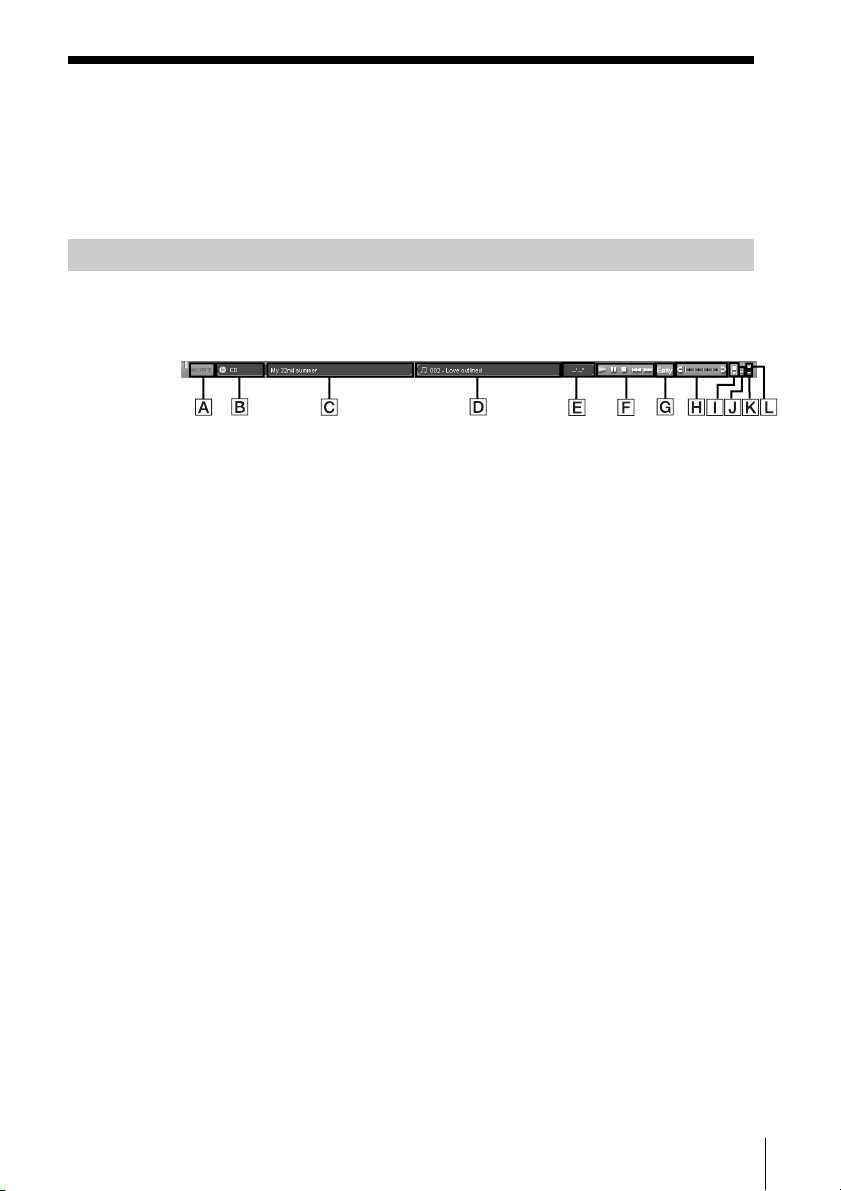
Main bar
The Main bar provides basic functions for playing a CD/MD and
operating the tuner.
A SONY logo
Drag the logo with the left mouse button to move the Main bar up
or down.
Right-click the logo to display a pop-up menu.
B Function Name display
Click to display and select a function (CD, MD, TUNER, etc).
C Disk Information (Radio Band) display
Displays the name of the selected CD/MD or the selected radio
band depending on which function of CD/MD or TUNER is
selected in the Function name display.
D Track Number/Track Name (Preset Number/Broadcasting Station
Name) display
Displays the track number/track name or the preset number/
broadcasting station name depending on which function of CD/MD
or TUNER is selected in the Function name display.
(continued)
21
GB
Page 22

E Timer (Frequency) display
Displays time information such as total playing time and elapsed
playing time while you are playing a CD/MD. Clicking on it allows
you to select a display mode. It also displays the frequency of the
selected station while you are listening to the radio.
F Operation buttons
Buttons displayed on this area appear as the CD/MD operation
buttons or the tuner operation buttons depending on which
function of CD/MD or TUNER is selected in the Function name
display. The CD/MD operation buttons allow you to play, pause,
stop, and locate a track on a CD/MD. The tuner operation buttons
provide such functions as those for selecting a radio band and
locating the preset number.
G Easy Mode button
Opens the Easy Mode window that provides easy access to the basic
functions for playing a CD/MD, recording to an MD.
H Volume control
Adjusts the volume of the system stereo component connected to
the computer.
I Tool bar switch
Click to show or hide the Tool bar.
J Help button
Click to open Help.
K Minimize button
Click to reduce the size of the window.
L Close button
Click to exit M-crew.
22
GB
Page 23

Tool bar
To view the Tool bar, click the Tool bar switch in the Main bar.
When you click a function icon in the Tool bar, the system switches to
the selected function and the corresponding window appears. Note that
only one window can be opened at a time.
A CD icon
Click to display the CD window.
B MD icon
Click to display the MD window.
C TUNER icon
Click to display the TUNER window.
D OTHERS icon
Click to display the OTHERS window.
E TIMER icon
Click to display the Timer window.
F File icon
Click to display the File window. Use this window to play the music
files stored on your computer’s hard disk.
G Disc Library icon
Click to display the Disc Library window. Use this window to view
or reuse data on the media that were played at least once before.
H Rec Window icon
Click to display the Rec window. Use this window to record to an
MD from the CD player, tuner, or other sources. Rec window has
two different recording modes; synchro recording mode and
manual recording mode.
I Option icon
Click to display the “Option” dialog box. Use this dialog box to
enter miscellaneous settings.
23
GB
Page 24
Operation windows
When you click a function icon in the Tool bar, a window
corresponding to the selected function appears. Operation windows
provide different sets of functions according to the function selected in
the Tool bar, such as those for selecting a play mode and editing disc
names.
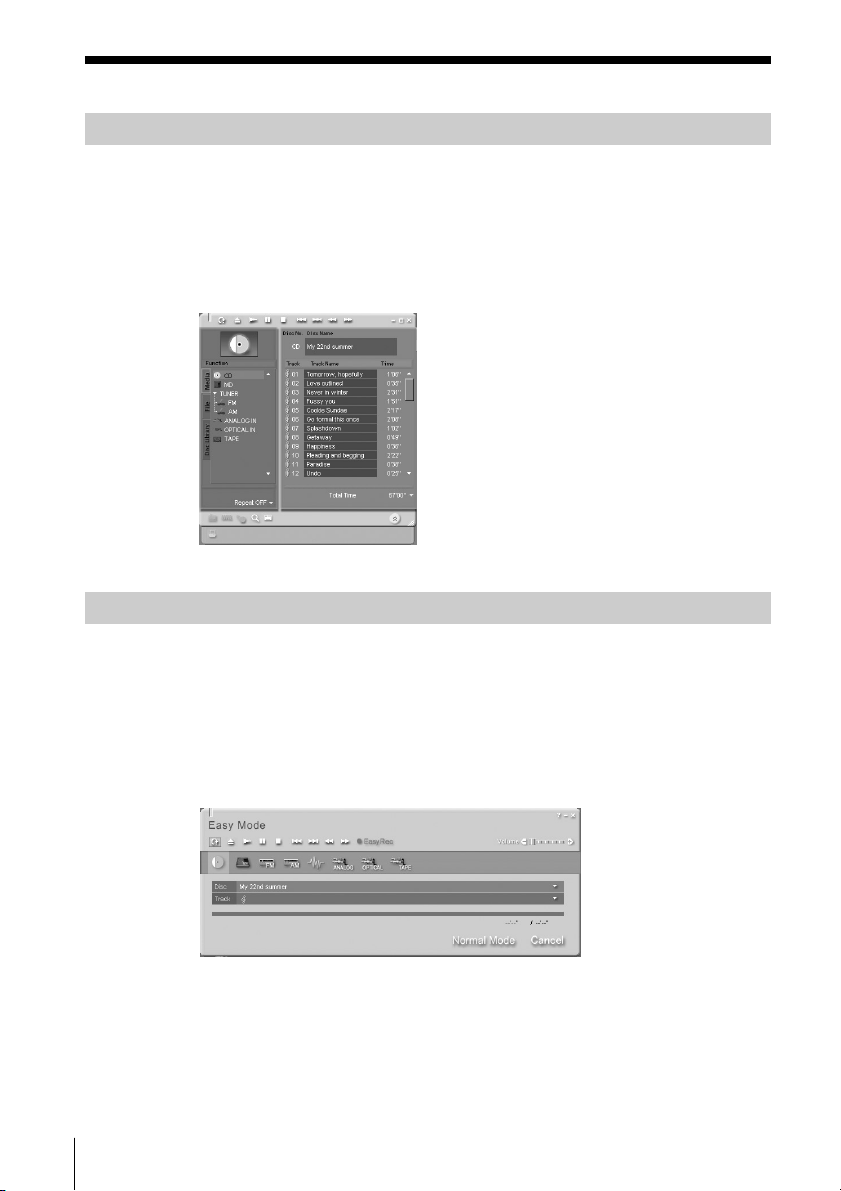
Easy Mode window
When you click the Easy Mode button in the Main bar, the Easy Mode
window appears. The Easy Mode window allows you to use basic
functions of M-crew from within the window, such as those for playing
a CD/MD and recording to an MD.
To return to the normal window, click the Normal Mode button in the
window.
24
GB
Page 25

Quitting the software
1 Click in the Main bar.
A dialog box for quitting the software appears.
2 Click “Do not turn off power.”
M-crew ends.
If you want to turn off the system stereo component as well, click
“Turn off power.”
25
GB
Page 26
Additional Information
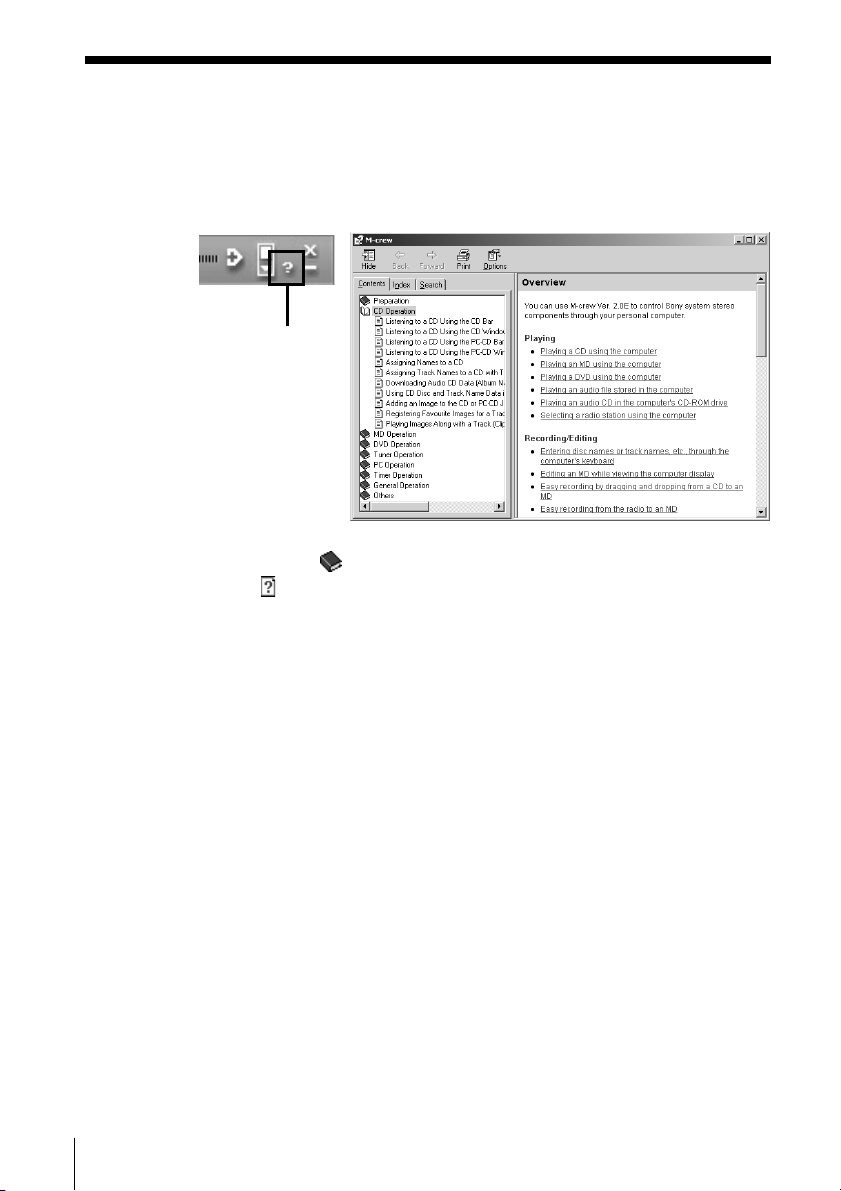
Using Help
Opening the Help table of contents
Click the Help button on the Main bar. The M-crew table of contents
will appear.
Click to open Help
26
GB
• Double-click
• Click
• Click an underlined item in an explanation to display a related
Searching by Keyword
1 Click the “Index” tab in the above topic search dialog box.
2 Enter a word or phrase that you want to search for or select the
3 Click “Display.”
Finding topics with a certain word or phrase
1 Click the “Search” tab in the above topic search dialog box.
2 Enter a word or phrase that is related to the desired topic, and then
3 Select the appropriate entry and click “Display.”
to display an explanation of the given item.
explanation on another page.
keyword by scrolling the list of keywords.
A topic containing the selected keyword appears in the right frame
of the dialog box.
If the “Topics Found” dialog box appears, select the appropriate
topic and click “Display.”
click “List Topics.” The topics that are found appear in the “Select
Topics to display:” list box.
A topic corresponding to the selected entry appears in the right
frame of the dialog box.
to display the topics within.
Page 27

Troubleshooting
If you experience any of the following difficulties while using this
software, use this troubleshooting guide to remedy the problem.
Should any problem persist, consult your nearest Sony dealer.
Please also refer to your computer’s manual, as well as the
“Readme.txt” file installed on the hard disk with the software.
To open the “Readme” file, go to the Start menu and select “Programs”
and “M-crew,” and then click “View Readme.”
Problem Cause/countermeasure
M-crew aborts automatically. OpenMG Jukebox is started.
t M-crew and OpenMG Jukebox cannot be
active simultaneously. Therefore, starting
OpenMG Jukebox while M-crew is active may
cause M-crew to abort. To restart M-crew, quit
OpenMG Jukebox, and then double-click the
M-crew icon in the task tray on the Desktop.
You can also select “Restart M-crew” from the
menu that can be opened by right-clicking on
the Desktop.
The message “Equipment does
not respond. Check connections.”
appears.
The USB cable is not properly connected to the
USB port on the computer.
t Check the USB connector connection.
t Try disconnecting the USB cable from the
computer, and then connecting it again.
The USB cable is not properly connected to the
system stereo component.
t Check the USB connector connection.
t Check that the AC power cord of the system
stereo component is connected to an AC
outlet.
(continued)
27
GB
Page 28

Problem Cause/countermeasure
No screen response or screen
error.
t Turn the power of the system stereo
component off and on, and then restart
M-crew.
t Try disconnecting the USB cable from the
system stereo component and from the
computer, and then connecting it again.
t Start up another often-used application and
verify that the computer functions properly.
t After uninstalling the M-crew software (page
19), try re-installing it (page 7).
Text input, recording, editing
etc., cannot be done.
The disc’s protect tab may be set to write-protect.
t Slide the tab so that recording is possible.
The MD may be a commercial playback-only MD
(an MD with prerecorded tracks).
t Text input, recording, editing, etc., are not
possible on commercial playback-only MDs.
The system stereo component
does not respond.
The displayed name of the MD or
CD does not match the disc’s
contents.
t Check that the connections have been made
properly (page 11).
t Disconnect the connecting cables and then
reconnect them.
t Try disconnecting the USB cable from the
system stereo component and from the
computer, and then connecting it again.
t Click the Reload button.
t Restart M-crew. Should the problem persist,
the data in the Disc Library may be corrupted.
Enter the names again.
28
GB
Page 29

Problem Cause/countermeasure
The installed devices are not set
properly.
t Refer to the “Readme.txt” file in the Start
menu. The “Readme.txt” file is in the folder
which the M-crew software is installed in.
No sound comes out of the builtin or external speakers of the
computer.
The USB audio device is preferred on the
computer that has a USB connection to a system
stereo component.
t Select the standard audio device (usually the
built-in sound card of the computer) for the
preferred device in the “Sounds and
Multimedia Properties” dialog box (page 17).
No sound from the system stereo
component comes out of the
built-in or external speakers of
the computer.
t Connect the analog output terminal on the
system stereo component and the line-in
terminal on the computer with an audio cable,
and then uncheck the “Mute” check box under
the “Line In Balance:” section in Volume
Control.
The message “Could not connect
to the CDDB.” appears.
t Check that you are successfully connected to
the Internet.
t If you have access to the Internet through a
proxy server, check the proxy settings in the
“Option” dialog box.
The system sounds (warning
alarm/mail arrival notice) are not
heard.
t The system sounds have been specified not to
sound during M-crew startup, or the setting
may have changed to OFF when M-crew was
abnormally ended. To restore the sounds,
restart M-crew and then quit the program
normally. Or double-click the backup file
(reg0.reg to reg3.reg) in the M-crew folder
and follow the instructions to set up the
program again (except for Windows XP).
29
GB
Page 30

• La copie de tout ou partie de ce logiciel et
du mode d’emploi, ou le prêt de ce logiciel
à des tiers sans l’autorisation expresse du
détenteur des droits d’auteur sont
strictement interdits par la loi sur les droits
d’auteur.
• Sony n’assume aucune responsabilité, de
quelque nature que ce soit, pour les pertes
financières, les pertes de bénéfices ou les
plaintes de tiers émanant de l’utilisation de
ce logiciel.
• En cas de défaut de fabrication, la
responsabilité de Sony se limite
uniquement au remplacement de ladite
marchandise défectueuse.
• L’utilisation de ce logiciel n’est approuvée
qu’avec l’équipement spécifié.
• Sony se réserve le droit de modifier sans
préavis les spécifications de ce logiciel. Les
autres logiciels connexes et services fournis
sont aussi sujets à modification sans
préavis.
Programme 1997-2001 Sony
Corporation
Documentation 2001 Sony
Corporation 2001 Sony Corporation Tous droits réservés.
• M-crew, LabelMaker et and sont
des marques de fabrique déposées de Sony
Corporation.
• Microsoft, MS-DOS et Windows sont des
marques de fabrique déposées de Microsoft
Corporation.
• IBM et PC/AT sont des marques de
fabrique déposées d’International Business
Machines Corporation.
• Macintosh est une marque de fabrique
d’Apple Computer Inc.
• Gracenote CDDB or Gracenote CDDB
Music Recognition Service
SM
• Powered by Gracenote CDDB
• Les autres noms d’entreprise ou de produit
sont des marques de fabrique ou marques
de fabrique déposées de chaque entreprise.
FR
2
Page 31

Table des matières
Démarrage
Aperçu ....................................................4
Exigences du système .......................... 6
Préparatifs
1: Installation de M-crew ..................... 7
2: Raccordements ................................11
3:Procédure d’implantation pour
votre système d’ordinateur ....... 11
Implantation pour Windows 98/
98SE ......................................12
Implantation pour Windows
2000/Windows Me/
Windows XP ....................... 14
Quand aucun son ne sort de
l’ordinateur ......................... 17
Installation de LabelMaker 5.1 ......... 18
Désinstallation du logiciel .................19
Opérations de base
Démarrage de M-crew ....................... 20
Utilisation de M-crew ........................ 21
Barre principale (Main) ............. 21
Barre d’outils ............................... 23
Fenêtres d’opération .................. 24
Fenêtre Easy Mode .....................24
Sortie du logiciel ................................. 25
A propos de ce manuel
Ce manuel indique comment installer le
logiciel M-crew et comment utiliser l’aide.
Consultez le fichier “Readme.txt” dans le
menu Start pour les informations les plus
récentes.
Le fichier “Readme.txt” se trouve dans le
dossier dans lequel le logiciel M-crew est
installé.
FR
Informations complémentaires
Utilisation de l’aide ............................ 26
Dépannage ...........................................27
FR
3
Page 32

Démarrage
Aperçu
M-crew (ver. 2.0E) vous permet de contrôler des composants stéréo de
système Sony. Les fonctions énumérées ci-dessous deviennent
utilisables par le biais de M-crew.
Lecture
• Opérer la fonction de lecture de platines CD, MD et DVD à partir de
votre ordinateur.
• Apprécier des fichiers audio stockés dans votre ordinateur.
• Accorder des stations de radio à partir de votre ordinateur.
Enregistrement/édition
• Entrer des titres de disque et de plage au clavier de votre ordinateur.
• Editer des MD sur l’écran de votre ordinateur.
• Enregistrer d’un CD à un MD par des opérations de glisser-déposer
simples.
• Enregistrer facilement d’une station de radio sur un MD.
• Organiser les plages d’un MD en groupes selon votre choix.
• Accéder au CDDB2 à partir de votre ordinateur pour titrer
automatiquement des albums et plages (seulement pour les
composants assistant cette fonction).
Autres opérations
• Créer un support virtuel pour la gestion des fichiers audio.
• Conserver la trace des plages lues et enregistrées via une
Bibliothèque de disques.
• Consigner des images pour les attacher à une plage et les visionner
pendant l’écoute de la plage (fonction CLIP).
• Accéder à des sites web concernés tout en écoutant des émissions de
radio.
• Régler les minuteries de lecture et d’enregistrement.
• Utiliser la fenêtre Easy Mode pour accéder facilement aux fonctions
de base de M-crew.
• Imprimer des étiquettes de MD.
FR
4
Page 33

Remarques
• Dans ce mode d’emploi, le terme “composant stéréo de système” réfère
spécifiquement aux systèmes à composants stéréo (platines CD et MD y
compris) et aux platines CD, MD et DVD discrètes.
• Les fonctions de M-crew opérantes sur votre ordinateur dépendront du
composant stéréo de système raccordé à votre ordinateur.
• Ce logiciel est utilisable uniquement pour opérer des composants stéréo de
système directement raccordés à votre ordinateur.
Music recognition technology and related data are provided by Gracenote and
the Gracenote CDDB Music Recognition ServiceSM. Gracenote is the industry
standard in music recognition technology and related content delivery. For
more information go to www.gracenote.com.
Gracenote is CDDB, Inc. d/b/a “Gracenote.” CD and music related data from
Gracenote CDDB Music Recognition ServiceSM 2000, 2001 Gracenote.
Gracenote CDDB Client Software 2000, 2001 Gracenote. U.S. Patents Numbers
#5,987,525; #6,061,680; #6,154,773, and other patents issued or pending.
CDDB is a registered trademark of Gracenote. CDDB-Enabled, the Gracenote
logo, the CDDB Logo, and the “Powered by Gracenote CDDB” logo are
trademarks of Gracenote. Music Recognition Service and MRS are service marks
of Gracenote.
FR
5
Page 34

Exigences du système
Les éléments matériels et logiciels suivants sont requis pour l’emploi du
logiciel M-crew (ver. 2.0E).
s Ordinateur IBM PC/AT ou compatible (Ce logiciel ne fonctionne pas
sur Apple Macintosh.)
s Unité centrale (CPU)*
s Carte vidéo et pilote d’affichage:
s Espace libre sur le disque dur:
s Port USB: 1 ou plus
s Système d’exploitation:
s Lecteur de média: Windows Media Player de version 6.4 ou
s Moniteur vidéo: SVGA (800 x 600 pixels), 65.536 couleurs ou plus
1
:
Intel Pentium II 266 MHz/Celeron 333 MHz ou
plus
SVGA (800 × 600 pixels), 65.536 couleurs ou plus
2
30 Mo*
ou plus
Windows 98/Windows 98SE/Windows 2000*
Windows Me/Windows XP*
fonctionne pas sur Microsoft Windows 3.1,
Windows 95 ou Windows NT.)
supérieure est requis pour lire des fichiers
musicaux sur votre ordinateur.
3
(Ce logiciel ne
3
/
*1Le fonctionnement de M-crew n’est pas garanti sur certains ordinateurs avec
puces CPU compatibles Pentium, tels que AMD K6 (par ex. des sauts de son
peuvent survenir pendant la lecture d’un fichier audio.)
*220 Mo d’espace de disque supplémentaires sont requis pour installer
LabelMaker 5.1.
*3Connectez-vous via le compte d’administrateur pour installer le logiciel et les
dispositifs d’implantation sur un ordinateur exécutant Windows 2000 ou
Windows XP.
Remarques
• Le bon fonctionnement de M-crew n’est pas garanti sur certains ordinateurs,
même s’ils remplissent les exigences ci-dessus.
• Le bon fonctionnement de M-crew n’est pas garanti sur un ordinateur que
vous avez construit vous-même ou sur un ordinateur avec système
d’exploitation que vous avez mis à jour vous-même.
• N’utilisez pas de concentrateur USB. Si plusieurs dispositifs USB sont
raccordés au concentrateur, M-crew pourra ne pas opérer correctement le
composant stéréo de système raccordé à l’ordinateur.
• Ce logiciel est utilisable seulement avec un système d’exploitation en langue
FR
6
anglaise. Dans un environnement langagier différent, il peut ne pas
fonctionner correctement ou le texte peut être incorrectement affiché.
Page 35

Préparatifs
1: Installation de M-crew
Procédez comme suit pour installer le logiciel M-crew sur le disque dur
de votre ordinateur. N’oubliez pas de préalablement démarrer
Windows.
Remarques
• Installez bien ce logiciel avant de raccorder le composant stéréo de
système à votre ordinateur. Sinon, ce logiciel peut ne pas fonctionner
correctement.
• Connectez-vous via le compte d’administrateur pour installer le logiciel (pour
Windows 2000/Windows XP).
1 Chargez le CD-ROM M-crew fourni dans le lecteur de CD-ROM de
votre ordinateur.
La fenêtre s'ouvrira avec l’icône
Remarque
Si la fenêtre ne s’ouvre pas, utilisez Windows Explorer pour l’ouvrir en
double-cliquant sur l’icône CD-ROM M-crew.
2 Double-cliquez sur l’icône (InstallDlg.exe).
La fenêtre d’implantation apparaît.
• Si vous utilisez le PCLK-MN10/MN10A et que le pilote USB PCLK est
déjà installé sur votre ordinateur, passez à l’étape 4.
• Si vous installez M-crew sur un ordinateur avec le CMT-C7NT raccordé,
commencez la procédure à partir de l’étape 3 même si vous utilisez le
PCLK-MN10/MN10A. Ne sautez pas l’étape 3.
(InstallDlg.exe) affichée.
3 Cliquez sur “1. Setting up PCLK-USB Driver” dans la fenêtre
d’implantation.
L’installation du pilote démarre. Quand la boîte de dialogue
indiquant l’achèvement de l’installation apparaît, cliquez sur
“Finish”.
4 Cliquez sur “2. Setting up M-crew” dans la fenêtre d’implantation.
Le programme d’implantation est lancé.
(à suivre)
FR
7
Page 36

Remarque
Windows Installer est nécessaire pour installer M-crew. S’il n’est pas
installé dans votre ordinateur, la fenêtre suivante apparaîtra. Dans ce cas,
cliquez sur “Restart” pour redémarrer votre ordinateur. Au redémarrage de
votre ordinateur, ne retirez pas le CD-ROM.
5 Cliquez sur “Next”.
6 Sélectionnez une des options de type d’implantation, puis cliquez
sur “Next”.
Complete: Tous les fichiers M-crew sur le CD-ROM seront
installés. Cette option ne vous permet pas de spécifier
le dossier dans lequel les fichiers M-crew sont
installés. (Normalement, les fichiers sont installés
dans le dossier “C:\Program Files\M-crew”.)
Custom: Vous pouvez spécifier le dossier dans lequel les
fichiers M-crew sont installés.
FR
8
Page 37

7 Si vous avez sélectionné “Complete” à l’étape 6, cliquez sur
“Install”.
L’installation commence.
Si vous avez sélectionné “Custom” à l’étape 6, cliquez sur
“Next”.
Pour changer de dossier d’installation pour M-crew, cliquez sur
“Change” pour ouvrir la boîte de dialogue, cliquez sur “Next”
après la spécification du dossier, puis cliquez sur “Install”.
(à suivre)
FR
9
Page 38

8 Quand la boîte de dialogue indiquant l’achèvement de l’installation
apparaît, cliquez sur “Finish”.
La procédure d’implantation est maintenant terminée.
N’oubliez pas de redémarrer l’ordinateur. Sinon, le logiciel ne
fonctionnera pas correctement.
Refermez bien la boîte de dialogue activée en exécutant
InstallDlg.exe avant de raccorder le composant stéréo de système à
l’ordinateur.
Vous pouvez maintenant passer aux étapes suivantes des
préparatifs: raccordement du composant stéréo de système à
l’ordinateur, installation des pilotes USB, puis vérification de l’état
des dispositifs installés conformément aux procédures décrites aux
pages suivantes.
10
Avant de démarrer M-crew
Ouvrez le fichier “Readme” et lisez-le.
Pour ouvrir le fichier “Readme”, passez au menu Start et sélectionnez
“Programs” et “M-crew”, puis cliquez sur “Readme”.
Remarques
• Un dossier est créé suite à l’installation. Ce dossier est utilisé par le logiciel.
N’effacez pas, ne transférez pas et ne modifiez pas son contenu.
• Si le pilote requis et d’autres éléments sont déjà installés, une boîte de
dialogue vous demandant confirmation apparaîtra pendant l’installation.
FR
Page 39

2: Raccordements
Pour les informations sur le raccordement du composant stéréo de
système à l’ordinateur, consultez le mode d’emploi du composant
stéréo de système ou celui de l’adaptateur de raccordement PC PCLKMN20.
3: Procédure d’implantation pour
votre système d’ordinateur
Vérifiez l’état des dispositifs installés avant de démarrer M-crew.
La procédure suivante est prévue pour Windows 98/98SE. Certaines
parties de cette procédure peuvent différer selon le système
d’exploitation dans lequel vous avez installé le logiciel. Consultez la
page 14 pour Windows 2000/Windows Me/Windows XP.
Remarque
Certaines illustrations insérées dans des procédures suivantes peuvent être
partiellement différentes selon le système d’exploitation sur lequel fonctionne
votre ordinateur.
11
FR
Page 40

Implantation pour Windows 98/98SE
Installation du pilote USB
1 Raccordez le composant stéréo de système directement à
l’ordinateur ou via l’adaptateur de raccordement PC, puis lancez
l’ordinateur.
“Add New Hardware Wizard” apparaît.
Quitter toute application active.
2 Cliquez sur “Next”.
3 Sélectionnez “Search for the best driver for your device.
(Recommended)”. (Pour le système d’ordinateur avec le
CMT-C7NT raccordé, consultez le mode d’emploi de ce composant
stéréo de système.)
Chargez le CD-ROM Windows 98/98SE dans le lecteur de CDROM de l’ordinateur si l’assistant le demande, puis installez les
pilotes. La procédure d’installation sera répétée pour chacun des
dispositifs suivants.
• Dispositif audio USB
• Dispositif composite USB
• Concentrateur USB générique
12
FR
Page 41

Vérification de l’état des dispositifs installés
Contrôlez l’état des dispositifs installés après l’installation de leurs
pilotes.
1 Ouvrez le panneau de commande.
Au menu Start, pointez “Setting” et cliquez sur “Control Panel”.
2 Double-cliquez sur l’icône System.
La boîte de dialogue “System Properties” apparaît.
3 Cliquez sur l’onglet “Device Manager”. (Pour un système
d’ordinateur avec CMT-C7NT raccordé, consultez le mode
d’emploi de ce composant stéréo de système.)
Vérifiez que les rubriques suivantes sont listées dans la boîte de
dialogue “Device Manager”.
• “SONY PCLK USB Driver”
• “USB Audio Device” sous “Sound, video and game controllers”
• “USB Composite Device” et “Generic USB Hub” sous “Universal Serial
Bus controllers”
4 Cliquez sur “OK” pour fermer la boîte de dialogue “System
Properties”.
13
FR
Page 42

Implantation pour Windows 2000/Windows Me/ Windows XP
Installation du pilote USB (Windows 2000)
1 Raccordez le composant stéréo de système directement à
l’ordinateur ou via l’adaptateur de raccordement PC, puis lancez
l’ordinateur.
“Found New Hardware Wizard” apparaît.
Quittez toute application active.
2 Cliquez sur “Next”.
3 Sélectionnez “Search for a suitable driver for my device.
(recommended)”. (Pour le système d’ordinateur avec le
CMT-C7NT raccordé, consultez le mode d’emploi de ce composant
stéréo de système.)
Chargez le CD-ROM Windows 2000 dans le lecteur de CD-ROM de
l’ordinateur si l’assistant le demande, puis installez les pilotes. La
procédure d’installation sera répétée pour chacun des dispositifs
suivants.
• Dispositif audio USB
• Dispositif composite USB
• Concentrateur USB générique
14
Installation du pilote USB (Windows Me)
1 Raccordez le composant stéréo de système directement à
l’ordinateur ou via l’adaptateur de raccordement PC, puis lancez
l’ordinateur.
“Add New Hardware Wizard” apparaît.
Quittez toute application active.
FR
Page 43

2 Sélectionnez “Search for the best driver for your device.
(Recommended)”. (Pour le système d’ordinateur avec le
CMT-C7NT raccordé, consultez le mode d’emploi de ce composant
stéréo de système.)
Chargez le CD-ROM Windows Me dans le lecteur de CD-ROM de
l’ordinateur si l’assistant le demande, puis installez les pilotes. La
procédure d’installation sera répétée pour chacun des dispositifs
suivants.
• Dispositif audio USB
• Dispositif composite USB
• Concentrateur USB générique
Installation des pilotes USB (Windows XP)
1 Quittez toute application active.
2 Raccordez le composant stéréo de système directement à
l’ordinateur ou via l’adaptateur de raccordement PC, puis lancez
l’ordinateur.
L’installation des pilotes commence automatiquement et sera
terminée à son achèvement.
Si “Found New Hardware Wizard” apparaît, passez à l’étape 3.
3 Sélectionnez “Install the software automatically [Recommended]”
après confirmation que le nom du dispositif pour lequel le pilote
doit être installé est “SONY LINK KIT”.
Vérification de l’état des dispositifs installés (Windows 2000/Windows
Me/Windows XP)
Contrôlez l’état des dispositifs installés après l’installation de leurs
pilotes.
1 Ouvrez le panneau de commande.
Au menu Start, pointez “Setting” et cliquez sur “Control Panel”.
(Pour Windows XP) Au menu Start, cliquez sur “Control Panel”,
puis sur “Switch to Classic View” dans la partie gauche de la
fenêtre.
(à suivre)
15
FR
Page 44

2 Double-cliquez sur l’icône “System”.
La boîte de dialogue “System Properties” apparaît.
Remarque
Si vous ne pouvez pas trouver l’icône “System”, cliquez sur “View all
Control Panel options” (pour Windows Me).
3 (Pour Windows 2000/Windows XP uniquement) Cliquez sur
l’onglet “Hardware”.
4 Cliquez sur l’onglet “Device Manager”. (Pour Windows 2000/
Windows XP, cliquez sur le bouton “Device Manager” à la place.)
(Pour un système d’ordinateur avec CMT-C7NT raccordé,
consultez le mode d’emploi de ce composant stéréo de système.)
Vérifiez que les rubriques suivantes sont listées dans la boîte de
dialogue “Device Manager”.
• “SONY PCLK USB Driver” (Cette rubrique peut se trouver sous
“Universal Serial Bus controllers”.)
• “USB Audio Device” sous “Sound, video and game controllers”
• “USB Composite Device” et “Generic USB Hub” sous “Universal Serial
Bus controllers”
16
Exemple: Fenêtre pour
Windows 2000
Remarque (pour Windows Me seulement)
Selon la configuration de votre ordinateur, peut apparaître
devant le dispositif listé. Mais cela n’affecte pas le fonctionnement
du système (l’ordinateur et le composant stéréo de système).
5 Cliquez sur “OK” pour fermer la boîte de dialogue “System
Properties”.
FR
Page 45

Quand aucun son ne sort de l’ordinateur
M-crew utilise le dispositif audio USB pour la lecture et
l’enregistrement du son. Quand vous lancez l’ordinateur avec un
composant stéréo de système raccordé, le dispositif audio USB est
validé à la place du dispositif audio standard. Il en résulte qu’aucun
son ne sort du haut-parleur intégré ou des enceintes externes de
l’ordinateur, parce que tous les sons seront sortis au dispositif audio
USB via le câble USB. Pour permettre aux sons de sortir de l’ordinateur,
retirez le câble USB de l’ordinateur.
Procédez comme suit pour valider les enceintes de l’ordinateur avec un
composant stéréo de système raccordé.
1 Ouvrez Control Panel.
Au menu Start, pointez “Setting” et cliquez sur “Control Panel”.
(Pour Windows XP) Au menu Start, cliquez sur “Control Panel”,
puis sur “Switch to Classic View” dans la partie droite de la
fenêtre.
2 Double-cliquez sur l’icône “Sounds and Multimedia” (ou
“Multimedia” pour Windows 98/98SE ou “Sounds and Audio
Devices” pour Windows XP) pour ouvrir la boîte de dialogue
“Sounds and Multimedia Properties” (“Multimedia Properties”
pour Windows 98/98SE ou “Sounds and Audio Devices
Properties” pour Windows XP).
3 Cliquez sur l’onglet “Audio”, puis sélectionnez le dispositif audio
standard pour chaque case de groupe “Preferred device:” (ou
“Default Device”: pour Windows XP) de “Sound Playback” (ou
“Playback” pour Windows 98/98SE) et “Sound Recording” (ou
“Recording” pour Windows 98/98SE).
4 Cliquez sur l’option “Use only preferred devices” (ou “Use only
default devices” pour Windows XP) pour la valider.
5 Cliquez sur “OK”.
Remarque
Sélectionnez bien “USB Audio Device” pour chaque “Preferred device:” (ou
“Default Device”: pour Windows XP) à l’étape 3 ci-dessus avant de démarrer
l’enregistrement sur un MD.
17
FR
Page 46

Installation de LabelMaker 5.1
Notez que si vous installez LabelMaker 5.1 sur Windows XP préinstallé
dans un ordinateur VAIO, LabelMaker 5.0 déjà installé pourra être
écrasé par la nouvelle version.
L’installation de LabelMaker 5.1 n’écrasera aucune version de
LabelMaker plus ancienne que 5.0, par exemple celle incluse dans
PictureGear 4.x.
1 Cliquez sur “Setting up LabelMaker 5.1” dans la fenêtre
d’implantation (voir l’étape 2 à la page 7).
2 Suivez les instructions apparaissant pour installer l’application.
18
FR
Page 47

Désinstallation du logiciel
Quand vous n’avez plus besoin de M-crew ou de LabelMaker 5.1,
désinstallez les programmes comme suit.
1 Ouvrez Control Panel.
Au menu Start, pointez “Settings” et cliquez sur “Control Panel”.
2 Double-cliquez sur l’icône “Add/Remove Programs”.
La fenêtre “Add/Remove Programs Properties” apparaît.
3 Sélectionnez et cliquez sur “M-crew” ou “LabelMaker 5.1” dans la
liste de programmes.
4 Cliquez sur “Add/Remove”.
Le désinstallateur est activé et le logiciel sélectionné à l’étape 3 est
automatiquement supprimé.
Remarques
• Après la désinstallation de M-crew, les dossiers “Database” et “Jacket” créés
dans le dossier M-crew (ordinairement C:/Program Files/M_crew) et leurs
fichiers restent sur le disque dur. Supprimez-les manuellement s’ils sont
inutiles.
• Si vous sélectionnez LabelMaker 5.1 à l’étape 3 ci-dessus et le désinstallez, non
seulement LabelMaker 5.1 installé via M-crew, mais aussi toute autre copie de
LabelMaker 5.1 que vous avez peut-être installée séparément de M-crew sera
éliminée.
• Similairement, si vous désinstallez LabelMaker 5.1 installé séparément de
M-crew, la fonction d’impression d’étiquettes ne sera plus disponible dans
M-crew non plus.
19
FR
Page 48

Opérations de base
Démarrage de M-crew
, Au menu Start, pointez “Programs” et “M-crew”, puis
cliquez sur “M-crew”.
Le logiciel est lancé et la barre Main de M-crew apparaît.
La barre ci-dessous s’affiche immédiatement après le démarrage de
M-crew.
La description subséquente suppose que M-crew fonctionne sur
l’ordinateur auquel le CMT-C7NT est raccordé comme composant
stéréo de système.
Remarques
• Pendant l’enregistrement de MD, une boîte de dialogue apparaît
pour vous inviter à arrêter l’enregistrement ou à démarrer M-crew.
• M-crew (ver. 2.0E) et OpenMG Jukebox à Net MD validé ne peuvent
pas être actifs simultanément.
20
FR
Page 49

Utilisation de M-crew
Cette section donne une brève description des fonctionnalités de base et
de l’usage des barres et fenêtres disponibles par M-crew.
Voir l’aide (page 26) pour plus d'informations sur l'emploi de M-crew.
Barre principale (Main)
La barre Main fournit les fonctions de base pour la lecture de CD/MD
et le fonctionnement du tuner.
A Logo SONY
Tirez le logo avec la touche gauche de la souris pour déplacer la
barre principale vers le haut ou le bas.
Cliquez de la touche droite sur le logo pour afficher un menu
déroulant.
B Affichage du nom des fonctions
Cliquez dessus pour afficher et sélectionner une fonction (CD, MD,
TUNER etc.).
C Affichage des informations de disque (bande radio)
Affiche le nom du CD/MD sélectionné ou de la bande radio
sélectionnée selon la sélection de la fonction de CD/MD ou TUNER
sur l’affichage du nom des fonctions.
D Affichage du numéro de plage/titre de plage (numéro de
préréglage/nom de station de diffusion)
Affiche le numéro de plage/titre de plage ou le numéro de
préréglage/nom de station de diffusion selon la sélection de la
fonction de CD/MD ou TUNER sur l’affichage du nom des
fonctions.
(à suivre)
21
FR
Page 50

E Affichage de minuterie (fréquence)
Affiche les informations de temps, comme le temps total de lecture
et le temps de lecture écoulé pendant la lecture d’un CD/MD.
Cliquer dessus vous permet de sélectionner un mode d’affichage. Il
affiche aussi la fréquence de la station sélectionnée pendant l’écoute
de la radio.
F Boutons d’opération
Les boutons affichés dans cette zone apparaissent comme des
boutons d’opération CD/MD ou des boutons d’opération du tuner
selon la sélection de la fonction de CD/MD ou TUNER sur
l’affichage du nom des fonctions. Les boutons d’opération CD/MD
vous permettent de lire, faire une pause, arrêter et localiser une
plage sur un CD/MD. Les boutons d’opération du tuner vous
offrent des fonctions comme la sélection d’une bande radio et la
localisation d’un numéro de préréglage.
G Bouton Easy Mode
Ouvre la fenêtre Easy Mode qui permet d’accéder facilement aux
fonctions de base pour la lecture d’un CD/MD et l’enregistrement
sur un MD.
H Commande de volume
Ajuste le volume du composant stéréo de système raccordé à
l’ordinateur.
I Commutateur de barre d’outils
Cliquez dessus pour montrer ou cacher la barre d’outils.
J Bouton d’aide
Cliquez dessus pour ouvrir l’aide.
K Bouton de réduction
Cliquez dessus pour réduire la taille de la fenêtre.
L Bouton de fermeture
Cliquez dessus pour quitter M-crew.
22
FR
Page 51

Barre d’outils
Pour visualiser la barre d’outils, cliquez sur le commutateur de barre
d’outils sur la barre principale.
Quand vous cliquez sur une icône de fonction de la barre d’outils, le
système commute à la fonction sélectionnée et la fenêtre
correspondante apparaît. Notez qu’une seule fenêtre peut être ouverte
à la fois.
A Icône CD
Cliquez dessus pour afficher la fenêtre CD.
B Icône MD
Cliquez dessus pour afficher la fenêtre MD.
C Icône TUNER
Cliquez dessus pour afficher la fenêtre TUNER.
D Icône OTHERS
Cliquez dessus pour afficher la fenêtre OTHERS.
E Icône TIMER
Cliquez dessus pour afficher la fenêtre TIMER.
F Icône de fichier
Cliquez dessus pour afficher la fenêtre File. Utilisez cette fenêtre
pour écouter des fichiers musicaux stockés sur le disque dur de
votre ordinateur.
G Icône de bibliothèque de disques
Cliquez dessus pour afficher la fenêtre Disc Library. Utilisez cette
fenêtre pour visualiser ou réutiliser des données sur le support qui
ont été lues au moins une fois.
H Icône de fenêtre Rec
Cliquez dessus pour afficher la fenêtre Rec auparavant. Utilisez
cette fenêtre pour enregistrer sur un MD à partir d’un lecteur CD,
tuner ou d’une autre source. La fenêtre Rec a deux modes
d’enregistrement: mode d’enregistrement synchro et mode
d’enregistrement manuel.
I Icône Option
Cliquez dessus pour afficher la boîte de dialogue “Option”. Utilisez
cette boîte de dialogue pour entrer des réglages divers.
23
FR
Page 52

Fenêtres d’opération
Quand vous cliquez sur une icône de fonction de la barre d’outils, une
fenêtre correspondant à la fonction sélectionnée apparaît. Les fenêtres
d’opération offrent différents jeux de fonctions selon la fonction
sélectionnée à la barre d’outils, par exemple celles pour la sélection
d’un mode de lecture et l’édition des titres de disque.
Fenêtre Easy Mode
La fenêtre Easy Mode apparaît quand vous cliquez sur le bouton Easy
Mode de la barre principale. Elle vous permet d’utiliser les fonctions de
base de M-crew de l’intérieur de la fenêtre, par exemple celles pour la
lecture d’un CD/MD et l’enregistrement sur un MD.
Pour revenir à la fenêtre normale, cliquez sur le bouton Normal Mode
dans cette fenêtre.
24
FR
Page 53

Sortie du logiciel
1 Cliquez sur sur la barre principale.
Une boîte de dialogue de sortie du logiciel apparaît.
2 Cliquez sur “Do not turn off power”.
M-crew se termine.
Si vous souhaitez aussi mettre le composant stéréo de système hors
tension, cliquez sur “Turn off power”.
25
FR
Page 54

Informations complémentaires
Utilisation de l’aide
Ouverture de la table des matières de l’aide
Cliquez sur le bouton Help sur la barre principale. La table des matières
M-crew apparaîtra.
Cliquez pour
ouvrir l’aide
26
• Double-cliquez sur
• Cliquez sur
• Cliquez sur un article souligné dans une explication pour afficher une
explication connexe sur une autre page.
Recherche par mot de passe
1 Cliquez sur l’onglet “Index” dans la boîte de dialogue de recherche
de thèmes ci-dessus.
2 Entrez un mot ou une phrase que vous souhaitez rechercher ou
sélectionnez le mot de passe en déroulant la liste des mots de passe.
3 Cliquez sur “Display”.
Un thème contenant le mot de passe sélectionné apparaît dans le
cadre droit de la boîte de dialogue.
Si la boîte de dialogue “Topics Found” apparaît, sélectionnez le
thème approprié et cliquez sur “Display”.
Recherche de thèmes avec un certain mot ou une certaine phrase
1 Cliquez sur l’onglet “Search” dans la boîte de dialogue de recherche
de thèmes ci-dessus.
2 Entrez le mot ou la phrase en relation avec le thème souhaité, puis
cliquez sur “List Topics”. Les thèmes trouvés apparaissent dans la
boîte de liste “Select Topics to display:”.
3 Sélectionnez l’entrée appropriée et cliquez sur “Display”.
Un thème correspondant à l’entrée sélectionnée apparaît dans le
cadre droit de la boîte de dialogue.
FR
pour afficher une explication sur un article donné.
pour afficher les thèmes à l’intérieur.
Page 55

Dépannage
Si vous rencontrez une des difficultés suivantes pendant l’utilisation de
ce logiciel, servez-vous de ce guide de dépannage pour résoudre le
problème. S’il persiste, consultez le revendeur Sony le plus proche.
Consultez également le mode d’emploi de votre ordinateur, ainsi que le
fichier “Readme.txt” installé sur le disque dur avec le logiciel.
Pour ouvrir le fichier “Readme”, passez au menu Start et sélectionnez
“Programs” et “M-crew”, puis cliquez sur “View Readme”.
Problème Cause/mesure à prendre
Abandon automatique de M-crew OpenMG Jukebox est lancé.
t M-crew et OpenMG Jukebox ne peuvent pas
être actifs simultanément. Aussi, démarrer
OpenMG Jukebox quand M-crew est actif peut
provoquer l’abandon de M-crew. Pour
redémarrer M-crew, quittez OpenMG Jukebox,
puis double-cliquez sur l’icône M-crew dans le
tiroir des tâches de votre ordinateur. Vous
pouvez aussi sélectionner “Restart M-crew” au
menu qui peut être ouvert en cliquant de la
touche droite sur l’ordinateur.
Le message “Equipment does not
respond. Check connections.”
apparaît.
Le câble USB est mal raccordé au port USB de
l’ordinateur.
t Vérifiez le raccordement du connecteur USB.
t Essayez de déconnecter le câble USB de
l’ordinateur, puis de le reconnecter.
Le câble USB est mal raccordé au composant
stéréo de système.
t Vérifiez le raccordement du connecteur USB.
t Vérifiez que le câble d’alimentation du
composant stéréo de système est raccordé à
une prise secteur.
(à suivre)
27
FR
Page 56

Problème Cause/mesure à prendre
Pas de réponse de l’écran ou
erreur d’écran.
t Mettez le composant stéréo de système hors
tension, puis redémarrez M-crew.
t Essayez de déconnecter le câble USB du
composant stéréo de système et de
l’ordinateur, puis de le reconnecter.
t Démarrez une application fréquemment
utilisée et vérifiez si l’ordinateur fonctionne
bien.
t Après la désinstallation du logiciel M-crew
(page 19), essayez de le réinstaller (page 7).
Entrée de texte, enregistrement,
édition etc. sont impossibles.
Le taquet de protection du disque est réglé à la
protection contre l’écriture.
t Faites glisser le taquet de manière à permettre
l’enregistrement.
Le MD est peut-être un MD de lecture seulement
disponible dans le commerce (un MD à plages
préenregistrées).
t Entrée de texte, enregistrement, édition etc.
sont impossibles sur des MD de lecture
seulement disponibles dans le commerce.
28
Le composant stéréo de système
ne répond pas.
Le titre affiché du MD ou du CD
ne correspond pas aux matériaux
du disque.
FR
t Vérifiez que les raccordements sont faits
correctement (page 11).
t Déconnectez les câbles de raccordement, puis
reconnectez-les.
t Essayez de déconnecter le câble USB du
composant stéréo de système et de
l’ordinateur, puis de le reconnecter.
t Cliquez sur le bouton Reload.
t Redémarrez M-crew. Si le problème persiste,
les données dans la bibliothèque de disques
peuvent être altérées. Réentrez les titres.
Page 57

Problème Cause/mesure à prendre
Les dispositifs installés sont mal
réglés.
t Consultez le fichier “Readme.txt” du menu
Start. Le fichier “Readme.txt” se trouve dans le
dossier dans lequel le logiciel M-crew a été
installé.
Aucun son ne sort du hautparleur intégré ou des enceintes
extérieures de l’ordinateur.
Le dispositif audio USB est préféré défaut sur
l’ordinateur pourvu d’une connexion USB à un
composant stéréo de système.
t Sélectionnez le dispositif audio standard
(ordinairement une carte son intégrée à
l’ordinateur) comme dispositif préféré dans la
boîte de dialogue “Sounds and Multimedia
Properties” (page 17).
Aucun son du composant stéréo
de système ne sort du hautparleur intégré ou des enceintes
extérieures de l’ordinateur.
Le message “Could not connect
to the CDDB.” apparaît.
Les sons du système (alarme
d’avertissement/alerte sonore
d’arrivée de courrier
électronique) ne sont pas
audibles.
t Raccordez la prise de sortie analogique du
composant stéréo de système et la prise
d’entrée de ligne de l’ordinateur avec un câble
audio, puis désélectionnez la case “Mute”
dans la section “Line In Balance:” de Volume
Control.
t Vérifiez que vous êtes bien raccordé à Internet.
t Si vous avez accès à Internet via un serveur
mandataire, vérifiez les réglages d’autorisation
dans la boîte de dialogue “Option”.
t Il a été spécifié que les sons du système ne
soient pas audibles pendant le démarrage de
M-crew, ou le réglage a peut-être été modifié à
OFF quand M-crew a été terminé
anormalement. Pour rétablir les sons,
redémarrez M-crew, puis quittez le
programme normalement. Ou bien doublecliquez sur le fichier de sauvegarde (reg0.reg
to reg3.reg) dans le dossier M-crew et suivez
les instructions pour réimplanter le
programme (sauf pour Windows XP).
29
FR
Page 58

• Die Vervielfältigung des Inhalts dieser
Software und der Bedienungsanleitung, ob
auszugsweise oder insgesamt, sowie das
Verleihen dieser Software an dritte ohne
ausdrückliche Genehmigung des
Urheberrechtsinhabers verstößt gegen das
Urheberrecht und ist strafbar.
• Sony übernimmt keinerlei Haftung für
finanzielle Verluste, Gewinnverluste oder
Schadensersatzforderungen Dritter, die aus
dem Gebrauch dieser Software entstehen.
• Für den Fall von Herstellungsfehlern
beschränkt sich der Haftungsumfang der
Firma Sony ausschließlich auf den Ersatz
der defekten Ware.
• Diese Software ist nur für den Gebrauch
mit der vorgeschriebenenen Hardware
zugelassen.
• Sony behält sich das Recht vor,
Änderungen an den
Softwarespezifikationen ohne
Vorankündigung vorzunehmen.
Änderungen bei anderer zugehöriger
Software und Diensten bleiben ebenfalls
vorbehalten.
Programm 1997-2001 Sony
Corporation
Dokumentation 2001 Sony
Corporation
2001 Sony Corporation. Alle Rechte
vorbehalten.
• Andere Firmen- und Produktnamen sind
die Handelsmarken oder eingetragenen
Warenzeichen der jeweiligen Firma.
• M-crew, LabelMaker und sind
eingetragene Warenzeichen der Sony
Corporation.
• Microsoft, MS-DOS und Windows sind
eingetragene Warenzeichen der Microsoft
Corporation.
• IBM und PC/AT sind eingetragene
Warenzeichen der International Business
Machines Corporation.
• Macintosh ist ein eingetragenes
Warenzeichen der Apple Computer Inc.
• Gracenote CDDB or Gracenote CDDB
Music Recognition Service
• Powered by Gracenote CDDB
DE
2
SM
Page 59

Inhaltsverzeichnis
Einstieg
Überblick ................................................ 4
Systemvoraussetzungen ...................... 6
Vorbereitung
1: Installation von M-crew................... 7
2: Anschlüsse .......................................11
3:Einstellung des Rechners
entsprechend dem jeweiligen
Betriebssystem ............................ 11
Einstellung für Windows 98/
98SE ......................................12
Einstellung für Windows 2000/
Windows Me/
Windows XP ....................... 14
Wenn kein Ton vom Rechner
kommt.................................. 17
Installation von LabelMaker 5.1 ....... 18
Deinstallieren der Software............... 19
Grundlegende Bedienung
Starten von M-crew ............................20
Verwendung von M-crew ................. 21
Hauptleiste .................................. 21
Symbolleiste ................................ 23
Bedienungsfenster ...................... 24
Easy-Mode-Fenster .................... 24
Beenden der Software ........................ 25
Über diese Bedienungsanleitung
Diese Bedienungsanleitung beschreibt, wie
die M-crew-Software zu installieren ist und
wie das Hilfesystem verwendet wird. Die
Informationen auf dem neuesten Stand
finden Sie in der Datei „Readme.txt“ im
Startmenü. Die Datei „Readme.txt“ befindet
sich in dem Ordner, in dem die M-crewSoftware installiert ist.
DE
Zusätzliche Information
Nutzung des Hilfesystems ................26
Störungssuche ..................................... 27
DE
3
Page 60

Einstieg
Überblick
Das Programm M-crew (ver. 2.0E) ermöglicht Ihnen die Steuerung von
Sony System-Stereokomponenten. Mit M-crew haben Sie Zugriff auf
die folgenden Funktionen.
Wiedergabe
• Steuerung der Wiedergabefunktion auf CD-, MD- und DVD-Spielern.
• Abspielen von Audiodateien, die auf dem Computer gespeichert
sind.
• Abstimmen von Rundfunksendungen über den Computer.
Aufnehmen/Editieren
• Eingabe von Disc- und Titelnamen über die Computertastatur.
• Editieren von MDs auf dem Computerbildschirm.
• Einfaches Überspielen von CD auf MD durch „Drag & Drop“ (Ziehen
und Ablegen).
• Einfaches Aufnehmen von Rundfunksendungen auf MD.
• Anordnen von Titeln auf MD in Gruppen Ihrer Wahl.
• Zugriff zu CDDB2 von Ihrem Computer, um Alben und Titel
automatisch zu etikettieren (nur für Komponenten, die dieses
Merkmal unterstützen).
Sonstige Operationen
• Erstellen von virtuellen Datenträgern zur Verwaltung von
Audiodateien.
• Überwachung der abgespielten und aufgenommenen Titel über ein
Disc-Archiv (Disc Library).
• Zugreifen auf zugehörige Websites während der Wiedergabe von
Titeln.
• Registrieren von Bildern, um sie zu einem Titel zuzuordnen und
während der Wiedergabe des Titels zu betrachten (CLIP-Funktion).
• Zugreifen auf zugehörige Websites während des
Rundfunkempfangs.
• Programmieren von Wiedergabe- und Aufnahme-Timern.
• Verwendung des Easy-Mode-Fensters zum leichten Zugriff zu den
Basisfunktionen von M-crew.
• Ausdrucken von MD-Etiketten.
DE
4
Page 61

Hinweise
• Der in dieser Anleitung verwendete Begriff „System-Stereokomponente“
bezieht sich konkret auf Stereo-Komponentenanlagen (einschließlich CD- und
MD-Decks) sowie auf separat angeschlossene CD-, MD- und DVD-Decks.
• Welche Funktionen des Programms M-crew an Ihrem Computer zur
Verfügung stehen, richtet sich im Einzelfall danach, welche SystemStereokomponenten an dem Computer angeschlossen sind.
• Diese Software kann nur zur Steuerung von System-Stereokomponenten
genutzt werden, die direkt an den Computer angeschlossen sind.
Music recognition technology and related data are provided by Gracenote and
the Gracenote CDDB Music Recognition ServiceSM. Gracenote is the industry
standard in music recognition technology and related content delivery. For
more information go to www.gracenote.com.
Gracenote is CDDB, Inc. d/b/a „Gracenote.“ CD and music related data from
Gracenote CDDB Music Recognition ServiceSM 2000, 2001 Gracenote.
Gracenote CDDB Client Software 2000, 2001 Gracenote. U.S. Patents Numbers
#5,987,525; #6,061,680; #6,154,773, and other patents issued or pending.
CDDB is a registered trademark of Gracenote. CDDB-Enabled, the Gracenote
logo, the CDDB Logo, and the „Powered by Gracenote CDDB“ logo are
trademarks of Gracenote. Music Recognition Service and MRS are service marks
of Gracenote.
DE
5
Page 62

Systemvoraussetzungen
Damit das Programm M-crew (Version 2.0E) auf Ihrem Computer läuft,
muss dieser die folgenden Mindestanforderungen erfüllen.
s IBM PC/AT oder kompatible Computer (Dieses Programm läuft
nicht auf Macintosh-Computern).
1
s CPU*
s Grafikkarte und Bildschirmtreiber:
s Festplattenspeicherplatz:
s USB-Port: 1 oder mehr
s Betriebssystem: Windows 98/Windows 98SE/Windows 2000*
s Media Player: Windows Media Player 6.4 oder höher ist
s Monitor: SVGA (800 × 600 Pixel), Farbtiefe von 65.536 oder
*1Bei bestimmten Computern mit Pentium-kompatiblen CPU-Chips, z.B. AMD
*2Zur Installation des Programms LabelMaker 5.1 sind weitere 20 MB
*3Zum Installieren von der Software und zum Einstellen von Geräten auf einem
: Intel Pentium II 266 MHz/Celeron 333 MHz oder
höher
SVGA (800 × 600 Pixel), Farbtiefe von 65.536 oder
mehr Farben.
2
30 MB*
oder mehr
Windows Me/Windows XP*3 (Diese Software
läuft nicht unter Microsoft Windows 3.1,
Windows 95 oder Windows NT.)
erforderlich, um Musikdateien auf dem Computer
abzuspielen.
mehr Farben.
K6, ist kein einwandfreier Betrieb des Programms M-crew gewährleistet (d.h.
während der Wiedergabe einer Audiodatei können Tonaussetzer auftreten).
Festplattenspeicherplatz erforderlich.
Computer, der unter Windows 2000 oder Windows XP läuft, müssen Sie sich
immer als Administrator anmelden.
3
/
Hinweise
• Auch wenn die obigen Anforderungen erfüllt sind, ist bei manchen
Computern ein einwandfreier Betrieb des Programms M-crew nicht
gewährleistet.
• So ist die richtige Funktion von M-crew z.B. bei Computern, die Sie selber
gebaut haben, oder bei Computern, deren Betriebssystem Sie selber einem
Upgrade unterzogen haben, nicht gewährleistet.
• Verwenden Sie keinen USB-Hub. Wenn mehrere USB-Geräte an den Hub
angeschlossen sind, kann M-crew u.U. die an den Computer angeschlossene
System-Stereokomponente nicht richtig steuern.
• Diese Software kann nur mit einem englischsprachigen Betriebssystem
verwendet werden. Wenn sie in einer anderen Sprachumgebung verwendet
wird, kann es sein, dass sie nicht richtig funktioniert oder dass Text falsch
DE
6
dargestellt wird.
Page 63

Vorbereitung
1: Installation von M-crew
Installieren Sie gemäß dem nachstehend beschriebenen Verfahren die
M-crew-Software auf der Festplatte Ihres Rechners. Vergessen Sie nicht,
Windows vorher zu starten.
Hinweise
• Stellen Sie sicher, dass diese Software installiert ist, bevor die SystemStereokomponente an Ihren Computer angeschlossen wird. Wenn dies
nicht der Fall ist, kann es sein, dass die Software nicht richtig arbeitet.
• Zum Installieren dieser Software müssen Sie sich immer als Administrator
anmelden (bei Windows 2000/Windows XP).
1 Legen Sie die mitgelieferte M-crew-CD-ROM in das CD-ROM-
Laufwerk Ihres Computers ein.
Das Fenster wird mit angezeigtem
geöffnet.
Hinweis
Wenn das Fenster sich nicht öffnet, verwenden Sie Windows Explorer, um
das Fenster durch Doppelklicken auf das M-crew CD-ROM-Symbol zu
öffnen.
(InstallDlg.exe) Symbol
2 Doppelklicken Sie auf das Symbol (InstallDlg.exe).
Daraufhin erscheint das Einstellfenster.
• Wenn Sie PCLK-MN10/MN10A verwenden und bereits den PCLK USBTreiber auf Ihrem Computer installiert haben, gehen Sie zu Schritt 4
weiter.
• Wenn Sie M-crew auf einem Computer mit angeschlossenem CMT-C7NT
installieren, setzen Sie das Verfahren ab Schritt 3 fort, auch wenn Sie den
PC-Kit PCLK-MN10/MN10A verwenden. Achten Sie darauf, nicht
Schritt 3 zu überspringen.
3 Klicken Sie auf „1. Setting up PCLK-USB Driver“ im Einstellen-
Fenster.
Die Installation des Treibers beginnt. Wenn das Dialogfeld, das die
Fertigstellung der Installation anzeigt, erscheint, klicken Sie auf
„Finish“.
4 Klicken Sie auf „2. Setting up M-crew“ im Einstellen-Fenster.
Das Setup-Programm startet.
(Fortsetzung nächste Seite)
DE
7
Page 64

Hinweis
Der Windows-Installer ist zur Installation von M-crew erforderlich. Wenn
der Windows-Installer nicht auf Ihrem Computer installiert ist, erscheint
das folgende Fenster. In diesem Fall klicken Sie auf „Restart“, um Ihren
Computer neu zu starten. Beim Neustart des Computers entfernen Sie nicht
die CD-ROM.
5 Klicken Sie auf „Next“.
6 Wählen Sie eine der Setup-Optionen und klicken Sie dann auf
„Next“.
Complete: Alle M-crew-Dateien auf der CD-ROM werden
installiert. In diesem Fall lässt sich der Ordner, in
dem die M-crew-Dateien abgelegt werden, nicht
angeben. (Normalerweise werden die Dateien unter
„C:\Program Files\M_crew“ abgelegt.)
Custom: Dabei können Sie den Ordner festlegen, in dem die
M-crew-Dateien abgelegt werden.
DE
8
Page 65

7 Bei Wahl von „Complete“ in Schritt 6. klicken Sie auf „Install“.
Daraufhin beginnt die Installation.
Bei Wahl von „Custom“ in Schritt 6. klicken Sie auf „Next“.
Um den Ordner zu wechseln, in dem M-crew installiert werden
soll, klicken Sie auf „Change“ zum Öffnen des Dialogfelds, klicken
auf „Next“ nach der Eingabe des Ordners, und klicken dann auf
„Install“.
(Fortsetzung nächste Seite)
DE
9
Page 66

8 Das Dialogfeld, das die Fertigstellung der Installation anzeigt,
erscheint, klicken Sie auf „Finish“.
Damit ist der Setup-Vorgang beendet.
Vergessen Sie nicht, den Computer neu zu starten. Wenn Sie das
unterlassen, arbeitet die Software nicht richtig.
Schließen Sie das durch Ausführen von InstallDlg.exe geöffnete
Dialogfeld immer, bevor Sie die System-Stereokomponente an den
Computer anschließen.
Sie können jetzt zu den weiteren Vorbereitungsschritten
weitergehen: Anschließen der System-Stereokomponenten an den
Computer, Installieren der USB-Treiber und Verifizieren des Status
der installierten Geräte wie auf den folgenden Seiten beschrieben.
Vor dem Starten von M-crew
Öffnen Sie die Datei „Readme“ und lesen Sie sie.
Zum Öffnen der Datei „Readme“ gehen Sie zum Start-Menü und
wählen „Programs“ und „M-crew“, und klicken dann auf „Readme“.
10
Hinweise
• Als Ergebnis der Installation wird ein Ordner angelegt. Dieser Ordner wird
von der Software genutzt. Daher darf sein Inhalt keinesfalls gelöscht,
verschoben oder geändert werden.
• Wenn der erforderliche Treiber und andere Gegenstände bereits installiert
sind, erscheint ein Dialogfeld zur Bestätigung während der Installation.
DE
Page 67

2: Anschlüsse
Informationen über Anschließen der System-Stereokomponenten an
den Computer siehe Bedienungsanleitung für die SystemStereokomponente oder den PC-Anschlussadapter PCLK-MN20.
3: Einstellung des Rechners
entsprechend dem jeweiligen
Betriebssystem
Prüfen Sie immer den Status der installierten Geräte vor dem Starten
von M-crew.
Die nachstehenden Anweisungen gelten für Windows 98/98SE. Je nach
dem Betriebssystem, in dem die Software installiert ist, unterscheidet
sich das Verfahren in manchen Teilen. Siehe Seite 14 für Windows
2000/Windows Me/Windows XP.
Hinweis
Einige der Abbildungen auf den folgenden Seiten, können je nach verwendetem
Betriebssystem von den tatsächlich bei Ihnen vorhandenen Bildschirmbildern
abweichen.
11
DE
Page 68

Einstellung für Windows 98/98SE
Installation des USB-Treibers
1 Schließen Sie die System-Stereokomponente direkt oder über den
PC-Anschlussadapter an den Computer an, und starten Sie dann
den Computer. Daraufhin erscheint die Anzeige „Add New
Hardware Wizard“.
Beenden Sie alle aktiven Programme.
2 Klicken Sie auf „Next“.
3 Wählen Sie „Search for the best driver for your device
(Recommended)“. (Bei Computern mit angeschlossenem
CMT-C7NT siehe Bedienungsanleitung für die betreffende SystemStereokomponente.)
Legen Sie die Windows 98/98SE CD-ROM in das CD-ROMLaufwerk des Computers, wenn der Assistant dazu auffordert, und
installieren Sie die Treiber.
Das Installationsverfahren wird für jedes der folgenden Geräte
wiederholt.
• USB-Audiogerät
• USB-Kompositgerät
• Generischer USB-Hub
12
DE
Page 69

Den Status der installierten Geräte bestätigen
Prüfen Sie immer den Status der installierten Geräte nach der
Installation ihrer Treiber.
1 Öffnen Sie die Systemsteuerung.
Im Start-Menü wählen Sie „Settings“ und klicken dann auf
„Control Panel“.
2 Doppelklicken Sie auf das System-Symbol.
Das Dialogfeld „System Properties“ erscheint.
3 Klicken Sie auf das Register „Device Manager“. (Bei Computern
mit angeschlossenem CMT-C7NT siehe Bedienungsanleitung für
die betreffende System-Stereokomponente.)
Vergewissern Sie sich, dass die folgenden Gegenstände im
Dialogfeld „Device Manager“ aufgelistet sind.
• „SONY PCLK USB Driver“
• „USB Audio Device“ unter „Sound, video and game controllers“
• „USB Composite Device“ und „Generic USB Hub“ unter „Universal
Serial Bus controllers“
4 Klicken Sie auf „OK“, um das Dialogfeld „System Properties“ zu
schließen.
13
DE
Page 70

Einstellung für Windows 2000/Windows Me/Windows XP
Installation des USB-Treibers (Windows 2000)
1 Schließen Sie die System-Stereokomponente direkt oder über den
PC-Anschlussadapter an den Computer an, und starten Sie dann
den Computer. Daraufhin erscheint die Anzeige „Found New
Hardware Wizard“.
Beenden Sie alle aktiven Programme.
2 Klicken Sie auf „Next“.
3 Wählen Sie „Search for a suitable driver for my device
(recommended)“. (Bei Computern mit angeschlossenem
CMT-C7NT siehe Bedienungsanleitung für die betreffende SystemStereokomponente.)
Legen Sie die Windows 2000 CD-ROM in das CD-ROM-Laufwerk
des Computers, wenn der Assistant dazu auffordert, und
installieren Sie die Treiber. Das Installationsverfahren wird für
jedes der folgenden Geräte wiederholt.
• USB-Audiogerät
• USB-Kompositgerät
• Generischer USB-Hub
14
Installation des USB-Treibers (Windows Me)
1 Schließen Sie die System-Stereokomponente direkt oder über den
PC-Anschlussadapter an den Computer an, und starten Sie dann
den Computer. Daraufhin erscheint die Anzeige „Add New
Hardware Wizard“.
Beenden Sie alle aktiven Programme.
DE
Page 71

2 Wählen Sie „Search for the best driver for your device
(Recommended)“. (Bei Computern mit angeschlossenem
CMT-C7NT siehe Bedienungsanleitung für die betreffende SystemStereokomponente.)
Legen Sie die Windows Me CD-ROM in das CD-ROM-Laufwerk
des Computers, wenn der Assistant dazu auffordert, und
installieren Sie die Treiber.
Das Installationsverfahren wird für jedes der folgenden Geräte
wiederholt.
• USB-Audiogerät
• USB-Kompositgerät
• Generischer USB-Hub
Installation der USB-Treiber (Windows XP)
1 Beenden Sie alle aktiven Programme.
2 Schließen Sie die System-Stereokomponente direkt oder über den
PC-Anschlussadapter an den Computer an, und starten Sie dann
den Computer.
Die Installation der Treiber beginnt automatisch und wird nach
dem Fertigstellen der Installation beendet. Wenn der Assistant
„Found New Hardware Wizard“ gehen Sie zu Schritt 3.
3 Wählen Sie „Install the software automatically [Recommended]“ ,
nachdem bestätigt worden ist, dass der Name des Geräts, für das
Treiber installiert werden sollen, „SONY LINK KIT“ ist.
Den Status der installierten Geräte bestätigen (Windows 2000/Windows
Me/Windows XP)
Prüfen Sie immer den Status der installierten Geräte nach der
Installation ihrer Treiber.
1 Öffnen Sie die Systemsteuerung.
Im Start-Menü wählen Sie „Settings“ und klicken dann auf
„Control Panel“.
(Für Windows XP) Im Start-Menü klicken Sie auf „Control Panel“
und dann auf „Switch to Classic View“ im linken Feld des Fensters.
(Fortsetzung nächste Seite)
15
DE
Page 72

2 Doppelklicken Sie auf das „System“-Symbol.
Das Dialogfeld „System Properties“ erscheint.
Hinweis
Wenn Sie das „System“-Symbol nicht finden können, klicken Sie auf „View
all Control Panel options“ (bei Windows Me).
3 (Nur Windows 2000/Windows XP) Klicken Sie auf das Register
„Hardware“.
4 Klicken Sie auf das Register „Device Manager“. (Bei Windows
2000/Windows XP klicken Sie stattdessen auf die Schaltfläche
„Device Manager“.) (Bei Computern mit angeschlossenem
CMT-C7NT siehe Bedienungsanleitung für die betreffende SystemStereokomponente.)
Vergewissern Sie sich, dass die folgenden Gegenstände im
Dialogfeld „Device Manager“ aufgelistet sind.
• „SONY PCLK USB Driver“ (Dieser Gegenstand kann unter „Universal
Serial Bus controllers“ gefunden werden.)
• „USB Audio Device“ unter „Sound, video and game controllers“
• „USB Composite Device“ und „Generic USB Hub“ unter „Universal
Serial Bus controllers“
16
Beispiel: Fenster for
Windows 2000
Hinweis (nur für Windows Me)
Je nach der Konfiguration Ihres Computers kann vor dem
aufgelisteten Gerät erscheinen. Dies hat aber keinen Einfluss auf
die Funktion des Systems (Computer und SystemStereokomponente).
5 Klicken Sie auf „OK“, um das Dialogfeld „System Properties“ zu
schließen.
DE
Page 73

Wenn kein Ton vom Rechner kommt
M-crew verwendet das USB-Audiogerät für Tonwiedergabe und
-aufnahme. Beim Starten des Computers mit einer angeschlossenen
Stereo-Systemkomponente wird das USB-Audiogerät anstelle des
Standard-Audiogeräts aktiviert. Deshalb kommt kein Ton von den
eingebauten oder externen Lautsprechern des Computers, weil alle
Tonsignale über das USB-Kabel zum USB-Audiogerät ausgegeben
werden. Um Ton vom Computer kommen zu lassen, muss das USBKabel vom Computer abgezogen werden.
Zum Aktivieren der Lautsprecher des Computers mit einer
angeschlossenen Stereokomponente verfahren Sie wie folgt.
1 Öffnen Sie die Systemsteuerung.
Im Start-Menü wählen Sie „Settings“ und klicken dann auf
„Control Panel“.
(Für Windows XP) Im Start-Menü klicken Sie auf „Control Panel“
und dann auf „Switch to Classic View“ im linken Feld des Fensters.
2 Doppelklicken Sie auf das Symbol „Sounds and Multimedia“ (oder
„Multimedia“ bei Windows 98/98SE oder „Sounds and Audio
Devices“ bei Windows XP) zum Öffnen des Dialogfelds „Sounds
and Multimedia Properties“ (oder „Multimedia Properties“ bei
Windows 98/98SE oder „Sounds and Audio Devices Properties“
bei Windows XP).
3 Klicken Sie auf das Register „Audio“, und wählen Sie das
Standard-Audiogerät für beide Gruppenfelder „Preferred device:“
(oder „Default Device“ bei Windows XP) unter „Sound Playback“
(oder „Playback“ bei Windows 98/98SE) und „Sound Recording“
(oder „Recording“ bei Windows 98/98SE).
4 Klicken Sie auf „Use only preferred devices“ (oder „Use only
default devices“ bei Windows XP), um es zu aktivieren.
5 Klicken Sie auf „OK“.
Hinweis
Stellen Sie sicher, in Schritt 3 oben „USB Audio Device“ für jedes „Preferred
device:“ (oder „Default Device“ bei Windows XP) zu wählen, bevor Sie die
Aufnahme auf MD beginnen.
17
DE
Page 74

Installation von LabelMaker 5.1
Bitte beachten Sie, dass bei der Installation von LabelMaker 5.1 in
VAIO-Computern mit vorinstalliertem Windows XP die installierte
Version LabelMaker 5.0 durch die neue Version überschrieben werden
kann.
Durch Installation von LabelMaker 5.1 wird aber keine Version von
LabelMaker, die älter ist als 5.0, überschrieben wie etwa Versionen die
in PictureGear 4.x enthalten sind.
1 Klicken Sie im Einstell-Fenster auf „Setting up LabelMaker 5.1“
(siehe Schritt 2 auf Seite 7).
2 Gehen Sie zur Installation des Programms gemäß den im
Bildschirm erscheinenden Anweisungen vor.
18
DE
Page 75

Deinstallieren der Software
Wenn M-crew oder LabelMaker 5.1 nicht mehr benötigt wird,
deinstallieren Sie das betreffende Programm wie folgt:
1 Öffnen Sie die Systemsteuerung.
Im Start-Menü wählen Sie „Settings“ und klicken dann auf
„Control Panel“.
2 Doppelklicken Sie auf das Symbol „Add/Remove Programs“.
Das Fenster „Add/Remove Programs Properties“ erscheint.
3 Wählen Sie „M-crew“ oder „LabelMaker 5.1“ aus der
Programmliste.
4 Klicken Sie auf „Add/Remove“.
Uninstaller wird aktiviert, und die in Schritt 3 gewählte Software
wird automatisch gelöscht.
Hinweise
• Nach der Deinstallation von M-crew verbleiben die Ordner „Database“ und
„Jacket“, die unter dem M-crew-Ordner angelegt wurden (normalerweise
C:\Program Files\M_crew) und ihre Dateien auf der Festplatte. Löschen Sie
sie von Hand, falls sie nicht mehr gebraucht werden.
• Wenn Sie LabelMaker 5.1 in Schritt 3 oben wählen und deinstallieren, wird
nicht nur die durch M-crew installierte Software LabelMaker 5.1 entfernt,
sondern auch jede andere Kopie von LabelMaker 5.1, die möglicherweise
getrennt von M-crew installiert wurde.
• Entsprechend gilt, dass wenn Sie eine getrennt von M-Crew installierte
Software LabelMaker 5.1 deinstallieren, die Etikettendruckfunktion auch in
M-crew nicht mehr zur Verfügung steht.
19
DE
Page 76

Grundlegende Bedienung
Starten von M-crew
, Im Start-Menü gehen Sie zu „Programs“ und „M-crew“, und
klicken dann auf „M-crew“.
Daraufhin startet das Programm, und die Hauptleiste für M-crew
erscheint.
Die unten gezeigte Leiste erscheint sofort nach dem Starten von
M-crew.
Im folgenden wird davon ausgegangen, dass M-crew einem
Computer läuft, an dem CMT-C7NT als System-Stereokomponente
angeschlossen ist.
Hinweise
• Während MD-Aufnahme erscheint ein Dialogfeld, in dem Sie die
Aufnahme stoppen oder M-crew starten können.
• M-crew (ver. 2.0E) und Net MD-aktiviertes OpenMG Jukebox können
nicht gleichzeitig aktiv sein.
20
DE
Page 77

Verwendung von M-crew
Dieser Abschnitt enthält eine kurze Beschreibung der grundlegenden
Möglichkeiten und der Verwendung von Leisten und Fenstern in
M-crew.
Weitere Einzelheiten über M-crew siehe Hilfe-Funktion (Seite 26).
Hauptleiste
Die Hauptleiste bietet grundlegende Funktionen zur Wiedergabe von
CD/MD und dem Betrieb des Tuners.
A SONY-Logo
Ziehen Sie das Logo mit der linken Maustaste, um die Hauptleiste
nach oben oder unten zu verschieben.
Rechtsklicken Sie auf das Logo, um ein Pop-up-Menü abzurufen.
B Funktionsnamen-Anzeige
Klicken Sie auf die Anzeige und wählen Sie eine Funktion (CD, MD,
TUNER, usw.).
C Anzeige von Disc-Information (oder Radiowellenbereich)
Zeigt den Namen der gewählten CD/MD oder den gewählten
Radiowellenbereich an, je nachdem ob die Funktion CD/MD oder
TUNER in der Funktionsnamen-Anzeige gewählt ist.
D Anzeige von Titelnummer/Titelname (Festsendernummer/
Sendername)
Zeigt Titelnummer/Titelnamen oder Festsendernummer/
Sendernamen an, je nachdem ob die Funktion CD/MD oder
TUNER in der Funktionsnamen-Anzeige gewählt ist.
(Fortsetzung nächste Seite)
21
DE
Page 78

E Timer- (Frequenz-) Anzeige
Zeigt Zeitinformation wie die Gesamt-Spielzeit oder die verflossene
Spielzeit während der Wiedergabe einer CD/MD an. Klicken Sie
auf diese Anzeige, um einen Anzeigemodus zu wählen. Bei
Radiobetrieb wird hier die Frequenz des gewählten Senders
angezeigt.
F Bedien-Schaltflächen
In diesem Bereich gezeigte Schaltflächen erscheinen als CD/MDBedien-Schaltflächen oder Tuner-Bedien-Schaltflächen, je nachdem,
ob CD/MD oder TUNER in der Funktionsnamen-Anzeige gewählt
ist. Die CD/MD-Bedien-Schaltflächen erlauben Wiedergabe, Pause,
Stopp und Aufsuchen von Titeln auf einer CD/MD. Die TunerBedien-Schaltflächen erlauben Wählen des Wellenbereichs und
Eingabe der Festsendernummer.
G Easy-Mode-Schaltfläche
Öffnet das Easy-Mode-Fenster, das leichten Zugang zu den
Grundfunktionen zur Wiedergabe einer CD/MD und zum
Bespielen einer MD bietet.
H Lautstärkeregler
Zum Einstellen der Lautstärke der an den Computer
angeschlossenen Stereokomponente.
I Symbolleistenschalter
Klicken, um die Symbolleiste erscheinen oder verschwinden zu
lassen.
J Hilfe-Schaltfläche
Klicken, um die Hilfe-Funktion zu aktivieren.
K Minimieren-Schaltfläche
Klicken, um das Fenster auf Minimalgröße zu schalten.
L Schließen-Schaltfläche
Klicken, um M-crew zu verlassen.
22
DE
Page 79

Symbolleiste
Zum Betrachten der Symbolleiste klicken Sie auf den SymbolleistenSchalter in der Hauptleiste. Wenn Sie auf ein Funktionssymbol in der
Symbolleiste klicken, schaltet das System auf die gewählte Funktion
um, und das entsprechende Fenster erscheint. Beachten Sie, dass nur
ein Fenster zur Zeit geöffnet sein kann.
A CD-Symbol
B MD-Symbol
C TUNER-Symbol
D OTHERS-Symbol
E TIMER-Symbol
F Datei-Symbol
G Disc-Archiv-Symbol
H Aufnahmefenster-Symbol
I Option-Symbol
Klicken, um das CD-Fenster zu zeigen.
Klicken, um das MD-Fenster zu zeigen.
Klicken, um das TUNER-Fenster zu zeigen.
Klicken, um das OTHERS-Fenster zu zeigen.
Klicken, um das Timer-Fenster zu zeigen.
Klicken, um das Datei-Fenster zu zeigen. Verwenden Sie dieses
Fenster, um die auf der Festplatte Ihres Rechners gespeicherten
Musikdateien abzuspielen.
Klicken, um das Disc-Archiv-Fenster zu zeigen. Verwenden Sie
dieses Fenster, um Daten mindestens einmal vorher früher
abgespielten Datenträgern zu betrachten oder erneut zu verwenden.
Klicken, um das Aufnahme-Fenster zu zeigen. Verwenden Sie
dieses Fenster, um eine MD von einem CD-Spieler, Tuner oder
anderen Signalquellen zu bespielen. Das Aufnahme-Fenster hat
zwei verschiedene Funktionen: Synchronaufnahme und manuelle
Aufnahme.
Klicken, um das Dialogfeld „Option“ abzurufen. Verwenden Sie
dieses Dialogfeld zur Eingabe verschiedener Einstellungen.
23
DE
Page 80

Bedienungsfenster
Wenn Sie auf ein Funktionssymbol in der Symbolleiste klicken,
erscheint das entsprechende Fenster der gewählten Funktion. Die
Bedienungsfenster bieten verschiedene Sätze von Funktionen, je nach
der in der Symbolleiste gewählten Funktion, wie etwa Funktionen zur
Wahl eines Wiedergabemodus und zum Bearbeiten von Disc-Namen.
Easy-Mode-Fenster
Wenn Sie auf die Easy-Mode-Schaltfläche in der Hauptleiste klicken,
erscheint das Easy-Mode-Fenster. Die Easy Mode erlaubt es, die
Grundfunktionen von M-crew, wie z.B. zur Wiedergabe einer CD/MD
und zum Bespielen einer MD, direkt aus dem Fenster zu verwenden.
Zum Zurückschalten zum normalen Fenster klicken Sie Schaltfläche
Normal Mode im Fenster.
24
DE
Page 81

Beenden der Software
1 Klicken Sie auf in der Hauptleiste.
Ein Dialogfeld zum Beenden der Software erscheint.
2 Klicken Sie auf „Do not turn off power“.
M-crew wird beendet.
Wenn Sie die angeschlossene System-Stereokomponente ebenfalls
ausschalten wollen, klicken Sie auf „Turn off power“.
25
DE
Page 82

Zusätzliche Information
Nutzung des Hilfesystems
Öffnen des Hilfe-Inhaltsverzeichnisses
Klicken Sie auf die Hilfe-Schaltfläche in der Hauptleiste. Das M-crewInhaltsverzeichnis erscheint.
Klicken Sie, um die
Hilfe-Funktion zu
aktivieren.
26
DE
• Doppelklicken Sie
• Klicken Sie auf
sehen.
• Klicken Sie auf einen unterstrichen dargestellten Gegenstand, um
eine zugehörige Erklärung auf einer anderen Seite zu sehen.
Suchen nach Stichwort
1 Klicken Sie auf das Register „Index“ im Themen-Suchdialog oben.
2 Geben Sie das gewünschte Stichwort ein oder rollen Sie die Liste,
um das Stichwort zu suchen.
3 Klicken Sie auf „Display“.
Ein Thema, das das Stichwort enthält, erscheint daraufhin im
rechten Rahmen des Dialogfelds.
Wenn das Dialogfeld „Topics Found“ erscheint, wählen Sie das
gewünschte Thema und klicken Sie auf „Display“.
Aufsuchen von Themen, die bestimmte Wörter oder
Wortsequenzen enthalten
1 Klicken Sie auf das Register „Search“ im Themen-Suchdialog oben.
2 Geben Sie ein Wort oder eine Wortsequenz ein, bei der ein Bezug
zum gewünschten Thema besteht, und klicken Sie dann auf „List
Topics“. Die Themen, die dieses Wort oder die Wortsequenz
enthalten, werden daraufhin im Listenfeld „Select Topics to
display:“ angezeigt.
3 Wählen Sie das betreffende Thema und klicken Sie auf „Display“.
Ein Thema, das das eingegebene Wort bzw. die Wortsequenz
enthält, erscheint daraufhin im rechten Rahmen des Dialogfelds.
, um die enthaltenen Themen zu zeigen.
, um eine Erklärung des jeweiligen Gegenstands zu
Page 83

Störungssuche
Sollte bei der Nutzung der Software eine der nachstehend aufgeführten
Störungen auftreten, so versuchen Sie bitte zunächst, das Problem mit
Hilfe der folgenden Liste zu beheben. Ist eine Abhilfe auf diese Weise
nicht möglich, so wenden Sie sich bitte an Ihren Sony-Händler.
Nehmen Sie bitte auch die Bedienungsanleitung Ihres Computers und
die auf der Festplatte installierte Datei „Readme.txt“ dieser Software zu
Hilfe.
Zum Öffnen der Datei „Readme“ gehen Sie zum Start-Menü und
wählen „Programs“ und „M-crew“, und klicken dann auf „View
Readme“.
Problem Ursache/Abhilfemaßnahme
Das Programm M-crew wird
automatisch beendet.
Die Meldung „Equipment does
not respond. Check connections.“
erscheint.
Die Software OpenMG Jukebox ist aktiv.
t M-crew and OpenMG Jukebox können nicht
gleichzeitig aktiv sein. Das Starten von
OpenMG Jukebox während M-crew aktiv ist,
kann deshalb bewirken, dass M-crew beendet
wird. Zum erneuten Starten von M-crew
beenden Sie OpenMG Jukebox und
doppelklicken dann auf das M-crew-Symbol
in der Taskleiste im Desktop. Sie können auch
„Restart M-crew“ aus dem Menü wählen, das
durch Rechtsklicken im Desktop geöffnet
werden kann.
Das USB-Kabel ist nicht richtig am USB-Anschluss
des Computers angeschlossen.
t Prüfen Sie die USB-Steckerverbindung.
t Ziehen Sie einmal das USB-Kabel vom
Computer ab und stecken es erneut ein.
Das USB-Kabel ist nicht richtig am USB-Anschluss
der System-Stereokomponente angeschlossen.
t Prüfen Sie die USB-Steckerverbindung.
t Prüfen Sie, ob der Netzstecker der System-
Stereokomponente in eine Netzsteckdose
gesteckt ist.
(Fortsetzung nächste Seite)
27
DE
Page 84

Problem Ursache/Abhilfemaßnahme
Keine oder falsche Anzeige auf
dem Bildschirm.
t Die Stromversorgung der System-
Stereokomponente aus- und wieder
einschalten, und dann M-crew erneut starten.
t Ziehen Sie einmal das USB-Kabel von der
System-Stereokomponente ab, und stecken es
erneut ein.
t Starten Sie ein anderes, häufig verwendetes
Programm und prüfen Sie, ob der Computer
einwandfrei arbeitet.
t Deinstallieren Sie M-crew (Seite 19), und
installieren Sie das Programm neu (Seite 7).
Bedienvorgänge wie
Zeicheneingabe, Aufnahme und
Editieren usw. sind nicht
möglich.
Der Schreibschutz der MD ist möglicherweise
aktiviert.
t Schieben Sie den Schreibschutzschieber in die
Stellung, wo Aufnahme möglich ist.
Bei der MD handelt es sich u.U. um eine nur für
Wiedergabe bestimmte (kommerziell
vorbespielte) MD.
t Bedienvorgänge wie Zeicheneingabe,
Aufnahme, Editieren usw. sind auf
kommerziell vorbespielten MDs nicht
möglich.
28
Die System-Stereokomponente
reagiert nicht.
Der angezeigte MD- oder CDName stimmt nicht mit den
Discdaten überein.
DE
t Prüfen Sie, ob alle Anschlüsse richtig
hergestellt sind (Seite 11).
t Trennen Sie die Verbindungskabel ab, und
schließen Sie sie neu an.
t Ziehen Sie einmal das USB-Kabel von der
System-Stereokomponente ab, und stecken es
erneut ein.
t Klicken Sie auf die Aktualisieren-Schaltfläche.
t Starten Sie M-crew neu. Ist eine Abhilfe auf
diese Weise nicht möglich, sind die Daten des
Disc-Archivs u.U. defekt. In diesem Fall
müssen die Namen neu eingegeben werden.
Page 85

Problem Ursache/Abhilfemaßnahme
Die installierten Geräte sind nicht
richtig eingestellt.
t Siehe Datei „Readme.txt“ im Startmenü. Die
Datei „Readme.txt“ befindet sich in dem
Ordner, in dem die M-crew-Software
installiert ist.
Kein Ton kommt von den
eingebauten oder externen
Lautsprechern des Computers.
Das USB-Audiogerät hat bei Computern mit USBVerbindung zu einer System-Stereokomponente
Vorrang.
t Wählen Sie das Standard-Audiogerät
(normalerweise die eingebaute Soundkarte des
Computers) als bevorzugtes Gerät im
Dialogfeld „Sounds and Multimedia
Properties“ (Seite 17).
Es kommt kein Ton von der
System-Stereokomponente aus
den eingebauten oder externen
Lautsprechern des Computers.
Die Meldung „Could not connect
to the CDDB.“ erscheint.
Die System-Tonsignale
(Warnsignal/MailAnkunftsignal) werden nicht
ausgegeben.
t Verbinden Sie den Ausgangsanschluss der
Stereo-Systemkomponente und den LineAnschluss am Computer über ein Audiokabel,
und geben Sie dann das Wahlkästchen „Mute“
unter „Line In Balance:“ in der
Lautstärkeregelung frei.
t Prüfen Sie, ob die Verbindung zum Internet
richtig hergestellt ist.
t Wenn Sie Internetzugang über einen Proxy-
Server haben, prüfen Sie die ProxyEinstellungen im Dialogfeld „Option“.
t Die System-Tonsignale wurden so eingestellt,
dass sie beim Starten von M-crew nicht mehr
ertönen, oder die Einstellung wurde auf AUS
umgestellt, als M-Crew anormal beendet
wurde. Zum Wiederherstellen der Tonsignale
starten Sie M-crew neu und beenden das
Programm dann normal. Oder doppelklicken
Sie auf die Backup-Datei (reg0.reg bis reg3.reg)
im M-crew-Ordner und gehen gemäß den
Anweisungen vor, um das Programm erneut
wunschgemäß einzurichten (ausgenommen
bei Windows XP).
29
DE
Page 86

• La duplicación parcial o total del contenido
de este software y manual de instrucciones
así como el prestar el software a terceros
sin el consentimiento expreso del
propietario de los derechos de autor está
estrictamente prohibido por las leyes de
derechos de autor.
• Bajo ninguna circunstancia Sony será
responsable por las pérdidas monetarias,
lucro cesante o reclamación de terceros que
pudieran surgir del uso de este software.
• En el caso de que el producto tuviera
defectos de fabricación, la responsabilidad
de Sony estará limitada exclusivamente al
reemplazo del producto defectuoso.
• Este software fue aprobado sólo para su
uso con el equipo especificado.
• Sony se reserva el derecho de hacer
cambios en las especificaciones de hacer
cambios en las especificaciones del
software sin previo aviso. Otros software y
servicios relacionados también están
sujetos a cambios sin previo aviso.
Programa 1997-2001 Sony Corporation
Documentación 2001 Sony
Corporation 2001 Sony Corporation.
Todos los derechos reservados.
• M-crew, LabelMaker y son marcas
registradas de Sony Corporation.
• Microsoft MS-DOS y Windows son marcas
registradas de Microsoft Corporation
• IBM y PC/AT son marcas registradas de
International Business Machines
Corporation.
• Macintosh es una marca registrada de
Apple Computer Inc.
• Gracenote CDDB or Gracenote CDDB
Music Recognition Service
• Powered by Gracenote CDDB
• Los nombres de otras compañías y
productos son marcas comerciales o marcas
registradas de cada compañía.
ES
2
SM
Page 87

Indice
Para empezar
Resumen general .................................. 4
Requisitos del sistema .......................... 6
Preparativos
1: Instalación del M-crew..................... 7
2: Conexiones ...................................... 11
3: Procedimientos de instalación para
el sistema de su ordenador ....... 11
Instalación para Windows 98/
98SE ......................................12
Instalación para Windows 2000/
Windows Me/
Windows XP ....................... 14
Cuando no sale ningún sonido
del ordenador ..................... 17
Instalación del LabelMaker 5.1 ......... 18
Desinstalación del software .............. 19
Operaciones básicas
Inicio del M-crew ................................20
Utilización del M-crew ...................... 21
Barra principal ............................ 21
Barra de herramientas ............... 23
Ventanas de funcionamiento ....24
Ventana de modo fácil ............... 24
Salida del software ............................. 25
Acerca de este manual
Este manual describe la forma de instalar el
software M-crew y la forma de utilizar la
Ayuda.
Para la información más reciente, consulte el
archivo “Readme.txt” en el menú Start.
El archivo “Readme.txt” está en la carpeta
donde esta instalado el software M-crew.
ES
Información adicional
Utilización de la ayuda ...................... 26
Solución de problemas ....................... 27
ES
3
Page 88

Para empezar
Resumen general
El M-crew (ver. 2.0E) permite controlar los componentes estéreo del
sistema Sony. Mediante el M-crew, puede utilizar las funciones en la
lista a continuación.
Reproducción
• Utilice el ordenador para hacer funcionar la reproducción en los
decks de discos compactos, minidiscos y DVD.
• Disfrute de los archivos de audio memorizados en el ordenador.
• Sintonice emisoras de radio desde el ordenador.
Grabación/edición
• Entre los nombres de disco y canción con el teclado del ordenador.
• Edite los minidiscos en la pantalla del ordenador.
• Grabe un disco compacto a un minidisco mediante un simple
movimiento del ratón.
• Grabe fácilmente de la radio a un minidisco.
• Organice las canciones en un minidisco en grupos de su elección.
• Active el CDDB2 de su ordenador para colocar automáticamente
etiquetas en los álbumes y canciones (sólo para los componentes que
aceptan esta función).
Otras operaciones
• Prepare soportes virtuales para la administración de los archivos de
audio.
• Mantenga un registro de las canciones reproducidas y grabadas en
una biblioteca de discos.
• Visite los sitios de Internet relacionados mientras disfruta de las
canciones.
• Registre las imágenes y adjúntelos a una canción y véalas mientras
escuche la canción (función CLIP).
• Visite los sitios de Internet mientras disfruta de los programas de
radio.
• Ajuste los temporizadores de reproducción y grabación.
• Utilice la ventana Easy Mode para tener fácil acceso a las funciones
básicas del M-crew.
• Imprima las etiquetas de MD.
ES
4
Page 89

Notas
• En este manual, el término “componente estéreo del sistema” se refiere
específicamente al sistema estéreo (que incluyen decks de discos compactos y
mindiscos) y decks de discos compactos, minidiscos y DVD discretos.
• Las funciones M-crew actúan en su ordenadores según los componentes
estéreo del sistema conectados a su ordenador.
• Se puede utilizar este software para hacer funcionar sólo los componentes
estéreo del sistema conectados directamente al ordenador.
Music recognition technology and related data are provided by Gracenote and
the Gracenote CDDB Music Recognition ServiceSM. Gracenote is the industry
standard in music recognition technology and related content delivery. For
more information go to www.gracenote.com.
Gracenote is CDDB, Inc. d/b/a “Gracenote.” CD and music related data from
Gracenote CDDB Music Recognition ServiceSM 2000, 2001 Gracenote.
Gracenote CDDB Client Software 2000, 2001 Gracenote. U.S. Patents Numbers
#5,987,525; #6,061,680; #6,154,773, and other patents issued or pending.
CDDB is a registered trademark of Gracenote. CDDB-Enabled, the Gracenote
logo, the CDDB Logo, and the “Powered by Gracenote CDDB” logo are
trademarks of Gracenote. Music Recognition Service and MRS are service marks
of Gracenote.
ES
5
Page 90

Requisitos del sistema
Los siguientes hardware y software son necesarios para utilizar el
software M-crew (ver. 2.0E).
s IBM PC/AT o compatibles (Este software no funciona con
Macintosh de Apple.)
s CPU*
s Tarjeta de video y controlador de pantalla:
s Espacio en el disco duro:
s Terminal USB: 1 o más
s Sistema operativo:
s Reproductor del soporte:
s Monitor de video: SVGA (800 × 600 pixels), 65.536 colores o más
1
: Intel Pentium II 266 MHz/Celeron 333 MHz o
superior
SVGA (800 × 600 pixels), 65.536 colores o más.
2
30 MB*
o más
Windows 98/Windows 98SE/Windows 2000*
Windows Me/Windows XP*
funciona con Microsoft Windows 3.1, Windows 95
o Windows NT.)
Es necesario el Media Player 6.4 de Windows o
más alto para reproducir archivos d música en el
ordenador.
3
(Este software no
3
/
*1El funcionamiento del M-crew no puede garantizarse en algunos ordenadores
con chips CPU, tales como el AMD K6 (por ejemplo, puede saltar el sonido
durante la reproducción de un archivo de audio).
*2Es necesario contar con 20 MB de espacio adicional en el disco duro para
instalar el LabelMaker 5.1
*3Asegúrese de conectar mediante la cuenta del administrador para instalar el
software y los dispositivos de programación en un ordenador que funciona
con Windows 2000 o Windows XP.
Notas
• El funcionamiento correcto del M-crew no está garantizado en algunos
ordenadores incluso si cumplen con los requisitos anteriores.
• El funcionamiento correcto del M-crew no está garantizado en los
ordenadores fabricados personalmente o en ordenadores con un sistema
operativo actualizado por su cuenta.
• No utilice un grupo de conexiones USB. Si se conectan múltiples equipos USB
en el grupo de conectores, el M-crew puede no hacer funcionar correctamente
el componente estéreo del sistema conectado al ordenador.
• Ese software puede utilizarse sólo con el sistema operativo inglés. Si utiliza
ES
6
una configuración en otro idioma, puede no funcionar correctamente o el
texto puede no aparecer correctamente.
Page 91

Preparativos
1: Instalación del M-crew
Utilice este procedimiento para instalar el software M-crew en el disco
duro de su ordenador. Asegúrese de iniciar Windows por adelantado.
Notas
• Asegúrese de instalar este software antes de conectar el componente
estéreo del sistema en su ordenador. Si no lo hace, el software puede no
funcionar correctamente.
• Asegúrese de conectarse mediante la cuenta del administrador para instalar
este software (para Windows 2000/Windows XP).
1 Coloque el CD-ROM del M-crew suministrado en el equipo CD-
ROM de su ordenador.
La ventana se abrirá mostrando el icono
Nota
Si no se abre la ventana, utilice Windows Explorer para abrir la ventana
haciendo doble clic en el icono del CD-ROM del M-crew.
2 Haga clic dos veces en el icono (InstallDlg.exe).
Aparece la ventana de instalación
• Si utiliza el PCLK-MN10/MN10A y ya tiene instalado el controlador
PCLK USB en su ordenador, vaya al paso 4.
• Si está instalando el M-crew en su ordenador con el CMT-C7NT
conectado, vaya al procedimiento desde el paso 3 incluso si está
utilizando el PCLK-MN10/MN10A. Asegúrese de no saltar el paso 3.
(InstallDlg.exe).
3 Haga clic en “1. Setting up PCLK-USB Driver” en la ventana de
instalación.
Empieza la instalación del controlador. Cuando aparece el cuadro
de diálogo que indica que se ha completado la instalación, haga clic
en “Finish”.
4 Haga clic en “2. Setting up M-crew” en la ventana de instalación.
Empieza el programa de instalación.
(continúa)
ES
7
Page 92

Nota
Es necesario el Windows Installer para instalar el M-crew. Si el Windows
Installer no está instalado en su ordenador, aparece la siguiente ventana. En
este caso, haga clic en “Restart” para volver a activar su ordenador. Cuando
vuelve a activar su ordenador, no retire el CD-ROM.
5 Haga clic en “Next”.
6 Seleccione una de las opciones de tipo de instalación y haga clic en
“Next”.
Complete: Se instalarán todos los archivos M-crew en el CD-
ROM. Esta opción no permite especificar la carpeta a
la que se instalarán los archivos M-crew.
(Normalmente los archivos se instalan en la carpeta
“C:\Program Files\M_crew”.)
Custom: Se puede especificar la carpeta en la que se instalan
los archivos M-crew.
ES
8
Page 93

7 Si se selecciona “Complete” en el paso 6, haga clic en “Install”.
Empieza la instalación.
Si se selecciona “Custom” en el paso 6, haga clic en “Next”.
Para cambiar la carpeta en la que se instala M-crew, haga clic en
“Change” para abrir el cuadro de diálogo, haga clic en “Next”
después de especificar la carpeta y haga clic en “Install”.
(continúa)
ES
9
Page 94

8 Cuando aparece el cuadro de diálogo que indica que se ha
completado la instalación, haga clic en “Finish”.
Esto completa el proceso de instalación.
Asegúrese de volver a activar el ordenador. Si no lo hace, el
software no funcionará correctamente.
Asegúrese de cerrar el cuadro de diálogo activado ejecutando
InstallDlg.exe antes de conectar el componente estéreo del sistema
en el ordenador.
Ahora puede continuar con los siguientes pasos de preparación:
conexión del componente estéreo del sistema al ordenador,
instalación de los controladores USB y verificación del estado de
los equipos instalados de acuerdo con los procedimientos descritos
en las siguientes páginas.
10
Antes de iniciar el M-crew
Abra el archivo “Readme” y léalo.
Para abrir el archivo “Readme”, vaya al menú Start y seleccione
“Programs” y “M-crew” y haga clic en “Readme”.
Notas
• Se crea una carpeta como resultado de la instalación. El software utilizará esta
carpeta. No la borre, mueva o cambie su contenido.
• Si el controlador requerido y otros ítems ya fueron instalados, aparecerá un
cuadro de diálogo para su confirmación durante la instalación.
ES
Page 95

2: Conexiones
Para información sobre la conexión del componente estéreo del sistema
en el ordenador, consulte el manual de instrucciones para el
componente estéreo del sistema o el adaptador de conexión
PCLK-MN20 al ordenador.
3: Procedimientos de instalación para
el sistema de su ordenador
Asegúrese de verificar el estado de los equipos instalados antes de
instalar el M-crew.
El siguiente procedimiento es para Windows 98/98SE. Algunas partes
del procedimiento pueden ser diferentes según el sistema operativo en
el que se ha instalado el software. Vea la página 14 para Windows
2000/Windows Me/Windows XP.
Nota
Algunas figuras incluidas en los siguientes procedimientos pueden ser
parcialmente diferentes según el sistema operativo utilizado en su ordenador.
11
ES
Page 96

Instalación para Windows 98/98SE
Instalación del controlador de USB
1 Conecte el componente estéreo del sistema en el ordenador
directamente o a través del adaptador de conexión a ordenador e
inicie el ordenador. Aparece “Add New Hardware Wizard”.
Salga de todas las aplicaciones activas.
2 Haga clic en “Next”.
3 Seleccione “Search for the best driver for your device.
(Recommended)”. (Para el sistema de ordenador con CMT-C7NT
conectado, consulte el manual de instrucciones de ese componente
estéreo del sistema.)
Cargue el CD-ROM del Windows 98/98SE en el equipo CD-ROM
del ordenador si el ayudante lo solicita e instale los controladores.
El procedimiento de instalación se repetirá para cada uno de los
siguientes equipos.
• Equipo de audio USB
• Equipo compuesto USB
• Grupo de conexiones USB genérico
12
ES
Page 97

Verificación del estado de los equipos instalados
Asegúrese de confirmar el estado de los equipos instalados después de
instalar sus controladores.
1 Abra el Panel de Controles
En el menú Start, apunte a “Settings” y haga clic en “Control
Panel”.
2 Haga clic dos veces en el icono del Sistema
Aparece el cuadro de diálogo “System Properties”.
3 Haga clic en la ficha “Device Manager”. (Para el sistema de
ordenador con el CMT-C7NT conectado, consulte el manual de
instrucciones para ese componente estéreo del sistema.)
Asegúrese de que los siguientes ítems están en la lista del cuadro
de diálogo “Device Manager”.
• SONY PCLK USB Driver”
• “USB Composite Driver” bajo “Sound, video and game controllers”
• USB Composite Device” y “Generic USB Hub” bajo “Universal Serial Bus
controllers”
4 Haga clic en “OK” para cerrar el cuadro de diálogo “System
Properties”.
13
ES
Page 98

Instalación para Windows 2000/Windows Me/Windows XP
Instalación del controlador de USB (Windows 2000)
1 Conecte el componente estéreo del sistema en el ordenador
directamente o a través del adaptador de conexión a ordenador e
inicie el ordenador. Aparece “Found New Hardware Wizard”.
Salga de todas las aplicaciones activas.
2 Haga clic en “Next”.
3 Seleccione “Search for a suitable driver for my device.
(recommended)”. (Para el sistema de ordenador con CMT-C7NT
conectado, consulte el manual de instrucciones de ese componente
estéreo del sistema.)
Cargue el CD-ROM del Windows 2000 en el equipo CD-ROM del
ordenador si el ayudante lo solicita e instale los controladores. El
procedimiento de instalación se repetirá para cada uno de los
siguientes equipos.
• Equipo de audio USB
• Equipo compuesto USB
• Grupo de conexiones USB genérico
Instalación del controlador de USB (Windows Me)
14
1 Conecte el componente estéreo del sistema al ordenador
directamente o a través del adaptador de conexión a ordenador e
inicie el ordenador.
Aparece “Add New Hardware Wizard”.
Salga de todas las aplicaciones activas.
ES
Page 99

2 Seleccione “Search for the best driver for your device.
(Recommended)”. (Para el sistema de ordenador con CMT-C7NT
conectado, consulte el manual de instrucciones de ese componente
estéreo del sistema.)
Cargue el CD-ROM del Windows Me en el equipo CD-ROM del
ordenador si el ayudante lo solicita e instale los controladores. El
procedimiento de instalación se repetirá para cada uno de los
siguientes equipos.
• Equipo de audio USB
• Equipo compuesto USB
• Grupo de conexiones USB genérico
Instalación de los controladores USB (Windows XP)
1 Salga de todas las aplicaciones activadas.
2 Conecte directamente el componente estéreo del sistema o a través
del adaptador de conexión a ordenador, y haga funcionar el
ordenador.
La instalación de los controladores empieza automáticamente y se
termina al completar la instalación.
Si aparece “Found New Hardware Wizard”, vaya al paso 3.
3 Seleccione “Install the software automatically [Recommended]”
después de confirmar que el nombre del equipo para el que los
controladores se van a instalar sea “SONY LINK KIT”.
Verificación del estado de los equipos instalados (Windows 2000/
Windows Me/Windows XP)
Asegúrese de confirmar el estado de los equipos instalados después de
instalar sus controladores.
1 Abra el Panel de Controles
En el menú Start, apunte a “Settings” y haga clic en “Control
Panel”.
(Para Windows XP) En el menú Start, haga clic en el “Control
Panel” y haga clic en “Switch to Classic View” en la parte izquierda
de la ventana.
(continúa)
15
ES
Page 100

2 Haga clic dos veces en el icono del “System”.
Aparece el cuadro de diálogo “System Properties”.
Nota
Si no puede encontrar el icono “System”, “View all Control Panel options”
(En el caso de Windows Me).
3 (Sólo para Windows 2000/Windows XP) Haga clic en la ficha
“Hardware”.
4 Haga clic en la ficha “Device Manager”. (para Windows 2000/
Windows XP, pulse en su lugar el botón “Device Manager”) (para
el sistema de ordenador con el CMT-C7NT conectado, consulte el
manual de instrucciones para el componente estéreo del sistema.)
Asegúrese de que los siguientes ítems están en la lista del cuadro
de diálogo “Device Manager”.
• “SONY PCLK USB Driver” (Este ítem puede encontrarse en los
“Universal Serial Bus controllers”.)
• “USB Audio Device” bajo “Sound, video and game controllers”
• “USB Composite Device” y “Generic USB Hub” bajo “Universal Serial
Bus controllers”
16
Ejemplo: Ventana para
Windows 2000
Nota (sólo para Windows Me)
Según la configuración de su ordenador, puede aparecer antes
del equipo en la lista. Esto no afecta el funcionamiento del sistema
(el ordenador y el componente estéreo del sistema).
5 Haga clic en “OK” para cerrar el cuadro de diálogo “System
Properties”.
ES
 Loading...