

Sony KP-51WS500 User Manual
WARNING
To prevent fire or shock hazard, do not
expose the projection TV to rain or
moisture.
CAUTION
RISK OF ELECTRIC SHOCK
DO NOT OPEN
Note on Caption Vision
This television receiver provides display of television
closed captioning in accordance with §15.119 of the FCC
rules.
Note on convergence adjustment
Before you use your projection TV, make sure to adjust
convergence. For details, see “Adjusting the Convergence
Automatically – FLASH FOCUS™ –” on page 33.
ATTENTION
RISQUE DE CHOC ELECTRIQUE,
NE PAS OUVRIR
PRECAUCION
RIESGO DE CHOQUE ELECTRICO
NO ABRIR
CAUTION : TO REDUCE THE RISK OF ELECTRIC SHOCK,
DO NOT REMOVE COVER (OR BACK).
NO USER-SERVICEABLE PARTS INSIDE.
REFER SERVICING TO QUALIFIED SERVICE PERSONNEL.
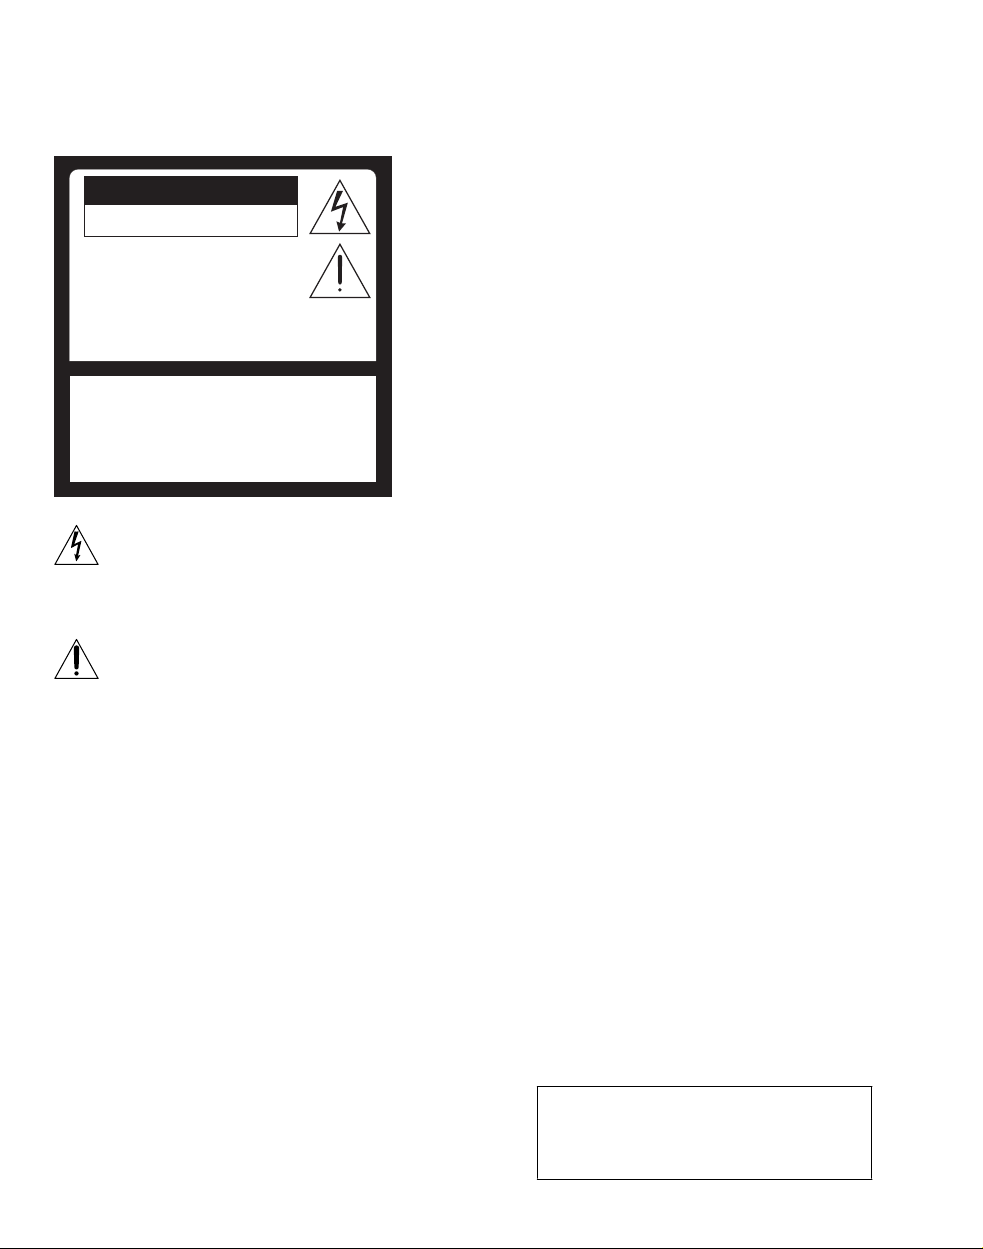
This symbol is intended to alert the user to the
presence of uninsulated “dangerous voltage”
within the product’s enclosure that may be of
sufficient magnitude to constitute a risk of
electric shock to persons.
This symbol is intended to alert the user to the
presence of important operating and
maintenance (servicing) instructions in the
literature accompanying the appliance.
CAUTION
To prevent electric shock, do not use this polarized AC
plug with an extension cord, receptacle or other outlet
unless the blades can be fully inserted to prevent blade
exposure.
CAUTION
When using TV games, computers, and
similar products with your projection
TV, or viewing a TV station whose logo
always stays on the screen, keep the
brightness and contrast functions at
low settings. If a fixed (non-moving)
pattern such as a station logo is left on
the screen for long periods of time,
especially at a high brightness or
contrast setting, the image can be
permanently imprinted onto the screen.
These types of imprints are not covered
by your warranty.
Note to CATV system installer
This reminder is provided to call the CATV system
installer’s attention to Article 820-40 of the NEC that
provides guidelines for proper grounding and, in
particular, specifies that the cable ground shall be
connected to the grounding system of the building, as
close to the point of cable entry as practical.
Use of this television receiver for other than private
viewing of programs broadcast on UHF, VHF,
transmitted by cable companies or satellite for the use of
the general public may require authorization from the
broadcaster/cable company and/or program owner.
NOTIFICATION
This equipment has been tested and found to comply with
the limits for a Class B digital device pursuant to Part 15
of the FCC Rules. These limits are designed to provide
reasonable protection against harmful interference in a
residential installation. This equipment generates, uses,
and can radiate radio frequency energy and, if not
installed and used in accordance with the instructions,
may cause harmful interference with radio
communications. However, there is no guarantee that
interference will not occur in a particular installation. If
this equipment does cause harmful interference to radio
or television reception, which can be determined by
turning the equipment off and on, the user is encouraged
to try to correct the interference by one or more of the
following measures:
❑ Reorient or relocate the receiving antennas.
❑ Increase the separation between the equipment and
receiver.
❑ Connect the equipment into an outlet on a circuit
different from that to which the receiver is
connected.
❑ Consult the dealer or an experienced radio/TV
technician for help.
You are cautioned that any changes or
modifications not expressly approved in
this manual could void your warranty and
your authority to operate this equipment.
IMPORTANT SAFEGUARDS
For your protection, please read these instructions
completely, and keep this manual for future reference.
Carefully observe and comply with all warnings, cautions
and instructions placed on the set or described in the
operating instructions or service manual.
WARNING
To guard against injury, the following basic safety
precautions should be observed in the installation, use
and servicing of the set.
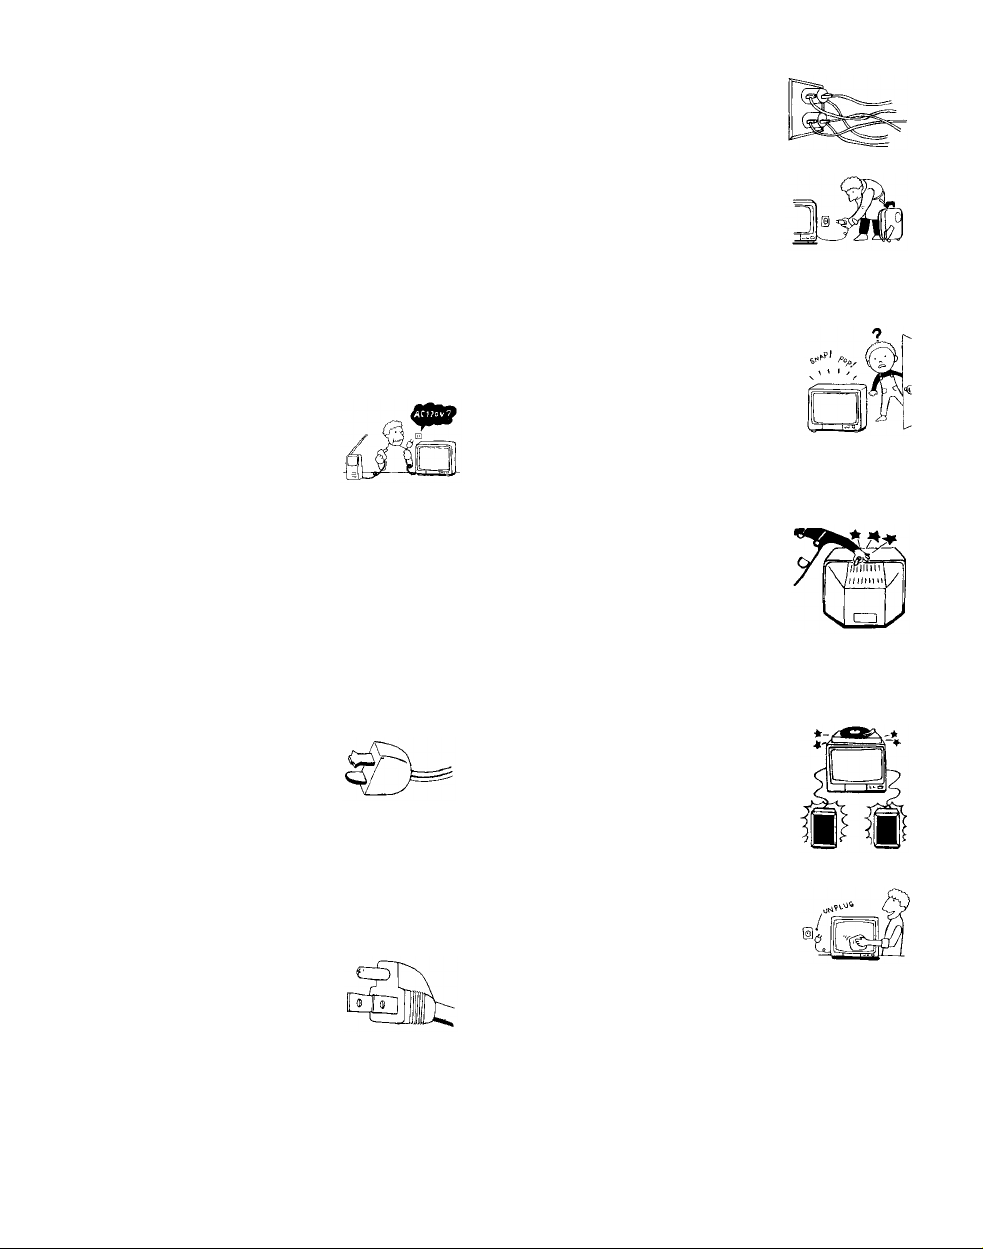
Use
Power Sources
This set should be operated only from
the type of power source indicated on
the serial/model plate. If you are not sure
of the type of electrical power supplied
to your home, consult your dealer or
local power company. For those sets designed to operate
from battery power, refer to the operating instructions.
Grounding or Polarization
This set is equipped with a polarized AC power cord plug
(a plug having one blade wider than the other), or with a
three-wire grounding type plug (a plug having a third pin
for grounding). Follow the instructions below:
Overloading
Do not overload wall outlets, extension
cords or convenience receptacles
beyond their capacity, since this can
result in fire or electric shock.
Always turn the set off when it is not
being used. When the set is left
unattended and unused for long
periods of time, unplug it from the
wall outlet as a precaution against the
possibility of an internal malfunction that could create a
fire hazard.
If a snapping or popping sound from a TV
set is continuous or frequent while the TV
is operating, unplug the TV and consult
your dealer or service technician. It is
normal for some TV sets to make
occasional snapping or popping sounds,
particularly when being turned on or off.
Object and Liquid Entry
Never push objects of any kind into the
set through the cabinet slots as they may
touch dangerous voltage points or short
out parts that could result in a fire or
electric shock. Never spill liquid of any
kind on the set.
For the set with a polarized AC power cord
plug
This plug will fit into the power outlet
only one way. This is a safety feature. If
you are unable to insert the plug fully
into the outlet, try reversing the plug. If
the plug still fails to fit, contact your electrician to have a
suitable outlet installed. Do not defeat the safety purpose
of the polarized plug by forcing it in.
For the set with a three-wire grounding type
AC plug
This plug will only fit into a groundingtype power outlet. This is a safety
feature. If you are unable to insert the
plug into the outlet, contact your
electrician to have a suitable outlet
installed. Do not defeat the safety purpose of the
grounding plug.
Attachments
Do not use attachments not
recommended by the manufacturer, as
they may cause hazards.
Cleaning
Clean the cabinet of the projection TV
with a dry soft cloth. To remove dust
from the screen, wipe it gently with a soft
cloth. Stubborn stains may be removed
with a cloth slightly dampened with
solution of mild soap and warm water. Never use strong
solvents such as thinner or benzine for cleaning.
If the picture becomes dark after using the projection TV
for a long period of time, it may be necessary to clean the
inside of the projection TV. Consult qualified service
personnel.
Installing and Connecting the Projection TV
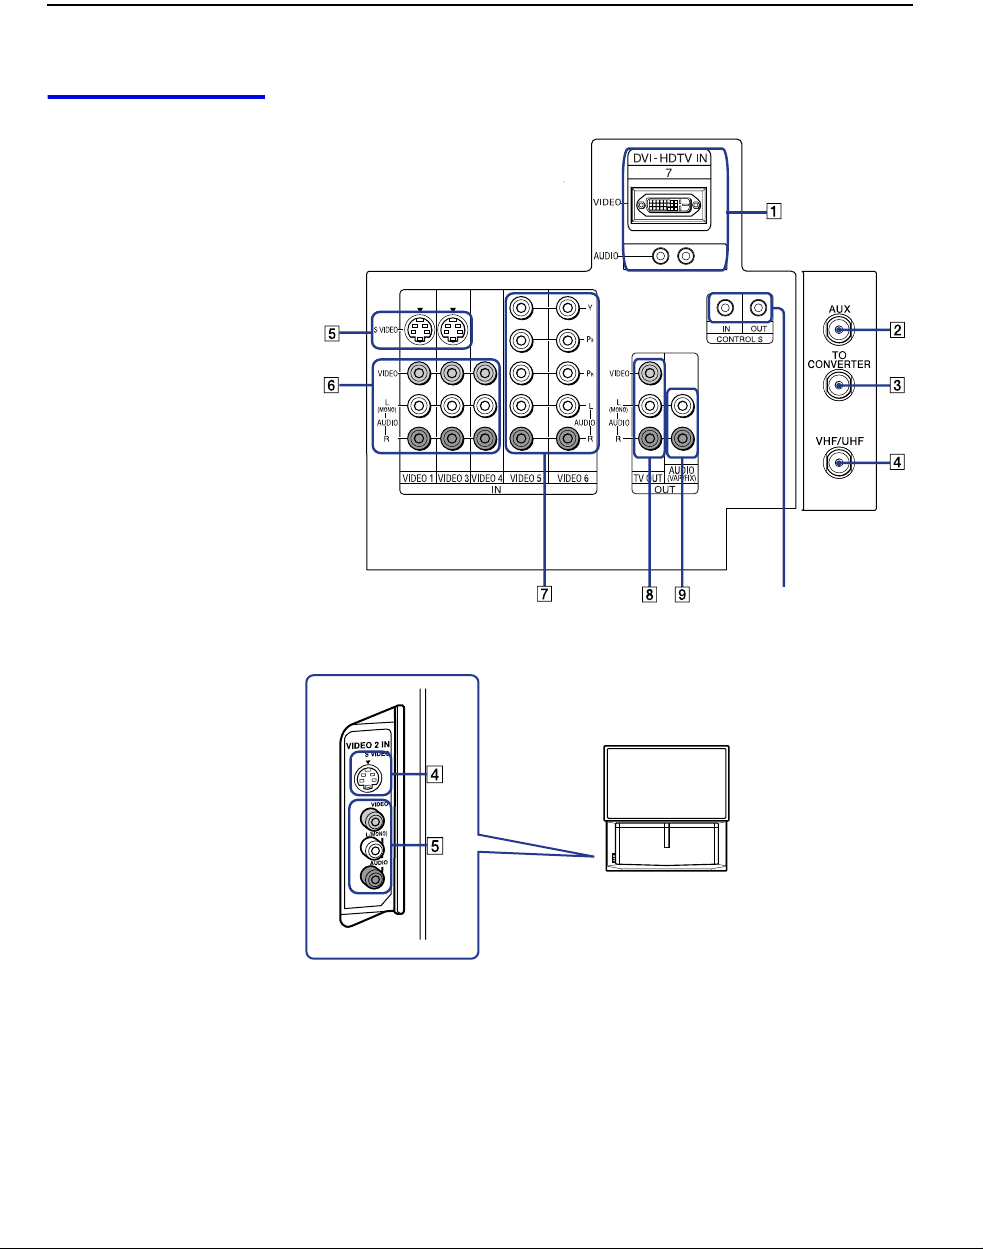
Projection TV Rear
and Front Panel
Rear of projection TV
Connectors
0
Front of projection TV

Installing and Connecting the Projection TV
Connection Description
1 DVI-HDTV
VIDEO
AUDIO R/L
(VIDEO 7 IN)
Can accommodate a copy-protected digital connection
*
(HDCP
) to other devices (such as digital set-top boxes) that
have compatible interfaces. The DVI-HDTV input terminal is
compliant with the EIA-861 standard, and is not intended for
use with personal computers. See the instruction manual that
came with your equipment for details about connecting and
using it with the TV.
2 AUX Allows you to view local and cable channels if your cable
provider does not feature local channels. You can switch
between local and cable channels easily by pressing ANT
on the remote control. Devices connected to the AUX
input cannot be viewed in Twin View.
3 TO CONVERTER This is a VHF/UHF OUT jack that lets you set up your
projection TV to switch between scrambled channels
(through a cable box) and normal cable channels (CATV).
Use this jack instead of a splitter to get better picture
quality when switching between scrambled and
unscrambled cable channels.
4 VHF/UHF Connects to your VHF/UHF antenna or cable.
5 S VIDEO
(Rear and front)
Connects to the S VIDEO OUT jack of your VCR or other S
VIDEO-equipped video component. Provides better picture
quality than the VHF/UHF jacks or the Video IN jack.
6 VIDEO
(L/R)/AUDIO
(Rear and front)
7 Y/PB/PR
(L/R)/AUDIO
Connects to the audio and video OUT jacks on your VCR
or other video component. A fourth video input (VIDEO 2)
is located on the front panel of the projection TV.
Connects to your DVD player’s or Digital Set-top box’s
component video (Y, P
B, PR) and audio (L/R) jacks.
8 TV OUT Connects to an AV receiver for greater control of all audio
and video equipment (see page 30). For detailed
information about connection, refer to the operating
manual supplied with the AV receiver.
9 AUDIO OUT
(VAR/FIX)
Connects to the left and right audio inputs of your audio or
video component.
L (MONO)/R
Installing and Connecting the Projection TV
0 CONTROL S
IN/OUT
To control other Sony equipment with the projection TV's
remote control, connect the CONTROL S IN jack of the
equipment to the CONTROL S OUT jack on the
projection TV with the CONTROL S cable.
To control the projection TV with a remote control for
another Sony product, connect the CONTROL S OUT
jack of the equipment to the CONTROL S IN jack on the
projection TV with the CONTROL S cable.
* High-bandwidth Digital Content Protection.
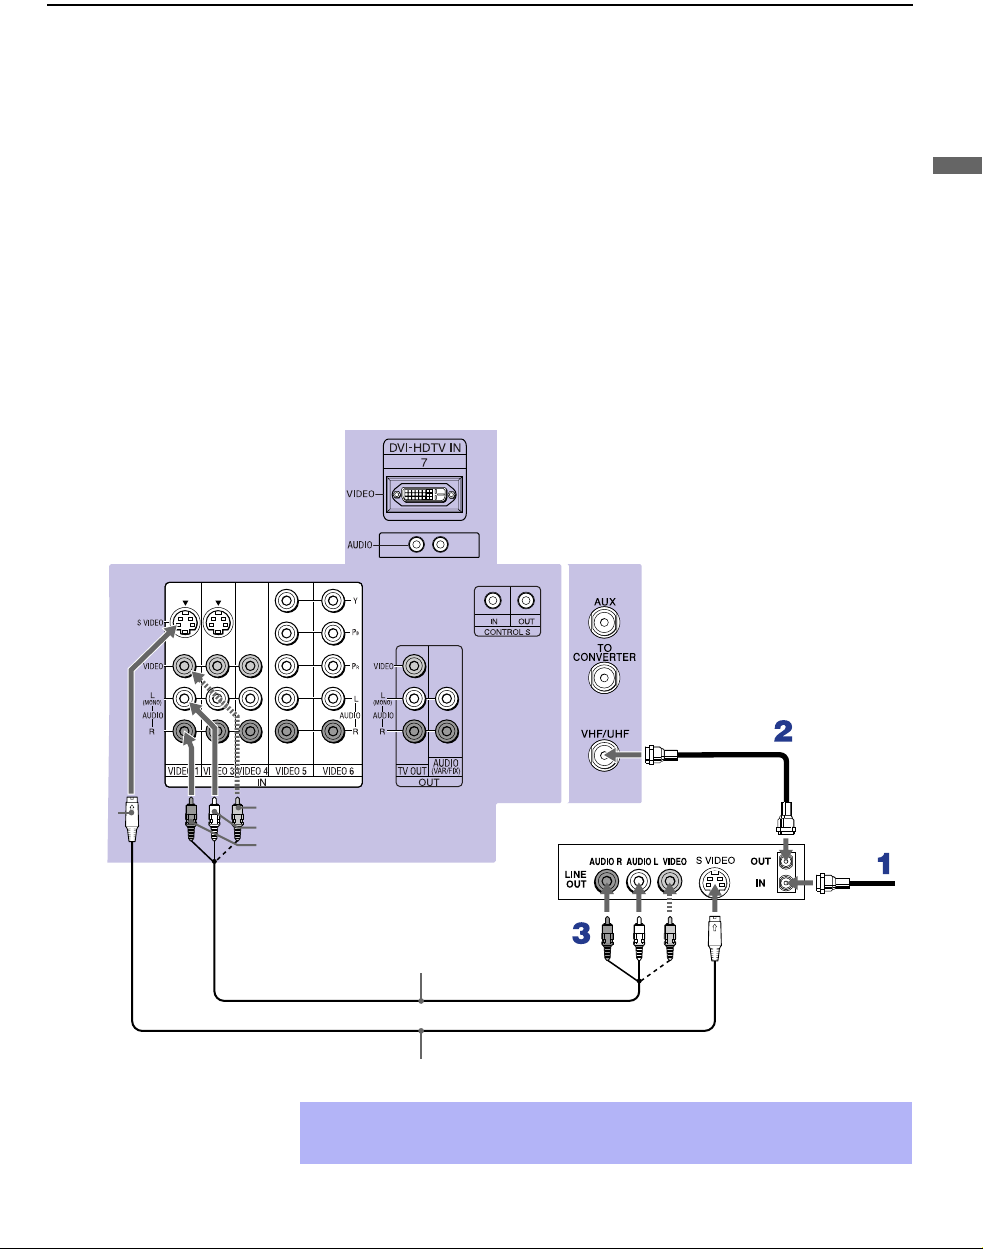
Connecting a VCR and Cable
Use this hookup if:
Installing and Connecting the Projection TV
❑ You have cable TV that does not require a cable box.
Disconnect all power sources before making any connections.
1 Connect the cable TV cable to the VCR’s IN jack.
2 Using a coaxial cable, connect the VCR’s OUT jack to the projection
3 Using AUDIO and S VIDEO cables, connect the VCR’s Audio and
Rear of Projection TV
Installing and Connecting the Projection TV
TV’s VHF/UHF jack.
S Video OUT jacks to the projection TV’s AUDIO and S VIDEO IN
jacks.
Coaxial cable
S VIDEO
VIDEO (yellow)
AUDIO-L (white)
AUDIO-R (red)
YC-15V/30V (not supplied)
VMC-810S/820S
(not supplied)
VCR
✍ If your VCR is not equipped with S VIDEO, use a VIDEO cable (yellow)
instead of the S VIDEO cable.
Cable
 Loading...