

Page 1
2-699-134-42 (1)
©
FM/MW/LW
Compact Disc Player
Operating Instructions
Инструкция по эксплуатации
To cancel the demonstration (DEMO) display, see page 10.
Для отмены демонстрации на дисплее (режим DEMO) см. стр. 11.
GB
RU
CDX-GT217
2006 Sony Corporation
Page 2
For installation and connections, see the
supplied installation/connections manual.
Warning if your car’s ignition has no
ACC position
Be sure to set the Auto Off function (page 10).
The unit will shut off completely and
automatically in the set time after the unit is
turned off, which prevents battery drain.
If you do not set the Auto Off function, press
and hold (OFF) until the display disappears
each time you turn the ignition off.
This label is located on the bottom of the
chassis.
Disposal of Old Electrical &
Electronic Equipment (Applicable in
the European Union and other
European countries with separate
collection systems)
packaging indicates that this product shall not be treated
as household waste. Instead it shall be handed over to the
applicable collection point for the recycling of electrical
and electronic equipment. By ensuring this product is
disposed of correctly, you will help prevent potential
negative consequences for the environment and human
health, which could otherwise be caused by inappropriate
waste handling of this product. The recycling of materials
will help to conserve natural resources. For more detailed
information about recycling of this product, please contact
your local Civic Office, your household waste disposal
service or the shop where you purchased the product.
This symbol on the product or on its
Microsoft, Windows Media,
and the Windows logo are
trademarks or registered
trademarks of Microsoft
Corporation in the United States and/or other
countries.
2
Page 3

Table of Contents
Welcome ! . . . . . . . . . . . . . . . . . . . . . . . . . . . . . 4
Getting Started
Setting the clock . . . . . . . . . . . . . . . . . . . . . . . . 4
Detaching the front panel . . . . . . . . . . . . . . . . . 4
Attaching the front panel . . . . . . . . . . . . . . . 5
Location of controls and basic
operations
Main unit. . . . . . . . . . . . . . . . . . . . . . . . . . . . 6
CD
Display items . . . . . . . . . . . . . . . . . . . . . . . . 7
Repeat and shuffle play. . . . . . . . . . . . . . . . . 7
Radio
Storing and receiving stations . . . . . . . . . . . . . . 7
Storing automatically — BTM . . . . . . . . . . . 7
Storing manually. . . . . . . . . . . . . . . . . . . . . . 7
Receiving the stored stations . . . . . . . . . . . . 7
Tuning automatically . . . . . . . . . . . . . . . . . . 7
RDS . . . . . . . . . . . . . . . . . . . . . . . . . . . . . . . . . . 8
Overview. . . . . . . . . . . . . . . . . . . . . . . . . . . . 8
Setting AF and TA . . . . . . . . . . . . . . . . . . . . 8
Selecting PTY. . . . . . . . . . . . . . . . . . . . . . . . 9
Setting CT. . . . . . . . . . . . . . . . . . . . . . . . . . . 9
Other functions
Changing the sound settings . . . . . . . . . . . . . . . 9
Adjusting the balance and fader
— BAL/FAD . . . . . . . . . . . . . . . . . . . . . . . . 9
Customizing the equalizer curve
— EQ lite . . . . . . . . . . . . . . . . . . . . . . . . . . . 9
Adjusting setup items — SET . . . . . . . . . . . . 10
Using optional equipment. . . . . . . . . . . . . . . . 10
Auxiliary audio equipment. . . . . . . . . . . . . 10
Additional Information
Precautions . . . . . . . . . . . . . . . . . . . . . . . . . . . 11
Notes on discs . . . . . . . . . . . . . . . . . . . . . . 11
About MP3/WMA files . . . . . . . . . . . . . . . 12
Maintenance . . . . . . . . . . . . . . . . . . . . . . . . . . 12
Removing the unit. . . . . . . . . . . . . . . . . . . . . . 13
Specifications . . . . . . . . . . . . . . . . . . . . . . . . . 13
Troubleshooting . . . . . . . . . . . . . . . . . . . . . . . 14
Error displays/Messages. . . . . . . . . . . . . . . 15
3
Page 4
Welcome !
Getting Started
Thank you for purchasing this Sony Compact
Disc Player. You can enjoy your drive with the
following functions.
• CD playback
You can play CD-DA (also containing CD
TEXT*) and CD-R/CD-RW (MP3/WMA files
also containing Multi Session (
Type of discs Label on the disc
CD-DA
MP3
WMA
• Radio reception
– You can store up to 6 stations per band (FM1,
FM2, FM3, MW and LW).
– BTM (Best Tuning Memory): the unit selects
strong signal stations and stores them.
• RDS services
– You can use FM station with Radio Data
System (RDS).
• Sound adjustment
– EQ lite: You can choose any one of 6 preset
equalizer curves.
• Auxiliary equipment connection
An AUX input jack on the front of the unit
allows connection of a portable audio device.
* A CD TEXT disc is a CD-DA that includes
information such as disc, artist and track name.
page 12)).
Setting the clock
The clock uses a 24-hour digital indication.
1 Press and hold the select button.
The setup display appears.
2 Press the select button repeatedly
until “CLOCK-ADJ” appears.
3 Press (SEEK) +.
The hour indication flashes.
4 Rotate the volume control dial to set
the hour and minute.
To move the digital indication, press (SEEK)
–/+.
5 Press the select button.
The setup is complete and the clock starts.
To display the clock, press (DSPL). Press
(DSPL) again to return to the previous display.
Tip
You can set the clock automatically with the RDS
page 9).
feature (
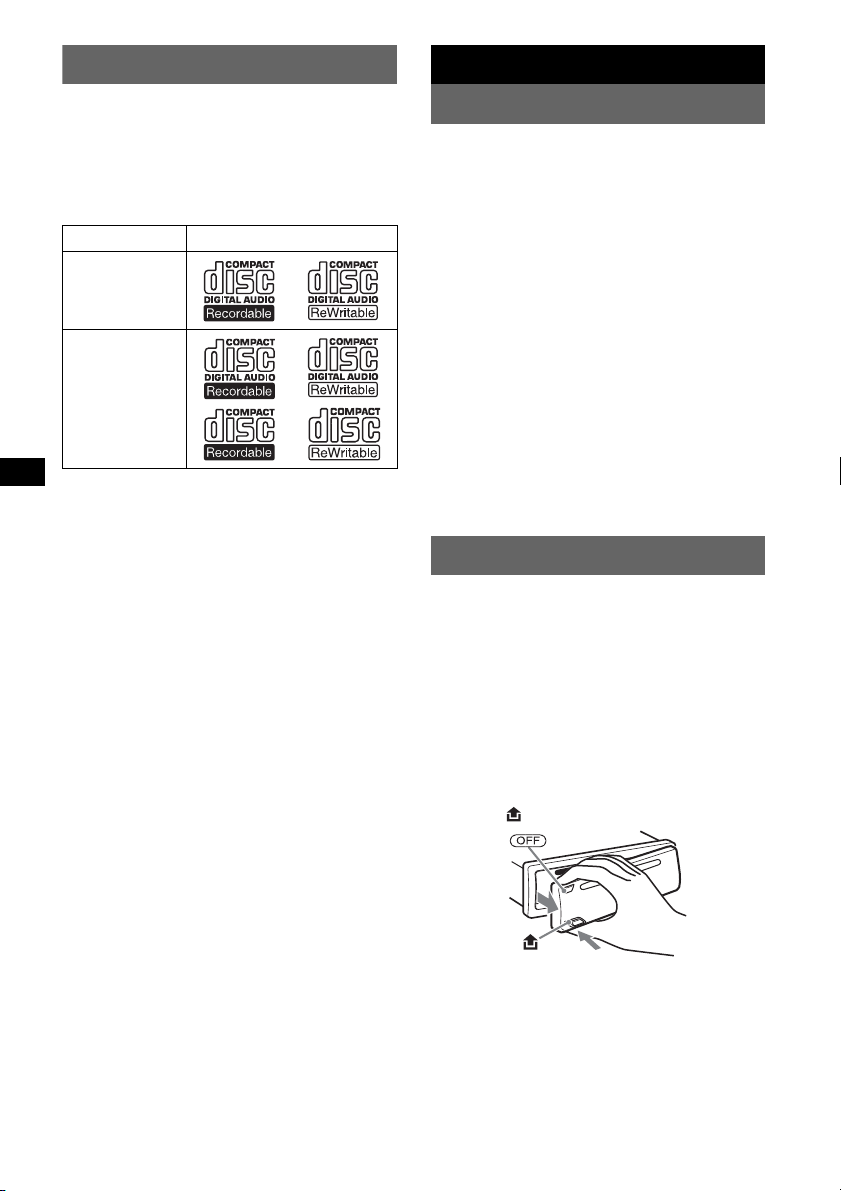
Detaching the front panel
You can detach the front panel of this unit to
prevent theft.
Caution alarm
If you turn the ignition switch to the OFF
position without detaching the front panel, the
caution alarm will sound for a few seconds.
The alarm will only sound if the built-in
amplifier is used.
1 Press (OFF).
The unit is turned off.
2 Press , then pull it off towards you.
Notes
• Do not drop or put excessive pressure on the front
panel and display window.
• Do not subject the front panel to heat/high
temperature or moisture. Avoid leaving it in a parked
car or on a dashboard/rear tray.
4
Page 5
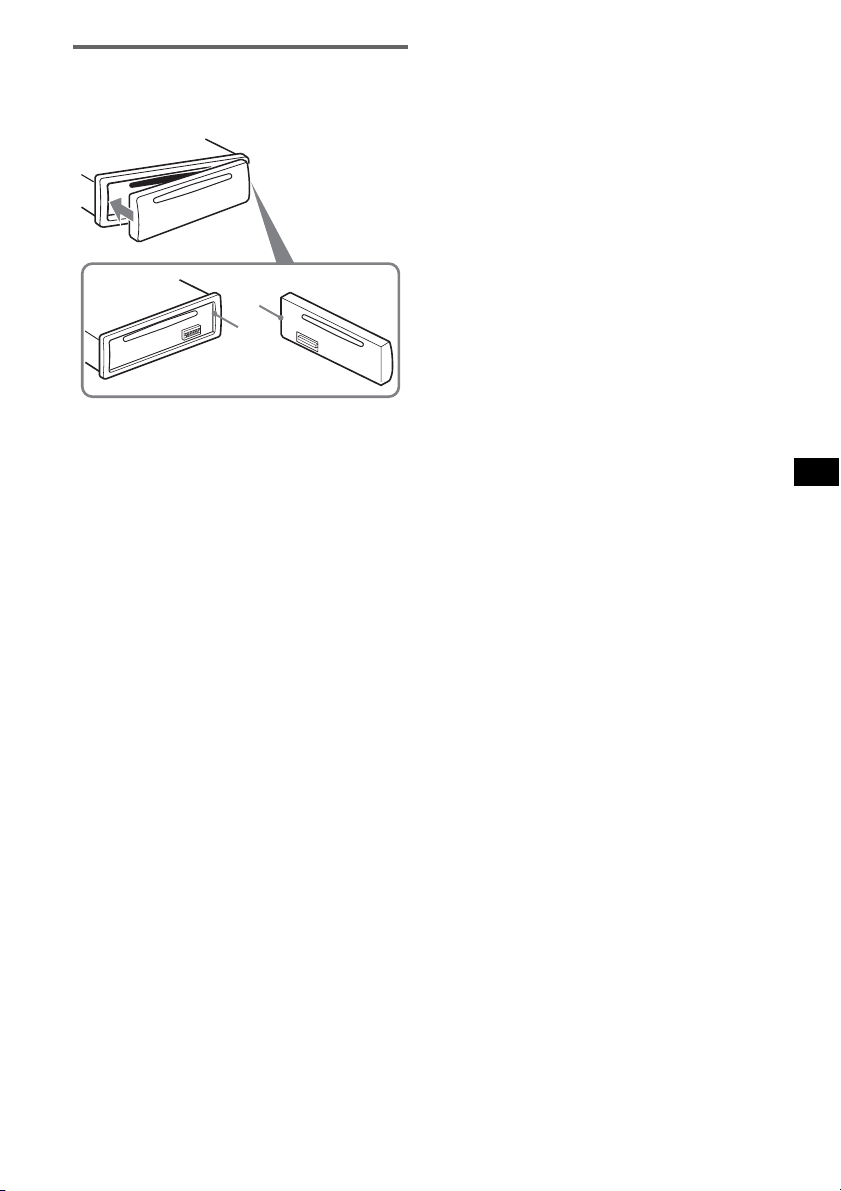
Attaching the front panel
Engage part A of the front panel with part B of
the unit, as illustrated, and push the left side into
position until it clicks.
A
B
Note
Do not put anything on the inner surface of the front
panel.
5
Page 6
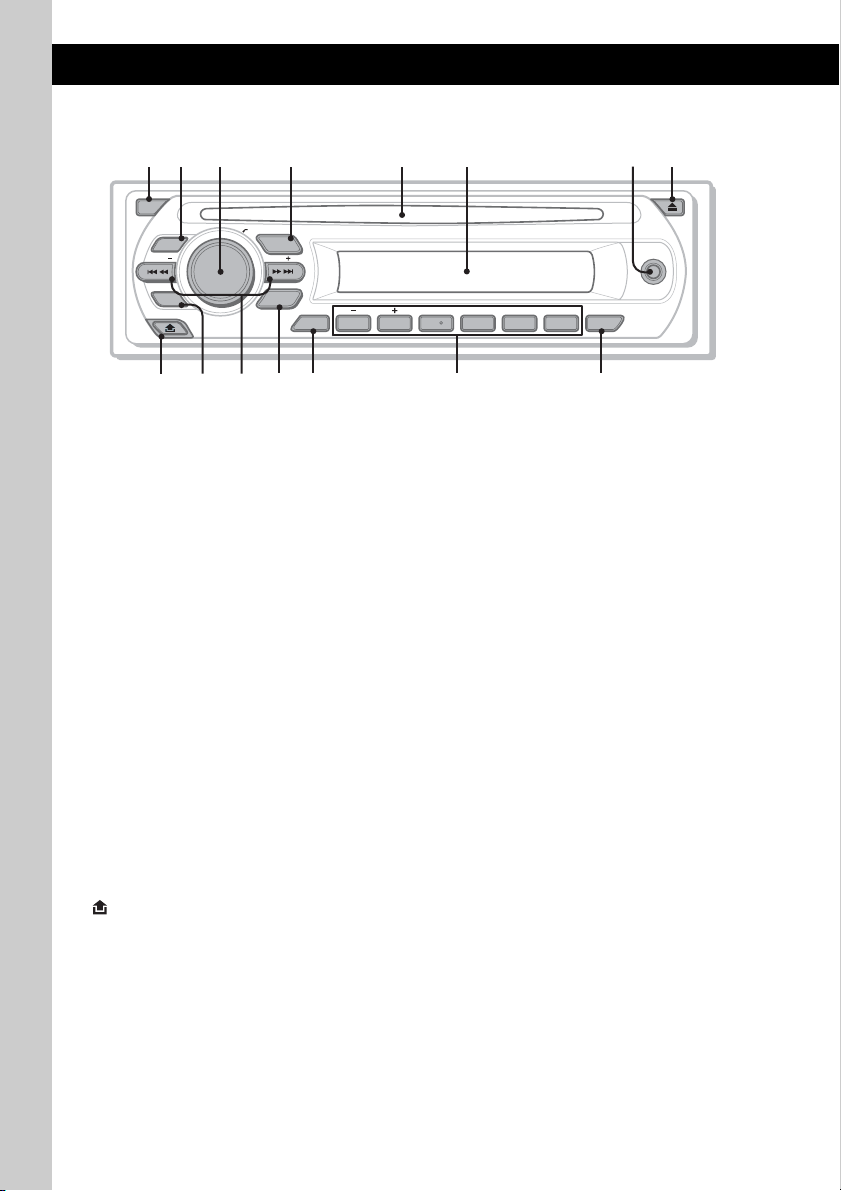
Location of controls and basic operations
1
2
4 5 8673
Main unit
OFF
PUSH SELECT
SEEK
EQ
SOURCE
SEEK
AUX
PTY
MODE
qa qsq;9
Refer to the pages listed for details.
A OFF button
To power off; stop the source.
B EQ (equalizer) button 9
To select an equalizer type (XPLOD,
NATURAL, HARD, UPBEAT, VOCAL,
CUSTOM or OFF).
C Volume control dial/select button 9
To adjust volume (rotate); select setup items
(press and rotate).
D SOURCE button
To power on; change the source (Radio/CD/
AUX).
E Disc slot
To insert the disc (label side up). Playback
starts automatically.
F Display window
G AUX input jack 10
To connect a portable audio device.
H Z (eject) button
To eject the disc.
I (front panel release) button 4
J PTY (Program Type) button 9
To select PTY in RDS.
ALBMDIM REP SHUF
123456
qd qgqf
K SEEK –/+ buttons
CD:
To skip tracks (press); skip tracks
continuously (press, then press again within
about 1 second and hold); reverse/fastforward a track (press and hold).
Radio:
To tune in stations automatically (press); find
a station manually (press and hold).
L MODE button 7
To select the radio band (FM/MW/LW).
M DSPL (display)/DIM (dimmer) button
7, 8
To change display items (press); change the
display brightness (press and hold).
N Number buttons
CD:
(1)/(2): ALBM –/+*
(3): REP 7
(4): SHUF 7
(6): PAU SE
Radio:
To receive stored stations (press); store
stations (press and hold).
O AF (Alternative Frequencies)/TA
(Traffic Announcement) button
To set AF and TA in RDS.
* When an MP3/WMA is played.
PAUSE
/
TADSPL
AF
CDX-GT217
To skip albums (press); skip albums
continuously (press and hold).
To pause playback. To cancel, press
again.
8
6
Page 7
CD
Radio
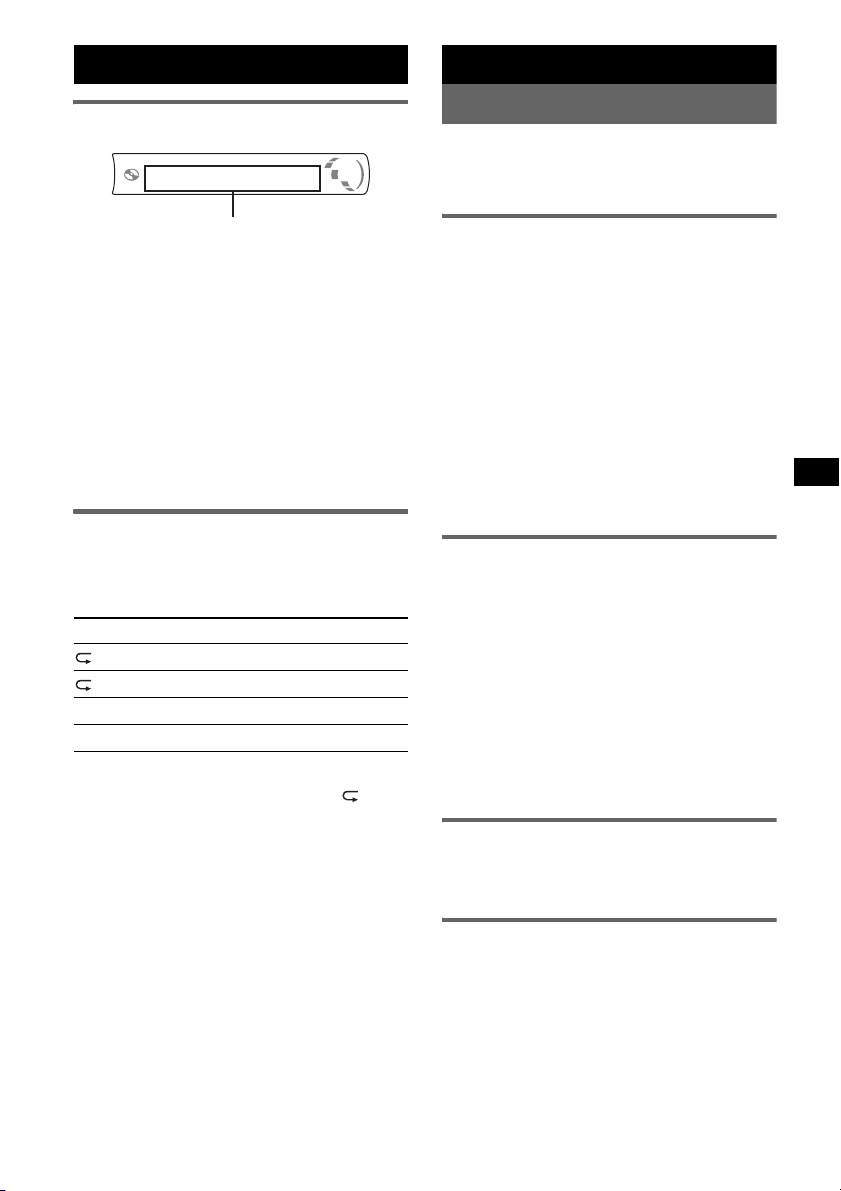
Display items
Track number/Elapsed playing time, Disc/
artist name, Album number*
name, Track name, Text information*
Clock
*1 Album number is displayed only when the album is
changed.
*2 When playing an MP3, ID3 tag is displayed, and
when playing a WMA, WMA tag is displayed.
To change display items, press (DSPL); scroll
display items, set “A.SCRL-ON” (
Tip
Displayed items will differ, depending on the disc type,
recorded format and settings. For details on MP3/
WMA, see
page 12.
1
, Album
page 10).
2
,
Repeat and shuffle play
1 During playback, press (3) (REP) or
(4) (SHUF) repeatedly until the
desired setting appears.
Select To p lay
TRACK track repeatedly.
ALBUM* album repeatedly.
SHUF ALBUM* album in random order.
SHUF DISC disc in random order.
* When an MP3/WMA is played.
To return to normal play mode, select “ OFF”
or “SHUF OFF.”
Storing and receiving stations
Caution
When tuning in stations while driving, use Best
Tuning Memory (BTM) to prevent an accident.
Storing automatically — BTM
1 Press (SOURCE) repeatedly until
“TUNER” appears.
To change the band, press (MODE)
repeatedly. You can select from FM1, FM2,
FM3, MW or LW.
2 Press and hold the select button.
The setup display appears.
3 Press the select button repeatedly
until “BTM” appears.
4 Press (SEEK) +.
The unit stores stations in order of frequency
on the number buttons.
A beep sounds when the setting is stored.
Storing manually
1 While receiving the station that you
want to store, press and hold a
number button ((1) to (6)) until
“MEMORY” appears.
The number button indication appears in the
display.
Note
If you try to store another station on the same number
button, the previously stored station will be replaced.
Tip
When a RDS station is stored, the AF/TA setting is
also stored (
Receiving the stored stations
1 Select the band, then press a number
page 8).
button ((1) to (6)).
Tuning automatically
1 Select the band, then press (SEEK) –/+
to search for the station.
Scanning stops when the unit receives a
station. Repeat this procedure until the
desired station is received.
continue to next page t
7
Page 8
Tip
If you know the frequency of the station you want to
listen to, press and hold (SEEK)
approximate frequency, then press (SEEK)
repeatedly to fine adjust to the desired frequency
(manual tuning).
–/+ to locate the
–/+
RDS
Overview
FM stations with Radio Data System (RDS)
service send inaudible digital information along
with the regular radio program signal.
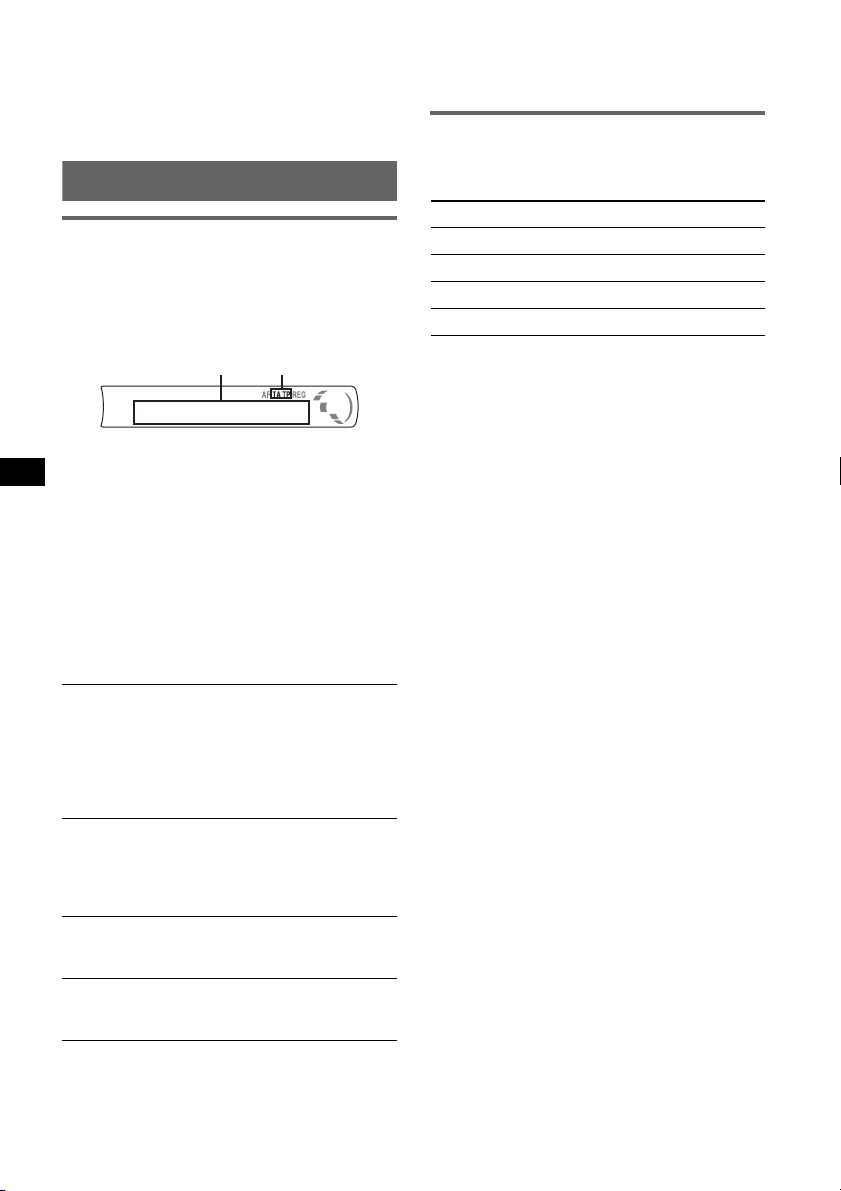
Display items
BA
A Frequency*1 (Program service name), Preset
number, Clock, RDS data
B TA /T P*
*1 While receiving the RDS station, “ *” is displayed
*2 “TA” flashes during traffic information. “TP” lights
To change display items A, press (DSPL).
RDS services
This unit automatically provides RDS services as
follows:
AF (Alternative Frequencies)
Selects and retunes the station with the
strongest signal in a network. By using this
function, you can continuously listen to the
same program during a long-distance drive
without having to retune the same station
manually.
TA (Traffic Announcement)/TP (Traffic
Program)
Provides current traffic information/programs.
Any information/program received, will
interrupt the currently selected source.
PTY (Program Types)
Displays the currently received program type.
Also searches your selected program type.
CT (Clock Time)
The CT data from the RDS transmission sets
the clock.
Notes
• Depending on the country/region, not all RDS
functions may be available.
2
on the left of the frequency indication.
up while such a station is received.
• RDS will not work if the signal strength is too weak,
or if the station you are tuned to is not transmitting
RDS data.
Setting AF and TA
1 Press (AF/TA) repeatedly until the
desired setting appears.
Select To
AF-ON activate AF and deactivate TA.
TA-ON activate TA and deactivate AF.
AF, TA-ON activate both AF and TA.
AF, TA-OFF deactivate both AF and TA.
Storing RDS stations with the AF and
TA setting
You can preset RDS stations along with the AF/
TA setting. If you use the BTM function, only
RDS stations are stored with the same AF/TA
setting.
If you preset manually, you can preset both RDS
and non-RDS stations with the AF/TA setting for
each.
1 Set AF/TA, then store the station with BTM or
manually.
Presetting the volume of traffic
announcements
You can preset the volume level of the traffic
announcements so as to not miss hearing them.
1 Rotate the volume control dial to adjust the
volume level.
2 Press and hold (AF/TA) until “TA” appears.
Receiving emergency
announcements
With AF or TA on, the emergency
announcements will automatically interrupt the
currently selected source.
Staying with one regional program
— REG
When the AF function is on: this unit’s factory
setting restricts reception to a specific region, so
you will not be switched to another regional
station with a stronger frequency.
If you leave this regional program’s reception
area, set “REG-OFF” in setup during FM
reception (
Note
This function does not work in the UK and in some
other areas.
page 10).
8
Page 9
Local Link function (UK only)
This function enables you to select other local
stations in the area, even if they are not stored on
your number buttons.
1 During FM reception, press a number button
((1) to (6)) on which a local station is stored.
2 Within 5 seconds, press again a number button
of the local station.
Repeat this procedure until the local station is
received.
Selecting PTY
1 Press (PTY) during FM reception.
The current program type name appears if the
station is transmitting PTY data.
2 Press (PTY) repeatedly until the
desired program type appears.
3 Press (SEEK) –/+.
The unit starts to search for a station
broadcasting the selected program type.
Type of programs
NEWS (News), AFFAIRS (Current Affairs),
INFO (Information), SPORT (Sports),
EDUCATE (Education), DRAMA (Drama),
CULTURE (Culture), SCIENCE (Science),
VARIE D (Varied), POP
ROCK
M (Rock Music), EASY M (Easy
Listening), LIGHT
CLASSICS (Classical), OTHER
Music Type), WEATHER (Weather),
FINANCE (Finance), CHILDREN (Children’s
Programs), SOCIAL
RELIGION (Religion), PHONE
TRAVEL (Travel), LEISURE (Leisure), JAZZ
(Jazz Music), COUNTRY (Country Music),
NATION
Music), FOLK
(Documentary)
Note
You cannot use this function in countries/regions
where no PTY data is available.
M (National Music), OLDIES (Oldies
M (Folk Music), DOCUMENT
M (Popular Music),
M (Light Classical),
M (Other
A (Social Affairs),
IN (Phone In),
Setting CT
1 Set “CT-ON” in setup (page 10).
Notes
• The CT function may not work even though an RDS
station is being received.
• There might be a difference between the time set by
the CT function and the actual time.
Other functions
Changing the sound settings
Adjusting the balance and fader
— BAL/FAD
1 Press the select button repeatedly
until “BAL” or “FAD” appears.
The item changes as follows:
LOW*1 t HI*1 t BAL (left-right) t
FAD (front-rear) t AUX*
*1 When EQ lite is activated (page 9).
*2 When AUX source is activated (page 10).
2 Rotate the volume control dial to
adjust the selected item.
After 3 seconds, the setting is complete and
the display returns to normal play/reception
mode.
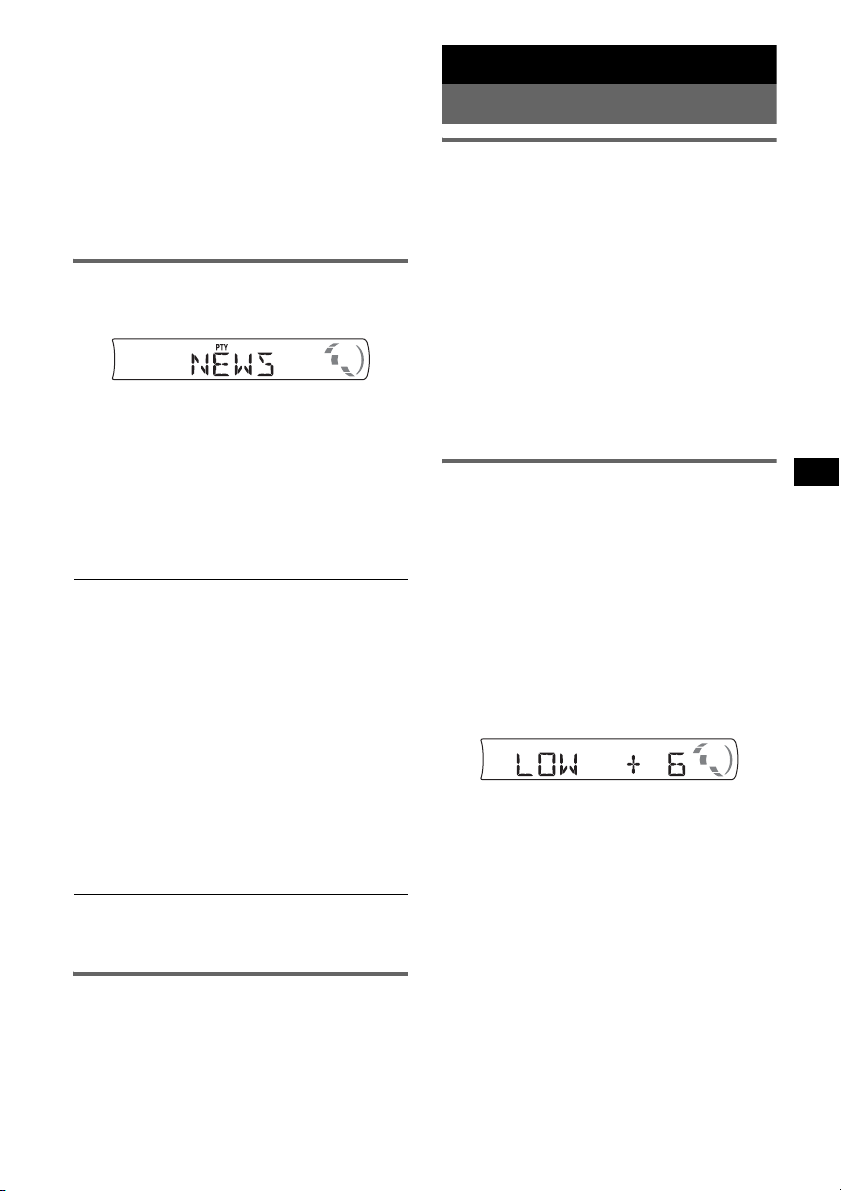
Customizing the equalizer curve
— EQ lite
“CUSTOM” of EQ lite allows you to make your
own equalizer settings.
1 Select a source, then press (EQ)
repeatedly to select “CUSTOM.”
2 Press the select button repeatedly
until “LOW” or “HI” appears.
3 Rotate the volume control dial to
adjust the selected item.
The volume level is adjustable in 1 dB steps,
from –10 dB to +10 dB.
Repeat steps 2 and 3 to adjust the equalizer
curve.
To restore the factory-set equalizer curve,
press and hold the select button before the
setting is complete.
After 3 seconds, the setting is complete and
the display returns to normal play/reception
mode.
Tip
Other equalizer types are also adjustable.
2
9
Page 10
Adjusting setup items — SET
1 Press and hold the select button.
The setup display appears.
2 Press the select button repeatedly
until the desired item appears.
3 Rotate the volume control dial to
select the setting (example “ON” or
“OFF”).
4 Press and hold the select button.
The setup is complete and the display returns
to normal play/reception mode.
Note
Displayed items will differ, depending on the source
and setting.
The following items can be set (follow the page
reference for details):
“z” indicates the default settings.
MONO (Monaural Mode)*
2
To improve poor FM reception, select monaural
reception mode.
– “MONO-ON”: to hear stereo broadcast in
monaural.
– “MONO-OFF” (
z): to hear stereo broadcast in
stereo.
REG*2 (Regional)
To set “REG-ON” (
z) or “REG-OFF” (page 8).
LOUD (Loudness)
To allow you to listen clearly at low volume
levels.
– “LOUD -ON”: to reinforce bass and treble.
– “LOUD -OFF” (
z) : to not reinforce bass and
treble.
BTM (page 7)
*1 When the unit is turned off.
*2 When FM is received.
CLOCK-ADJ (Clock Adjust) (page 4)
CT (Clock Time)
To set “CT-ON” or “CT-OFF” (z) (page 8, 9).
BEEP
To set “BEEP-ON” (z) or “BEEP-OFF.”
1
AUX -A *
(AUX Audio)
To turn the AUX source display “AUX-A-ON”
(
z) or “AUX-A-OFF” (page 10).
A.OFF (Auto Off)
To shut off automatically after a desired time
when the unit is turned off: “A.OFF-NO” (
z),
“A.OFF-30S (Seconds),” “A.OFF-30M
(Minutes)” or “A.OFF-60M (Minutes).”
1
DEMO*
(Demonstration)
To set “DEMO-ON” (z) or “DEMO-OFF.”
DIM (Dimmer)
To change the brightness of the display.
– “DIM-ON”: to dim the display.
– “DIM-OFF” (
z): to deactivate the dimmer.
M.DSPL (Motion Display)
– “M.DSPL-ON” (z): to show moving patterns.
– “M.DSPL-OFF”: to deactivate the Motion
Display.
A.SCRL (Auto Scroll)
To scroll long displayed item automatically
when the album/track is changed.
– “A.SCRL-ON” (
z): to scroll.
– “A.SCRL-OFF”: to not scroll.
LOCAL (Local Seek Mode)
– “LOCAL-ON”: to only tune into stations with
stronger signals.
– “LOCAL-OFF” (
z): to tune normal reception.
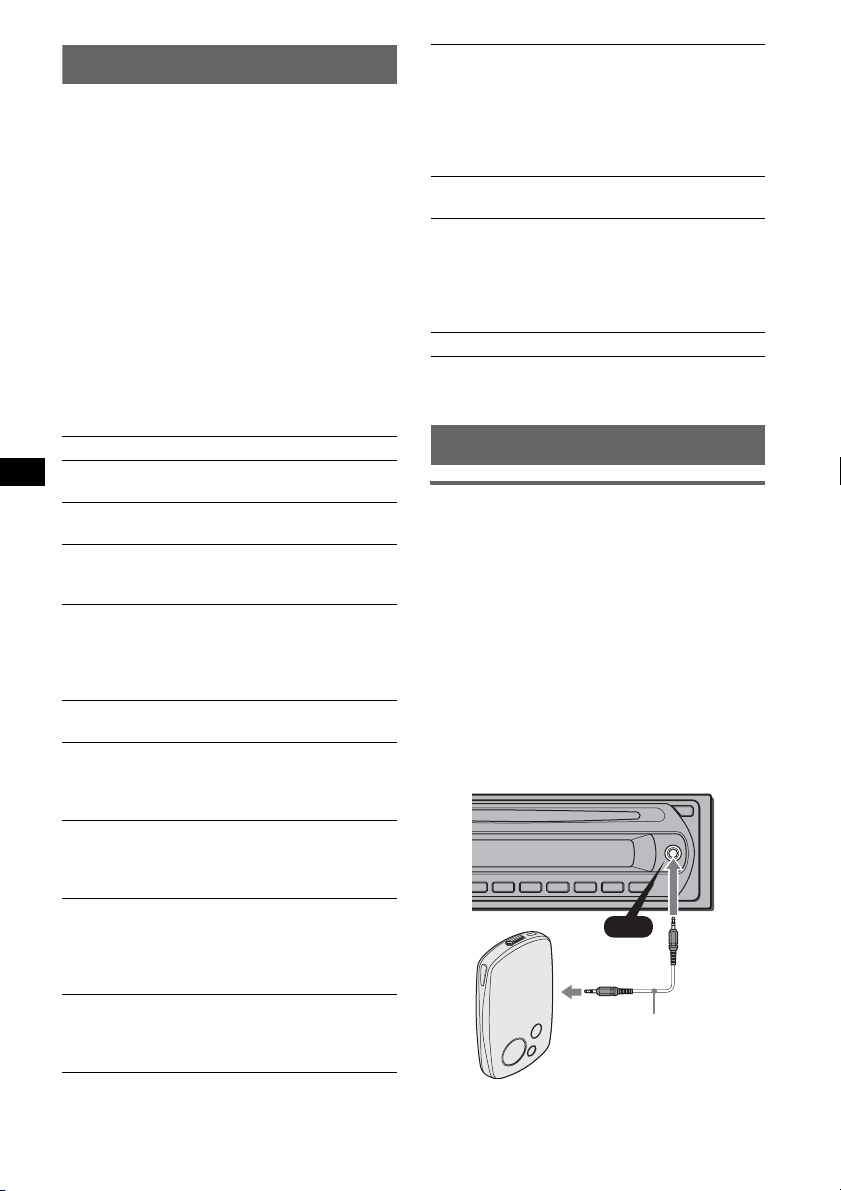
Using optional equipment
Auxiliary audio equipment
By connecting an optional portable audio device
to the AUX input jack (stereo mini jack) on the
unit and then simply selecting the source, you
can listen on your car speakers. The volume level
is adjustable for any difference between the unit
and the portable audio device. Follow the
procedure below:
Connecting the portable audio
device
1 Turn off the portable audio device.
2 Turn down the volume on the unit.
3 Connect to the unit.
AUX
AUX
Connecting cord*
(not supplied)
10
* Be sure to use a straight type plug.
Page 11

Adjust the volume level
Be sure to adjust the volume for each connected
audio device before playback.
1 Turn down the volume on the unit.
2 Press (SOURCE) repeatedly until “AUX”
appears.
“FRONT IN” appears.
3 Start playback of the portable audio device at a
moderate volume.
4 Set your usual listening volume on the unit.
5 Press the select button repeatedly until “AUX”
appears, and rotate the volume control dial to
adjust the input level (–8 dB to +18 dB).
Additional Information
Precautions
• If your car has been parked in direct sunlight,
allow the unit to cool off before operating it.
• Power antenna (aerial) will extend automatically
while the unit is operating.
Moisture condensation
On a rainy day or in a very damp area, moisture
condensation may occur inside the lenses and
display of the unit. Should this occur, the unit will
not operate properly. In such a case, remove the disc
and wait for about an hour until the moisture has
evaporated.
To maintain high sound quality
Be careful not to splash juice or other soft drinks
onto the unit or discs.
Notes on discs
• To keep a disc clean, do not touch its surface.
Handle the disc by its edge.
• Keep your discs in their cases or disc magazines
when not in use.
• Do not subject discs to heat/high temperature.
Avoid leaving them in a parked car or on a
dashboard/rear tray.
• Do not attach labels, or use discs with sticky ink/
residue. Such discs may stop spinning when used,
causing a malfunction, or may ruin the disc.
• Do not use any discs with labels or stickers
attached.
The following malfunctions may result from using
such discs:
– Inability to eject a disc (due to a label or sticker
peeling off and jamming the eject mechanism).
– Inability to read audio data correctly (e.g.,
playback skipping, or no playback) due to heat
shrinking of a sticker or label causing a disc to
warp.
• Discs with non-standard shapes (e.g., heart,
square, star) cannot be played on this unit.
Attempting to do so may damage the unit. Do not
use such discs.
• You cannot play 8 cm (3
1
/4 in) CDs.
continue to next page t
11
Page 12

• Before playing, clean the discs
with a commercially available
cleaning cloth. Wipe each disc
from the center out. Do not use
solvents such as benzine,
thinner, commercially available
cleaners, or antistatic spray
intended for analog discs.
Notes on CD-R/CD-RW discs
• Some CD-Rs/CD-RWs (depending on the
equipment used for its recording or the condition
of the disc) may not play on this unit.
• You cannot play a CD-R/a CD-RW that is not
finalized.
Playback order of MP3/WMA files
MP3/WMA
Folder
(album)
MP3/WMA file
(track)
Music discs encoded with copyright
protection technologies
This product is designed to play back discs that
conform to the Compact Disc (CD) standard.
Recently, various music discs encoded with
copyright protection technologies are marketed by
some record companies. Please be aware that among
those discs, there are some that do not conform to
the CD standard and may not be playable by this
product.
Note on DualDiscs
A DualDisc is a two sided disc product which
mates DVD recorded material on one side with
digital audio material on the other side. However,
since the audio material side does not conform to
the Compact Disc (CD) standard, playback on this
product is not guaranteed.
About MP3/WMA files
MP3, which stands for MPEG-1 Audio Layer-3, is a
music file compression format standard. It
compresses audio CD data to approximately 1/10 of
its original size.
WMA, which stands for Windows Media Audio, is
another music file compression format standard. It
compresses audio CD data to approximately 1/22*
of its original size.
* only for 64 kbps
• The unit is compatible with the ISO 9660 level 1/
level 2 format, Joliet/Romeo in the expansion
format, and Multi Session.
• The maximum number of:
– folders (albums): 150 (including root and empty
folders).
– MP3/WMA files (tracks) and folders contained
in a disc: 300 (if a folder/file names contain
many characters, this number may become less
than 300).
– displayable characters for a folder/file name is
32 (Joliet), or 64 (Romeo).
• ID3 tag versions 1.0, 1.1, 2.2, 2.3 and 2.4 apply to
MP3 only. ID3 tag is 15/30 characters (1.0 and
1.1), or 63/126 characters (2.2, 2.3 and 2.4).
WMA tag is 63 characters.
12
Notes
• When naming an MP3 file/WMA file, be sure to add
the file extension “.mp3”/“.wma” to the file name.
• During playback of a VBR (variable bit rate) MP3/
WMA file or fast-forward/reverse, elapsed playing
time may not display accurately.
• When the disc is recorded in Multi Session, only the
first track of the first session format is recognized
and played (any other format is skipped). The
priority of the format is CD-DA and MP3/WMA.
– When the first track is a CD-DA, only CD-DA of the
first session is played.
– When the first track is not a CD-DA, an MP3/WMA
session is played. If the disc has no data in any of
these formats, “NO MUSIC” is displayed.
Notes on MP3
• Be sure to finalize the disc before using on the unit.
• If you play a high-bit-rate MP3, such as 320 kbps,
sound may be intermittent.
Notes on WMA
• Files made with lossless compression are not
playable.
• Files protected by copyright are not playable.
If you have any questions or problems concerning
your unit that are not covered in this manual, consult
your nearest Sony dealer.
Maintenance
Fuse replacement
When replacing the fuse, be
sure to use one matching the
amperage rating stated on the
original fuse. If the fuse blows,
check the power connection and
replace the fuse. If the fuse
blows again after replacement,
there may be an internal
malfunction. In such a case,
consult your nearest Sony
dealer.
Fuse (10A)
Page 13

Cleaning the connectors
The unit may not function properly if the connectors
between the unit and the front panel are not clean. In
order to prevent this, detach the front panel (page 4)
and clean the connectors with a cotton swab. Do not
apply too much force. Otherwise, the connectors
may be damaged.
2 Remove the unit.
1 Insert both release keys simultaneously
until they click.
Hook facing
inwards.
Main unit
Notes
• For safety, turn off the ignition before cleaning the
connectors, and remove the key from the ignition
switch.
• Never touch the connectors directly with your fingers
or with any metal device.
Back of the front
panel
Removing the unit
1 Remove the protection collar.
1 Detach the front panel (page 4).
2 Engage the release keys together with the
protection collar.
Orient the release
keys as shown.
3 Pull out the release keys to remove the
protection collar.
2 Pull the release keys to unseat the unit.
3 Slide the unit out of the mounting.
Specifications
CD Player section
Signal-to-noise ratio: 95 dB
Frequency response: 10 – 20,000 Hz
Wow and flutter: Below measurable limit
Tuner section
FM
Tuning range: 87.5 – 108.0 MHz
Antenna (aerial) terminal:
External antenna (aerial) connector
Intermediate frequency: 10.7 MHz/450 kHz
Usable sensitivity: 9 dBf
Selectivity: 75 dB at 400 kHz
Signal-to-noise ratio: 67 dB (stereo), 69 dB (mono)
Harmonic distortion at 1 kHz: 0.5 % (stereo),
0.3 % (mono)
Separation: 35 dB at 1 kHz
Frequency response: 30 – 15,000 Hz
MW/LW
Tuning range:
MW: 531 – 1,602 kHz
LW: 153 – 279 kHz
Antenna (aerial) terminal:
External antenna (aerial) connector
Intermediate frequency: 10.7 MHz/450 kHz
Sensitivity: MW: 30 µV, LW: 40 µV
continue to next page t
13
Page 14

Power amplifier section
Outputs: Speaker outputs (sure seal connectors)
Speaker impedance: 4 – 8 ohms
Maximum power output: 45 W × 4 (at 4 ohms)
General
Output:
Power antenna (aerial) relay control terminal
Inputs:
Telephone ATT control terminal
Antenna (aerial) input terminal
AUX input jack (stereo mini jack)
Tone controls:
Low: ±10 dB at 100 Hz
High: ±10 dB at 10 kHz
Loudness:
+9 dB at 100 Hz
+5 dB at 10 kHz
Power requirements: 12 V DC car battery
(negative ground (earth))
Dimensions: Approx. 178 × 50 × 179 mm
(7 1/8 × 2 × 7 1/8 in) (w/h/d)
Mounting dimensions: Approx. 182 × 53 × 162 mm
(7
1/4 × 2 1/8 × 6 1/2 in) (w/h/d)
Mass: Approx. 1.2 kg (2 lb 11 oz)
Supplied accessory:
Parts for installation and connections (1 set)
MPEG Layer-3 audio coding technology and
patents licensed from Fraunhofer IIS and Thomson.
Design and specifications are subject to change
without notice.
Troubleshooting
The following checklist will help you remedy
problems you may encounter with your unit.
Before going through the checklist below, check the
connection and operating procedures.
General
No power is being supplied to the unit.
Check the connection. If everything is in order, check
the fuse.
The power antenna (aerial) does not extend.
The power antenna (aerial) does not have a relay box.
No sound.
• The volume is too low.
• The position of the fader control “FAD” is not set for
a 2-speaker system.
No beep sound.
The beep sound is canceled (page 10).
The contents of the memory have been erased.
• The power supply lead or battery has been
disconnected.
• The power supply lead is not connected properly.
Stored stations and correct time are erased.
The fuse has blown.
Makes noise when the position of the ignition
is switched.
The leads are not matched correctly with the car’s
accessory power connector.
The display disappears from/does not appear
in the display window.
• The dimmer is set “DIM-ON” (page 10).
• The display disappears if you press and hold (OFF).
t Press and hold (OFF) on the unit until the
display appears.
• The connectors are dirty (page 13).
The Auto Off function does not operate.
The unit is turned on. The Auto Off function activates
after turning off the unit.
t Turn off the unit.
CD playback
The disc cannot be loaded.
• Another disc is already loaded.
• The disc has been forcibly inserted upside down or in
the wrong way.
The disc does not playback.
• Defective or dirty disc.
• The CD-Rs/CD-RWs are not for audio use (page 12).
MP3/WMA files cannot be played back.
The disc is incompatible with the MP3/WMA format
and version (page 12).
MP3/WMA files take longer to play back than
others.
The following discs take a longer time to start
playback.
– a disc recorded with a complicated tree structure.
– a disc recorded in Multi Session.
– a disc to which data can be added.
The display items do not scroll.
• For discs with very many characters, those may not
scroll.
• “A.SCRL” is set to “OFF”.
t Set “A.SCRL-ON” (page 10).
The sound skips.
• Installation is not correct.
t Install the unit at an angle of less than 45° in a
sturdy part of the car.
• Defective or dirty disc.
The disc will not eject.
Press Z (eject) (page 6).
14
Page 15

Radio reception
The stations cannot be received.
The sound is hampered by noises.
• Connect a power antenna (aerial) control lead (blue)
or accessory power supply lead (red) to the power
supply lead of a car’s antenna (aerial) booster (only
when your car has built-in FM/MW/LW antenna
(aerial) in the rear/side glass).
• Check the connection of the car antenna (aerial).
• The auto antenna (aerial) will not go up.
t Check the connection of the power antenna
(aerial) control lead.
• Check the frequency.
Preset tuning is not possible.
• Store the correct frequency in the memory.
• The broadcast signal is too weak.
Automatic tuning is not possible.
• Setting of the local seek mode is not correct.
t Tuning stops too frequently:
Set “LOCAL-ON” (page 10).
t Tuning does not stop at a station:
Set “MONO-ON” (page 10).
• The broadcast signal is too weak.
t Perform manual tuning.
During FM reception, the “ST” indication
flashes.
• Tune in the frequency accurately.
• The broadcast signal is too weak.
t Set “MONO-ON” (page 10).
An FM program broadcast in stereo is heard in
monaural.
The unit is in monaural reception mode.
t Set “MONO-OFF” (page 10).
RDS
The SEEK starts after a few seconds of
listening.
The station is non-TP or has weak signal.
t Deactivate TA (page 8).
No traffic announcements.
• Activate TA (page 8).
• The station does not broadcast any traffic
announcements despite being TP.
t Tune in another station.
PTY displays “- - - - - - - -.”
• The current station is not an RDS station.
• RDS data has not been received.
• The station does not specify the program type.
Error displays/Messages
FAILURE
The connection of speakers is incorrect.
t See the installation guide manual of this model to
check the connection.
L. SEEK +/–
The local seek mode is on during automatic tuning.
NO AF
There is no alternative frequency for the current
station.
t Press (SEEK) –/+ while the program service name
is flashing. The unit starts searching for another
frequency with the same PI (Program
Identification) data (“PI SEEK” appears).
NO INFO
Text information is not written in the MP3/WMA file.
NO MUSIC
The disc is not a music file.
t Insert a music CD.
NO NAME
An album/track name is not written in the track.
NO TP
The unit will continue searching for available TP
stations.
OFFSET
There may be an internal malfunction.
t Check the connection. If the error indication
remains on in the display, consult your nearest
Sony dealer.
READ
The unit is reading all track and album information on
the disc.
t Wait until reading is complete and playback starts
automatically. Depending on the disc structure, it
may take more than a minute.
PUSH EJT
The disc cannot be ejected.
t Press Z (eject) (page 6).
“ ” or “ ”
During reverse or fast-forward, you have reached the
beginning or the end of the disc and you cannot go any
further.
“ ”
The character cannot be displayed with the unit.
If these solutions do not help improve the situation,
consult your nearest Sony dealer.
If you take the unit to be repaired because of CD
playback trouble, bring the disc that was used at the
time the problem began.
ERROR
• The disc is dirty or inserted upside down.
t Clean or insert the disc correctly.
• A blank disc has been inserted.
• The disc cannot play due to a problem.
t Insert another disc.
15
Page 16

Проигрыватель компактдисков с диапазоном
FM/MW/LW
Сделано в Таиланде
Внимание. Если в замке зажигания
нет положения ACC
Убедитесь, что настроена функция
автоматического выключения (стр. 11).
После выключения устройства его
питание будет автоматически
отключено в установленное время, что
предотвращает разрядку аккумулятора.
Если функция автоматического
выключения не задана, то при каждом
выключении зажигания нажмите и
удерживайте кнопку (OFF) до тех пор,
пока дисплей не погаснет.
2
Page 17

Содержание
Поздравляем с покупкой! . . . . . . . . . . . . . . 4
Начало работы
Установка часов . . . . . . . . . . . . . . . . . . . . . . 4
Снятие передней панели . . . . . . . . . . . . . . . 4
Установка передней панели . . . . . . . . . . 5
Расположение органов
управления и основные
операции
Основное устройство. . . . . . . . . . . . . . . . 6
Компакт-диск
Индикация на дисплее . . . . . . . . . . . . . . . 7
Повторное воспроизведение и
воспроизведение в случайной
последовательности . . . . . . . . . . . . . . . . . 7
Радиоприемник
Сохранение и прием радиостанций . . . . . . 7
Автоматическое сохранение
— BTM (Память оптимальной
настройки) . . . . . . . . . . . . . . . . . . . . . . . . . 7
Сохранение вручную . . . . . . . . . . . . . . . . 7
Прием радиостанций, сохраненных в
памяти . . . . . . . . . . . . . . . . . . . . . . . . . . . . . 8
Автоматическая настройка . . . . . . . . . . 8
RDS . . . . . . . . . . . . . . . . . . . . . . . . . . . . . . . . . 8
Обзор. . . . . . . . . . . . . . . . . . . . . . . . . . . . . . 8
Настройка AF и TA . . . . . . . . . . . . . . . . . 8
Выбор PTY. . . . . . . . . . . . . . . . . . . . . . . . . 9
Установка CT . . . . . . . . . . . . . . . . . . . . . 10
Другие функции
Изменение настроек звука . . . . . . . . . . . . 10
Настройка баланса и фейдера
— BAL/FAD . . . . . . . . . . . . . . . . . . . . . . 10
Настройка кривой эквалайзера
— EQ lite . . . . . . . . . . . . . . . . . . . . . . . . . 10
Настройка параметров установки
— SET . . . . . . . . . . . . . . . . . . . . . . . . . . . . . . 11
Использование дополнительного
оборудования. . . . . . . . . . . . . . . . . . . . . . . . 12
Вспомогательное
аудиооборудование . . . . . . . . . . . . . . . . 12
Дополнительная информация
Меры предосторожности . . . . . . . . . . . . . 13
Примечания относительно дисков . . . 13
О файлах MP3/WMA . . . . . . . . . . . . . . 14
Уход за устройством . . . . . . . . . . . . . . . . . 15
Извлечение устройства . . . . . . . . . . . . . . . 15
Технические характеристики. . . . . . . . . . 16
Поиск и устранение неисправностей . . . 16
Индикация/сообщения об
ошибках . . . . . . . . . . . . . . задняя крышка
3
Page 18

Поздравляем с покупкой!
Начало работы
Благодарим за приобретение данного
проигрывателя компакт-дисков Sony. В
поездке можно использовать следующие
функции проигрывателя.
• Воспроизведение компакт-дисков
Можно воспроизводить диски CD-DA
(содержащие также информацию CD
TEXT*) и CD-R/CD-RW (с файлами
MP3/WMA и диски в формате Multi
Session (
• Прием радиостанций
– Можно хранить в памяти до 6 станций в
– BTM (Память оптимальной настройки):
• Услуги RDS
– Можно использовать FM-станцию с
• Настройка звучания
– EQ lite: можно выбрать любую из 6
• Подключение дополнительного
оборудования
Входное гнездо AUX на передней панели
проигрывателя позволяет подсоединять
переносное аудиоустройство.
* Диск с CD TEXT - это компакт-диск CD-DA,
содержащий такую информацию, как название
диска, имя исполнителя и название дорожки.
стр. 14)).
Ти п д и ск а Метка на диске
CD-DA
MP3
WMA
каждом диапазоне (FM1, FM2, FM3,
MW и LW).
устройство выбирает радиостанции с
наиболее сильным сигналом и
сохраняет их в памяти.
услугой системы радиоданных (RDS).
предварительно настроенных кривых
эквалайзера.
Установка часов
Часы данного устройства имеют 24часовую индикацию.
1 Нажмите и удерживайте кнопку
выбора.
Отобразится дисплей установок.
2 Нажимайте кнопку выбора, пока не
появится индикация “CLOCK-ADJ”.
3 Нажмите кнопку (SEEK) +.
Замигает индикация часа.
4 Поверните регулятор громкости
для установки значения часов и
минут.
Чтобы переместить индикацию,
нажмите кнопку (SEEK) –/+.
5 Нажмите кнопку выбора.
Установка завершена, и часы начинают
отсчет времени.
Чтобы отобразить часы, нажмите кнопку
(DSPL). Нажмите кнопку (DSPL ) еще раз,
чтобы вернуться к предыдущей индикации
дисплея.
Совет
Время можно установить автоматически с
помощью функции RDS (
стр. 10 ).
Снятие передней панели
Во избежание кражи устройства можно
снять с него переднюю панель.
Предупреждающий сигнал
Если до поворота ключа зажигания в
положение OFF с устройства не была
снята передняя панель, то в течение
нескольких секунд будет слышен
предупредительный звуковой сигнал.
Звуковой сигнал будет слышен только в
том случае, если используется встроенный
усилитель.
1 Нажмите кнопку (OFF).
Устройство выключится.
2 Нажмите кнопку , затем снимите
панель, потянув на себя.
4
Page 19

Примечания
• Старайтесь не ронять переднюю панель. Не
надавливайте слишком сильно на переднюю
панель и окошко дисплея.
• Не подвергайте переднюю панель воздействию
тепла/высокой температуры или влажности.
Старайтесь не оставлять его в припаркованной
машине или на приборной доске/полочке за
задним сиденьем.
Установка передней панели
Прикрепите часть A передней панели к
части B устройства, как показано на
рисунке, и установите левую сторону на
место до щелчка.
A
B
Примечание
Не ставьте ничего на внутреннюю поверхность
передней панели.
5
Page 20

Расположение органов управления и основные операции
1
2
4 5 8673
Основное устройство
OFF
PUSH SELECT
SEEK
EQ
SOURCE
SEEK
AUX
PTY
MODE
qa qsq;9
Подробную информацию см. на
указанных страницах.
A Кнопка OFF
Выключение питания; остановка
источника.
B Кнопка EQ (эквалайзер) 10
Выбор типа эквалайзера (XPLOD,
NATURAL, HARD, UPBEAT,
VOCAL, CUSTOM или OFF).
C Регулятор громкости/кнопка
выбора
Настройка громкости (поверните);
выбор элементов настройки (нажмите
и поверните).
D Кнопка SOURCE
Включение питания, смена источника
(радиоприемник/компакт-диск/AUX).
E Слот для дисков
Вставка диска (этикеткой вверх).
Воспроизведение начнется
автоматически.
F Окошко дисплея
G Входное гнездо AUX 12
Для подсоединения переносного
аудиоустройства.
H Кнопка Z (извлечение)
Извлечение диска.
I Кнопка для снятия передней
панели 4
J Кнопка PTY (тип программы) 9
Выбор функции PTY в системе RDS.
K Кнопки SEEK –/+
Компакт-диск:
пропуск композиций (нажмите);
непрерывный пропуск композиций
(нажмите, затем нажмите еще раз
6
примерно через 1 секунду и
10
ALBMDIM REP SHUF
123456
qd qgqf
удерживайте нажатой); перемещение
вперед/назад на одну композицию
(нажмите и удерживайте).
Радиоприемник:
автоматическая настройка на
радиостанции (нажмите); поиск
станций вручную (нажмите и
удерживайте).
L Кнопка MODE 7
Выбор радиодиапазона (FM/MW/LW).
M Кнопка DSPL (дисплей)/DIM
(диммер)
Смена индикаций на дисплее
(нажмите); изменение яркости дисплея
(нажмите и удерживайте).
N Номерные кнопки
Компакт-диск:
(1)/(2): ALBM –/+*
(3): REP 7
(4): SHUF 7
(6): PAU SE
Радиоприемник:
Прием хранящихся в памяти
радиостанций (нажмите); сохранение
радиостанций в памяти (нажмите и
удерживайте).
O Кнопка AF (альтернативные
частоты)/TA (сообщения о текущей
ситуации на дорогах)
Установка функций AF и TA в системе
RDS.
*
Если воспроизводится диск в формате MP3/WMA.
PAUSE
AF
/
TADSPL
CDX-GT217
7, 8
Пропуск альбомов (нажмите);
непрерывный пропуск альбомов
(нажмите и удерживайте).
Приостановка воспроизведения.
Чтобы возобновить
воспроизведение, нажмите кнопку
еще раз.
8
Page 21

Компакт-диск
Радиоприемник
Индикация на дисплее
Номер композиции/время с начала
воспроизведения, название диска/имя
исполнителя, номер альбома*
альбома, название композиции,
текстовая информация*
*1 Номер альбома отображается только при
смене альбома.
*2 При воспроизведении файла MP3
отображается тег ID3, а при воспроизведении
файла WMA отображается тег WMA.
Для смены индикаций нажмите кнопку
(DSPL); чтобы прокрутить индикации,
установите параметр “A.SCRL-ON”
(
стр. 11).
Совет
Отображаемая индикация будет отличаться в
зависимости от типа диска, формата записи и
параметров. Для получения дополнительных
сведений о дисках MP3/WMA см.
2
, часы
1
, название
стр. 14.
Повторное воспроизведение и
воспроизведение в случайной
последовательности
1 Во время воспроизведения
нажимайте кнопку (3) (REP) или
(4) (SHUF), пока на дисплее не
появится нужный параметр.
Выбор Воспроизведение
TRACK композиции
неоднократно.
ALBUM* альбома
неоднократно.
SHUF ALBUM* альбома в случайной
последовательности.
SHUF DISC диска в случайной
последовательности.
* Если воспроизводится диск в формате MP3/
WMA.
Чтобы вернуться в режим обычного
воспроизведения, выберите “
“SHUF OFF”.
OFF” или
Сохранение и прием
радиостанций
Предупреждение
Во избежание возникновения аварийной
ситуации при настройке на радиостанции
во время управления автомобилем
используйте функцию памяти
оптимальной настройки (BTM).
Автоматическое сохранение
— BTM (Память оптимальной
настройки)
1 Нажимайте кнопку (SOURCE), пока
не появится индикация “TUNER”.
Чтобы изменить диапазон, нажимайте
кнопку (MODE). Можно выбрать
следующие диапазоны: FM1, FM2, FM3,
MW или LW.
2 Нажмите и удерживайте кнопку
выбора.
Отобразится дисплей установок.
3 Нажимайте кнопку выбора, пока не
появится индикация “BTM”.
4 Нажмите кнопку (SEEK) +.
Радиостанции закрепляются за
номерными кнопками и сохраняются в
памяти устройства в порядке частот.
При занесении станции в память
раздается звуковой сигнал.
Сохранение вручную
1 Во время приема радиостанции,
которую необходимо сохранить,
нажмите и удерживайте номерную
кнопку ((1) - (6)), пока не появится
индикация “MEMORY”.
На дисплее отображается индикация,
соответствующая номерной кнопке.
Примечание
При попытке сохранить другую радиостанцию для
уже используемой номерной кнопки предыдущая
радиостанция будет заменена.
Совет
Когда в память сохраняется радиостанция,
передающая сигналы RDS, сохраняются также и
параметры AF/TA (
продолжение на следующей странице
стр. 8).
t
7
Page 22

Прием радиостанций,
сохраненных в памяти
1 Выберите диапазон, затем нажмите
номерную кнопку ((1) - (6)).
Автоматическая настройка
1 Выберите диапазон, затем нажмите
кнопку (SEEK)
радиостанции.
Поиск остановится, когда устройство
найдет радиостанцию. Повторяйте
процедуру, пока не будет найдена
нужная радиостанция.
Совет
Если известна частота радиостанции, которую
требуется прослушать, нажмите и удерживайте
кнопку (SEEK)
частота, затем нажимайте кнопку (SEEK)
точной настройки частоты (настройка вручную).
–/+ для поиска
–/+, пока не будет найдена нужная
–/+ для
RDS
Обзор
Радиостанции диапазона FM с услугой
системы радиоданных (RDS) передают,
кроме обычных сигналов радиопрограмм,
неслышимую цифровую информацию.
Индикации
BA
A Частота*1 (название программной
услуги), программная позиция, часы,
данные RDS
B TA/ TP *
*1 Во время приема радиостанции, передающей
сигналы RDS, слева от индикации частоты
отображается знак “*”.
*2 Во время передачи информации о дорожном
движении мигает индикация “TA”. Во время
приема такой радиостанции загорается
индикация “TP”.
Для смены индикаций A нажмите кнопку
(DSPL).
2
Услуги RDS
Это устройство автоматически
обеспечивает использование следующих
служб RDS.
AF (Альтернативные частоты)
Выбирает и выполняет перенастройку
радиостанций, имеющих самый сильный
сигнал в сети. С помощью этой функции
можно непрерывно прослушивать одну и
ту же программу во время
продолжительной поездки. При этом нет
необходимости выполнять
перенастройку на одну и ту же станцию
вручную.
TA (Сообщения о текущей ситуации на
дорогах)/TP (Программа о текущей
ситуации на дорогах)
Обеспечивает прием текущей
информации/программ. При приеме
сигналов такой информации/программы
прием любого выбранного в данный
момент источника прерывается.
PTY (Типы программ)
Отображает тип принимаемой в данный
момент программы. Кроме того,
позволяет выполнять поиск заданного
типа программ.
CT (Время на часах)
Данные CT, передаваемые с сигналами
RDS, используются для установки часов
устройства.
Примечания
• В зависимости от страны или региона могут
быть доступными не все функции RDS.
• Функция RDS не будет работать, если сигнал
очень слабый или радиостанция, на которую
настроено устройство, не передает данные
RDS.
Настройка AF и TA
1 Нажимайте кнопку (AF/TA), пока на
дисплее не появится нужный
параметр.
Выбор Действие
AF-ON Включение AF и
TA -O N Включение TA и
AF, TA-ON Включение как AF, так и
AF, TA-OFF Отключение как AF, так и
отключение TA.
отключение AF.
TA .
TA .
8
Page 23

Сохранение станций RDS с
параметрами AF и TA
Можно выполнить предварительную
настройку станций RDS с параметрами
AF/TA. При использовании функции BTM
сохраняются только станции RDS с теми
же параметрами AF/TA.
При выполнении предварительной
настройки вручную можно сохранить как
станции RDS, так и станции без RDS с
индивидуальными параметрами AF/TA.
1 Задайте AF/TA, затем сохраните
станцию с помощью BTM или вручную.
Предварительная установка
уровня громкости сообщений о
текущей ситуации на дорогах
Можно предварительно установить
уровень громкости сообщений о текущей
ситуации на дорогах, чтобы не пропустить
момент, когда они передаются.
1 Поворачивайте регулятор громкости,
чтобы настроить уровень громкости.
2 Нажмите и удерживайте нажатой
кнопку (AF/TA), пока не появится
индикация “TA”.
Прием сообщений об аварийных
ситуациях
При включении AF или TA сообщения об
аварийных ситуациях будут
автоматически прерывать текущее
вещание.
Прослушивание одной
региональной программы
— REG
Когда функция AF включена: в
соответствии с заводскими настройками
данного устройства прием возможен
только в определенном регионе, поэтому
оно не будет переключено на другую
региональную станцию с более сильной
частотой.
При выезде за пределы области приема
определенной региональной программы
установите параметр “REG-OFF” в меню
настройки во время приема FMрадиостанции (
Примечание
Эта функция не работает в Великобритании и
некоторых других регионах.
стр. 11).
Функция местной привязки
(только для Великобритании)
Эта функция позволяет настраиваться на
волну других местных станций в данном
районе, даже если они не занесены в
память приемника под номерными
кнопками.
1 Во время приема в диапазоне FM
нажмите номерную кнопку ((1) до (6)),
для которой запрограммирована
местная станция.
2 Не более чем через 5 секунд, еще раз
нажмите номерную кнопку местной
станции.
Повторяйте процедуру, пока не будет
найдена местная радиостанция.
Выбор PTY
1 Нажмите кнопку (PTY) во время
приема в диапазоне FM.
Если станция передает данные PTY,
появляется название типа текущей
программы.
2 Нажимайте кнопку (PTY), пока не
появится нужный тип программы.
3 Нажмите кнопку (SEEK) –/+.
Устройство начинает поиск станции,
передающей программу выбранного
типа.
продолжение на следующей странице
t
9
Page 24

Тип программ
NEWS (новости), AFFAIRS (текущие
события), INFO (информация), SPORT
(спорт), EDUCATE (образование),
DRAMA (радиоспектакли), CULTURE
(культура), SCIENCE (наука), VA R IE D
(интервью, игры и комедии), POP
(популярная музыка), ROCK
музыка), EASY
LIGHT
M (легкая классика), CLASSICS
(классика), OTHER
музыки), WEATHER (погода), FINANCE
(финансы), CHILDREN (детские
программы), SOCIAL
жизнь), RELIGION (религия), PHONE
(звонки в прямой эфир), TRAVEL
(путешествия), LEISURE (досуг), JAZZ
(джазовая музыка), COUNTRY (музыка
“кантри”), NATION
музыка), OLDIES (старые шлягеры),
FOLK
M (народная музыка), DOCUMENT
(документальные репортажи)
Примечание
Эту функцию невозможно использовать в
некоторых странах/регионах, где не передаются
данные PTY.
M (легкая музыка),
M (прочие типы
A (общественная
M (национальная
M
M (рок-
IN
Установка CT
1 Установите “CT-ON” в меню
настройки (
Примечания
• Функция CT может не работать, даже если
принимается станция, передающая данные
RDS.
• Возможно расхождение между временем,
установленным с помощью функции CT, и
реальным временем.
стр. 11).
Другие функции
Изменение настроек звука
Настройка баланса и фейдера
— BAL/FAD
1 Нажимайте кнопку выбора, пока не
появится индикация “BAL” или
“FAD”.
Индикация будет меняться следующим
образом:
LOW*1 t HI*1 t
BAL (баланс левого-правого каналов)
t FAD (баланс передних-задних
громкоговорителей) t AUX*
*1 Когда активизирована функция
эквалайзера EQ lite (стр. 10).
*2 Когда активизирован источник AUX
(стр. 12).
2 Поверните регулятор громкости,
чтобы настроить выбранный
параметр.
Через 3 секунды по окончании
настройки дисплей возвращается в
обычный режим воспроизведения/
приема.
Настройка кривой эквалайзера
— EQ lite
Меню “CUSTOM”, появляющееся при
нажатии кнопки EQ lite, позволяет
настроить собственные установки
эквалайзера.
1 Выберите источник, затем, нажимая
кнопку (EQ), выберите меню
“CUSTOM”.
2 Нажимайте кнопку выбора до тех
пор, пока не появится индикация
“LOW” или “HI”.
3 Поверните регулятор громкости,
чтобы настроить выбранный
параметр.
Уровень громкости настраивается в
диапазоне от –10 дБ до +10 дБ с шагом
1
дБ.
2
10
Повторите шаги 2 и 3, чтобы настроить
кривую эквалайзера.
Page 25

Чтобы восстановить заводскую
настройку кривой эквалайзера,
нажмите и удерживайте кнопку выбора
перед завершением настройки.
Через 3 секунды по окончании
настройки дисплей возвращается в
обычный режим воспроизведения/
приема.
Совет
Можно также настроить другие типы
эквалайзера.
Настройка параметров
установки — SET
1 Нажмите и удерживайте кнопку
выбора.
Отобразится дисплей установок.
2 Нажимайте кнопку выбора, пока не
появится нужный параметр.
3 Поворачивайте регулятор
громкости, чтобы выбрать
параметр (например, “ON” или
“OFF”).
4 Нажмите и удерживайте кнопку
выбора.
Установка завершена, и дисплей
возвращается в обычный режим
воспроизведения/приема.
Примечание
Для разных источников и параметров, возможно,
отображаемые элементы будут отличаться.
Можно установить следующие параметры
(дополнительные сведения см. на
указанной странице руководства):
“z” указывает значения по умолчанию.
CLOCK-ADJ (Установка часов) (стр. 4)
CT (Время на часах)
Установка значения “CT-ON” или “CTOFF” (
z) (стр. 8, 10).
BEEP
Используется для установки значения
“BEEP-ON” (
AUX-A*
Используется, чтобы установить для
дисплея источника AUX значение “AUXA-ON” (
z) или “BEEP-OFF”.
1
(AUX Audio)
z) или “AUX-A-OFF” (стр. 12).
A.OFF (Автоматическое выключение)
Для автоматического выключения через
определенный промежуток времени,
когда устройство выключится: “A.OFFNO” (
z), “A.OFF-30S (Секунды),” “A.OFF-
30M (Минуты)” или “A.OFF-60M
(Минуты)”.
1
DEMO*
(Режим демонстрации)
Используется для установки значения
“DEMO-ON” (
z) или “DEMO-OFF”.
DIM (Диммер)
Используется для изменения яркости
дисплея.
– “DIM-ON”: для ослабления яркости
дисплея.
– “DIM-OFF” (
z): для отключения
диммера.
M.DSPL (Движущийся дисплей)
– “M.DSPL-ON” (
z): для отображения
движущихся изображений.
– “M.DSPL-OFF”: для отключения
движущегося дисплея.
A.SCRL (Автоматическая прокрутка)
Используется для автоматической
прокрутки отображаемого элемента при
смене альбома/композиции.
–“A.SCRL-ON” (
z): прокрутка включена.
–“A.SCRL-OFF”: прокрутка отключена.
LOCAL (Режим местного поиска)
– “LOCAL-ON”: настройка только на
станции с сильным сигналом.
–“LOCAL-OFF” (
z): настройка обычного
приема.
MONO (Монофонический режим)*
2
При низком качестве приема FMрадиостанций выберите режим
монофонического приема.
– “MONO-ON”: прослушивание
стереопередач в монофоническом
режиме.
– “MONO-OFF” (
z): прослушивание
стереопередач в стереорежиме.
REG*2 (Региональная)
Используется для установки значения
“REG-ON” (
z) или “REG-OFF” (стр. 9).
LOUD (Громкость)
Используется для обеспечения
слышимости с большей отчетливостью
на низком уровне громкости.
– “LOUD -ON”: для усиления низких и
высоких частот.
– “LOUD -OFF” (
z): для отмены усиления
низких и высоких частот.
BTM (стр. 7)
*1 Когда устройство выключено.
*2 Когда поступает сигнал в диапазоне FM.
11
Page 26

Использование
дополнительного
оборудования
Вспомогательное
аудиооборудование
Подсоединив дополнительное переносное
аудиоустройство к входному гнезду AUX
(мини-стереоразъем) на аппарате, а затем
просто выбрав источник, его можно
прослушивать через громкоговорители
автомобиля. Если уровень громкости у
аппарата и переносного аудиоустройства
различен, его можно настроить.
Выполните процедуру, описанную ниже.
Подсоединение переносного
аудиоустройства
1 Выключите переносное
аудиоустройство.
2 Уменьшите громкость на аппарате.
3 Подключите к аппарату.
AUX
Отрегулируйте уровень громкости
Перед воспроизведением настройте
уровень громкости для каждого
подключенного аудиоустройства.
1 Уменьшите громкость на аппарате.
2 Нажимайте кнопку (SOURCE) до тех
пор, пока не появится индикация “AUX”.
Появится индикация “FRONT IN”.
3 Начните воспроизведение на
переносном аудиоустройстве при
умеренной громкости.
4 Установите обычный уровень
громкости для прослушивания на
аппарате.
5 Нажимайте кнопку выбора, пока не
появится индикация “AUX”, и поверните
регулятор громкости, чтобы настроить
входной уровень (с шагом от –8 дБ до
+18 дБ).
AUX
Соединительный кабель*
(не входит в комплект)
* Обязательно используйте разъем прямого типа.
12
Page 27

Дополнительная
информация
Меры предосторожности
• Если автомобиль был припаркован в
солнечном месте, не включайте устройство
до тех пор, пока оно не охладится.
• При работе устройства автоматически
выдвигается антенна с электрическим
приводом.
Конденсация влаги
В дождливый день или в месте с повышенной
влажностью на линзах или дисплее
устройства может конденсироваться влага.
Это может привести к неправильной работе
устройства. В этом случае извлеките диск и
подождите приблизительно час, пока не
испарится влага.
Для поддержания высокого
качества звука
Будьте осторожны и не проливайте сок или
другие напитки на устройство или диски.
Примечания относительно
дисков
• Чтобы диск оставался чистым, не
прикасайтесь к его поверхности. Диск
следует брать за края.
• Если диски не используются, храните их в
футлярах или в папках для дисков.
• Не подвергайте диски воздействию тепла/
высокой температуры. Старайтесь не
оставлять их в припаркованной машине или
на приборной доске/полочке за задним
сиденьем.
• Не прикрепляйте наклейки и не
используйте диски с остатками чернил или
клея на них. Использование таких дисков
может привести к остановке их вращения,
неправильной работе или повреждению.
• Не используйте диски с ярлыками и
наклейками.
В результате использования таких дисков
могут возникнуть следующие неполадки.
– Невозможность извлечения диска (так
как отклеился ярлык или наклейка, что
привело к затору в механизме извлечения
диска).
– Невозможность правильного чтения
аудиоданных (например, скачки при
воспроизведении или отсутствие
воспроизведения) из-за того, что ярлык
или наклейка деформировались от тепла,
что привело к перекосу диска.
• Диски нестандартной формы (например, в
форме сердца, квадрата, звезды) нельзя
воспроизводить на этом устройстве. В
противном случае это может привести к
повреждению устройства. Не пользуйтесь
такими дисками.
• Нельзя воспроизводить компакт-диски
диаметром 8 см.
• Перед воспроизведением
протрите компакт-диск
имеющейся в продаже
чистящей тканью.
Протирайте компакт-диск
в направлении от центра к
краям. Не пользуйтесь
растворителями, такими
как бензин, растворитель, а
также имеющимися в продаже чистящими
средствами или антистатическими
аэрозолями, предназначенными для
виниловых пластинок.
Примечания относительно дисков
CD-R/CD-RW
• Некоторые диски CD-R/CD-RW
(в зависимости от оборудования, на
котором выполнялась запись, или
состояния самого диска) могут не
воспроизводиться на данном устройстве.
• Нельзя воспроизвести незакрытый диск
CD-R/CD-RW.
Музыкальные диски,
закодированные с помощью
технологий защиты авторских
прав
Этот продукт предназначен для
воспроизведения дисков, отвечающих
требованиям стандарта Compact Disc (CD).
В последнее время некоторые фирмы
звукозаписи выпускают музыкальные диски,
закодированные с использованием
технологии защиты авторского права.
Помните, что некоторые из таких дисков не
отвечают требованиям стандарта CD и их
нельзя воспроизводить с помощью данного
устройства.
продолжение на следующей странице
t
13
Page 28

О файлах MP3/WMA
MP3 является сокращением от MPEG-1
Audio Layer-3 и представляет собой стандарт
формата сжатия музыкальных файлов. Этот
формат обеспечивает сжатие данных
музыкальных компакт-дисков
приблизительно до 1/10 исходного размера.
WMA является сокращением от Windows
Media Audio и представляет собой еще один
стандарт формата сжатия музыкальных
файлов. Этот формат обеспечивает сжатие
данных музыкальных компакт-дисков
приблизительно до 1/22* исходного размера.
* только для 64 Кбит/с
• Это устройство совместимо с форматом
ISO 9660 уровень 1/уровень 2,
расширенным форматом Joliet/Romeo, а
также с форматом Multi Session.
• Максимальное количество:
– папок (альбомов): 150 (включая корневую
и пустые папки).
– файлов MP3/WMA (композиций) и папок,
содержащихся на диске: 30 0 (если
названия папок/файлов состоят из
большого числа символов, это количество
может стать менее 300).
– отображаемых символов в названии
папки/файла: 32 (Joliet) или 64 (Romeo).
• Тег ID3 версий 1.0, 1.1, 2.2, 2.3 и 2.4
применим только к MP3. В теге ID3: 15/30
символов (1.0 и 1.1) или 63/126 символов
(2.2, 2.3 и 2.4). В теге WMA 63 символа.
Порядок воспроизведения
файлов MP3/WMA
MP3/WMA
Примечания
• При указании имени файла MP3/WMA не
забудьте добавить к нему расширение “.mp3” /
“.wma”.
• При воспроизведении или перемещении
вперед/назад файла MP3/WMA с переменной
скоростью передачи в битах (VBR) прошедшее
время воспроизведения может отображаться
неточно.
• Если диск записан в формате Multi Session,
будет распознан формат только первой
композиции первой сессии, и будут
воспроизводиться композиции только этого
формата (все другие форматы
воспроизводиться не будут). Форматы имеют
следующий приоритет: CD-DA и MP3/WMA.
– Если первая композиция записана в формате
CD-DA, то будут воспроизводиться композиции
первой сессии, имеющие только формат CDDA.
– Если первая композиция имеет формат,
отличный от CD-DA, будут воспроизводиться
композиции формата MP3/WMA. Если на диске
отсутствуют данные в этих форматах, на
дисплее появится индикация “NO MUSIC”.
Примечания относительно файлов MP3
• Обязательно закройте диск перед
использованием в устройстве.
• При воспроизведении файла MP3 с высокой
скоростью передачи бит, например 320 кбит/с,
звучание может быть прерывистым.
Примечания относительно файлов WMA
• Файлы, созданные с помощью сжатия без
потерь, не воспроизводятся.
• Файлы, защищенные авторским правом, не
воспроизводятся.
В случае возникновения вопросов или
проблем, касающихся данного устройства,
которые не описаны в данном руководстве,
обратитесь к ближайшему дилеру Sony.
Папка
(альбом)
Файл MP3/
WMA
(композиция)
14
Page 29

Уход за устройством
Извлечение устройства
Замена
предохранителя
При замене
предохранителей
обязательно используйте
только те, которые
соответствуют силе тока,
указанной на изначально
установленном
предохранителе. Если
перегорел предохранитель,
проверьте подключение
питания и замените предохранитель. Если
после замены предохранитель снова
перегорел, это может означать
неисправность устройства. В этом случае
обратитесь к ближайшему дилеру Sony.
Предохранитель
(10 А)
Чистка контактов
Возможно, устройство не будет работать
надлежащим образом из-за загрязнения
контактов, служащих для соединения
передней панели с устройством. Во
избежание этого отсоедините переднюю
панель (стр. 4) и протрите контакты ватным
тампоном. Не прикладывайте излишних
усилий. В противном случае можно
повредить контакты.
1 Снимите защитную манжету.
1 Снимите переднюю панель (стр. 4).
2 Чтобы снять защитные манжеты,
используйте ключи для демонтажа.
Установите ключи для демонтажа,
как показано на рисунке.
3 Потяните на себя ключи для
демонтажа, чтобы снять защитную
манжету.
2 Извлеките устройство.
1 Вставьте одновременно оба ключа
для демонтажа до щелчка.
Крючком
внутрь.
Основное
устройство
Примечания
• В целях безопасности перед чисткой контактов
выключите зажигание и выньте ключ из замка
зажигания.
• Никогда не прикасайтесь к контактам пальцами
или металлическими предметами.
Обратная сторона
передней панели
2 Потяните ключи для демонтажа,
чтобы извлечь устройство.
3 Выдвиньте устройство из монтажной
панели.
продолжение на следующей странице
t
15
Page 30

Технические характеристики
Проигрыватель компакт-дисков
Отношение “сигнал-шум”: 95 дБ
Диапазон воспроизводимых частот:
10 – 20000 Гц
Низкочастотная и высокочастотная детонация:
ниже уровня обнаружения
Тюнер
FM
Диапазон настройки: 87,5 – 108,0 МГц
Антенное гнездо:
разъем внешней антенны
Промежуточная частота: 10,7 МГц/450 кГц
Используемая чувствительность: 9 дБф
Избирательность: 75 дБ при 400 кГц
Отношение “сигнал-шум”: 67 дБ (стерео),
69 дБ (моно)
Коэффициент гармонических искажений при
1 кГц: 0,5 % (стерео), 0,3 % (моно)
Разделение: 35 дБ при 1 кГц
Диапазон воспроизводимых частот:
30 – 15000 Гц
MW/LW
Диапазон настройки:
MW: 531 – 1602 кГц
LW: 153 – 279 кГц
Антенное гнездо:
разъем внешней антенны
Промежуточная частота: 10,7 МГц/450 кГц
Чувствительность: MW: 30 мкВ, LW: 40 мкВ
Усилитель мощности
Выходы: выходы громкоговорителей
(с соединительными фиксаторами)
Полное сопротивление громкоговорителей:
4 – 8 Ом
Максимальная выходная мощность:
45 Вт × 4 (при 4 Ом)
Общая информация
Выходы:
терминал релейного управления антенной с
электрическим приводом
Входы:
терминал управления функцией Telephone
AT T
входной разъем антенны
входное гнездо AUX (мини-стереоразъем)
Регуляторы тембра:
низкие: ±10 дБ при 100 Гц
высокие: ±10 дБ при 10 кГц
Громкость:
+9 дБ при 100 Гц
+5 дБ при 10 кГц
Требования к источнику питания:
автомобильный аккумулятор 12 В пост.
тока (с отрицательным заземлением)
Раз меры : прибл. 178 × 50 × 179 мм
(ш/в/г)
Монтажные размеры: прибл. 182 × 53 × 162 мм
(ш/в/г)
Масса: прибл. 1,2 кг
16
Прилагаемые принадлежности:
детали для установки и подключений
(1 комплект)
Конструкция и характеристики могут быть
изменены без предварительного уведомления.
Поиск и устранение
неисправностей
Приводимый ниже проверочный перечень
поможет устранить большинство проблем,
которые могут возникнуть при эксплуатации
устройства.
Перед ознакомлением с нижеприведенной
таблицей обратитесь к разделам по
подключению и эксплуатации устройства.
Общая информация
На устройство не подается питание.
Проверьте подключение. Если все соединения
выполнены правильно, проверьте
предохранитель.
Антенна с электрическим приводом не
выдвигается.
В антенне с электрическим приводом
отсутствует реле.
Нет звука.
• Уровень громкости слишком низкий.
• Регулятор фейдера “FAD” не установлен для
системы с 2 громкоговорителями.
Не слышен звуковой сигнал.
Функция звукового сигнала отключена
(стр. 11).
Удалены данные из памяти.
• Отсоединился провод питания, или извлечена
батарейка.
• Плохо подсоединен провод питания.
Из памяти удалены запрограммированные
радиостанции и установка времени.
Перегорел предохранитель.
Слышен шум при переключении положения
ключа зажигания.
Провода неправильно подсоединены к разъему
электропитания вспомогательного
оборудования автомобиля.
Page 31

Пропала/не отображается индикация в
окошке дисплея.
• Для диммера установлено значение “DIMON” (стр. 11).
• Дисплей отключится, если нажать и
удерживать кнопку (OFF).
t Нажмите кнопку (OFF) еще раз и
удерживайте ее нажатой, пока дисплей не
включится.
• Контакты загрязнены (стр. 15).
Функция автоотключения не работает.
Устройство включено. Функция
автоотключения активизируется после
выключения устройства.
t Выключите устройство.
Воспроизведение компакт-дисков
Не удается вставить диск.
• Уже вставлен другой компакт-диск.
• Компакт-диск вставлен с усилием, не той
стороной или неправильно.
Компакт-диск не воспроизводится.
• Диск загрязнен или поврежден.
• Диски CD-R/CD-RW не предназначены для
воспроизведения звука (стр. 13).
Невозможно воспроизвести файлы MP3/
WMA.
Диск не совместим с форматом MP3/WMA и
версией (стр. 14).
Для начала воспроизведения файлов MP3/
WMA требуется больше времени, чем для
других файлов.
Может потребоваться больше времени до
начала воспроизведения следующих дисков.
– диск, записанный с использованием сложной
разветвленной структуры папок.
– диск, записанный в формате Multi Session.
– диск, на который можно добавлять данные.
Не осуществляется прокрутка индикации
на дисплее.
• Информация в виде бегущей строки может не
отображаться для дисков, содержащих
слишком большое количество символов.
• Для “A.SCRL” установлено значение “OFF”.
t Установите значение “A.SCRL-ON”
(стр. 11).
Имеют место провалы звука.
• Неправильная установка.
t Устанавливайте устройство под углом, не
превышающим 45°, в не подверженном
вибрации месте.
• Диск загрязнен или поврежден.
Диск не извлекается.
Нажмите кнопку Z (извлечение) (стр. 6).
Прием радиостанций
Не удается принять радиостанции.
Звук сопровождается помехами.
• Подсоедините провод питания антенны с
электрическим приводом (синий) или провод
питания устройства (красный) к проводу
питания усилителя антенны автомобиля (если
на заднем/боковом стекле имеется встроенная
антенна диапазона FM/MW/LW).
• Проверьте подсоединение автомобильной
антенны.
• Не выдвигается автомобильная антенна.
t Проверьте подсоединение провода
питания антенны с электрическим
приводом.
• Проверьте частоту.
Не удается выполнить предварительную
настройку.
• Сохраните в памяти правильную частоту.
• Передаваемый радиосигнал слишком слаб.
Не удается выполнить автоматическую
настройку.
• Неправильная установка режима местного
поиска.
t Настройка прерывается слишком часто:
Установите параметр “LOCAL-ON”
(стр. 11).
t При настройке пропускается станция:
Установите параметр “MONO-ON”
(стр. 11).
• Передаваемый радиосигнал слишком слаб.
t Выполните настройку вручную.
При приеме FM-радиостанций мигает
индикация “ST”.
• Выполните точную настройку частоты.
• Передаваемый радиосигнал слишком слаб.
t Установите параметр “MONO-ON”
(стр. 11).
Стреопрограммы в диапазоне FM
принимаются как монофонические.
Устройство находится в режиме
монофонического приема радиостанций.
t Установите параметр “MONO-OFF”
(стр. 11).
продолжение на следующей странице
t
17
Page 32

RDS
После нескольких секунд прослушивания
включается функция SEEK.
Станция не передает данные TP или передает
слишком слабый сигнал.
t Отключите TA (стр. 8).
Дорожные сообщения не передаются.
• Включите функцию TA (стр. 8).
• Станция не транслирует дорожных
сообщений, хотя и относится к типу TP.
t Настройтесь на другую станцию.
При включении функции PTY отображается
индикация “- - - - - - - -”.
• Принимаемая станция не передает данные
RDS.
• Данные RDS не принимаются.
• Станция не указывает тип программы.
Индикация/сообщения об
ошибках
ERROR
• Компакт-диск загрязнен или вставлен нижней
стороной вверх.
t Почистите или правильно вставьте
компакт-диск.
• Вставлен пустой диск.
• Диск не воспроизводится по какой-либо
причине.
t Вставьте другой компакт-диск.
FA IL UR E
Громкоговорители подключены неправильно.
t Для проверки подключения см. руководство
по установке.
L. SEEK +/–
Во время автоматической настройки включен
режим местного поиска.
NO AF
Для выбранной в данный момент станции не
используется альтернативная частота.
t Нажмите кнопку (SEEK) –/+, пока мигает
название программной услуги. Устройство
начинает поиск другой частоты с теми же
данными PI (программная идентификация)
(появляется индикация “PI SEEK”).
NO INFO
В файле MP3/WMA не содержится текстовая
информация.
NO MUSIC
Диск не содержит музыкальных файлов.
t Вставьте компакт-диск, содержащий
музыкальные файлы.
NO NAME
В композиции не содержатся названия
альбома/композиции.
NO TP
Устройство продолжит поиск станций,
передающих TP.
OFFSET
Это может означать неисправность устройства.
t Проверьте подключение. Если сообщение
об ошибке не исчезает с дисплея, обратитесь
к ближайшему дилеру Sony.
READ
Устройство считывает с диска всю
информацию о композициях и альбоме.
t Дождитесь завершения процесса
считывания. Воспроизведение начнется
автоматически. В зависимости от структуры
диска, перед началом воспроизведения
может пройти более одной минуты.
PUSH EJT
Невозможно извлечь диск.
t Нажмите кнопку Z (извлечение) (стр. 6).
“ ” или “ ”
Во время перемещения вперед или назад
достигнуто начало или конец диска, и
продолжение невозможно.
“ ”
Устройство не может отобразить такой
символ.
Если в результате предлагаемых действий не
удастся устранить неполадку, обратитесь к
ближайшему дилеру Sony.
Если устройство сдается в ремонт в случае
какой-либо неполадки, возникшей при
воспроизведении компакт-диска, необходимо
иметь при себе компакт-диск, при
воспроизведении которого обнаружилась
неисправность.
http://www.sony.net/
Sony Corporation
Printed in Thailand
 Loading...