

Page 1
Manual de usuario
ES
Manuale d’uso
Manual do utilizador
User guide
Gebrauchsanweisung
IT/MT
PT
GB/MT
DE/AT/CH
ES Las características descritas en este manual pueden ser objeto de futuras
modificaciones.
IT / MT Le caratteristiche descritte nel presente manuale vengono pubblicate con
riserva di modifica.
PT As características descritas neste manual são publicadas sob reserva de
modificação.
GB / MT The features described in this manual are published with reservation to
modifications.
DE / AT / CH Die in dieser Bedienungsanleitung umschriebenen Möglichkeiten werden
vorbehaltlich Änderungen publiziert.
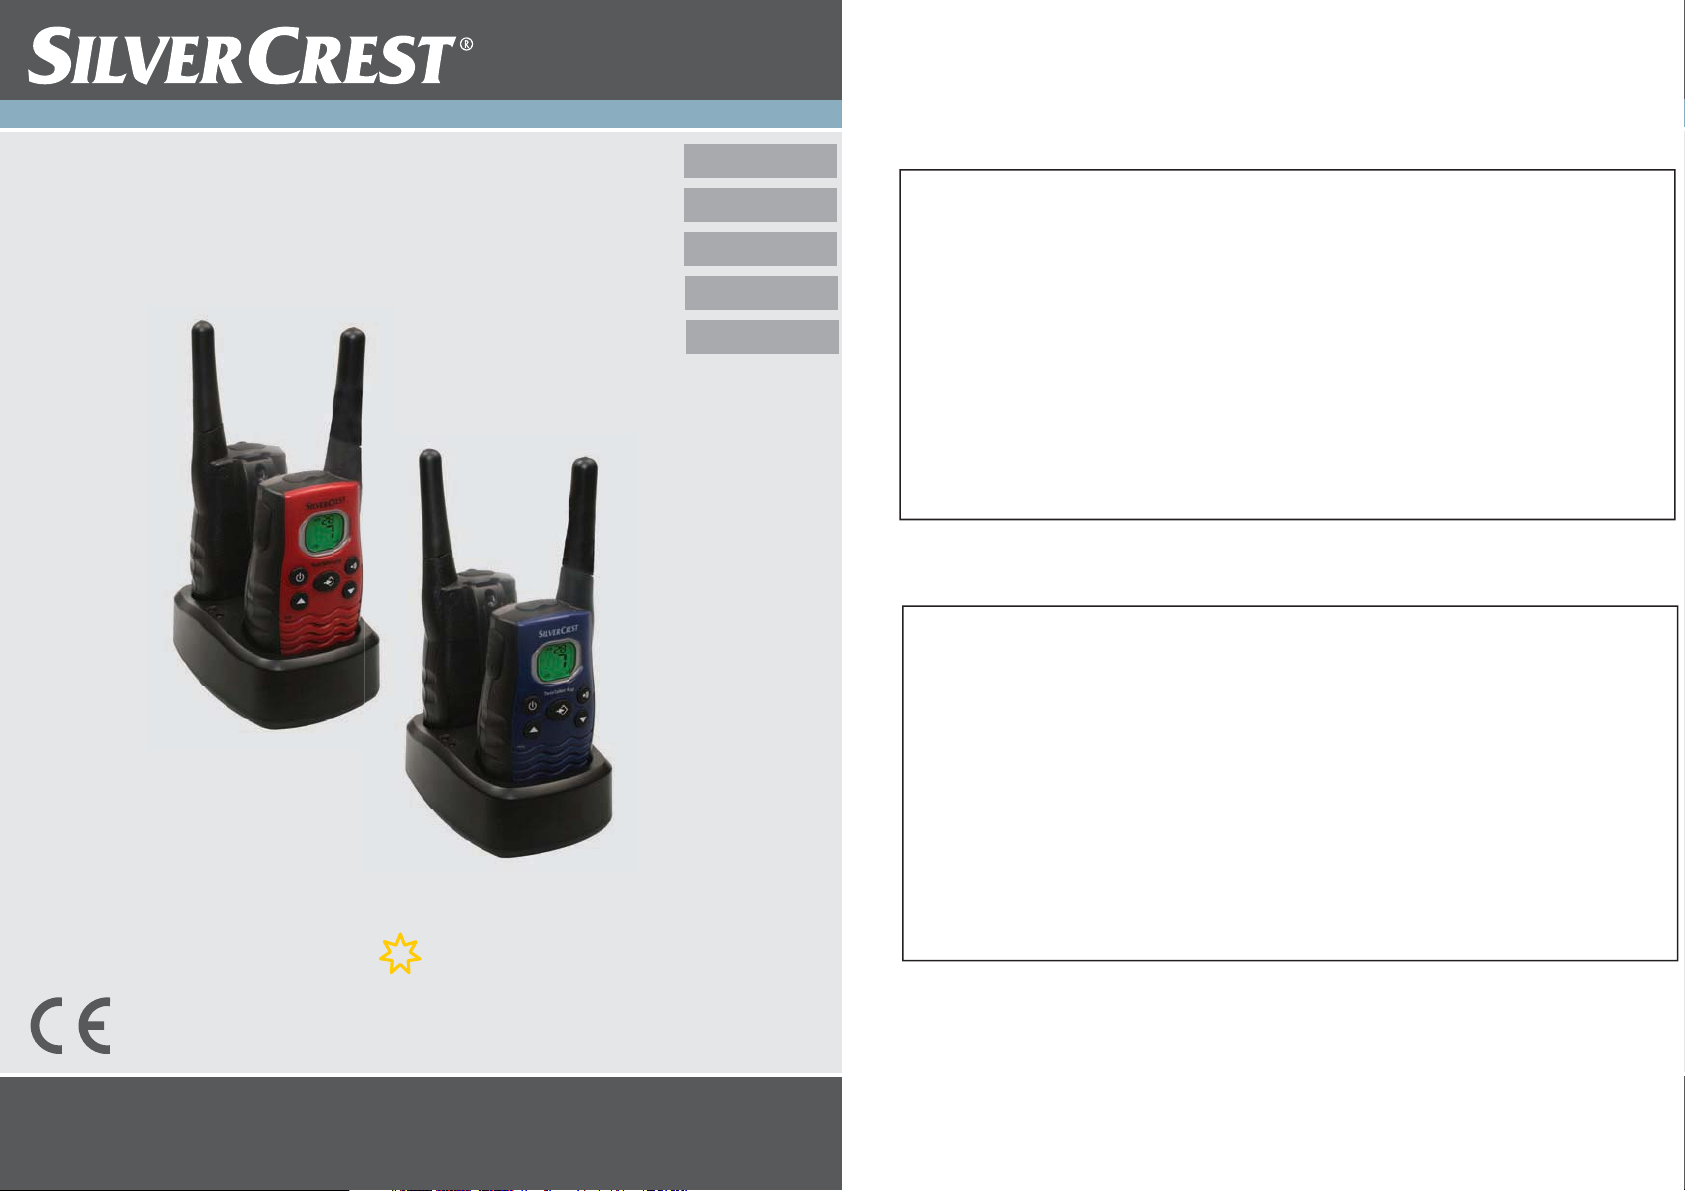
ES El sello CE corrobora la conformidad del equipo con los requerimientos básicos
de la directiva R&TTE.
IT / MT Il simbolo CE indica che l’unità è conforme ai requisiti fondamentali della
direttiva R&TTE.
PT O símbolo CE indica que esta unidade cumpre com os requisitos essenciais
da directiva R&TTE.
TWINTALKER 4810
5
new
GB / MT The CE symbol indicates that the unit complies with the essential requirements
of the R&TTE directive.
DE / AT / CH Die Übereinstimmung des Gerätes mit den grundlegenden Anforderungen der
R&TTE-Directive ist durch das CE-Kennzeichen bestätigt.
V 1.0 - 05/09
Page 2
A
B
3
11
10
9
8
12
2
1
1413
24
23
4
22
15
16
17
18
5
6
192021
7
26
25
C
D
Page 3

Twintalker 4810
1 Introducción 5
2 Finalidad 5
3 Marcado CE 5
4 Instrucciones de seguridad 5
4.1 General 5
4.2 Quemaduras 5
4.3 Lesiones 5
4.4 Riesgo de explosión 5
4.5 Riesgo de envenenamiento 6
4.6 Cuestiones legales 6
4.7 Notas 6
5 Limpieza y mantenimiento 6
6 Eliminación del dispositivo (medio ambiente) 7
7 Uso de un dispositivo PMR 7
8 El paquete incluye: 8
9 Introducción 8
9.1 Retirada e instalación del clip del cinturón 8
9.2 Instalación de las pilas 8
10 Carga de las pilas 9
11 Descripción 10
12 Información de la pantalla LCD 10
13 Uso del Twintalker 4810 10
13.1 Encendido y apagado de la unidad 11
13.2 Nivel de carga de las pilas / Indicación de carga baja 11
13.3 Ajuste del volumen del altavoz 11
13.4 Recepción de una señal 11
13.5 Transmisión de una señal 12
13.6 Cambio de canales 12
13.7 CTCSS (sistema silenciador con código por tono continuo) /
DCS (silenciador con código digital) 12
13.8 Rastreo 13
13.9 Selección de VOX 13
13.10 Barrido de canal 14
13.11 Tonos de llamada 15
13.12 Activación y desactivación del pitido Roger 15
13.13 Activación y desactivación del tono de las teclas 16
13.14 Función de monitor de canal dual 16
13.15 Bloqueo de botones 17
13.16 Función de cronómetro 17
13.17 Retroiluminación de la pantalla 17
ESPAÑOL
Twintalker 4810 3
Page 4

Twintalker 4810
14 Conector de auriculares 17
15 Solución de problemas 18
16 Especificaciones técnicas 18
17 Dirección de servicio técnico y asistencia telefónica 19
18 Declaración de conformidad y fabricante 19
19 Garantía 19
19.1 Período de garantía 19
19.2 Tratamiento de la garantía 20
19.3 Limitaciones de la garantía 20
4 Twintalker 4810
Page 5

Twintalker 4810
1 Introducción
Gracias por adquirir la unidad Twintalker 4810. Se trata de un aparato de radiocomunicación
de baja potencia y largo alcance de máximo 8 km. No tiene más costes de funcionamiento
que los costes mínimos de recarga de las pilas.
El Twintalker funciona en 8 canales.
El Twintalker está protegido contra gotas de agua verticales con una inclinación de la
carcasa de 15° según la norma IPX2.
2 Finalidad
Puede utilizarse con fines recreativos. Por ejemplo: para mantener la comunicación si se
viaja en dos o más coches, si se viaja en bicicleta o si se practica esquí. Puede emplearse
para mantenerse en contacto con los niños mientras juegan en el exterior, etcétera.
3 Marcado CE
El sello CE en la unidad, el manual de usuario y la caja corrobora la conformidad del equipo
con los requerimientos básicos de la directiva R&TTE 1995/5/EC.
4 Instrucciones de seguridad
4.1 General
Lea atentamente la siguiente información de seguridad y uso apropiado. Familiarícese con
todas las funciones del aparato. Guarde este manual en un lugar seguro para futuras
consultas.
ESPAÑOL
4.2 Quemaduras
• No tocar la antena si se daña la tapa; si una antena entra en contacto con la piel durante
una transmisión, puede provocar una pequeña quemadura.
• Las pilas pueden ocasionar daños como quemaduras al contacto de los terminales
expuestos con cualquier material conductor como joyas, llaves o cadenas, ya que el
material puede completar un circuito eléctrico (cortocircuito) y calentarse bastante.
Tenga cuidado al manipular pilas cargadas, sobre todo si las mete con otros objetos
metálicos en un bolsillo, en un bolso o en otro lugar.
4.3 Lesiones
• No colocar el dispositivo en la zona situada sobre un airbag ni en su radio de acción.
Los airbags se inflan con mucha fuerza. Si se coloca un PMR en el radio de acción de
un airbag y éste se infla, el comunicador puede salir propulsado con gran fuerza y
causar lesiones graves a los ocupantes del vehículo.
• Mantener el PMR a al menos 15 centímetros de los marcapasos.
• Apagar el aparato en cuanto se produzcan interferencias con cualquier equipo médico.
4.4 Riesgo de explosión
• No sustituir las pilas en un ambiente potencialmente explosivo. Durante la instalación o
la retirada de las pilas pueden producirse chispas y causar una explosión.
Twintalker 4810 5
Page 6

Twintalker 4810
Aunque no siempre es así, las zonas con ambientes potencialmente
explosivos suelen estar claramente marcadas. Entre ellas se cuentan
las zonas de repostaje como las situadas bajo cubierta en los barcos o
las instalaciones de almacenamiento o transferencia de sustancias
químicas o combustible; zonas en las que el aire contiene sustancias
químicas o partículas como grano, polvo o polvo metálico; y cualquier
otra zona en la que suela recomendarse apagar el motor de los
vehículos.
• Apagar el PMR siempre que se esté en una zona con un ambiente potencialmente
explosivo. Las chispas en esas zonas pueden provocar explosiones o incendios que
pueden causar lesiones corporales e incluso la muerte.
• No desechar nunca las pilas al fuego; éstas pueden explotar.
4.5 Riesgo de envenenamiento
• Mantener las pilas fuera del alcance de los niños.
4.6 Cuestiones legales
• En algunos países está prohibido utilizar el PMR mientras se conduce. Si es el caso,
deje de conducir antes de utilizar el aparato.
• Apagar la unidad en los aviones cuando se solicite. Cualquier uso de ella debe cumplir
las regulaciones de la línea aérea o las instrucciones de la tripulación.
• Apagar la unidad en cualquier instalación en la que se solicite mediante avisos. Los
hospitales o centros sanitarios pueden usar equipo sensible a la energía externa de RF.
• La sustitución o la modificación de la antena puede afectar a las especificaciones del
PMR y violar las regulaciones CE. Las antenas no autorizadas también pueden dañar la
radio.
4.7 Notas
• No tocar la antena durante la transmisión; podría afectar al alcance.
• Quitar las pilas si no se va a utilizar el dispositivo durante mucho tiempo.
5 Limpieza y mantenimiento
• Limpiar la unidad con un paño suave humedecido. No emplear productos de limpieza ni
disolventes; podrían dañar la carcasa, filtrarse y causar daños permanentes.
• Limpiar los contactos de las pilas con un paño seco sin hilachos.
• Si la unidad se moja, apagarla y retirar las pilas de inmediato. Secar el compartimento
de las pilas con un paño suave para reducir al mínimo los posibles daños. Dejar el
compartimento de las pilas sin la tapa hasta el día siguiente o hasta que se seque por
completo. No usar la unidad hasta que esté totalmente seca.
6 Twintalker 4810
Page 7
Twintalker 4810
Si dos o más usuarios presionan el botón PTT a la vez, el receptor
recibirá sólo la señal más fuerte y las otras señales se suprimirán. Por lo
tanto, sólo se debe transmitir una señal (presionar el botón PTT )
cuando el canal está libre.
11
El alcance de las ondas de radio se verá fuertemente afectado por
obstáculos como edificios, estructuras metálicas o de hormigón,
árboles, plantas, la irregularidad del terreno, etc. Esto implica que, en
algunos casos extremos, el alcance entre dos o más dispositivos PMR
puede verse restringido a unas pocas decenas de metros. En seguida se
percatará de que el dispositivo PMR funciona mejor cuando hay un
mínimo de obstáculos entre los usuarios.
6 Eliminación del dispositivo (medio ambiente)
Al final de su vida útil este producto no debe ser desechado en un contenedor
normal, sino en un punto de recolección destinado al reciclaje de equipos
eléctricos y electrónicos. Tanto en el producto como en el manual de usuario y
en la caja se incluye este símbolo.
Si usted los lleva a un punto de reciclaje, algunos de los materiales del producto
podrán reutilizarse. La reutilización de algunas de las piezas o materias primas
de estos productos supone una importante contribución a la protección del medio ambiente.
Si necesita más información sobre los puntos de reciclaje existentes en su zona, póngase
en contacto con las autoridades locales correspondientes.
7 Uso de un dispositivo PMR
Para que la comunicación entre dispositivos PMR sea posible, deben estar en el mismo
canal y código CTCSS / DCS, y dentro del alcance (máximo 8 km en campo abierto).
Consulte el apartado “13.7 CTCSS (sistema silenciador con código por tono continuo) / DCS
(silenciador con código digital)”. Dado que utilizan bandas de frecuencias libres (canales),
todos los dispositivos activos comparten estos canales (8 en total). Por tanto, la privacidad
no está garantizada. Cualquier persona con un PMR en el mismo canal puede escuchar
cualquier conversación transmitida a través de él. Para comunicarse (transmitir una señal
de voz) debe presionar el botón PTT .
Una vez presionado este botón, el dispositivo pasará al modo de transmisión y se podrá
hablar a través del micrófono. Todos los demás dispositivos PMR que se encuentren dentro
del alcance, en el mismo canal y en el modo en espera (sin transmitir) oirán el mensaje. Para
poder responder a un mensaje, hay que esperar a que la otra parte deje de transmitir. Al final
de cada transmisión, la unidad emitirá un pitido si está activado el pitido Roger de «corto y
cambio» (consulte el apartado “13.12 Activación y desactivación del pitido Roger”). Para
responder, sólo hay que presionar el botón PTT
11
y hablar a través del micrófono.
11
ESPAÑOL
Twintalker 4810 7
11
Page 8
Twintalker 4810
A
B
8 El paquete incluye:
• 2 Twintalker 4810
• 2 clips de cinturón
• 1 cargador dúo
• 1 adaptador de corriente
• 8 pilas AAA de NiMH
• 2 auriculares con micrófono y botón PTT
• Manual de usuario
• Tarjeta con dirección de servicio técnico y teléfono de asistencia
9 Introducción
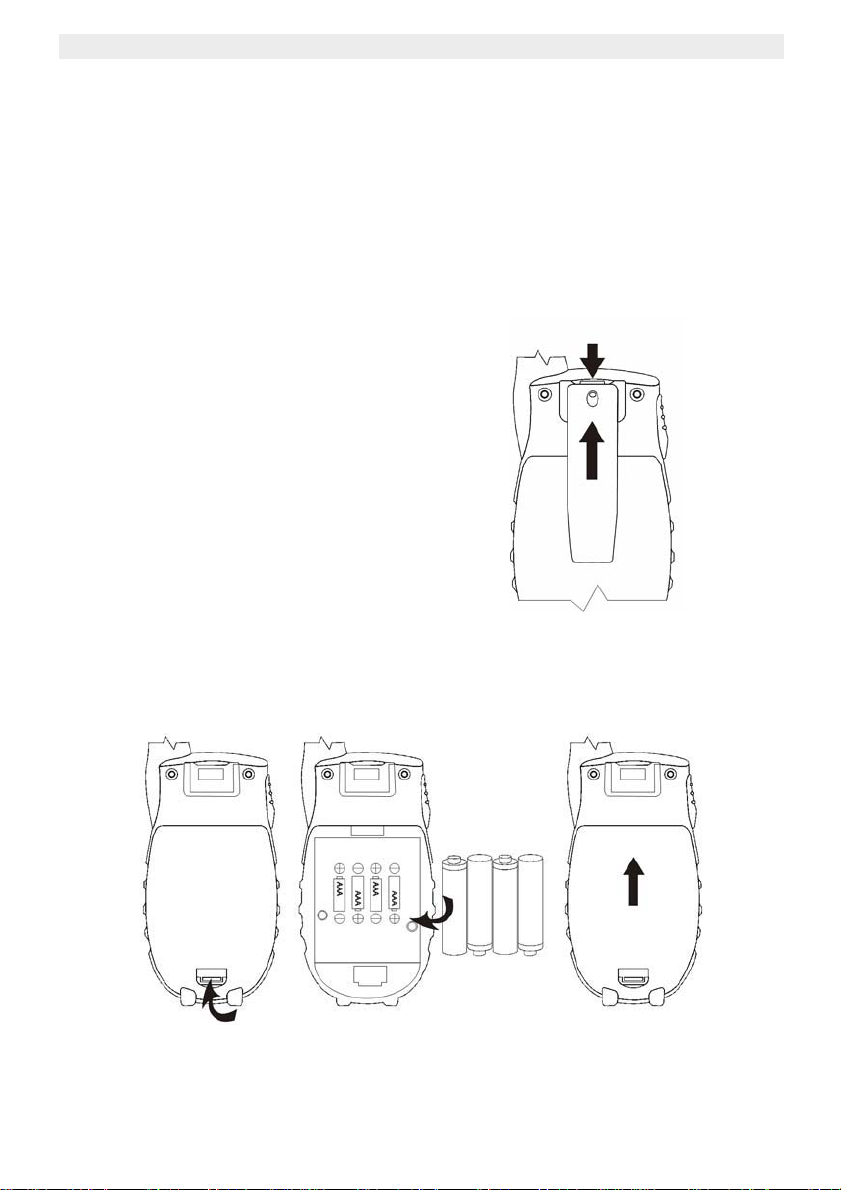
9.1 Retirada e instalación del clip del
cinturón
1. Empuje el clip del cinturón (B) hacia la antena
y tire de la pestaña (A) para retirarlo de la
unidad.
2. Vuelva a instalar el clip del cinturón; un clic
indicará que está bien colocado.
9.2 Instalación de las pilas
C
8 Twintalker 4810
Page 9

Twintalker 4810
25
No provoque cortocircuitos con las pilas ni las tire al fuego. Retírelas si
no va a utilizar el dispositivo durante mucho tiempo.
No utilice el cargador para recargar pilas que no sean recargables,
como las pilas alcalinas. El dispositivo PMR y el cargador podrían
resultar dañados.
1. Retire el clip del cinturón (consulte el apartado “9.1 Retirada e instalación del clip del
cinturón”).
2. Levante la tapa de las pilas tirando con cuidado del enganche (C) con la uña.
3. Instale las pilas NiMH. Asegúrese de que la polaridad de las pilas es correcta.
4. Cierre la tapa de las pilas.
5. Vuelva a colocar el clip del cinturón.
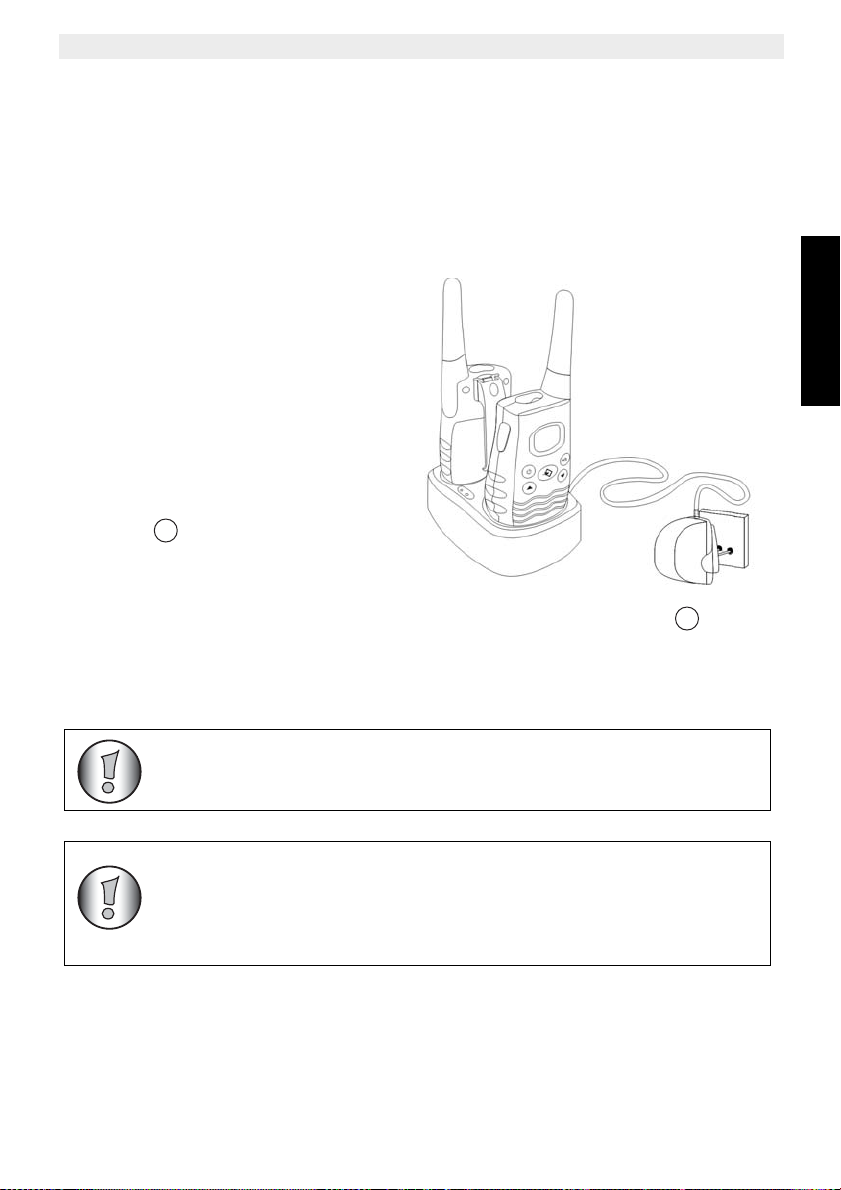
10 Carga de las pilas
Una vez instaladas las pilas, el cargador
de sobremesa permite cargarlas
cómodamente.
1. Coloque el cargador de
sobremesa sobre una superficie
plana.
2. Enchufe un extremo del
adaptador suministrado a una
toma de corriente fácilmente
accesible y el otro extremo al
conector de la parte trasera del
cargador de sobremesa .
(Consulte la imagen C de la
página doblada de la portada.)
3. Coloque la radio en el cargador
tal y como se indica.
4. El LED de carga se encenderá si se ha colocado correctamente y ha comenzado
a cargarse. (Consulte la imagen D de la página doblada de la portada.)
26
ESPAÑOL
Las pilas tardarán entre 8 y 10 horas en cargarse por completo.
No pulse el botón PTT de los dispositivos PMR mientras estén en el
cargador!
Twintalker 4810 9
Page 10
Twintalker 4810
Las ilustraciones de las pantallas incluidas en las siguientes páginas
solo muestran los iconos o la información relacionada con las funciones
que se explican en el texto.
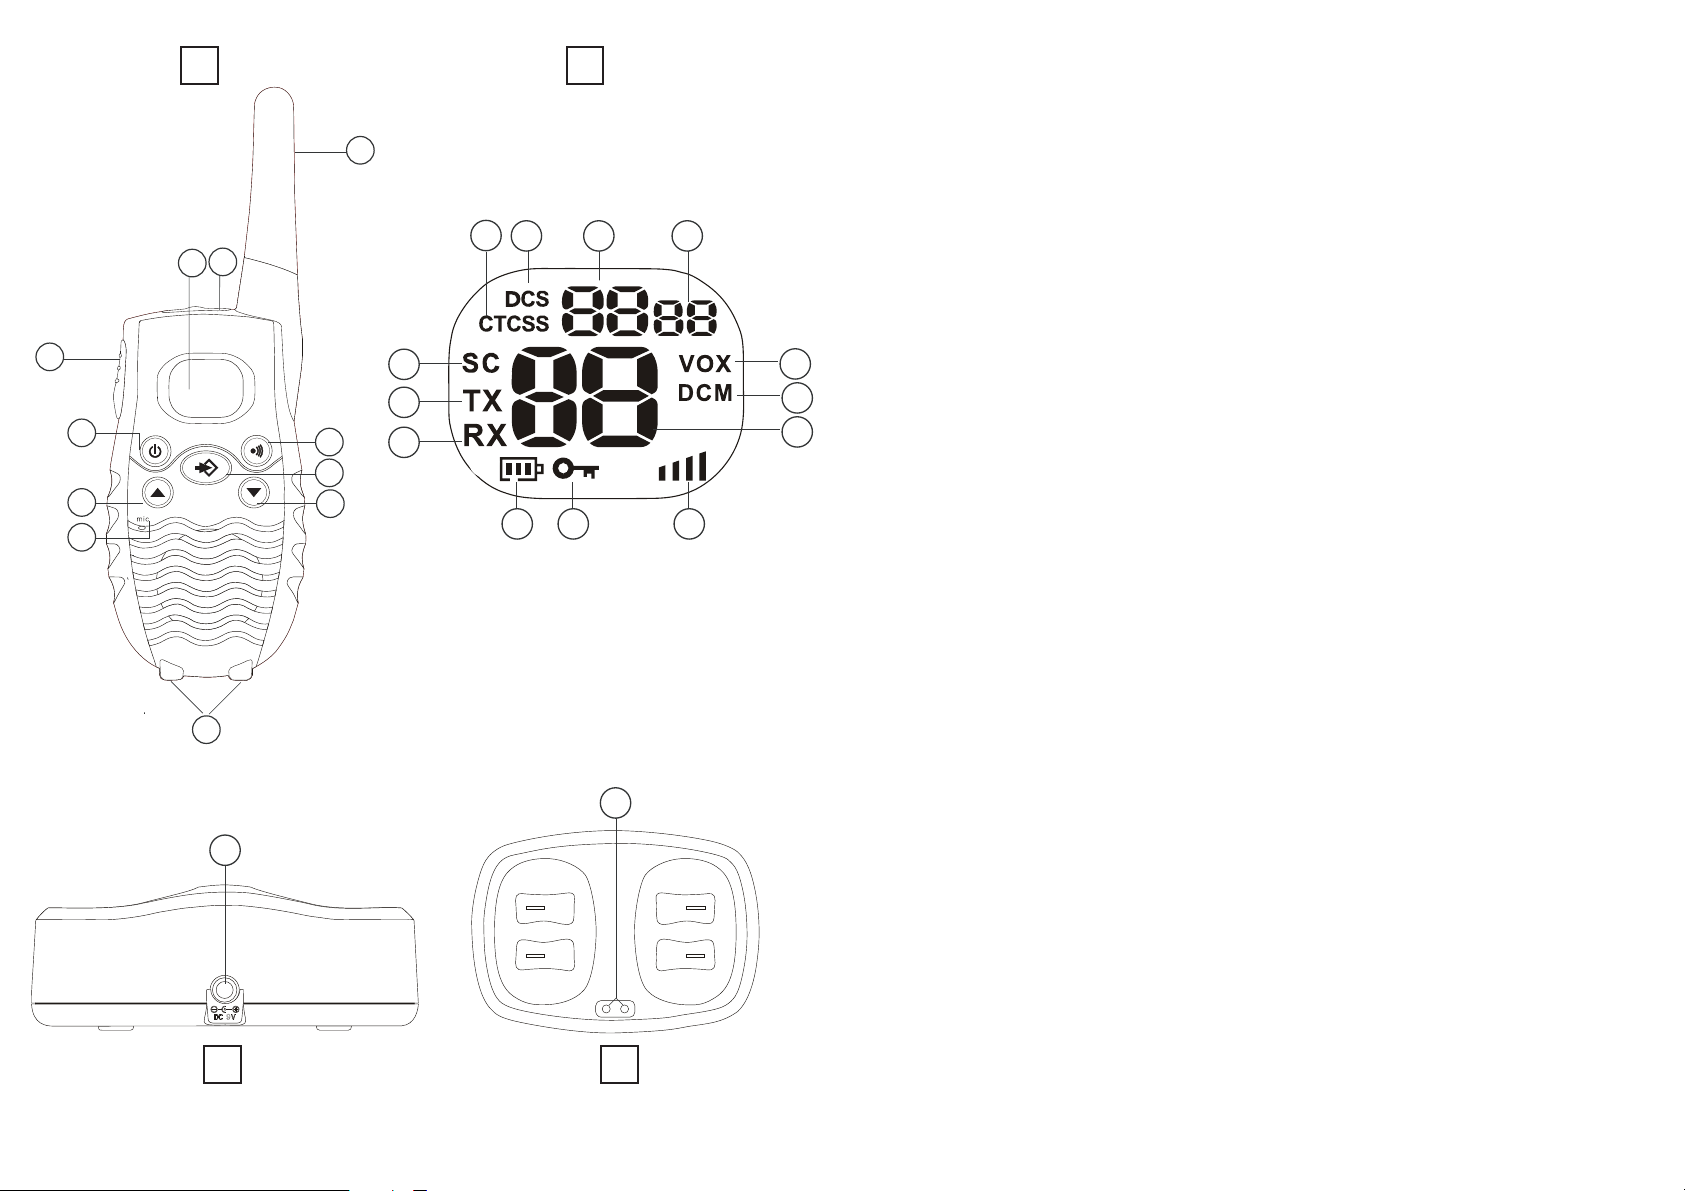
11 Descripción
Consulte la ilustración A de la página doblada de la portada.
1. Pantalla LCD
2. Conexión de auriculares
3. Antena
4. Botón de llamar
5. Botón de menú
– Accede a los ajustes del menú.
6. Botón de bajar
– Baja el volumen del altavoz.
– Selecciona la opción anterior del menú.
7. Contactos del cargador
8. Micrófono
9. Botón de subir
– Sube el volumen del altavoz.
– Selecciona la opción siguiente del menú.
10. Botón de encendido / apagado
11. Botón PTT de pulsar para hablar
12 Información de la pantalla LCD
Consulte la ilustración B de la página doblada de la portada.
12. Indicación CTCSS
13. Indicación DCS
14. CTCSS / DCS / Segundos del cronómetro / Valor de la opción de menú
15. Valor 1/100 del cronómetro
16. Indicación VOX
17. Indicación de modo de canal dual (DCM)
18. Indicación de canal / elemento del menú
19. Indicación del volumen del altavoz
20. Icono de bloqueo de teclado
21. Indicación del nivel de pilas
22. Icono RX
– Aparece cuando se está recibiendo.
23. Icono TX
– Aparece cuando se está transmitiendo.
24. Indicación de barrido
– Aparece durante el modo de barrido.
13 Uso del Twintalker 4810
10 Twintalker 4810
Page 11

Twintalker 4810
10
10
Para que otras personas puedan recibir una transmisión, deben
encontrarse en el mismo canal y tener el mismo código CTCSS o DCS que
el emisor. Consulte el apartado “13.6 Cambio de canales” y “13.7 CTCSS
(sistema silenciador con código por tono continuo) / DCS (silenciador con
código digital)”.
Puede seleccionar CTCSS o DCS, pero nunca al mismo tiempo.
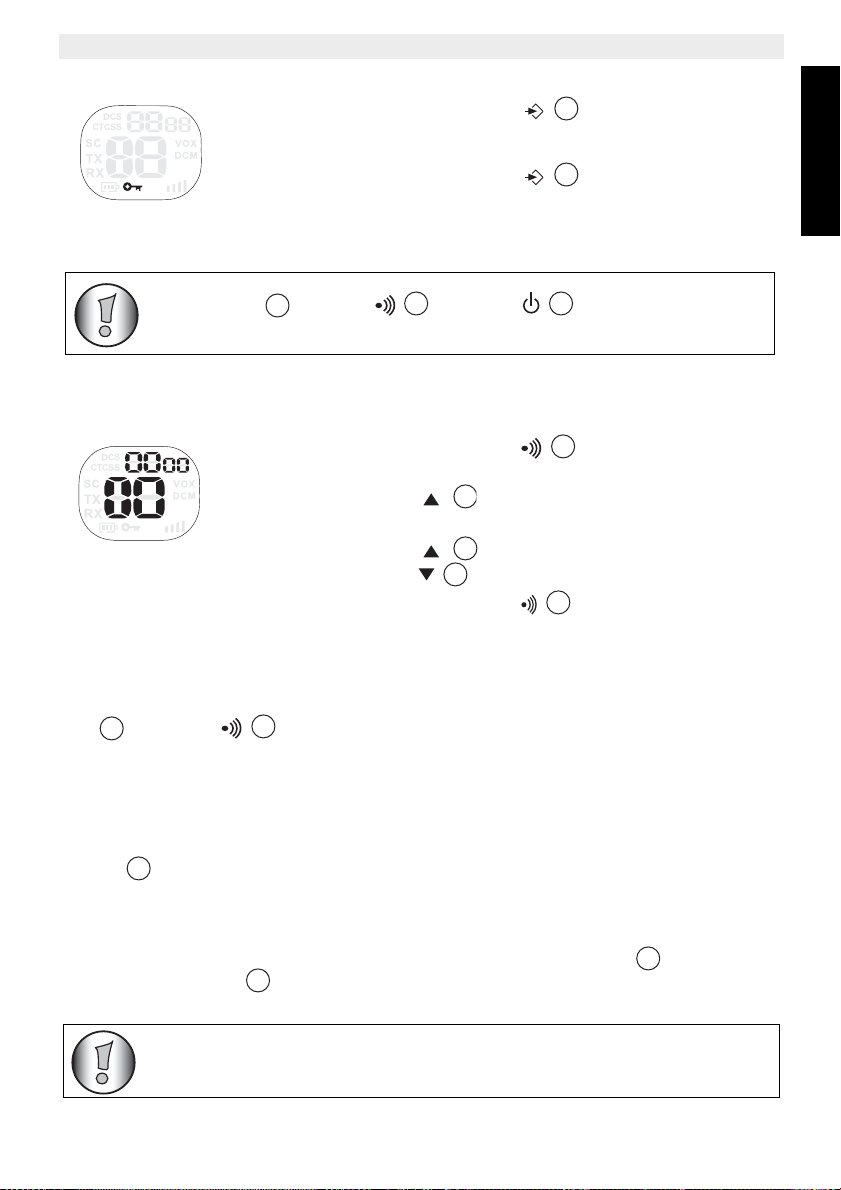
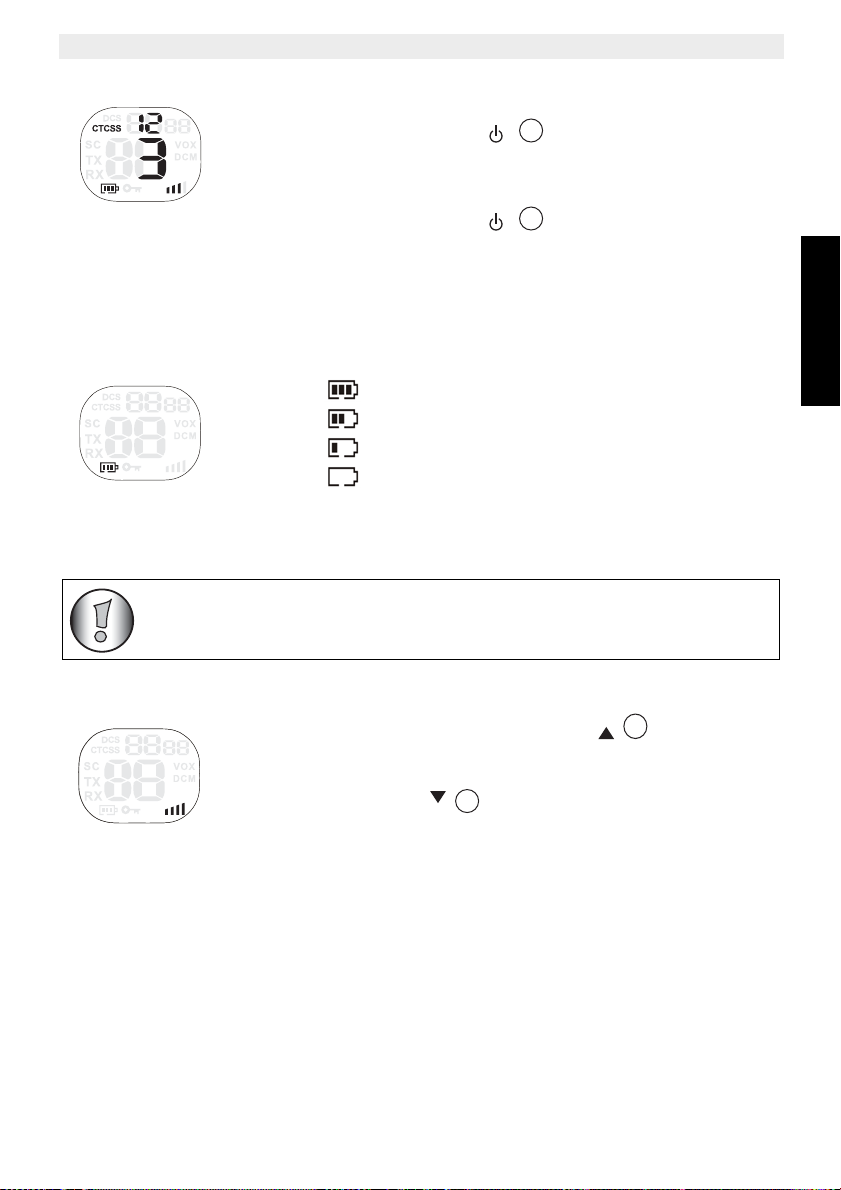
13.1 Encendido y apagado de la unidad
Para encender:
• Mantenga pulsado el botón durante 3 segundos. El
aparato emitirá un pitido y la pantalla LCD mostrará el canal
actual.
Para apagar:
• Mantenga pulsado el botón durante 3 segundos. El
aparato emitirá un pitido y la pantalla LCD se apagará.
13.2 Nivel de carga de las pilas / Indicación de carga baja
El nivel de carga de las pilas está indicado por el número de rectángulos presentes en el
interior del icono de la pila en la pantalla LCD.
Carga completa
2/3 de la carga
1/3 de la carga
Batería agotada
Cuando el nivel de carga de las pilas es bajo, el icono de la pila parpadea y emite un pitido
para avisar de la necesidad de cambiar o recargar las pilas.
No recargue nunca pilas que no sean recargables, como las pilas
alcalinas.
ESPAÑOL
13.3 Ajuste del volumen del altavoz
• Pulse el botón en el modo de espera para subir el
volumen del altavoz. Se mostrará el nivel del volumen.
• Pulse el botón
9
para bajar el volumen del altavoz.
6
13.4 Recepción de una señal
Cuando está encendida pero sin transmitir, la unidad se encuentra en modo de recepción.
Twintalker 4810 11
Page 12

Twintalker 4810
11
11
5
9
11
13.5 Transmisión de una señal
• Mantenga presionado el botón PTT
Aparecerá el símbolo TX.
• Mantenga la unidad en posición vertical con el micrófono a
10 cm de la boca y hable a través de él.
• Suelte el botón PTT
Para comprobar la actividad que hay en el canal, utilice la función de
rastreo (consulte el apartado “13.8 Rastreo”).
13.6 Cambio de canales
• Pulse una vez el botón . El número del canal actual
parpadea en la pantalla.
• Presione el botón
canal.
• Pulse el botón PTT para confirmar y regresar al modo
en espera.
Si no se presiona ningún botón en 5 segundos mientras se está
configurando, la unidad volverá al modo en espera.
para transmitir.
cuando quiera dejar de transmitir.
o el botón para cambiar el
6
13.7 CTCSS (sistema silenciador con código por tono continuo) /
DCS (silenciador con código digital)
Los dispositivos PMR que no necesitan licencia y funcionan en la banda de frecuencia de
446 MHz, como el Twintalker 4810, tienen 8 canales de radio disponibles. Si hay muchos
usuarios de dispositivos PMR en las cercanías, algunos de ellos podrían estar utilizando el
mismo canal de radio.
Para que no reciba la señal de otros usuarios, se han integrado subcanales.
Dos dispositivos PMR solo podrán comunicarse entre sí si utilizan el mismo canal de radio
y han seleccionado exactamente el mismo subcanal.
Hay dos tipos de subcanales:
• Sistema silenciador controlado por tono continuo (CTCSS)
• Silenciador con código digital (DCS)
Si se utiliza el CTCSS, se transmitirá un tono de baja frecuencia (entre 67 y 250 Hz) junto
con la señal de voz. Hay 38 tonos diferentes para elegir. Puede seleccionar uno de estos 38
tonos. Como consecuencia del filtrado, los tonos no suelen ser audibles para que no
interfieran en la comunicación.
El DCS es parecido al CTCSS, pero en lugar de emitir un tono continuo en la frecuencia
seleccionada, se añade una transmisión digital de datos a la señal de radio. Este código
digital se transmite a una velocidad muy lenta, de aproximadamente 134 bits por segundo
12 Twintalker 4810
Page 13
Twintalker 4810
9
6
11
5
9
6
11
Para desactivar el CTCSS o el DCS, seleccione el código «00» para CTCSS
o para DCS en el menú. Una vez confirmada la entrada, aparecerá «OF»
(desactivado) en pantalla.
6
Durante el rastreo de canal, el circuito del receptor en el dispositivo PMR
no captará códigos CTCSS o DCS.
11
(el código tiene una longitud de 23 bits). Solo los dispositivos PMR de última generación son
compatibles con el DCS. Hay 83 códigos DCS disponibles para su uso. Dado que los
modelos más antiguos solo son compatibles con el CTCSS, se recomienda utilizar el DCS
para evitar escuchar a otros usuarios durante las conversaciones con el dispositivo PMR.
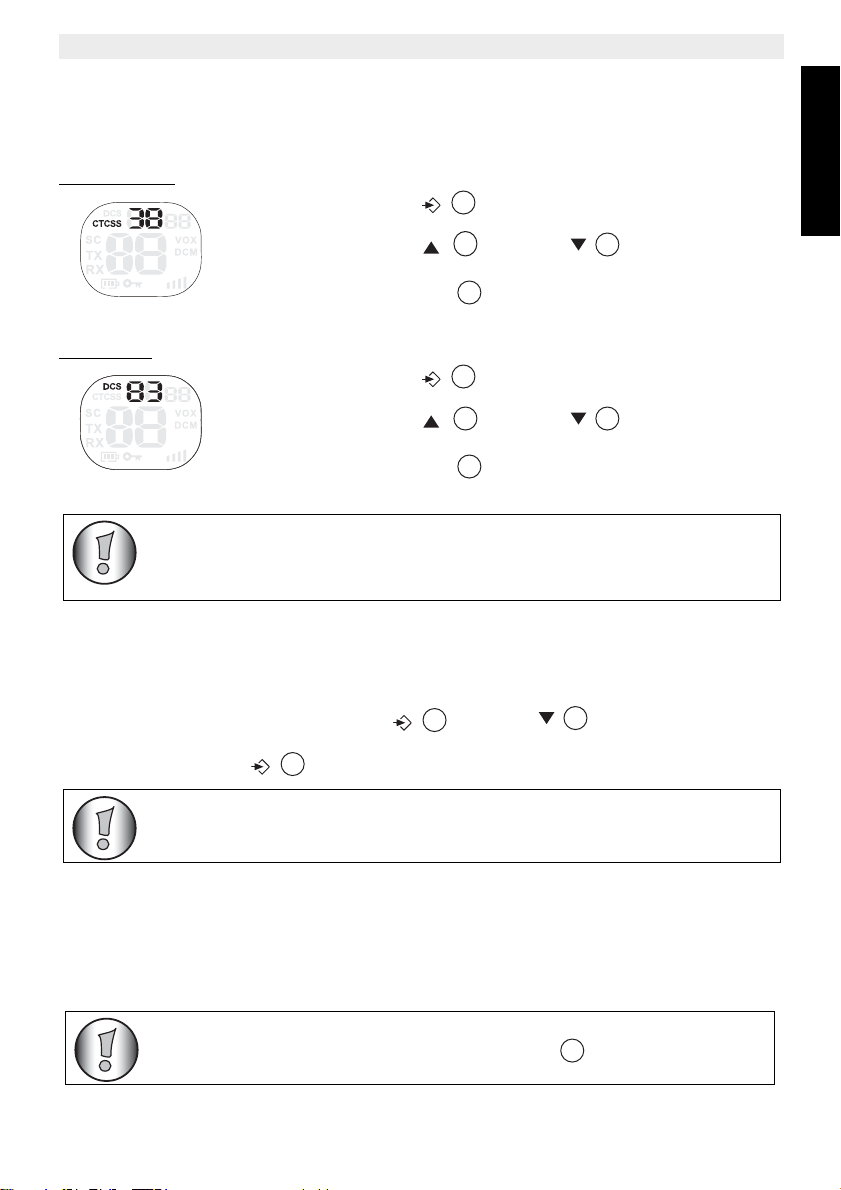
13.7.1 CTCSS
• Pulse el botón dos veces: en pantalla parpadeará
«CTCSS» y el código actual de CTCSS.
• Pulse el botón o el botón para cambiar a
otro código.
• Pulse el botón PTT para confirmar y regresar al modo
en espera.
13.7.2 DCS
• Pulse el botón tres veces: en pantalla parpadeará
«DCS»y el código actual de DCS.
• Pulse el botón o el botón para cambiar a
otro código.
• Pulse el botón PTT para confirmar y regresar al modo
en espera.
5
13.8 Rastreo
La función de rastreo se puede utilizar para buscar señales más débiles en el canal activo.
• Pulse simultáneamente el botón y el botón para activar el rastreo
de canal.
• Pulse el botón para detener el rastreo.
5
5
ESPAÑOL
13.9 Selección de VOX
El PMR admite la transmisión activada por voz (VOX). En el modo VOX, la radio transmitirá
una señal cuando se active mediante su voz o cualquier otro sonido que se produzca a su
alrededor. No se recomienda el uso de este modo en entornos ruidosos o con viento.
El modo VOX se cancela al pulsar el botón PTT .
Twintalker 4810 13
Page 14
Twintalker 4810
5
6
11
9
6
Si pulsa el botón PTT mientras está escuchando el canal que acaba
de localizar, el dispositivo PMR entrará en el modo en espera en dicho
canal.
9
6
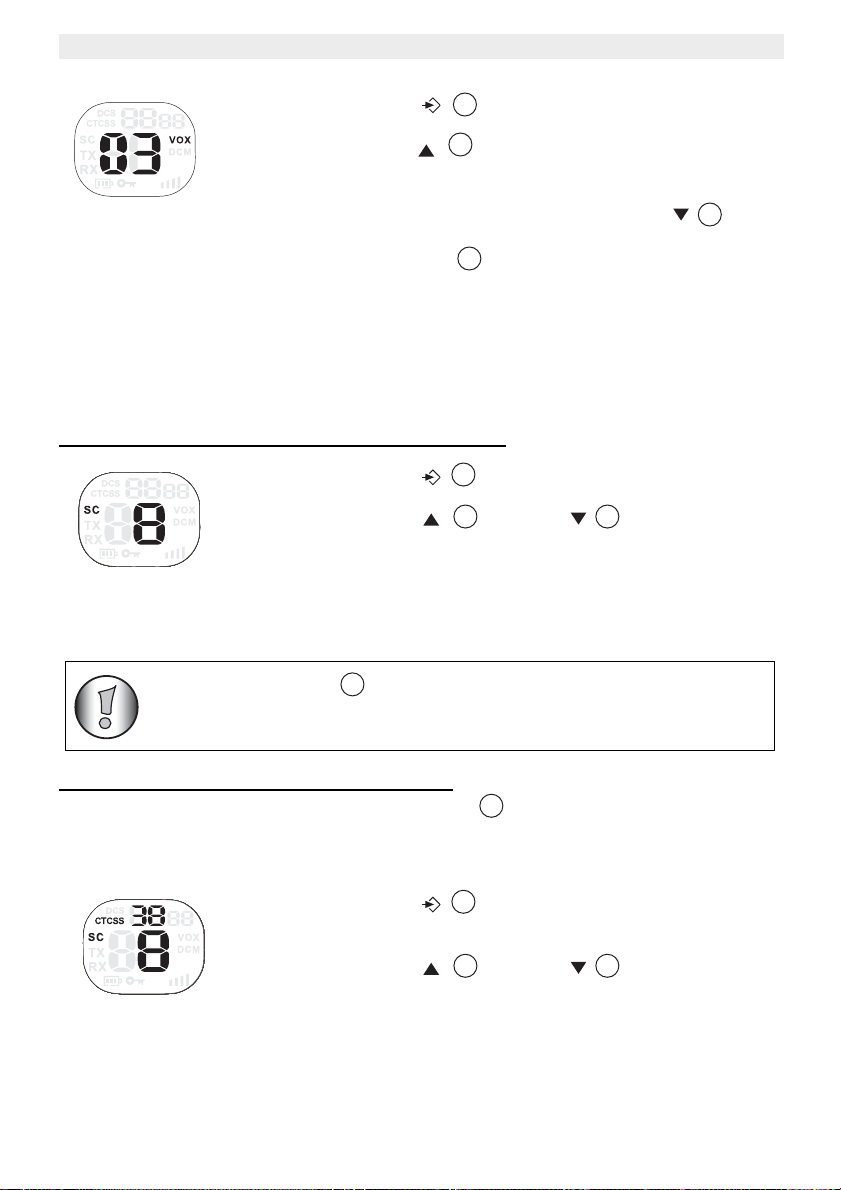
• Pulse el botón 4 veces. La configuración actual de
VOX parpadea en la pantalla y aparece el icono VOX.
• Pulse el botón para configurar el nivel de
sensibilidad de la función VOX entre 1 y 3 (el nivel 3 es el
más sensible).
• Para desactivar la función VOX, pulse el botón hasta
que aparezca en pantalla «OF» (apagado).
• Pulse el botón PTT
en espera.
9
para confirmar y regresar al modo
13.10 Barrido de canal
El barrido de canal busca señales activas en un bucle continuo del canal 1 al 8.
En cuanto se localiza un canal activo, tiene la opción de buscar el código CTCSS o DCS
configurado por el usuario que está transmitiendo en dicho canal.
13.10.1 Barrido en busca de un canal de radio activo
• Pulse el botón 5 veces: en pantalla parpadeará
«SC»y el canal actual.
• Pulse el botón o el botón para comenzar el
barrido de canal.
En cuanto se localiza un canal activo, el barrido se detiene y puede escuchar la transmisión.
Cuando la transmisión en dicho canal se detiene, el barrido se reanuda automáticamente.
5
11
13.10.2 Barrido en busca de un código CTCSS
Cuando localice un canal activo, pulse el botón PTT para seleccionar dicho canal. A
continuación, podrá buscar el código CTCSS / DCS que utiliza el usuario del canal que
acaba de encontrar.
• Pulse el botón 6 veces: en pantalla parpadeará la
información «SC» y «CTCSS 00» del canal de radio
seleccionado.
• Pulse el botón o el botón para comenzar el
barrido de CTCSS.
En cuanto comience la transmisión en el canal, se detectará y se mostrará en pantalla el
código CTCSS (si se utiliza).
11
5
14 Twintalker 4810
Page 15

• Si pulsa el botón PTT mientras está escuchando el código
CTCSS que acaba de localizar, el dispositivo PMR entrará en el
modo en espera en el canal con dicho código.
• Si no se detecta ningún código CTCSS, el usuario podría haber
seleccionado un código DCS. En este caso, deberá realizar un
barrido del código DCS (apartado 13.10.3).
11
9
6
Si pulsa el botón PTT mientras está escuchando el código DCS que
acaba de localizar, el dispositivo PMR entrará en el modo en espera en el
canal con dicho código.
11
5
9
6
11
T
13.10.3 Barrido en busca de un código DCS
Twintalker 4810
ESPAÑOL
• Pulse el botón 7 veces: en pantalla parpadeará la
información «SC» y «DCS 00» del canal de radio
seleccionado.
• Pulse el botón o el botón para comenzar el
barrido de DCS.
En cuanto comience la transmisión en el canal, se detectará y se mostrará en pantalla el
código DCS (si se utiliza).
5
13.11 Tonos de llamada
El tono de llamada avisa a otros de su deseo de hablar.
13.11.1 Ajuste del tono de llamada
El Twintalker 4810 tiene 15 tonos de llamada.
• Pulse el botón 8 veces. En pantalla aparecerá
«CA» y parpadeará el tono de llamada actual.
• Pulse el botón
tono de llamada.
• Pulse el botón PTT
en espera.
13.11.2 Envío de un tono de llamada
Pulse brevemente el botón . El tono de llamada se transmitirá en el canal
establecido.
4
o el botón para cambiar a otro
para confirmar y regresar al modo
13.12 Activación y desactivación del pitido Roger
Una vez soltado el botón , la unidad enviará un pitido Roger para confirmar que se ha
dejado de hablar.
Twintalker 4810 15
PT
Page 16
Twintalker 4810
5
11
11
5
9
6
9611
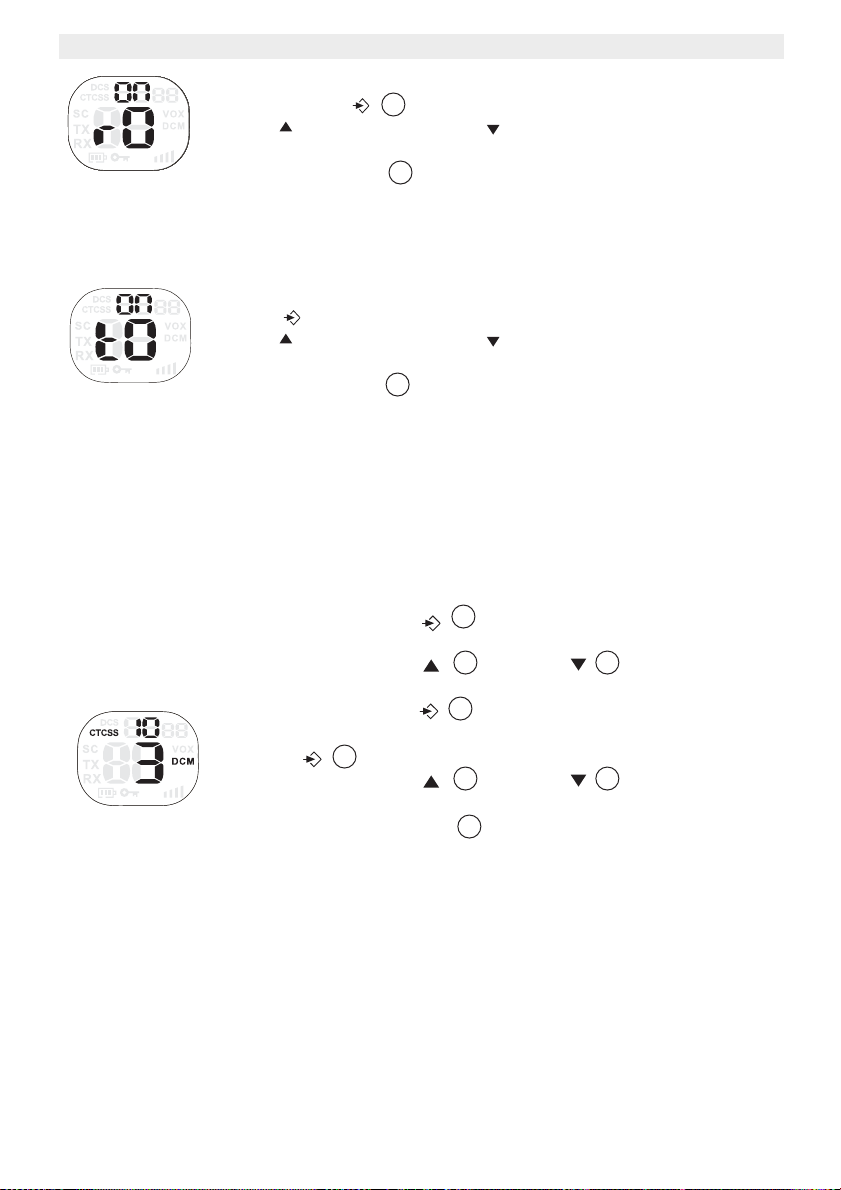
Para establecer el pitido Roger:
• Pulse el botón 9 veces. Aparecerá en pantalla «rO».
• Pulse para activar («ON») o para desactivar («OF») el pitido
Roger.
• Pulse el botón PTT para confirmar la selección y regresar al
modo en espera.
13.13 Activación y desactivación del tono de las teclas
Al presionar un botón la unidad emitirá un breve pitido.
Para establecer el tono de las teclas:
• Pulse 10 veces. Aparecerá en pantalla «tO».
• Pulse para activar («ON») o para desactivar («OF») el tono de
las teclas.
• Pulse el botón PTT para confirmar la selección y regresar al modo
en espera.
13.14 Función de monitor de canal dual
En modo en espera, el dispositivo PMR está establecido en un canal con código CTCSS /
DCS. El dispositivo PMR solo recibirá las señales que se transmitan en ese canal con el
código CTCSS / DCS.
El monitor de canal dual (DCM) permite escuchar un segundo canal con código CTCSS /
DCS.
• Pulse el botón 11 veces. En pantalla parpadeará
«DCM OF».
• Pulse el botón o el botón para cambiar el
canal.
• Pulse el botón para confirmar el canal seleccionado
y pasar a la selección de CTCSS. (Pulse de nuevo el botón
5
para acceder a la selección de DCS.)
• Pulse el botón o el botón para cambiar el
código CTCSS o DCS.
• Pulse el botón PTT para confirmar y regresar al modo
en espera.
• Para desactivar la función, seleccione «OF» al seleccionar
el DCM.
5
Con la función de monitor de canal dual activada, el dispositivo PMR alternará
secuencialmente entre el canal en espera + código CTCSS / DCS y el canal dual + código
CTCSS / DCS.
16 Twintalker 4810
Page 17
13.15 Bloqueo de botones
5
5
El botón PTT , el botón y el botón seguirán funcionando
aunque se haya activado el bloqueo de botones.
11
10
9
9
6
11
• Mantenga pulsado el botón durante 3 segundos
para activar el modo de bloqueo de botones. El icono de
bloqueo de botones aparecerá en la pantalla LCD.
• Mantenga pulsado el botón de nuevo durante 3
segundos para desactivar el bloqueo de botones.
4
13.16 Función de cronómetro
El Twintalker 4810 dispone de un cronómetro que cuenta hasta 59'59''99.
• Mantenga pulsado el botón durante 3 segundos
para que aparezca la pantalla del cronómetro.
• Pulse el botón para poner en marcha el
cronómetro.
• Pulse el botón para detener el cronómetro.
• Pulse el botón para poner a cero el cronómetro.
• Mantenga pulsado el botón durante 3 segundos
para desactivar el cronómetro.
4
4
Twintalker 4810
ESPAÑOL
13.17 Retroiluminación de la pantalla
Para activar la retroiluminación de la pantalla LCD, pulse cualquier botón excepto el botón
PTT o el botón .
11
La retroiluminación de la pantalla se activará durante 6 segundos.
4
14 Conector de auriculares
El Twintalker 4810 se puede utilizar con el auricular incluido.
El conector está situado bajo la cubierta protectora de goma de la parte superior del
aparato .
Para acoplar el auricular, abra la pestaña de goma para acceder al conector. La pestaña de
goma no puede extraerse del dispositivo PMR, ya que está fijada a la unidad.
Introduzca la clavija del auricular en el conector (toma de 2,5 mm).
El pequeño botón del auricular tiene la misma función que el botón PTT
Al utilizar el botón PTT del auricular, hay que utilizar también el micrófono del auricular
para hablar..
Twintalker 4810 17
2
11
No conecte otros auriculares. Podría causar daños al equipo.
de la unidad.
Page 18

Twintalker 4810
Channel Frequency Chart: CTCSS Code Chart
Channel Frequency (MHz
)
Code Frequency (Hz) Code Freq. (Hz) Code Freq. (Hz) Code Freq. (Hz)
1 446,00625 0 Disabled 10 94,8 20 131,8 30 186,2
2 446,01875 1 67,0 11 97,4 21 136,5 31 192,8
3 446,03125 2 71,9 12 100,0 22 141,3 32 203,5
4 446,04375 3 74,4 13 103,5 23 146,2 33 210,7
5 446,05625 4 77,0 14 107,2 24 151,4 34 218,1
6 446,06875 5 79,7 15 110,9 25 156,7 35 225,7
7 446,08125 6 82,5 16 114,8 26 162,2 36 233,6
8 446,09375 7 85,4 17 118,8 27 167,9 37 241,8
8 88,5 18 123,0 28 173,8 38 250,3
9 91,5 19 127,3 29 179,9
15 Solución de problemas
No hay corriente. Limpie los contactos de las pilas con un paño suave.
Cambie las pilas.
No hay transmisión. Asegúrese de pulsar bien el botón PTT antes de hablar.
11
Supervise la actividad de los canales y cambie a otro canal,
si el canal actual está siendo utilizado.
No hay recepción. Revise el volumen del altavoz.
Compruebe que está dentro de la zona de alcance del
emisor y, si es necesario, cámbiese de sitio.
Alcance limitado y ruido
durante la transmisión.
El alcance para hablar depende del terreno.
En las construcciones de acero o de cemento y en los
vehículos, la cobertura es mala.
Procure evitar cualquier obstáculo y comuníquese en un
recorrido despejado.
Cambie de lugar.
Interferencias. El receptor y el transmisor están demasiado próximos entre
sí. La distancia mínima entre dos unidades es de 1,5
metros.
16 Especificaciones técnicas
Canales
Subcódigo
Frecuencia
Alcance
Pilas
Potencia de transmisión
Tipo de modulación
Separación de canales
Adaptador para cargador dúo
8
CTCSS 38 / DCS 83
446,00625 MHz - 446,09375 MHz
Hasta 8 km en campo abierto
4 pilas alcalinas AAA o 4 pilas NiMH AAA recargables
=< 500 mW ERP
FM - F3E
12,5 kHz
Entrada: 230 V CA / 50 Hz. Salida: 9 V CC / 200 mA
18 Twintalker 4810
Page 19

Twintalker 4810
DCS Code Chart
No DCS code No DCS code No DCS code No DCS code
0 Disabled 21 134 42 311 63 516
1 23 22 143 43 315 64 532
2 25 23 152 44 331 65 546
3 26 24 155 45 343 66 565
4 31 25 156 46 346 67 606
5 32 26 162 47 351 68 612
6 43 27 165 48 364 69 624
7 47 28 172 49 365 70 627
8 51 29 174 50 371 71 631
9 54 30 205 51 411 72 632
10 65 31 223 52 412 73 654
11 71 32 226 53 413 74 662
12 72 33 243 54 423 75 664
13 73 34 244 55 431 76 703
14 74 35 245 56 432 77 712
15 114 36 251 57 445 78 723
16 115 37 261 58 464 79 731
17 116 38 263 59 465 80 732
18 125 39 265 60 466 81 734
19 131 40 271 61 503 82 743
20 132 41 306 62 506 83 754
ESPAÑOL
17 Dirección de servicio técnico y asistencia telefónica
Los contactos del servicio técnico están impresos en la tarjeta especial que va incluida en el
paquete o se pueden consultar en www.ucom.be.
18 Declaración de conformidad y fabricante
Topcom Europe Nv.
Grauwmeer 17
3001 Heverlee
Bélgica
La declaración de conformidad se puede consultar en la última página de este manual de
usuario.
19 Garantía
19.1 Período de garantía
Las unidades tienen un periodo de garantía de 36 meses. El período de garantía entra en
vigor el día en que se adquiere la nueva unidad. No existe ninguna garantía sobre las pilas
estándar o recargables (tipo AA / AAA).
La garantía no cubre los consumibles ni los defectos que tengan un efecto insignificante en
el funcionamiento o en el valor del equipo.
La garantía debe demostrarse presentando el comprobante original de compra o una copia
de este, en el que constarán la fecha de la compra y el modelo de la unidad.
Twintalker 4810 19
Page 20

Twintalker 4810
19.2 Tratamiento de la garantía
Los aparatos averiados deberán remitirse a un servicio técnico oficial junto con un
comprobante de compra válido y una tarjeta de servicio técnico cumplimentada.
Si la unidad tiene una avería durante el período de garantía, el servicio técnico reparará sin
cargo alguno cualquier avería causada por defectos de material o fabricación, ya sea
reparando o sustituyendo las unidades defectuosas o partes de las mismas. En caso de
sustitución, el color y el modelo pueden variar respecto a los de la unidad adquirida
inicialmente.
La fecha de compra inicial determinará el comienzo del período de garantía. El período de
garantía no se ampliará en caso de que el servicio técnico cambie o sustituya la unidad.
19.3 Limitaciones de la garantía
Los daños o defectos ocasionados por un tratamiento o funcionamiento incorrectos, así
como los daños resultantes del uso de piezas o accesorios no originales, no estarán
cubiertos por esta garantía.
La garantía no cubre los daños ocasionados por factores externos tales como relámpagos,
agua o fuego, como tampoco los daños causados durante el transporte.
La garantía no será válida si el número de serie de las unidades se cambia, se elimina o
resulta ilegible.
Cualquier reclamación de la garantía se invalidará si la unidad ha sido reparada, alterada o
modificada por el comprador.
20 Twintalker 4810
Page 21

Twintalker 4810
1 Introduzione 23
2 Destinazione d'uso 23
3 Marchio CE 23
4 Norme di sicurezza 23
4.1 Informazioni generali 23
4.2 Rischio di ustioni 23
4.3 Lesioni 23
4.4 Pericolo di esplosione 24
4.5 Rischio di avvelenamento 24
4.6 Informazioni legali 24
4.7 Note 24
5 Pulizia e manutenzione 24
6 Smaltimento dell'apparecchio (ambiente) 25
7 Utilizzo di un apparecchio PMR 25
8 Contenuto della confezione 26
9 Prima d'iniziare 26
9.1 Installazione/Rimozione della clip da cintura 26
9.2 Inserimento delle batterie 26
10 Ricarica delle batterie 27
11 Descrizione 28
12 Informazioni sul display LCD 28
13 Uso del Twintalker 4810 28
13.1 Accensione/spegnimento dell'unità 29
13.2 Indicazione livello di carica batteria/batteria scarica 29
13.3 Regolazione del volume dell'altoparlante 29
13.4 Ricezione di un segnale 29
13.5 Trasmissione di un segnale 30
13.6 Cambio di canale 30
13.7 CTCSS (Continuous Tone Coded Squelch System, sistema squelch codificato
a tono continuo) /
DCS (Digital Coded Squelch, squelch codificato digitale) 30
13.8 Monitoraggio 31
13.9 Selezione VOX 32
13.10 Scansione canali 32
13.11 Segnali di chiamata 34
13.12 Attivazione/disattivazione del tono/cicalino audio 34
13.13 Attivazione/disattivazione dei toni dei tasti 34
13.14 Funzione di monitoraggio a doppio canale 34
13.15 Blocco tasti 35
13.16 Funzione cronometro 35
13.17 Retroilluminazione del display 36
ITALIANO
Twintalker 4810 21
Page 22

Twintalker 4810
14 Collegamento dell'auricolare 36
15 Risoluzione dei problemi 36
16 Specifiche tecniche 37
17 Indirizzo dell'assistenza e supporto tramite hotline 38
18 Dichiarazione di conformità e del produttore 38
19 Garanzia 38
19.1 Periodo di garanzia 38
19.2 Utilizzo della garanzia 38
19.3 Decadenza della garanzia 38
22 Twintalker 4810
Page 23

Twintalker 4810
1 Introduzione
Grazie per avere acquistato il Twintalker 4810. Si tratta di un apparato per
radiocomunicazioni a lungo raggio, a basso consumo di energia, con una copertura massima
di 8 Km, il cui unico e minimo costo di esercizio è rappresentato dalla ricarica delle batterie.
Il Twintalker funziona su 8 canali.
Se la custodia è inclinata di 15°, il Twintalker è protetto dalle gocce d'acqua che cadono
verticalmente in conformità allo standard IPX2.
2 Destinazione d'uso
L'unità può essere utilizzata per impieghi ricreativi. Ad esempio: mantenere un contatto
durante un viaggio fra 2 o più automobili, ciclisti o sciatori. I genitori possono inoltre utilizzarlo
per tenersi in contatto con i figli mentre giocano fuori casa, ecc.
3 Marchio CE
Il simbolo CE riportato sull'unità, nel manuale d'uso e sulla confezione indica che l'unità è
conforme ai requisiti fondamentali della direttiva R&TTE 1995/5/CE.
4 Norme di sicurezza
4.1 Informazioni generali
Si prega di leggere attentamente le seguenti informazioni relative alla sicurezza e ad un
utilizzo appropriato dell'unità. Acquisire la necessaria familiarità con tutte le funzioni
dell'apparecchio. Conservare il presente manuale in un luogo sicuro per ogni futura
consultazione.
ITALIANO
4.2 Rischio di ustioni
• Evitare di toccare un'antenna il cui rivestimento sia stato danneggiato. Durante la
trasmissione, il contatto dell'antenna danneggiata con la pelle potrebbe provocare
ustioni di lieve entità.
• Le batterie possono causare danni a cose e/o lesioni a persone (ad esempio ustioni) in
caso di contatto tra materiali conduttivi (gioielli, chiavi, catenelle) e i morsetti esposti. Il
materiale in questione può fungere da chiusura del circuito elettrico (cortocircuito) e
surriscaldarsi. Usare la massima prudenza durante l'impiego di qualunque batteria
carica, in particolare se viene infilata in tasca, in borsa o in altri recipienti assieme a
oggetti metallici.
4.3 Lesioni
• Non appoggiare l'apparecchio nella zona sovrastante l'air bag o nella zona di apertura
dell'air bag. Il gonfiaggio dell'air bag avviene infatti in modo estremamente energico. Se
il PMR si trova sulla zona di apertura dell'air bag nel momento in cui questo si gonfia, è
possibile che l'apparecchio venga proiettato con grande forza con rischio di gravi lesioni
per gli occupanti del veicolo.
• I portatori di pacemaker dovranno tenere il PMR ad almeno 15 centimetri di distanza dal
dispositivo.
• In caso di interferenza con qualsiasi apparecchiatura medicale, spegnere
immediatamente il PMR.
Twintalker 4810 23
Page 24
Twintalker 4810
Gli ambienti potenzialmente esplosivi sono spesso, ma non sempre,
segnalati in modo chiaro. Tra questi: aree di rifornimento carburante (ad
esempio sottocoperta di una imbarcazione) oppure impianti di
trasferimento e stoccaggio di sostanze combustibili o chimiche;
ambienti contenenti prodotti chimici o particelle in sospensione
nell'aria, quali residui o polveri metalliche; qualsiasi altra zona in cui si
raccomanda generalmente di spegnere il motore del proprio veicolo.
4.4 Pericolo di esplosione
• Non sostituire le batterie in ambienti a rischio di esplosione. Durante l'inserimento o la
rimozione delle batterie, possono verificarsi scintille sui contatti, con conseguente
rischio di esplosione.
• Quando ci si trova in un'area soggetta a rischio di esplosione, spegnere il PMR.
L'emissione di scintille in tali aree può infatti dare origine a esplosioni o incendi con
conseguente rischio di lesioni o morte.
• Non gettare mai le batterie sul fuoco, in quanto potrebbero esplodere.
4.5 Rischio di avvelenamento
• Tenere le batterie fuori dalla portata dei bambini
4.6 Informazioni legali
• In alcuni paesi non è consentito utilizzare un apparecchio PMR mentre si è alla guida di
una vettura. In tal caso, accostare prima di utilizzare l'apparecchio.
• Spegnere il PMR a bordo di aeromobili quando ne sia espressamente vietato l'uso.
Qualsiasi utilizzo del PMR dovrà avvenire in conformità al regolamento della linea aerea
o alle istruzioni dell'equipaggio.
• Spegnere il PMR in qualunque edificio in cui siano affissi cartelli che ne vietino l'uso. Gli
ospedali o gli istituti sanitari possono fare uso di attrezzature sensibili all'energia a
radiofrequenza esterna.
• La sostituzione (o la modifica) dell'antenna può avere effetti sulle specifiche radio PMR
e causare la violazione delle norme CE. L'uso di un'antenna non autorizzata può inoltre
danneggiare la radio.
4.7 Note
• Per evitare di ridurne la portata, non toccare l'antenna durante la trasmissione.
• Se si prevede di lasciare l'apparecchio inutilizzato per un periodo di tempo prolungato,
rimuovere le batterie.
5 Pulizia e manutenzione
• Pulire l'apparecchio con un panno morbido inumidito con acqua. Non utilizzare mai
detergenti o solventi, i quali, intaccando l'involucro esterno, possono penetrare
all'interno dell'apparecchio causando danni irreparabili.
• Per pulire i contatti delle batterie è possibile servirsi di un panno asciutto che non
sfilacci.
• Nel caso in cui l'apparecchio entri in contatto con l'acqua, spegnerlo e rimuovere
immediatamente le batterie. Asciugare il vano batterie con un panno morbido per ridurre
l'eventuale danno provocato dall'acqua. Lasciare il vano batterie aperto per almeno 24
24 Twintalker 4810
Page 25
Twintalker 4810
11
11
Se 2 o più utenti premono il tasto PTT contemporaneamente, il
ricevitore riceverà unicamente il segnale più forte, mentre l'altro o gli altri
segnali verranno soppressi. Si consiglia pertanto di trasmettere un
segnale (premendo il tasto PTT ) solo quando il canale è libero.
11
11
La portata delle onde radio è fortemente influenzata da ostacoli quali
edifici, strutture in calcestruzzo/metallo, irregolarità del paesaggio,
terreni boscosi, piante… Ciò implica che in casi estremi la portata tra due
o più PMR potrebbe essere limitata a un massimo di poche decine di
metri. Presto vi renderete conto che il PMR funziona meglio quando tra
gli utenti sono presenti alcuni ostacoli.
ore o almeno fino ad una asciugatura completa. Non utilizzare l'apparecchio finché non
è completamente asciutto.
6 Smaltimento dell'apparecchio (ambiente)
Alla conclusione del suo ciclo di vita, il prodotto non deve essere gettato nel
contenitore dei rifiuti domestici, ma deve essere depositato presso un apposito
punto di raccolta per il riciclaggio di apparecchi elettrici ed elettronici. Questa
raccomandazione è riportata sul manuale d'uso e/o sulla confezione; è indicata,
inoltre, dal simbolo riportato sul prodotto.
Alcuni materiali del prodotto possono essere riutilizzati se consegnati presso un centro di
riciclaggio. Riciclando alcune parti o materie prime dei prodotti usati si offre un importante
contributo alla protezione dell'ambiente. Per maggiori informazioni sui punti di raccolta più
vicini, contattare le autorità locali.
7 Utilizzo di un apparecchio PMR
Per poter comunicare, due o più apparecchi PMR devono essere impostati sullo stesso
canale, avere lo stesso codice CTCSS/DCS (consultare il capitolo “13.7 CTCSS (Continuous
Tone Coded Squelch System, sistema squelch codificato a tono continuo) / DCS (Digital
Coded Squelch, squelch codificato digitale)”) e trovarsi entro la portata di ricezione (fino a un
massimo di 8 km in campo aperto). Utilizzando bande (canali) di frequenza libera, tutti gli
apparecchi attivi in un dato momento si trovano a condividere gli stessi canali (8 in tutto). La
privacy, pertanto, non può essere garantita. Una conversazione fra due utenti può essere
ascoltata da chiunque possieda un PMR sintonizzato sullo stesso canale. Per comunicare
(trasmettere un segnale vocale) è necessario premere il tasto PTT .
Una volta premuto il tasto, l'apparecchio entra in modalità di trasmissione ed è possibile
parlare nel microfono. Tutti gli altri apparecchi PMR che si trovano nel raggio di portata, sullo
stesso canale e in modalità di stand-by (non in trasmissione) riceveranno il messaggio.
Prima di poter rispondere al messaggio, occorre attendere che l'interlocutore interrompa la
trasmissione. Al termine di ogni trasmissione, l'apparecchio emette un segnale acustico se
è stato attivato il tono/cicalino audio (consultare il capitolo “13.12 Attivazione/disattivazione
del tono/cicalino audio”). Per rispondere, premere il tasto PTT
.
e parlare nel microfono
ITALIANO
Twintalker 4810 25
Page 26

Twintalker 4810
A
B
8 Contenuto della confezione
• 2 x Twintalker 4810
• 2 x clip da cintura
• 1 x caricatore duo charger
• 1 x adattatore di alimentazione
• 8 x batteria AAA NiMh
• 2 x cuffia auricolare con microfono e tasto PTT
• Manuale d'uso
• Scheda con indirizzo dell'assistenza e Hotline
9 Prima d'iniziare
9.1 Installazione/Rimozione della clip da
cintura
1. Per rimuovere la clip da cintura dall'unità,
spingere la clip (B) verso l'antenna tirando
contemporaneamente la linguetta della clip
(A).
2. Durante la reinstallazione della clip da cintura,
un "clic" indica che la clip da cintura è fissata
in posizione.
9.2 Inserimento delle batterie
C
26 Twintalker 4810
Page 27
Twintalker 4810
25
Non cortocircuitare né smaltire le batterie bruciandole. Se si prevede di
non utilizzare il dispositivo per un periodo di tempo prolungato,
rimuovere le batterie.
Non tentare di ricaricare batterie non ricaricabili come le batterie
alcaline nel caricatore. Ciò potrebbe danneggiare il PMR e il caricatore.
1. Rimuovere la clip da cintura (consultare il capitolo “9.1 Installazione/Rimozione della
clip da cintura”).
2. Sollevare il coperchio del vano batterie premendo delicatamente la clip del coperchio
(C) con l'unghia.
3. Inserire le batterie NiMh. Verificare che la polarità delle batterie NiMh sia corretta.
4. Chiudere il vano batterie.
5. Reinstallare la clip da cintura.
10 Ricarica delle batterie
Quando le batterie sono inserite, il
caricabatterie da tavolo rappresenta
un'unità di caricamento esterna.
1. Sistemare il caricatore da tavolo
su una superficie piana.
2. Collegare un'estremità del cavo
dell'adattatore in dotazione a una
presa elettrica facilmente
accessibile e l'altra estremità al
connettore situato nella parte
posteriore del caricabatterie da
tavolo .(Vedere la pagina di
copertina ripiegata - figura C)
3. Inserire la radio nel caricabatterie
come indicato.
4. Se la radio è correttamente inserita e in fase di ricarica, il LED di carica si
accenderà. (Vedere la pagina di copertina ripiegata - figura D)
26
ITALIANO
Per caricare completamente le batterie sono necessarie da 8 a 10 ore circa.
Non premere il tasto PTT del PMR quando sono posizionati nel
caricatore!
Twintalker 4810 27
Page 28

Twintalker 4810
Le figure del display riportate nelle pagine successive mostrano soltanto
le icone o visualizzano le informazioni delle funzioni spiegate nel testo.
11 Descrizione
Vedere la pagina di copertina ripiegata - figura A
1. Display LCD
2. Collegamento cuffia auricolare
3. Antenna
4. Tasto chiamata
5. Tasto Menu
– Accedere alle impostazioni del menu
6. Tasto Giù
– Diminuire il volume dell'altoparlante
– Selezionare il valore precedente nel menu
7. Contatti caricatore
8. Microfono
9. Tasto Su
– Aumentare il volume dell'altoparlante
– Selezionare il valore successivo nel menu
10. Tasto on/off
11. Tasto conversazione PTT
12 Informazioni sul display LCD
Vedere la pagina di copertina ripiegata - figura B
12. Indicazione CTCSS
13. Indicazione DCS
14. CTCSS/DCS/ Secondi cronometro / Valore opzione menu
15. Valore cronometro 1/100
16. Indicazione VOX
17. Indicazione modalità a doppio canale (DCM)
18. Indicazione canale/voce di menu
19. Indicazione volume altoparlante
20. Icona blocco tastiera
21. Indicazione livello batteria
22. Icona RX
– Visualizzata durante la ricezione
23. Icona TX
– Visualizzata durante la trasmissione
24. Indicazione di scansione
– Visualizzata in modalità di scansione
13 Uso del Twintalker 4810
28 Twintalker 4810
Page 29
Twintalker 4810
Non ricaricare mai batterie non ricaricabili come per esempio le batterie
alcaline.
13.1 Accensione/spegnimento dell'unità
Accensione:
• tenere premuto il tasto per 3 secondi.
L'apparecchio emette un segnale acustico e sul display
LCD viene visualizzato il canale corrente.
Spegnimento:
• tenere premuto il tasto per 3 secondi.
L'apparecchio emette un segnale acustico e il display LCD
si spegne.
10
10
13.2 Indicazione livello di carica batteria/batteria scarica
Il livello di carica della batteria è indicato dal numero di quadrati all'interno dell'icona della
batteria sul display LCD.
Batteria carica
Batteria carica per 2/3
Batteria carica per 1/3
Batteria scarica
Quando il livello di carica della batteria è basso, l'icona della batteria lampeggia e viene
emesso un segnale acustico ad indicare che è necessario sostituire o ricaricare le batterie.
ITALIANO
13.3 Regolazione del volume dell'altoparlante
• In modalità stand-by, premere il tasto per alzare il
volume dell'altoparlante. Viene visualizzato il livello del
volume.
• Premere il tasto
dell'altoparlante.
per abbassare il volume
6
9
13.4 Ricezione di un segnale
Quando l'unità è accesa e non è in fase di trasmissione, si trova stabilmente in modalità di
ricezione.
Twintalker 4810 29
Page 30

Twintalker 4810
Affinché i destinatari possano ricevere la trasmissione, è necessario che
si trovino sullo stesso canale e sullo stesso codice CTCSS o DCS.
(Consultare il capitolo “13.6 Cambio di canale” e “13.7 CTCSS
(Continuous Tone Coded Squelch System, sistema squelch codificato a
tono continuo) / DCS (Digital Coded Squelch, squelch codificato
digitale)”).
È possibile usare indistintamente il codice CTCSS o DCS, ma non
contemporaneamente.
6
13.5 Trasmissione di un segnale
• Tenere premuto il tasto PTT
trasmissione. Viene visualizzato il simbolo TX.
• Tenere l'unità in posizione verticale con il microfono a una
distanza di 10cm dalla bocca, quindi parlare nel microfono.
• Per interrompere la trasmissione, rilasciare il tasto PTT
.
Utilizzare la funzione di monitoraggio per verificare che il canale sia
attivo (consultare il capitolo “13.8 Monitoraggio”).
per effettuare una
11
11
13.6 Cambio di canale
• Premere una volta il tasto : il numero del canale
corrente lampeggia sul display.
• Premere il tasto o il tasto per passare al
canale successivo.
• Premere il tasto PTT
modalità stand-by.
Se durante l'impostazione non si preme alcun tasto entro 5 secondi,
l'unità torna in stand-by.
9
11
5
per confermare e tornare alla
13.7 CTCSS (Continuous Tone Coded Squelch System, sistema squelch
codificato a tono continuo) /
DCS (Digital Coded Squelch, squelch codificato digitale)
Le radio PMR senza licenza che operano sulla banda di frequenza da 446 MHz, come il
Twintalker 4810, dispongono di 8 canali radio. Se molti dei vostri vicini utilizzano apparecchi
PMR, è possibile che altri utenti si servano dello stesso canale radio.
Per evitare di ricevere segnali da altri utenti, sono stati aggiunti dei subcanali.
Due radio PMR sono in grado di comunicare tra loro solo quando operano sullo stesso
canale radio e quando selezionano lo stesso subcanale.
30 Twintalker 4810
Page 31

Twintalker 4810
5
9
9
Per disattivare il CTCSS o il DCS, selezionare nel menu il codice "00" per
il CTCSS o per il DCS. Quando la voce viene confermata, viene
visualizzato "OF".
565
Sono disponibili due tipi di subcanali:
• Continuous Tone Coded Squelch System (CTCSS, sistema squelch codificato a
tono continuo)
• Digital Coded Squelch (DCS, squelch codificato digitale)
Quando si utilizza il CTCSS, insieme al segnale vocale viene trasmesso un tono di frequenza
basso (tra 67 e 250 Hz). È possibile scegliere tra 38 toni diversi. Siete liberi di scegliere uno
tra i 38 toni disponibili. A causa del filtraggio, questi toni in genere non sono udibili, quindi
non disturberanno la comunicazione.
Il DCS è simile al CTCSS, ma invece di inviare un tono continuo della frequenza selezionata,
al segnale radio si aggiunge la trasmissione digitale dei dati. Questo Codice Digitale viene
trasmesso a una frequenza molto bassa, di circa 134 bit al secondo (il codice è composto da
23 bit). Solo i PMR di ultima generazione supportano il DCS. È possibile utilizzare 83 codici
DCS disponibili. Dato che i modelli precedenti supportano solo il CTCSS, si consiglia di
utilizzare il DCS per evitare di udire altri utenti durante le vostre conversazioni con il PMR.
13.7.1 CTCSS
• Premere 2 volte il tasto : "CTCSS" e il codice
CTCSS corrente lampeggiano sul display.
• Per passare a un altro codice, premere il tasto o
.
6
• Premere il tasto PTT per confermare e tornare alla
modalità stand-by.
11
ITALIANO
13.7.2 DCS
• Premere tre volte il tasto : "DCS" e il codice DCS
corrente lampeggiano sul display.
• Per passare a un altro codice, premere il tasto o
.
6
• Premere il tasto PTT per confermare e tornare alla
modalità stand-by.
11
5
13.8 Monitoraggio
È possibile utilizzare la funzione di monitoraggio per la ricerca dei segnali più deboli nel
canale corrente.
• Premere il tasto e il tasto contemporaneamente per attivare il
monitoraggio del canale.
• Premere il tasto per interrompere il monitoraggio del canale.
Twintalker 4810 31
Page 32

Twintalker 4810
Durante il monitoraggio del canale, il circuito del ricevitore nel PMR non
sentirà i codici CTCSS o DCS.
9
6
5
9
6
13.9 Selezione VOX
Il ricetrasmettitore PMR è dotato della funzione di trasmissione ad attivazione vocale (VOX).
In modalità VOX, l'apparecchio trasmette un segnale quando viene attivato dalla voce
dell'utente o da un rumore qualsiasi nell'ambiente. La funzione VOX non è consigliata se si
ha intenzione di usare il ricetrasmettitore in un ambiente rumoroso o esposto al vento.
La modalità VOX viene ignorata quando si preme il tasto PTT .
5
• Premere quattro volte il tasto
corrente lampeggia sul display e viene visualizzata l'icona
VOX.
• Premere il tasto per impostare il livello di sensibilità
VOX tra 1 e 3 (il livello 3 è quello più sensibile).
• Premere il tasto fino a quando sul display non
appare "OF", per disattivare la funzione VOX.
• Premere il tasto PTT
modalità stand-by.
per confermare e tornare alla
11
: l'impostazione VOX
11
13.10 Scansione canali
La funzione scansione canali effettua ricerche di segnali attivi in una sequenza continua dal
canale 1 al canale 8.
Una volta identificato il canale attivo, è possibile effettuare la ricerca del codice CTCSS o del
codice DCS impostato dall'utente che trasmette sul canale.
13.10.1 Scansione di un canale radio attivo
• Premere cinque volte il tasto : "SC" e il canale
corrente lampeggiano sul display.
• Premere il tasto o il tasto per iniziare la
scansione dei canali.
Una volta identificato il canale attivo, la scansione si interrompe ed è possibile ascoltare la
trasmissione.
Quando si interrompe la trasmissione sul canale trovato, la scansione riprenderà
automaticamente.
32 Twintalker 4810
Page 33

Twintalker 4810
Premendo il tasto PTT durante l'ascolto di un canale trovato, il PMR
si rimetterà in modalità stand-by sul canale trovato.
11
11
5
9
• Premendo il tasto PTT durante l'ascolto di un codice CTCSS
trovato, il PMR ritornerà sul canale con il codice CTCSS in
modalità stand-by.
• Se non viene rilevato nessun codice CTCSS, è possibile che
l'utente abbia selezionato il codice DCS. In tal caso è possibile
effettuare la scansione del codice DCS. (sezione 13.10.3)
11
Premendo il tasto PTT durante l'ascolto di un codice DCS trovato, il
PMR ritornerà sul canale con il codice DCS in modalità stand-by.
11
13.10.2 Scansione di un codice CTCSS
Quando viene identificato un canale attivo, premere il tasto PTT per selezionarlo. È ora
possibile cercare il codice CTCSS/DCS utilizzato dall'utente trovato.
• Premere sei volte il tasto : "SC" e "CTCSS 00" del
canale radio selezionato lampeggiano sul display.
• Premere il tasto o il tasto per avviare la
scansione CTCSS.
Quando sul canale è presente una trasmissione, il codice CTCSS (se utilizzato) viene
rilevato e visualizzato.
6
ITALIANO
13.10.3 Scansione di un codice DCS
• Premere sette volte il tasto : "SC" e "DCS 00" del
canale radio selezionato lampeggiano sul display.
• Premere il tasto o il tasto per iniziare la
scansione DCS.
Quando sul canale è in corso una trasmissione, il codice DCS (se utilizzato) viene rilevato e
visualizzato.
Twintalker 4810 33
9
5
6
Page 34

Twintalker 4810
5
9
6
11
4
PTT
11
11
13.11 Segnali di chiamata
Un segnale di chiamata avvisa gli altri interlocutori che si desidera di iniziare a parlare.
13.11.1 Impostazione del segnale di chiamata
Il Twintalker 4810 dispone di 15 segnali di chiamata.
• Premere otto volte il tasto : “CA” viene visualizzato
e il segnale di chiamata corrente lampeggia.
• Per passare a un altro segnale di chiamata, premere il tasto
o il tasto .
• Premere il tasto PTT per confermare e tornare alla
modalità stand-by.
13.11.2 Invio di un segnale di chiamata
Premere brevemente il tasto . Il segnale di chiamata sarà trasmesso sul canale
impostato.
13.12 Attivazione/disattivazione del tono/cicalino audio
Ogni volta che si rilascia il tasto , l'unità trasmette un tono/cicalino audio per confermare
che si è terminato di parlare.
Per impostare il tono/cicalino audio:
• Premere nove volte il tasto . "rO" viene visualizzato.
• Premere per attivare (ON) o per disattivare il tono/cicalino
audio (OF).
• Premere il tasto PTT per confermare la selezione e tornare alla
modalità stand-by.
5
13.13 Attivazione/disattivazione dei toni dei tasti
Quando viene premuto un tasto, l'unità emette un breve segnale acustico.
Per impostare il tono dei tasti:
• Premere dieci volte . "tO" viene visualizzato.
• Premere per attivare (ON) o per disattivare i toni dei tasti (OF).
• Premere il tasto PTT per confermare la selezione e tornare alla
modalità stand-by.
13.14 Funzione di monitoraggio a doppio canale
In modalità stand-by, il PMR è sintonizzato su un canale impostato con il codice CTCSS/
DCS. Il PMR riceverà soltanto i segnali trasmessi su quel canale e con quel codice CTCSS/
DCS.
La funzione di monitoraggio a doppio canale (DCM) consente di monitorare un secondo
canale con il codice CTCSS/DCS.
34 Twintalker 4810
Page 35

Twintalker 4810
5
5
5
5
Con il blocco tasti attivato, il tasto PTT , il tasto e il tasto
rimangono comunque attivi.
10
4
9
• Premere undici volte il tasto , "DCM OF"
lampeggerà sul display.
• Premere il tasto o il tasto per cambiare il
canale.
• Premere il tasto per confermare il canale scelto e
passare alla selezione del CTCSS. (Premere nuovamente il
tasto per passare alla selezione del DCS)
• Premere il tasto o il tasto per cambiare il
codice CTCSS o DCS.
• Premere il tasto PTT per confermare e tornare alla
modalità stand-by.
• Per disattivare la funzione selezionare "OF" durante la
selezione del canale DCM.
Quando la funzione di monitoraggio a doppio canale è attivata, il PMR passa in sequenza
dal canale di stand-by + codice CTCSS/DCS al doppio canale + codice CTCSS/DCS.
9
9
11
6
6
13.15 Blocco tasti
• Tenere premuto per tre secondi il tasto per attivare
la modalità di blocco tasti. Sul display LCD viene
visualizzata l'icona di blocco tasti.
• Tenere premuto nuovamente per tre secondi il tasto
per disattivare il blocco tasti.
5
ITALIANO
11
4
13.16 Funzione cronometro
Il Twintalker 4810 è dotato di cronometro in grado di contare fino a 59'59''99.
• Tenere premuto per tre secondi il tasto : il
cronometro viene visualizzato.
• Premere il tasto per avviare il cronometro.
• Premere il tasto per arrestare il cronometro.
• Premere il tasto per azzerare il cronometro.
• Tenere premuto per tre secondi il tasto per
disattivare il cronometro.
Twintalker 4810 35
9
6
4
Page 36

Twintalker 4810
2
11
Non collegare altri auricolari. Potrebbero danneggiare l'apparecchio.
13.17 Retroilluminazione del display
Per attivare la retroilluminazione del display LCD, premere qualsiasi tasto tranne il tasto
PTT o il tasto .
11
La retroilluminazione del display LCD si accende per 6 secondi.
4
14 Collegamento dell'auricolare
Il Twintalker 4810 può essere utilizzato con l'auricolare in dotazione.
Il connettore si trova sotto la custodia in gomma protettiva nella parte superiore
dell'apparecchio
Per collegare l'auricolare, aprire il coperchio in gomma per scoprire il connettore. Il coperchio
in gomma non può essere rimosso dal PMR perché è fissato all'unità.
Inserire la spina dell'auricolare nel connettore (jack da 2,5 mm).
Il piccolo tasto sull'auricolare ha la stessa funzione del tasto PTT
Quando si utilizza il tasto PTT dall'auricolare, è anche necessario usare il microfono
dell'auricolare stesso..
.
sull'unità.
11
15 Risoluzione dei problemi
Assenza di alimentazione Pulire i contatti della batteria con un panno morbido.
Sostituire le batterie.
Assenza di trasmissione Prima di parlare, verificare che il tasto PTT sia
completamente premuto.
Monitorare l'attività del canale e passare ad un altro canale
se quello corrente è in uso.
Assenza di ricezione Controllare il volume dell'altoparlante.
Verificare di trovarsi entro il raggio di ricezione di chi
trasmette ed eventualmente spostarsi.
Copertura limitata e rumori
durante la trasmissione
Interferenza Il ricevitore e il trasmettitore sono troppo vicini. La distanza
36 Twintalker 4810
La portata di trasmissione dipende dal terreno.
Le costruzioni in acciaio, gli edifici in calcestruzzo o l'uso
all'interno di veicoli possono compromettere la portata.
Evitare più ostacoli possibili e comunicare in presenza di
una chiara linea di visibilità.
Cambiare posizione.
minima tra 2 unità è 1,5 m.
11
Page 37

16 Specifiche tecniche
)
DCS Code Chart
No DCS code No DCS code No DCS code No DCS code
0 Disabled 21 134 42 311 63 516
1 23 22 143 43 315 64 532
2 25 23 152 44 331 65 546
3 26 24 155 45 343 66 565
4 31 25 156 46 346 67 606
5 32 26 162 47 351 68 612
6 43 27 165 48 364 69 624
7 47 28 172 49 365 70 627
8 51 29 174 50 371 71 631
9 54 30 205 51 411 72 632
10 65 31 223 52 412 73 654
11 71 32 226 53 413 74 662
12 72 33 243 54 423 75 664
13 73 34 244 55 431 76 703
14 74 35 245 56 432 77 712
15 114 36 251 57 445 78 723
16 115 37 261 58 464 79 731
17 116 38 263 59 465 80 732
18 125 39 265 60 466 81 734
19 131 40 271 61 503 82 743
20 132 41 306 62 506 83 754
Twintalker 4810
Canali
Subcodice
Frequenza
Copertura
Batterie
Potenza di trasmissione
Tipo di modulazione
Spaziatura canali
Adattatore per caricatore Duo
8
CTCSS 38 / DCS 83
446,00625MHz - 446,09375 MHz
Fino a 8 Km (in campo aperto)
4 x alcaline AAA o 4 x ricaricabili AAA NiMH
=< 500mW ERP
FM - F3E
12,5 kHz
Entrata: 230 V CA / 50Hz - Uscita: 9V CC/200 mA
Charger
Channel Frequency Chart: CTCSS Code Chart
Channel Frequency (MHz
1 446,00625 0 Disabled 10 94,8 20 131,8 30 186,2
2 446,01875 1 67,0 11 97,4 21 136,5 31 192,8
3 446,03125 2 71,9 12 100,0 22 141,3 32 203,5
4 446,04375 3 74,4 13 103,5 23 146,2 33 210,7
5 446,05625 4 77,0 14 107,2 24 151,4 34 218,1
6 446,06875 5 79,7 15 110,9 25 156,7 35 225,7
7 446,08125 6 82,5 16 114,8 26 162,2 36 233,6
8 446,09375 7 85,4 17 118,8 27 167,9 37 241,8
Code Frequency (Hz) Code Freq. (Hz) Code Freq. (Hz) Code Freq. (Hz)
8 88,5 18 123,0 28 173,8 38 250,3
9 91,5 19 127,3 29 179,9
ITALIANO
Twintalker 4810 37
Page 38

Twintalker 4810
17 Indirizzo dell'assistenza e supporto tramite hotline
Gli indirizzi dell'assistenza sono stampati sulla scheda di assistenza supplementare inclusa
nella confezione oppure sono reperibili sul sito www.ucom.be
18 Dichiarazione di conformità e del produttore
Topcom Europe Nv.
Grauwmeer 17
3001 Heverlee
Belgio
La dichiarazione di conformità si trova sull'ultima pagina del presente manuale d'uso.
19 Garanzia
19.1 Periodo di garanzia
Gli apparecchi hanno un periodo di garanzia di 36 mesi. Il periodo di garanzia decorre dal
giorno d'acquisto della nuova unità. Non esiste alcuna garanzia su batterie standard o
ricaricabili (tipo AA/AAA). Le parti soggette a usura o i difetti che causano effetti trascurabili
sul funzionamento o sul valore dell'apparecchio non sono coperti da garanzia.
La garanzia potrà ritenersi valida solo dietro presentazione della ricevuta originale di
acquisto o di una copia di essa, a condizione che vi siano indicati la data di acquisto e il tipo
di unità.
19.2 Utilizzo della garanzia
Un apparecchio difettoso dovrà essere restituito a un centro di assistenza autorizzato
insieme a un valido documento di acquisto e alla scheda di assistenza debitamente
compilata.
Durante il periodo di validità della garanzia, il centro di assistenza provvederà alla
riparazione gratuita di ogni difetto imputabile ai materiali o a errori di produzione, riparando
o sostituendo le unità difettose o i pezzi difettosi delle unità. In caso di sostituzione, il colore
e il modello potrebbero differire dall'unità originariamente acquistata.
La data d'acquisto iniziale determina l'inizio del periodo di garanzia. Ogni sostituzione o
riparazione dell'apparecchio da parte delcentro di assistenza non comporta un'estensione
del periodo di garanzia.
19.3 Decadenza della garanzia
Si intendono esclusi dalla garanzia tutti i danni o i guasti dovuti a una cattiva manutenzione
o a un errato utilizzo dell'apparecchio, nonché i danni dovuti all'uso di ricambi o di accessori
non originali.
La presente garanzia non copre i danni causati da fattori esterni come fulmini, acqua e
incendi, né i danni dovuti al trasporto.
La garanzia non è applicabile in caso di modifica, eliminazione o illeggibilità del numero di
serie delle unità.
Qualsiasi rivendicazione in garanzia sarà considerata priva di fondamento in caso di
intervento da parte dell'acquirente.
38 Twintalker 4810
Page 39

Twintalker 4810
PORTUGUÊS
1 Introdução 41
2 Utilização prevista 41
3 Marca CE 41
4 Instruções de segurança 41
4.1 Geral 41
4.2 Queimaduras 41
4.3 Lesões 41
4.4 Perigo de explosão 41
4.5 Perigo de envenenamento 42
4.6 Restrições legais 42
4.7 Notas 42
5 Limpeza e manutenção 42
6 Eliminação do dispositivo (ambiente) 43
7 Utilizar um dispositivo PMR 43
8 Esta embalagem inclui 44
9 Iniciar 44
9.1 Colocar/retirar o clipe de cinto 44
9.2 Instalação das Pilhas 44
10 Carregar as pilhas 45
11 Descrição 45
12 Informação apresentada no visor LCD 46
13 Utilizar o Twintalker 4810 46
13.1 Ligar e desligar a unidade (ON/OFF) 46
13.2 Nível de Carga das Pilhas/Indicador de Pilhas Fracas 46
13.3 Ajustar o volume do altifalante 47
13.4 Receber um Sinal 47
13.5 Transmitir um sinal 47
13.6 Mudar de Canal 48
13.7 CTCSS (Continuous Tone Coded Squelch System - sistema silenciador
controlado por tonalidades)
DCS (Digital Coded Squelch - sistema celular digital) 48
13.8 Monitorização 49
13.9 Selecção de VOX 49
13.10 Procura de canais (SCAN) 50
13.11 Tons de chamada 51
13.12 Ligar/Desligar sinal de fim de comunicação (Roger) 51
13.13 Ligar/Desligar tons de teclado 52
13.14 Função de monitorização de bicanal 'Dual Channel' 52
13.15 Bloqueio do teclado 52
13.16 Função de cronómetro 53
13.17 Luz de fundo do visor 53
Twintalker 4810 39
Page 40

Twintalker 4810
14 Ligar o auricular 53
15 Diagnóstico de avarias 54
16 Especificações técnicas 54
17 Endereço de apoio ao cliente e linha de assistência 55
18 Declaração de conformidade e fabricante 55
19 Garantia 55
19.1 Período de garantia 55
19.2 Modo de funcionamento da garantia 56
19.3 Exclusões de garantia 56
40 Twintalker 4810
Page 41

Twintalker 4810
PORTUGUÊS
1 Introdução
Agradecemos a sua aquisição do Twintalker 4810. Este é um dispositivo de comunicação
rádio de longo alcance e baixo consumo, que permite a comunicação com um alcance
máximo de 8 Km. O seu único custo é limitado ao recarregamento das pilhas.
O TwinTalker funciona em 8 canais.
O Twintalker está protegido contra gotas de água a cair na vertical com o corpo virado para
cima até 15° de acordo com a norma IPX2.
2 Utilização prevista
Pode ser utilizado para fins recreativos. Por exemplo: para manter em contacto 2 ou mais
carros, ciclistas ou esquiadores durante uma viagem ou percurso. Pode ser utilizado para se
manter em contacto com as crianças enquanto elas brincam no exterior, etc...
3 Marca CE
O símbolo CE na unidade, guia do utilizador e caixa de oferta indica que a unidade se
encontra em conformidade com os requisitos essenciais da directiva R&TTE 1995/5/CE.
4 Instruções de segurança
4.1 Geral
Leia atentamente as seguintes informações acerca da segurança e da utilização correcta da
unidade. Familiarize-se com todas as funções do dispositivo. Conserve este manual em
lugar seguro para utilização futura.
4.2 Queimaduras
• Se a cobertura da antena estiver danificada, não lhe toque, pois se a antena entrar em
contacto com a pele durante a transmissão, pode resultar numa queimadura ligeira.
• As pilhas podem provocar danos materiais, como queimaduras, caso algum material
condutor, como jóias, chaves ou correntes, tocar nos pólos expostos. O material pode
fechar um circuito eléctrico (curto circuito) e ficar bastante quente. Tome cuidado ao
manusear uma pilha carregada, em particular ao colocá-la num bolso, bolsa ou outro
contentor que possa conter objectos metálicos.
4.3 Lesões
• Não coloque o dispositivo na zona por cima de um air bag nem na área de acção do air
bag. Os air bags são insuflados com muita força. Se um PMR for colocado na área de
acção do air bag e este for activado, o comunicador pode ser projectado com muita
força e causar lesões graves nos ocupantes do veículo.
• Mantenha o PMR a pelo menos 15 centímetros de um pacemaker.
• Desligue o PMR (OFF) imediatamente se este causar interferência em qualquer
equipamento médico.
4.4 Perigo de explosão
• Não substitua as pilhas na presença de qualquer atmosfera potencialmente explosiva.
Pode libertar-se uma faísca do pólo ao colocar ou ao retirar pilhas e provocar uma
explosão.
Twintalker 4810 41
Page 42

Twintalker 4810
Áreas com atmosferas potencialmente explosivas estão frequentemente
marcadas de forma clara, mas nem sempre. Estas incluem áreas de
armazenamento de combustível como o porão de embarcações,
instalações de armazenamento ou transferência de combustível ou de
produtos químicos; áreas onde o ar contém substâncias químicas ou
partículas, como poeiras de cereais, pó ou metais; e quaisquer outras áreas
em que normalmente seria recomendável desligar o motor do seu veículo.
• Desligue o PMR quando se encontrar em áreas com uma atmosfera potencialmente
explosiva. Faíscas nestas áreas podem provocar uma explosão ou um incêndio,
resultando em lesões físicas ou mesmo morte.
• Nunca coloque pilhas no fogo, pois podem explodir.
4.5 Perigo de envenenamento
• Mantenha as pilhas afastadas de crianças pequenas
4.6 Restrições legais
• Nalguns países é proibido utilizar o PMR durante a condução de veículos. Neste caso, é
aconselhável sair da estrada antes de utilizar o dispositivo.
• Desligue o PMR (OFF) a bordo de aviões quando for instruído a fazê-lo. Qualquer
utilização da unidade deve estar em conformidade com os regulamentos da linha aérea
e as instruções da tripulação.
• Desligue o PMR (OFF) em quaisquer instalações onde existam avisos de que deve
fazê-lo. Os hospitais e unidades de saúde poderão conter equipamento sensível a
energia RF externa.
• A substituição ou a modificação da antena poderá afectar as especificações de rádio
PMR e violar os regulamentos CE. Antenas não autorizadas poderão igualmente
danificar o rádio.
4.7 Notas
• Não tocar na antena enquanto o dispositivo estiver em transmissão, pois poderá afectar
o alcance.
• Remova as pilhas se não pretender utilizar o dispositivo durante um longo período de
tempo.
5 Limpeza e manutenção
• Para limpar a unidade, passe com um pano macio humedecido com água. Não utilize
agentes de limpeza ou solventes na unidade pois podem danificar a caixa e penetrar no
interior do dispositivo, causando danos permanentes.
• Os contactos das pilhas podem ser limpos com um pano seco que não liberte
partículas.
• Caso a unidade se molhe, desligue-a e retire imediatamente as pilhas. Seque o
compartimento das pilhas com um pano macio de modo a minimizar os danos
potenciais causados pela água. Deixe o compartimento das pilhas aberto durante a
noite ou até estar completamente seco. Não utilizar a unidade até estar completamente
seca.
42 Twintalker 4810
Page 43

Twintalker 4810
PORTUGUÊS
11
11
Caso 2 ou mais utilizadores premirem o botão PTT ao mesmo tempo,
o receptor receberá apenas o sinal mais forte e os restantes sinais serão
suprimidos. Assim, deve transmitir um sinal (premir o botão PTT )
apenas quando o canal está desimpedido.
11
11
O alcance das ondas de rádio é fortemente afectado por obstáculos, tais
como edifícios, estruturas de metal/betão, os acidentes da paisagem,
bosques, plantas, ... Isto quer dizer que, nalguns casos, o alcance entre
dois ou mais PMR pode ser reduzido a um máximo de algumas dezenas
de metros. Rapidamente verificará que os PMR funcionam melhor
quando existe um número mínimo de obstáculos entre os utilizadores.
6 Eliminação do dispositivo (ambiente)
Quando o ciclo de vida do produto chega ao fim, não deve eliminar este produto
juntamente com os resíduos domésticos. Deve levá-lo a um ponto de recolha
de equipamentos eléctricos e electrónicos. O símbolo presente no produto, no
manual do utilizador e na caixa dá esta indicação. Alguns dos materiais do
produto podem ser reutilizados se os colocar num ponto de reciclagem. Ao
reutilizar algumas das partes ou das matérias-primas dos produtos utilizados, dá uma
contribuição importante para a protecção do meio ambiente. Contacte as autoridades locais
se necessitar de mais informações sobre os pontos de recolha existentes na sua área.
7 Utilizar um dispositivo PMR
Para que seja possível estabelecer comunicação entre dispositivos PMR, estes têm de
estar definidos para o mesmo canal e código CTCSSDCS (ver capítulo “13.7 CTCSS
(Continuous Tone Coded Squelch System - sistema silenciador controlado por tonalidades)
DCS (Digital Coded Squelch - sistema celular digital)”) e encontrar-se dentro do alcance de
recepção (até a um máx. de 8 km em campo aberto). Dado que estes dispositivos utilizam
bandas de frequência livre (canais), todos os dispositivos ligados partilham estes canais
(total de 8 canais). Assim, a privacidade não é garantida. Qualquer pessoa que disponha de
um conjunto PMR definido para o mesmo canal poderá ouvir a conversa. Se pretende
comunicar (transmitir um sinal de voz) prima o botão PTT .
Uma vez premido este botão, o dispositivo entra em modo de transmissão e pode falar para
o microfone. Todos os outros dispositivos PMR na área de alcance, definidos para o mesmo
sinal e em modo de espera (que não estejam em modo de transmissão), ouvirão a sua
mensagem. É necessário esperar até que um outro dispositivo acabe a transmissão para
poder responder à mensagem. No final de cada transmissão, a unidade enviará um sinal
sonoro "bip" se a função Roger Beep estiver activada (ver capítulo “13.12 Ligar/Desligar
sinal de fim de comunicação (Roger)”). Para responder, simplesmente prima o botão PTT
e fale para o microfone.
Twintalker 4810 43
Page 44

Twintalker 4810
A
B
C
8 Esta embalagem inclui
• 2 x Twintalker 4810
• 2 x Clipe de cinto
• 1 x Carregador Duo
• 1 x Transformador
• 8 x pilhas AAA de NiMh
• 2 x Auriculares com microfone e botão PTT
• Manual do utilizador
• Cartão com endereço de apoio ao cliente e linha de assistência
9 Iniciar
9.1 Colocar/retirar o clipe de cinto
1. Para retirar o clipe de cinto da unidade,
empurre o clipe de cinto (B) na direcção da
antena ao mesmo tempo que puxa pela
patilha (A).
2. Ao recolocar o clipe de cinto, um clique indica
que o clipe está preso em posição.
9.2 Instalação das Pilhas
1. Retire o clipe de cinto (ver capítulo “9.1 Colocar/retirar o clipe de cinto”).
2. Levante a tampa do compartimento das pilhas empurrando suavemente o fecho (C)
com a unha.
3. Coloque as pilhas de NiMh. Assegure-se de que a polaridade das pilhas de NiMh está
correcta.
4. Feche o compartimento das pilhas.
5. Reponha o clipe de cinto
44 Twintalker 4810
Page 45

Twintalker 4810
PORTUGUÊS
25
26
Não provoque curto-circuitos nem elimine as pilhas queimando. Retire
as pilhas se não pretender utilizar o dispositivo durante um longo
período de tempo.
Não carregue pilhas não recarregáveis, tais como pilhas alcalinas, no
carregador. Isto poderá causar danos nos PMR e no carregador.
10 Carregar as pilhas
Quando as pilhas estão instaladas, o
carregador de secretária proporciona a
possibilidade de carregamento.
1. Coloque o carregador de mesa
sobre uma superfície plana.
2. Ligue uma extremidade do
transformador fornecido a uma
tomada eléctrica facilmente
acessível e a outra extremidade
ao conector na parte de trás do
carregador de secretária .(Ver
na página de rosto dobrada ilustração C)
3. Coloque o rádio no carregador da
forma indicada.
4. O LED indicador de carregamento acende-se quando o dispositivo está inserido
da forma adequada e em carregamento. (Ver na página de rosto dobrada ilustração D)
Levará cerca de 8 a 10 horas até que as pilhas estejam totalmente carregadas.
Não premir o botão PTT dos rádios PMR enquanto estes estiverem
colocados no carregador!
11 Descrição
Ver folha de rosto dobrada - ilustração A
1. Visor LCD
2. Ligação do dispositivo auricular
3. Antena
4. Botão de chamada
5. Botão de Menu
– Entra no menu de configuração
6. Botão para baixo
– Reduz o volume do som
– Selecciona o valor anterior no menu
7. Contactos do carregador
Twintalker 4810 45
Page 46

Twintalker 4810
As ilustrações do visor nas páginas que se seguem apenas mostram os
ícones ou as informações no visor das funções que são explicadas no
texto.
10
10
8. Microfone
9. Botão PARA CIMA
– Aumenta o volume do som
– Selecciona o valor seguinte no menu
10. Botão Ligar/Desligar
11. Botão premir para falar PTT
12 Informação apresentada no visor LCD
Ver folha de rosto dobrada - ilustração B
12. Indicação CTCSS
13. Indicação DCS
14. CTCSS/DCS/ Segundos marcados no cronómetro / Valor da opção do Menu
15. Valor do cronómetro 1/100
16. Indicação VOX
17. Indicação de modo bicanal (Dual Channel Mode - DCM)
18. Indicação do item de Canal/Menu
19. Indicação do volume do som
20. Ícone Bloqueio do teclado
21. Indicador de carga da pilha
22. Ícone RX
– Apresentado durante a recepção
23. Ícone TX
– Apresentado durante a transmissão
24. Indicação de procura
– Apresentado durante o modo de procura
13 Utilizar o Twintalker 4810
13.1 Ligar e desligar a unidade (ON/OFF)
Ligar (ON):
• Prima e mantenha premido o botão durante 3
segundos. A unidade emitirá um sinal sonoro (bip) e o visor
LCD apresentará o canal activo.
Desligar (OFF):
• Prima e mantenha premido o botão durante 3
segundos. A unidade emitirá um sinal sonoro (bip) e o visor
LCD ficará vazio.
13.2 Nível de Carga das Pilhas/Indicador de Pilhas Fracas
O nível de carga das pilhas é indicado pelo número de quadrados presentes no interior do
ícone de pilhas no visor LCD.
46 Twintalker 4810
Page 47

Twintalker 4810
PORTUGUÊS
Nunca recarregue pilhas não recarregáveis, como por exemplo pilhas
alcalinas.
9
6
Para que os outros recebam a sua transmissão, têm de estar no mesmo
canal e ter definido o mesmo código CTCSS ou código DCS. (Consulte o
capítulo “13.6 Mudar de Canal” e “13.7 CTCSS (Continuous Tone Coded
Squelch System - sistema silenciador controlado por tonalidades) DCS
(Digital Coded Squelch - sistema celular digital)”)
Pode usar CTCSS ou DCS, mas nunca os dois ao mesmo tempo.
11
Pilhas carregadas
Pilhas a 2/3
Pilhas a 1/3
Pilhas descarregadas
Quando o nível de carga das pilhas é fraco, o ícone de nível de carregamento das pilhas
começará a piscar e ouve-se um sinal sonoro de modo a indicar que é necessário substituir
ou recarregar as pilhas.
13.3 Ajustar o volume do altifalante
• Prima o botão em modo de espera para aumentar o
volume de som. É mostrado o nível do volume.
• Prima o botão para baixar o volume do som do
altifalante.
13.4 Receber um Sinal
A unidade encontra-se continuamente em modo de recepção enquanto está ligada e não
está a transmitir.
13.5 Transmitir um sinal
• Prima e mantenha premido o botão PTT
É mostrado o símbolo TX.
• Mantenha a unidade numa posição vertical, com o
microfone a 10cm da boca, e fale directamente para o
microfone.
• Solte o botão PTT
Para verificar a actividade do canal, utilize a função de monitorização
(ver capítulo “13.8 Monitorização”).
Twintalker 4810 47
para parar de transmitir.
11
para transmitir.
Page 48

Twintalker 4810
9
6
13.6 Mudar de Canal
5
• Prima uma vez o botão
aparece intermitente no visor.
• Prima o botão ou o botão para mudar de
canal.
• Prima o botão PTT
de espera.
Se nenhum botão for premido no espaço de 5 segundos durante a
configuração, a unidade regressa ao modo de espera.
para confirmar e regressar ao modo
11
; o número do canal actual
13.7 CTCSS (Continuous Tone Coded Squelch System - sistema
silenciador controlado por tonalidades)
DCS (Digital Coded Squelch - sistema celular digital)
Os rádios PMR sem licença que operam na banda de frequências de 446 MHz, como o PMR
Twintalker 4810, dispõem de 8 canais de rádio disponíveis. Caso existam muitos utilizadores
de PMR na sua região, existe a possibilidade de alguns destes utilizadores operarem no
mesmo canal de rádio.
Para evitar receber sinais de outros utilizadores, foram integrados subcanais.
Dois rádios PMR apenas poderão comunicar entre si quando operam no mesmo canal de
rádio e quando tiverem seleccionado exactamente o mesmo subcanal.
Existem dois tipos de subcanais:
• CTCSS (Continuous Tone Coded Squelch System - sistema silenciador controlado
por tonalidades )
• DCS (Digital Coded Squelch - sistema celular digital)
Ao utilizar o CTCSS, é transmitido um tom de baixa frequência (entre 67 e 250 Hz) em
conjunto com o sinal de voz. Pode seleccionar entre 38 tons disponíveis. Escolha livremente
entre um dos 38 tons disponíveis. Devido à filtração, estes tons em geral não são audíveis,
de modo a não prejudicarem a comunicação.
O DCS é semelhante ao CTCSS, mas em vez de ser enviado um tom contínuo de uma
frequência seleccionada, é adicionada uma transmissão de sinais digitais ao sinal de rádio.
Este Código Digital é transmitido a uma frequência muito baixa, à volta de 134 bits por
segundo (o código tem um tamanho de 23 bits). Apenas os PMR de última geração suportam
DCS. Existem 83 códigos DCS disponíveis que podem ser utilizados. Dado que os modelos
mais antigos apenas suportam CTCSS, o melhor é utilizar DCS para evitar que outros
utilizadores sejam audíveis durante as suas conversas com o PMR.
48 Twintalker 4810
Page 49

Twintalker 4810
PORTUGUÊS
6
5
9
6
11
Para desactivar CTCSS ou DCS, seleccione o código "00" para CTCSS ou
para DCS no menu. Quando a sua selecção for confirmada, "OF" será
apresentado.
6
Durante a monitorização de canais, o circuito de recepção do PMR não
escuta os códigos CTCSS ou DCS.
11
13.7.1 CTCSS
• Prima o botão duas vezes : "CTCSS" e o código
CTCSS actual piscam no visor.
• Prima o botão ou o botão para mudar para
outro código.
• Prima o botão PTT para confirmar a selecção e
regressar ao modo de espera.
13.7.2 DCS
• Prima o botão três vezes: "DCS" e o código DCS
actual piscam no visor.
• Prima o botão ou o botão para mudar para
outro código.
• Prima o botão PTT para confirmar a selecção e
regressar ao modo de espera.
5
9
11
13.8 Monitorização
Pode utilizar a função de monitorização para procurar sinais mais fracos no canal activo.
• Prima os botões e simultaneamente para activar a monitorização
de canais.
• Prima o botão para parar a monitorização de canais.
5
5
13.9 Selecção de VOX
A transmissão do PMR pode ser activada por voz (VOX). No modo VOX, o rádio transmitirá
um sinal sempre que seja activado pela sua voz ou por qualquer som. A operação em modo
VOX não é recomendada se o rádio for utilizado em locais ruidosos ou ventosos.
O modo VOX será desactivado quando premir o botão PTT .
Twintalker 4810 49
Page 50

Twintalker 4810
9
6
6
Se premir o botão PTT enquanto ouve um canal encontrado, o PMR
regressa ao modo de espera no canal encontrado.
5
• Prima quatro vezes o botão
corrente de VOX fica intermitente no visor e o ícone VOX é
apresentado.
• Prima o botão para seleccionar o nível de
sensibilidade VOX de 1 a 3 (o nível 3 é o mais sensível).
• Prima o botão até que ‘OF’ seja apresentado no
visor, para desligar o modo VOX.
• Prima o botão PTT
de espera.
para confirmar e regressar ao modo
11
, a configuração
13.10 Procura de canais (SCAN)
A procura de canais procura sinais activos em contínuo, do canal 1 ao 8.
Quando um canal activo é encontrado, tem a opção de procurar o código CTCSS ou o
código DCS definido pelo utilizador que está a emitir nesse canal.
13.10.1 Procura de um canal de rádio activo
• Prima o botão cinco vezes : "SC" e o código actual
piscam no visor.
• Prima o botão ou o botão para iniciar a
procura de canais.
Quando um canal activo é encontrado, a procura pára e pode ouvir a transmissão.
Quando a transmissão do canal encontrado pára, a procura de canais é retomada
automaticamente.
5
9
11
13.10.2 Procura de um código CTCSS
Quando um canal activo é encontrado, prima o botão PTT para seleccionar o canal
activo encontrado. Tem agora a opção de procurar o código CTCSS/DCS utilizado pelo
utilizador encontrado.
• Prima o botão seis vezes: "SC" e "CTCSS 00"
piscam no visor para o canal de rádio seleccionado.
• Prima o botão ou o botão para iniciar a
procura do CTCSS.
Quando existir uma transmissão no canal, o código CTCSS (se utilizado) será detectado e
apresentado.
50 Twintalker 4810
5
9
11
6
Page 51

Twintalker 4810
PORTUGUÊS
• Se premir o botão PTT enquanto ouve um canal encontrado,
o PMR regressa ao modo de espera no canal com o código
CTCSS.
• Caso não seja detectado nenhum código CTCSS, há a
possibilidade de estar a ser utilizado um código DCS
seleccionado pelo utilizador. Neste caso, procure o código DCS.
(secção 13.10.3)
11
6
Se premir o botão PTT enquanto ouve o código DCS encontrado, o
PMR regressa ao modo de espera no canal com o código DCS.
596
T
13.10.3 Procura de um código DCS
• Prima o botão sete vezes : "SC" e "DCS 00"
5
piscam no visor para o canal de rádio seleccionado.
• Prima o botão ou o botão para iniciar a
9
procura do DCS.
Quando existir uma transmissão no canal, o código DCS (se utilizado) será detectado e
apresentado.
11
13.11 Tons de chamada
Um tom de chamada alerta os outros utilizadores de que pretende começar a falar.
13.11.1 Definir o sinal de chamada
O Twintalker 4810 tem disponíveis 15 tons de chamada.
• Prima oito vezes o botão , “CA” é apresentado e o
tom de chamada actual fica intermitente.
• Prima o botão
outro Tom de chamada.
• Prima o botão PTT para confirmar e regressar ao modo
de espera.
13.11.2 Enviar um sinal de chamada
Prima brevemente o botão . O tom de chamada é transmitido no canal definido.
13.12 Ligar/Desligar sinal de fim de comunicação (Roger)
Depois de soltar o botão , a unidade envia um sinal de fim de comunicação (Roger) de
modo a confirmar que parou de falar.
4
PT
Twintalker 4810 51
ou o botão para mudar para
11
Page 52

Twintalker 4810
5
9
6
5
6
5
5
Para definir o sinal de fim de comunicação (Roger).
• Prima nove vezes o botão . ‘rO’ é apresentado.
• Prima para ligar (ON) ou desligar o sinal de fim de comunicação
(Roger) (OF).
• Prima o botão PTT para confirmar e regressar ao modo de
espera.
11
5
13.13 Ligar/Desligar tons de teclado
Quando um botão é premido, a unidade emite um ligeiro 'bip'.
Para definir os tons do teclado.
• Prima dez vezes. ‘tO’ é apresentado.
• Prima para ligar (ON) ou desligar os Tons do Teclado (OF).
• Prima o botão PTT para confirmar a sua selecção e regressar ao
modo de espera.
11
13.14 Função de monitorização de bicanal 'Dual Channel'
No modo de espera, o PMR é definido para um canal com um código CTCSS/DCS. O PMR
apenas recebe sinais transmitidos nesse canal com o código CTCSS/DCS.
O monitor de bicanal 'Dual Channel Monitor' (DCS) permite-lhe monitorizar um segundo
canal com código CTCSS/DCS.
• Prima onze vezes o botão ,” DCM OF" pisca no
visor.
• Prima o botão ou o botão para mudar o
canal.
• Prima o botão para confirmar a selecção de canal e
ir para a selecção de CTCSS. (Prima novamente o botão
5
para ir para a selecção DCS)
• Prima o botão ou o botão para mudar o
código CTCSS ou o código DCS.
• Prima o botão PTT ara confirmar e regressar ao modo
de espera.
• Para desligar a função seleccione "OF" quando estiver a
seleccionar o canal DCM.
Quando a função de monitorização de duocanal está activada, o PMR comuta
sequencialmente entre o canal de espera + código CTCSS/DCS e o outro canal
seleccionado + código CTCSS/DCS.
9
11
13.15 Bloqueio do teclado
• Prima e mantenha premido o botão durante três
segundos para activar o modo de bloqueio de teclado. O
ícone de bloqueio de teclado é mostrado no visor LCD.
• Prima e mantenha premido o botão de novo,
durante três segundos, para desactivar o bloqueio de
teclado
52 Twintalker 4810
Page 53

Twintalker 4810
PORTUGUÊS
O botão PTT , o botão e o botão continuam funcionais
mesmo quando o bloqueio de teclado está activado.
11
10
4
9
6
11
2
11
4
13.16 Função de cronómetro
O Twintalker 4810 tem um cronómetro que marca o tempo até 59'59''99.
• Prima o botão e mantenha premido durante três
segundos. O cronómetro é apresentado.
• Prima o botão para iniciar o cronómetro.
• Prima o botão para parar o cronómetro.
• Prima o botão para repor o cronómetro a zeros.
• Prima e mantenha premido o botão durante três
segundos para desactivar o cronómetro.
9
4
13.17 Luz de fundo do visor
Para activar a luz de fundo do visor LCD, prima qualquer botão excepto o botão PTT ou
o botão .
A luz de fundo do visor LCD acende-se até 6 segundos.
4
14 Ligar o auricular
O Twintalker 4810 pode ser utilizado com o auricular fornecido.
O conector encontra-se por baixo da tampa de protecção de borracha do lado superior da
unidade
Para ligar o auricular, abra a patilha de borracha de modo a expor o conector. A patilha de
borracha não pode ser retirada do PMR dado que se encontra fixada à unidade.
Insira a ficha do auricular no conector (jaque de 2,5 mm).
O pequeno botão no auricular tem a mesma função que o botão PTT -
Ao utilizar o botão PTT do auricular, tem de utilizar também o microfone existente no fio
do auricular.
Twintalker 4810 53
.
11
Não conecte outros auriculares. Isso pode danificar o dispositivo.
na unidade
Page 54

Twintalker 4810
)
15 Diagnóstico de avarias
Sem energia Limpe os contactos das pilhas com um pano suave.
Substitua as pilhas.
Sem transmissão Certifique-se de que o botão - PTT é completamente
11
premido antes de falar.
Monitorize a actividade do canal e mude para outro canal
se o canal actual estiver ocupado.
Sem recepção Verifique o volume do altifalante.
Certifique-se de que se encontra dentro da área de
cobertura de recepção do emissor e, se necessário, mude
de lugar.
Alcance limitado e ruído
durante a transmissão
O alcance da área de cobertura depende do terreno.
Construções em aço, edifícios de betão e a utilização
dentro de veículos têm uma influência negativa sobre o
alcance.
Tente evitar o máximo de obstáculos possível e manter
uma linha visual desimpedida durante a comunicação.
Mude de lugar.
Interferência O receptor e o transmissor estão demasiado próximos. A
distância mínima entre 2 unidades é de 1,5 m.
16 Especificações técnicas
Canais
Subcódigo
Frequência
Alcance
Pilhas
Poder de Transmissão
Tipo de Modulação
Espaçamento de canais
Transformador Duo Charger
8
CTCSS 38 / DCS 83
446.00625MHz - 446.09375 MHz
Até 8 km (campo aberto)
4 x AAA alcalinas ou 4 x AAA NiMH recarregáveis
=< 500mW ERP
FM - F3E
12,5 kHz
Entrada : 230V AC / 50Hz - Saída : 9V AC / 200mA
Channel Frequency Chart: CTCSS Code Chart
Channel Frequency (MHz
1 446,00625 0 Disabled 10 94,8 20 131,8 30 186,2
2 446,01875 1 67,0 11 97,4 21 136,5 31 192,8
3 446,03125 2 71,9 12 100,0 22 141,3 32 203,5
4 446,04375 3 74,4 13 103,5 23 146,2 33 210,7
5 446,05625 4 77,0 14 107,2 24 151,4 34 218,1
6 446,06875 5 79,7 15 110,9 25 156,7 35 225,7
7 446,08125 6 82,5 16 114,8 26 162,2 36 233,6
8 446,09375 7 85,4 17 118,8 27 167,9 37 241,8
54 Twintalker 4810
Code Frequency (Hz) Code Freq. (Hz) Code Freq. (Hz) Code Freq. (Hz)
8 88,5 18 123,0 28 173,8 38 250,3
9 91,5 19 127,3 29 179,9
Page 55

Twintalker 4810
PORTUGUÊS
DCS Code Chart
No DCS code No DCS code No DCS code No DCS code
0 Disabled 21 134 42 311 63 516
1 23 22 143 43 315 64 532
2 25 23 152 44 331 65 546
3 26 24 155 45 343 66 565
4 31 25 156 46 346 67 606
5 32 26 162 47 351 68 612
6 43 27 165 48 364 69 624
7 47 28 172 49 365 70 627
8 51 29 174 50 371 71 631
9 54 30 205 51 411 72 632
10 65 31 223 52 412 73 654
11 71 32 226 53 413 74 662
12 72 33 243 54 423 75 664
13 73 34 244 55 431 76 703
14 74 35 245 56 432 77 712
15 114 36 251 57 445 78 723
16 115 37 261 58 464 79 731
17 116 38 263 59 465 80 732
18 125 39 265 60 466 81 734
19 131 40 271 61 503 82 743
20 132 41 306 62 506 83 754
17 Endereço de apoio ao cliente e linha de assistência
Os endereços de apoio ao cliente encontram-se impressos no cartão de serviço extra
incluído na embalagem ou podem ser encontrados em www.ucom.be
18 Declaração de conformidade e fabricante
Topcom Europe Nv.
Grauwmeer 17
3001 Heverlee
Bélgica
A declaração de conformidade pode ser encontrada na última página deste manual do
utilizador
19 Garantia
19.1 Período de garantia
As unidades têm um período de garantia de 36 meses. O período de garantia entra em efeito
a partir da data de compra da unidade. Não há nenhuma garantia em baterias padrão ou
recarregáveis (tipo de AA/AAA).
Consumíveis e defeitos que causem um efeito negligenciável sobre o funcionamento ou o
valor do equipamento não se encontram cobertos por esta garantia.
A prova de garantia terá de ser dada com a apresentação da respectiva confirmação de
compra, ou uma cópia da mesma, no qual aparecem indicados a data de compra bem como
o modelo da unidade.
Twintalker 4810 55
Page 56

Twintalker 4810
19.2 Modo de funcionamento da garantia
Uma unidade com defeito tem de ser devolvida a um centro de serviços autorizado
juntamente com uma nota de compra válida e um cartão de assistência preenchido.
Caso a unidade desenvolva um defeito durante o período de garantia, o centro de serviços
reparará qualquer defeito derivado de material ou falhas de fabrico, reparando ou
substituindo as unidades ou as peças defeituosas, de forma gratuita. No caso de
substituição, a cor e o modelo poderão ser diferentes dos da unidade adquirida
originalmente.
A data inicial de compra determinará o início do período de garantia. O período de garantia
não é alargado se a unidade for trocada ou reparada pelo centro de serviço.
19.3 Exclusões de garantia
Danos ou defeitos causados pelo tratamento ou operação incorrectos e danos resultantes
da utilização de peças ou acessórios não originais não são abrangidos pela garantia.
A garantia não cobre danos causados por factores externos, como relâmpagos, água e fogo,
nem quaisquer danos causados durante o transporte.
Não se poderá reclamar os direitos de garantia se o número de série que se encontra na
unidade tiver sido alterado, retirado ou tornado ilegível
Qualquer reclamação de garantia não será válida se a unidade tiver sido reparada, alterada
ou modificada pelo comprador.
56 Twintalker 4810
Page 57

Twintalker 4810
1 Introduction 59
2 Intended purpose 59
3 CE Mark 59
4 Safety instructions 59
4.1 General 59
4.2 Burning injuries 59
4.3 Injuries 59
4.4 Danger of explosion 60
4.5 Poisoning danger 60
4.6 Legal 60
4.7 Notes 60
5 Cleaning and maintenance 60
6 Disposal of the device (environment) 61
7 Using a PMR device 61
8 Included in the package 61
9 Getting started 62
9.1 Installing/Removing the Belt Clip 62
9.2 Battery Installation 62
10 Charging the batteries 63
11 Description 63
12 LCD display information 64
13 Using the Twintalker 4810 64
13.1 Turning the Unit ON/OFF 64
13.2 Battery Charge Level/Low Battery Indication 64
13.3 Adjusting Speaker Volume 65
13.4 Receiving a Signal 65
13.5 Transmitting a Signal 65
13.6 Changing Channels 66
13.7 CTCSS (Continious Tone Coded Squelch System) /
DCS (Digital Coded Squelch) 66
13.8 Monitor 67
13.9 VOX Selection 67
13.10 Channel Scan 68
13.11 Call Tones 69
13.12 Roger Beep On/Off 69
13.13 Key-Tone On/Off 70
13.14 Dual Channel Monitor function 70
13.15 Button Lock 70
13.16 Stopwatch function 71
13.17 Display back light 71
ENGLISH
Twintalker 4810 57
Page 58

Twintalker 4810
14 Earpiece connection 71
15 Troubleshooting 72
16 Technical specifications 72
17 Service address and hotline support 73
18 Declaration of conformity and manufacturer 73
19 Warranty 74
19.1 Warranty period 74
19.2 Warranty handling 74
19.3 Warranty exclusions 74
58 Twintalker 4810
Page 59

Twintalker 4810
1 Introduction
Thank you for purchasing the Twintalker 4810. It’s a long range, low powered radio
communication device with a range of maximum 8 Km. It has no running costs other than the
minimal cost of re-charging the batteries.
The Twintalker operates on 8 channels.
The Twintalker is protected against vertically falling water drops when enclosure tilted up to
15° according to the IPX2 standard.
2 Intended purpose
It can be used for recreational purposes. For example: to keep in contact during travelling
with 2 or more cars, biking, skiing. It can be used to keep in contact with your children when
they are playing outside, etc...
3 CE Mark
The CE symbol on the unit, user guide and giftbox indicates that the unit complies with the
essential requirements of the R&TTE directive 1995/5/EC.
4 Safety instructions
4.1 General
Please read carefully through the following information concerning safety and proper use.
Make yourself familiar with all functions of the device. Keep this manual in a safe place for
future use.
4.2 Burning injuries
• If the cover of the antenna is damaged, do not touch because when an antenna
comes in contact with the skin, a minor burn may result when transmitting.
• Batteries can cause property damage such as burns if conductive material such as
jewellery, keys or beaded chains touches exposed terminals.The material may
complete an electrical circuit (short circuit) and become quite hot. Exercise care in
handling any charged battery, particularly when placing it inside a pocket, purse or
other container with metal objects.
4.3 Injuries
• Do not place your device in the area over an air bag or in the air bag deployment
area. Air bags inflate with great force. If a PMR is placed in the bag deployment
area and the air bag inflates, the communicator may be propelled with great force
and cause serious injury to the occupants of the vehicle.
• Keep the PMR at least 15 centimetres away from a pacemaker.
• Turn your PMR OFF as soon as interference is taking place with medical
equipment.
Twintalker 4810 59
ENGLISH
Page 60

Twintalker 4810
Areas with potentially explosive atmospheres are often, but not always,
clearly marked. They include fuelling areas such as below deck on
boats, fuel or chemical transfer or storage facilities; areas where the air
contains chemicals or particles, such as grain, dust or metal powders;
and any other area where you would normally be advised to turn off
your vehicle engine.
4.4 Danger of explosion
• Do not replace batteries in a potentially explosive atmosphere. Contact sparking
may occur while installing or removing batteries and cause an explosion.
• Turn your PMR off when in any area with a potentially explosive atmosphere.
Sparks in such areas could cause an explosion or fire resulting in bodily injury or
even death.
• Never throw batteries in fire as they may explode.
4.5 Poisoning danger
• Keep batteries away from small children.
4.6 Legal
• In some countries it is prohibited to use your PMR while driving a vehicle. In this
case leave the road before using the device.
• Turn your PMR OFF when on board an aircraft when instructed to do so. Any use of
the PMR must be in accordance with airline regulations or crew instructions.
• Turn your PMR OFF in any facilities where posted notices instruct you to do so.
Hospitals or health care facilities may be using equipment that is sensitive to
external RF energy.
• Replacing or modifying the antenna may affect the PMR radio specifications and
violate the CE regulations. Unauthorised antennas could also damage the radio.
4.7 Notes
• Do not touch the antenna while transmitting, it could affect the range.
• Remove the batteries if the device is not going to be used for a long period.
5 Cleaning and maintenance
• To clean the unit, wipe with a soft cloth dampened with water. Don’t use a cleaner
or solvents on the unit; they can damage the case and leak inside, causing
permanent damage.
• Battery contacts may be wiped with a dry lint-free cloth.
• If the unit gets wet, turn it off and remove the batteries immediately. Dry the battery
compartment with a soft cloth to minimize potential water damage. Leave the cover
off the battery compartment overnight or until completely dry. Do not use the unit
until completely dry.
60 Twintalker 4810
Page 61

Twintalker 4810
If 2 or more users press the PTT- button at the same time the receiver
will receive only the stongest signal and the other signal(s) will be
supressed. Therefore you should only transmit a signal (press PTTbutton ) when the channel is free.
11
11
The range of radio waves is strongly affected by obstacles such as
buildings, concrete/metal structures, the unevenness of the landscape,
woodland, plants, … This implies that the range between two or more
PMR's may in some extreme cases be restricted to a maximum of a few
tens of meters. You will soon notice that PMR works best when there is
a minimum of obstacles between users.
6 Disposal of the device (environment)
At the end of the product lifecycle, you should not throw this product into the
normal household garbage but bring the product to a collection point for the
recycling of electrical and electronic equipments. The symbol on the product,
user guide and/or box indicate this.
Some of the product materials can be re-used if you bring them to a recycling
point. By re-using some parts or raw materials from used products you make an important
contribution to the protection of the environment. Please contact your local authorities in case
you need more information on the collection points in your area.
7 Using a PMR device
To communicate between PMR devices they need to be set all on the same channel and
CTCSS/DCS code (see chapter “13.7 CTCSS (Continious Tone Coded Squelch System) /
DCS (Digital Coded Squelch)”) and within receiving range (up to max. 8 km in open field).
Since these devices use free frequency bands (channels), all devices in operation share
these channels(total 8 channels). Therefore, privacy is not garanteed. Anybody with a PMR
set to your channel can overhear the conversation. If you want to communicate
(transmitting a voice signal) you need to press the PTT-button .
Once this button pressed, the device will go into transmit mode and you can speak into the
microphone. All other PMR devices in range , on the same channel and in standby mode (not
transmitting) will hear your message. You need to wait until the other party stops transmitting
before you can reply to the message. At the end of each transmission the unit will send a
beep if the Roger Beep is enable (see chapter “13.12 Roger Beep On/Off”). To reply, just
press the PTT-button
and speak into the microphone.
11
11
8 Included in the package
• 2 x Twintalker 4810
• 2 x Beltclip
• 1 x Duo Charger
• 1 x Power adapter
• 8 x AAA NiMh battery
• 2 x Earpiece with microphone and PTT - button
• User guide
• Card with service address and Hotline
Twintalker 4810 61
ENGLISH
Page 62

Twintalker 4810
A
B
9 Getting started
9.1 Installing/Removing the Belt Clip
1. To remove the belt clip from the unit, push the
belt clip (B) towards the antenna, while pulling
the clip tab (A).
2. When re-installing the belt clip, a click
indicates the belt clip is locked into position.
9.2 Battery Installation
C
1. Remove the belt clip (See chapter “9.1 Installing/Removing the Belt Clip”).
2. Lift the battery door by gently pushing the door clip (C) using your finger nail.
3. Install the NiMh batteries. Make sure that the polarity of the NiMh batteries is correct.
4. Close the battery door.
5. Re-install the belt clip.
62 Twintalker 4810
Page 63

10 Charging the batteries
26
Do not press the PTT-button of the PMR’s while they are placed in the
charger !
Do not short-circuit the batteries or dispose in fire. Remove the
batteries if this device is not going to be used for a long period.
Do not charge non rechargeable batteries like Alkaline batteries in the
charger. This might damage the PMR’s and charger unit.
When the batteries are installed, the
desktop charger provides drop-in
charging conveniency.
1. Put the desktop charger on a flat
surface.
2. Plug one end of the supplied
adapter into an easy accessible
electric socket and the other end
into the connector on the
backside of the desktop charger
25
.(See folded cover page -
illustration C)
3. Put the radio in the charger as
indicated.
4. The charging LED will turn on
if it’s properly inserted and charging.(See folded cover page - illustration D)
It will take about 8 to 10 hours to fully charge the batteries.
Twintalker 4810
11 Description
See folded cover page - illustration A
1. LCD display
2. Headset connection
3. Antenna
4. Call button
5. Menu button
– Enter the menu settings
6. Down button
– Decrease the speaker volume
– Select the previous value in the menu
7. Charger contacts
8. Microphone
Twintalker 4810 63
ENGLISH
Page 64

Twintalker 4810
9. UP button
– Increase the speaker volume
– Select the next value in the menu
10. On-off button
11. Push to talk button PTT
12 LCD display information
See folded cover page - illustration B
12. CTCSS indication
13. DCS indication
14. CTCSS/DCS/ Stopwatch seconds / Menu option -value
15. Stopwatch 1/100 value
16. VOX indication
17. Dual Channel Mode (DCM) indication
18. Channel/Menu item indication
19. Speaker volume indication
20. Key pad lock icon
21. Battery level indication
22. RX icon
– Displayed when receiving
23. TX icon
– Displayed when transmitting
24. Scanning indication
– Displayed during scan mode
13 Using the Twintalker 4810
The display illustrations in next pages only show the icons or display
informations of the functions that are explained in the text.
13.1 Turning the Unit ON/OFF
To turn ON:
• Press and hold the - button for 3 seconds. The unit
will “beep” and the LCD display will display the current
channel.
To switch OFF:
• Press and hold the - button for 3 seconds. The unit
will “beep” and the LCD display will turn blank.
13.2 Battery Charge Level/Low Battery Indication
The battery charge level is indicated by the number of squares present inside the battery icon
on the LCD Screen.
64 Twintalker 4810
10
10
Page 65

Twintalker 4810
9
6
In order for other people to receive your transmission, they must also be
on the same channel and have set the same CTCSS code or DCS code.
(See chapter “13.6 Changing Channels” and “13.7 CTCSS (Continious
Tone Coded Squelch System) / DCS (Digital Coded Squelch)”)
Either CTCSS or DCS can be used but never both at the same time.
Battery Full
Battery 2/3 charged
Battery 1/3 charged
Battery empty
When the battery charge level is low, the battery icon will flash and a beep will be heard to
indicate that the batteries need to be replaced or recharged.
Never recharge non-rechargable batteries like for exemple Alkaline
batteries.
13.3 Adjusting Speaker Volume
• Press the - button in stand-by-mode to increase the
speaker volume. The volume level is displayed.
• Press the - button to decrease the speaker volume.
13.4 Receiving a Signal
The unit is continuously in the receive mode when the unit is switched ON and not
transmitting.
13.5 Transmitting a Signal
• Press and hold the PTT - button to transmit. The TX
symbol is displayed.
• Hold the unit in a vertical position with the microphone 10cm
from the mouth and speak into the microphone.
• Release the PTT - button
transmitting.
To check the channel activity use the monitor function (See chapter
“13.8 Monitor”).
Twintalker 4810 65
11
when you want to stop
11
ENGLISH
Page 66

Twintalker 4810
9
11
If no button is pressed within 5 seconds during setting, the unit will return
to standby.
5
9
6
11
13.6 Changing Channels
• Press the - button once, the current channel
number flashes on the display.
• Press the - button
the channel.
• Press the PTT - button to confirm and return to stand-by
mode.
5
or the - button to change
6
13.7 CTCSS (Continious Tone Coded Squelch System) /
DCS (Digital Coded Squelch)
License free PMR radio's operating on the 446 MHz frequency band, like the Twintalker 4810
PMR, have 8 available radio channels. If there are many PMR users in your neighborhood,
there is a chance that some of these users are operating on the same radio channel.
To prevent that you receive signals from other users, sub-channels have been integrated.
Two PMR radio's will only be able to communicate with each other when they are operating
on the same radio channel and when they have selected exactly the same sub-channel.
There are two kind of sub-channels :
• Continuous Tone Coded Squelch System (CTCSS)
• Digital Coded Squelch (DCS)
When using CTCSS, a low frequency tone (between 67 and 250 Hz) will be transmitted along
with the voice signal. There are 38 available tones to choose from. You are free to choose
one of these 38 available tones. Due to filtering, these tones will generally not be audible so
they will not disturb the communication.
DCS is similar to CTCSS, but instead of sending a continuous tone of a selected frequency,
a digital data transmission is added to the radio signal. This Digital Code is transmitted at a
really low rate, around 134 bits per second (the code is 23 bits long). Only the PMR's of the
latest generation will support DCS. There are 83 available DCS codes that can be used.
Since earlier models will only support CTCSS it will be better to use DCS to prevent that other
users will be audible during your PMR conversations.
13.7.1 CTCSS
• Press the -button twice : "CTCSS" and the current
CTCSS code flashes on the display.
• Press the -button or the -button to change to
another code.
• Press the PTT-button to confirm and return to stand-by
mode.
66 Twintalker 4810
Page 67

Twintalker 4810
5
9
To disable CTCSS or DCS, select code "00" for CTCSS or for DCS in the
menu. When the entry is confirmed, "OF" will be displayed.
5
During channel monitoring the receiver circuit in the PMR will not listen to
CTCSS or DCS codes.
6
11
13.7.2 DCS
• Press the -button three times : "DCS" and the
current DCS code flashes on the display.
• Press the -button or the -button to change to
another code.
• Press the PTT-button to confirm and return to stand-by
mode.
11
6
13.8 Monitor
You can use the monitor feature to check for weaker signals in the current channel.
• Press the -button and -button simultaneously to activate channel
monitoring.
• Press the -button to stop channel monitoring.
5
6
13.9 VOX Selection
The PMR is capable of voice activated (VOX) transmission. In VOX mode, the radio will
transmit a signal when it is activated by your voice or other sound around you. VOX operation
is not recommended if you plan to use your radio in a noisy or windy environment.
VOX mode will be overrided when you press the PTT - button .
5
• Press the - button
setting flashes on the display and the VOX icon is
displayed.
• Press the -button to set the VOX sensitivity level
between 1 and 3 (level 3 is the most sensitive level).
• Press the button until ‘OF’ appears on the display,
to turn VOX OFF.
• Press the PTT - button
mode.
four times, the current VOX
9
to confirm and return to stand-by
11
ENGLISH
Twintalker 4810 67
Page 68

Twintalker 4810
5
9
6
If you press the PTT button while listening to a found channel, the
PMR will go back in stand-by mode on the found channel.
11
11
5
9
6
• If you press the PTT button while listening to a found CTCSS
code, the PMR will go back in stand-by mode on the channel with
the CTCSS code.
• If no CTCSS code is detected there is a chance that DCS is
selected by the user. In this case you can scan for the DCS code.
(section 13.10.3)
13.10 Channel Scan
Channel scan performs searches for active signals in an endless loop from channel 1 to 8.
Once an active channel is found you have the option to search for the CTCSS code or the
DCS code that is set by the user who is broadcasting on the channel.
13.10.1 Scanning for an active radio channel
• Press the -button five times : "SC" and the current
channel flashes on the display.
• Press the -button or the -button to start the
channel scan.
Once an active channel is found, the scanning will stop and you can listen to the
transmission.
When the transmission on the found channel stops, the scanning will resume automatically.
13.10.2 Scanning for a CTCSS code
When an active channel is found press the PTT button to select the found active channel.
Now you have to option to search for the CTCSS/DCS code that is used by the found user.
• Press the -button six times : "SC" and "CTCSS 00"
flashes on the display for the selected radio channel.
• Press the -button or the -button to start the
CTCSS scan.
Once there is a transmission on the channel, the CTCSS code (if used) will be detected and
displayed.
11
68 Twintalker 4810
Page 69

Twintalker 4810
5
9
6
If you press the PTT button while listening to a found DCS code, the
PMR will go back in stand-by mode on the channel with the DCS code.
5
9
6
11
T
5
11
13.10.3 Scanning for a DCS code
• Press the -button seven times : "SC" and "DCS 00"
flashes on the display for the selected radio channel.
• Press the -button or the -button to start the
DCS scan.
Once there is a transmission on the channel, the DCS code (if used) will be detected and
displayed.
11
13.11 Call Tones
A call tone alerts others that you want to start talking.
13.11.1 Setting the Call Tone
The Twintalker 4810 has 15 call tones.
• Press the - button
and the current call tone is flashing.
• Press the - button
another Call Tone.
• Press the PTT - button
mode.
eight times, “CA” is displayed
or the - button to change to
to confirm and return to stand-by
13.11.2 Sending a call Tone
Press the button briefly. The call tone will be transmitted on the set channel.
4
13.12 Roger Beep On/Off
After the -button is released, the unit will send out a roger beep to confirm that you have
stopped talking.
Twintalker 4810 69
PT
To set the Roger Beep.
• Press the - button nine times. ‘rO’ will be displayed.
• Press to enable (ON) or to disable the Roger-Beep (OF).
• Press the PTT - button to confirm your selection and return to the
standby mode.
ENGLISH
Page 70

Twintalker 4810
9
5
5
9
The PTT-button , the -button and the -button will still be
functional when the Button Lock is activated.
11
13.13 Key-Tone On/Off
When a button is pressed, the unit will beep briefly.
To set the key-tone.
• Press ten times. ‘tO’ will be displayed.
• Press to enable (ON) or disable the Key Tones (OF).
• Press the PTT - button to confirm your selection and return to the.
standby mode.
11
13.14 Dual Channel Monitor function
In stand-by, the PMR is set on one channel with CTCSS/DCS code. The PMR will only
receive signals transmitted on that channel with the CTCSS/DCS code.
Dual Channel Monitor (DCM) allows you to monitor a second channel with CTCSS/DCS
code.
• Press the -button eleven times,” DCM OF" will flash
on the display.
• Press the -button or the -button to change the
channel.
• Press the -button to confirm the channel selection
and go to CTCSS selection. (Press the -button
again to go to DCS selection)
• Press the -button or the -button to change the
CTCSS code or DCS code.
• Press the PTT-button to confirm and return to stand-by
mode.
• To disable the function select "OF" when selecting the DCM
channel.
When the Dual Channel Monitor function is activated, the PMR will switch sequentially
between the standby channel + CTCSS/DCS code and the Dual Channel + CTCSS/DCS
code.
5
6
6
11
13.15 Button Lock
• Press and hold the -button for three seconds to
activate the Button lock mode. The button lock icon is
displayed on the LCD Screen.
• Press and hold the -button again for three seconds
deactivate button lock
5
5
4
70 Twintalker 4810
10
Page 71

13.16 Stopwatch function
9
9
6
4
2
11
11
The Twintalker 4810 has a stopwatch that will count to 59'59''99.
Twintalker 4810
• Press the -button and hold for three seconds , the
stopwatch display will appear.
• Press the -button to start the stopwatch.
• Press the -button to stop the stopwatch.
• Press the -button to reset the stopwatch to zero.
• Press the -button and hold for three seconds to
deactivate the stopwatch.
4
4
13.17 Display back light
To activate the backlight of the LCD display, press any button except the PTT- button or
the button .
The LCD backlight will light up for 6 seconds.
11
14 Earpiece connection
The Twintalker 4810 can be used with the included earpiece.
The connector is located under the protective rubber cover on the upper side of the unit .
To attach the earpiece, open the rubber flap to expose the connector. The rubber flap cannot
be removed from the PMR as it is fixed to the unit.
Insert the earpiece plug into the connector (2,5mm jack).
The small button on the earpiece has the same function as the PTT - button
When you use the PTT - button from the Earpiece, you must also use the microphone
from the earpiece to talk into
Do not connect other earpieces. This may damage your device.
.
on the unit
ENGLISH
Twintalker 4810 71
Page 72

Twintalker 4810
15 Troubleshooting
No power Clean the battery contacts with a soft cloth.
Replace the batteries.
No transmission Make sure the PTT - button is pressed completely
before you speak.
Monitor the channel activity and switch to another channel
if the current is used.
No reception Check the speaker volume.
Make sure that you are in the reception range of the sender
and change if necessary your location.
Limited Range and noice
during transmission
Interference The receiver and transmitter are too close. The mimimum
The talking range depends on the terrain.
Steal constructions, concrete buildings or the use in
vehicles have a bad influence on the range.
Try to avoid as many obstacles as possible and
communicate in a clear line of sight.
Change your locations.
distance between 2 units is 1,5m.
11
16 Technical specifications
Channels
Sub-code
Frequency
Range
Batteries
Transmission Power
Modulation Type
Channel spacing
Duo Charger adapter
8
CTCSS 38 / DCS 83
446.00625MHz - 446.09375 MHz
Up to 8 Km (Open field)
4 x AAA Alkaline or 4 x AAA NiMH rechargeable
=< 500mW ERP
FM - F3E
12,5 kHz
Input : 230V AC / 50Hz - Output : 9V DC / 200mA
72 Twintalker 4810
Page 73

Twintalker 4810
)
DCS Code Chart
No DCS code No DCS code No DCS code No DCS code
0 Disabled 21 134 42 311 63 516
1 23 22 143 43 315 64 532
2 25 23 152 44 331 65 546
3 26 24 155 45 343 66 565
4 31 25 156 46 346 67 606
5 32 26 162 47 351 68 612
6 43 27 165 48 364 69 624
7 47 28 172 49 365 70 627
8 51 29 174 50 371 71 631
9 54 30 205 51 411 72 632
10 65 31 223 52 412 73 654
11 71 32 226 53 413 74 662
12 72 33 243 54 423 75 664
13 73 34 244 55 431 76 703
14 74 35 245 56 432 77 712
15 114 36 251 57 445 78 723
16 115 37 261 58 464 79 731
17 116 38 263 59 465 80 732
18 125 39 265 60 466 81 734
19 131 40 271 61 503 82 743
20 132 41 306 62 506 83 754
Channel Frequency Chart: CTCSS Code Chart
Channel Frequency (MHz
1 446,00625 0 Disabled 10 94,8 20 131,8 30 186,2
2 446,01875 1 67,0 11 97,4 21 136,5 31 192,8
3 446,03125 2 71,9 12 100,0 22 141,3 32 203,5
4 446,04375 3 74,4 13 103,5 23 146,2 33 210,7
5 446,05625 4 77,0 14 107,2 24 151,4 34 218,1
6 446,06875 5 79,7 15 110,9 25 156,7 35 225,7
7 446,08125 6 82,5 16 114,8 26 162,2 36 233,6
8 446,09375 7 85,4 17 118,8 27 167,9 37 241,8
Code Frequency (Hz) Code Freq. (Hz) Code Freq. (Hz) Code Freq. (Hz)
8 88,5 18 123,0 28 173,8 38 250,3
9 91,5 19 127,3 29 179,9
17 Service address and hotline support
The service adresses are printed on the extra service card included in the package or can be
found on www.ucom.be.
18 Declaration of conformity and manufacturer
Topcom Europe Nv.
Grauwmeer 17
3001 Heverlee
Belgium
The declaration of conformity can be found on the last page of this user guide.
Twintalker 4810 73
ENGLISH
Page 74

Twintalker 4810
19 Warranty
19.1 Warranty period
The devices have a 36-month warranty period. The warranty period starts on the day the new
unit is purchased. There is no warranty on standard or rechargeable batteries (AA/AAA type).
Consumables or defects causing a negligible effect on operation or value of the equipment
are not covered. The warranty has to be proven by presentation of the original or copy of the
purchase receipt, on which the date of purchase and the unit-model are indicated.
19.2 Warranty handling
A faulty unit needs to be returned to an authorized service centre including a valid purchase
note and a filled in service card. If the unit develops a fault during the warranty period, the
service centre will repair any defects caused by material or manufacturing faults free of
charge, by either repairing or exchanging the faulty units or parts of the faulty units. In case
of replacement, colour and model can be different from the original purchased unit.
The initial purchase date shall determine the start of the warranty period. The warranty period
is not extended if the unit is exchanged or repaired by the service centre.
19.3 Warranty exclusions
Damage or defects caused by incorrect treatment or operation and damage resulting from
use of non-original parts or accessories are not covered by the warranty.
The warranty does not cover damage caused by outside factors, such as lightning, water and
fire, nor any damage caused during transportation. No warranty can be claimed if the serial
number on the units has been changed, removed or rendered illegible. Any warranty claims
will be invalid if the unit has been repaired, altered or modified by the buyer.
74 Twintalker 4810
Page 75

Twintalker 4810
1 Einleitung 77
2 Verwendungszweck 77
3 CE-Kennzeichnung 77
4 Sicherheitshinweise 77
4.1 Allgemein 77
4.2 Verbrennungsgefahr 77
4.3 Verletzungsgefahr 77
4.4 Explosionsgefahr 78
4.5 Vergiftungsgefahr 78
4.6 Vorschriften 78
4.7 Hinweise 78
5 Reinigung und Wartung 79
6 Entsorgung des Geräts (Umweltschutz) 79
7 Betrieb eines Sprechfunkgeräts 79
8 Packungsinhalt 80
9 Erste Schritte 80
9.1 Anbringen/Entfernen des Gürtelhalters 80
9.2 Einlegen der Batterien / Akkus 81
10 Laden der Akkus 81
11 Beschreibung 82
12 Informationen zum LCD-Display 82
13 Betrieb des Twintalker 4810 83
13.1 Ein-/Ausschalten des Geräts 83
13.2 Ladezustandsanzeige / Anzeige schwache Batterie 83
13.3 Einstellen der Lautsprecherlautstärke 84
13.4 Empfangen eines Signals 84
13.5 Senden eines Signals 84
13.6 Wechseln des Kanals 84
13.7 CTCSS (Continuous Tone Coded Squelch System) /
DCS (Digital Coded Squelch) 85
13.8 Kanalüberwachung 86
13.9 VOX-Auswahl 86
13.10 Kanalsuchlauf 86
13.11 Ruftöne 88
13.12 Ein-/Ausschalten des Quittungstons 88
13.13 Ein-/Ausschalten des Tastentons 88
13.14 Zweikanalsuchlauf (DCM) 89
13.15 Tastensperre 89
13.16 Stoppuhrfunktion 90
13.17 Display-Hintergrundbeleuchtung 90
DEUTSCH
Twintalker 4810 75
Page 76

Twintalker 4810
14 Anschluss des Kopfhörers 90
15 Problembeseitigung 91
16 Technische Eigenschaften 91
17 Kundendienstadresse und Support-Hotline 92
18 Konformitätserklärung und Hersteller 92
19 Garantie 93
19.1 Garantiezeit 93
19.2 Garantieabwicklung 93
19.3 Garantieausschlüsse 93
76 Twintalker 4810
Page 77

Twintalker 4810
1 Einleitung
Vielen Dank, dass Sie sich für der Twintalker 4810 entschieden haben. Er ist ein
Sprechfunkgerät für große Entfernungen mit einer Reichweite bis zu 8 km. Er verursacht
keine laufenden Betriebskosten außer den geringfügigen Kosten für das Aufladen der Akkus.
Der TwinTalker verwendet 8 Kanäle.
Der Twintalker ist geschützt gegen schräg fallendes Tropfwasser (15°) nach IPX2 Norm.
2 Verwendungszweck
Das Gerät kann für Freizeitzwecke verwendet werden, zum Beispiel um bei einem Ausflug
in einer Gruppe mit mehreren Autofahrern, Radfahrern oder Skiläufern untereinander
Verbindung zu halten. Es kann auch eingesetzt werden, um mit Ihren Kindern in Kontakt zu
bleiben, wenn sie draußen spielen usw.
3 CE-Kennzeichnung
Das CE-Zeichen auf dem Gerät, der Bedienungsanleitung und der Verpackung zeigt an,
dass das Gerät die grundlegenden Anforderungen der R&TTE-Richtlinie 1999/5/EG erfüllt.
4 Sicherheitshinweise
4.1 Allgemein
Bitte lesen Sie die folgenden Informationen für den sicheren und ordnungsgemäßen
Gebrauch aufmerksam durch. Machen Sie sich mit allen Funktionen des Geräts vertraut.
Bewahren Sie diese Bedienungsanleitung zur späteren Verwendung sicher auf.
4.2 Verbrennungsgefahr
• Berühren Sie die Antenne nicht, wenn der Antennenschutz beschädigt ist. Eine
Berührung der Antenne mit der Haut kann bei einer Übertragung zu einer
geringfügigen Verbrennung führen.
• Batterien/ Akkus können Sachschäden und Verbrennungen verursachen, wenn
leitende Materialien wie Schmuck, Schlüssel oder Perlenketten freiliegende
Anschlüsse berühren. Das Material schließt unter Umständen einen elektrischen
Stromkreis (Kurzschluss) und wird dadurch entsprechend heiß. Seien Sie achtsam
im Umgang mit Akkus und Batterien, insbesondere wenn Sie diese in einer Tasche,
einem Geldbeutel oder einem anderen Behälter mit metallenen Objekten
aufbewahren.
4.3 Verletzungsgefahr
• Legen Sie Ihr Gerät nicht in den Bereich über einem Airbag oder in den
Airbagauslösebereich. Airbags blasen sich mit großer Wucht auf. Wenn sich das
Funkgerät im Airbagauslösebereich befindet und der Airbag auslöst, kann es sein,
dass das Funkgerät mit großer Wucht durch das Auto geschleudert wird und dabei
Insassen des Fahrzeugs verletzt.
• Halten Sie mit dem Sprechfunkgerät einen Abstand von mindestens 15 cm zu
einem Herzschrittmacher ein.
• Schalten Sie Ihr Sprechfunkgerät sofort aus, sobald eine Interferenz mit
medizinischen Geräten auftritt.
Twintalker 4810 77
DEUTSCH
Page 78

Twintalker 4810
Explosionsgefährdete Bereiche sind oft, aber nicht immer eindeutig
ausgewiesen. Dazu zählen Tankbereiche, wie z. B. unter Deck auf
Schiffen, Kraftstoff- oder Chemikalienüberführungen oder
Aufbewahrungsbereiche; Bereiche, in denen die Luft Chemikalien oder
Teilchen enthält, wie z. B. Getreide, Staub oder Metallpulver; alle
anderen Bereiche, in denen Sie normalerweise angewiesen werden,
Ihren Kraftfahrzeugmotor abzuschalten.
4.4 Explosionsgefahr
• Tauschen Sie die Batterien / Akkus niemals in einer potenziell
explosionsgefährdeten Umgebung aus. Während des Einsetzens oder Entfernens
der Batterien / Akkus kann es zu einem Funkenschlag kommen, der eine Explosion
auslöst.
• Schalten Sie Ihr Sprechfunkgerät aus, wenn Sie sich in einer
explosionsgefährdeten Umgebung befinden. Ein Funkenschlag in solchen
Gebieten kann eine Explosion oder einen Brand verursachen, was zu Verletzungen
und sogar zum Tod führen kann.
• Werfen Sie Batterien / Akkus niemals ins Feuer, da sie explodieren könnten.
4.5 Vergiftungsgefahr
• Halten Sie Batterien / Akkus außer Reichweite von kleinen Kindern.
4.6 Vorschriften
• In einigen Ländern ist es verboten, Ihr Sprechfunkgerät während des Steuerns
eines Fahrzeugs zu benutzen. Halten Sie Ihr Fahrzeug in diesen Fällen neben der
Straße an, bevor Sie es benutzen.
• Schalten Sie Ihr Sprechfunkgerät aus, wenn Sie sich an Bord eines Flugzeugs
befinden und entsprechende Anweisungen erhalten. Die Benutzung des Geräts
muss entsprechend den Bestimmungen der Fluglinie und den Anweisungen der
Besatzung erfolgen.
• Schalten Sie Ihr Gerät überall dort aus, wo Aushänge es von Ihnen verlangen.
Krankenhäuser und Gesundheitseinrichtungen verwenden möglicherweise Geräte,
die empfindlich auf externe Radiofrequenzen reagieren.
• Das Ersetzen oder Verändern der Antenne kann die Gerätespezifizierung
verändern und die CE-Bestimmungen verletzen. Nicht genehmigte Antennen
können außerdem das Funkgerät beschädigen.
4.7 Hinweise
• Berühren Sie die Antenne während einer Übertragung nicht, da dadurch die
Reichweite beeinflusst werden kann.
• Entfernen Sie die Batterien / Akkus, wenn Sie das Gerät längere Zeit nicht
verwenden.
78 Twintalker 4810
Page 79

Twintalker 4810
11
11
5 Reinigung und Wartung
• Reinigen Sie das Gerät mit einem weichen, leicht feuchten Tuch.
• Reinigen Sie schmutzige Anschlüsse und Kontakte mit einer kratzfreien Bürste.
• Reinigen Sie die Batteriekontakte und das Batteriefach mit einem trockenen
flusenfreien Tuch.
• Sollte das Gerät nass werden, schalten Sie es aus, und entfernen Sie sofort die
Batterien/Akkus.
Trocknen Sie das Batteriefach mit einem weichen Tuch, um einen möglichen
Wasserschaden zu minimieren.
Lassen Sie das Batteriefach geöffnet, bis es komplett trocken ist.
Benutzen Sie das Gerät erst, wenn es vollständig getrocknet ist.
• Prüfen Sie regelmäßig die Batterie/Akkus des Gerätes und tauschen Sie die
Batterien rechtzeitig aus.
• Prüfen Sie die Anschlüsse und Kabel auf Fehlfunktionen.
6 Entsorgung des Geräts (Umweltschutz)
Verbrauchte und defekte Geräte sollten Sie nicht in den normalen Hausmüll
werfen, sondern an einer Sammelstelle für die Aufbereitung von elektrischen
und elektronischen Geräten abgeben. Das Symbol am Gerät, in der
Bedienungsanleitung und/oder auf der Verpackung weist darauf hin.
Einige der Materialien des Geräts können wiederverwertet werden, wenn man
sie an einer Aufbereitungsstelle abgibt. Mit der Wiederverwertung einiger Teile oder
Rohmaterialien aus gebrauchten Produkten liefern Sie einen wichtigen Beitrag zum
Umweltschutz. Wenden Sie sich bitte an Ihre örtlichen Behörden, wenn Sie weitere
Informationen über die Sammelstellen in Ihrer Umgebung benötigen.
7 Betrieb eines Sprechfunkgeräts
Zur Verständigung über Sprechfunkgeräte müssen diese auf denselben Kanal und CTCSS/
DCS-Code eingestellt sein (siehe Kapitel „13.7 CTCSS (Continuous Tone Coded Squelch
System) / DCS (Digital Coded Squelch)“). Sie müssen sich auch innerhalb der
Empfangsreichweite befinden (bis zu max. 8 km in offenem Gelände). Da diese Geräte freie
Kanäle verwenden, teilen sich alle in Betrieb befindlichen Geräte diese Kanäle (insgesamt 8
Kanäle). Daher ist eine Privatsphäre nicht garantiert. Jede Person mit einem
Sprechfunkgerät, das auf Ihren Kanal eingestellt ist, kann Ihr Gespräch mithören. Möchten
Sie kommunizieren (Erzeugen einer Sprechverbindung), drücken Sie die PTT-Taste .
Sobald diese Taste gedrückt ist, schaltet sich das Gerät in den Sendemodus und Sie können
in das Mikrofon sprechen. Alle Sprechfunkgeräte innerhalb der Reichweite, die auf
denselben Kanal eingestellt sind und sich im Standby-Modus befinden (nicht im
Sendemodus), hören Ihre Nachricht. Zum Antworten müssen Sie abwarten, bis die andere
Seite mit dem Sprechen fertig ist. Wenn der Quittungston aktiviert ist (siehe Kapitel „13.12
Ein-/Ausschalten des Quittungstons“), sendet das Gerät am Ende jeder Übertragung einen
Ton. Zum Antworten drücken Sie einfach die PTT-Taste
Twintalker 4810 79
und sprechen in das Mikrofon.
DEUTSCH
Page 80

Twintalker 4810
Drücken zwei oder mehr Benutzer die PTT-Taste gleichzeitig, so wird
der Empfänger nur das stärkste Signal empfangen. Alle anderen Signale
werden unterdrückt. Daher sollten Sie nur ein Signal übertragen (die
PTT-Taste drücken), wenn der Kanal frei ist.
Die Reichweite der Funkwellen wird stark durch Hindernisse wie
beispielsweise Gebäude, Beton- und Metallstrukturen, Unebenheiten in
der Landschaft, Bewaldungen, Bepflanzungen usw. beeinflusst. Das
bedeutet, dass die Reichweite zwischen zwei oder mehreren
Sprechfunkgeräten in einigen extremen Fällen auf einige Dutzend Meter
beschränkt sein kann. Sie werden schnell feststellen, dass ein
Sprechfunkgerät am besten funktioniert, wenn zwischen den Benutzern
nur wenige Hindernisse vorhanden sind.
A
B
11
8 Packungsinhalt
• 2 x Twintalker 4810
• 2 x Gürtelhalter
• 1 x Duo-Ladegerät
• 1 x Netzteil
• 8 x AAA NiMH Akku
• 2 x Kopfhörer mit Mikrofon und PTT--Taste
• Bedienungsanleitung
• Karte mit Kundendienstadresse und Hotline
11
9 Erste Schritte
9.1 Anbringen/Entfernen des
Gürtelhalters
1. Um den Gürtelhalter vom Gerät zu entfernen,
drücken Sie den Gürtelhalter (B) in Richtung
Antenne, während Sie an der Lasche des
Halters (A) ziehen.
2. Wenn Sie den Gürtelhalter wieder montieren,
zeigt ein Klicken an, dass der Gürtelhalter
eingerastet ist.
80 Twintalker 4810
Page 81

Twintalker 4810
C
25
26
9.2 Einlegen der Batterien / Akkus
1. Entfernen Sie den Gürtelhalter (siehe Kapitel „9.1 Anbringen/Entfernen des
Gürtelhalters“).
2. Heben Sie die Batteriefachabdeckung ab, indem Sie mit dem Fingernagel vorsichtig
den Clip der Abdeckung (C) drücken.
3. Legen Sie die Batterien / Akkus ein. Achten Sie dabei auf richtige Polarität der
Batterien / Akkus.
4. Schließen Sie das Batteriefach.
5. Montieren Sie den Gürtelhalter wieder.
10 Laden der Akkus
Wenn die Akkus eingelegt sind, können
Sie sie mit dem Ladegerät einfach
aufladen.
1. Stellen Sie das Ladegerät auf
eine ebene Oberfläche.
2. Stecken Sie das mitgelieferte
Steckernetzteil in eine gut
zugängliche Steckdose. Den
Niederspannungsstecker
verbinden Sie mit dem Anschluss
auf der Rückseite des
Ladegerätes ( Siehe
Abbildung C auf der
ausklappbaren Umschlagseite)
3. Stellen Sie das Funkgerät wie
dargestellt in das Ladegerät.
4. Die Ladeanzeige leuchtet auf, wenn das Gerät korrekt eingesetzt wurde und lädt.
( Siehe Abbildung D auf der ausklappbaren Umschlagseite).Es dauert ungefähr 8 bis
10 Stunden, bis die Akkus vollständig geladen sind.
DEUTSCH
Drücken Sie die PTT-Taste des PMR’s nicht während diese sich im
Ladegerät befindet.
Twintalker 4810 81
Page 82

Twintalker 4810
Schließen Sie die Batterien / Akkus nicht kurz und verbrennen Sie sie
nicht. Entfernen Sie die Batterien / Akkus, wenn das Gerät längere Zeit
nicht verwendet wird. Laden Sie im Ladegerät keine nicht aufladbaren
Batterien wie Alkaline Batterien auf. Hierdurch können die
Sprechfunkgeräte und das Ladegerät beschädigt werden.
11 Beschreibung
Siehe Abbildung A auf der ausklappbaren Umschlagseite
1. LCD-Display
2. Anschlussbuchse für Kopfhörer
3. Antenne
4. Ruftaste
5. Menütaste
– Aufrufen der Menüeinstellungen
6. Nach-unten-Taste
– Verringern der Lautsprecherlautstärke
– Auswählen des vorigen Menüpunkts
7. Ladekontakte
8. Mikrofon
9. Nach-oben-Taste
– Erhöhen der Lautsprecherlautstärke
– Auswählen des nächsten Menüpunkts
10. Ein-Aus-Taste
11. Sprechtaste PTT
12 Informationen zum LCD-Display
Siehe Abbildung B auf der ausklappbaren Umschlagseite
12. CTCSS-Anzeige
13. DCS-Anzeige
14. CTCSS/DCS/ Stoppuhr Sekunden / Menüoptionswert
15. Stoppuhr Hundertstelwert
16. VOX-Anzeige
17. DCM-Anzeige (Dual Channel Monitor)
18. Anzeige des Kanals/Menüpunkts
19. Anzeige der Lautsprecherlautstärke
20. Tastensperre-Symbol
21. Ladeanzeige
22. RX-Symbol
– Wird beim Empfang angezeigt
23. TX-Symbol
– Wird beim Übertragen angezeigt
24. Scan-Anzeige
– Wird im Scan-Modus (Suchlauf) angezeigt
82 Twintalker 4810
Page 83

Twintalker 4810
Die Displayabbildungen in dieser Bedienungsanleitung zeigen immer nur
die Teile an, die für diese Funktion oder Einstellung wichtig sind.
13 Betrieb des Twintalker 4810
13.1 Ein-/Ausschalten des Geräts
Zum Einschalten:
• Halten Sie die -Taste 3 Sekunden lang gedrückt.
Sie hören einen Signalton und im LCD-Display erscheint
der aktuelle Kanal.
Jetzt befindet man sich im “ Stand By “ - Modus.
Zum Ausschalten:
• Halten Sie die -Taste 3 Sekunden lang gedrückt.
Sie hören einen Signalton und das LCD-Display zeigt nichts
mehr an.
13.2 Ladezustandsanzeige / Anzeige schwache Batterie
Der Ladezustand wird durch die Anzahl der Quadrate im Batteriesymbol im LCD-Display
angezeigt.
Batterie voll
Batterie 2/3 voll
Batterie 1/3 voll
Batterie leer
10
10
Wenn der Ladezustand niedrig ist, blinkt das Batteriesymbol und ein Signalton ertönt, um
anzuzeigen, dass die Batterien ausgetauscht oder die Akkus aufgeladen werden müssen.
Laden Sie keinenfalls nicht aufladbare Batterien auf.
Twintalker 4810 83
DEUTSCH
Page 84

Twintalker 4810
Damit andere Personen Ihre Übertragung empfangen können, müssen sie
denselben Kanal und CTCSS-Code oder DCS-Code eingestellt haben.
(Siehe Kapitel „13.6 Wechseln des Kanals“ und „13.7 CTCSS (Continuous
Tone Coded Squelch System) / DCS (Digital Coded Squelch)“)
Entweder CTCSS oder DCS kann verwendet werden aber nie beides zu
gleich.
11
Zum Kontrollieren der Kanäle verwenden Sie die
Kanalüberwachungsfunktion (siehe Kapitel „13.8 Kanalüberwachung“).
6
Wenn beim Einstellen 5 Sekunden lang keine Taste betätigt wird, kehrt
das Gerät in den Standby-Modus zurück.
13.3 Einstellen der Lautsprecherlautstärke
• Drücken Sie die -Taste im Standby-Modus, um die
Lautsprecherlautstärke zu erhöhen. Die Lautstärke wird
angezeigt.
• Drücken Sie die -Taste , um die
Lautsprecherlautstärke zu verringern.
9
6
13.4 Empfangen eines Signals
Das Gerät befindet sich immer im Empfangsmodus, wenn es eingeschaltet ist und nicht
sendet.
13.5 Senden eines Signals
• Halten Sie zum Senden die PTT-Taste gedrückt. Das
TX-Symbol erscheint im Display.
• Halten Sie das Gerät in einer senkrechten Position mit dem
Mikrofon 10 cm vor dem Mund. Sprechen Sie in das
Mikrofon.
• Lassen Sie die PTT-Taste
beenden möchten.
los, wenn Sie die Durchsage
11
13.6 Wechseln des Kanals
• Drücken Sie die -Taste einmal. Die aktuelle
Kanalnummer blinkt im Display.
• Drücken Sie die -Taste
Kanal zu wechseln.
• Drücken Sie die PTT-Taste , um die Einstellung zu
bestätigen und in den Standby-Modus zurückzukehren.
84 Twintalker 4810
5
9
oder die -Taste , um den
11
Page 85

Twintalker 4810
Wenn CTCSS und DCS ausgeschaltet sind, kann man jedes Gespräch auf
einem Kanal mithören.
6
6
13.7 CTCSS (Continuous Tone Coded Squelch System) /
DCS (Digital Coded Squelch)
Lizenzfreien Sprechfunkgeräten, die wie der Twintalker 4810 auf dem Frequenzband 446
MHz senden, stehen 8 Funkkanäle zur Verfügung. Falls in Ihrer Nachbarschaft viele
Sprechfunkgeräte im Einsatz sind, besteht die Möglichkeit, dass einige der Benutzer
denselben Funkkanal verwenden.
Um zu vermeiden, dass Sie Signale von anderen Benutzern empfangen, wurden Subkanäle
integriert.
Zwei Sprechfunkgeräte können nur miteinander kommunizieren, wenn sie auf demselben
Funkkanal senden und genau denselben Subkanal ausgewählt haben.
Es gibt zwei Arten von Subkanälen:
• CTCSS (Continuous Tone Coded Squelch System)
• DCS (Digital Coded Squelch)
Bei Verwendung von CTCSS wird ein Ton mit niedriger Frequenz (zwischen 67 und 250 Hz)
zusammen mit dem Sprachsignal übertragen. Es gibt 38 verfügbare Töne, aus denen Sie
einen beliebigen Ton wählen können. Aufgrund der Filterung sind diese Töne im
Allgemeinen nicht zu hören, so dass sie die Kommunikation nicht stören.
DCS funktioniert ähnlich wie CTCSS, aber anstatt einen kontinuierlichen Ton einer
ausgewählten Frequenz zu senden, wird dem Funksignal eine digitale Datenübertragung
hinzugefügt. Dieser digitale Code wird mit einer sehr niedrigen Rate von etwa 134 Bit pro
Sekunde übertragen (der Code ist 23 Bit lang). Nur Sprechfunkgeräte der jüngsten
Generation unterstützen DCS. Es können 83 verfügbare DCS-Codes verwendet werden. Da
ältere Modelle nur CTCSS unterstützen, empfiehlt sich die Verwendung von DCS, um zu
verhindern, dass andere Benutzer bei Ihren Gesprächen mit dem Funkgerät zu hören sind.
13.7.1 CTCSS
• Drücken Sie die -Taste zweimal: „CTCSS“ und der
aktuelle CTCSS-Code blinken im Display.
• Drücken Sie die -Taste oder die -Taste , um zu
einem anderen Code zu wechseln.
• Drücken Sie die PTT-Taste , um die Einstellung zu
bestätigen und in den Standby-Modus zurückzukehren.
13.7.2 DCS
• Drücken Sie die -Taste dreimal: „DCS“ und der
aktuelle DCS-Code blinken im Display.
• Drücken Sie die -Taste oder die -Taste , um zu
einem anderen Code zu wechseln.
• Drücken Sie die PTT-Taste , um die Einstellung zu
bestätigen und in den Standby-Modus zurückzukehren.
Twintalker 4810 85
5
9
11
5
9
11
DEUTSCH
Page 86

Twintalker 4810
Zum Deaktivieren von CTCSS oder DCS wählen Sie im Menü für CTCSS
oder für DCS der Code „00“ aus. Nach Bestätigung wird im Menu „OF“
angezeigt.
6
Der VOX-Modus ist nicht aktiv, wenn Sie die PTT-Taste verwenden.
11
5
13.8 Kanalüberwachung
Mit der Überwachungsfunktion können Sie schwächere Signale im aktuellen Kanal suchen.
• Drücken Sie die -Taste und die -Taste gleichzeitig, um die
Kanalüberwachung zu aktivieren.
• Drücken Sie die -Taste , um die Überwachung zu beenden.
Während der Kanalüberwachung wertet die Empfängerschaltung im
Sprechfunkgerät keine CTCSS- oder DCS-Codes aus.
5
5
13.9 VOX-Auswahl
Das Sprechfunkgerät eignet sich für sprachaktivierte (VOX) Übertragung. Im VOX-Modus
sendet das Sprechfunkgerät ein Signal, wenn es von Ihrer Stimme oder einem anderen
Geräusch in Ihrer Umgebung aktiviert wird. Der VOX-Betrieb ist nicht empfehlenswert, wenn
Sie Ihr Funkgerät in einer lauten oder windigen Umgebung benutzen möchten.
• Drücken Sie die -Taste
Einstellung blinkt im Display und das VOX-Symbol wird
angezeigt.
• Drücken Sie die -Taste , um die VOX-Empfindlichkeit
zwischen 1 und 3 einzustellen (3 ist die empfindlichste
Stufe).
• Drücken Sie die -Taste , bis im Display „OF“
erscheint, um VOX auszuschalten.
• Drücken Sie die PTT-Taste , um die Einstellung zu
bestätigen und in den Standby-Modus zurückzukehren.
viermal. Die aktuelle VOX-
9
6
11
13.10 Kanalsuchlauf
Der Kanalsuchlauf sucht in einer Endlosschleife in den Kanälen 1 bis 8 nach aktiven
Signalen.
Sobald ein aktiver Kanal gefunden wird, haben Sie die Möglichkeit, den CTCSS-Code oder
den DCS-Code zu suchen, den der Benutzer, der auf dem Kanal sendet, eingestellt hat.
86 Twintalker 4810
Page 87

Twintalker 4810
9
6
Wenn Sie die PTT-Taste drücken, während Sie einen gefundenen
Kanal abhören, kehrt das Sprechfunkgerät auf dem gefundenen Kanal in
den Standby-Modus zurück.
11
9
6
• Wenn Sie die PTT-Taste drücken, während Sie einen
gefundenen CTCSS-Code abhören, kehrt das Sprechfunkgerät
auf dem Kanal mit dem CTCSS-Code in den Standby-Modus
zurück.
• Wenn kein CTCSS-Code erkannt wird, besteht die Möglichkeit,
dass der Benutzer DCS gewählt hat. In diesem Fall können Sie
nach dem DCS-Code suchen (Abschnitt 13.10.3).
11
13.10.1 Suchen nach einem aktiven Funkkanal
• Drücken Sie die -Taste fünfmal: „SC“ und der
aktuelle Kanal blinken im Display.
• Drücken Sie die -Taste oder die -Taste , um
den Kanalsuchlauf zu starten.
Sobald ein aktiver Kanal gefunden wird, hört der Suchlauf auf und Sie können die
Übertragung abhören.
Wenn die Übertragung auf dem gefundenen Kanal beendet wird, wird der Suchlauf
automatisch fortgesetzt.
5
11
13.10.2 Suchen nach einem CTCSS-Code
Wenn ein aktiver Kanal gefunden wird, drücken Sie die PTT-Taste , um den gefundenen
aktiven Kanal auszuwählen. Nun haben Sie die Möglichkeit, nach dem vom gefundenen
Benutzer verwendeten CTCSS/DCS-Code zu suchen.
• Drücken Sie die -Taste sechsmal: „SC“ und
„CTCSS 00“ blinken im Display für den ausgewählten
Funkkanal.
• Drücken Sie die -Taste oder die -Taste , um
den CTCSS-Suchlauf zu starten.
Sobald eine Übertragung auf dem Kanal stattfindet, wird der CTCSS-Code (falls verwendet)
erkannt und angezeigt.
Twintalker 4810 87
5
DEUTSCH
Page 88

Twintalker 4810
9
6
Wenn Sie die PTT-Taste drücken, während Sie einen gefundenen
DCS-Code abhören, kehrt das Sprechfunkgerät auf dem Kanal mit dem
DCS-Code in den Standby-Modus zurück.
5
9
6
T
11
13.10.3 Suchen nach einem DCS-Code
• Drücken Sie die -Taste siebenmal: „SC“ und „DCS
00“ blinken im Display für den ausgewählten Funkkanal.
• Drücken Sie die -Taste oder die -Taste , um
den DCS-Suchlauf zu starten.
Sobald eine Übertragung auf dem Kanal stattfindet, wird der DCS-Code (falls verwendet)
erkannt und angezeigt.
5
11
13.11 Ruftöne
Ein Rufton weist andere darauf hin, dass Sie eine Durchsage beginnen möchten.
13.11.1 Einstellen des Ruftons
Der Twintalker 4810 verfügt über 15 Ruftöne.
• Drücken Sie die -Taste
angezeigt und der aktuelle Rufton blinkt.
• Drücken Sie die -Taste oder die -Taste , um
einen anderen Rufton auszuwählen.
• Drücken Sie die PTT-Taste , um die Einstellung zu
bestätigen und in den Standby-Modus zurückzukehren.
achtmal. „CA“ wird
11
13.11.2 Senden eines Ruftons
Drücken Sie kurz die -Taste . Der Rufton wird über den eingestellten Kanal gesendet.
4
13.12 Ein-/Ausschalten des Quittungstons
Nach dem Loslassen der -Taste sendet das Gerät einen Quittungston, um das
Übertragungsende zu bestätigen.
PT
Einstellen des Quittungstons:
• Drücken Sie die -Taste neunmal. „rO“ wird angezeigt.
• Drücken Sie zum Aktivieren (ON) oder zum Deaktivieren (OF)
des Quittungstons.
• Drücken Sie die PTT-Taste , um die Auswahl zu bestätigen und in
den Standby-Modus zurückzukehren.
5
13.13 Ein-/Ausschalten des Tastentons
Wenn eine Taste gedrückt wird, hören Sie einen kurzen Ton. Diese Funktion gilt nicht für die
-Taste oder die PTT-Taste .
88 Twintalker 4810
10 11
Page 89

Twintalker 4810
11
9
6
5
5
9
6
5
Die PTT-Taste , die -Taste und die -Taste funktionieren
auch bei aktivierter Tastensperre.
11
Einstellen des Tastentons:
• Drücken Sie zehnmal. „tO“ wird angezeigt.
• Drücken Sie zu m Aktivieren (ON) oder zum Deaktivieren (OF)
des Tastentons.
• Drücken Sie die PTT-Taste , um die Auswahl zu bestätigen und in
den Standby-Modus zurückzukehren.
13.14 Zweikanalsuchlauf (DCM)
Im Standby-Modus ist das Sprechfunkgerät auf einen Kanal mit CTCSS/DCS-Code
eingestellt. Das Sprechfunkgerät empfängt nur Signale, die auf diesem Kanal und mit diesem
CTCSS/DCS-Code übertragen werden.
Mit dem Zweikanalsuchlauf (DCM) können Sie einen zweiten Kanal mit CTCSS/DCS-Code
überwachen.
• Drücken Sie die -Taste elfmal. „DCM OF“ blinkt im
Display.
• Drücken Sie die -Taste oder die -Taste , um
den Kanal zu wechseln.
• Drücken Sie die -Taste , um die Kanalauswahl zu
bestätigen und zur CTCSS-Auswahl zu gelangen. (Drücken
Sie die -Taste erneut, um zur DCS-Auswahl zu
gelangen.)
• Drücken Sie die -Taste oder die -Taste , um
den CTCSS-Code oder den DCS-Code zu wechseln.
• Drücken Sie die PTT-Taste , um die Einstellung zu
bestätigen und in den Standby-Modus zurückzukehren.
• Zum Deaktivieren der Funktion wählen Sie „OF“, wenn Sie
den DCM-Kanal auswählen.
Bei aktivierter Zweikanalabfrage wechselt das Sprechfunkgerät abwechselnd zwischen dem
Standby-Kanal + CTCSS/DCS-Code und dem Zweikanal + CTCSS/DCS hin und her.
5
11
13.15 Tastensperre
• Halten Sie die -Taste drei Sekunden lang gedrückt,
um die Tastensperre zu aktivieren. Das TastensperreSymbol wird im LCD-Display angezeigt.
• Halten Sie die Taste -Taste erneut für 3 Sekunden
gedrückt, um die Tastensperre zu deaktivieren.
5
DEUTSCH
4
Twintalker 4810 89
10
Page 90

Twintalker 4810
9
9
6
4
11
4
Schließen Sie keine anderen Kopfhörer an. Ihr Gerät könnte beschädigt
werden.
13.16 Stoppuhrfunktion
Der Twintalker 4810 verfügt über eine Stoppuhr, die bis 59'59''99 zählt.
• Halten Sie die -Taste drei Sekunden lang gedrückt.
Die Stoppuhranzeige erscheint im Display.
• Drücken Sie die -Taste , um die Stoppuhr zu starten.
• Drücken Sie die -Taste , um die Stoppuhr zu
stoppen.
• Drücken Sie die -Taste , um die Stoppuhr auf Null
zurückzusetzen.
• Halten Sie die -Taste drei Sekunden lang gedrückt,
um die Stoppuhr zu deaktivieren.
4
13.17 Display-Hintergrundbeleuchtung
Drücken Sie zum Aktivieren der Hintergrundbeleuchtung des LCD-Displays eine beliebige
Taste außer der PTT-Taste oder der -Taste . Auch die - Taste erzeugt
kein Licht, nur beim Einschalten.
Die Displaybeleuchtung leuchtet 6 Sekunden.
10
14 Anschluss des Kopfhörers
Der Twintalker 4810 kann mit dem mitgelieferten Kopfhörer verwendet werden.
Zum Anschluss des Kopfhörers muss die Gummilasche geöffnet werden. Sie kann nicht
entfernt werden, da sie mit dem Gerät verbunden ist.
Stecken Sie den Kopfhörerstecker in den Anschluss (2,5 mm Buchse). Bei Betrieb mit
Headset, kann sowohl die PTT-Taste am Gerät, als auch am Headset verwendet
werden. Es ist bei Headsetbetrieb jedoch nur das Micro am Headset aktiv.
11
2
90 Twintalker 4810
Page 91

Twintalker 4810
15 Problembeseitigung
Keine Funktion Reinigen Sie die Batteriekontakte mit einem weichen Tuch.
Tauschen Sie die Batterien / Akkus aus.
Keine Übertragung Stellen Sie sicher, dass die PTT-Taste vollständig
gedrückt ist, bevor Sie sprechen.
Prüfen Sie die Kanalaktivität und wechseln Sie auf einen
anderen, wenn der aktuelle Kanal in Benutzung ist.
Kein Empfang Überprüfen Sie die Lautsprecherlautstärke.
Stellen Sie sicher, dass Sie sich innerhalb des
Empfangsbereichs des Senders befinden. Ändern Sie bei
Bedarf Ihre Position.
Begrenzte Reichweite und
Geräusche während der
Übertragung
Störungen Der Empfänger und Sender befinden sich zu nahe
Die Gesprächsreichweite hängt vom Gelände ab.
Stahlkonstruktionen, Betongebäude oder die Benutzung in
Kraftfahrzeugen haben einen negativen Einfluss auf die
Reichweite.
Versuchen Sie, so viele Hindernisse wie möglich zu
vermeiden. Kommunizieren Sie möglichst bei
ungehindertem Sichtkontakt.
Ändern Sie Ihre Position.
aneinander. Der Mindestabstand zwischen zwei Geräten
beträgt 1,5 m.
11
16 Technische Eigenschaften
Kanäle
Subcode
Frequenz
Reichweite
Batterien / Akkus
Sendeleistung
Modulationstyp
Kanalabstand
Netzteil Duo-Ladegerät
8
CTCSS 38 / DCS 83
446,00625 MHz - 446,09375 MHz
Bis zu 8 km (freies Gelände)
4 x AAA Batterien oder 4 x AAA NiMH Akkus
=< 500 mW ERP
FM - F3E
12,5 kHz
Ein: 230 V AC / 50 Hz - Aus: 9 V DC / 200 mA
DEUTSCH
Twintalker 4810 91
Page 92

Twintalker 4810
)
DCS Code Chart
No DCS code No DCS code No DCS code No DCS code
0 Disabled 21 134 42 311 63 516
1 23 22 143 43 315 64 532
2 25 23 152 44 331 65 546
3 26 24 155 45 343 66 565
4 31 25 156 46 346 67 606
5 32 26 162 47 351 68 612
6 43 27 165 48 364 69 624
7 47 28 172 49 365 70 627
8 51 29 174 50 371 71 631
9 54 30 205 51 411 72 632
10 65 31 223 52 412 73 654
11 71 32 226 53 413 74 662
12 72 33 243 54 423 75 664
13 73 34 244 55 431 76 703
14 74 35 245 56 432 77 712
15 114 36 251 57 445 78 723
16 115 37 261 58 464 79 731
17 116 38 263 59 465 80 732
18 125 39 265 60 466 81 734
19 131 40 271 61 503 82 743
20 132 41 306 62 506 83 754
Channel Frequency Chart: CTCSS Code Chart
Channel Frequency (MHz
1 446,00625 0 Disabled 10 94,8 20 131,8 30 186,2
2 446,01875 1 67,0 11 97,4 21 136,5 31 192,8
3 446,03125 2 71,9 12 100,0 22 141,3 32 203,5
4 446,04375 3 74,4 13 103,5 23 146,2 33 210,7
5 446,05625 4 77,0 14 107,2 24 151,4 34 218,1
6 446,06875 5 79,7 15 110,9 25 156,7 35 225,7
7 446,08125 6 82,5 16 114,8 26 162,2 36 233,6
8 446,09375 7 85,4 17 118,8 27 167,9 37 241,8
Code Frequency (Hz) Code Freq. (Hz) Code Freq. (Hz) Code Freq. (Hz)
8 88,5 18 123,0 28 173,8 38 250,3
9 91,5 19 127,3 29 179,9
17 Kundendienstadresse und Support-Hotline
Die Kundendienstadresse finden Sie auf der im Lieferumfang enthaltenen Servicekarte oder
im Internet : www.ucom.be.
18 Konformitätserklärung und Hersteller
Topcom Europe Nv.
Grauwmeer 17
3001 Heverlee
Belgien
Die Konformitätserklärung finden Sie auf der letzten Seite dieser Bedienungsanleitung.
92 Twintalker 4810
Page 93

Twintalker 4810
19 Garantie
19.1 Garantiezeit
Die Geräte haben eine Garantiezeit von 36 Monaten. Die Garantiezeit beginnt an dem Tag,
an dem das neue Gerät erworben wird. Die Garantie gilt nicht für normale Batterien oder
wiederaufladbare Akkus (Typen AA/AAA).
Verbrauchsmaterialien und Schäden, die unbedeutende Auswirkungen auf den Betrieb oder
den Wert des Geräts haben, sind nicht abgedeckt. Der Garantieanspruch muss durch
Vorlage des Originalkaufbelegs oder einer Kopie des Kaufbelegs, aus dem das Kaufdatum
und das Gerätemodell ersichtlich sind, nachgewiesen werden.
19.2 Garantieabwicklung
Ein defektes Gerät muss mit dem gültigen Kaufbeleg und einer ausgefüllten Servicekarte an
ein autorisiertes Kundendienstzentrum geschickt werden. Tritt ein Gerätefehler innerhalb der
Garantiezeit auf, übernimmt das Kundendienstzentrum unentgeltlich die Reparatur jedes
durch einen Material- oder Herstellungsfehler aufgetretenen Defekts mittels Reparatur oder
Austausch des fehlerhaften Geräts oder von Teilen des fehlerhaften Geräts. Im Falle eines
Austauschs können die Farbe und das Modell von dem ursprünglich erworbenen Gerät
abweichen.
Das ursprüngliche Kaufdatum legt den Beginn der Garantiezeit fest. Die Garantiezeit
verlängert sich nicht, wenn das Gerät durch das zuständige Kundendienstzentrum
ausgetauscht oder repariert wird.
19.3 Garantieausschlüsse
Schäden oder Defekte, die durch unsachgemäße Handhabung oder unsachgemäßen
Betrieb verursacht werden, sowie Defekte, die durch die Verwendung von NichtOriginalteilen oder -zubehör entstehen, fallen nicht unter die Garantie.
Die Garantie deckt weder Schäden durch äußere Einflüsse, wie Blitzschlag, Wasser und
Feuer, noch Transportschäden ab. Wenn die Seriennummer des Geräts verändert, entfernt
oder unleserlich gemacht wurde, kann keine Garantie in Anspruch genommen werden. Alle
Garantieansprüche erlöschen, wenn das Gerät vom Käufer repariert, verändert oder
umgebaut wurde.
Twintalker 4810 93
DEUTSCH
Page 94

Page 95

Page 96

MD17200287
 Loading...