

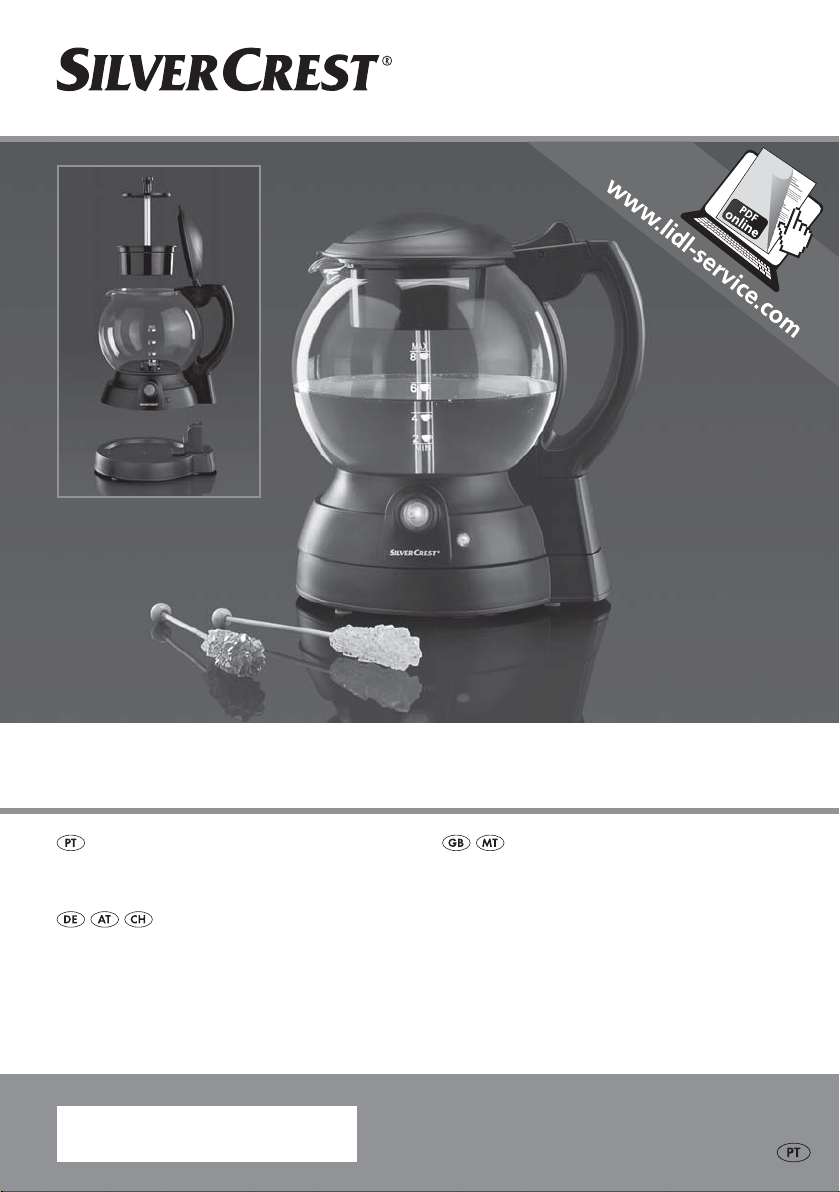
CHALEIRA STK 650 A2
CHALEIRA
Manual de instruções
TEEKOCHER
Bedienungsanleitung
IAN 277007
TEA MAKER
Operating instructions
Antes de começar a ler abra na página com as imagens e, de seguida, familiarize-se com todas as
funções do aparelho.
Before reading, unfold the page containing the illustrations and familiarise yourself with all functions of
the device.
Klappen Sie vor dem Lesen die Seite mit den Abbildungen aus und machen Sie sich anschließend mit allen
Funktionen des Gerätes vertraut.
PT Manual de instruções Página 1
GB / MT Operating instructions Page 11
DE / AT / CH Bedienungsanleitung Seite 21

Índice Página
Introdução 2
Utilização correcta 2
Material fornecido 2
Dados técnicos 2
Descrição do aparelho 2
Indicações de segurança 3
Antes da primeira utilização 5
Funcionamento 5
Protecção contra sobreaquecimento 6
Limpeza e conservação 6
Descalcificação 7
Armazenamento 8
Eliminação 8
Garantia da Kompernass Handels GmbH 8
Assistência Técnica 9
Importador 9
Leia cuidadosamente o manual de instruções antes da primeira utilização e guarde-o para consultar
posteriormente. Ao entregar o aparelho a terceiros, entregue também o manual.
- 1 -
CHALEIRA
Introdução
Parabéns pela compra do seu novo aparelho.
Optou por um produto de elevada qualidade.
O manual de instruções é parte integrante deste
produto. Este contém instruções importantes para a
segurança, utilização e eliminação. Antes de utilizar
o produto, familiarize-se com todas as instruções de
operação e segurança. Utilize o produto apenas
como descrito e nas áreas de aplicação indicadas.
Guarde bem este manual de instruções.
Ao transferir o produto para terceiros, entregue
todos os respetivos documentos.
Utilização correcta
Este aparelho destina-se a preparar chá e a mantê-lo
quente. Este destina-se apenas ao uso privado e não
deve ser utilizado para fins comerciais ou industriais.
Material fornecido
Chaleira
Escova para o tubo ascendente
Manual de instruções
Dados técnicos
Consumo de energia: 550 - 650 W
Tensão de rede: 220 - 240 V ~, 50 Hz
Todas as peças deste aparelho que
entram em contacto com alimentos são
próprios para produtos alimentares.
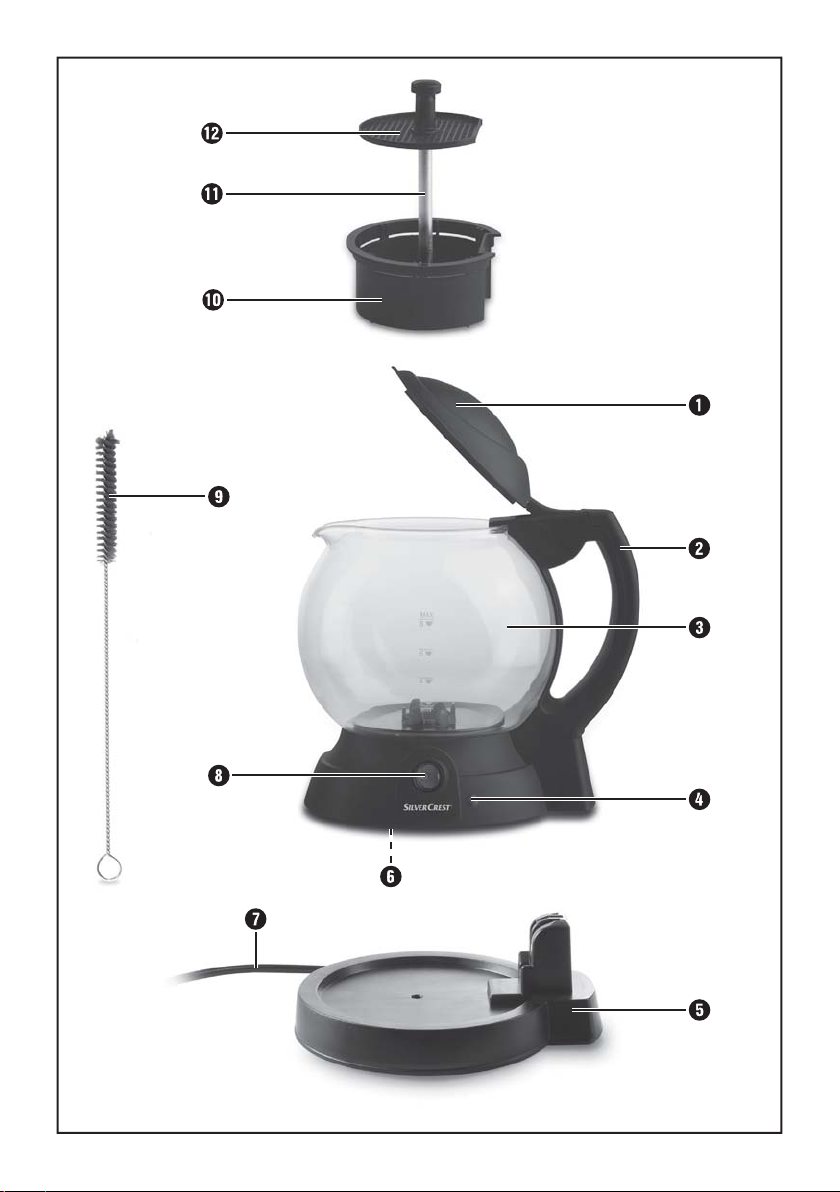
Descrição do aparelho
1 Tampa
2 Pega
3 Jarro
4 Luz de controlo
5 Base
6 Botão de reposição
7 Cabo de alimentação
8 Interruptor para ligar/desligar
9 Escova para o tubo ascendente
0 Câmara de aquecimento
q Tubo ascendente
w Filtro
- 2 -
Indicações de segurança
Perigo - Choque elétrico!
• Certifique-se de que a base com as ligações eléctricas nunca entra em
contacto com água! Deixe a base secar totalmente, se esta tiver ficado
húmida acidentalmente.
• Utilize o aparelho apenas com a base fornecida.
• Certifique-se de que o cabo de alimentação nunca fica molhado nem
húmido quando está em funcionamento. Disponha o cabo de modo a
que este não fique apertado nem danificado.
• Em caso de danos, a ficha de rede ou o cabo de alimentação devem ser
imediatamente substituídos por técnicos autorizados ou pela Assistência
Técnica, de modo a evitar perigos.
• Após a utilização, retire sempre a ficha da tomada. Desligar o aparelho
não é suficiente, porque ainda há alguma tensão de rede enquanto aficha
de rede estiver encaixada na tomada.
Aviso - Perigo de ferimentos!
• Utilize sempre o aparelho com a tampa fechada. Caso contrário, a desconexão automática não funciona. A água a ferver pode transbordar.
• Pode ser libertado vapor muito quente. Além disso, o jarro fica muito
quente durante o funcionamento. Use, por isso, luvas de cozinha.
• Antes de ligar o aparelho, certifique-se de que este se encontra estável
e na vertical. Se o aparelho não assentar firmemente a água a ferver
pode fazê-lo cair.
• Manuseie o jarro com precaução. Os vidros partidos podem provocar
ferimentos graves por corte.
• Ao adicionar água, nunca exceda a marcação MÁX. Caso contrário, a
água a ferver pode ser projectada e provocar queimaduras.
• Não abra a tampa enquanto a água estiver a ferver.
- 3 -
• Os aparelhos podem ser utilizados por pessoas com capacidades físicas,
sensoriais ou mentais reduzidas, bem como com falta de experiência
e/ou conhecimento, caso sejam vigiadas ou instruídas sobre a utilização
segura do aparelho e tenham compreendido os perigos daí resultantes.
• Este aparelho pode ser utilizado por crianças com idades superiores a
8 anos, caso sejam vigiadas ou instruídas sobre a utilização segura do
aparelho e tenham compreendido os perigos daí resultantes.
• A limpeza e a manutenção por parte do utilizador não podem ser efetuadas por crianças, salvo se tiverem idade igual ou superior a 8 anos e
forem vigiadas.
• O aparelho e o respetivo cabo de ligação devem ser mantidos afastados
de crianças com idades inferiores a 8 anos.
• As crianças não podem brincar com o aparelho.
• As crianças devem ser supervisionadas, de modo a garantir que não
brincam com o aparelho.
• Não utilize temporizadores externos ou sistemas de comando à distância
para operar o aparelho.
CUIDADO: superfícies quentes!
Deste modo, evita danos no aparelho:
• Nunca introduza água fria no aparelho imediata-mente após um aquecimento de água. Podem criar-se tensões no vidro e este pode partir!
- 4 -

Antes da primeira utilização
• Remova todos os materiais de embalagem do
aparelho.
• Lave cuidadosamente todas as peças do sistema
de aquecimento (câmara de aquecimento 0,
tubo ascendente q, filtro w) e o jarro 3 (consulte o capítulo “Limpeza e conservação”).
1. Retire o jarro 3 da base 5.
2. Abra a tampa 1 e retire o sistema de aquecimento. Coloque o sistema de aquecimento sobre
uma superfície plana.
3. Adicione a quantidade de água pretendida no
jarro 3. Ao adicionar água, não exceda a marcação MÁX e nunca coloque uma quantidade inferior à marcação MÍN.
Antes da primeira utilização, proceda do seguinte
modo:
1. Retire o jarro 3 da base 5.
2. Encha o jarro 3 com água até à marcação
MAX, adicionando uma colher de chá de sumo
de limão (ou concentrado de limão). Caso não
tenha limões, pode colocar um saquinho de chá
(ou uma colher de chá de chá solto) directamente na água.
3. Coloque o sistema de aquecimento no jarro 3.
4. Feche a tampa 1 e coloque o jarro 3 sobre a
base 5.
5. Ligue o aparelho com o interruptor para ligar/
desligar 8. A luz de controlo 4 e o interruptor
para ligar/desligar 8 acendem. Aguarde até
que a luz de controlo 4 se apague.
6. Desligue o aparelho com o interruptor para ligar/
desligar 8 e limpe o aparelho, tal como descrito
em "Limpeza e conservação".
A chaleira encontra-se agora operacional.
Funcionamento
Atenção:
Não introduza açúcar na chaleira. Não aqueça leite
nem álcool na chaleira. Isso provoca danos irreparáveis no aparelho.
Atenção:
Certifique-se de que a água não transborda do
jarro 3 para evitar queimaduras e choques eléctricos.
4. Segure no sistema de aquecimento e desloque o
tubo ascendente q com o filtro w para cima.
5. Adicione a quantidade de chá desejada ou o
saquinho de chá na câmara de aquecimento 0.
Indicação:
Certifique-se de que as etiquetas ou fios do saquinho
não ficam dentro do aparelho.
6. Coloque novamente o sistema de aquecimento
no jarro 3. Certifique-se de que o tubo ascen-
dente q encaixa no entalhe na base do jarro 3.
A câmara de aquecimento 0 deve ser coloca-
da com o lado plano voltado para a pega 2.
7. Feche a tampa 1.
8. Coloque novamente o jarro 3 na base 5.
9. Insira a ficha de rede na tomada e coloque o
interruptor para ligar/desligar 8 na posição
“I”. A luz de controlo 4 e o interruptor para
ligar/ desligar 8 acendem.
A água é aquecida, impelida para cima pelo tubo
ascendente q, e passa pela câmara de aquecimento 0 até ao jarro 3.
Indicação:
Não deve preparar chá verde na chaleira eléctrica.
A temperatura de aquecimento ideal para o chá
verde é de aprox. 70 ºC. Com temperaturas mais
elevadas, produzidas pela chaleira, formam-se
taninos. O chá fica com um sabor amargo.
- 5 -
O aparelho comuta automaticamente para a função
de manutenção do calor, depois de a água ter aquecido. A luz de controlo 4 apaga-se, apenas o interruptor para ligar/desligar 8 se mantém aceso.
Assim que a água arrefecer, a chaleira aquece-a
novamente. A luz de controlo 4 acende-se novamente durante o processo de aquecimento.
Indicação
Visto que a água é novamente conduzida através
do sistema de aquecimento durante o novo processo
de aquecimento, deverá retirar o sistema de aquecimento do jarro 3 após o primeiro aquecimento.
Perigo de ferimentos!
O sistema de aquecimento encontra-se muito quente!
Existe perigo de queimaduras! Utilize luvas de
cozinha quando entrar em contacto com o sistema
de aquecimento.
Indicação
Quanto mais tempo mantiver a bebida quente, mais
líquido se evapora e mais forte fica a bebida.
Por isso, recomendamos que beba o chá o mais
rapidamente possível após o primeiro aquecimento.
Protecção contra
sobreaquecimento
Em caso de sobreaquecimento, a protecção contra
sobreaquecimento desliga o elemento de aquecimento
no interior do aparelho. O interruptor para ligar/
desligar 8 permanece aceso, porém, o aparelho
já não aquece.
A protecção contra sobreaquecimento é activada
se não se encontrar água no jarro 3, ou se a água
for insuficiente, apesar de o aparelho estar ligado.
Se a protecção contra sobre aquecimento desligar
o elemento de aquecimento, proceda da seguinte
forma:
• Deixe o aparelho arrefecer.
• Prima o botão de reposição 6 na parte inferior
do jarro 3.
O aparelho pode ser novamente utilizado.
Limpeza e conservação
Pode interromper o processo de aquecimento a
qualquer momento:
Para isso, desloque o interruptor para ligar/desligar 8
para a posição "0". O processo de aquecimento é
concluído.
Caso retire o jarro 3 da base 5, o processo de
aquecimento é interrompido.
Atenção:
Deixe o jarro 3 arrefecer antes de adicionar água
fria para um novo processo de aquecimento!
Caso contrário, são provocadas tensões no vidro e
o jarro 3 pode partir.
Perigo de ferimentos!
Antes da limpeza, retire a ficha de rede da tomada.
Existe perigo de choque eléctrico! Deixe o aparelho
arrefecer. Perigo de queimaduras!
Nunca mergulhe o aparelho em água ou noutros
líquidos! Existe perigo de choque eléctrico!
O aparelho pode sofrer danos irreparáveis.
Para que atinja os melhores resultados em cada
processo de aquecimento, o aparelho deve ser limpo
após cada utilização. Deste modo, evita que:
• a combinação de calcário e taninos, provocada
pelo aquecimento de água e a preparação do
chá, prejudique o funcionamento da chaleira;
- 6 -

• em caso de utilização regular da chaleira, os
aromas de chás muito fortes se imponham e se
transmitam para outros tipos de chá.
Limpe o jarro 3 da chaleira com um pano humedecido. Em caso de sujidade profunda, aplique um detergente suave no pano. De seguida, lave o jarro 3
abundantemente com água, para que todos os resíduos de detergente sejam removidos. Pode limpar
eficazmente o entalhe na base do jarro 3 com a
escova de limpeza 9.
Atenção:
Não utilize produtos de limpeza abrasivos, químicos
ou corrosivos. Estes podem causar danos irreparáveis
no aparelho!
Limpe o sistema de aquecimento com água quente
e um detergente líquido:
A câmara de aquecimento q e o filtro e podem
ser limpos com a escova de limpeza 9 fornecida.
Limpe o tubo ascendente com o auxílio da escova
para o tubo ascendente 0.
Lave todo o sistema de aquecimento com água
limpa, para que não restem quaisquer resíduos de
detergente.
Descalcificação
O teor de calcário (grau de dureza) na água pode
conduzir à formação de calcário no aparelho ao
longo de várias utilizações. O calcário prejudica o
funcionamento do aparelho, diminui a qualidade
do chá e provoca ainda um aumento do consumo
de energia.
Indicação:
Informe-se junto do seu fornecedor de água relativamente ao grau de dureza da sua água canalizada.
No caso de um elevado grau de dureza, a descalcificação deve ser efectuada mais cedo; com um
baixo nível de dureza a descalcificação pode ser
efectuada mais tarde. Utilize um produto de descalcificação para aparelhos domésticos e tenha em
atenção as instruções de utilização.
1. Utilize um produto anti-calcário doméstico convencional à base de limão. Tenha em atenção
as indicações na embalagem do produto anticalcário.
2. Coloque o sistema de aquecimento no jarro 3.
3. Adicione a solução anti-calcário no jarro 3.
Não insira líquido de forma a ultrapassar a marcação MAX nem ficar abaixo da marcação
MIN.
4. Aguarde 10 minutos e ligue o aparelho.
5. Deixe a solução ferver e aguarde até que circule
através do sistema de aquecimento.
6. Caso seja necessário, repita o processo. Pode
utilizar novamente a solução anti-calcário; deixe-a
arrefecer previamente.
7. Assim que o calcário se soltar, aqueça 2 - 3
enchimentos de água limpa e deixe circular
pelo sistema de aquecimento.
8. De seguida, limpe o jarro 3 e o sistema de
aquecimento, tal como descrito no capítulo "Limpeza e conservação".
- 7 -

Armazenamento
• Caso não utilize o aparelho durante um longo
período de tempo, enrole o cabo no sentido
oposto ao dos ponteiros do relógio no dispositivo de enrolamento do cabo, no lado inferior da
base 5, e insira a extremidade na passagem
do cabo na base 5.
• Guarde o aparelho num local seco e isento de pó.
Eliminação
Nunca elimine o aparelho juntamente
com o lixo doméstico comum. Este
produto está em conformidade com
a Directiva Europeia 2012/19/EU.
Elimine o aparelho através de um serviço
de elimina-ção autorizado ou das entidades
de eliminação locais.
Respeite os regulamentos actualmente em vigor.
Em caso de dúvida, entre em contacto com a
entidade de eliminação de resíduos.
Elimine todos os materiais da embalagem
de modo ecológico.
Garantia da
Kompernass Handels GmbH
Estimada Cliente, Estimado Cliente,
Este aparelho tem uma garantia de 3 anos a contar
da data de compra. No caso deste produto ter
defeitos, tem direitos legais contra o vendedor do
produto. Estes direitos legais não são limitados pela
nossa garantia que passamos a transcrever.
Condições de garantia
O prazo de garantia tem início na data da compra.
Por favor, guarde bem o talão de compra original.
Este documento é necessário como comprovativo
da compra.
Se dentro de três anos a partir da data de compra
deste produto, ocorrer um defeito de material ou
fabrico, o produto será reparado ou substituído por
nós – consoante a nossa preferência – gratuitamente.
Esta garantia parte do princípio que o aparelho
defeituoso e o comprovativo da compra (talão de
compra) são apresentados dentro do prazo de três
anos e é descrito brevemente, por escrito, em que
consiste o defeito e quando ocorreu.
Se o defeito estiver coberto pela nossa garantia, receberá o produto reparado ou um novo produto.
Prazo de garantia e direitos legais
O período de garantia não é prolongado pelo
acionamento da mesma. Isto também se aplica a
peças substituídas e reparadas. Danos e defeitos
que possam eventualmente já existir no momento
da compra devem ser imediatamente comunicados,
após retirar o aparelho da embalagem. Expirado
o período da garantia, quaisquer reparações necessárias estão sujeitas a pagamento.
Âmbito da garantia
O aparelho foi fabricado segundo diretivas de qualidade rigorosas, com o maior cuidado, e testado
escrupulosamente antes da sua distribuição.
A garantia abrange apenas defeitos de material ou
de fabrico. Esta garantia não abrange peças do
produto, que estão sujeitas ao desgaste normal e
podem ser consideradas desta forma peças de desgaste, ou danos em peças frágeis, p. ex. interruptores,
acumuladores, formas para bolos ou peças de vidro.
Esta garantia perde a validade, se o produto for
danificado, utilizado incorretamente ou se a manutenção tenha sido realizada indevidamente.
- 8 -

Para garantir uma utilização correta do produto, é
necessário cumprir todas as instruções contidas no
manual de instruções. Ações ou fins de utilização que
são desaconselhados, ou para os quais é alertado
no manual de instruções, têm de ser impreterivelmente evitados.
O produto foi concebido apenas para uso privado
e não para uso comercial.
A garantia extingue-se em caso de utilização incorreta, uso de força e intervenções que não tenham
sido efetuadas pela nossa Filial de Assistência Técnica autorizada.
Procedimento em caso de acionamento da
garantia
Para garantir um processamento rápido do seu pedido, siga, por favor, as seguintes instruções:
Para todos os pedidos de esclarecimento, tenha à
mão o talão de compra e o número do artigo (p. ex.
IAN 12345) como comprovativo da compra.
O número do artigo consta na placa de características, numa impressão, na capa do seu manual de instruções (em baixo à esquerda) ou, como autocolante, no verso ou no lado inferior.
Caso ocorram falhas de funcionamento ou outros
defeitos, contacte primeiro o Serviço de Assistência
Técnico, indicado em seguida, telefonicamente ou
por e-mail.
De seguida, pode enviar gratuitamente o produto
registado como defeituoso, incluindo o comprovativo
da compra (talão de compra) e indique o defeito e
quando este ocorreu, para a morada do Serviço
de Assistência Técnica que lhe foi indicada.
Assistência Técnica
Assistência Portugal
Tel.: 70778 0005 (0,12 EUR/Min.)
E-Mail: kompernass@lidl.pt
IAN 277007
Importador
Por favor, observe que a seguinte morada não é a
morada do Serviço de Assistência Técnica. Primeiro
entre em contacto com o Serviço de Assistência
Técnica.
KOMPERNASS HANDELS GMBH
BURGSTRASSE 21
44867 BOCHUM
GERMANY
www.kompernass.com
Em www.lidl-service.com poderá descarregar este manual de instruções e
muitos outros, bem como vídeos sobre
os produtos e software.
- 9 -

- 10 -

Content Page
Introduction 12
Intended Usage 12
Items supplied 12
Technical data 12
Appliance description 12
Safety information 13
Before the First Use 15
Operation 15
Overheating protection 16
Cleaning and care 16
Scale removal 17
Storage 17
Disposal 18
Kompernass Handels GmbH warranty 18
Service 19
Importer 19
Read the operating instructions carefully before using the appliance for the first time and preserve this
booklet for later reference. Pass the manual on to whomsoever might acquire the appliance at a later date.
- 11 -

TEA MAKER
Introduction
Congratulations on the purchase of your new
appliance.
You have selected a high-quality product. The operating instructions are a constituent of this product.
They contain important information about safety,
usage and disposal. Before using the product, familiarise yourself with all of the operating and safety
instructions. Use the product only as described and
for the specified usage areas. Keep these operating
instructions in a safe place. Please also pass these
operating instructions on to any future owner(s).
Items supplied
Tea Maker
Riser tube brush
Operating instructions
Technical data
Power consumption : 550 - 650 W
Mains voltage: 220 - 240 V ~, 50 Hz
All of the parts of this appliance that come
into contact with food are food-safe.
Appliance description
Intended Usage
This appliance is intended for brewing tea and then
keeping it warm. This appliance is intended for
domestic use only, it is not suitable for commercial
or industrial applications.
1 Lid
2 Grip
3 Glass pot
4 Control lamp
5 Base
6 Reset button
7 Power cable
8 On/Off switch
9 Riser tube brush
0 Brew chamber
q Water riser tube
w Sieve
- 12 -

Safety information
Danger – electric shock!
• Ensure that the base with the electrical connections does not come into
contact with water! Ensure that the base is completely dry before use,
especially if it has accidentally become wet.
• Use the appliance only with the supplied base.
• Ensure that the power cable never becomes wet or damp during operation. Lay the cable so that it cannot be trapped or otherwise damaged.
• To avoid potentially fatal risks, arrange for a defective power plug
and/or cable to be replaced at once by qualified technicians or our
Customer Service Department.
• Always remove the plug from the mains power socket after use. Simply
switching the appliance off is not sufficient, as the appliance is under
power for as long as the plug is connected to the socket.
NEVER submerse the appliance in water or other liquids! There is a
risk of electric shock!
Warning - Risk of injury!
• Always heat the water with a closed lid, otherwise the automatic cut-out
may not work. Boiling water can then spray out over the edge.
• Hot steam clouds may be released. The glass pot also becomes very hot
during use. Wear oven mitts.
• Make certain that the appliance stands firmly and vertically before switching it on. Boiling water can cause an instable kettle to fall over.
• Exercise caution with the glass pot. Broken glass can cause serious cut
wounds.
• Never fill it with more water than to the MAX marking. If you do, boiling
water may spray out and lead to scalds.
• Do not open the lid while the water is boiling.
- 13 -

• Appliances may be used by persons with reduced physical, sensory or
mental capabilities or lack of experience and/or knowledge if they are
supervised or have been instructed how to use the appliance safely and
have understood the potential risks.
• This appliance may be used by children aged 8 years or over if they are
supervised or have been told how to use the appliance safely and are
aware of the potential risks.
• Cleaning and user maintenance tasks must not be carried out by children
unless they are aged 8 years or over and under supervision.
• The appliance and its connecting cable must be kept away from children
younger than 8 years old.
• Children must not use the appliance as a plaything.
• Children should be supervised to ensure that they do not play with the
appliance.
• Do not use an external timing switch or a separate remote control system
to operate the appliance.
CAUTION: hot surfaces!
You can thus prevent the appliance from being damaged:
• Under no circumstances should you fill the appliance with cold water
immediately after a brewing process. It could form stresses in the glass,
causing it to break!
- 14 -

Before the First Use
• Remove all packaging materials from the appliance.
• Carefully rinse all parts of the brewing system
(brew chamber 0, water riser pipe q, Sieve w)
and the glass pot 3 (see chapter “Cleaning
and Care”).
Proceed as follows before the first usage:
1. Remove the glass pot 3 from the base 5.
2. Fill the glass pot 3 up to the MAX marking with
water, then add a teaspoon of lemon juice (or lemon concentrate) to it. If lemon juice is not available, you could add a teabag (or a teaspoon of
loose tea) directly into the water.
3. Replace the brew system in the glass pot 3.
4. Close the lid 1 and replace the glass pot 3 on
the base 5.
5. Switch the appliance on with the On/Off switch 8.
The control lamp 4 and the On/Off switch 8
light up. Wait until the control lamp 4 goes out.
6. Switch the appliance off with the On/Off switch 8
and then clean the appliance as described in
“Cleaning and Care”.
The Tea Automat is now ready for use.
Operation
Attention:
DO NOT put any sugar into the Tea Automat.
DO NOT heat milk or alcohol in the tea automat.
This would irreparably damage the appliance.
1. Remove the glass pot 3 from the base 5.
2. Open the lid 1 and take out the brew system.
Place the brew system on a level and even surface.
3. Pour the desired quantity of water into the glass
pot 3. NEVER fill it with more water than to the
MAX marking, and never with less than to the
MIN marking.
Danger!
To avoid scalds/burns and electric shocks, ensure
that water does not overflow from the glass pot 3.
4. Take hold of the brew system and pull the water
riser pipe q with the sieve w upwards.
5. Place the necessary amount of tea or number of
teabags in the brew chamber 0.
Note:
Ensure that no labels or teabag strings remain in the
appliance.
6. Replace the brew system in the glass pot 3.
Ensure that the water riser pipe q sits firmly in
the recess on the bottom of the glass pot 3.
The brew chamber 0 must be positioned with
the flattened side towards the handle 2.
7. Close the appliance lid 1.
8. Replace the glass pot 3 back on to the base 5.
9. Insert the plug into a wall power socket and place
the On/Off switch 8 at the position “I”. The
control lamp 4 and the On/Off switch 8 light up.
The water is now boiled and forced upwards
through the water riser pipe q to flow through the
brew chamber 0 and then back into the glass pot 3.
Note:
Green tea is not suitable for brewing in the Tea
Automat. The ideal brewing temperature for green teas
lies at around 70°C. At higher brewing temperatures,
such as those generated in the Tea Automat, tannic
acids are released. The tea will taste bitter.
- 15 -

After the water has boiled, the appliance automatically switches itself into the keep-warm function. The
control lamp 4 goes out, only the On/Off switch 8
continues to glow. As soon as the water cools, the
Tea Automat warms the water back up. The control
lamp 4 lights up again during this rewarming process.
Overheating protection
In the event of overheating, thermal protection switches
the heating element off inside the appliance. The
On/Off switch 8 remains lit, the appliance however
does not continue to heat up.
Note:
As the water is fed back through the brewing system
during the rewarming, after the first brewing process
you should remove the brew system from the glass
pot 3.
Risk of personal injury!
The brew system is very hot! There is a risk of being
burnt! Use oven gloves when you take hold of the
brew system.
Note:
The longer the brew is kept warm, the greater is
the amount of fluid evaporated, and thus the brew
becomes stronger.
We therefore recommend that the tea be drunk as
soon as possible after brewing.
You can interrupt the brew process at any time:
For this, place the On/Off switch 8 back into the
position “0”. The brew process is finished.
If you remove the glass pot 3 from the base 5,
the brew process is interrupted.
Attention:
Always first let the glass pot 3 cool down before
you pour in fresh cold water for another brewing
process! Otherwise, tension may be created in the
glass pot 3 and it could shatter.
The thermal protection is activated if no or not enough
water is in the glass pot 3 and the appliance is
switched on anyway.
If the thermal protection function has switched the
heating element off, please proceed as follows:
• Allow the appliance to cool down.
• Press the Reset button 6 in the underside of
the glass pot 3.
The appliance can now be used again.
Cleaning and care
Risk of personal injury!
ALWAYS remove the plug before cleaning the appliance. There is a risk of electric shock! Allow the
appliance to cool down. Risk of Burns!
NEVER submerse the appliance in water or
other liquids! There is a risk of electric shock!
The appliance could also be irreparably
damaged!
To obtain an optimal result with every brew process
the appliance should be cleaned after every use.
This will avoid, that:
• The combination of scale and tannins, caused by
boiling the water and the tea brewing, impair
the function of the Tea Automat;
- 16 -

• Regular use of the Tea Automat could perhaps
cause it take on aromas from strongly aromatic
teas and pass them to other tea sorts.
Clean the glass pot 3 of the Tea Automat with a
moist cloth. For stubborn soiling use a mild detergent
on the cloth. Rinse the glass pot 3 afterwards with
copious amounts of clear water to remove all detergent residues. The recess on the bottom of the glass
pot 3 can easily be cleaned using a washing-up
brush.
Attention:
Do not use abrasive cleaners or chemical or caustic
detergents. These could irreparably damage the
appliance!
Clean the brew system with warm water and a liquid
detergent:
You can clean the brew chamber 0 and the sieve w
with a washing-up brush. Clean the riser tube q with
the aid of the riser tube brush 9.
After cleaning it, rinse the entire brewing system well
with clear water to ensure that no detergent residues
remain on or in it.
Scale removal
The mineral content (hardness) in the water causes,
over a period of time, a calcification of the appliance.
This calcification impairs the appliance in its function,
diminishes the quality of the brewed tea and
increases the energy consumption.
1. Use a standard household descaling agent based
on citric acid. Follow the preparation instructions
on the packaging of the descaler.
2. Place the brew system in the glass pot 3.
3. Tip the descaler solution into the glass pot 3.
Never pour in more liquid than to the MAX marking, and never less than to the MIN marking.
4. Wait for 10 minutes and then switch the
appliance on.
5. Allow the solution to boil and wait until it has
passed through the brew system.
6. Should it be necessary, repeat the process.
You can use the descaler solution once again;
however, first let it cool down.
7. When the scale has dissolved, allow 2 - 3 fillings
of clear water to boil and then flow through the
brewing system.
8. Afterwards, clean the glass pot 3 and the
brewing system as described in chapter,
"Cleaning and Care".
Storage
• If you do not intend to use it for an extended
period, wrap the power cable anti-clockwise
around the cable winder on the underside of
the base 5 and run the end through the cable
outlet on the base 5.
• Store the appliance in a dry and dust free location.
Note:
Enquire at your local waterworks about the hardness
level of your mains water. The need for decalcification
comes early in hard water areas, somewhat later
in soft water areas. Use a decalcifier designed for
household appliances and pay heed to the usage
instructions.
- 17 -

Disposal
Do not dispose of the appliance in your
normal domestic waste. This product is
subject to the provisions of European
Directive 2012/19/EU.
Dispose of the appliance through an approved
dis-posal centre or at your community waste facility.
Observe the currently applicable regulations.
In case of doubt, please contact your waste disposal
centre.
Dispose of all packaging materials in an
environmentally friendly manner.
Kompernass Handels GmbH
warranty
Dear Customer,
This appliance has a 3-year warranty valid from the
date of purchase. If this product has any faults, you,
the buyer, have certain statutory rights. Your statutory
rights are not restricted in any way by the warranty
described below.
Warranty conditions
The validity period of the warranty starts from the
date of purchase. Please keep your original receipt
in a safe place. This document will be required as
proof of purchase.
If any material or production fault occurs within
three years of the date of purchase of the product,
we will either repair or replace the product for you
at our discretion. This warranty service is dependent
on you presenting the defective appliance and the
proof of purchase (receipt) and a short written description of the fault and its time of occurrence.
If the defect is covered by the warranty, your product
will either be repaired or replaced by us. The repair
or replacement of a product does not signify the beginning of a new warranty period.
Warranty period and statutory claims
for defects
The warranty period is not prolonged by repairs
effected under the warranty. This also applies to
replaced and repaired components. Any damage
and defects present at the time of purchase must be
reported immediately after unpacking. Repairs
carried out after expiry of the warranty period shall
be subject to a fee.
Scope of the warranty
This appliance has been manufactured in accordance
with strict quality guidelines and inspected meticulously prior to delivery.
The warranty covers material faults or production
faults. The warranty does not extend to product
parts subject to normal wear and tear or fragile
parts such as switches, batteries, baking moulds or
parts made of glass.
The warranty does not apply if the product has been
damaged, improperly used or improperly maintained. The directions in the operating instructions for
the product regarding proper use of the product
are to be strictly followed. Uses and actions that are
discouraged in the operating instructions or which
are warned against must be avoided.
This product is intended solely for private use and
not for commercial purposes. The warranty shall be
deemed void in cases of misuse or improper handling, use of force and modifications/repairs which
have not been carried out by one of our authorised
Service centres.
- 18 -

Warranty claim procedure
To ensure quick processing of your case, please
observe the following instructions:
Please have the till receipt and the item number
(e.g. IAN 12345) available as proof of purchase.
You will find the item number on the type plate, an
engraving on the front page of the instructions (bottom left), or as a sticker on the rear or bottom of the
appliance.
If functional or other defects occur, please contact
the service department listed either by telephone or
by e-mail.
You can return a defective product to us free of
charge to the service address that will be provided to
you. Ensure that you enclose the proof of purchase
(till receipt) and information about what the defect
is and when it occurred.
Service
Service Great Britain
Tel.: 0871 5000 720 (£ 0.10/Min.)
E-Mail: kompernass@lidl.co.uk
Service Malta
Tel.: 80062230
E-Mail: kompernass@lidl.com.mt
IAN 277007
Importer
Please note that the following address is not the
service address. Please use the service address
provided in the operating instructions.
You can download these instructions
along with many other manuals,
product videos and software on
www.lidl-service.com.
KOMPERNASS HANDELS GMBH
BURGSTRASSE 21
44867 BOCHUM
GERMANY
www.kompernass.com
- 19 -

- 20 -

Inhaltsverzeichnis Seite
Einleitung 22
Bestimmungsgemäßer Gebrauch 22
Lieferumfang 22
Technische Daten 22
Gerätebeschreibung 22
Sicherheitshinweise 23
Vor dem ersten Gebrauch 25
Bedienen 25
Überhitzungsschutz 26
Reinigen und Pflegen 26
Entkalken 27
Aufbewahrung 27
Entsorgen 28
Garantie der Kompernaß Handels GmbH 28
Service 29
Importeur 29
Lesen Sie die Bedienungsanleitung vor der ersten Verwendung aufmerksam durch und heben Sie diese für
den späteren Gebrauch auf. Händigen Sie bei Weitergabe des Gerätes an Dritte auch die Anleitung aus.
- 21 -

TEEKOCHER
Einleitung
Herzlichen Glückwunsch zum Kauf Ihres neuen
Gerätes.
Sie haben sich damit für ein hochwertiges Produkt
entschieden. Die Bedienungsanleitung ist Bestandteil dieses Produkts. Sie enthält wichtige Hinweise
für Sicherheit, Gebrauch und Entsorgung. Machen
Sie sich vor der Benutzung des Produkts mit allen
Bedien- und Sicherheitshinweisen vertraut. Benutzen
Sie das Produkt nur wie beschrieben und für die angegebenen Einsatzbereiche. Bewahren Sie diese
Bedienungsanleitung gut auf. Händigen Sie alle
Unterlagen bei Weitergabe des Produkts an Dritte
mit aus.
Bestimmungsgemäßer
Gebrauch
Dieses Gerät ist dafür bestimmt, Tee aufzubrühen
und warmzuhalten. Es ist nur für den privaten Haushalt bestimmt und nicht für gewerbliche oder industrielle Zwecke konzipiert.
Lieferumfang
Teekocher
Steigrohr-Bürste
Bedienungsanleitung
Technische Daten
Leistungsaufnahme: 550 - 650 W
Netzspannung: 220 - 240 V ~, 50 Hz
Alle Teile dieses Gerätes, die mit
Lebensmitteln in Berührung kommen,
sind lebensmittelecht.
Gerätebeschreibung
1 Deckel
2 Griff
3 Kanne
4 Kontrollleuchte
5 Sockel
6 Reset-Taste
7 Netzkabel
8 Ein-/Ausschalter
9 Steigrohr-Bürste
0 Brühkammer
q Steigrohr
w Sieb
- 22 -

Sicherheitshinweise
Gefahr - elektrischer Schlag!
• Stellen Sie sicher, dass der Sockel mit den elektrischen Anschlüssen
niemals mit Wasser in Berührung kommt! Lassen Sie den Sockel erst
vollständig trocknen, wenn er versehentlich feucht geworden ist.
• Verwenden Sie das Gerät nur mit dem mitgelieferten Sockel.
• Achten Sie darauf, dass im Betrieb das Netzkabel niemals nass oder
feucht wird. Führen Sie es so, dass es nicht eingeklemmt oder anderweitig
beschädigt werden kann.
• Lassen Sie beschädigte Netzstecker oder Netzkabel sofort von autorisiertem Fachpersonal oder dem Kundenservice austauschen, um Gefährdungen zu vermeiden.
• Ziehen Sie nach Gebrauch immer den Stecker aus der Steckdose. Ausschalten alleine genügt nicht, weil noch immer Netzspannung im Gerät
anliegt, solange der Netzstecker in der Steckdose steckt.
Tauchen Sie das Gerät nie ins Wasser oder in andere Flüssigkeiten!
Es besteht die Gefahr eines elektrischen Schlages!
Warnung - Verletzungsgefahr!
• Betreiben Sie das Gerät immer nur bei geschlossenem Deckel, andernfalls funktioniert die Abschaltautomatik nicht. Kochendes Wasser kann
dann über den Rand herausspritzen.
• Es können heiße Dampfschwaden entweichen. Die Kanne ist zudem im
Betrieb sehr heiß. Tragen Sie daher Topf-Handschuhe.
• Stellen Sie sicher, dass das Gerät stabil und senkrecht steht, bevor Sie
dieses einschalten. Kochendes Wasser kann ein unstabil stehendes Gerät zum Umstürzen bringen.
• Gehen Sie vorsichtig mit der Kanne um. Zerbrochenes Glas kann schwere Schnittverletzungen verursachen.
• Füllen Sie niemals mehr Wasser als bis zur MAX-Markierung ein. Ansonsten
kann kochendes Wasser herausspritzen und zu Verbrühungen führen.
• Öffnen Sie nicht den Deckel, während das Wasser kocht.
- 23 -

• Geräte können von Personen mit reduzierten physischen, sensorischen
oder mentalen Fähigkeiten oder Mangel an Erfahrung und/oder Wissen
benutzt werden, wenn sie beaufsichtigt oder bezüglich des sicheren Gebrauchs des Gerätes unterwiesen wurden und die daraus resultierenden
Gefahren verstanden haben.
• Dieses Gerät kann von Kindern ab 8 Jahren und darüber benutzt werden,
wenn sie beaufsichtigt werden oder bezüglich des sicheren Gebrauchs
des Gerätes unterwiesen wurden und die daraus resultierenden Gefahren verstanden haben.
• Reinigung und die Wartung durch den Benutzer dürfen nicht durch Kinder
vorgenommen werden, es sei denn, sie sind 8 Jahre oder älter und werden beaufsichtigt.
• Das Gerät und seine Anschlussleitung sind von Kindern jünger als 8 Jahre
fernzuhalten.
• Kinder dürfen nicht mit dem Gerät spielen.
• Kinder sollten beaufsichtigt werden, um sicherzustellen, dass sie nicht mit
dem Gerät spielen.
• Benutzen Sie keine externe Zeitschaltuhr oder ein separates Fernwirksystem, um das Gerät zu betreiben.
VORSICHT: heiße Oberflächen!
So vermeiden Sie Schäden am Gerät:
• Füllen Sie nach einem Kochgang keinesfalls sofort wieder kaltes Wasser
in das Gerät. Es können sich Spannungen im Glas bilden und das Glas
kann brechen!
- 24 -

Vor dem ersten Gebrauch
• Entfernen Sie sämtliche Verpackungsmaterialien
vom Gerät.
• Spülen Sie alle Teile des Brühsystems (Brühkammer 0, Steigrohr q, Sieb w) und die Kanne 3
sorgfältig ab (siehe Kapitel “Reinigen und Pflegen”).
1. Nehmen Sie die Kanne 3 vom Sockel 5.
2. Öffnen Sie den Deckel 1 und nehmen Sie das
Brühsystem heraus. Stellen Sie das Brühsystem
auf einer ebenen Fläche ab.
3. Füllen Sie die gewünschte Wassermenge in die
Kanne 3. Füllen Sie nie mehr Wasser als bis zur
MAX-Markierung, und nie weniger als bis zur
MIN-Markierung ein.
Gehen Sie vor dem ersten Gebrauch wie folgt vor:
1. Nehmen Sie die Kanne 3 vom Sockel 5.
2. Füllen Sie die Kanne 3 bis zur MAX-Markierung mit Wasser, geben Sie einen Teelöffel Zitronensaft (oder Zitronenkonzentrat) dazu. Wenn
keine Zitrone verfügbar ist, können Sie einen
Teebeutel (oder einen Teelöffel losen Tee) direkt
ins Wasser geben.
3. Setzen Sie das Brühsystem in die Kanne 3 ein.
4. Schließen Sie den Deckel 1 und setzen Sie die
Kanne 3 auf den Sockel 5.
5. Schalten Sie das Gerät am Ein-/Ausschalter 8
ein. Die Kontrollleuchte 4 und der Ein-/Aus-
schalter 8 leuchten auf. Warten Sie, bis die
Kontrollleuchte 4 erlischt.
6. Schalten Sie das Gerät am Ein-/Ausschalter 8
aus und reinigen Sie das Gerät, wie unter “Reinigen und Pflegen” beschrieben.
Der Teekocher ist nun einsatzbereit.
Bedienen
Achtung:
Geben Sie keinen Zucker in den Teekocher hinein.
Erhitzen Sie keine Milch oder Alkohol im Teekocher.
Das führt zu irreparablen Schäden am Gerät.
Gefahr!
Achten Sie darauf, dass kein Wasser aus der Kanne 3
überläuft, um Verbrennungen und elektrische Schocks
zu vermeiden.
4. Nehmen Sie das Brühsystem und ziehen Sie das
Steigrohr q mit dem Sieb w nach oben.
5. Geben Sie die gewünschte Menge Tee oder
Teebeutel in die Brühkammer 0.
Hinweis:
Achten Sie darauf, dass keine Etiketten oder Beutelfäden im Gerät verbleiben.
6. Setzen Sie das Brühsystem wieder in die Kanne 3
ein. Achten Sie darauf, dass das Steigrohr q in
die Aussparung am Boden der Kanne 3 greift.
Die Brühkammer 0 muss mit der abgeflachten
Seite zum Griff 2 eingesetzt werden.
7. Schließen Sie den Deckel 1.
8. Setzen Sie die Kanne 3 wieder auf den Sockel 5.
9. Stecken Sie den Netzstecker in eine Netzsteckdose und stellen Sie den Ein-/Ausschalter 8
auf die Position “I”. Die Kontrollleuchte 4, sowie
der Ein-/Ausschalter 8 leuchten.
Das Wasser wird nun gekocht, durch das Steigrohr q
nach oben gedrückt und läuft durch die Brühkammer 0 wieder in die Kanne 3.
Hinweis:
Grüner Tee eignet sich nicht zum Aufbrühen im Teekocher. Die ideale Brühtemperatur für grünen Tee
liegt bei etwa 70°C. Bei höheren Brühtemperaturen, wie sie der Teekocher erzeugt, treten Gerbstoffe aus. Der Tee schmeckt bitter.
- 25 -

Das Gerät schaltet sich, nachdem das Wasser gekocht hat automatisch in die Warmhaltefunktion. Die
Kontrollleuchte 4 erlischt, nur noch der Ein-/Ausschalter 8 leuchtet. Sobald das Wasser erkaltet,
kocht der Teekocher das Wasser wieder auf. Die
Kontrollleuchte 4 leuchtet während des Kochvorganges wieder auf.
Hinweis:
Da das Wasser beim erneuten Aufkochen wieder
durch das Brühsystem geleitet wird, sollten Sie nach
dem ersten Brühvorgang das Brühsystem aus der
Kanne 3 heraus nehmen.
Überhitzungsschutz
Bei Überhitzung schaltet der Überhitzungsschutz
das Heizelement im Inneren des Gerätes aus. Der
Ein-/Ausschalter 8 leuchtet weiter, das Gerät heizt
jedoch nicht mehr.
Der Überhitzungsschutz wird aktiviert, wenn sich
kein oder nicht ausreichend Wasser in der Kanne 3
befindet und das Gerät trotzdem eingeschaltet wird.
Wenn der Überhitzungsschutz das Heizelement abgeschaltet hat, gehen Sie bitte wie folgt vor:
Verletzungsgefahr!
Das Brühsystem ist sehr heiß! Es besteht die Gefahr
von Verbrennungen! Benutzen Sie Topfhandschuhe,
wenn Sie das Brühsystem berühren.
Hinweis:
Je länger Sie das Getränk warm halten und je mehr
Flüssigkeit verdampft, desto stärker wird das Getränk.
Wir empfehlen daher, den Tee möglichst nach dem
ersten Aufbrühen zu trinken.
Sie können den Kochvorgang jederzeit unterbrechen:
Stellen Sie hierzu den Ein-/Ausschalter 8 in die Po-
sition “0”. Der Kochvorgang wird beendet.
Wenn Sie die Kanne 3 vom Sockel 5 nehmen,
wird der Kochvorgang unterbrochen.
Achtung:
Lassen Sie die Kanne 3 immer erst abkühlen, bevor
Sie kaltes Wasser für einen weiteren Brühvorgang
einfüllen! Ansonsten kommt es zu Spannungen im
Glas und die Kanne 3 kann zerbrechen.
• Lassen Sie das Gerät abkühlen.
• Drücken Sie die Reset-Taste 6 an der
Unterseite der Kanne 3.
Das Gerät kann jetzt wieder benutzt werden.
Reinigen und Pflegen
Verletzungsgefahr!
Ziehen Sie vor der Reinigung den Netzstecker. Es
besteht die Gefahr eines elektrischen Schlages! Lassen Sie das Gerät abkühlen. Verbrennungsgefahr!
Tauchen Sie das Gerät nie ins Wasser oder in
andere Flüssigkeiten! Es besteht die Gefahr
eines elektrischen Schlages! Das Gerät kann
irreparabel beschädigt werden.
Um bei jedem Brühvorgang ein optimales Tee-Ergebnis zu erzielen, sollte das Gerät nach jeder Benutzung
gereinigt werden. Dadurch wird vermieden, dass:
• die Kombination von Kalk und Gerbstoffen, verursacht durch das Kochen des Wassers und die
Teezubereitung, die Funktion des Teekochers
beeinträchtigt;
- 26 -

• bei regelmäßigem Gebrauch des Teekochers unter Umständen das Aroma von stark aromatischem
Tee annimmt und an andere Teesorten abgibt.
Reinigen Sie die Kanne 3 des Teekochers mit einem feuchten Tuch. Bei hartnäckigeren Verschmutzungen geben Sie ein mildes Spülmittel auf das
Tuch. Spülen Sie die Kanne 3 danach mit viel klarem Wasser ab, so dass alle Spülmittelreste beseitigt
werden. Die Aussparung am Boden der Kanne 3
können Sie gut mit einer Spülbürste reinigen.
Achtung
Benutzen Sie keine Scheuermittel, chemische oder
ätzende Reinigungsmittel. Diese können das Gerät
irreparabel beschädigen!
Reinigen Sie das Brühsystem mit warmem Wasser
und einem flüssigen Spülmittel:
Die Brühkammer 0 und das Sieb w können Sie mit
einer Spülbürste reinigen. Reinigen Sie das Steigrohr q mit Hilfe der Steigrohr-Bürste 9. Spülen Sie
das gesamte Brühsystem nach dem Reinigen mit klarem Wasser ab, damit keine Spülmittelrückstände
haften bleiben.
1. Benutzen Sie einen handelsüblichen Haushaltsentkalker auf Zitronenbasis. Beachten Sie die
Hinweise auf der Verpackung des Entkalkers.
2. Setzen Sie das Brühsystem in die Kanne 3 ein.
3. Geben Sie die Entkalker-Lösung in die Kanne 3.
Füllen Sie nie mehr Flüssigkeit als bis zur MAXMarkierung, und nie weniger als bis zur MINMarkierung ein.
4. Warten Sie 10 Minuten und schalten Sie dann
das Gerät ein.
5. Lassen Sie die Lösung aufkochen und warten
Sie, bis sie durch das Brühsystem gelaufen ist.
6. Sollte es erforderlich sein, wiederholen Sie den
Vorgang noch einmal. Sie können die EntkalkerLösung noch einmal verwenden; lassen Sie sie
jedoch vorher abkühlen.
7. Wenn sich der Kalk gelöst hat, lassen Sie 2 - 3
Füllungen klares Wasser aufkochen und durch
das Brühsystem laufen.
8. Reinigen Sie danach die Kanne 3 und das
Brühsystem wie im Kapitel „Reinigen und Pflegen“ beschrieben.
Aufbewahrung
Entkalken
Der Kalkgehalt (Härtegrad) im Wasser führt im
Laufe der Benutzung zum Verkalken des Gerätes.
Der Kalk beeinträchtigt das Gerät in seiner Funktion,
vermindert die Qualität des Tees und erhöht zudem
den Stromverbrauch.
Hinweis:
Erkundigen Sie sich bei Ihrem Wasserversorger
nach dem Härtegrad Ihres Leitungswassers. Bei hohem Härtegrad ist die Entkalkung bereits eher notwendig, bei niedrigem Härtegrad später. Verwenden Sie ein Entkalkungsmittel für Haushaltsgeräte
und beachten Sie die Gebrauchsanleitung.
• Wenn Sie das Gerät für längere Zeit nicht
verwenden, wickeln Sie das Kabel gegen den
Uhrzeigersinn um die Kabelaufwicklung an
der Unterseite des Sockels 5 und führen Sie das
Ende durch den Kabeldurchlass am Sockel 5.
• Lagern Sie das Gerät an einem staubfreien und
trockenen Ort.
- 27 -

Entsorgen
Werfen Sie das Gerät keinesfalls in den
normalen Hausmüll. Dieses Produkt
unterliegt der europäischen Richtlinie
2012/19/EU.
Entsorgen Sie das Gerät über einen zugelassenen
Entsorgungsbetrieb oder über Ihre kommunale
Entsorgungseinrichtung.
Beachten Sie die aktuell geltenden Vorschriften.
Setzen Sie sich im Zweifelsfall mit Ihrer Entsorgungseinrichtung in Verbindung.
Wenn der Defekt von unserer Garantie gedeckt ist,
erhalten Sie das reparierte oder ein neues Produkt
zurück. Mit Reparatur oder Austausch des Produkts
beginnt kein neuer Garantiezeitraum.
Garantiezeit und gesetzliche
Mängelansprüche
Die Garantiezeit wird durch die Gewährleistung
nicht verlängert. Dies gilt auch für ersetzte und reparierte Teile. Eventuell schon beim Kauf vorhandene
Schäden und Mängel müssen sofort nach dem Auspacken gemeldet werden. Nach Ablauf der Garantiezeit anfallende Reparaturen sind kostenpflichtig.
Führen Sie alle Verpackungsmaterialien
einer umweltgerechten Entsorgung zu.
Garantie der
Kompernaß Handels GmbH
Sehr geehrte Kundin, sehr geehrter Kunde,
Sie erhalten auf dieses Gerät 3 Jahre Garantie ab
Kaufdatum. Im Falle von Mängeln dieses Produkts
stehen Ihnen gegen den Verkäufer des Produkts gesetzliche Rechte zu. Diese gesetzlichen Rechte werden durch unsere im Folgenden dargestellte Garantie nicht eingeschränkt.
Garantiebedingungen
Die Garantiefrist beginnt mit dem Kaufdatum. Bitte
bewahren Sie den Original Kassenbon gut auf.
Diese Unterlage wird als Nachweis für den Kauf
benötigt.
Tritt innerhalb von drei Jahren ab dem Kaufdatum
dieses Produkts ein Material- oder Fabrikationsfehler
auf, wird das Produkt von uns – nach unserer Wahl
– für Sie kostenlos repariert oder ersetzt. Diese
Garantieleistung setzt voraus, dass innerhalb der
Drei-Jahres-Frist das defekte Gerät und der Kaufbeleg
(Kassenbon) vorgelegt und schriftlich kurz beschrieben
wird, worin der Mangel besteht und wann er aufgetreten ist.
Garantieumfang
Das Gerät wurde nach strengen Qualitätsrichtlinien
sorgfältig produziert und vor Auslieferung gewissenhaft geprüft.
Die Garantieleistung gilt für Material- oder Fabrikationsfehler. Diese Garantie erstreckt sich nicht auf
Produktteile, die normaler Abnutzung ausgesetzt
sind und daher als Verschleißteile angesehen werden können oder für Beschädigungen an zerbrechlichen Teilen, z. B. Schalter, Akkus, Backformen
oder Teile die aus Glas gefertigt sind.
Diese Garantie verfällt, wenn das Produkt beschädigt,
nicht sachgemäß benutzt oder gewartet wurde. Für
eine sachgemäße Benutzung des Produkts sind alle
in der Bedienungsanleitung aufgeführten Anweisungen
genau einzuhalten. Verwendungszwecke und Handlungen, von denen in der Bedienungsanleitung abgeraten oder vor denen gewarnt wird, sind unbedingt
zu vermeiden.
Das Produkt ist nur für den privaten und nicht fürden
gewerblichen Gebrauch bestimmt. Bei missbräuchlicher und unsachgemäßer Behandlung, Gewaltanwendung und bei Eingriffen, die nicht von unserer
autorisierten Service-Niederlassung vorgenommen
wurden, erlischt die Garantie.
- 28 -

Abwicklung im Garantiefall
Um eine schnelle Bearbeitung ihres Anliegens zu
gewährleisten, folgen Sie bitte den folgenden Hinweisen:
Bitte halten Sie für alle Anfragen den Kassenbon
und die Artikelnummer (z. B. IAN 12345) als Nachweis für den Kauf bereit.
Die Artikelnummer entnehmen Sie bitte dem Typenschild, einer Gravur, auf dem Titelblatt ihrer Anleitung
(unten links) oder als Aufkleber auf der Rück- oder
Unterseite.
Sollten Funktionsfehler oder sonstige Mängel
auftreten kontaktieren Sie zunächst die nachfolgend
benannte Serviceabteilung telefonisch oder per
E-Mail.
Ein als defekt erfasstes Produkt können Sie dann unter Beifügung des Kaufbelegs (Kassenbon) und der
Angabe, worin der Mangel besteht und wann er
aufgetreten ist, für Sie portofrei an die Ihnen mitgeteilte Service Anschrift übersenden.
Service
Service Deutschland
Tel.: 0800 5435 111
(Kostenfrei aus dem dt. Festnetz/Mobilfunknetz)
E-Mail: kompernass@lidl.de
Service Österreich
Tel.: 0820 201 222 (0,15 EUR/Min.)
E-Mail: kompernass@lidl.at
Service Schweiz
Tel.: 0842 665566 (0,08 CHF/Min.,
Mobilfunk max. 0,40 CHF/Min.)
E-Mail: kompernass@lidl.ch
IAN 277007
Importeur
Auf www.lidl-service.com können Sie
diese und viele weitere Handbücher, Produktvideos und Software herunterladen.
Bitte beachten Sie, dass die folgende Anschrift
keine Serviceanschrift ist. Kontaktieren Sie zunächst
die benannte Servicestelle.
KOMPERNASS HANDELS GMBH
BURGSTRASSE 21
44867 BOCHUM
GERMANY
www.kompernass.com
- 29 -

KOMPERNASS HANDELS GMBH
BURGSTRASSE 21
44867 BOCHUM
DEUTSCHLAND / GERMANY
www.kompernass.com
Estado das informações · Last Information Update
Stand der Informationen:
06 / 2016 · Ident.-No.: STK650A2-062016-1
IAN 277007
5
 Loading...