

Page 1
PERSONAL CARE
3
KOMPERNASS GMBH
BURGSTRASSE 21 · D-44867 BOCHUM
www.kompernass.com
ID-Nr.: SNHT 1.5 A1-02/11-V1
IAN: 63709
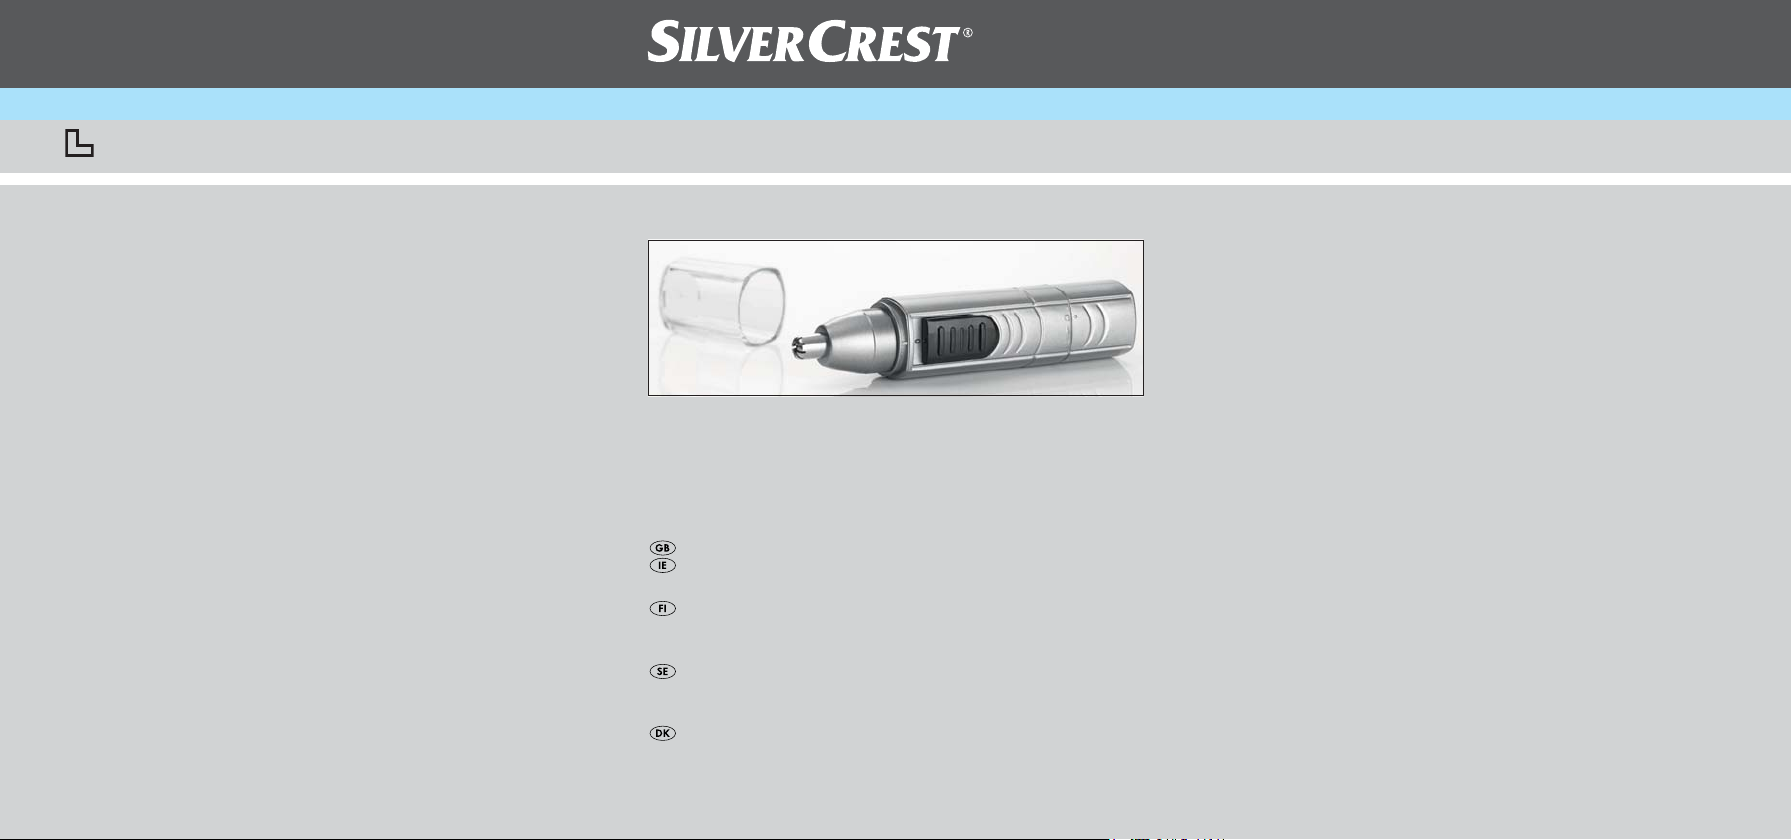
Nose/Ear Trimmer SNHT 1.5 A1
Nose/Ear Trimmer
Operating instructions
Nenä-/korvakarvatrimmeri
Käyttöohje
Näs-/örontrimmer
Bruksanvisning
Trimmer næse og ører
Betjeningsvejledning
Page 2
SNHT 1.5 A1
1
2
3
4
5
Page 3
INDEX PAGE
Intended use 2
Technical data 2
Safety Instructions 2
Items supplied 4
Appliance description 4
Inserting the battery 4
Attaching and removing the blade attachment 5
Removing nasal and ear hairs 5
Cleaning and care 5
Disposal 7
Warranty & Service 8
Importer 9
Read these operating instructions carefully before using the appliance for the
first time and preserve this manual for later reference. Pass this manual on to
whoever might acquire the appliance at a future date.
- 1 -
Page 4
NOSE/EAR TRIMMER
Intended use
With this Multitrimmer you can gently remove hair from your nose and ears.
The appliance in intended exclusively for domestic use. It is not intended for
commercial applications.
Technical data
Power supply: 1 x 1,5 V DC (Type AA/Mignon/LR06)
Protection class: IPX 4
Safety Instructions
Risk of personal injuries
• Insert the appliance into the nostril or ear only as far as the narrow tip will
reach.
• Do not use the appliance if the blades are deformed or damaged in any
way.
• Protect the blades from knocks and do not use excessive force. This will
prevent the blades from becoming damaged.
• Do not open the housing: there are no user-serviceable elements inside.
- 2 -
Page 5
• This appliance is not intended for use by individuals (including children)
with restricted physical, physiological or intellectual abilities or deficiences
in experience and/or knowledge unless they are supervised by a person
responsible for their safety or receive from this person instruction in how
the appliance is to be used.
• Children should be supervised to ensure that they do not play with the
appliance.
Information regarding the handling of batteries
When handling batteries, please pay heed to the following:
• Do not throw batteries into a fire. Do not recharge the batteries. There is a
risk of explosions and injuries!
• Never open batteries, never solder or weld batteries. There is a risk of explosions and injuries!
• Regularly check the condition of the batteries. Leaking batteries can cause
damage to the appliance.
• If you do not intend to use the appliance for an extended period, remove
the batteries.
• Wear protective gloves in the event of having to remove a leaking battery.
Then clean the battery compartment and the battery contacts with a dry
cloth.
• Keep batteries away from children. Children can put batteries into their
mouths and swallow them. Should a battery be swallowed, seek medical
assistance IMMEDIATELY.
- 3 -
Page 6
Items supplied
Facial hair trimmer
Battery (Type AA/Mignon/LR06)
Operating instructions
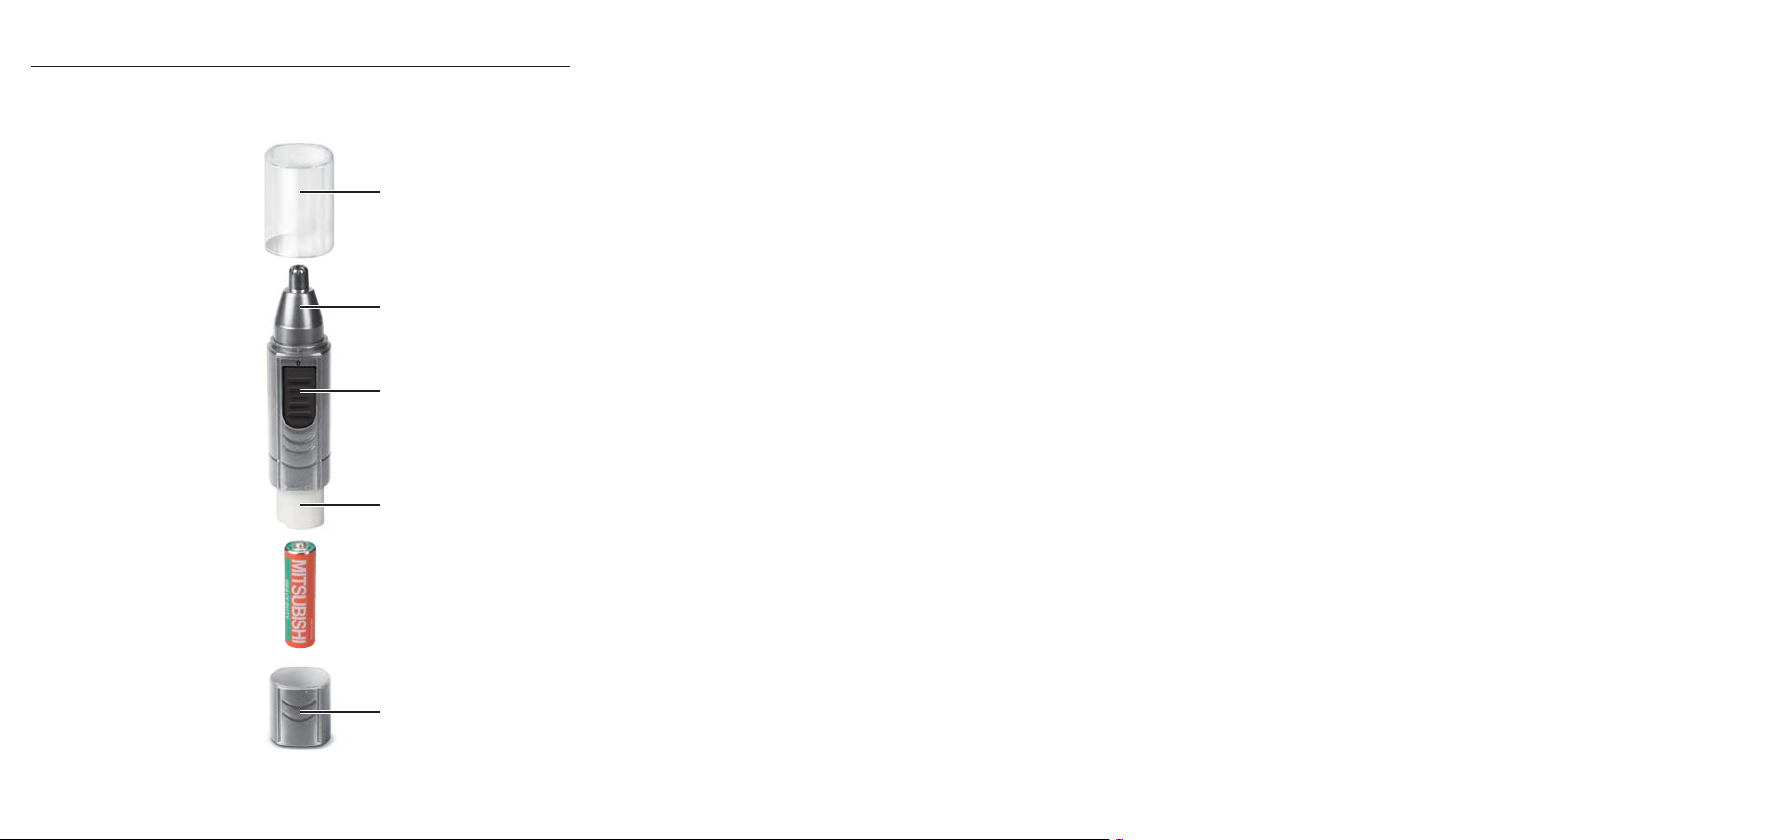
Appliance description
1 Protective cover
2 Blade attachment for nose/ear hair
3 Hand appliance with On / Off switch
4 Battery compartment
5 Battery compartment cover
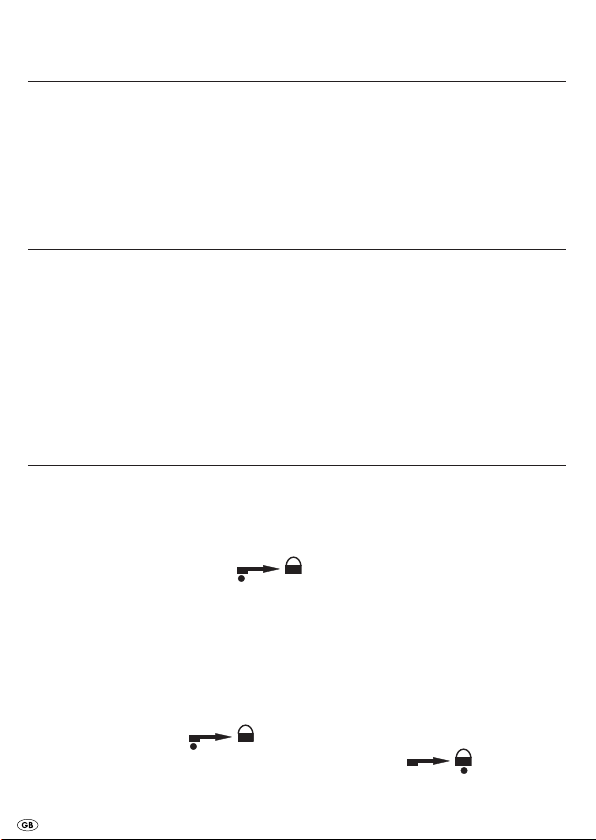
Inserting the battery
³ To open the battery compartment 4, turn the battery compartment cover
5 so far in the opposite direction of the arrow on the hand appliance 3
that the point on the battery compartment cover 5 lies against the arrow
on the hand appliance 3 . You can now lift the battery compartment cover 5 off.
³ Insert a battery of the type AA/Mignon/LR06. Observe the correct polari-
ty (this is indicated in the battery compartment 4)!
³ Close the battery compartment 4. To do this, place the battery compart-
ment cover 5 at a slant on the battery compartment 4, so that the mark
on the battery compartment cover 5 is placed against the arrow on the
hand appliance 3 . Then turn the battery compartment cover
5 until the mark is placed against the lock symbol .
- 4 -
Page 7
Attaching and removing the blade attachment
³ Place the blade attachment 2 on the hand appliance 3 slanted by approx.
45° to the right so that it grasps the guides on the hand appliance 3.
³ Turn the blade attachment 2 clockwise to secure it.
³ Turn the blade attachment 2 anticlockwise to release and remove it.
Removing nasal and ear hairs
³ Assemble the blade attachment for nose/ear hairs 2 as described in the
chapter "Attaching and removing the blade attachment".
³ Double-check to ensure that the blade attachment 2 is firmly and securely
attached before taking the appliance into use.
³ First then switch the hand unit 3 on with the On/Off switch (slide the
switch upwards, number 1 visible).
³ Carefully insert the tip of the blade attachment 2 into the nostril / ear. The
rotating blades remove the hairs painlessly.
³ After use, switch the appliance off (slide the switch downwards, number 0
visible).
Cleaning and care
³ Remove the assembled blade attachment 2 from the hand unit 3 and
rinse it under running water.
Warning:
The hand unit 3 is only splashproof. NEVER submerse it in water. This could
irreparably damage the appliance.
- 5 -
Page 8
³ Afterwards, dry the blade attachment 2 completely.
³ Should any hairs remain on the blade of the attachment, remove them
with, for example, a soft brush.
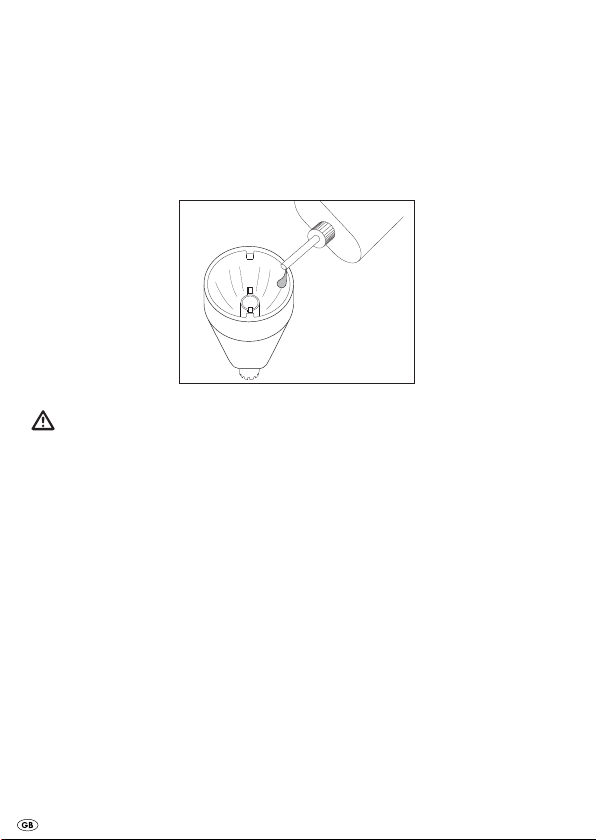
³ At regular intervals apply a few drops of oil suitable for electric razors to
the blade attachment 2. At the latest, however, when the blades no longer run smoothly.
Important:
Do not use cleaning agents or solvents. They can damage the plastic
surfaces.
³ Keep the appliance in a cool dry place.
³ Remove the battery if you are not intending to use the appliance for a long
period.
- 6 -
Page 9
Disposal
Do not dispose of the appliance in your normal domestic waste. This product is subject to the European guideline
2002/96/EC.
Dispose of the appliance through an approved dis-posal centre or at your
community waste facility.
Observe the currently applicable regulations.
In case of doubt, please contact your waste disposal centre.
Battery disposal!
Batteries may not be disposed of with normal domestic waste. All consumers
are statutorily obliged to dispose of batteries at the collection point in their
community/district or with the original supplier.
The purpose of this obligation is to ensure that batteries can be disposed of in
an environmentally friendly manner. Only dispose of batteries when they are
fully discharged.
Dispose of all packaging materials in an environmentally friendly
manner.
- 7 -
Page 10
Warranty & Service
The warranty for this appliance is for 3 years from the date of purchase. The
appliance has been manufactured with care and meticulously examined before delivery. Please retain your receipt as proof of purchase. In the event of
a warranty claim, please make contact by telephone with our Service Department. Only in this way can a post-free despatch for your goods be assured.
The warranty covers only claims for material and maufacturing defects, but
not for transport damage, for wearing parts or for damage to fragile components, e.g. buttons or batteries. This product is for private use only and is not
intended for commercial use. The warranty is void in the case of abusive and
improper handling, use of force and internal tampering not carried out by our
authorized service branch. Your statutory rights are not restricted in any way
by this warranty.
The warranty period will not be extended by repairs made unter warranty.
This applies also to replaced and repaired parts. Any damage and defects
extant on purchase must be reported immediately after unpacking the appliance, at the latest, two days after the purchase date. Repairs made after the
expiration of the warranty period are subject to payment.
Service Great Britain
Tel.: 0871 5000 700
E-Mail: kompernass@lidl.gb
Service Ireland
Tel.: 1850 930 412 (0,082 EUR/Min.)
Standard call rates apply. Mobile operators may vary.
E-Mail: kompernass@lidl.ie
(£ 0.10 / minute)
- 8 -
Page 11

Importer
KOMPERNASS GMBH
BURGSTRASSE 21
44867 BOCHUM, GERMANY
www.kompernass.com
- 9 -
Page 12

- 10 -
Page 13
SISÄLLYSLUETTELO SIVU
Käyttötarkoitus 12
Tekniset tiedot 12
Turvaohjeet 12
Toimituslaajuus 14
Laitteen kuvaus 14
Pariston asettaminen 14
Teräsarjan asettaminen ja irrottaminen 15
Nenä- ja korvakarvojen poistaminen 15
Puhdistus ja säilytys 16
Hävittäminen 17
Takuu & huolto 18
Maahantuoja 19
Lue käyttöohje huolellisesti ennen ensimmäistä käyttöä ja säilytä se
myöhempää käyttöä varten. Jos myyt laitteen, anna ohje myös seuraavalle
omistajalle.
- 11 -
Page 14

NENÄ-/KORVAKARVATRIMMERI
Käyttötarkoitus
Tämän monileikkurin avulla voidaan poistaa karvat nenästä tai korvista
hellävaraisesti.
Laite on tarkoitettu ainoastaan yksityiskäyttöön. Sitä ei ole tarkoitettu
ammatilliseen käyttöön.
Tekniset tiedot
Virransyöttö: 1 x 1,5 V DC (tyyppi AA/mignon/LR06)
Suojaluokitus: IPX 4
Turvaohjeet
Loukkaantumisvaara!
• Vie laite sieraimeen tai korvaan ainoastaan niin pitkälle kuin sen kapea
kärki ulottuu.
• Älä käytä laitetta, jos terät ovat vääntyneet tai vaurioituneet.
• Suojaa teriä iskuilta. Älä käytä liikaa voimaa. Muuten terät saattavat
vaurioitua.
• Älä avaa koteloa. Sisällä ei ole minkäänlaisia hallintalaitteita.
- 12 -
Page 15

• Tätä laitetta ei ole tarkoitettu sellaisten henkilöiden (mukaan lukien lapset)
käyttöön, joiden rajoitetut, fyysiset, aistilliset tai henkiset kyvyt tai kokemuksen ja/tai tiedon puute estävät käytön, lukuun ottamatta tilanteita, joissa
heitä valvoo turvallisuudesta vastaava henkilö tai joissa he ovat saaneet
tältä ohjeita laitteen käytöstä.
• Lapsia tulee valvoa, jotta varmistettaisiin, etteivät he leiki laitteella.
Ohjeita paristojen käsittelyyn:
Huomaa paristojen käsittelyssä seuraavaa:
• Älä heitä paristoja tuleen. Älä lataa paristoja uudelleen. On olemassa
räjähdyksen ja loukkaantumisen vaara!
• Älä koskaan avaa, juota tai hitsaa paristoja.
On olemassa räjähdyksen ja loukkaantumisen vaara!
• Tarkasta paristot säännöllisesti. Vuotavat paristot saattavat aiheuttaa laite-
vaurioita.
• Jos et käytä laitetta pidempään, poista paristot.
• Jos paristot ovat vuotaneet, käytä suojakäsineitä. Puhdista paristokotelo ja
paristoliitännät kuivalla liinalla.
• Paristoja ei saa jättää lasten käsiin. Lapset saattavat pistää paristot su-
uhunsa ja niellä ne. Jos paristo on joutunut nieluun, on hakeuduttava välittömästi lääkärin hoitoon.
- 13 -
Page 16

Toimituslaajuus
Monileikkuri
Paristo (tyyppi AA/mignon/LR06)
Käyttöohje
Laitteen kuvaus
1 Suojus
2 Teräosa nenä-/korvakarvoille
3 Käsilaite ja virtakytkin
4 Paristokotelo
5 Paristokotelon kansi
Pariston asettaminen
³ Avaa paristokotelo 4 kiertämällä paristokotelon kantta 5 niin pitkälle
käsilaitteen 3 nuolen suuntaan, että paristokotelon kannessa 5 oleva
piste osoittaa käsilaitteessa 3 olevaa nuolta . Nyt voit nostaa
paristokotelon kannen 5 ylös.
³ Aseta tyypin AA/Mignon/LR06 paristo paikoilleen. Huomaa tällöin oikea
napaisuus (merkintä paristokotelossa 4)!
³ Sulje paristokotelo 4. Aseta sitä varten paristokotelon kansi 5 vinosti pa-
ristokotelolle 4 niin, että paristokotelon kannessa 5 oleva piste on käsilaitteen 3 nuolen kohdalla . Kierrä paristokotelon kantta 5 niin
pitkälle, että piste sijaitsee lukkosymbolin kohdalla .
- 14 -
Page 17

Teräsarjan asettaminen ja irrottaminen
³ Aseta teräsarja 2 n. 45° oikealle siirrettynä käsilaitteeseen 3 niin, että
se osuu käsilaitteessa 3 olevaan kiskoon.
³ Kiinnitä teräsarja 2 kääntämällä sitä myötäpäivään.
³ Voit irrottaa teräsarjan 2 kääntämällä sitä vastapäivään.
Nenä- ja korvakarvojen poistaminen
³ Aseta nenä- ja korvakarvoille tarkoitettu teräsarja 2 paikoilleen luvussa
"Teräsarjan asettaminen ja irrottaminen" kuvatulla tavalla.
³ Varmista ennen käyttöä, että teräsarja 2 on kiinnitetty oikein.
³ Kytke vasta sitten käsilaite 3 päälle virtakytkimestä (työnnä kytkintä
ylöspäin, luku 1 on näkyvissä).
³ Työnnä teräsarjan 2 kärki varovasti sieraimeen tai korvaan. Pyörivät terät
poistavat karvat kivuttomasti.
³ Kytke laite pois päältä jälleen käytön jälkeen (työnnä kytkintä alaspäin,
luku 0 on näkyvissä).
- 15 -
Page 18

Puhdistus ja säilytys
³ Irrota teräsarja 2 käsilaitteesta 3 ja puhdista se juoksevalla vedellä.
Huomio:
Käsilaite 3 on vain roiskevesisuojattu. Älä koskaan upota sitä veteen. Se
vaurioittaa laitteen korjauskelvottomaksi.
³ Kuivaa sen jälkeen teräsarja 2 huolellisesti.
³ Poista tarvittaessa jäljelle jääneet karvat sarjan teristä esimerkiksi sivelti-
men avulla.
³ Voitele teräsarja 2 säännöllisin väliajoin partakoneille soveltuvaa teräöl-
jyä. Viimeistään kuitenkin silloin, kun terät eivät enää pyöri tasaisesti.
Huomio:
Älä käytä puhdistusaineita äläkä liuottimia. Nämä voivat vahingoittaa
muovipintoja.
³ Säilytä laite kuivassa, viileässä paikassa.
³ Poista paristot, jos laite on pidemmän aikaa käyttämättä.
- 16 -
Page 19

Hävittäminen
Älä missään tapauksessa heitä laitetta tavallisen talousjätteen
sekaan. Tämä tuote on yhdenmukainen EU-direktiivin
2002/96/EC kanssa.
Anna laite hyväksytyn jätehuoltoyrityksen tai kunnallisen jätelaitoksen
hävitettäväksi.
Noudata voimassa olevia määräyksiä.
Epäselvissä tilanteissa ota yhteyttä paikalliseen jätehuoltoviranomaiseen.
Paristot
Älä missään tapauksessa heitä paristoja tavallisen kotitalousjätteen joukkoon.
Paristot saattavat sisältää myrkkyjä, jotka vahingoittavat ympäristöä. Hävitä
paristot siksi ehdottomasti voimassa olevien lakisääteisten määräysten
mukaisesti.
Hävitä kaikki pakkausmateriaalit ympäristöystävällisesti.
- 17 -
Page 20

Takuu & huolto
Laitteen takuu on 3 vuotta ostopäivästä. Laite on valmistettu huolellisesti ja tarkistettu tarkasti ennen toimitusta. Säilytä ostokuitti todisteeksi takuun voimassaolosta.
Ota takuutapauksessa puhelimitse yhteyttä huoltopisteeseesi. Vain näin voidaan taata tuotteesi maksuton lähettäminen huoltoon. Takuu koskee ainoastaan materiaali- ja valmistusvirheitä, ei kuitenkaan kuljetusvaurioita, kuluvia
osia tai herkästi vaurioituvien osien, esim. kytkinten tai akkujen vaurioita.
Tuote on tarkoitettu ainoastaan yksityiseen, ei kaupalliseen käyttöön.
Väärä tai asiaton käyttö, väkivallan käyttö ja muiden kuin valtuutetun huoltopisteen suorittamat korjaukset aiheuttavat takuun raukeamisen. Tämä takuu ei
rajoita kuluttajan lakisääteisiä oikeuksia. Takuukorjaus ei pidennä takuuaikaa.
Tämä koskee myös vaihdettuja ja korjattuja osia. Mahdollisista jo ostettaessa
olemassa olevista vahingoista ja puutteista on ilmoitettava välittömästi pakkauksesta purkamisen jälkeen, kuitenkin viimeistään kaksi päivää ostopäiväyksen jälkeen. Takuuajan jälkeen suoritetut korjaukset ovat maksullisia.
Service Suomi
Tel.: 010 30 935 80
(Soittamisen hinta lankaliittymästä: 8,21 snt/
puh + 5,9 snt/min / Matkapuhelimesta: 8,21 snt/
puh + 16,90 snt/min)
E-Mail: kompernass@lidl.fi
- 18 -
Page 21

Maahantuoja
KOMPERNASS GMBH
BURGSTRASSE 21
44867 BOCHUM, GERMANY
www.kompernass.com
- 19 -
Page 22

- 20 -
Page 23

INNEHÅLLSFÖRTECKNING SIDAN
Föreskriven användning 22
Tekniska data 22
Säkerhetsanvisningar 22
Leveransens omfattning 24
Beskrivning 24
Lägga i batteri 24
Sätta på och ta av bladtillsatsen 25
Ta bort näs- och öronhår 25
Rengöring och förvaring 25
Kassering 27
Garanti & Service 28
Importör 29
Läs igenom bruksanvisningen noga innan du börjar använda apparaten och
spara den för senare bruk. Lämna över bruksanvisningen tillsammans med
apparaten om du överlåter den till någon annan person.
- 21 -
Page 24

NÄS-/ÖRONTRIMMER
Föreskriven användning
Med den här multitrimmern kan du ta bort hår ur öron och näsa på ett
skonsamt sätt.
Apparaten är endast avsedd för privat bruk. Den är inte avsedd att användas
yrkesmässigt.
Tekniska data
Spänningsförsörjning: 1 st. 1,5V DC batteri (av typ AA/mignon/LR06)
Skyddstyp: IPX 4
Säkerhetsanvisningar
Skaderisk!
• För in hela den smala spetsen i örat eller näsborren.
• Använd inte apparaten om bladen är deformerade eller skadade.
• Akta bladen för stötar och utsätt dem inte för starkt tryck. Då kan de
skadas.
• Öppna inte höljet – det finns inga som helst kontrollelement inuti apparaten.
- 22 -
Page 25

• Låt aldrig personer (inklusive barn) som av fysiska, sensoriska eller men-
tala skäl eller på grund av bristande erfarenhet och kunskap inte kan
använda apparater på ett säkert sätt använda den här apparaten utan att
de först övervakats eller instruerats av någon ansvarig person.
• Se noga till så att barnen inte leker med apparaten.
Handskas med batterier:
Tänk på följande när du handskas med batterier:
• Kasta aldrig batterier i en eld. Ladda aldrig upp batterier (som inte är
uppladdningsbara). Då finns risk för explosion och personskador!
• Öppna, löd eller svetsa aldrig batterier. Då finns risk för explosion och
personskador!
• Kontrollera batterierna regelbundet. Läckande batterier kan skada
apparaten.
• Ta ut batterierna om du inte ska använda apparaten under en längre tid.
• Om batterierna läcker ska du ta på dig skyddshandskar innan du tar ut
dem. Rengör batterifacket och batterikontakterna med en torr trasa.
• Små barn får inte handskas med batterier. De kan stoppa dem i munnen
och svälja dem. Om någon råkar svälja ett batteri måste man genast söka
medicinsk vård.
- 23 -
Page 26

Leveransens omfattning
Multitrimmer
Batteri (av typ AA/mignon/LR06)
Bruksanvisning
Beskrivning
1 Skyddskåpa
2 Knivblad för näs/öronhår
3 Handenhet med på/av-knapp
4 Batterifack
5 Lock till batterifack
Lägga i batteri
³ För att öppna batterifacket 4 skruvar du locket 5 i samma riktning som
pilen på handenheten 3 tills punkten på batterifackets lock 5 hamnar
mitt för pilen på handenheten 3 . Sedan kan du ta av locket
5.
³ Lägg in ett batteri av typ AA/Mignon/LR06. Se till så att polerna ligger åt
rätt håll (märkning inuti facket 4)!
³ Stäng batterifacket 4. Sätt då locket 5 snett på batterifacket 4 så att
punkten på locket 5 hamnar mitt för pilen på handenheten 3 .
Vrid locket 5 tills punkten hamnar vid låssymbolen istället .
- 24 -
Page 27

Sätta på och ta av bladtillsatsen
³ Sätt bladtillsatsen 2 på handenheten 3 med ca 45° förskjutning åt
höger så att den griper tag i skenan på handenheten 3.
³ Skruva bladtillsatsen 2 medsols för att fästa den.
³ Skruva bladtillsatsen 2 motsols för att lossa och ta av den.
Ta bort näs- och öronhår
³ Sätt på bladtillsatsen för näs- och öronhår 2 så som beskrivs i kapitel
"Sätta på och ta av bladtillsatsen".
³ Försäkra dig om att bladtillsatsen 2 sitter fast ordentligt innan du sätter på
apparaten.
³ Först därefter sätter du på handenheten 3 med på/av-knappen (flytta
knappen uppåt så att siffran 1 blir synlig).
³ För försiktigt in spetsen av bladtillsatsen 2 i näsborren eller örat. Det gör
inte alls ont när de roterande bladen tar bort håret i öronen eller näsan.
³ Stäng av apparaten när du är färdig (flytta knappen neråt så att siffran 0
blir synlig).
Rengöring och förvaring
³ Ta av bladtillsatsen 2 om den är monterad på handenheten 3 och
rengör den under rinnande vatten.
Akta:
Handenheten 3 är bara stänkvattenskyddad. Doppa därför aldrig ner den i
vatten. Då kan apparaten totalförstöras.
- 25 -
Page 28

³ Torka sedan av bladtillsatsen 2 ordentligt.
³ Ta bort ev. hår som finns kvar på bladen med till exempel en pensel.
³ Droppa någon olja som lämpar sig för rakapparater i bladtillsatsen 2
med jämna mellanrum och allra senast när bladen inte längre roterar.
Akta:
Använd inte rengörings- eller lösningsmedel. Då kan plastytorna skadas.
³ Förvara trimmern på en torr och sval plats.
³ Ta ut batteriet om du inte ska använda trimmern under en längre tid.
- 26 -
Page 29

Kassering
Apparaten får absolut inte kastas bland de vanliga hushållssoporna. Denna produkt uppfyller kraven i EU-direktiv
2002/96/EC.
Lämna in den till ett företag som har tillstånd att ta hand om kasserade
apparater av den här typen eller till rätt återvinningsstation på din
kommuns avfallsanläggning.
Följ gällande föreskrifter. Om du är tveksam ska du fråga den lokala
avfallshanteringsmyndigheten.
Kassering av batterier
Den som använder någon typ av batterier är skyldig att lämna in dem till ett
insamlingsställe i sin kommun eller stadsdel eller lämna tillbaka dem till
affären där de köptes.
Den här bestämmelsen är till för att skydda miljön. Lämna bara in urladdade
batterier.
Lämna in allt förpackningsmaterial till miljövänlig återvinning.
- 27 -
Page 30

Garanti & Service
För den här apparaten lämnar vi tre års garanti från och med inköpsdatum.
Den här apparaten har tillverkats med omsorg och genomgått en noggrann
kontroll innan leveransen. Var god bevara kassakvittot som köpbevis. Vi ber
dig att kontakta ditt serviceställe per telefon vid garantifall. Endast då kan
produkten skickas in fraktfritt.
Garantin gäller bara för bara för material- eller fabrikationsfel, den täcker
inte transportskador, förslitningsdelar eller skador på ömtåliga delar som t ex
brytare och batterier. Produkten är endast avsedd för privat bruk och får inte
användas yrkesmässigt.
Vid missbruk och felaktig behandling, användande av våld och vid ingrepp
som inte gjorts av vår auktoriserade servicefilial upphör garantin att gälla.
Den lagstadgade garantin begränsas inte av denna garanti.
Garantitiden förlängs inte för att man utnyttjar garantiförmånerna. Det gäller
även för utbytta eller reparerade delar. Eventuella skador och brister som
upptäcks redan vid köpet måste anmälas omedelbart efter uppackningen,
dock senast två dagar efter inköpsdatum. När garantitiden är slut måste man
betala för eventuella reparationer.
Service Sverige
Tel.: 0770 93 00 35
E-Mail: kompernass@lidl.se
Service Suomi
Tel.: 010 30 935 80
(Soittamisen hinta lankaliittymästä: 8,21 snt/
puh + 5,9 snt/min / Matkapuhelimesta: 8,21 snt/
puh + 16,90 snt/min)
E-Mail: kompernass@lidl.fi
- 28 -
Page 31

Importör
KOMPERNASS GMBH
BURGSTRASSE 21
44867 BOCHUM, GERMANY
www.kompernass.com
- 29 -
Page 32

- 30 -
Page 33

INDHOLDSFORTEGNELSE SIDE
Anvendelsesformål 32
Tekniske data 32
Sikkerhedsanvisninger 32
Leveringsomfang 34
Medfølger ved levering/apparatbeskrivelse 34
Indsætning af batteri 34
Påsætning og aftagning af skæresystemet 35
Klipning af næse- og ørehår 35
Rengøring og opbevaring 35
Bortskaffelse 37
Garanti & Service 38
Importør 39
Læs betjeningsvejledningen omhyggeligt igennem, før du bruger multitrimmeren første gang, og gem den til senere brug. Hvis du giver multitrimmeren
videre til andre, skal vejledningen også følge med.
- 31 -
Page 34

TRIMMER NÆSE OG ØRER
Anvendelsesformål
Med denne multitrimmer kan du på skånsom vis fjerne hår i næsen eller øret.
Apparatet er udelukkende beregnet til privat brug. Det er ikke beregnet til
erhvervsmæssig brug.
Tekniske data
Spændingsforsyning: 1 x 1,5 V DC (type AA/Mignon/LR06)
Beskyttelsesart: IPX 4
Sikkerhedsanvisninger
Fare for kvæstelser!
• Før kun apparatet så langt ind i næseboret eller øret, som den smalle
spids kan nå.
• Anvend ikke apparatet, hvis klingerne er deformeret eller beskadiget.
• Beskyt klingerne mod stød, og udøv ikke for stort tryk. Ellers kan klingerne
blive beskadiget.
• Åbn ikke kabinettet – det indeholder ingen dele, som du kan gøre noget
ved.
- 32 -
Page 35

• Denne maskine må ikke benyttes af personer (inklusive børn) med be-
grænsede fysiske, sensoriske eller psykiske evner eller med manglende
erfaringer og/ eller manglende viden, medmindre en ansvarlig person
holder opsyn med dem og giver dem anvisninger til, hvordan maskinen
anvendes.
• Der skal holdes opsyn med børn, så det sikres, at de ikke leger med
maskinen.
Informationer vedrørende brug af batterier
Overhold følgende ved brug af batterier:
• Smid aldrig batterierne ind i ild. Batterierne må ikke genoplades. Der er
fare for eksplosioner og personskader!
• Batterierne må aldrig åbnes, loddes eller svejses. Der er fare for eksplo-
sioner og personskader!
• Kontrollér regelmæssigt batterierne. Batterier, som løber ud, kan beskadi-
ge apparatet.
• Tag batterierne ud, hvis du ikke skal bruge apparatet i længere tid.
• Brug beskyttelseshandsker, hvis batterierne lækker. Rengør batterirummet
og batterikontakten med en tør klud.
• Lad ikke børn få fat i batterierne. Børn kan putte batterierne i munden og
sluge dem. Søg omgående lægehjælp, hvis en person ved en fejltagelse
har slugt et batteri.
- 33 -
Page 36

Leveringsomfang
Multitrimmer
Batteri (type AA/Mignon/LR06)
Betjeningsvejledning
Medfølger ved levering/apparatbeskrivelse
1 Beskyttelseskappe
2 Bladstykke til næse- ørehår
3 Håndapparat med tænd/sluk-knap
4 Batterirum
5 Låg til batterirum
Indsætning af batteri
³ For at åbne batterirummet 4 skal du dreje batterirummets låg 5 i pilens
retning på håndapparatet 3, så punktet på batterirummets låg 5 sidder
ud for pilen på håndapparatet 3 . Nu kan du tage batterirummets låg 5 af.
³ Sæt batteriet af typen AA/Mignon/LR06 i. Sørg for, at batteriet vender
rigtigt (vist i batterirummet 4)!
³ Luk batterirummet 4. Sæt hertil låget til batterirummet 5 skråt på batter-
irummet 4, så punktet på batterirummets låg 5 er ved pilen på håndap-
paratet 3 . Drej batterirummets låg 5, indtil punktet er ved
låse-symbolet .
- 34 -
Page 37

Påsætning og aftagning af skæresystemet
³ Sæt klingedelen 2 forskudt ca. 45° til højre på håndapparatet 3, så
den går ind i skinnen på håndapparatet 3.
³ Drej skæresystemet 2 med uret for at fastgøre det.
³ Drej skæresystemet 2 mod uret for at løsne det og tage det af.
Klipning af næse- og ørehår
³ Sæt skæresystemet til næse-/ørehår 2 på som forklaret i kapitlet "Påsæt-
ning og aftagning af skæresystem“.
³ Kontrollér, at skæresystemet 2 er sat rigtigt på, før du bruger apparatet.
³ Tænd så først for håndapparatet 3 på tænd-/ slukkontakten (skub kontak-
ten op, ciffer 1 synligt).
³ Sæt forsigtigt spidsen af skæresystemet 2 ind i næseboret/øret. De ro-
terende klinger fjerner hårene smertefrit.
³ Sluk for apparatet igen efter brug (skub kontakten ned, ciffer 0 synligt).
Rengøring og opbevaring
³ Tag det påsatte skæresystem 2 af håndapparatet 3, og rengør det un-
der rindende vand.
Obs:
Håndapparatet 3 er kun stænktæt. Du må derfor aldrig dyppe det
i vand. Det fører til skader på apparatet, som ikke kan repareres igen.
³ Tør derefter skæresystemet 2 omhyggeligt.
- 35 -
Page 38

³ Fjern evt. hår på skæresystemet med f.eks. en pensel.
³ Smør med regelmæssige mellemrum klingedelen 2 med en klingeolie,
der er egnet til barbermaskiner. Dog senest, når klingerne ikke længere
kører rundt.
Obs:
Anvend ikke rengørings- eller opløsningsmidler. Disse midler kan beskadige
kunststofoverfladerne.
³ Opbevar apparatet et køligt og tørt sted.
³ Tag batteriet ud, hvis du ikke skal bruge apparatet i længere tid.
- 36 -
Page 39

Bortskaffelse
Kom under ingen omstændigheder afspilleren i det normale
husholdningsaffald. Dette produkt overholder EuropaParlamentets og Rådets direktiv 2002/96/EC.
Bortskaf afspilleren hos et godkendt affaldsfirma eller på dit kommunale affaldsanlæg. Følg de aktuelt gældende regler. Kontakt affaldsordningen, hvis
du er i tvivl.
Batterier
Smid aldrig batterierne ud med det almindelige husholdningsaffald.
Batterier kan indeholde giftige stoffer, som kan ødelægge miljøet. Bortskaf
derfor altid batterierne efter de gældende regler i loven.
Bortskaffelse af emballage
Aflever alle emballagematerialer på et affaldsdepot, så miljøet
skånes.
- 37 -
Page 40

Garanti & Service
På denne donkraft får du 3 års garanti fra købsdatoen. Apparatet er produceret omhyggeligt og inden levering afprøvet samvittighedsfuldt. Opbevar
kassebonen som bevis for købet.
I garantitilfælde bedes du kontakte service-afdelingen telefonisk. På denne
måde kan gratis indsendelse af varen garanteres.
Garantiydelsen gælder kun for materiale- eller fabrikationsfejl, men ikke for
transportskader, sliddele eller skader på skrøbelige dele som f.eks. kontakter
eller batterier. Produktet er kun beregnet til privat og ikke til erhvervsmæssigt
brug. Ved misbrug og uhensigtsmæssig behandling, anvendelse af vold og
ved indgreb, som ikke er foretaget af vores autoriserede service-afdeling,
ophører garantien. Dine juridiske rettigheder indskrænkes ikke ved denne garanti. Garantiperioden forlænges ikke på grund af produktansvaret. Det gælder også for udskiftede og reparerede dele. Eventuelle skader og mangler,
som allerede findes ved køb, skal straks anmeldes efter udpakning og senest
to dage efter købsdatoen. Når garantiperioden er udløbet, skal udgifterne til
reparationer betales normalt.
Service Danmark
Tel.: 80-889 980
(
Der kan kun ringes til servicenummeret fra fastnet)
E-Mail: kompernass@lidl.dk
- 38 -
Page 41

Importør
KOMPERNASS GMBH
BURGSTRASSE 21
44867 BOCHUM, GERMANY
www.kompernass.com
- 39 -
Page 42

- 40 -
 Loading...