

Page 1
NUMÉRISEUR DE DIAPOSITIVES SND 3600 A2
NUMÉRISEUR DE DIAPOSITIVES
Mode d’emploi
PHOTO SLIDE SCANNER
Operating instructions
IAN 73761
DIA-SCANNER
Bedienungsanleitung
Page 2
Avant de lire le mode d‘emploi, ouvrez les deux pages contenant les illustrations et familiarisez-vous ensuite avec toutes les fonctions de l‘appareil.
Klappen Sie vor dem Lesen die beiden Seiten mit den Abbildungen aus und
machen Sie sich anschließend mit allen Funktionen des Gerätes vertraut.
Before reading, unfold both pages containing illustrations and familiarise
yourself with all functions of the device.
FR Mode d’emploi Page 1
DE / AT / CH Bedienungsanleitung Seite 27
GB Operating instructions Page 53
Page 3
Page 4
2 x
Page 5

Sommaire
Introduction . . . . . . . . .2
Informations relatives à ce
mode d’emploi . . . . . . . . . . 2
Droits d’auteur . . . . . . . . . . 2
Limitation de responsabilité 2
Avertissements . . . . . . . . . . 3
Utilisation conforme . . . . . . 3
Sécurité . . . . . . . . . . . .4
Consignes de sécurité
fondamentales . . . . . . . . . . 4
Installation et
raccordement . . . . . . .6
Consignes de sécurité . . . . 6
Accessoires fournis et
inspection de transport . . . . 6
Recyclage de l’emballage . 7
Critères de sélection du lieu
d’installation . . . . . . . . . . . . 7
Raccordement à un
ordinateur . . . . . . . . . . . . . . 8
Eléments de
commande . . . . . . . . .14
Fonctionnement et
opération . . . . . . . . . .14
Insérer les bandes de
négatifs . . . . . . . . . . . . . . . 14
Insérer les diapositives . . . 14
Démarrer le programme
FR
ArcSoft MediaImpression 2 16
Programme ArcSoft
MediaImpression 2 . . . . . 16
Scanner avec le programme
ArcSoft MediaImpression 2 17
Après usage . . . . . . . . . . . 20
Nettoyage . . . . . . . . .21
Consignes de sécurité . . . 21
Nettoyage . . . . . . . . . . . . 21
Dépannage . . . . . . . .22
Consignes de sécurité . . . 22
Causes des pannes et
remèdes . . . . . . . . . . . . . . 22
Entreposage/
Mise au rebut . . . . . . .23
Entreposage . . . . . . . . . . . 23
Mise au rebut . . . . . . . . . . 23
Annexe . . . . . . . . . . . .24
Caractéristiques techniques 24
Remarques concernant la
déclaration de conformité 25
Garantie . . . . . . . . . . . . . . 25
Service après-vente . . . . . 26
Importateur . . . . . . . . . . . . 26
SND 3600 A2
1
Page 6

Introduction
FR
Informations relatives à ce mode d’emploi
Toutes nos félicitations pour l’achat de votre nouvel appareil.
Vous avez choisi un produit de grande qualité.
Ce mode d’emploi fait partie intégrante du numériseur de négatifs
SND 3600 A2 (désigné ci-après par appareil) et vous donne
des indications importantes sur l’usage conforme, la sécurité, le
raccordement, ainsi que l’opération de l’appareil.
Le mode d’emploi doit en tout temps être accessible à proximité
de l’appareil. Il doit être lu et utilisé par chaque personne chargée
de l’opération et du dépannage de l’appareil. Conservez ce mode
d’emploi et remettez-le au nouveau propriétaire de l’appareil.
Droits d’auteur
Cette documentation est protégée par les droits d’auteur.
Toute reproduction, ou toute réimpression, même sous forme d’extrait,
ainsi que la reproduction des illustrations, même sous une forme modifi ée est uniquement autorisée avec l’autorisation écrite du fabricant.
Limitation de responsabilité
L’ensemble des informations, données et remarques techniques, pour
le raccordement et l’opération contenues dans le présent mode d’emploi
sont conformes à l’état le plus avancé de la technique lors du passage
en presse en tenant compte de nos expériences passées et de nos
connaissances en toute bonne foi.
Aucune prétention ne peut être dérivée des indications, photos et
descriptions contenues dans le présent mode d’emploi.
Le fabricant n’assume aucune responsabilité pour les dommages résultant d’un non-respect du mode d’emploi, de l’usage non
conforme, de réparations inadéquates, de modifi cations opérées sans
autorisation ou de l’emploi de pièces de rechange non agréées.
2
Introduction
SND 3600 A2
Page 7

Introduction
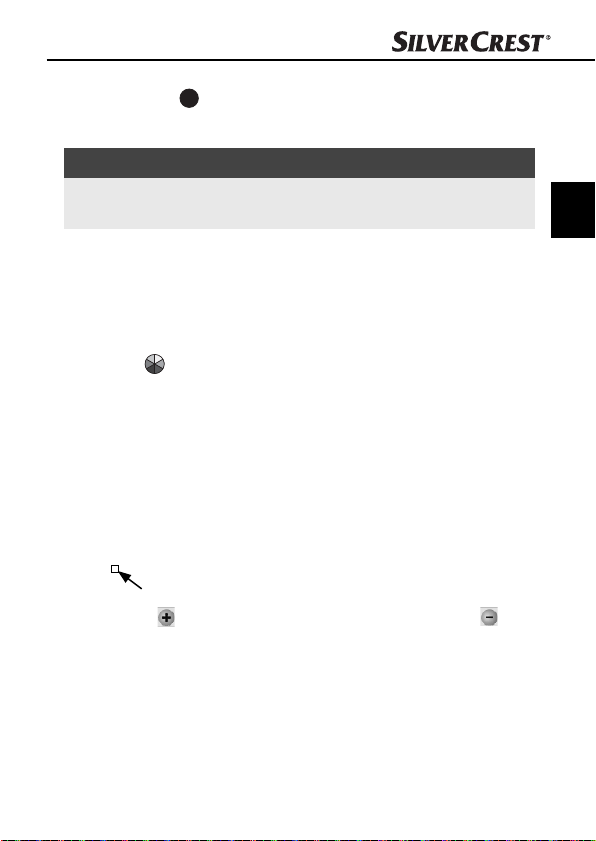
Avertissements
Les avertissements suivants sont utilisés dans ce mode d’emploi :
AVERTISSEMENT
Un avertissement de ce niveau de danger signale
une situation potentiellement dangereuse.
Des accidents peuvent résulter de l'incapacité à éviter la
situation dangereuse.
► Voilà pourquoi il est important de suivre les instructions fi gu-
rant dans cet av
ne soient blessées.
ATTENTION
Un avertissement de ce niveau de danger signale
un dommage mat
Si vous ne pouvez éviter la situation dangereuse, cela peut
entraîner des dommages matériels.
► Suivre les instructions dans cet avertissement, pour éviter tous
dommages matériels.
REMARQUE
► Une remarque signale des informations supplémentaires qui
facilitent la manipulation de l'appareil.
ertissement, pour éviter que des personnes
ériel potentiel.
FR
Utilisation conforme
Cet appareil est exclusivement prévu pour scanner et numériser des
fi lms négatifs et des diapositives dans un cadre non commercial.
Tout usage divergent ou toute utilisation allant au-delà seront considérés comme non conformes.
SND 3600 A2
3
Page 8
AVERTISSEMENT
FR
Danger par l'usage non conforme !
L'appareil peut présenter un danger en cas d'usage non conforme
et/ou d'usage divergent.
► Utiliser l'appareil exclusivement de manière conforme à sa
destination.
► Respecter les procédures décrites dans ce mode d'emploi.
Les prétentions de toutes sor
non conforme sont exclues.
La personne opérant l’appareil est seule à assumer le risque.
tes pour dommages résultant d’un usage
Sécurité
Ce chapitre contient des consignes de sécurité importantes se rapportant
à la manipulation de l’appareil.
Cet appareil est conforme aux consignes de sécurité prescrites. Tout
usage non conforme peut entraîner des accidents et des dommages
matériels.
Consignes de sécurité fondamentales
Pour assurer la manipulation de l’appareil en toute sécurité, veuillez
respecter les consignes de sécurité suivantes :
■ Vérifi ez la présence de dommages visibles extérieurs avant
l’usage de l’appareil. Ne mettez pas en ser
endommagé ou ayant subi une chute.
■ En cas de dommages sur les câbles ou les raccordements, faites-les
remplacer par le per
après-vente.
sonnel technique agréé ou par le service
vice un appareil
Sécurité
4
SND 3600 A2
Page 9

Sécurité
■ Cet appareil n’est pas prévu pour des personnes (y compris des
enfants) dont les capacités phy
dont le manque d’expérience ou de connaissances les empêchent
d’assurer un usage sûr des appareils, s’ils n’ont pas été surveillés
ou initiés au préalable.
■ Les enfants doivent être surveillés afi n d’éviter qu’ils ne jouent avec
l’appareil.
■ Confi ez les réparations sur l’appareil exclusivement à des entre-
prises agréées ou au ser
conformes peuvent entraîner des risques importants pour l’utilisateur. A cela s’ajoute l’expiration de la garantie.
■ Toute réparation de l’appareil au cours de la période sous garantie
devr
a être exclusivement confi ée à un service après-vente agréé
par le fabricant, sinon tous dommages se produisant ultérieurement
ne seront pas couverts par la garantie.
■ Les pièces défectueuses devront impérativement être remplacées
par des pièces de rechange d’
en eff et la satisfaction des critères de sécurité.
■ Ne procédez à aucune transformation ou modifi cation de l’appa-
reil de
votre propre chef.
■ Protégez l’appareil de l’humidité et de la pénétration de liquides.
Ne posez pas de récipients pleins de liquides sur l’appar
comme des vases par exemple.
■ N’utilisez pas l’appareil à proximité de fl ammes ouvertes.
siques, sensorielles ou mentales ou
vice après-vente. Toutes réparations non
origine. Seules ces pièces garantissent
FR
eil,
SND 3600 A2
5
Page 10
Installation et raccordement
Installation et raccordement
FR
Consignes de sécurité
AVERTISSEMENT
Lors de la mise en service de l'appareil, il peut se
produire des accidents et des dommages matériels !
Respectez les consignes de sécurité suivantes pour éviter tous
dangers :
► Les matériaux d'emballage ne sont pas un jouet et ne
doivent donc pas êtr
d'étouff ement.
Accessoires fournis et inspection de transport
L’appareil est équipé par défaut des composants suivants :
▯ Scanner
▯ 1 x Porte-diapositives
▯ 2 x Porte-négatifs
▯ CD du logiciel
▯ Ecouvillon
▯ Mode d’emploi
REMARQUE
► Vérifi ez que la livraison est bien complète et qu'elle ne
présente pas de dommages appar
► En cas de livraison incomplète ou de dommages résultant
d'un emballage défectueux ou du transpor
adresser à la hotline du service après-vente (cf. le chapitre
Service après-vente).
e considérés comme tels. Il y a un risque
ents.
t, veuillez vous
6
SND 3600 A2
Page 11
Installation et raccordement
Recyclage de l’emballage
L’emballage protège l’appareil de tous dommages éventuels au
cours du transport. Les matériaux d’emballage ont été sélectionnés
selon des critères de respect de l’environnement et de recyclage, de
sorte qu’ils peuvent être recyclés.
Le retour de l’emballage dans le cycle des matériaux permet
d’économiser les matières premières et réduit la formation de
déchets. Recyclez les matériaux d’emballage qui ne sont
plus utilisés en conformité avec les règles locales en vigueur.
REMARQUE
► Dans la mesure du possible, conservez l'emballage d'origine
pendant la période sous gar
l'appareil en bonne et due forme pour l'expédition si vous
étiez amené à faire valoir la garantie.
Critères de sélection du lieu d’installation
Pour assurer l’opération sûre et sans défaillances de l’appareil,
l’emplacement choisi doit satisfaire aux conditions suivantes :
■ L’appareil doit être installé sur une surface stable, plane et
horizontale.
■ Evitez d’installer l’appareil dans un environnement chaud, mouillé
ou très humide ou à pr
■ Installez l’appareil de telle manière qu’il ne soit pas directement
exposé aux r
ayons du soleil.
antie, afi n de pouvoir emballer
oximité de matériaux infl ammables.
FR
SND 3600 A2
7
Page 12

Installation et raccordement
Raccordement à un ordinateur
FR
Confi guration du système
♦ Il vous faut un ordinateur doté d’un port USB libre et équipé
du système d’e
Windows® 7 de la société Microsoft®.
Installation du programme ArcSoft MediaImpression 2
REMARQUE
► Le présent mode d'emploi ne décrit que les éléments du pro-
gramme dont v
ou vos négatifs. Vous trouverez de plus amples informations
dans l'assistant en ligne du programme.
► Les illustrations et les descriptions se rapportent au système
d'exploitation Micr
La représentation sur l'écran peut diverger selon les paramètres
d'affi chage d'autres systèmes d'exploitation.
♦ Insérez le CD du programme fourni dans le lecteur de CD de
vo
tre ordinateur.
La fenêtre «Lecture automatique» s’affi che.
xploitation Windows® XP, Windows® Vista ou
ous avez besoin pour scanner vos diapositives
osoft® Windows® 7.
♦ Cliquez sur le bouton «exécuter autorun.exe».
L’installation débute et la fenêtre de démarrage s’affi che.
8
SND 3600 A2
Page 13

Installation et raccordement
REMARQUE
► Lorsque vous avez désactivé la fonction d'autodémarrage et
que le processus d'installation ne démarr
ment, lancez le processus d'installation en eff ectuant un doubleclic sur le fi chier "autorun.exe" du répertoire principal du CD.
♦ Cliquez sur le bouton «Arcsoft Software» pour installer le
programme «ArcSoft MediaImpression 2».
L’assistant d’installation est alors confi guré.
e pas automatique-
FR
SND 3600 A2
9
Page 14

FR
Installation et raccordement
La fenêtre de démarrage de l’assistant d’installation s’affi che.
♦ Cliquez sur le bouton «Suivant>».
La fenêtre «Accord de licence» s’affi che.
♦ Cliquez sur le bouton «Oui».
10
SND 3600 A2
Page 15

Installation et raccordement
La fenêtre de sélection du répertoire d’installation s’affi che.
♦ Sélectionnez le répertoire d’installation souhaité et cliquez sur
le bouton «Suivant>“.
La fenêtre de sélection du dossier du programme (entrée dans le
menu de démarrage Windows) s’affi che.
♦ Sélectionnez le répertoire du programme souhaité et cliquez sur
le bouton «Suivant>».
FR
SND 3600 A2
11
Page 16

FR
Installation et raccordement
Le programme est installé et l’avancée de l’installation s’affi che.
La fenêtre «Formats de fi chier correspondants» s’affi che.
♦ Sélectionnez les formats de fi chiers qui doivent être reliés au
programme et cliquez sur le bouton «Suivant >»
12
SND 3600 A2
Page 17

Installation et raccordement
L’écran indique que l’installation est achevée dans son intégralité.
♦ Cliquez sur le bouton «Terminer».
La fenêtre de démarrage s’affi che à nouveau.
♦ Cliquez sur le bouton «Exit Installation», pour mettre fi n au
programme d’installation.
Raccordement
♦ Raccordez le câble USB
nateur. L’ordinateur reconnaît la nouvelle hardware et démarre
l’installation automatique du pilote.
4
à l’un des ports USB de votre ordi-
FR
SND 3600 A2
13
Page 18
Eléments de …/Fonctionnement …
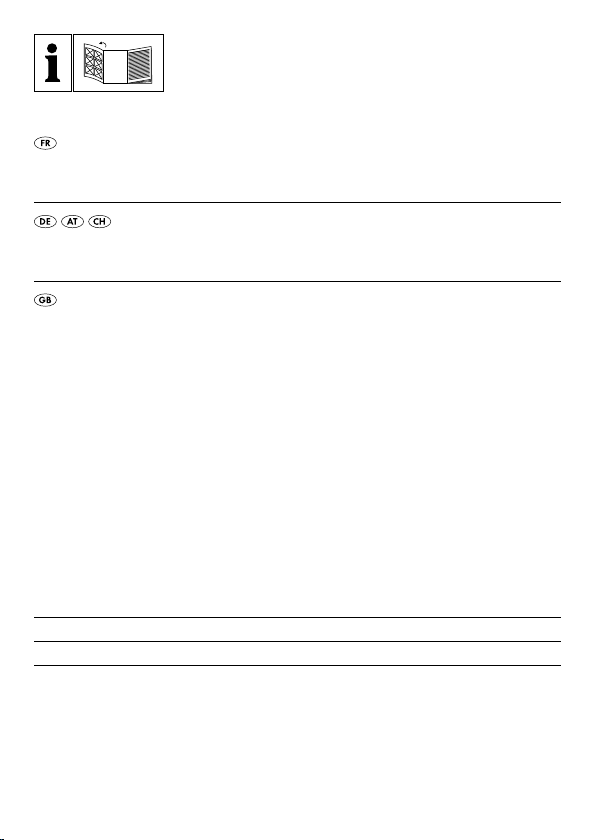
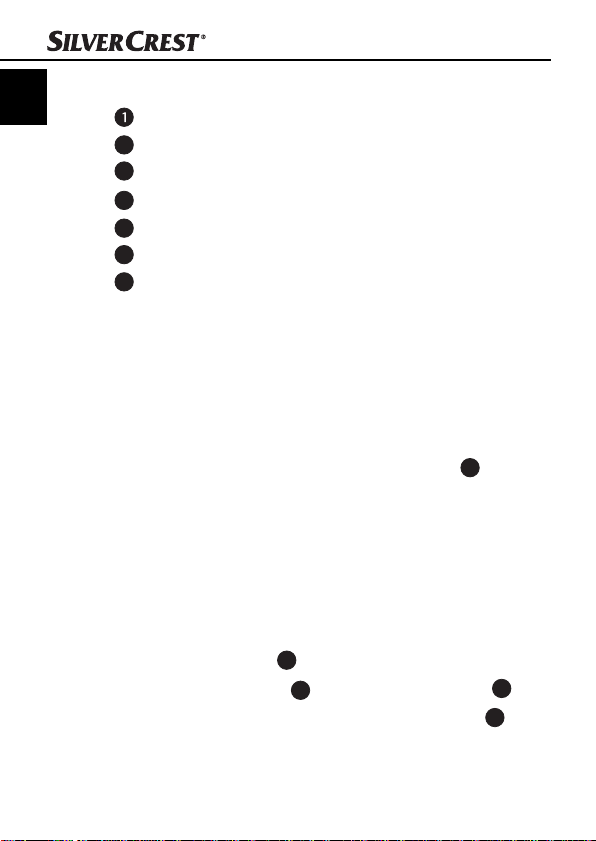
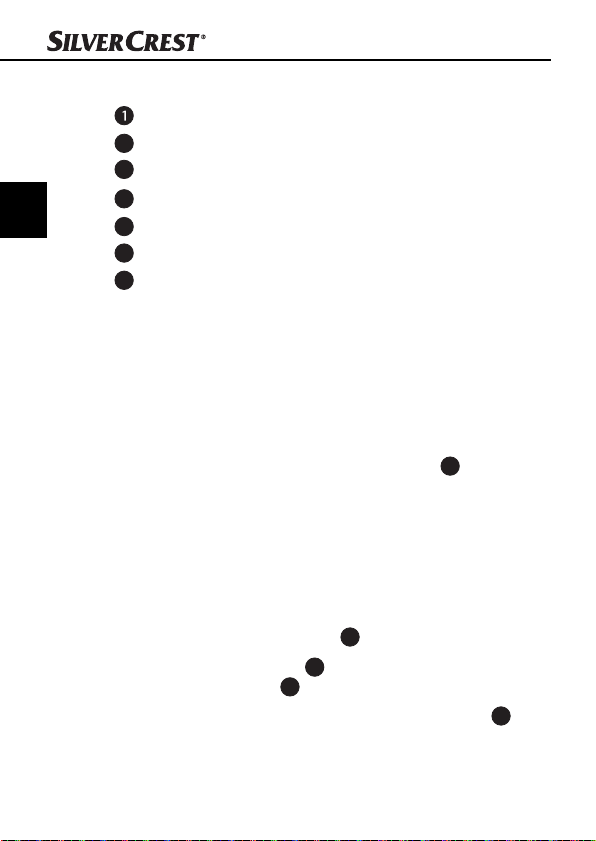
Eléments de commande
FR
LED PWR
2
Touche SCAN
3
Insert pour le porte-négatifs ou le porte-diapositives
4
Cordon de raccordement USB
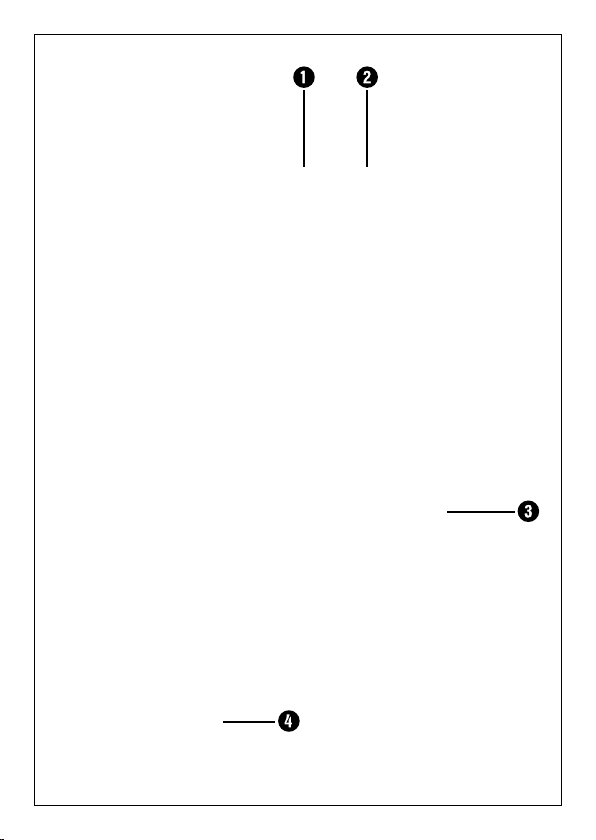
5
Porte-négatifs
6
Porte-diapositives
7
Ecouvillon
Fonctionnement et opération
Ce chapitre contient des remarques importantes sur le fonctionnement et l’opération de l’appareil.
Insérer les bandes de négatifs
♦ Déverrouillez la fermeture à l’avant du porte-négatifs 5 et
ouvrez le porte-négatifs.
♦ Insérez les bandes négatives du bon côté dans la fi xation.
♦ Fermez le porte-négatifs, jusqu’à ce que le couvercle s’en-
clenche.
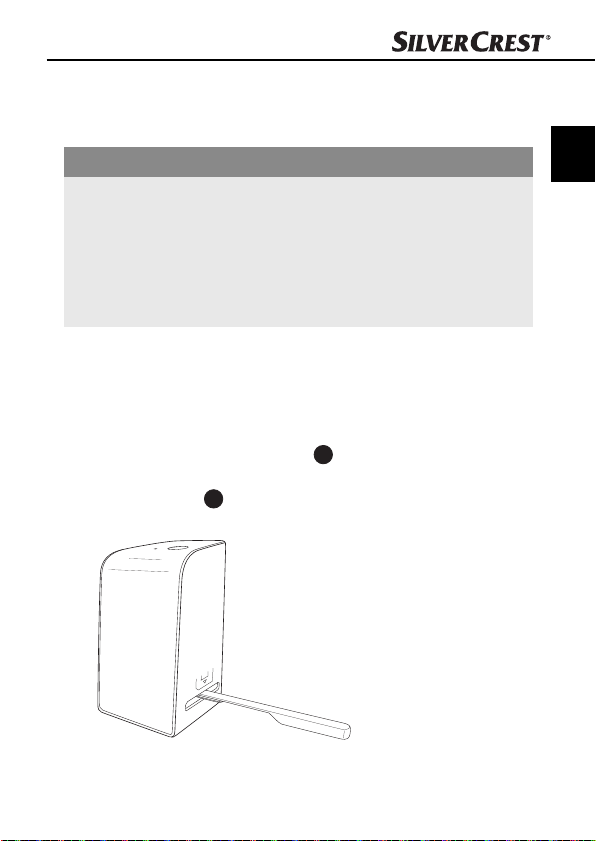
Insérer les diapositives
♦ Insérez les diapositives du bon côté dans la fente prévue à cet
eff et du porte-diapositives 6.
♦ Insérez le porte-diapositives
Avec la règlette qui se trouve sur le côté du porte-diapositives
diapositives qui se trouvent dans la fente sont glissées individuellement dans le scanner.
6
avec l’oculus dans l’insert 3.
6
, les
14
SND 3600 A2
Page 19

Fonctionnement et opération
♦ Pour ce faire, faites glisser la réglette jusqu’à la butée du scan-
ner. Puis, faites à nouv
direction du scanner.
REMARQUE
► Une diapositive se trouvant dans le scanner est ainsi retirée de
l’appareil et une nouv
de vision du scanner.
► Veillez à insérer une nouvelle diapositive lentement dans
le scanner. Si v
sitive peut glisser au-delà de la zone de vision du scanner.
Dans ce cas, vous devez légèrement lever l’appareil sur le
côté, afi n que la diapositive se trouve à nouveau dans une
position optimale.
♦ Si vous ne souhaitez plus scanner d’autres diapositives, retirez
le porte-diapositiv
sitive d’en-bas de l’oculus du porte-diapositives 6.
eau glisser la règlette avec précaution en
elle diapositive est glissée dans le zone
ous y procédez trop rapidement, la diapo-
es 6 de l’insert 3. Retirez la dernière diapo-
FR
SND 3600 A2
15
Page 20
Fonctionnement et opération
Démarrer le programme ArcSoft MediaImpression 2
FR
♦ Démarrez le programme ArcSoft MediaImpression 2 en
eff ectuant un double-clic sur le symbole du programme sur le
bureau ou sélectionnez l’entrée correspondante dans le menu
de démarrage.
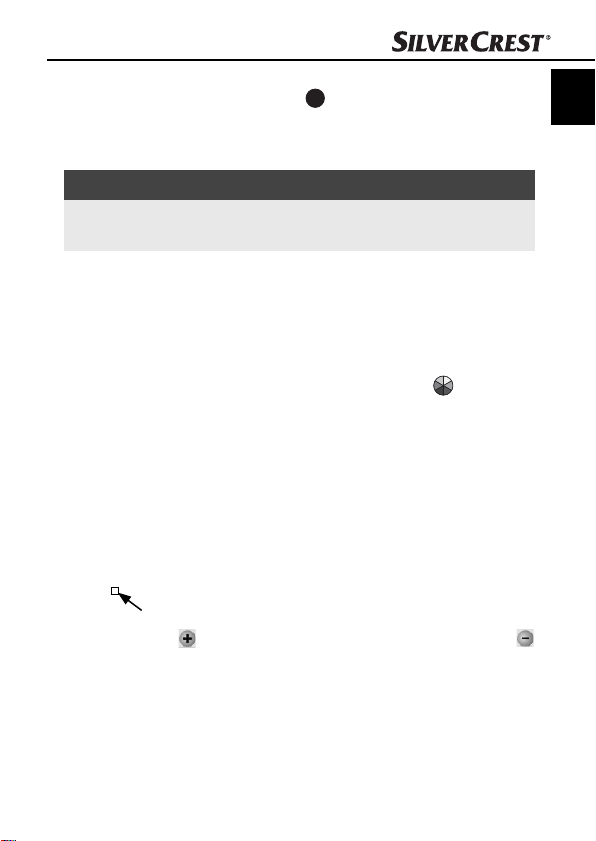
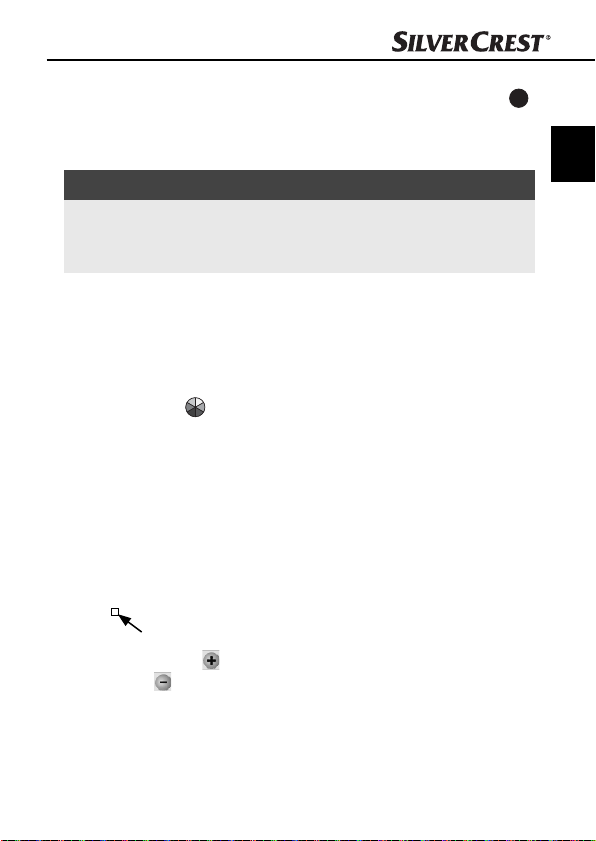
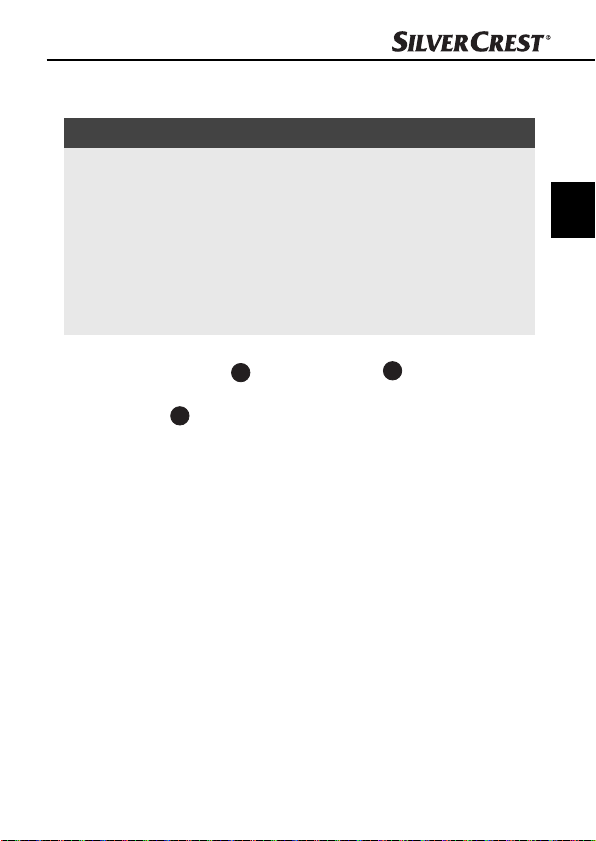
Programme ArcSoft MediaImpression 2
1
Quatre options sont disponibles :
1. Photos : ouvrir une photo se trouvant sur l’ordinateur ou sur une
carte mémoire.
2. Saisir : pour scanner de nouvelles prises
3. Rectifi cation simple : édition rapide de la photo
4. Outils d’édition de la photo : édition exhaustive de la photo
REMARQUE
► Le présent mode d'emploi ne décrit que les éléments du pro-
gramme dont v
ou vos négatifs. Vous trouverez de plus amples informations
dans l'assistant en ligne du programme.
16
ous avez besoin pour scanner vos diapositives
2
3
4
SND 3600 A2
Page 21

Fonctionnement et opération
Scanner avec le programme ArcSoft MediaImpression 2
♦ Raccordez l’appareil. La LED PWR est allumée.
♦ Démarrez le programme ArcSoft MediaImpression 2.
♦ Cliquez sur le bouton «Saisir».
Lor
un processus de calibration et de collecte de données se produit.
Assurez-vous qu’aucun porte-négatifs/diapositives n’est inséré
dans l’appareil.
♦ Dans la fenêtre d’information qui s’affi che, cliquez sur le bouton
«OK» pour démarrer la calibration et la collecte de données.
Le premier processus de calibration et de collecte de données
peut durer quelques minutes.
L’avancée de la calibration s’affi che.
Dès que la calibration est achevée, la fenêtre du programme
s’affi che.
emier démarrage de programme après l’installation,
s du pr
FR
SND 3600 A2
17
Page 22

FR
Fonctionnement et opération
La fenêtre «Saisir par le scanner» s’affi che.
♦ Procédez aux réglages nécessaires :
Format de fi chier, qualité (uniquement chez les fi chiers JPG),
emplacement d’enregistrement, type de fi lm, intensité de couleur,
résolution du scanner
REMARQUE
► L'intensité de couleur est fi xée à 24 bits. Un scan de 1800 DPI
che une résolution de 2520 x 1680 pixels, avec 3600 DPI,
affi
un scan affi che une résolution de 5040 x 3360 pixels.
♦ Cliquez sur le bouton «Saisir».
La fenêtre «Saisir» s
’affi che.
18
SND 3600 A2
Page 23
Fonctionnement et opération
♦ Insérez le support avec le négatif à scanner ou avec les diapo-
sitives à scanner dans la fente
s’enclenche.
L’image à scanner s’affi che dans la zone de prévisualisation.
REMARQUE
► Un porte-diapositives inséré dans l'appareil ne peut pas être à
nouveau r
♦ En cas de besoin, ajustez le porte-diapositives jusqu’à ce que
l’image à scanner s’affi
de prévisualisation.
♦ En cas de besoin, réglez la compensation électrique (Balance),
l’exposition (Exposur
et la saturation (Saturation), en cliquant sur le bouton
La fenêtre de réglage s’ouvre alors.
etiré, mais doit complètement traverser l'appareil.
e), la clarté (Brightness), le contraste (Contrast)
3
de l’appareil, jusqu’à ce qu’il
che de manière optimale dans la fenêtre
«Adapter».
FR
♦ Cliquez sur pour accroître la valeur correspondante et sur
pour réduire la valeur correspondante.
Utilisez le curseur coulissant pour procéder à la compensation
électrique (compensation des couleurs).
Exemple : si la photo affi che une part trop importante de bleu, cela
peut être réduit en augmentant la part de jaune.
SND 3600 A2
19
Page 24

FR
Après usage
Fonctionnement et opération
♦ Cliquez sur le bouton «OK» pour procéder au réglage et revenir
à la fenêtre «Saisir».
♦ Appuyez sur la touche SCAN
le bouton «Saisir». L’image est scannée et s’affi che dans la zone
de prévisualisation.
♦ Répétez les étapes pour scanner d’autres photos.
♦ Retirez le porte-négatifs 5, en le faisant glisser entièrement à
travers l’appareil.
♦ Retirez le porte-diapositives
3
l’insert
♦ Retirez le cordon USB
.
2 de l’appareil ou cliquez sur
6
en le retirant à nouveau de
4
du raccord USB de votre ordinateur.
20
SND 3600 A2
Page 25

Nettoyage
Nettoyage
Consignes de sécurité
ATTENTION
Dommages potentiels sur l'appareil.
Toute pénétr
► Assurez-vous lors du nettoyage qu'aucune humidité ne pénètre
dans l'appareil pour é
l'appareil.
Nettoyage
■ Nettoyez le boîtier exclusivement à l’aide d’un chiff on humidifi é
et d’un détergent doux.
■ Nettoyez la surface de la lentille du scanner à l’intérieur de
l’appareil à l’aide de l’écouvillon 7. Pour ce faire, faites glisser
la brosse de nettoyage avec la surface de nettoyage vers le bas
uniquement dans la fente droite 3.
ation d'humidité peut endommager l'appareil.
viter tous dommages irréparables sur
FR
SND 3600 A2
21
Page 26

Dépannage
FR
Ce chapitre contient des remarques importantes relatives à la localisation des pannes et au dépannage. Respectez les remarques pour
éviter tous dangers et dommages.
Consignes de sécurité
AVERTISSEMENT
Respectez les consignes de sécurité suivantes pour éviter tous
dangers et dommages matériels :
► Les réparations sur les appareils électriques doivent exclu-
sivement êtr
par le fabricant. Toutes réparations non conformes peuvent
entraîner des dangers signifi catifs pour l'utilisateur et endommager l'appareil.
Causes des pannes et remèdes
Le tableau ci-dessous est destiné à vous aider à localiser de petits
dysfonctionnements et à y remédier :
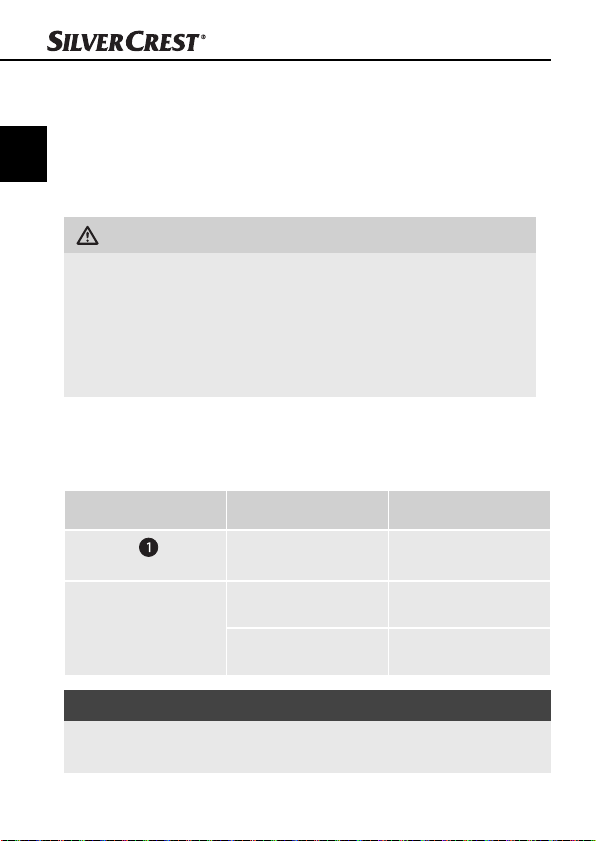
Panne Cause possible Solutions
La LED PWR
pas allume
Mauvaise qualité de
l'image
e confi ées à des spécialistes qui ont été formés
L'appareil n'est pas
n'est
correctement raccordé.
Poussière sur la lentille
du scanner.
Poussière sur le fi lm ou
la diapositive
Raccordez l'appareil.
Nettoyez la lentille du
scanner.
Nettoyez le fi lm ou la
diapositive.
Dépannage
REMARQUE
► Si vous ne parvenez pas à résoudre le problème à l'aide des
étapes précitées, v
euillez vous adresser au service après-vente.
22
SND 3600 A2
Page 27

Entreposage/Mise au rebut
Entreposage/Mise au rebut
Entreposage
Entreposez l’appareil dans un environnement sec.
Mise au rebut
L’appareil ne doit jamais être jeté dans la
poubelle domestique normale. Ce produit
est assujetti à la directive européenne
2002/96/EC-WEEE (Waste Electrical and
Electronic Equipment).
Remettez l’appareil destiné au recyclage à une entre-
prise spécialisée ou au centre de recyclage de votre
commune. Respectez la réglementation en vigueur. En
cas de doutes, contactez votre organisme de recyclage.
FR
SND 3600 A2
23
Page 28

Annexe
FR
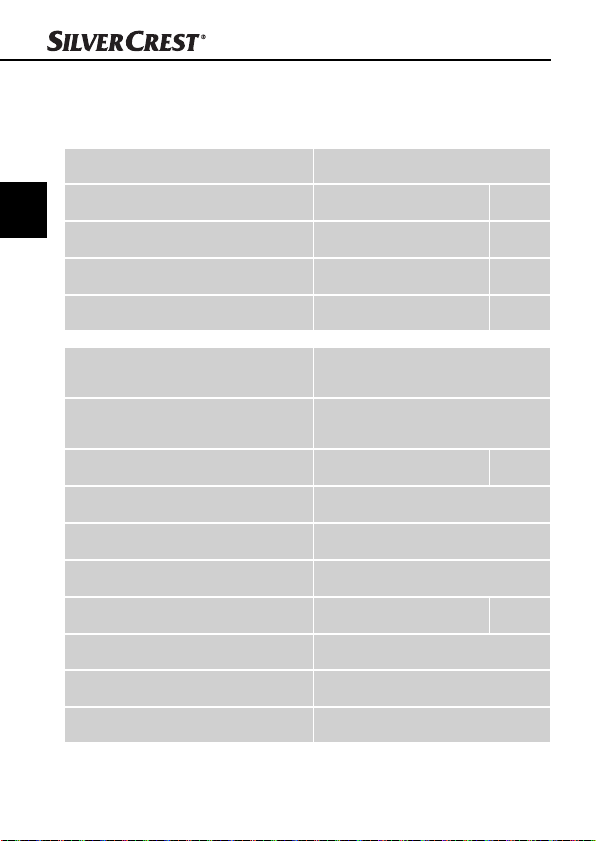
Caractéristiques techniques
Interface USB 2.0
Température de service +5 - +40 °C
Humidité (pas de condensation) 5 - 90 %
Dimensions (l x H x P) 9,6 x 16,9 x 10,5 cm
Poids (sans accessoires) env. 540 g
Annexe
Capteur d'imagerie
Lentille
Fréquence de rafraîchissement
Plage de mise au point Mise au point fi xe
Contrôle de la luminosité automatique
Equilibre des couleurs automatique
Résolution (interpolée) 3600 dpi
Conversion des données 10 bits par canal de couleurs
Méthode de scan Single pass
Source de lumière Entre-jour (3 LED blancs)
24
1/2,5 " capteur CMOS
(5 038 848 pixel)
F=6.0, 4 éléments de verre,
demi-angle de champ de vision
15°
2 fps
SND 3600 A2
Page 29

Annexe
Remarques concernant la déclaration de conformité
Cet appareil est conforme aux exigences fondamentales et autres règles pertinentes de la directive sur
la compatibilité électromagnétique 2004/108/EC.
La déclaration de conformité originale est disponible chez l'importateur.
Garantie
Cet appareil bénéfi cie de 3 ans de garantie à compter de la date
d’achat. L’appareil a été fabriqué avec soin et consciencieusement
contrôlé avant sa distribution.
Veuillez conserver le ticket de caisse en guise de preuve d’achat. Dans
le cas où la garantie s’applique, veuillez appeler le service après-vente
compétent. Cette condition doit être respectée pour assurer l’expédition gratuite de votre marchandise.
REMARQUE
► Cette garantie concerne uniquement les vices de fabrication
et ne couvre pas les dommages de tr
d'usure ou les dommages subis par des éléments fragiles,
par ex. le commutateur ou les accus.
Ce matériel est exclusivement destiné à un usage privé et non
commercial. La garantie est annulée en cas d’utilisation incorrecte et
inappropriée, d’utilisation brutale et en cas d’intervention qui n’aurait
pas été réalisée par un centre de service après-vente agréé.
Cette garantie ne constitue pas une restriction de vos droits légaux. La
période sous garantie n’est pas prolongée par la garantie du fabricant.
Ceci vaut également pour les pièces remplacées et réparées.
ansport, les pièces
FR
SND 3600 A2
25
Page 30

Tous dommages et défauts éventuellement déjà présents à l’achat
FR
doivent être notifi és immédiatement après le déballage, au plus tard
deux jours après la date d’achat.
Toutes réparations eff ectuées après la période sous garantie sont
payantes.
Service après-vente
Service France
Tel.: 0800 919270
E-Mail: kompernass@lidl.fr
IAN 73761
Service Belgique
Tel.: 070 270 171 (0,15 EUR/Min.)
E-Mail: kompernass@lidl.be
IAN 73761
Importateur
KOMPERNASS GMBH
BURGSTRASSE 21
44867 BOCHUM, GERMANY
www.kompernass.com
Annexe
26
SND 3600 A2
Page 31

Inhaltsverzeichnis
Einführung . . . . . . . . .28
Informationen zu dieser
Bedienungsanleitung . . . . 28
Urheberrecht . . . . . . . . . . 28
Haftungsbeschränkung . . . 28
Warnhinweise . . . . . . . . . . 29
Bestimmungsgemäße
Verwendung . . . . . . . . . . . 29
Sicherheit . . . . . . . . . .30
Grundlegende
Sicherheitshinweise . . . . . . 30
Aufstellen und
Anschließen . . . . . . . .32
Sicherheitshinweise . . . . . . 32
Lieferumfang und
Transportinspektion . . . . . . 32
Entsorgung der Verpackung 33
Anforderungen an den
Aufstellort . . . . . . . . . . . . . 33
Anschluss an einen
Computer . . . . . . . . . . . . . 34
Bedienelemente. . . . .40
Bedienung und Betrieb 40
Negativstreifen einlegen . . 40
Dias einlegen . . . . . . . . . . 40
Programm ArcSoft
MediaImpression 2 starten . 42
Programm ArcSoft
MediaImpression 2 . . . . . 42
Scannen mit dem Programm
ArcSoft MediaImpression 2 43
Nach dem Gebrauch . . . . 46
Reinigung . . . . . . . . . .47
Sicherheitshinweise . . . . . . 47
Reinigung . . . . . . . . . . . . . 47
Fehlerbehebung . . . .48
Sicherheitshinweise . . . . . . 48
Fehlerursachen und
-behebung . . . . . . . . . . . . 48
Lagerung/Entsorgung 49
Lagerung . . . . . . . . . . . . . 49
Gerät entsorgen . . . . . . . . 49
Anhang . . . . . . . . . . . .50
Technische Daten . . . . . . . 50
Hinweise zur
Konformitätserklärung . . . 51
Garantie . . . . . . . . . . . . . . 51
Service . . . . . . . . . . . . . . . 52
Importeur . . . . . . . . . . . . . 52
DE
AT
CH
SND 3600 A2
27
Page 32

Einführung
Informationen zu dieser Bedienungsanleitung
DE
Herzlichen Glückwunsch zum Kauf Ihres neuen Gerätes.
AT
Sie haben sich damit für ein hochwertiges Produkt entschieden.
CH
Diese Bedienungsanleitung ist Bestandteil des Negativ-Digitalisierers
SND 3600 A2 (nachfolgend als Gerät bezeichnet) und gibt Ihnen
wichtige Hinweise für den bestimmungsgemäßen Gebrauch, die
Sicherheit, den Anschluss sowie die Bedienung des Gerätes. Die
Bedienungsanleitung muss ständig in der Nähe des Gerätes verfügbar sein. Sie ist von jeder Person zu lesen und anzuwenden, die mit
der Bedienung und Störungsbehebung des Gerätes beschäftigt ist.
Bewahren Sie diese Bedienungsanleitung auf und geben Sie diese
mit dem Gerät an den Nachbesitzer weiter.
Urheberrecht
Diese Dokumentation ist urheberrechtlich geschützt.
Jede Vervielfältigung, bzw. jeder Nachdruck, auch auszugsweise,
sowie die Wiedergabe der Abbildungen, auch im veränderten Zustand
ist nur mit schriftlicher Zustimmung des Herstellers gestattet.
Haftungsbeschränkung
Alle in dieser Bedienungsanleitung enthaltenen technischen Informationen, Daten und Hinweise für den Anschluss und die Bedienung, entsprechen dem letzten Stand bei Drucklegung und erfolgen unter Berücksichtigung unserer bisherigen Erfahrungen und Erkenntnisse nach
bestem Wissen. Aus den Angaben, Abbildungen und Beschreibungen in dieser Anleitung können keine Ansprüche hergeleitet werden.
Der Hersteller übernimmt keine Haftung für Schäden aufgrund von
Nichtbeachtung der Anleitung, nicht bestimmungsgemäßer Verwendung, unsachgemäßen Reparaturen, unerlaubt vorgenommenen
Veränderungen oder Verwendung nicht zugelassener Ersatzteile.
Einführung
28
SND 3600 A2
Page 33

Einführung
Warnhinweise
In der vorliegenden Bedienungsanleitung werden folgende Warnhinweise verwendet:
WARNUNG
Ein Warnhinweis dieser Gefahrenstufe kennzeichnet
eine mögliche gefährliche Situation.
Falls die gefährliche Situation nicht vermieden wird, kann dies
zu Verletzungen führen.
► Die Anweisungen in diesem Warnhinweis befolgen, um
Verletzungen v
ACHTUNG
Ein Warnhinweis dieser Gefahrenstufe kennzeichnet
einen möglic
Falls die Situation nicht vermieden wird, kann dies zu Sachschäden führen.
► Die Anweisungen in diesem Warnhinweis befolgen, um
Sachschäden zu ve
HINWEIS
► Ein Hinweis kennzeichnet zusätzliche Informationen, die den
Umgang mit dem Gerät erleichtern.
on Personen zu vermeiden.
hen Sachschaden.
rmeiden.
DE
AT
CH
Bestimmungsgemäße Verwendung
Dieses Gerät ist ausschließlich für den nicht gewerblichen Gebrauch
zum Scannen und Digitalisieren von Filmnegativen und Dias bestimmt.
Eine andere oder darüber hinausgehende Benutzung gilt als nicht
bestimmungsgemäß.
SND 3600 A2
29
Page 34
WARNUNG
DE
AT
CH
Gefahr durch nicht bestimmungsgemäße
Verwendung!
Von dem Gerät können bei nicht bestimmungsgemäßer
Verwendung und/oder andersartiger Nutzung Gefahren
ausgehen.
► Das Gerät ausschließlich bestimmungsgemäß verwenden.
► Die in dieser Bedienungsanleitung beschriebenen Vorgehens-
weisen einhalten.
Ansprüche jeglicher Ar
mäßer Verwendung sind ausgeschlossen.
Das Risiko trägt allein der Betreiber.
t wegen Schäden aus nicht bestimmungsge-
Sicherheit
In diesem Kapitel erhalten Sie wichtige Sicherheitshinweise im Umgang
mit dem Gerät.
Dieses Gerät entspricht den vorgeschriebenen Sicherheitsbestimmungen.
Ein unsachgemäßer Gebrauch kann zu Personen- und Sachschäden
führen.
Grundlegende Sicherheitshinweise
Beachten Sie für einen sicheren Umgang mit dem Gerät die folgenden
Sicherheitshinweise:
■ Kontrollieren Sie das Gerät vor der Verwendung auf äußere
sichtbare Schäden. Nehmen Sie ein beschädigtes oder her
gefallenes Gerät nicht in Betrieb.
■ Bei Beschädigung der Kabel oder Anschlüsse lassen Sie diese
von autorisier
austauschen.
tem Fachpersonal oder dem Kundenservice
Sicherheit
unter-
30
SND 3600 A2
Page 35

Sicherheit
■ Dieses Gerät ist nicht dafür bestimmt, durch Personen (einschließ-
lich Kinder) mit eingeschränkten ph
geistigen Fähigkeiten oder mangels Erfahrung und/oder mangels
Wissen benutzt zu werden, es sei denn, sie werden durch eine für
ihre Sicherheit zuständige Person beaufsichtigt oder erhielten von
ihr Anweisungen, wie das Gerät zu benutzen ist.
■ Kinder sollten beaufsichtigt werden, um sicherzustellen, dass sie
nicht mit dem Gerät spielen.
■ Lassen Sie Reparaturen am Gerät nur von autorisierten Fachbetrieben
oder dem Kundenser
Reparaturen können erhebliche Gefahren für den Benutzer
entstehen. Zudem erlischt der Garantieanspruch.
■ Eine Reparatur des Gerätes während der Garantiezeit darf nur
von einem v
werden, sonst besteht bei nachfolgenden Schäden kein Garantieanspruch mehr.
■ Defekte Bauteile dürfen nur gegen Original-Ersatzteile ausgetauscht
wer
Sicherheitsanforderungen erfüllen werden.
■ Nehmen Sie keine eigenmächtigen Umbauten oder Veränderungen
an dem Gerät v
■ Schützen Sie das Gerät vor Feuchtigkeit und dem Eindringen von
Flüssigkeiten. S
de (z.B. Vasen) neben das Gerät.
■ Das Gerät nicht in der Nähe von off enen Flammen betreiben.
om Hersteller autorisierten Kundendienst vorgenommen
den. Nur bei diesen Teilen ist gewährleistet, dass sie die
vice durchführen. Durch unsachgemäße
or.
tellen Sie keine mit Flüssigkeit gefüllten Gegenstän-
ysischen, sensorischen oder
DE
AT
CH
SND 3600 A2
31
Page 36
Aufstellen und Anschließen
Aufstellen und Anschließen
Sicherheitshinweise
DE
AT
CH
WARNUNG
Bei der Inbetriebnahme des Gerätes können
Personen- und Sachschäden auftreten!
Beachten Sie die folgenden Sicherheitshinweise, um die
Gefahren zu vermeiden:
► Verpackungsmaterialien dürfen nicht zum Spielen verwendet
wer
den. Es besteht Erstickungsgefahr.
Lieferumfang und Transportinspektion
Das Gerät wird standardmäßig mit folgenden Komponenten geliefert:
▯ Scanner
▯ 1 x Dia Magazin
▯ 2 x Halterung für Negative
▯ Programm-CD
▯ Reinigungsbürste
▯ Bedienungsanleitung
HINWEIS
► Prüfen Sie die Lieferung auf Vollständigkeit und auf sichtbare
Schäden.
► Bei einer unvollständigen Lieferung oder Schäden infolge
mangelhafter V
sich an die Service-Hotline (siehe Kapitel Service).
erpackung oder durch Transport wenden Sie
32
SND 3600 A2
Page 37

Aufstellen und Anschließen
Entsorgung der Verpackung
Die Verpackung schützt das Gerät vor Transportschäden.
Die Verpackungsmaterialien sind nach umweltverträglichen und
entsorgungstechnischen Gesichtspunkten ausgewählt und deshalb
recyclebar.
Die Rückführung der Verpackung in den Materialkreislauf
spart Rohstoff e und verringert das Abfallaufkommen.
Entsorgen Sie nicht mehr benötigte Verpackungsmaterialien
gemäß den örtlich geltenden Vorschriften.
HINWEIS
► Heben Sie, wenn möglich, die Originalverpackung während
der Garantiez
Garantiefall ordnungsgemäß verpacken zu können.
Anforderungen an den Aufstellort
Für einen sicheren und fehlerfreien Betrieb des Gerätes muss der
Aufstellort folgende Voraussetzungen erfüllen:
■ Das Gerät muss auf einer festen, fl achen und waagerechten
Unterlage aufgestellt wer
■ Stellen Sie das Gerät nicht in einer heißen, nassen oder sehr feuchten
Umgebung oder in der Nähe von br
■ Stellen Sie das Gerät so auf, dass es nicht direkter Sonnenein-
strahlung ausgesetzt wir
eit des Gerätes auf, um das Gerät im
den.
ennbarem Material auf.
d.
DE
AT
CH
SND 3600 A2
33
Page 38

Aufstellen und Anschließen
Anschluss an einen Computer
Systemvoraussetzungen
DE
AT
CH
♦ Sie benötigen einen Computer mit einem freien USB-Anschluss
und als Betriebssystem Windo
Windows® 7 der Firma Microsoft®.
Installation des Programms ArcSoft MediaImpression 2
HINWEIS
► In dieser Bedienungsanleitung sind nur die Programmteile
beschrieben, die Sie zum Scannen Ihrer Dias bzw
benötigen. Weiterführende Informationen fi nden Sie in der
Onlinehilfe des Programmes.
► Die Abbildungen und die Beschreibungen beziehen sich auf
das Betriebssystem Micr
darstellung kann in Abhängigkeit der Anzeigeeinstellungen
bei anderen Betriebssystemen abweichen.
♦ Legen Sie die mitgelieferte Programm-CD in das CD-Laufwerk
Ihres Computer
Das Fenster „Automatische Wiedergabe“ wird angezeigt.
s ein.
ws® XP, Windows® Vista oder
osoft® Windows® 7. Die Bildschirm-
. Filmnegative
♦ Klicken Sie auf die Schaltfl äche „autorun.exe ausführen“.
Die Installation startet und das Startfenster wird angezeigt.
34
SND 3600 A2
Page 39

Aufstellen und Anschließen
HINWEIS
► Wenn Sie die Autostartfunktion ausgeschaltet haben und der
Installationsvor
den Installationsvorgang durch einen Doppelklick auf die
Datei „autorun.exe“ im Hauptverzeichnis der CD.
♦ Klicken Sie auf die Schaltfl äche „Arcsoft Software“, um das
Programm „ArcSoft MediaImpression 2“ zu installieren.
Der Installationsassistent wird konfi guriert.
gang nicht automatisch beginnt, starten Sie
DE
AT
CH
SND 3600 A2
35
Page 40

DE
AT
CH
Aufstellen und Anschließen
Das Startfenster des Installationsassistenten wird angezeigt.
♦ Klicken Sie auf die Schaltfl äche „Weiter >“.
Das Fenster „Lizenzvereinbarung“ wird angezeigt.
♦ Klicken Sie auf die Schaltfl äche „Ja“.
36
SND 3600 A2
Page 41

Aufstellen und Anschließen
Das Fenster zur Auswahl des Installationsverzeichnisses wird
angezeigt.
♦ Wählen Sie das gewünschte Installationsverzeichnis und klicken
Sie auf die Schaltfl äche „Weiter >“.
Das Fenster zur Auswahl des Programmordners (Eintrag im
Windows-Startmenü) wird angezeigt.
DE
AT
CH
♦ Wählen Sie den gewünschten Programmordner und klicken Sie
auf die Schaltfl äche „Weiter >“.
SND 3600 A2
37
Page 42

DE
AT
CH
Aufstellen und Anschließen
Das Programm wird installiert und der Installationsfortschritt
wird angezeigt.
Das Fenster „Zugehörige Dateiformate“ wird angezeigt.
♦ Wählen Sie die Dateiformate aus, die mit dem Programm
verknüpft werden sollen und klicken Sie auf die Schaltfl äche
„Weiter>“
38
SND 3600 A2
Page 43

Aufstellen und Anschließen
Es wird angezeigt, dass die Installation vollständig erfolgt ist.
♦ Klicken Sie auf die Schaltfl äche „Fertigstellen“.
Das Startfenster wird wieder angezeigt.
♦ Klicken Sie auf die Schaltfl äche „Exit Installation“, um das
Installationsprogramm zu beenden.
Anschluss
♦ Schließen Sie das USB-Kabel
Computers an. Der Computer erkennt die neue Hardware und
startet die automatische Treiberinstallation.
4
an einem USB-Anschluss Ihres
DE
AT
CH
SND 3600 A2
39
Page 44

Bedienelemente
Bedienelemente/Bedienung …
DE
AT
CH
LED PWR
2
Taste SCAN
3
Einschub für Negativhalterung bzw. Dia-Magazin
4
USB-Anschlusskabel
5
Negativhalterung
6
Dia-Magazin
7
Reinigungsbürste
Bedienung und Betrieb
In diesem Kapitel erhalten Sie wichtige Hinweise zur Bedienung und
Betrieb des Gerätes.
Negativstreifen einlegen
♦ Entriegeln Sie den Verschluss an der Vorderseite der Negativ-
halterung 5 und öff nen Sie die Halterung.
♦ Legen Sie den Negativstreifen seitenrichtig in die Halterung ein.
♦ Schließen Sie die Halterung, bis der Deckel einrastet.
Dias einlegen
♦ Legen Sie die Dias seitenrichtig in den dafür vorgesehenen
Schacht des Dia-Magazins 6.
♦ Führen Sie das Dia-Magazin
den Einschub 3 ein.
Mit dem Schieber, der sich seitlich am Dia-Magazin
werden die im Schacht befi ndlichen Dias einzeln in den Scanner
geschoben.
6
mit dem Sichtfenster zuerst in
6
befi ndet,
40
SND 3600 A2
Page 45

Bedienung und Betrieb
♦ Schieben Sie dazu den Schieber zunächst bis zum Anschlag
vom Scanner w
tig in Richtung des Scanners bewegen.
HINWEIS
► Ein im Scanner befi ndliches Dia wird dadurch aus dem
Gerät entfernt und ein neues Dia in den Sichtber
Scanner geschoben.
► Achten Sie darauf, ein neues Dia langsam in den Scanner zu
schieben. Geschieht dies zu schnell, so kann das Dia über
den Sichtber
müssen Sie das Gerät seitlich etwas anheben, damit das Dia
wieder in eine optimale Lage gelangt.
♦ Sobald Sie keine weiteren Dias mehr scannen möchten,
entfernen Sie das Dia-Magazin
Entnehmen Sie das letzte Dia von unten aus dem Sichtfenster
des Dia-Magazins 6.
eg. Anschließend den Schieber wieder vorsich-
eich des
eich des Scanners hinaus gleiten. In diesem Fall
6
aus dem Einschub 3.
DE
AT
CH
SND 3600 A2
41
Page 46

Bedienung und Betrieb
Programm ArcSoft MediaImpression 2 starten
♦ Starten Sie das Programm ArcSoft MediaImpression 2 durch
DE
AT
CH
einen Doppelklick auf das Programmsymbol auf dem Desktop
oder wählen Sie den entsprechenden Eintrag im Startmenü aus.
Programm ArcSoft MediaImpression 2
1
2
4
Es stehen vier Optionen zur Verfügung:
1. Bilder: Ein auf dem Computer oder einer Speicherkarte
vorhandenes Bild öff nen.
2. Erfassen: Zum Scannen von neuen Aufnahmen
3. Einfaches Nachbessern: Schnelle Bildbearbeitung
4. Bildbearbeitungswerkzeuge: Ausführliche Bildbearbeitung
HINWEIS
► In dieser Bedienungsanleitung sind nur die Programmteile
beschrieben, die Sie zum Scannen Ihrer Dias bzw
tive benötigen. Weiterführende Informationen fi nden Sie in
der Onlinehilfe des Programmes.
42
3
. Filmnega-
SND 3600 A2
Page 47

Bedienung und Betrieb
Scannen mit dem Programm ArcSoft MediaImpression 2
♦ Schließen Sie das Gerät an. Die LED PWR leuchtet.
♦ Starten Sie das Programm ArcSoft MediaImpression 2.
♦ Klicken Sie auf die Schaltfl äche „Erfassen“.
Beim er
Kalibrier- und Datensammlungsprozess. Stellen Sie sicher, dass
keine Dia- oder Negativhalterung im Gerät eingelegt ist.
♦ Klicken Sie im angezeigten Informationsfenster auf die Schaltfl ä-
che „OK“, um die Kalibrierung und Datensammlung zu starten.
Der erste Kalibrierungs- und Datensammlungsvorgang kann
einige Minuten dauern.
Der Kalibrierungsfortschritt wird angezeigt.
Nach Abschluss der Kalibrierung wird das Programmfenster
angezeigt.
ogrammstart nach der Installation erfolgt ein
sten Pr
DE
AT
CH
SND 3600 A2
43
Page 48

DE
AT
CH
Bedienung und Betrieb
Das Fenster „Vom Scanner erfassen“ wird angezeigt.
♦ Nehmen Sie die notwendigen Einstellungen vor:
Dateiformat, Qualität (nur bei JPG-Dateien), Speicherort, Filmtyp,
Farbtiefe, Scanaufl ösung
HINWEIS
► Die Farbtiefe ist mit 24 Bit festgelegt. Ein Scan mit 1800 DPI
hat eine Aufl
hat ein Scan eine Aufl ösung von 5040 x 3360 Pixel.
♦ Klicken Sie auf die Schaltfl äche „Erfassen“.
Das Fenster „
ösung von 2520 x 1680 Pixel, mit 3600 DPI
Aufnehmen“ wird angezeigt.
44
SND 3600 A2
Page 49
Bedienung und Betrieb
♦ Schieben Sie die Halterung mit den zu scannenden
Negativen bzw
am Gerät, bis sie einrastet.
Das Scanmotiv wird im Vorschaubereich angezeigt.
HINWEIS
► Eine in das Gerät eingeschobene Halterung kann nicht
wieder herausgez
durch das Gerät hindurchgeschoben werden.
♦ Justieren Sie bei Bedarf die Halterung, bis das Scanmotiv
optimal im Vor
♦ Stellen Sie bei Bedarf den elektrischen Abgleich (Balance), die
Belichtung (Exposure), die Helligk
(Contrast) und die Sättigung (Saturation) ein, indem Sie auf die
Schaltfl äche
Ein Einstellungsfenster wird geöff net.
. mit den zu scannenden Dias in den Einschub 3
ogen werden, sondern muss komplett
schaufenster angezeigt wird.
eit (Brightness), den Kontrast
„Anpassen“ drücken.
DE
AT
CH
♦ Klicken Sie auf um den entsprechenden Wert zu erhöhen
und auf um den entsprechenden Wert zu verringern.
Verwenden Sie die Schieberegler, um den elektrischen Abgleich
(Farbabgleich) vorzunehmen.
Beispiel: Hat das Bild einen zu hohen Blauanteil, kann dies durch
Erhöhen des Gelbanteils verringert werden.
SND 3600 A2
45
Page 50
♦ Klicken Sie auf die Schaltfl äche „OK“, um die Einstellung zu
übernehmen und zum Fenster „Aufnehmen“ zurückzukehren.
DE
AT
CH
♦ Drücken Sie die Taste SCAN
die Schaltfl äche „Aufnehmen“. Das Bild wird gescannt und im
Scanbereich angezeigt.
♦ Wiederholen Sie die Arbeitsschritte, um weitere Bilder zu
scannen.
Nach dem Gebrauch
♦ Entnehmen Sie die Negativhalterung 5, indem Sie sie komplett
durch das Gerät hindurchschieben.
♦ Entnehmen Sie das Dia-Magazin
dem Einschub 3 herausziehen.
♦ Entfernen Sie das USB-Kabel
Computers.
Bedienung und Betrieb
2 am Gerät oder klicken Sie auf
6
, indem Sie es wieder aus
4
von dem USB-Anschluss Ihres
46
SND 3600 A2
Page 51
Reinigung
Reinigung
Sicherheitshinweise
ACHTUNG
Mögliche Beschädigung des Gerätes.
Eindringende Feuchtigk
Gerätes führen.
► Stellen Sie sicher, dass bei der Reinigung keine Feuchtigkeit
in das Gerät eindringt, um eine ir
des Gerätes zu vermeiden.
eit kann zu einer Beschädigung des
reparable Beschädigung
Reinigung
■ Reinigen Sie das Gehäuse ausschließlich mit einem leicht
feuchten Tuch und einem milden Spülmittel.
■ Reinigen Sie die Oberfl äche der Scannerlinse im Inneren des
Gerätes mit der Reinigungsbürste 7. Schieben Sie dazu die
Reinigungsbürste mit der Reinigungsfl äche nach unten nur in den
rechten Einschub3.
DE
AT
CH
SND 3600 A2
47
Page 52
Fehlerbehebung
Fehlerbehebung
In diesem Kapitel erhalten Sie wichtige Hinweise zur Störungsloka-
DE
lisierung und Störungsbehebung. Beachten Sie die Hinweise, um
AT
Gefahren und Beschädigungen zu vermeiden.
CH
Sicherheitshinweise
WARNUNG
Beachten Sie die folgenden Sicherheitshinweise, um Gefahren
und Sachschäden zu vermeiden:
► Reparaturen an Elektrogeräten dürfen nur von Fachleuten
durchgeführ
unsachgemäße Reparaturen können erhebliche Gefahren für
den Benutzer und Schäden am Gerät entstehen.
Fehlerursachen und -behebung
Die nachfolgende Tabelle hilft bei der Lokalisierung und Behebung
kleinerer Störungen:
Fehler Mögliche Ursache Behebung
t werden, die vom Hersteller geschult sind. Durch
LED PWR
nicht
schlechte Bildqualität
leuchtet
Das Gerät ist nicht
korrekt angeschlossen.
Staub auf der Scannerlinse.
Staub auf dem Film
bzw. dem Dia
Schließen Sie das
Gerät an.
Reinigen Sie die Scannerlinse.
Reinigen Sie den Film
bzw. das Dia.
HINWEIS
► Wenn Sie mit den vorstehend genannten Schritten das Problem
nicht lösen können, w
enden Sie sich bitte an den Kundendienst.
48
SND 3600 A2
Page 53

Lagerung/Entsorgung
Lagerung/Entsorgung
Lagerung
Lagern Sie das Gerät in einer trockenen Umgebung.
Gerät entsorgen
Werfen Sie das Gerät keinesfalls in den
normalen Hausmüll. Dieses Produkt unterliegt der europäischen Richtlinie 2002/96/EC
WEEE (Waste Electrical and Electronic
Equipment).
Entsorgen Sie das Gerät über einen zugelassenen
Entsorgungsbetrieb oder über Ihre kommunale Entsorgungseinrichtung. Beachten Sie die aktuell geltenden
Vorschriften. Setzen Sie sich im Zweifelsfall mit Ihrer
Entsorgungseinrichtung in Verbindung.
DE
AT
CH
SND 3600 A2
49
Page 54
Anhang
Technische Daten
DE
AT
Schnittstelle USB 2.0
CH
Betriebstemperatur +5 - +40 °C
Feuchtigkeit (keine Kondensation) 5 - 90 %
Abmessungen (B x H x T) 9,6 x 16,9 x 10,5 cm
Gewicht (ohne Zubehör) ca. 540 g
Anhang
Bildsensor
Linse
Bildwiederholrate 2 fps
Fokussierungsbereich fester Fokus
Helligkeitssteuerung Automatisch
Farbabgleich Automatisch
Aufl ösung (interpoliert) 3600 dpi
Datenkonvertierung 10 bit pro Farbkanal
Scanmethode Single pass
Lichtquelle Gegenlicht (3 weiße LED)
50
1/2,5 " CMOS-Sensor
(5 038 848 Pixel)
F=6.0, 4 Glaselemente, Halb-
feldwinkel 15°
SND 3600 A2
Page 55

Anhang
Hinweise zur Konformitätserklärung
Dieses Gerät entspricht hinsichtlich Übereinstimmung
mit den grundlegenden Anforderungen und den
anderen relevanten Vorschriften der Richtlinie zur
elektromagnetischen Verträglichkeit 2004/108/EC.
Die vollständige Original-Konformitätserklärung ist
beim Importeur erhältlich.
Garantie
Sie erhalten auf dieses Gerät 3 Jahre Garantie ab Kaufdatum. Das
Gerät wurde sorgfältig produziert und vor Anlieferung gewissenhaft
geprüft.
Bitte bewahren Sie den Kassenbon als Nachweis für den Kauf auf.
Bitte setzen Sie sich im Garantiefall mit Ihrer Servicestelle telefonisch
in Verbindung. Nur so kann eine kostenlose Einsendung Ihrer Ware
gewährleistet werden.
HINWEIS
► Die Garantieleistung gilt nur für Material- oder Fabrikations-
fehler, nicht aber für T
für Beschädigungen an zerbrechlichen Teilen, z. B. Schalter
oder Akkus.
Das Produkt ist lediglich für den privaten und nicht für den gewerblichen Gebrauch bestimmt. Bei missbräuchlicher und unsachgemäßer
Behandlung, Gewaltanwendung und bei Eingriff en, die nicht von
unserer autorisierten Service-Niederlassung vorgenommen wurden,
erlischt die Garantie.
Ihre gesetzlichen Rechte werden durch diese Garantie nicht eingeschränkt. Die Garantiezeit wird durch die Gewährleistung nicht
verlängert. Dies gilt auch für ersetzte und reparierte Teile.
ransportschäden, Verschleißteile oder
DE
AT
CH
SND 3600 A2
51
Page 56

Eventuell schon beim Kauf vorhandene Schäden und Mängel müssen sofort nach dem Auspacken gemeldet werden, spätestens aber
zwei Tage nach Kaufdatum.
DE
Nach Ablauf der Garantiezeit anfallende Reparaturen sind kosten-
AT
pfl ichtig.
CH
Service
Service Deutschland
Tel.: 0180 5772033 (0,14 EUR/Min. aus dem dt. Festnetz,
Mobilfunk max. 0,42 EUR/Min.)
E-Mail: kompernass@lidl.de
IAN 73761
Service Österreich
Tel.: 0820 201 222 (0,15 EUR/Min.)
E-Mail: kompernass@lidl.at
IAN 73761
Service Schweiz
Tel.: 0842 665566 (0,08 CHF/Min.,
Mobilfunk max. 0,40 CHF/Min.)
E-Mail: kompernass@lidl.ch
IAN 73761
Anhang
Importeur
KOMPERNASS GMBH
BURGSTRASSE 21
44867 BOCHUM, GERMANY
www.kompernass.com
52
SND 3600 A2
Page 57

Index
Introduction . . . . . . . .54
Information for these
operating instructions . . . . 54
Copyright . . . . . . . . . . . . . 54
Limited liability . . . . . . . . . 54
Warnings . . . . . . . . . . . . . 55
Proper use . . . . . . . . . . . . 55
Safety . . . . . . . . . . . . .56
Basic Safety Instructions . . 56
Setting up and
connecting . . . . . . . . .58
Safety instructions . . . . . . . 58
Package contents and
transport inspection . . . . . 58
Disposal of the packaging 59
Requirements for the set-up
location . . . . . . . . . . . . . . 59
Connecting to a computer 60
Operating
components . . . . . . . .66
Handling and
operation . . . . . . . . . .66
Insert the negative strip . . . 66
Inserting slides . . . . . . . . . 66
Starting the ArcSoft MediaImpression 2 programme 68
ArcSoft MediaImpression 2
programme . . . . . . . . . . . . 68
Scanning with the
ArcSoft MediaImpression 2
programme . . . . . . . . . . . 69
After Use . . . . . . . . . . . . . 72
Cleaning . . . . . . . . . .73
Safety instructions . . . . . . . 73
Cleaning . . . . . . . . . . . . . . 73
Troubleshooting . . . .74
Safety instructions . . . . . . . 74
Malfunction causes and
remedies . . . . . . . . . . . . . . 74
Storage/Disposal . . .75
Storage . . . . . . . . . . . . . . . 75
Disposal of the device . . . 75
Appendix . . . . . . . . . .76
Technical data . . . . . . . . . 76
Note regarding the
conformity declaration . . 77
Warranty . . . . . . . . . . . . . 77
Service . . . . . . . . . . . . . . . 78
Importer . . . . . . . . . . . . . . 78
GB
SND 3600 A2
53
Page 58

Introduction
Information for these operating instructions
Congratulations on the purchase of your new appliance.
You have clearly decided in favor of a quality product.
These operating instructions are a component of the Slide & Negative
GB
Scanner SND 3600 A2 (henceforth designated as the device) and
supplies you with important information for intended use, safety and
connection as well as operation of the device. The operating instructions must be constantly kept available close to the device. They
are to be read and used by anyone assigned to the operation and
repairing of the device. Keep these operating instructions and hand
them over with the device to any future owners.
Copyright
This documentation is copyright protected.
Any copying and/or printing, including partial copying/printing,
as well as reproductions of the diagrams, even in an altered state is
only allowed with written permission from the manufacturer.
Limited liability
All technical information, data and information for connection and
operation, contained in these operating instructions correspond to
the latest at the time of printing and, to the best of our knowledge,
take into account our previous experience and know-how.
No claims can be derived from the details, illustrations and descriptions
in these instructions.
The manufacturer assumes no responsibility for damage caused
by failure to observe the instructions, improper use, inappropriate
repairs, making unauthorized changes or for using unapproved
replacement parts.
Introduction
54
SND 3600 A2
Page 59
Introduction
Warnings
In the current operation instructions the following warnings are used:
WARNING
A warning of this danger level signifi es a possible
dangerous situation.
If the dangerous situation is not avoided it can lead to injuries.
► The directives in this warning are there to avoid personal
injuries.
IMPORTANT
A warning of this danger level signifi es possible
pr
operty damage.
If the situation is not avoided it can lead to property damage.
► The directives in this warning are there to avoid property
damage.
NOTICE
► A notice signifi es additional information that assists in the
handling of the device.
Proper use
This device is intended exclusively for the non-commercial use of
scanning and digitizing fi lm negatives and slides.
This device is not intended for any other use or for uses beyond those
mentioned.
GB
SND 3600 A2
55
Page 60

WARNING
Danger from unintended use!
Danger can come from the device if used for unintended purposes
and/or other types of use.
GB
► Use the device exclusively for intended purposes.
► Observe the procedures described in these operating instructions.
Claims of any kind for damage r
be excepted.
The operator alone bears liability.
esulting from unintended use will not
Safety
In this chapter you receive important safety information regarding
handling of the device.
This device complies with the statutory safety regulations. Improper
use can lead to personal injury and property damage.
Basic Safety Instructions
For safe handling of the device observe the following safety information:
■ Before use check the device for visible external damage. Do not
put into operation a de
■ Damaged cables or connections should be replaced by authorized
qualifi
ed persons or by the customer service department.
vice that is damaged or has been dropped.
Safety
56
SND 3600 A2
Page 61

Safety
■ This appliance is not intended for use by individuals (including
children) with r
ities or defi ciences in experience and/or knowledge unless they
are supervised by a person responsible for their safety or receive
from this person instruction in how the appliance is to be used.
■ Children should be supervised to ensure that they do not play
with the appliance.
■ Repairs should only be carried out by authorized specialist com-
panies or b
can result in signifi cant dangers for the user. In addition warranty
claims become void.
■ A repair to the device during the warranty period may only be
carried out by a customer ser
manufacturer otherwise no additional warranty claims can be
considered for subsequent damages.
■ Defective components may only be replaced with original
replacement par
you guarantee that the safety requirements are complied with.
■ Do not carry out any unauthorised reconstructions or alterations
to the device.
■ Protect the device from moisture and liquid penetration. Do not
place any liquid-fi
appliance.
■ Do not operate the device in the vicinity of open fl ames.
estricted physical, physiological or intellectual abil-
y the customer ser
ts. Only by using original replacement parts can
lled vessels (such as fl ower vases) next to the
vice department. Incorrect repairs
vice department authorized by the
GB
SND 3600 A2
57
Page 62

Setting up and connecting
Setting up and connecting
Safety instructions
WARNING
GB
Personal injury and property damage can occur
during initial operation of the device!
Observe the following safety information to avoid danger:
► Packaging material should not be used as a play thing.
There is a risk of suff
ocation!
Package contents and transport inspection
The device is delivered with the following components as standard:
▯ Scanner
▯ 1 x Slide magazine
▯ 2 x Negative holder
▯ Programme CD
▯ Cleaning brush
▯ Operating instructions
NOTICE
► Check the contents to make sure everything is there and for
visible damage.
► If the contents are not complete or are damaged due to
defective pack
service hotline (see the section “Service”).
aging or through transportation contact the
58
SND 3600 A2
Page 63

Setting up and connecting
Disposal of the packaging
The packaging protects the device from transport damage. The packaging materials are selected from the point of view of their environmental
friendliness and disposal technology and are therefore recyclable.
The recirculation of packaging into the material circuit
saves on raw material and reduces generated waste.
Dispose of packaging material that is no longer needed
according to the regionally established regulations.
NOTICE
► If possible preserve the device's original packaging during
rranty period so that in the case of a warranty claim
the wa
you can package the device properly for return.
Requirements for the set-up location
For safe and faultless operation of the device the set-up location must
fulfi ll the following provisions:
■ The device must be placed on a fi rm, fl at and level surface.
■ Do not place the device in a hot, wet or very damp environment
or in the vicinit
■ Place the device so that it is not subjected to direct sunlight.
ammable materials.
y of fl
GB
SND 3600 A2
59
Page 64

Setting up and connecting
Connecting to a computer
System prerequisites
♦ You will need a computer with a vacant USB port and with the
operating sy
from the Microsoft® corporation.
GB
Installation of the ArcSoft MediaImpression 2 programme
NOTICE
► In these operating instructions only the programme sections
are described that y
and/or fi lm negatives. You can fi nd further information in the
programme's on-line help.
► The illustrations and descriptions refer to the operating
system Micr
can diff er, depending on the display settings, with other
operating systems.
♦ Insert the supplied programme CD into your computer’s CD drive.
The window “
stem Windows® XP, Windows® Vista or Windows® 7
ou will need for scanning your slides
osoft® Windows® 7. The illustration depictions
Automatic playback” will be displayed.
♦ Click on the button “run autorun.exe”.
The installation begins and the start window is displayed.
60
SND 3600 A2
Page 65

Setting up and connecting
NOTICE
► If you have switched off the autostart function and the installa-
tion process does not begin automatically you can star
installation process by double clicking on the fi le "autorun.exe"
in the CD's main directory.
♦ Click on the button “Arcsoft Software” to install the “ArcSoft
MediaImpression 2“ programme.
The installation wizard will be confi gured.
t the
GB
SND 3600 A2
61
Page 66

GB
Setting up and connecting
The start window of the installation wizard will be displayed.
♦ Click on the button “Continue>”.
The window “License agreement” will be displayed.
♦ Click on the button “Yes”.
62
SND 3600 A2
Page 67

Setting up and connecting
The window for the selection of the installation directory will be
displayed.
♦ Select the desired installation directory and click on the button
“Continue>”.
The window for the selection of the programme folders (Entry in
the Windows start menu) will be displayed.
GB
♦ Select the desired programme folder and click on the button
“Continue>”.
SND 3600 A2
63
Page 68

GB
Setting up and connecting
The programme will be installed and the installation progress
will be displayed.
The window “Associated fi le formats” will be displayed.
♦ Select the fi le format that is to be associated with the programme
and click on the button “Continue >”.
64
SND 3600 A2
Page 69

Setting up and connecting
The display will show that the installation has been completed.
♦ Click on the button “Finish”.
The start window will be displayed again.
♦ Click on the button “Exit Installation” to exit the installation
programme.
Connection
♦ Connect the USB cable
The computer recognizes the new hardware and starts the
automatic driver installation.
4
to a USB port on your computer.
GB
SND 3600 A2
65
Page 70
Operating components/Handling …
Operating components
LED PWR
2
SCAN button
3
Insert slot for the negative or slide magazine
4
GB
USB connection cable
5
Film holder
6
Slide magazine
7
Cleaning brush
Handling and operation
In this chapter you receive important information for the handling
and operation of the device.
Insert the negative strip
♦ Release the fastener on the front of the fi lm holder 5 and open
the holder.
♦ Insert the fi lm strip, correctly orientated, into the holder.
♦ Close the holder making sure that the cover locks into place.
Inserting slides
♦ Place the slides, with the sides the right way round, into the
intended slot of the slide magazine 6.
♦ First guide the slide magazine
leading, into the insert slot 3.
By means of the slider, located laterally on the slide magazine
the slides contained in the slots are pushed individually into the
scanner.
6
, with the viewing window
6
,
66
SND 3600 A2
Page 71
Handling and operation
♦ For this, fi rst slide the slider away from the scanner to the dead
stop. Then carefully mo
NOTICE
► A slide located in the scanner is thereby removed from the
appliance and a new slide is pushed into the visual r
the scanner.
► Be sure to insert a new slide into the scanner slowly. If this
happens too quickly, then the slide could glide outside the
ange of the scanner. In this case, you will need to
visual r
raise the appliance slightly to the side, so that the slide can
glide back to an optimal position.
♦ When you have decided to fi nish scanning the slides, remove
the slide magazine
last slide from the bottom of the viewing window of the slide
magazine 6.
ve the slider back towards the scanner.
6
from the insert slot 3. Remove the
ange of
GB
SND 3600 A2
67
Page 72

Handling and operation
Starting the ArcSoft MediaImpression 2 programme
♦ Start the ArcSoft MediaImpression 2 programme by double
clicking on the programme icon on the desktop or select the
corresponding input from the start menu.
ArcSoft MediaImpression 2 programme
GB
1
There are four options available:
1. Image: Open an available image on the computer or memory
medium.
2. Capture: For the scanning of new images
3. Simple reproduction: Fast image editing
4. Image editing tools: Detailed image editing
NOTICE
► In these operating instructions only the programme sections
are described that y
and/or fi lm negatives. You can fi nd further information in
the programme's online help.
68
ou will need for scanning your slides
2
3
4
SND 3600 A2
Page 73

Handling and operation
Scanning with the ArcSoft MediaImpression 2 programme
♦ Connect the device. The LED PWR lights up.
♦ Start the ArcSoft MediaImpression 2 programme.
♦ Click on the button “Capture”.
When the pr
bration and data collection process takes place. Make sure that
no slide or negative holders are inserted into the device.
♦ In the displayed information window click on the button “OK”
to start calibration and data collection. The fi rst calibration and
data collection process can take several minutes.
The calibration progress will be displayed.
After completion of the calibration the programme window will
be displayed.
amme is fi rst started after the installation a cali-
ogr
GB
SND 3600 A2
69
Page 74

GB
Handling and operation
The window “Capture from scanner” will be displayed.
♦ Carry out the necessary settings:
File format, quality (only with JPG fi les), memory location, fi lm
type, colour depth, scan resolution
NOTICE
► The colour depth is defi ned as 24 Bit. A scan with 1800 DPI
has a resolution of 2520 x 1680 Pix
3600 DPI has a resolution of 5040 x 3360 Pixel.
♦ Click on the button “Capture”.
The “Capture” windo
w is displayed.
el and a scan with
70
SND 3600 A2
Page 75
Handling and operation
♦ Slide the holder with the negatives and/or slides to be scanned
into the slot
The scan motif will be displayed in the preview fi eld .
NOTICE
► A holder that has been inserted into the device cannot be pulled
out again, it has to be pushed completely through the de
♦ Adjust the holder, if required, until the scan motif is displayed
optimally in the pre
♦ If necessary, you can set the electrical balance (Balance), the
exposur
(Contrast) and the saturation (Saturation) by pressing on the
button
A settings window will be opened.
♦ Click on to increase the corresponding value and on to
decrease the corresponding value.
Use the slide controller to adjust the electrical balance (Colour
balance).
Example: If the image has a too high proportion of blue, this can be
reduced by increasing the yellow component.
3
on the device until it locks into place.
vice.
view window.
e (Exposure), the brightness (Brightness), the contrast
“Adjust”.
GB
SND 3600 A2
71
Page 76

GB
Handling and operation
♦ Click on the “OK” button to accept the setting and return to the
“Capture” window.
♦ Press the SCAN
button. The image will be scanned and be displayed in the
scan fi eld.
♦ Repeat this procedure to scan additional images.
After Use
♦ Remove the fi lm holder 5 by pushing it completely through the
appliance.
♦ Remove the slide magazine
insert slot
♦ Remove the USB cable
2
button on the device or click on the “Capture”
6
by pulling it back out of the
3
.
4
from the USB port of your computer.
72
SND 3600 A2
Page 77

Cleaning
Cleaning
Safety instructions
IMPORTANT
Possible damage to the device
Penetr
ating moisture can lead to damaging of the device.
► Make sure when you are cleaning the device that no moisture
gets inside in order to av
Cleaning
■ Clean the housing exclusively with a soft damp cloth and a mild
dishwashing liquid.
■ Clean the surface of the scanner lens inside of the device with
a cleaning brush 7. For this, push the cleaning brush with the
cleaning surface facing downwards only into the right slot 3.
oid irreparable damage to it.
GB
SND 3600 A2
73
Page 78

Troubleshooting
Troubleshooting
In this chapter you will receive important information for malfunction
localization and remedies. Observe the instructions in order to avoid
danger and damage.
Safety instructions
GB
WARNING
Observe the following safety information to avoid danger
and property damage:
► Repairs to electronic devices may only be carried out by
specialists who have been tr
siderable danger to the consumer and damage to the device
can occur as a result of incorrect repairs.
Malfunction causes and remedies
The following table will help with localizing and remedying minor
malfunctions:
Malfunction Possible cause Solution
ained by the manufacturer. Con-
LED PWR
light up
Poor image quality
does not
The device is not connected correctly.
Dust on the scanner
lens.
Dust on the fi lm and/or
the slide
Connect the device.
Clean the scanner lens.
Clean the fi lm and/or
the slide.
NOTICE
► If you cannot solve the problem with the aforementioned methods
please contact customer service.
74
SND 3600 A2
Page 79

Storage/Disposal
Storage/Disposal
Storage
Store the device in a dry environment.
Disposal of the device
Do not dispose of the device in your normal
domestic waste. This product is subject to
the European directive 2002/96/EC-WEEE
(Waste Electrical and Electronic Equipment).
Dispose of the device through an approved disposal
centre or at your community waste facility. Observe
the currently applicable regulations. In case of doubt,
please contact your waste disposal centre.
GB
SND 3600 A2
75
Page 80
Appendix
Technical data
Interface USB 2.0
Operating temperature +5 - +40 °C
GB
Humidity (no condensation) 5 - 90 %
Measurements (W x H x D) 9.6 x 16.9 x 10.5 cm
Weight (without accessories) approx. 540 g
Appendix
Image sensor
Lens
Image repeat rate 2 fps
Focusing range Fixed focus
Brightness control automatic
Colour adjustment automatic
Resolution (interpolated) 3600 dpi
Data converting 10 bit per colour channel
Scan method Single pass
Light source Backlighting (3 white LEDs)
76
1/2.5 " CMOS-Sensor
(5 038 848 Pixel)
F=6.0, 4 Glass components,
half fi eld angle 15°
SND 3600 A2
Page 81

Appendix
Note regarding the conformity declaration
This device complies regarding conformity with the
basic requirements and other relevent provisions
of the directive for electromagnetic compatibility
2004/108/EC.
The complete original declaration of conformity
can be obtained from the importer.
Warranty
You receive a 3-year warranty for this device as of the purchase date.
This device has been manufactured with care and meticulously examined before delivery.
Please retain your receipt as proof of purchase. In the case of a warranty claim, please get in touch, by telephone, with our service
department. Only in this way can a post-free despatch for your
goods be assured.
NOTICE
► The warranty is valid only for material or manufacturing defects
and not for transpor
ages to breakable parts such as switches or power packs.
This product is for private use only and is not intended for commercial applications. In the event of misuse and improper handling, use
of force and interference not carried out by our authorized service
branch, the warranty will become void.
Your statutory rights are not restricted in any way by this warranty.
The guarantee period will not be extended by the warranty. This also
applies to replacement and repaired parts.
tation damage, wear and tear or for dam-
GB
SND 3600 A2
77
Page 82
Damages and defects possibly present at time of purchase must be
reported immediately after unpacking or at the latest two days after
the purchase date. After expiration of the guarantee period incidental repairs are liable to costs.
Service
GB
Service Great Britain
Tel.: 0871 5000 720 (£ 0.10/Min.)
E-Mail: kompernass@lidl.co.uk
IAN 73761
Importer
KOMPERNASS GMBH
BURGSTRASSE 21
44867 BOCHUM, GERMANY
www.kompernass.com
Appendix
78
SND 3600 A2
Page 83

KOMPERNASS GMBH
Burgstraße 21
D-44867 Bochum
www.kompernass.com
Version des informations · Stand der Informationen
Last Information Update: 03 / 2012
Ident.-No.: SND3600A2012012-2
IAN 73761
2
 Loading...