

Page 1

WIRELESS SOCKET SET
WIRELESS SOCKET SET
Operation and safety notes
IAN 322055
FUNKSTECKDOSEN-SET
Bedienungs- und Sicherheitshinweise
Page 2
Before reading, unfold the page containing the illustrations and familiarise yourself
with all functions of the device.
Klappen Sie vor dem Lesen die Seite mit den Abbildungen aus und machen Sie
sich anschließend mit allen Funktionen des Gerätes vertraut.
GB / IE / NI Operation and safety notes Page 5
DE / AT / CH Bedienungs- und Sicherheitshinweise Seite 15
Page 3
A
1
A
B
C
D
Master
ON OFF
4
2
3
B
6
5
Page 4

Page 5

Legend of pictograms used.......................................................Page 6
Introduction ............................................................................................ Page 6
Proper handling ............................................................................................Page 6
Scope of supply ........................................................................................... Page 6
Control elements .......................................................................................... Page 6
Technical data .............................................................................................. Page 7
Safety .......................................................................................................... Page 8
Safety advice ................................................................................................Page 8
Safety instructions for batteries / rechargeable batteries ..........................Page 8
Setting up ................................................................................................. Page 9
Preparing the remote control ....................................................................... Page 9
Replacing the battery ................................................................................... Page 10
Setting up the remote- controlled socket .....................................................Page 10
Setting-up operation .......................................................................Page 11
Using the radio- controlled socket ...............................................................Page 11
Using the remote control..............................................................................Page 11
Troubleshooting ............................................................................................Page 11
Cleaning ....................................................................................................Page 12
Disposal ..................................................................................................... Page 12
Guarantee and service ................................................................. Page 13
Guarantee .................................................................................................... Page 13
Service address ............................................................................................ Page 13
Declaration of conformity ............................................................................ Page 13
Manufacturer ................................................................................................Page 14
5 GB/IE/NI
Page 6
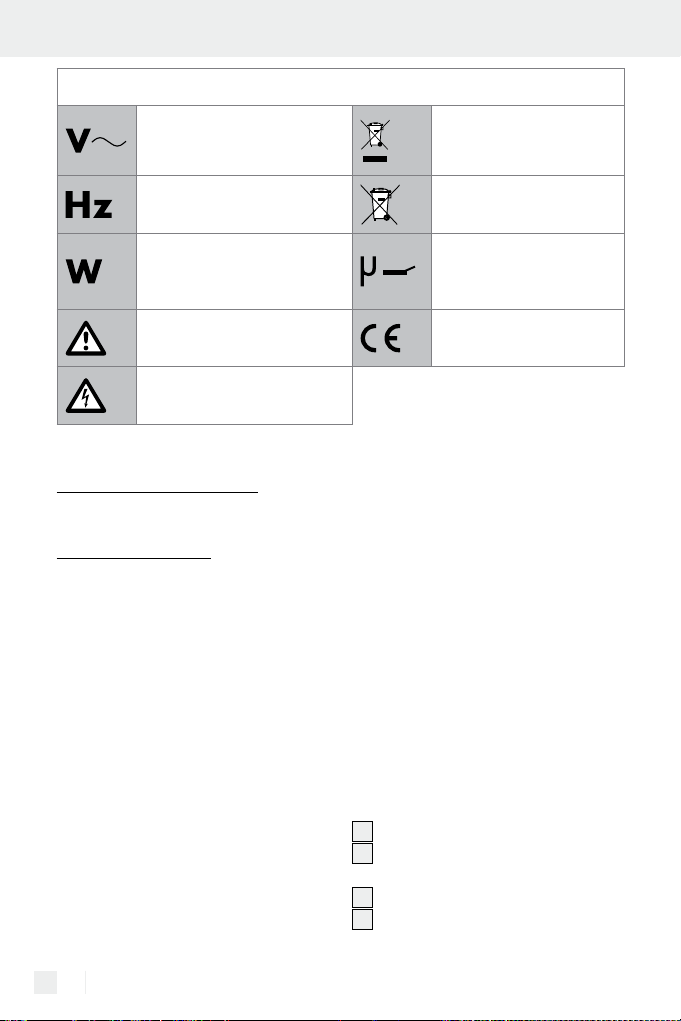
Legend of pictograms used
Volt (AC voltage)
Hertz (frequency)
Do not dispose of electric
appliances in household
rubbish!
Improper battery disposal
harms the environment!
Watt (effective power)
Observe warnings and
safety instructions!
Beware of electric shock!
Danger to life!
Wireless Socket Set
Q
Introduction
Q
Proper handling
The radio-controlled socket set is suitable
for switching electrical equipment on and
off by remote control. Any alterations to
this device are not in accordance with
regulations and could represent significant risk of accidents. The manufacturer
does not accept liability for any damage
caused through the device not being
used in accordance with the regulations.
This device is not intended for commercial
use.
Micro-switch with contact
opening < 3 mm
EU-compliant
Q
Scope of supply
After you have unpacked this set, please
check to make sure all the contents are
complete.
4 Remote controlled sockets
1 4-channel remote control
1 Button cell CR 2032, lithium 3 V
(in remote control)
1 Set of operating instructions
Q
Control elements
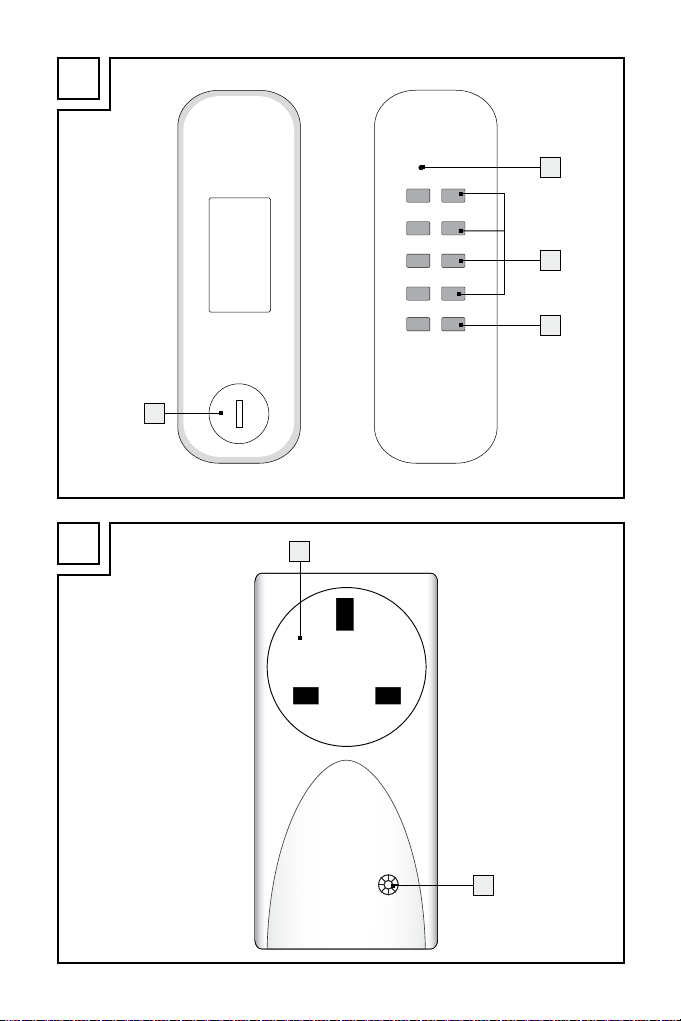
Remote control (fig. A):
1
Power indicator light
2
Channel ON / OFF button Channel
A, B, C, D
3
Master ON / OFF switch
4
Battery compartment lid
6 GB/IE/NI
Page 7

Remote-controlled socket (fig. B):
5
LED power indicator
6
Child protection socket
Q
Technical data
Wireless Socket Set
RC DP3 4001-A GB 3726
Remote control
RCT DS1 CR-A 3726:
Batteries: CR 2032, lithium
3 V
Frequency band: 433.05 MHz -
434.79 MHz
Radio frequency: 433.92 MHz
Max. transmitting
power: 0 dBm
Licensing: The system is li-
censed for general
use, is free of charge
and does not require registration.
Range: Depending on the
circumstances
approx. 40 m under
optimum circumstances.
Dimensions: 4.5 x 13.6 x
1.1 cm (W x H x D)
Weight: 37 g
Radio-controlled sockets
RCR DP3 3011-A IP20 GB 3726:
Rated voltage: 240 V~ 50 Hz
Breaking capacity: 13 A, 3000 W
Standby power
consumption: < 0.7 W
Transmission
frequency: 433.92 MHz
Protection class: I
Protection level: IP20
Switching load: essentially resistive
load
Switch type: single-pole, one
load
Encoding: 1.2
Switching cycles: 1E4 (10000)
Ambient
temperature: T35 (0° to 35°C)
Surge withstand
voltage: 2500 V
Shutdown type: μ (small contact
opening)
Pollution degree: 2
Insulation material
group: IIIa
Creeping current
resistance: PTI175
Glow wire
temperature: 850°C (level 3 for
parts in contact
with electric cables)
Dimensions: 5.1 x 9.5 x
5.3 cm (W x H x D)
Weight: 113 g
Advice: The radio-controlled sockets
each have a child protection socket
6
which significantly increases safety at
home. The contacts are protected in
such a way that children cannot stick
needles or other sharp objects into
them and thus get an electric shock.
Nevertheless, please keep the device
out of the reach of children at all times.
,
7 GB/IE/NI
Page 8

Q
Safety
Safety advice
Read these operating instructions and
safety advice carefully. Look at the diagram page and familiarise yourself with
all functions of the device before starting
it up for the first time.
Avoid danger to life from
electric shock!
Only connect the radio-controlled
sockets to earthed 240 V~ domestic
sockets.
At all costs, avoid exposure to
damp and extreme temperatures.
Only use the radio-controlled sockets
in enclosed spaces. They are not
suitable for outdoor use.
Despite the child protection socket
6
, please keep the device out of
the reach of children at all times.
Avoid overloading the device.
Overloading can cause a fire hazard
or damage to the device. The maximum capacity is approx. 3000 W
per radio-controlled socket.
Please contact the service department
immediately operational faults arise.
Do not open the device on any ac-
count. All necessary repairs should
only be carried out by the service
department or a specialist electrical
workshop.
Before cleaning always disconnect
the device from the mains supply. In
this case always remove the radiocontrolled electrical outlet socket
from the mains wall socket and
remove all plugs from the device.
Do not have one radio-controlled
electrical outlet socket inserted
behind the other.
Only voltage-free when unplugged.
Do not use any additional child
protection devices for the radio-
controlled sockets. The connection
between the plug and the radio-
controlled socket could be impaired
and risk from overheating then arises.
The radio-controlled sockets already
have a child protection device which
prevents children from putting any
objects into the socket.
Ensure that the outlet is installed
close to the connected product, is
easily accessible and that the prod-
uct is not operated while covered.
If the device malfunctions, switch it
off immediately.
These instructions are a component
of the device. If you pass the device
on to a third party, these instructions
must also be handed on.
Do not switch the wireless sockets
erratically or unattended.
Safety instructions
for batteries /
rechargeable
batteries
This product contains button cell batteries.
ATTENTION! Do not ingest battery;
risk of burns due to dangerous sub-
stances.
8 GB/IE/NI
Page 9

Keep new and used batteries away
from children. If a button cell battery
is swallowed, it can cause severe
internal burns in just 2 hours and
lead to death.
See a doctor immediately if a battery
has been swallowed or is located
in a part of the body.
If the battery compartment does
not close securely, stop using the
remote control and keep it away
from children.
DANGER OF EXPLO-
SION! Never recharge
non-rechargeable batteries. Do not short-circuit batteries /
rechargeable batteries and / or
open them. Overheating, fire or
bursting can be the result.
Never throw batter ies / rechargea-
ble batteries into fire or water.
Do not exert mechanical loads to
batteries / rechargeable batteries.
Risk of leakage of batteries /
rechargeable batteries
Avoid extreme environmental con-
ditions and temperatures, which
could affect batteries / rechargeable batteries, e.g. radiators / direct
sunlight.
If batteries / rechargeable batteries
have leaked, avoid contact with
skin, eyes and mucous membranes
with the chemicals! Flush immediately the affected areas with fresh
water and seek medical attention!
WEAR PROTECTIVE
GLOVES! Leaked or
damaged batteries /
rechargeable batteries can cause
burns on contact with the skin.
Wear suitable protective gloves at
all times if such an event occurs.
In the event of a leakage of batter-
ies / rechargeable batteries, immediately remove them from the
product to prevent damage.
Only use the same type of batteries /
rechargeable batteries. Do not mix
used and new batteries / rechargeable batteries.
Remove batteries / rechargeable
batteries if the product will not be
used for a longer period.
Risk of damage of the product
Only use the specified type of bat-
tery / rechargeable battery!
Insert batteries / rechargeable bat-
teries according to polarity marks
(+) and (-) on the battery / rechargeable battery and the product.
Clean the contacts on the battery /
rechargeable battery and in the
battery compartment before inserting!
Remove exhausted batteries /
rechargeable batteries from the
product immediately.
Q
Setting up
Preparing the remote
control
Note: The button cell is already in the
battery compartment. Remove the contract strips by opening the battery compartment as described below.
9 GB/IE/NI
Page 10

Replacing the battery
CAUTION! Danger of explosion
in the case of improper battery replacement. Only replace with the
same or equivalent battery type.
1. Open the battery compartment on
the back of the remote control by
turning the battery compartment
4
cover
anti-clockwise with the
aid of a coin or a screwdriver, then
removing the lid (open).
2.
Replace the button cell type CR
2032.
Make sure you fit the battery
with the correct polarity (+ = up).
3. Place the battery compartment
4
cover
back on and lock it in
place by turning it in a clockwise
direction (close).
4. Press one of the ON / OFF buttons
2
or 3 to test whether the remote
control works; if it does, the power
indicator light will come on
Q
Setting up the remote-
1
.
controlled socket
1. Plug the remote-controlled socket
into an earthed household socket.
2. The LED operating status display
5
will now flash slowly for approx.
30 seconds after plugging in.
3. Aim the remote control at the
remote-controlled socket at a
distance of approx. 50 cm.
4. With the LED operating status dis-
5
play
flashing, press the desired
ON button of the channel ON /OFF
2
button
(A, B, C or D) on the remote control. The LED operating
status display
5
will now light
continuously. You can now use the
remote control to switch a connected device on or off using.
5. Repeat this process with the other
wireless sockets.
Note: You can use one channel
ON / OFF button
2
to switch
several remote-controlled sockets
at once. You can further train six
remote controls successively and
use these for a single receiver. This
means you can switch one appliance
on and off from up to six different
places. In this case, synchronise
every remote-controlled socket with
the channel of the remote control.
Note: The codes for the remote
control will also remain stored
when changing the batteries.
Note: The codes will remain
permanently stored when disconnecting the remote-controlled
socket from the power supply.
However, the remote control cannot
be used for at least 30 seconds after the connection is renewed, as
this can cause new encoding to
take place.
Note: Avoid interference: Ensure
the various remote-controlled sockets
are approx. 50 cm apart.
Note: The LED operating status dis-
5
play
indicates if the remote-con-
trolled socket is in ON / OFF mode.
10 GB/IE/NI
Page 11

Deleting a code:
To delete a code, first repeat steps
1–3.
With the LED operating display 5
flashing, press the desired OFF
button of the channel ON/ OFF
2
button
(A, B, C or D) you wish
to delete on the remote control.
The LED operating status display 5
will flash rapidly for approx. 2 seconds to confirm deletion.
It will then flash slowly again for
approx. 30 seconds and a new
code entered.
Deleting all codes:
To delete all codes, first repeats
steps 1–3.
Then with the LED operating status
display
ALL-OFF button
5
flashing, press the
3
on the remote
control. The LED operating status
display
5
will flash rapidly for
approx. 2 seconds to confirm deletion, then go out.
Q
Setting-up operation
Q
Using the radiocontrolled socket (fig. B)
ATTENTION! FIRE HAZARD!
Do not attach any appliances which
could cause fires or other damaged
if left unattended when switched
on. The maximum load of every
radio-controlled socket is approx.
3000 W. Any overload could cause
a risk of fire or damage to the device.
Q
Using the remote
control (fig. A)
The remote control will control up to 4
remote-controlled sockets (individually,
in groups or simultaneously).
1. Press the desired ON button of the
channel ON / OFF button
B, C or D) on the remote control of
the device you wish to switch on.
The LED status light
erating control lamp
2. Press the desired OFF button of the
channel ON / OFF button
B, C or D) on the remote control for
the device you wish to switch off.
The LED operating status display
will go out.
3. Confirm the ALL ON / OFF button
3
to switch all remote-controlled
sockets simultaneously.
2
5
and the op-
1
will light up.
2
(A,
(A,
5
1. Put the radio-controlled socket into
any shuttered socket and connect
the appliance you want to operate.
2. Switch the electrical appliance on.
The radio-controlled socket can
only perform its switching function
when the device to be controlled is
switched on.
Q
Troubleshooting
If the remote control does not
work, please check the following points:
11 GB/IE/NI
Page 12

Problem
Remedy
Problem
Remedy
The operating indica-
1
tor
on the remote
control device illuminates but there is no
reaction
· Check if the battery still
has sufficient Ampere. If
necessary, install a new
battery.
No indicator light
1
on remote control
when pressing “ON”
or “OFF”
· Check if the battery is
inserted correctly.
· Check if the battery has
good contact, if necessary press down.
Prob-
Range is too small
lem
Remedy
· For large ranges, ensure
that as few walls and as
little furniture as possible
are in the way of the
remote control and the
radio-controlled socket.
· If the range is too small
at times, the reason could
be a remote control which
works on a similar frequency. Whenever this remote control is active, the
range declines (e.g. wireless headphones, radiocontrolled movement
alarms, radio gongs etc.).
Problem
Rem-
No reaction from
consumer
· Check that the appliance
edy
· Assign a new code to
· Check - by walking closer
12 GB/IE/NI
is switched on.
the wireless socket (see
“Setting up the wireless
socket”).
to it - that the range is
correct for the desired
location.
Q
Cleaning
Before cleaning, always disconnect
the radio-controlled socket from the
wall socket and remove all power
plugs from the device.
Ensure that no liquids get into the
inside of the device. Use a soft cloth
to clean the housing. Never use
petroleum, solvents or cleaners
which corrode plastics.
Q
Disposal
Electrical appliances
must not be disposed
of with domestic waste.
Page 13

In accordance with Council Directive
2012/19/EC on waste electrical and
electronic equipment (WEEE), used
electrical appliances, lighting equipment
and batteries have to be collected separately and recycled in an environmentally
friendly way. Enquire at your city council
or local government regarding the possibilities of disposing of electronic waste in
a correct and environmentally friendly
way.
The guarantee only applies to faults in
materials or workmanship when used
properly. The guarantee lapses in cases
of unauthorized tampering. This guarantee does not restrict your legal rights.
If you wish to make a claim under the
guarantee, please telephone the service
centre. Only by doing so can we ensure
that your appliance is returned free of
charge.
The product packaging is made from
recyclable materials. Please dispose of
these in an environmentally friendly
way and ensure that they are sorted
into the appropriate collection bins.
Environmental damage
through incorrect disposal of the batteries!
Batteries should not be disposed of with
domestic waste. They may contain toxic
heavy metals and are subject to hazardous waste treatment rules and regulations.
That is why you should dispose of used
batteries at a local collection point.
Q
Guarantee and service
Q
Guarantee
This appliance comes with a 3-year
guarantee commencing on the date of
purchase. Please keep your receipt as
proof of purchase. The appliance has
been produced to the highest standards
and thoroughly checked before dispatch.
Q
Service address
BAT
Lindenstraße 35
DE-72074 Tübingen
GERMANY
E-mail: exp@bat-tuebingen.com
Service Tel.: 00800 48720741
For further information, we recommend
you visit the service section / FAQs of
our home page www.dvw-service.com.
There, you will also find these instructions
for use as a PDF document.
IAN 322055
Q
Declaration of
conformity
BAT declares that the wireless system
model RC DP3 4001-A GB 3726
complies with EU directives
2014/53/EU and 2011/65/EU (incl.
2015/863/EU).
The full text of the EU declaration of
conformity is available at:
13 GB/IE/NI
Page 14

www.dvw-service.com/
konformitaetserklaerung/ke_
1008463706.pdf
Q
Manufacturer
BAT
Lindenstraße 35
DE-72074 Tübingen
GERMANY
14
GB/IE/NI
Page 15

Legende der verwendeten Piktogramme .................... Seite 16
Einleitung .................................................................................................. Seite 16
Bestimmungsgemäßer Gebrauch ................................................................Seite 16
Lieferumfang ................................................................................................. Seite 16
Bedienelemente ............................................................................................ Seite 16
Technische Daten ......................................................................................... Seite 17
Sicherheit .................................................................................................. Seite 18
Sicherheitshinweise ...................................................................................... Seite 18
Sicherheitshinweise für Batterien / Akkus .................................................... Seite 19
Vorbereitung .........................................................................................Seite 20
Fernbedienung vorbereiten ......................................................................... Seite 20
Batterie ersetzen ...........................................................................................Seite 20
Funksteckdose vorbereiten .......................................................................... Seite 20
Inbetriebnahme .................................................................................. Seite 21
Funksteckdose benutzen .............................................................................. Seite 21
Fernbedienung benutzen ............................................................................. Seite 21
Fehlerhinweise .............................................................................................. Seite 22
Reinigung ................................................................................................. Seite 22
Entsorgung .............................................................................................. Seite 23
Garantie und Service ..................................................................... Seite 23
Garantieerklärung ........................................................................................Seite 23
Serviceadresse ............................................................................................. Seite 23
Konformitätserklärung .................................................................................. Seite 24
Hersteller .......................................................................................................Seite 24
15 DE/AT/CH
Page 16

Legende der verwendeten Piktogramme
Volt (Wechselspannung)
Hertz (Frequenz)
Watt (Wirkleistung)
Warn- und Sicherheitshinweise beachten!
Vorsicht vor elektrischem
Schlag! Lebensgefahr!
Funksteckdosen-Set
Einleitung
Bestimmungsgemäßer
Gebrauch
Das Funksteckdosen-Set ist zum ferngesteuerten Ein- und Ausschalten von
Elektrogeräten geeignet. Alle Veränderungen des Gerätes sind nicht bestimmungsgemäß und können erhebliche
Unfallgefahren bedeuten. Der Hersteller
übernimmt für aus bestimmungswidriger
Verwendung entstandene Schäden keine
Haftung.
gewerblichen
Dieses Gerät ist nicht für den
Einsatz bestimmt.
Elektrogeräte nicht in den
Hausmüll werfen!
Umweltschäden durch
falsche Entsorgung der
Batterien!
Mikroschalter mit einer
Kontaktöffnung < 3 mm
EU-konform
Lieferumfang
Prüfen Sie dieses Set nach dem Auspacken auf seinen vollständigen Inhalt.
4 Funksteckdosen
1 4-Kanal-Fernbedienung
1 Knopfzelle CR 2032, Lithium 3 V
(in Fernbedienung)
1 Bedienungsanleitung
Bedienelemente
Fernbedienung (Abb. A):
1
Betriebskontroll-Leuchte
2
Kanal-ON- / OFF-Taste Kanal A , B, C, D
3
ALL-ON- / OFF-Taste (Master-
EIN / AUS)
4
Batteriefachabdeckung
16 DE/AT/CH
Page 17

Funksteckdose (Abb. B):
5
LED-Betriebsanzeige
6
Kinderschutz-Steckdose
Technische Daten
Funksteckdosen-Set
RC DP3 4001-A GB 3726
Fernbedienung
RCT DS1 CR-A 3726:
Batterien: CR 2032, Lithium
3 V
Frequenzband: 433,05MHz -
434,79MHz
Funkfrequenz: 433,92 MHz
Max. Sendeleistung: 0 dBm
Zulassung: Das System besitzt
eine allgemeine
Zulassung (BZT)
und ist anmelde-
und gebührenfrei.
Reichweite: abhängig von den
Umgebungsbedin-
gungen ca. 40 m
bei optimalen Be-
dingungen
Maße: 4,5 x 13,6 x
1,1 cm (B x H x T)
Gewicht: 37 g
Funksteckdose
RCR DP3 3011-A IP20 GB 3726:
Nennspannung: 240 V∼, 50 Hz
Max. Schaltleistung: 13 A, 3000 W
Stand-by-Verbrauch: < 0,7 W
Übertragungsfrequenz: 433,92 MHz
Schutzklasse: I
Schutzgrad: IP20
Schaltlast: wesentlich
ohmsche Last
Schalterart: einpolig, eine Last
Kodierung: 1.2
Schaltzyklen: 1E4 (10000)
Umgebungstemperatur: T35 (0 ° bis
35 °C)
Stehstoßspannung: 2500 V
Abschaltungsart: μ (kleine Kontakt-
öffnung)
Verschmutzungsgrad: 2
Isolierstoffgruppe: IIIa
Kriechstromfestigkeit: PTI175
Glühdrahttemperatur: 850 °C (Level 3
für Teile in Kontakt
mit elektr. Leitungen)
Maße: 5,1 x 9,5 x
5,3 cm (B x H x T)
Gewicht: 113 g
Hinweis: Die Funksteckdosen verfügen
jeweils über eine Kinderschutz-Steckdose
6
. Dadurch wird die häusliche Sicherheit erheblich erhöht. Die Kontakte sind
entsprechend geschützt, so dass Kinder
keine leitende Verbindung (mit Nadeln
o.ä.) herstellen können. Bewahren Sie das
Gerät trotzdem außerhalb der Reichweite von Kindern auf.
17 DE/AT/CH
Page 18

Sicherheit
Sicherheitshinweise
Lesen Sie diese Bedienungsanleitung
und Sicherheitshinweise aufmerksam
durch. Klappen Sie die Bildseite aus
und machen Sie sich vor der ersten
Inbetriebnahme mit allen Funktionen
des Gerätes vertraut.
Vermeiden Sie Lebensgefahr
durch elektrischen Schlag!
Schließen Sie die Funksteckdosen
nur an geerdete 240 Volt Haushaltssteckdosen an.
Vermeiden Sie unbedingt die
Einwirkung von Feuchtigkeit und
extremen Temperaturen.
Verwenden Sie die Funksteckdosen
nur in geschlossenen Räumen. Sie
sind nicht für den Außenbereich
geeignet.
Bewahren Sie das Gerät trotz
Kinderschutz-Steckdose
außerhalb der Reichweite von
Kindern auf.
Vermeiden Sie eine Überlastung
des Gerätes. Bei Überlastung kann
Brandgefahr oder Schaden am
Gerät auftreten. Die maximale
Belastbarkeit beträgt ca. 3000 W
je Funksteckdose.
Wenden Sie sich bei Funktions-
störungen bitte sofort an die
Servicestelle.
Öffnen Sie das Gerät auf keinen
Fall selbst. Lassen Sie notwendige
Reparaturen ausschließlich von der
6
immer
Servicestelle oder einer ElektroFachwerkstatt ausführen.
Unterbrechen Sie vor der Reinigung
des Gerätes unbedingt den Stromfluss. Trennen Sie in diesem Fall
immer die Funksteckdose von der
Wandsteckdose und alle Netzstecker
vom Gerät.
Stecken Sie die Funksteckdosen
nicht hintereinander.
Spannungsfrei nur bei gezogenem
Stecker.
Verwenden Sie keine zusätzlichen
Kindersicherungen für die Funksteckdosen. Die Verbindung zwischen
Stecker und Funksteckdose könnte
beeinträchtigt werden und die
Gefahr der Überhitzung besteht.
Die Funksteckdosen verfügen bereits
über eine Kindersicherung, welche
verhindert, dass Kinder irgendwelche
Gegenstände in die Steckdose
einbringen können.
Stellen Sie sicher, dass die Steckdose
in der Nähe des angeschlossenen
Produktes angebracht, leicht zugänglich ist und das Produkt nicht
abgedeckt betrieben wird.
Schalten Sie bei Störungen das
Gerät sofort aus.
Diese Anleitung ist ein Bestandteil
des Gerätes. Geben Sie diese deshalb bei Weitergabe des Gerätes
an Dritte unbedingt auch weiter.
Schalten Sie die Funksteckdosen
nicht unkontrolliert und nicht ohne
Aufsicht.
18 DE/AT/CH
Page 19

Sicherheitshinweise
für Batterien /
Akkus
Dieses Produkt enthält Knopfzellen.
ACHTUNG! Batterie nicht ein-
nehmen, Verbrennungsgefahr durch
gefährliche Stoffe.
Neue und gebrauchte Batterien von
Kin dern fernhalten. Wenn eine
Knopfzelle verschluckt wird, können
schwere innere Verbrennungen innerhalb von gerade einmal 2 Stunden
auftreten und zum Tode führen.
Sofort einen Arzt aufsuchen, wenn
eine Batterie verschluckt wurde oder
sich in einem Körperteil befindet.
Wenn das Batteriefach nicht sicher
schließt, die Fernbedienung nicht
mehr benutzen und von Kindern
fernhalten.
EXPLOSIONSGE-
FAHR! Laden Sie nicht
aufladbare Batterien
niemals wieder auf. Schließen Sie
Batterien / Akkus nicht kurz und /
oder öffnen Sie diese nicht. Überhitzung, Brandgefahr oder Platzen
können die Folge sein.
Werfen Sie Batterien / Akkus niemals
in Feuer oder Wasser.
Setzen Sie Batterien / Akkus keiner
mechanischen Belastung aus.
Risiko des Auslaufens von
Batterien / Akkus
Vermeiden Sie extreme Bedingungen
und Temperaturen, die auf Batterien /
Akkus einwirken können z. B. auf
Heizkörpern / direkte Sonneneinstrahlung.
Vermeiden Sie den Kontakt mit Haut,
Augen und Schleimhäuten! Spülen
Sie bei Kontakt mit Batteriesäure
die betroffenen Stellen sofort mit
klarem Wasser und suchen Sie
umgehend einen Arzt auf!
SCHUTZHAND-
SCHUHE TRAGEN!
Ausgelaufene oder beschädigte Batterien / Akkus können
bei Berührung mit der Haut Verätzungen verursachen. Tragen Sie
deshalb in diesem Fall geeignete
Schutzhandschuhe.
Im Falle eines Auslaufens der
Batterien / Akkus entfernen Sie
diese sofort aus dem Produkt, um
Beschädigungen zu vermeiden.
Verwenden Sie nur Batterien / Akkus
des gleichen Typs. Mischen Sie nicht
alte Batterien / Akkus mit neuen!
Entfernen Sie die Batterien / Akkus,
wenn das Produkt längere Zeit
nicht verwendet wird.
Risiko der Beschädigung des
Produkts
Verwenden Sie ausschließlich den
angegebenen Batterietyp / Akkutyp!
Setzen Sie Batterien / Akkus gemäß
der Polaritätskennzeichnung (+)
und (-) an Batterie / Akku und des
Produkts ein.
Reinigen Sie Kontakte an Batterie /
Akku und im Batteriefach vor dem
Einlegen!
Entfernen Sie erschöpfte Batterien /
Akkus umgehend aus dem Produkt.
19 DE/AT/CH
Page 20

Vorbereitung
Fernbedienung
vorbereiten
Hinweis: Die Knopfzelle liegt bereits
im Batteriefach. Entfernen Sie den Kontaktstreifen, indem Sie das Batteriefach
wie nachfolgend beschrieben öffnen.
Batterie ersetzen
ACHTUNG! Explosionsgefahr bei
unsachgemäßem Auswechseln der
Batterie. Ersatz nur durch denselben
oder einen gleichwertigen Batterietyp.
1. Öffnen Sie das Batteriefach auf der
Rückseite der Fernbedienung, indem
Sie die Batteriefachabdeckung
mit einer Münze oder einem
Schraubendreher entgegen der
Uhrzeigerrichtung drehen und
herausnehmen (open).
2. Ersetzen Sie die Knopfzelle Typ CR
2032. Achten Sie auf die richtige
Polarität (+ = oben).
3. Legen Sie die Batteriefachabdeckung
4
wieder ein und verriegeln Sie
diese durch Drehen im Uhrzeigersinn (close).
4. Drücken Sie eine der ON- / OFF-
2
Tasten
ob die Fernbedienung funktioniert;
wenn ja, leuchtet die BetriebskontrollLeuchte
oder 3, um zu prüfen,
1
.
4
Funksteckdose
vorbereiten
1. Stecken Sie die Funksteckdose in
eine geerdete Haushaltssteckdose.
2. Die LED-Betriebsanzeige
nun langsam für ca. 30 Sekunden
ab dem Einstecken.
3. Halten Sie die Fernbedienung mit
einem Abstand von ca. 50 cm auf
die Funksteckdose gerichtet.
4. Drücken Sie während des Blinkens
der LED-Betriebsanzeige
gewünschte ON-Taste der KanalON- / OFF-Taste
an der Fernbedienung. Die LEDBetriebsanzeige
dauerhaft. Sie können nun einen
angeschlossenen Verbraucher mit
dieser Taste ferngesteuert ein- oder
ausschalten.
5. Wiederholen Sie diesen Vorgang
mit den anderen Funksteckdosen.
Hinweis: Sie können mit einer
Kanal-ON- / OFF-Taste
Funksteckdosen gleichzeitig schalten.
Außerdem können Sie sechs Fernbedienungen nacheinander einlernen
und diese für einen einzelnen Empfänger verwenden. So kann ein Gerät von bis zu sechs verschiedenen
Plätzen geschaltet werden. Synchronisieren Sie in diesem Fall jede
Funksteckdose mit dem Kanal der
Fernbedienung.
Hinweis: Der Code der Fernbedienung bleibt auch dann erhalten,
wenn Sie die Batterien wechseln.
Hinweis: Wenn Sie die Funksteckdose vom Netz nehmen, bleiben die
2
(A, B, C oder D)
5
leuchtet jetzt
5
blinkt
5
die
2
mehrere
20 DE/AT/CH
Page 21

Codierungen dauerhaft gespeichert.
Die Fernbedienung darf jedoch
mind. 30 Sekunden nach erneuter
Verbindung nicht bedient werden,
da dadurch eine neue Codierung
entstehen kann.
Hinweis: Vermeiden Sie Störungen:
Stellen Sie sicher, dass der Abstand
zwischen den verschiedenen Funksteckdosen ca. 50 cm beträgt.
Hinweis: Die LED-Betriebsanzeige
5
zeigt an, ob die Funksteckdose
im EIN- / AUS-Modus ist.
Eine Codierung löschen:
Um eine Codierung wieder zu lö-
schen, wiederholen Sie zuerst den
Vorgang 1.–3.
Drücken Sie dann während des
Blinkens der LED-Betriebsanzeige
die gewünschte OFF-Taste der KanalON- / OFF-Taste
an der Fernbedienung, welche Sie
löschen wollen.
Die LED-Betriebsanzeige 5 blinkt
zur Bestätigung des Löschvorgangs
für ca. 2 Sekunden schnell.
Anschließend blinkt diese wieder
langsam für ca. 30 Sekunden und
kann eine neue Codierung einlernen.
Alle Codierungen löschen:
Um alle Codierungen zu löschen,
wiederholen Sie zuerst den Vorgang 1.–3.
Drücken Sie dann während des
Blinkens der LED-Betriebsanzeige
die ALL-OFF-Taste
bedienung. Die LED-Betriebsanzeige
5
blinkt zur Bestätigung des
2
(A, B, C oder D)
3
an der Fern-
5
5
Löschvorgangs für ca. 2 Sekunden
schnell und erlischt anschließend.
Inbetriebnahme
Funksteckdose
benutzen (Abb. B)
1. Stecken Sie die Funksteckdose in
eine beliebige Schutzkontaktsteckdose ein und schließen Sie den zu
schaltenden Verbraucher an.
2. Schalten Sie das Verbrauchergerät
ein. Die Funksteckdose kann die
Schaltfunktion nur dann übernehmen,
wenn das zu schaltende Gerät
eingeschaltet ist.
VORSICHT! BRANDGEFAHR!
Schließen Sie keine Geräte an,
deren unbeaufsichtigtes Einschalten
Brände oder andere Schäden verursachen könnte. Die maximale
Belastbarkeit je Funksteckdose beträgt ca. 3000 W. Eine Überlastung
kann Brandgefahr oder Schaden
am Gerät verursachen.
Fernbedienung
benutzen (Abb. A)
Die Fernbedienung steuert bis zu 4
Funksteckdosen (einzeln, in Gruppen
oder alle gleichzeitig).
1. Drücken Sie die gewünschte ONTaste der Kanal-ON- / OFF-Taste
(A, B, C oder D) an der Fernbedienung, dessen Verbraucher Sie
einschalten wollen. Die LED-Betriebs-
2
21 DE/AT/CH
Page 22

anzeige 5 und die Betriebskontroll-Leuchte
1
leuchten.
2. Drücken Sie die gewünschte OFFTaste der Kanal-ON- / OFF-Taste
(A, B, C oder D) an der Fernbedienung, dessen Verbraucher Sie
ausschalten wollen. Die LEDBetriebsanzeige
5
erlischt.
3. Betätigen Sie die ALL-ON- / OFF-
3
Taste
, um alle Funksteckdosen
gleichzeitig zu schalten.
Problem
Ab-
2
hilfe
Keine Reaktion am
Verbraucher
· Prüfen Sie, ob der Verbraucher eingeschaltet ist.
· Ordnen Sie der Funksteckdose einen neuen
Code zu (siehe „Funksteckdose vorbereiten“).
· Stellen Sie durch Annähern
fest, ob die Reichweite
ausreichend für den gewünschten Standort ist.
Fehlerhinweise
Sollte die Fernschaltung nicht
funktionieren, prüfen Sie bitte
das System auf folgende Punkte:
Problem
Abhilfe
Problem
Abhilfe
BetriebskontrollLeuchte
1
an der Fernbedienung leuchtet,
keine Reaktion
· Prüfen Sie, ob die Ampere-
Leistung der Batterie noch
ausreichend ist. Setzen
Sie gegebenenfalls eine
neue Batterie ein.
BetriebskontrollLeuchte
1
an der Fernbedienung leuchtet
nicht beim Drücken
von ON oder OFF
· Prüfen Sie, ob die Batterie
falsch eingelegt ist.
· Prüfen Sie, ob die Batterie
guten Kontakt hat, evtl.
andrücken.
Prob-
Reichweite zu gering
lem
Abhilfe
· Stellen Sie für hohe
Reichweiten sicher, dass
möglichst wenig Wände,
Möbel etc. zwischen
Fernbedienung und Funksteckdose liegen.
· Wenn die Reichweite nur
zeitweise gering ist, kann
der Grund in einem Sender, der auf einer ähnlichen Frequenz arbeitet,
liegen. Sobald dieser
Sender aktiv ist, sinkt die
Reichweite (z. B. drahtlose
Kopfhörer, Funkbeweg
ungs-
melder, Funkgong etc.).
Reinigung
Trennen Sie vor der Reinigung
immer die Funksteckdose von der
Wandsteckdose und alle Netzstecker
vom Gerät.
Es dürfen keine Flüssigkeiten in
das Innere des Gerätes gelangen.
22 DE/AT/CH
Page 23

Verwenden Sie zum Reinigen des
Gehäuses ein weiches Tuch. Verwenden Sie niemals Benzin, Lösungsmittel oder Reiniger, die Kunststoff
angreifen.
Entsorgung
Elektrogeräte nicht in
den Hausmüll werfen!
Gemäß Europäischer Richtlinie
2012/19/EC über Elektro- und Elektroni
Altgeräte müssen verbrauchte Elektrogeräte, Leuchtmittel und Batterien getrennt
gesammelt und einer umweltgerechten
Wiederverwertung zugeführt werden.
Möglichkeiten zur Entsorgung des ausgedienten Geräts erfahren Sie bei Ihrer
Gemeinde- oder Stadtverwaltung.
Garantie und Service
Garantieerklärung
3 Jahre Garantie ab Kaufdatum auf dieses
Gerät. Bitte Kassenbon als Nachweis
aufbewahren. Das Gerät wurde sorgfältig
produziert und vor Auslieferung gewissenhaft geprüft. Die Garantieleistung gilt
nur für Material- oder Fabrikationsfehler
bei sachgemäßer Verwendung. Die
Garantie erlischt bei Fremdeingriff. Ihre
gesetzlichen Rechte werden durch diese
Garantie nicht eingeschränkt. Im Garantie-
k-
fall mit der Servicestelle telefonisch in
Verbindung setzen. Nur so kann eine
kostenlose Einsendung Ihres Geräts
gewährleistet werden.
Serviceadresse
Die Produktverpackung besteht aus
recyclingfähigen Materialien. Entsorgen
Sie diese umweltgerecht in den bereitgestellten Sammelbehältern.
Umweltschäden durch
falsche Entsorgung der
Batterien!
Batterien gehören nicht in den Hausmüll.
Sie können giftige Schwermetalle enthalten und unterliegen der Sondermüllbehandlung. Geben Sie deshalb
verbrauchte Batterien bei einer kommunalen Sammelstelle ab.
BAT
Lindenstraße 35
DE-72074 Tübingen
DEUTSCHLAND
E-Mail: exp@bat-tuebingen.com
Service-Tel.: 00800 48720741
Für weitere Informationen empfehlen wir
den Bereich Service / FAQ‘s auf unserer
Homepage www.dvw-service.com.
Dort finden Sie auch diese Anleitung im
PDF-Format.
IAN 322055
23 DE/AT/CH
Page 24

Konformitätserklärung
Hiermit erklärt BAT, dass der Funkanlagentyp RC DP3 4001-A GB 3726
der Richtlinie 2014/53/EU und
2011/65/EU (inkl. 2015/863/EU)
entspricht.
Der vollständige Text der EU-Konformitätserklärung ist unter der folgenden
Internetadresse verfügbar:
www.dvw-service.com/
konformitaetserklaerung/
ke_1008463706.pdf
Hersteller
BAT
Lindenstraße 35
DE-72074 Tübingen
DEUTSCHLAND
24 DE/AT/CH
Page 25

BAT
Lindenstraße 35
72074 Tübingen
GERMANY
Last Information Update · Stand der
Informationen: 04 / 2019 · Ident.-No.:
0499591 042019-GB / IE / NI
IAN 322055
 Loading...