

Page 1

MAMMOMAT 300/1000/3000/3000 Nova
SP
Service
Replacement of parts
Compression plates
© Siemens AG 2001
The reproduction, transmission or
use of this document or its contents
is not permitted without express
written authority. Offenders will be
liable for damages. All rights,
including rights created by patent
grant or registration of a utility
model _or_ design,_are_ reserved.
English
Print No.: SPB7-230.841.01.05.02 Doc. Gen. Date: 12.04
Replaces: SPB7-230.841.01.04.02
Page 2

0 - 2 Revision
Chapter Page Revision
all all 05
Document revision level
The document corresponds to the version/revision level effective at the time of system delivery. Revisions to hardcopy documentation are not automatically distributed.
Please contact your local Siemens office to order current revision levels.
Disclaimer
The installation and service of equipment described herein is to be performed by qualified personnel
who are employed by Siemens or one of its affiliates or who are otherwise authorized by Siemens or
one of its affiliates to provide such services.
Assemblers and other persons who are not employed by or otherwise directly affiliated with or authorized by Siemens or one of its affiliates are directed to contact one of the local offices of Siemens or
one of its affiliates before attempting installation or service procedures.
M 300/1000/3000/3000 Nova SPB7-230.841.01 Page 2 of 4 Siemens AG
Service Rev. 05 12.04 CS PS 24 Medical Solutions
Page 3

Contents 0 - 3
Page
1 _______Prerequisites __________________________________________________ 1 - 1
General . . . . . . . . . . . . . . . . . . . . . . . . . . . . . . . . . . . . . . . . .1 - 1
Tools required . . . . . . . . . . . . . . . . . . . . . . . . . . . . . . . . . . . . . . 1 - 2
Time required . . . . . . . . . . . . . . . . . . . . . . . . . . . . . . . . . . . . . . 1 - 2
Parts included . . . . . . . . . . . . . . . . . . . . . . . . . . . . . . . . . . . . . . 1 - 3
2 _______Replacement procedures ________________________________________ 2 - 1
Replace the plastic tray . . . . . . . . . . . . . . . . . . . . . . . . . . . . . . . . . 2 - 1
Plastic tray with frame, former version, unmodified. . . . . . . . . . . . . . . . . . 2 - 1
Plastic tray with frame, newer version, modified. . . . . . . . . . . . . . . . . . . 2 - 1
Spot plastic tray . . . . . . . . . . . . . . . . . . . . . . . . . . . . . . . . . . . 2 - 3
Flexible plastic tray and rubber springs . . . . . . . . . . . . . . . . . . . . . . . 2 - 4
Attach the identification label . . . . . . . . . . . . . . . . . . . . . . . . . . . . . . 2 - 5
3 _______Adjustment procedures _________________________________________ 3 - 1
Final check and adjustment of the compression plate . . . . . . . . . . . . . . . . . 3 - 1
Low edge compression plate . . . . . . . . . . . . . . . . . . . . . . . . . . . . 3 - 1
High edge compression plate . . . . . . . . . . . . . . . . . . . . . . . . . . . . 3 - 2
4 _______Changes to previous version _____________________________________ 4 - 1
Siemens AG SPB7-230.841.01 Page 3 of 4 M 300/1000/3000/3000 Nova
Medical Solutions Rev. 05 12.04 CS PS 24 Service
Page 4

0 - 4 Contents
M 300/1000/3000/3000 Nova SPB7-230.841.01 Page 4 of 4 Siemens AG
Service Rev. 05 12.04 CS PS 24 Medical Solutions
Page 5

Prerequisites 1
General 1
These instructions describe how to replace and adjust the plastic trays and the frames on
the MAMMOMAT 300/1000/3000/3000 Nova.
These instructions are valid for the plastic trays listed below and for the rubber spring
kit (part No. 65 76 172).
• In cases of Mammomat 300/1000/3000/3000 Nova with all serial no.
Article Part no.
Spot frosted old 64 20 991
Spot clear new 64 14 119
Stereo 63 96 548
Biopsy 64 14 143
Shadow cross 63 96 993
• In cases of Mammomat 1000/3000/3000 Nova from serial no. > 7000 or, if below, then in
cases when upgraded with AEC (part no. 64 83 783)
1 - 1
Article Part no.
18 x 24 64 83 809
24 x 30 64 83 817
18 H 64 83 833
24 H 64 83 841
Axilla 64 83 825
Mag 1.5 64 83 858
Mag 1.8 64 83 866
18 H Flexible 65 76 065
24 H Flexible 65 76 024
Siemens AG SPB7-230.841.01 Page 1 of 4 M 300/1000/3000/3000 Nova
Medical Solutions Rev. 05 12.04 CS PS 24 Service
Page 6
1 - 2 Prerequisites
• In cases of Mammomat 300/1000/3000 with serial no. 6999 or lower and not upgraded
with AEC (part no. 64 83 783)
Article Part no.
18 x 24 63 97 348
24 x 30 64 14 085
18 H 65 61 091
24 H 65 61 117
Axilla 64 14 101
Mag 1.5 64 14 127
Mag 1.8 64 14 135
18 H Flexible 65 76 131
24 H Flexible 65 76 149
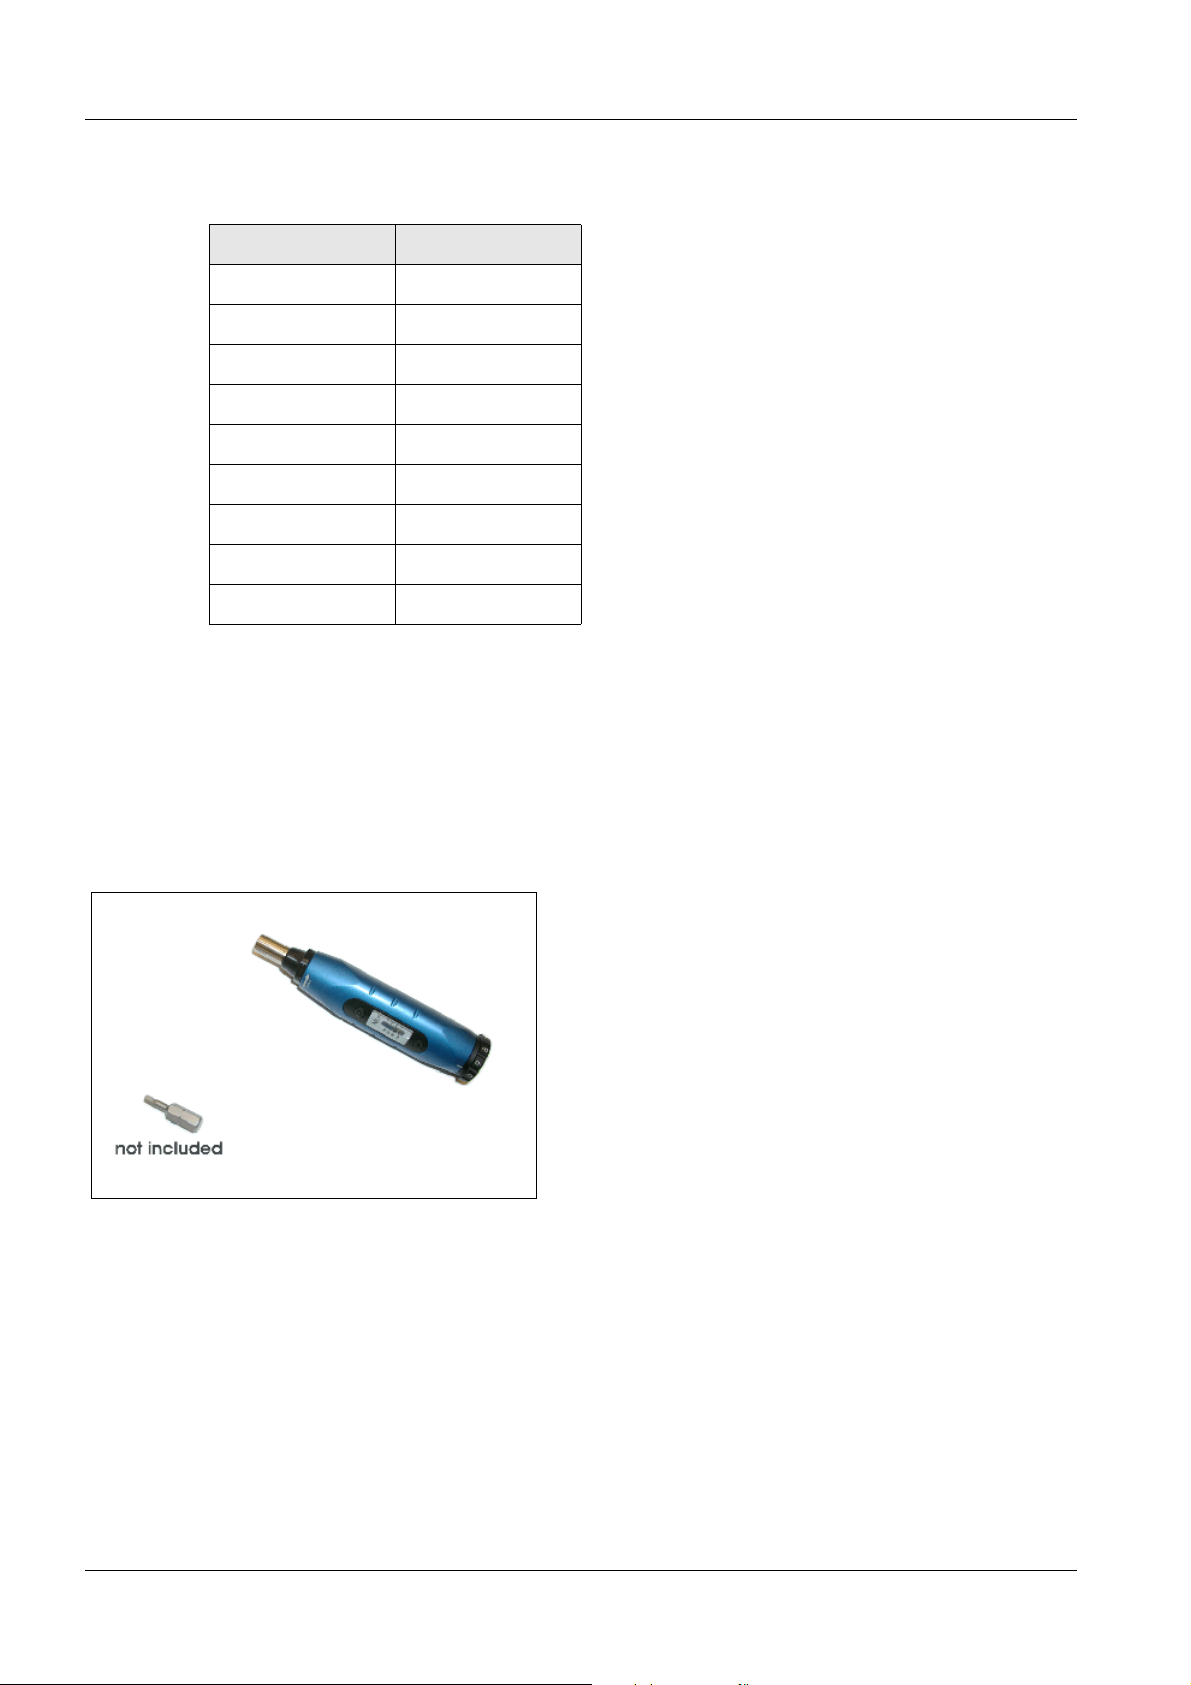
Tools required 1
A standard tool kit, including Allen keys.
Torque screwdriver with range of approximately 10 - 100 Ncm, e.g.
- "Torque screwdriver - 65 950/8, 10-80 Ncm", material number 080 79 241 (see Service
Tools Catalogue).
- Procure the necessary bit/insert in a local hardware store, see Fig.1.
Fig. 1 Torque screwdriver
Time required 1
Approximately 1/2 hour for 1 person.
M 300/1000/3000/3000 Nova SPB7-230.841.01 Page 2 of 4 Siemens AG
Service Rev. 05 12.04 CS PS 24 Medical Solutions
Page 7

Prerequisites 1 - 3
Parts included 1
Plastic trays with frame
Article Part No. Tray Frame Screw Washer
or bushing
(Fig.2,
chapt. 2)
18 x 24 64 83 809 or
63 97 348
24 x 30 64 83 817 or
64 14 085
18 H 64 83 833 or
65 61 091
24 H 64 83 841 or
65 61 117
Axilla 64 83 825 or
64 14 101
Mag 1.5 64 83 858 or
64 14 127
Mag 1.8 64 83 866 or
64 14 135
114 41 - 1
114 41 - 1
114 41 1 1
114 41 1 1
124 41 - 1
114 41 - 1
114 41 - 1
Label Adhesive
gauge
block
Instruction
(this docu-
ment)
Stereo 63 96 548 1 1 4 4 1 - 1
Biopsy 64 14 143 1 1 4 4 1 - 1
Shadow
cross
Spot plastic trays
Article Part No. Tr ay Threaded
Spot frosted old 64 20 991 1 - 2 6 1 - 1
Spot clear new 64 14 119 1 2 2 2 1 1 1
Flexible plastic trays
Article Part No Tray Instruction
18 H Flexible 65 76 065 or 65 76 131 1 1
24 H Flexible 65 76 024 or 65 76 149 1 1
63 96 993 1 1 4 4 1 - 1
Screw Washer Label Gasket Instruction
bushing
(this document)
(this docu-
ment)
Siemens AG SPB7-230.841.01 Page 3 of 4 M 300/1000/3000/3000 Nova
Medical Solutions Rev. 05 12.04 CS PS 24 Service
Page 8

1 - 4 Prerequisites
The Rubber spring kit - 065 76 172 - for flexible plastic trays shall contain:
Item
number
1 Rubber spring bushing
2 Nut, (serving as axle) 6576073 4
3 Bolt, (Screw) 6576081 4
4 Washer, outer dia 25, inner
5 This Repl. instruction,
Name,
description
(Gummi Federbuchse)
dia 6.8, and thickness 1 mm;
(SPB7-230.841.01.04 )
Material
number
6576123 5 1 pc as reserve, if dam-
6616259 4
(6608066) 1
Number
of pieces
Remark
aged during assembly
M 300/1000/3000/3000 Nova SPB7-230.841.01 Page 4 of 4 Siemens AG
Service Rev. 05 12.04 CS PS 24 Medical Solutions
Page 9

Replacement procedures 2
Replace the plastic tray 2
Plastic tray with frame, former version, unmodified.
2 - 1
NOTICE
1. Loosen the four screws (1/Fig. 1) and remove the plastic tray from the frame.
Fig. 1
When replacing the plastic tray, always replace the frame as well.
(The new frame is delivered with the new plastic tray.)
Support
2
MAM00529
Frame
1
3
Plastic tray
2
2. Loosen the two Allen screws (2/Fig. 1) and remove the frame from the support.
3. Fit the new frame to the support and fasten with the two Allen screws (2/Fig. 1)
and washers.
4. Then fit the new plastic tray to the frame and fasten with four new screws (1/Fig. 1)
and washers, but do not screw tight.
NOTICE
Check that the plastic tray is correctly inserted regarding the AEC
detector markings (3/Fig. 1).
Plastic tray with frame, newer version, modified. 2
In order to improve the reliability of the plastic trays some frame fixations have been modified.
In the first step the fixation of the plastic trays, material number 64 83 809 and 64 83 817
were modified, the four screws (1/Fig. 1) are being led inside of special plastic bushings
(Fig. 2). These bushings have to be inserted from inside of the tray, their collar staying
inside (see Fig. 3)
Siemens AG SPB7-230.841.01 Page 1 of 6 M 300/1000/3000/3000 Nova
Medical Solutions Rev. 05 12.04 CS PS 24 Service
Page 10

2 - 2 Replacement procedures
CAUTION
The exchange procedure is self explanatory following the description above.
NOTE
Correct torque.
If torque is out of tolerance, either the fixation will be weak or the
bushings will get damaged.
Tighten all 4 screws by a torque of 0.45 Nm +
In future there may be other material numbers from the table
"Plastic trays with frame" delivered with such plastic bushings.
In such cases follow this part of the instruction.
Strictly adhere to prescribed value of the tightening torque.
10 %.
Fig. 2 Huelse_Bushing
M 300/1000/3000/3000 Nova SPB7-230.841.01 Page 2 of 6 Siemens AG
Service Rev. 05 12.04 CS PS 24 Medical Solutions
Page 11

Replacement procedures 2 - 3
Fig. 3 DSCF 0014
Spot plastic tray
1. Loosen the two screws (1/Fig. 4) and remove the plastic tray.
2
2. Fit the new gasket (2/Fig. 4) (clear spot only).
3
2
1
Fig. 4
3. Fit the new plastic tray with new screws and washers. For clear spot fit the
threaded bushings (3/Fig. 4).
Siemens AG SPB7-230.841.01 Page 3 of 6 M 300/1000/3000/3000 Nova
Medical Solutions Rev. 05 12.04 CS PS 24 Service
Page 12

2 - 4 Replacement procedures
Flexible plastic tray and rubber springs 2
NOTICE
When replacing the flexible plastic tray, always replace the rubber
springs, nuts, bolts and washers, as well. (Actually the entire kit
should always be replaced, the used materials properly disposed
off.)
1. Loosen the four screws and nuts (1 and 3 / Fig. 5) and remove the plastic tray from
the frame.
4
1
2
3
Plastic tray
Frame
MAM00859
Fig. 5
2. Fit the four new rubber springs (2/ Fig. 5) to the new plastic tray. Make sure the
rubber springs are properly positioned. (One rubber spring is delivered as reserve,
if damage by fitting it into the hole should occur.)
3. Fit the new plastic tray to the frame on the support and fasten it with the four new
screws and nuts (1 and 3/ Fig. 5). Do not forget to insert one washer 066 16 259
each between the outer collar of the rubber spring and the inner part of the frame
(as indicated by the arrow 4 / Fig. 5). The washers are meant to prevent
unprotected rubbing of the spring on painted inner surface of the support frame in
case of flexible compression plates.
NOTICE
When the screws are tightened there is still a small gap between
the frame and the plastic tray. This is to allow for the tray to move
slightly up and down. (It is a "Flexible compression plate"!)
M 300/1000/3000/3000 Nova SPB7-230.841.01 Page 4 of 6 Siemens AG
Service Rev. 05 12.04 CS PS 24 Medical Solutions
Page 13

Replacement procedures 2 - 5
Attach the identification label 2
NOTICE
Fig. 6
The instructions on this page apply to all compression plates with
the exception of flexible compression plates.
Model
No.
Serial
No.
Siemens-Elema AB - MADE IN SWEDEN
TA
MAM00659
1. Remove the old identification label (Fig. 6) and dispose of it.
2. Attach the new identification label in place of the old one.
Siemens AG SPB7-230.841.01 Page 5 of 6 M 300/1000/3000/3000 Nova
Medical Solutions Rev. 05 12.04 CS PS 24 Service
Page 14

2 - 6 Replacement procedures
M 300/1000/3000/3000 Nova SPB7-230.841.01 Page 6 of 6 Siemens AG
Service Rev. 05 12.04 CS PS 24 Medical Solutions
Page 15

Adjustment procedures 3
Final check and adjustment of the compression plate 3
After replacing a plastic tray, the compression plate must be checked and adjusted.
Flexible compression plates and spot compression plates do not need further adjustment.
Low edge compression plate
3 - 1
NOTICE
The instructions on this page only apply to low edge compression
plates (18 x 24, 24 x 30, Axilla, Mag 1.5 and Mag 1.8).
1. Attach the compression plate to the compression unit (ensure that the
compression plate is fully inserted).
2. Place a non-compressive object, for example a 10 - 20 mm thick Plexiglas plate,
on the object table. The plate must cover the object table.
3. Lower the compression plate to the Plexiglas plate. Apply a compression force of
3 - 5 kg. The plastic tray will now adjust itself so that it lies flat against the Plexiglas
plate. Before tightening the four screws, check the alignment of the compression
plate and the object table at the front edge (chest-wall side) (Fig. 1). Adjust by
displacing the plastic tray, if necessary. Tighten the screws.
3
Compression plate
MAM00738
Fig. 1
Siemens AG SPB7-230.841.01 Page 1 of 2 M 300/1000/3000/3000 Nova
Medical Solutions Rev. 05 12.04 CS PS 24 Service
Object table
0-2 mm
Page 16

3 - 2 Adjustment procedures
High edge compression plate 3
NOTICE
The instructions on this page only apply to high edge compression plates (18 H and 24 H).
This adjustment is necessary to ensure that the front edge does not show on the film.
1. Attach the compression plate to the compression unit (ensure that the
compression plate is fully inserted).
2. Place a non-compressive object, for example a 10 - 20 mm thick Plexiglas plate,
on the object table. The plate must cover the object table.
3. Lower the compression plate to the object table. Apply a compression force of
3 - 5 kg. The plastic tray will now adjust itself so that it lies flat against the Plexiglas
plate. Attach the adhesive gauge block to the front of the object table (chest-wall
side). Make sure the piece is perpendicular to the object table and laterally placed
at the center of the compression table (1/Fig. 2).
4. Raise the compression unit and adjust the compression plate so that the bottom
and the center fits the adhesive gauge block when a compression force of 3 - 5 kg
is applied (2/Fig. 2).
5. Tighten the four screws.
6. Remove the adhesive gauge block.
MAM00726
Object table
Plexiglas plate
Compression plate
Object table
1
2
1
Fig. 2 View from above, from one side and a section
M 300/1000/3000/3000 Nova SPB7-230.841.01 Page 2 of 2 Siemens AG
Service Rev. 05 12.04 CS PS 24 Medical Solutions
Page 17

Changes to previous version 4
Chap. 1 and 2 Revised
4 - 1
Siemens AG SPB7-230.841.01 Page 1 of 2 M 300/1000/3000/3000 Nova
Medical Solutions Rev. 05 12.04 CS PS 24 Service
Page 18

4 - 2 Changes to previous version
This page intentionally left blank.
M 300/1000/3000/3000 Nova SPB7-230.841.01 Page 2 of 2 Siemens AG
Service Rev. 05 12.04 CS PS 24 Medical Solutions
 Loading...