

Siemens Gigaset S45 trio,Gigaset S45 User Manual

s
Siemens Aktiengesellschaft,
issued by Siemens Communications
Haidenauplatz 1
D-81667 Munich
© Siemens AG 2005
All rights reserved. Subject to availability.
Rights of modification reserved.
Siemens Aktiengesellschaft
www.siemens.com/gigaset
Gigaset S45
Handset at a glance
Handset at a glance
16
15
14
13
12
11
10
9
ÐV
INT 1
10.05.05 09:45
INT SMS
8
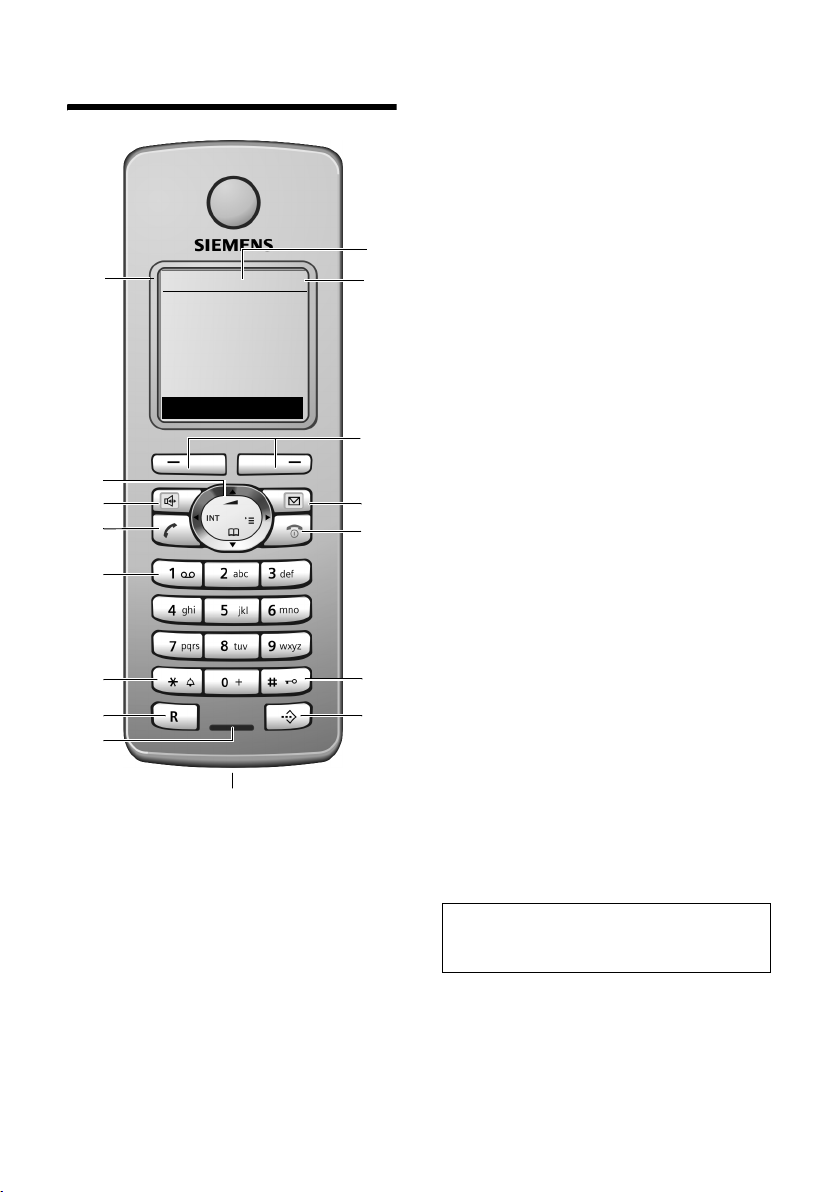
1 Display in idle status
2 Charge status of the batteries
= e V U (flat to full)
= flashes: batteries almost flat
e V U flashes: batteries charging
3 Display keys (page 9)
4 Message key
Access to calls and message lists (depending
on the base station)
1
2
3
4
5
6
7
Flashes: new message or new call.
5 End call key, On/Off key
End call, cancel function, go back one menu
level (press briefly), back to idle status
(press and hold), activate/deactivate handset (press and hold in idle status)
6 Hash key
Key lock on/off (press and hold in idle status),
Toggle between upper/lower case and digits
7 Call-by-call list key
Open call-by-call list
8 Connection socket for headset
9 Microphone
10 Recall key
- Confer (Flash)
- Insert a dialling pause (press and hold)
11 Star key
Ringtones on/off (press and hold),
Open table of special characters
12 Key 1
Select answering machine/network mailbox
(press and hold)
13 Tal k key
Answer a call, open last number redial list
(press briefly), start dialling (press and hold)
14 Handsfree key
Switch between earpiece and handsfree
mode
Lights up: handsfree activated
Flashes: incoming call
15 Control key (page 8)
16 Signal strength
Ð i Ñ Ò (high to low)
| flashes: no reception
Note:
Illustration of a handset on a base station with
SMS functionality.
1

Contents
Contents
Handset at a glance . . . . . . . . . . . 1
Safety precautions . . . . . . . . . . . . 3
Gigaset S45 – a handset
with many extras 4
First Steps 4
Pack contents . . . . . . . . . . . . . . . . . . . . 4
Setting up the handset for use . . . . . . . 4
Making calls . . . . . . . . . . . . . . . . . 7
Making an external call . . . . . . . . . . . . 7
Ending a call . . . . . . . . . . . . . . . . . . . . . 7
Answering a call . . . . . . . . . . . . . . . . . . 7
Handsfree operation . . . . . . . . . . . . . . 7
Muting . . . . . . . . . . . . . . . . . . . . . . . . . 8
Making internal calls . . . . . . . . . . . . . . 8
Operating the handset . . . . . . . . . 8
Switching the handset on/off . . . . . . . 8
Activating/deactivating the keypad lock 8
Control key . . . . . . . . . . . . . . . . . . . . . . 8
Display keys . . . . . . . . . . . . . . . . . . . . . 9
Returning to idle status . . . . . . . . . . . . 9
Menu guidance . . . . . . . . . . . . . . . . . . 9
Correcting incorrect entries . . . . . . . . 10
Using the directory and lists . . . 10
Directory and call-by-call list . . . . . . . 10
Last number redial list . . . . . . . . . . . . 12
Opening lists with the message key . 12
Using a handset as a room
monitor . . . . . . . . . . . . . . . . . . . . 12
Activating the room monitor and
entering the number to be called . . . 13
Handset settings . . . . . . . . . . . . . 14
Changing the display language . . . . . 14
Setting the display . . . . . . . . . . . . . . . 14
Setting the screen picture . . . . . . . . . 14
Setting display illumination . . . . . . . . 15
Activating/deactivating auto answer . 15
Adjusting the loudspeaker volume . . 15
Changing ringtones . . . . . . . . . . . . . . 15
Activating/deactivating advisory tones 16
Setting the alarm clock . . . . . . . . . . . 17
Restoring the handset default settings 17
Appendix . . . . . . . . . . . . . . . . . . . 18
Care . . . . . . . . . . . . . . . . . . . . . . . . . . . 18
Contact with liquid . . . . . . . . . . . . . . . 18
Questions and answers . . . . . . . . . . . . 18
Customer service (Customer Care) . . . 19
Specifications . . . . . . . . . . . . . . . . . . . 19
Guarantee Certificate
United Kingdom . . . . . . . . . . . . . . . . . 20
Guarantee Certificate
Ireland . . . . . . . . . . . . . . . . . . . . . . . . . 21
Notes on the operating
instructions . . . . . . . . . . . . . . . . . 22
Symbols used . . . . . . . . . . . . . . . . . . . 22
Example: menu input . . . . . . . . . . . . . 22
Example: multiple line input . . . . . . . . 23
Writing and editing a text message . . 23
Accessories . . . . . . . . . . . . . . . . . 25
Index . . . . . . . . . . . . . . . . . . . . . . 26
2
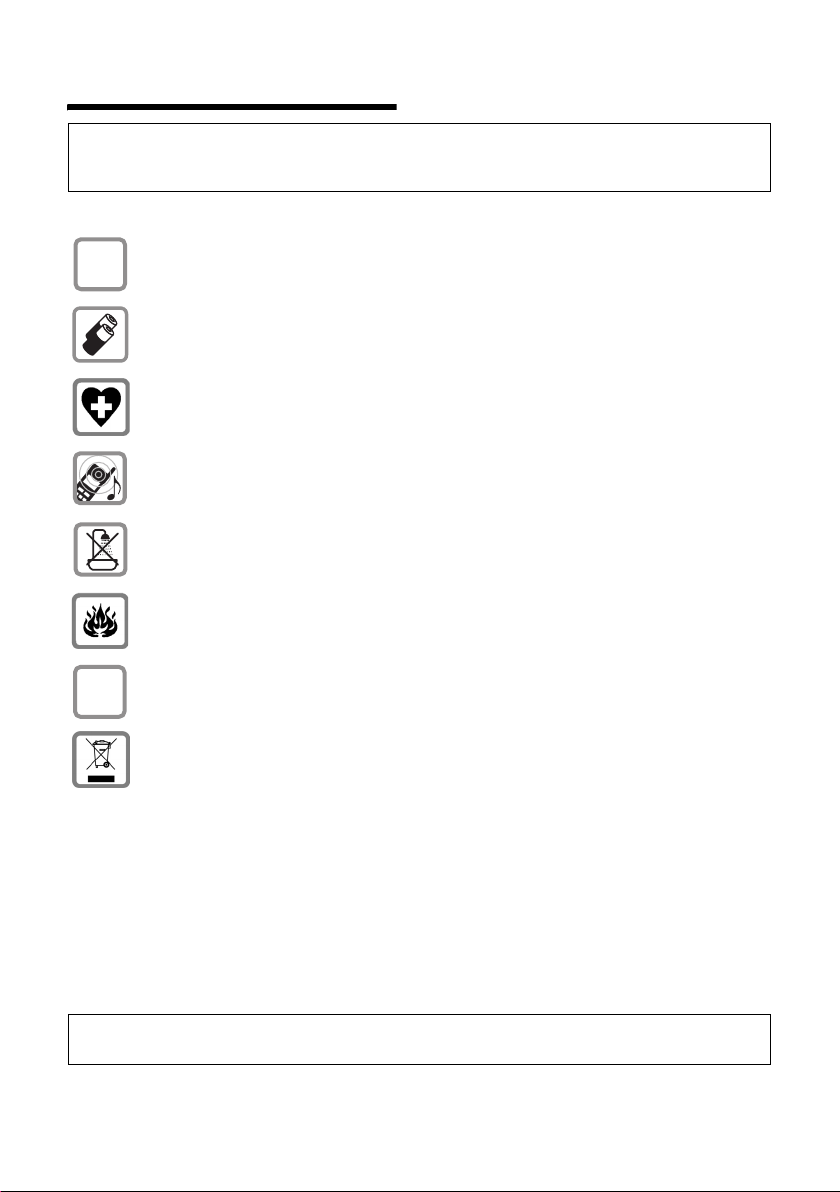
Safety precautions
Safety precautions
Caution:
Read the safety precautions and the user guide before use. Explain their contents to your children,
and the potential hazards associated with using the phone.
Use only the mains adapter supplied, as indicated on the underside of the charg-
$
ing cradle.
Only insert the recommended rechargeable batteries (page 19). i.e. Do not
use any other battery type or non-rechargeable batteries as this could result in
significant health risks and personal injury.
The operation of medical appliances may be affected. Be aware of the technical
conditions in your particular environment (e.g. doctor's surgery).
The handset may cause an unpleasant humming noise in hearing aids.
Do not install the charging cradle in bathrooms or shower rooms. Handset and
charging cradle are not splash proof (page 18).
Do not use your phone in environments with a potential explosion hazard
(e.g. auto paint shops).
ƒ
If you give your Gigaset to someone else, make sure you also give them the user
guide.
All electrical and electronic products should be disposed of separately from the
municipal waste stream via designated collection facilities appointed by the
government or the local authorities.
This crossed-out wheeled bin symbol on the product means the product is covered by the European Directive 2002/96/EC.
The correct disposal and separate collection of your old appliance will help prevent potential negative consequences for the environment and human health.
It is a precondition for reuse and recycling of used electrical and electronic
equipment.
For more detailed information about disposal of your old appliance, please contact your city office, waste disposal service or the shop where you purchased the
product.
Note:
Not all of the functions described in this manual are available in all countries.
3
Gigaset S45 – a handset with many extras
Gigaset S45 – a handset
with many extras
Your Gigaset S45 not only lets you store up
to 150 telephone numbers (page 10) your Gigaset S45 can do much, much
more:
u You can designate important people as
VIPs so you can tell important calls from
the "tone" (page 10).
u You can store anniversaries (page 11)
in your phone and it will remind you of
them in advance.
u Select frequently used phone numbers
at the press of a single key (page 11).
Have fun using your new Gigaset S45!
First Steps
Pack contents
u one Gigaset S45 handset,
u one charging cradle (incl. mains
adapter),
u two batteries,
u one battery cover,
u one belt clip,
u one user guide.
Setting up the handset for use
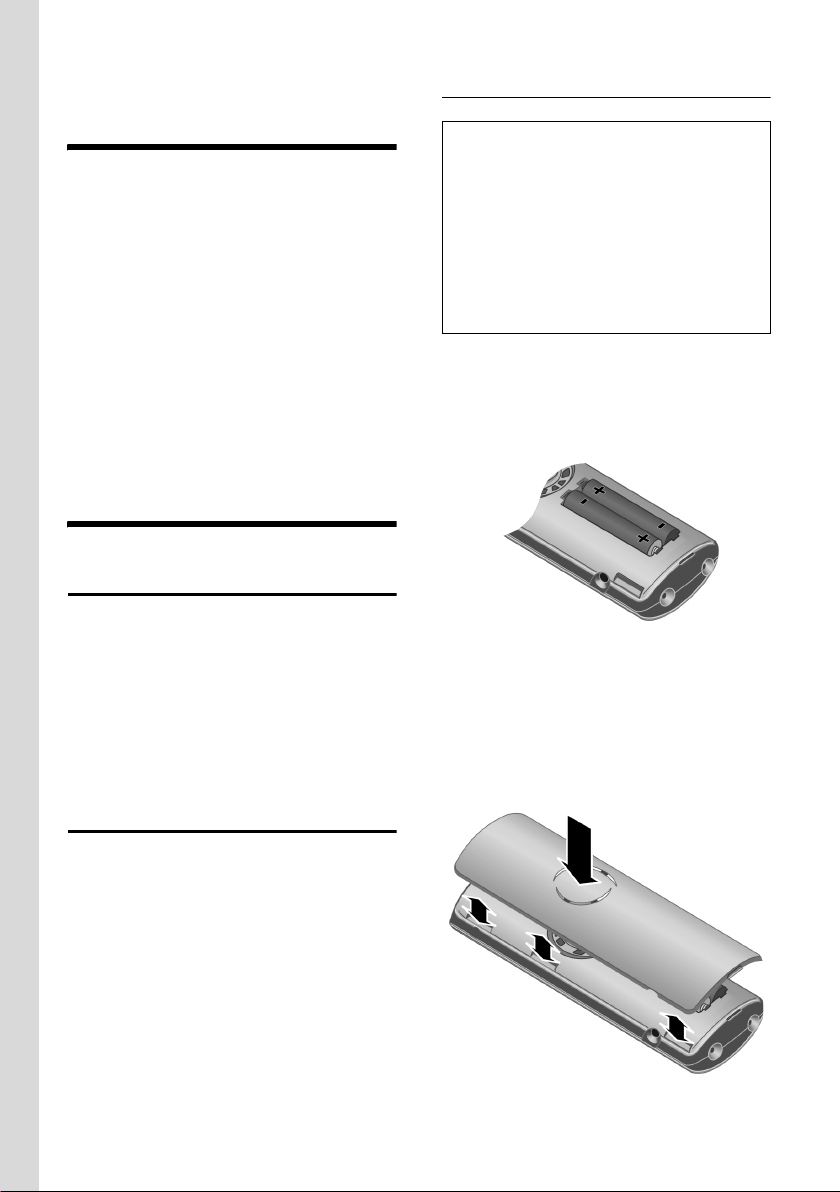
Inserting the batteries
Caution:
Only use the rechargeable batteries recommended by Siemens (page 19)! This means:
Never use conventional batteries (nonrechargeable) as this may cause significant
damage to health and property. For example,
the outer casing of the batteries could be
destroyed or the batteries could explode. The
phone could also malfunction or be damaged
as a result of using batteries that are not of the
recommended type.
¤ Fit the batteries with the correct polar-
ity (see diagram).
The polarity is indicated in/on the battery
compartment.
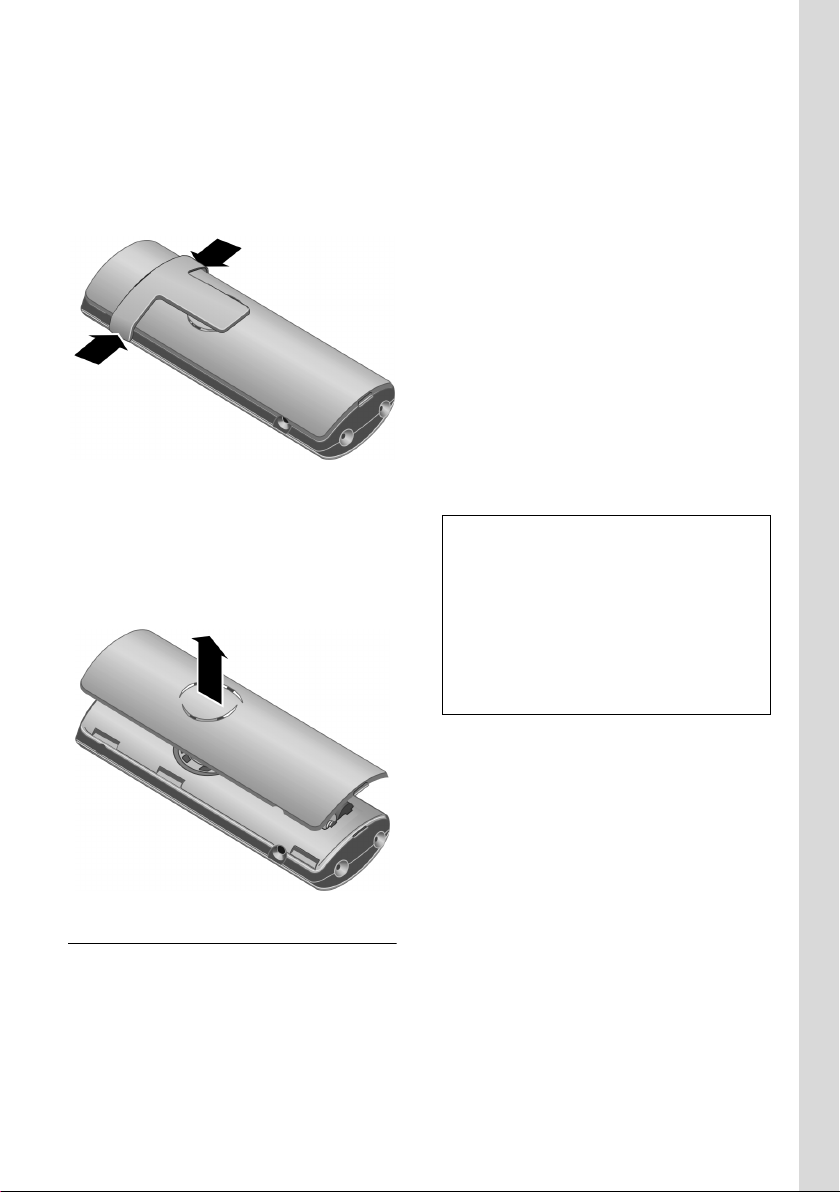
Closing the battery cover
¤ First align the battery cover with the
notches on the lugs on the inside of the
housing.
¤ Then press the cover closed so that it
clicks into place.
Connecting up the charging cradle and
mounting it on the wall (if required) is
described at the end of these instructions.
4
First Steps
Attaching the belt clip
There are notches for attaching the belt
clip on the side of the handset at the same
height as the display.
¤ Press the belt clip onto the back of the
handset so that the lugs on the belt clip
click into the notches.
Opening the battery cover
¤ If fitted, remove the belt clip.
¤ Slide your finger nail or a screw driver
down the notch to separate the belt
clip from the cover. Push the entire
cover upwards so that it unclicks.
Automatic registration Gigaset S45 to
Gigaset S450/S455
Important: The handset must not already
be registered to any base station.
Registering the handset to the Gigaset
S450 base station occurs automatically.
¤ Place the handset in the base with its
display facing forward.
Registration takes around 1 minute. During this process, Regstr.Procedure appears
in the display and the name of the base
station flashes e.g. Base 1. When the
handset has registered, its screen displays
its internal number, e.g. INT 2 for internal
number 2. The handset is assigned the
lowest available internal number (1-6). If
all internal numbers 1-6 have been
assigned, number 6 is overwritten, provided the handset with the internal
number 6 is in idle status.
Notes:
– Automatic registration is not possible when
the base station on which you wish to register the handset is being used to make a
call.
– Each key press interrupts the automatic
registration.
– If automatic registration does not work,
you will have to register the handset manually.
Registering your phone
Before you can use your Gigaset S45 you
must register it to a base station. It can be
registered to a maximum of four base stations. The actual registration procedure
will depend on the type of base station.
Manual registration Gigaset S45
If the handset does not switch on automatically when the batteries are fitted,
you must first charge the batteries.
You must activate manual registration of
the handset at both the handset and the
base station.
After it has registered, the handset returns
to idle status. The handset's internal
number is shown in the display e.g. INT 1.
If not, repeat the procedure.
5

First Steps
1. On the handset
v ¢ Ð ¢ Handset ¢ Register H/Set
s Select base station, e.g. Base
1, and press
~ Enter the system PIN of the
base station (the default is
0000) and press
screen will display, e.g. Base 1.
§OK§.
§OK§. The
2. On the base station
Within 60 secs. press and hold the registration/paging key on the base station
(page 1) (approx. 3 secs.).
Headset socket
You can connect the following types of
headset (with jack connector): HAMA
Plantronics M40, MX100 and MX150.
Charging batteries
¤ Plug the mains adapter of the charging
cradle into a mains power socket.
¤ Place the handset in the cradle with its
display facing forward.
To charge the batteries, leave the handset
in the charging cradle. If the handset is
activated, the flashing battery icon e in
the top right of the display indicates that
the batteries are charging. During handset
operation, the battery icon indicates the
charge status of the batteries (page 1).
Initial charging and discharging of
batteries
The correct charge level can only be displayed if the batteries are first fully
charged and discharged.
¤ To do this, leave the handset in the
charging cradle continuously for ten
hours. Your handset need not be
switched on for it to charge.
¤ Once the batteries are fully charged,
remove the handset from the charging
cradle and do not put it back again until
the batteries are fully discharged.
Notes:
– The handset should only be placed in a
base station or charging cradle that is
designed for it.
– When the handset is in the cradle, it
charges even if it is switched off.
– If the handset has switched itself off
because the batteries are flat and it is then
placed in the charging cradle, it will switch
itself on automatically.
– After the first battery charge and discharge
you may replace your handset in the charging cradle after every call.
Please remember:
u Always repeat the charging and dis-
charging procedure if you remove the
batteries from the handset and reinsert them.
u The batteries may become warm as
they are charging. This is not dangerous.
u After a time the charge capacity of the
batteries will decrease for technical reasons.
Setting the date and time
If you have not yet set the date and time,
press the display key
input field.
To change the time, open the input field
via:
¢ Ð ¢ Date/Time
v
§Time§ to open the
¤ Change multiple line input:
Date:
Enter day, month and year in 6-digit
format.
Time:
Enter hours and minutes with 4 digits,
e.g. Q M 1 5 for 07:15 a.m.
§Save§ Press the display key.
6

Making calls
Changing the base station
If your handset is registered to more than
one base station, you can set it to a particular base station or to the base station
that has the best reception (Best Base ).
¢ Ð ¢ Handset ¢Select Base
v
s Select one of the registered
base stations or Best Base and
§OK§.
press
Making calls
Making an external call
External calls are calls using the public telephone network.
~c Enter the number and press
the talk key.
Or:
c~ Press and hold the talk key
c and then enter the
number.
You can cancel the dialling operation with
the end call key a.
You are shown the duration of the call
while the call is in progress.
Notes:
– Dialling using the directory, call-by-call list
(page 1, page 10) or last number redial list
(page 12) saves time re-entering numbers
and network provider access codes ("callby-call numbers").
Ending a call
a Press the end call key.
Answering a call
The handset indicates an incoming call in
three ways: by ringing, by a display on the
screen and by the flashing handsfree
key d.
You can accept the call by:
¤ Pressing the talk key c.
¤ Pressing the handsfree key d.
If the handset is in the charging cradle and
the Auto Answer function is activated
(page 15), the handset will take a call
automatically when you lift it out of the
cradle.
If the ringtone is intrusive, press the display key
long as it is displayed on the screen.
§Silence§. You can take the call so
Handsfree operation
In handsfree mode instead of holding the
handset to your ear you can put it down
e.g. on the table in front of you to allow
others to participate in the call.
Activating/deactivating handsfree
Activating while dialling
~d Enter the number and press
the handsfree key.
¤ You should inform your caller before
you use the handsfree function so that
they know someone else is listening.
Switching between earpiece and
handsfree mode
d Press the handsfree key.
During a call and when listening to the
answering machine (depending on the
base station), switch handsfree on or off.
If you wish to place the handset in the
charging cradle during a call:
¤ Press and hold the handsfree key d
while placing the handset in the base
station. If handsfree key d does not
light up, press the key again.
For how to adjust the volume, see
page 15.
7

Operating the handset
Muting
You can deactivate the microphone in
your handset during an external call. The
other party hears a wait melody.
u Press the control key on the
left to mute the handset.
” Press the display key to reacti-
vate the microphone.
Making internal calls
Internal calls to other handsets registered
on the same base station are free.
Calling a specific handset
u Initiate internal call.
~ Enter the number of the hand-
set.
Or:
u Initiate internal call.
s Select handset.
c Press the talk key.
Calling all handsets ("group call")
u Initiate internal call.
* Press the star key. All handsets
are called.
Ending a call
a Press the end call key.
Operating the handset
Switching the handset on/off
a Press and hold the end call
key. You will hear the confirmation beep.
Activating/deactivating the
keypad lock
# Press and hold the hash key.
You will hear the confirmation beep. The
icon Ø appears in the display when the
keypad lock is activated.
The keypad lock is deactivated automatically if someone calls you. It is re-activated
when the call is finished.
Control key
In the following information the side of
the control key (top, bottom, right, left)
you have to press in each operating situation is shown in black (e.g. v for "press
the right of the control key").
The control key has a number of different
functions:
When the handset is in idle status
s Open the directory.
v Open main menu.
u Open list of handsets.
t Set the ringtones on the hand-
set (page 15).
In the main menu and in input fields
You can use the control key to move the
cursor up t, down s, right v or left
u.
In lists and submenus
t / s Scroll up/down line by line.
v Open submenu or confirm
selection.
u Go back one menu level, or
cancel.
8
 Loading...