


EN Dear Customer,
Gigaset Communications GmbH is the legal successor to
Siemens Home and Office Communication Devices GmbH &
Co. KG (SHC), which in turn continued the Gigaset business
of Siemens AG. Any statements made by Siemens AG or
SHC that are found in the user guides should therefore be
understood as statements of Gigaset Communications
.
GmbH
We hope you enjoy your Gigaset.
DE Sehr geehrte Kundin, sehr geehrter Kunde,
FR Chère Cliente, Cher Client,
IT Gentile cliente,
NL Geachte klant,
ES Estimado cliente,
PT SCaros clientes,
die Gigaset Communications GmbH ist Rechtsnachfolgerin
der Siemens Home and Office Communication Devices
GmbH & Co. KG (SHC), die ihrerseits das Gigaset-Geschäft
der Siemens AG fortführte. Etwaige Erklärungen der
Siemens AG oder der SHC in den Bedienungsanleitungen
sind daher als Erklärungen der Gigaset Communications
GmbH zu verstehen.
Wir wünschen Ihnen viel Freude mit Ihrem Gigaset.
la société Gigaset Communications GmbH succède en droit
à Siemens Home and Office Communication Devices GmbH
& Co. KG (SHC) qui poursuivait elle-même les activités Gigaset de Siemens AG. Donc les éventuelles explications de Siemens AG ou de SHC figurant dans les modes d’emploi
doivent être comprises comme des explications de Gigaset
Communications GmbH.
Nous vous souhaitons beaucoup d’agrément avec votre
Gigaset.
la Gigaset Communications GmbH è successore della Siemens Home and Office Communication Devices GmbH &
Co. KG (SHC) che a sua volta ha proseguito l’attività della
Siemens AG. Eventuali dichiarazioni della Siemens AG o
della SHC nei manuali d’istruzione, vanno pertanto intese
come dichiarazioni della Gigaset Communications GmbH.
Le auguriamo tanta soddisfazione con il vostro Gigaset.
Gigaset Communications GmbH is de rechtsopvolger van
Siemens Home and Office Communication Devices GmbH &
Co. KG (SHC), de onderneming die de Gigaset-activiteiten
van Siemens AG heeft overgenomen. Eventuele uitspraken
of mededelingen van Siemens AG of SHC in de gebruiksaanwijzingen dienen daarom als mededelingen van Gigaset
Communications GmbH te worden gezien.
Wij wensen u veel plezier met uw Gigaset
la Gigaset Communications GmbH es derechohabiente de la
Siemens Home and Office Communication Devices GmbH &
Co. KG (SHC) que por su parte continuó el negocio Gigaset
de la Siemens AG. Las posibles declaraciones de la
Siemens AG o de la SHC en las instrucciones de uso se
deben entender por lo tanto como declaraciones de la Gigaset Communications GmbH.
Le deseamos que disfrute con su Gigaset.
Gigaset Communications GmbH é a sucessora legal da Siemens Home and Office Communication Devices GmbH &
Co. KG (SHC), que, por sua vez, deu continuidade ao sector
de negócios Gigaset, da Siemens AG. Quaisquer declarações por parte da Siemens AG ou da SHC encontradas nos
manuais de utilização deverão, portanto, ser consideradas
como declarações da Gigaset Communications GmbH.
Desejamos que tenham bons momentos com o seu Gigaset.
DA Kære Kunde,
FI Arvoisa asiakkaamme,
SV Kära kund,
NO Kjære kunde,
EL Αγ α πητή πελάτισσα, αγαπητέ πελάτη,
HR Poštovani korisnici,
.
SL Spoštovani kupec!
Gigaset Communications GmbH er retlig efterfølger til Siemens Home and Office Communication Devices GmbH &
Co. KG (SHC), som fra deres side videreførte Siemens AGs
Gigaset-forretninger. Siemens AGs eller SHCs eventuelle
forklaringer i betjeningsvejledningerne skal derfor forstås
som Gigaset Communications GmbHs forklaringer.
Vi håber, du får meget glæde af din Gigaset.
Gigaset Communications GmbH on Siemens Home and
Office Communication Devices GmbH & Co. KG (SHC)-yri-
tyksen oikeudenomistaja, joka jatkoi puolestaan Siemens
AG:n Gigaset-liiketoimintaa. Käyttöoppaissa mahdollisesti
esiintyvät Siemens AG:n tai SHC:n selosteet on tämän
vuoksi ymmärrettävä Gigaset Communications GmbH:n
selosteina.
Toivotamme Teille paljon iloa Gigaset-laitteestanne.
Gigaset Communications GmbH övertar rättigheterna från
Siemens Home and Office Communication Devices GmbH &
Co. KG (SHC), som bedrev Gigaset-verksamheten efter Siemens AG. Alla förklaringar från Siemens AG eller SHC i
användarhandboken gäller därför som förklaringar från
Gigaset Communications GmbH.
Vi önskar dig mycket nöje med din Gigaset.
Gigaset Communications GmbH er rettslig etterfølger etter
Siemens Home and Office Communication Devices GmbH &
Co. KG (SHC), som i sin tur videreførte Gigaset-geskjeften i
Siemens AG. Eventuelle meddelelser fra Siemens AG eller
SHC i bruksanvisningene er derfor å forstå som meddelelser
fra Gigaset Communications GmbH.
Vi håper du får stor glede av din Gigaset-enhet.
η Gigaset Communications GmbH είναι η νομική διάδοχος της
Siemens Home and Office Communication Devices GmbH &
Co. KG (SHC), η οποία έχει αναλάβει την εμπορική
δραστηριότητα Gigaset της Siemens AG. Οι δηλώσεις της
Siemens AG ή της SHC στις
επομένως δηλώσεις της Gigaset Communications GmbH.
Σας ευχόμαστε καλή διασκέδαση με τη συσκευή σας Gigaset.
Gigaset Communications GmbH pravni je sljednik tvrtke
Siemens Home and Office Communication Devices GmbH &
Co. KG (SHC), koji je nastavio Gigaset poslovanje tvrtke
Siemens AG. Zato sve izjave tvrtke Siemens AG ili SHC koje
se nalaze u uputama za upotrebu treba tumačiti kao izjave
tvrtke Gigaset Communications GmbH.
Nadamo se da sa zadovoljstvom koristite svoj Gigaset
uređaj.
Podjetje Gigaset Communications GmbH je pravni naslednik
podjetja Siemens Home and Office Communication Devices
GmbH & Co. KG (SHC), ki nadaljuje dejavnost znamke
Gigaset podjetja Siemens AG. Vse izjave podjetja Siemens
AG ali SHC v priročnikih za uporabnike torej veljajo kot izjave
podjetja Gigaset Communications GmbH.
Želimo vam veliko užitkov ob uporabi naprave Gigaset.
οδηγίες χρήσ
ης αποτ
ελούν
Issued by
Gigaset Communications GmbH
Schlavenhorst 66, D-46395 Bocholt
Gigaset Communications GmbH is a trademark
licensee of Siemens AG
© Gigaset Communications GmbH 2008
All rights reserved.
Subject to availability. Rights of modifications
reserved.
www.gigaset.com

CS Vážení zákazníci,
společnost Gigaset Communications GmbH je právním
nástupcem společnosti Siemens Home and Office
Communication Devices GmbH & Co. KG (SHC), která dále
přejala segment produktů Gigaset společnosti Siemens AG.
Jakékoli prohlášení společnosti Siemens AG nebo SHC, které
naleznete v uživatelských příručkách, je třeba považovat za
prohlášení společnosti Gigaset Communications GmbH.
Doufáme, že jste s produkty Gigaset spokojeni.
SK Vážený zákazník,
Spoločnosť Gigaset Communications GmbH je právnym
nástupcom spoločnosti Siemens Home and Office
Communication Devices GmbH & Co. KG (SHC), ktorá zasa
pokračovala v činnosti divízie Gigaset spoločnosti Siemens
AG. Z tohto dôvodu je potrebné všetky vyhlásenia
spoločnosti Siemens AG alebo SHC, ktoré sa nachádzajú v
používateľských príručkách, chápať ako vyhlásenia
spoločnosti Gigaset Communications GmbH.
Veríme, že budete so zariadením Gigaset spokojní.
PL Szanowny Kliencie,
Firma Gigaset Communications GmbH jest spadkobiercą
prawnym firmy Siemens Home and Office Communication
Devices GmbH & Co. KG (SHC), która z kolei przejęła
segment produktów Gigaset od firmy Siemens AG. Wszelkie
oświadczenia firm Siemens AG i SHC, które można znaleźć
w instrukcjach obsługi, należy traktować jako oświadczenia
firmy Gigaset Communications GmbH.
Życzymy wiele przyjemności z korzystania z produktów
Gigaset.
TR Sayın Müşterimiz,
Gigaset Communications GmbH, Siemens AG'nin Gigaset
işletmesini yürüten Siemens Home and Office
Communication Devices GmbH & Co. KG (SHC)'nin yasal
halefidir. Kullanma kılavuzlarında bulunan ve Siemens AG
veya SHC tarafından yapılan bildiriler Gigaset
Communications GmbH tarafından yapılmış bildiriler olarak
algılanmalıdır.
Gigaset'ten memnun kalmanızı ümit ediyoruz.
RO Stimate client,
Gigaset Communications GmbH este succesorul legal al
companiei Siemens Home and Office Communication
Devices GmbH & Co. KG (SHC), care, la rândul său, a
continuat activitatea companiei Gigaset a Siemens AG.
Orice afirmaţii efectuate de Siemens AG sau SHC şi incluse
în ghidurile de utilizare vor fi, prin urmare, considerate a
aparţine Gigaset Communications GmbH.
Sperăm ca produsele Gigaset să fie la înălţimea dorinţelor
dvs.
SR Poštovani potrošaču,
Gigaset Communications GmbH je pravni naslednik
kompanije Siemens Home and Office Communication
Devices GmbH & Co. KG (SHC), kroz koju je nastavljeno
poslovanje kompanije Gigaset kao dela Siemens AG. Stoga
sve izjave od strane Siemens AG ili SHC koje se mogu naći u
korisničkim uputstvima treba tuma
Gigaset Communications GmbH.
Nadamo se da ćete uživati u korišćenju svog Gigaset
uređaja.
BG Уважаеми потребители,
Gigaset Communications GmbH е правоприемникът на
Siemens Home and Office Communication Devices GmbH
& Co. KG (SHC), която на свой ред продължи бизнеса на
подразделението Siemens AG. По тази причина
всякакви изложения, направени от Siemens AG или
SHC, които се намират в ръководствата за
потребителя, следва да се разбират като изложения на
Gigaset Communications GmbH.
Надяваме се да ползвате с удоволствие вашия Gigaset.
izjave kompanije
čiti kao
RU Уважаемыи покупатель!
Компания Gigaset Communications GmbH является
правопреемником компании Siemens Home and Office
Communication Devices GmbH & Co. KG (SHC), которая,
ою очередь, приняла подразделение Gigaset в свое
в св
управление от компании Siemens AG. Поэтому любые
заявления, сделанные от имени компании Siemens AG
или SHC и встречающиеся в руководствах
пользователя, должны восприниматься как заявления
компании Gigaset Communications GmbH.
Мы надеемся, что продукты Gigaset удовлетворяют
вашим требованиям.
HU T
isztelt Vásárló!
A Siemens Home and Communication Devices GmbH & Co.
KG (SHC) törvényes jogutódja a Gigaset Communications
GmbH, amely a Siemens AG Gigaset üzletágának utódja.
Ebből következően a Siemens AG vagy az SHC felhasználói
kézikönyveiben található bármely kijelentést a Gigaset
Communications GmbH kijelentésének kell tekinteni.
Reméljük, megelégedéssel használja Gigaset készülékét.
Issued by
Gigaset Communications GmbH
Schlavenhorst 66, D-46395 Bocholt
Gigaset Communications GmbH is a trademark
licensee of Siemens AG
© Gigaset Communications GmbH 2008
All rights reserved.
Subject to availability. Rights of modifications
reserved.
www.gigaset.com
s
mobile
Issued by
Information and Communication mobile
Haidenauplatz 1
D-81667 Munich
© Siemens AG 2004
All rights reserved. Subject to availability.
Rights of modification reserved.
Siemens Aktiengesellschaft
www.siemens-mobile.com/gigaset
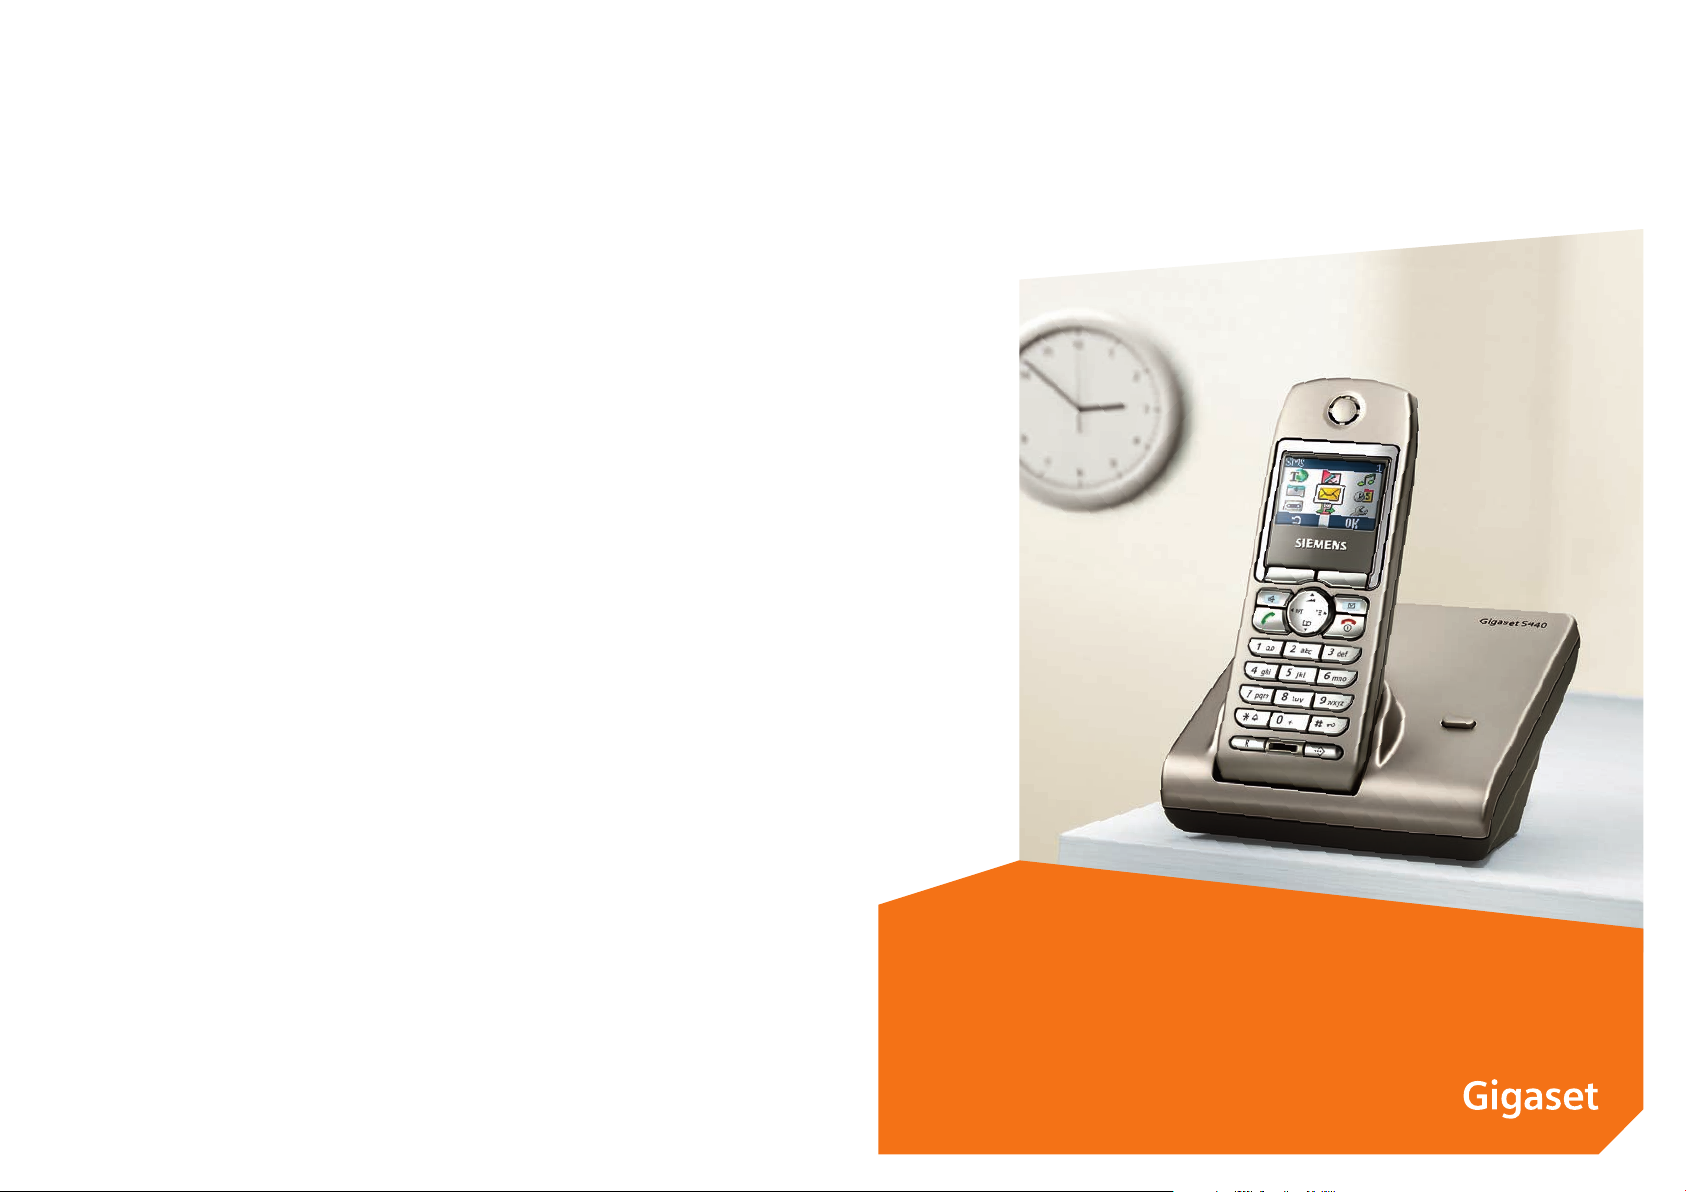
Gigaset S440
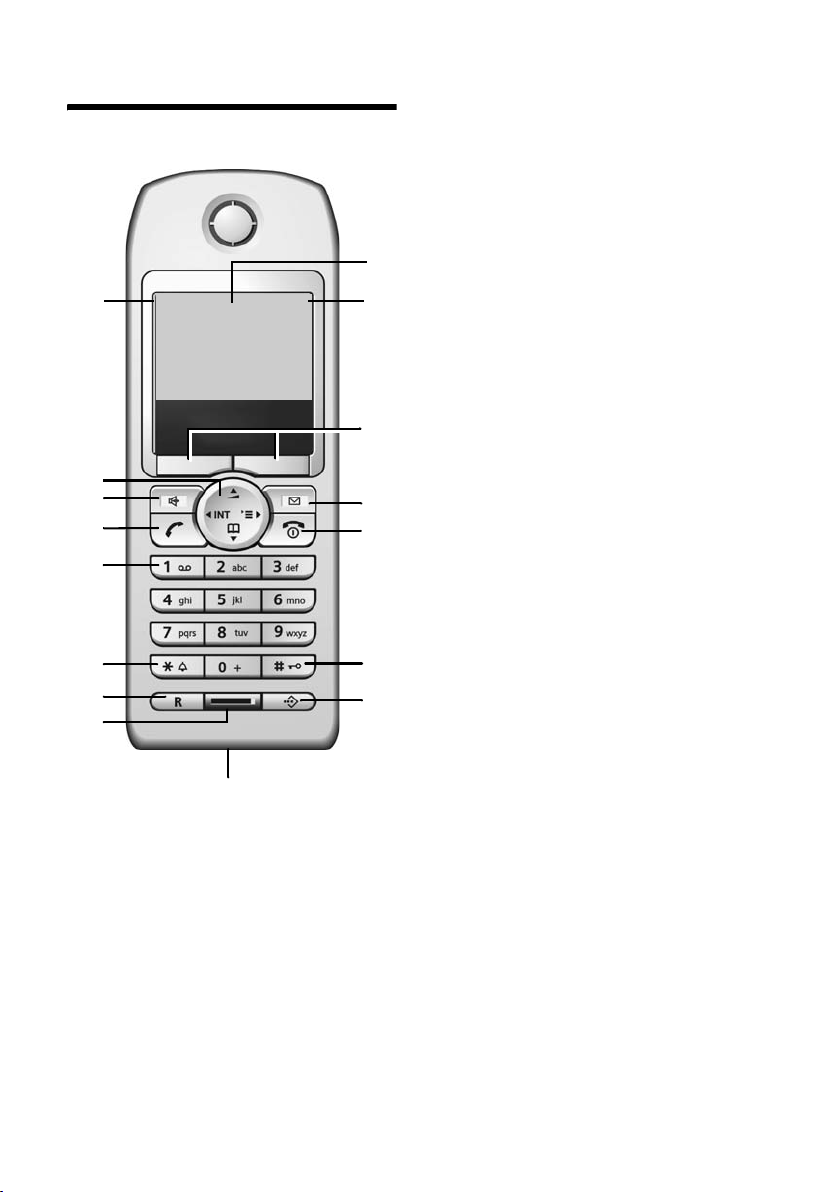
Handset at a glance
Handset at a glance
16
15
14
13
12
11
10
9
ÐV
INT 1
28.09.04 09:45
} §§§§§§§SMS§§§§§
8
1 Display (screen) in idle status
2 Battery charge condition
= e V U (flat to full)
= flashes: battery almost flat
e V U flashes: battery charging
3 Display keys (page 9)
4 Message key
Access to calls and messageslists;
Flashes: new message or new call.
5 End call key, On/Off key
1
2
3
4
5
6
7
End call, cancel function, go back one menu
level (press briefly), back to idle status
(press and hold), activate/deactivate handset (press and hold in idle status)
6 Hash key
Keypad lock on/off (press and hold)
7 Call-by-Call list key
Open Call-by-Call list
8 Connection socket for headset and
PC interface
9 Microphone
10 R key
Insert a dial pause (press and hold)
11 Star key
Ringtones on/off (press and hold),
Toggle between upper/lower case and digits
12 Key 1
Select T-Net box – answering machine in
network (press and hold)
13 Tal k key
Answer a call, open last number redial list
(press briefly), start dialling (press and hold)
14 Handsfree key
Switch between earpiece and handsfree
mode;
Lights up: handsfree activated;
Flashes: incoming call, automatic last
number redial
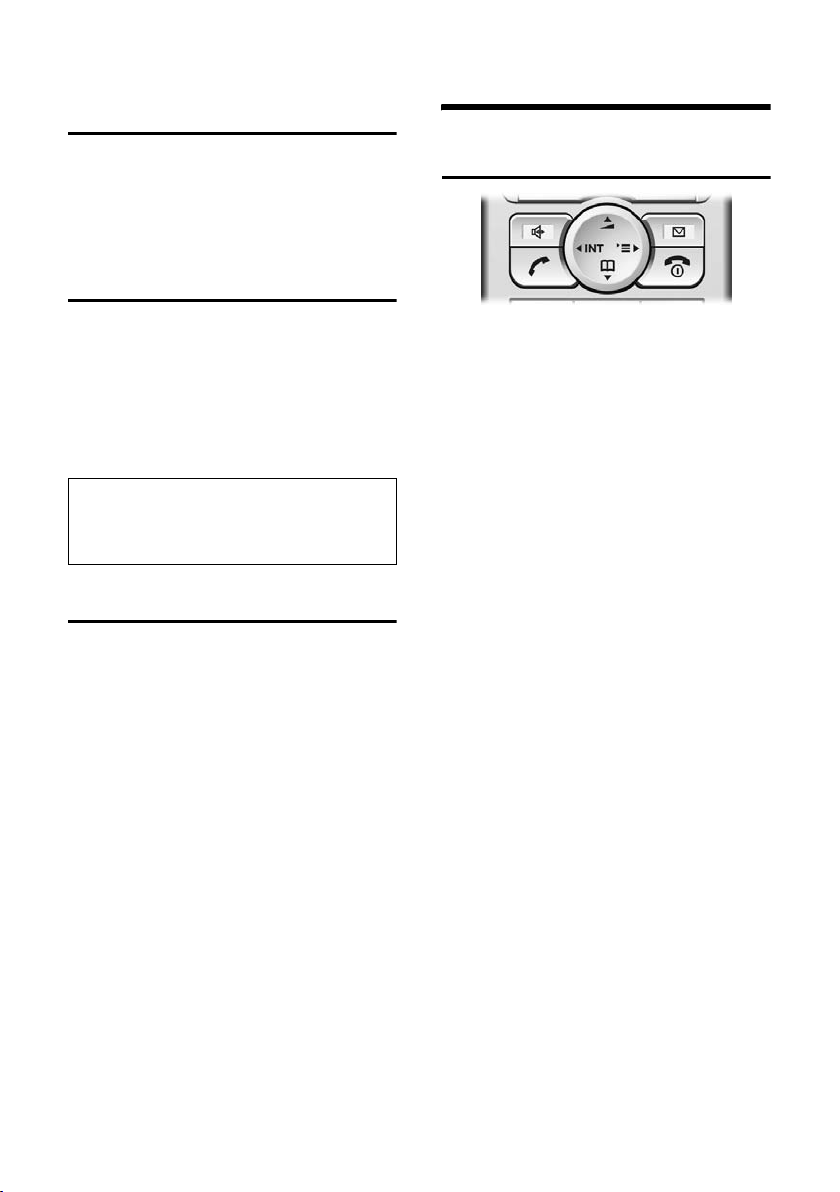
15 Control key (page 8)
16 Signal strength
Ð i Ñ Ò (high to low)
| flashes: no reception
1

Contents
Contents
Handset at a glance . . . . . . . . . . . 1
Safety precautions . . . . . . . . . . . . 4
Gigaset S440 –
More than just a telephone . . . . . 5
Setting up the telephone
for use . . . . . . . . . . . . . . . . . . . . . . 5
Installing the base station . . . . . . . . . . 5
Range and reception strength . . . . . . . 5
Connecting the base station . . . . . . . . 6
Setting up the handset for use . . . . . . . 6
Activating/deactivating the handset . . 8
Activating/deactivating the
keypad lock . . . . . . . . . . . . . . . . . . . . . . 8
Setting the date and time . . . . . . . . . . 8
Operating the handset . . . . . . . . . 8
Control key . . . . . . . . . . . . . . . . . . . . . . 8
Display keys . . . . . . . . . . . . . . . . . . . . . 9
Return to idle status . . . . . . . . . . . . . . . 9
Menu guidance . . . . . . . . . . . . . . . . . . 9
Correcting incorrect entries . . . . . . . . 10
Notes on the user guide . . . . . . 10
Symbols . . . . . . . . . . . . . . . . . . . . . . . 10
Example: menu input . . . . . . . . . . . . . 10
Example: multiple line input . . . . . . . 11
Making calls . . . . . . . . . . . . . . . . 12
Making an external call . . . . . . . . . . . 12
Ending a call . . . . . . . . . . . . . . . . . . . . 12
Answering a call . . . . . . . . . . . . . . . . . 12
Calling Line Identification . . . . . . . . . 12
Handsfree operation . . . . . . . . . . . . . 13
Muting . . . . . . . . . . . . . . . . . . . . . . . . 13
Using the directory and lists . . . 14
Directory and call-by-call list . . . . . . . 14
Email directory . . . . . . . . . . . . . . . . . . 17
Last number redial list . . . . . . . . . . . . 18
Opening lists with the message key . 18
Making cost-effective calls . . . . 20
Linking call-by-call numbers
with one number . . . . . . . . . . . . . . . . 20
Automatic network provider
code (preselection) . . . . . . . . . . . . . . . 20
SMS (text messages) . . . . . . . . . 22
Writing/sending an SMS . . . . . . . . . . . 22
Receiving an SMS . . . . . . . . . . . . . . . . 25
Using attachment data . . . . . . . . . . . . 26
Notification by SMS . . . . . . . . . . . . . . 27
SMS mailboxes . . . . . . . . . . . . . . . . . . 27
Setting SMS centre . . . . . . . . . . . . . . . 28
SMS info services . . . . . . . . . . . . . . . . 29
SMS to a PABX . . . . . . . . . . . . . . . . . . . 29
Activating/deactivating the
SMS function . . . . . . . . . . . . . . . . . . . . 29
SMS troubleshooting . . . . . . . . . . . . . 30
Using T-Net box . . . . . . . . . . . . . . 31
Configuring T-Net box for
fast access . . . . . . . . . . . . . . . . . . . . . . 31
Viewing a message from
T-Net box . . . . . . . . . . . . . . . . . . . . . . . 31
Using several handsets . . . . . . . 32
Registering handsets . . . . . . . . . . . . . . 32
De-registering handsets . . . . . . . . . . . 33
Locating a handset ("Paging") . . . . . . 33
Changing the base station . . . . . . . . . 33
Changing the name of the
base station . . . . . . . . . . . . . . . . . . . . . 33
Making internal calls . . . . . . . . . . . . . . 33
Linking internal participants
to an external call . . . . . . . . . . . . . . . . 34
Changing the name of a handset . . . . 35
Changing a handset's
internal number . . . . . . . . . . . . . . . . . 35
Using a handset as a room monitor . . 36
Setting the Walk and Talk mode . . . . . 37
Using a handset in Walk and Talk
mode as a room monitor . . . . . . . . . . 38
2

Contents
Handset settings . . . . . . . . . . . . . 39
Shortcuts for functions
and numbers . . . . . . . . . . . . . . . . . . . 39
Changing the display language . . . . . 40
Setting the display . . . . . . . . . . . . . . . 40
Setting screen picture . . . . . . . . . . . . 40
Setting night mode . . . . . . . . . . . . . . 40
Activating/deactivating auto answer . 41
Adjusting the loudspeaker volume . . 41
Changing ringtones . . . . . . . . . . . . . . 41
Activating/deactivating first
ring muting . . . . . . . . . . . . . . . . . . . . 42
Sound Manager . . . . . . . . . . . . . . . . . 42
Activating/deactivating
advisory tones . . . . . . . . . . . . . . . . . . 43
Setting the alarm clock . . . . . . . . . . . 44
Setting an appointment . . . . . . . . . . . 44
Displaying missed
appointments, anniversaries . . . . . . . 45
Emergency number . . . . . . . . . . . . . . 45
Restoring the handset default
settings . . . . . . . . . . . . . . . . . . . . . . . . 46
Base station settings . . . . . . . . . 46
Protecting against unauthorised
access . . . . . . . . . . . . . . . . . . . . . . . . . 46
Repeater support . . . . . . . . . . . . . . . . 46
Restoring default settings
to base station . . . . . . . . . . . . . . . . . . 46
Connecting the base station
to the PABX . . . . . . . . . . . . . . . . . 47
Dialling modes and flash time . . . . . . 47
Save access code . . . . . . . . . . . . . . . . 47
Setting pauses . . . . . . . . . . . . . . . . . . 48
Switching temporarily to
tone dialling (DTMF) . . . . . . . . . . . . . 48
Appendix . . . . . . . . . . . . . . . . . . . 49
Care . . . . . . . . . . . . . . . . . . . . . . . . . . . 49
Contact with liquid . . . . . . . . . . . . . . . 49
Questions and answers . . . . . . . . . . . . 49
Service (Customer Care) . . . . . . . . . . . 50
Specifications . . . . . . . . . . . . . . . . . . . 51
Default setting . . . . . . . . . . . . . . . . . . 52
PC Interface . . . . . . . . . . . . . . . . . . . . . 53
Writing and editing text . . . . . . . . . . . 53
Menu tree . . . . . . . . . . . . . . . . . . 55
Accessories . . . . . . . . . . . . . . . . . 58
Index . . . . . . . . . . . . . . . . . . . . . . 61
3
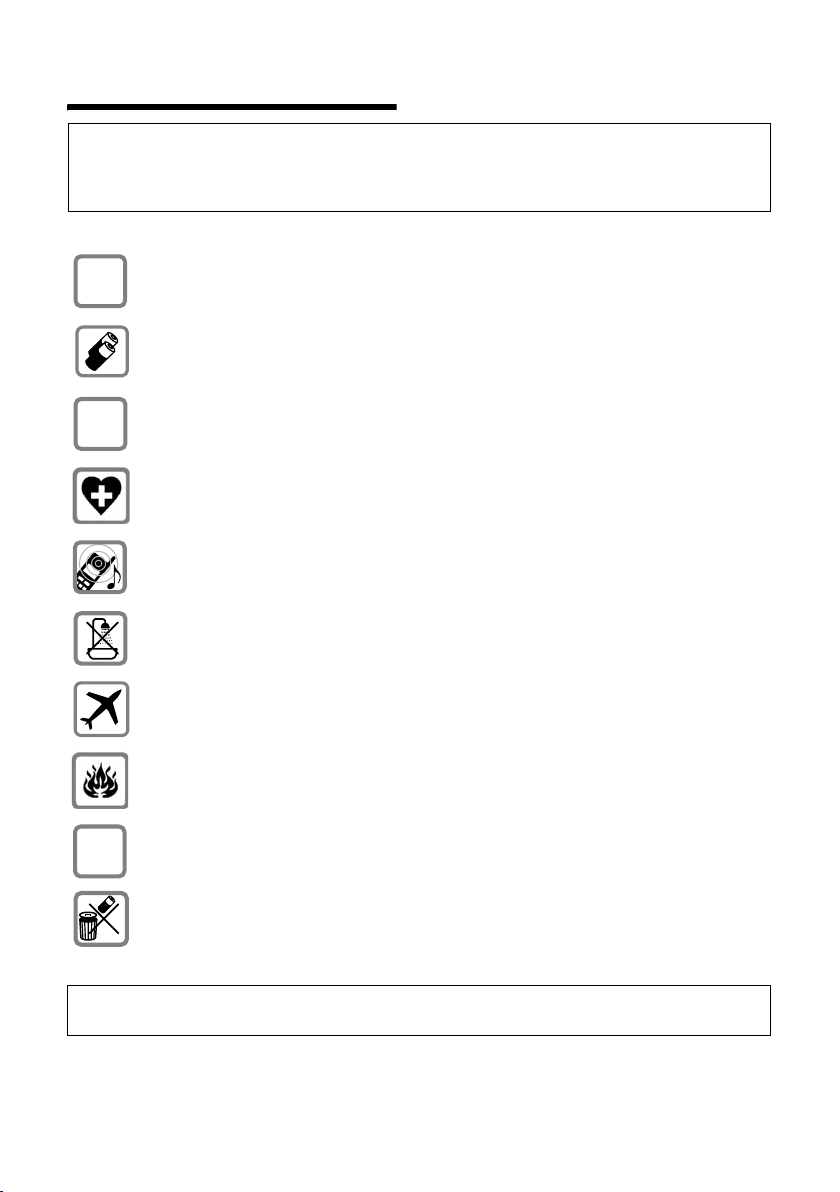
Safety precautions
Safety precautions
Caution:
Read the safety precautions and the user guide before use.
Explain their contents to your children, and the potential hazards associated with using the telephone.
Only use the mains adapter supplied, as indicated on the underside of the base
$
‹
Œ
station.
Fit only the recommended, rechargeable batteries (page 51)! Donot use any
other battery type or non-rechargeable batteries as this could result in significant health risks and personal injury.
Insert rechargeable batteries with the correct polarity and use in accordance
with this user guide (polarity symbols are provided in the handset battery compartments).
The operation of medical appliances may be affected. Be aware of the technical
conditions in your particular environment, e.g. doctor's surgery.
The handset may cause an unpleasant humming noise in hearing aids.
Do not install the base station in a bathroom or shower room, as the handset
and base station are not splash-proof (page 49).
Switch off your phone (incl. Walk and Talk function) while on board an aircraft.
Ensure that it cannot be switched on again accidentally.
Do not use your phone in environments with a potential explosion hazard,
e.g. auto paint shops.
ƒ
If you give your Gigaset to someone else, make sure you also give them the user
guide.
Dispose of the batteries and phone in accordance with environmental regulations.
Note:
Not all of the functions described in this manual are available in all countries.
4

Gigaset S440 – More than just a telephone
Gigaset S440 –
More than just a telephone
Your telephone not only enables you send
and receive SMS via the fixed network and
store up to 200 telephone numbers and email addresses (page 14) – your telephone can do a whole lot more:
u You can programme the keys of your
phone with important numbers or frequently used functions. The number is
then dialled or the function started by
simply pressing a key (page 39).
u You can designate important people as
VIPs so you can tell important calls from
the ring tone (page 15).
u Store a voice pattern for important
directory entries – the telephone will
dial "on command" (page 16).
u You can store appointments (page 44)
and anniversaries (page 16) in your
phone and it will remind you of them in
advance.
Have fun using your new telephone!
Setting up the telephone
for use
Installing the base station
The base station and integrated charger is
designed for operation in enclosed, dry
areas at temperatures ranging from +5 °C
to +45 °C.
Set up the base station at a central point in
the apartment or house.
Please note:
u Never expose the telephone to heat
sources, direct sunlight, other electrical
appliances.
u Protect your Gigaset from moisture,
dust, corrosive liquids and vapours.
Range and reception strength
Range:
u up to 300 m in the open
u up to 50 m in buildings
Reception strength:
The display shows the quality of the radio
contact between the base station and
handset:
u good to poor: ÐiÑÒ
u no reception: | flashes
The pack contains:
u one base station Gigaset S440,
u one Gigaset S44 handset,
u one mains adapter,
u one phone cord,
u two batteries,
u one battery cover,
u one belt clip,
u one user guide.
5
Setting up the telephone for use
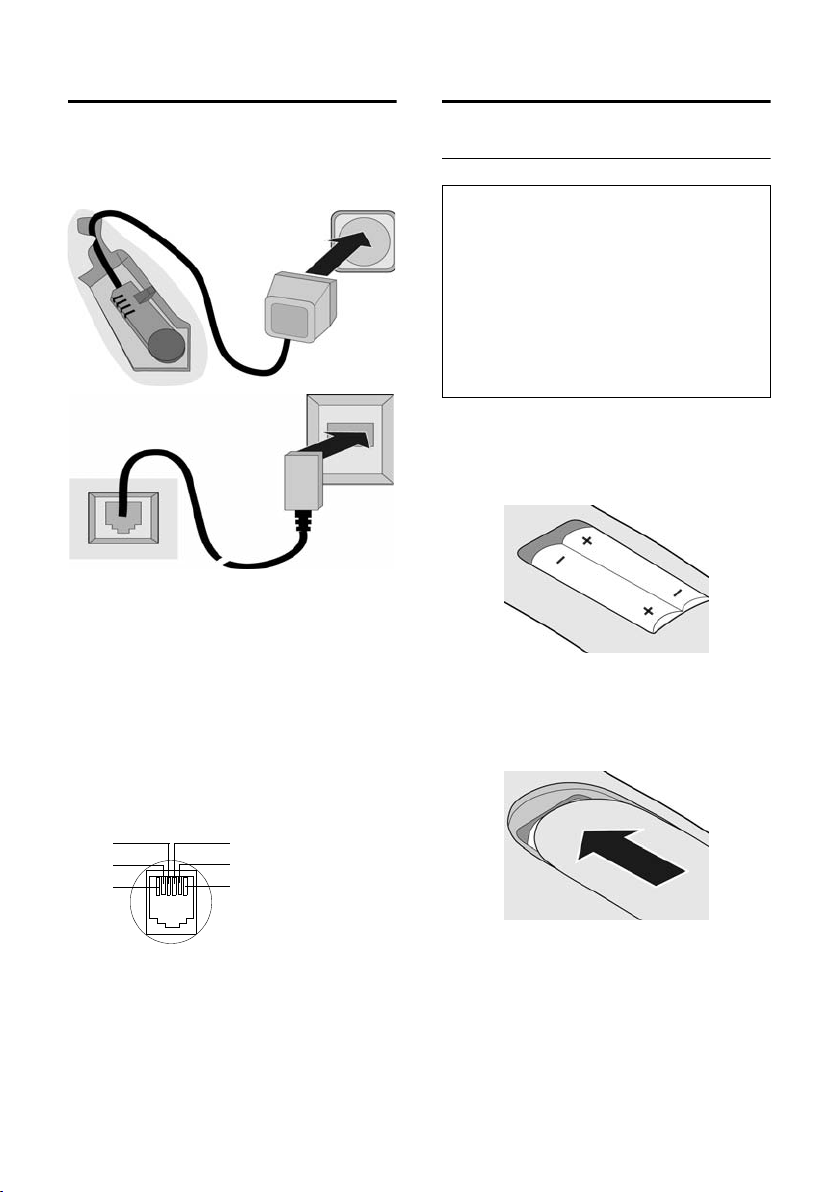
Connecting the base station
¤ First connect the mains unit and then
the phone jack as shown below and
place the cable in the cable channels.
2
1
1
3
1
1
1 Underside of base station (enlarged view)
2 Mains adapter 230 V
3 Phone jack with phone cord
Please note:
u The mains adapter must be always
connected, as the phone will not oper-
ate without mains connection.
u If you buy another phone cable, ensure
that it has the correct phone jack
assignment:
Correct phone jack assignment
1unused
3
2
1
4
5
6
2unused
3a
4b
5unused
6unused
Setting up the handset for use
Inserting batteries
Caution:
Use only the rechargeable batteries recommended by Siemens on page 51! Never use
conventional batteries (non-rechargeable) or
other battery types as this may cause significant damage to health and property. For
example, the outer casing of the batteries
could be destroyed or the batteries could
explode. The phone could also malfunction or
be damaged as a result of using batteries that
are not of the recommended type.
¤ Fit the batteries with the correct polar-
ity (see diagram).
The polarity is indicated in/on the battery
compartment.
Closing the battery cover
¤ Position the cover pointing slightly
downwards and push it up until it clicks
into position.
Opening the battery cover
¤ Press below the upper curve on the bat-
tery cover and slide down.
6
Setting up the telephone for use
Placing handset in base station
and registering
¤ Place the handset in the base station
with its display facing forward.
The handset registers automatically. Registration takes around 1 minute. During
this process Regstr.Procedure appears in
the display and the name of the base station flashes e.g. Base 1. The handset will
be assigned the lowest unassigned internal number (1–6).
This will appear in the display when registration is complete, e.g. INT 1. This means
that the number 1 has been assigned. If
the internal numbers 1–6 are already
assigned to other units, the number 6 is
overwritten.
Notes:
– Automatic registration is only possible
while no-one is making calls using the base
station.
– Each key press interrupts the automatic
registration.
– If automatic registration does not work,
you will have to register the handset manually.
– You can change the name of the handset
(page 35).
To charge the batteries, leave the handset
in the charging cradle.
Notes:
– When the handset is in the base station, it
charges even if it is switched off.
– If the handset has switched itself off
because the batteries are flat and is then
placed in the cradle, it will switch itself on
automatically.
– The handset must only be placed in the
designated base station.
For questions and problems see page 49.
Initial charging and discharging of
batteries
If the handset is activated, the battery
charging process is indicated on the handset by the flashing battery icon e.
During handset operation, the battery
icon indicates the charge status of the batteries (page 1). The correct charge status
can only be displayed if the batteries are
first fully charged and discharged.
¤ To do this, leave the handset in the
charging cradle uninterrupted for 10
hours. Your handset need not be
switched on for it to charge.
¤ Once the batteries are fully charged,
remove the handset from the cradle
and do not put it back again until the
batteries are fully discharged.
Note:
After the initial charge and discharge you may
replace your handset in the charging cradle
after every call.
Please note:
u Always repeat the charging and dis-
charging procedure if you remove the
batteries from the handset and insert
them in again.
u The batteries may warm up as they are
charging. This is not dangerous.
u After a time the charge capacity of the
batteries will decrease for technical rea-
sons.
Your phone is now ready for use.
¤ Set the date and the time(page 8), for
example to ensure the correct time of
incoming calls is recorded.
Attaching the belt clip
There are notches on the side of the handset side at approximately the same height
as the display for attaching the belt clip.
¤ Press the belt clip onto the back of the
handset so that the protrusions on the
belt clip click into the notches.
The belt clip's clasp must be pointing
towards the battery compartment.
7
Operating the handset
Activating/deactivating the
handset
a Press and hold the end call
key. You hear the confirmation
beep.
Activating/deactivating the
keypad lock
# Press and hold the hash key.
You hear the confirmation beep. The
icon Ø appears in the display when
the keypad lock is activated.
The key lock deactivates automatically if
someone calls you. It re-activates when
the call is finished.
Note
You can call the specified emergency number
(page 45), even when the keypad lock is activated.
Setting the date and time
¤ If you have not yet set the date and
time, press the display key
the input field.
To change the time, open the input field
via:
¢ Ð ¢ Date/Time
v
§Time§ to open
¤ Change multiple line input:
Date:
Enter day, month and year with 6 digits.
Time:
Enter hours and minutes with 4 digits,
e.g. Q M 1 5 for 7:15
a.m.
§Save§ Press the display key.
Operating the handset
Control key
In this user guide, the side of the control
key that you will have to press in the relevant operating situations is marked black
(up, down, right, left) (e.g. v for "press
right on the control key").
The control key has a number of different
functions:
When the handset is in the idle state
s Open the directory.
v Open main menu.
u Open list of handsets.
t Press briefly: Setting handset
ringtones (page 41).
Press and hold: Initiate voiceactivated dialling (page 17).
In the main menu and in input fields
Using the control key you can move the
cursor up t, down s, right v or left
u.
In lists and submenus
t / s Scroll up/down line by line.
v Open submenu or confirm
selection.
u Go back one menu level, or
cancel.
8
Operating the handset
During an external call
s Open the directory.
v Open menu.
u Initiate an internal consulta-
tion.
t Adjust loudspeaker volume for
earpiece and handsfree mode.
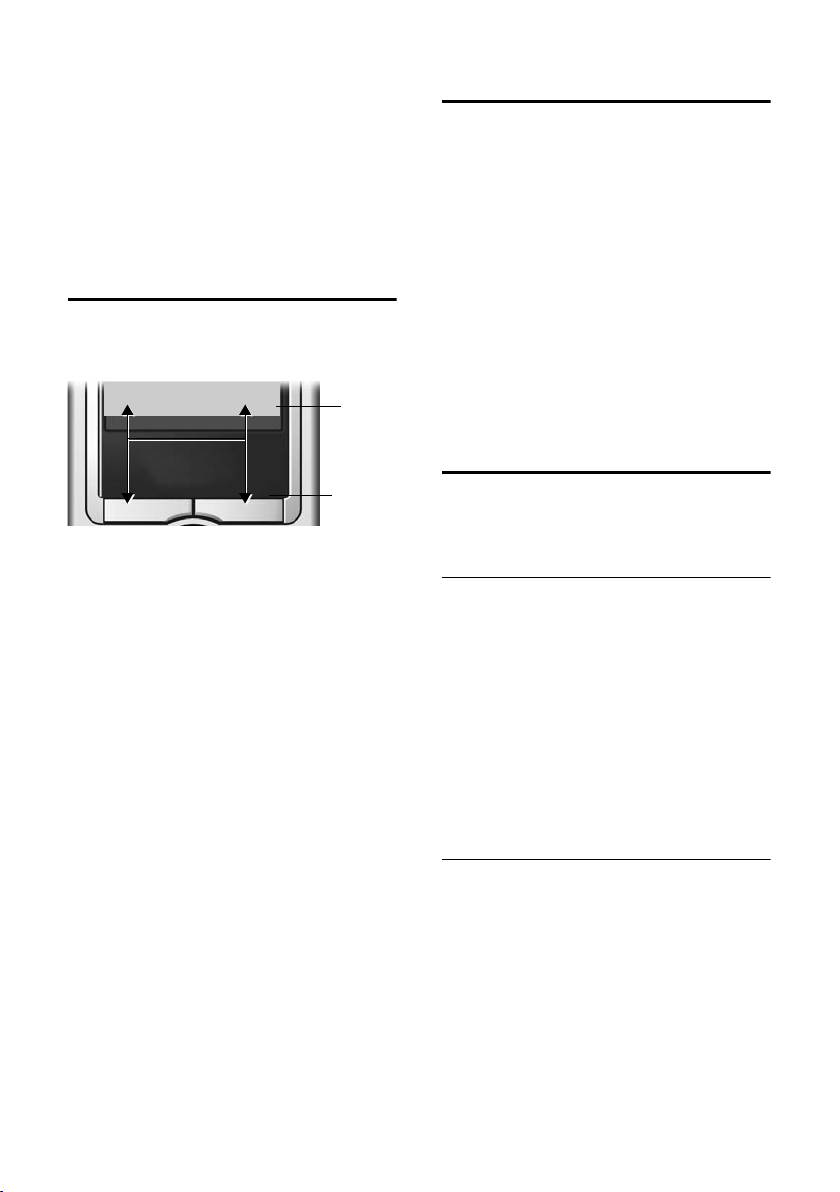
Display keys
The functions of the display keys changes
depending on the particular operating situation. Example:
}
1 The display keys' current functions are
shown in the bottom display line.
2Display keys
The most important display symbols are:
} Left display key, as long as it
¨ Open the main menu or a
W Delete key: deletes one char-
Î Go back one menu level or
ΠOpen email directory.
Ó Copy number into directory.
• Open the last number redial
§§§§§SMS§§§§§§
has not been assigned a function (page 39).
context dependent menu.
acter at a time from right to
left.
cancel operation.
list.
1
2
Return to idle status
You can revert to idle status from anywhere in the menu by proceeding as follows:
¤ Press and hold the end call key a.
Or:
¤ Press no key: After 2 minutes the dis-
play will return automatically to its idle
status.
Changes which you have not confirmed or
saved by pressing
Save Entry
An example of the display in the idle status
is shown on page 1.
§OK§ will be lost.
§OK§, §Yes§, §Save§, §Send§ or
Menu guidance
Your telephone's functions are accessed in
a menu that has a number of levels.
Main menu (first menu level)
¤ Press v with the handset in idle status
to open the main menu.
The main menu functions are displayed on
the display as coloured icons.
Accessing a function, i.e. opening the cor-
responding submenu (next menu level):
¤ Navigate to the function using the con-
trol key (q and r). The name of the
function is displayed in the screen's
header row. Press the display key
§OK§.
Submenus
The functions in the submenus are displayed as lists.
Accessing a function:
¤ Scroll to the function with the control
key q and press
Or:
§OK§.
¤ Enter the corresponding digit combina-
tion (page 55).
9
Notes on the user guide
Pressing briefly on the end call key a
returns you to the previous menu level /
cancels the operation.
Correcting incorrect entries
You can correct incorrect characters in the
text by navigating to the incorrect entry
using the control key. You can then:
u press X to delete the character to the
left of the cursor,
u insert characters to the left of the cur-
sor,
u overwrite the character (flashing)
when entering the time and date, etc.
Notes on the user guide
This section explains the meaning of certain symbols and typographical conventions that are used in this user guide.
Symbols
Copy Entry / Copy List (example)
Select one of the two menu
functions specified.
~ Enter digits or letters.
§Save§ The display keys' current func-
tions are shown reverse highlighted in the bottom display
line. Press the display key
below to launch the function.
q Press the top or the bottom of
the control key: scroll up or
down.
r Press the right or left of the
control key: e.g. select setting.
c / Q / * etc.
Press the matching key on the
handset.
Example: menu input
In this user guide, sequences of symbols
are used to show you which steps you
must carry out. This system is explained
below using the example of "setting the
display's colour scheme". The things you
have to do are explained in the boxes.
¢ Ð ¢ Display
v
¤ With the handset in idle status, press
on the right of the control key to open
the main menu.
¤ Select the icon Ð using the control
key – press the control key right, left,
up or down.
In the display header, H/Set Settings is displayed.
¤ Press §OK§ on the display key to confirm
the function H/Set Settings.
You will see the submenu H/Set Settings.
¤ Press the bottom of the control key
repeatedly until Display is selected.
¤ Press §OK§ on the display key to confirm
the function.
Colour Scheme
Select and press
§OK§.
¤ Press the bottom of the control key
repeatedly until Colour Scheme is
selected.
¤ Press §OK§ on the display key to confirm
the function.
s Select a colour scheme and
§OK§ (‰ = current colour).
press
¤ Press the top or bottom of the control
key to select a colour scheme.
¤ Press §OK§ on the display key to confirm
the function.
The selected colour scheme is
marked with ‰.
10
Notes on the user guide
a Press and hold press (idle sta-
tus).
¤ Press and hold the end call key until the
handset returns to idle status.
Example: multiple line input
There are many situations in which you
can change the settings of a display or
enter data in several lines.
In this user guide, sequences of symbols
are used to show you multiple line input.
This system is explained using the example of "storing appointments". The things
you have to do are explained in the boxes.
You will see the following displayed:
Appoint.: f On g
Date: 28.09
Time: 11:11
Notes: Appoint.
Î §§Save§§
Appoint.:
Select On or Off.
¤ Press right or left (r) on the control
key to select On or Off.
Time:
Enter hours/minutes in 4-digit format.
¤ Press the s key.
The third line is marked with [ ] to show
it is active.
¤ Enter the date using the digit keys.
Notes:
Press the display key
(max. of 16 characters) and press
§Edit§. Enter text
§OK§.
¤ Press the s key.
The fourth line is marked with < > to
show it is active.
¤ Press the display key §Edit§ to open the
input field. Enter the text (page 53).
¤ Press the display key §OK§.
¤ Save changes.
You will see the ¼ icon.
¤ Press the display key §Save§.
¤ Always subsequently press and hold
the a key.
The handset will change to idle status and
display the icon ¼.
Date:
Enter day/month in 4-digits format.
¤ Press the s key to move to the next
line.
The second line is marked with [ ] to
show it is active.
¤ Enter the date using the digit keys.
11

Making calls
Making calls
Making an external call
External calls are calls using the public telephone network.
~c Enter the number and press
the talk key.
Or:
c~ Press and hold the talk key
c and then enter the
number.
You can cancel the dialling operation with
the end call key a.
Notes:
– Dialling using the directory, call-by-call list
(page 1, page 14) or last number redial list
(page 9, page 18) saves time re-entering
numbers and network provider prefixes
("call-by-call numbers").
– You can programme the keys of your phone
with numbers from the directory
(page 39).
– With voice dialling, you can dial numbers
simply by saying the name (page 16).
Ending a call
a Press the end call key.
Answering a call
The handset indicates an incoming call in
three ways: by ringing, by displaying on
the screen and by flashing of the handsfree key d.
You can take the call in the following
ways:
¤ Press the talk key c.
¤ Press the display key §Accept§.
¤ Press the handsfree key d.
If the handset is in the base station and
the Auto Answer function is activated
(page 41), the handset will take a call
automatically when you lift it from of the
base station.
If the ringtone is intrusive press the display
§Silence§. You can take the call as long as
key
it remains displayed on the screen.
Calling Line Identification
When you receive a call, the caller's
number is displayed on the screen if the
following conditions are met.
u Your network provider supports CLIP,
CLI.
– CLI (Calling Line Identification):
number of the caller is transmitted
– CLIP (Calling Line Identification Pres-
entation): number of the caller is
indicated
u You have arranged CLIP with your net-
work provider.
u The caller has arranged CLI with the
network provider.
12

Making calls
Call display with CLIP/CLI
If the number of the caller is stored in your
directory, you will see their name.
Å
1234567890
§Accept§ §§§Silence§§
1Ring symbol
2 Number or name of caller
The following is displayed in place of the
number:
u External, if no number is transmitted.
u Withheld, if the caller has withheld Call-
ing Line Identification (page 15).
u Unavailable, if the caller has not
arranged Calling Line Identification.
1
2
Handsfree operation
With handsfree operation, instead of holding the handset to your ear you can put it
down, e.g. on the table in front of you to
allow others to participate in the call.
Switching between earpiece and
handsfree mode
d Press the handsfree key.
During a call switch the handsfree on or
off.
If you wish to place the handset in the
base station during a call:
¤ Press and hold the handsfree key d
while placing the handset in the base
station. If handsfree key d does not
light up, press the key again.
How to adjust the volume, see page 41.
Muting
You can deactivate the microphone in
your handset during an external call.
The other party hears a wait melody.
u Press the control key on the
left to mute the handset.
” Press the display key to reacti-
vate the microphone.
Activating/deactivating handsfree
Activating while dialling
~d Enter the number and press
the handsfree key.
¤ You should inform your caller before
you use the handsfree function so that
they know someone else is listening.
13

Using the directory and lists
Using the directory and lists
The options are:
u Directory,
u Call-by-Call list,
u Email directory,
u Last number redial list,
u SMS list,
u Calls list.
You can store a maximum of 200 entries in
the directory, call-by-call list and email
directory (the actual number depends on
the size of the individual entries).
You create a personalised directory, email
directory and call-by-call list for your own
individual handset. You can also send lists/
entries to other handsets (page 15).
Directory and call-by-call list
In the directory, you store numbers and
matching names.
¤ With the handset in idle status, open
the directory by pressing s.
In the call-by-call list, you can store prefixes of network providers (so-called "callby-call numbers").
¤ Open the call-by-call list using the
C key.
Length of entries
Number: max. 32 digits
Name: max. 16 characters
Note:
For quick access to a number from the directory or the call-by-call list (speed dial), you can
assign the number to a key (page 39).
Storing a number in the directory
s ¢ New Entry
¤ Change multiple line input:
Number:
Enter number
Name:
Enter name.
Annivers.:
Enter anniversary if required (page 16).
¤ Save changes.
If your phone is connected to a PABX,
please note page 47.
Storing a number in the call-by-call list
C ¢ New Entry
¤ Change multiple line input:
Number:
Enter number.
Name:
Enter name.
¤ Save changes.
Selecting entries in the directory and
call-by-call list
s / C Open directory or call-by-call
list.
You have the following options:
u Use q to scroll through the entries
until the required name is selected.
u Enter the first characters (max. 10) of
the name, scroll to the entry with s if
required.
Dialling with the directory/
call-by-call list
s / C ¢ s (select entry)
c Press the talk key. The number
is dialled.
14

Using the directory and lists
Managing entries in the directory/
call-by-call lists
s / C ¢ s (select entry)
Viewing an entry
§View§ Press the display key.
The entry is displayed.
Back with
§OK§.
Editing an entry
§View§ / Edit
Press display keys one after the
other.
¤ Carry out changes and save.
Using other functions
s / C ¢ s (Select entry)
¢ v (open menu)
The following functions can be selected
with q:
Display Number
Edit or enhance a stored number. Then
dial or call up further functions by
pressing ©.
Edit Entry
Edit a selected entry.
Delete Entry
Delete a selected entry.
VIP Entry (directory only)
Mark a directory entry as VIP (Very
Important Person) and assign it a particular ringtone. You will now be able to
tell VIP calls from the ringtone.
Requirement: Calling Line Identification (page 12).
Record Pattern (directory only)
Speak the name of the selected entry
and store as voice pattern (page 16).
Play Pattern (directory only)
Play voice patterns (page 17).
Delete Pattern (directory only)
Delete voice patterns (page 17).
Copy Entry
Send a single entry to a handset
(page 15).
Delete List
Delete all entries in the directory/call-
by-call list.
Copy List
Send complete list to a handset
(page 15).
Available Memory
Display the available entries in the
directory, call-by-call list (page 14) and
email directory (page 17).
Sending the directory/call-by-call list
to another handset
Requirements:
u The sending and receiving handsets
must both be registered to the same
base station.
u The other handset and base station can
send and receive directory entries.
s / C
¢ s (Select entry)
¢ v (open menu) ¢ Copy Entry /
Copy List
~ Enter the internal number of
the receiver handset
Copying entry.
§Yes§ / §No§ Press the display key.
A successful transfer is confirmed by a
message and the confirmation tone at the
receiver handset.
Please note:
u Entries with identical numbers are not
overwritten in the receiver handset.
u The transfer is cancelled if the phone
rings or if the memory of the receiving
handset is full.
§. You see
15

Using the directory and lists
Adding a displayed number to the
directory
You can add numbers to the directory
which are displayed in a list, e.g. the call
list or the last number redial list, in an SMS
or during a call.
A number will be displayed.
¢ Copy to Directory
v
¤ Complete the entry, see page 14.
Copying a number from the directory
In many operating situations you can
open the directory, e. g. to copy a number.
Your handset need not be in idle status.
¤ Depending on the operating situation,
open the directory with s or Ò
or © Directory.
q Select an entry (page 14).
Storing anniversaries in the directory
You can store an anniversary for every
number in the directory, and specify a
time when you will receive a reminder call
on the anniversary.
¢ s (Select entry; page 14)
s
§View§ / Edit
Press display keys one after the
other.
s Jump to the Annivers.: line.
§Edit§ Press the display key.
¤ Change multiple line input:
Date:
Enter day/month in 4-digits format.
Time:
Enter the hour/minute for the reminder
call in 4-digit.
Prompt:
Select the type of signal for the
reminder and press
§OK§.
¤ Save changes (page 11).
Note:
Reminder calls require a time stamp. If you
select an optical signal, then a time stamp is
not required and is automatically set to 00.00.
Deleting anniversaries
s ¢ s (Select entry; page 14)
s Jump to the Annivers.: line.
§Edit§ §Delete§ §Save§
Press display keys one after the
other.
Reminder call on an anniversary
A birthday reminder call is signalled on the
handset with the selected ring tone.
§Silence§ Press the display key to stop
the reminder call.
Voice dialling
You can dial numbers from the directory
by speaking the name. So that your phone
"recognises" you, you must record a voice
pattern for every name, i.e. say the name
loudly to the handset and store it.
You can also set your telephone to
announce the name of the caller instead
of ringing for an external call, see
page 41.
You can store a voice pattern for a total of
30 directory entries. Entries assigned with
voice patterns are marked with ´.
Recording voice patterns
Record the voice pattern in quiet surroundings. The handset should be around
25 cm (10 inches) away from you. The
voice pattern can be 1.5 seconds long.
Note:
If you use voice dialling predominantly with a
handsfree set, then it is beneficial to record the
voice pattern via the handsfree set.
16

¢ s (Select entry; page 14)
s
v Open menu.
Record Pattern
Select.
§OK§ Press the display key to start
the recording.
You will hear a short beep. The display will
prompt you accordingly. Speak the name.
Repeat the name after being prompted to
do so by the display and by a further beep.
Note:
If the memory cannot accommodate a new
voice pattern, a message will appear on the
display. The phone automatically returns to
the directory. Delete a voice pattern and select
Record Pattern once again.
To change a voice pattern, you must
delete it (page 17) and re-record it.
Using the directory and lists
Email directory
You store email addresses in the email
directory (for SMS to email).
Saving a new email address
s Open the directory.
<E-Mail Directory>
Select and press
New Entry Select and press §OK§.
~ Enter email address
(max. 60 characters).
§OK§.
¤ Storing (page 11).
During entry, you can open the menu with
© and use the following functions:
Insert '.' / Insert '@'
Insert a dot or @.
Using voice dialling
t Press and hold.
Speak the name after the beep. If the
name corresponds with the recorded
voice pattern, it will be repeated and the
number will be dialled.
Playing voice patterns
s ¢ s (Select entry with ´ )
v Open menu.
Play Pattern Select and press §OK§. The voice
pattern will be played in
handsfree mode.
a Press and hold (idle status).
Deleting voice patterns
s ¢ s (Select entry with ´)
v Open menu.
Delete Pattern
Select and press
a Press and hold (idle status).
The directory entry is retained.
§OK§.
Managing email addresses
s ¢ <E-Mail Directory>
¢ s (Select entry; page 14)
Viewing entries
§View§ Press the display key. The
number is displayed.
Back with
§OK§.
Editing entries
View §Edit§
Press display keys one after the
other.
¤ Carry out changes and save (page 11).
Using other functions
s ¢ <E-Mail Directory>
¢ s (Select entry; page 14)
¢ v (open menu)
As with the directory, (page 15) you can
select the following functions with s:
Edit Entry
Delete Entry
Delete List
17

Using the directory and lists
Last number redial list
The last number redial list shows the last
ten numbers dialled on the handset
(max. 32 digits). If one of the numbers is
in the directory, then the corresponding
name will be displayed.
Manual last number redial
c Press the key briefly.
s Select entry.
c Press the talk key again. The
number is dialled.
When displaying a name, you can have the
respective phone number displayed by
using the display key
Managing entries in the last
number redial list
c Press the key briefly.
s Select entry.
v Open menu.
The following functions can be selected
with q:
Automatic Redial
The number is automatically dialled at
regular intervals (at least every
50 seconds) and the handsfree key
flashes, "open listening" is activated.
– Participant answers: press the talk
key c. The function is ended.
– Participant doesn't answer: the call
is terminated after approx.
30 seconds. The function is ended
after pressing any key or ten unsuccessful attempts.
Display Number (as in the directory
page 15)
Copy to Directory
Copy an entry to the directory
(page 16).
Delete Entry (as in the directory page 15)
Delete List (as in the directory page 15)
§View§.
Opening lists with the
message key
You can use the Message key f to open
the following lists:
u SMS list
If several mailboxes are set up
(page 27), several lists are displayed.
u Network mailbox
If your network provider supports this
function and the network mailbox is
configured for fast access (page 31).
u Calls list
An advisory tone sounds as soon as a new
entry appears on a list. The key f
flashes. In idle status, the displays shows
an icon for the new message.
Icon New message
Ã
Á
À
The number of new entries is shown
beneath the corresponding icon.
Pressing the flashing key f will call up
the lists that contain the new messages.
Key f disappears on opening a list and
exiting the menu. If there are more new
entries, you can set the message key back
to flashing (page 18), e.g. to notify other
users of the new entries.
Setting message key to flashing
Requirement: There is at least one new
entry remaining in one of the lists.
f Open calls list.
Set Message LED
a Press and hold (idle status).
Key f disappears on opening a list and
exiting the menu.
... in T-Net box
... in calls list
... in SMS list
Select and press
§OK§.
18

Using the directory and lists
Calls list
Requirement: Calling Line Identification
(CLIP, page 12)
The numbers of the last 30 incoming calls
are stored. Depending on the Calls List
Typ e set, All Calls or just Missed Calls are
stored.
Multiple calls from the same number are
stored as follows:
u All Calls stored several times.
u Missed Calls stored once (last call).
The calls list is displayed as follows:
Calls List: 01+02
Number of new entries + number of old, read
entries
Setting list type for calls list
f ¢ Calls List: 01+02 ¢ v ¢ Calls
List Type
Missed Calls / All Calls
Select and
§OK§ press (‰ =on).
a Press and hold (idle status).
The entries in the calls list are retained
when you change the list type.
Opening calls list
f Press.
Calls List: 01+02
Select as required and
press.
q Select entry.
The calls list displays the last incoming
call.
§OK§
List entry
Example of a list entry:
Missed Calls
New Call 01/ 02
1234567890
28.09.04 09:45
§Delete§ §§Call§§§
u List type (in header)
u Status of entry
New Call: new missed call
Old Call: previously read entry
Answ.: call was accepted (only on list
type All Calls)
u Entry number
01/02 means, for example, first entry
of two entries in total
u Number or name of caller
You can add the number of the caller to
the directory (page 16).
u Date and time of call (if set, page 8)
You have the following options:
u Call back the caller (if the number of
the caller was transmitted, page 12)
Press the display key §Call§. Callback
begins at once. The number is entered
in the last number redial list.
u Delete entry
Press the display key
§Delete§.
Deleting the calls list
Caution! All old and new entries will be
deleted.
¢ Calls List: ¢ v (Open menu)
f
¢ Delete Calls List
a Press and hold (idle status).
19

Making cost-effective calls
Making cost-effective calls
Sign up with a network provider who
offers particularly low-cost call rates (callby-call). You can manage the numbers in
the call-by-call list.
Linking call-by-call numbers
with one number
You can insert the dialling code of a network provider in front of the number
("linking").
C Open Call-by-Call list.
s Select entry (call-by-call
number).
© Press the display key.
Display Number
Select and press
~ Enter number or select
number from the directory
(page 16).
c Press the talk key. Both num-
bers are dialled.
§OK§.
Automatic network provider
code (preselection)
You can specify a call-by-call number
(preselection number), which is automat-
ically placed in front of numbers according to two lists.
u The list "with preselection" contains
the "rule" for dialling code numbers or
the first digits of dialling code numbers
with which you wish the preselection
number to be used.
u The list "without preselection" con-
tains the "exception to the rule".
Example:
You entered 08 for "with preselection".
Consequently, all numbers that start
with 08 are dialled with preselection.
However, if you want, for example,
that 081 is still dialled without prese-
lection, enter 081 for "without prese-
lection.
When dialling, after pressing the Talk/
Handsfree key the first digits of the dialled
number are compared with both lists:
u The preselection number is not
inserted in front if the dialled number
–matches no entry in both lists
– matches an entry in the list "with-
out preselection"
u The preselection number is inserted in
front if the first digits of the dialled
number match with only one entry in
the list "with preselection".
20

Storing preselection numbers
v ¢ Ð ¢ Base ¢ Preselection
¢ Preselect. No.
~ Enter or edit preselection
number (call-by-call number).
¤ Save changes (page 11).
a Press and hold (idle status).
Saving/editing entries in the
preselection lists
Each of the two lists can hold 11 entries:
u 5 entries with up to 6 digits
u 6 entries with up to 2 digits
Depending on the particular country, the
list "with preselection" may already contain preset numbers. This means, for
example, that all national calls or calls in
the mobile phone network will be auto-
matically linked to the call-by-call number
which you have previously stored.
¢ Ð ¢ Base ¢ Preselection ¢ With
v
Preselect / Without Presel.
s Select entry.
§Edit§ Press the display key.
~ Enter or edit first digits of
number.
¤ Save changes (page 11).
a Press and hold (idle status).
Making cost-effective calls
Temporarily cancelling preselection
c (press and hold) ¢ v ¢ Aut
Preselct off
Permanently deactivating preselection
¤ Delete the preselection number
(page 21).
21

SMS (text messages)
SMS (text messages)
Your unit is supplied pre-prepared for the
sending of SMS.
Requirements:
u Calling Line Identification is enabled for
your phone connection.
u Your network provider supports SMS in
the fixed network (information on this
can be obtained from your network
provider).
u You are registered with your service
provider for the sending and receiving
of SMS.
Text messages are exchanged between
SMS centres that are operated by service
providers. You must enter the SMS centre
in your unit, through which you wish to
send and receive. You can receive SMS
from every SMS centre that is entered if
you have registered with your service provider. Your SMS is sent through the SMS
centre that is entered as the send centre
(page 28). Only one SMS centre can be
the send centre at any one time.
If no SMS Service Centre is entered, the
SMS menu only consists of the entry Set-
tings. Enter an SMS Service Centre
(page 28).
u Enter the text see page 53.
u Writing using the predictive text tool
EATONI, see page 53.
Rules
u An SMS can be up to 612 characters
long.
u If there are more than 160 characters
or large image data, the SMS is sent
as a linked SMS (up to eight SMS of
153 characters each).
Please note:
u Each incoming SMS is signalled by a
single ring (ringtone as for external
calls). If you accept such an SMS "call"
on the first ring, the SMS will be lost. To
prevent this ringing, suppress the first
ringtone for all external calls (page 42).
u If your phone is connected to a PABX,
please read page 29.
u To receive text messages you must be
registered with your service provider.
Writing/sending an SMS
Writing an SMS
v ¢ î
Select Mailbox 2 as required and press OK.
~ Enter mailbox PIN if necessary
and press
Write Message
Select and press
~ Writing an SMS.
© Press the display key.
Send Select and press §OK§.
SMS Select and press §OK§.
Sending an SMS
s / C / ~
Select number with area code
(even if you are in that area)
from the directory or Call-byCall list or enter directly. For
SMS to an SMS mailbox: put
the mailbox ID at the end of
the number.
Note:
If you have assigned the number to a key: press
and hold the key to copy the number.
© Press the display key.
Send Select and press
The SMS is sent.
§OK§.
§OK§.
§OK§.
22

Notes:
– If you are interrupted by an external call
while writing an SMS, the text is automatically saved in the draft message list.
– If the memory is full, or if the SMS function
on the base is being used by another handset, this cancels the operation. An appropriate message appears in the display. Delete
SMS messages you no longer require or
send the SMS later.
Setting input language
¤ Requirement: You are writing an SMS
(page 22).
© Press the display key.
Select Language
Select and press
s Select input language and
OK.
press
a Press the end call key briefly
to return to the text panel.
The setting of the input language only
applies to the current SMS.
§OK§.
Inserting pre-written text or an email
address in an SMS
The options are:
u 15 icons,
u 10 tones,
u email addresses from your email direc-
tory (page 17).
¤ Requirement: You are writing an SMS
(page 22). The cursor is in the correct
position.
© Press the display key.
Predef. Picture / Predef. Sound / Insert E-mail
Adr.
Select and press
s Select a language and
§OK§.
press
The selected object is inserted.
§OK§.
SMS (text messages)
SMS status report
If you have activated the status report, you
will receive a message with a confirmation
text after you have sent your SMS.
Activating/deactivating the status report
v ¢ î ¢ Settings
Status Report
Select and press
§OK§ (‰ =on).
Reading/deleting a status report
¤ Opening the incoming message list
(page 25) and then:
q Select SMS with the status
State OK or State not OK.
§Read§ Press the display key.
Or:
§Delete§ Press the display key. The text
message is deleted.
Draft message list
In the draft message list, you can save,
edit later and send an SMS.
Saving an SMS in the draft message list
¤ You are writing an SMS (page 22).
© Press the display key.
Save Entry Select and press §OK§.
Opening the draft message list
v ¢ î ¢ (Mailbox, mailbox PIN)
¢ Outgoing
The first list entry is displayed, e.g.:
Saved 01/ 02
1234567890
28.09.04 09:45
01/02: Number/total number of SMS
23

SMS (text messages)
Reading or deleting individual SMS
¤ Opening the draft message list
q Select SMS.
§Read§ Press the display key. The
entry will be displayed. Scroll
line by line using q.
Or:
§Delete§ Press the display key. The text
message is deleted.
Writing/editing an SMS
¤ You are reading an SMS in the draft
message list.
v Open menu.
You can select the following:
Write Message
Write and then send an new SMS
(page 22) or save.
Use Text
Edit the text of the saved SMS and then
send (page 22).
Character Set
Text is shown in the selected character
set.
Deleting draft message list
¤ Open the draft message list and then:
v Open menu.
Delete all
Select, press
§Yes§. The list is cleared.
with
a Press and hold (idle status).
§OK§ and confirm
Sending an SMS to an email address
If your service provider supports the 'SMS
to email' service, then you can also send
your text messages to email addresses.
The email address must be written at the
beginning of the text. You must send the
SMS to the email service of your SMS send
centre.
¢ î ¢ (Mailbox, mailbox PIN)
v
¢ Write Message
Π/ ~
Copy the email address from
the email directory or enter
directly. End with a space or
colon (depending on the service provider).
~ Enter the SMS text.
© Press the display key.
Send Select and press
E-mail Select and press §OK§. If the
number of the email service is
not entered (page 28), enter
the number of the email service.
© Press the display key.
Send Select and press
§OK§.
§OK§.
Sending an SMS as a fax
You can also send an SMS to a fax
machine.
Requirement: Your service provider supports this feature.
¤ You are writing an SMS (page 22).
© Press the display key.
Send Select and press §OK§.
Fax Select and press §OK§.
s / ~ Select number from the direc-
tory or enter directly. Enter the
number with area code (even
if you are in the area).
© Press the display key.
Send Select and press
§OK§.
24

SMS (text messages)
Receiving an SMS
All SMS received are saved in the incoming
message list. Linked text messages are displayed as one SMS. If this is too long or
has not been transferred completely, it
will be split into individual messages.
Since an SMS remains in the list after you
have read it, you should delete SMS reg-
ularly from the list.
The display tells you if the message memory is full.
¤ Deleting SMS you no longer require
(page 25).
Incoming message list
The incoming message list contains:
u all SMS received, starting with the most
recent.
u messages that could not be sent
despite several attempts.
New SMS are signalled on all Gigaset S44
handsets by the À icon on the display, the
flashing message key f and an advisory tone.
Opening the incoming message list with
the
f key
Requirement: There is a new SMS in the
list.
f Press.
Select mailbox if necessary and enter mail-
box PIN.
The incoming message list is displayed as
follows (example):
SMS: 01+05
1 Number of new + number of old, read en-
tries
2 Name of mailbox, here: general mailbox
1
2
An entry in the list is displayed e.g. as follows:
New 01/ 02
1234567890
28.09.04 09:45
01/02: Total number of new SMS/number of the
SMS displayed
Opening the incoming message list via the
SMS menu
v ¢ î ¢ (Mailbox, mailbox PIN)
¢ Incoming 01+05
Reading or deleting individual SMS
¤ Open the incoming message list
¤ Continue as described at "Reading or
deleting individual SMS", page 24.
A new message which you have read
acquires the status Old.
Deleting incoming message list
All new and old SMS in the list are
deleted.
¤ Open the incoming message list
v Open menu.
¤ To continue, see "Deleting draft mes-
sage list", page 24.
Replying to or forwarding SMS
¤ Reading an SMS (page 25):
© Press the display key.
You have the following options:
Reply
Write and send a reply SMS directly
(page 22).
Answer: Yes / Answer: No
Yes or no is added to the SMS. Then
send the SMS (page 22).
Use Text
Edit the text in the SMS and then send
it (page 22). Attachments (e.g. pictures, melodies) are not sent.
25

SMS (text messages)
Forwarding an SMS
¤ You are reading an SMS (page 25):
© Press the display key.
Forward Select and press §OK§. Next see
page 22.
Attachments are forwarded. If a service
provider does not permit the forwarding
of attachments:
¤ Select Use Text, to forward the SMS
without attachments.
¤ Confirm the prompt New SMS will
not contain picture/ melody. Continue?
§Yes§.
with
Adding a number to the directory
Adding the sender's number
¤ Open incoming message list and select
entry (page 25).
© Press the display key. To con-
tinue, see see page 16.
Notes:
– You can create a special directory for SMS
within your directory by putting an star (*)
before the names.
– An attached mail box identifier is added to
the directory.
Copying/selecting numbers from a
SMS text
¤ Read SMS (page 25) and scroll to the
telephone number.
The digits are reverse-highlighted.
Ó Press the display key. Continue
see page 16.
Or:
c Press the talk key to dial the
number.
If you wish to use the number to send an
SMS:
¤ Save the number with the area code
(dialling code) in the directory.
Changing the character set
¤ Read the SMS (page 25):
© Press the display key.
Character Set
Text is shown in the selected character
set.
Using attachment data
An attachment is reverse-highlighted in
the SMS. An SMS can contain multiple
attachments.
Listening to and saving a melody
You can save approx. 5 melodies in "iMelody" format and install them as ringtones
(page 41). The melodies are stored in the
Sound Manager.
You can also save and install these melodies on other handsets registered to the
same base station.
You can find a range of melodies on the
Internet at www.siemens.com/
gigasets440. The Internet pages will tell
you which data is available in your country.
Listening to a melody
¤ Read the SMS (page 25) and move the
cursor to the line in which the attachment can be found. The melody is
played back immediately.
Saving a melody
¤ Open the SMS to read it (page 25).
¤ Listen to the melody.
§Save§ Press the display key.
~ If necessary, change the name
of the melody.
§Save§ Press the display key.
Melodies are saved in the Sound Manager
(page 42).
26

SMS (text messages)
Notification by SMS
You can be notified by SMS about missed
calls .
Requirement: For missed calls, the
caller's number (CLI) must have been
transmitted.
Notification is sent to your mobile phone
or another phone with SMS functionality.
You only need to set the phone number to
which notification should be sent (notification number) and the notification type.
Storing the notification number
v ¢ î ¢ Settings ¢ Notify Number
~ Enter the number to which the
SMS should be sent.
© Press the display key.
Save Entry Select and press
a Press and hold (idle status).
§OK§.
Caution:
Do not enter your own fixed network number
for the notification of missed calls. This can
lead to chargeable endless looping.
Setting the notification type
v ¢ î ¢ Settings ¢ Notify Type
¤ Change multiple line input if necessary:
Missed Calls:
Set On, if you want SMS notification.
¤ Save changes (page 11).
SMS mailboxes
The General Mailbox is the default setting. Anyone can access this mailbox and
it cannot be protected by a PIN. You can
also set up three personal mailboxes and
protect these with a PIN. Each mailbox is
identified by a name and a "Mailbox ID"
(a kind of extension number).
Please note:
u If you operate a number of devices
(base stations) with SMS functionality
on a single phone line, then each SMS
mailbox ID may only occur once. In this
case you must also change the preset
ID of the general mailbox ("0").
u You can only use personal mailboxes if
your service provider supports such a
function. You can tell that this is supported by the fact that a star (*) is
added to the number of a (preset) SMS
centre.
u If you have forgotten your mailbox PIN,
you can reset it by restoring the base
station's factory settings. This will
delete all messages from all mailboxes.
Setting up and changing a personal
mailbox
Setting up a personal mailbox
v ¢ î ¢ Settings ¢ SMS Mailboxes
s Select mailbox, e.g. Mailbox 2
and press
§OK§.
¤ Change multiple line input:
On/Off:
Activate or deactivate mailbox.
ID:
Select mailbox ID (0–9). You can only
select the available numbers.
Protection:
Activate/deactivate PIN protection.
PIN
Enter 4-digit PIN, if necessary.
¤ Save changes (page 11).
27

SMS (text messages)
Active mailboxes are marked with ‰ in the
mailbox list. They are shown in the SMS
list and can, if necessary, be displayed by
pressing the message key f.
Deactivating a mailbox
¤ Set On/Off: to Off. Confirm message with
§Yes§ if necessary.
All SMS saved in this mailbox will be
deleted.
Deactivating PIN protection
¤ Set Protection: to Off.
The mailbox PIN is reset to "0000".
Changing the name of a mailbox
v ¢ î ¢ Settings ¢ SMS Mailboxes
¢ s (Select mailbox)
§Edit§ Press the display key.
~ Enter new name.
§Save§ Press the display key.
a Press and hold (idle status).
Changing a mailbox's PIN and ID
v ¢ î ¢ Settings ¢ SMS Mailboxes
¢ s (Select mailbox)
~ Enter mailbox PIN if necessary
und press
§OK§.
¤ Set ID:, Protection: and PIN (page 27).
Sending a text message to a
personal mailbox
To send a text message to a personal mailbox, the sender must know your ID and
enter it after your number.
¤ You can send your SMS contact an SMS
via your personal mailbox.
Your SMS contact will receive your SMS
number with current ID and can save it in
their directory. If the ID is invalid, the SMS
will not be delivered.
Setting SMS centre
Entering/changing SMS centres
¤ You should find out about the services
and special functions offered by your
service provider before you make a
new application and/or before you
delete pre-configured call numbers.
¢ î ¢ Settings ¢ Service Centres
v
s Select an SMS centre
(e.g. Service Centr. 1) and
§OK§.
press
¤ Change multiple line input:
Active Send:
Select Yes, if SMS should be sent via the
SMS centre.
SMS:
Press the display key
number of the SMS service and add a
star, if your service provider supports
personal mailboxes.
E-mail:
Press the display key
number of the email service.
§Edit§. Enter the
§Edit§. Enter the
¤ Save changes (page 11).
Note:
Ask your service provider for details of how
you should enter service numbers if you wish
to use personal mailboxes (requirement: your
service provider supports this function).
Sending an SMS through another SMS
centre
¤ Activate the SMS centre (2 to 5) as send
centre.
¤ Send the SMS.
28

SMS (text messages)
SMS info services
You can have your service provider send
you specific information by SMS
(e.g. weather forecast or the lottery numbers). Up to 10 info services can be stored.
You can obtain information about the info
services available and their costs from
your service provider.
Setting up/ordering an info service
Ordering an info service
v ¢ î ¢ SMS Service
s Select info service.
§Send§§ Press the display key.
Note:
You can also open the menu for ordering an
info service via v
£ Ì.
Setting up an info service
¤ Select info service (see above). Now:
§View§ Press the display key.
§Edit§ Press the display key.
~ If necessary, enter code, desig-
nation and destination
number.
§Save§ Press the display key.
Changing the entry of an info service
¤ Select info service (see above). Now:
§View§ Press the display key.
§Edit§ Press the display key.
~ If necessary, change code,
designation or destination
number.
§Save§ Press the display key.
Deleting an info service
¤ Select info service (see above). Now:
v Open menu.
Delete Entry Select and press §OK§.
SMS to a PABX
u You can only receive an SMS when the
Calling Line Identification is forwarded to the extension of the PABX
(CLIP).The CLIP of the phone number
for the SMS centre is evaluated in your
Gigaset.
u If required, you must prefix the number
for the SMS centre with the access code
(depending on your PABX). You can
store the access code in your base station.
If in doubt, test your PABX by e.g. sending an SMS to your own number: once
with access code and once without.
u When you send SMS, your sender
number may be sent without your
extension number. The recipient cannot reply to you directly in this case.
SMS can only be sent and received
through ISDN exchanges with the MSN
number assigned to your base.
Activating/deactivating the
SMS function
When you switch off you cannot send or
receive any SMS with your phone.
The settings which you have made for
sending and receiving SMS (e.g. the call
numbers of the SMS centres) and the
entries in the incoming and draft message
lists are saved when you switch off your
phone.
v Open menu.
54O2L
Enter the digits.
§OK§ Deactivate the SMS function.
Q
Or:
1 §OK§ Activate SMS function (default
settings).
29

SMS (text messages)
SMS troubleshooting
Errors when sending
E0 Calling Line Identification permanently
withheld (CLIR) or Calling Line
Identification not activated.
FE Error occurred during SMS transfer.
FD Connection to SMS centre failed, see self-
help.
Self-help with errors
The following table lists error situations
and possible causes and provides notes on
troubleshooting.
You cannot send messages.
1. You have not requested the CLIP service
(Calling Line Identification Presentation).
¥ Ask your service provider to enable this
service.
2. SMS transfer was interrupted (e.g. by a
call).
¥ Re-send the SMS.
3. Feature is not supported by network pro-
vider. .
4. No number or an invalid number is entered
for the SMS centre activated as the send
centre.
¥ Enter the number (page 28).
You receive an SMS whose text is incomplete.
1. Your phone's memory is full.
¥ Delete old messages (page 25).
2. The provider has not yet sent the rest of the
message.
You have stopped receiving messages.
1. You have changed the ID of your mailbox.
¥ Tell your SMS contacts your new ID or
undo the change (page 28).
2. You have not activated your mailbox.
¥ Activate your mailbox (page 28).
3. Call diversion is activated with When: All Calls
or the call diversion All Calls is activated for
the network mailbox.
¥ Change your call diversion.
The message is played back.
1. The "display call number" service is not activated.
¥ Have your service provider enable this
service (there is a charge for this).
2. Mobile phone operator and network SMS
service provider have not agreed on a
cooperation.
¥ Obtain information from your network
SMS service provider.
3. Your terminal is recorded in the records of
your SMS provider as having no fixed network SMS functionality, i.e. you are no
longer registered with the provider.
– Register the terminal (again) for SMS
reception.
Messages are only received during the day.
1. Your terminal is stored in the database of
your SMS provider as having no fixed network SMS functionality, i.e. you are no
longer registered with the provider.
¥ Register the terminal (again) for SMS
reception (see above).
30

Using T-Net box
Using T-Net box
The T-Net box is the answering machine in
your network provider's network. You cannot use the T-Net box unless you have
applied to your network provider.
Configuring T-Net box for
fast access
With fast access you can direct dial the TNet box .
The T-Net box is preconfigured for fast
access. You only have to enter the number
of the T-Net box.
Configuring T-Net box for fast access and
entering the T-Net box number
v ¢ Î ¢ Set Key 1
Network Mailb.
Select and press
~ Enter T-Net box number.
© Press the display key.
Save Entry Select and press §OK§. The entry
is stored.
a Press and hold (idle status).
This setting is now valid for all registered
handsets.
§OK§ (‰ =on).
Calling T-Net box
1 Press and hold. This connects
you directly to T-Net box.
d Press handsfree key d
if required. You hear the
T-Net box announcement.
Viewing a message from
T-Net box
When a message arrives for you, you get a
call from T-Net box. If you have requested
Calling Line Identification, the display
shows the T-Net box number. If you accept
the call, the new messages are played
back. If you do not accept the call, the
T-Net box number will be stored in the list
of missed calls and the message key
flashes (page 18).
31

Using several handsets
Using several handsets
Registering handsets
You can register up to a total of six handsets on your base station.
A Gigaset S44 handset can be registered
on up to four base stations.
Automatic registration Gigaset S44 to
Gigaset S440
Important: The handset must not already
be registered to any base station.
Registration of the handset to the Gigaset
S440 base station occurs automatically.
¤ Place the handset in the base station
with its display facing forward.
Registration takes around 1 minute. During this process Regstr.Procedure appears
in the display and the name of the base
station flashes e.g. Base 1.When the handset has registered, its screen displays its
internal number, e.g. INT 2 for internal
number 2. The handset is assigned the
lowest available internal number (1-6).
If all internal numbers 1-6 have been
assigned, number 6 is overwritten, provided the handset with the internal
number 6 is in idle status.
Notes:
– Automatic registration is not possible when
the base station on which you wish to register the handset is being used to make a
call.
– Press any key to cancel automatic registra-
tion.
– If automatic registration does not work,
you will have to register the handset manually.
– You can change the name of the handset
(page 35).
Manual registration Gigaset S44 to
Gigaset S440
You must activate manual registration of
the handset at both the handset and the
base station.
After it has registered, the handset returns
to idle status. The internal number of the
handset appears in the display, e.g. INT 1.
If it does not, repeat the procedure.
On the handset
v ¢ Ð ¢ Handset ¢ Register H/Set
s Select base station, e.g. Base 1
and press
~ Enter the system PIN of the
base station (the default is
0000) and press
screen will display, e.g. Base 1.
§OK§.
§OK§. The
On the base station
÷ Within 60 secs. press and hold
the registration/paging key on
the base station (approx. 3
secs.).
Registering other handsets
You can register other Gigaset handsets
and handsets for other devices with GAP
functionality as follows.
On the handset
¤ Start to register the handset as
described in its user guide.
On the base station
÷ Press and hold the registra-
tion/paging key on the base
station (approx. 3 secs.).
32

Using several handsets
De-registering handsets
You can de-register any registered handset
from any registered Gigaset S44 handset.
u Open list of internal users.
The handset you are currently
using is indicated by <.
s Select the internal user you
wish to de-register.
v Open menu.
De-reg. H/Set No.
Select and press
~ Enter current System PIN and
§OK§.
press
§Yes§ Press the display key.
§OK§.
Locating a handset ("Paging")
You can locate your handset using the
base station.
¤ Briefly press the registration/paging
key on the base station.
¤ All handsets will ring at the same time
("Paging"), even if the ringers are
switched off.
Ending paging
÷ / c Briefly press the registration/
paging key on the base station
or the talk key on the handset.
Changing the base station
If your handset is registered to more than
one base station, you can set it to a particular base station or to the base station
that has the best reception (Best Base).
¢ Ð ¢ Handset ¢ Select Base
v
s Select one of the registered
base stations or Best Base and
§OK§.
press
Changing the name of the
base station
Names "Base 1" to "Base 4" are assigned
automatically. The name of the base station is handset-specific, i.e. the base station receives the name which was
assigned by the handset. The same base
station can have different names on different handsets. You can change the
name of your base station.
¢ Ð ¢ Handset ¢ Select Base
v
s Select base station and
§Edit§.
press
~ Enter new name, max. of
16 characters (page 53).
§Save§ Press the display key to save
the setting.
a Press and hold (idle status).
Making internal calls
Internal calls to other handsets registered
on the same base station are free.
Calling a specific handset
u Initiate internal call.
~ Enter the number of the hand-
set.
Or:
u Initiate internal call.
s Select handset.
c Press the talk key.
Calling all handsets ("group call")
u Initiate internal call.
* Press the star key. All handsets
are called.
Ending calls
a Press the end call key.
33

Using several handsets
Transferring a call to another handset
You can transfer an external call to
another handset (connect).
u Open list of handsets.
The external caller hears the
hold music.
s Select a handset or Call All and
§OK§.
press
When the internal participant answers:
¤ If necessary announce the external call.
a Press the end call key.
The external call is transferred to the other
handset.
If the internal participant does not answer
or is busy, press the display key
return to the external call.
When diverting a call you can also press
the end call key a before the internal
participant lifts the receiver.
Then, if the internal participant does not
answer or is busy, the call will automatically return to you (the display will show
Recall).
Internal consultation calls
When you are speaking to an external
participant you can simultaneously call an
internal participant for consultation.
u Open list of handsets.
The external caller hears the
hold music.
s Select handset and press
Ending an enquiry call
§End§ Press the display key.
You are reconnected with the external
caller.
§End§, to
§OK§.
Accepting/rejecting call waiting
If you get an external call while conducting an internal call, you will hear the call
waiting tone (short tone). The caller's
number will appear in the display if phone
number identification is enabled.
Ending an internal call, accepting an
external call
§Accept§ Press the display key.
The internal call is ended. You are connected to the external caller.
Rejecting external call
§Reject§ Press the display key.
The call waiting tone is turned off. You
remain connected with the internal participant. The ringtone can still be heard at
other registered handsets.
Linking internal participants
to an external call
Important: The Listening In function must
be activated.
You are conducting an external call. An
internal party can join this call and take
part in the conversation. All the parties are
made aware of the 'join-in' by a signal
tone.
Activating/deactivating internal join-in
v ¢ Ð ¢ Base ¢ Add. Features
¢ Listening In
a Press and hold (idle status).
34

Using several handsets
Internal join-in
The line is engaged with an external call.
The screen will display information to that
effect. You would like to join-in on the
existing external call.
c Press and hold the talk key.
You are linked into the call. All parties hear
a signal tone. During this time, this handset will not display any information and no
selection can be made from this handset.
Ending join-in
a Press the end call key.
All parties hear a signal tone.
If the first internal participant presses the
end call key a, the handset that is
'joined-in' remains connected to the external participant.
Changing the name of a handset
The names "INT 1", "INT 2" etc. are
assigned automatically at registration.
You can change these names. The name
must be no more than 10 characters. The
changed name is displayed in every handset's list.
u Open list of handsets. Your
own handset is indicated by <.
s Select handset.
§Edit§ Press the display key.
~ Enter name.
§Save§ Press the display key.
Changing a handset's
internal number
A handset is automatically assigned the
lowest unassigned number when it is registered. If all the numbers have been
assigned, number 6 is overwritten, provided the handset is in idle status. You can
change the internal number of all registered handsets (1-6).
u Open list of handsets. Your
own handset is indicated by <.
v Open menu.
Edit H/Set No.
Select and press
handsets is displayed.
s The current number flashes.
Select a handset.
~ Enter the new internal
number(1-6). The handset's
old number is overwritten.
§Save§ Press the display key to save
the input.
a Press and hold (idle status).
You will hear the error tone (descending
tone sequence) if you assign an internal
number twice.
§OK§. The list of
¤ Repeat the process with an unused
number.
35

Using several handsets
Using a handset as a
room monitor
If the room monitor is activated, a previously stored destination number is called
as soon as a set noise level is reached. You
can store an internal or external number
in your handset as the destination
number.
The room monitor call to an external
number stops after approx. 90 seconds.
The room monitor call to an internal
number (handset) stops after approx.
3 minutes (depending on the base station). While the room monitor is activated,
all keys are locked except the end call key.
The handset's speaker is muted.
When the room monitor is activated,
incoming calls to the handset are indicated without a ringtone and are only
shown on the screen. The display and keypad are not illuminated and advisory
tones are also turned off.
If you accept an incoming call, the room
monitor mode is suspended for the duration of the call, but the function remains
activated.
If you switch off the handset, the room
monitor mode is deactivated. You must
reactivate the function after switching on
the handset again.
Caution!
– You should always check the operation
of the room monitor before use. For
example, test its sensitivity. Check the
connection if you are diverting the room
monitor to an outside number.
– The active room monitor function consider-
ably reduces the operating time of the
handset. Place the handset in the charging
cradle if necessary. This ensures that the
battery does not run down.
– Ideally the handset should be positioned 1
to 2 metres away from the baby. The microphone must be directed towards the baby.
– The connection to which the room monitor
is diverted must not be blocked by an activated answering machine.
Activating the room monitor and
entering the number to be called
v ¢ í ¢ Room Monitor
¤ Change multiple line input:
Room M.:
Select On to activate.
Call to:
Press the display key
tination number.
External number: select number from
the directory or enter directly. Only the
last 4 digits are displayed.
Internal number:
set or Call All if all registered handsets
are to be called)
Store number with © Save Entry
Level:
Set noise level sensitivity (Low or High).
§Edit§ and enter des-
§INT§ s (Select hand-
§OK§.
§OK§.
¤ Save changes (page 11).
The function is now activated. With v,
you can move directly to settings.
Changing previously set external
destination number
v ¢ í ¢ Room Monitor
s Jump to the Call to: line.
§Edit§ Press the display key.
X Delete existing number.
¤ Enter number as described in "Activat-
ing the room monitor and entering the
number to be called" (page 36).
¤ Save changes (page 11).
36

Using several handsets
Changing previously set internal
destination number
v ¢ í ¢ Room Monitor
s Jump to the Call to: line.
§Edit§ Press the display key.
§Yes§ Press the display key to con-
firm the prompt.
¤ Enter number as described in "Activat-
ing the room monitor and entering the
number to be called" (page 36).
¤ Save changes (page 11).
Deactivating the room monitor
remotely
Important: The phone must support
touch tone dialling and the room monitor
should be set for an external destination
number.
¤ Take the call from the room monitor
and press keys 9 ;.
The room monitor function will deactivate
after the call ends. There will be no further
room monitor calls. The other room monitor settings on the handset (e.g. no ringtone) will however remain activated until
you press the display key
set.
To reactivate the room function with the
same phone number:
§Off§ on the hand-
¤ Turn on the activation again and save
§Save§ (page 36).
with
Setting the Walk and Talk mode
The Walk and Talk function allows two
handsets to communicate with each other
no matter how far they are from the base
station.
Example: You go on holiday and take two
handsets with Walk and Talk functionality
with you. Set the Walk and Talk function
on both handsets.
Important:
One of the following requirements must
be met.
u Both handsets are registered to the
same base station.
u Both handsets are registered to differ-
ent base stations and both are set to
Best Base (page 33).
u One of the handsets is not registered to
any base station and the registered
handset is set to Best Base.
u Neither handset is registered to a base
station.
Please note:
u In Walk and Talk mode, the range
between the handsets is a maximum of
300 m in the open.
u The handsets can no longer be reached
by incoming calls.
u The Walk and Talk mode severely
reduces the handset operating times.
u The Walk and Talk mode is retained
even when you switch your handset off
and back on.
Activating Walk and Talk mode
v ¢ í ¢ Walky-Talky
If, when you are in Walk and Talk mode,
you press the talk key c or handsfree
key d, the call will go to all the handsets that are in Walk and Talk mode. The
connection is made with the first handset
to answer the Walk and Talk call.
u The loudspeaker volume and advisory
tones are set in exactly the same way as
if your handsets were in range of the
base station (page 41).
u "Activate/deactivate ringtone"
(page 42) and "Activate/deactivate keypad lock" (page 8) are available in Walk
and Talk mode.
u To open the menu, press the display
key ©.
37

Using several handsets
Deactivating Walk and Talk mode
§OFF§ Press the display key.
Using a handset in Walk and Talk
mode as a room monitor
This function allows you to use the Walk
and Talk mode as a room monitor. The
room monitor will then call all handsets
that are in Walk and Talk mode as soon as
the previously set noise level has been
reached.
During the call, all keys are locked except
the end call key. The room monitor
function remains active after you end the
call. It must be activated again if the handset has been switched off.
Caution!
– You should always check the operation
of the room monitor before use.
For example, test the sensitivity and
connection.
– The active room monitor function consider-
ably reduces the operating time of the
handset. Place the handset in the charging
cradle if necessary. This ensures that the
battery does not run down.
– The handset should be positioned 1 to
2 metres away from the baby. The microphone must be directed towards the baby.
– Please note that the Walk and Talk func-
tion's room monitor does not provide full
security.
Activating/deactivating the
room monitor
© Press the display key.
Room Monitor
Select and press
Room M.:
Select On to activate. Select Off to deactivate.
Level:
Set the noise sensitivity at the desired
level (Low or High).
§OK§.
¤ Save changes.
The room monitor has now been activated/deactivated.
38

Handset settings
Handset settings
Your handset is preconfigured, but you
can change the settings to suit your individual requirements.
Shortcuts for functions
and numbers
You can assign the left display key and the
digit keys Q and 2 to O each
with a number or a function.
The number is then dialled or the function
started by simply pressing a key.
Assigning a digit key/left display key
Requirement: The digit key or the left display key has not yet been assigned a
number or a function.
¤ Press the display key } or press
and hold the digit key.
The list of possible key assignments is
opened. The following can be selected:
Quick Dial / Call-by-Call
Assign key with a number from the
directory or call-by-call list.
The directory or call-by-call list is
opened.
¤ Select an entry and press §OK§.
If you delete or edit an entry in the
directory or call-by-call list, this has no
effect on the assignment to the digit/
display key.
Info Services
Assign key with the menu for ordering
info services (page 29).
¢ SMS Service
î
SMS Notific.
Assign key with the menu for activating
SMS notification (page 27):
¢ Settings ¢ Notify Type
î
Room Monitor
Assign key with the menu for setting
and activating the room monitor
(page 36):
¢ Room Monitor
í
Set Appoints. / Alarm Clock
Assign key with the menu for setting
and activating an appointment/the
alarm clock (page 44):
¢ Set Appoints. / Alarm Clock
ì
If the left display key has been assigned a
shortcut, the selected function or name of
the phone number in the directory or callby-call list is displayed (abbreviated if necessary) in the bottom display line.
Starting the function, dialling
the number
If the handset is in idle status, press and
hold the digit key or press the display key
briefly.
Depending on the key assignment:
u Numbers are dialled directly.
u Function menu is opened.
Changing key assignment
Display key
¤ Press and hold the left display key.
The list of possible key assignments is
opened.
¤ Proceed as is described when first
assigning the key with a shortcut
(page 39).
Digit key
¤ Press and hold digit key.
§Change§ Press the display key. The list
of possible key assignments is
displayed.
¤ Proceed as is described when first
assigning the key with a shortcut
(page 39).
39

Handset settings
Changing the display language
You can view the display texts in different
languages.
¢ Ð ¢ Handset ¢ Language
v
The current language is indicated by ‰.
s Select a language and
§OK§.
press
a Press and hold (idle status).
If you accidentally choose a language you
do not understand:
v 5 I1
Press keys one after the other.
s Select the correct language
and press
§OK§.
Setting the display
You have a choice of four colour schemes
and several different contrasts.
¢ Ð ¢ Display
v
Colour Scheme
Select and press
s Select a colour scheme and
§OK§ (‰ = current colour).
press
a Press briefly.
Contrast Select and press §OK§.
r Select contrast.
§Save§ Press the display key.
a Press and hold (idle status).
§OK§.
Setting screen picture
¢ Ð ¢ Display ¢ Screen Picture
v
The current setting is displayed.
¤ Change multiple line input:
Activation:
Select On (screen picture is displayed)
or Off (no screen picture).
Picture:
Change screen picture if necessary
(see below).
¤ Save changes.
If the screen picture conceals the display,
press any key briefly to show the idle display with time and date.
Changing screen picture
v ¢ Ð ¢ Display ¢ Screen Picture
s Jump to the line Picture:.
§View§ Press the display key. The
active screen picture is displayed
s Select picture and press
§OK§.
¤ Save changes.
Setting night mode
If the handset is in the charging cradle, the
display is dimmed. If this bothers you, you
can set the handset to night mode. The
display is then completely dark when that
handset is in the charging cradle.
¢ Ð ¢ Display
v
Night Mode Select and press §OK§ (‰ =on).
a Press and hold (idle status).
You can display a screen picture when the
handset is in idle status. This will replace
the idle status display. It may conceal the
date, time and name.
The screen picture is now displayed in certain situations, e.g. during a call or when
the handset has been deregistered.
If a screen picture has been activated, the
menu item Screen Picture is ma rk ed wi th ‰ .
40

Handset settings
Activating/deactivating
auto answer
If you have activated this function, when
you get a call you can simply lift the handset out of the charging cradle without having to press the talk key c.
¢ Ð ¢ Handset
v
Auto Answer
Select and press
a Press and hold (idle status).
§OK§ (‰ =on).
Adjusting the loudspeaker
volume
You can set the loudspeaker volume for
handsfree speaking to five different levels
and the earpiece volume to three different
levels. You can only make these adjustments during an external call.
The handsfree volume can only be
adjusted when this function is set.
You are conducting an external call.
t Open menu.
r Select volume.
§Save§ Press display key if necessary
to save the setting permanently.
If t is assigned a different function,
e.g. when toggling (page 17):
v Open menu.
Vol ume Select and press
Configure setting (see above).
§OK§.
Changing ringtones
u Volume:
You can choose between five volumes
(1–5; e.g. volume 2 = ˆ) and
the "Crescendo" ring (6; volume
increases with each ring =
‰).
u Ringtones:
You can select any sound from the
Sound Manager (page 42).
You can configure the following functions
with different ringtones:
u Ext. Calls: For external calls
u Internal Calls: For internal calls
u Appointments: For set appointments
(page 44)
u Alarm: For a pre-set wake-up call
(page 44)
u All: The same for all functions
Settings for individual functions
Set the volume and melody depending on
the type of ringing. For external calls, you
can choose to have the name of the caller
announced. This requires the corresponding voice pattern to be recorded beforehand (page 16).
¢ ï ¢ Ringer Settings
v
q Select setting, e.g. Ext. Calls,
and press
r Set volume (1–6).
s Jump to the next line.
r Select melody.
r Activate or deactivate
Announce. Requirement: Call-
ing Line Identification
(page 15)
§OK§.
¤ Save changes (page 11).
In idle status, you can also open the menu
Ringer Settings by pressing t briefly.
41

Handset settings
Same settings for all functions
v ¢ ï ¢ Ringer Settings ¢ All
¤ Set volume and ringtone (see "Settings
for individual functions").
§Yes§ Press the display key to con-
firm the prompt.
a Press and hold (idle status).
Activating/deactivating the ringtone
You can deactivate the ringer on your
handset before you answer a call or when
the handset is in idle status; the ringer can
be deactivated permanently or just for the
current call. The ringtone cannot be reactivated while an external call is in
progress.
Deactivating the ringtone permanently
* Press the star key and hold
until you can no longer hear
the ringtone.
The Ú icon appears in the display.
Re-activating the ringtone
* Press and hold the star key.
Deactivating the ringtone for the current
call
§Silence§ Press the display key.
Activating/deactivating the alert tone
Instead of a ringtone, you can activate an
alert tone. When you get a call, you will
hear a short tone ("Beep") instead of the
ringtone.
* Press and hold the star key
and within 3 seconds:
§Beep on§ Press the display key. A call is
now signalled by one brief
alert tone. You will now see
º
in the display.
Activating/deactivating first
ring muting
v Open menu.
54O1O
Press keys.
§OK§ First ring audible.
Q
Or:
1 §OK§ First ring muted.
Sound Manager
The handset's Sound Manager manages
ringtones and sounds which you can use
as ringtone melodies. It can manage the
following sound types:
Icon Sound Format
Ù Ringtones; monophonic standard
× Polyphonic standard
× Polyphonic .psf
Ö Monophonic iMelody
The icon is displayed in front of the name
in the Sound Manager. Your phone has
3 Ù and 17 × as default settings. You can
neither delete nor rename these default
sounds.
You can download sounds in .psf- and
iMelody format from a PC (page 53). You
can have sounds in iMelody format sent to
you via SMS (page 26).
In Sound Manager you can listen to the
existing sounds and rename and delete
sounds that you have downloaded onto
your handset via SMS or data cable
(max. 16 KB).
42

Handset settings
Playing back sounds
v ¢ Ë ¢ q (Select entry)
§Play§ Press the display key. Sounds
are played. Change between
entries using the q key.
§End§ Press the display key. Play back
is ended.
a Press and hold (idle status).
Whilst you are playing sounds, you can
adjust the volume using the display key
§Volume§.
If you have saved a sound in an invalid
data format, you will receive an error message after selecting the entry. The operation is cancelled by pressing Î. The
sound is deleted by pressing
§Delete§.
Renaming/deleting sounds
You have selected an entry. If a sound cannot be deleted (è), these options are not
available.
v Open menu.
Depending on the situation, you can
select the following functions:
Rename
Select and press
(max. 16 characters, do not use spaces
or special characters) and press
The entry is saved with its new name.
Delete Entry
The selected entry is deleted.
A deleted ringtone melody is automati-
cally replaced. A deleted ringtone melody for VIP calls or anniversaries is not
automatically replaced.
§OK§. Change name
§OK§.
Activating/deactivating
advisory tones
Your handset uses ‘advisory tones’ to tell
you about different activities and statuses.
The following advisory tones can be activated and deactivated independently of
each other:
u Key beep: Each key press is acknowl-
edged.
u Acknowledge tones:
– Confirmation tone (ascending tone
sequence): at the end of entry/setting and when an SMS or a new
entry arrives in the the call list
– Error beep (descending tone
sequence): when you make an
incorrect entry
– Menu end tone: when scrolling at
the end of a menu
u Battery low beep: the battery requires
charging.
¢ ï ¢ Advisory Tones
v
¤ Change multiple line input:
Key Tones:
Select On or Off.
Confirm.:
Select On or Off.
Battery:
Select On, Off or In Call. The battery
warning tone is activated/deactivated
or only sounds during a call.
¤ Save changes (page 11).
You cannot deactivate the confirmation
tone for placing the handset in the base
station.
43

Handset settings
Setting the alarm clock
Requirement: the date and time have
already been set (page 8).
Activating/deactivating and setting
the alarm clock
v ¢ ì ¢ Alarm Clock
¤ Change multiple line input:
Alarm Clock:
Select On or Off.
Time:
Enter the wake-up time in 4-digit format.
¤ Save changes (page 11).
You will see the icon ¼.
A wake-up call with the selected ringtone
(page 41) is signalled on the handset. The
wake up call sounds for 60 seconds. The
display shows Alarm Clock.
During a call, the wake-up call is signalled
by a short tone.
Deactivating the wake-up call
Requirement: The appointment reminder
is ringing.
§Silence§ Press the display key or any
key.
<New Entry>
Select and press
§OK§.
¤ Change multiple line input:
Appoint.:
Select On or Off.
Date:
Enter day/month in 4-digit format.
Time:
Enter hours/minutes in 4-digit format.
Notes:
Press the display key
(max. of 16 characters) and press
The text appears as the appointment
name in the list and will be displayed
on the screen during the appointment
reminder. If no text is entered, you will
see the date and time of the appointment
§Edit§. Enter text
§OK§.
¤ Save changes (page 11).
You will see the icon ¼. The appointment
is marked with ‰ in the appointment list.
The appointments are sorted according to
the date in the list.
An appointment is signalled with the
selected ringtone melody (page 41).
The appointment reminder sounds for
30 seconds. It will display the entered text
or date and time.
During a call, the appointment reminder is
signalled by a short tone.
Setting an appointment
You can receive reminders for up to
5 appointments from your handset (volume and melody, see page 41).
Saving appointments
Requirement: the date and time have
already been set (page 8).
¢ ì ¢ Set Appoints.
v
The list of stored appointments is displayed. If you have already saved five
appointments, then you must delete an
existing one.
44
Managing appointments
v ¢ ì ¢ Set Appoints. ¢ (Appoint.
Select 1–5)
Viewing/editing appointments
§View§ Press the display key.
The appointment is displayed.
Back with
§Edit§ Press the display key to change
entry if required
§OK§ or:
¤ Make changes.

Handset settings
Using additional menu functions
v Open menu.
You have the following options:
Edit Entry
Edit selected appointment.
Delete Entry
Delete selected appointment.
Delete List
Delete all appointments.
Switching off or answering an
appointment reminder
Requirement: An appointment reminder
is sounding.
§Silence§ Press the display key to switch
off the appointment reminder.
Or:
§SMS§ Press display key to answer the
appointment reminder with
an SMS.
Displaying missed
appointments, anniversaries
Missed appointments/anniversaries
(page 16) are displayed in the list Missed
Dates if:
u You don't accept an appointment/anni-
versary.
u The appointment/anniversary was sig-
nalled during a phone call.
u The handset is deactivated at the time
of the appointment/anniversary
The most recent entry is at the start of the
list.
If there is a new appointment/anniversary
in the list, the display shows
Pressing the display key will also open the
Missed Dates list.
§Appoint.§.
Opening the list via the menu:
¢ ì ¢ Missed Dates
v
s Select appointment/anniver-
sary.
This will display information
about the appointment/anniversary. A missed appointment is marked with ¼, a
missed anniversary with ‚.
§§Delete§ Press the display key to delete
the appointment/anniversary.
Or:
§SMS§ Press the display key to write
an SMS.
a Press and hold (idle status).
If 10 entries are already stored in the list,
the oldest entry will be deleted for the
next appointment reminder.
Emergency number
The phone is supplied with 112 preset as
the emergency number. You can edit or
delete the emergency number.
You can dial the emergency number even
if the keypad lock is activated.
Editing the emergency number
v ¢ Ð ¢ Handset ¢ Add. Emerg. No
The emergency number is displayed. You
cannot select the number with c from
this menu.
~ Edit emergency number.
© Press the display key.
Save Entry Select and press
is stored.
Dialling the emergency number
You can dial the emergency number even
when the keypad lock is activated
(page 8).
~ Enter emergency number.
c Press the talk key.
§OK§. The entry
45

Base station settings
Restoring the handset default
settings
You can reset any individual settings and
changes that you have made. This will not
affect entries in the directory, call-by-call
list, call list, email directory, SMS lists, the
handset's registration to the base station
or the content of the Sound Manager. You
will find an overview of the default settings in the appendix, page 52.
¢ Ð ¢ Handset ¢ Reset Handset
v
§Yes§ Press the display key.
a Press and hold (idle status).
Cancel the reset process by pressing a
or the display key
§No§.
Base station settings
The base station settings are carried out
using a registered Gigaset S44 handset.
Protecting against unauthorised
access
Protect the system settings of the base station with a PIN known only to yourself.
The system PIN must now be entered
when, for example, registering/de-registering a handset to/from the base station
or when restoring the default settings.
Changing the system PIN
You can change the 4-digit system PIN set
on the base station to a 4-digit PIN which
is known only to you.
Caution:
Memorise the new system PIN well! If you forget it, the phone will require specialist attention. If this happens, contact the Siemens Hotline (page 50).
~ Enter new system PIN. For
security reasons the PIN is
shown as four stars (
s~ Jump to the next line, re-enter
new system PIN and press
a Press and hold (idle status).
****
).
§OK§.
Repeater support
With a repeater you can increase the range
and reception strength of your base station. First you must activate the repeater
mode. This would terminate any calls,
which are currently running through the
base station.
Requirement: A repeater is registered.
¢ Ð ¢ Base ¢ Add. Features
v
¢ Repeater Mode
§Yes§ Press the display key.
When repeater mode is active, the menu
item is marked with ‰ .
Restoring default settings
to base station
When resetting, handsets remain registered. Following settings are not reset:
u System PIN
u Setting "First ringtone suppressed"
u SMS info services
You will find an overview of the default
settings in the appendix, page 52.
¢ Ð ¢ Base ¢ Base Reset
v
~ Enter the system PIN and
§OK§.
press
§Yes§ Press the display key.
Cancel the restoring process by pressing
a or the display key
§No§.
¢ Ð ¢ Base ¢ System PIN
v
~ Enter current PIN if necessary
und press
46
§OK§.

Connecting the base station to the PABX
Connecting the base station
to the PABX
The following settings are only needed
when your PABX requires them, please
refer to the user guide for your PABX.
You cannot send or receive SMS on PABXs
that do not support Calling Line Identification.
Dialling modes and flash time
The current setting is indicated by ‰.
Changing the dialling mode
The following dialling modes can be
selected:
u Tone dialling (DTMF),
u Pulse dialling (DP).
v ¢ Ð ¢ Base ¢ Add. Features
¢ Dialling Mode
s Select dialling mode (‰ =on)
and press
a Press and hold (idle status).
Setting the flash time
v ¢ Ð ¢ Base ¢ Add. Features
¢ Recall
s Select flash time (‰ =on) and
press
a Press and hold (idle status).
§OK§.
§OK§.
Save access code
Requirement: For your PABX, you must
enter an access code where required for
external calls, e.g. "0".
¢ Ð ¢ Base ¢ Add. Features
v
¢ Access Code
~ Enter or change access code,
max. 3 digits.
¤ Save changes (page 11).
If an access code is saved, the following
applies:
u The access code is automatically put in
front of numbers dialled from the following lists: numbers for SMS centres,
calls list.
u You must enter the access code when
dialling manually and when entering
directory, emergency/direct dial numbers and numbers for SMS centres
manually.
u If, when sending an SMS, you copy the
number of the recipient from the directory, you must delete the access code.
u You can delete an existing access code
by pressing X. Press © s Insert
§OK§ or © s Insert Recall §OK§ to
Pause
insert a pause or a flash.
47

Connecting the base station to the PABX
Setting pauses
Changing pause after line seizure
You can change the length of pause that is
inserted between pressing the talk key
c and sending the number.
v Open menu.
5 4 O 1 L
Press keys.
~ Enter digit for the pause
length (1 = 1 sec.; 2 =3sec.;
3 = 7 sec) and press
Changing the pause after the recall key
You can change the length of the pause if
your PABX requires this (refer to the user
guide for your PABX).
v Open menu.
5 4 O 1 2
Press keys.
~ Enter a digit for the length of
the pause (1 = 800 ms;
2 = 1600 ms; 3 = 3200 ms)
and press
§OK§.
§OK§.
Switching temporarily to
tone dialling (DTMF)
If your PABX works with dial pulsing (DP),
but you need tone dialling for a call
(e.g. to listen to a T-Net box), you must
switch to tone dialling for the call.
Requirement: You are conducting a call
or have already dialled an external
number.
v Open menu.
Tone Dialing
Select and press
Tone dialling is now activated
for this call only.
§OK§.
Changing a dialling pause
(pause after access code)
Requirement: You have saved an access
code (page 47).
v Open menu.
5 4 O 1 1
Press keys.
~ Enter a digit for the length
of the pause (1 = 1 sec.;
2 = 2 sec.; 3 = 3 sec.;
4 = 6 sec.) and press
48
§OK§.

Appendix
Appendix
Care
¤ Wipe the base station and handset with
a damp cloth (do not use solvent) or an
antistatic cloth.
Never use a dry cloth. This can cause
static.
Contact with liquid
If the handset has come into contact with
liquid:
1. Switch the handset off and remove
the batteries immediately.
2. Allow the liquid to drain from the handset.
3. Pat all parts dry, then place the handset
with the battery compartment open
and the keypad facing down in a dry,
warm place for at least 72 hours (not
in a microwave, oven etc.).
4. Do not activate the handset again
until it is dry.
When it has fully dried out you will normally be able to use it again.
Questions and answers
If you have any queries about the use of
your phone, you can contact us 24/7 at
www.siemens.com/gigasetcustomercare
The table below contains a list o f co mmo n
problems and possible solutions.
The display is blank.
1. The handset is not switched on.
¥ Press and hold the end call key a.
2. The batteries are flat.
¥ Charge or replace the batteries (page 7).
The handset does not respond to a key press.
The keypad lock is activated.
¥ Press and hold the hash key
"Base station x" flashes in the display.
!
#
(page 8).
1. The handset is outside the range of the base
station.
¥ Reduce the distance between handset/
base station.
2. The handset has been de-registered.
¥ Register the handset (page 32).
3. The base station is not switched on.
¥ Check the base station mains adapter
(page 6).
Base Search flashes in the display.
The handset is set for Best Base and no base sta-
tion is switched on or within range.
¥ Reduce the distance between handset/base
station.
¥ Check the base station mains adapter
(page 6).
Handset does not ring.
1. The ringtone is switched off.
¥ Activate the ringtone (page 42).
2. Call diversion set to All Calls.
¥ Switch off Call Diversion (page 15).
You cannot hear a ringtone/dialling tone.
Base station's phone cord has been replaced.
¥ When purchasing a new cord, ensure that it
has the correct pin connections (page 6).
The other party cannot hear you.
You have pressed the
set is "muted".
u (INT) key. The hand-
¥ Switch on the microphone again (page 13).
The incoming call number is not displayed
although CLIP is set.
Phone number identification is not enabled.
¥ Caller should ask network provider to acti-
.
vate phone number identification (CLI).
You hear an error tone when keying an input
(a descending sequence of tones).
Action has failed/invalid input.
¥ Repeat the operation.
Watch the display and refer to the operating
instructions if necessary.
You cannot listen to messages on the T-Net
box.
Your phone system is set for pulse dialling.
¥ Set your phone system to tone dialling.
49

Appendix
Service (Customer Care)
You can get assistance easily when you have technical questions or questions about how
to use your device by using our online support service on the Internet at:
www.siemens.com/customercare
or by referring to the section entitled Questions and answers in this manual (page 49).
If the device needs to be repaired, please contact one of our Customer Care Centers:
Abu Dhabi. . . . . . . . . . . . . . . 0 26 42 38 00
Argentina . . . . . . . . . . . . 0 80 08 88 98 78
Australia . . . . . . . . . . . . . . .18 00 62 24 14
Austria . . . . . . . . . . . . . . . .05 17 07 50 04
Bahrain . . . . . . . . . . . . . . . . . . . . . 40 42 34
Bangladesh. . . . . . . . . . . . . . 0 17 52 74 47
Belgium . . . . . . . . . . . . . . . . 0 78 15 22 21
Bosnia Herzegovina . . . . . . . 0 33 27 66 49
Brazil. . . . . . . . . . . . . . . . 0 80 07 07 12 48
Brunei . . . . . . . . . . . . . . . . . . . 02 43 08 01
Bulgaria. . . . . . . . . . . . . . . . . . 02 73 94 88
Cambodia . . . . . . . . . . . . . . . . 12 80 05 00
Canada . . . . . . . . . . . . . . 1 88 87 77 02 11
China . . . . . . . . . . . . . . . 0 21 50 31 81 49
Croatia . . . . . . . . . . . . . . . . . 0 16 10 53 81
Czech Republic . . . . . . . . . .02 33 03 27 27
Denmark. . . . . . . . . . . . . . . . . 35 25 86 00
Dubai . . . . . . . . . . . . . . . . . . 0 43 96 64 33
Egypt. . . . . . . . . . . . . . . . . . . 0 23 33 41 11
Estonia . . . . . . . . . . . . . . . . . . 06 30 47 97
Finland . . . . . . . . . . . . . . . . 09 22 94 37 00
France. . . . . . . . . . . . . . . . .01 56 38 42 00
Germany. . . . . . . . . . . . . . .01805 333 222
Greece . . . . . . . . . . . . . . 0 80 11 11 11 16
Hong Kong . . . . . . . . . . . . . . . 28 61 11 18
Hungary . . . . . . . . . . . . . . . 06 14 71 24 44
Iceland . . . . . . . . . . . . . . . . . . . 5 11 30 00
India . . . . . . . . . . . . . . 01 13 73 85 89 - 98
Indonesia . . . . . . . . . . . . 0 21 46 82 60 81
Ireland . . . . . . . . . . . . . . . . 18 50 77 72 77
Italy. . . . . . . . . . . . . . . . . . .02 66 76 44 00
Ivory Coast . . . . . . . . . . . . . . . 80 00 03 33
Jordan. . . . . . . . . . . . . . . . . . 0 64 39 86 42
Kenya . . . . . . . . . . . . . . . . . . . . 2 72 37 17
Kuwait . . . . . . . . . . . . . . . . . . . 2 45 41 78
Latvia . . . . . . . . . . . . . . . . . . . . 7 50 11 14
Lebanon . . . . . . . . . . . . . . . . . 01 44 30 43
Libya . . . . . . . . . . . . . . . . . . 02 13 50 28 82
Lithuania. . . . . . . . . . . . . . . . 8 22 74 20 10
Luxembourg . . . . . . . . . . . . . 43 84 33 99
Macedonia. . . . . . . . . . . . . . . . 02 13 14 84
Malaysia. . . . . . . . . . . . . . . 03 21 63 11 18
Malta . . . . . . . . . . . . 00 35 32 14 94 06 32
Mauritius . . . . . . . . . . . . . . . . . . 2 11 62 13
Mexico . . . . . . . . . . . . . .01 80 07 11 00 03
Morocco . . . . . . . . . . . . . . . . . 22 66 92 09
Netherlands. . . . . . . . . . . . 0900-3333102
New Zealand . . . . . . . . . . . 08 00 27 43 63
Norway . . . . . . . . . . . . . . . . . . 22 70 84 00
Oman. . . . . . . . . . . . . . . . . . . . . . 79 10 12
Pakistan . . . . . . . . . . . . . . . 02 15 66 22 00
Philippines . . . . . . . . . . . . . . 0 27 57 11 18
Poland . . . . . . . . . . . . . . . . 08 01 30 00 30
Portugal . . . . . . . . . . . . . . . . 8 00 85 32 04
Qatar . . . . . . . . . . . . . . . . . . . . 04 32 20 10
Romania . . . . . . . . . . . . . . 02 12 04 60 00
Russia. . . . . . . . . . . . . . . . (800) 200 10 10
Saudi Arabia . . . . . . . . . . . . 0 22 26 00 43
Serbia. . . . . . . . . . . . . . . . . 01 13 22 84 85
Singapore . . . . . . . . . . . . . . . . 62 27 11 18
Slovak Republic . . . . . . . . . 02 59 68 22 66
Slovenia. . . . . . . . . . . . . . . . 0 14 74 63 36
South Africa. . . . . . . . . . . . 08 60 10 11 57
Spain . . . . . . . . . . . . . . . . . . 9 02 11 50 61
Sweden . . . . . . . . . . . . . . . . 0 87 50 99 11
Switzerland . . . . . . . . . . . . 08 48 21 20 00
Taiwan. . . . . . . . . . . . . . . . 02 25 18 65 04
Thailand. . . . . . . . . . . . . . . . 0 22 68 11 18
Tunisia . . . . . . . . . . . . . . . . . . . 71 108 108
Turkey . . . . . . . . . . . . . . .0 21 65 79 71 00
Ukraine . . . . . . . . . . . . . .8 80 05 01 00 00
United Arab Emirates . . . . . 0 43 31 95 78
United Kingdom . . . . . . .0 87 05 33 44 11
USA . . . . . . . . . . . . . . . . . 1 88 87 77 02 11
Vietnam . . . . . . . . . . . . . . . . . . 45 63 22 44
Please have your record of purchase ready
when calling.
50
Replacement or repair services are not
offered in countries where our product is
not sold by authorised dealers.

Appendix
Authorisation
Your Gigaset is intended for operation in
your country, as depicted on the underside of the base station and the packaging. Country-specific conditions have
been taken into account. The CE mark certifies conformity of the device with the
essential requirements of the R&TTE directive.
Excerpt from the original declaration:
"We, Siemens AG, declare, that the above mentioned product is manufactured according to
our Full Quality Assurance System certified by
CETECOM ICT Services GmbH with ANNEX V of
the R&TTE-Directive 99/5/EC. The presumption
of conformity with the essential requirements
regarding Council Directive 99/5/EC is ensured"
Senior Approvals Manager
The Declaration of Conformity (DoC) has been
signed. In case of need, a copy of the original
DoC can be made available via the company
hotline.
Specifications
Recommended batteries
(Valid at the time of going to press)
Nickel-metal-hydride (NiMH):
u Sanyo Twicell 650
u Sanyo Twicell 700
u Panasonic 700mAh "for DECT"
u GP 700mAh
u Yuasa Technology AAA Phone 700
u Varta Phone Power AAA 700mAh
u GP 850 mAh
u Sanyo NiMH 800
u Yuasa Technologies AAA 800
The handset is supplied with recommended batteries.
Handset operating times/
charging times
Capacity 800 mAh
Standby time approx. 150 hours (6 days)
Calling time approx. 10 hours
Charging time approx. 10 hours
The operating and charging times apply
only when using the recommended batteries.
Base station power consumption
In standby mode: approx. 2 Watt
During a call: approx. 2 watts
General specifications
DECT standard is supported
GAP standard is supported
No. of channels 60 duplex channels
Radio frequency
range 1880–1900 MHz
Duplex method Time multiplex,
Channel grid 1728 kHz
Bit rate 1152 kbit/s
Modulation GFSK
Language code 32 kbit/s
Transmission
power
Range up to 300 m outdoors,
Base station
power supply 230 V ~/50 Hz
Environmental
conditions for
operation
Dialling mode DTMF (tone dialling)/
Base station
dimensions
10 ms frame length
10 mW, average power per
channel
up to 50 m indoors
+5 °C to +45 °C;
20 % to 75 % relative
humidity
DP (dial pulsing)
115 x 109 x 75 mm
(L x W x H)
51

Appendix
Handset dimensions
Base station
weight
Weight of handset
with battery
141 x 51 x 28 mm
(L × W × H)
116 g
120 g
Default setting
On purchase, your Gigaset S440 is preset
with this default setting. You can restore
the default setting (page 46, page 46).
Default settings of base station
Function Default setting Page
First ringtone sup-
pressed
Flash time 100 ms page 47
Internal join-in off page 34
List type calls list Missed Calls page 19
Handset: name "INT 1" to
Network provider
preselection
Pause: line seizure 3 s page 48
Pause: R key 800 ms page 48
Pause: access code 3 s page 48
Fast access
SMS notification/
notification number
SMS incoming and
draft messages list
SMS function on page 29
SMS info services 10 preset page 29
SMS send centre page 28
System PIN 0000 page 32
Access code none page 47
Dialling mode DTMF page 47
1 on
on page 42
"INT 6"
Preset accord-
ing to country
T-Net box with
no number
off/no number page 27
empty page 23
page 35
page 20
page 31
Default settings of the handset
Function Default setting Page
Battery tone/
Key click/
Confirmation tone
Auto answer on page 41
Room monitor off page 36
Room monitor:
sensitivity/number
Base station selec-
tion
Display language country-spe-
Volume: handsfree
talking/loudspeaker/
ringtone, alarm
clock, appointment
Night mode off page 40
Emergency number 112 page 45
EATONI predictive
text
Alarm clock/appoint-
ment
Character set standard page 53
on page 43
high/
no number
Base1 page 33
cific
3/1/5 page 41
on page 53
off page 44
page 36
page 40
52

Appendix
PC Interface
You can connect the handset to your computer using a data cable (page 59).
Your computer can communicate with
your handset using a program (free download at www.siemens.com/gigasets440
).
You can access your handset's directory
and load sounds from the computer on to
the handset.
During the transfer of data between handset and PC, you will see Data Transfer on the
display. During this time, it is not possible
to use the keypad and incoming calls will
be ignored.
Writing and editing text
The following rules apply when writing a
text:
u Control the cursor with u v t s.
u Characters are added to the left of the
cursor.
u Press the star key
switch from "Abc" mode to "123" and
from "123" to "abc" and from "abc" to
"Abc" (upper case: 1st letter upper
case, all others lower case). Press the
star key * before entering the letter.
u Press and hold the star key
Shows the selection line of the characters assigned to the star key.
u The first letter of the name of directory
entries is automatically capitalised, followed by lower case letters.
*
briefly to
*
:
Writing an SMS/name
(without predictive text)
When you press a key and hold it, the
characters of that key appear in the bot-
tom display line and are highlighted one
after the other. When you release the key
the highlighted character is inserted into
the input field.
You can see in the display whether upper
case, lower case or digits are selected:
u 'A' or 'a' appears on the bottom display
line when you make an entry in the
directory.
u 'Abc', 'abc' or '123' appears at the top
right of the screen when an SMS is
entered.
Writing SMS (with predictive text)
EATONI predictive text helps you when
you are writing an SMS.
Each key between Q and O is
assigned several letters and characters
(see the character set tables, page 54).
These appear in a selection line immediately under the text panel (over the display keys) as soon as you press a key. The
letter you are most likely looking for is
reverse-highlighted and is at the beginning of the selection line. It is copied into
the text panel.
470(2) Ç Abc
Hello Peter, I cannot come
today. Ic
hgi
W¨
1 EATONI is activated
2SMS text
3Selection line
If this letter is the one you want, confirm it
by pressi ng t he n ext key. If it is n ot t he o ne
you want, briefly press the hash key #
repeatedly until the required letter is
reverse-highlighted on the display line
and copied into the text panel.
1
2
3
53

Appendix
If you press and hold the hash key #,
you will see the selection line of characters
that are assigned to the hash key.
Deactivating/activating predictive text
Requirement: You are writing an SMS.
© Press the display key.
Predictive Text
Select and press
§OK§ (‰ =on).
a Press the end call key briefly
to return to the text panel.
Enter the text.
Order of directory entries
The directory entries are usually sorted in
alphabetical order. Spaces and digits take
first priority. The sort order is as follows:
1. Space (shown here as s)
2. Digits (0–9)
3. Letters (alphabetical)
4. Other characters
To get round the alphabetical order of the
entries, insert a space or a digit in front of
the name. These entries will now move to
the beginning of the directory. Names
which you have preceded with an asterisk
will move to the end of the directory.
Entering special characters
Standard characters
1 Q * #
*) **)
1x
Space Space
2x 1 Â ,
3x £ 1 ? * \
4x $
â
!/&
5x ¥ £ 0 ( §
6x ¤ $ + )
7x ¥ - <
8x ¤ : =
9x ¿ >
10x ¡ %
11x “
12x ‘
13x ;
14x _
*) Directory and other lists
**) When writing an SMS
Abc-->
.
123
123 -->
abc
#
@
54

Menu tree
Menu tree
Instead of scrolling to locate a menu function, you can select a menu function faster by
opening the menu and keying in the digit combination ("Shortcut").
Example: v414 for "Set ringtone for the alarm clock".
With the telephone in idle status, press v (open main menu):
1 SMS î
You have activated an SMS mailbox (general or private) without a PIN
1-1 Write Message
1-2 Incoming 00+00
1-3 Outgoing
You have activated an SMS mailbox or 2-3 mailboxes with a PIN
1-1 Mailbox 1-1-1 Write Message
1-1-2 Incoming 00+00
1-1-3 Outgoing
1-2
to
1-4
Mailbox 1
Mailbox 2
Mailbox 3
1-2-1
to
1-4-1
1-2-2
to
1-4-2
1-2-3
to
1-4-3
Write Message
Incoming 00+00
Outgoing
1-5 SMS Service
1-5 SMS Service 1-5-1 Info Centre
1-5-2 Ordering
1-6 Settings 1-6-1 Service Centres 1-6-1-1 Service Centr.1
… [to]
1-6-1-5 Service Centr. 5
1-6-2 SMS Mailboxes 1-6-2-1 Mailbox
1-6-2-2 Mailbox 1
1-6-2-3 Mailbox 2
1-6-2-4 Mailbox 3
1-6-3 Notify Number
1-6-4 Notify Type
1-6-5 Status Report
55

Menu tree
3 Add. Features í
3-1 Room Monitor
3-2 Walky-Talky
4 Audio Settings
4-1 Ringer Settings 4-1-1 Ext. Calls
4-2 Advisory Tones
5 H/Set Settings
5-1 Date/Time
5-2 Display 5-2-1 Screen Picture
5-3 Handset 5-3-1 Language
ï
4-1-2 Internal Calls
4-1-3 Appointments
4-1-4 Alarm
4-1-5 All
Ð
5-2-2 Colour Scheme
5-2-3 Contrast
5-2-4 Night Mode
5-3-2 Auto Answer
5-3-3 Add. Emerg. No
5-3-4 Register H/Set 5-3-4-1 Base1
5-3-5 Select Base 5-3-5-1 Base1
… [to]
5-3-4-4 Base4
… [to]
5-3-5-4 Base4
5-3-5-5 Best Base
56
5-3-6 Reset Handset

5-4 Base 5-4-2 System PIN
5-4-3 Base Reset
5-4-4 Add. Features 5-4-4-1 Dialling Mode
5-4-5 Preselection 5-4-5-1 Preselect. No.
Menu tree
5-4-4-2 Recall
5-4-4-3 Repeater Mode
5-4-4-4 Access Code
5-4-4-5 Listening In
5-4-5-2 With Preselect
5-4-5-3 Without Presel.
6 Answer Machine
6-1 Set Key 1 6-1-1 Network Mailb.
7 Calendar
7-1 Set Appoints.
7-2 Alarm Clock
7-3 Missed Dates
8 Sound Manager
9 SMS Service
Î
ì
Ë
Ì
57

Accessories
Accessories
Gigaset Handsets
Turn your Gigaset into a cordless telephone system:
Gigaset Handset S44
u Illuminated colour display (4096 colours)
u Graphic main menu with icons
u Illuminated keypad
u Handsfree talking
u Polyphone ringer melodies
u Directory for around 200 entries
u SMS (CLIP must be enabled)
u Voice-activated dialling
u PC interface for managing directory entries
u Headphone socket
u Walk and Talk
www.siemens.com/gigasets44
Gigaset Handset SL44
u Unusual design
u Illuminated colour display (4096 colours)
u Graphic main menu with icons
u Handsfree talking
u Polyphone ringer melodies
u Recording ringer melodies via the handset
u Directory for around 200 entries
u SMS (CLIP must be enabled)
u Voice-activated dialling
u PC interface for managing directory entries
u Headphone socket
u Walk and Talk
u "Balloon Shooter" game
www.siemens.com/gigasetsl44
58

Gigaset Handset C34
u Illuminated graphic display
u Polyphone ringer melodies
u Handsfree talking
u Directory for around 100 entries
u SMS (CLIP must be enabled)
u Room monitor
u Timer
www.siemens.com/gigasetc34
Voice and data adapter Gigaset M43 USB
Use the Gigagset M34 USB for wireless connections between
your PC and Gigaset. Then you can:
u Make low-cost calls via the Internet (ADSL) on your
Gigaset handset (Voice-over-IP)
u Enjoy wireless surfing on the Internet from your PC (ISDN)
u Write, send and receive text messages on your PC
u Have Internet messages (e.g. weather, share prices)
displayed on your handset
u Send and receive texts from messenger services (IMS)
u Operate your PC remotely via the handset (e.g. operating
the Windows Media Player)
www.siemens.com/gigasetm34usb
Gigaset repeater
The Gigaset repeater can be used to increase the reception
range of your Gigaset handset to the base station.
www.siemens.com/gigasetrepeater
Accessories
Mobile handsfree set with P2T key
With the mobile handsfree set you can make a call while
keeping your hands free.
Data Cable DCA-500
For connecting your phone to the serial RS232 interface of
your computer.
59

Accessories
Data Cable USB DCA-510
For connecting your phone to the USB interface of your computer.
All accessories and batteries are available from your mobile phone retailer.
Or you can order direct online via the online shop: www.siemens.com/shop
The Online Shop also has the latest product information.
Only use original accessories. This will avoid possible health risks and damage,
and also ensure that all the relevant regulations are complied with.
.
60

Index
Index
A
Access code . . . . . . . . . . . . . . . . . . . 47
on a PABX
pause
Access protection
Acknowledge tones
Activate
advisory tones
appointment
auto answer
intern join-in
muting ringtone
room monitor
Activating
handset
keypad lock
Advisory tones
Alarm clock
Alert tone
Anniversary
display missed
not accepting
storing in directory
Answering machine, see T-Net box
Appointment
Assigning a digit key
Assigning key
Attachment (SMS)
Attachment, see Appendix
Auto answer
Automatic network provider code
Automatic redial
Available memory
B
Base station
changing
changing the name of
connecting and setting up
connecting to PABX
range
restoring default settings
setting
system PIN
Battery
charging
. . . . . . . . . . . . . . . . . . . 47
. . . . . . . . . . . . . . . . . . . . . . 48
. . . . . . . . . . . . . . . 46
. . . . . . . . . . . . . . 43
. . . . . . . . . . . . . . . . 43
. . . . . . . . . . . . . . . . . 44
. . . . . . . . . . . . . . . . . . 41
. . . . . . . . . . . . . . . . . 34
. . . . . . . . . . . . . . . 42
. . . . . . . . . . . . . . . . 36
. . . . . . . . . . . . . . . . . . . . . . 8
. . . . . . . . . . . . . . . . . . . 8
. . . . . . . . . . . . . . . . . 43
. . . . . . . . . . . . . . . . . . . . 44
. . . . . . . . . . . . . . . . . . . . . 42
. . . . . . . . . . . . . . . . . . . . 16
. . . . . . . . . . . . . . . . 45
. . . . . . . . . . . . . . . . . 45
. . . . . . . . . . . . . 16
. . . . . . . . . . . . . . . . . . 45
. . . . . . . . . . . . . 39
. . . . . . . . . . . . . . . . . . 39
. . . . . . . . . . . . . . . 26
. . . . . . . . . . . . . . . . 12, 41
. . . 20
. . . . . . . . . . . . . . . . 18
. . . . . . . . . . . . . . . 15
. . . . . . . . . . . . . . . . . . . . 33
the base station
. . . . . . . . . . . . 33
. . . . . . . . 5
. . . . . . . . . . . . 47
. . . . . . . . . . . . . . . . . . . . . . . 5
. . . . . . . . 46
. . . . . . . . . . . . . . . . . . . . . . 46
. . . . . . . . . . . . . . . . . . . 46
. . . . . . . . . . . . . . . . . . . . . 7
display . . . . . . . . . . . . . . . . . . . . . . 7
. . . . . . . . . . . . . . . . . . . . . . . . 7
icon
inserting
low beep
recommended batteries
Best base station
Birthday, see Anniversary
Brightness (display)
. . . . . . . . . . . . . . . . . . . . . 6
. . . . . . . . . . . . . . . . . . . .43
. . . . . . . . . .51
. . . . . . . . . . . . . . . .33
. . . . . . . . . . . . . .40
C
Call
accepting
connect participant
end
external
forwarding (connect)
forwarding (connecting)
internal
Call waiting
internal call. . . . . . . . . . . . . . . . . . .34
Call-by-Call list
key
Call-by-Call numbers
Calling
external
Calling back caller
Calling back from calls list
Calling Line Identification.
Calls list
Cancelling(operation)
Care of the telephone
Change
display language
loudspeaker volume
Changing
destination number
dialling mode
emergency number
internal number of a handset
name of handset
name of the base
pause time
PIN
ringtone
system PIN
Character set table special characters
Charge status display
CLI, CLIP
Confirmation beep
Connection, Base station to PABX
. . . . . . . . . . . . . . . . . . . .12
. . . . . . . . . . . . .34
. . . . . . . . . . . . . . . . . . . . . . . .12
. . . . . . . . . . . . . . . . . .12, 13
. . . . . . . . . . .35
. . . . . . . . .34
. . . . . . . . . . . . . . . . . . . . . .33
. . . . . . . . . . . . . . . . . .14
. . . . . . . . . . . . . . . . . . . . . . . . . 1
. . . . . . . . . . . . . .14
. . . . . . . . . . . . . . . . . . . . .12
. . . . . . . . . . . . . . . .19
. . . . . . . . . .19
. . . . . . . . .12
. . . . . . . . . . . . . . . . . . . .18, 19
. . . . . . . . . . . . . 9
. . . . . . . . . . . . .49
. . . . . . . . . . . . . . .40
. . . . . . . . . . . .41
. . . . . . . . . . . . .36
. . . . . . . . . . . . . . . . .47
. . . . . . . . . . . . .45
. . . . . .35
. . . . . . . . . . . . . . .35
. . . . . . . . . . . . . .33
. . . . . . . . . . . . . . . . . . .48
. . . . . . . . . . . . . . . . . . . . . . . . .46
. . . . . . . . . . . . . . . . . . . . .41
. . . . . . . . . . . . . . . . . . .46
. . . . . . . . . . . . . 7
. . . . . . . . . . . . . . . . . . . . . . .12
. . . . . . . . . . . . . . .43
. . . .47
61

Index
Consultation (intern)
Control key
Correcting wrong inputs
Customer Care
. . . . . . . . . . . . . . . . . . . 1, 8
. . . . . . . . . . . . . 34
. . . . . . . . . . 10
. . . . . . . . . . . . . . . . . 50
D
Deactivate
advisory tones
appointment
auto answer
intern join-in
muting ringtone
room monitor
Deactivating
appointment reminder
handset
keypad lock
Default settings
base station . . . . . . . . . . . . . . . 46, 52
handset
Delete key
Deleting
anniversary
appointment
characters
from calls list
voice pattern
De-registering (handset)
Dialing mode
Dialling
call-by-call list
directory
speed dialling
voice dialling
Dialling pause
entering
Dialling, emergency number
Directory
Display
. . . . . . . . . . . . . . . . . . . . . . 14
copying number from text
managing entries
. . . . . . . . . . . . . . . . . . . . . . 8, 9
open
order of entries
saving entry
sending entry/list to handset
store number of sender (SMS)
storing anniversary
use for number entry
. . . . . . . . . . . . . . . . . . . . . . . . 1
available memory
brightness
. . . . . . . . . . . . . . . . 43
. . . . . . . . . . . . . . . . . 44
. . . . . . . . . . . . . . . . . . 41
. . . . . . . . . . . . . . . . . 34
. . . . . . . . . . . . . . . 42
. . . . . . . . . . . . . . . . 37
. . . . . . . . . . 45
. . . . . . . . . . . . . . . . . . . . . . 8
. . . . . . . . . . . . . . . . . . . 8
. . . . . . . . . . . . . . . . . . 46, 52
. . . . . . . . . . . . . . . . . . . . . . 9
. . . . . . . . . . . . . . . . . . 45
. . . . . . . . . . . . . . . . . 45
. . . . . . . . . . . . . . . . . . . 10
. . . . . . . . . . . . . . . . . 19
. . . . . . . . . . . . . . . . . 17
. . . . . . . . . . 33
. . . . . . . . . . . . . . . . . . 47
. . . . . . . . . . . . . . . . 14
. . . . . . . . . . . . . . . . . . . . 14
. . . . . . . . . . . . . . . . 39
. . . . . . . . . . . . . . . . . 17
. . . . . . . . . . . . . . . . . . 48
. . . . . . . . . . . . . . . . . . . . . 1
. . . . . . . 45
. . . . . . . 16
. . . . . . . . . . . . . . 15
. . . . . . . . . . . . . . . 54
. . . . . . . . . . . . . . . . . . 14
. . . . . 15
. . . . 26
. . . . . . . . . . . . 16
. . . . . . . . . . . 16
. . . . . . . . . . . . . 15
. . . . . . . . . . . . . . . . . . . 40
change display language . . . . . . . . .40
contrast
emergency number
in idle status
missed anniversaries
missed appointments
night mode
number (CLI/CLIP)
screen picture
setting
T-Net box message
wrong language
Display key
assigning
Display keys
DP (pulse dialling)
Draft message list (SMS)
. . . . . . . . . . . . . . . . . . . . .40
. . . . . . . . . . . . .45
. . . . . . . . . . . . . . . . . . 9
. . . . . . . . . . . .45
. . . . . . . . . . .45
. . . . . . . . . . . . . . . . . . .40
. . . . . . . . . . . . . .12
. . . . . . . . . . . . . . . . .40
. . . . . . . . . . . . . . . . . . . . . .40
. . . . . . . . . . . . .31
. . . . . . . . . . . . . . .40
. . . . . . . . . . . . . . . . . . . .39
. . . . . . . . . . . . . . . . . . .1, 9
. . . . . . . . . . . . . . .47
. . . . . . . . . . .23
E
Earpiece mode . . . . . . . . . . . . . . . . . .13
Earpiece volume
EATONI (predictive text)
Email address
Email directory
Emergency number
End call key
End, call
Ending, see Deactivate
Entry
Error beep
Escape key
Example
. . . . . . . . . . . . . . . . . . . . . . .12
delete from calls list
saving, changing (Preselection)
select from directory
selecting (menu)
storing (T-Net box)
menu input
multiple line input
. . . . . . . . . . . . . . . . .41
. . . . . . . . . . .53
. . . . . . . . . . . . . . . . . . .24
. . . . . . . . . . . . . . . . . .17
. . . . . . . . . . . . . .45
. . . . . . . . . . . . . . . . . .1, 12
. . . . . . . . . . . .19
. . . .21
. . . . . . . . . . . .14
. . . . . . . . . . . . . . . 8
. . . . . . . . . . . . .31
. . . . . . . . . . . . . . . . . . . . .43
. . . . . . . . . . . . . . . . . . . . . 9
. . . . . . . . . . . . . . . . . . .10
. . . . . . . . . . . . . .11
F
Fast access
T-Net box
Fax (SMS)
Flash time
. . . . . . . . . . . . . . . . . . . .31
. . . . . . . . . . . . . . . . . . . . . .24
. . . . . . . . . . . . . . . . . . . . .47
G
Group call . . . . . . . . . . . . . . . . . . . . .33
62

Index
H
Handset
activating/deactivating
advisory tones
change name
change number
changing for best reception
changing internal number
changing to another base station
contact with liquid
de-registering
display language
forwarding call
idle status, returning to
. . . . . . . . . . . . . . . . . . . . . . . . 8, 9
list
loudspeaker volume
muting
night mode
operating and charging times
. . . . . . . . . . . . . . . . . . . . . . 33
paging
preparing for use
reception strength
registering
registering on another
base station
restoring default settings
screen picture
setting (individual)
use room monitor
using room monitor
using several
Handset charging times
Handset operating time
in room monitor mode
Handsfree key
Handsfree talking
Hash key
Hearing aids
. . . . . . . . . . . . . . . . . . . . . 1, 8
. . . . . . . . . . . . . . . . 43
. . . . . . . . . . . . . . . . . 35
. . . . . . . . . . . . . 32, 33
. . . . . . . . . . . . . . . . 34
. . . . . . . . . . . . . . . . . . . . . 13
. . . . . . . . . . . . . . . . . . 40
. . . . . . . . . . . . . . . . . . . 32
. . . . . . . . . . . . . . . . 40
. . . . . . . . . . . . . . . . . 32
. . . . . . . . . . . . . . . . . . . 1
. . . . . . . . . . . . . . . . . . . . 4
. . . . . . . . . . . 8
. . . . . . . . . . . . . . . 35
. . . . . . . 35
. . . . . . . . . . . . . 49
. . . . . . . . . . . . . . 40
. . . . . . . . . . 9
. . . . . . . . . . . . 41
. . . . . . . . . . . . . . . 6
. . . . . . . . . . . . . . 5
. . . . . . . . . . . . . . . 33
. . . . . . . . 46
. . . . . . . . . . . . . 39
. . . . . . . . . . . . . 38
. . . . . . . . . . . . 36
. . . . . . . . . . . 51
. . . . . . . 36, 38
. . . . . . . . . . . . . . . 13
I
Icon
alarm clock
appointment
battery
display
keypad lock
new SMS
ringtone
Idle status (display)
Incoming message list (SMS)
. . . . . . . . . . . . . . . . . . 44
. . . . . . . . . . . . . . . . . 44
. . . . . . . . . . . . . . . . . . . . . . 7
. . . . . . . . . . . . . . . . . . . . . . . 9
. . . . . . . . . . . . . . . . . . . 8
. . . . . . . . . . . . . . . . . . . . 25
. . . . . . . . . . . . . . . . . . . . 42
. . . . . . . . . . . . . . . 9
. . . . . . 33
. . 33
. . . . . 51
. . . . . . . 25
Info services (SMS)
Input language (SMS)
Insert email addresses in SMS
Insert picture in SMS
Insert sounds in SMS
Intern
consultation
. . . . . . . . . . . . . . . . . . . . . . .34
join-in
Internal
making calls
Internal call
call waiting
. . . . . . . . . . . . . . . . . . . .33
. . . . . . . . . . . . . . .29
. . . . . . . . . . . . .23
. . . . . . .23
. . . . . . . . . . . . . .23
. . . . . . . . . . . . .23
. . . . . . . . . . . . . . . . . .34
. . . . . . . . . . . . . . . . . .33
. . . . . . . . . . . . . . . . . . .34
J
Join-in on a call . . . . . . . . . . . . . . . . .34
K
Key 1 (fast access) . . . . . . . . . . . . . . . 1
Keypad lock
Keys
Call-by-Call keys
cancel key
control key
delete key
display keys
end call key
escape key
fast access
handsfree key
hash key
menu key
message key
On/Off key
recall key
star key
talk key
. . . . . . . . . . . . . . . . . . . . 8
. . . . . . . . . . . . . . . 1
. . . . . . . . . . . . . . . . . . . . 9
. . . . . . . . . . . . . . . . . .1, 8
. . . . . . . . . . . . . . . . . . . . 9
. . . . . . . . . . . . . . . . . .1, 9
. . . . . . . . . . . . . . . . .1, 12
. . . . . . . . . . . . . . . . . . . 9
. . . . . . . . . . . . . . . . . . . 1
. . . . . . . . . . . . . . . . . 1
. . . . . . . . . . . . . . . . . . . .1, 8
. . . . . . . . . . . . . . . . . . . . 9
. . . . . . . . . . . . . . . . . . 1
. . . . . . . . . . . . . . . . . . . 1
. . . . . . . . . . . . . . . . . . . . 1
. . . . . . . . . . . . . . . . . . . .1, 42
. . . . . . . . . . . . . . . . . . . .1, 12
L
Language, Display . . . . . . . . . . . . . . .40
Last number redial
Linking, see SMS
. . . . . . . . . . . . . . . . . . . . . . . .49
Liquid
List
Call-by-Call list
calls list
email directory
handsets
missed calls
Lock
activating/deactivating keypad lock
. . . . . . . . . . . . . . . . . . . . .18
. . . . . . . . . . . . . . .18
. . . . . . . . . . . . . . . .14
. . . . . . . . . . . . . . . .17
. . . . . . . . . . . . . . . . . . . .8, 9
. . . . . . . . . . . . . . . . . .19
. 8
63

Index
Loudspeaker volume
. . . . . . . . . . . . . 41
M
Mailbox ID, see SMS
Mailboxes, see SMS
Mains adapter
Making calls
accepting a call
external
internal
Making cost-effective calls
Manual last number redial
Medical appliances
Menu
back one menu level
end tone
entry
. . . . . . . . . . . . . . . . . . . . . . . . . 9
key
menu guidance
menu input
open
overview
Message key
opening lists
setting to flashing
Message LED
Message list
open list
Messages
. . . . . . . . . . . . . . . . . . . . . . . . . 1
key
Microphone
Missed
appointment
Missed call
Multiple line input
Muting
first ring
Muting handset
. . . . . . . . . . . . . . . . . . . 4
. . . . . . . . . . . . 12, 13
. . . . . . . . . . . . . . . . . . . . . 12
. . . . . . . . . . . . . . . . . . . . . 33
. . . . . . . . . 20
. . . . . . . . . 18
. . . . . . . . . . . . . . . 4
. . . . . . . . . . . . 9
. . . . . . . . . . . . . . . . . . . . 43
. . . . . . . . . . . . . . . . . . . . . . . . 8
. . . . . . . . . . . . . . . . 9
. . . . . . . . . . . . . . . . . . 10
. . . . . . . . . . . . . . . . . . . . . . 8, 9
. . . . . . . . . . . . . . . . . . . . 55
. . . . . . . . . . . . . . . . . 18
. . . . . . . . . . . . . 18
. . . . . . . . . . . . . . . . . . . 18
. . . . . . . . . . . . . . . . . . . . 25
. . . . . . . . . . . . . . . . . . . . 1
. . . . . . . . . . . . . . . . . 45
. . . . . . . . . . . . . . . . . . . . 19
. . . . . . . . . . . . . . . 11
. . . . . . . . . . . . . . . . . . . . 42
. . . . . . . . . . . . . . . . . 13
N
Name
changing the base station
of handset
Network provider (number list)
Network provider code,
automatic
Night mode
Not accepted
anniversary
Notification via SMS
. . . . . . . . . . . . . . . . . . . 35
. . . . . . . . . . . . . . . . . . 20
. . . . . . . . . . . . . . . . . . . . 40
. . . . . . . . . . . . . . . . . . 45
. . . . . . . . . . . . . 27
. . . . . . . 33
. . . . . 14
Number
adding to directory . . . . . . . . . . . . .16
as destination for room monitor
copying from directory
copying from SMS text
display calling number (CLIP)
enter T-Net box number
entry with directory
saving in directory
Number list
network provider
. . . . . . . . . .16
. . . . . . . . . .26
. . . . . . . . . . . . .16
. . . . . . . . . . . . . .14
. . . . . . . . . . . . . . .14
. . . .36
. . . . . .12
. . . . . . . . .31
O
On/Off key . . . . . . . . . . . . . . . . . . . . . 1
Operating time for handset
Operation (preparing to use
the phone)
Order of entries in directory
. . . . . . . . . . . . . . . . . 5
. . . . . . . . .51
. . . . . . . .54
P
PABX
connecting base station
pause after access code
pause times
setting dialling mode
setting flash time
. . . . . . . . . . . . . . . . . . . . . . . .29
SMS
storing access code
switch to touch tone dialling
Pack contents
Paging
Paging, handset
. . . . . . . . . . . . . . . . . . . . . . . . .48
Pause
PC Interface
Phone jack assignment
Phoning
internally
Playing
voice pattern
Power consumption
Predictive text
Preparing for use
handset
Preparing to use
phone
Preselection
suppress
Protect phone from access
Pulse dialling
. . . . . . . . . . . . . . . . . .48
. . . . . . . . . . . . . . . . . . . 5
. . . . . . . . . . . . . . . . . . . . . . . .33
. . . . . . . . . . . . . . . . .33
. . . . . . . . . . . . . . . . . . . .53
. . . . . . . . . . . . . . . . . . . .33
. . . . . . . . . . . . . . . . . .17
. . . . . . . . . . . . . . . . . .53
. . . . . . . . . . . . . . . . . . . . . 6
. . . . . . . . . . . . . . . . . . . . . . . 5
. . . . . . . . . . . . . . . . . . . .20
. . . . . . . . . . . . . . . . . . . . .21
. . . . . . . . . . . . . . . . . . .47
. . . . . . . . . .47
. . . . . . . . . .48
. . . . . . . . . . . .47
. . . . . . . . . . . . . .47
. . . . . . . . . . . . .47
. . . . . .48
. . . . . . . . . . . . 6
. . . . . . . . . . . . . .51
. . . . . . . . .46
64

Index
Q
Questions and answers . . . . . . . . . . . 49
R
Range. . . . . . . . . . . . . . . . . . . . . . . . . 5
Recall key
Reception booster, see Repeater
Reception strength
Recording
voice pattern
Registering (handset)
Reminder call
Repeater
Ring delay
Ringtone
changing
muting
set melody
set volume
setting
R-key
pause after
Room monitor
activating
sensitivity
. . . . . . . . . . . . . . . . . . . . . . 1
. . . . . . . . . . . . . . . 5
. . . . . . . . . . . . . . . . . 16
. . . . . . . . . . . . 32
. . . . . . . . . . . . . . . . . . 16
. . . . . . . . . . . . . . . . . . . . . . 46
. . . . . . . . . . . . . . . . . . . . . 41
. . . . . . . . . . . . . . . . . . . . 41
. . . . . . . . . . . . . . . . . . . . . 42
. . . . . . . . . . . . . . . . . . . 41
. . . . . . . . . . . . . . . . . . . 41
. . . . . . . . . . . . . . . . . . . . . . . 8
. . . . . . . . . . . . . . . . . . 48
. . . . . . . . . . . . . . . 36, 38
. . . . . . . . . . . . . . . . . . . 38
. . . . . . . . . . . . . . . . . . . 38
S
Safety precautions. . . . . . . . . . . . . . . . 4
Screen picture
Searching in directory
Sending
directory entry to handset
Sensitivity (room monitor)
Sensitivity, room monitor
Service
Set date
Set melody
Set time
Setting
screen picture
Setting up, base station
Shortcut
Signal beep, see Advisory tones
. . . . . . . . . . . . . . . . . . . . . . . . . 22
SMS
active send service centre
changing mailbox
deleting
diverting
draft message list
info services
. . . . . . . . . . . . . . . . . . 40
. . . . . . . . . . . . 14
. . . . . . . 15
. . . . . . . . . 36
. . . . . . . . . . 38
. . . . . . . . . . . . . . . . . . . . . . . 50
. . . . . . . . . . . . . . . . . . . . . . . 8
. . . . . . . . . . . . . . . . . . . . 41
. . . . . . . . . . . . . . . . . . . . . . . 8
. . . . . . . . . . . . . . . . 40
. . . . . . . . . . . . 5
. . . . . . . . . . . . . . . . . . . . . . 55
. . . . . . . . 22
. . . . . . . . . . . . . 28
. . . . . . . . . . . . . . . . . . . . . 24
. . . . . . . . . . . . . . . . . . . . 25
. . . . . . . . . . . . . . 23
. . . . . . . . . . . . . . . . . 29
input language . . . . . . . . . . . . . . . .23
. . . . . . . . . . . . . . . . . . . . . . .22
linked
listening to melody in
an attachment
mailbox ID
mailboxes
notification number
notification type
notification via SMS
PIN protection
reading
receiving
replying to or diverting
rules
saving a melody in an attachment
self-help with error messages
sending as fax
sending to a personal mailbox
sending to email address
status report
store number
to PABX
troubleshooting
use data (SMS)
SMS centre
changing number
setting
Sound Manager
Sound, see Ringtone
Special characters
Special functions
Specifications
Speed dialling
Star key
Storing (access code)
Suppress
preselection
System settings
. . . . . . . . . . . . . . . . . . .27
. . . . . . . . . . . . . . . . . . . .27
. . . . . . . . . . . . . . . . . . . . . .24
. . . . . . . . . . . . . . . . . . . . .25
. . . . . . . . . . . . . . . . . . . . . . . .22
. . . . . . . . . . . . . . . . . . . . . .29
. . . . . . . . . . . . . . . . . . . . . .28
. . . . . . . . . . . . . . . . . . . . .1, 42
. . . . . . . . . . . . .26
. . . . . . . . . . . .27
. . . . . . . . . . . . . . .27
. . . . . . . . . . . . .27
. . . . . . . . . . . . . . . . .27
. . . . . . . . . .25
. .26
. . . . .30
. . . . . . . . . . . . . . . . .24
. . . . .28
. . . . . . . . .24
. . . . . . . . . . . . . . . . . .23
. . . . . . . . . . . . . . . . .26
. . . . . . . . . . . . . . .30
. . . . . . . . . . . . . . . .26
. . . . . . . . . . . . . .28
. . . . . . . . . . . . . . . . .42
. . . . . . . . . . . . . . . .54
. . . . . . . . . . . . . . . .47
. . . . . . . . . . . . . . . . . . .51
. . . . . . . . . . . . . . .14, 39
. . . . . . . . . . . . .47
. . . . . . . . . . . . . . . . . .21
. . . . . . . . . . . . . . . . .46
T
Talk key . . . . . . . . . . . . . . . . . . . . .1, 12
Tex t
writing, editing
Text message, see SMS
T-Net box
touch tone dialling
Tro ubl eshoot ing
Troubleshooting (SMS)
. . . . . . . . . . . . . . . . . . . . . .31
. . . . . . . . . . . . . . . .53
. . . . . . . . . . . . . . .48
. . . . . . . . . . . . . . . . .49
. . . . . . . . . . . .30
65

Index
U
Unknown . . . . . . . . . . . . . . . . . . . . . 13
Unknown caller
Use data (SMS)
Using Walk and Talk as a
room monitor
. . . . . . . . . . . . . . . . . 13
. . . . . . . . . . . . . . . . . 26
. . . . . . . . . . . . . . . 38
V
View T-Net box message . . . . . . . . . . 31
VIP (directory entry)
Voice dialling
dialling
initiating
Voice pattern
deleting
playing
recording
Volume
earpiece
handset loudspeaker
loudspeaker
ringer
ringtone
setting
. . . . . . . . . . . . . . . . . . . . . 17
. . . . . . . . . . . . . . . . . . . . . 8
. . . . . . . . . . . . . . . . . . . . . 17
. . . . . . . . . . . . . . . . . . . . . 17
. . . . . . . . . . . . . . . . . . . . 16
. . . . . . . . . . . . . . . . . . . . 41
. . . . . . . . . . . . . . . . . . . . . . 41
. . . . . . . . . . . . . . . . . . . . 41
. . . . . . . . . . . . . . . . . . . . . . 41
. . . . . . . . . . . . . 15
. . . . . . . . . . . . . . . . . . 16
. . . . . . . . . . . 41
. . . . . . . . . . . . . . . . . . 41
W
Wait melody . . . . . . . . . . . . . . . . . . . 13
Walk and Talk
activating/deactivating
. . . . . . . . . . . . . . . . . . . . . . 37
setting
Warning beep, see Advisory tones
Writing (SMS)
Wrong inputs (correcting)
. . . . . . . . . . . . . . . . . . 22
. . . . . . . . . . 38
. . . . . . . . . 10
66

Présentation (combiné)
Présentation (combiné)
16
15
14
13
12
11
10
9
ÐV
INT 1
28/09/04 09:45
} §§§§§§§SMS§§§§§
8
1 Ecran (zone d'affichage) à l'état de repos
2 Etat de charge de la batterie
= e V U (déchargé à chargé)
= clignotant : batterie presque vide
e V U clignotant : batterie en cours
de charge
3 Tou ches Ecra n (p. 9)
4 Tou che M essa ges
Accès au journal des appels et à la liste des
messages
1
2
3
4
5
6
7
Clignotant : nouveau message ou nouvel
appel
5 Touche Raccrocher et Marche/Arrêt
Terminer la communication, interrompre la
fonction, passer au niveau précédent du
menu (appui bref), retourner à l'état de
repos (appui long), mettre le téléphone en
marche/à l'arrêt (appui long dans l'état de
repos)
6 Tou che D ièse
Activer/désactiver le verrouillage du clavier
(appui long)
7 Tou che R éper toire s péci al
Ouvrir le répertoire spécial
8 Prise pour casque et
interface PC
9 Microphone
10 Tou che R
Insérer une pause interchiffres (appui long)
11 Tou che E toil e
Activer/désactiver les sonneries
(appui long),
commuter entre l'emploi de majuscules,
minuscules et de chiffres
12 Tou che 1
/la messagerie externe (répondeur sur le
réseau) (appui long)
13 Tou che D é crocher
Prendre l'appel, ouvrir la liste des numéros
Bis (appui bref), composer un numéro
(appui long)
14 Tou che M a ins- libr es
Commuter entre le mode écouteur et mainslibres
Allumé : mode mains-libres activé
Clignotant : appel entrant, rappel
automatique
15 Tou che d e nav igat ion (p. 8)
16 Intensité de réception
Ð i Ñ Ò (forte à faible)
| clignotant : pas de réception
1

Sommaire
Sommaire
Présentation (combiné) . . . . . . . . 1
Consignes de sécurité . . . . . . . . . 4
Gigaset S440 –
plus qu'un poste téléphonique . . 5
Mise en service du
téléphone . . . . . . . . . . . . . . . . . . . 5
Installation de la base . . . . . . . . . . . . . 5
Portée et intensité de la réception . . . . 5
Raccordement de la base . . . . . . . . . . . 6
Mise en service du combiné . . . . . . . . 6
Marche/arrêt du combiné . . . . . . . . . . . 8
Activation/désactivation du
verrouillage clavier . . . . . . . . . . . . . . . . 8
Réglage de la date et de l'heure . . . . . . 8
Utilisation du combiné . . . . . . . . . 8
Touche de navigation . . . . . . . . . . . . . 8
Touches écran . . . . . . . . . . . . . . . . . . . 9
Retour à l’état de repos . . . . . . . . . . . 10
Navigation dans le menu . . . . . . . . . . 10
Correction d'erreurs de saisie . . . . . . . 10
Symboles utilisés . . . . . . . . . . . . . . . . 11
Exemple de saisie dans un menu . . . . 11
Exemple de saisie de
plusieurs lignes . . . . . . . . . . . . . . . . . 12
Communication . . . . . . . . . . . . . 13
Appel externe . . . . . . . . . . . . . . . . . . . 13
Fin de communication . . . . . . . . . . . . 13
Prise d’appel . . . . . . . . . . . . . . . . . . . . 13
Transmission du numéro . . . . . . . . . . 13
Mains-libres . . . . . . . . . . . . . . . . . . . . 14
Désactivation du micro . . . . . . . . . . . 14
Utilisation du répertoire et
des autres listes . . . . . . . . . . . . . 15
Répertoire principal/
répertoire spécial . . . . . . . . . . . . . . . . 15
Répertoire des adresses e-mail . . . . . 18
Liste des numéros Bis . . . . . . . . . . . . . 19
Appel de listes avec
la touche Messages . . . . . . . . . . . . . . 20
Maîtrise des coûts de
télécommunication . . . . . . . . . . 22
Ajout d'un numéro de présélection à
un numéro d'appel . . . . . . . . . . . . . . . 22
Présélection automatique
de l'opérateur réseau . . . . . . . . . . . . . 22
SMS (messages textuels) . . . . . . 24
Rédaction/envoi d'un SMS . . . . . . . . . 24
Réception d'un SMS . . . . . . . . . . . . . . 27
Utilisation des données de
la pièce jointe . . . . . . . . . . . . . . . . . . . 29
Notification par SMS . . . . . . . . . . . . . . 29
Boîtes à lettres SMS . . . . . . . . . . . . . . . 30
Réglage du centre SMS . . . . . . . . . . . . 31
Services d'information SMS . . . . . . . . 31
SMS au niveau des
autocommutateurs privés . . . . . . . . . . 32
Activation/désactivation de
la fonction SMS . . . . . . . . . . . . . . . . . . 32
Dépannage SMS . . . . . . . . . . . . . . . . . 33
Utilisation de la
messagerie externe . . . . . . . . . . 34
Réglage de la messagerie externe
pour la numérotation rapide . . . . . . . 34
Consultation de la
messagerie externe . . . . . . . . . . . . . . . 34
Utilisation de plusieurs
combinés . . . . . . . . . . . . . . . . . . . 35
Inscription de combinés . . . . . . . . . . . 35
Retrait de combinés . . . . . . . . . . . . . . 36
Recherche d'un combiné
(« Paging ») . . . . . . . . . . . . . . . . . . . . . 36
Changement de base . . . . . . . . . . . . . 36
Modification du nom de la base . . . . . 36
Appel interne . . . . . . . . . . . . . . . . . . . 36
Intrusion d'un utilisateur interne
dans une communication externe . . . 38
Modification du nom d'un combiné . . 38
Modification du numéro interne
d'un combiné . . . . . . . . . . . . . . . . . . . 38
Utilisation du combiné pour la
surveillance de pièce . . . . . . . . . . . . . 39
Réglage du mode Walky-Talky . . . . . . 40
2

Sommaire
Utilisation du combiné pour
la surveillance de pièce en
mode Walky-Talky . . . . . . . . . . . . . . . . 41
Réglages du combiné . . . . . . . . . 42
Accès rapide à des fonctions
et numéros . . . . . . . . . . . . . . . . . . . . . 42
Modification de la langue
d’affichage . . . . . . . . . . . . . . . . . . . . . 43
Réglage de l'affichage . . . . . . . . . . . . 43
Réglage de l'écran de veille . . . . . . . . 43
Réglage du mode nuit . . . . . . . . . . . . 44
Activation/désactivation du décroché au-
tomatique . . . . . . . . . . . . . . . . . . . . . . 44
Réglage du volume d'écoute . . . . . . . 44
Modification des sonneries . . . . . . . . 44
Activation/désactivation de
la suppression de la
première sonnerie . . . . . . . . . . . . . . . 46
Gestion des mélodies . . . . . . . . . . . . . 46
Activation/désactivation des tonalités
d'avertissement . . . . . . . . . . . . . . . . . 47
Réglage du réveil/de l'alarme . . . . . . . 47
Création d’un rendez-vous . . . . . . . . . 48
Affichage des RdV, dates
anniversaire non acquittés . . . . . . . . . 49
Numéro d'urgence . . . . . . . . . . . . . . . 49
Réinitialisation du combiné . . . . . . . . 49
Réglages de la base . . . . . . . . . . 50
Protection du téléphone contre
les accès non autorisés . . . . . . . . . . . 50
Prise en charge du répéteur . . . . . . . . 50
Réinitialisation de la base . . . . . . . . . . 50
Raccordement de la base à
un autocommutateur privé . . . . 51
Mode de numérotation et
durée de flashing . . . . . . . . . . . . . . . . 51
Enregistrement du préfixe
(indicatif de sortie) . . . . . . . . . . . . . . . 51
Réglage des durées de pause . . . . . . . 52
Activation provisoire du mode
fréquence vocale (FV) . . . . . . . . . . . . 52
Annexe . . . . . . . . . . . . . . . . . . . . 53
Entretien . . . . . . . . . . . . . . . . . . . . . . . 53
Contact avec un liquide . . . . . . . . . . . 53
Questions et réponses . . . . . . . . . . . . 53
Service (Customer Care) . . . . . . . . . . . 55
Caractéristiques techniques . . . . . . . . 56
Réglages usine . . . . . . . . . . . . . . . . . . 57
Interface PC . . . . . . . . . . . . . . . . . . . . . 57
Saisie et édition de texte . . . . . . . . . . . 58
Présentation du menu . . . . . . . . 60
Accessoires . . . . . . . . . . . . . . . . . 63
Index . . . . . . . . . . . . . . . . . . . . . . 66
3

Consignes de sécurité
Consignes de sécurité
Attention :
Lisez attentivement le mode d'emploi et les consignes de sécurité avant l'utilisation.
Informez vos enfants sur les recommandations qui y figurent et mettez-les en garde contre les risques
liés à l'utilisation du téléphone.
Utilisez exclusivement le bloc-secteur fourni, comme indiqué sous la base.
$
Utilisez uniquement les batteries rechargeables recommandées par Siemens
(p. 56) ! N'utilisez jamais d'autres types de batteries ni des piles non rechargeables, qui peuvent représenter un risque pour la santé ou occasionner des blessures.
‹
Œ
Positionnez correctement les batteries rechargeables (en respectant la polarité)
et utilisez-les conformément à ce mode d'emploi (symboles figurant dans le
compartiment des batteries du combiné).
Le combiné peut perturber le fonctionnement de certains équipements médicaux. Tenez compte à ce sujet des recommandations émises par le corps médical.
Le combiné peut provoquer un bourdonnement désagréable dans les aides
auditives. De façon générale, ne placez pas d'appareil électronique à proximité
immédiate du téléphone.
N'installez pas la base dans une salle de bains ou douche. Le combiné et la base
ne sont pas étanches aux projections d'eau (p. 53).
Eteignez le téléphone pendant que vous êtes en avion (fonction Walky-Talky
incluse). Assurez-vous que le téléphone ne peut pas être mis en marche involontairement.
N'utilisez pas le téléphone dans un environnement présentant un risque
d'explosion, p. ex. ateliers de peinture.
ƒ
Lorsque vous confiez votre Gigaset à un tiers, veillez toujours à joindre le mode
d'emploi.
Respectez bien les règles concernant la protection de l'environnement lorsque
vous mettez au rebut le téléphone et les batteries. Ne jetez pas ces dernières au
feu, ne les ouvrez pas et ne les mettez pas en court-circuit.
Remarque :
Toutes les fonctions décrites dans ce mode d'emploi ne sont pas nécessairement disponibles dans
tous les pays.
4

Gigaset S440 – plus qu'un poste téléphonique
Gigaset S440 –
plus qu'un poste
téléphonique
Votre téléphone ne se contente pas de
permettre l'envoi et la réception de SMS
par le réseau commuté, l'enregistrement
de 200 numéros et adresses e-mail (p. 15)
– il sait faire beaucoup plus que cela :
u Affectez des touches du téléphone à
des numéros importants ou des fonctions souvent utilisées. La numérotation ou le démarrage de la fonction
s'effectue sur pression de touche
(p. 42).
u Identifiez les interlocuteurs importants
comme VIP – vous reconnaîtrez alors
les appels importants à partir de la sonnerie (p. 16).
u Enregistrez les entrées de répertoire
importantes comme modèle vocal – le
téléphone appellera le numéro sur simple énonciation (p. 17).
u Enregistrez les rendez-vous (p. 48) et
dates anniversaire (p. 17) dans votre
téléphone – il vous les rappellera à
temps.
Bonne utilisation de votre nouveau
téléphone !
Installation de la base
La base et le chargeur intégré sont prévus
pour fonctionner dans des locaux protégés, sur une plage de températures comprise entre +5 °C et +45 °C.
Installer la base dans un endroit central du
logement ou de la maison.
A noter :
u N'exposez pas le téléphone à une
source de chaleur, au rayonnement
direct du soleil ou au voisinage immédiat d'autres appareils électriques.
u Protégez votre Gigaset contre l'humi-
dité, la poussière, les vapeurs et liquides corrosifs.
Portée et intensité de la
réception
Portée :
u Sur un terrain dégagé : jusqu'à 300 m
u A l'intérieur d'un bâtiment : jusqu'à 50
m
Intensité de réception :
L'affichage indique la qualité de la liaison
radio entre la base et le combiné:
u forte à faible : ÐiÑÒ
u aucune réception : | clignote
Mise en service du
téléphone
L'emballage contient les éléments
suivants :
u une base Gigaset S440
u un combiné Gigaset S44
u un bloc-secteur
u un cordon téléphonique
u deux batteries
u un couvercle batterie
u un clip ceinture
u un mode d’emploi
5

Mise en service du téléphone
Raccordement de la base
¤ D'abord brancher le bloc-secteur,
ensuite le connecteur du téléphone
comme représenté ci-dessous et poser
les câbles dans les conduits.
2
1
1
3
1
1
1 Face inférieure de la base (vue partielle)
2 Bloc-secteur 230 V
3 Connecteur téléphonique avec cordon
A noter :
u Le bloc-secteur doit toujours être
branché parce que le téléphone ne
fonctionne pas s'il n'est pas raccordé au
secteur.
u Si vous achetez un autre cordon télé-
phonique dans le commerce par la
suite, vérifiez que le brochage du connecteur est bien correct :
Brochage correct du connecteur
1libre
3
2
1
4
2libre
5
3a
6
4b
5libre
6libre
Mise en service du combiné
Insertion des batteries
Attention :
Utilisez uniquement les batteries rechargeables homologuées par Siemens p. 56 ! N'utilisez jamais des piles normales (non rechargeables) ou d'autres types de batteries, qui peuvent endommager le combiné ou présenter un
risque pour la santé. Par exemple, il est possible que l'enveloppe de la pile ou de la batterie
soit endommagée ou que les batteries explosent. En outre, l'appareil peut subir des dysfonctionnements ou dommages.
¤ Placez les batteries en respectant la
polarité (voir schéma).
La polarité est indiquée dans ou sur le
compartiment des batteries.
Fermeture du couvercle batterie
¤ Posez le couvercle décalé un peu vers le
bas et poussez-le vers le haut jusqu'à ce
qu'il s'enclenche.
Ouverture du couvercle batterie
¤ Appuyez au-dessous de la partie arron-
die supérieure du couvercle batterie et
poussez-le vers le bas.
6

Mise en service du téléphone
Pose du combiné sur la base et
inscription
¤ Posez le combiné écran face à vous
dans la base.
Le combiné s'inscrit tout seul. L'inscription
dure une minute environ. Pendant ce
temps l'écran affiche Processus Inscr. et le
nom de la base clignote, p. ex. Base 1.
Le combiné reçoit automatiquement le
numéro interne disponible le plus bas
(1–6).
Après une inscription réussie, l'écran affiche p. ex. INT 1, ce qui signifie que le
numéro interne 1 a été attribué au combiné. Si les numéros internes 1–6 ont déjà
été attribués à d'autres appareils, le
numéro 6 sera remplacé.
Remarques :
– L'inscription automatique n'est possible
que si aucune communication n'est en
cours à partir de la base sur laquelle vous
souhaitez inscrire votre combiné.
– Chaque pression de touche interrompt l'ins-
cription automatique.
– Si l'inscription automatique ne fonctionne
pas, vous devez inscrire le combiné
manuellement.
– Vous pouvez modifier le nom du combiné
(p. 38).
Pour charger les batteries, laissez le combiné sur le chargeur.
Remarques :
– Si le combiné se trouve dans la base, il se
charge aussi quand il est éteint.
– Si le combiné s'est éteint à cause de batte-
ries vides et est replacé dans la base, il se
remet en marche tout seul.
– Le combiné a seulement le droit d'être posé
dans la base prévue à cet effet.
En cas de questions et de problèmes, voir
p. 53.
Premières charge et décharge des
batteries
Si le combiné est en marche, la charge des
batteries est signalée en haut à droite de
l'écran par clignotement du témoin de
charge e.
Pendant le fonctionnement, le témoin de
charge signale l'état de charge des batteries (p. 1). Pour que l'état de charge soit
affiché correctement, les batteries doivent
d'abord être chargées et déchargées
entièrement.
¤ Laissez à cet effet le combiné dans le
chargeur sans interruption pendant
10 heures. Votre combiné n'a pas
besoin d'être en marche pour la charge.
¤ Retirez ensuite le combiné du chargeur
et ne le remettez dedans qu'après
décharge complète des batteries.
Remarque :
Une fois les premières charge et décharge
effectuées, vous pouvez reposer le combiné
dans la base ou le chargeur après chaque communication.
A noter :
u Répétez la charge et décharge chaque
fois que vous retirez les batteries du
combiné et les remettez en place.
u Les batteries peuvent s'échauffer pen-
dant la charge. Ceci n'est pas dangereux.
u Pour des raisons techniques, la capacité
de charge de la batterie diminue au
bout d'un certain temps.
Votre téléphone est maintenant prêt à
fonctionner !
¤ Régler la date et l'heure, p. ex pour que
l'appareil indique la bonne heure en cas
d'appels entrants (p. 8).
7

Utilisation du combiné
Fixation du clip ceinture
Le combiné est pourvu au niveau de
l'écran de trous latéraux prévus pour la
fixation du clip ceinture.
¤ Placez le clip ceinture à l'arrière du
combiné et appuyez jusqu'à ce que les
ergots s'enclipsent dans les trous.
La languette du clip ceinture doit être
pointée vers le compartiment des piles.
Marche/arrêt du combiné
a Appuyer sur la touche Raccro-
cher longuement. Vous
entendez le bip de confirmation.
Activation/désactivation du
verrouillage clavier
# Appuyer longuement sur la
touche Dièse.
Vous entendez le bip de confirmation. Si le
clavier est verrouillé, Ø s'affiche.
Le verrouillage du clavier est automatiquement désactivé lorsque vous recevez un
appel. A la fin de la communication, il est
réactivé.
Remarque
Le numéro d'urgence (p. 49) entré peut aussi
être appelé quand le clavier est verrouillé.
Réglage de la date et de l'heure
¤ Si vous n'avez pas réglé la date et
l'heure, appuyez sur la touche écran
§Dat./Hre§ pour ouvrir le champ de saisie.
Pour modifier l'heure, ouvrez le champ de
saisie avec :
¢ Ð ¢ Date/Heure
v
¤ Modifier la saisie de plusieurs lignes :
Date :
Entrer le jour, le mois et l'année avec
6 caractères.
Heure :
Entrer les heures et minutes avec
4 caractères, p. ex. Q M
15 pour 07:15.
§Sauver§ Appuyer sur la touche écran.
Utilisation du combiné
Touche de navigation
Dans la partie suivante, le côté de la touche de navigation que vous devez utiliser
dans une situation donnée est marqué en
noir (en haut, en bas, à droite, à gauche),
p. ex. v pour « appuyer sur le côté droit
de la touche de navigation ».
La tache de navigation a différentes
fonctions :
8

Utilisation du combiné
A l'état de repos du combiné
s Ouvrir le répertoire principal.
v Ouvrir le menu principal.
u Ouvrir la liste des combinés.
t Appuyer brièvement : régler
les sonneries du combiné
(p. 44).
Appuyer longuement : activer la numérotation vocale
(p. 18).
Dans le menu principal et les champs de
saisie
Avec la touche de navigation, vous déplacez le curseur vers le haut t, vers le bas
s, à droite v ou à gauche u.
Dans les listes et les sous-menus
t / s Naviguer vers le haut ou vers
le bas ligne par ligne.
v Ouvrir le sous-menu ou confir-
mer la sélection.
u Remonter d'un niveau de
menu ou annuler l'opération.
Pendant une communication externe
s Ouvrir le répertoire principal.
v Ouvrir le menu.
u Acitver le double appel
interne.
t Modifier le volume d'écoute
pour le mode écouteur ou
mains-libres.
Touches écran
Les fonctions des touches écran varient
selon le contexte. Exemple :
}
1 Les fonctions actuelles des touches écran
sont affichées sur la dernière ligne de
l'écran.
2 Touches écran
Principales icônes affichées :
} Touche écran gauche tant
¨ Ouvrir le menu principal ou un
W Touche Effacer : effacer carac-
Î Remonter d'un niveau de
Œ Ouvrir le répertoire des e-
Ó Copier le numéro dans le
• Ouvrir la liste des numéros Bis.
§§§§§SMS§§§§§§
qu'aucune fonction n'y est
affectée (p. 42).
menu contextuel.
tère par caractère de la droite
vers la gauche.
menu ou annuler l'opération.
mails.
répertoire principal.
1
2
9

Utilisation du combiné
Retour à l’état de repos
Depuis n'importe quel niveau du menu
vous retournez à l'état de repos de la
manière suivante :
¤ Appuyer sur la touche Raccrocher a
longuement.
Ou :
¤ N'appuyer sur aucune touche : après
2 minutes, l'écran revient automatiquement à l'état de repos.
Les modifications non validées ou enregistrées par pression de
§Envoi§ ou Sauvegarder §OK§ sont rejetées.
Un exemple d'affichage à l'état de repos
est reproduit p. 1.
§OK§, §Oui§, §Sauver§,
Navigation dans le menu
Les fonctions de votre téléphone sont proposées par le biais d'un menu constitué de
plusieurs niveaux.
Menu principal (premier niveau)
¤ Appuyez sur v à l'état de repos pour
ouvrir le menu principal.
Les fonctions du menu principal sont affichées sous forme d'icônes en couleur.
Pour accéder à une fonction, ouvrir le
sous-menu correspondant (prochain
niveau) :
¤ Se placer avec la touche de navigation
sur la fonction (q et r). La première
ligne de l'écran affiche le nom de la
fonction. Appuyez sur la touche
§OK§.
écran
Sous-menus
Les fonctions des sous-menus sont affichées sous forme de listes.
Pour accéder à une fonction :
¤ Se placer avec la touche de navigation
q sur la fonction et appuyer sur
Ou :
§OK§.
¤ Entrer la combinaison de chiffres
(p. 60) associée.
Si vous appuyez une fois sur la touche Raccrocher a brièvement vous revenez au
niveau précédent ou annulez l'opération.
Correction d'erreurs de saisie
Vous pouvez corriger les erreurs de saisie
en vous positionnant sur l'entrée incorrecte avec la touche de navigation. Vous
avez alors la possibilité :
u d'effacer avec X le caractère à gauche
du curseur
u d'insérer un caractère à gauche du cur-
seur
u de remplacer le caractère (clignotant)
par exemple lors de la saisie de l'heure
et de la date.
10

Remarques concernant le manuel d'utilisation
Remarques concernant le
manuel d'utilisation
Ce mode d'emploi utilise certains symboles et modes d'écriture expliqués ci-après.
Symboles utilisés
Copier entrée / Copier liste (ex.)
Sélectionner l'une des deux
fonctions indiquées.
~ Entrer des chiffres ou des let-
tres.
§Sauver§ Les fonctions courantes des
touches écran, indiquées sur
la dernière ligne de l'affichage,
sont représentées en surbrillance. Appuyer sur la touche écran située dessous pour
appeler la fonction.
q Appuyer sur la touche de navi-
gation en haut ou en bas :
feuilleter vers le haut ou vers
le bas.
r Appuyer sur la touche de navi-
gation à droite ou à gauche :
p. ex. Sélectionner l'option.
c / Q / *, etc.
Appuyer sur la touche reproduite sur le combiné.
Exemple de saisie dans un menu
Le mode d'emploi décrit en abrégé les étapes que vous devez effectuer. Ce mode
d'écriture est illustré par la fonction
« Configuration des couleurs de l'écran ».
Le texte encadré explique ce que vous
devez faire.
¢ Ð ¢ Réglage écran
v
¤ A l'état de repos du combiné, appuyer
sur la to uche de n avig ation po ur ouvri r
le menu principal.
¤ Avec la touche de navigation, sélec-
tionner le symbole Ð – appuyer sur la
touche de navigation à droite, à gauche, en haut ou en bas.
La première ligne de l'écran affiche Régla-
ges comb..
¤ Appuyer sur la touche écran §OK§ pour
valider la fonction Réglages comb..
Le sous-menu Réglages comb. s'affiche.
¤ Appuyer sur la touche de navigation
jusqu'à ce que la fonction Réglage écran
soit sélectionnée.
¤ Appuyer sur la touche écran §OK§ pour
valider la sélection.
Conf. couleur
Sélectionner et appuyer
§OK§.
sur
¤ Appuyer sur la touche de navigation
jusqu'à ce que la fonction Conf. couleur
soit sélectionnée.
¤ Appuyer sur la touche écran §OK§ pour
valider la sélection.
11

Remarques concernant le manuel d'utilisation
s Sélectionner la configuration
de couleurs et appuyer sur
(‰ = couleur actuelle).
§OK§
¤ Appuyer sur la touche de navigation
en haut ou en bas pour sélectionner la
configuration des couleurs.
¤ Appuyer sur la touche écran §OK§ pour
valider la sélection.
La configuration des couleurs sélectionnée est marquée par ‰.
a Appuyer longuement (état
de repos).
¤ Appuyer longuement sur la touche
Raccrocher pour mettre le combiné à
l'état de repos.
Exemple de saisie de
plusieurs lignes
Dans de nombreuses situations, vous pouvez modifier des paramètres ou entrer des
données sur plusieurs lignes.
La saisie multiligne décrite dans ce mode
d'emploi est reproduite en abrégé. Elle est
illustrée par la fonction « Enregistrement
d'un rendez-vous ». Le texte encadré explique ce que vous devez faire.
L'écran affiche :
Activation : f Act. g
Date : 28 09
Heure : 11:11
Texte : Rendez-vous
Î §§Sauver§§
Date :
Entrer le jour/mois avec 4 caractères.
¤ Appuyer sur la touche s pour passer
à la ligne suivante.
La deuxième ligne est marquée comme
active avec [ ].
¤ Entrer la date avec les touches numéri-
ques.
Heure :
Entrer l'heure/lesminutes avec 4 caractères.
¤ Appuyer sur la touche s.
La troisième ligne est marquée comme
active avec [ ].
¤ Entrer la date avec les touches numéri-
ques.
Texte :
Appuyer sur la touche écran
Entrer le texte (max. 16 caractères) et
appuyer sur
§OK§.
§Modifier§.
¤ Appuyer sur la touche s.
La quatrième ligne est marquée comme
active avec < >.
¤ Appuyer sur la touche écran §Modifier§
pour ouvrir le champ de saisie. Saisir le
texte (p. 58).
¤ Appuyer sur la touche écran §OK§.
¤ Enregistrer les modifications.
L’i cône ¼ s’affiche.
Activation :
Sélectionner Act. ou Dés.
¤ Appuyer sur le côté droit ou gauche
(r) de la touche de navigation pour
sélectionner Act. ou Dés..
12
¤ Appuyer sur la touche écran §Sauver§.
¤ Appuyer ensuite longuement sur la
touche a.
Le combiné passe à l'état de repos et affiche l'icône ¼.

Communication
Communication
Appel externe
Les appels externes sont des appels à destination du réseau public.
~c Entrer le numéro et appuyer
sur la touche Décrocher.
Ou :
c~ Appuyer sur la touche Décro-
cher c longuement puis
entrer le numéro.
Appuyez sur la touche Raccrocher a
pour annuler la numérotation.
Remarques :
– La numérotation avec le répertoire princi-
pal ou spécial (p. 1, p. 15) ou la liste de
numéros Bis (p. 9, p. 19) évite l'introduction répétée de numéros et de préfixes
d'opérateurs (« numéro appel par appel »).
– Vous pouvez affecter aux touches des
numéros d'entrées de répertoire (p. 42).
– La numérotation vocale vous permet de
composer les numéros affectés aux noms
énoncés (p. 17).
Fin de communication
a Appuyer sur la touche Raccro-
cher.
Prise d’appel
Un appel entrant est signalé de trois
façons : par la sonnerie, par l'affichage et
par le clignotement de la touche Mainslibres d.
Vous pouvez prendre un appel de diverses
façons :
¤ Appuyer sur la touche Décrocher c.
¤ Appuyer sur la touche écran §Accept.§.
¤ Appuyer sur la touche Mains-
libres d.
Si le combiné est placé dans la base et que
la fonction Décroché auto. est activée
(p. 44), le combiné prendra l'appel dès
que vous l'aurez retiré de la base.
Si la sonnerie vous dérange, appuyez sur
la touche écran
dre l'appel tant qu'il est visible à l'écran.
Transmission du numéro
Lors d'un appel, le numéro de l'appelant
s'affiche si les conditions suivantes sont
remplies :
u Votre opérateur supporte les services
CLIP, CLI.
– CLI (Calling Line Identification) :
transmission du numéro de l'appelant.
– CLIP (Calling Line Identification
Presentation) : affichage du numéro
de l'appelant.
u Vous avez demandé l'activation du ser-
vice CLIP auprès de votre opérateur.
u L'appelant a demandé l'activation du
service CLI auprès de l'opérateur.
§Silence§. Vous pouvez pren-
13

Communication
Affichage d'appel avec le service CLIP/
CLI
Si le numéro de l'appelant est enregistré
dans votre répertoire principal, vous voyez
son nom.
Å
1234567890
§Accept.§ §§§Silence§§
1 Icône de sonnerie
2 Numéro ou nom de l'appelant
A la place du numéro, l'écran affiche :
u Appel externe, si aucun numéro n'est
transmis
u Appel masqué, si l'appelant masque la
transmission du numéro (p. 16)
u Idt. Indisponible, si l'appelant n'a pas
demandé l'activation de la transmission
du numéro
1
2
Mains-libres
Ne tenez pas le combiné à l'oreille en
mode mains-libres. Posez-le p. ex. sur la
table devant vous. D'autres personnes
pourront alors participer à la communication.
Basculement entre le mode écouteur et
le mode mains-libres
d Appuyer sur la touche Mains-
libres.
Pendant une communication , vous activez ou désactivez le mode mains-libres.
Pour placer le combiné dans la base pendant une communication :
¤ Maintenir la touche Mains-libres d
enfoncée pendant l'insertion. Si la touche mains-libres d ne s'allume pas,
réappuyez dessus.
Pour modifier le volume d'écoute, voir
p. 44.
Désactivation du micro
Vous pouvez désactiver le micro de votre
combiné pendant une communication
externe. Votre correspondant entend
alors une musique d'attente.
u Appuyer sur le côté gauche de
la touche de navigation pour
désactiver le micro.
” Appuyer sur la touche écran
pour réactiver le micro.
Activation/désactivation du
mode Mains-libres
Activation lors de la numérotation
~d Entrer le numéro et appuyer
sur la touche Mains-libres.
¤ Si vous faites écouter la conversion à
d'autres personnes, prévenez votre correspondant.
14

Utilisation du répertoire et des autres listes
Utilisation du répertoire et
des autres listes
Types de listes disponibles :
u Répertoire principal
u Répertoire spécial
u Répertoire e-mail
u Liste des numéros Bis
u Liste des SMS
u Journal des appels.
Vous pouvez enregistrer 200 entrées dans
le répertoire principal, le répertoire spécial
et le répertoire e-mail (le nombre dépend
de l'étendue des entrées).
Vous établissez individuellement le répertoire principal, le répertoire e-mail et le
répertoire spécial de votre combiné. Vous
pouvez cependant envoyer aussi ces listes/
entrées à d'autres combinés ou à la base
(p. 16).
Répertoire principal/
répertoire spécial
Dans le répertoire principal, vous enregistrez les numéros et noms correspondants.
¤ Il est accessible à l’aide de la touche s
à l'état de repos.
Dans le répertoire spécial, vous enregistrez des préfixes d'opérateurs (« numéros
appel par appel »).
¤ Ouvrir le répertoire spécial avec la tou-
che C.
Longueur des entrées
Numéro : 32 chiffres max.
Nom : 16 caractères max.
Remarque :
Pour accéder rapidement à un numéro du
répertoire principal ou spécial (numérotation
abrégée), vous pouvez affecter le numéro à
une touche (p. 42).
Enregistrement d'un numéro dans
le répertoire principal
s ¢ Nouvelle entrée
¤ Modifier la saisie de plusieurs lignes :
Numéro :
Entrer le numéro.
Nom :
Entrer le nom.
Annivers. :
Entrer éventuellement la date anniversaire (p. 17).
¤ Enregistrer les modifications.
Si votre téléphone est connecté à un autocommutateur privé, observez p. 51.
Enregistrement d'un numéro dans
le répertoire spécial
C ¢ Nouvelle entrée
¤ Modifier la saisie de plusieurs lignes :
Numéro :
Entrer le numéro.
Nom :
Entrer le nom.
¤ Enregistrer les modifications.
Sélection d'une entrée de
répertoire principal/spécial
s / C Ouvrir le répertoire principal
ou spécial.
Vous avez le choix entre les possibilités
suivantes :
u Naviguer avec s jusqu'à l'entrée cor-
respondante, jusqu'à ce que le nom
recherché soit sélectionné.
u Entrer les premiers caractères
(max. 10) du nom. Naviguer le cas
échéant avec s jusqu'à l'entrée.
Numérotation avec le répertoire
principal/spécial
s / C ¢ s (sélectionner l'entrée)
c Appuyer sur la touche Décro-
cher. Le numéro est composé.
15

Utilisation du répertoire et des autres listes
Gestion des entrées du répertoire
principal/spécial
s / C ¢ s (sélectionner l'entrée)
Affichage d'une entrée
§Afficher§ Appuyer sur la touche écran.
L'entrée s'affiche.
Retour avec
§OK§.
Modification d'une entrée
§Afficher§ §Modifier§
Appuyer sur les touches écran
l'une après l'autre.
¤ Effectuer les modifications et les enre-
gistrer.
Utilisation d'autres fonctions
s / C ¢ s (sélectionner l'entrée)
¢ v (ouvrir le menu)
Vous pouvez sélectionner les fonctions
suivantes avec q :
Utiliser le No
Modifier ou compléter un numéro
enregistré. Composer le numéro ou
appeler d'autres fonctions par pression
de ©.
Modifier entrée
Modifier l’entrée sélectionnée.
Effacer entrée
Supprimer l’entrée sélectionnée.
Entrer comme VIP (uniquement répertoire
principal)
Sélectionner une entrée de répertoire
comme VIP (Very Important Person) et
lui attribuer une mélodie spéciale. Vous
reconnaîtrez alors les appels VIP à la
mélodie.
Condition : transmission du numéro
activée (p. 13).
Enreg. modèle (uniquement répertoire
principal)
Prononcer le nom de l'entrée sélectionnée et l'enregistrer comme modèle
vocal (p. 18).
Ecouter modèle (uniquement répertoire
principal)
Ecouter le modèle vocal (p. 18).
Effac. modèle (uniquement répertoire
principal)
Supprimer le modèle vocal (p. 18).
Copier entrée
Envoyer une entrée à un autre
combiné (p. 16).
Effacer liste
Effacer toutes les entrées dans le
répertoire principal ou spécial.
Copier liste
Envoyer la liste complète à un autre
combiné (p. 16).
Mémoire dispo.
Afficher le nombre d'entrées libres
dans le répertoire principal, spécial
(p. 15) et le répertoire e-mail (p. 18).
Transfert du répertoire principal/
spécial à un autre combiné
Conditions :
u Les combinés destinataire et expédi-
teur sont inscrits à la même base.
u L'autre combiné et la base peuvent
envoyer et recevoir des entrées de
répertoire.
s / C
¢ s (sélectionner l'entrée)
¢ v (ouvrir le menu) ¢ Copier
entrée / Copier liste
~ Entrer le numéro interne du
combiné destinataire
chage Copie entrée en cours.
§Oui§ / §Non§ Appuyer sur la touche écran.
La réussite de l'opération de transfert est
signalée par un message et par le bip de
validation sur le combiné destinataire.
A noter :
u Les entrées avec des noms identiques
ne sont pas remplacées sur le combiné
destinataire.
§. Affi-
16

Utilisation du répertoire et des autres listes
u La transmission s'interrompt lorsque le
téléphone sonne ou que la mémoire du
combiné du destinataire est pleine.
Reprise du numéro affiché dans
le répertoire principal
Vous pouvez reprendre dans le répertoire
principal des numéros affichés p. ex. dans
le journal des appels ou la liste des numéros Bis, dans un SMS ou pendant une communication.
Un numéro s'affiche :
¢ No.vers répert.
v
¤ Compléter le numéro, voir p. 15.
Reprise d'un numéro du
répertoire principal
Dans de nombreuses situations, vous pouvez ouvrir le répertoire principal, p. ex.
pour reprendre un numéro. Votre combiné ne doit pas se trouver à l'état de
repos.
¤ Suivant le contexte, ouvrir le répertoire
principal avec s ou Ò ou
© Répertoire.
q Sélectionner l'entrée (p. 15).
Enregistrement d'une date
anniversaire dans le répertoire
principal
Vous pouvez enregistrer avec chaque
numéro dans le répertoire principal une
date anniversaire et entrer l'heure à
laquelle vous souhaitez que cette date
vous soit rappelée.
¢ s (sélectionner l'entrée ; p. 15)
s
§Afficher§ §Modifier§
Appuyer sur les touches écran
l'une après l'autre.
s Se placer sur la ligne
Annivers. :.
§Modifier§ Appuyer sur la touche écran.
¤ Modifier la saisie de plusieurs lignes :
Date :
Entrer le jour/mois avec 4 caractères.
Heure :
Entrer l'heure/les minutes du rappel
avec 4 caractères.
Mémo :
Sélectionner le type de signalisation et
appuyer sur
§OK§.
¤ Enregistrer les modifications (p. 12).
Remarque :
Pour être rappelé, il faut entrer une heure. Si
vous avez sélectionné une signalisation optique, l'entrée de l'heure n'est pas nécessaire.
Elle est automatiquement réglée sur 00:00.
Suppression d'une date anniversaire
s ¢ s (sélectionner l'entrée ; p. 15)
s Se placer sur la ligne
Annivers. :.
§Modifier§ §Effacer§ §Sauver§
Appuyer sur les touches écran
l'une après l'autre.
Rappel de date anniversaire
Un rappel de date anniversaire est signalé
avec la mélodie que vous avez choisie sur
le combiné.
§Silence§ Appuyer sur la touche écran
pour terminer le rappel.
Numérotation vocale
Vous pouvez composer des numéros du
répertoire en énonçant le nom. Pour que
votre téléphone vous « reconnaisse »,
vous devez entrer un modèle vocal pour
chaque nom, c'est-à-dire énoncer à haute
voix le nom et l'enregistrer dans le combiné.
Vous pouvez en outre configurer votre
téléphone de telle manière qu'en cas
d'appel externe entrant, la sonnerie soit
remplacée par l'annonce du nom de
l'appelant, voir p. 44.
Vous pouvez enregistrer un modèle vocal
pour 30 entrées de répertoire en tout.
17

Utilisation du répertoire et des autres listes
Les entrées à modèle vocal sont marquées
par ´.
Enregistrement d'un modèle vocal
Enregistrez le modèle dans un
environnement silencieux, à une distance
de 25 cm environ du combiné. Le modèle
vocal peut avoir une durée de 1,5 s.
Remarque :
Si vous utilisez la numérotation vocale principalement avec un kit mains-libres, il est avantageux d'enregistrer le modèle avec le kit
mains-libres.
¢ s (sélectionner l'entrée p. 15)
s
v Ouvrir le menu.
Enreg. modèle
Sélectionner.
§OK§ Appuyer sur la touche écran
pour démarrer l'enregistrement.
Un signal bref retentit. L'écran affiche
l'invite correspondante. Dictez le nom.
Répétez le nom après y avoir été invité et
un deuxième signal sonore retentit.
Remarque :
Si l'espace en mémoire ne suffit plus pour
l'enregistrement d'un modèle vocal, un message le signale à l'écran. Le téléphone repasse
au répertoire principal. Effacer un modèle
vocal et resélectionner Enreg. modèle.
Pour modifier un modèle vocal, vous
devez l'effacer (p. 18) puis le réenregistrer.
Numérotation vocale
t Appuyer longuement.
Dictez le nom après le signal sonore. Si le
nom correspond au modèle vocal enregistré, il sera répété. Le numéro sera composé.
Ecoute d'un modèle vocal
s ¢ s (sélectionner l'entrée avec ´ )
v Ouvrir le menu.
Ecouter modèle
Sélectionner et appuyer
§OK§. Le modèle vocal est
sur
écouté en mode mains-libres.
a Appuyer longuement (état de
repos).
Suppression d'un modèle vocal
s ¢ s (sélectionner l'entrée avec ´)
v Ouvrir le menu.
Effac. modèle
Sélectionner et appuyer
§OK§.
sur
a Appuyer longuement (état de
repos).
L'entrée du répertoire reste conservée.
Répertoire des adresses e-mail
Le répertoire e-mail vous permet d'enregistrer des adresses e-mail (pour l'envoi de
SMS à des adresses e-mail).
Enregistrement d'une
nouvelle adresse e-mail
s Ouvrir le répertoire principal.
<Répert. e-mail>
Sélectionner et appuyer
§OK§.
sur
Nouvelle entrée
Sélectionner et appuyer
§OK§.
sur
~ Entrer l'adresse e-mail
(60 caractères max.).
¤ Enregistrer (p. 12).
Pendant l'entrée, vous pouvez ouvrir le
menu avec © et utiliser les fonctions
suivantes :
Insérer "." / Insérer "@"
Insérer un point ou le caractère @.
18

Utilisation du répertoire et des autres listes
Gestion des adresses e-mail
s ¢ <Répert. e-mail>
¢ s (sélectionner l'entrée ; p. 15)
Affichage d'une entrée
§Afficher§ Appuyer sur la touche écran.
L’entrée s’affiche.
Retour avec
§OK§.
Modification d'une entrée
Afficher §Modifier§
Appuyer sur les touches écran
l'une après l'autre.
¤ Effectuer les modifications et les enre-
gistrer (p. 12).
Utilisation d'autres fonctions
s ¢ <Répert. e-mail>
¢ s (sélectionner l'entrée ; p. 15)
¢ v (ouvrir le menu)
Comme dans le répertoire principal
(p. 16), vous pouvez sélectionner les fonctions avec s :
Modifier entrée
Effacer entrée
Effacer liste
Liste des numéros Bis
La liste des numéros Bis contient les dix
derniers numéros appelés (32 chiffres
max.) sur le combiné. Si l'un des numéros
figure dans le répertoire, le nom correspondant s'affiche.
Gestion des entrées de la liste des
numéros Bis
c Appuyer brièvement sur la
touche.
s Sélectionner une entrée.
v Ouvrir le menu.
Vous pouvez sélectionner les fonctions
suivantes avec q :
Renumérot.Auto.
Le numéro est appelé à intervalles fixes
(au moins toutes les 50 s). La touche
Mains-libres clignote et la fonction
« Ecoute amplifiée » est activée.
– Le correspondant prend l'appel :
appuyer sur la touche Décrocher
c. La fonction est terminée.
– Personne ne prend l'appel : l'appel
est interrompu au bout de 30 s environ. Après pression d'une touche
quelconque ou dix essais infructueux, la fonction se termine.
Utiliser le No (comme dans le répertoire
principal, p. 16)
No.vers répert.
Reprendre l'entrée dans le répertoire
principal (p. 17)
Effacer entrée (comme dans le répertoire
principal, p. 16)
Effacer liste (comme dans le répertoire
principal, p. 16)
Renumérotation manuelle
c Appuyer brièvement sur la
touche.
s Sélectionner une entrée.
c Réappuyer sur la touche
Décrocher. Le numéro est
composé.
Lorsqu'un nom apparaît à l'écran, vous
pouvez utiliser la touche écran
pour visualiser le numéro correspondant.
§Afficher§
19

Utilisation du répertoire et des autres listes
Appel de listes avec
la touche Messages
La touche Messages f vous permet
d'appeler les listes suivantes :
u Liste SMS
Si plusieurs boîtes à lettres sont configurées (p. 30), plusieurs listes s'affichent.
u Messagerie externe
Si votre opérateur prend cette fonction
en charge et si la messagerie externe a
été configurée pour l'accès rapide
(p. 34).
u Journal des appels
Dès qu'une nouvelle entrée est présente,
une tonalité d'avertissement retentit. La
touche f clignote. A l'état de repos,
une icône s'affiche pour les nouveaux
appels ou messages :
Icône Nouveau message...
Ã
Á
À
Le nombre de nouvelles entrées s'affiche
sous l'icône correspondante.
Si vous appuyez sur la touche clignotante
f, vous appelez les listes qui renferment les nouveaux messages.
La touche f s'éteint après l'ouverture
d'une liste et la fermeture du menu. Si
d'autres nouvelles entrées sont présentes,
vous pouvez régler de nouveau la touche
Messages sur l'état clignotant (p. 20),
p. ex. pour signaler les nouvelles entrées
à d'autres utilisateurs.
... dans le la messagerie externe
... dans le journal des appels
... dans la liste SMS
Activation du clignotement de
la touche Messages
Condition : il existe au moins une autre
nouvelle entrée dans une des listes.
f Ouvrir le journal des appels.
Act. LED messg.
Sélectionner et appuyer
§OK§.
sur
a Appuyer longuement (état de
repos).
La touche f s'éteint après l'ouverture
d'une liste et la fermeture du menu.
Journal des appels
Condition : transmission du numéro activée (CLIP, p. 13)
Les numéros des 30 derniers appels
entrants sont enregistrés. Selon le Type de
liste configuré, Tous appels ou Appels perdus sont enregistrés.
Plusieurs appels du même numéro sont
enregistrés avec
u Tous appels plusieurs fois.
u Appels perdus une fois (dernier appel).
Le journal des appels s'affiche de la
manière suivante :
Journal : 01+02
Nombre de nouvelles entrées + nombre
d'anciennes entrées lues
Réglage du type de journal d'appels
f ¢ Journal : 01+02 ¢ v ¢ Type de
liste
Appels perdus / Tous appels
Sélectionner et appuyer
§OK§ (‰ =activé).
sur
a Appuyer longuement (état de
repos).
Les entrées restent conservées dans le
journal des appels si vous changez de type
de liste.
20

Utilisation du répertoire et des autres listes
Ouvrir le journal des appels
f Appuyer.
Journal : 01+02
Sélectionner et appuyer
§OK§ si nécessaire.
sur
q Sélectionner l'entrée.
Le journal des appels affiche le dernier
appel reçu.
Entrée de liste
Exemple d'entrée de liste :
Appels perdus
Nvl Appel 01/ 02
1234567890
28/09/04 09:45
§Effacer§ §§Réponse§§§
u Type de liste (première ligne)
u Etat de l'entrée
Nvl Appel : nouvel appel perdu
Appel lu : entrée déjà lue
Appel reçu : appel pris (seulement avec
le type de liste Tous appels)
u Numéro séquentiel de l'entrée
01/02 signifie p. ex. : première entrée
de deux en tout
u Numéro ou nom de l'appelant
Vous pouvez reprendre le numéro de
l'appelant dans le répertoire principal
(p. 17).
u Date et heure de l'appel (si réglé, p. 8)
Vous avez le choix entre les possibilités
suivantes :
u Rappeler l'appelant (si le numéro de
l'appelant a été transmis, p. 13)
Appuyer sur la touche écran
Le rappel est immédiatement réalisé.
Le numéro est ajouté à la liste des
numéros Bis.
u Effacer une entrée
Appuyer sur la touche écran
§Réponse§.
§Effacer§.
Suppression du journal des appels
Attention ! Toutes les anciennes et nou-
velles entrées seront supprimées.
¢ Journal : ¢ v (ouvrir le menu)
f
¢ Effacer liste
a Appuyer longuement (état de
repos).
21

Maîtrise des coûts de télécommunication
Maîtrise des coûts de
télécommunication
Optez pour un opérateur réseau proposant des tarifs avantageux sans abonnement (appel par appel). Vous pouvez gérer
les numéros dans le répertoire spécial.
Ajout d'un numéro
de présélection à
un numéro d'appel
Vous pouvez faire précéder le préfixe d'un
opérateur au numéro (« ajouter »).
C Ouvrir le répertoire spécial.
s Sélectionner une entrée
(numéro de présélection).
© Appuyer sur la touche écran.
Utiliser le No
Sélectionner et appuyer
§OK§.
sur
~ Entrer le numéro ou sélection-
ner le numéro dans le répertoire principal (p. 17).
c Appuyer sur la touche Décro-
cher. Les deux numéros seront
composés.
Présélection automatique
de l'opérateur réseau
Vous pouvez définir un préfixe (numéro
de présélection) ajouté automatique-
ment au début de certains numéros
composés par l'intermédiaire de deux listes.
u La liste « avec présélection » contient
la « règle »: préfixes ou premiers chiffres de ces derniers pour lesquels vous
voulez utiliser le numéro de présélection.
u La liste « sans présélection » contient
«l'exception».
Exemple :
Vous avez entré 08 dans la liste « avec
présélection ». Tous les numéros commençant par 08 seront composés avec
la présélection.
Si vous souhaitez p. ex. exclure 081 de
la règle de numérotation avec présélection, entrez 081 dans la liste « sans
présélection ».
Lorsque vous avez pressé sur la touche
Décrocher/Mains-libres, les premiers chiffres du numéro appelé sont comparés aux
deux listes :
u Le préfixe présélection ne sera pas
placé devant si le numéro composé
– ne correspond à aucune entrée des
deux listes
– correspond à une entrée de la liste
« sans présélection »
u Le préfixe de présélection est aussi
placé devant quand les premiers chiffres du numéro appelé ne correspon-
dent qu'à une entrée figurant dans la
liste « avec présélection ».
22

Maîtrise des coûts de télécommunication
Enregistrement du numéro
de présélection
v ¢ Ð ¢ Base ¢ Sél.rés.auto.
¢ Présélect.réseau
~ Entrer ou modifier le numéro
de présélection.
¤ Enregistrer les modifications (p. 12).
a Appuyer longuement (état de
repos).
Enregistrement ou modification
d'entrées dans les listes de
présélection
Chacune de ces deux listes peut contenir
11 entrées :
u 5 entrées comportant jusqu'à
6chiffres.
u 6 entrées comportant jusqu'à
2chiffres.
La liste « avec présélection » peut comporter des numéros, en fonction du pays.
Cette liste associe p. ex. toutes les communications nationales ou les appels en
direction du réseau mobile automatique-
ment aux numéros de présélection que
vous avez enregistrés.
¢ Ð ¢ Base ¢ Sél.rés.auto. ¢ Avec
v
présél. / Sans présél.
s Sélectionner une entrée.
§Modifier§ Appuyer sur la touche écran.
~ Entrer ou modifier les pre-
miers chiffres du numéro.
¤ Enregistrer les modifications (p. 12).
a Appuyer longuement (état de
repos).
Désactivation provisoire de
la présélection
c (appui long) ¢ v ¢ Préselect. dés.
Désactivation permanente de
la présélection
¤ Effacer un numéro de présélection
enregistré (p. 23).
23

SMS (messages textuels)
SMS (messages textuels)
Votre appareil est configuré en usine de
manière à vous permettre d'envoyer un
SMS dès la mise en oeuvre.
Conditions :
u La transmission du numéro a été acti-
vée pour votre ligne.
u Votre opérateur prend en charge l'envoi
de SMS sur le réseau commuté (il
pourra vous renseigner à ce sujet).
u Vous êtes enregistré auprès de votre
fournisseur de services pour l'envoi et
la réception de SMS.
Les SMS sont échangés par des fournisseurs de services par l'intermédiaire de
centres SMS. Vous devez inscrire le centre
SMS par lequel vous souhaitez envoyer ou
recevoir des SMS dans votre appareil. Vous
pouvez recevoir des SMS émis à partir de
n'importe quel centre SMS inscrit si vous
vous êtes enregistré auprès de votre fournisseur de services. Vos SMS sont envoyés
à partir du centre SMS enregistré en tant
que centre d'envoi (p. 31). Il ne peut y
avoir à un moment donné qu'un centre
SMS qui fasse office de centre d'envoi.
Si aucun centre de service SMS n'est inscrit, le menu SMS ne contient que l'entrée
Réglages. Inscrivez un centre de service
SMS (p. 31).
u Saisir le texte voir p. 58.
u Rédiger le texte avec la saisie intuitive
EATONI, voir p. 58.
Règles
u Un SMS peut avoir une longueur maxi-
male de 612 caractères.
u S'il y a plus de 160 caractères ou des
données image volumineuses, le SMS
est envoyé comme séquence (jusqu'à
huit SMS avec 153 caractères respectivement).
A noter :
u Chaque SMS reçu est signalé par 1 son-
nerie (comme celle d'un appel
externe). Si vous prenez un tel
« appel », le SMS sera perdu. Pour éviter la sonnerie, régler l'appareil de
façon à supprimer la première sonnerie
de tous les appels externes (p. 46).
u Si votre téléphone est raccordé à un
autocommutateur privé, lisez p. 32.
u Pour recevoir des SMS, vous devez être
enregistré auprès de votre fournisseur
de services.
Rédaction/envoi d'un SMS
Rédaction d'un SMS
v ¢ î
Boîte lettres 2
Sélectionner la boîte à lettres
et appuyer sur
saire.
~ Entrer le code PIN de la boîte à
lettres et appuyer sur
nécessaire.
Créer texte Sélectionner et appuyer
§OK§.
sur
~ Ecrire un SMS.
© Appuyer sur la touche écran.
Envoi Sélectionner et appuyer
§OK§.
sur
SMS Sélectionner et appuyer
§OK§.
sur
Envoyer un SMS
s / C / ~
Sélectionner un numéro avec
préfixe (y compris local) dans
le répertoire ou le répertoire
spécial ou l'introduire directement. En cas d'envoi de SMS à
une boîte à lettres SMS : ajouter l'ID boîte à lettres à la fin du
numéro.
§OK§ si néces-
§OK§ si
24

Remarque :
Si le numéro est affecté à une touche : appuyer
longuement sur la touche pour reprendre le
numéro.
© Appuyer sur la touche écran.
Envoi Sélectionner et appuyer
§OK§.
sur
Le SMS est envoyé.
Remarques :
– Si vous recevez un appel externe pendant la
rédaction du SMS, le texte sera automatiquement enregistré dans la liste des
brouillons.
– L'opération est annulée si la mémoire est
pleine ou que la fonction SMS est affectée
sur la base à un autre combiné. Un message
correspondant s'affiche à l'écran. Effacez
les SMS inutiles ou envoyez le SMS ultérieurement.
SMS (messages textuels)
Joindre Image / Joindre Mélodie / Insér. adr. E-
mail
Sélectionner et appuyer
§OK§.
sur
s Sélectionner l'objet à insérer et
appuyer sur
L'objet sélectionné sera inséré.
§OK§.
Accusé de réception SMS
Si vous avez activé l'accusé de réception,
vous recevrez après l'envoi un SMS avec
un texte de confirmation.
Activation/désactivation de l'accusé de
réception
v ¢ î ¢ Réglages
Accusé réception
Sélectionner et appuyer
§OK§ (‰ =activé).
sur
Réglage de la langue de saisie
¤ Condition : vous rédigez un SMS
(p. 24).
© Appuyer sur la touche écran.
Langue saisie
Sélectionner et appuyer
§OK§.
sur
s Sélectionner la langue de sai-
sie et appuyer sur
a Appuyer brièvement sur la
touche Raccrocher pour revenir au champ de texte.
La configuration de la langue de saisie
n'est valable que pour le SMS en cours.
§OK§.
Ajout d'images, de mélodies ou d'une
adresse e-mail à un SMS
Données disponibles :
u 15 images (icônes)
u 10 mélodies
u Adresses e-mail du répertoire e-mail
(p. 18).
¤ Vous rédigez un SMS (p. 24). Le curseur
se trouve à la bonne position.
© Appuyer sur la touche écran.
Lecture/suppression de l'accusé de
réception
¤ Ouvrir la liste de réception (p. 27),
puis :
q Sélectionner le SMS avec Etat
OK ou Etat NOK.
§Lire§ Appuyer sur la touche écran.
Ou :
§Effacer§ Appuyer sur la touche écran.
Le SMS est effacé.
Liste des brouillons
Vous pouvez enregistrer un SMS dans la
liste des brouillons, le modifier et
l'envoyer ultérieurement.
Enregistrement d'un SMS dans la liste des
brouillons
¤ Vous rédigez un SMS (p. 24).
© Appuyer sur la touche écran.
Sauvegarder
Sélectionner et appuyer
§OK§.
sur
25

SMS (messages textuels)
Ouverture de la liste des brouillons
v ¢ î ¢ (boîte à lettres, PIN boîte à
¢ Brouillons
lettres)
La première entrée de liste s'affiche,
p. ex. :
Sauvegardé 01/02
1234567890
28/09/04 09:45
01/02 : numéro séquentiel/nombre de SMS
enregistrés
Lecture ou suppression de SMS
individuels
¤ Ouvrir la liste des brouillons, puis :
q Sélectionner l'entrée.
§Lire§ Appuyer sur la touche écran.
Le texte s'affiche. Feuilleter
ligne par ligne avec q.
Ou :
§Effacer§ Appuyer sur la touche écran.
Le SMS est effacé.
Rédaction/modification d'un SMS
¤ Vous lisez un SMS dans la liste des
brouillons.
v Ouvrir le menu.
Vous pouvez sélectionner l'une des
options suivantes :
Créer texte
Rédiger un nouveau SMS puis l'envoyer
(p. 24) ou l'enregistrer.
Utiliser texte
Modifier le texte du SMS enregistré,
puis l'envoyer (p. 24).
Police caract.
Le texte est reproduit avec le jeu de
caractères sélectionné.
Suppression de la liste des brouillons
¤ Ouvrir la liste des brouillons, puis :
v Ouvrir le menu.
Effacer liste
Sélectionner, appuyer sur
et confirmer avec
sera effacée.
a Appuyer longuement (état de
repos).
§Oui§. La liste
Envoi d'un SMS à une adresse e-mail
Dans le cas où votre fournisseur de services prend en charge l'envoi de SMS à des
adresses e-mail, vous pouvez également
envoyer votre SMS à des adresses e-mail.
L'adresse e-mail doit se trouver au début
du texte. Vous devez envoyer le SMS au
service e-mail de votre centre d'envoi
SMS.
¢ î ¢ (boîte à lettres, PIN boîte à
v
lettres)
¢ Créer texte
Π/ ~
Reprendre l'adresse e-mail du
répertoire correspondant ou
l'entrer directement. Terminer
par un espace ou un double
point (selon le fournisseur de
services).
~ Saisir le texte SMS
© Appuyer sur la touche écran.
Envoi Sélectionner et appuyer
§OK§.
sur
E-mail Sélectionner et appuyer
§OK§. Si le numéro du ser-
sur
vice e-mail n'est pas inscrit
(p. 31), entrer le numéro du
service e-mail.
© Appuyer sur la touche écran.
Envoi Sélectionner et appuyer
§OK§.
sur
§OK§
26

SMS (messages textuels)
Envoi d'un SMS comme fax
Vous pouvez aussi envoyer un SMS à un
télécopieur.
Condition : votre opérateur prend cette
fonctionnalité en charge
¤ Vous rédigez un SMS (p. 24).
© Appuyer sur la touche écran.
Envoi Sélectionner et appuyer
§OK§.
sur
Fax Sélectionner et appuyer
§OK§.
sur
s / ~ Sélectionner le numéro du
répertoire principal et l'entrer
directement. Entrer le numéro
avec le préfixe (y compris dans
le réseau local).
© Appuyer sur la touche écran.
Envoi Sélectionner et appuyer
§OK§.
sur
Réception d'un SMS
Tous les SMS reçus sont enregistrés dans
la boîte de réception. Les SMS associés
sont indiqués comme un SMS. Si le message est trop long ou transmis de façon
incomplète, il sera divisé en plusieurs
SMS. Comme un SMS reste dans la boîte
après la lecture, vous devriez régulière-
ment effacer les SMS dans la boîte.
Dans le cas où la mémoire des SMS est
saturée, le message correspondant s'affiche.
¤ Supprimer les SMS qui ne sont plus uti-
lisés (p. 28).
Liste de réception
La liste de réception contient :
u tous les SMS reçus, le plus récent étant
inscrit au début
u les SMS qui n'ont pu être envoyés en
raison d'une erreur
Les nouveaux SMS reçus sont signalés sur
tous les combinés Gigaset S44 par l'icône
À sur l'écran, par clignotement de la touche Messages f et un bip d'avertissement.
Ouverture de la liste de réception avec
la touche
Condition : la liste contient au moins un
nouveau SMS.
f Appuyer.
Le cas échéant, sélectionner une boîte à
lettres et entrer le code PIN correspondant.
La liste de réception s'affiche de la
manière suivant (exemple) :
SMS comm. : 01+05
1 Nombre de nouvelles entrées + nombre
2 Nom de la boîte à lettres, ici : boîte à lettres
Une entrée de la liste s'affiche p. ex. de la
manière suivante :
Non lu 01/02
1234567890
28/09/04 09:45
01/02 : nombre total de nouveaux SMS/numéro
séquentiel du SMS affiché
Ouverture de la liste de réception avec
le menu SMS
v ¢ î ¢ (boîte à lettres, PIN boîte à
f
d'anciennes entrées lues
commune
lettres)
¢ Réception 01+05
1
2
27

SMS (messages textuels)
Lecture ou suppression de SMS
individuels
¤ Ouvrir la liste de réception
¤ Suite comme avec « Lecture ou sup-
pression de SMS individuels », p. 26.
Une fois que vous avez lu un nouveau
SMS, il prend le statut Lu.
Suppression de la liste de réception
Tous les nouveaux et anciens SMS de la
liste seront supprimés.
¤ Ouvrir la liste de réception.
v Ouvrir le menu.
¤ Voir également « Suppression de la liste
des brouillons », p. 26.
Réponse à un SMS ou transfert
d'un SMS
¤ Lecture du SMS (p. 28).
© Appuyer sur la touche écran.
Vous avez le choix entre les possibilités
suivantes :
Répondre
Ecrire un SMS de réponse directement
et l'envoyer (p. 24).
Réponse : oui / Réponse : non
Au SMS est ajouté oui ou non. Envoyer
ensuite le SMS (p. 24).
Utiliser texte
Modifier le texte du SMS et l'envoyer
après (p. 24). Les pièces jointes
(p. ex. images, mélodies) ne sont
pas envoyées.
Transfert d'un SMS
¤ Vous lisez un SMS (p. 28).
© Appuyer sur la touche écran.
Renvoyer texte
Sélectionner et appuyer
§OK§. Suite voir p. 24.
sur
Les pièces jointes sont envoyées. Si un
fournisseur de services n'autorise pas le
transfert avec des pièces jointes :
¤ Utiliser texte pour transférer le SMS sans
pièces jointes.
¤ Confirmer l'interrogation Nouveau SMS
sans image/mélodie. Continuer ? avec
Reprise du numéro dans le
répertoire principal
Reprise du numéro de l'expéditeur
§Oui§.
¤ Ouvrir la liste de réception et sélection-
ner un SMS (p. 27).
© Appuyer sur la touche écran.
Suite voir p. 17.
Remarques :
– Vous avez également la possibilité de créer
à l'intérieur de votre répertoire un répertoire destiné spécifiquement aux SMS, en
faisant précéder le nom des entrées en
question d'un astérisque (*).
– Un ID boîte à lettres ajouté est repris dans le
répertoire principal.
Reprise/composition de numéros d'un
texte SMS
¤ Lire le SMS (p. 27) et aller à la position
où se trouve le numéro de téléphone.
Les chiffres sont affichés en surbrillance.
Ó Appuyer sur la touche écran.
Suite voir p. 17.
Ou :
c Appuyer sur la touche écran
pour composer le numéro.
Si vous souhaitez utiliser le numéro pour
l'envoi de SMS :
¤ Enregistrer le numéro avec le code
régional dans le répertoire principal.
Modification de la police de caractère
¤ Lecture du SMS (p. 28).
© Appuyer sur la touche écran.
Police caract.
Le texte est reproduit avec la police
sélectionnée
28

SMS (messages textuels)
Utilisation des données de
la pièce jointe
Une pièce jointe est affichée en surbrillance dans le SMS. Un SMS peut contenir plusieurs pièces jointes.
Ecouter et enregistrer une mélodie
Vous pouvez enregistrer env. 5 mélodies
au format « iMelody » et les installer
comme sonnerie (p. 44). Les mélodies
sont enregistrées dans le menu gestion
des mélodies.
Vous pouvez aussi mémoriser et enregistrer les mélodies sur d'autres combinés
inscrits à la même base.
Vous trouverez une liste de mélodies téléchargeables à l'adresse Internet www.siemens.com/gigasets440. Veuillez vous
référer aux indications du site pour savoir
quelles données sont disponibles dans
votre pays.
Ecouter une mélodie
¤ Lire le SMS (p. 27) et déplacer le cur-
seur dans la ligne comportement la
pièce jointe. La mélodie est jouée
immédiatement.
Enregistrer une mélodie
¤ Ouvrir le SMS pour la lecture (p. 28).
¤ Ecouter la mélodie.
§Sauver§ Appuyer sur la touche écran.
~ Le cas échéant, la renommer.
§Sauver§ Appuyer sur la touche écran.
Les mélodies sont enregistrées dans le
menu gestion des mélodies, (p. 46).
Notification par SMS
Vous pouvez recevoir une notification par
SMS sur les appels perdus .
Condition : en cas d'appels perdus, le
numéro de l'appelant (CLI) doit être transmis.
La notification est envoyée sur téléphone
portable ou un autre appareil prenant les
SMS en charge.
Il suffit d'enregistrer le numéro de téléphone auquel la notification doit être
transmise (numéro de notification) et de
régler le type de notification
Enregistrement du numéro de notification
v ¢ î ¢ Réglages ¢ No. Notification
~ Entrer le numéro auquel le
SMS doit être envoyé.
© Appuyer sur la touche écran.
Sauvegarder
Sélectionner et appuyer
§OK§.
sur
a Appuyer longuement (état de
repos).
Attention :
N'entrez pas le propre numéro de réseau commuté pour la notification des appels perdus.
Cela peut activer une boucle sans fin payante.
Définition du type de notification
v ¢ î ¢ Réglages ¢ Type notificat.
¤ Modifier une saisie de plusieurs lignes :
Appels perdus :
Act., régler si l'on souhaite recevoir un
SMS de notification.
¤ Enregistrer les modifications (p. 12).
29

SMS (messages textuels)
Boîtes à lettres SMS
A la livraison, la boîte à lettres commune
est activée. Cette boîte à lettres est accessible à tous et ne peut être protégée par un
PIN. Vous pouvez configurer en plus trois
boîtes privées et protéger l'accès par PIN.
Chaque boîte à lettres est identifiée par un
nom et un « ID boîte à lettres » (une sorte
de numéro direct).
A noter :
u Si vous utilisez sur la même ligne télé-
phonique plusieurs appareils (bases)
gérant les messages SMS, chaque identifiant de boîte à lettres SMS ne peut
être utilisé qu'une seule fois. Dans ce
cas, vous devrez également modifier
l'identifiant prédéfini de la boîte à lettres commune (0).
u Vous ne pouvez utiliser des boîtes à let-
tres privées que si le fournisseur de services prend cette fonctionnalité en
charge. La prise en charge est signalée
par un astérisque (*) placé devant un
centre SMS prédéfini.
u Dans le cas où vous avez oublié votre
code Postfach-PIN, vous pouvez le réinitialiser en rétablissant les paramètres
par défaut de la base. Cette opération
efface tous les SMS présents dans
l'ensemble des boîtes à lettres.
Configuration et modification d'une
boîte à lettres privée
Configuration d'une boîte à lettres privée
v ¢ î ¢ Réglages ¢ Boîtes lettres
s Sélectionner la boîte à lettres,
p. ex. Boîte lettres 2 et appuyer
§OK§.
sur
¤ Modifier la saisie de plusieurs lignes :
Activation :
Activer ou désactiver la boîte à lettres.
Identif. :
Sélectionner l'ID boîte à lettres (0–9).
Seuls les chiffres libres peuvent être
sélectionnés.
Protect. PIN :
Activer/désactiver la protection par
code PIN.
Code PIN
Entrer un code PIN à quatre caractères.
¤ Enregistrer les modifications (p. 12).
Les boîtes à lettres actives sont marquées
dans la liste correspondante par ‰. Elles
apparaissent dans la liste SMS et peuvent
le cas échéant être visualisées avec la touche f.
Désactivation d'une boîte à lettres
¤ Activation :, régler sur Dés.. Confirmer si
nécessaire le message avec
Tou s les SMS enregistrés dans cette boîte
à lettres seront effacés.
Désactivation de la protection
par code PIN
§Oui§.
¤ Régler Protect. PIN : sur Arrêt.
Le code PIN est réinitialisé sur 0000.
Modification du nom d'un combiné
v ¢ î ¢ Réglages ¢ Boîtes lettres
¢ s (sélectionner la boîte à lettres)
§Modifier§ Appuyer sur la touche écran.
~ Entrer le nouveau nom.
§Sauver§ Appuyer sur la touche écran.
a Appuyer longuement (état de
repos).
Modification du nom et de l'identifiant
d'une boîte à lettres
v ¢ î ¢ Réglages ¢ Boîtes lettres
¢ s (sélectionner la boîte à lettres)
~ Entrer le code PIN de la boîte à
lettres et appuyer sur
nécessaire.
§OK§ si
¤ Identif. :, Protect. PIN :, Code PIN, régler
(p. 30).
30

Envoi d'un SMS vers une boîte à
lettres privée
Pour qu’un SMS parvienne dans votre
boîte à lettres personnelle, l’expéditeur
doit connaître votre ID et l’ajouter à la suite
du numéro.
¤ Vous pouvez envoyer à votre partenaire
SMS un SMS par le biais de votre boîte
à lettres personnelle.
Avec ce SMS, votre partenaire SMS obtient
le numéro d'appel SMS avec l'identifiant
actuel ID et peut l'enregistrer dans le
répertoire principal. Si l'ID est invalide, le
SMS ne sera pas transmsis.
SMS (messages textuels)
Remarque :
Renseignez-vous auprès de votre fournisseur
de services afin de savoir ce que vous devez
prendre en compte en entrant les numéros
d'appels de service pour utiliser les boîtes à lettres privées (à condition que votre fournisseur
de services supporte cette fonction).
Envoi d'un SMS via un autre
centre SMS
¤ Activer le centre SMS (2 à 5) comme
centre d'envoi.
¤ Envoyer le SMS.
Réglage du centre SMS
Inscription/modification d'un
centre SMS
¤ Renseignez-vous avant de créer une
nouvelle entrée ou avant de suppri-
mer les numéros d'appels prédéfinis,
sur les services offerts et sur les particularités de votre fournisseur de services.
¢ î ¢ Réglages ¢ Centres SMS
v
s Sélectionner Centre SMS
(p. ex. Centre serv. 1) et
appuyer si nécessaire sur
§OK§.
¤ Modifier la saisie de plusieurs lignes :
Emetteur ? :
Sélectionner Oui pour envoyer des SMS
par le centre SMS.
SMS :
Appuyer sur la touche écran
Inscrire le numéro du service SMS et
ajouter un astérisque si votre fournisseur de services prend en charge des
boîtes à lettres privées.
E-mail :
Appuyer sur la touche écran
Entrer le numéro du service e-mail.
§Modifier§.
§Modifier§.
¤ Enregistrer les modifications (p. 12).
Services d'information SMS
Il vous est possible de faire transmettre
par votre fournisseur de services certaines
informations (p. ex. météo ou tirage du
loto) par SMS. Jusqu'à10 services d'informations peuvent être enregistrés. Votre
fournisseur de services pourra vous renseigner sur l'offre et les coûts.
Réglage/commande d'un
service d'information
Commande d'un service d'information
v ¢ î ¢ SMS services
s Sélectionner le service d'infor-
mation.
§Envoi§ Appuyer sur la touche écran.
Remarque :
Pour commander un service d'information,
vous pouvez aussi ouvrir le menu via v
£ Ì.
Réglage d'un service d'information
¤ Sélectionner le service d'information
(voir plus haut). Ensuite :
§Afficher§ Appuyer sur la touche écran.
§Modifier§ Appuyer sur la touche écran.
~ Entrer si nécessaire, le code, la
désignation et le numéro de
destination.
§Sauver§ Appuyer sur la touche écran.
31
 Loading...