

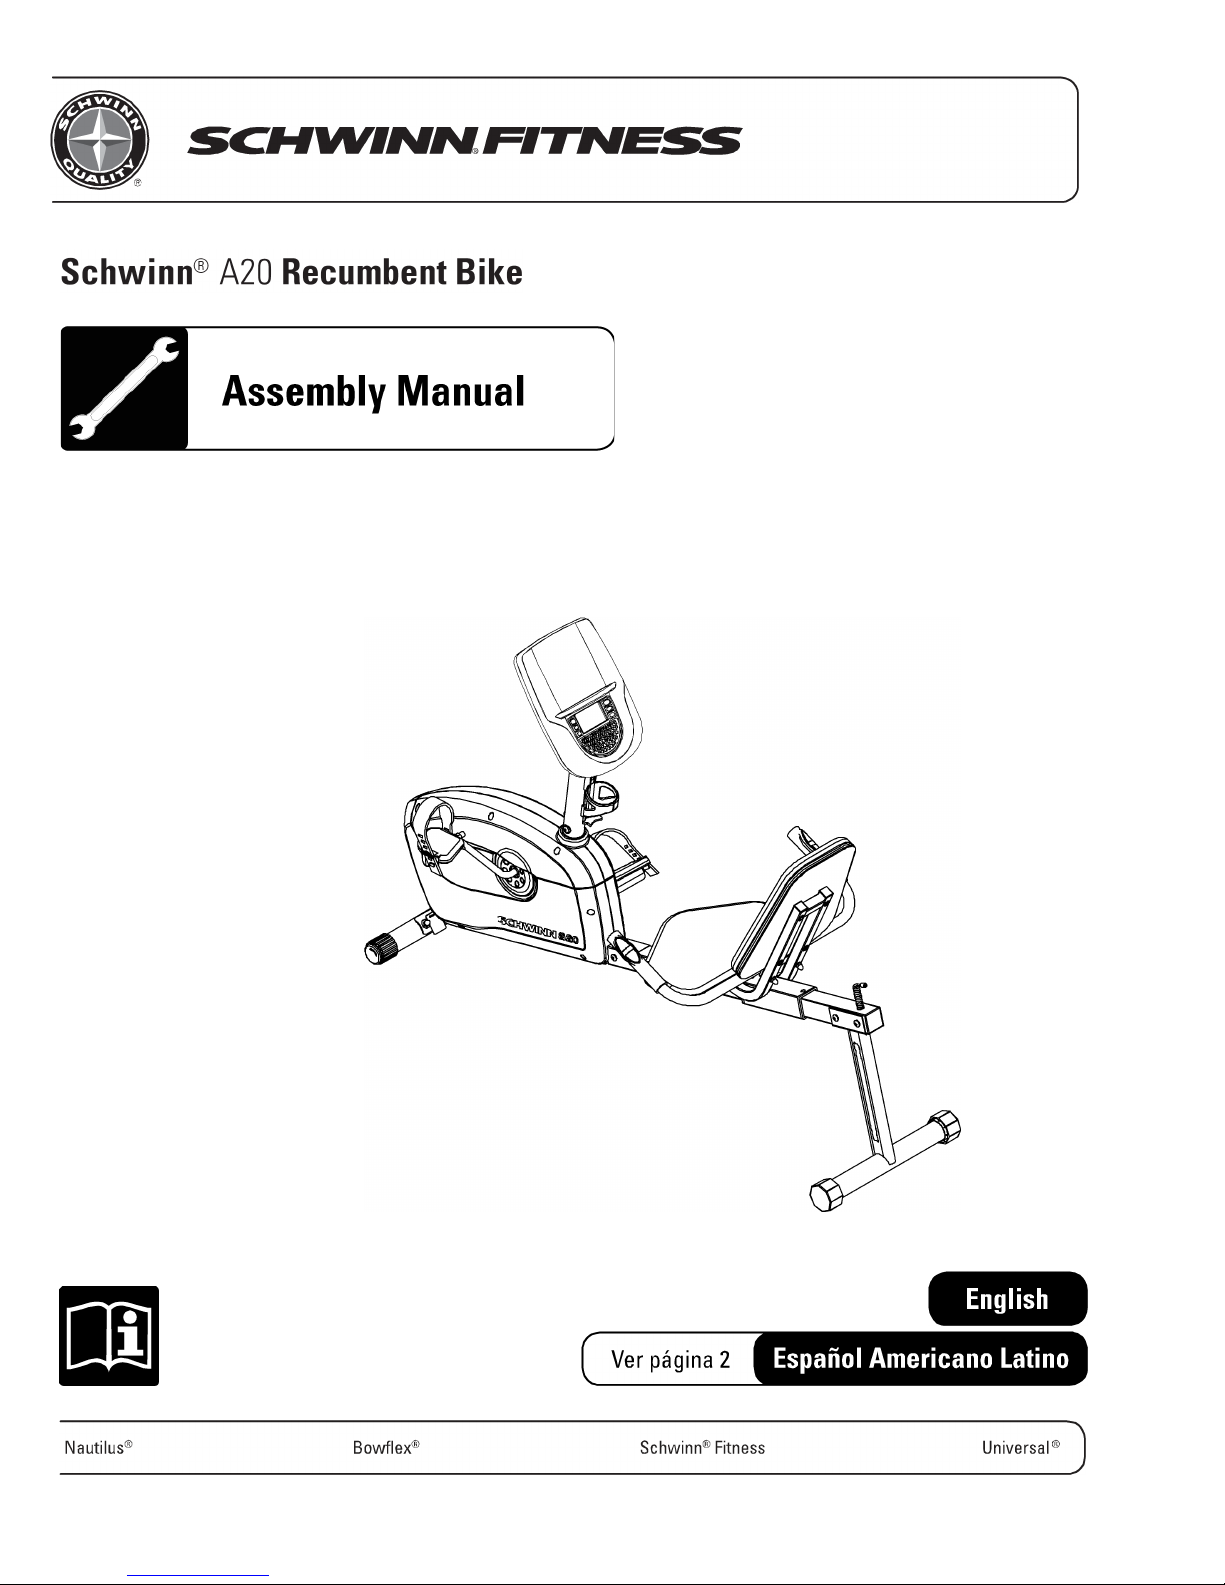
Schwinn A20 Recumbent Bike Assembly Manual
003–3802–042310A
Nautilus,Inc.,WorldHeadquarters,16400SENautilusDr.Vancouver,W A,USA98683,(800)NAUTILUS/(800)628-8458,www.NautilusInc.com-CustomerService:NorthAmerica(800)605-3369,
customerservice@schwinnfitness.com|Europe,MiddleEast&Africa490220320200,technics-EMEA@nautilus.com|Germany&Austria+490220320200,Switzerland+41264607766,UnitedKingdom
+441908267345,AsiaPacific&LatinAmerica(360)859-5180,technics-APLA@nautilus.com|Patentinformation:ThisproductmaybecoveredbyUSandForeignPatentsandPatentsPending.See
Productformoreinformation.|PrintedinChina|©2010Nautilus,Inc.,Allrightsreserved.™and®indicateatrademarkorregisteredtrademark.Nautilus,Inc.(www.nautilus.com)trademarksinclude
NAUTILUS®,BOWFLEX®,SCHWINN®andUNIVERSAL®andrespectivelogos.Othertrademarksarethepropertyoftheirrespectiveowners.
ParaobtenerestemanualenEspañolLatinoAmericanovayaa:http://www.schwinnfitness.com.
Important Important
Important
Safety Safety
Safety
Instructions Instructions
Instructions
Thisiconmeansapotentiallyhazardoussituationwhich,ifnotavoided,couldresultindeathorseriousinjury.
Obey Obey
Obey
the the
the
following following
following
warnings: warnings:
warnings:
•Readandunderstandallwarningsonthismachine.
•CarefullyreadandunderstandtheAssemblyManual.
•Keepbystandersandchildrenawayfromtheproductyouareassemblingatalltimes.
•Donotconnectpowersupplytothemachineuntilinstructedtodoso.
•Donotassemblethismachineoutdoorsorinawetormoistlocation.
•Makesureassemblyisdoneinanappropriateworkspaceawayfromfoottrafficandexposuretobystanders.
•Somecomponentsofthemachinecanbeheavyorawkward.Useasecondpersonwhendoingtheassemblystepsinvolvingtheseparts.Donotdostepsthat
involveheavyliftingorawkwardmovementsonyourown.
•Setupthismachineonasolid,level,horizontalsurface.
•Donottrytochangethedesignorfunctionalityofthismachine.Thiscouldcompromisethesafetyofthismachineandwillvoidthewarranty.
•IfreplacementpartsarenecessaryuseonlygenuineNautilus
®
replacementpartsandhardware.Failuretousegenuinereplacementpartscancausearisktousers,keep
themachinefromoperatingcorrectlyandvoidthewarranty.
•DonotuseorputthemachineintoserviceuntilthemachinehasbeenfullyassembledandinspectedforcorrectperformanceinaccordancewiththeOwner’sManual.
•ReadandunderstandthecompleteOwner’ sManualsuppliedwiththismachinebeforefirstuse.KeeptheOwner’sManualforfuturereference.
•Doallassemblystepsinthesequencegiven.Incorrectassemblycanleadtoinjuryorincorrectfunction.
Before Before
Before
Assembly Assembly
Assembly
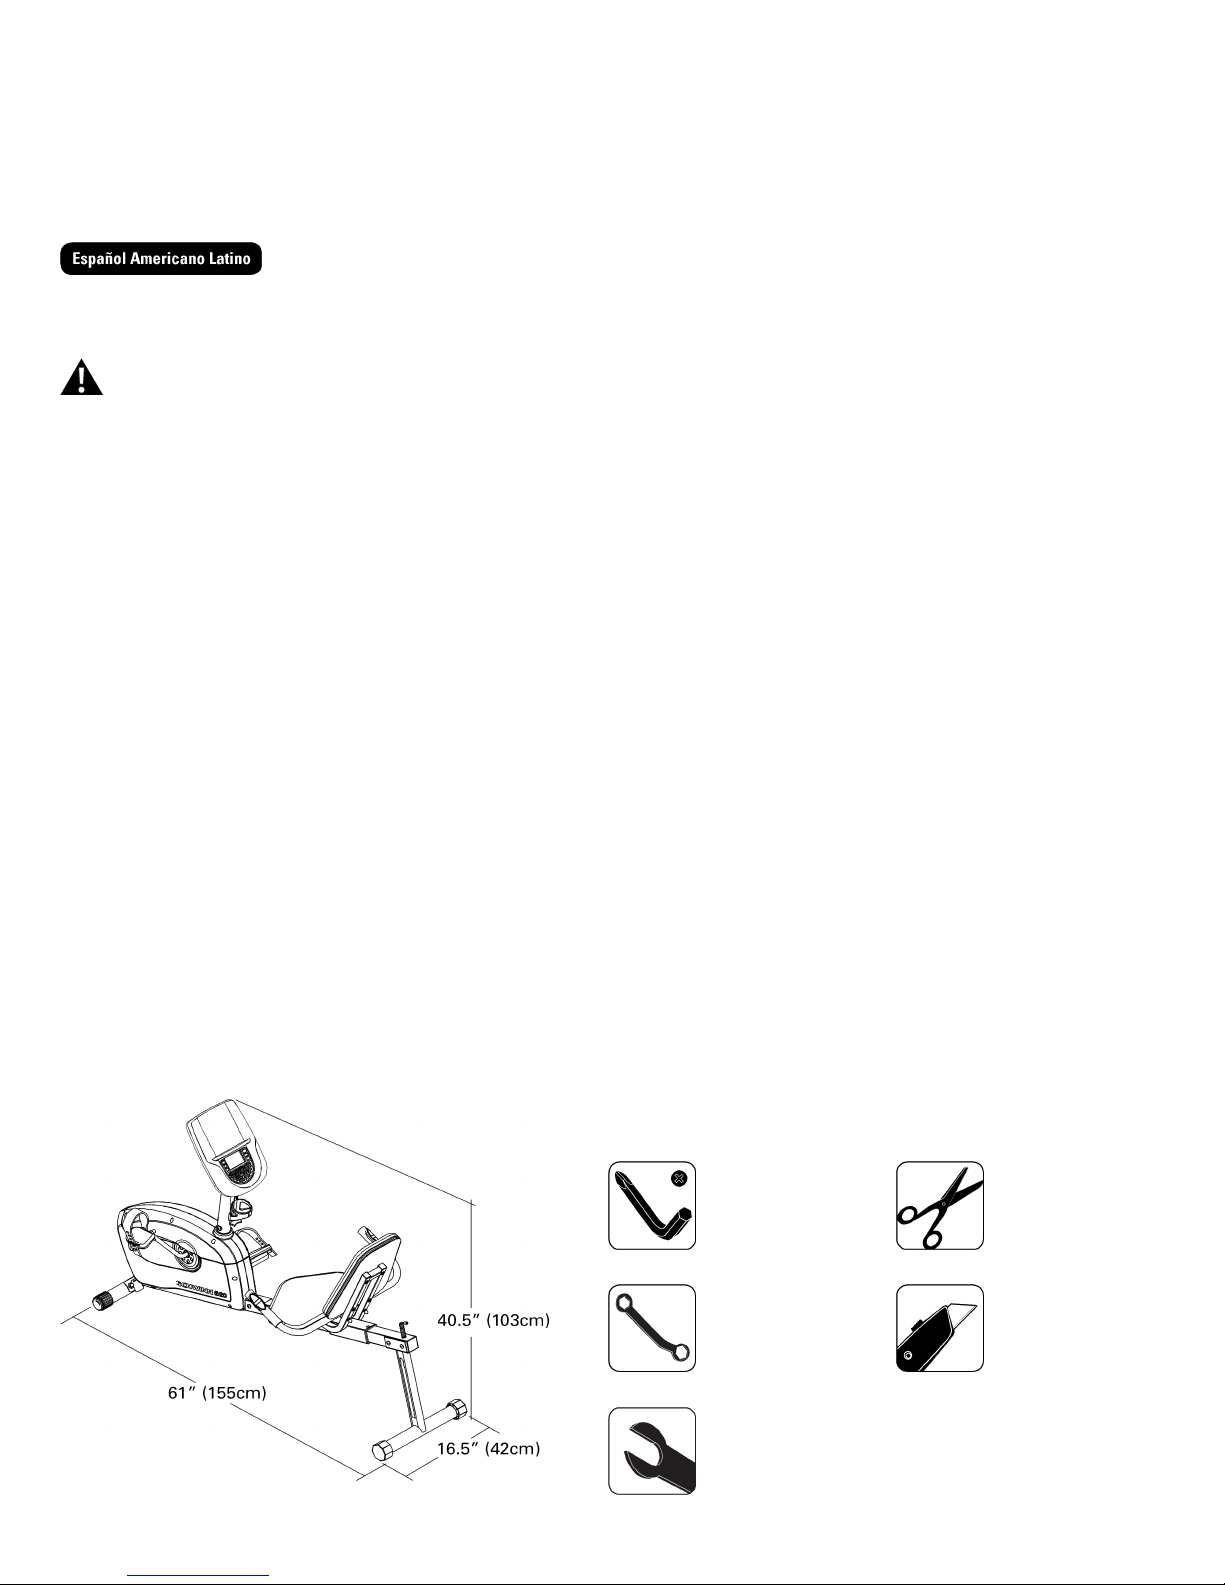
Selecttheareawhereyouaregoingtosetupandoperateyourmachine.Forsafeoperation,thelocationmustbeonahard,levelsurface.Allowaworkoutareaof
minimum100”x58”(254cmx147cm).
Followthesebasicpointswhenyouassembleyourmachine:
1.Readandunderstandthe“ImportantSafetyInstructions”beforeassembly.
2.Collectallthepiecesnecessaryforeachassemblystep.
3.Usingtherecommendedwrenches,turntheboltsandnutstotheright(clockwise)totighten,andtheleft(counterclockwise)toloosen,unlessinstructedotherwise.
4.Whenattaching2pieces,lightlyliftandlookthroughtheboltholestohelpinserttheboltthroughtheholes.
5.Theassemblycanrequire2people.
Specifications Specifications
Specifications
and and
and
T TTools ools
ools
Included Included
Included
Not Not
Not
Included Included
Included
6mm
(recommended)
13mm/17mm
(recommended)
15mm
2 2
2

Parts Parts
Parts
Item Item
Item
Qty Qty
Qty
Description Description
Description
Item Item
Item
Qty Qty
Qty
Description Description
Description
11
MainUnit
8
1
SideHandlebars
2
1
FrontStabilizer
9
1
ConsoleMast
3
1
RearStabilizer
10
1
Console
41
SeatRail
111
Pedal,Left(L)
51
SeatBracketAssembly
12
1
Pedal,Right(R)
6
1
SeatBottom
13
1
WaterBottleHolder
71
SeatBack
Hardware Hardware
Hardware
3 3
3
Item Item
Item
Qty Qty
Qty
Description Description
Description
Item Item
Item
Qty Qty
Qty
Description Description
Description
A
4
CarriageBoltM8x65
E
12
FlatWasher
B
5
ArcWasherF
2
RubberLimitPad
C
4
AcornNut
G
8
PhillipsHeadScrewM6x35
D
15
HexScrewM8x15
H
1
AdjustmentKnob
 Loading...