


WFR-27C

 GB
GB 

Version 1

"Made for iPod," "Made for iPhone," and "Made for iPad" mean that an electronic accessory has been designed to connect specifically to iPod, iPhone, or iPad, respectively, and has been certified by the developer to meet Apple performance standards. Apple is not responsible for the operation of this device or its compliance with safety and regulatory standards. Please note that the use of this accessory with iPod, iPhone, or iPad may affect wireless performance.
The iSangean App enables remote control of the WFR-27C running on your iPhone, iPod touch, iPad or Android smartphone.
iSangean is the remote control app for Sangean Internet radios and media streamers for your iPhone, iPod touch, iPad or Android smartphone. The app allows selection of Internet radio stations, selection and control of media for UPnP/DLNA music streaming from a local computer, server or NAS device, as well as control of FM radio and other functions (where these functions are present on the radio). The Now Playing screen provides radio station or media information with direct control of the radio volume.
Download iSangean from Apple iTunes (Apple Store) and Google Play now!
Contents |
|
Introduction ...................................................................................... |
3-7 |
Before you can use this product ...................................................... |
3-4 |
Controls and connections ............................................................... |
5-6 |
Navigation controls ............................................................................ |
7 |
Network configuration ................................................................... |
8-16 |
Connecting your radio to your computer network ......................... |
8-15 |
Network remote control options ....................................................... |
16 |
Internet Radio mode .................................................................... |
17-31 |
Internet Radio-the basics ................................................................. |
17 |
Selecting a radio station by location and genre .......................... |
18-20 |
Searching for a radio station by name ............................................. |
21 |
Searching a new or popular station ................................................. |
22 |
Selecting a podcast / BBC Listen Again .......................................... |
23 |
Presetting stations ........................................................................... |
24 |
Display modes ................................................................................. |
26 |
Customizing your radio .................................................................... |
27 |
Selecting favorite stations ........................................................... |
29-31 |
Music Player mode ...................................................................... |
32-48 |
Use with Windows, Apple Mac and Linux ........................................ |
31 |
Accessing your files via UPnP .................................................... |
32-33 |
Locating and playing media files using UPnP .................................. |
34 |
Media selection ................................................................................ |
35 |
Controlling playback ........................................................................ |
36 |
Display modes ................................................................................. |
38 |
Playlists ............................................................................................ |
39 |
Wake On LAN .................................................................................. |
42 |
Prune servers .................................................................................. |
42 |
Windows 7 ‘Play to’ function (UPnP renderer) ............................ |
43-44 |
DAB mode .................................................................................... |
45-52 |
Selecting a DAB radio station .......................................................... |
46 |
Display modes ................................................................................. |
47 |
Finding new DAB radio stations ...................................................... |
48 |
Manual Tuning ................................................................................. |
49 |
|
Dynamic Range Control Settings ..................................................... |
50 |
|
Station order setup .......................................................................... |
51 |
|
Prune stations ................................................................................. |
52 |
|
.......................................................................................FM mode |
53-58 |
GB |
..................................................................................Manual tuning |
54 |
|
Scan setting ..................................................................................... |
56 |
|
Stereo / Mono switching .................................................................. |
57 |
|
Presetting stations in DAB and FM modes ...................................... |
58 |
|
Clock and Alarms ......................................................................... |
59-69 |
|
Automatically updating the clock ...................................................... |
59 |
|
Setting the clock format ................................................................... |
60 |
|
Manually setting the clock ........................................................... |
61-62 |
|
Setting the alarm clock ............................................................... |
63-65 |
|
Snooze timer .................................................................................... |
67 |
|
Disabling alarms .............................................................................. |
67 |
|
Sleep timer ....................................................................................... |
68 |
|
Inactive standby ............................................................................... |
69 |
|
Display and Auto .......................................................................... |
70-73 |
|
Equalizer function ............................................................................ |
70 |
|
Brightness control ............................................................................ |
72 |
|
Language selection .......................................................................... |
73 |
|
Headphone socket ........................................................................... |
73 |
|
Information ................................................................................... |
74-82 |
|
Factory reset .................................................................................... |
74 |
|
Software update ............................................................................... |
75 |
|
Network profiles ............................................................................... |
76 |
|
Software version display and Audio FAQ ......................................... |
77 |
|
Accessing your audio files via a UPnP server using Windows Vista |
|
|
and XP ........................................................................................ |
78-79 |
|
Audio codecs ................................................................................... |
80 |
|
Cautions and Specifications ....................................................... |
81-82 |
|
Before you can use this product
Before you can use your internet radio, you must have the following:
●A broadband Internet connection (not required for DAB, FM or Music
Player functions).
●Awireless access point (WiFi) connection connected to your broadband
Internet Service Provider, preferably via a router. In many cases the broadband modem, router and wireless access point will be a single combined unit supplied by your Internet Service Provider or bought from a computer store.
●If your wireless network is configured to use Wired Equivalent Privacy (WEP) or WiFi Protected Access (WPA/WPA2) data encryption then you either need to know the WEP, WPAor WPA2 key used for encryption so you can get the internet radio to communicate with the network, or your router needs to offer WiFi Protected Setup (WPS).
If connecting using WiFi, the internet radio will typically work within a
10-20 metre radio from your wireless access point. The actual range achieved will depend upon the building type, other nearby wireless network, and possible interference sources. DAB and FM radio functions can operate wherever the internet radio is able to receive a suitable broadcast signal.
IMPORTANT:
Before you continue, make sure that your wireless access point or router is powered up and working with your broadband Internet service (use your computer to verify this). To get this part of the system working you must
read the instructions supplied with the wireless access point or router.
Battery operation
Battery operation using alkaline batteries
1. Remove the battery cover on the rear of the unit by pressing the catch.
Note:
Before you insert the batteries, if you use non-rechargeable batteries, make sure the NiMH/Alkaline switch which located inside the battery compartment is switched to Alkaline position. If you use rechargeable batteries, make sure to switch NiMH/Alkaline switch to NiMH position.
2.Insert 6 UM-3 (AA size) batteries into the spaces in the compartment.
3.Take care to ensure all batteries are inserted with correct polarity as shown on the rear cabinet. Replace the battery cover.
4.Reduced power, distortion and a “stuttering sound” are all signs that the batteries need replacing.
5.If the radio is not to be used for any extended period of time, it is recommended that the batteries are removed from the radio.

Battery operation using rechargeable batteries |
Using the AC power adaptor |
1.Slide the battery switch to the NiHM position.
2.Insert 6 UM-3 batteries into spaces in the compartment. Make sure all batteries are inserted with the correct polarity as shown on the rear cabinet. The radio is also designed to be used with NiMH rechargeable batteries.
Note:
Do not use a mix of old and new rechargeable batteries. Do not use a mix of full and empty rechargeable batteries.
Do not use batteries that have a different mAh capacity
Do not use damaged or leaking batteries
3.Make sure the radio is switched off and connected to the AC adaptor.
When the charge indicator flashes yellow indicating batteries are charging. Batteries will be fully charged in around 10 hours. The battery shows steady yellow light when the battery charging is complete.
Note:
Duration for charging your battery fully can be varied according to the mAh capacity of a battery. Higher mAh batteries required longer charging time.
Important:
Under some conditions the charging LED indicator may switch off after flashing briefly. This may happen if the batteries are already freshly charged, or if the radio detects that you may be attempting to recharge alkaline batteries or mixed different types or capacity of rechargeable battery. In these cases the charging will be stopped.
The AC power adaptor required for this unit should be 12 volts DC at 1A center pin positve.
Insert the adaptor plug into the DC socket on the left side of the radio.
GB
Plug the adaptor into a standard mains socket outlet.
Whenever the adaptor is used, the batteries are automatically disconnected. The AC adaptor should be disconnected from the main supply when not in use.

Controls and connections
1. |
Mode button |
9. |
Tuning Control Rotary / Select knob |
|
2. |
LCD display |
10. |
Volume button |
|
3. |
Info button |
11. Mute button |
||
4. |
Menu button |
12. |
Preset 5 / Stop button |
|
5. |
Back button |
13. |
Preset 4 |
/ play / pause button |
6. |
Forward button |
14. |
Preset 3 |
|
7. |
Standby button |
15. |
Preset 2 |
/ Rewind button |
8. |
Battery charge indicator / |
16. |
Preset 1 |
/ Fast-forward button |
|
Low battery indicator |
17. |
Loud speaker |
|
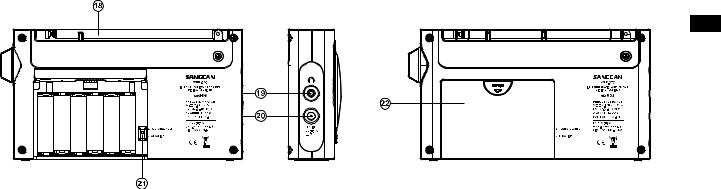
GB
18.FM telescopic aerial
19.Headphone jack
20.DC in jack
21.Alkaline / NiMH / NiCad rechargeable battery switch
22.Battery compartment
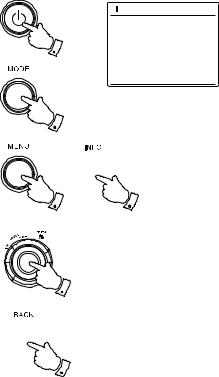
Navigation controls
This page describes the basic means of controlling your WFR-27C internet radio.
Instructions for each operating mode are given in the later section of this book.
1. Pressing the Standby button brings your radio out of Standby mode. Pressing Standby while
the radio is in use will cause it to return to the Standby mode with the clock display.
1
2. Pressing the Mode button gives you access to each of the operating modes: Internet Radio, DAB+ radio, Music player, FM radio.
3. |
Pressing the Menu button will access the menu system, whereas the Info button allows the |
2 |
|
display of information relating to the radio station or music file being played. |
|
4. |
Many operations require the user to make a selection from the menu. Highlight the menu item |
|
|
using the Tuning Control Rotary on the right side of the radio. Press the Tuning Control Rotary |
|
|
to select that item. If there are more than five items in a menu, then the display will automatically |
3 |
|
scroll up or down so that the additional items become visible. If there are many items in a menu, |
|
|
|
|
|
then the radio allows the menu to “wrap around” in either direction. This can make it easier to |
|
|
reach items at the end of a long menu, such as a list of countries or Internet radio stations. |
|
5. |
If an error is made when navigating the menus, it is generally possible to go back to a higher |
|
|
level menu by pressing the Back button. |
4 |
 5
5
 Main menu
Internet radio
Music player
DAB
FM
Sleep
 3
3

Configuration
Connecting your radio to your computer network
1.Place your radio on a flat surface and plug the mains lead into the mains socket located on the left side of your radio ensuring that the plug is pushed fully into the socket.
2.Plug the other end of the mains lead into the wall socket and switch on the wall socket.
IMPORTANT: The mains plug is used as the means of connecting the radio to the mains supply. The mains socket used for the radio must remain accessible during normal use.
In order to disconnect the radio from the mains completely, the mains plug should be removed from the mains socket outlet completely.
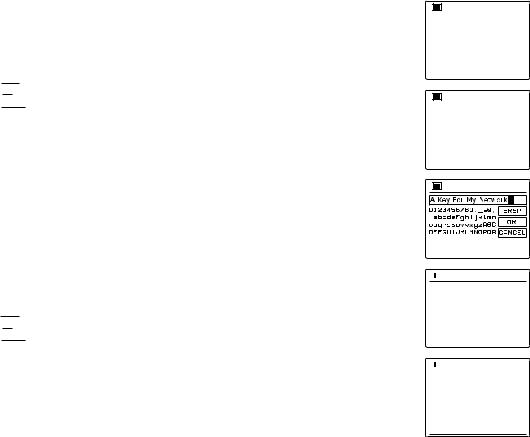
3.When you apply power, the display on the radio will light up and say: 'SANGEAN'. The first time that you use your radio (or after Factory Reset) the display will show “Setup wizard” and “YES” will be highlighted on the screen. Press the Tuning Control Rotary to start the setup wizard. The screen will ask if you wish to run the setup wizard again at the next start up. This will lead to the main menu.
4.Rotate the Tuning Control Rotary on the right hand side of the unit to highlight the desired clock format (either 12 or 24 hour) then press the Tuning Control Rotary to enter your selection. A menu allowing you to specify the auto update option for the clock will appear on the display. The default of ‘Update from Network’ will be the best option for most users.
GB
Setup wizard
Start now?
3,4
Date/Time
12/24 hour format
8
5.Rotate the Tuning Control Rotary to choose an auto-update option for the clock. This can be updated from DAB or FM radio, from the Network, or not updated. The default is to auto update from the network. If you choose any other option, go to step 8. Otherwise you will first need to select the correct time zone and daylight savings setting, see steps 6 and 7. If you choose “No update” you will need to set the clock manually later( see the section of ‘Manually setting the clock’). Press the Tuning Control Rotary to confirm your choice.
6.Rotate the Tuning Control Rotary to highlight the time zone which is applicable to your location. Press the Tuning Control Rotary to enter the setting.
7.You will then need to set the Daylight Savings option according to your location (Daylight
Savings is also known as Summer/Winter time ). Rotate the Tuning Control Rotary to highlight “YES” to turn on daylight savings if required or ‘NO’ if you do not wish to use daylight savings then press the Tuning Control Rotary to confirm the setting.
8.You will then need to set 'Keep network connected.' By default, your radio will shut down its
WiFi connection when it is in standby. This minimizes power consumption but it does mean that you will need to switch that radio on manually in order to use either the 'Play to' function or any other remote control software. If you need to be able to remotely control the radio even when it has been put into standby, then rotate the Tuning Control Rotary to highlight
'YES' to activate this function or 'NO' to deactivate this function. you can also choose to keep the network connected by using the ‘Keep connected’ option in the network setting menu.
In the standby mode display either the WiFi signal indicator is shown with or without a cross through it according to the chosen network settings.
9.The display will then show a list of WiFi regional options for the network set up. Rotate the Tuning Control Rotary to highlight the required region and then press the Tuning Control
Rotary to select it. Your radio will then scan for available WiFi networks.
10.The radio will enter the Network Settings Wizard and will display ‘Scanning…’. After a short while the display will show a list of the available WiFi networks.
5-9
 Wlan region
Most of Europe
 SSID
SSID
Smith
Jones [Rescan]
[Manual config]
 Auto update
Update from DAB Update from FM
Update from Network *
No update
 Set timezone
UTC+00:00:Dublin,Lon
UTC+00:30:
UTC+01:00:Madrid,Arr...
UTC+01:30:
UTC+02:00:Athens,Ca...
Network settings
Keep network connected?
 Network settings
Network wizard
Scanning...
11.You will first need to identify your network in the list of network names presented by the Network Wizard. If no networks are found then you may have to get your wireless router working (please see the instructions supplied with it) or you may be too far from the router. When the radio finds your wireless network, it displays the Network Name (SSID) for the wireless access point on the screen. This is a name that is allocated to the access point in your router by the person who set up the network – for example: ‘Jones family’ or ‘Paul’s network’. If the router supports WiFi Proteced Setup, then ‘[WPS]’ will be shown in front of the SSID. It is possible, and in some locations highly likely, that your radio will find more than one wireless network, in which case you should choose which one you need to connect to.
12.Rotate the Tuning Control Rotary to see the SSID for each wireless network that has been found. If your network is shown proceed to step 14. If it is not shown then proceed to step 12. If you make a mistake at any point, use the Back button to go back to the previous screen.
13.If your network is not found, it may be because the router is configured not to broadcast the
SSID. You should then use the Tuning Control Rotary to highlight and select the ‘[Manual config]’ option in order to enter the network details manually. This is described in ‘Manual Network Configuration”. If your network name is being broadcast, and it was not found, then try re-scanning press the Back button), and if necessary try moving your radio to a location closer to your access point / router.
14.When the SSID for the wireless network you wish to connect to is highlighted on the screen, press the Tuning Control Rotary. If WiFi Pretected Setup (WPS) was indicated, you will see an additional menu at this point, otherwise proceed to step 14. choose one of the WPS menu options as required for your router (WPS may be via push button, or using an identification number).
‘Push Button’ – the display prompts you to press the WPS button on your router and then the Select button on the radio. The two devices should then connect with the encryption key sent automatically to the radio.
‘PIN’ – the display shows an identification number which you must enter into your router using a web browser (refer to your router’s user documentation). You should then press the
Select button on the radio.
‘Skip WPS’ – if you wish to enter the encryption key yourself (or if it was previously Entered). If you choose Push Button or PIN the screen will then show ‘Connecting…’ and then ‘Setup wizard completed’. Press the Tuning Control Rotary to exit setup wizard.
|
SSID |
|
|
SSID |
|
|
[WPS]Paul’s network |
|
|
Smith |
|
|
[Rescan] |
|
|
[Wired] |
|
|
[Manual config] |
|
|
WPS Menu |
|
|
Push Button |
> |
|
PIN |
> |
|
Skip WPS |
> |
|
Jones family |
|
|
[WPS]Paul’s network |
|
|
Smith |
|
|
[Rescan] |
GB |
11-13 |
[Wired] |
|
11,12 |
|
|
 Network settings
Please wait
Connecting...
10
15.If your network is configured without an encryption key, the screen should say ‘Connecting…’, and then ‘Setup wizard completed’. Press the Tuning Control Rotary to exit the setup wizard and show the main menu. If this is the case then you have successfully connected your radio to your network.
16.If the screen displays ‘Key’ , it is because the network is using one of the encryption systems: Wired Equivalent Privacy (WEP) or WiFi Protected Access (WPA). You will need to enter the correct WEP or WPA key into the radio to allow it to communicate with your wireless network. If you do not have the WEP or WPA key, then you should obtain it from the person who set up your network. Some wireless routers may come with an encryption key already set up by the supplier, in which case you should refer to the documentation provided with it. WPA is used here to also include WPA2. WEP keys are 10 or 26 characters long (using 0 – 9, and A – F).
Some wireless Routers can also use pass-phrases for WEP but these are not supported. WPA keys are usually set up using a pass-phrase of between 8 and 63 characters. Your radio accepts pass-phrases for WPA keys.
17.To enter the WEP or WPA key, characters are selected and entered using the Tuning Control Rotary. The highlight scrolls through the available characters as well as the three controls on the right. The character currently highlighted will be entered when you press the
Tuning Control Rotary. Do this as needed until the complete key has been entered. Remember, WEP keys only use the numbers 0-9 and letters A-F. WPA keys are sensitive to upper and lower case characters. You must enter the key exactly or the radio will not connect to the network. The three controls on the right-hand side of the screen have special functions. You can quickly access these by pressing the Info button and then use the Up or Down and
Select buttons as needed:
select ‘ 


 ’ to erase a character just entered select ‘

 ’ when the complete key has been entered select ‘


 ’ to cancel an re-run the Network Wizard
If a WEP or WPA key has previously been entered for the selected SSID then the display will show ‘Key: [Set]’. If you have previously entered a different key, you must clear this by selec-
ting the ‘


 ’ symbol. This will remove the ‘[Set]’ indication.
After the final character of the WEP or WPA key has been entered, highlight the ‘

 ’ symbol and press the Tuning Control Rotary. Then screen will show ‘Connecting…’ and then ‘Setup wizard completed’. Press the Tuning Control Rotary to exit setup wizard. The radio should now be able to connect to the network.
Setup wizard
Setup wizard completed
Press SELECT to exit
 Main menu
Internet radio
Music player
DAB
FM
 Key:
Key:
 Network settings
Network wizard
Scanning...
Setup wizard
Setup wizard completed
Press SELECT to exit
11

18.Once you have connected your radio to the network (and therefore also to the Internet) it will display the main menu. Press the Tuning Control Rotary to put the radio in Standby mode. It should then display the time as obtained from the Internet. If the time display is not correct for any reason, it can easily be adjusted later, see ‘Manually setting the clock’. If you have followed the steps on the preceding pages successfully, your radio will have connected to your router, and then made a connection to the Internet and set its clock. If this is the case, then you can try listening to radio stations via the Internet.
Note:
To save the radio power consumption while your radio is powered with battery, the radio will turn off fully when put into standby mode. As a result, if you switch off your radio when it is power supplied with battery, next time when your radio is switched on, the time on the screen will be reset and show as ‘00:00’. However, as soon as the radio connects with WiFi, the time will update automatically from the network.
24/08/2010
15:37
GB
12

Changing the network connection
In the sections above, you chose how your radio would be connected to your network, using a WiFi connection. From time to time, you may find that you need to connect to different computer networks. The Internet setup menu allows you to change your radio’s network settings, scan for an alternative wireless network, or to manually configure the network parameters.
The steps outlined below describe how you can do this –see also the section ‘Network Profiles’.
Configuring the radio to use an alternative WiFi connection
From the Network settings menu select ‘Network wizard’. This will present you with details of any WiFi networks that are found. Scroll down the list using the Tuning Control Rotary to the desired network name. Press Tuning Control Rotary to select this network. The radio will then use its WiFi system to communicate with the network. Depending on the settings for the new network you may need to enter an encryption key. By default the radio will then acquire an IP address and other network settings from your router using DHCP.
 Internet radio
Last listened |
|
|
Station list |
> |
|
System settings |
> |
|
Main menu |
> |
|
|
|
|
System settings |
|
|
Brightness |
|
|
Contrast |
> |
|
Equaliser |
> |
|
Network |
> |
|
Time/Date |
|
|
Network settings |
|
|
Network wizard |
|
|
View settings |
> |
|
Wlan region |
|
|
Manual settings |
> |
|
Network profile |
> |
|
|
|
|
Connection type |
1/9 |
|
Wireless |
> |
|
Manual network configuration
If you do not wish to use DHCP for automatic configuration, or if your network is configured with a hidden SSID, then you will need to enter some network settings manually. (Note – a hidden
SSID may prevent casual observers from detecting your network, but is not recommended as a means of network security.)
1.From the radio Network settings menu, select ‘Manual settings’. You must then choose to connect using ‘Wireless’ connections. Entering this option, there are as many as nine settings screens, shown by the ‘1 of 9’ progress marker in the top right corner of the display.
2.The next menu asks whether you wish to use DHCP to configure your network parameters
(IP address, subnet mask, gateway address, etc). Unless you are familiar with networking and
related terminology, we recommend that you allow the use of DHCP. Choose ‘DHCP enable’ unless you need to specify the network details manually.
If you chose ‘DHCP enable’, please skip to step 6 in order to set up the wireless connection details. 13 If you chose ‘DHCP disable’ for either connection method, the next step is to set up the IP address.
|
DHCP |
|
2/9 |
|
DHCP enable |
|
|
||
DHCP disable |
|
|
||
|
|
|
|
|
|
IP settings |
|
3/9 |
|
IP address |
|
|
||
|
|
168 |
1 |
25 |
192 |
||||
Subnet mask |
|
|
||
255 |
255 |
255 |
0 |
|
|
Gateway address |
4/9 |
||
Grteway address |
|
|||
|
192 |
168 |
1 |
1 |

3.The manually specified IP address should be chosen to be compatible with the settings in your router and must be a unique address on your network. If you are using DHCP for some devices and static (manually configured) IP addresses for others, the IP address used should fall outside the range that the router may allocate using DHCP. Typically, the first three groups of digits will be the same for all devices on your network. To enter the IP address, rotate the
Tuning Control Rotary to set the value for each group of digits and then press the Tuning Control Rotary to enter the value and to move on to the next group. When the IP address has been entered, the subnet mask should be entered. The subnet mask defines which parts of the IP address are common across your network. For most small networks the subnet mask will be 255.255.255.0 and this is entered in the same way.
4.The Gateway address is normally the IP address of the router through which the radio connects to the internet and is entered in the same way as the previous addresses.
5.In most installations the DNS settings (DNS = Domain Name Server) will be set to the same IP address as your router. In this case the secondary DNS may be left at zero. To enter the DNS address, rotate the Tuning Control Rotary to set the value for each group of digits and then press the Tuning Control Rotary to enter the value and to move on to the next group. Repeat this until all eight groups of digits have been entered.
6.The next step is to set up the WiFi connection, starting with the name of the wireless network
(SSID) followed by the encryption options and password. To enter the SSID, characters are selected and entered using the Tuning Control Rotary The radio scrolls through the available characters as well as the three controls on the right. The character currently highlighted will be entered when you press the Tuning Control Rotary. Do this as needed until the complete network name has been entered. The SSID setting is sensitive to upper and lower case characters and symbols.
You must enter it exactly as set up in your router. The three controls on the right-hand side of the screen have special functions:
select ‘


 ’ to erase a character just entered
select ‘ 

 ’ when the complete SSID has been entered
select ‘


 ’ to cancel and go back to the DNS settings screen
7.Having entered the SSID, you must enter details of the encryption system used on your wireless network. This should be the same as specified in your router settings. If your network does not use encryption, then select the ‘Open’ option. Your radio should then connect to the network, so skip to step 11. If your network uses WEP (Wired Equivalent Privacy) select the ‘Pre-Shared Key’ option then go to step 8. The remaining options are for WPA or WPA2 (WiFi
Protected Access) – see step 9.
|
DNS |
|
|
|
|
5/9 |
|
|
||
Primary DNS |
|
|
|
|
||||||
|
|
|
168 |
|
1 |
1 |
|
|
||
192 |
|
|
|
|||||||
Secondary DNS |
|
|
|
|
||||||
0 |
|
0 |
|
0 |
0 |
|
|
|||
GB |
||||||||||
|
|
|
|
|
|
|
|
|
||
|
SSID |
|
|
|
|
6/9 |
|
|
||
|
|
|
|
|
|
|
|
|
|
|
|
|
|
|
|
|
|
|
|
|
|
|
|
|
|
|
|
|
|
|
|
|
|
|
|
|
|
|
|
|
|
|
|
|
|
|
|
|
|
|
|
|
|
|
|
|
|
|
|
|
|
|
|
|
|
|
|
|
|
|
|
|
|
|
|
|
|
|
|
|
|
|
|
|
|
|
|
Authentication |
7/9 |
|
|
Open |
|
Pre-Shared Key |
|
WPA |
|
WPA2 |
|
Encryption type |
8/9 |
Disabled |
|
WEP |
|
Key: |
9/9 |
14
8.If you chose ‘Pre-Shared Key’ in step 7, you should then choose the WEP option. The key should be entered using only the numbers 0-9 and the letters A-F. The key will be 10 characters long for 64-bit encryption and 26 characters long for 128-bit encryption. The radio will accept lower-case letters a-f as equivalent to upper-case A-F. Spaces or special symbols are not permitted in WEP keys.
The three controls on the right-hand side of the screen have special functions:
select ‘


 ’ to erase a character just entered (long press to clear); Info again to continue select ‘

 ’ when the complete encryption key has been entered
select ‘


 ’ to cancel and go back to the SSID settings screen
Once the key is entered the radio should connect to your network. Please skip to step 11.
9.WPA and WPA2 are similar, although WPA2 offers a higher level of security. Whichever you selected in step 7, you then have to specify the variant used. They are TKIP (Temporal
Key Integrity Protocol) and AES (Advanced Encryption Standard). As previously, the setting should match that used by your router. Some routers allow both to be specified, and the rou-
ter will use whichever variant is supported by the connected device. AES is regarded as the more secure option if it is available.
10.The radio will then require you to enter the encryption key. This must be a string of between 8 and 63 characters and must be identical to the key which has been entered into your router.
Note – the encryption key is sensitive to the use of upper and lower case letters and symbols. Take care to enter the key exactly, or the radio will not be able to connect to your router. The three controls on the right-hand side of the screen have special functions. You can access these by rotating the Tuning Control Rotary and then press the Tuning Control Rotary to select as you needed:
select ‘


 ’ to erase a character just entered (long press to clear ); Info again to continue select ‘

 ’ when the complete encryption key has been entered
select ‘


 ’ to cancel and go back to the TKIP / AES options screen
Once the key is entered the radio should connect to the network.
11.While the radio is trying to connect to the network, it will display ‘Processing…’ when checking the encryption key and then ‘Connecting…’. If the connection is made successfully, the radio will return to the Network settings menu. If the unit cannot connect, then it will display a ‘Failed to connect’ message and will return to the SSID entry screen (step 6). Once connected, the network settings are stored in the radio. The settings are retained when the radio is disconnected from the mains. You may now use the Back and Mode buttons to access the
functions of your radio.
15
Authentication |
7/9 |
Open |
|
Pre-Shared Key |
|
WPA |
|
WPA2 |
|
Encryption type |
8/9 |
|
|
TKIP |
|
AES |
|
Key: |
9/9 |
 Network settings
Please wait
Connecting...
 Network settings
Network wizard |
|
View settings |
|
Wlan region |
> |
Manual settings |
|
Network profile |
> |

Network remote control options
Network Pin setup (Pin number)
Your radio has the option of being controlled by an application installed on an Apple iPhone, iPod touch or iPod. The Pin number facility allows you to ensure that your radio can only be controlled by your ownApple device rather than someone else’s.
Details of how this feature can be used with your iPhone or iPod touch are explained in a separate sheet called 'The App for controlling your Sangean internet radio'.
 Network settings
Wlan region |
> |
|
|
Manual settings |
|
|
|
|
|
|
GB |
NetRemote PIN Setup |
|
|
|
Network profile |
> |
|
|
Keep network connected |
|
|
|
16
Internet Radio
Internet Radio – the basics
Before you can use your radio to listen to broadcasts via the Internet, it is necessary to have connected it to your computer network using the wireless (WiFi) connection.
There are literally many thousands of radio broadcasts available via the internet as well ‘Podcasts’. Your radio provides several ways of searching for broadcasts in order to make finding and choosing them easier. Once you have found radio stations which you like, you may either store them as presets within the radio, or add them to a list of your favorite stations which your radio can access. The number of presets is limited (there are five presets in the radio), but you can store as many favorites as you like.
You may search for an internet radio station by Location. If you know the name of the station and the country from which a station is broadcast this may be the easiest method to find a station. It is also a great way to experience radio from other parts of the world.
You may also search for an internet radio station by Genre. If you prefer a particular type of music, Blues for example, you may search for a radio station that broadcasts that type of music, and you can choose from a list of Blues radio stations regardless of location, or taking location into account.
If you know part of the name of an internet radio station, you can enter it into the radio and it will search for stations that match that name. This can be helpful if you are unsure of the location or genre of a particular station.
The WFR-27C radio connects to a radio station database which serves many users in many countries. This means that there is a very wide range of program content available. You can also search for stations which have been recently added to those available (new stations) or you can search for the most popular.
17
Selecting a radio station by location
1.Press the Standby button to switch the radio on. Then press the Mode button and rotate the Tuning Control Rotary to highlight the internet radio mode display. Press the Tuning Control Rotary to select the option.
2.Press the Menu button to enter the main Internet radio menu. Rotate the Tuning Control Rotary until ‘Station list’ is highlighted on the display and then press the Tuning Control Rotary to select the option.
3.Rotate the Tuning Control Rotary until ‘Stations’ is highlighted on the display and then press the Tuning Control Rotary. Note that the menu may offer one or more local selections based upon the country in which the unit is being used, according to your internet IP address (‘United
Kingdom’and ‘BBC’ stations, for example).
4.Rotate the Tuning Control Rotary until ‘Location’ is highlighted on the display and then press the Tuning Control Rotary to select.
5.Rotate the Tuning Control Rotary to scroll through the list of continents. When the desired continent is highlighted press the Tuning Control Rotary to enter your selection.
6.The display will show a list of countries within the chosen continent. If there are many countries shown you can scroll through the list continually in either direction. For example, if the chosen continent was Europe, then to find the United Kingdom scroll up from the top of the list to the bottom by rotating the Tuning Control Rotary. Press the Tuning Control Rotary to choose the desired country.
7.You will typically find that you then have the option to select either ‘All Stations’ or one of a number of categories. The lists are always sorted alphabetically, and long lists will wrap around from top to bottom or bottom to top.
1
 2
2
3-6
 Location
Africa
Asia
Caribbean
Central America
Europe
 United Kingdom
All stations
Highlighted stations Alternative Ambient
Celtic
|
Internet radio |
|
|
|
|
Last listened |
|
|
|
|
Station list |
> |
|
|
|
System settings |
> |
|
|
|
Main menu |
> |
|
GB |
|
|
|
|
|
|
Internet radio |
|
|
|
|
My Favourites |
> |
|
|
|
Local United Kingdom |
> |
|
|
|
BBC |
> |
|
|
|
Stations |
> |
|
|
|
Podcasts |
> |
|
|
|
Stations |
|
|
|
|
Location |
> |
|
|
|
Genre |
> |
|
|
|
Search stations |
|
|
|
|
Popular stations |
> |
|
|
|
New stations |
> |
|
|
|
|
|
|
|
|
Europs |
|
|
|
|
|
|
|
|
> |
Switzerland |
> |
|
|
> |
Turkey |
> |
|
|
> |
Ukraine |
> |
|
|
> |
United Kingdom |
> |
|
|
> |
Vatican |
> |
|
|
|
|
|
|
|
 All Stations
>Asian sound radio
>Aston FM
>Atlantic FM
>Audio Book Radio
>BBC Radio 1
18

8.Rotate the Tuning Control Rotary to highlight your chosen radio station and then press the
Tuning Control Rotary to enter your selection. The display will show ‘Connecting…’ while the radio connects to the new station. The station should then start playing. Adjust the volume as needed.
9.If the station has on-demand content, that is, it gives the option of listening to programs which have already been broadcast or to Podcasts, there will be an additional screen showing the radio station name as well as a ‘Podcasts’ option. These are selected using additional menus, determined by the radio station and the content. There may simply be a list of programs, or there may also be options to choose from broadcasts on particular dates or days of the week.
The examples shown here are typical. Podcasts and Listen Again content can also be accessed separately from the main Internet Radio menu.
If your radio cannot connect to a radio station
Note:
If your radio is unable to connect to an internet radio station it will generally either display ‘Network Error’ or ‘Stopped’. This can be for many reasons, but typically will be due to one of the following:
●The radio station may not be broadcasting at the present time.
●The radio station may not be able to accommodate any more connections from internet listeners.
●The broadcaster may limit listening to specific countries or regions.
●There may be network congestion (either locally or at a distance) which is affecting the reliability
of the connection.
If your radio can connect, but the audio is not continuous and the radio keeps having to reconnect, this may be due to the radio station only having limited connection capacity.
 BBC Radio 1
BBC Radio 1 |
|
Podcasts |
> |
 BBC Radio 1
BBC Radio 1
Podcasts >
 Podcasts
Dick and Dom |
> |
Eddie Halliwell |
> |
Edith Bowman |
> |
Fearne and Reggies |
> |
Gilles Peterson |
> |
 Edith Bowman
28/08/2009 - August 28
27/08/2009 - August 27
26/08/2009 - August 26
25/08/2009 - August 25
Internet radio |
12:34 |
Edith Bowman
Show description Edith Kickstarts your afternoon with music,
19
Selecting a radio station by genre
1.Press the Menu button to enter the main Internet radio menu.
2.Rotate the Tuning Control Rotary until ‘Stations’ is highlighted on the display and then press the Tuning Control Rotary to select.
3.Rotate the Tuning Control Rotary until ‘Genre’ is highlighted on the display and then press the Tuning Control Rotary.
4.Rotate the Tuning Control Rotary to scroll through the list of content types. This menu is normally cyclic – you can scroll the list continually in either direction. When the chosen genre is highlighted, press the Tuning Control Rotary.
5.You then have the choice of ‘All Stations’ of the chosen genre, or a list of countries. Note if a country is not shown then the station may still appear in the ‘All Stations’ list. Rotate the
Tuning Control Rotary and the Tuning Control Rotary to choose as needed.
6.A list of radio stations is then shown. Rotate the Tuning Control Rotary until the desired station name is highlighted on the display.
7.Press the Tuning Control Rotary to select the station. The display will show ‘Connecting…’ while it finds the new station. If the radio is unable to connect this may be for one of the reasons explained previously.
8.Adjust the Volume as needed to set the listening level.
 1
1
2-7
Internet radio |
|
|
|
|
|
|
|
My Favourites |
> |
|
|
Local United Kingdom |
> |
|
|
BBC |
> |
|
|
Stations |
> |
|
|
Podcasts |
> |
|
GB |
Stations |
|
|
|
Location |
> |
|
|
Genre |
> |
|
|
Search stations |
|
|
|
Popular stations |
> |
|
|
New stations |
> |
|
|
|
|
|
|
Genre |
|
|
|
|
|
|
|
Alternative |
> |
|
|
Ambient |
> |
|
|
Big Band |
> |
|
|
Bluegrass |
> |
|
|
Blues |
> |
|
|
Blues |
|
|
|
All Stations |
> |
|
|
Highlighted Stations |
> |
|
|
Belgium |
> |
|
|
France |
> |
|
|
Germany |
> |
|
|
All Stations |
|
|
|
|
|
|
|
Asian sound radio |
|
|
|
Aston FM |
|
|
|
Atlantic FM |
|
|
|
Audio Book Radio |
|
|
|
BBC Radio 1 |
|
|
|
20
Searching for a radio station by name
There may be occasions when you know the name of a radio station but you do not know the location or genre. This facility allows you to search for the station using a part (or parts) of the radio station name.
1.Press the Menu button to enter the main Internet radio menu. Rotate the Tuning Control Rotary until ‘Station list’ is highlighted on the display and then press the Tuning Control Rotary.
2.Rotate the Tuning Control Rotary until ‘Stations’ is highlighted on the display and then press the Tuning Control Rotary.
3.Rotate the Tuning Control Rotary until ‘Search stations’ is highlighted on the display and then press the Tuning Control Rotary.
4.To enter the search word(s) press the Tuning Control Rotary on the remote control to highlight each character for the search in turn, and press the Tuning Control Rotary to enter. If you make an error press the Info button to access the delete character ‘ 


 ’ on the screen and the character selection. After the final character of the search has been entered, use the Info button and then the Tuning Control Rotary to highlight the ‘

 ’ symbol on the screen and then press the Tuning Control Rotary to finish.
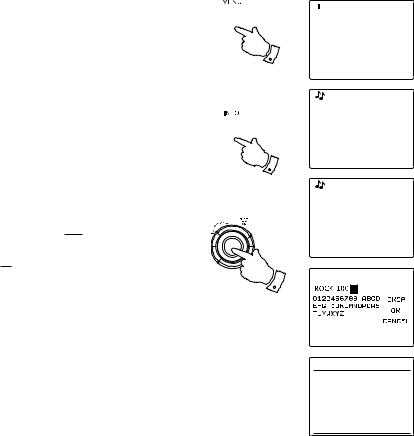
5.The radio will search for radio stations that match your search data. If you include a space between two search items the radio will look for station names which include both items. Thus a search for ‘ROCK 100’ could find a station called ‘100 Classic Rock Hits’ as well as a station called ‘100.FM Rocks’.
6.Rotate the Tuning Control Rotary to highlight the station that you wish to listen to and press the Tuning Control Rotary to confirm your choice. The display will show ‘Connecting…’ while it finds a new station.
 1
1
 4
4
1-6
 Internet radio
Last listened |
|
|
Station list |
> |
|
System settings |
> |
|
Main menu |
> |
|
|
|
|
Internet radio |
|
|
|
|
|
My Favourites |
> |
|
Local United Kingdom |
> |
|
BBC |
> |
|
Stations |
> |
|
Podcasts |
> |
|
Stations |
|
|
Location |
> |
|
Genre |
> |
|
Search stations |
|
|
Popular stations |
> |
|
New stations |
> |
|
|
|
|
Stations |
|
|
|
|
|
|
|
|
|
|
|
|
|
|
|
|
|
|
|
|
|
|
|
|
|
|
 Search stations
Radio10 - Top 100 Classic
Rock 100 DIZ
21
Selecting a new or popular station
As described in the section ‘Internet Radio – the basics’, your radio connects via the the Internet to a database of radio stations. This option is provided to highlight stations which are newly added to the list of those available, or stations which are particularly popular with listeners around the world. Your radio allows you to easily choose stations from these two categories, using menus very similar to those used when finding stations by location and genre.
1.Press the Menu button to enter the main Internet radio menu. Rotate the Tuning Control Rotary until ‘Station list’ is highlighted on the display and then press the Tuning Control Rotary.
2.Rotate the Tuning Control Rotary until ‘Stations’ is highlighted on the display and then press the Tuning Control Rotary.
3.Rotate the Tuning Control Rotary until ‘Popular stations’ or ‘New stations’ is highlighted on the display. Press the Tuning Control Rotary to enter your choice.
4.Rotate the Tuning Control Rotary to highlight the station that you wish to listen to and then press the Tuning Control Rotary to enter your choice. The display will show ‘Connecting…’ while the new station is found.
 1
1
1-4
GB
 Internet radio
Last listened |
|
Station list |
> |
System settings |
> |
Main menu |
> |
|
|
Internet radio |
|
My Favourites |
> |
Local United Kingdom |
> |
BBC |
> |
Stations |
> |
Podcasts |
> |
Stations |
|
|
|
Location |
> |
Genre |
> |
Search stations |
|
Popular stations |
> |
New stations |
> |
|
|
Stations |
|
BBC Radio 4 |
|
ENERGY ZURICH |
|
All Irish Radio |
|
Classic FM |
|
RTL 2 |
|
22
Selecting a podcast / BBC Listen Again
Some radio stations allow you to listen to programs that have already been broadcast. The BBC’ |
|
s Listen Again service is an example of this. In addition, radio broadcasters and individuals may |
|
make programs which are intended normally to be downloaded into a computer or copied onto a |
|
portable media player. These are commonly known as Podcasts. |
1 |
|
On your radio, both Listen Again programs and Podcasts are grouped together as Podcasts, and the same menu is used to access and listen to both types of programming. Listen Again programs are also accessible via the Stations menu.
1. Press the Menu button to enter the main Internet radio menu. Rotate the Tuning Control Rotary |
1-4 |
until ‘Station list’ is highlighted on the display and then press the Tuning Control Rotary. |
2.Rotate the Tuning Control Rotary until ‘Podcasts’ is highlighted on the display and press the
Tuning Control Rotary.
3.You may then search by location, genre, or using part of the name of the podcast. The searches operate in exactly the same way as when searching for a conventional radio station. Searching by location is done first by continent, then by country. You may then list ‘All shows’ or search within a country by genre. Searching by genre is more direct, since once the genre is chosen the next menu display shows a list of available podcasts. Searching by name operates in the same way as when searching for a named radio station, selecting the ‘ 

 ’ symbol when you have entered the text. You may enter one or more pieces of text which will be used for the search.
4.Rotate the Tuning Control Rotary and then press the Tuning Control Rotary to confirm your chosen podcast. The display will show ‘Connecting…’ while it finds the new program.
 Internet radio
Last listened |
|
|
Station list |
> |
|
System settings |
> |
|
Main menu |
> |
|
|
|
|
Internet radio |
|
|
|
|
|
My Favourites |
> |
|
Local United Kingdom |
> |
|
BBC |
> |
|
Stations |
> |
|
Podcasts |
> |
|
Stations |
|
|
Location |
> |
|
Genre |
> |
|
Search stations |
|
|
|
|
|
Podcasts |
|
|
|
|
|
|
|
|
|
|
|
|
|
|
|
|
|
|
|
|
|
|
|
|
|
|
|
|
|
 Podcasts
Dick and Dom |
> |
Eddie Halliwell |
> |
Edith Bowman |
> |
Fearne and Reggies |
> |
Gilles Peterson |
> |
23
Presetting stations
With so many Internet radio stations available, it is desirable to have a means of rapidly selecting the stations that you listen to most frequently. Your radio has five memory presets which can easily be set to store the details of any Internet radio station. The radio station presets are retained in memory even when the radio is switched off. Please see also the section ‘Last
Listened’ and ‘Configuring My Favorite Stations’.
Storing a preset
1.Press the Standby button to switch on your radio. Tune to the required station using one of the methods described on the preceding pages.
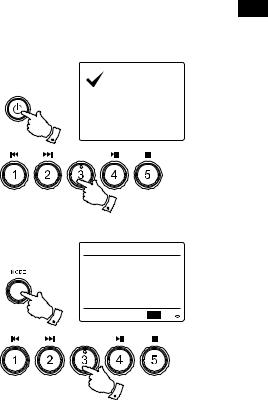
2.To store the currently playing radio station as a preset, press and hold the required Preset button (1 – 5) on the panel until the display shows ‘Preset stored’. The station will be stored using the chosen preset button. Repeat this procedure as needed for the remaining presets.
3.Stations which are already stored in the presets may be over-written by following the above procedure.
Recalling a preset
1.Press the Standby button to switch on your radio. Select the Internet radio mode using the Mode button.
2.Momentarily press the required Preset button on the remote control. Your radio will then connect to the station stored in preset memory. The preset used will be shown at the bottom of the display screen.
GB
Preset stored
1
2
Internet radio |
12:34 |
Aural Moon
Description:
Playing progressive rock old and new
1
UPnP
2
24
 Loading...