

Samsung CLP500N Users Manual

Replacing the Supplies
From time to time, you need to replace the following items to
maintain top performance and to avoid print quality problems.
Refer to the table below:
Item(s) Printer message
Black toner
cartridge
Color toner
cartridges
Waste toner
container
Drum cartridge
Image transfer
unit
*Average A4-/letter-sized pages counts based on 5% coverage of
individual colors on each page. Usage conditions and print patterns
may cause results to vary.
**Image counts based on one color on each page. If you print
documents in full colors (Cyan, Magenta, Yellow, Black), the lives of
these three items are reduced by 25%.
Replace Toner
Black
Replace Toner
[Color]
Waste Toner Tank
Full/Not Install
Replace
Drum Cartridge
Replace
Image Transfer
Pages
Printed
7,000 pages
5,000 pages
3,000
images
50,000
images
50,000
images
**
**
**
*
*
See
page
6.7.
6.7.
6.10.
6.13.
6.21.
6
M
AINTAINING YOUR PRINTER
6.3

Managing the Toner Cartridges
Toner Cartridge Storage
To get the maximum results from the toner cartridge, keep the
following guidelines in mind:
• Do not remove the toner cartridges from their packages until
you are ready to use them.
• Do not refill the toner cartridges. The printer warranty
does not cover damage caused by using a refilled
cartridge.
• Store the toner cartridges in the same environment as the
printer.
• To prevent damage to the toner cartridges, do not expose
them to light for more than a few minutes.
Toner Cartridge Life Expectancy
The life of the toner cartridge depends on the amount of toner
that your print jobs require. When printing text at 5% coverage,
a new toner cartridge lasts an average of 7,000 pages for black
and 5,000 pages for each color. The initial toner cartridge
supplied with the printer lasts an average of 2,000 pages for
black and 1,500 pages for each color.
At any time, you can verify the life expectancy by checking the
toner level. See the below.
Checking the Remaining Toner
You can check the level of toner left in each cartridge.
1
Press the Menu button ( ) on the control panel until you
see ‘Setup’ on the bottom line of the display.
2
Press the Enter button ( ) to access the menu.
3
Press the scroll button ( or ) until ‘Maintenance’
displays on the bottom line.
4
Press the Enter button ( ).
5
When ‘Check Toner’ displays on the bottom line, press the
Enter button ( ).
6.4
M
AINTAINING YOUR PRINTER
6
Press the scroll button ( or ) until the color of the
toner cartridge you want to check displays on the bottom
line.
7
Press the Enter button ( ).
The display shows the percentage of the remaining toner.
Redistributing the Toner
When a toner cartridge is nearly empty, faded or light areas may
appear on a printed page and ‘Ready [CMYK] Low Toner’ appears
on the display. The printer can continue to print using the
current toner cartridge until the control panel displays a
message telling you to replace the cartridge.
You may be able to temporarily improve the print quality by
redistributing the toner. The control panel display tells you which
color cartridge is low in toner.
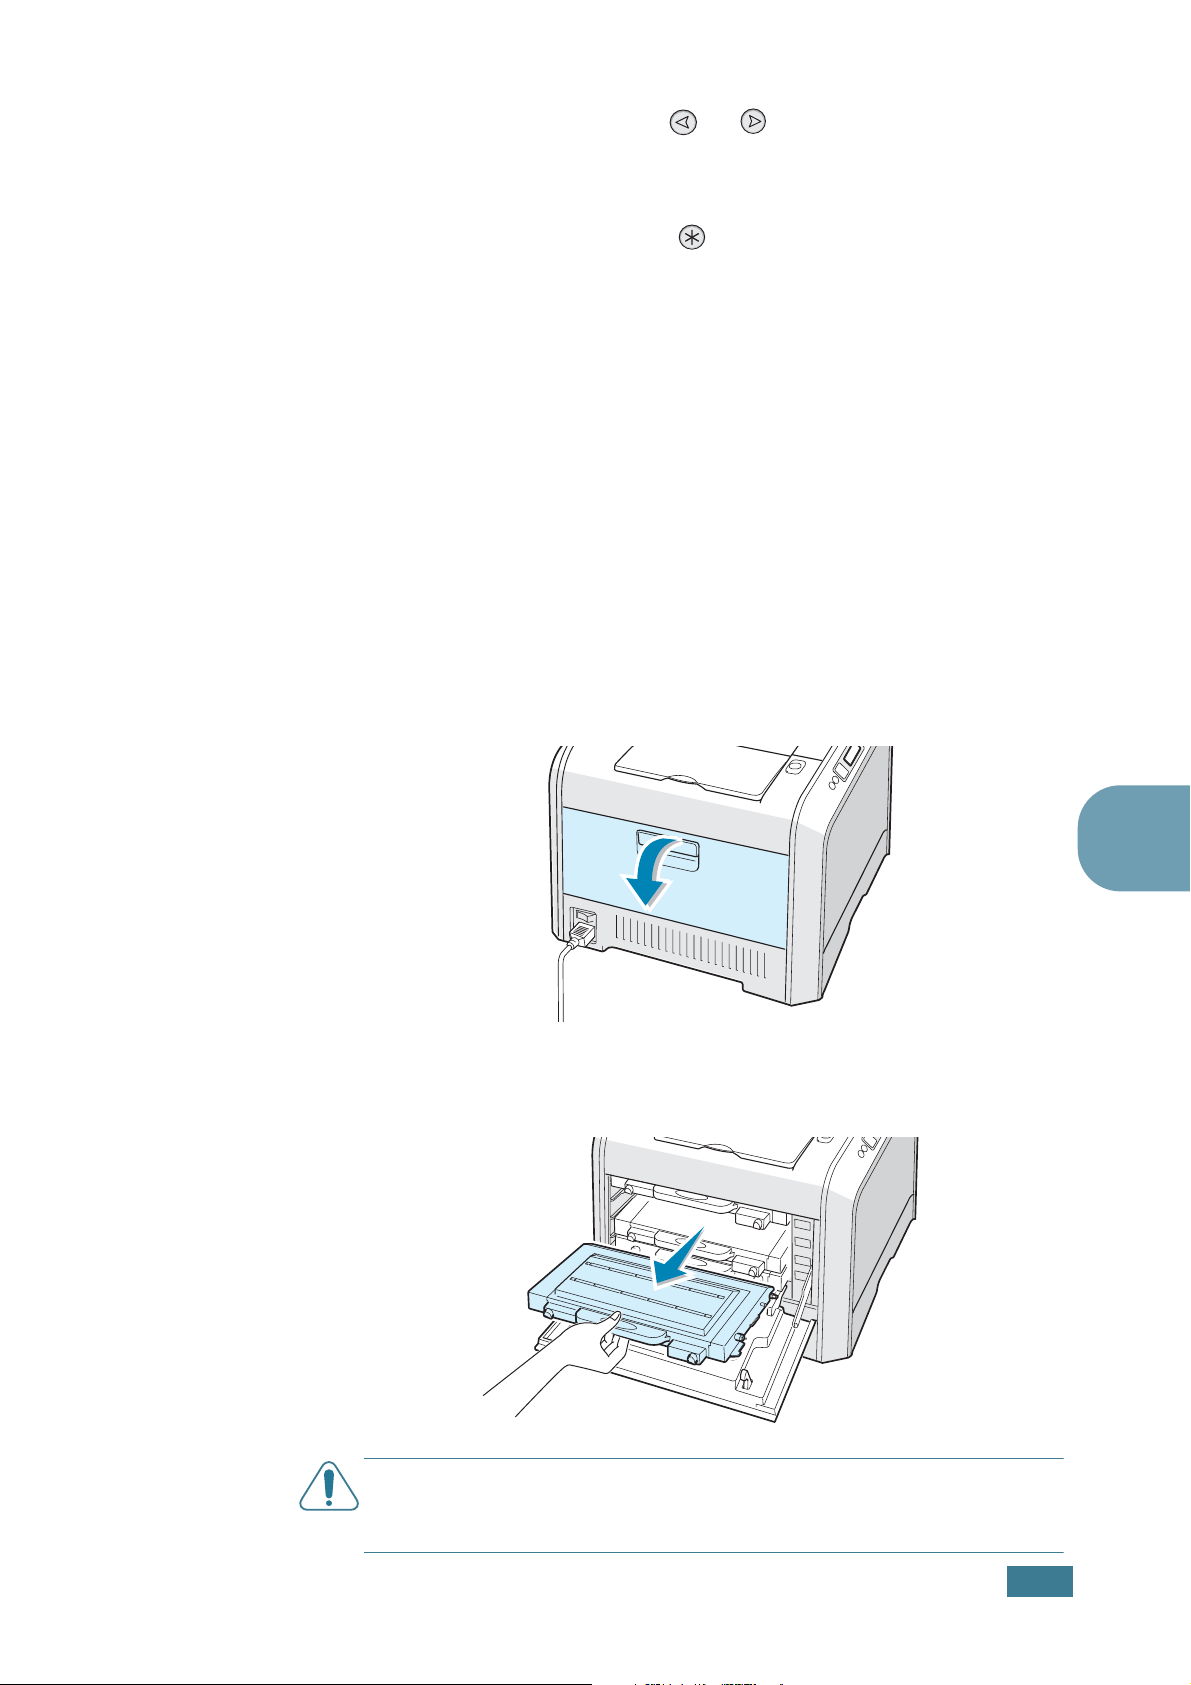
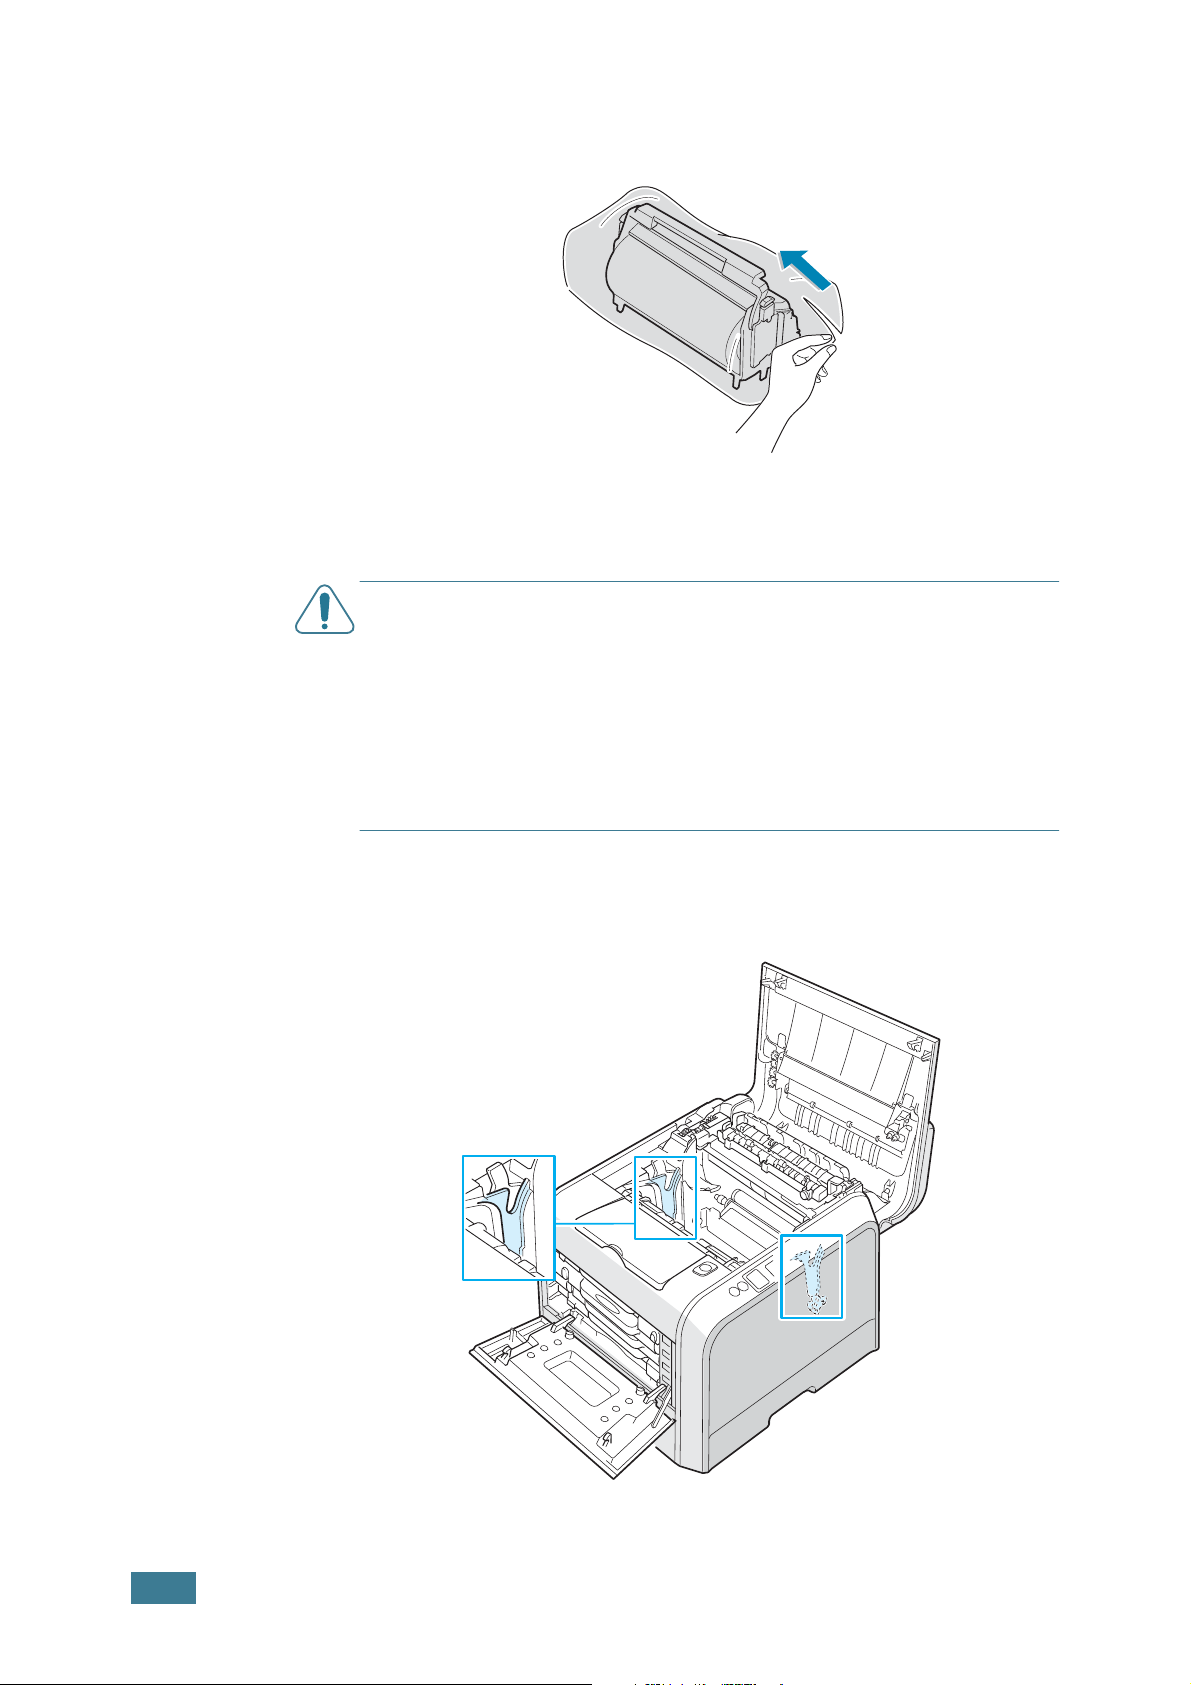
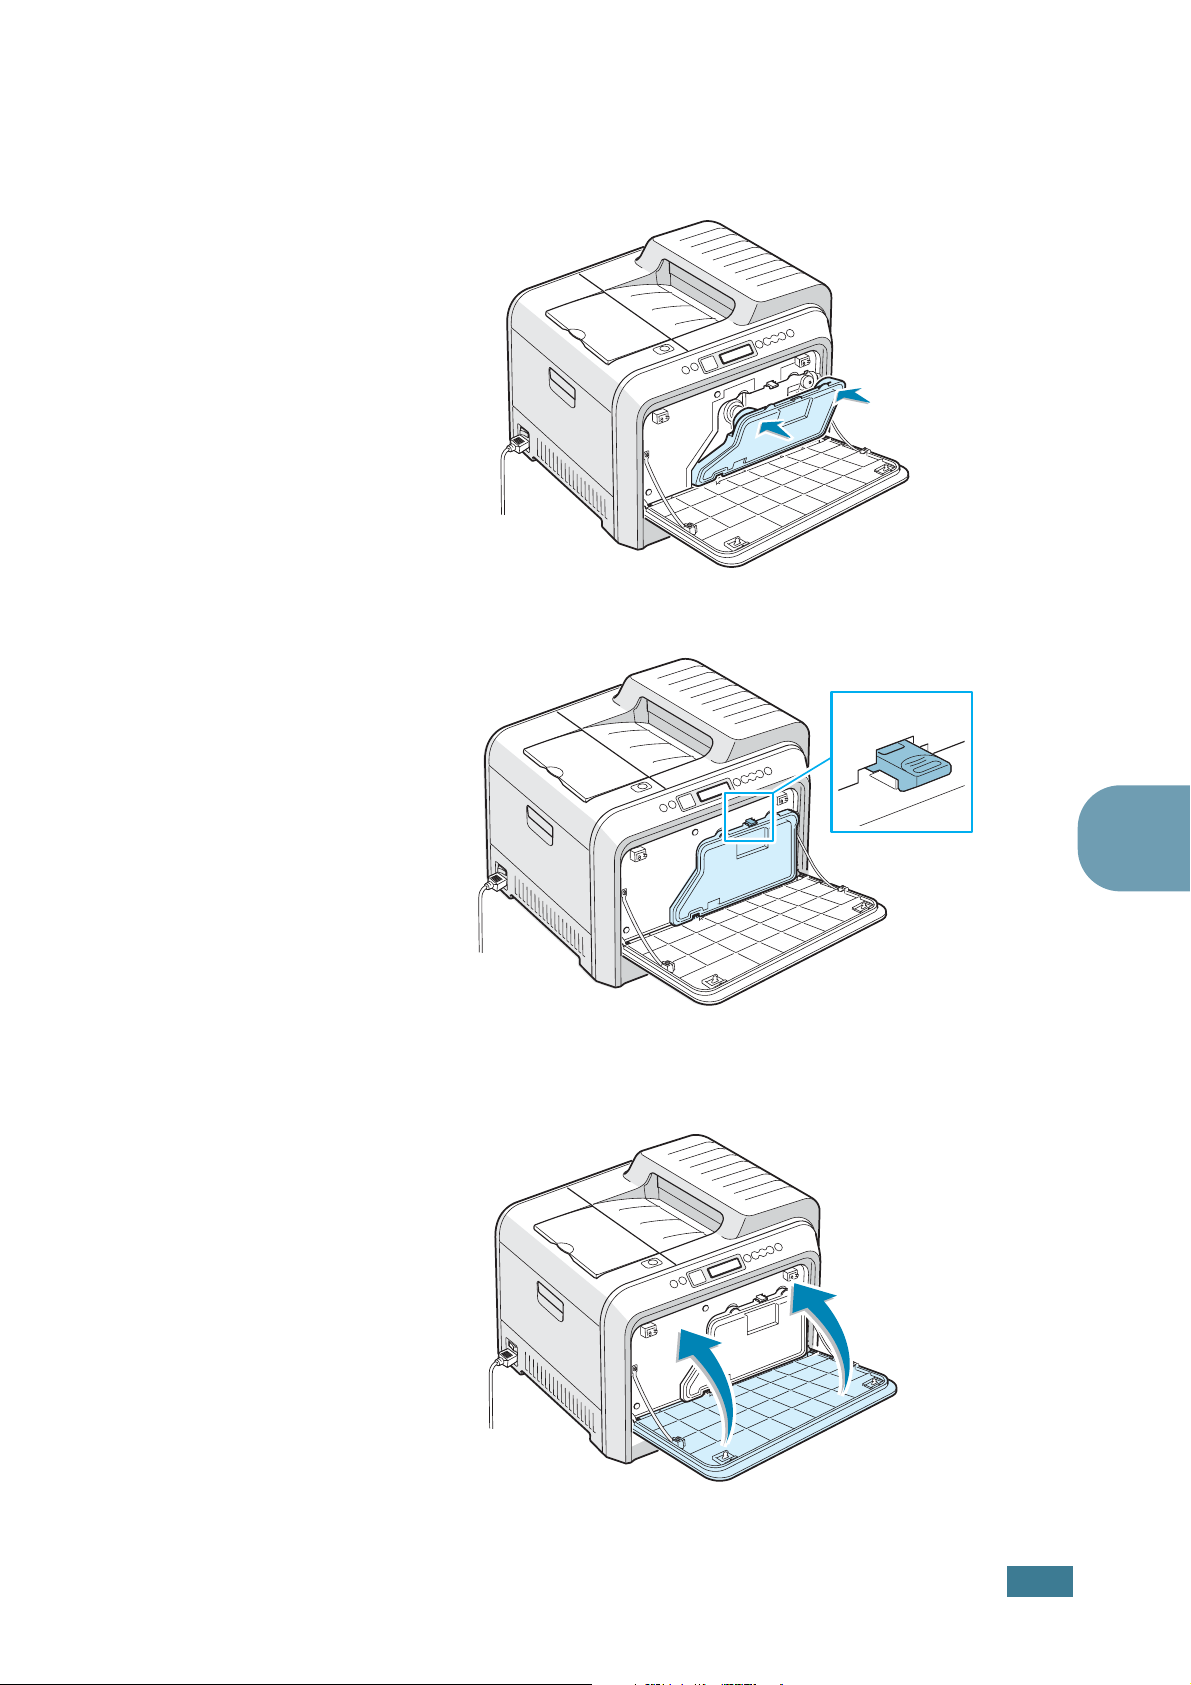
1
Using the handle, open the left cover completely.
2
Pull the handle lightly first, and then holding the used toner
cartridge, remove it.
6
C
AUTION
cartridge can be exposed to light. This causes damage to the drum
cartridge.
: If you open the left cover for a long time, the drum
M
AINTAINING YOUR PRINTER
6.5

3
Holding both sides of the toner cartridge, gently roll it from
side to side to redistribute the toner.
N
OTE
: If toner gets on your clothing, wipe it off with a dry cloth
and wash it in cold water. Hot water sets toner into fabric.
4
Slide the toner cartridge back into the printer.
6.6
5
Close the left cover. Make sure that the cover is securely
latched.
M
AINTAINING YOUR PRINTER
Replacing the Toner Cartridges
The printer uses four colors and has a different toner cartridge
for each one: cyan (C), magenta (M), yellow (Y), and black (B).
Replace a toner cartridge when the printer control panel displays
‘Replace Toner [Color]’.
color needs to be replaced.
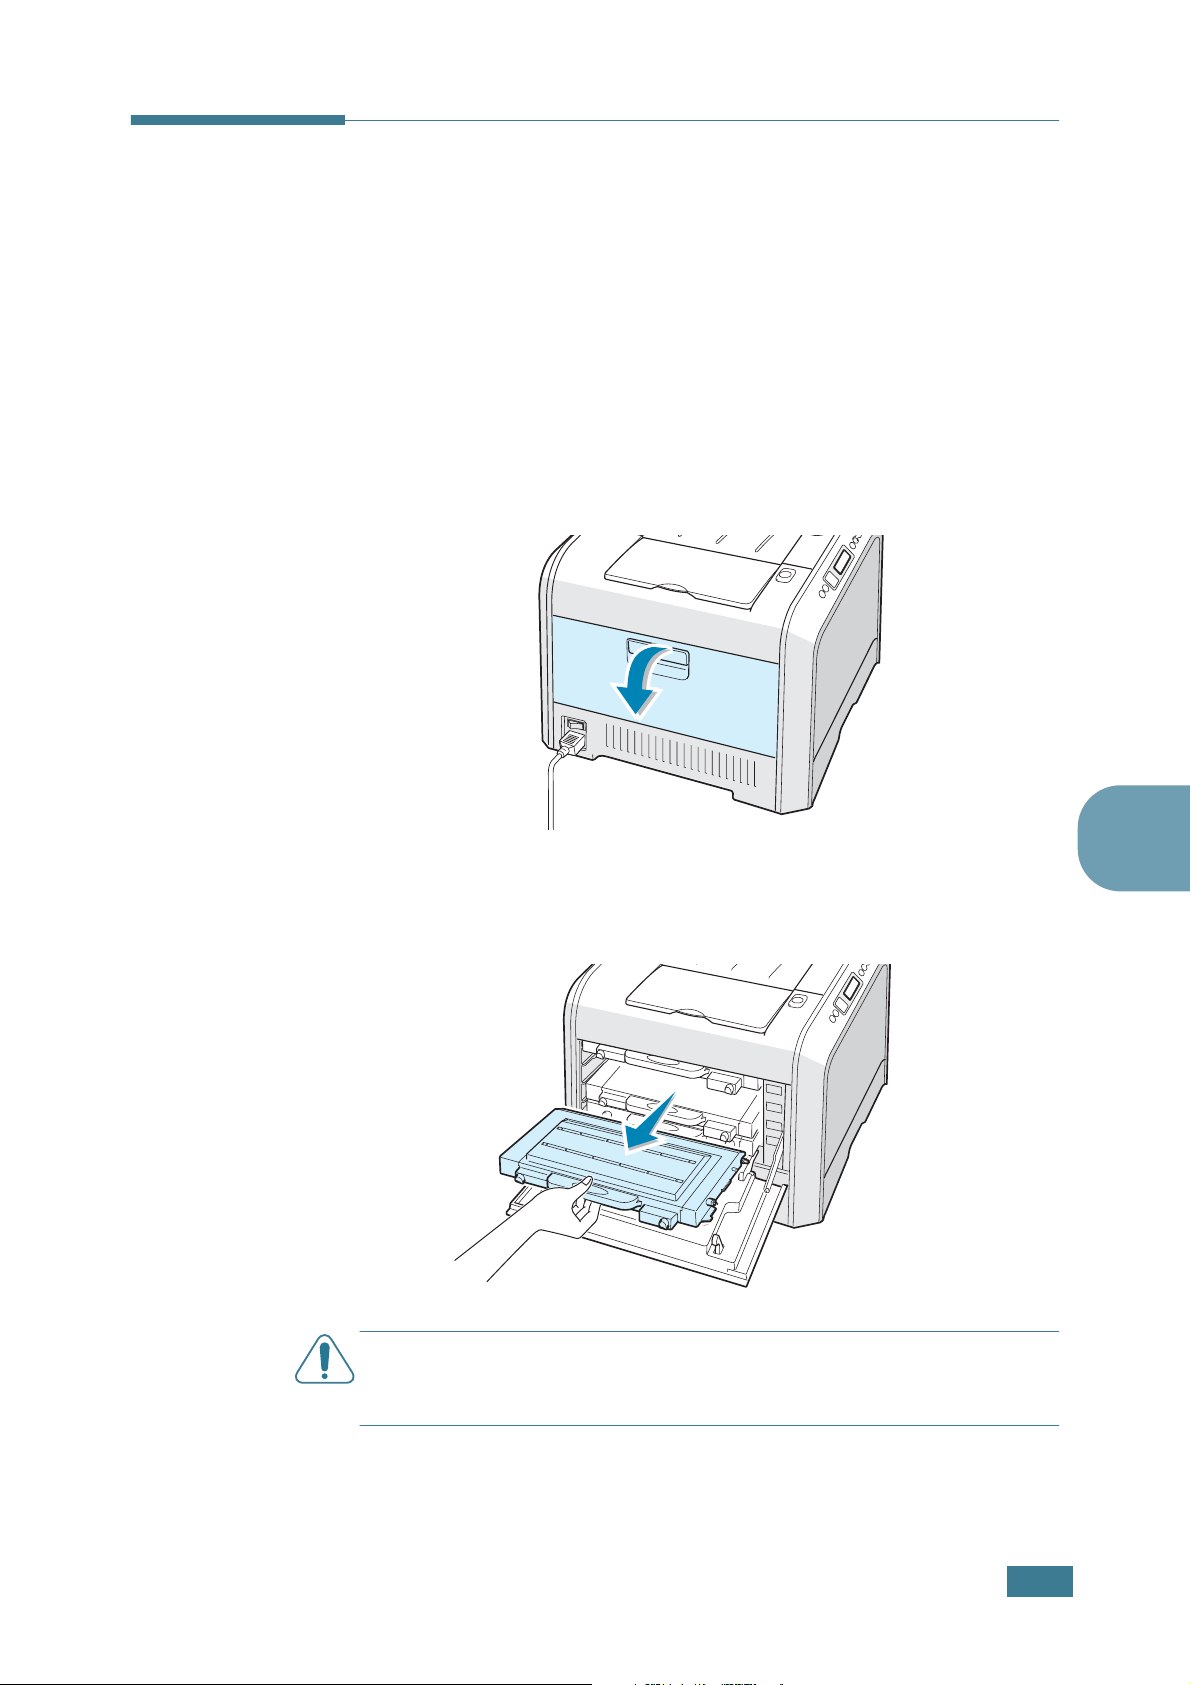
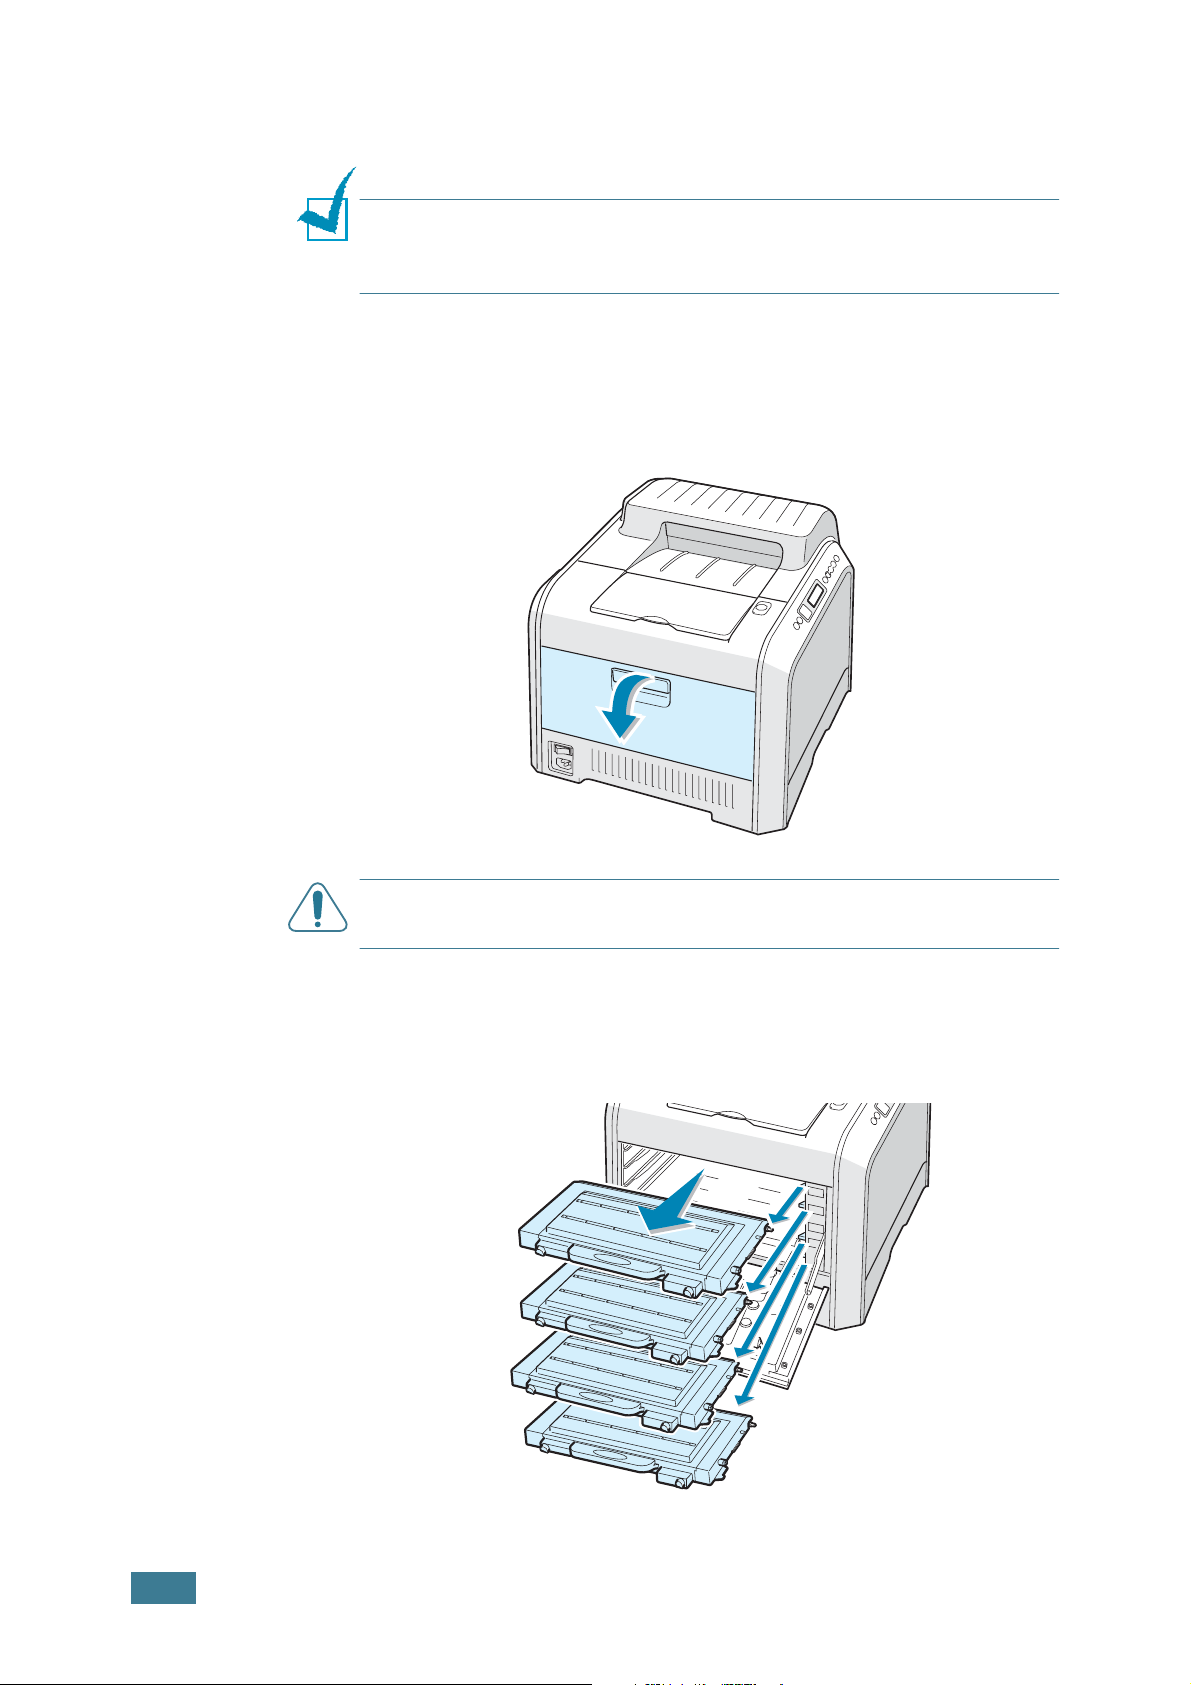
1
Turn the printer off.
2
Using the handle, open the left cover completely.
The control panel display tells you which
3
Pull the handle lightly first, and then holding the used toner
cartridge, remove it.
C
AUTION
cartridge can be exposed to light. This causes damage to the drum
cartridge.
: If you open the left cover for a long time, the drum
6
M
AINTAINING YOUR PRINTER
6.7
4
Take a new toner cartridge out of the package.
C
AUTION
open the toner cartridge package. You could damage the surface
of the toner cartridge.
5
Place the toner cartridge on a flat surface as shown and
: Don’t use sharp objects, such as a knife or scissors, to
remove the paper covering the toner cartridge by removing
the tape. Discard the paper and tape.
6
Holding both sides of the toner cartridge, gently roll it from
side to side to distribute the toner.
N
OTE
: If toner gets on your clothing, wipe it off with a dry cloth
and wash it in cold water. Hot water sets toner into fabric.
6.8
M
AINTAINING YOUR PRINTER
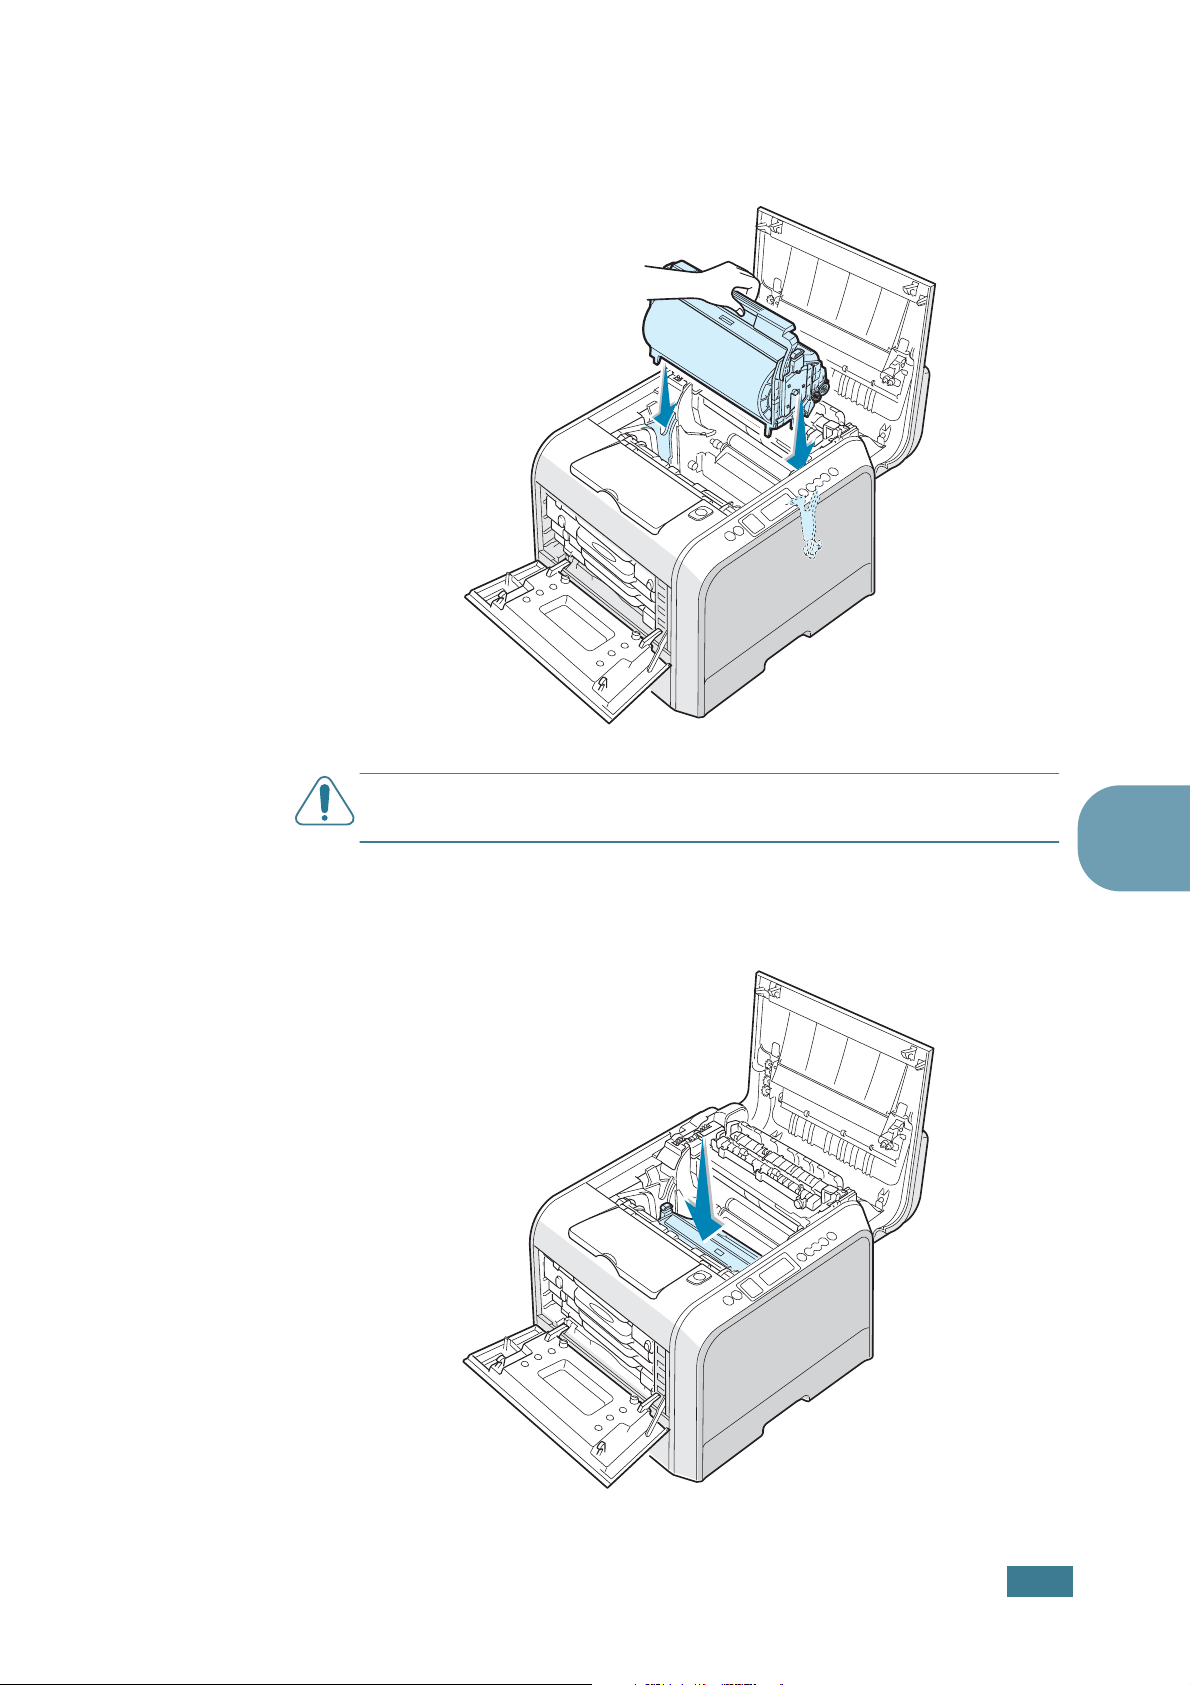
7
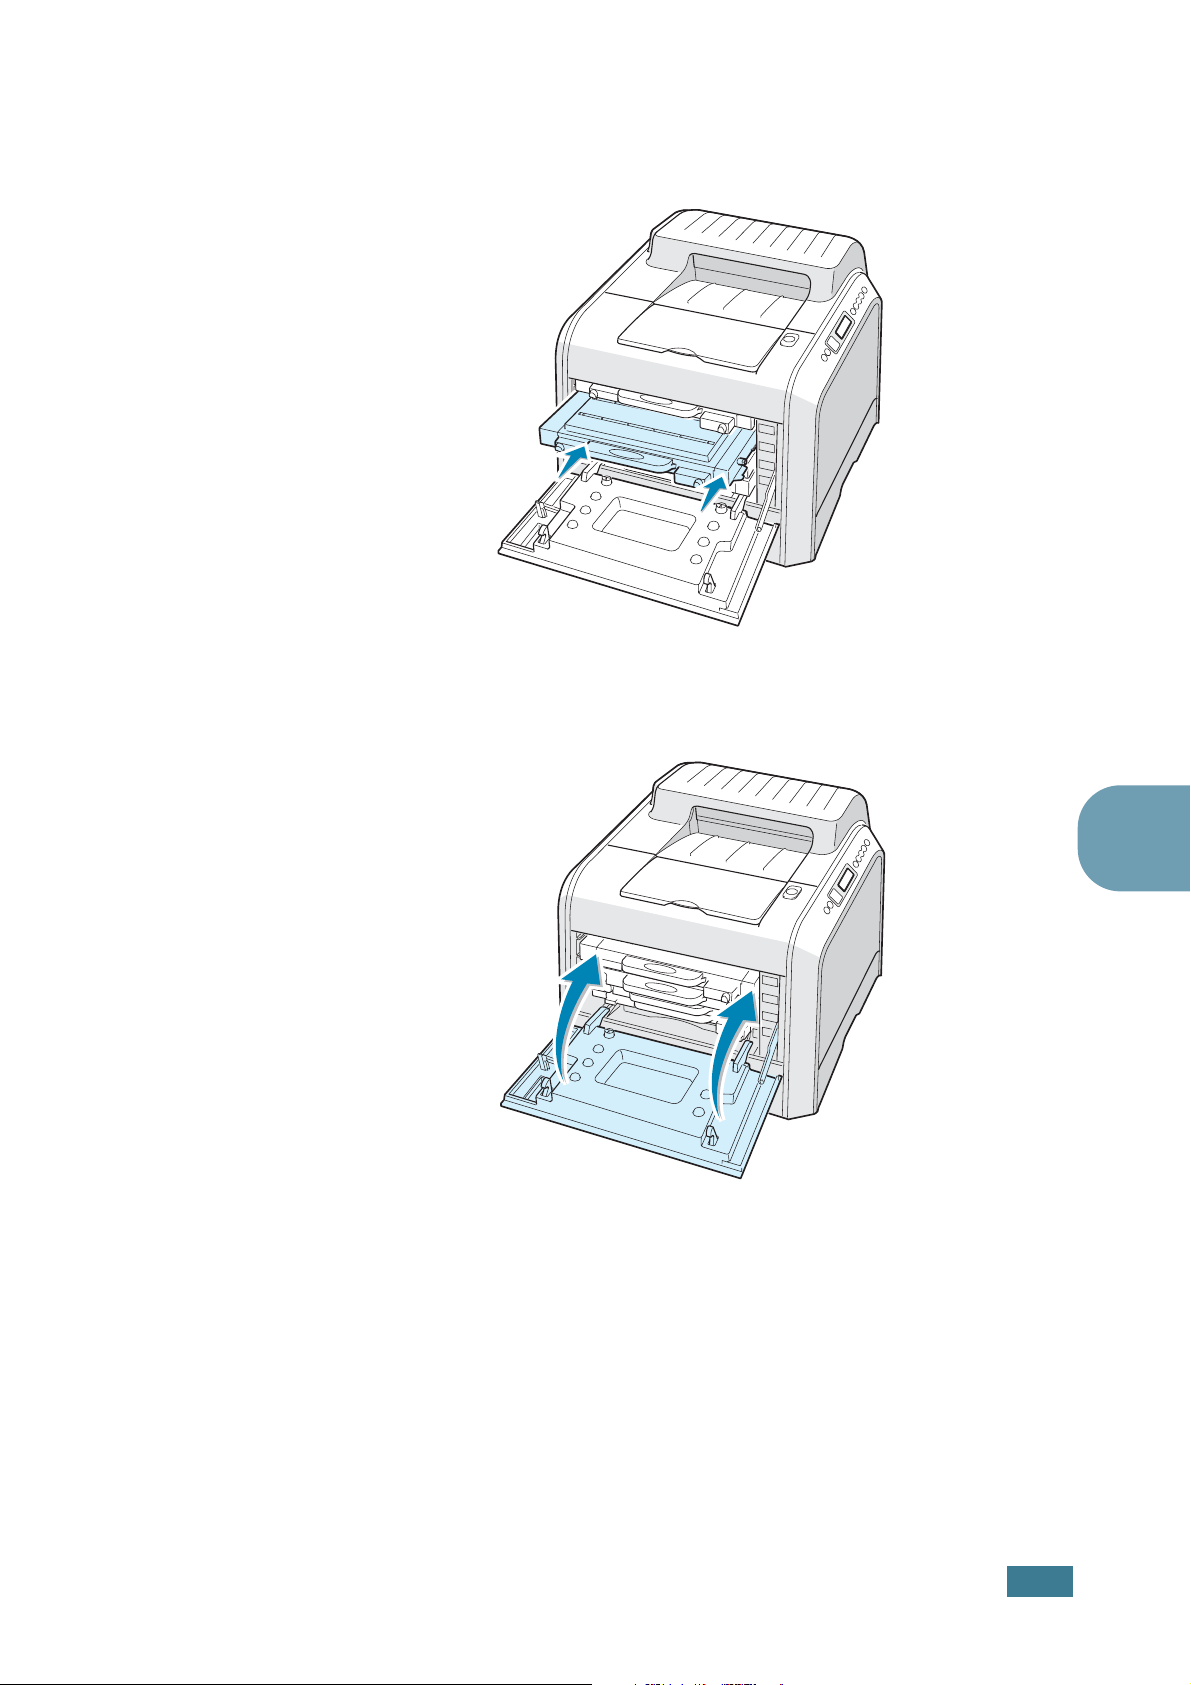
Make sure that the color of the toner cartridge matches the
color slot and then slide the new toner cartridge into the
printer.
8
Close the left cover. Make sure that the cover is securely
latched, and then turn the printer on.
9
Open the front cover and clean the LSU. For details, see
page 6.27.
6
M
AINTAINING YOUR PRINTER
6.9
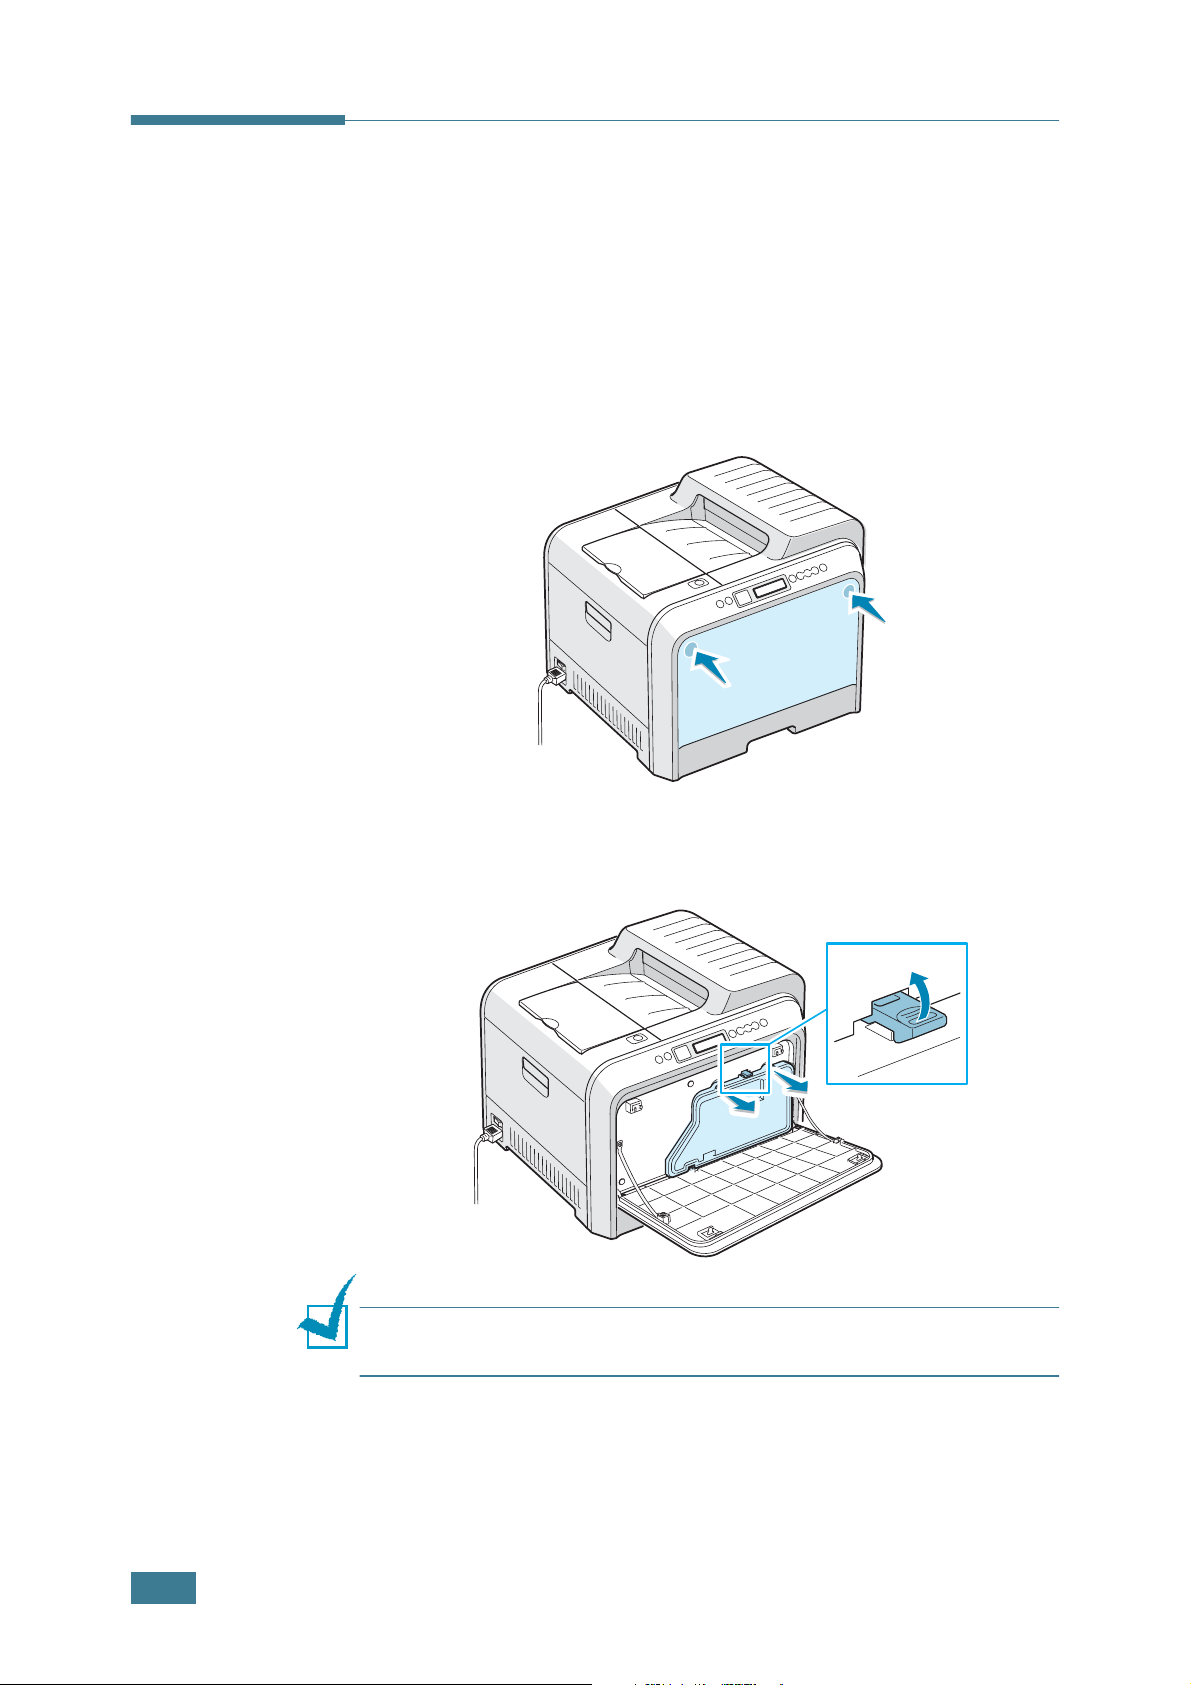
Replacing the Waste Toner
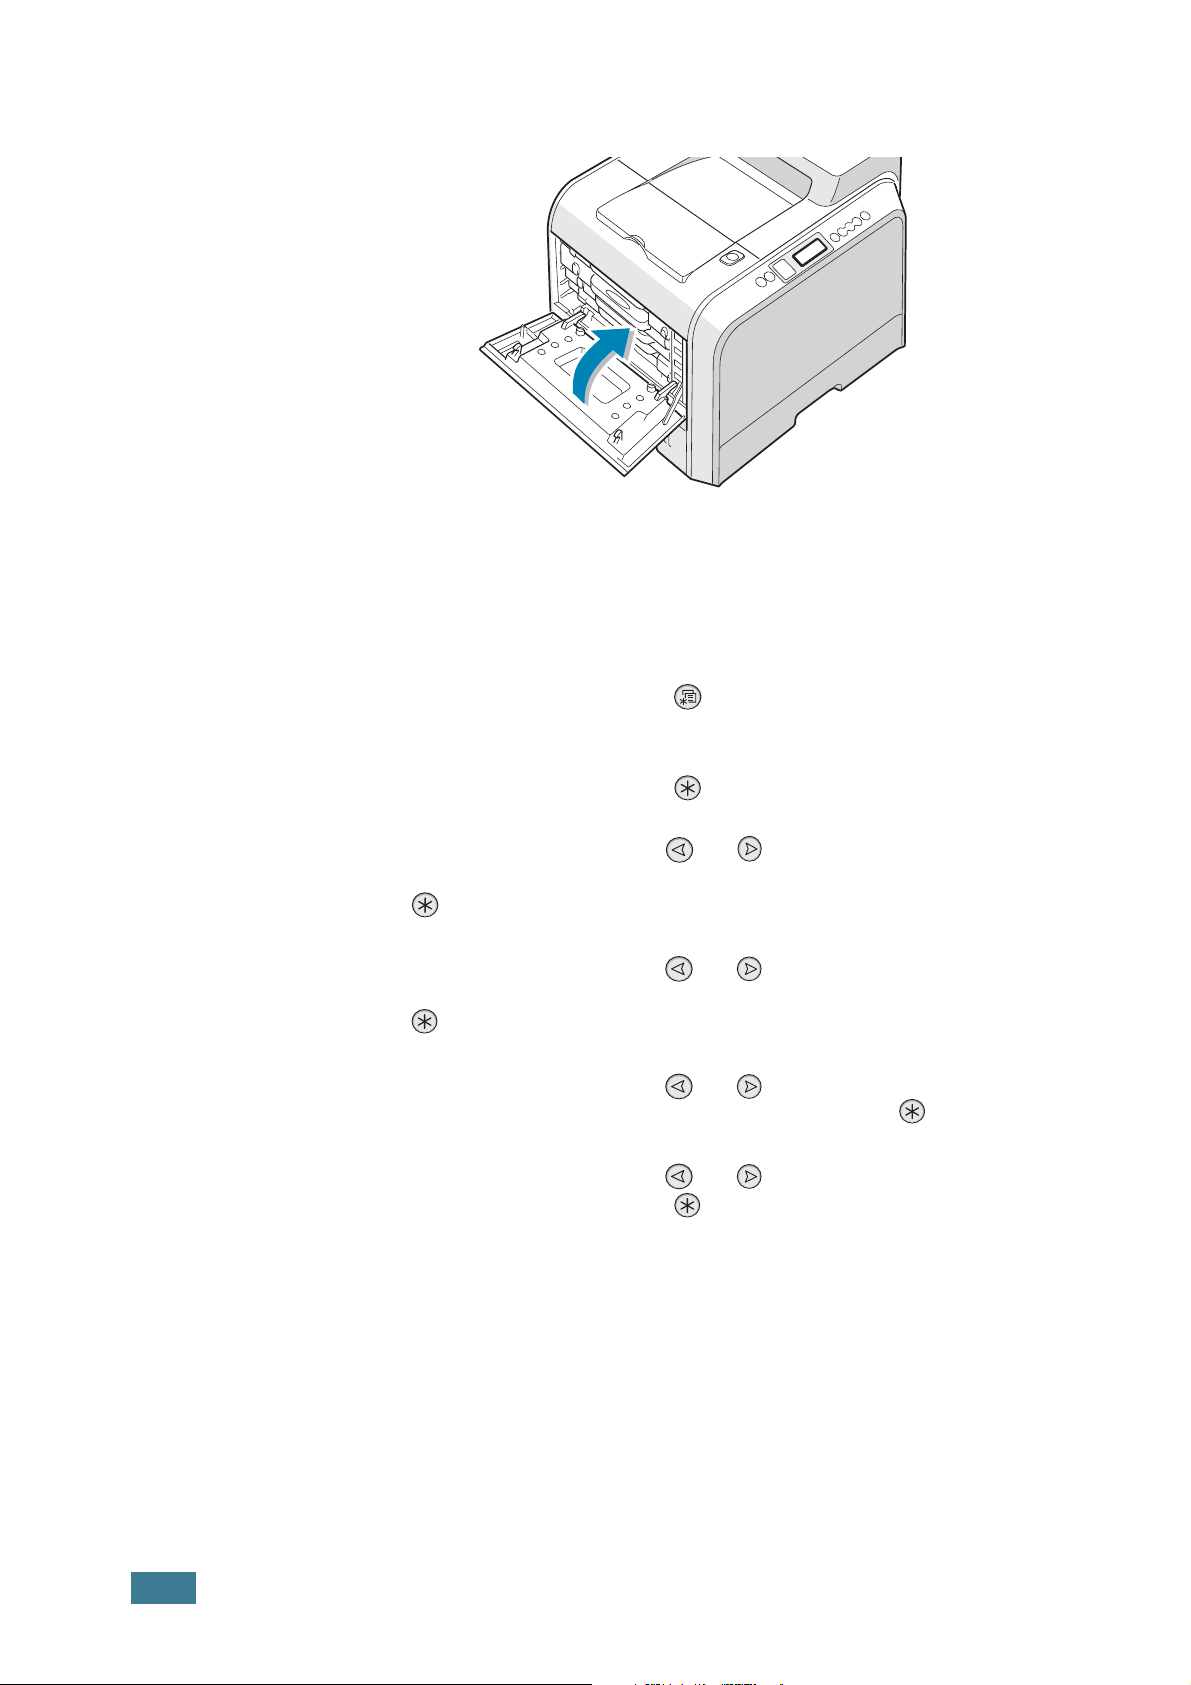
Container
Replace the waste toner container when the control panel
displays ‘Waste Toner Tank Full/Not Install’.
1
Unlatch the front cover, by quickly pressing and releasing it
using the depressions at the top.
2
Push the lock lever up and pull the waste toner container
out.
N
OTE
: Make sure that you lay the waste toner container on a flat
surface so that the toner does not spill.
6.10
M
AINTAINING YOUR PRINTER

3
Remove the container’s caps which are attached as shown
below and use them to close the waste toner container.
4
Take a new waste toner container out of the package.
5
Open the caps on the new container and attach them for
future use as shown below.
6
Locate the supplied LSU cleaner on the bottom.
6
M
AINTAINING YOUR PRINTER
6.11
7
Holding the end of the cleaner, slide it in and out several
times.
8
Insert the lower of the new container into place and then
push it to make sure that it is seated in place.
6.12
9
Make sure that the lock lever latches the container.
M
AINTAINING YOUR PRINTER

10
Close the front cover. Make sure that the cover is securely
latched.
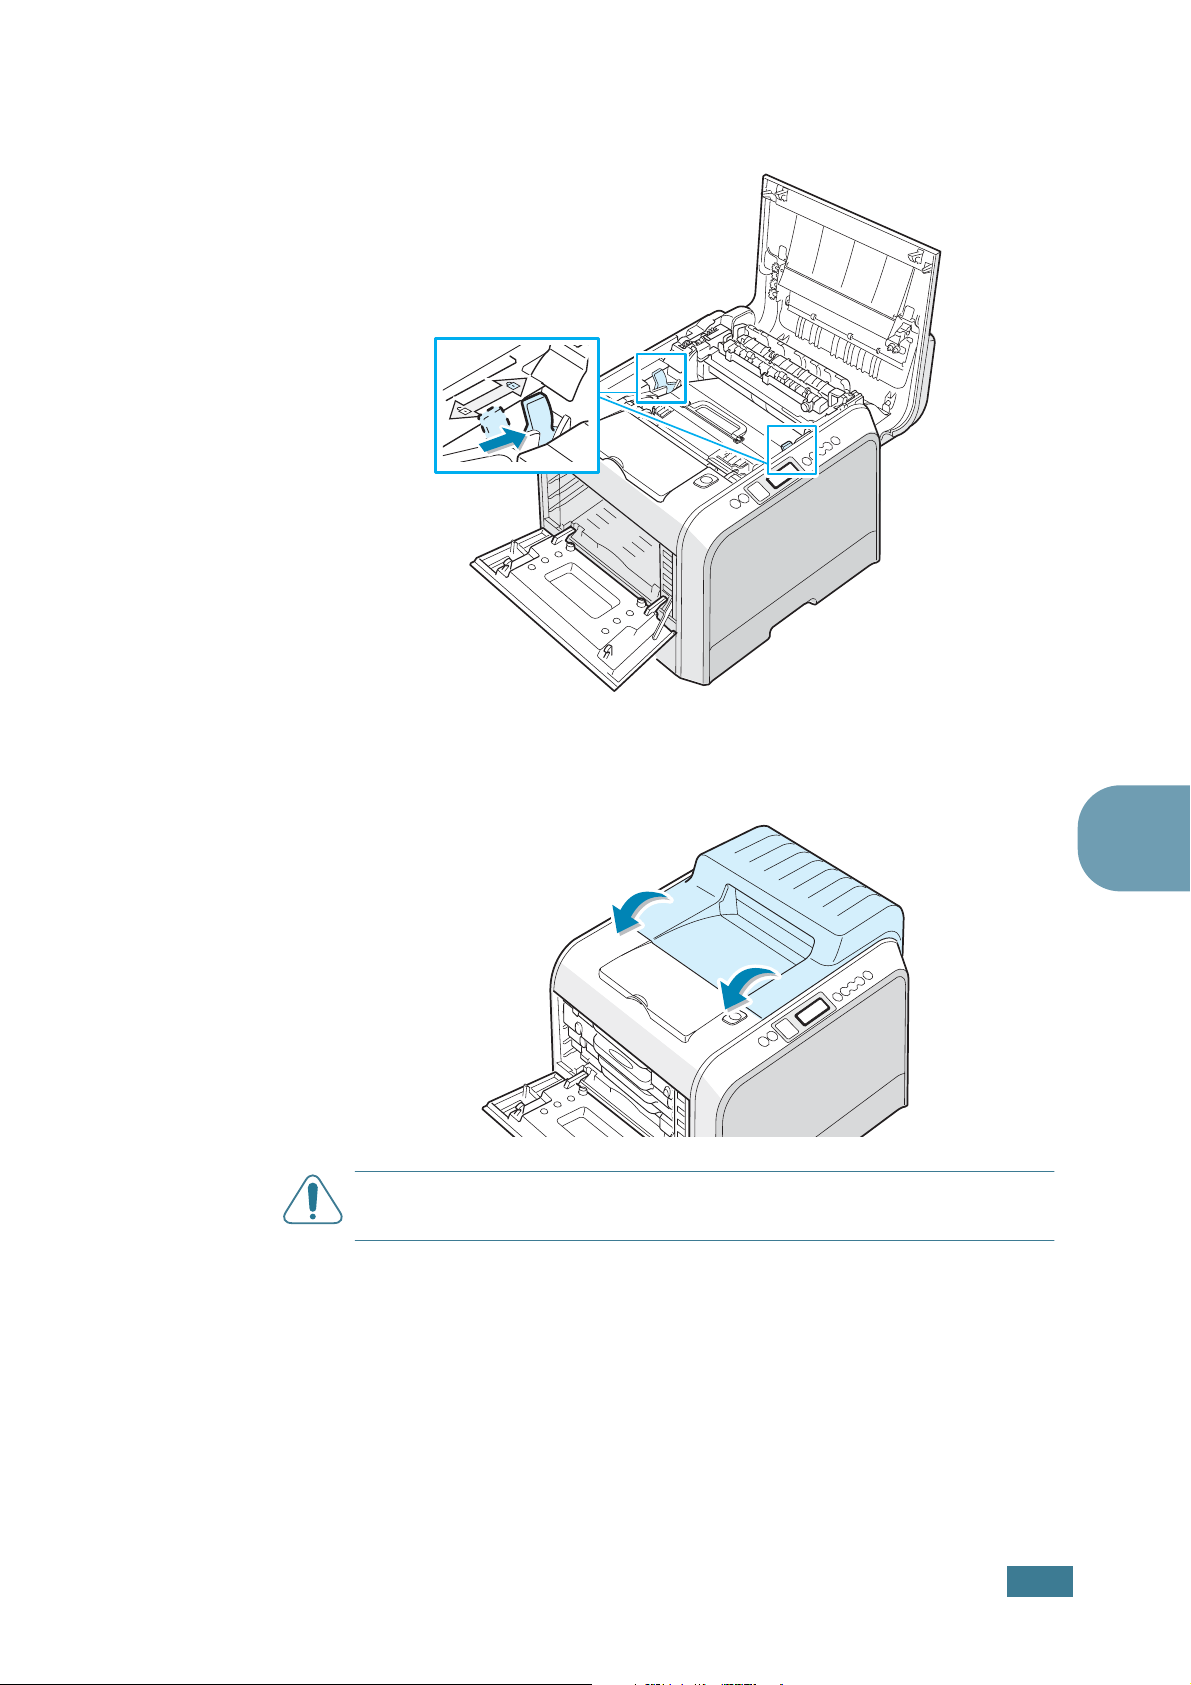
Replacing the Drum Cartridge
The life of the drum cartridge is approximately 50,000 images.
Replace the drum cartridge when the printer control panel
displays ‘Replace Drum Cartridge’.
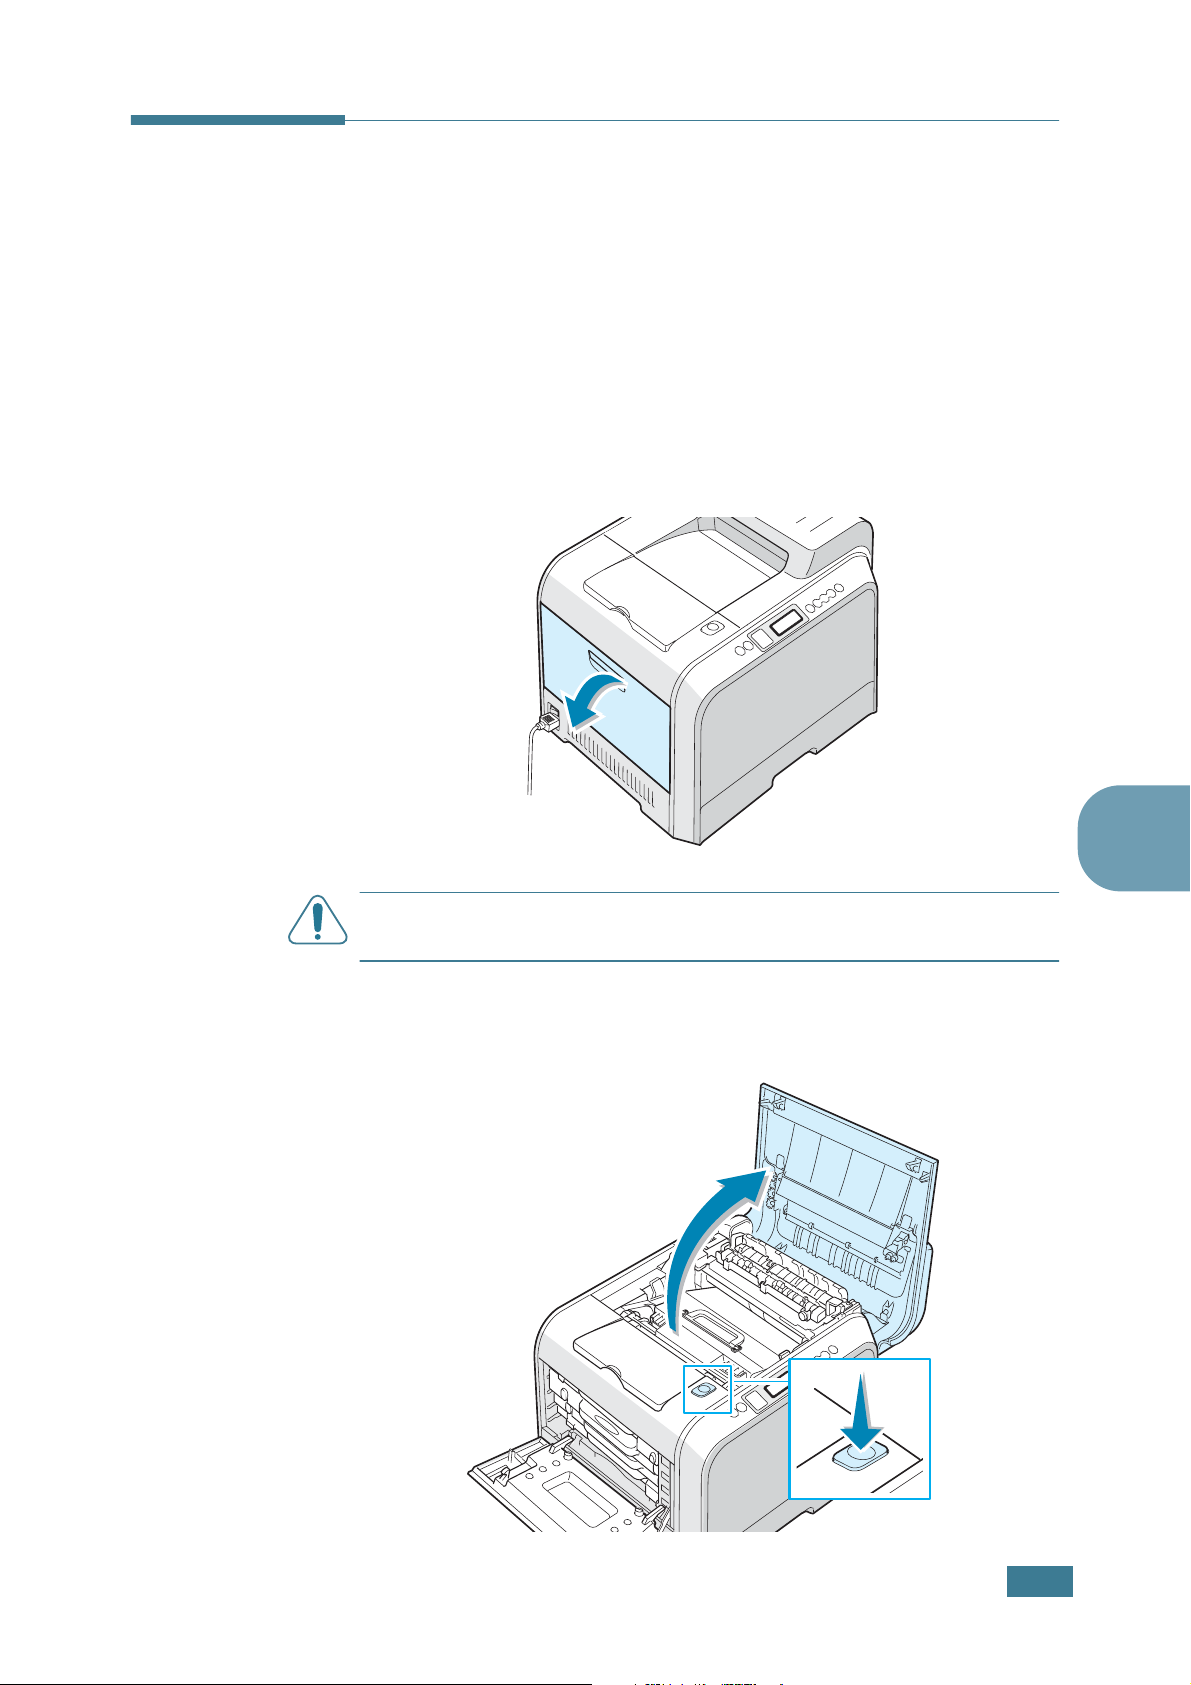
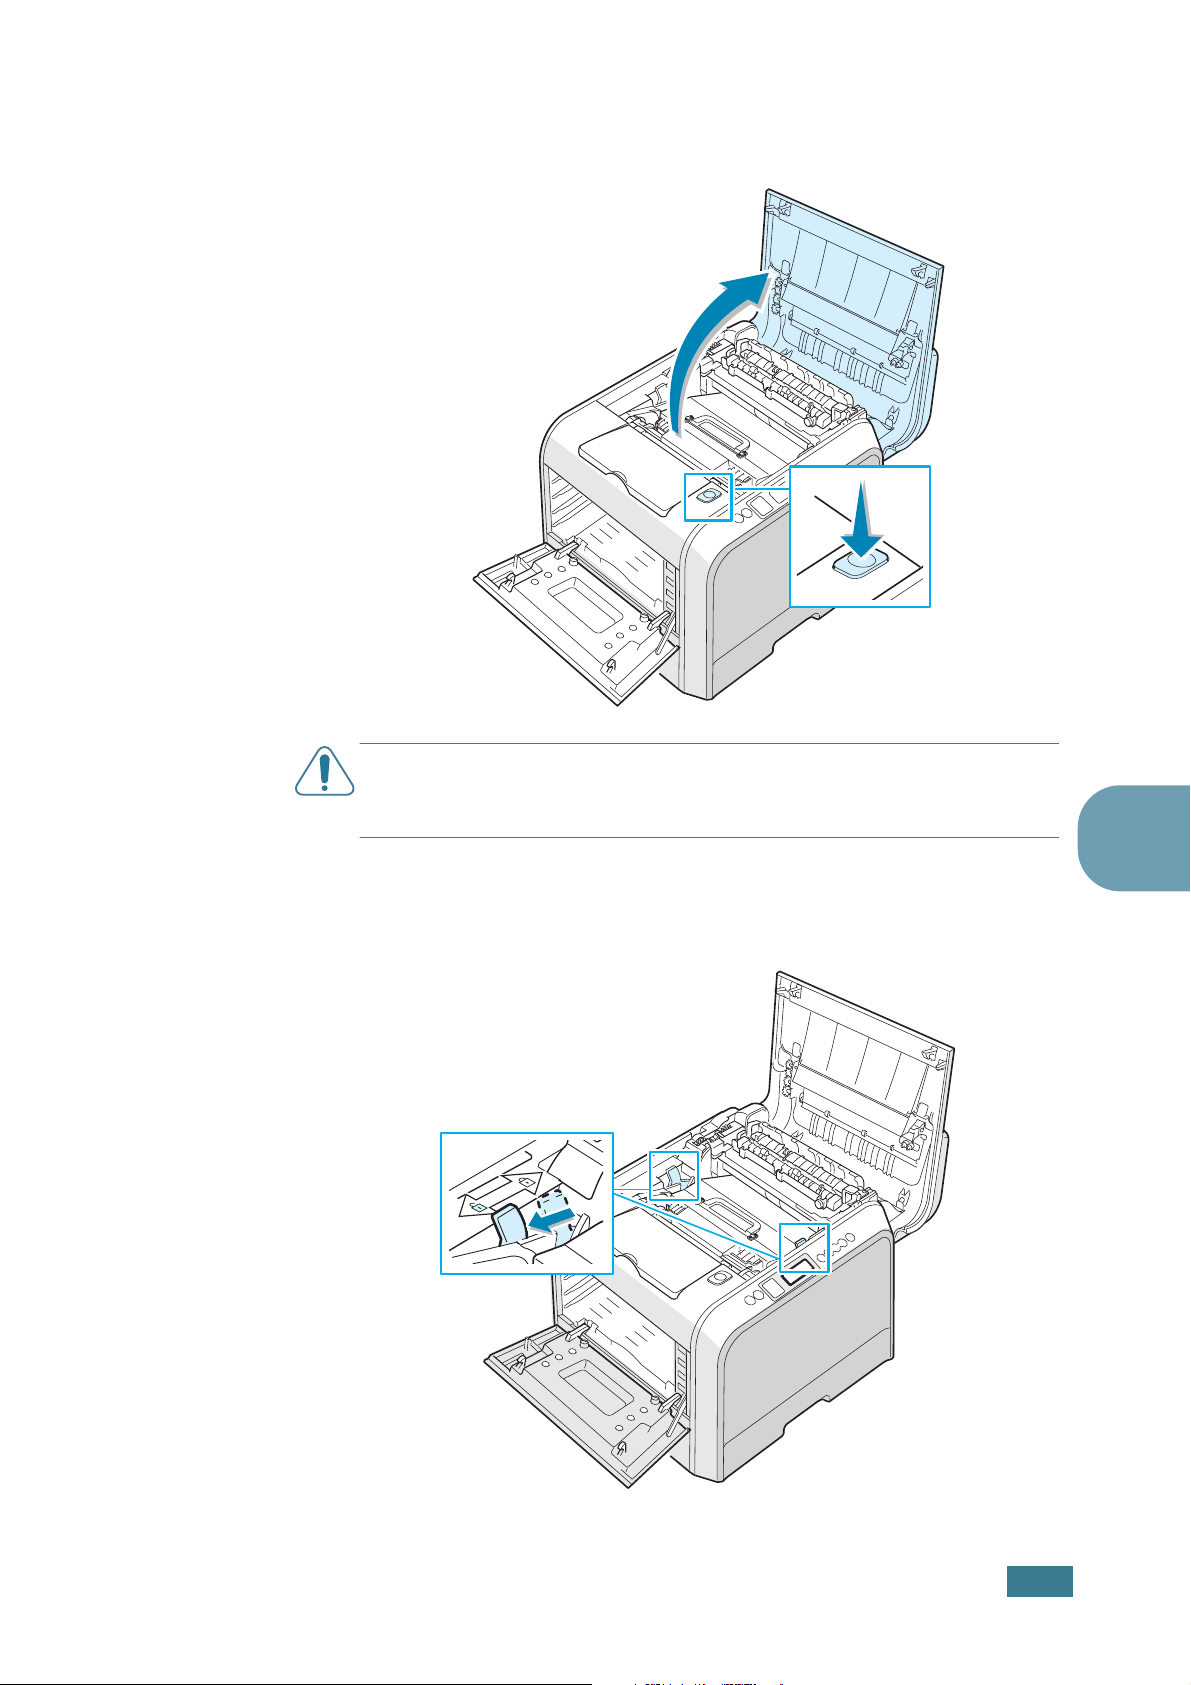
1
Turn the printer off.
2
Using the handle, open the left cover completely.
6
C
AUTION
release button does not press.
: If the left cover is not completely open, the top cover
M
AINTAINING YOUR PRINTER
6.13
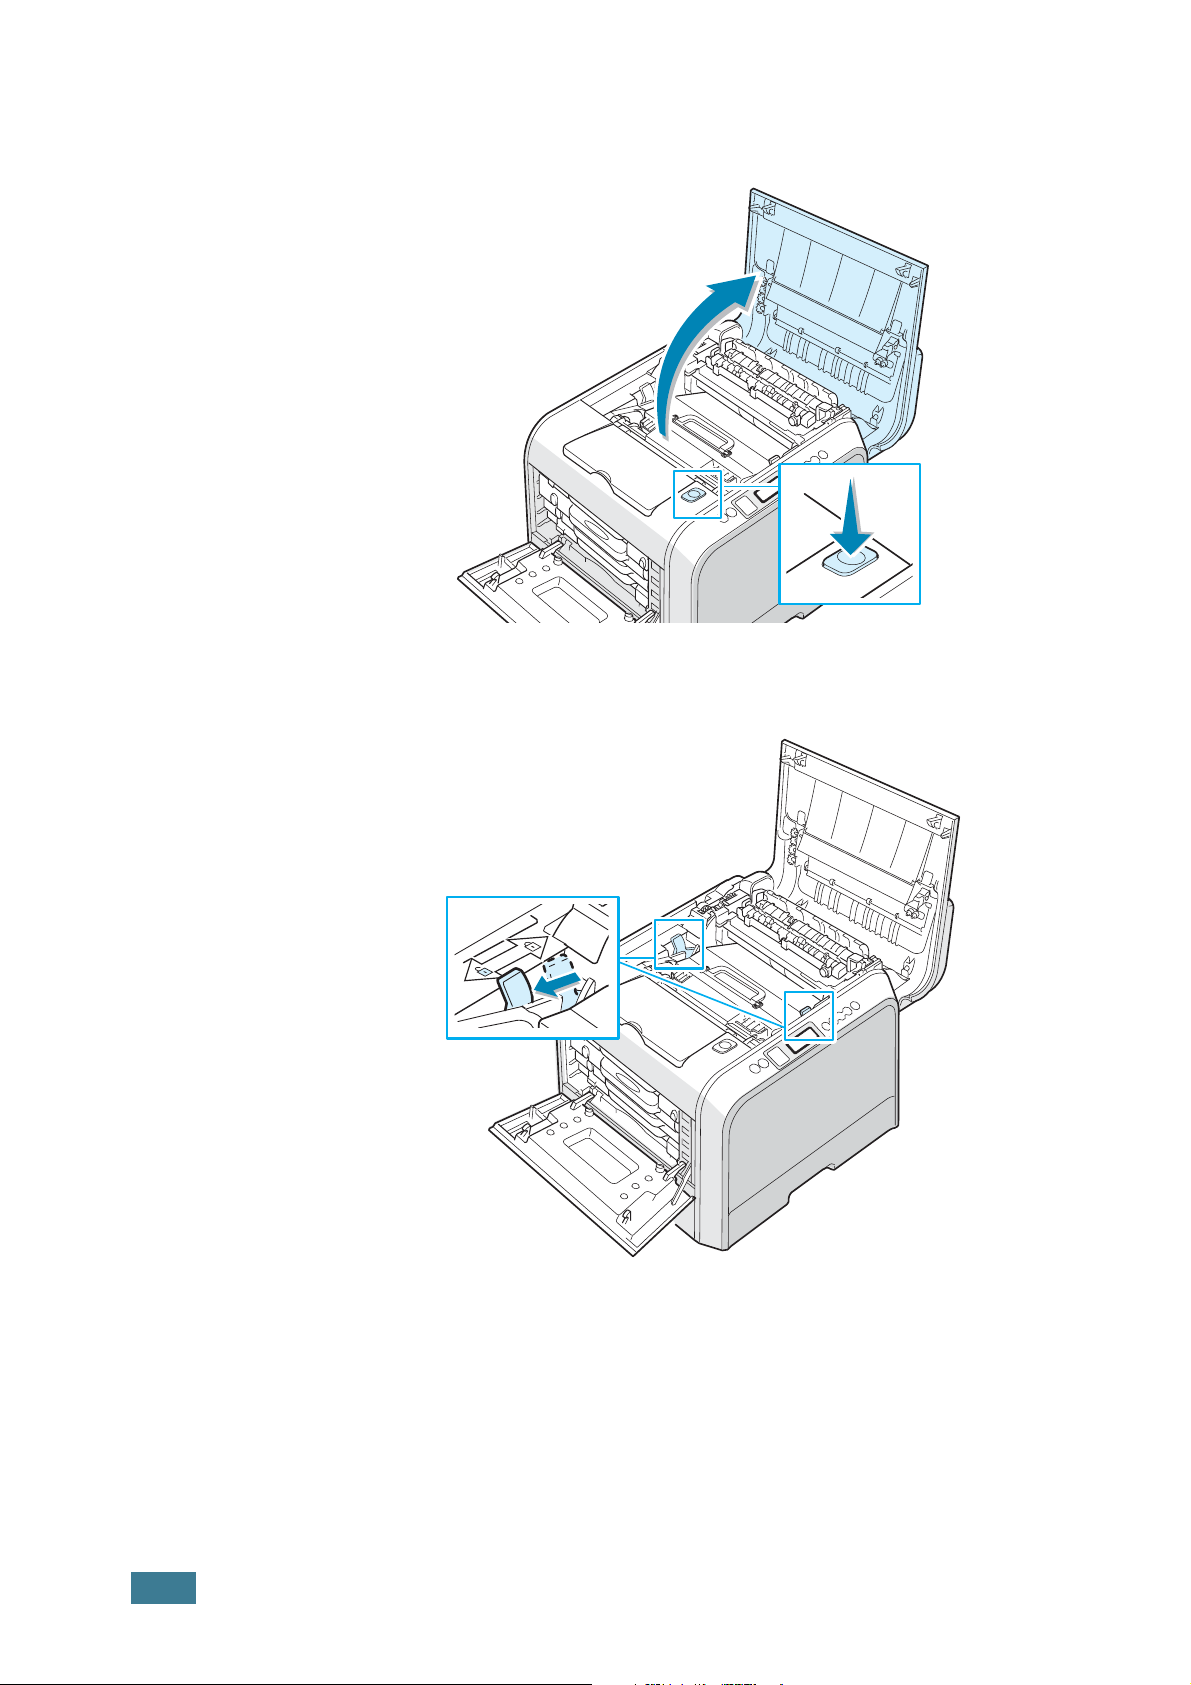
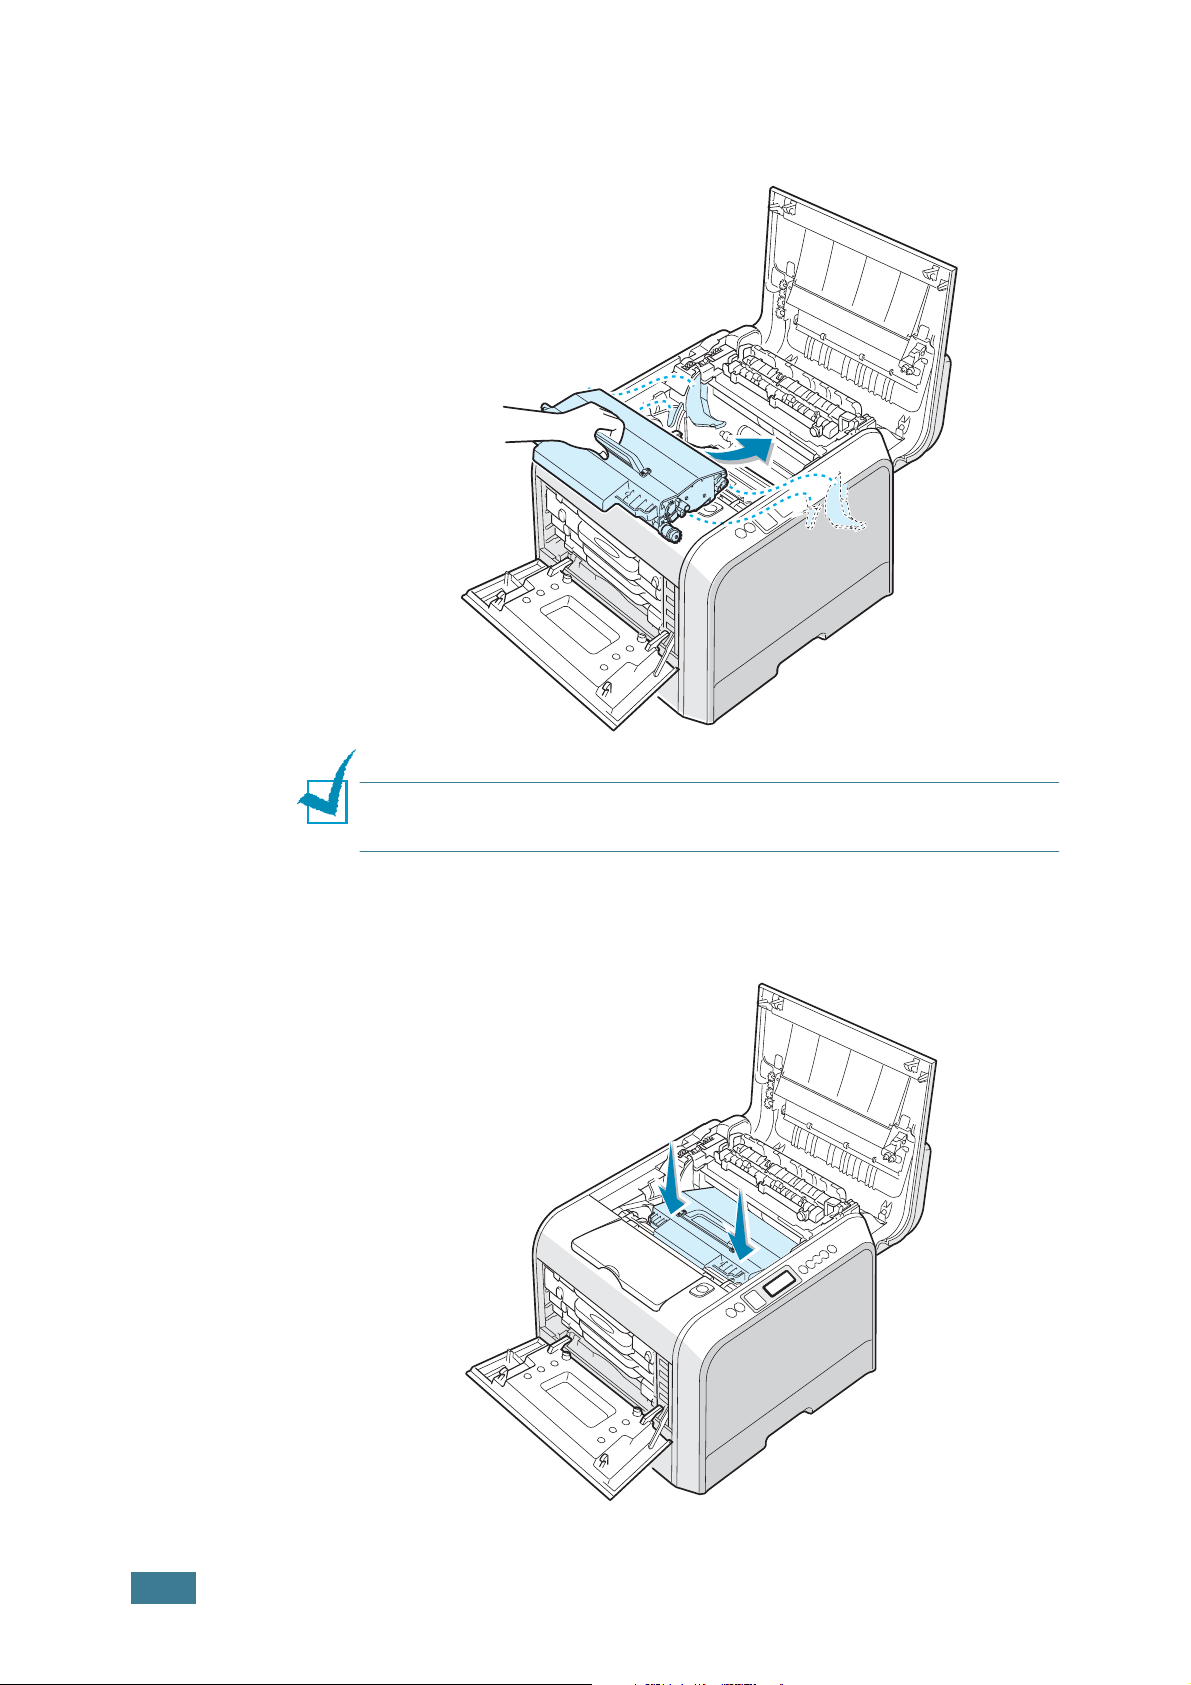
3
Press the top cover release button to unlatch the top cover
and open it all the way.
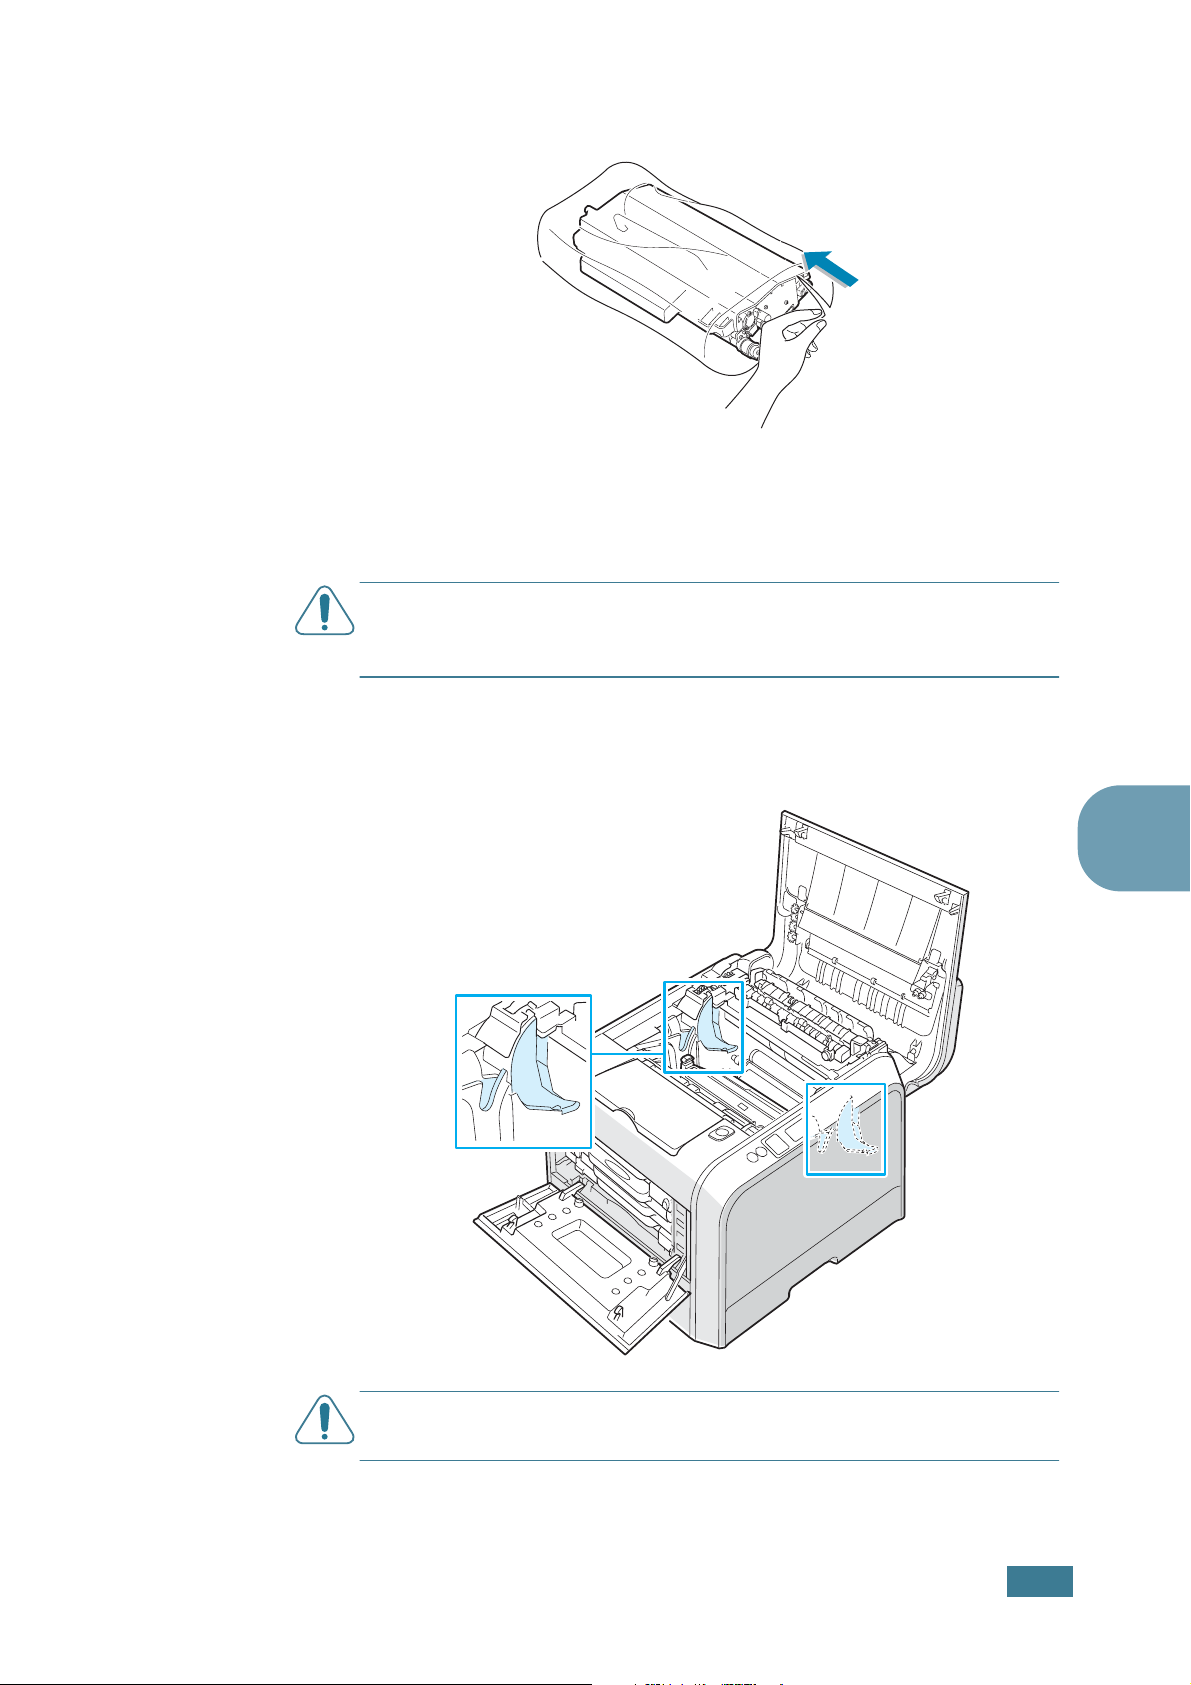
4
Pull the lock levers on each side towards you, as shown
below, to release the image transfer unit.
6.14
M
AINTAINING YOUR PRINTER
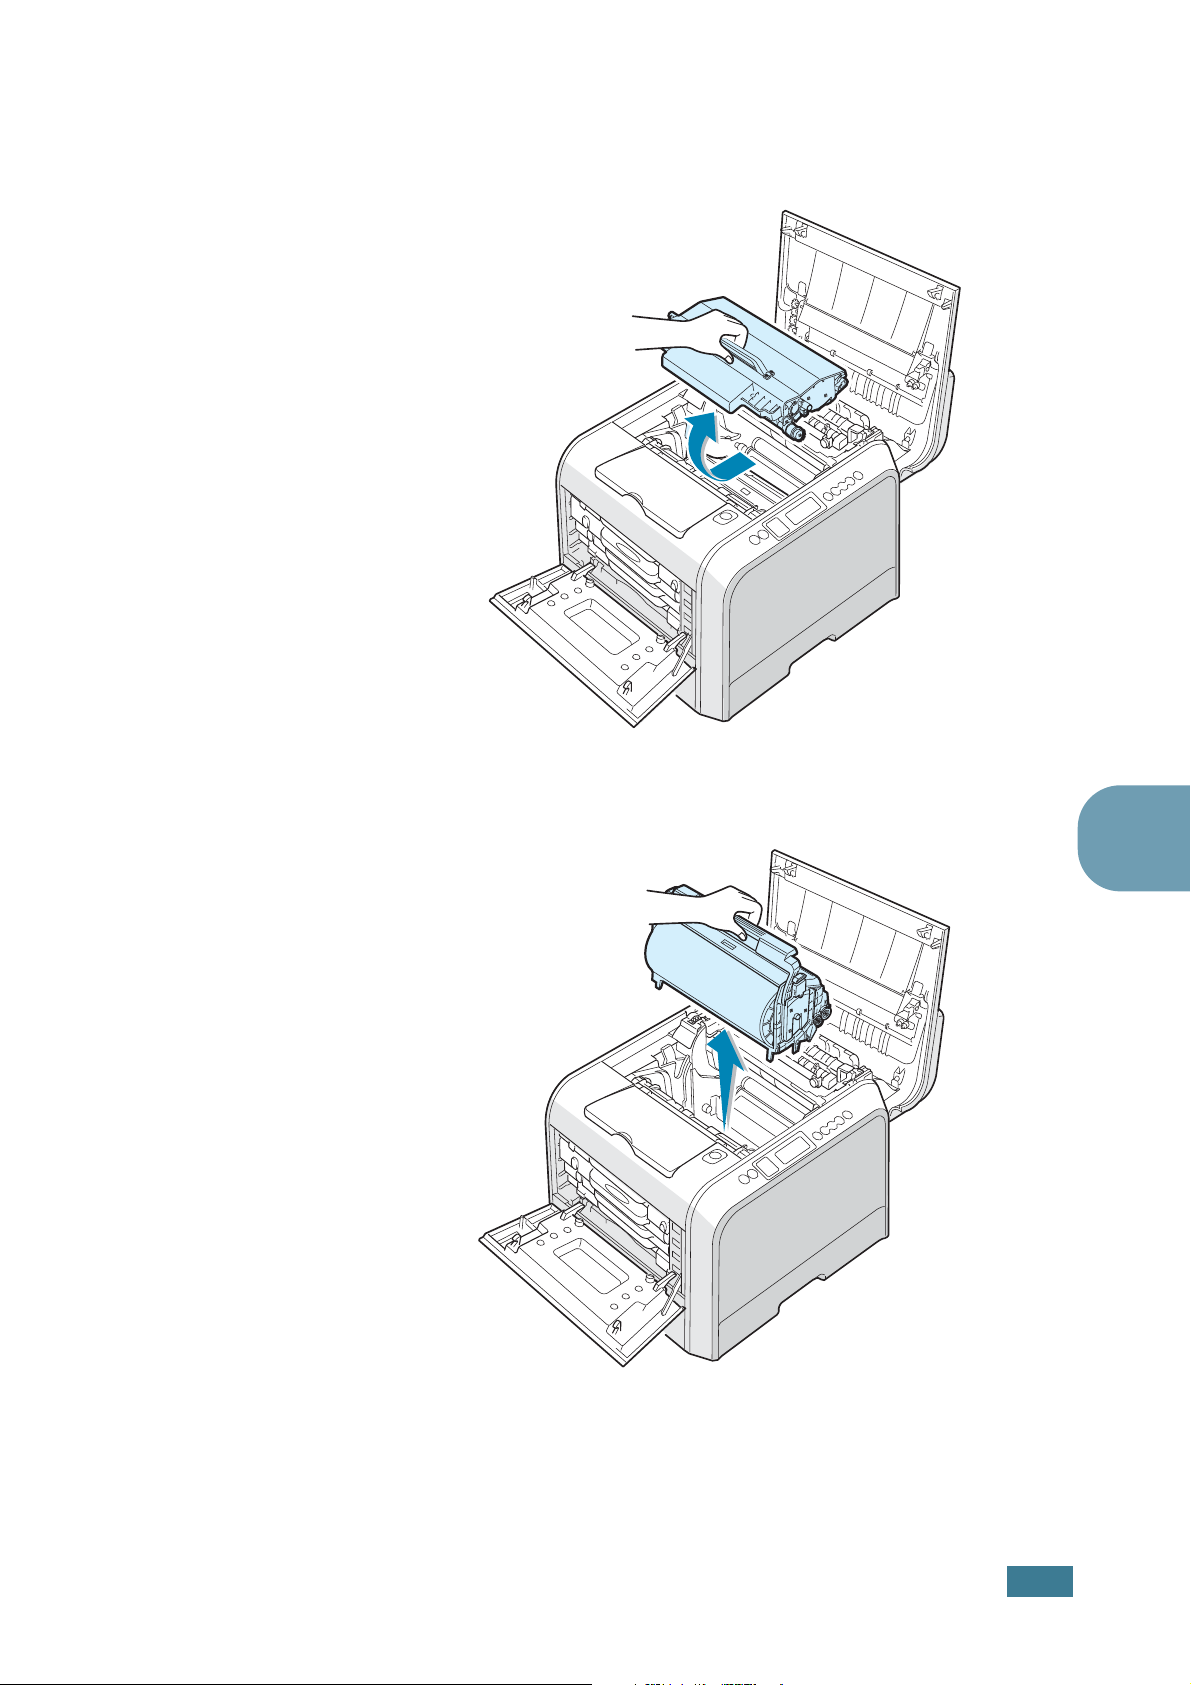
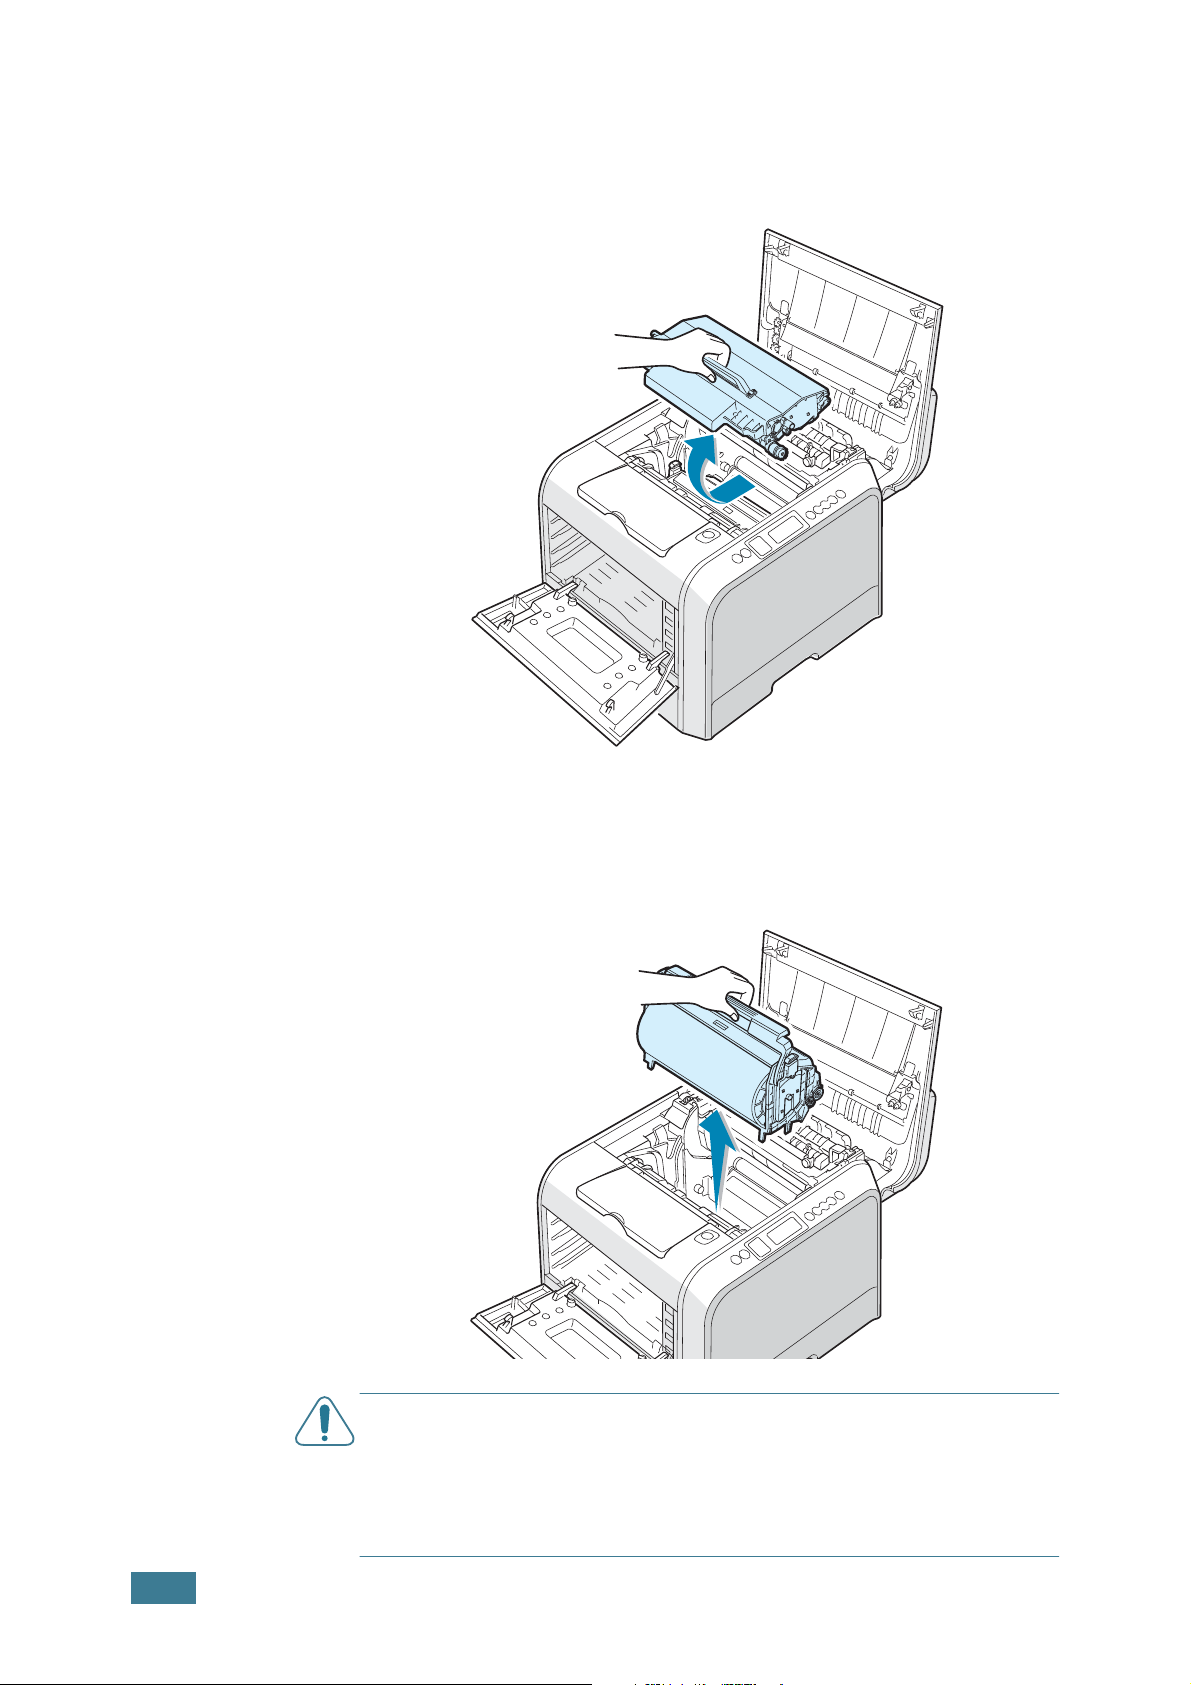
5
Using the handle, lift the image transfer unit out of the
printer by lightly pulling it towards the left of the machine.
Set it on a clean flat surface.
6
Lift the handle of the used drum cartridge and use it to pull
the drum cartridge out of the printer.
6
M
AINTAINING YOUR PRINTER
6.15
7
Take a new drum cartridge out of the package using the
handle.
8
Remove the paper covering the drum cartridge by removing
the tape under the handle of the drum cartridge.
C
AUTIONS
• Don’t use sharp objects, such as a knife or scissors, to open the
drum cartridge package. You could damage the surface of the
drum.
:
• To prevent damage, do not expose the drum cartridge to light for
more than a few minutes. Cover it with black paper, if necessary.
• Do not touch the surface of the green roller on the drum
cartridge or print quality problems can occur.
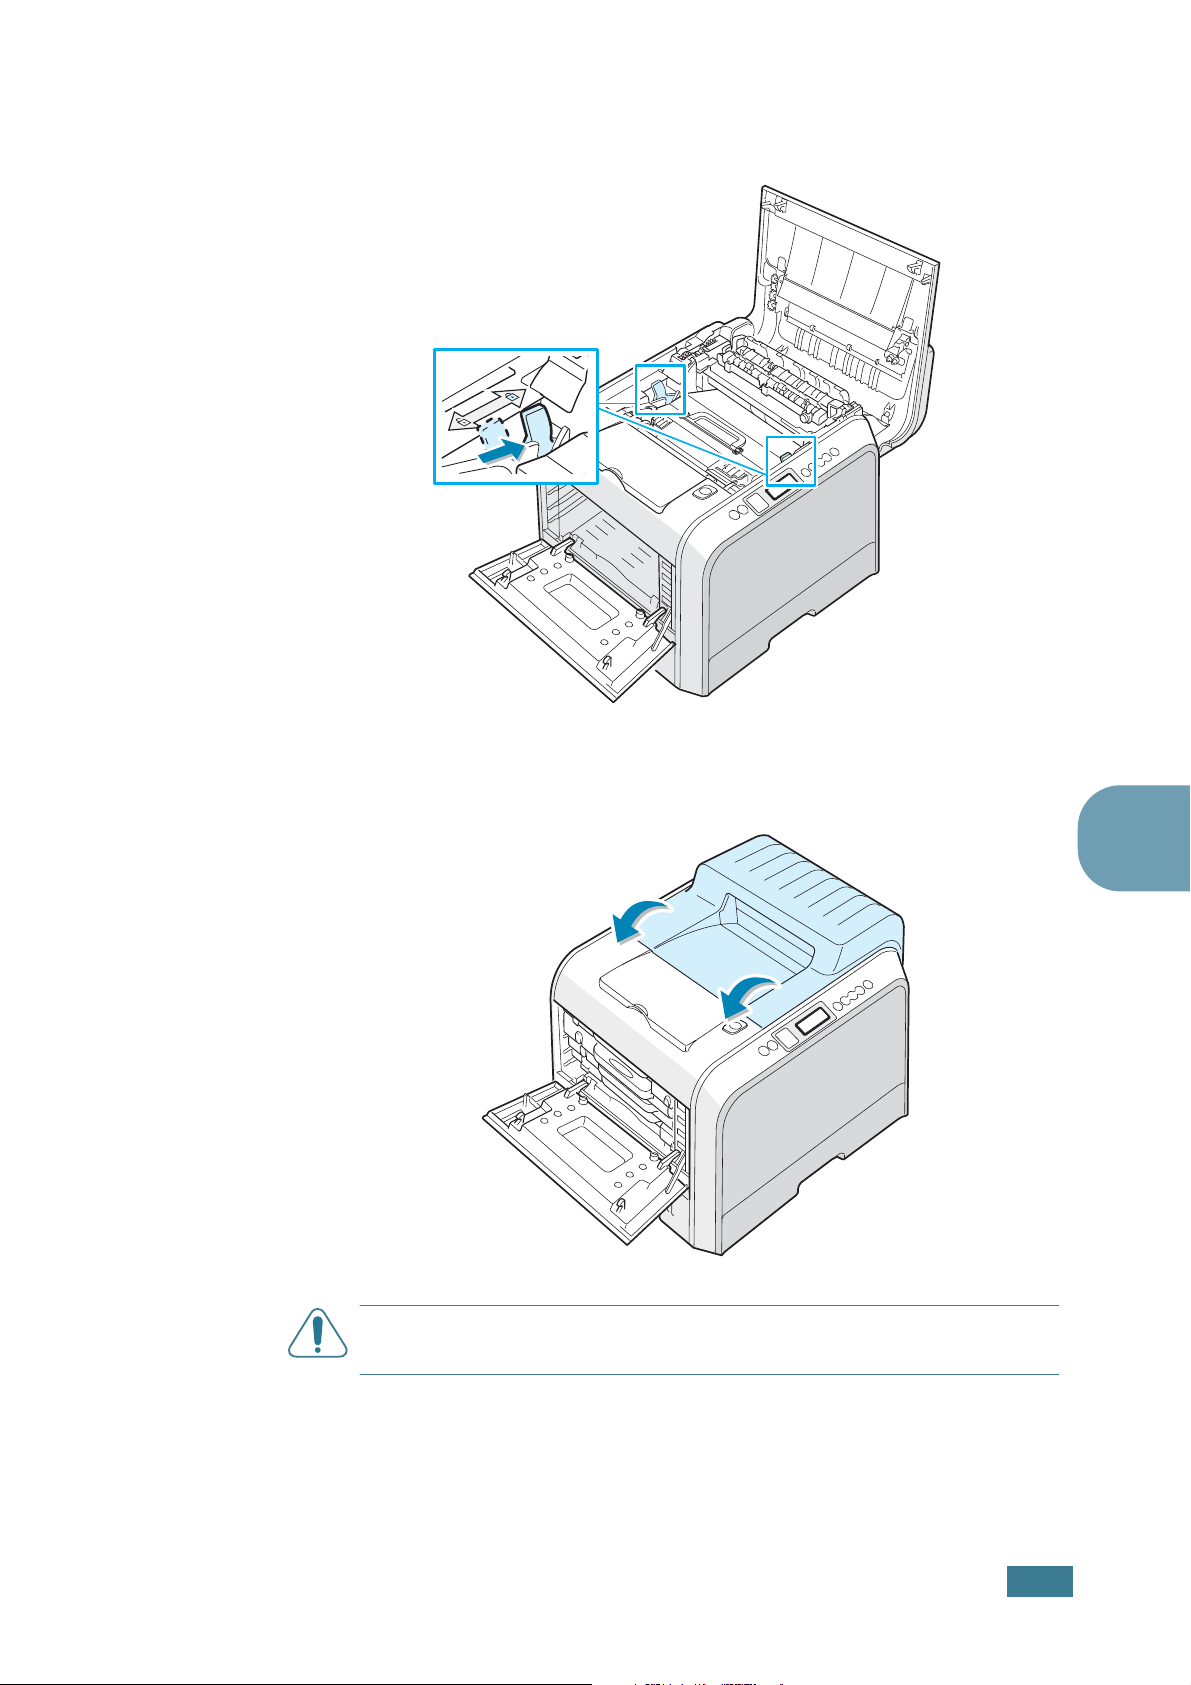
9
Locate the drum cartridge slots inside the printer, one on
each side.
6.16
M
AINTAINING YOUR PRINTER
10
Hold the handle of the new drum cartridge with the green
roller facing you. Then align the drum cartridge with the
slots in your printer.
C
AUTION
and damage the surface of the green roller.
11
Slide the new drum cartridge down into the printer until it
latches into place and fold the handle down.
: Insert the drum cartridge carefully so as not to scratch
6
M
AINTAINING YOUR PRINTER
6.17
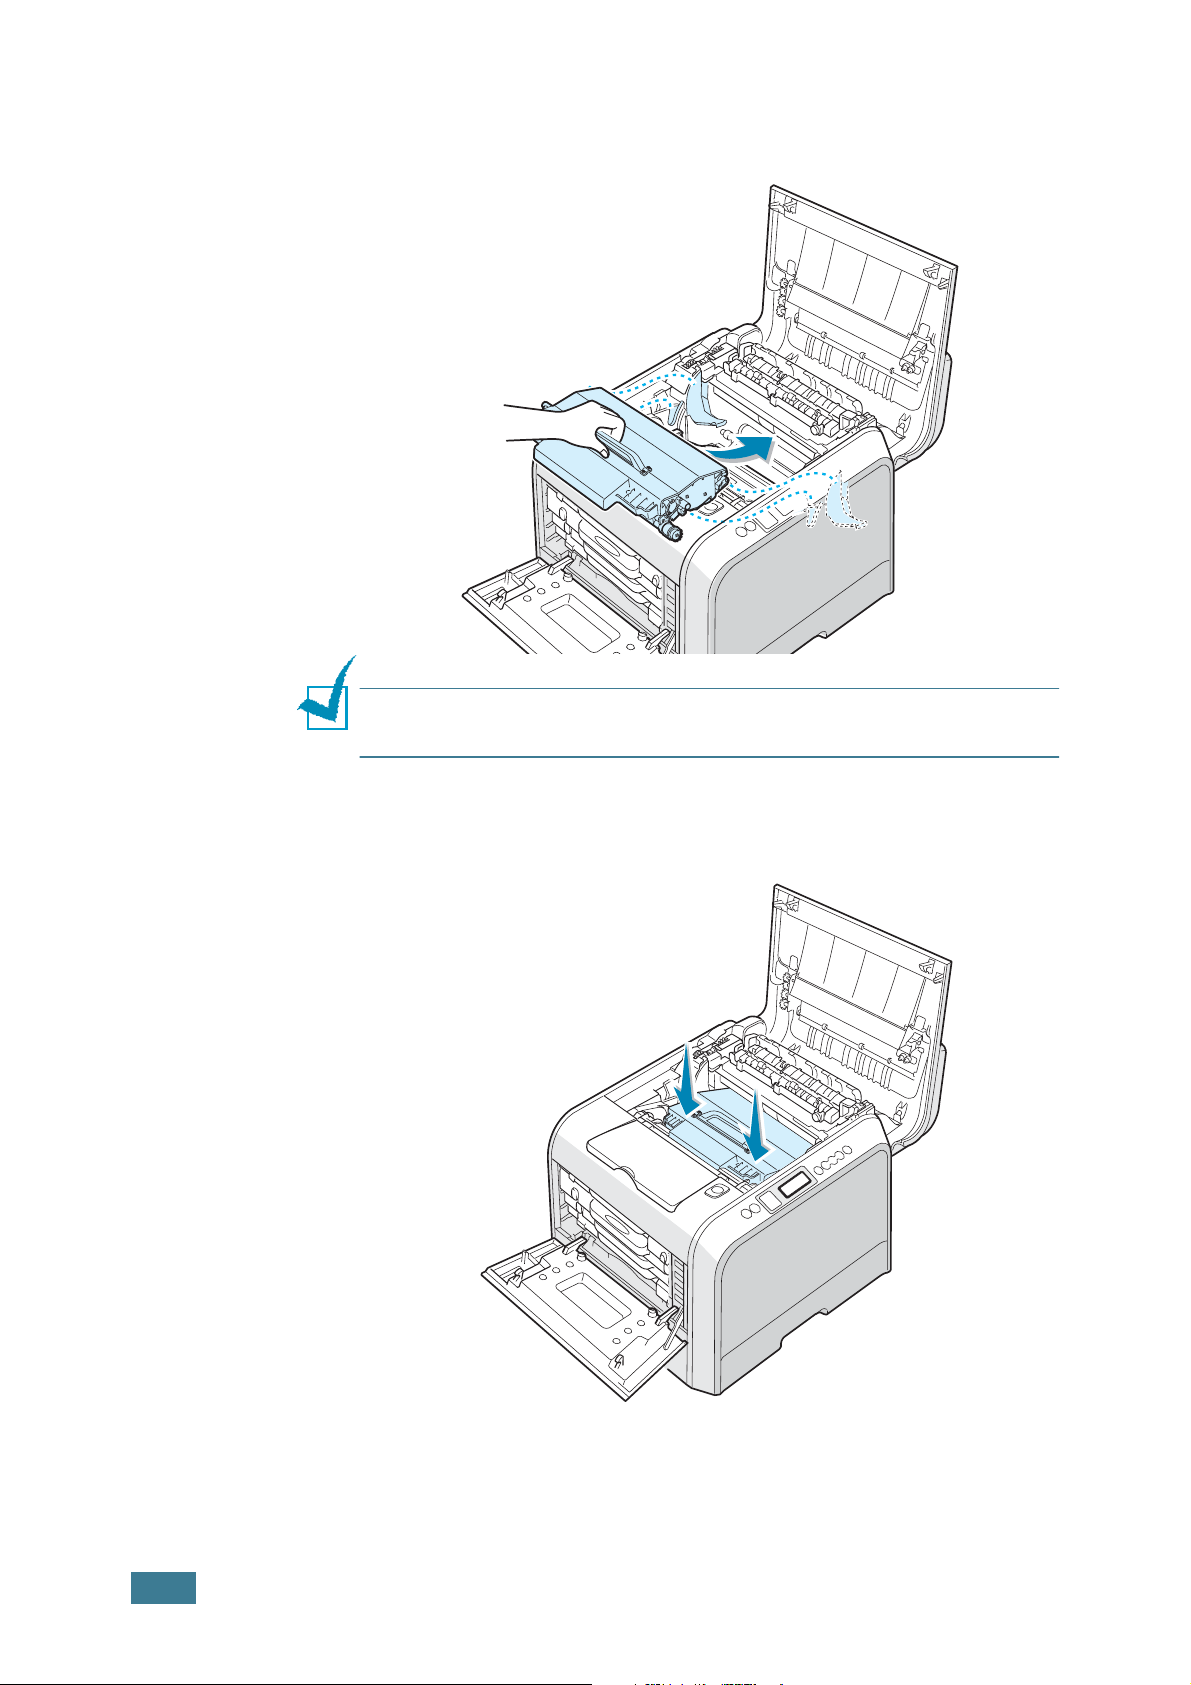
12
To replace the image transfer unit, hold its handle and then
align it with the slots inside your printer, on each side.
N
OTE
: Do not turn the transfer unit over. If you do this, the toner
may spill.
13
Slide the image transfer unit down into the printer and
press it firmly into place.
6.18
M
AINTAINING YOUR PRINTER
14
Firmly push the lock levers on each side away from you, as
shown below, to lock the image transfer unit into place.
15
After making sure that the left cover is open, close the top
cover. Make sure that it is securely latched.
C
AUTION
closed. This may cause damage to the machine.
: Do not try to close the top cover with the left cover
6
M
AINTAINING YOUR PRINTER
6.19
16
Close the left cover firmly.
17
Open the front cover and clean the LSU. For details, see
page 6.27.
18
Turn the printer on.
19
Press the Menu button ( ) on the control panel until you
see ’Setup’ on the bottom line of the display.
20
Press the Enter button ( ) to access the menu.
21
Press the scroll button ( or ) until ‘Maintenance’
displays on the bottom line and press the Enter button
().
22
Press the scroll button ( or ) to until ‘Check Others’
displays on the bottom line and press the Enter button
().
23
Press the Enter button ( ) when the first menu item,
‘Drum’ displays on the bottom line.
24
Press the scroll button ( or ) to display ‘Reset’ and
press the Enter button ( ).
6.20
25
‘Reset Now’ appears on the bottom line of the display. The
image counts of the drum cartridge are set to zero.
M
AINTAINING YOUR PRINTER
Replacing the Image Transfer Unit
The life of the image transfer unit is approximately 50,000
images. Replace the image transfer unit when the control panel
displays ‘Replace Image Transfer’.
To replace the image transfer unit:
1
Turn the printer off.
2
Using the handle, open the left cover completely.
C
AUTION
release button does not press.
3
Press the top cover release button to unlatch the top cover
and open it all the way.
: If the left cover is not completely open, the top cover
6
M
AINTAINING YOUR PRINTER
6.21

4
Pull the lock levers on each side towards you, as shown
below, to release the image transfer unit.
5
Using the handle, lift the used image transfer unit out of the
printer by lightly pulling it towards the left of the machine.
6.22
M
AINTAINING YOUR PRINTER
6
Take a new image transfer unit out of the package.
7
Remove the paper covering the image transfer unit by
removing the tape under the handle of the image transfer
unit.
C
AUTION
open the image transfer unit package. You could damage the
surface of the image transfer.
: Don’t use sharp objects, such as a knife or scissors, to
8
Locate the image transfer unit slots inside the printer, one
on each side.
6
C
AUTION
to light for more than a few minutes.
: To prevent damage, do not expose the drum cartridge
M
AINTAINING YOUR PRINTER
6.23
9
Hold the handle on the new image transfer unit and then
align it with the slots inside your printer, on each side.
N
OTE
: Do not turn the transfer unit over. If you do this, the toner
may spill.
10
Slide the new image transfer unit down into the printer and
press it firmly into place.
6.24
M
AINTAINING YOUR PRINTER
11
Firmly push the lock levers on each side away from you, as
shown below, to lock the image transfer unit into place.
12
After making sure that the left cover is open, close the top
cover. Make sure that it is securely latched.
C
AUTION
closed. This may cause damage to the machine.
: Do not try to close the top cover with the left cover
6
M
AINTAINING YOUR PRINTER
6.25
13
Close the left cover firmly.
14
Open the front cover and clean the LSU. For details, see
page 6.27.
15
Turn the printer on.
16
Press the Menu button ( ) on the control panel until you
see ’Setup’ on the bottom line of the display.
17
Press the Enter button ( ) to access the menu.
18
Press the scroll button ( or ) until ‘Maintenance’
displays on the bottom line and press the Enter button
().
19
Press the scroll button ( or ) to until ‘Check Others’
displays on the bottom line and press the Enter button
().
20
Press the scroll button ( or ) to display ‘Transfer’ on
the bottom line and press the Enter button ( ).
21
Press the scroll button ( or ) to display ‘Reset’ and
press the Enter button ( ).
22
‘Reset Now’ appears on the bottom line of the display. The
image counts of the image transfer unit are set to zero.
6.26
M
AINTAINING YOUR PRINTER
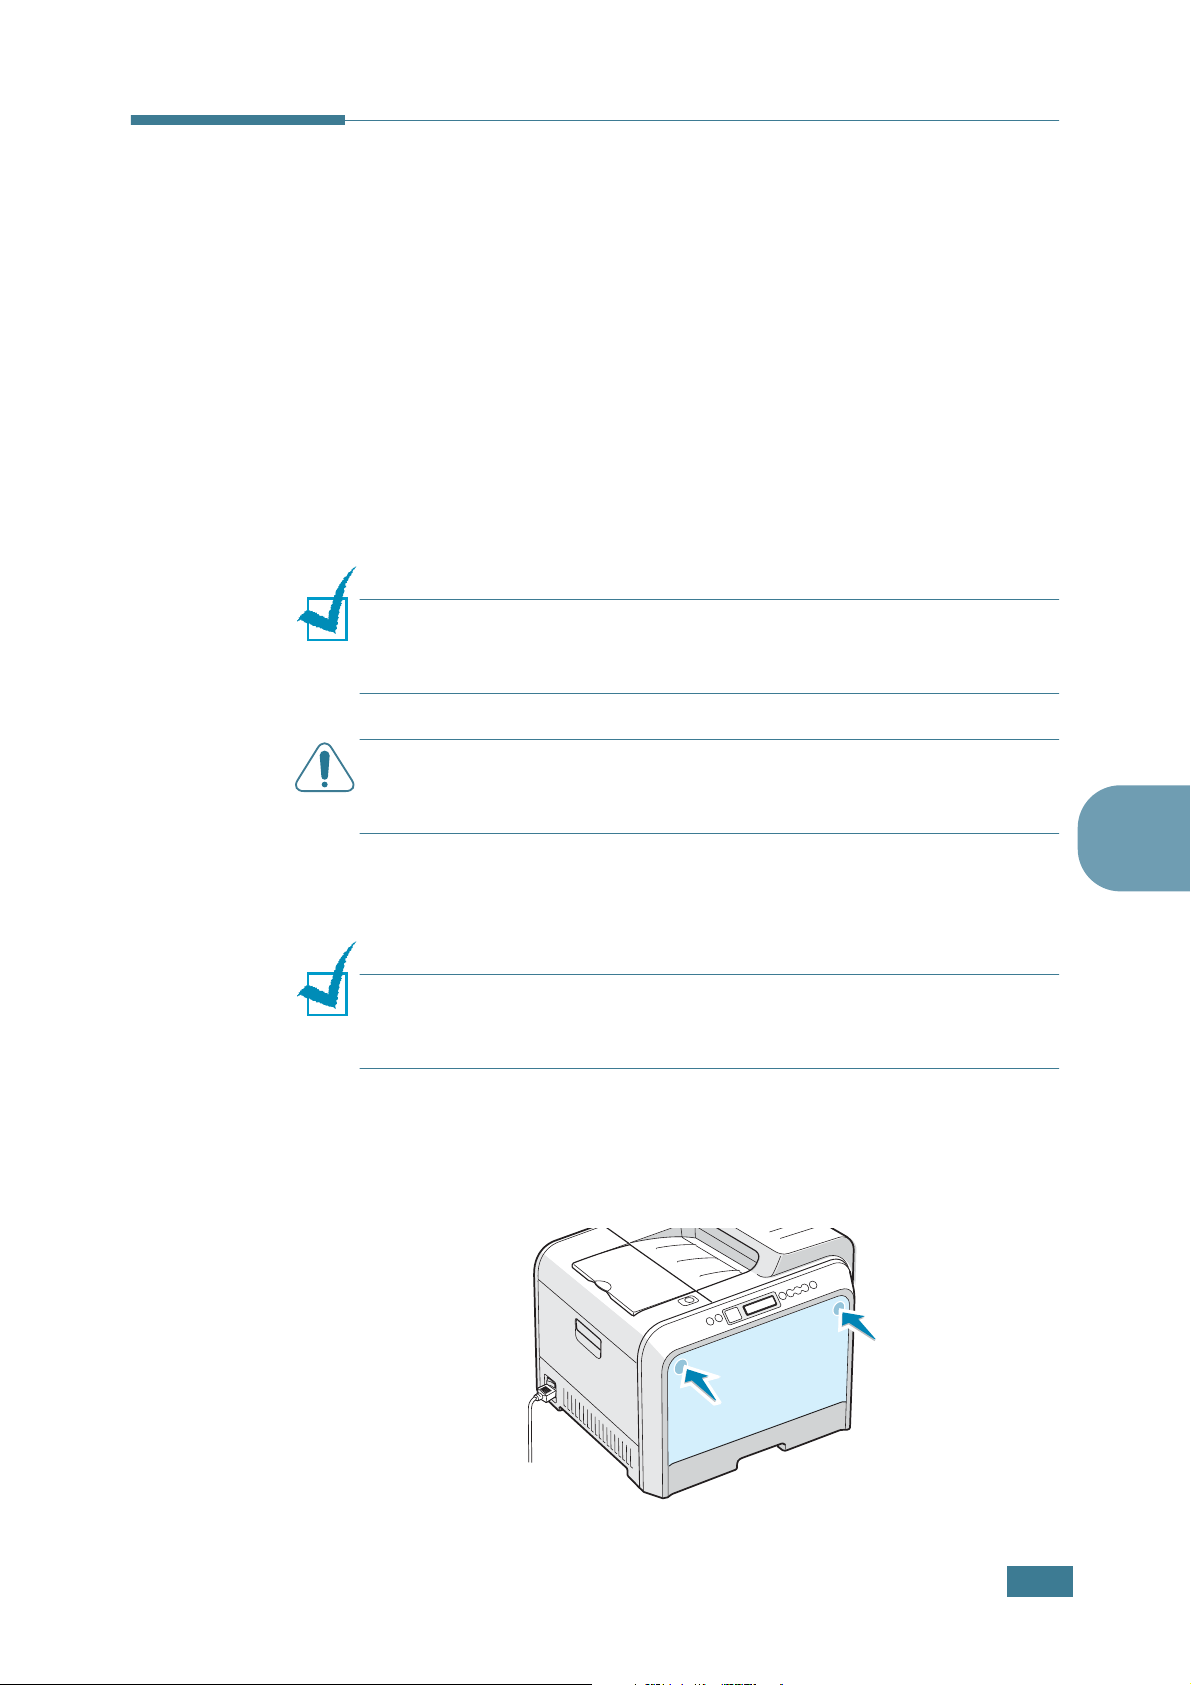
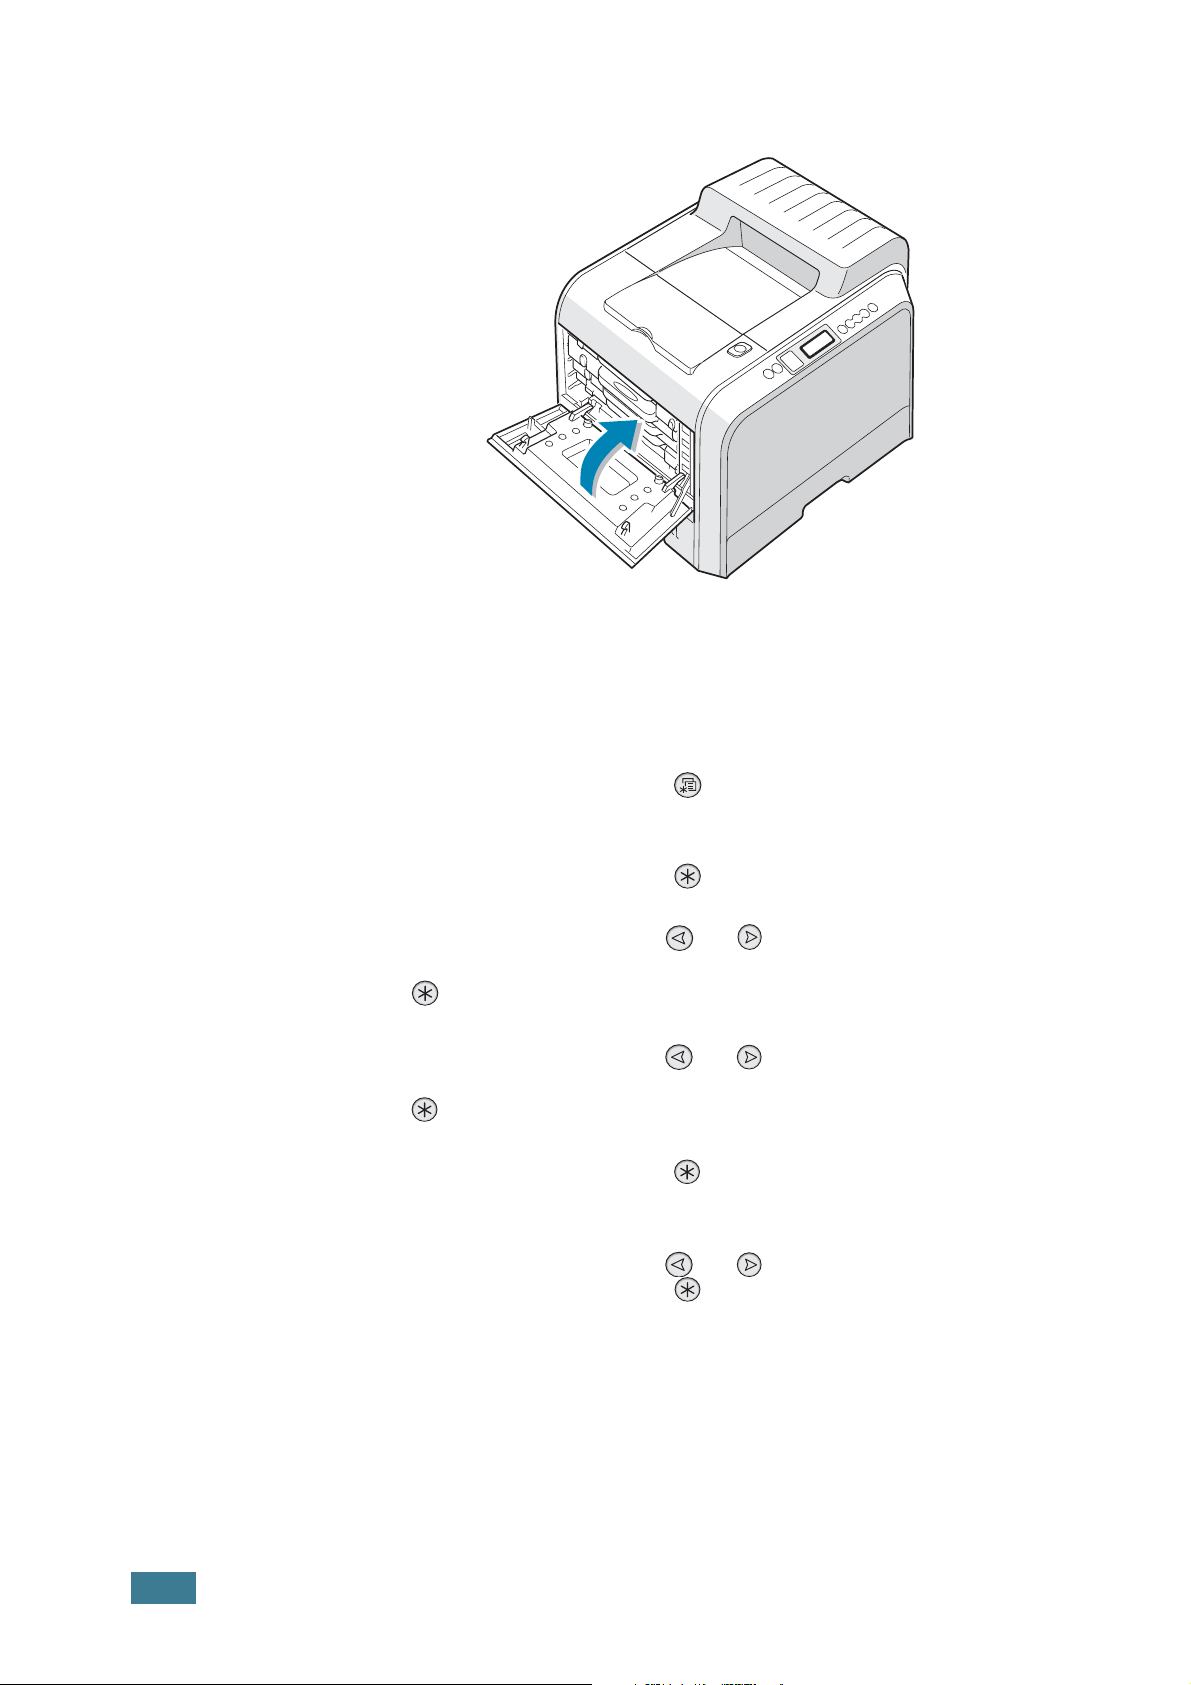
Cleaning the Printer
During the printing process, particles of paper, toner and dust
can accumulate inside the printer. Over time, this build-up can
cause print-quality problems such as toner specks or smearing.
Your printer has a cleaning mode that can correct and prevent
these types of problems.
Cleaning the Outside of the Printer
Clean the cabinet of the printer with a soft, lint-free cloth. You
can dampen the cloth slightly with water, but be careful not to
be let any water drip onto the printer or inside of it.
N
OTE
: While cleaning the inside of the printer, be careful not to
touch the transfer roller (located underneath the toner cartridge).
Oil from your fingers can cause print quality problems.
C
AUTION
containing large amounts of alcohol, solvent or other strong
substances can discolor or crack the cabinet.
: Cleaning the cabinet of the printer with cleaners
Cleaning the LSU Inside the Printer
N
OTE
: Clean the LSU when you remove the particles of paper,
toner and dust inside the printer. You should also clean it after
installing and replacing the supplies.
1
Turn the printer off.
2
To unlatch the front cover, quickly press and release it using
the depressions at the top.
6
M
AINTAINING YOUR PRINTER
6.27
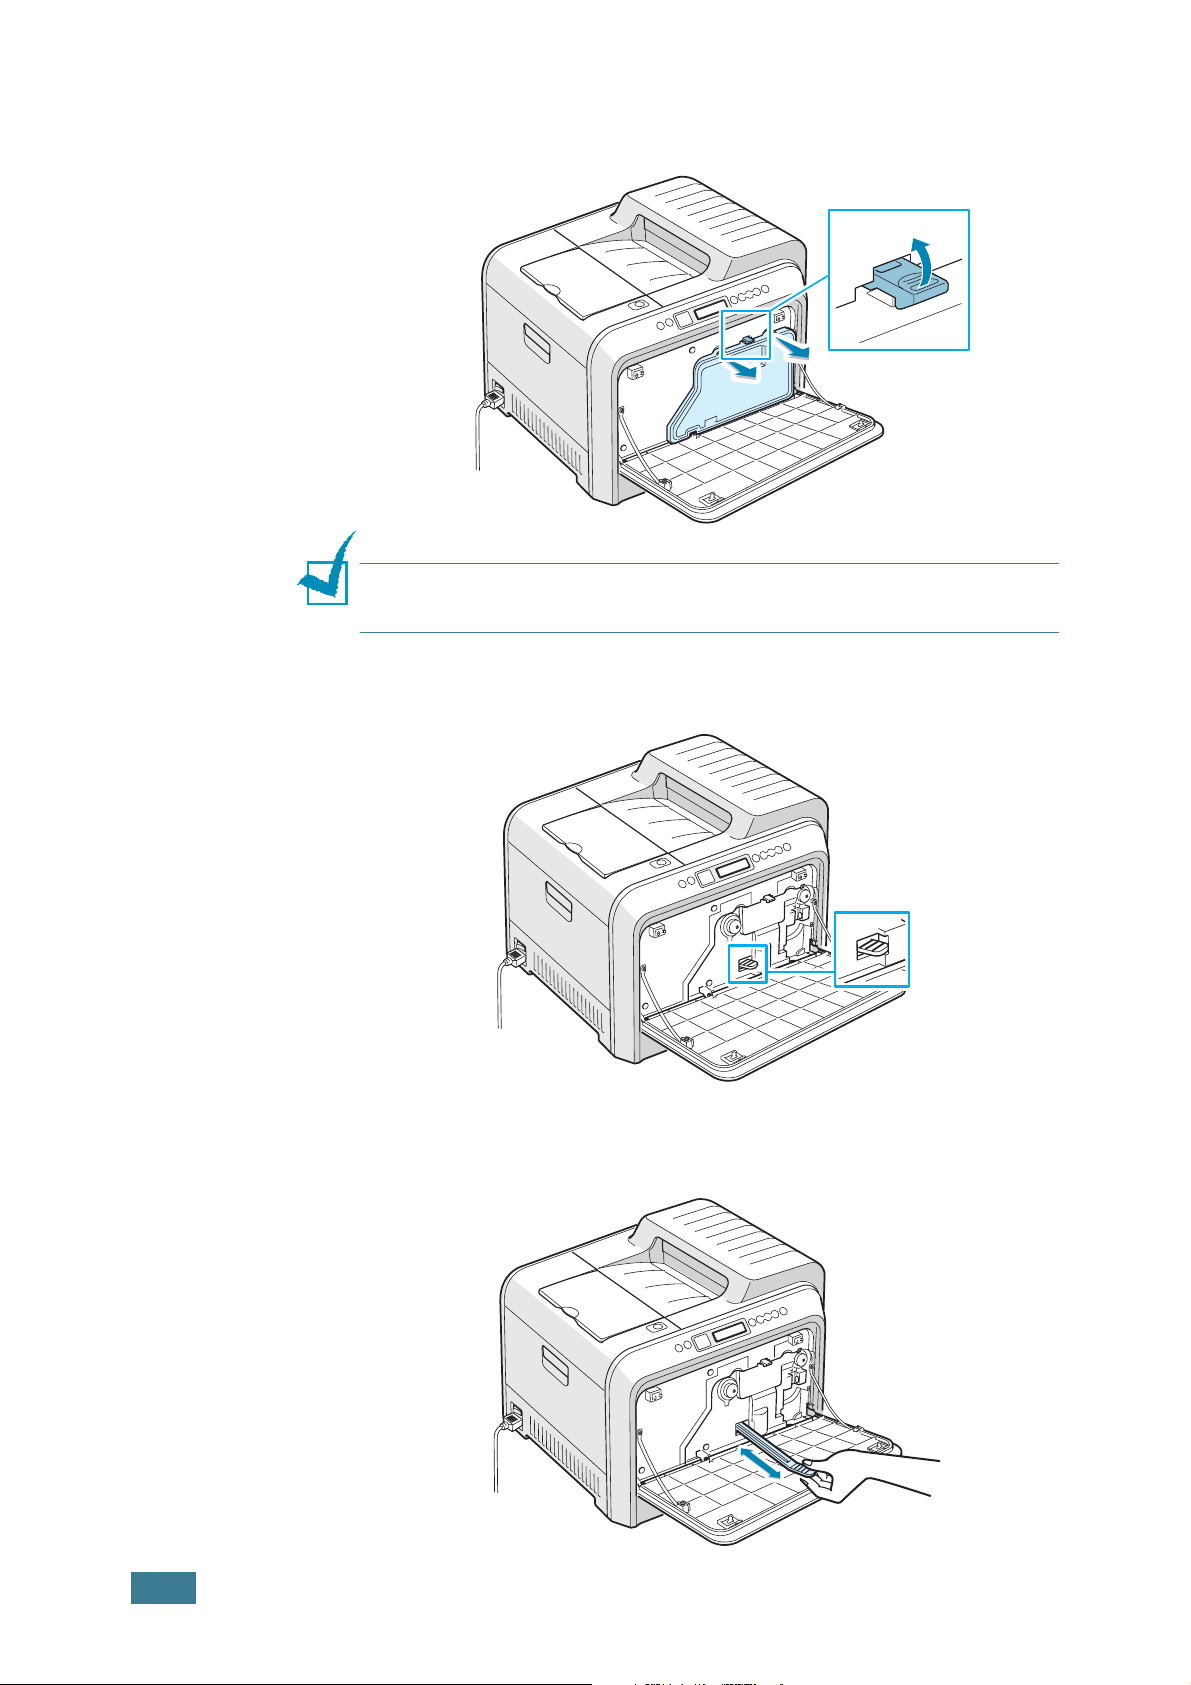
3
Push the lock lever up and pull the waste toner container
out.
N
OTE
: Make sure that you lay the waste toner container on a flat
surface so that the toner does not spill.
4
Locate the supplied LSU cleaner on the bottom.
6.28
5
Holding the end of the cleaner, slide it in and out several
times.
M
AINTAINING YOUR PRINTER
6
Slide the cleaner back into place and then replace the lower
of the waste toner container and then push it to make sure
that it is seated in place.
7
Make sure that the lock lever latches the container.
8
Close the front cover. Make sure that it is securely latched
and then turn the printer on.
6
M
AINTAINING YOUR PRINTER
6.29
Cleaning the Inside of the Printer
N
OTE
: While cleaning the inside of the printer, be careful not to
touch the transfer roller located underneath the toner cartridge.
Oil from your fingers can cause print quality problems.
1
Turn the printer off and unplug the power cord, then wait a
few minutes for the printer to cool.
2
Using the handle, open the left cover completely.
C
AUTION
release button does not press.
3
Pull the handle lightly first, and then holding the toner
cartridges, remove them from the printer. Set them on a
clean flat surface.
: If the left cover is not completely open, the top cover
6.30
M
AINTAINING YOUR PRINTER
4
Press the top cover release button to unlatch the top cover
and open it all the way.
C
AUTION
cartridge can be exposed to light. This causes damage to the drum
cartridge.
5
Pull the lock levers on each side towards you, as shown
below, to release the image transfer unit.
: If you open the left cover for a long time, the drum
6
M
AINTAINING YOUR PRINTER
6.31
6
Using the handle, lift the image transfer unit out of the
printer by lightly pulling it towards the left of the machine.
Set it on a clean flat surface.
7
Lift the handle of the drum cartridge and use it to pull the
drum cartridge out of the printer. Set it on a clean flat
surface.
C
AUTIONS
:
6.32
• To prevent damage, do not expose the drum cartridge to light for
more than a few minutes. Cover it with black paper, if necessary.
• Do not touch the surface of the green roller on the drum
cartridge or print quality problems can occur.
M
AINTAINING YOUR PRINTER
 Loading...