

Samsung CLP-500, CLP-500N User Manual

COLOR LASER PRINTER
Setup Guide

C
ONTENTS
Step 1.
Step 2.
Step 3.
Step 4.
Step 5.
Step 6.
Step 7.
Step 8.
Unpacking ............................................. 3
Understanding Your Printer ................... 5
Installing the Imaging Unit, Transfer Belt
and Toner Cartridges ............................. 7
Loading Paper ..................................... 16
Connecting a Printer Cable .................. 19
Using a Parallel Cable .................................19
Using a USB Cable .....................................20
For Networking Printing ..............................21
Turning the Printer On ........................ 22
Printing a Demo Page .......................... 23
Changing the Display Language .......... 23
Step 9.
Installing the Printer Software ............ 24
Installing Printer Software in Windows ..........24
Reinstalling Printer software ........................26
Removing Printer software ..........................26
Changing the Display Language ...................26
Step 10.
Viewing the User’s Guide ................... 27
In Windows ..............................................27
In Macintosh .............................................27
In Linux ...................................................28
2
S
ETUP
G
UIDE
:
Step 1.
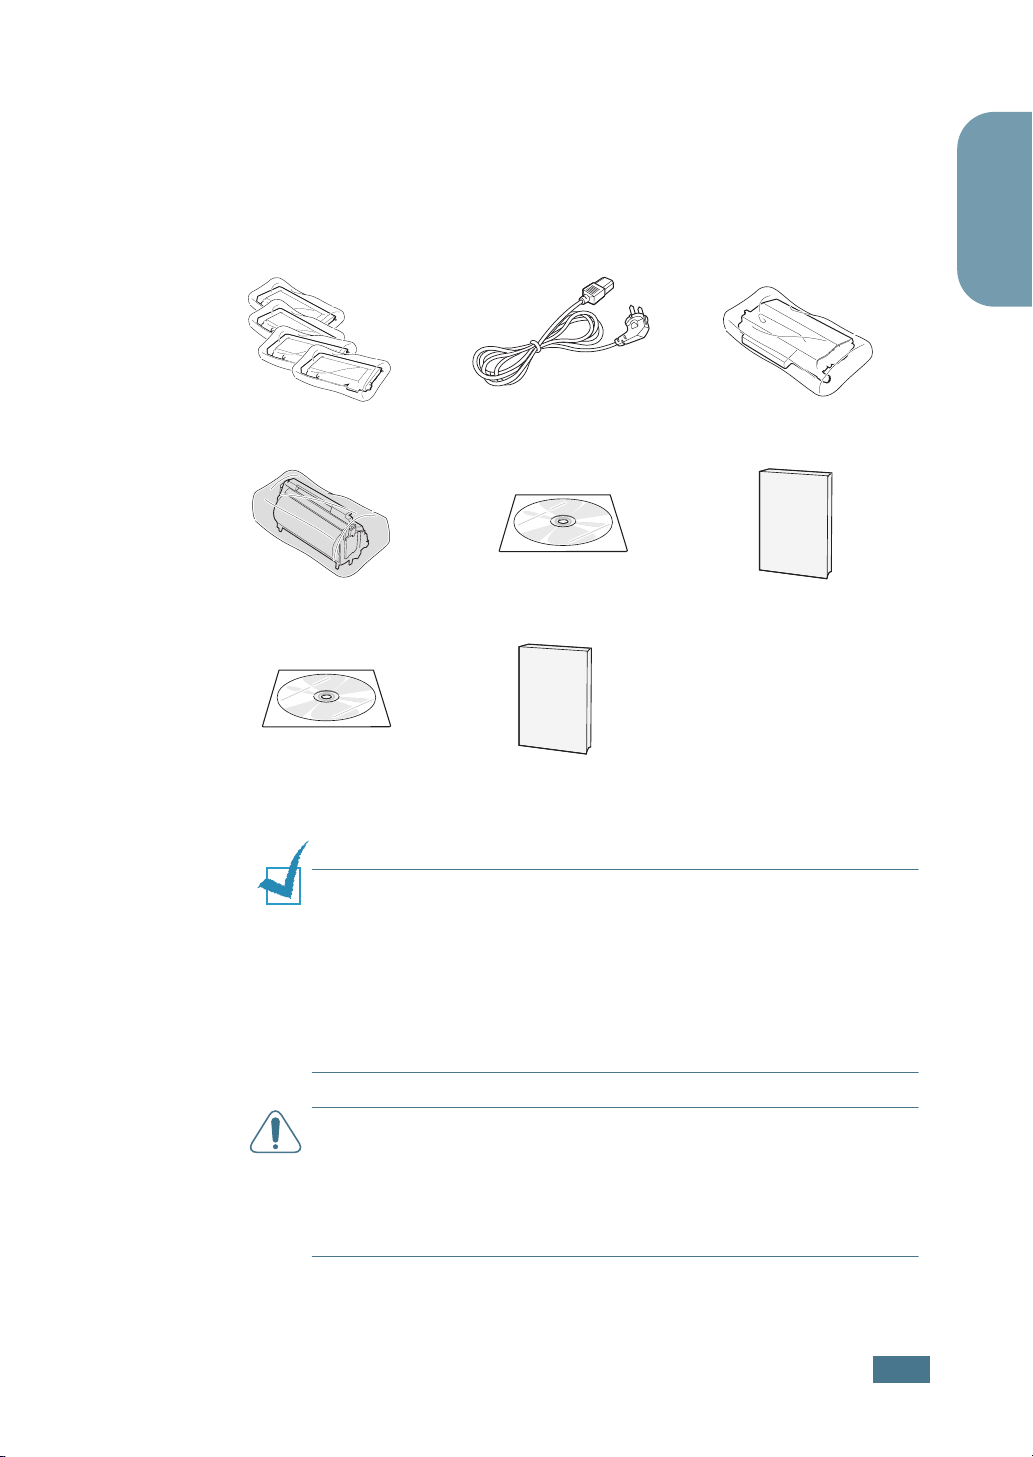
Toner Cartridges Power Cord Transfer Belt
Unpacking
1
Remove the printer and all of the accessories from the
packing carton. Make sure that the printer has been packed
with the following items:
Imaging Unit CD-ROM Setup Guide
English
SyncThru CD-ROM
(CLP-500N only)
N
OTES
:
• If any items are missing or damaged, notify your dealer
immediately.
• Components may differ from one country to another.
• The CD-ROM contains the printer driver, the User’s Guide, and
the Adobe Acrobat Reader program.
• The power cord may be different depending on your country.
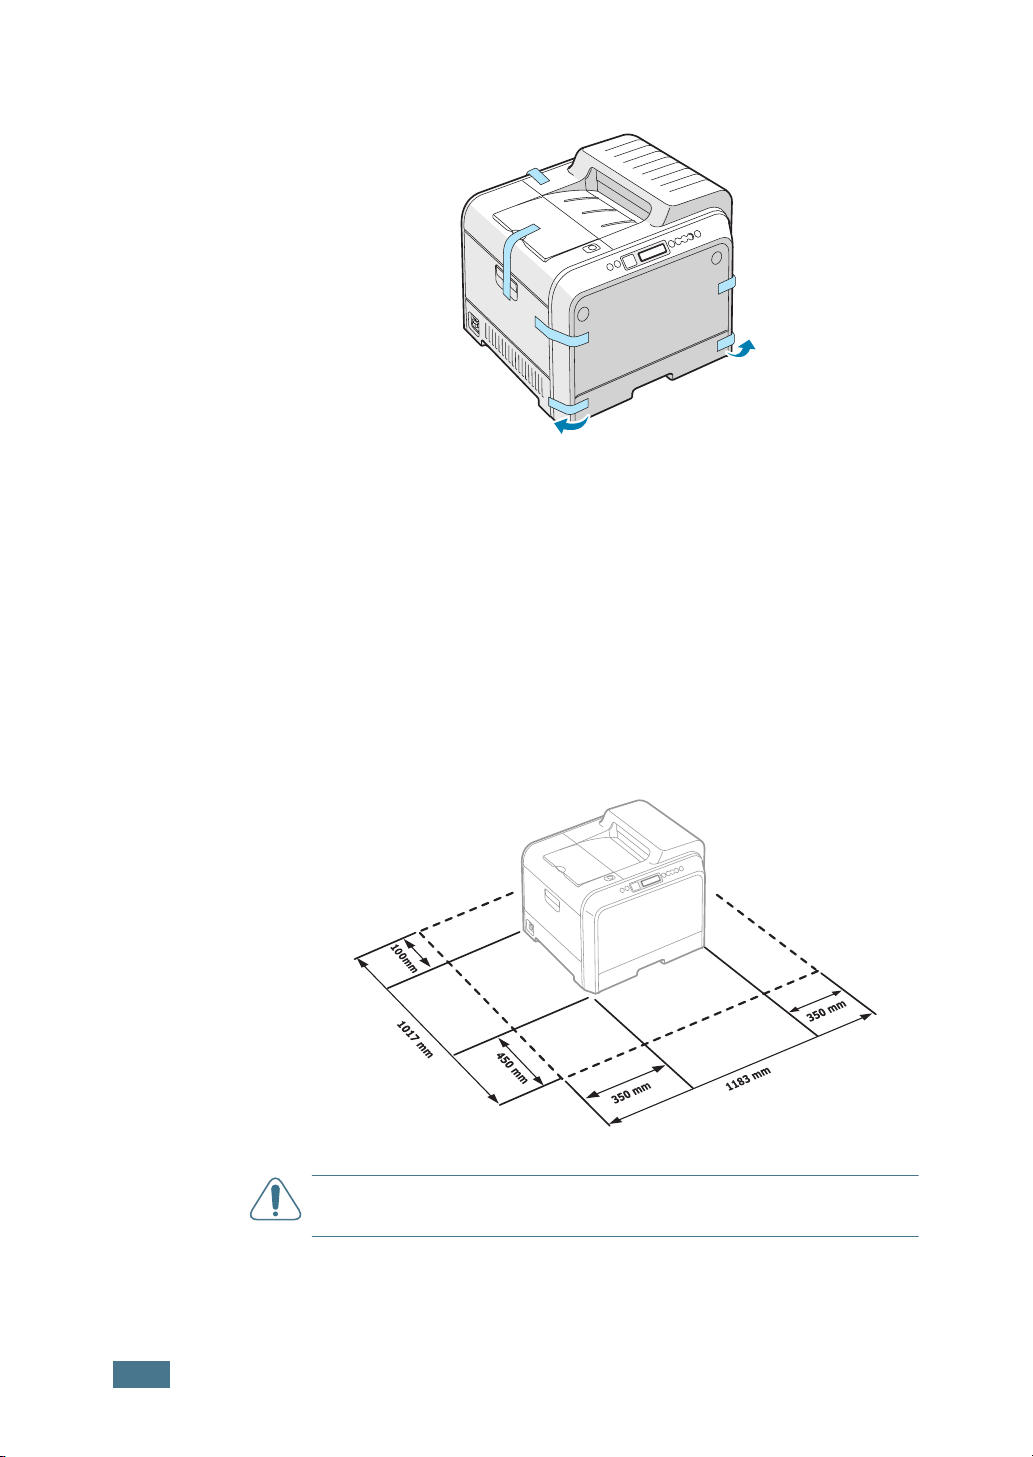
C
AUTION
and cassette. Use safe lifting and handling techniques. If you need
to move the printer it must be moved by two people. Use the
lifting handles located as shown in the diagram (see page 5). Back
injury could be caused if a single person attempts to lift the
printer.
SyncThru Quick Guide
(CLP-500N only)
This printer weighs 35kg including developer cartridge
S
ETUP
G
UIDE
3
:
2
Carefully remove all of the packing tapes from the printer.
3
Pull the paper tray out of the printer and remove the
packing tapes from the tray.
4
Select a location for the printer:
•Leave enough room to open the printer trays, covers, and
allow for proper ventilation.
•Provide the proper environment:
– A firm, level surface
– Away from direct airflow of air conditioners, heaters, or
ventilators
– Free of temperature, sunlight, or humidity extremes or
fluctuations
– Clean, dry, and free of dust
C
AUTION
do not, the print quality problems can occur.
4
S
ETUP
G
UIDE
You must place your printer in the level surface. If you
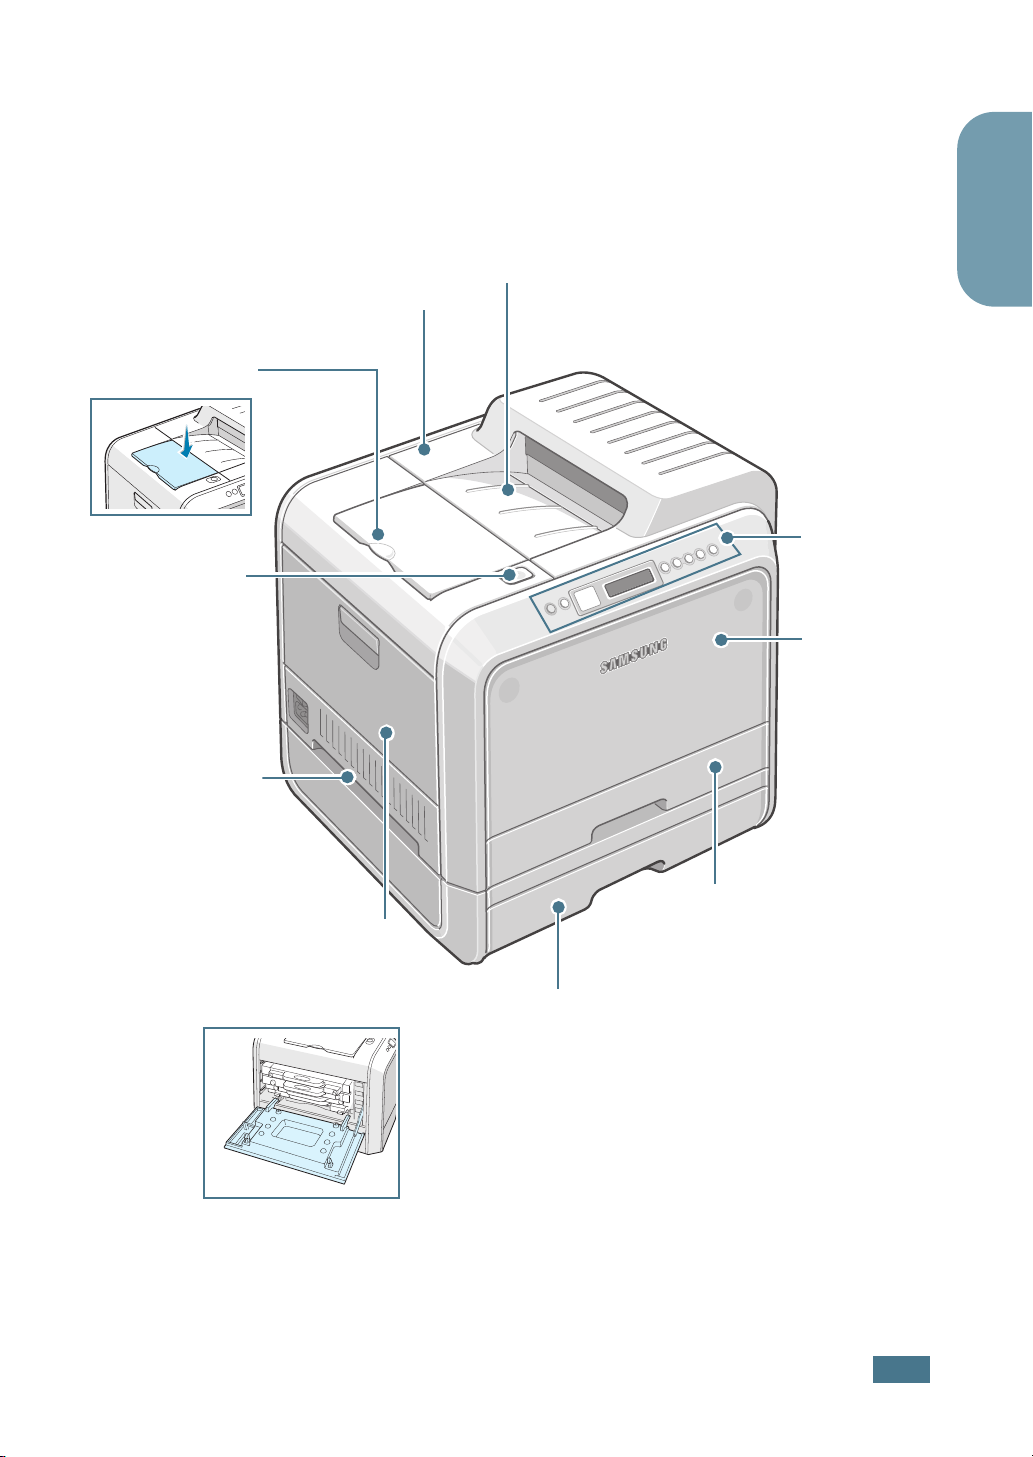
Step 2.
(Open to install the imaging unit,
Output Support
Top Cover
Release Button
Understanding Your Printer
These are the main components of your printer:
Top Cover
and transfer belt.)
Paper Output Tray
English
Control Panel
(refer to Chapter
5 in the User’s
Guide which is
on the CDROM.)
Front Cover
(Open to replace
the waste toner
container.)
Handle
(Lifting handles are
located at the lower
edge of both sides
of the printer.)
(To install the toner cartridges
press the top cover release
button and open fully.)
Tray 1
(250-sheet paper feeder)
Left Cover
Optional Tray 2
(500-sheet paper feeder)
S
ETUP
G
UIDE
5
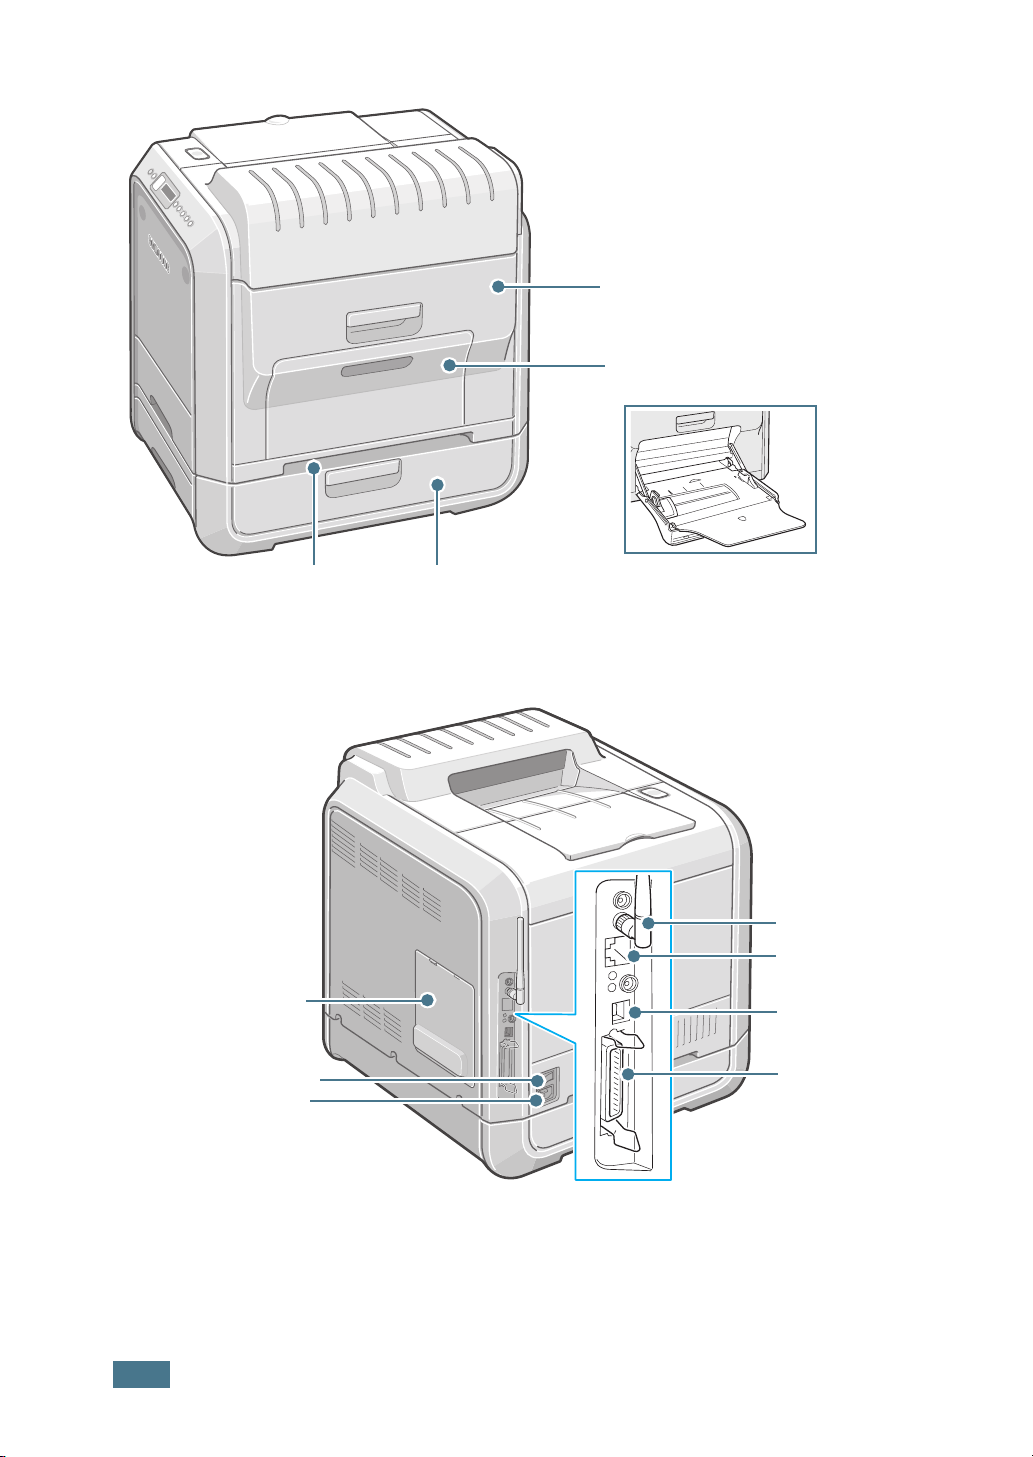
Right Cover
(Open to remove paper jams.)
Muti-purpose Tray
(Open to load special print materials.)
Handle
(Use it to lift the printer.)
Control Board
Cover
(Open to install optional
accessories.)
Power Switch
Power Receptacle
Optional Tray 2 Jam Cover
(Open to remove jams in the optional tray 2.)
Wireless Network
Antenna
Network Port
*
**
USB Port
Parallel Port
***
* This wireless network port is not supplied with the printer. It is an option that must be purchased and
installed separately.
** The network port is fitted as standard on the CLP-500N. CLP-500 users can purchase and install
separately an optional Network Card. For details, see the User's Guide of the printer in the CD-ROM.
*** The parallel port may not be available depending on your country.
6
S
ETUP
G
UIDE
:
Step 3.
Installing the Imaging Unit, Transfer
Belt and Toner Cartridges
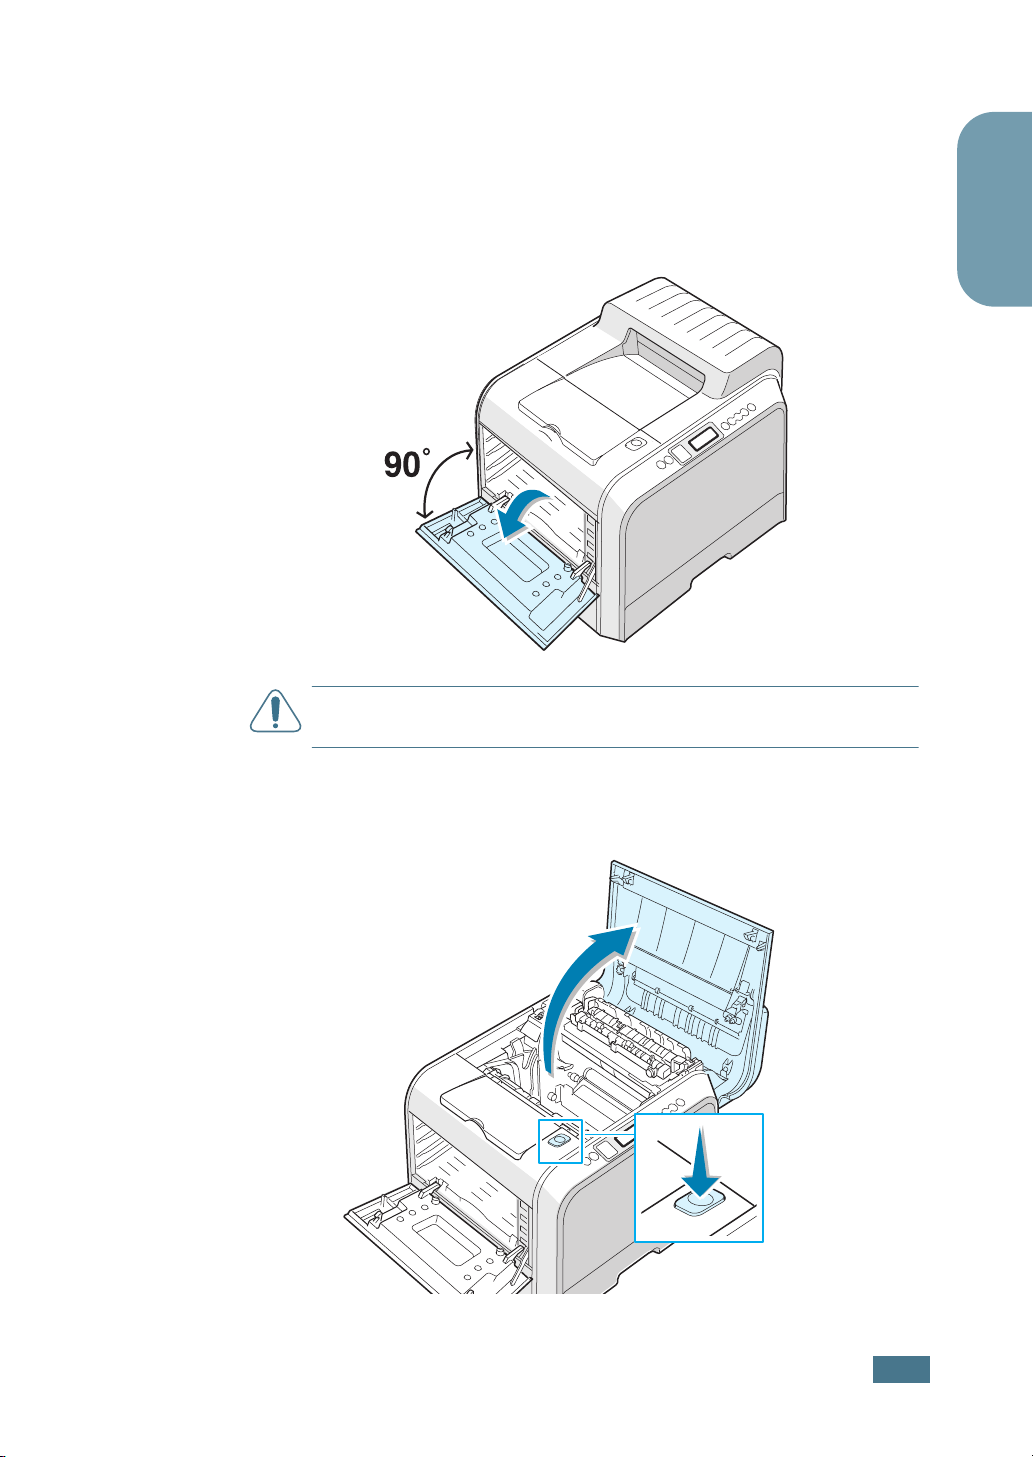
1
Using the handle, completely open the left cover until it is at
right angles to the main frame.
English
C
AUTION
release button does not press.
2
Press the top cover release button to unlatch the top cover
and open it all the way.
If the left cover is not completely open, the top cover
Top cover release
button
S
ETUP
G
UIDE
7
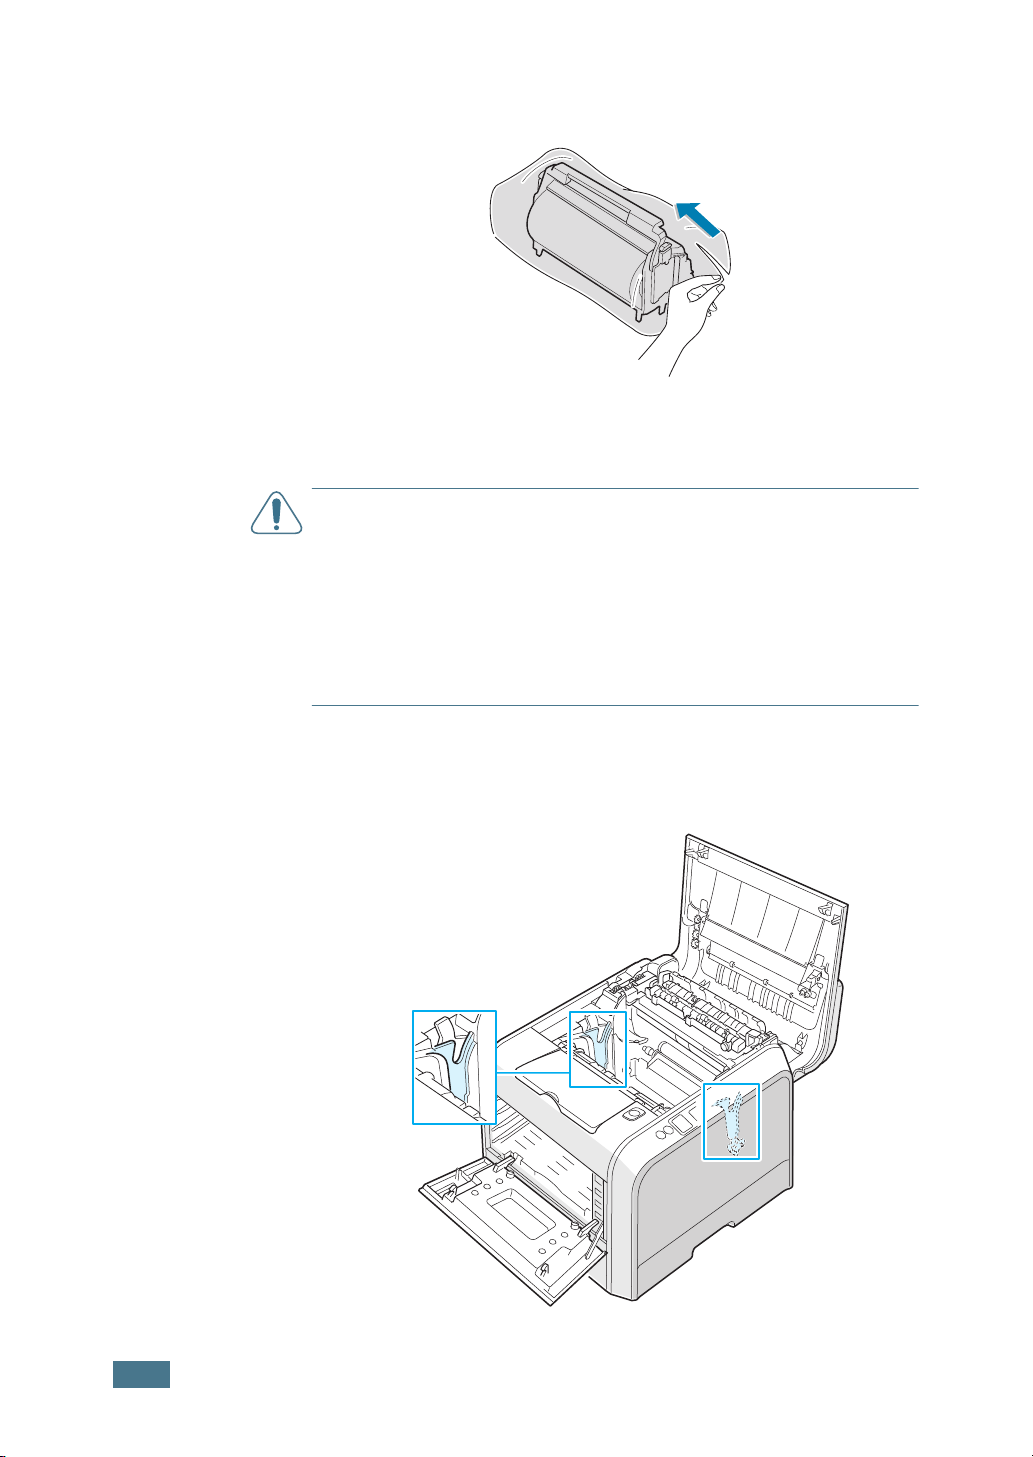
3
Take the imaging unit out of the package using the handle.
4
Remove the paper covering the imaging unit by removing
the tape under the handle of the imaging unit.
C
AUTIONS
• Do not use sharp objects, such as a knife or scissors, to open the
imaging unit package and tape on the protective paper liner. You
could damage the surface of the imaging unit.
• To prevent damage, do not expose the imaging unit to light for
more than a few minutes. Cover it with black paper, if necessary.
• Do not touch the surface of the green roller on the imaging unit
or print quality problems can occur.
:
5
Locate the imaging unit slots inside the printer, one on each
side.
8
S
ETUP
G
UIDE
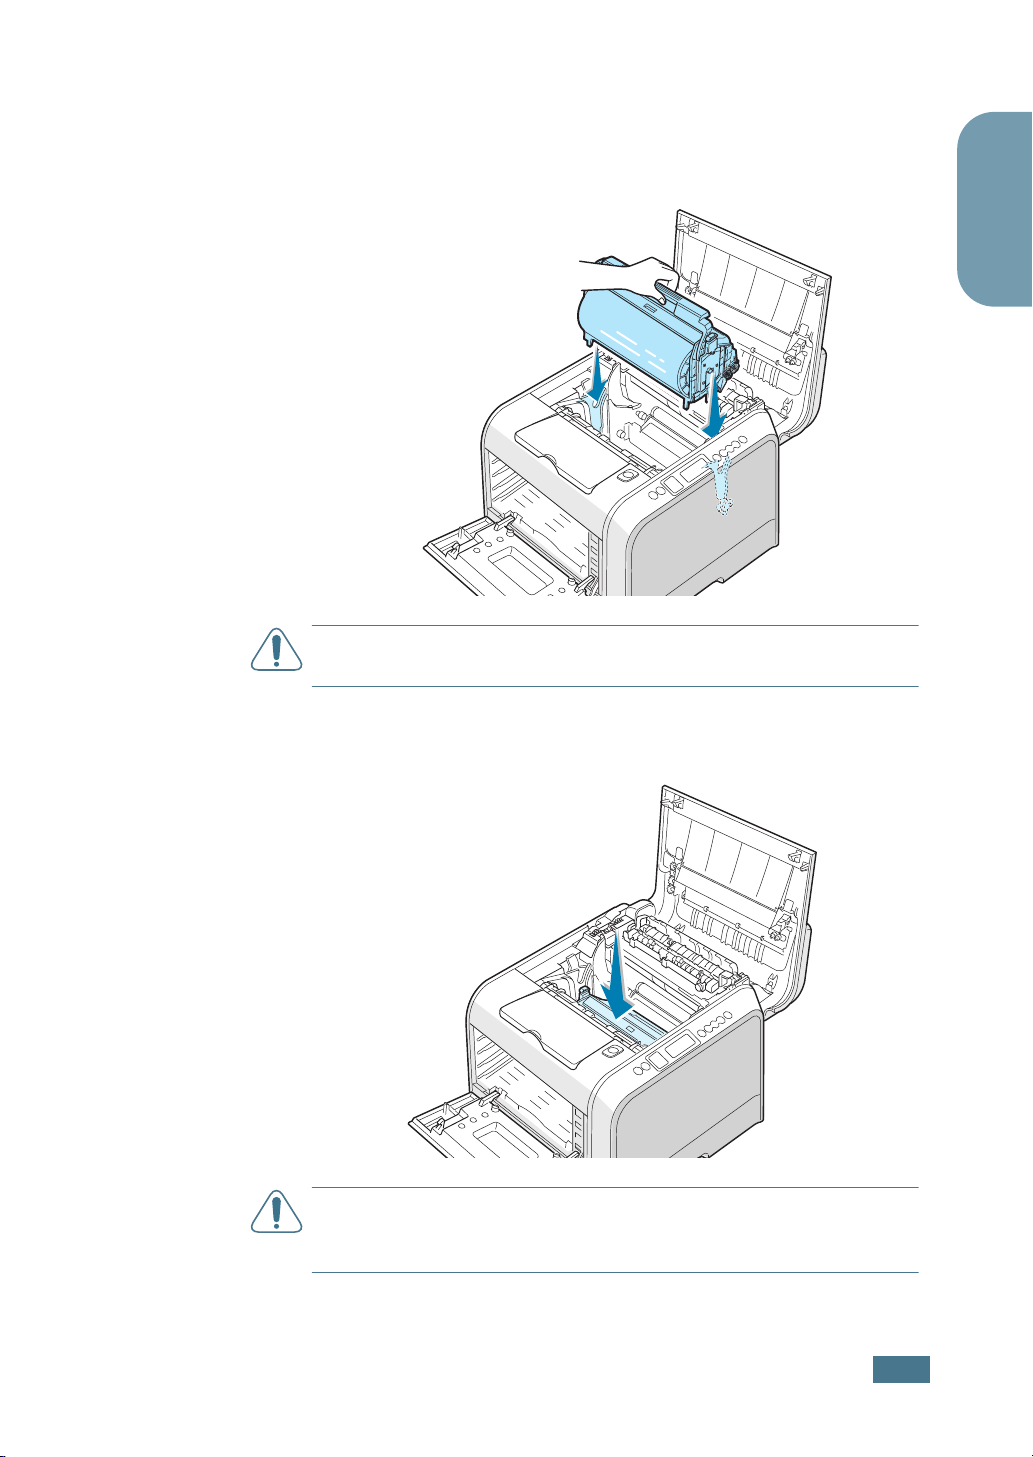
6
Hold the handle on the imaging unit with the green roller
facing you. Align the imaging unit with the slots in your
printer so that the colors on both sides of the imaging unit
slide into the corresponding colors of the slots.
C
AUTION
and damage the surface of the green roller.
: Insert the imaging unit carefully so as not to scratch
English
7
Slide the imaging unit down into the printer until it cannot
be pushed in any further and fold the handle down.
C
AUTION
to light for more than a few minutes. Close the top and left
cover should the setup need to be halted for any reason.
:
To prevent damage, do not expose the imaging unit
S
ETUP GUIDE
9
 Loading...